

Squoval nails have become the go-to shape for anyone who wants the best of both worlds — the sophisticated edges of a square nail with the graceful softness of an oval. Short squovals are especially magical because they’re practical for everyday life, work-appropriate, and genuinely easier to maintain than longer styles. But here’s what makes them truly special: they’re the perfect canvas for designs that range from minimalist and chic to playful and bold, and they photograph beautifully no matter the angle.
The beauty of short squoval nails lies in their versatility. They don’t require the nail strength that longer lengths demand, they’re less likely to break during daily activities, and they’re comfortable for people who spend their time typing, cooking, or doing detail work with their hands. Yet they still feel polished and intentional — never stubby or boring. Whether you’re drawn to elegant monochromes, fun color combinations, intricate patterns, or trendy techniques like ombre and stamping, the short squoval shape makes every design look curated and intentional.
If you’ve been scrolling through nail inspiration and feeling overwhelmed by the endless possibilities, here’s what you need to know: the designs that look most adorable on short squovals are those that respect the shape’s natural balance. A design that works on a long almond nail might look cramped or too busy on shorter nails, while the right design on a short squoval feels like it was custom-made for that exact length. The following 20 designs showcase exactly this kind of intentional matching — each one is specifically chosen because it translates beautifully to short squoval proportions and will actually look adorable when you wear it, not just on a screen.
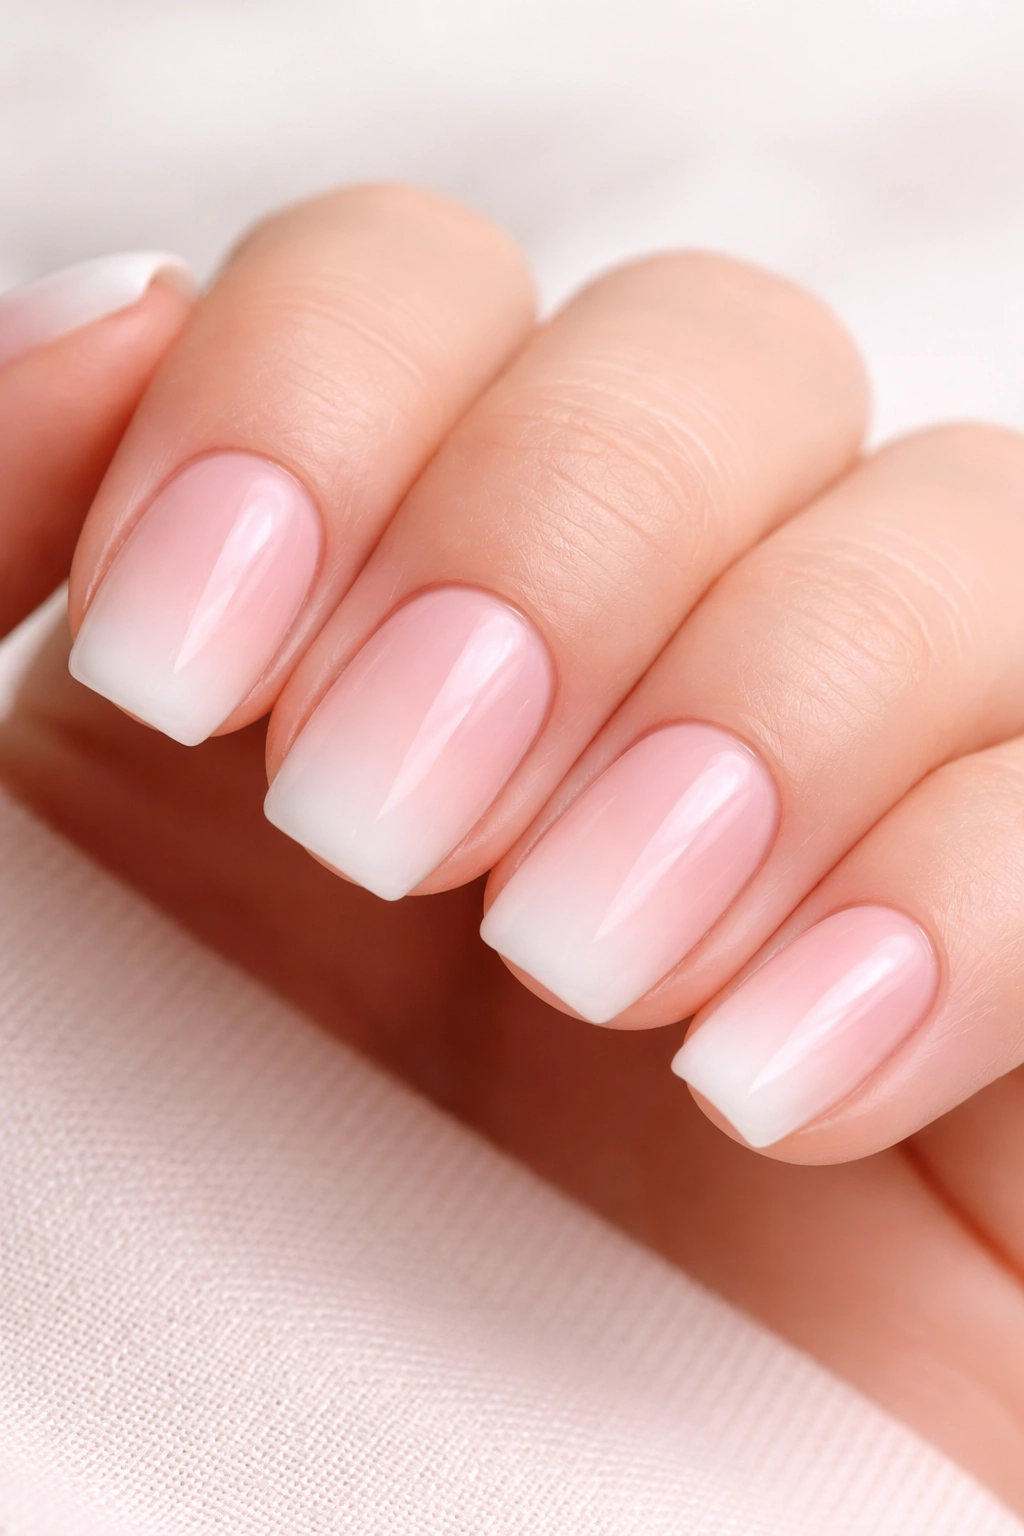
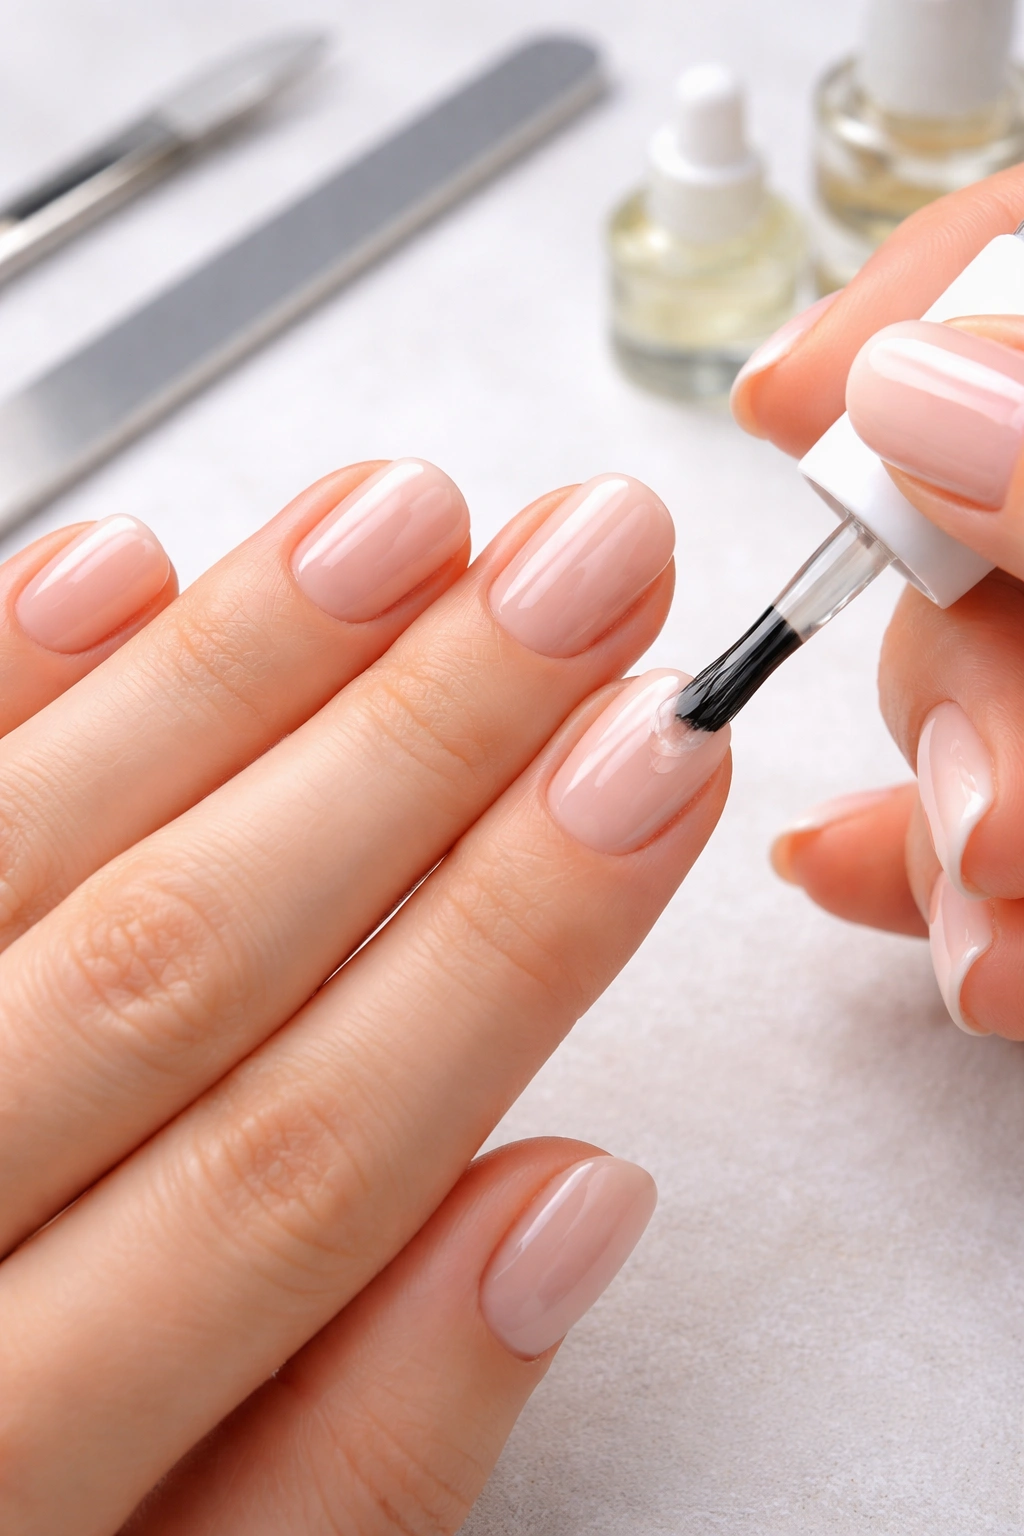
1. Soft Pink Ombre With Pearl Accents
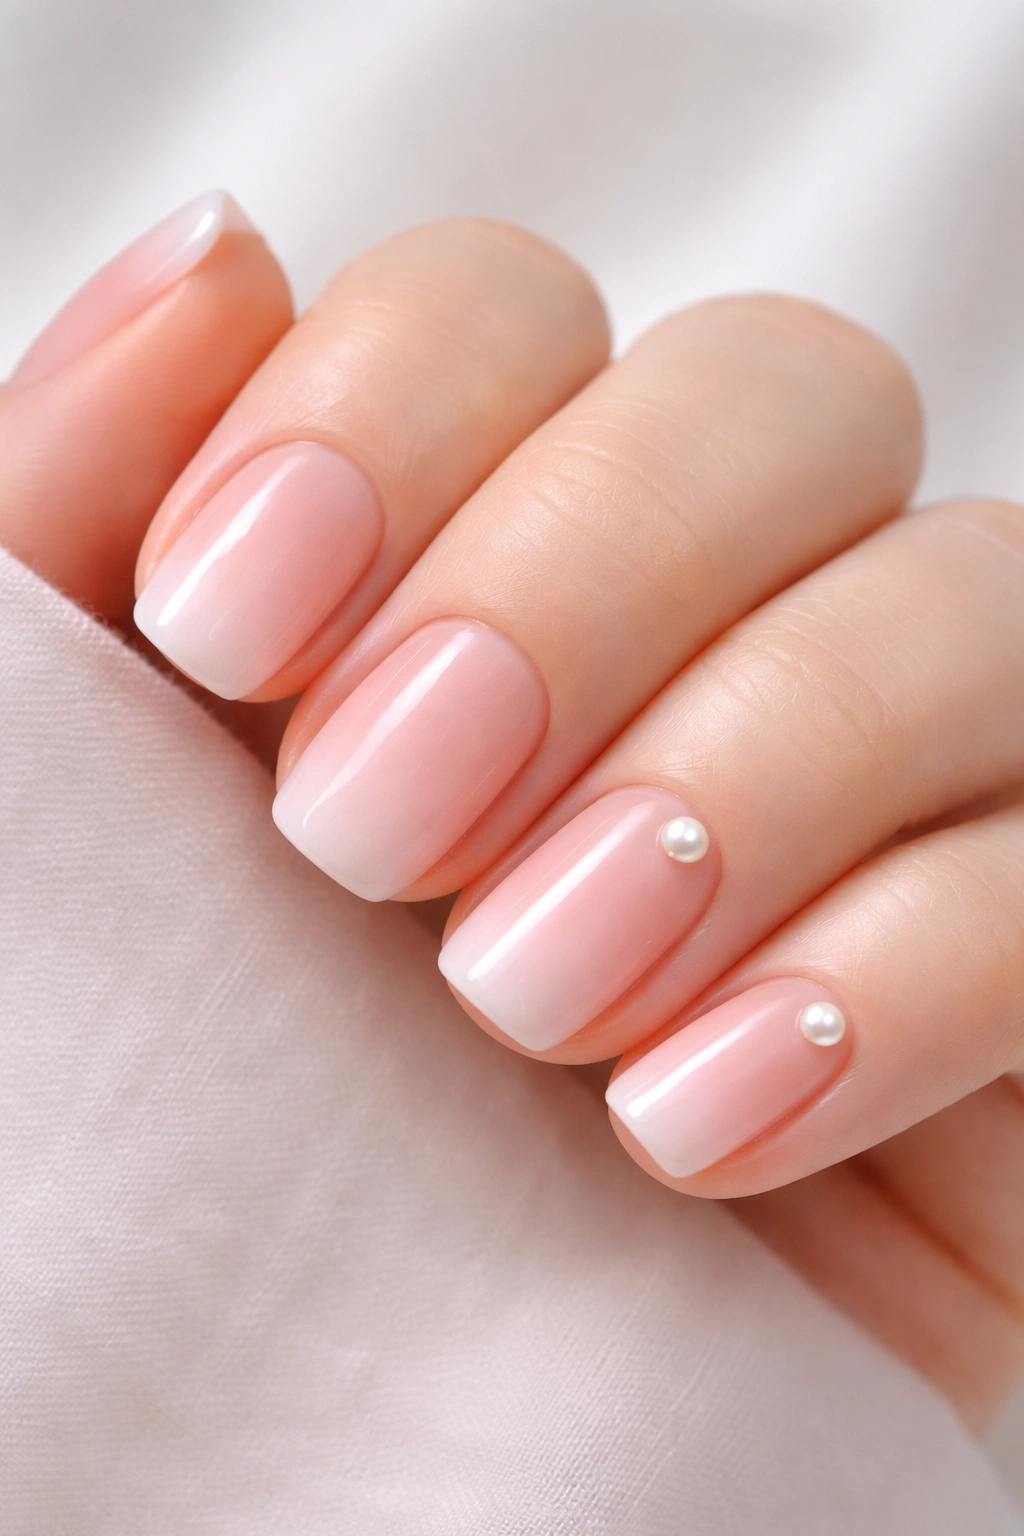
Soft pink ombre is the definition of timeless elegance, and on short squovals it feels especially polished because the shape doesn’t compete with the gradient. Start with a pale blush pink on the nail bed and gradually deepen it toward the cuticle, creating a subtle transition that looks like you spent hours at a salon. The magic happens when you add a single pearl or tiny diamond accent on the ring and pinky finger — just enough to catch light without overwhelming the design.
Why This Works on Short Squovals
The ombre effect actually looks fuller and more intentional on shorter nails because there’s less negative space to fill. The pearl accents anchor the design and add dimension that makes short nails feel more visually interesting.
Application Tips
- Use a sponge to blend the ombre for a seamless gradient
- Apply matte topcoat first to create texture for the pearls to grip
- Place pearls while the topcoat is still tacky so they adhere properly
- Seal with glossy topcoat for a polished finish
Pro tip: This design reads as “expensive salon visit” but takes about 15 minutes if you use a pre-made ombre kit or gradient polish.
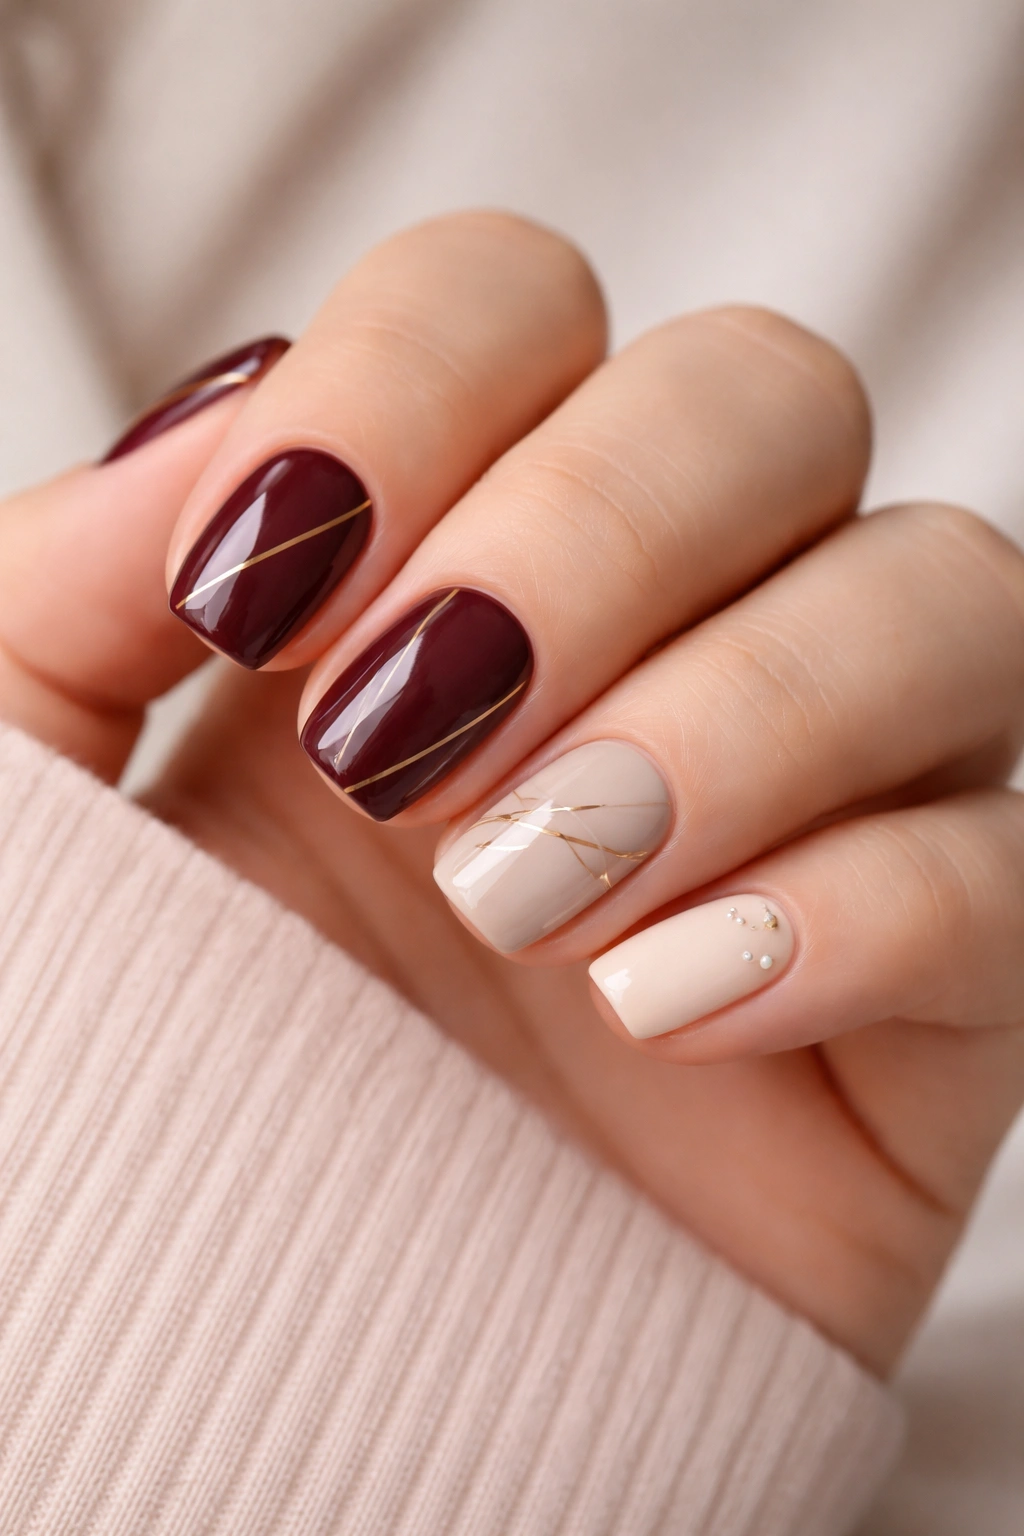
2. Burgundy With Minimalist Gold Lines
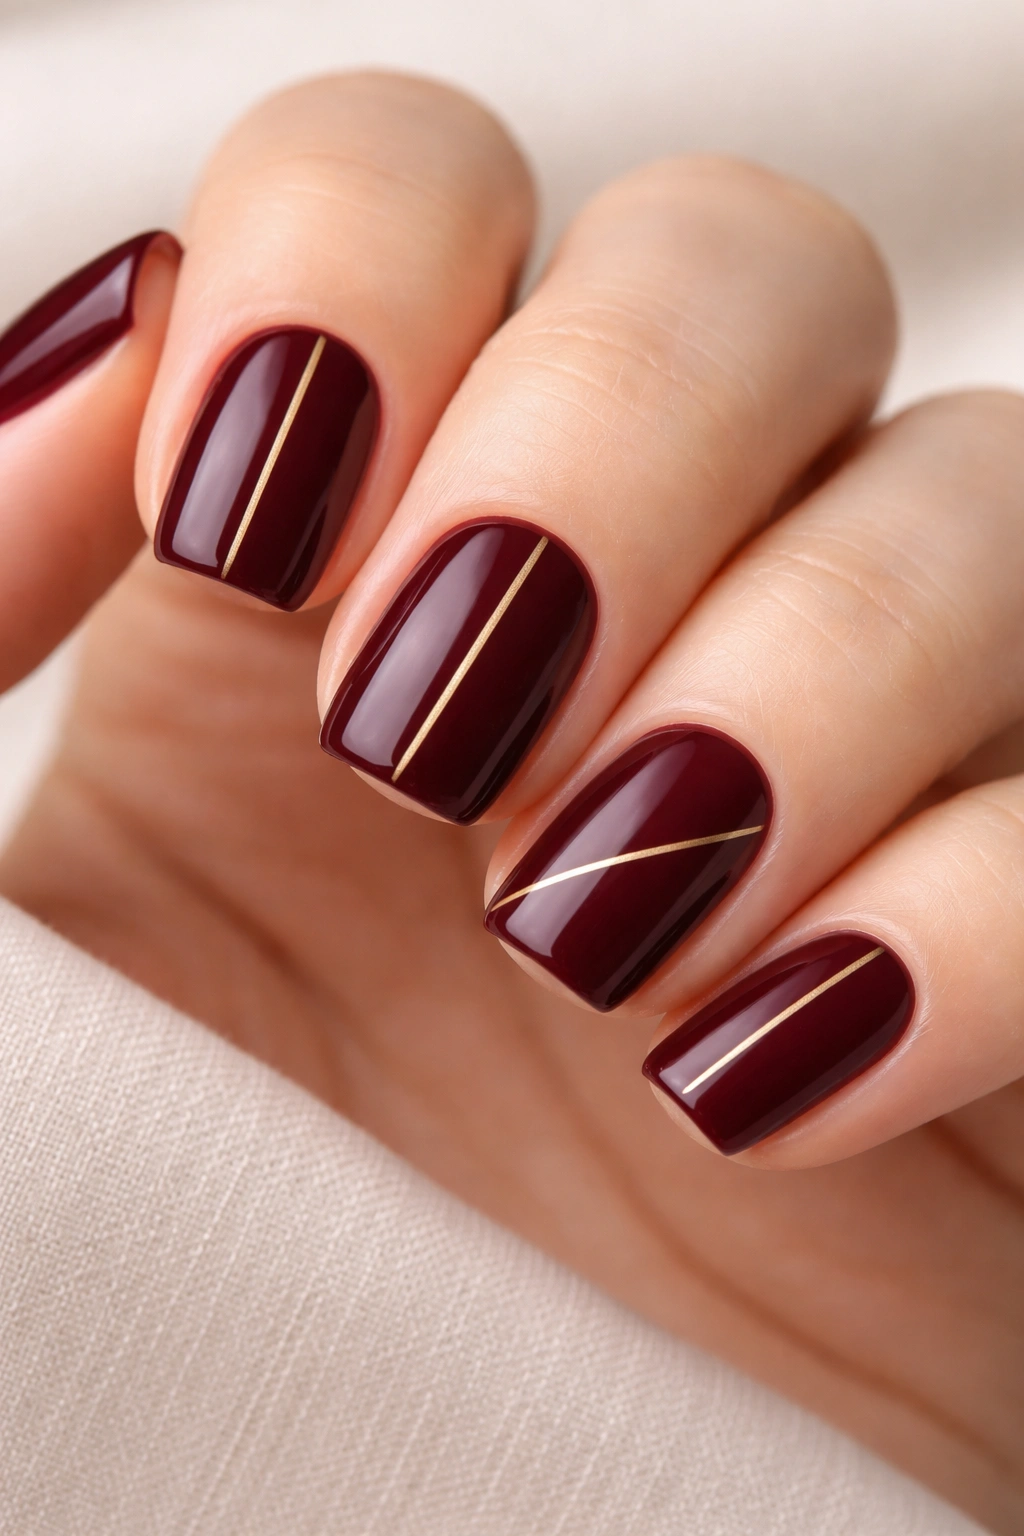
Burgundy is the color that never goes out of style, and when you pair it with crisp gold lines, it shifts from elegant to editorial instantly. Paint all nails in deep burgundy, then use a thin gold striping brush to create one or two delicate lines down the center of each nail — or create a geometric pattern with lines crossing toward the corners. The key is precision: the thinner and more intentional the lines, the more sophisticated the final result.
Why This Works on Short Squovals
Gold lines on burgundy create visual interest without adding bulk, which keeps short nails feeling refined rather than crowded. The contrast between the deep base color and bright metallic lines is striking even at smaller scale.
Application Tips
- Allow the burgundy base to dry completely before applying gold lines
- Use a steady hand or a gold striping tape for perfectly straight lines
- Thin lines are always better than thick ones on shorter nails — more elegance, less amateur-looking
- Finish with matte or glossy topcoat depending on your preference
Pro tip: Keep a steady hand by resting your pinky on the table and moving the entire hand, not just the brush.
3. Cream Base With Tiny Floral Stamping
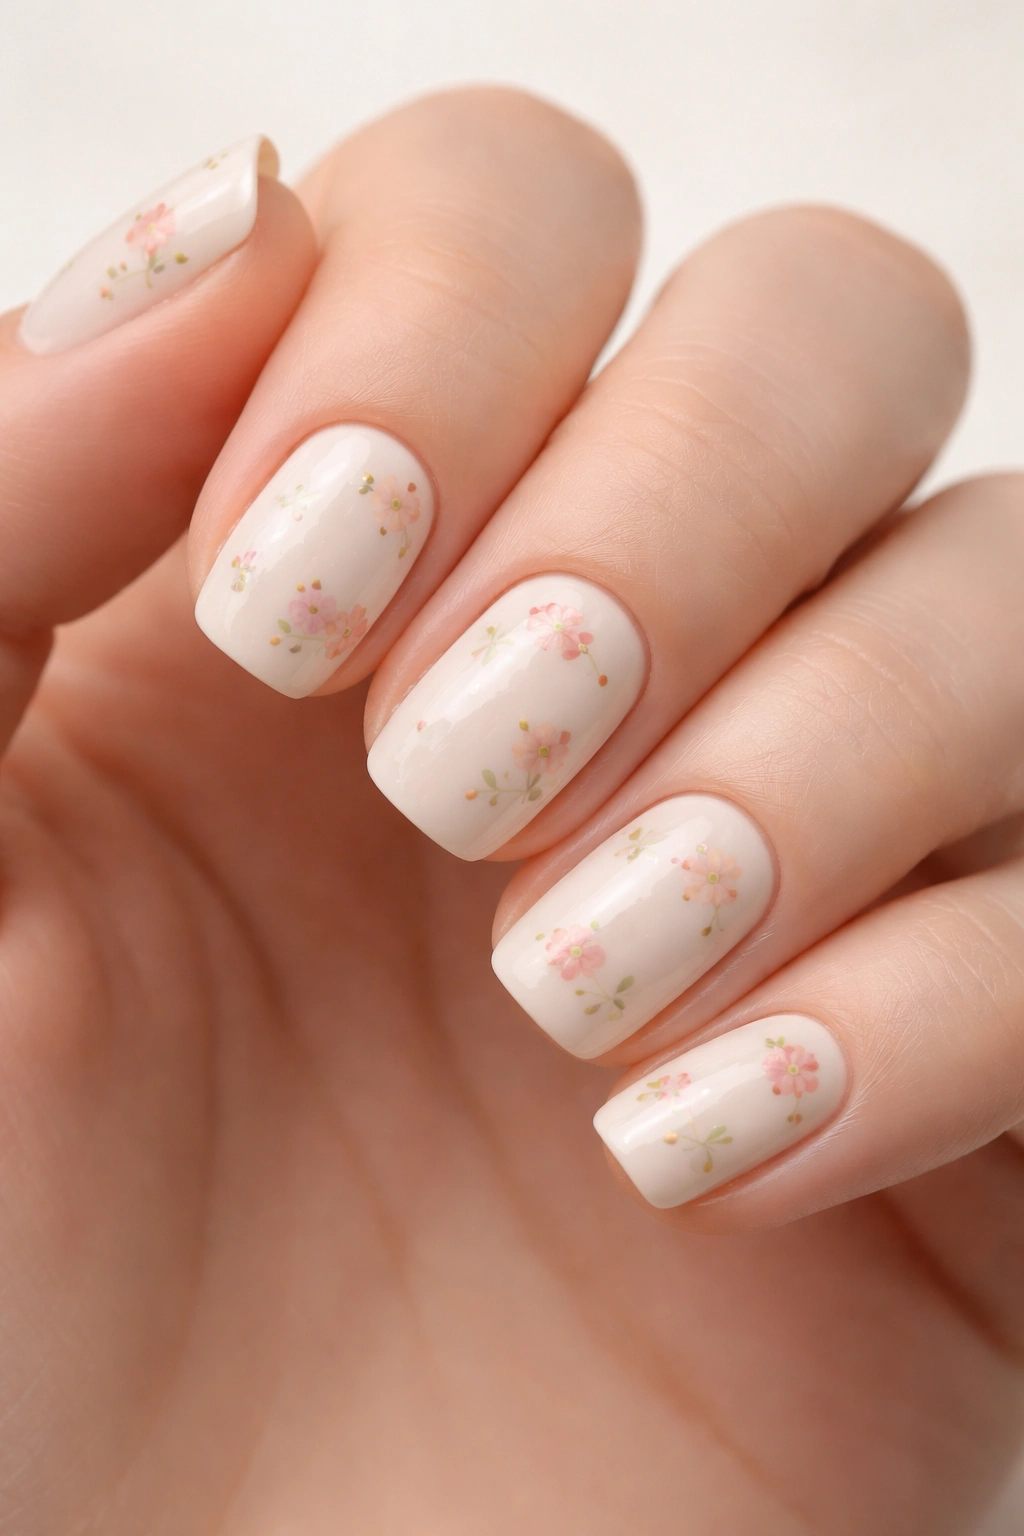
Florals feel special without being overly complicated when you use cream or off-white as your base color and add small, delicate flower stamps in soft colors. Pale pinks, peaches, and light greens work beautifully here. The flowers should be genuinely tiny — think half the size of a rice grain — so they feel scattered rather than dense. This design reads as “thoughtfully designed” rather than “covered in art.”
Why This Works on Short Squovals
Small-scale florals are perfectly proportioned to short squovals because they don’t create visual competition. You can actually see each flower rather than the whole nail feeling like a busy garden.
Application Tips
- Start with a smooth cream base and wait for it to dry completely
- Use the smallest flower stamps available or find a detailed stamper designed for delicate work
- Stamp in soft, muted colors rather than bright ones for a sophisticated look
- Space stamps randomly across the nail for organic feel
Pro tip: If you’re not confident with stamping, hand-paint one tiny flower on each nail instead — the result is just as adorable and feels more personal.
4. Pale Peach With Sunset Gradient
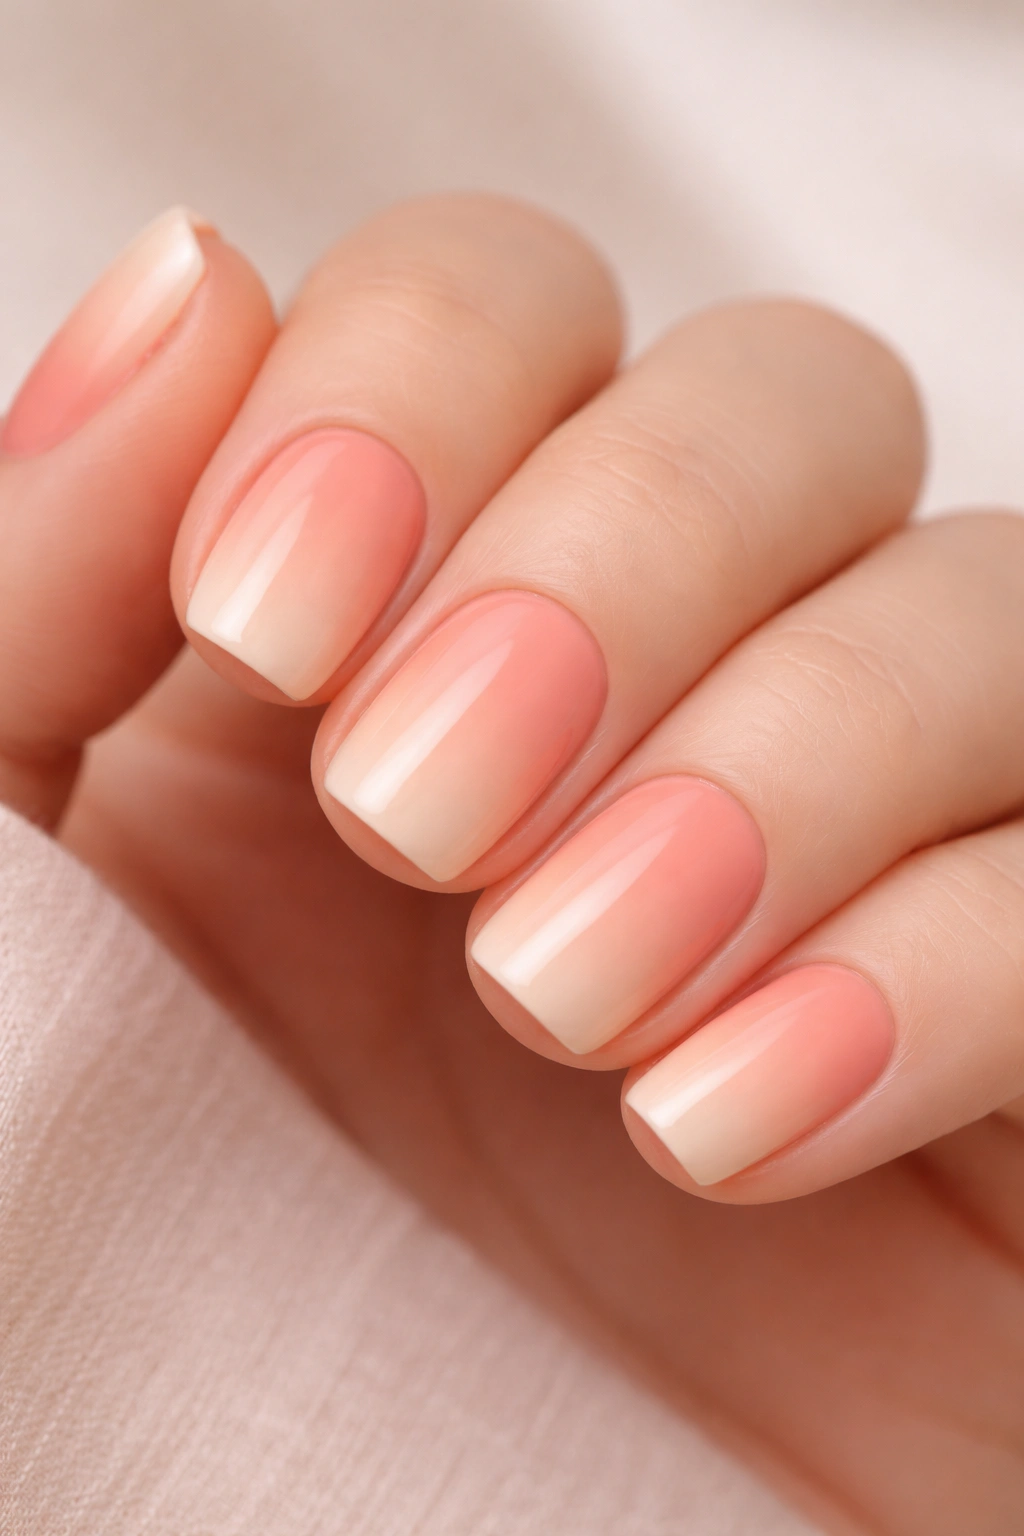
Peach is having a moment because it’s flattering, warm, and genuinely feels happy without being loud. Create a soft ombre from pale peach at the tips to a warm coral or peachy-orange at the base, mimicking the colors of a sunset. This design is easier to execute than you’d think because the colors naturally blend and slight imperfections in the gradient actually add to the organic, natural feel.
Why This Works on Short Squovals
Warm color gradients look incredibly polished on short squovals because there’s less room for mistakes to be noticeable, and the shape shows off the full color transition beautifully.
Application Tips
- Use a sponge to dab and blend the colors rather than painting straight on
- Start by placing the darkest color where you want it, then add lighter shades and blend
- Work quickly before the sponge dries out
- Seal with glossy topcoat to blur any hard lines
Pro tip: If your first gradient isn’t perfect, add a subtle shimmer topcoat over the whole nail — it catches light and makes the whole design feel more intentional.
5. White Base With Colorful Marble Swirls
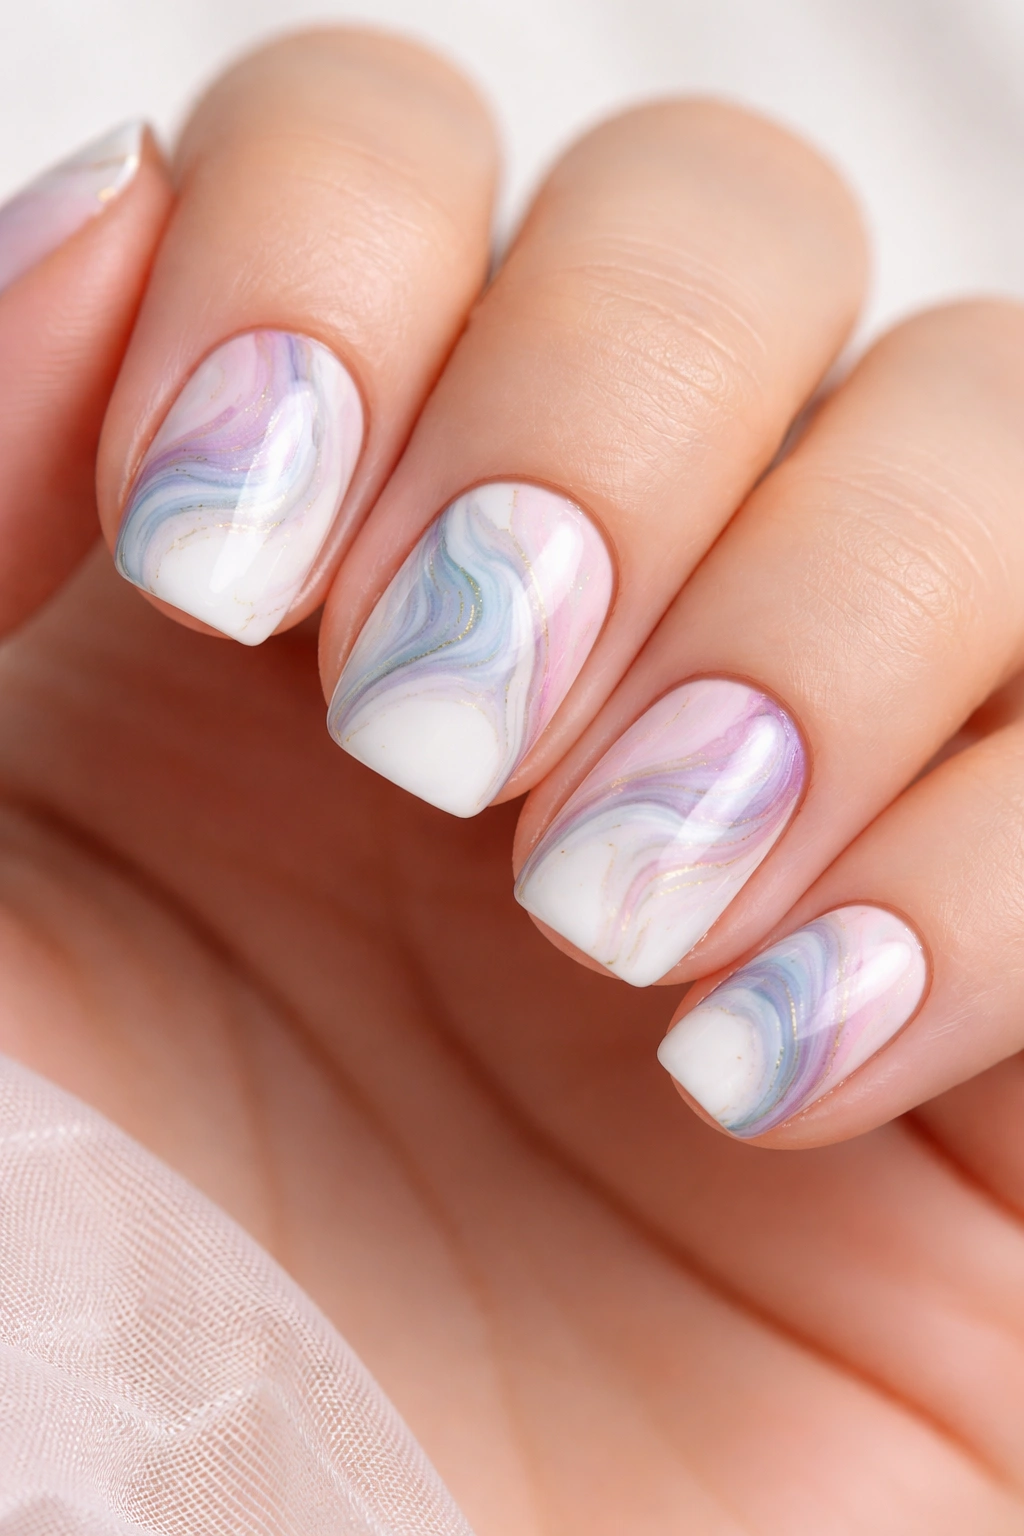
Marble is the design that looks impossibly complicated but actually requires only three colors and a water cup. Paint all nails white, then create organic swirls in two or three colors — think pale blue, dusty purple, and soft pink, or seafoam and sage green. Drag a thin tool through the wet polish to create those signature marble streaks. Each nail will be slightly different, which is exactly the point.
Why This Works on Short Squovals
Marble patterns work beautifully on short nails because the swirls can span the entire nail without looking cramped. The random nature of marble also means no two nails are identical, which keeps the design interesting.
Application Tips
- Work with wet polish — if it dries, the colors won’t blend and you’ll lose the marble effect
- Use a thin brush handle, needle, or specialized marble tool to drag through the colors
- Practice on a practice wheel first to get a feel for the technique
- Seal with topcoat before the polish completely dries
Pro tip: The less you drag and blend, the better marble often looks — over-working it creates muddy colors rather than beautiful swirls.
6. Ballet Pink With Chrome Accent Nail
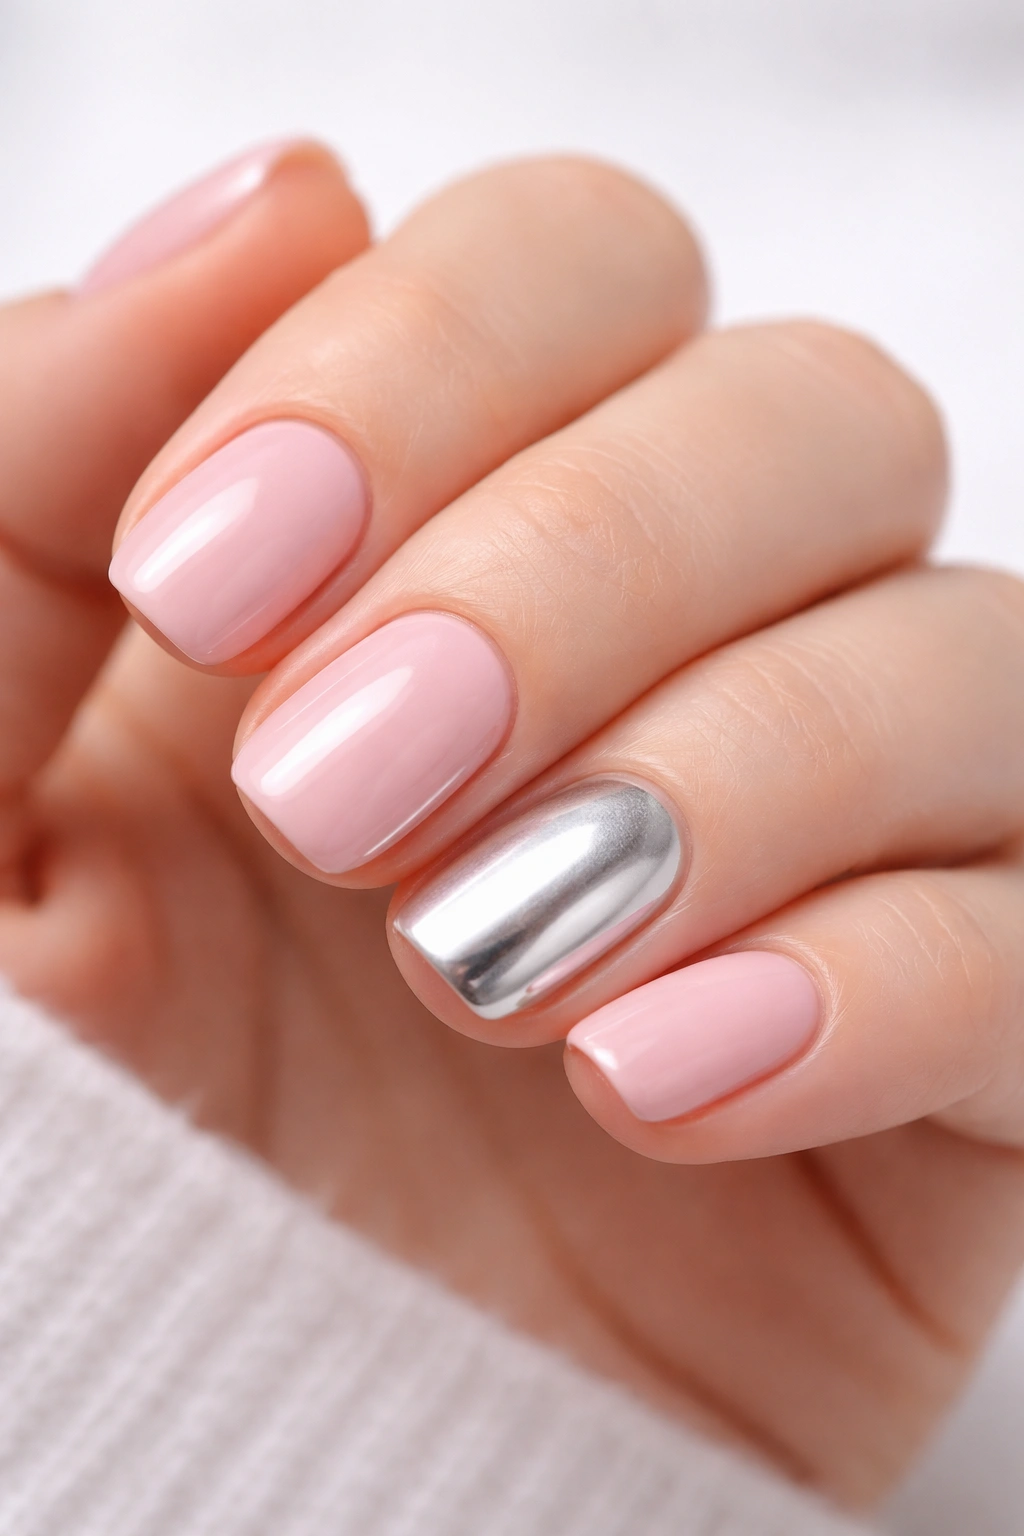
Ballet pink is universally flattering, and when you add just one accent nail with chrome or mirror powder, it feels contemporary without being over the top. Paint all nails in ballet pink, then on one accent nail (usually the ring finger), apply chrome powder over the pink base. The chrome creates a reflective, almost metallic effect that catches light beautifully and feels special and modern.
Why This Works on Short Squovals
One accent nail prevents the design from feeling like too much, while the chrome on that single nail adds personality and visual punch. The shape shows off chrome beautifully because there’s no wasted space.
Application Tips
- Paint two coats of ballet pink for an even base under the chrome
- Apply a sticky base coat or gel topcoat before applying chrome powder
- Use a rubber applicator or small sponge to press chrome powder firmly onto the nail
- Seal with topcoat to prevent the chrome from rubbing off
Pro tip: Chrome powder is sensitive to moisture, so apply it in a dry environment and seal it immediately.
7. Nude With Fine Geometric Lines
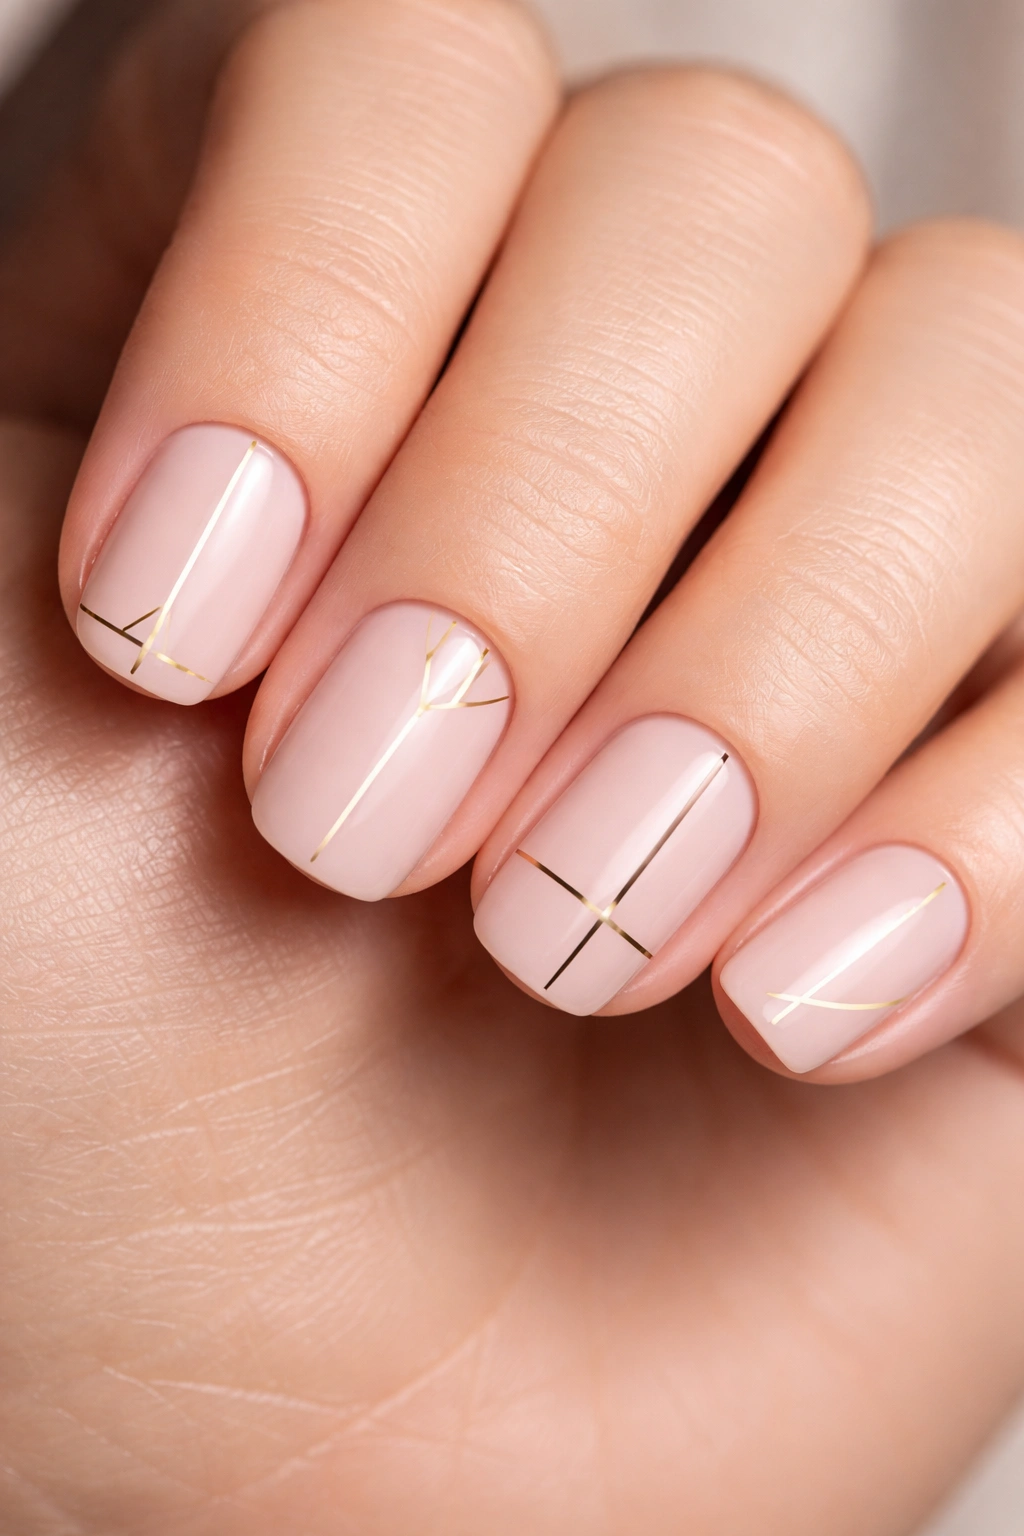
Nude creates a blank canvas for precise geometric line work in white, black, or metallic finishes. Think thin vertical lines, horizontal stripes, or even tiny triangles at the corners. The beauty of geometric design on short squovals is that the straight edges of the nail shape complement sharp, clean lines perfectly. This design feels modern and intentional.
Why This Works on Short Squovals
Geometric patterns need precision and clear definition, both of which are easier to achieve on shorter nails where you have less area to cover. The squoval shape’s straight edges are the perfect frame for linear designs.
Application Tips
- Use a thin striping brush or nail art liner for the cleanest lines
- Steady your hand by using nail guides or painter’s tape if you’re not confident freehand
- Let the nude base dry completely before adding lines
- Keep geometric patterns simple — one or two types of lines, not a jumbled mix
Pro tip: If your hand isn’t steady, tape off areas with painter’s tape to create perfectly straight lines, then remove the tape before topcoat.
8. Seafoam Green With White Daisy Chain
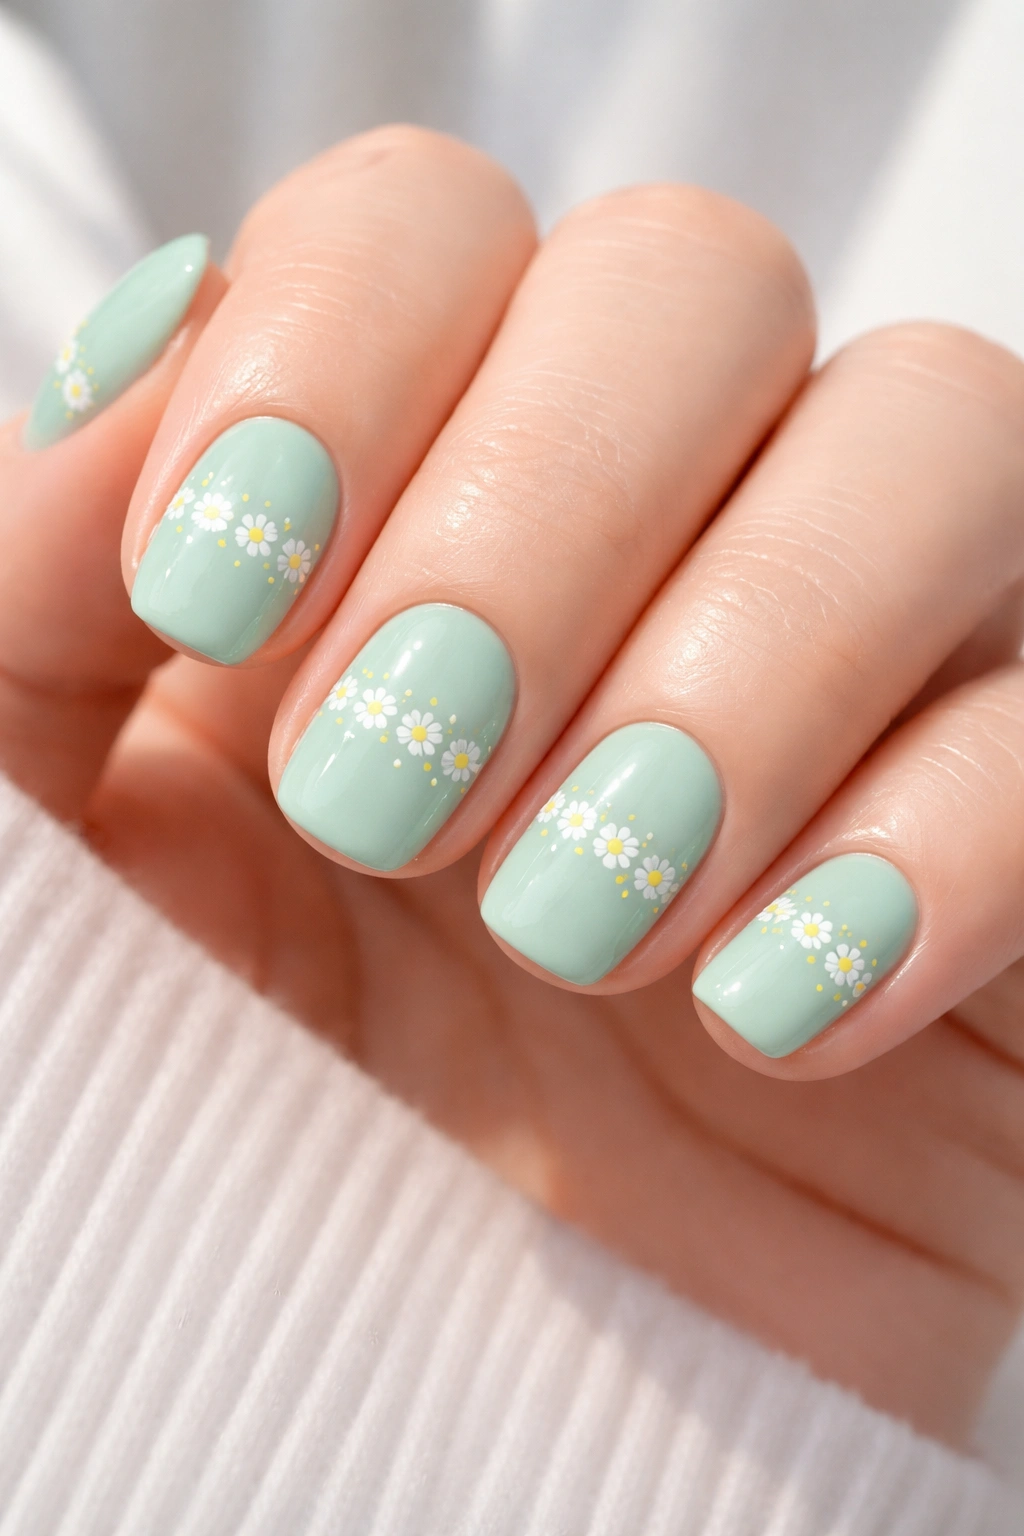
Seafoam is a color that feels fresh and summery without being bright or overwhelming. Paint all nails in soft seafoam, then add a simple chain of tiny white daisies across the center or along the side of each nail. Daisies are among the easiest flowers to paint — just five white dots in a circle with a tiny yellow dot in the center. Even absolute beginners can nail this.
Why This Works on Short Squovals
The cool-toned seafoam makes white flowers pop, and the small scale of daisies is perfectly proportioned to short nails. This design feels cute without being juvenile.
Application Tips
- Use a thin brush or dotting tool to create the petals
- Keep daisies intentionally small and slightly imperfect — that’s what makes them charming
- Space the chain loosely so there’s breathing room on the nail
- Finish with glossy topcoat to make the white and seafoam both shine
Pro tip: Paint the yellow center slightly larger than you think it needs to be — it balances the tiny white petals better.
9. Dusty Mauve With Rose Gold Confetti
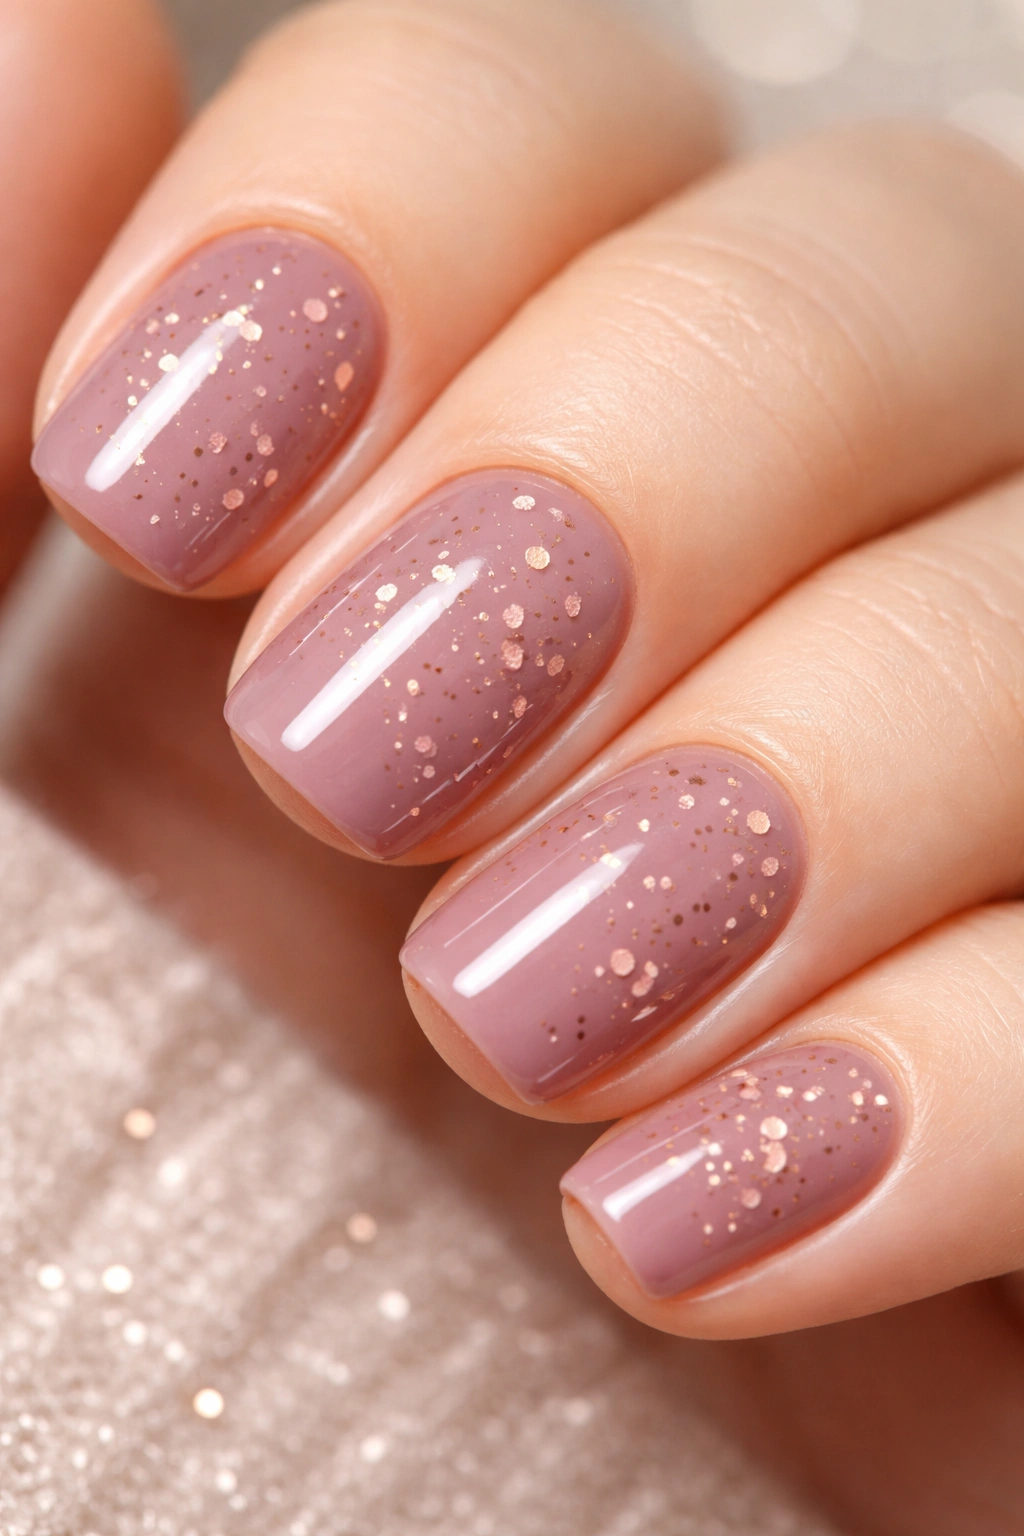
Dusty mauve is sophisticated and calming, and rose gold confetti adds just enough sparkle to feel celebratory. Paint all nails in dusty mauve, then drop tiny rose gold confetti pieces or sequins onto wet topcoat. The muted base color lets the rose gold shine without the design feeling overdone. This is a “special occasion” design that works anywhere.
Why This Works on Short Squovals
Confetti and tiny sequins create texture and interest on short nails without requiring actual nail art skills. The dusty mauve keeps it elegant rather than party-like.
Application Tips
- Apply a tacky base coat or sticky topcoat before adding confetti
- Press confetti gently into the wet topcoat so it adheres properly
- Space confetti randomly rather than in a pattern — scattered is more visually interesting
- Seal with glossy topcoat to lock everything in place
Pro tip: If confetti pieces aren’t sticking, let your topcoat become slightly less wet (30 seconds) before pressing them in.
10. Soft Gray With Delicate Black Script

Black script lettering on soft gray creates an unexpectedly edgy aesthetic that still feels polished. Paint all nails in cool soft gray, then add tiny black words or initials on one accent nail using a thin brush. This could be a single letter, your initials, or a tiny meaningful word. The monochromatic color scheme keeps it sophisticated even with the personalized detail.
Why This Works on Short Squovals
Script feels less busy on short nails because there’s not space for elaborate loops and flourishes — the lettering has to be intentionally small, which keeps it elegant and readable.
Application Tips
- Use a thin brush designed for lettering or a paint pen for the cleanest results
- Practice on paper first if you’re not confident in your handwriting
- Keep the script tight and small — think about the actual proportion to the nail
- Seal with matte or glossy topcoat depending on the mood you want
Pro tip: If your script doesn’t look perfect, you can always add a second coat of gray and try again — it’s more forgiving than you’d think.
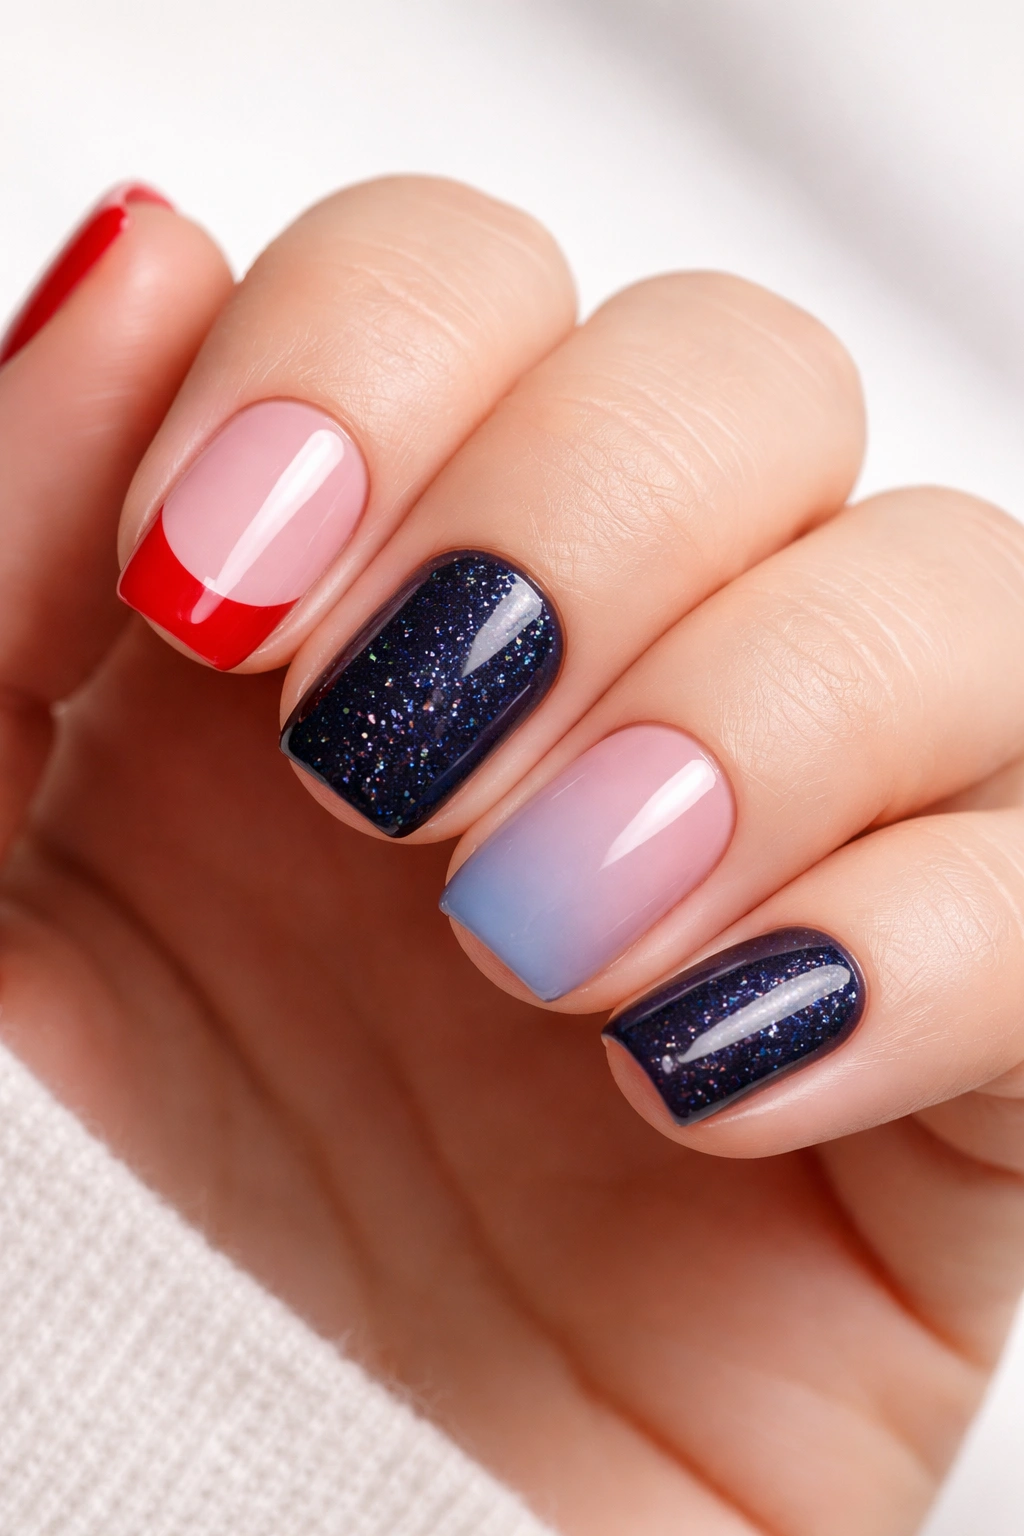
11. Classic Red With Minimalist White Tips
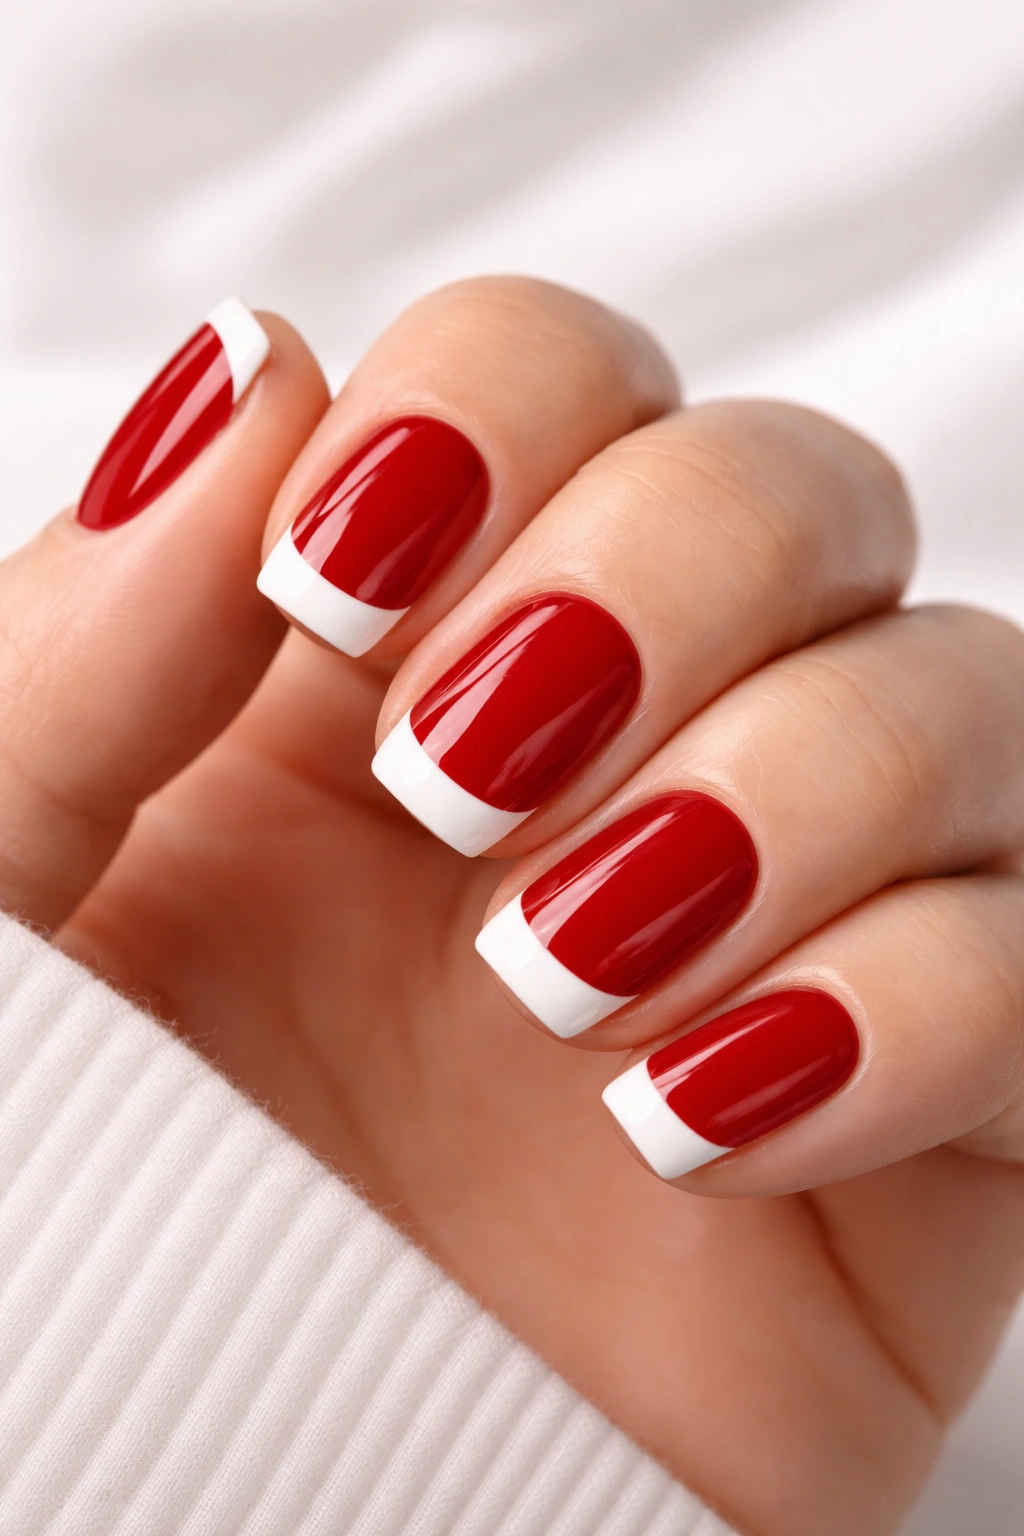
Red nails are timeless, but red with white tips feels fresh and contemporary rather than retro. This isn’t quite a French manicure — instead, paint all nails in deep red and create a thick white stripe near the tip. The white stripe should be at least 2-3mm thick but not take up the entire tip. This creates a modern, bold look that’s still very wearable.
Why This Works on Short Squovals
The thick white stripe balances the deep red and creates a striking contrast that looks intentional and editorial. The shape shows off this color combination beautifully because the stripe aligns perfectly with the nail’s natural curves.
Application Tips
- Paint the red base first and let it dry completely
- Use white striping polish or a white gel for the cleanest lines
- Keep the white stripe straight and even across all nails
- Seal with glossy topcoat for a professional finish
Pro tip: If the white line isn’t perfectly straight, you can always add a second coat — the opacity of white polish makes corrections easy.
12. Champagne Shimmer With Nude Outline
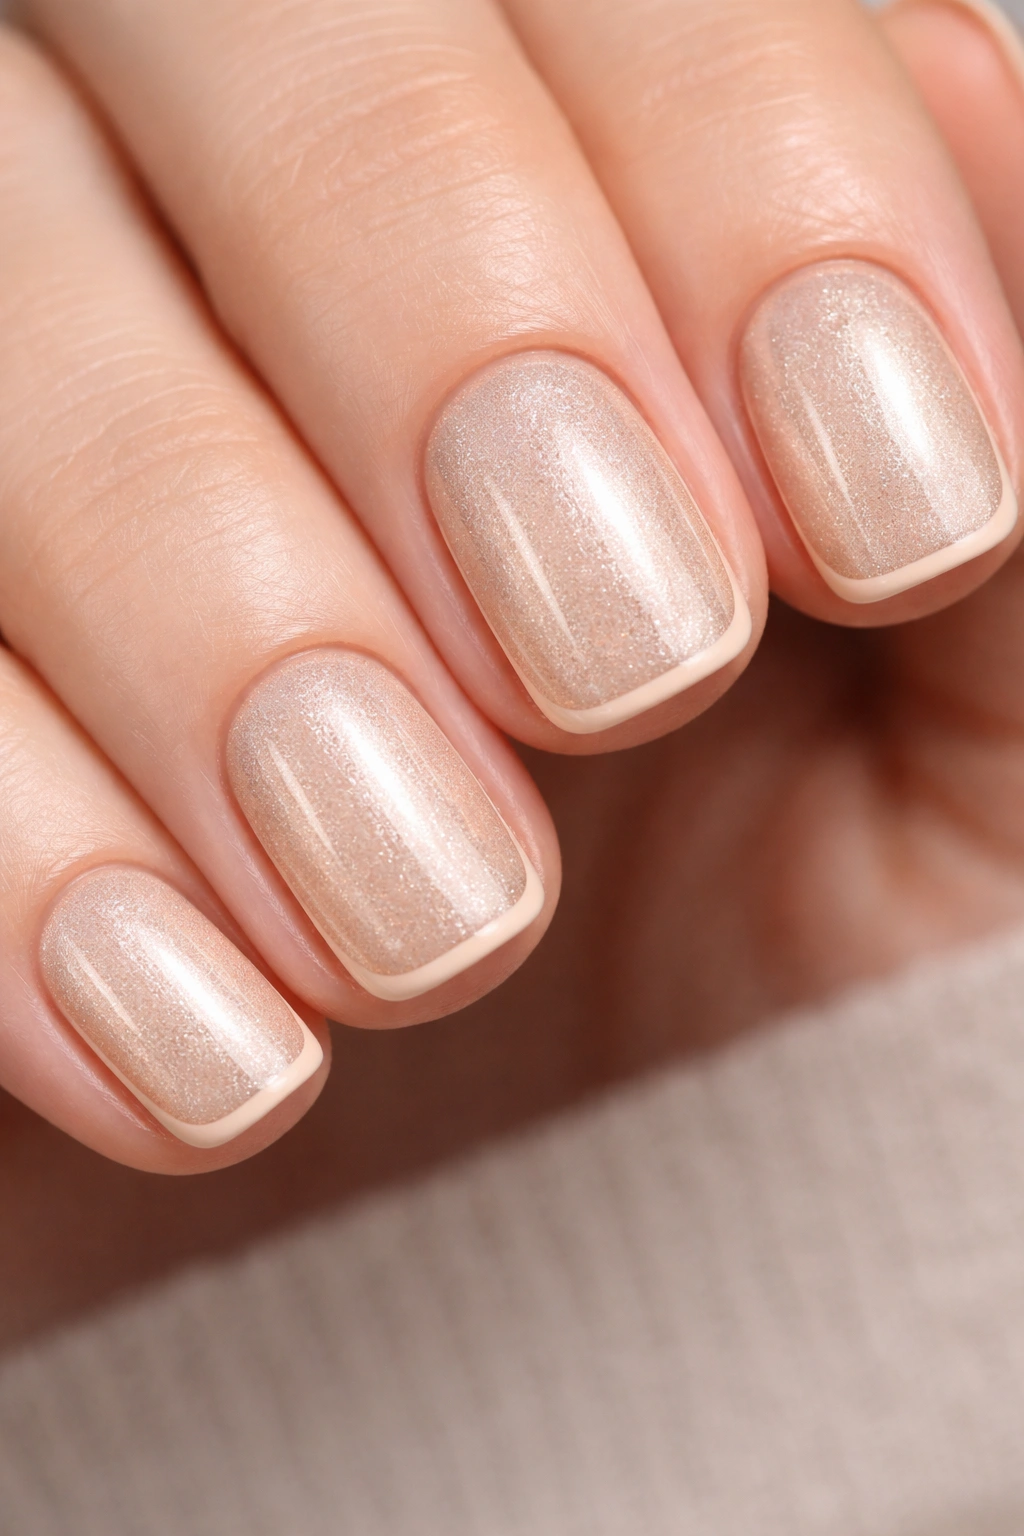
Champagne shimmer is elegant all on its own, but adding a nude outline around the entire perimeter of each nail elevates it to jewelry status. Paint the nail in champagne shimmer, then use a thin nude or warm brown brush to outline the edges. This creates definition that makes even short nails look carefully crafted.
Why This Works on Short Squovals
The outlined edge creates a subtle frame that prevents short nails from looking amorphous. The shimmer catches light while the outline keeps the design grounded and intentional.
Application Tips
- Use a champagne polish with actual shimmer, not just one that’s pale gold
- Apply the outline with a very thin brush for precision
- Keep the outline just barely visible — it’s a detail, not a border
- Finish with glossy topcoat to let the shimmer shine
Pro tip: Outline the free edge (the white tip) slightly thicker for added definition that makes nails look longer and stronger.
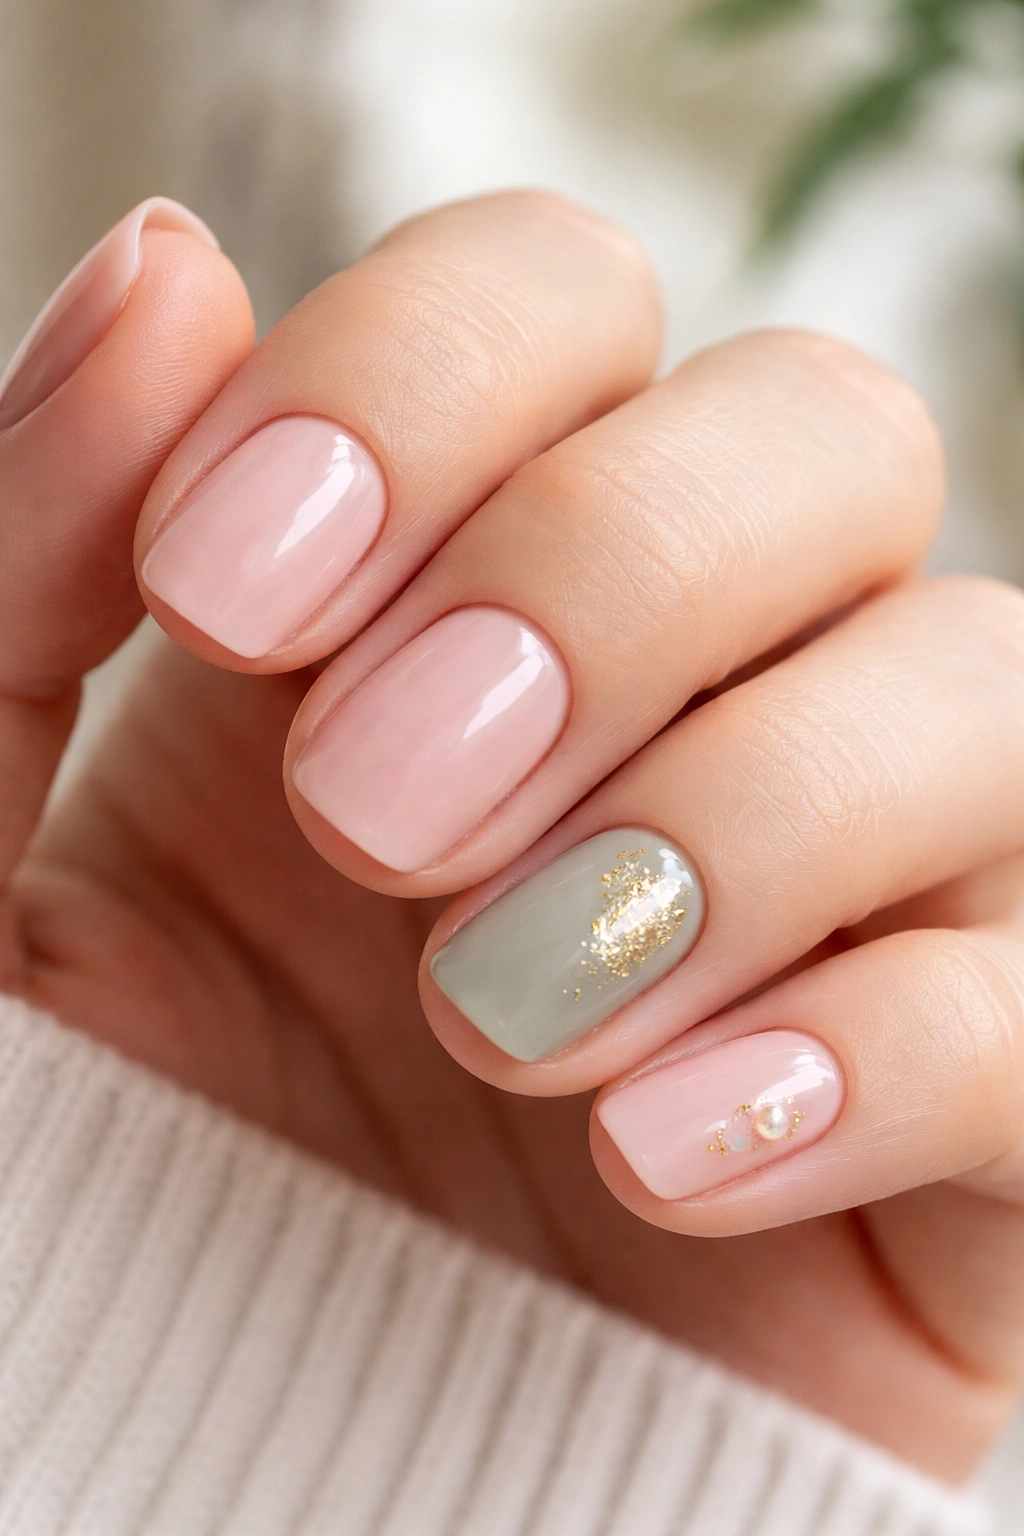
13. Sage Green With Tiny Gold Leaf Details
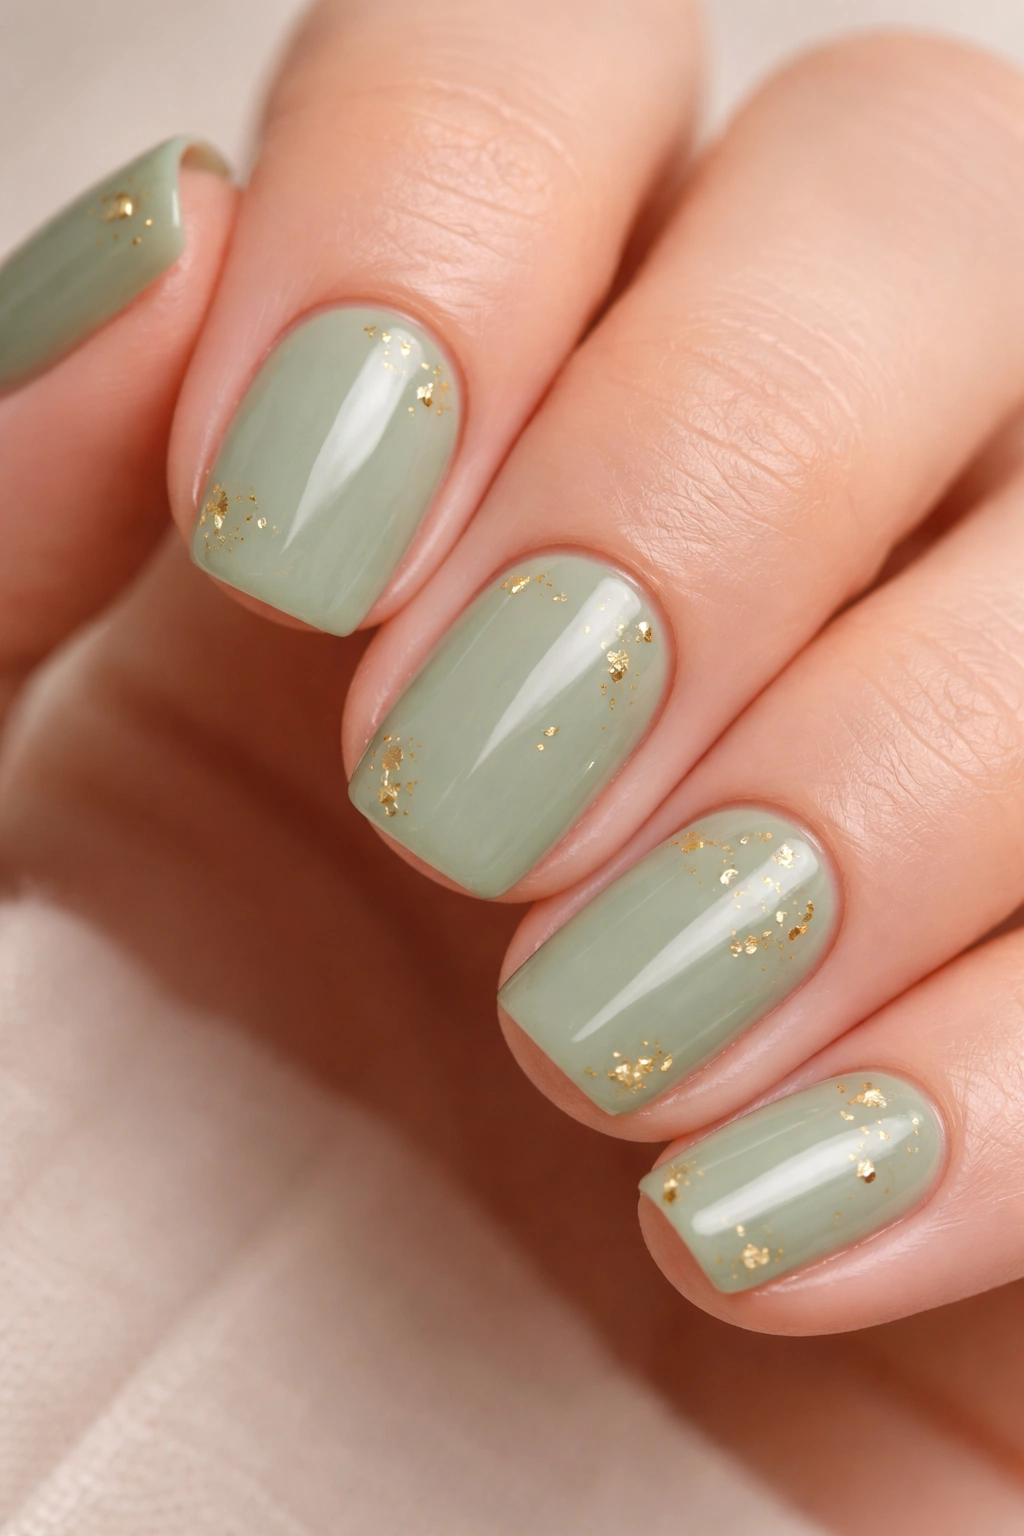
Sage green is the color that bridges seasons beautifully, and gold leaf adds luxury without looking overdone. Paint all nails in soft sage green, then add tiny gold leaf details at the corners or scattered across the surface. Gold leaf is real metallic material that adheres with topcoat and creates an authentic shimmery effect that’s different from shimmer polish.
Why This Works on Short Squovals
Gold leaf on sage is naturally sophisticated, and the tiny pieces of leaf create visual interest without covering much surface area. The muted green keeps it wearable rather than statement-making.
Application Tips
- Apply sticky topcoat where you want the leaf to adhere
- Gently press gold leaf pieces into the sticky topcoat with a soft brush
- Gold leaf crumbles when you handle it, which actually adds to the organic, textured look
- Seal with topcoat to protect the leaf
Pro tip: You don’t need much gold leaf — three or four small pieces per nail is plenty. Less is more elegant with this technique.
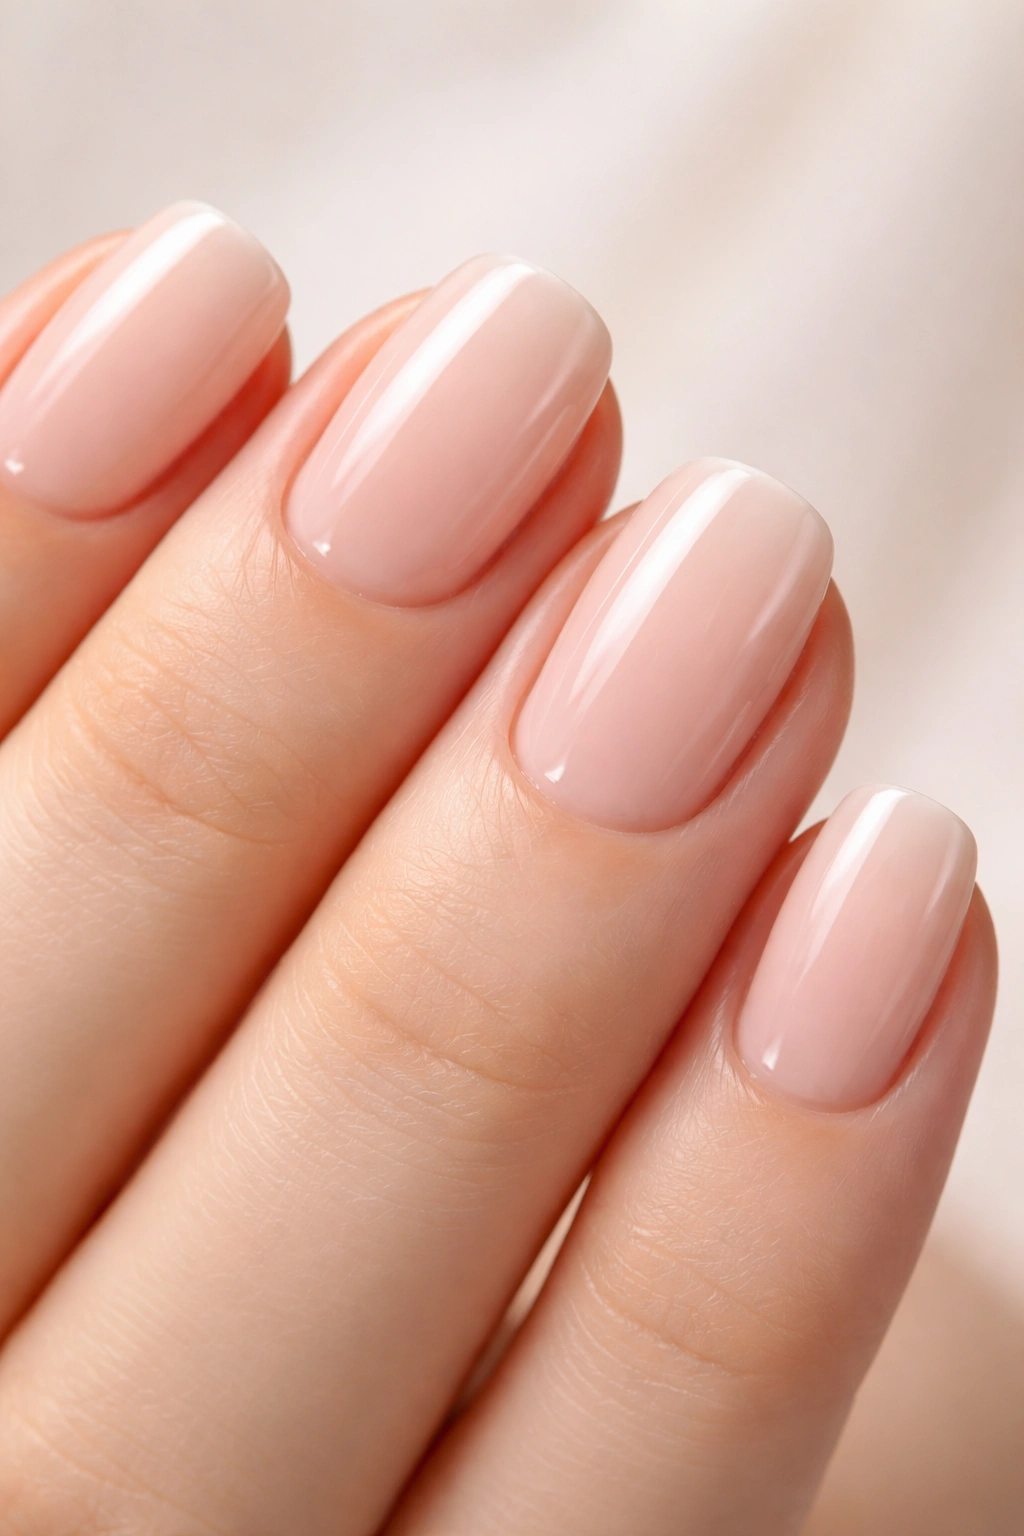
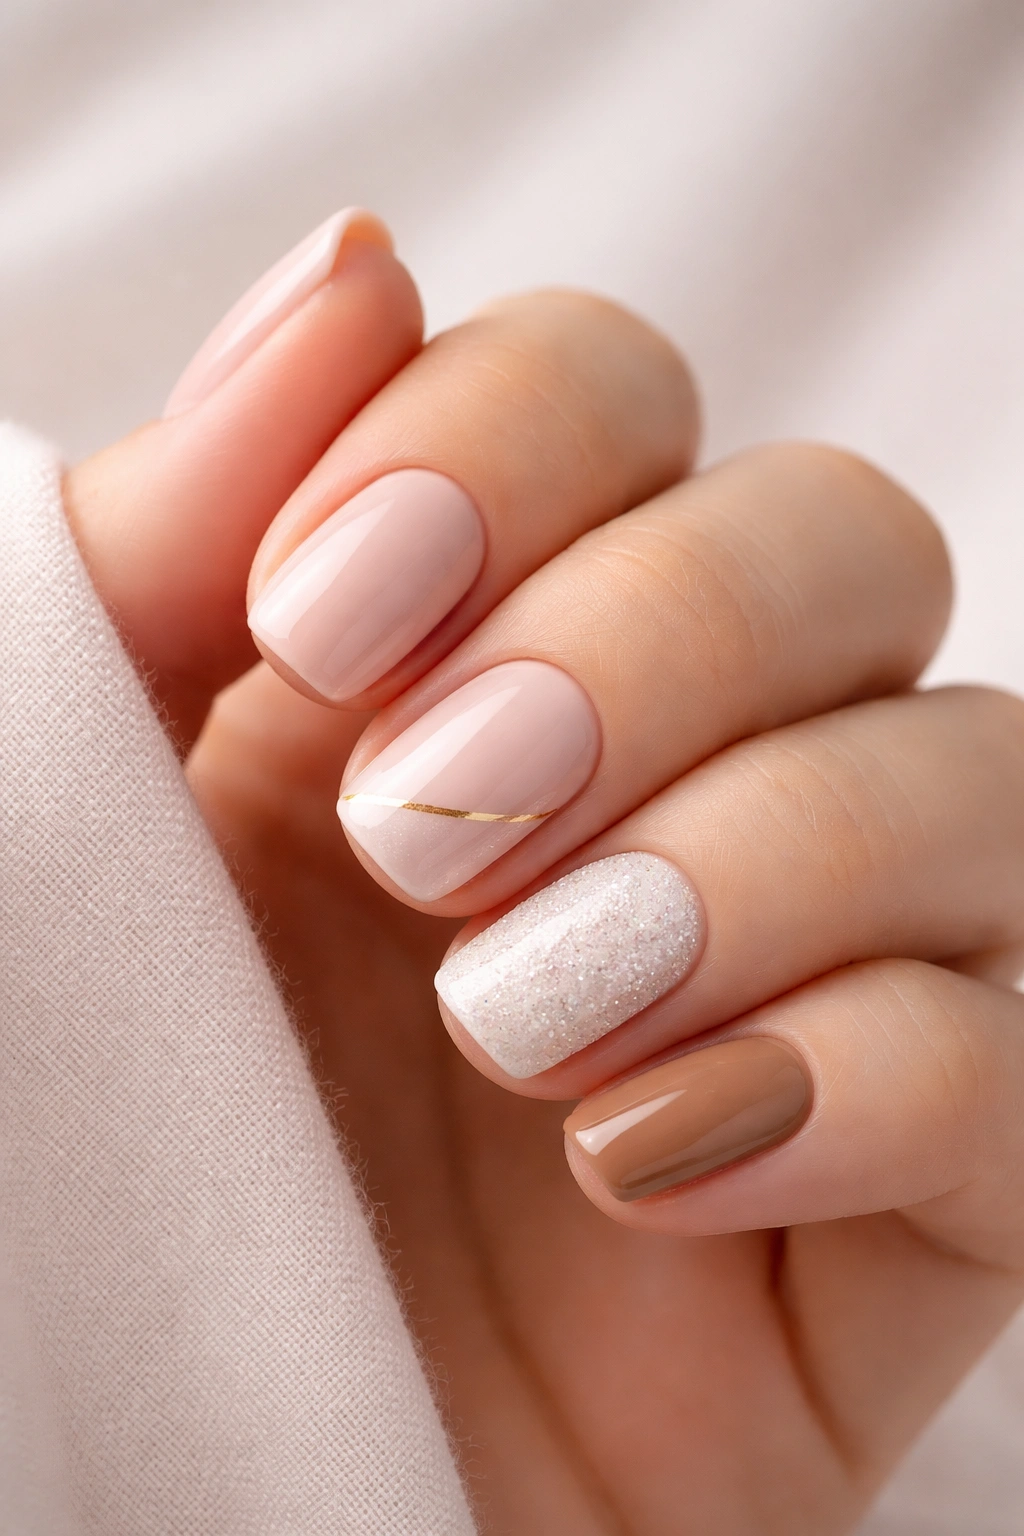
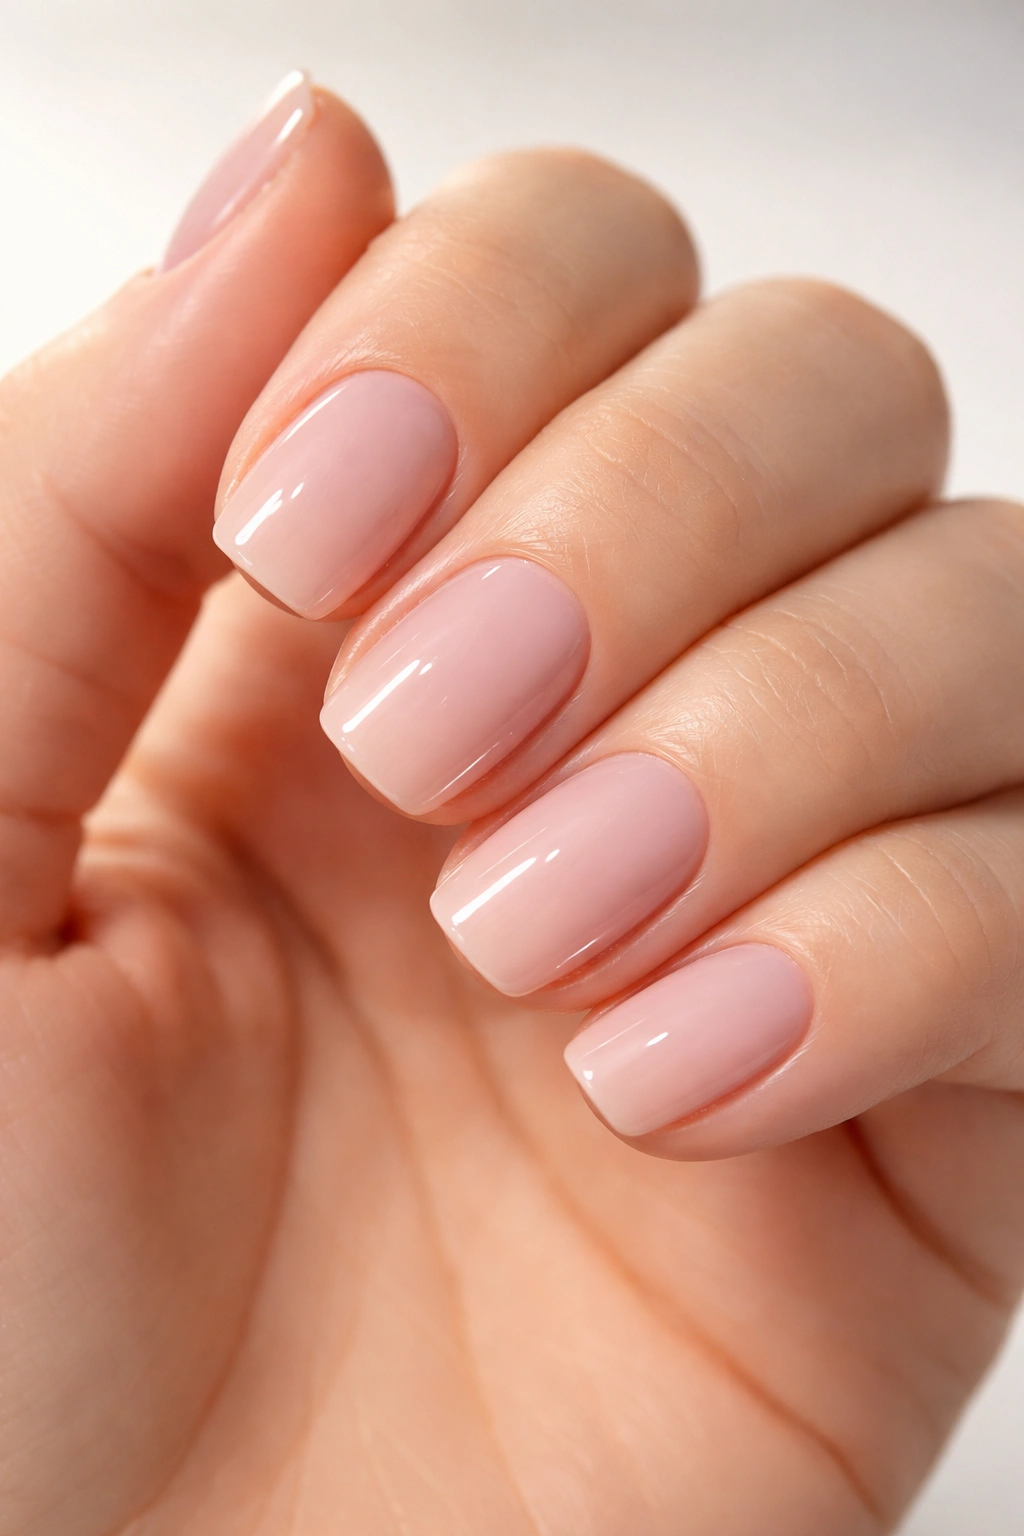
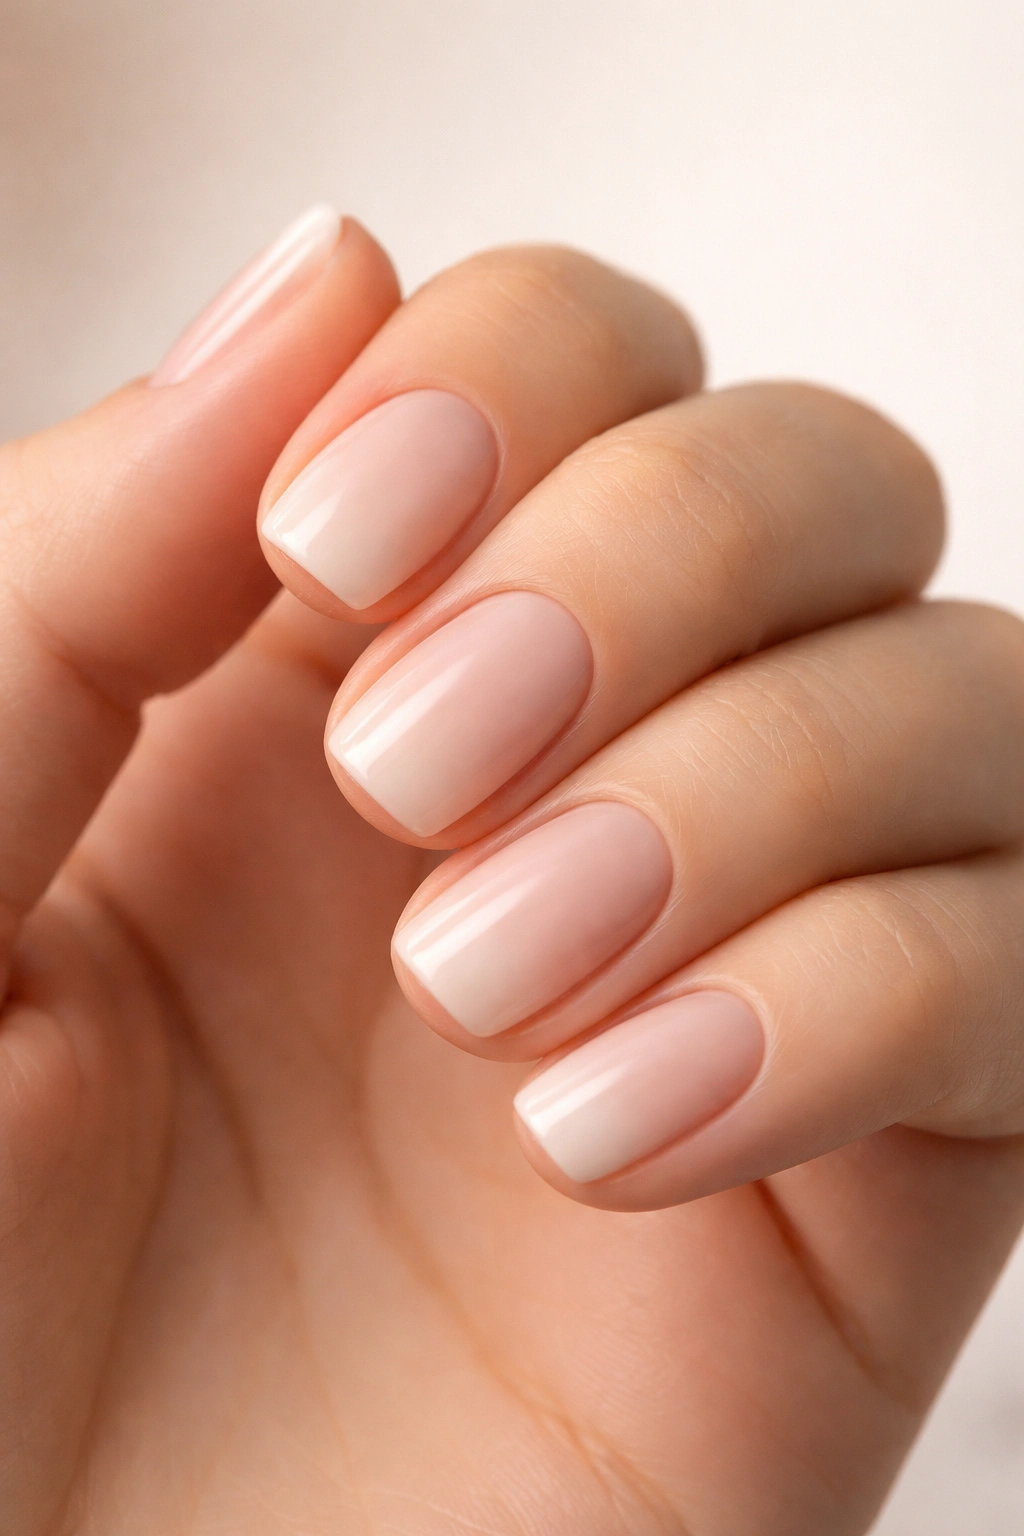
14. Blush Pink With Subtle Ombre to White
This design is blush pink that gradually fades to white at the tips, creating a soft, almost ethereal effect. This is easier than it looks because you’re working with two colors that naturally complement each other. Use a sponge to blend the transition, and keep it soft and organic rather than trying for a sharp line.
Why This Works on Short Squovals
The gradient from warm pink to cool white creates depth that makes short nails feel dimensional. The soft color palette is flattering on every skin tone.
Application Tips
- Let the blush pink base dry completely before adding white
- Use a sponge to apply and blend white toward the tips
- Blend several times for a seamless transition — no harsh lines
- Seal with glossy topcoat to blend the gradient further
Pro tip: If your gradient doesn’t look smooth, add a second layer of white on the tips and re-blend — layering actually helps create a softer transition.
15. Navy Blue With Tiny Star Stamping
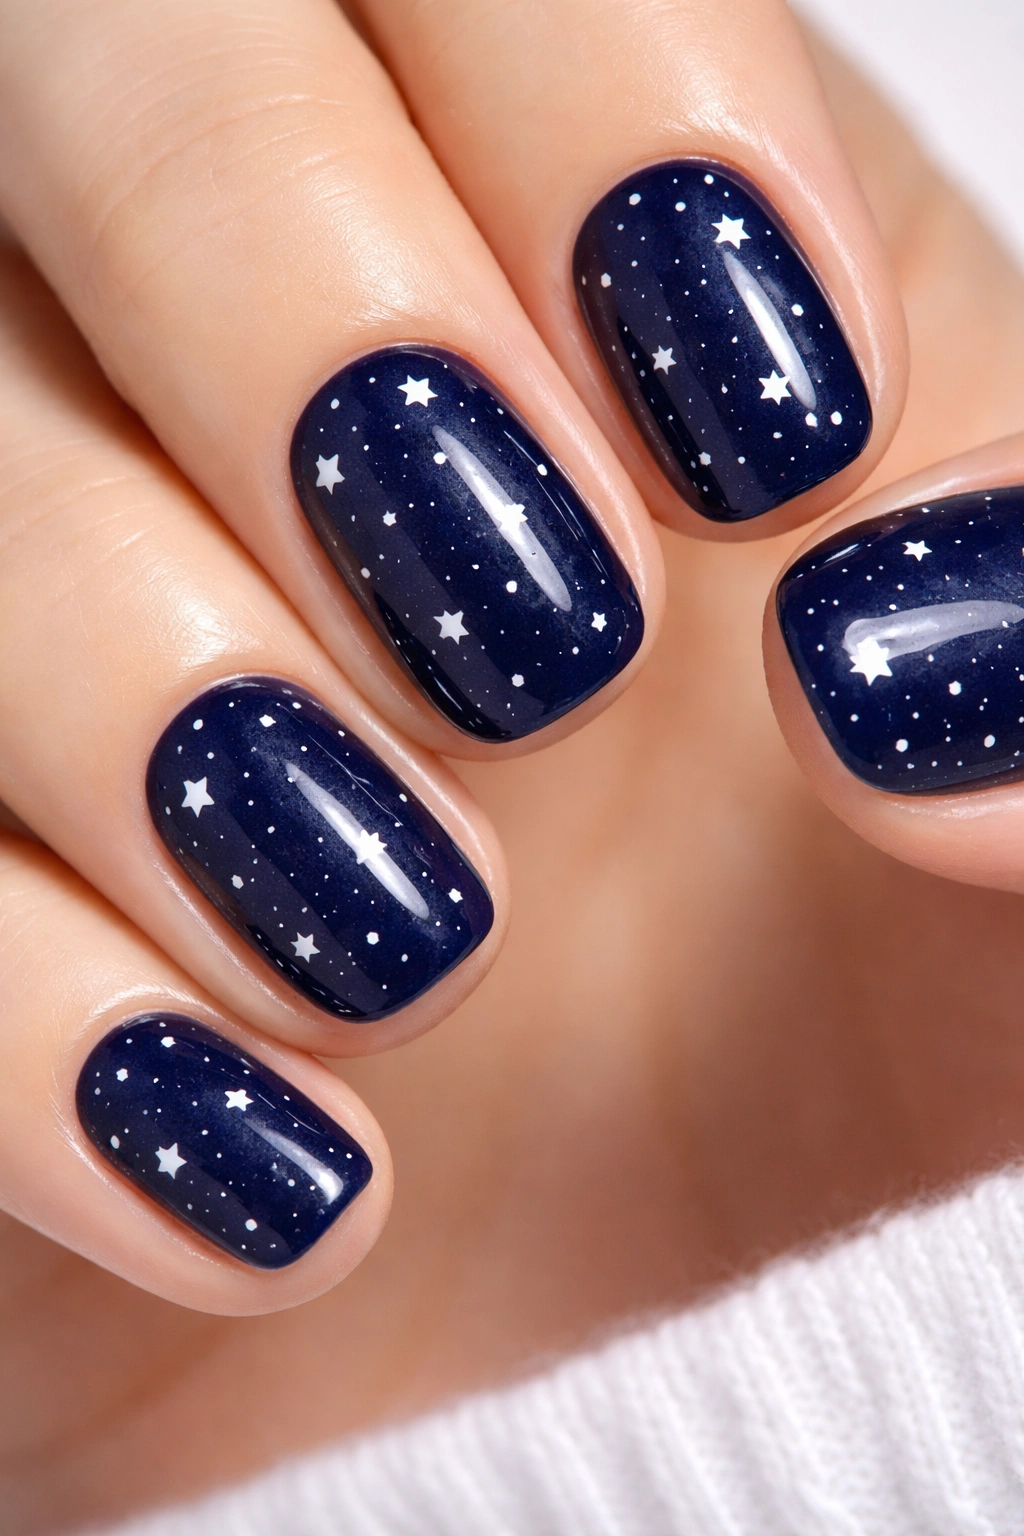
Navy is professional and polished, and tiny white or silver stars scattered across the surface add playfulness without sacrificing sophistication. Use a star stamp in white or silver polish, stamping randomly across the navy base. Stars are forgiving because they don’t have to be perfect — slightly smudged or misaligned stars actually add charm.
Why This Works on Short Squovals
Stars are small enough that they don’t feel childish even when stamped across the whole nail. Navy grounds the design and makes the stars feel intentional rather than random.
Application Tips
- Paint a solid navy base and let it dry completely
- Use a specialized star stamper or find a small star image in a stamper set
- Stamp randomly at different angles for organic feel
- Keep stars white or silver for maximum contrast against navy
Pro tip: If a stamp doesn’t come out clearly, don’t worry — just stamp again over top of it. Multiple slightly-imperfect stamps look more intentional than one perfect one.
16. Milky White With Colorful Marble Negative Space
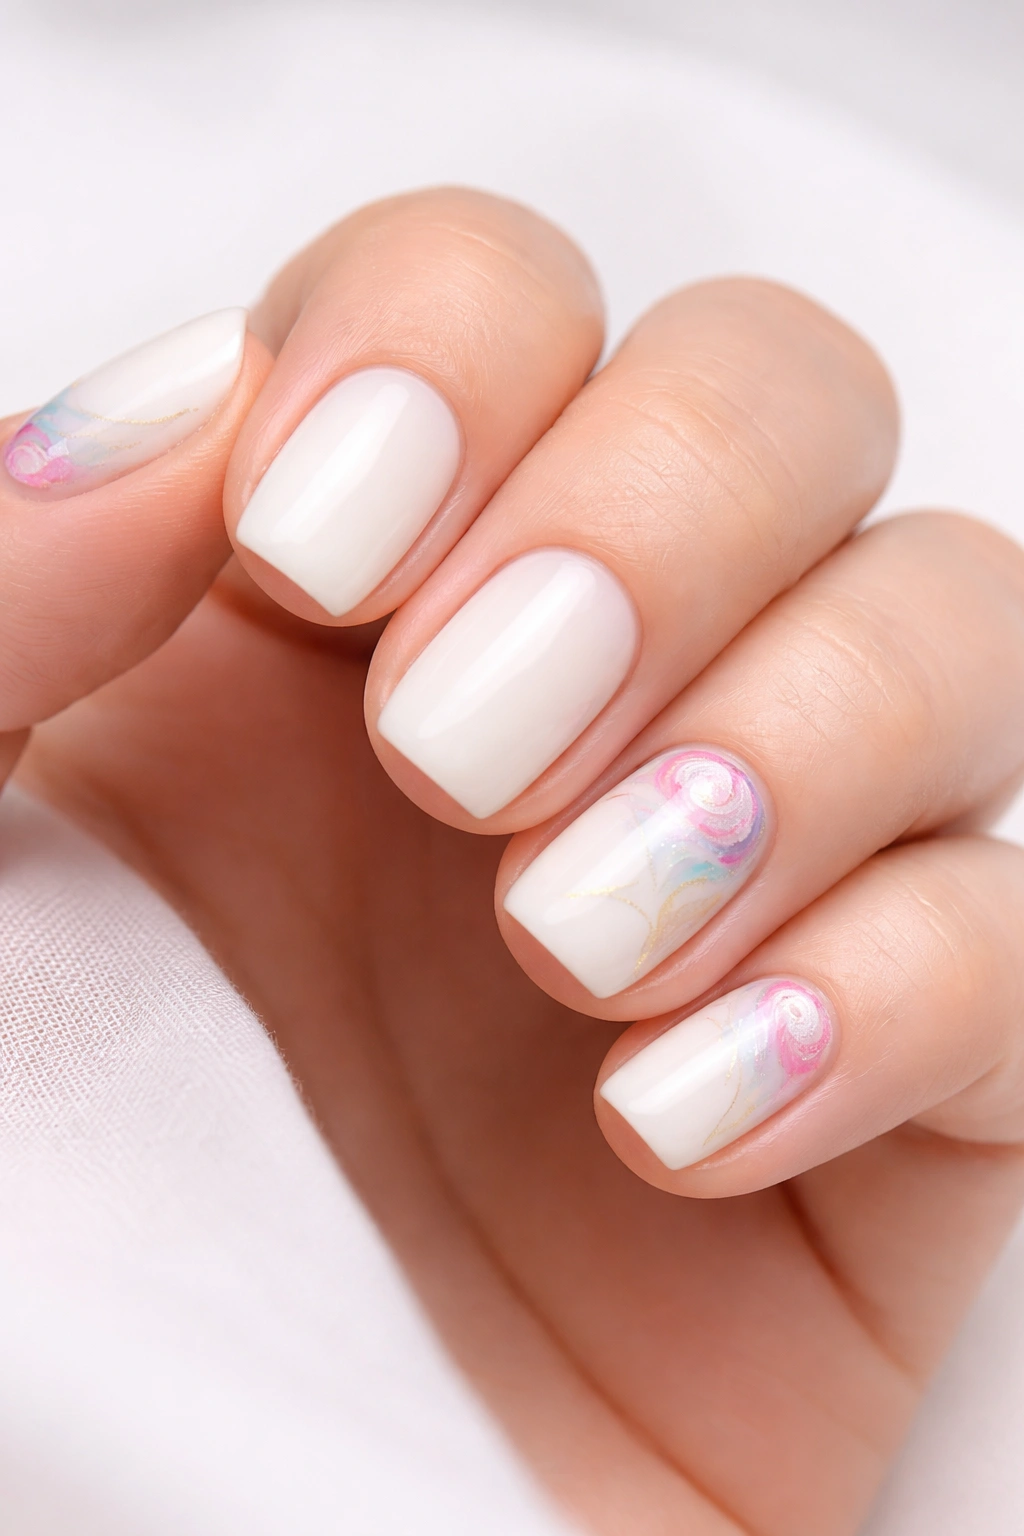
This design flips the usual marble approach — instead of marble over a base color, you paint the nail in milky white and create marble patterns by leaving unpainted negative space, then sealing it. Alternatively, paint the nail in milky white, then add colored marble accents in just one corner or along one side. This keeps the design minimalist while still being visually interesting.
Why This Works on Short Squovals
Negative space tricks make short nails feel longer and more sophisticated. The marble accent in just part of the nail prevents the design from feeling busy.
Application Tips
- Milky polish is semi-transparent, so it layers beautifully over other colors
- Create negative space by either leaving parts of the nail unpainted or using tape
- Add marble swirls in just one area rather than covering the whole nail
- Seal with topcoat to lock the design in place
Pro tip: Negative space designs photograph beautifully and always look more expensive than they are to execute.
17. Warm Taupe With Rose Gold Thin Stripes
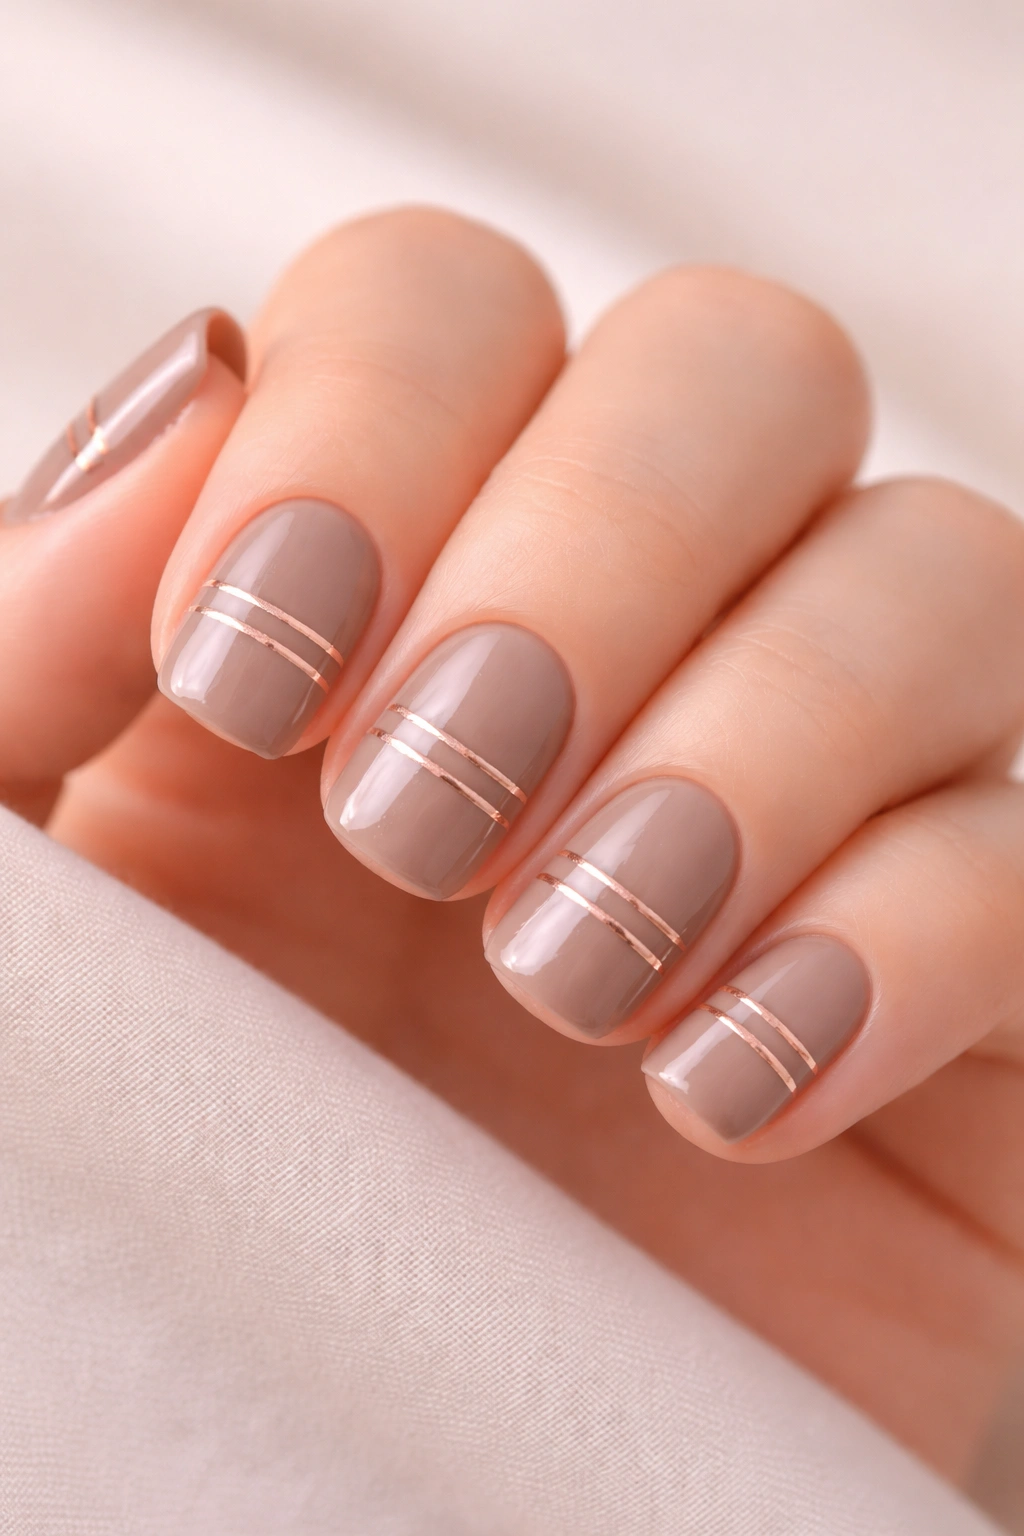
Taupe is the neutral that’s sophisticated without being boring, and rose gold thin stripes add a touch of luxury. Paint all nails in warm taupe, then use rose gold striping polish to create vertical or diagonal thin lines across each nail. Keep the stripes evenly spaced and parallel for a polished look.
Why This Works on Short Squovals
Taupe and rose gold are a naturally complementary color combination, and thin stripes don’t overwhelm short nails. This design works for any occasion.
Application Tips
- Use striping polish or a very thin brush for clean lines
- Space stripes evenly by estimating or using a guideline
- Keep stripes thin — thick ones look chunky on short nails
- Finish with topcoat for durability
Pro tip: If you’re worried about even spacing, use thin painter’s tape to guide your brush and create perfectly parallel stripes.
18. Pale Lavender With Silver Glitter Gradient
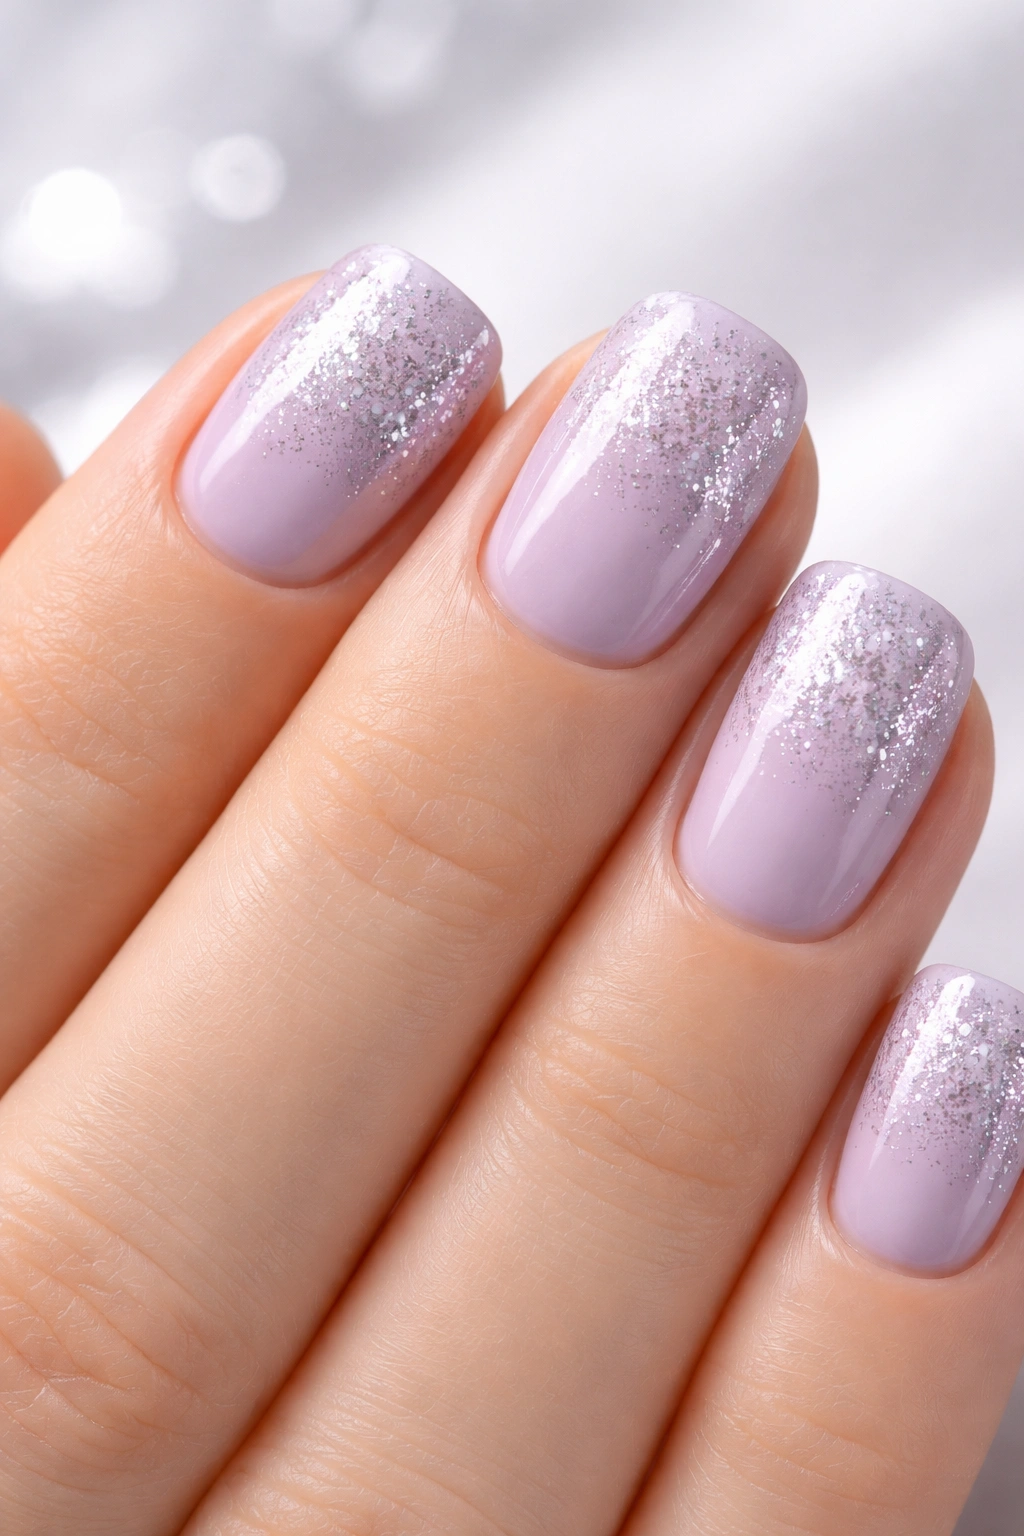
Lavender is calming and pretty, and silver glitter that’s concentrated at the tips and fades out toward the cuticle creates a subtle sparkle effect. Paint the base in pale lavender, then mix silver glitter polish with clear topcoat to create a diluted glitter solution. Apply this concentrate more heavily at the tips and fade it toward the cuticle using a sponge.
Why This Works on Short Squovals
Glitter concentrated at the tips makes nails appear slightly longer, while the pale lavender base keeps it wearable. The gradient prevents the design from feeling costume-y.
Application Tips
- Create glitter gradient by mixing glitter polish with clear topcoat
- Apply the thick mixture at the tips and feather it outward with a sponge
- Use a sponge rather than brushing to avoid dragging glitter around
- Seal with topcoat to contain the glitter and add shine
Pro tip: This design looks especially beautiful in indoor and outdoor light because of the way glitter plays with different lighting conditions.
19. Creamy Ivory With Tiny Geometric Gold Accents
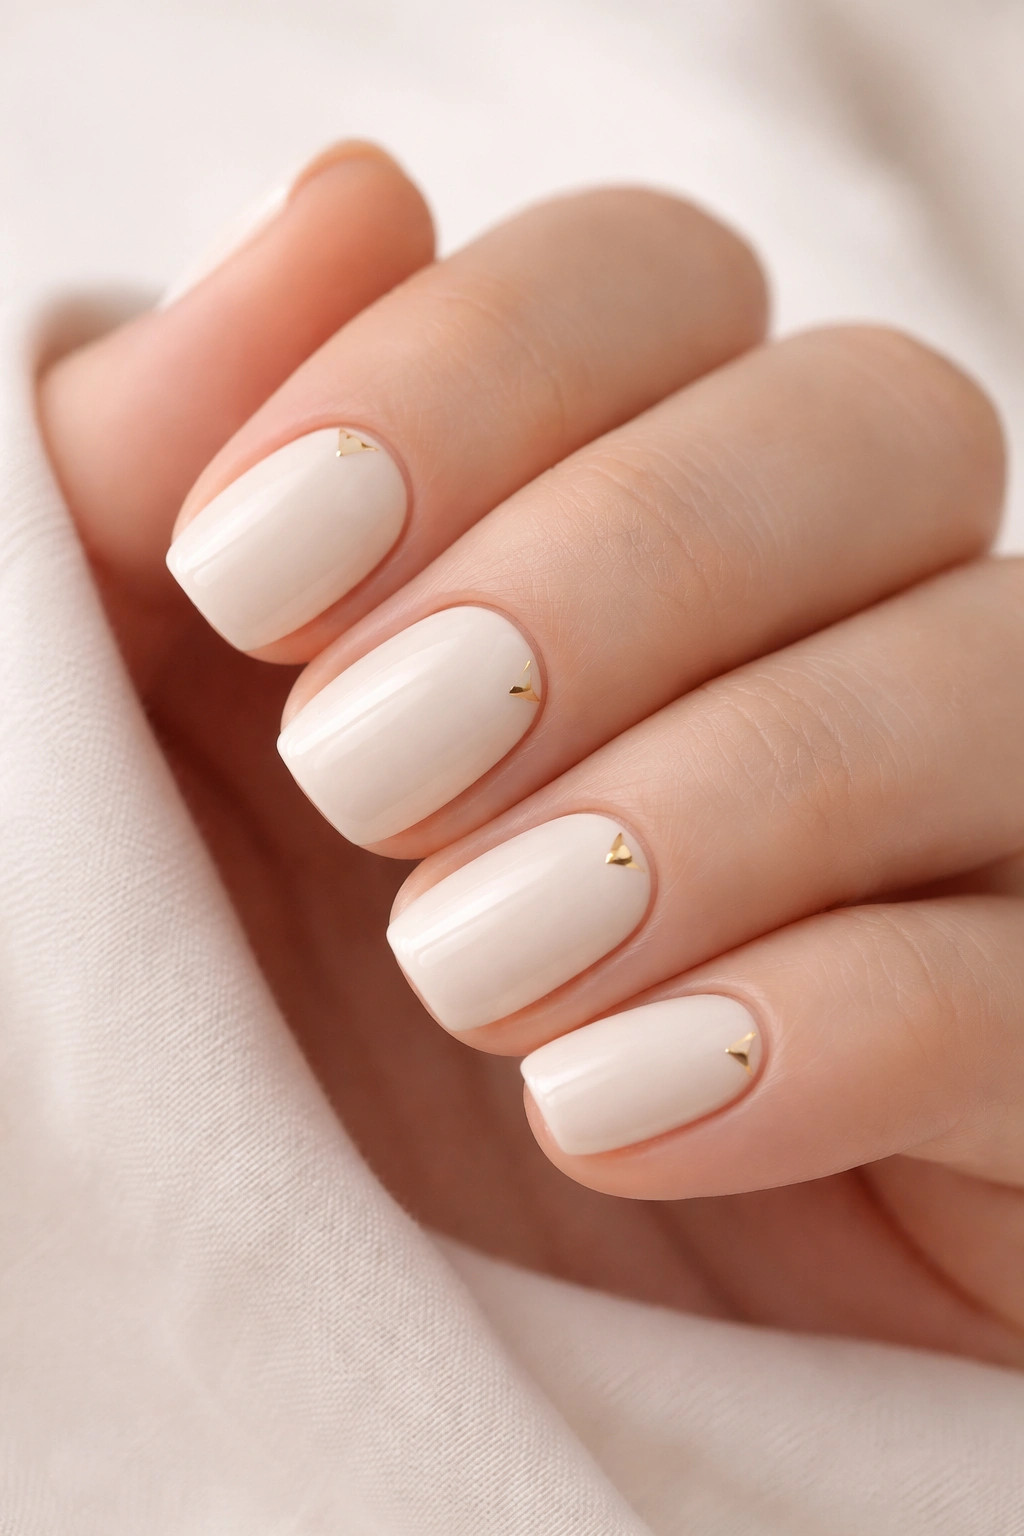
Ivory is the ultimate neutral canvas, and small geometric shapes in gold at the corners or corners of each nail add architectural interest. Think small triangles at the outer corner, a small gold circle near the cuticle, or tiny lines. The designs should be genuinely small — these are accents, not the main event.
Why This Works on Short Squovals
Geometric accents feel sophisticated on short squovals because they add visual interest without covering much surface area. Ivory is universally flattering and pairs with gold beautifully.
Application Tips
- Use a very thin gold brush or gold gel pen for precision
- Keep geometric shapes small and intentionally spaced
- Let the ivory base dry completely before adding gold details
- Seal with glossy topcoat to make the gold shine
Pro tip: If you’re not confident drawing geometric shapes, use gold striping tape to create perfectly straight lines and shapes, then remove the tape before sealing.
20. Soft Peach With Negative Space Half-Moon
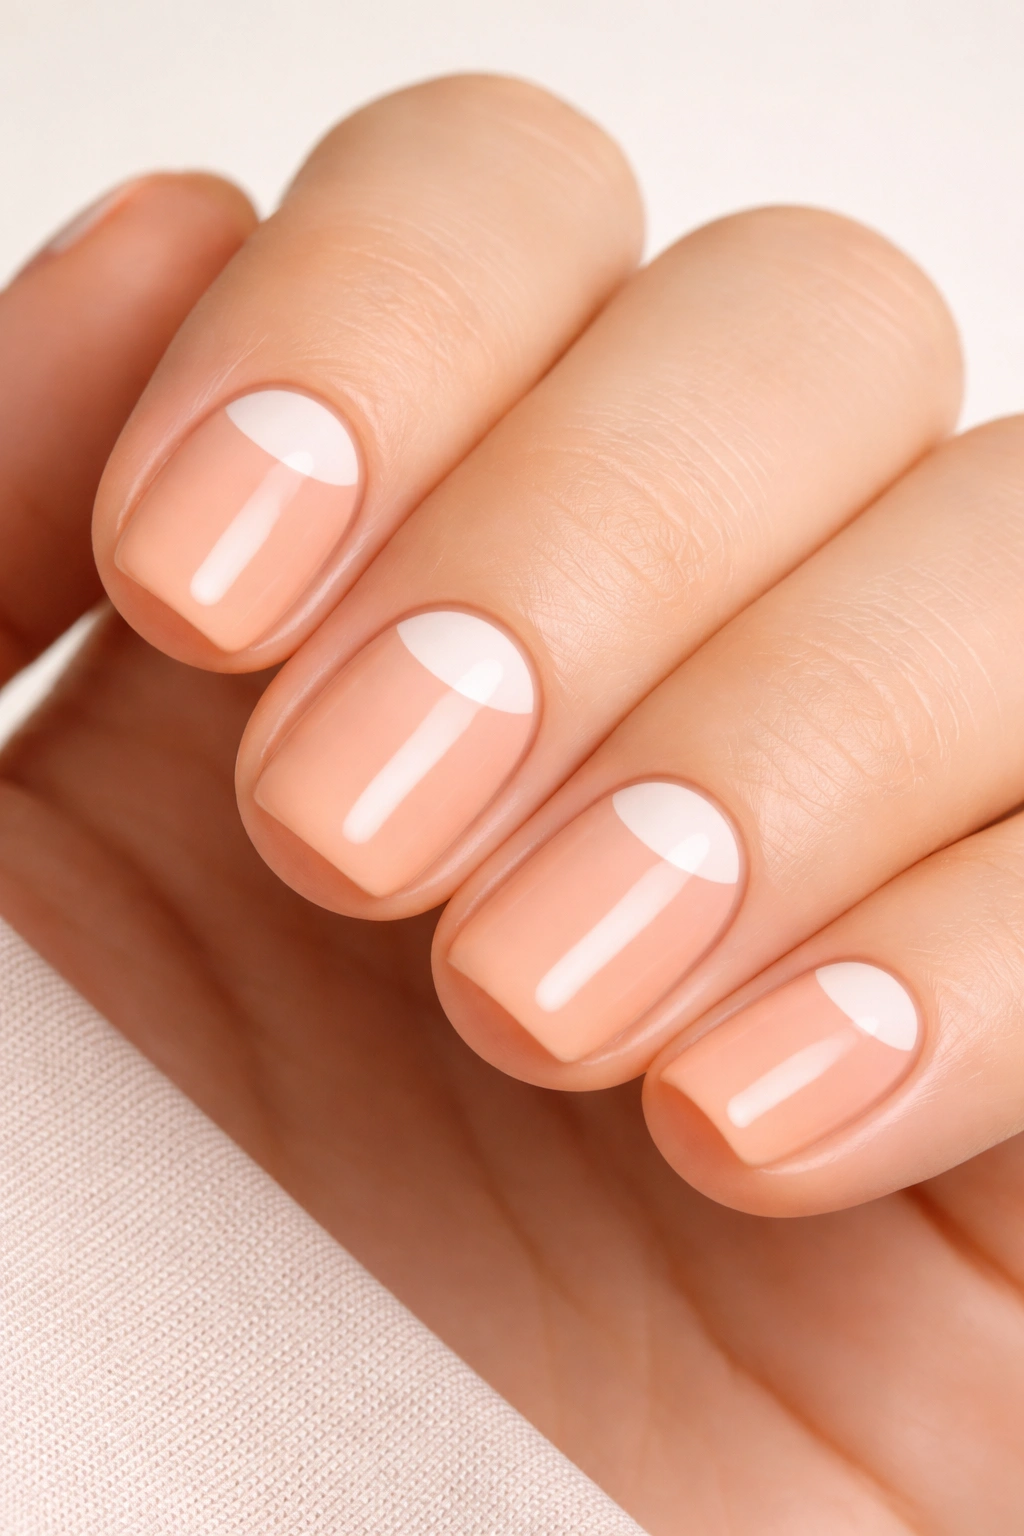
This design creates a half-moon shape at the base of each nail by either leaving that area unpainted or painting it a contrasting shade. Paint the main nail area in soft peach, leave (or paint) the half-moon section at the base in white, nude, or a complementary color. This creates a sophisticated, intentional look that feels editorial.
Why This Works on Short Squovals
The half-moon shape is a design element that literally frames the shape of the nail, making short squovals look defined and intentional. This design has been around for decades because it’s timeless.
Application Tips
- Use a thin brush and steady hand to create the curved line separating the two colors
- Alternatively, use painter’s tape curved like a half-moon to guide your brush
- The curved edge is the detail that makes this work — keep it smooth and even
- Seal with topcoat to seal the design in place
Pro tip: If your half-moon line isn’t perfectly smooth, add a thin gold or metallic line over it — it’ll make any minor imperfections look like intentional detail.
Understanding the Squoval Shape and Why It Works So Well
The squoval shape is literally the midpoint between a square and an oval, and that’s exactly why it’s become so wildly popular. Square nails are strong and structured but can feel harsh, while ovals are soft and elegant but may feel less grounded. The squoval gives you the best of both without the disadvantages of either extreme. The shape has slightly squared corners that round into a gentle slope toward the tip, creating a nail that looks intentional and carefully shaped rather than simply growing out naturally.
Short squovals are especially brilliant because they’re the shape that works for literally every lifestyle. If you work with your hands, short is practical but squoval makes it feel polished. If you want durability without constant maintenance, short avoids the breakage issues that plague long nails while squoval looks grown-up rather than stubby. If you love nail art, short squovals are the shape where designs show up clearly without taking over the entire nail.
The proportions of a short squoval are naturally balanced — about 2-3mm of white tip beyond the fingertip, with a length that extends no more than about halfway between your fingertip and the first knuckle. This means designs can span the entire visible nail surface without feeling overwhelming. A design that might look cramped on an even shorter nail reads beautifully on a short squoval.
How to Maintain Gorgeous Short Squoval Nails Between Salon Visits
Once you have your adorable squoval design, keeping it pristine requires a few habits that become second nature. Apply topcoat every 3-4 days to seal and refresh your design — topcoat doesn’t just protect the color, it also provides a glossy finish that makes any design pop more brightly. You’ll notice the shine diminishing after about a week, which is exactly when a new layer of topcoat brings it back to life.
Short squovals need the cuticle area kept neat if you want the shape to remain sharp. If your nails grow naturally quickly, you might need to file back the edges every 7-10 days to maintain that perfect squoval proportion. Use a glass or crystal file rather than metal — metal files create tiny fractures in the edge that can lead to peeling and breakage, while glass files seal the edge as they file.
Moisturize your nail beds and cuticles daily, especially if you’re removing nail art frequently. Nail designs dry out your nails, so counteract that with cuticle oil or hand cream applied every single day. This keeps your nails flexible and less prone to breakage, which means your designs last longer and your nails stay healthy enough for frequent color changes.
Popular Squoval Design Trends Across Different Styles
While the 20 designs above represent the core adorable squoval aesthetic, the shape is versatile enough to work with nearly any design philosophy. Minimalist designs — single color bases with just one or two small details — look incredibly sophisticated on short squovals because there’s nowhere to hide imperfection. Every element shows clearly, which means simplicity becomes elegance rather than simplicity becoming boring.
Maximalist designs with multiple colors and intricate patterns require more skill on short squovals because you have less surface area, but they can be stunning when done thoughtfully. The key is choosing a design where the complexity is intentional and layered, not just busy. A nail with three distinct design elements and a coordinated color story reads as curated. A nail with five different techniques and clashing colors reads as chaotic.
Textured designs — adding things like velvet powder, sugar effects, or real embellishments — work gorgeously on short squovals because the texture adds dimension that makes short nails feel more interesting. A matte velvet finish on a short squoval reads as intentional and modern, not like you couldn’t afford glossy polish.
Ombre and gradient designs are perhaps the most forgiving and gorgeous on short squovals specifically because the shape shows off the gradient’s full spectrum beautifully. There’s something about the gentle curves transitioning to straight edges that displays color transitions perfectly.
Why Short Squovals Photograph Better Than Other Shapes
If you love sharing your nails on camera or simply want them to look good in photos, short squovals are genuinely the most flattering shape. The balanced proportions look intentional rather than accidental in photos, and the shape doesn’t create odd shadows or visual distortion the way very long nails sometimes do. The slight angles of the squoval catch light beautifully, making any design (especially glittery or shimmer finishes) photograph with incredible dimension.
The shape also frames the nail bed at a proportion that makes hands look elegant in photos. A square nail that’s short can sometimes look stumpy, while an oval that’s short can sometimes look incomplete. A short squoval hits that sweet spot where it looks refined and intentional every single time.
When you’re photographing your nails for social media or just because you love them, short squovals photograph beautifully with any background. The shape doesn’t compete with backgrounds or make it hard to see the design — which is why so many nail artists and influencers actually prefer designing on short squovals themselves, even though longer shapes are trendier.
Choosing the Right Design for Your Lifestyle and Occasions
The gorgeous thing about the 20 designs above is that they span from professional-appropriate to playful, from everyday-wearable to special-occasion ready. If your lifestyle is professional or conservative, the minimalist designs (burgundy with gold lines, nude with geometric lines, ivory with gold accents) will serve you beautifully. These designs add personality without announcing themselves loudly, which is perfect for workplaces where boldness might be frowned upon.
If you’re more creative or expressive, the fun designs (daisy chain, star stamping, marble patterns) let your personality show while still being wearable. These aren’t costume nails — they’re just designs that have more personality than a single color. They work beautifully for creative industries, everyday wear if you’re someone who likes to stand out, or anywhere you want to show a little extra visual interest.
The special-occasion designs (confetti, glitter gradient, ombre with pearls) work for date nights, celebrations, or anytime you want your nails to feel extra polished. The nice thing about executing these on short squovals is that they’re achievable at home and don’t require special equipment beyond what most nail enthusiasts already have.
Consider which designs feel like “you” rather than trying to wear designs that look beautiful but don’t match your personal style. You’ll actually wear them more often and enjoy them more if they feel authentic to how you normally present yourself — with a little extra polish.
The Science Behind Why These Specific Designs Work on Short Squovals
Short squovals work so well with these particular designs because of how design elements interact with nail proportions. Designs with strong color contrast (red with white tips, navy with stars) work beautifully because the contrast reads clearly even across a smaller surface area. Designs with subtle gradients work because the squoval shape shows off the full gradient spectrum.
Designs concentrated on parts of the nail (half-moon, negative space) work because the squoval shape creates natural zones — you can treat the tip differently from the base and it looks intentional because of the shape’s structure. Designs scattered across the whole nail (daisies, stars, confetti) work because the squoval proportions are balanced enough that you can distribute elements without creating visual heaviness.
The actual proportion of a short squoval — roughly 1:1.5 length to width — creates a shape that photographs similarly to how it appears in real life. This means designs that look good on your actual nails will also look good in photos, which isn’t always true of more extreme shapes.
How to Adapt These Designs Based on Your Nail Strength and Sensitivity
If your nails are prone to breaking or peeling, choosing designs that don’t require intricate application or frequent changes is wise. The solid-color bases with simple accents (soft pink with pearls, sage green with gold leaf) are gentler on nails because they’re quick to apply and don’t require detailed brushwork that might require multiple attempts. These designs dry faster and seal faster, minimizing exposure to the drying effects of nail products.
If you have sensitive skin around your nails, avoid designs that require you to work right up against the cuticle area for extended periods. Designs with central focus (marble, ombre, glitter gradient) allow you to work farther from the cuticle, making them gentler on sensitive skin. Always use a cuticle oil or barrier cream between nail applications if your skin is reactive.
If your nails are strong and you love the process of creating intricate designs, all 20 of these work beautifully and you can even layer them or combine elements. You have the freedom to push yourself creatively because your nails can handle the application and removal process without compromise.
Troubleshooting Common Issues With Short Squoval Designs

If your designs look different when you’re done than they did in the inspiration image, the most common culprit is proportion. Remember that the designs need to be scaled to your actual nail size. A detailed design that looks beautiful when it takes up most of a long nail might look crowded on a short squoval. Don’t just copy designs one-to-one — adapt them to your nail proportions.
If your straight lines aren’t straight or your shapes aren’t symmetrical, this is actually one of the easiest things to fix. Most people think they need better hand-eye coordination, but what they actually need is a better tool (thinner brush, steadier hand rest) or a technique assist (painter’s tape, nail guides, or tracing). Using these tools isn’t cheating — it’s how professional nail artists get precise results.
If your colors are more muted or less vibrant than the inspiration image, you might need an extra base coat or the wrong polish formula for your desired effect. Shimmer polishes need a white or nude base to show their true color. Translucent colors need multiple coats. If a design doesn’t match the reference, your color choice might just need adjustment — different undertones or an extra coat makes a massive difference.
If your design is chipping or peeling, you likely have three problems: insufficient topcoat, rushing the drying process, or not properly prepping your nails before application. Always use a base coat, let colors dry fully between layers, and seal everything with at least two coats of topcoat. Patience in the building phase pays off in durability.
Final Thoughts
Short squoval nails are legitimately the best shape for everyone who wants their nails to feel polished, professional, and personal without requiring the maintenance that longer shapes demand. The 20 designs above represent the cream of adorable short squoval styles — each one chosen specifically because it translates beautifully to that exact length and shape. They’re not just pretty in pictures; they actually look great on your hands and hold up beautifully to daily life.
The real magic of these designs is that they prove you don’t need length to feel special or expressive through your nails. Short squovals are the shape that finally made nail art accessible to people who work with their hands, can’t spend two hours at a salon, or simply prefer the practicality of shorter nails. You get everything sophisticated nails offer with none of the fragility or maintenance burden.
Pick a design that genuinely speaks to you rather than just looking beautiful in a photo. Your nails are something you see every single day, so they should feel authentically like you. Whether you choose soft and romantic or bold and geometric, minimalist or playful, there’s absolutely a short squoval design in this collection that’ll make you happy every time you look down at your hands.
