

Short coffin nails are having a major moment, and honestly? They deserve all the hype. If you’ve been holding onto the idea that coffin nails only work at extreme length, it’s time to rethink that. The tapered shape with the squared-off tip creates an undeniably chic silhouette that actually looks intentional and polished at shorter lengths—not stubby or unfinished. The flat edge keeps the vibe edgy and commanding, while the taper still elongates your fingers and creates that slimming effect everyone loves.
What makes short coffin nails so wearable is their versatility. They work equally well whether you’re going minimalist or maximalist with design. You can keep them elegantly understated with a single color and glossy finish, or you can get creative with patterns, textures, nail art, and embellishments. They’re sturdy enough for daily life, they won’t constantly catch on things, and they actually last longer than longer lengths because there’s less leverage for breakage. Plus, short coffin nails feel modern and intentional in a way that short rounds or squares sometimes don’t—there’s something about that geometric shape that automatically reads as having thought behind it.
Whether you’re exploring this shape for the first time or you’re a committed coffin nail devotee, here are twenty design ideas that prove short coffin nails are genuinely as striking as their longer cousins. Each one works perfectly on natural nails or short extensions, and every single design here is achievable whether you’re a DIY nail artist or you’re showing these to your manicurist.
1. Candy Apple Red With High-Shine Finish
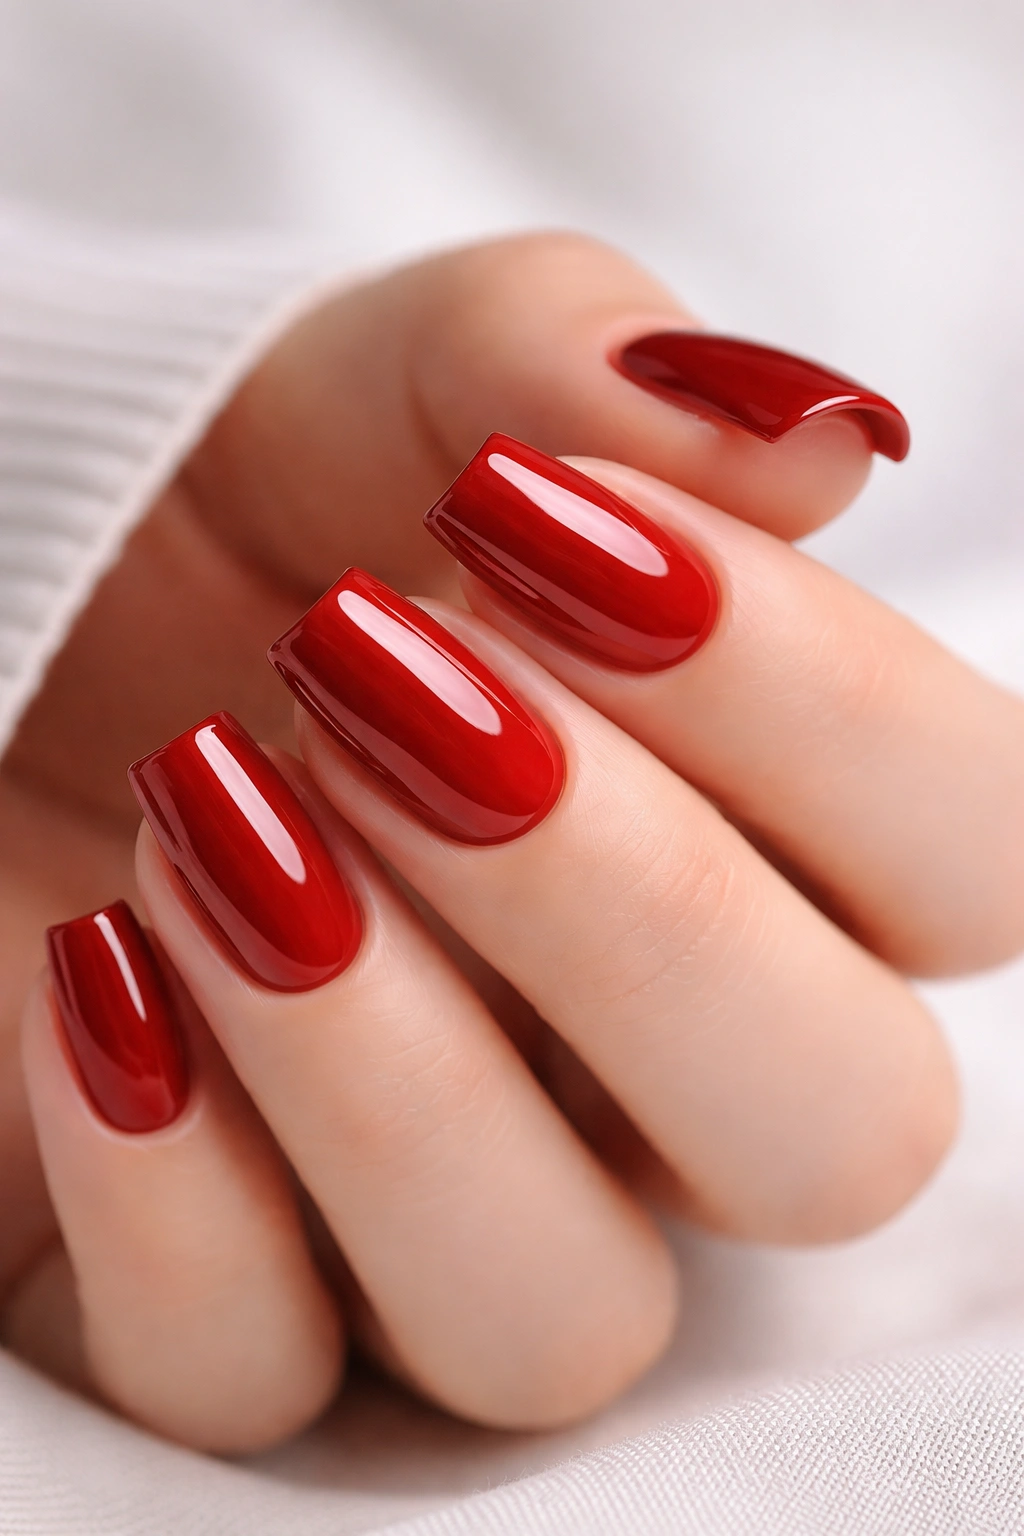
There’s a reason red nails are classic—they simply work. But on short coffin nails, red polish takes on a commanding edge that feels completely intentional. The key to making this design sing is the finish: skip matte and reach for a high-shine topcoat that creates that lacquered, glossy look. The glossiness amplifies the boldness of the color while keeping the overall effect sophisticated rather than theatrical.
Why This Works on Short Coffin Nails
Red is inherently bold, so it needs a shape that can handle that confidence. The squared-off tip and tapered sides of the coffin shape make the design feel polished and deliberate, like you chose the length and the color as a complete package rather than working with what you have. The geometric precision of the shape complements the boldness of the color perfectly.
Execution Tips
- Choose a true red or slightly warmer cherry red rather than orange-toned reds for maximum impact
- Apply a base coat first to prevent staining (red polish can be notorious for this)
- Use two thin coats of polish rather than one thick coat for better adhesion and longevity
- Seal everything with a thick, glossy topcoat to get that mirror-like finish
Pro tip: Red nails show polish application imperfections more than any other color, so take your time with even strokes and clean edges. If application is tricky for you, press-on short coffin nails in red come pre-painted and perfectly finished.
2. Nude Base With Glitter Ribbon Details
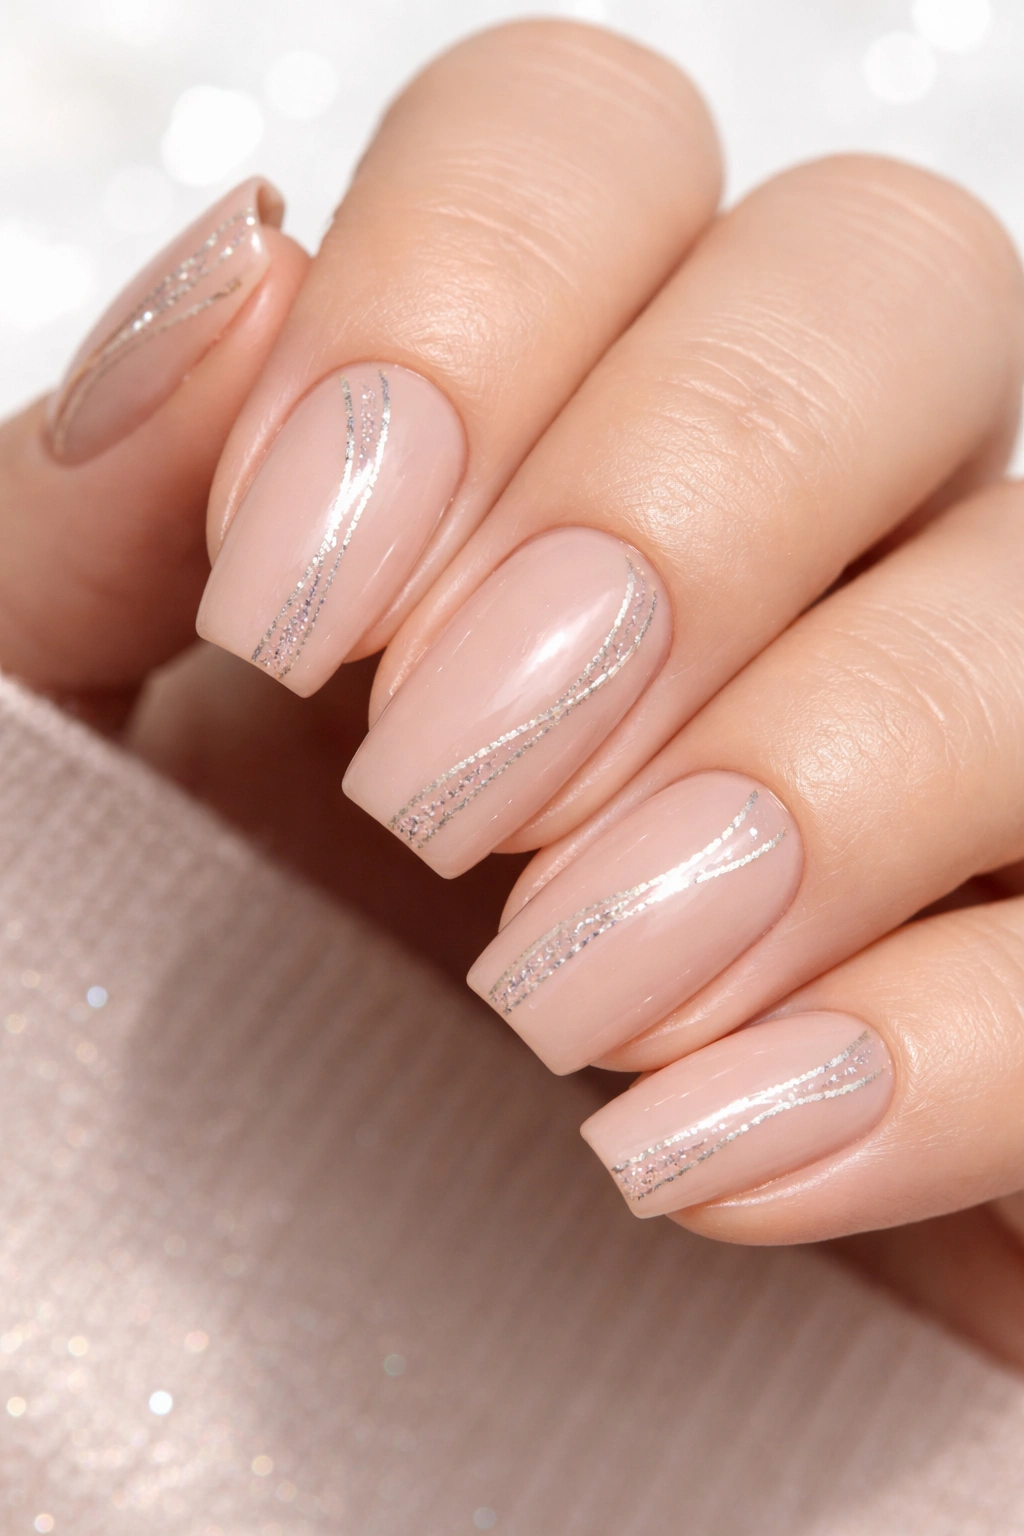
If you want something that reads as elevated but still wearable, this is your design. Start with a creamy nude polish that complements your skin tone, then add thin stripes or ribbons of glitter down the center or along one side of each nail. The contrast between the matte or satin nude and the sparkly glitter creates visual interest without being overwhelming.
The Glitter Selection Matters
Not all glitter is created equal. You’ll want either fine glitter flakes that create a soft shimmer or linear striping glitter that you can apply as a ribbon. Chunky glitter can look messy on short nails, and it catches on everything. Fine glitter gives you that alluring, sophisticated effect.
How to Apply It
- Paint your nude base and let it dry completely
- Using a thin striping brush or a detail brush, create one or two stripes down the center of the nail or along the side
- You can make these straight lines, wavy, or diagonal—whatever appeals to you
- Seal with a clear topcoat to keep the glitter in place
Worth knowing: This design is perfect if you’re drawn to neutral nails but find single-color manicures feel boring. The glitter adds just enough personality without reading as high-maintenance.
3. Baby Pink With Encapsulated White Flowers
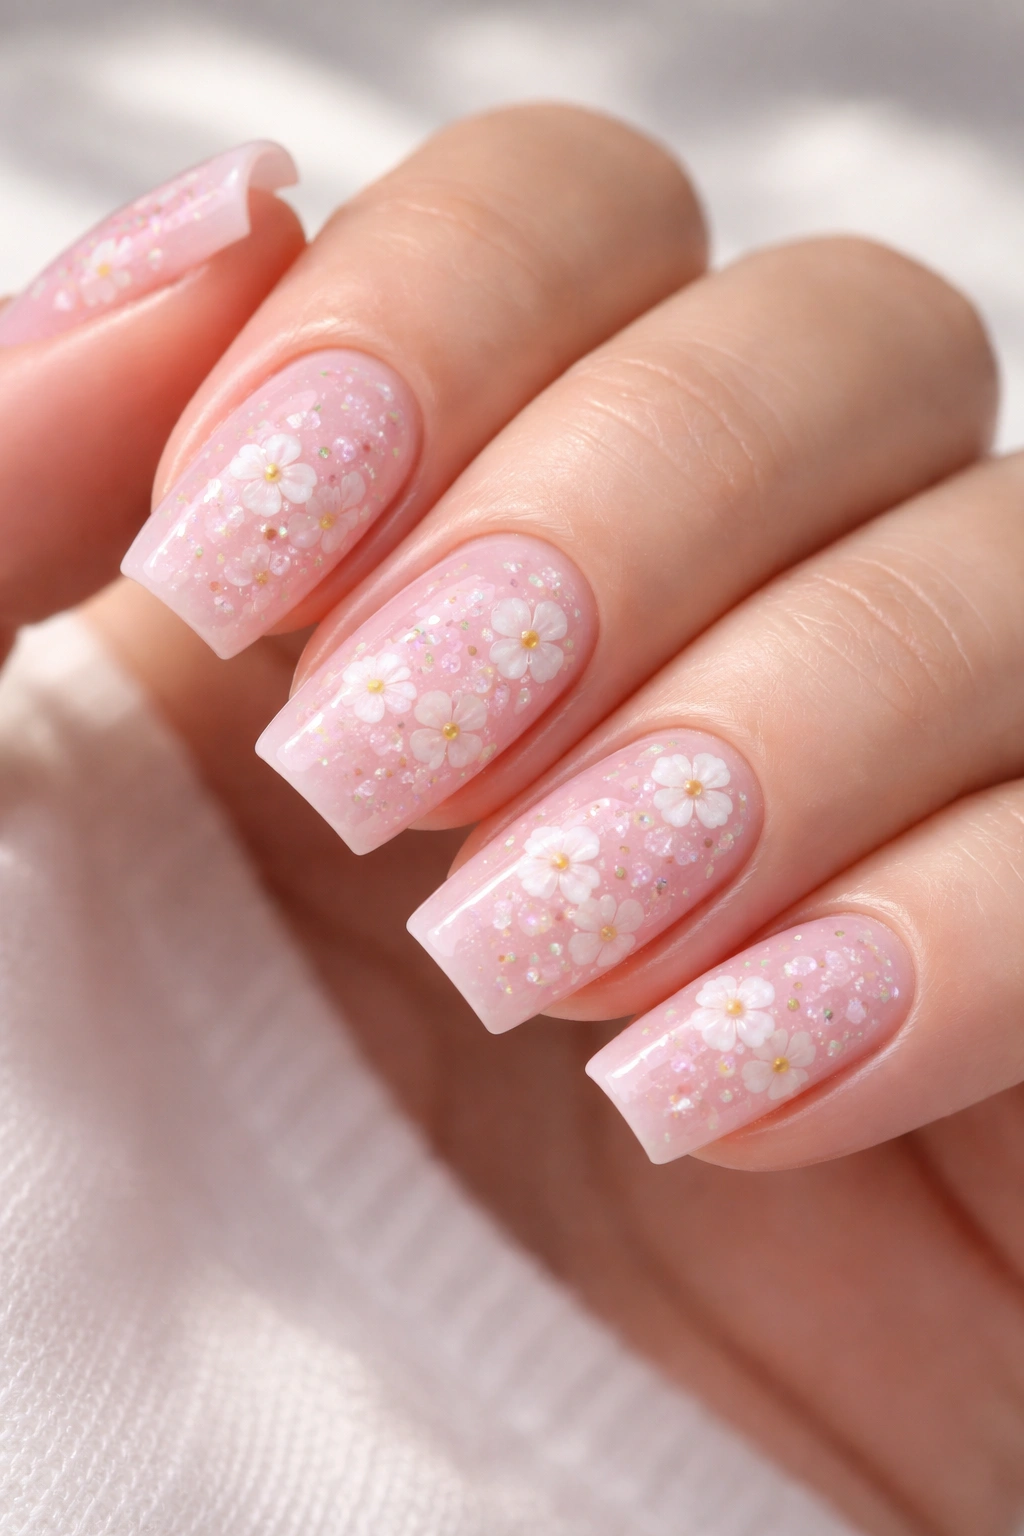
Floral designs work beautifully on coffin nails because the tapered sides give you room to place delicate details without them feeling cramped. Encapsulated flowers—blooms that are sealed inside the gel or acrylic rather than painted on top—create a dreamy, dimensional effect that’s surprisingly easy to achieve. Use a soft baby pink as your base and add white flower art to a few accent nails or scatter them across the whole set.
What Encapsulation Does
Encapsulated design involves layering the floral art between coats of gel or builder gel, creating a 3D effect that’s protected and long-wearing. It’s more forgiving than hand-painted details because the flowers are sealed underneath, so they won’t chip or smudge.
Design Variations
- Encapsulate flowers on the ring finger and pinky only for a subtle accent
- Create a flower arrangement that spans two to three nails for more visual impact
- Mix white flowers with green leaves or pink petals for dimension
- Add a thin gold or silver line near the base of the flowers for extra elegance
Insider note: This design pairs wonderfully with a glossy topcoat, which reflects light off the encapsulated details and makes them shimmer.
4. Minimalist Silver Line on Nude
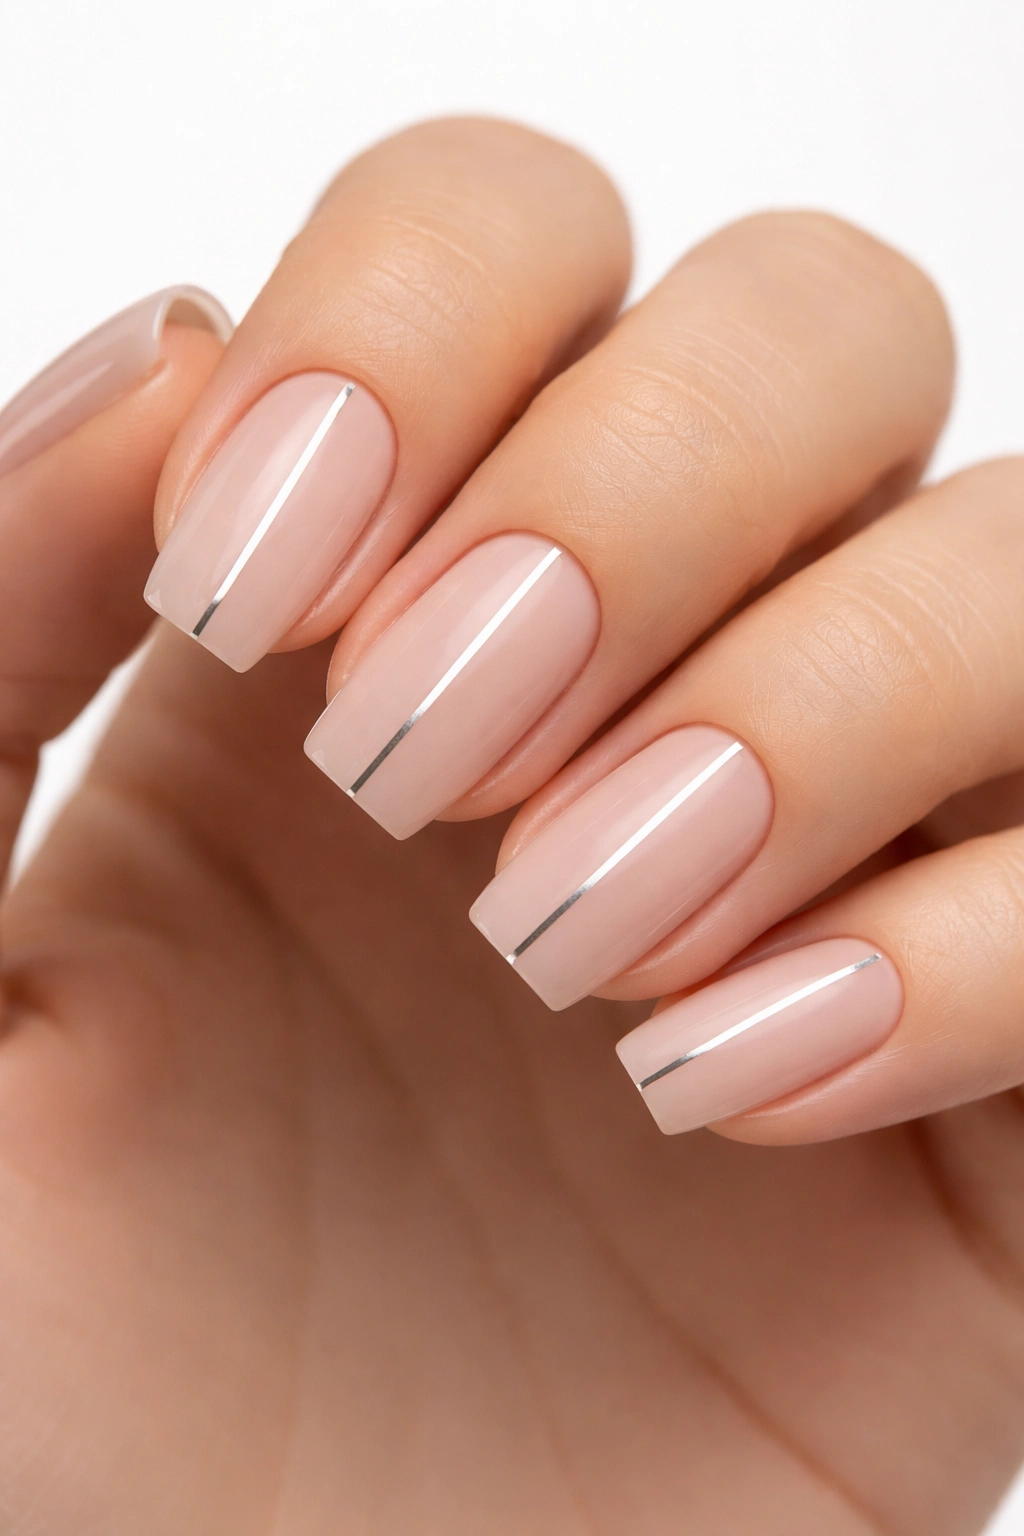
Sometimes the most sophisticated designs are the simplest. A single silver line running down the center of each nail on a soft neutral base is understated yet striking. It sounds basic until you actually see it—there’s something about that one clean line that makes the entire manicure feel intentional and polished.
Why Minimalism Hits Different on Coffin Nails
The geometry of the coffin shape actually enhances minimalist designs. The tapered sides create natural lines on the nail that your silver stripe echoes, so the whole design feels cohesive. It’s not just a line on a nail; it’s a design that works with the nail’s natural shape.
Execution Details
- Choose a nude shade that’s slightly warmer or cooler than your natural skin tone (don’t try to match exactly)
- Use a thin striping brush and metallic silver gel polish or stamping polish
- The line should run vertically from the cuticle to the tip for maximum lengthening effect
- A single thin line is more elegant than a thick one—practice getting consistency before you commit
Quick note: If you’re not confident with a striping brush, stamping plates with minimal line designs are a game-changer for this look.
5. Tortoiseshell Effect With High-Shine Topcoat
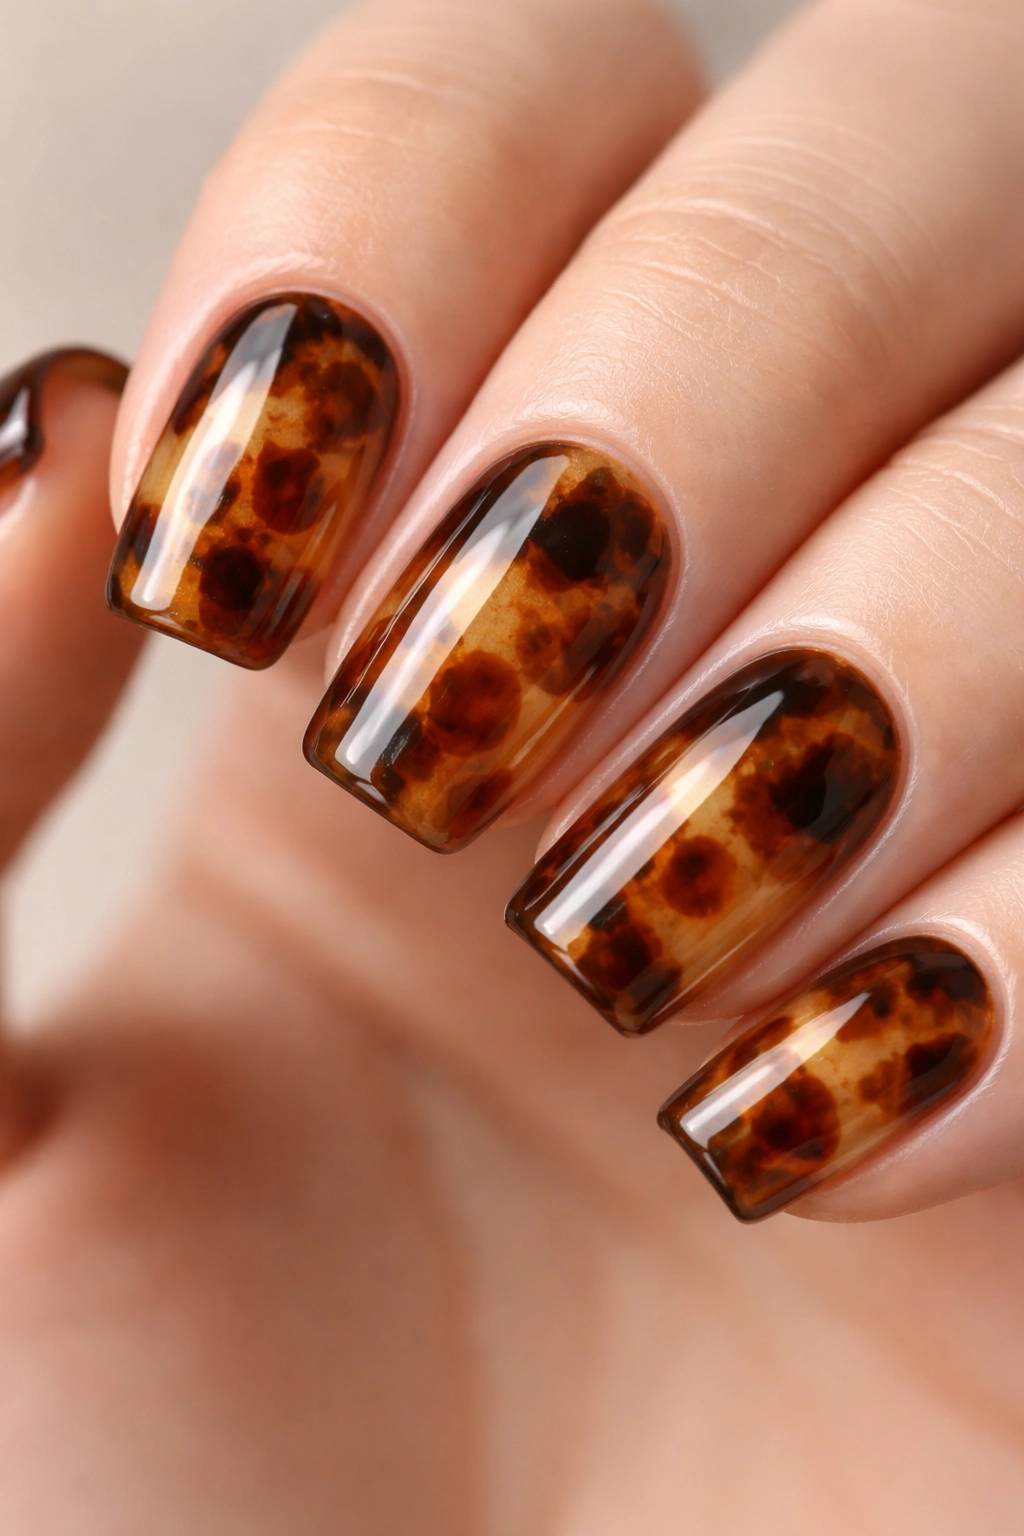
Tortoiseshell nails have been everywhere lately, and they translate beautifully to short coffin lengths. The multi-toned, organic pattern adds visual interest without reading as overly designed. The key is using translucent shades—think warm browns, honey, cream, and amber tones layered together—and finishing with a high-shine topcoat to create that glossy, glazed effect.
Creating the Tortoiseshell Look
- Start with a translucent cream or light amber base
- Layer in darker brown and warm tan shades in organic, irregular patches
- Use a fine brush to blend the colors where they meet, creating soft transitions
- Seal with a thick, glossy topcoat that makes everything look like glass
Why It Works on Short Nails
The beauty of tortoiseshell is that it’s inherently interesting, so even on shorter lengths, the design has presence. The organic pattern makes the nail look fuller and more dimensional than a solid color would, which actually works in your favor when working with less surface area.
Pro tip: You don’t need to perfectly recreate the pattern—the imperfections are what make tortoiseshell look intentional and natural. Embrace the organic, uneven placement of colors.
6. Marbled Latte Effect With Cream and Espresso Tones
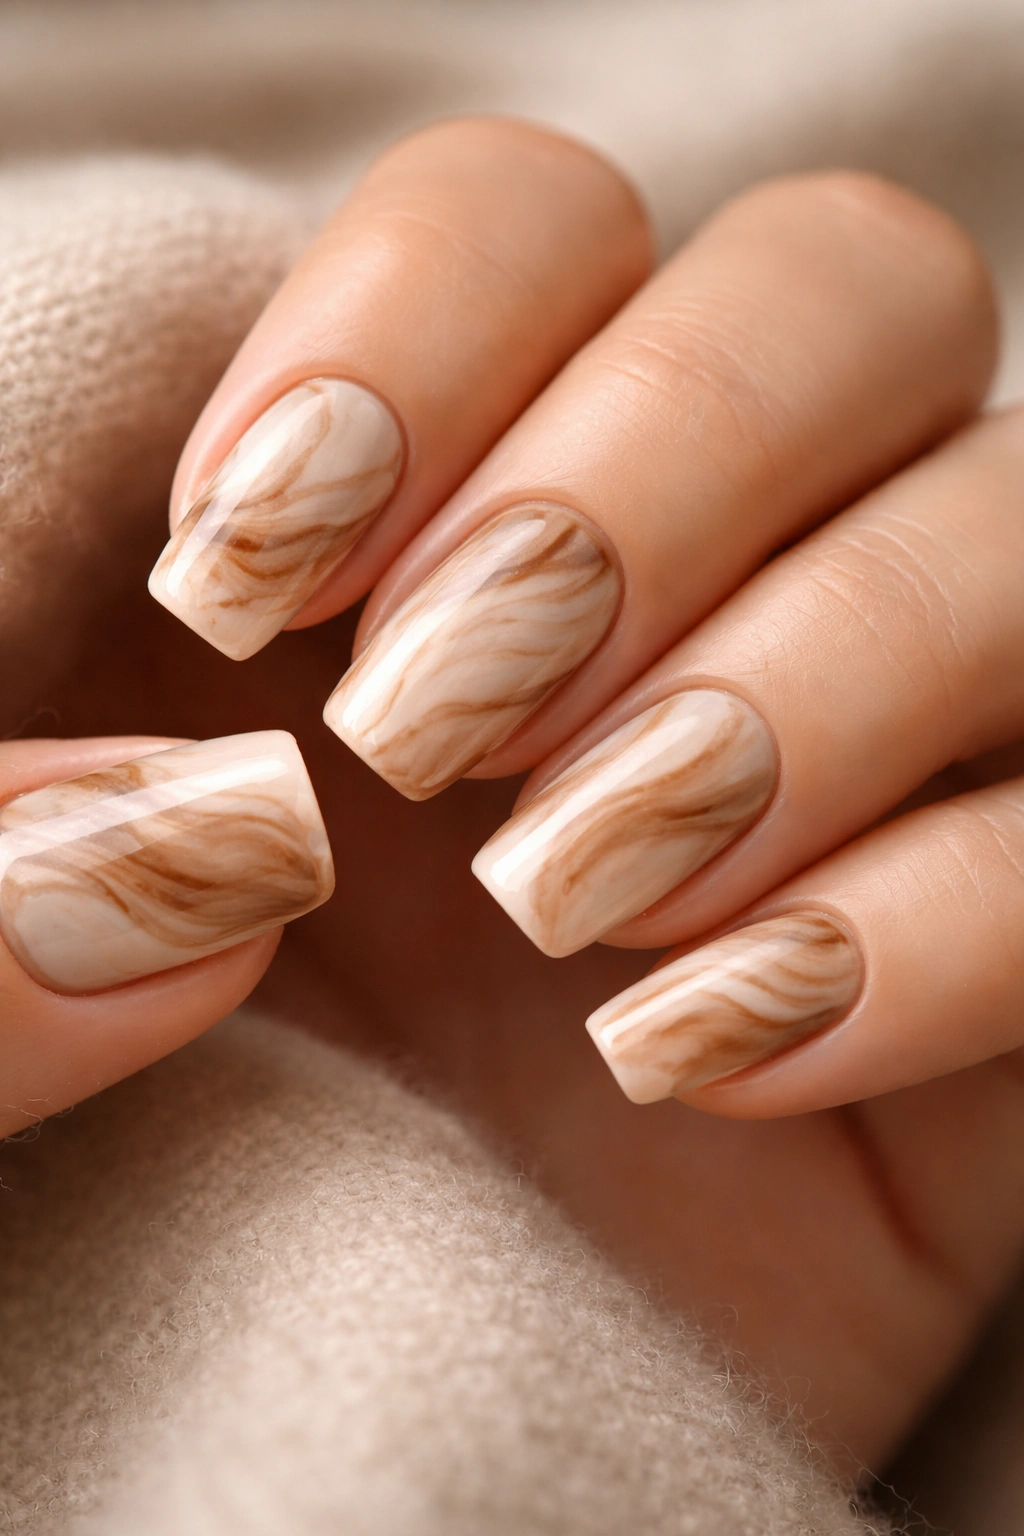
If you haven’t tried latte nails yet, this is your moment. The creamy, dreamy marble effect using warm beige, cream, and espresso brown tones feels cozy and sophisticated at the same time. On short coffin nails, the effect feels light and airy rather than heavy, making it perfect for anyone who loves warmth without drama.
The Marbling Technique
- Use a marbling tool (a dotting pen, a thin brush, or even a toothpick) to create organic, swirled patterns
- Start with a cream or light beige base
- Add darker brown in irregular patches and swirl it through
- The marble should be organic and flowing, not perfectly symmetric
Pro Application Tips
- Practice on a nail wheel first if you’re new to marbling
- Work with gel polish or regular polish that dries slowly so you have time to blend
- Use a marbling medium or just water as a marbling fluid to help the colors blend
- Seal immediately with topcoat to prevent smudging
Worth knowing: This design pairs beautifully with a natural, minimal approach—no rhinestones or extra embellishments needed. Let the marble effect be the star.
7. Psychedelic Aura Nails in Rich Jewel Tones

Aura nails have evolved, and the modern version trades pastels for rich, sophisticated jewel tones. Using an eggplant, deep plum, or rich navy as your base, airbrush a lighter complementary shade (lilac, periwinkle, or rose) in the center and around the edges to create that signature aura effect. The result is psychedelic but grounded—edgy but wearable.
The Aura Technique
- Aura nails rely on airbrushing to create those soft, gradient halos
- Start with a rich base color as a solid foundation
- Use the airbrush to apply a lighter shade in the middle of the nail and fade it out toward the edges
- The effect should look ethereal and glowing, not muddy
Color Combinations That Slay
- Deep eggplant base with lilac and rose aura
- Rich navy with periwinkle and silver shimmer aura
- Burgundy base with dusty rose and gold aura
Quick note: Aura nails require airbrushing equipment, so this is definitely a salon design unless you’re ready to invest in an airbrush for home use. It’s 100% worth requesting at your next appointment.
8. Edgy French Tips With Metallic Accents

The French manicure gets a modern update when you pair it with short coffin nails. Instead of white tips, go for black, burgundy, or deep green tips and add a thin metallic line (gold or silver) as a separator between the base and the tip. This creates a sophisticated, edgy vibe that feels completely current.
French Tip Customization Options
- Classic white tips with a gold or silver line separator
- Black tips on a nude base for maximum contrast and edge
- Burgundy or deep green tips for something unexpected
- Holographic or chrome tips for a futuristic twist
Precision Matters Here
- Use painter’s tape or a guide to keep the tip line perfectly straight
- The line between base and tip should be crisp and clean
- The metallic separator line should be thin but visible—thin enough to look refined, thick enough to read as intentional
Insider tip: This design is incredibly flattering on short coffin nails because the tip line creates the illusion of length. Your actual nail looks longer than it is.
9. Chrome Drip Effect on Ombré Base

This design is genuinely stunning. Start with an ombré gradient using two to three coordinating shades (maybe blush pink fading to deep rose, or soft yellow melting into peachy orange), then apply chrome powder dripping down from the tips like liquid metal. The contrast between the soft, blended gradient and the sharp metallic drip is chef’s kiss.
Ombré Base Creation
- Choose two colors that complement each other and blend naturally
- Apply the lighter shade to the base of the nail
- Apply the darker shade to the tip area
- Use a blending brush to create a smooth transition between the two
Adding the Chrome Drip
- Use chrome powder and a special chrome applicator for best results
- Apply the chrome powder to the tip area and let it extend slightly past the edge
- Create drips by concentrating the chrome powder in one area and letting it fade as it “drips” down the nail
- Seal with topcoat to prevent the chrome from flaking
Pro tip: This design works on both longer and shorter coffin nails, but the shorter length makes the chrome drip feel more intentional—it’s a statement, not just a detail.
10. Rose Quartz Marble With Soft Pink and White
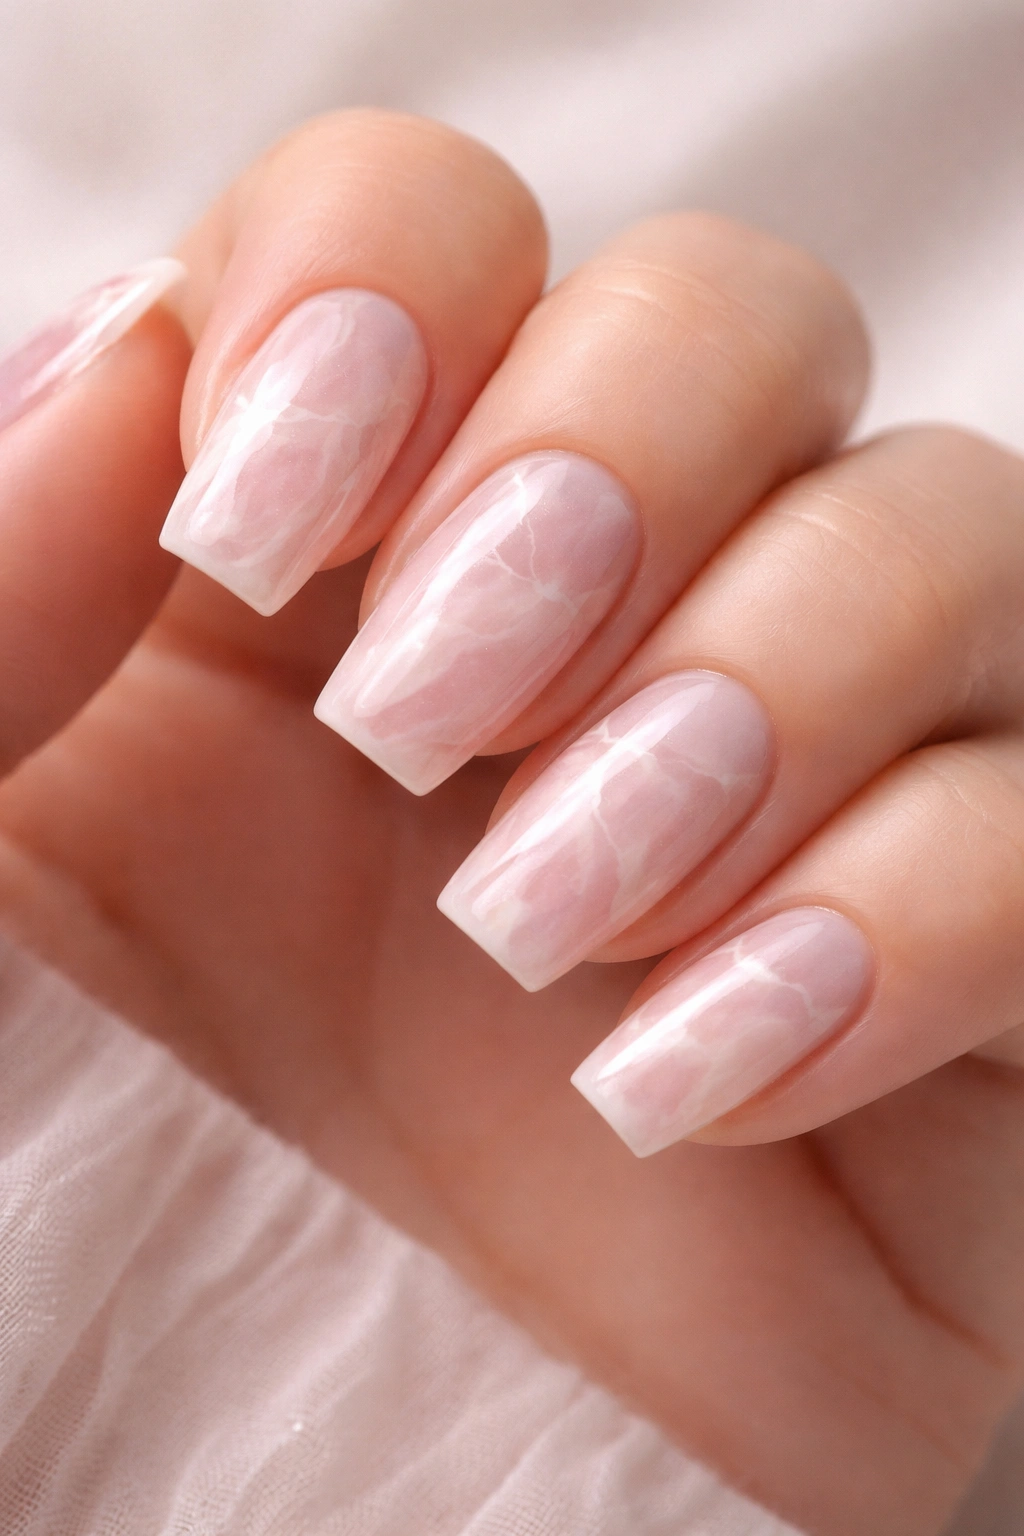
Rose quartz nails bring that peaceful, grounding energy to your fingertips. Using soft pink, white, and cream shades, create a marble effect that mimics the gentle, swirled patterns of actual rose quartz stone. It’s feminine without being frilly, elegant without being overdone.
Rose Quartz Color Palette
- Soft dusty pink as your base
- Soft white or cream for contrast
- Optional: a touch of rose gold shimmer for subtle sparkle
- The colors should be muted and warm rather than bright and saturated
Marbling for Rose Quartz
- This is one of the easier marble effects to create because the colors are forgiving
- Use a marbling tool to swirl the pink and white together
- Keep the effect organic and flowing rather than geometric
- Add a glossy topcoat to make the colors look luminous
Worth knowing: Rose quartz is a timeless design that never feels trendy or dated. It’s equally at home in professional settings and social occasions.
11. Black and White Negative Space Design
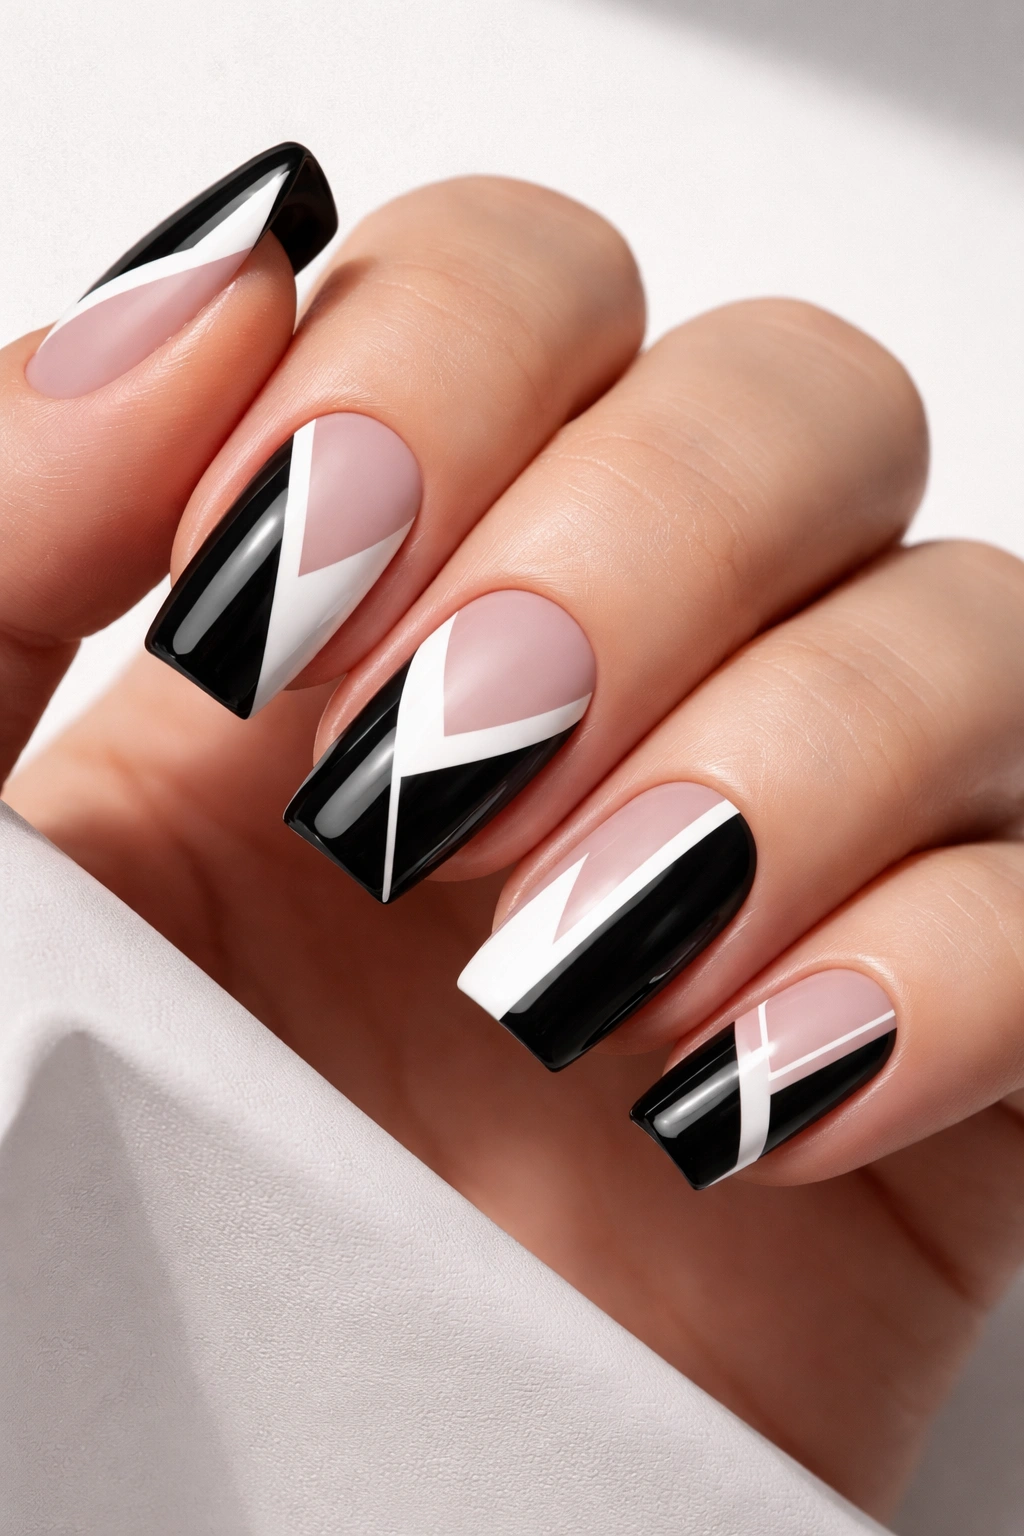
Negative space designs—where you leave parts of the nail unpolished to reveal the natural nail or the nail base underneath—are endlessly chic. On short coffin nails, a black and white geometric negative space design creates sharp, modern contrast without any additional embellishment.
Creating Negative Space
- Use painter’s tape to mask off sections of the nail
- Paint alternating sections black, white, or natural nail
- Create geometric patterns like chevrons, stripes, or abstract shapes
- Remove the tape carefully to reveal clean lines
Design Ideas
- Half the nail in black, half in white
- A white base with a black tip and negative space in between
- Geometric triangles alternating between black, white, and natural nail
- Vertical stripes in black, white, and natural nail
Pro tip: Negative space designs require precision and clean edges. If you’re attempting this at home, painter’s tape and a thin striping brush are your best friends.
12. Holographic Polish for Built-In Dimension
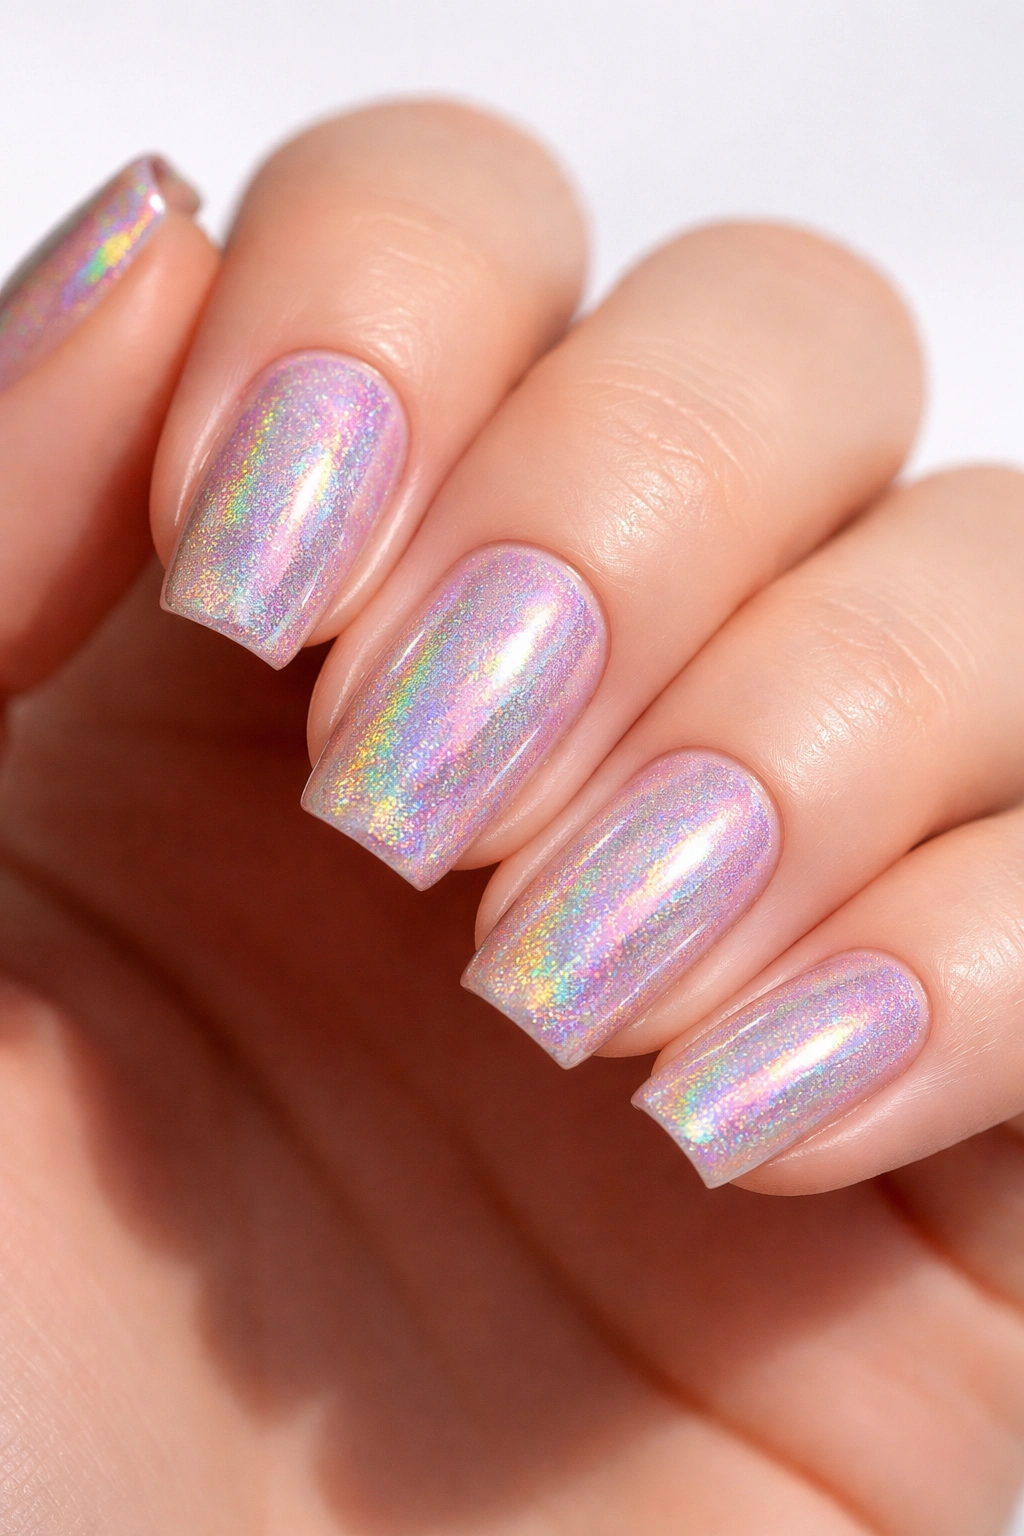
Sometimes the simplest designs create the most impact. A holographic polish—which shifts colors and throws rainbow light as you move your hand—applied to short coffin nails needs no additional design. The polish itself is the artwork. One coat of holographic polish on each nail keeps the look clean while still commanding attention.
Holographic Polish Characteristics
- Reflects light and creates rainbow effects across the nail
- Works best in natural or bright light (the effect is less visible in dim lighting)
- Pairs beautifully with a glossy topcoat that amplifies the light-catching effect
- Comes in a range of base colors (clear, pink, blue, purple, etc.)
Why This Works on Short Nails
The holographic effect adds so much visual interest that you don’t need additional nail art. The simple elegance of a single-color holographic manicure feels modern and intentional, especially on the geometric coffin shape.
Quick note: Make sure you’re buying true holographic polish, not just shimmery polish. True holo creates a distinct rainbow effect across the entire nail surface.
13. Jelly Nails With Embedded Gems
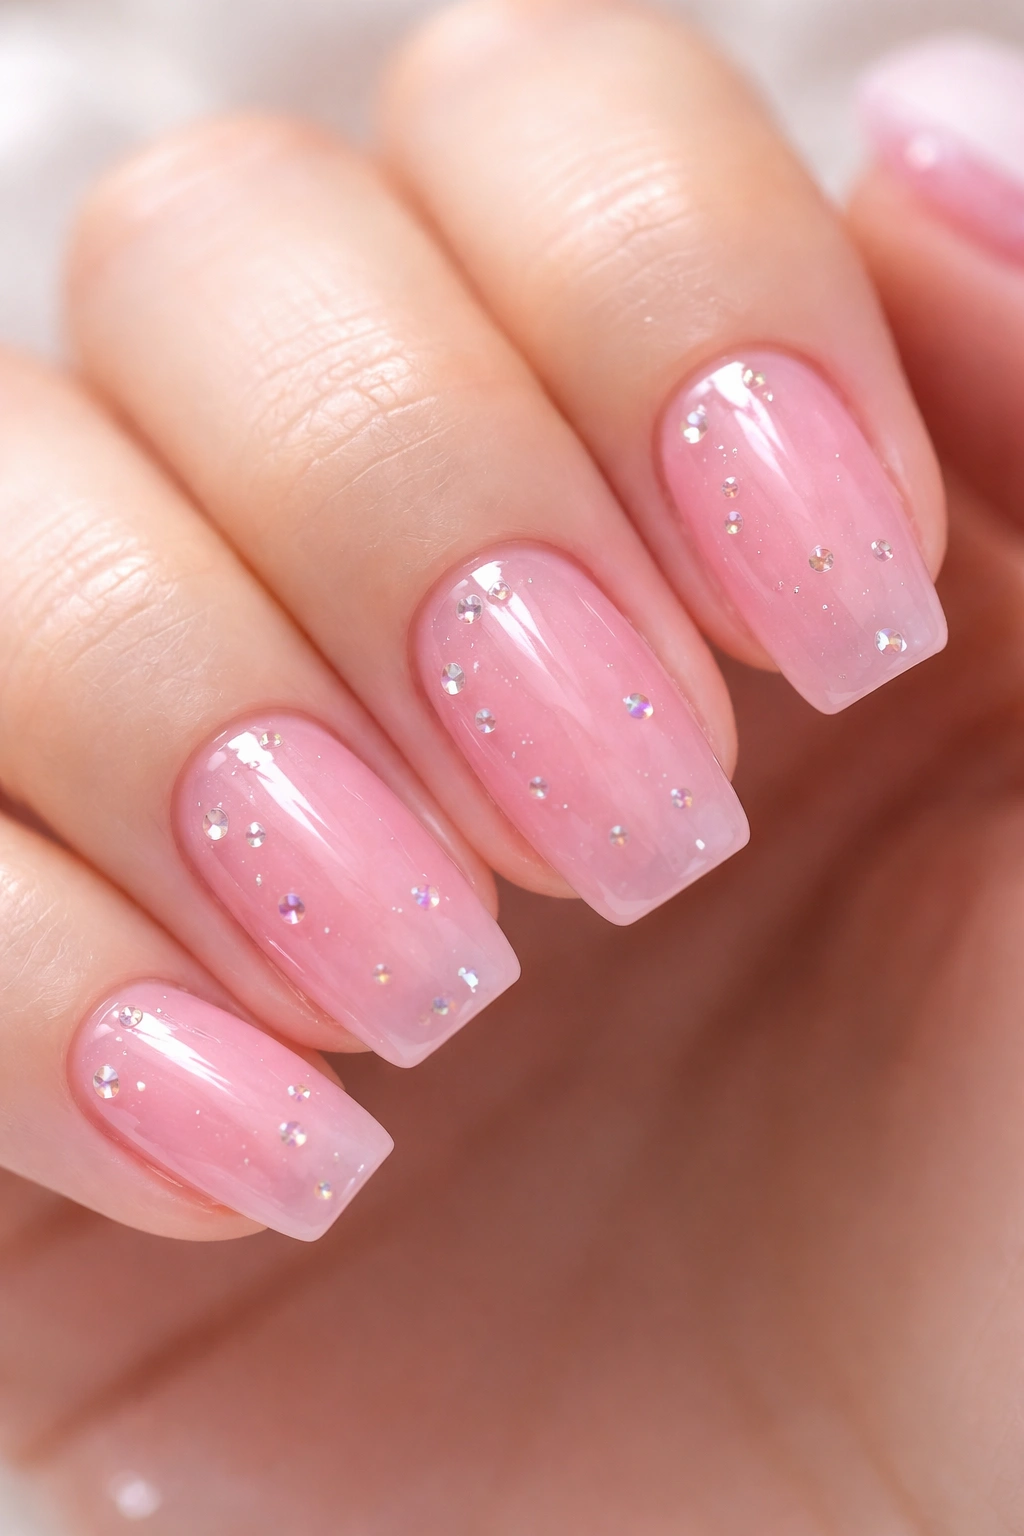
Jelly nails—sheer, translucent polish that shows the nail underneath—have made a huge comeback, and they’re perfect for short coffin nails. Use a jelly pink, jelly peach, or jelly peachy-nude as your base and add tiny gems or rhinestones throughout for subtle sparkle. The translucent base keeps it wearable while the gems add just enough glamour.
Jelly Polish Application
- Jelly polishes are often quite sheer, so you may need two to three thin coats for full color
- The translucence is the whole point, so don’t oversaturate with polish
- A glossy topcoat amplifies the jelly effect and makes the nails look dewy and dimensional
Gem Placement Ideas
- Scatter small gems randomly across all nails
- Create a gradient of gems from base to tip
- Add gems only to the ring finger and pinky for a subtle accent
- Use gems in coordinating colors rather than just clear stones
Insider note: Jelly nails look particularly good on shorter lengths because the translucence makes your actual nail visible, which makes the nails look less heavy.
14. Chocolate Brown Base With Espresso Ombré Tips
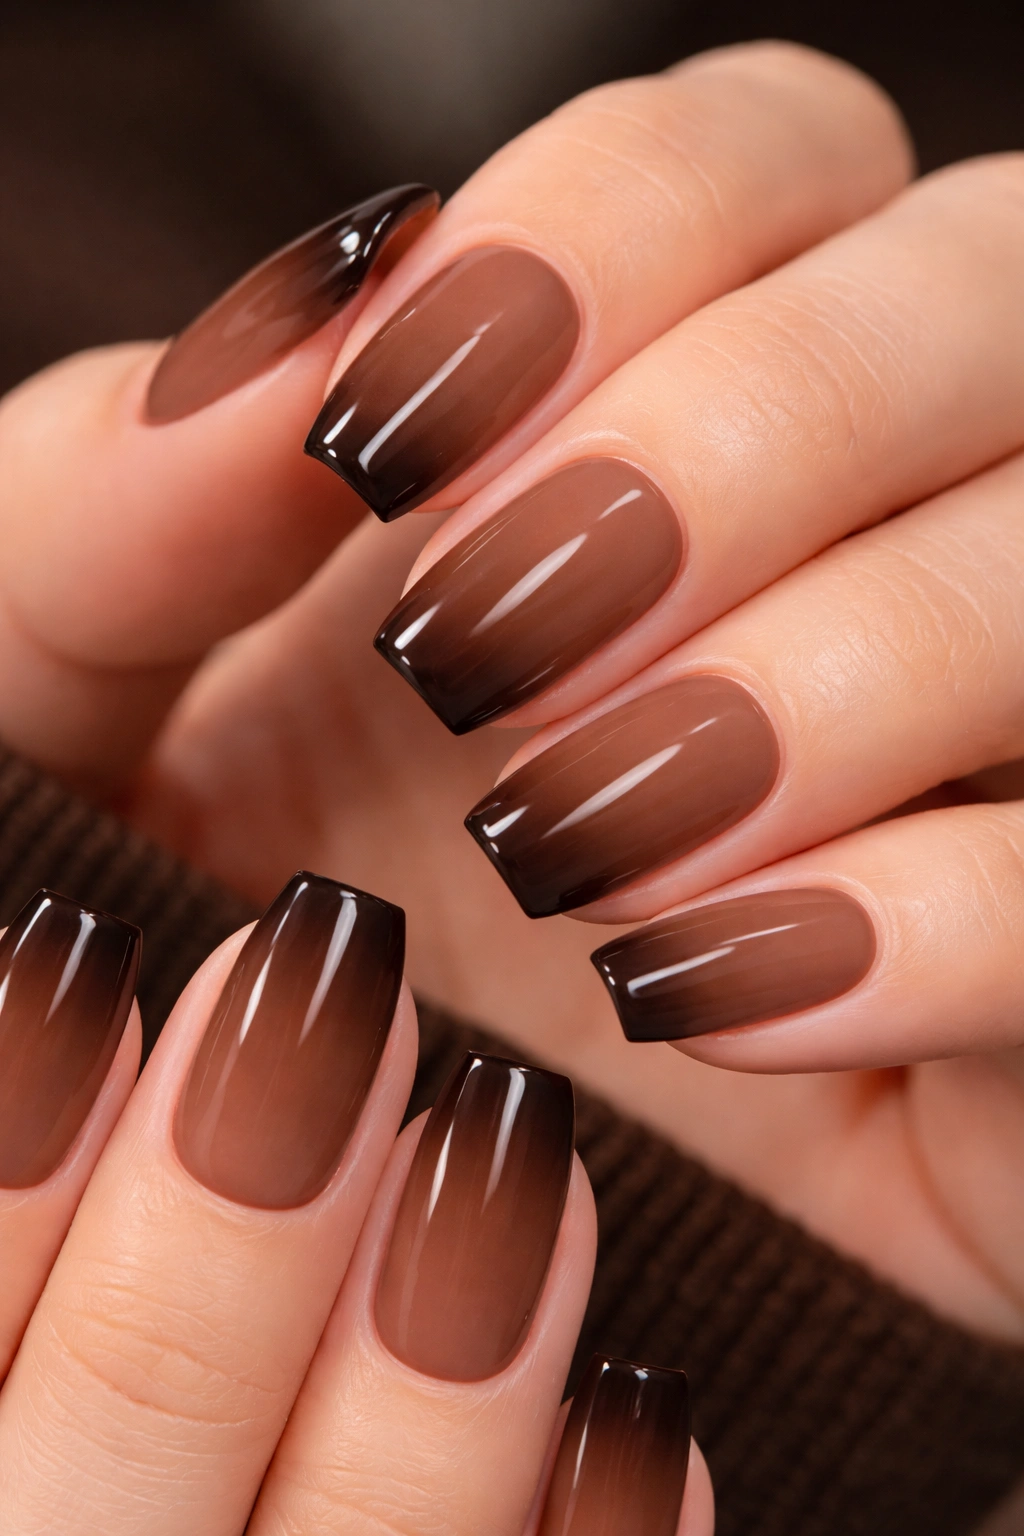
Chocolate brown nails are sophisticated and timeless, and a milk chocolate base with espresso brown tips creates depth and dimension without being high-maintenance. This works on both natural nails and extensions, and the warm brown tones complement virtually every skin tone.
Warm Brown Color Selection
- Milk chocolate brown for the base—warm but not orange-toned
- Deep espresso brown for the tips—dark enough to create contrast
- Blend where the colors meet for a gradient effect
Ombré Application
- Paint the lighter chocolate shade as your base
- Apply the darker espresso shade to the tip area
- Use a blending brush to create a smooth transition
- The gradient should fade gradually from light to dark
Pro tip: This color combination feels less expected than typical nude or pink bases, but it’s equally sophisticated and works year-round.
15. Colorful Pattern Play With Micro-Designs
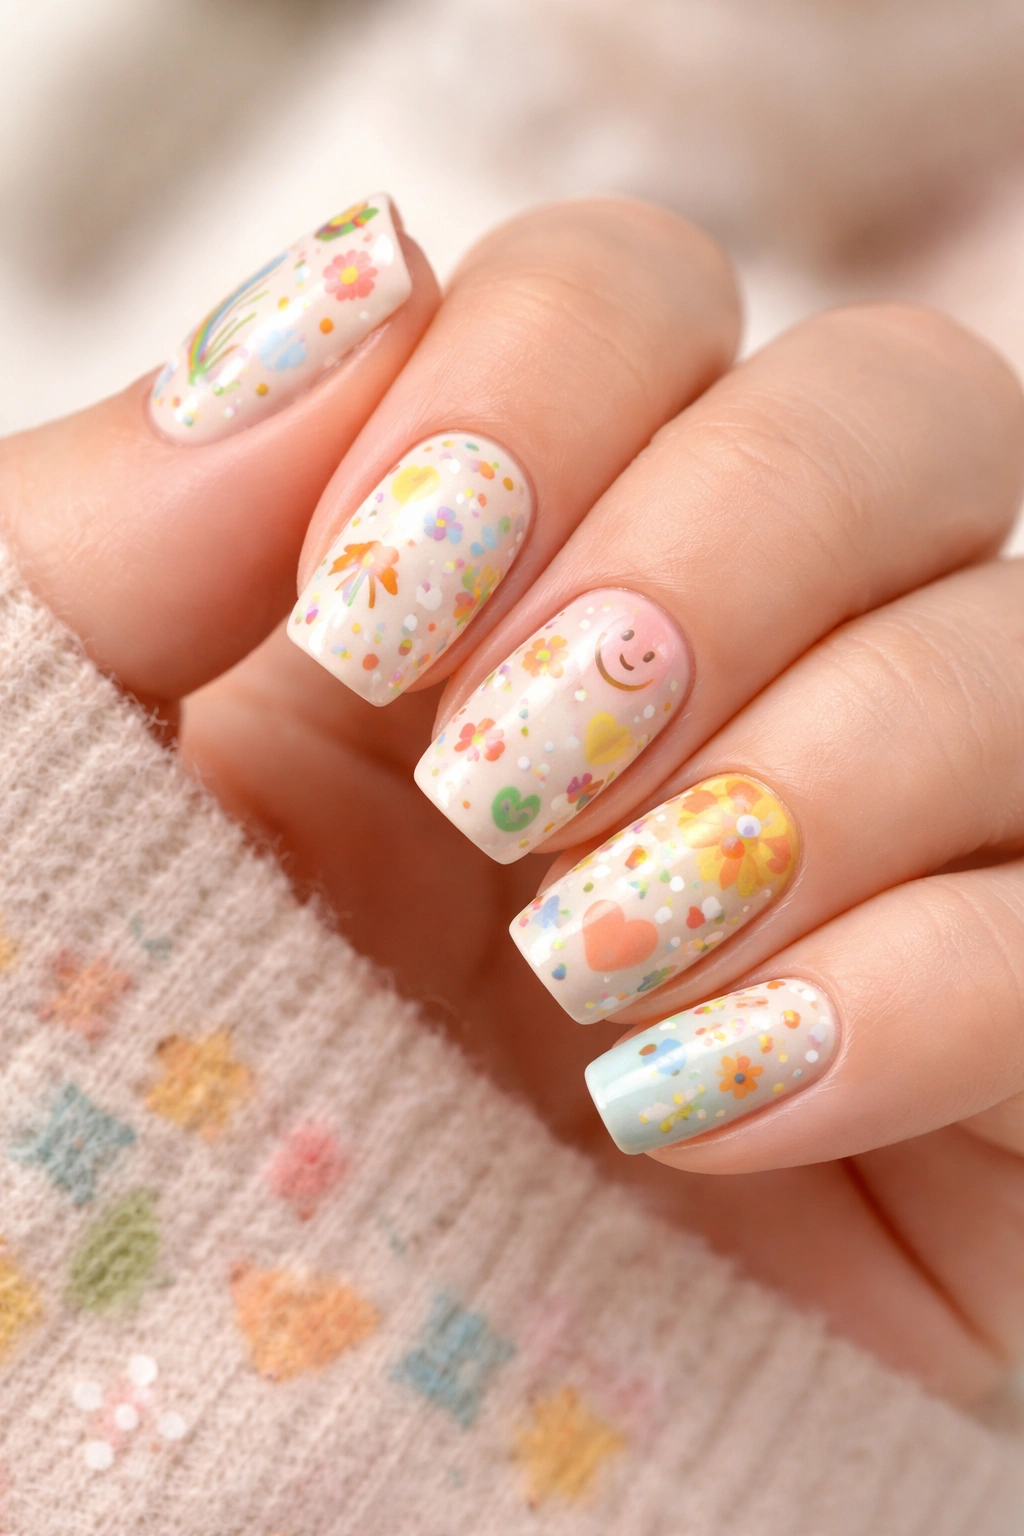
If you love maximalism but want to keep things wearable on shorter nails, use micro-designs—tiny, delicate patterns—on each nail with different color combinations. Think mini florals, geometric shapes, tiny landscapes, or abstract designs. Keep each pattern small and detailed rather than covering the whole nail.
Pattern Ideas for Short Nails
- Tiny floral motifs on each nail in different colors
- Geometric shapes (triangles, dots, lines) in contrasting colors
- Abstract brushstrokes in complementary shades
- Miniature landscapes or nature scenes
Making It Cohesive
- Choose a consistent color palette across all the patterns so they feel connected
- Make sure the patterns are proportionally appropriate for the nail size—tiny, delicate designs work better than large, busy ones
- Use a glossy topcoat to unify the look
Worth knowing: Nail stamping plates with micro-designs make this look achievable at home without having to freehand intricate details.
16. Ocean Blue With Silver Caviar Details

Deep ocean blue is unexpectedly wearable on short nails because the depth of color makes the nails feel more sophisticated than lighter blues. Add tiny silver caviar beads (tiny spherical nail decorations) scattered across the surface for subtle sparkle that catches the light as you move your hands.
Ocean Blue Selection
- Choose a blue that’s deep and saturated without being black
- True ocean blue or teal-leaning blue works better than bright or pale blues
- A glossy finish amplifies the color’s richness
Caviar Bead Application
- Use a sticky base coat (or just the polish itself before it dries) to adhere the beads
- Apply beads while the base is still tacky so they stick properly
- Don’t overload with beads—less is more for a refined look
- Seal with a topcoat that won’t dislodge the beads
Pro tip: This design reads as both edgy and elegant simultaneously, making it perfect for anyone who wants polish with personality but still needs sophistication for professional settings.
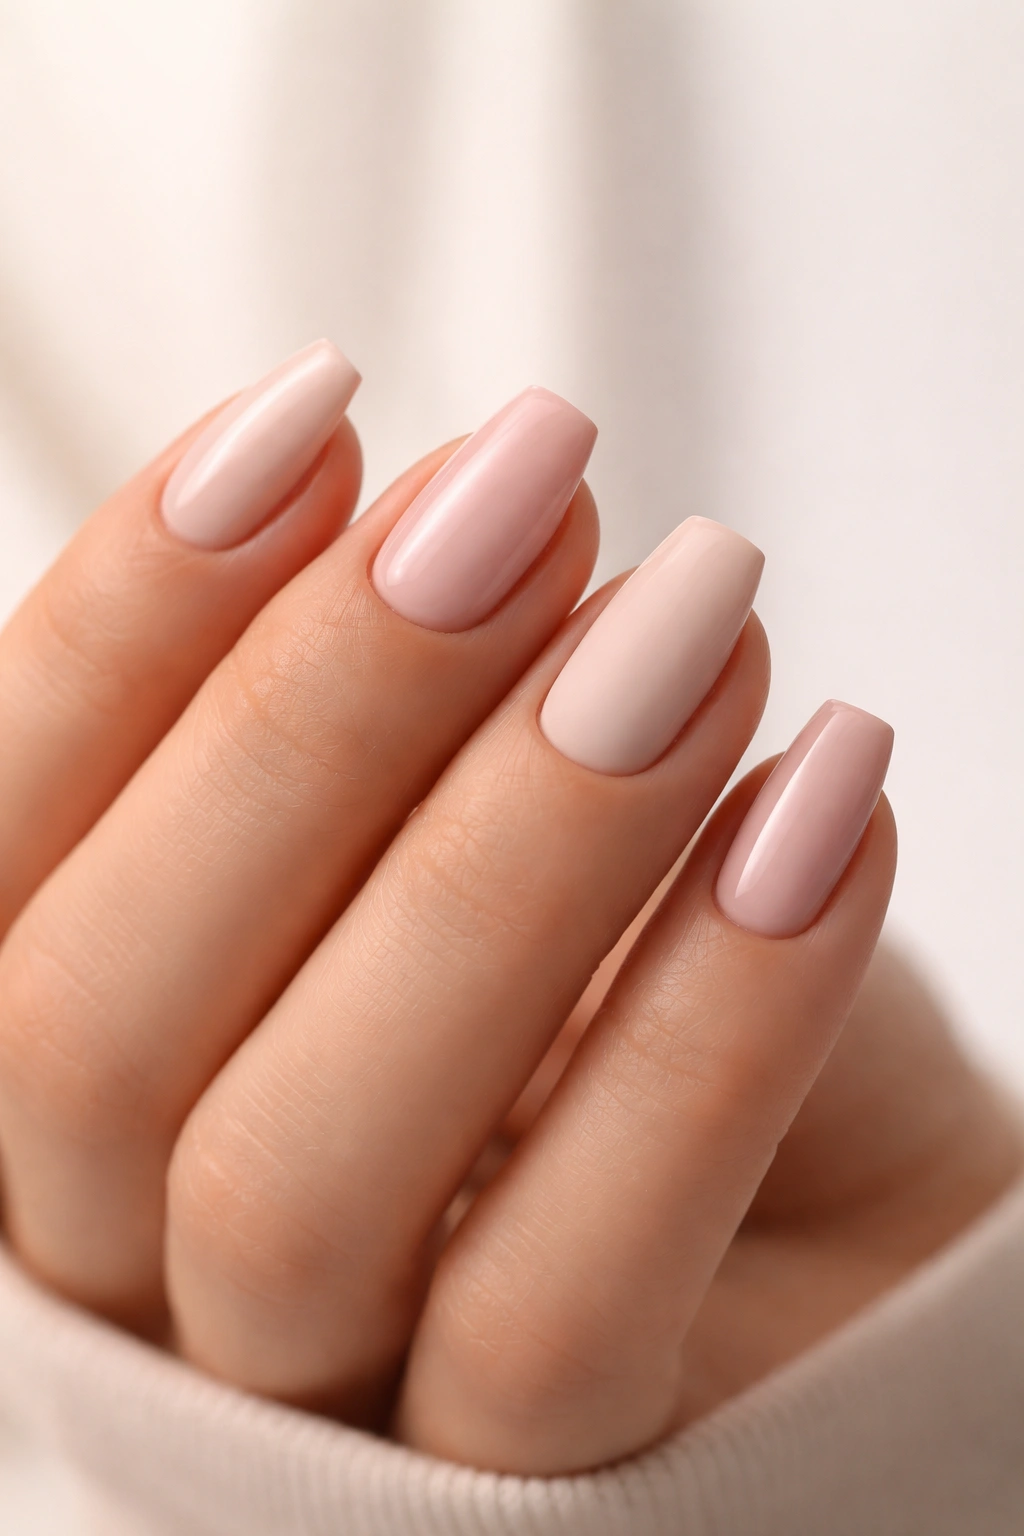
17. Naked Manicure With Subtle Shine

For the minimalist at heart, a naked manicure—nude or clear polish with just a touch of subtle shimmer—on short coffin nails is perfectly refined. The coffin shape adds enough visual interest that you don’t need additional design. A light nude base with a barely-there shimmer or a glossy topcoat that catches the light is all you need.
Naked Manicure Execution
- Choose a polish shade that’s one to two shades lighter than your natural skin tone
- Apply two thin coats for even coverage without looking opaque
- Use a high-shine topcoat to create that polished, professional look
- The shine is what elevates this from “no polish” to “intentional design”
Why Short Coffin Nails Elevate This Look
The tapered shape gives the naked manicure presence. If you wore the same polish on a rounded or square shape, it might feel unfinished. On coffin nails, it reads as deliberately minimal and intentional.
Insider note: This is the perfect look if you want to be able to grow out your natural nails without a color transition looking awkward.
18. Geometric Gold Leaf Accents on Cream Base
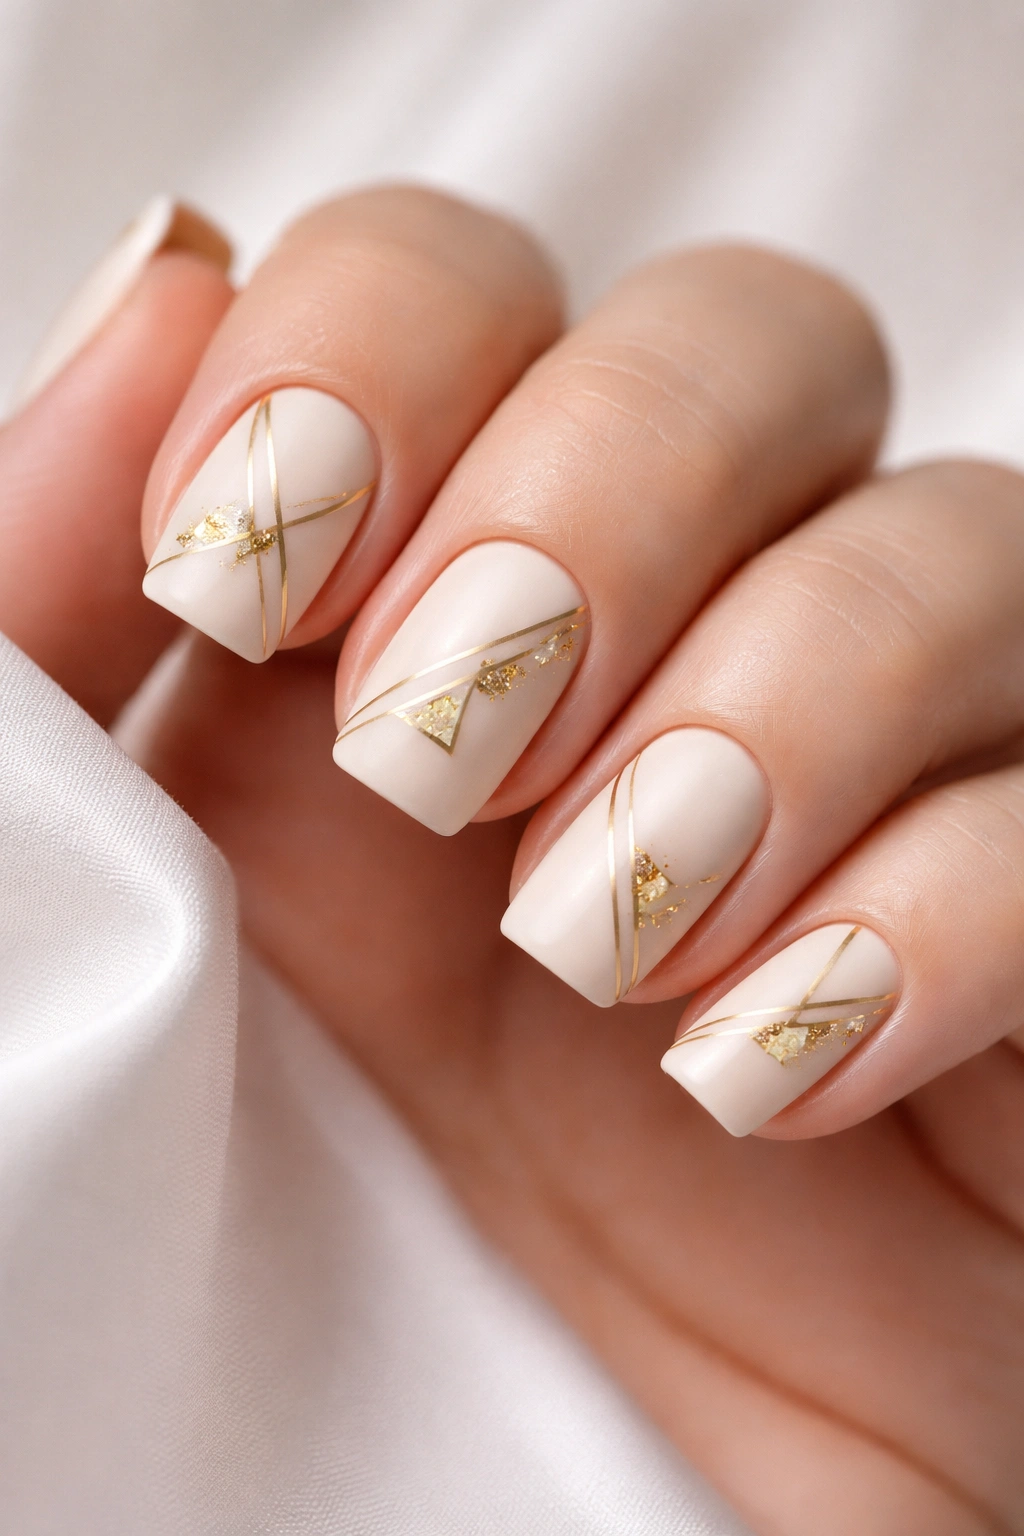
Cream or ivory base with delicate gold leaf accents creates a look that’s expensive-looking without being over-the-top. Use gold leaf on select nails or create geometric patterns (lines, triangles, or abstract shapes) using the leaf. The matte cream contrasts beautifully with the shiny metallic accents.
Gold Leaf Application
- Gold leaf is applied using a special adhesive (usually a gel or tacky topcoat)
- Apply the adhesive in your desired pattern
- Press gold leaf onto the adhesive and seal with topcoat
- The contrast between matte base and shiny accents is key
Pattern Ideas
- A single gold line down the center of select nails
- Gold leaf scattered across the base for a speckled effect
- Geometric triangles or chevrons in gold
- Gold accents concentrated near the cuticle or tip area
Quick note: Gold leaf elevates even simple designs, so this works beautifully on short nails where you might not have room for elaborate art.
19. Soft Pastel Ombré With Matte Finish
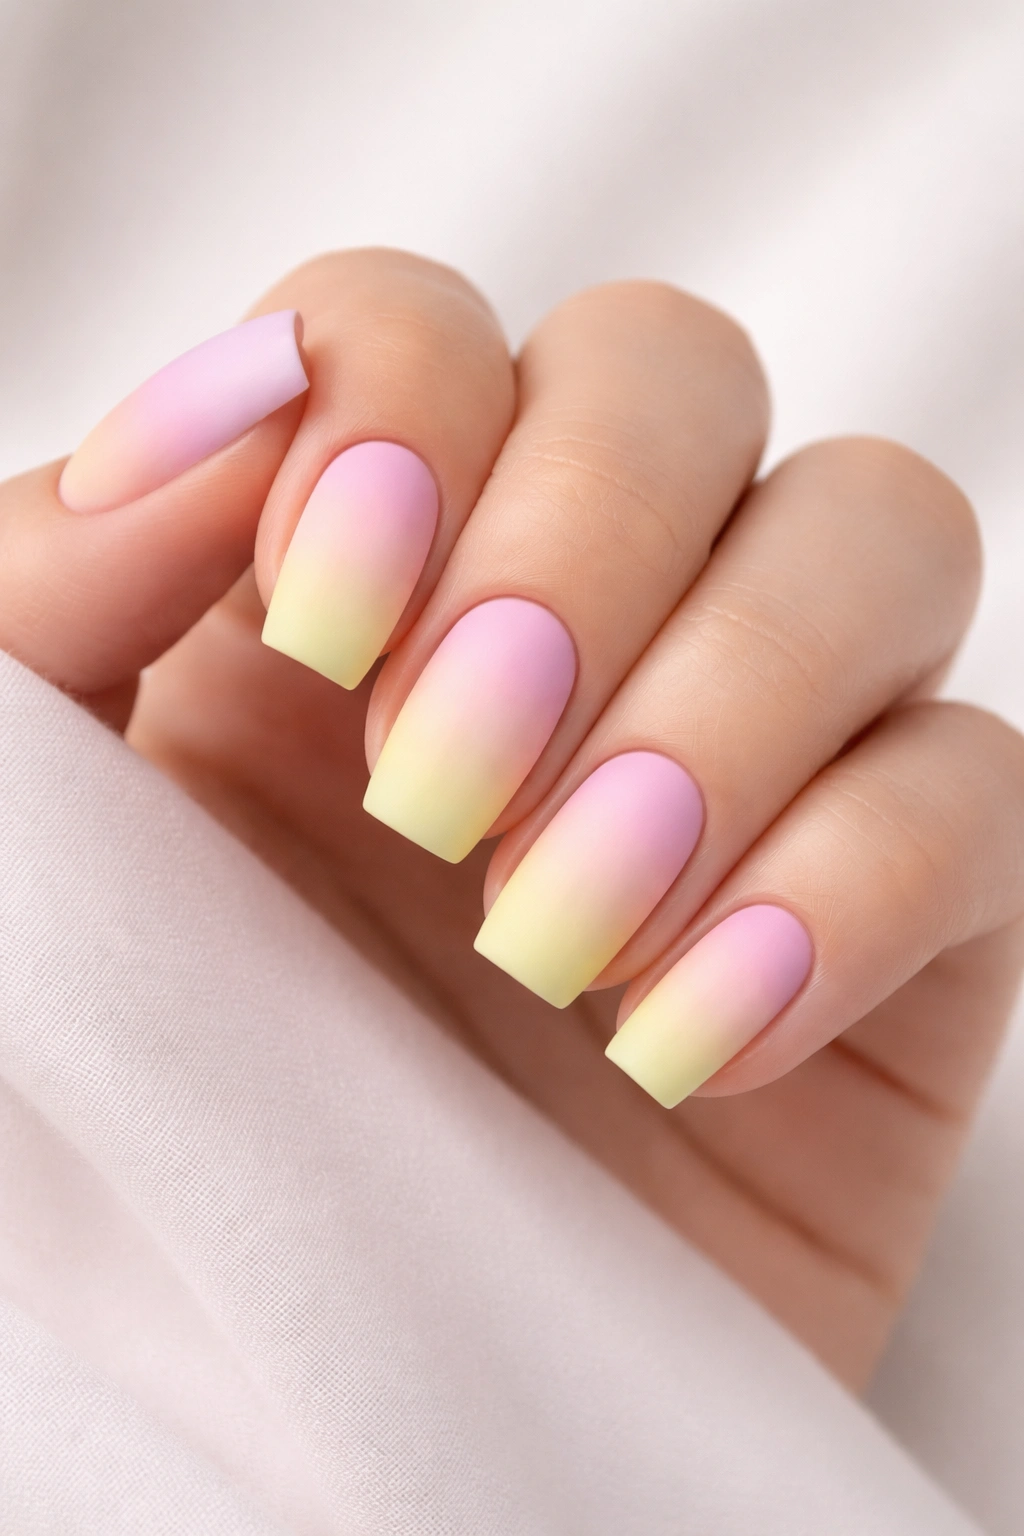
Soft pastel gradients on short coffin nails feel modern and unexpected, especially finished with a matte topcoat that gives everything a velvety, refined quality. Blend pastel pink to pastel yellow, or soft lavender to soft mint green. The matte finish keeps it from reading as juvenile.
Pastel Ombré Creation
- Choose two pastel shades that transition beautifully together
- Apply the first color to the base of the nail
- Apply the second color to the tip
- Use a blending brush to create a smooth gradient between them
- Finish with matte topcoat for that sophisticated, modern vibe
Color Combinations
- Soft pink to soft peach
- Lavender to soft pink
- Mint to soft yellow
- Baby blue to lilac
Pro tip: Matte finishes on ombré designs create a modern, fashion-forward look that feels completely current.
20. Glossy Red With Black Accent Nails
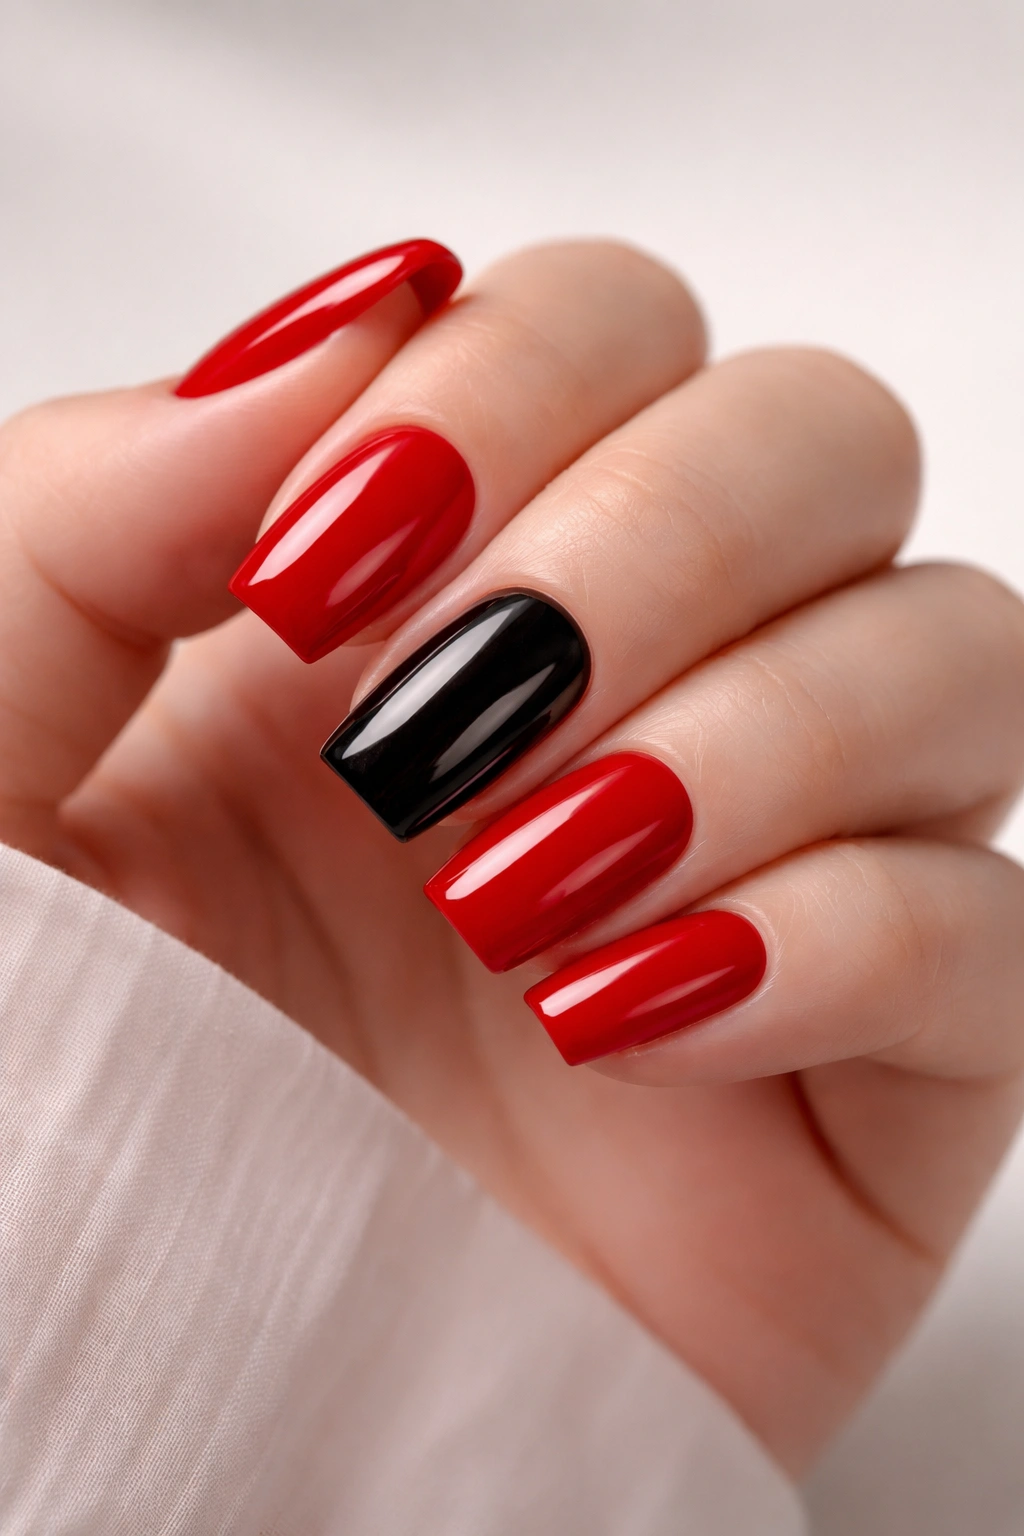
Finish strong with a statement design that’s pure boldness: glossy red as your main color with black accent nails (usually the ring finger and sometimes the pinky). The combination of bright, glossy red with matte or glossy black creates maximum contrast and drama without any additional embellishment.
Execution
- Paint all nails with a bright, true red and seal with glossy topcoat
- Paint your designated accent nails with solid black
- Both colors should have the same finish (both glossy or both matte) for cohesion
- Keep the lines perfectly clean and precise
Accent Nail Placement Options
- Ring finger and pinky in black, other three nails in red
- Just the ring finger in black
- Pinky and ring finger in black with black tips on the remaining nails for a half-and-half look
- All nails red with a black accent line at the base of two to three nails
Worth knowing: This design is instantly recognizable and commands attention. It’s perfect if you want nails that announce your confidence.
Final Thoughts
Short coffin nails prove that length isn’t actually what determines impact—shape, finish, and design are what make a manicure genuinely striking. The coffin silhouette’s tapered sides and squared-off tip create a naturally elegant, intentional look that works beautifully at any length. Whether you’re drawn to minimalist elegance or bold, sparkly statement nails, this shape adapts to any aesthetic without losing its inherent polish.
The best part? Short coffin nails are actually practical for daily life. They won’t snag on hair, clothes, or the things you’re typing on. They last longer than longer lengths because there’s less leverage for breakage. They’re sturdy enough to handle real living while still looking genuinely chic. You don’t have to sacrifice aesthetics for functionality—short coffin nails give you both.
Try one of these designs the next time you’re booking a manicure appointment. Bring this article to show your nail artist, and don’t hesitate to customize any of these looks to match your personal style. The most important thing is that you’re choosing a design that makes you feel confident and excited to show off your hands. Short coffin nails might just become your new signature look.
