

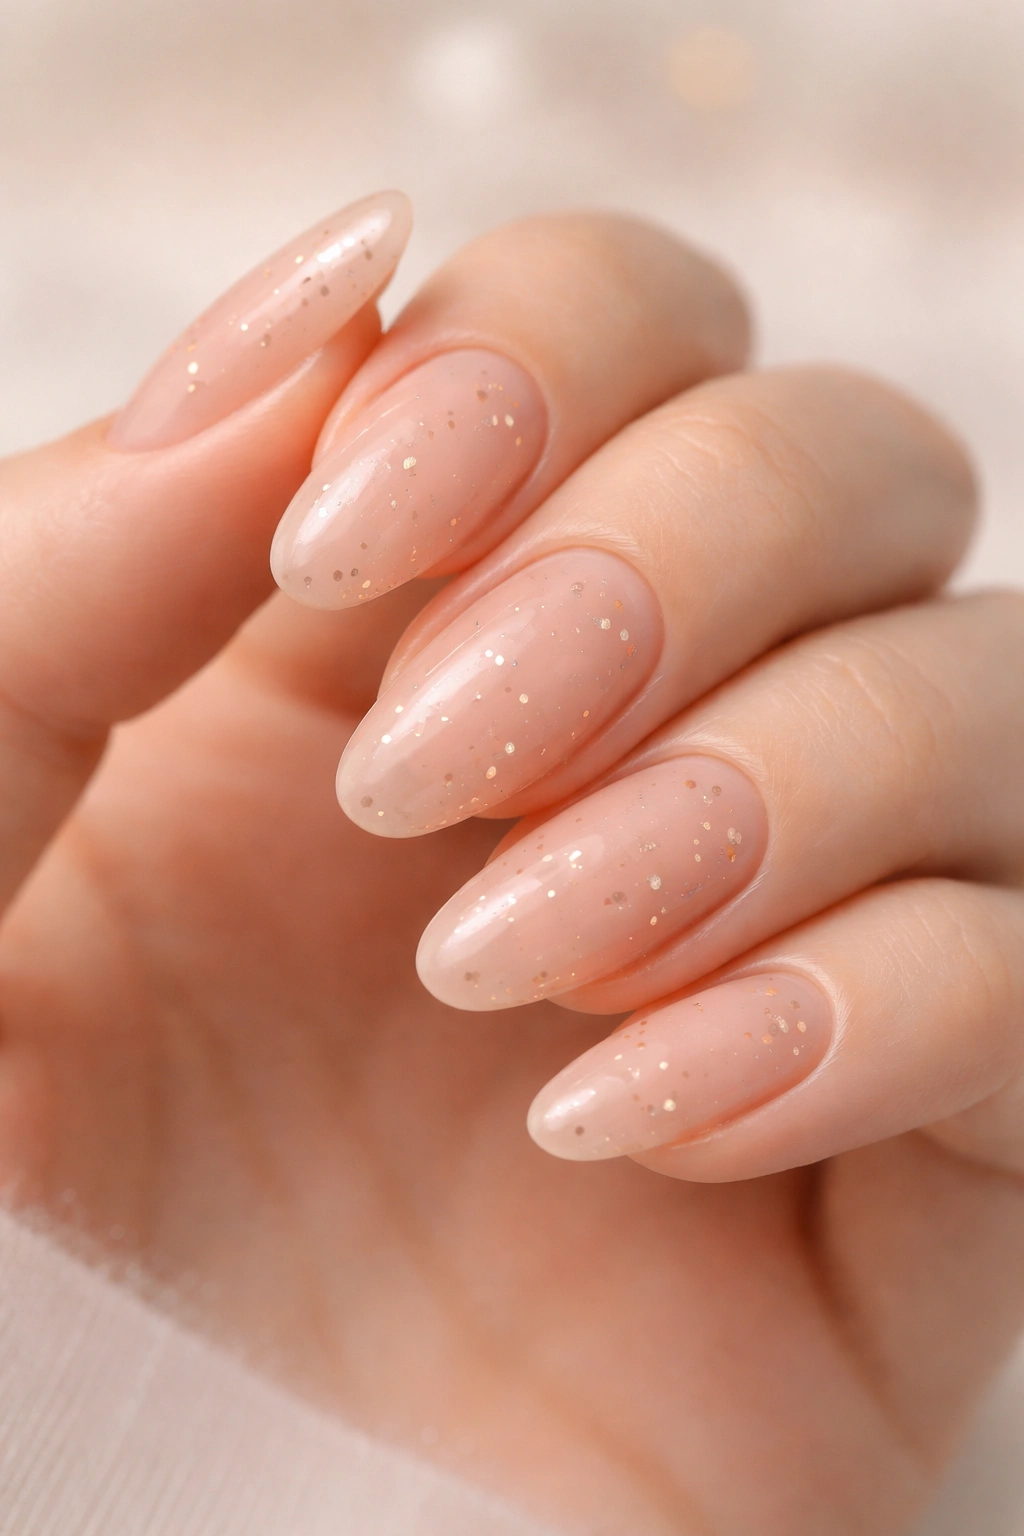
Long round nails have become the sweet spot for anyone who wants their nails to look elegant without veering into high-maintenance territory. There’s something almost contradictory about it — the length gives you drama, but the softened round shape keeps everything feeling approachable and genuinely wearable. Unlike sharp almond or coffin nails that demand a certain kind of confidence, round nails feel timeless, and when you keep them natural-looking, they blend into your life instead of dominating it.
What makes natural long round nails so compelling is that they work across every context. You can wear them to a corporate office, a weekend farmers market run, or a formal dinner, and they’ll read as put-together without screaming for attention. The roundness at the tip distributes stress more evenly across the nail, which actually means these nails tend to break less frequently than their pointed cousins — a practical advantage wrapped up in an aesthetic one. And when you embrace the natural look — whether that’s nude tones, soft pinks, barely-there sheers, or even just polished but undecorated nails — you get a look that actually improves with time instead of looking tired.
The styles that follow represent the breadth of what’s possible with this shape and length. Some lean into minimalist sophistication, others bring quiet personality through subtle detail, and a few push just far enough into decoration to feel special without losing that effortless quality. Each one is designed to last through real life — your actual job, your actual commute, your actual hands doing actual things.
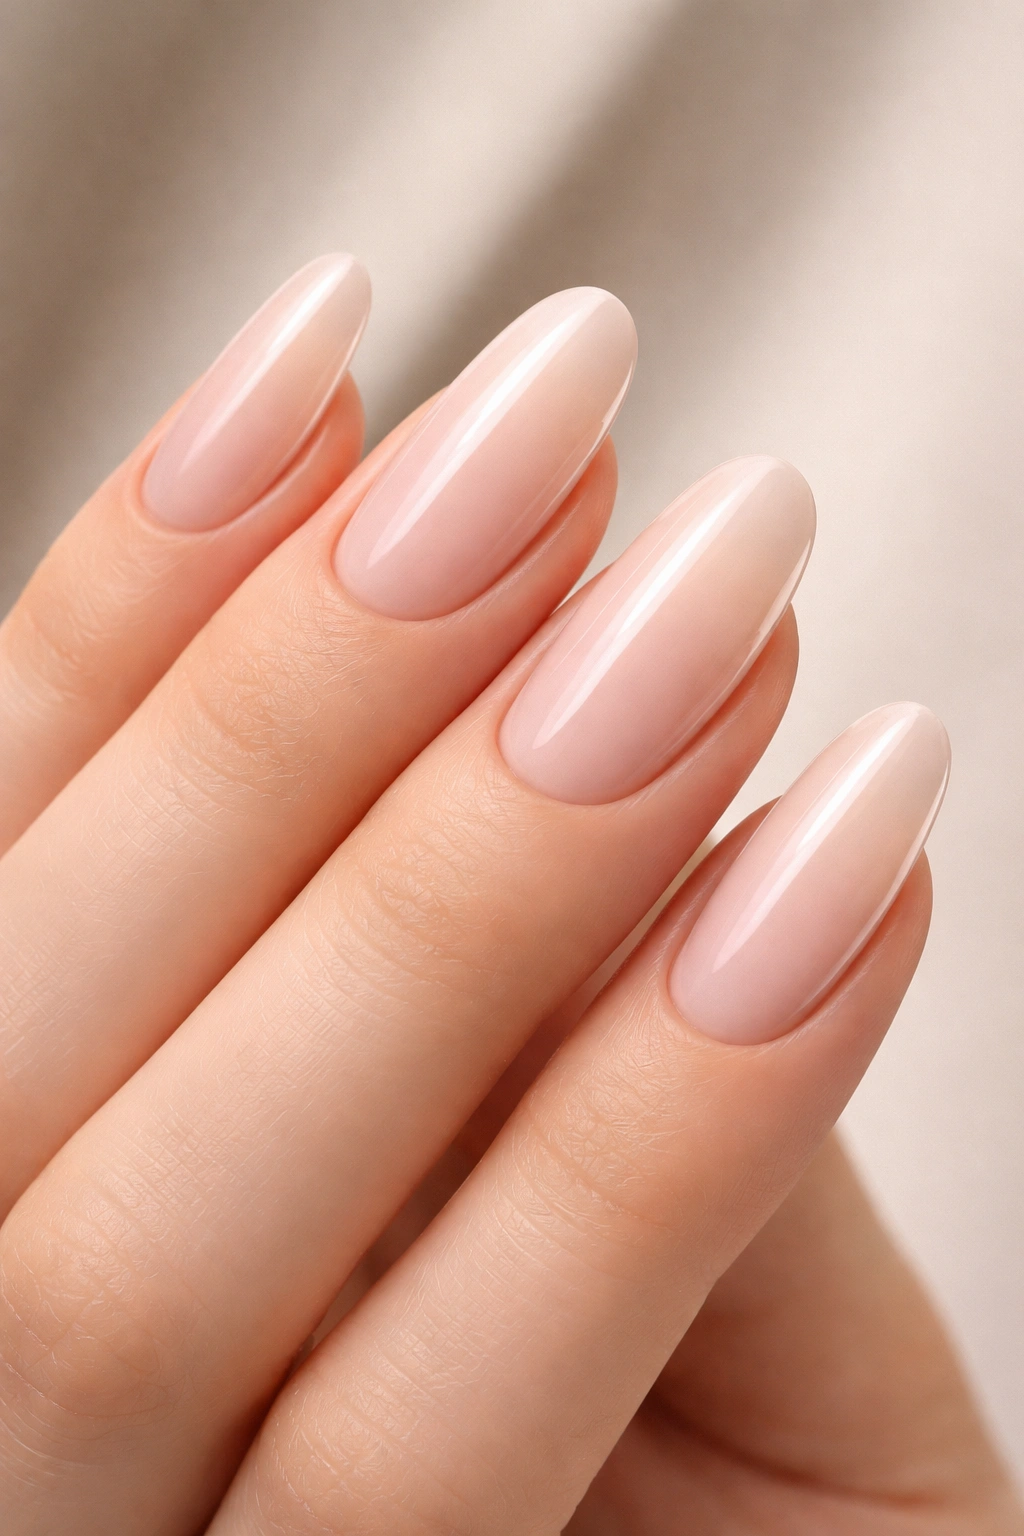
1. Barely-There Nude With Soft Shimmer

A nude that matches your exact skin tone with just enough shimmer to catch the light is the foundation of effortless elegance. The shimmer should be so fine that someone has to look twice to realize it’s there — think microscopic flecks rather than glitter. This look works because it elongates your fingers while creating a cohesive line from your finger to your nail, and the minimal shimmer adds dimension without introducing color.
Why This Works Best
The magic here is in the undertone matching. If you typically wear warm gold tones, lean toward peachy or honey-inflected nudes. Cool skin tone? Go for pinks with gray undertones. When you nail this, your nails don’t look like a separate accessory — they become an extension of your hand itself, but elevated. The light shimmer catches when you gesture, making your hands feel animated and alive without any effort on your part.
Application and Longevity
- Two thin coats apply much better than one thick coat for shimmer finishes
- A clear glossy topcoat locks the shimmer in place and adds depth
- This style easily lasts 2-3 weeks without looking chipped or tired
- Shimmer also hides minor imperfections and micro-scratches beautifully
- Reapply topcoat every 5-6 days to maintain that fresh-from-the-salon glow
Pro tip: Apply your nude as one full coat, then use a shimmer topcoat as your second layer — this technique gives you more control over the intensity and keeps the base color pure.
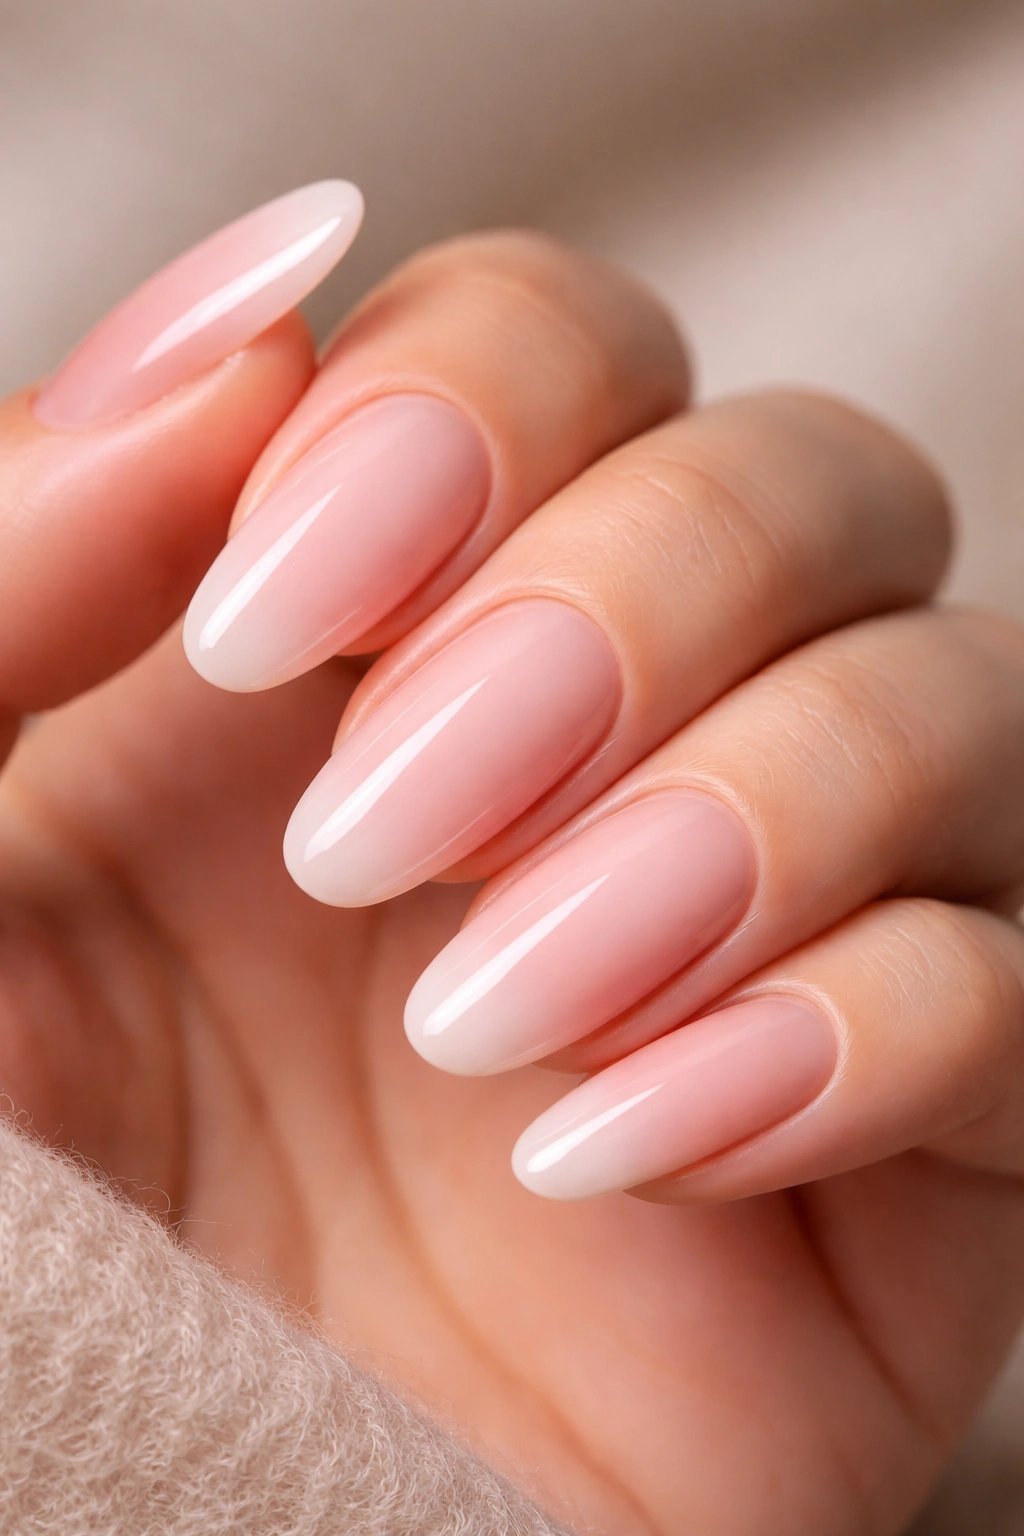
2. Milky Pink That Reads as French Without the Stripe

This is the evolution of the French manicure, where instead of a stark white tip, you embrace a soft milky pink base that gradually becomes slightly more opaque toward the free edge. It’s technically still monochromatic because you’re using the same pink throughout, but the opacity shift creates that suggestion of a French tip without any actual line work required.
The Optical Effect
Long round nails in this milky pink automatically read as more grown-up and intentional than you might expect. The barely-there definition at the tip gives you just enough visual interest to break up the length, which prevents your nails from feeling too plain. This is also the rare nail style that actually makes your nails look longer than they are because the eye stops at that subtle opacity shift rather than your actual nail edge.
Getting the Opacity Right
- Start with one coat of a sheer pink base
- Apply a second coat of a slightly more opaque version of the same pink, concentrating on the tip
- You want the transition to be so gradual that it’s almost undetectable
- If you mess up, it just looks like natural growth, which is honestly perfect
- This works with any soft pink from blush to dusty mauve-pink tones
Worth knowing: This style actually improves with about two weeks of growth — the slightly more transparent base starts to show more of your natural nail, deepening the gradient effect beautifully.
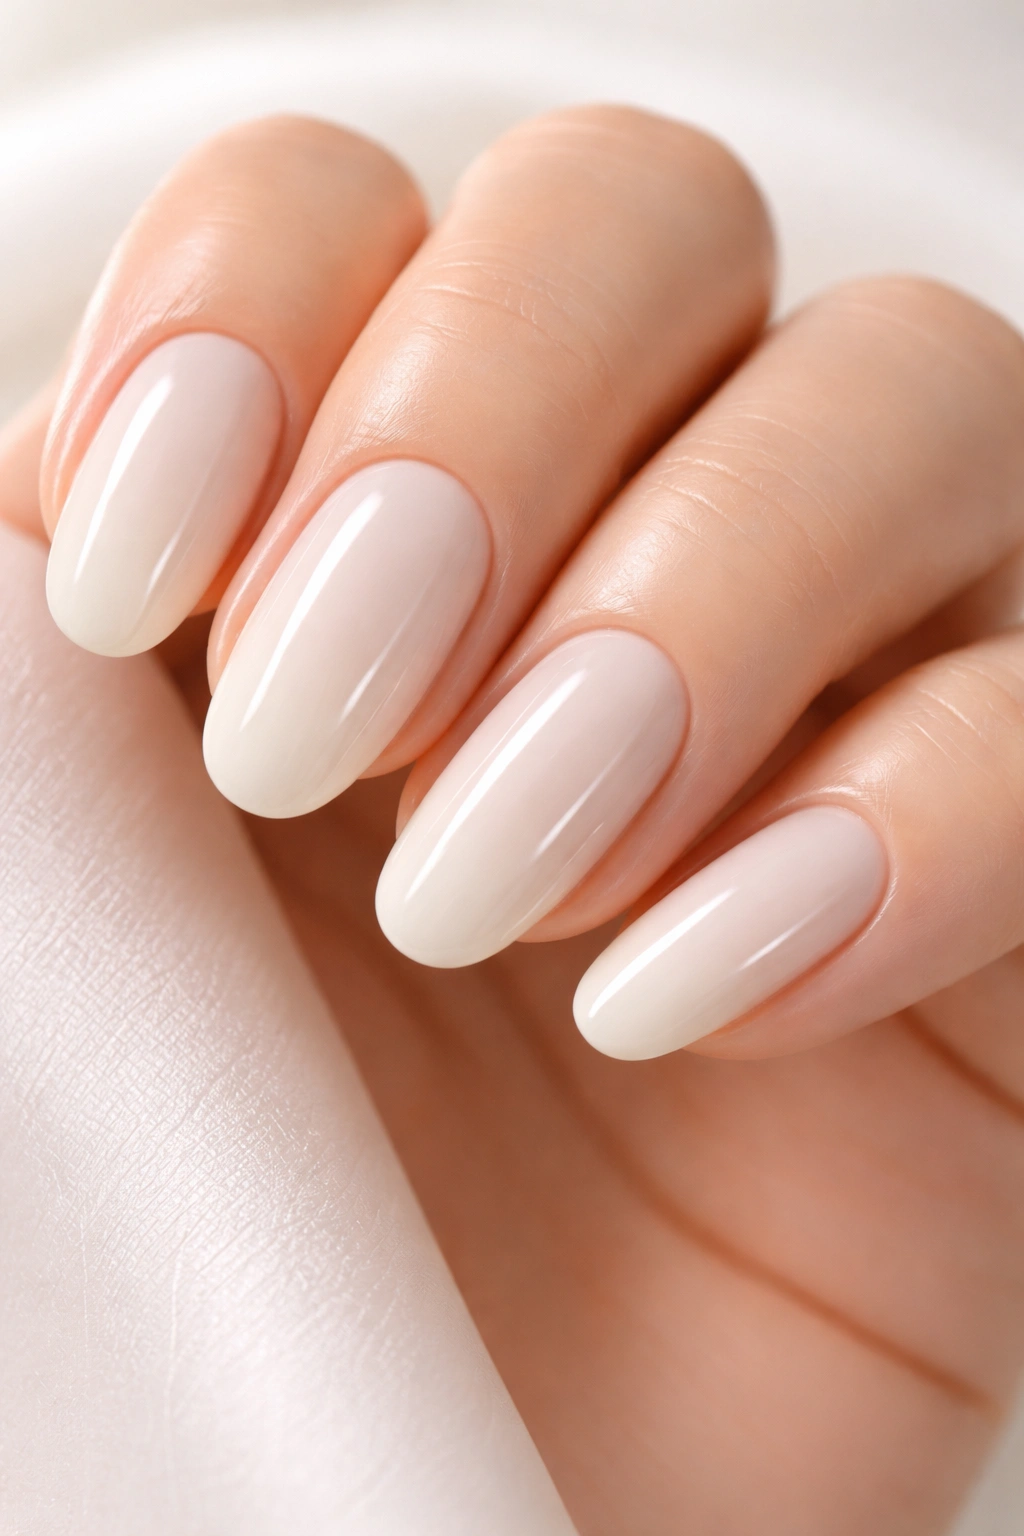
3. Pure Glossy Natural With No Polish

Sometimes the most effortless look is simply no color at all. A really good nail file, a chamois buffer that gently smooths the surface, and a clear glossy topcoat that you reapply weekly is all you need. Your actual nail color shines through, clean and healthy-looking, with a professional shine that reads as intentional grooming rather than “I just didn’t bother.”
Why Long Round Natural Nails Stand Alone
Without any color to distract, the shape becomes everything, and round nails are genuinely beautiful on their own. They look sophisticated in a way that reads as “I take care of myself but I’m not precious about it.” The gloss makes them look stronger and more lustrous, almost like you spent a fortune at a luxury salon when really you spent fifteen minutes on proper filing and buffing.
Maintenance That Keeps Them Shining
- Buff very gently — you’re smoothing the surface, not aggressively abrading
- Use a glass nail file instead of metal (it seals the edge better and prevents peeling)
- Reapply clear glossy topcoat every 5-7 days for that salon-fresh shine
- Keep cuticles pushed back and moisturized to make the nail base look more intentional
- The healthier your actual nails, the better this look works
Insider note: If you want your natural nails to look even more impressive, add a tiny brushstroke of white or cream just under the very tip of your nail with a fine brush — it mimics light reflection and makes them look shinier without being fake-looking.
4. Warm Caramel With Satin Finish
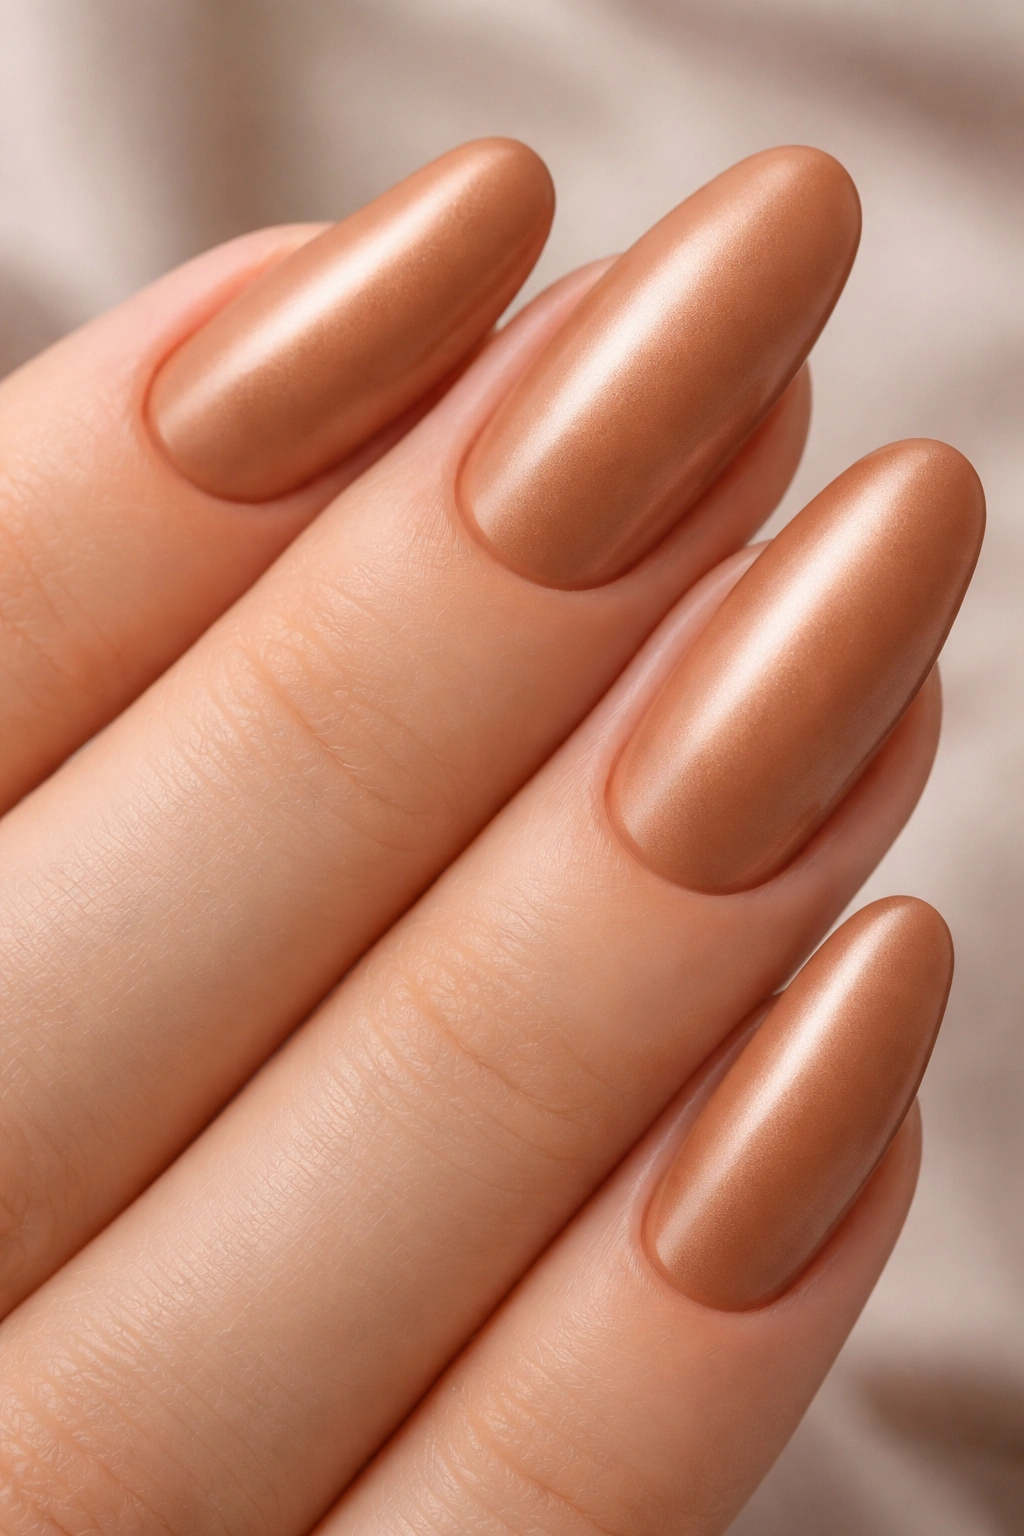
A satin finish gives you all the color richness of a crème finish but with a softer, more sophisticated visual quality. A warm caramel tone is that perfect bridging shade — it’s not quite brown, not quite nude, just warm enough to feel intentional but neutral enough to pair with literally everything in your closet. The satin finish diffuses light differently than gloss, making it look more expensive and more interesting.
The Satin Advantage
Glossy nails can sometimes feel overly formal or try-hard, while satin sits in this beautiful middle ground. It reflects light just enough to show off your nails without that shiny-for-the-sake-of-shiny quality. Caramel specifically works because it’s universally flattering across skin tones — it coordinates with warm golds, cool silvers, rose metals, and even bronze equally well.
Achieving True Satin Finish
- Use a specific satin topcoat product rather than trying to dull a glossy finish
- Satin topcoats are trickier than gloss but worth it — apply thin, even coats
- Two coats of satin topcoat gives you better durability than one thick coat
- Avoid matte finishes if longevity is important; satin is the compromise that works
- This finish lasts 10-14 days before needing reapplication
Quick truth: Caramel shows slight imperfections less than brighter colors, so if your actual nail health is a work in progress, this shade is forgiving while still looking elevated.
5. Classic Cream With Micro Floral Details at the Base
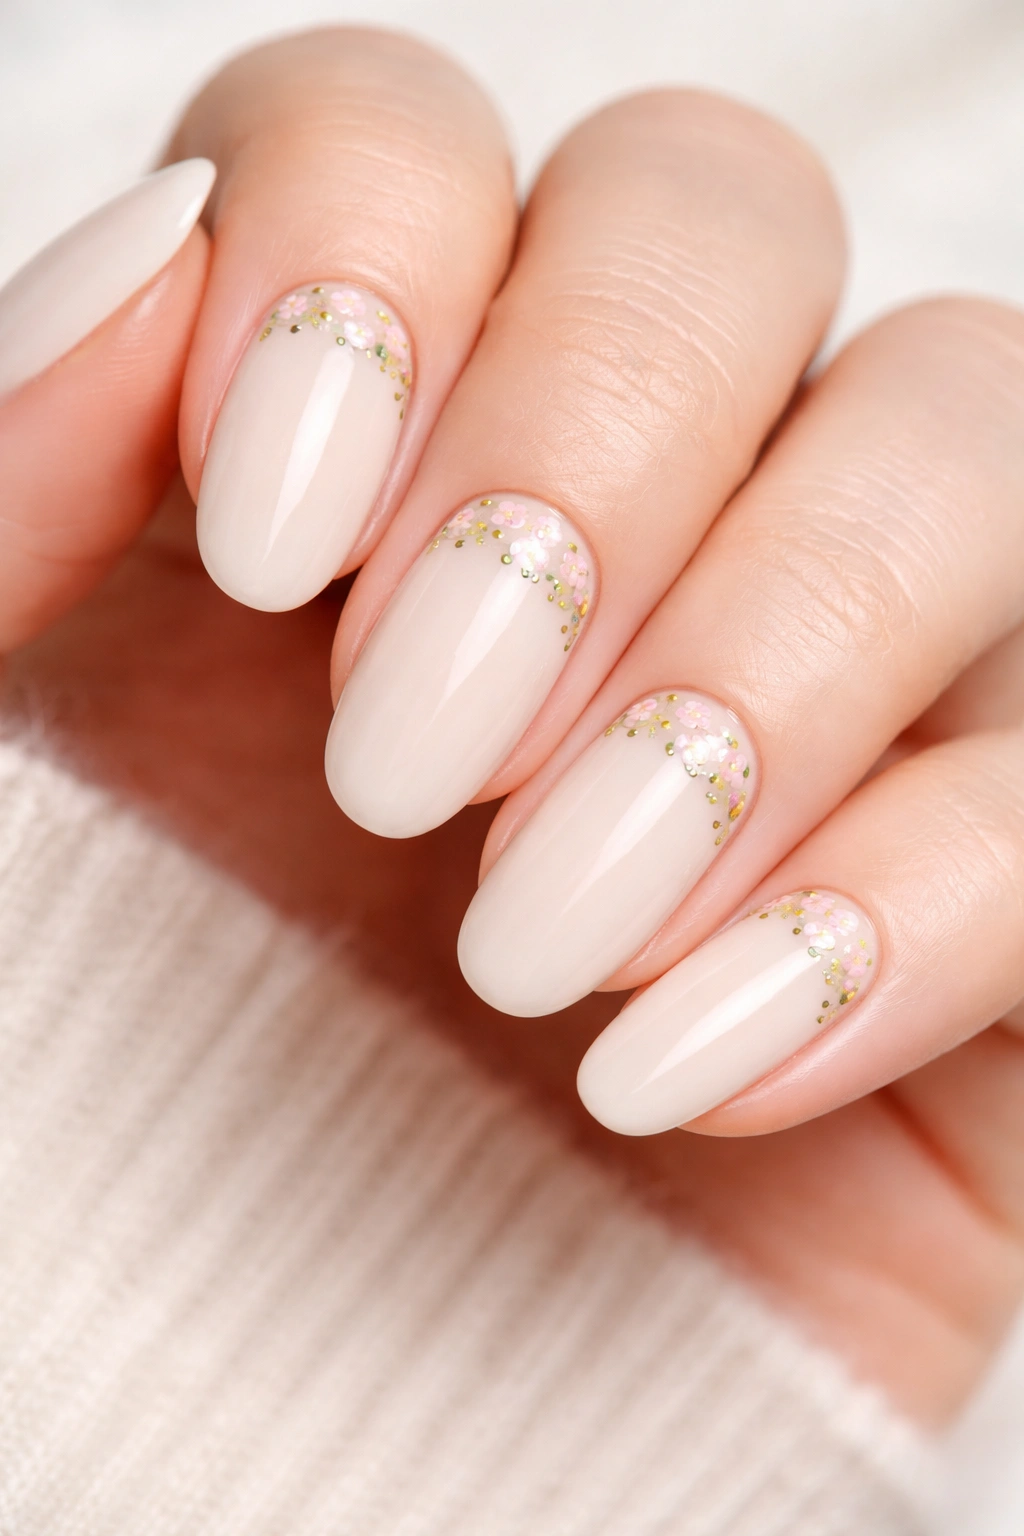
A soft cream base with the tiniest hand-painted florals clustered near your cuticle line brings personality without clashing with your actual life. The florals stay tucked near your hand, so they only show up when you’re consciously displaying them — they don’t interrupt your day or read as “costume nails.” The cream keeps everything soft and wearable; the florals add a thread of intentionality.
The Placement Psychology
Putting details at the base instead of scattered across the nail creates a cohesive look that reads as a single design rather than random decoration. It also means the designs age more gracefully — as your nails grow, the florals migrate down your nail, which somehow feels more organic and intentional than designs that end up in weird places as growth happens. When people see your nails from certain angles, they get this subtle surprise of detail, which is infinitely more interesting than obvious all-over design.
Hand-Painting Vs. Stamping
- Stamping for florals can look slightly plasticky; hand-painting feels more personal
- You don’t need to be skilled — even slightly imperfect florals look more genuine
- Use a very fine brush (00 or smaller) and thin paint to avoid overwhelming the scale
- Florals work best in colors that contrast gently with your base (dusty burgundy on cream, soft green on pale pink)
- Seal everything with a strong clear topcoat to protect the artwork
Pro tip: If hand-painting feels intimidating, order custom nail decals of small florals and apply them to the base area — they’ll adhere beautifully and won’t crack or peel early.
6. Dusty Rose With Subtle Linear Details
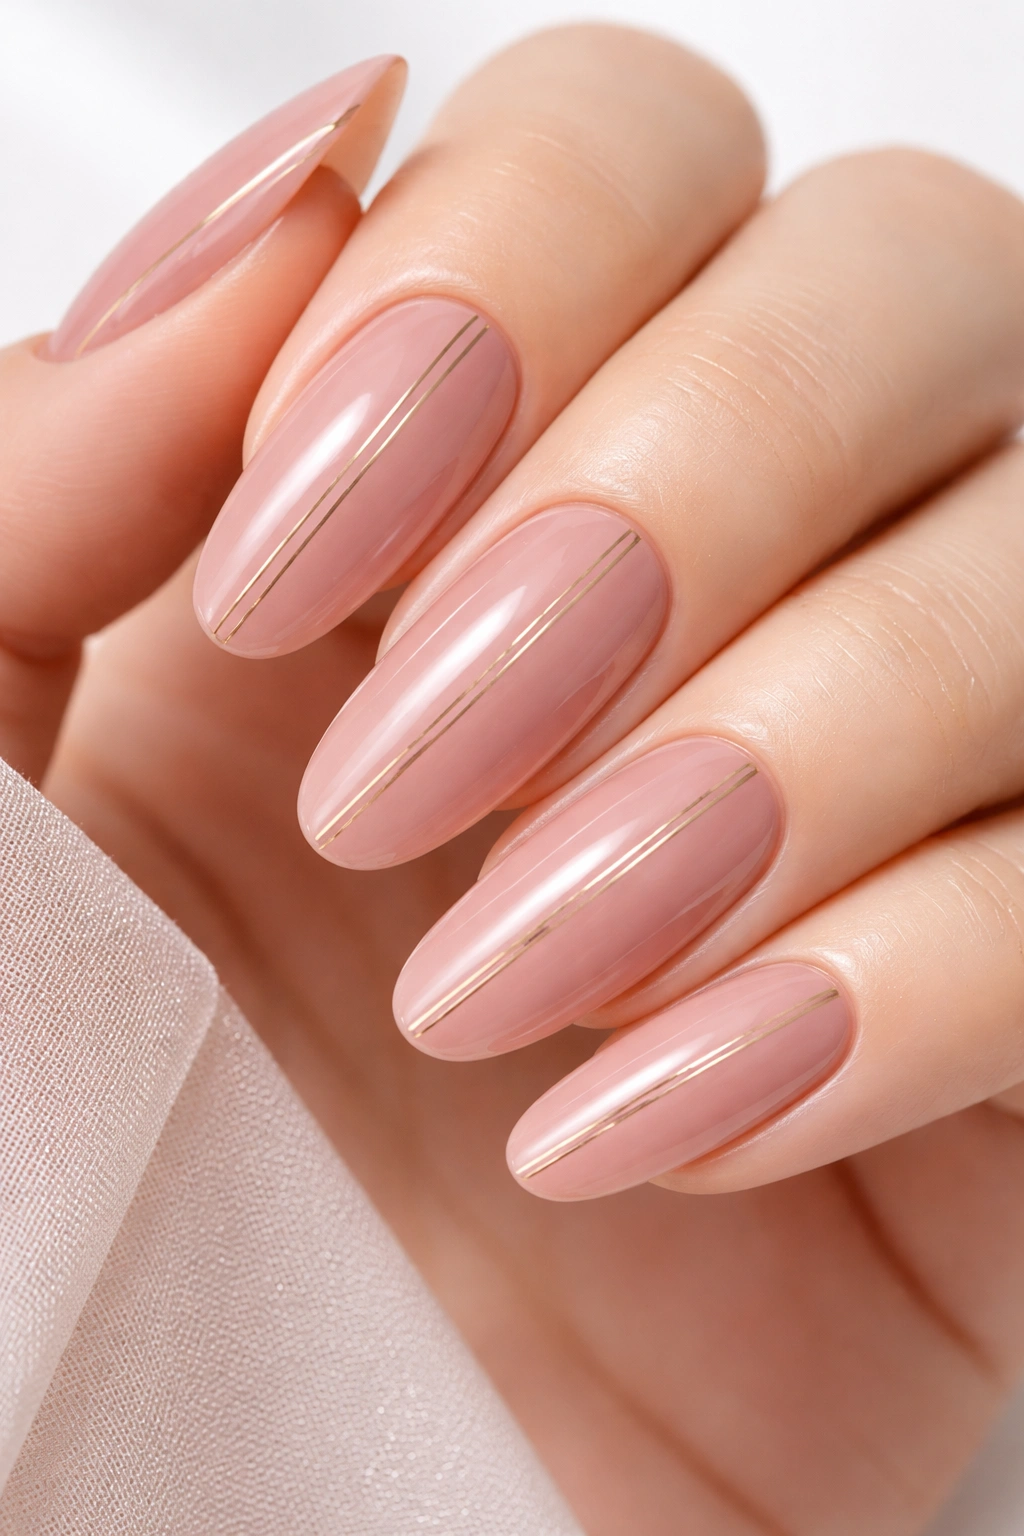
A dusty rose (think more gray than pink, almost mauve in tone) is sophisticated in a way that straightforward pink simply isn’t. Pair it with the thinnest gold or silver linear details running down the center of each nail, and you’ve created something that feels intentional and artistic without being loud. The lines should be so fine that they look almost accidental at first glance.
The Geometry of Restraint
Fine linear details feel architectural in the best way — they’re suggesting structure and intention without demanding attention. Dusty rose as a base is automatically a bit reserved and elegant, so pairing it with something equally spare (thin lines, minimal gold) creates harmony. This is the opposite of nails that feel like they’re trying too hard; instead, they feel like you know something about design.
Creating Clean Linear Details
- Use a nail art pen with an ultra-fine tip for precision
- Gold and silver work equally well; choose based on your typical metal preference
- Lines should run from cuticle to tip, following the natural nail line
- If lines aren’t perfectly straight, that’s okay — slight irregularity looks more hand-done and intentional
- One thin coat of metallic pen, then seal with clear topcoat
Worth knowing: Dusty rose photographs beautifully in all lighting, which means your hands will look great in photos without any of the washed-out quality that can plague pale pinks.
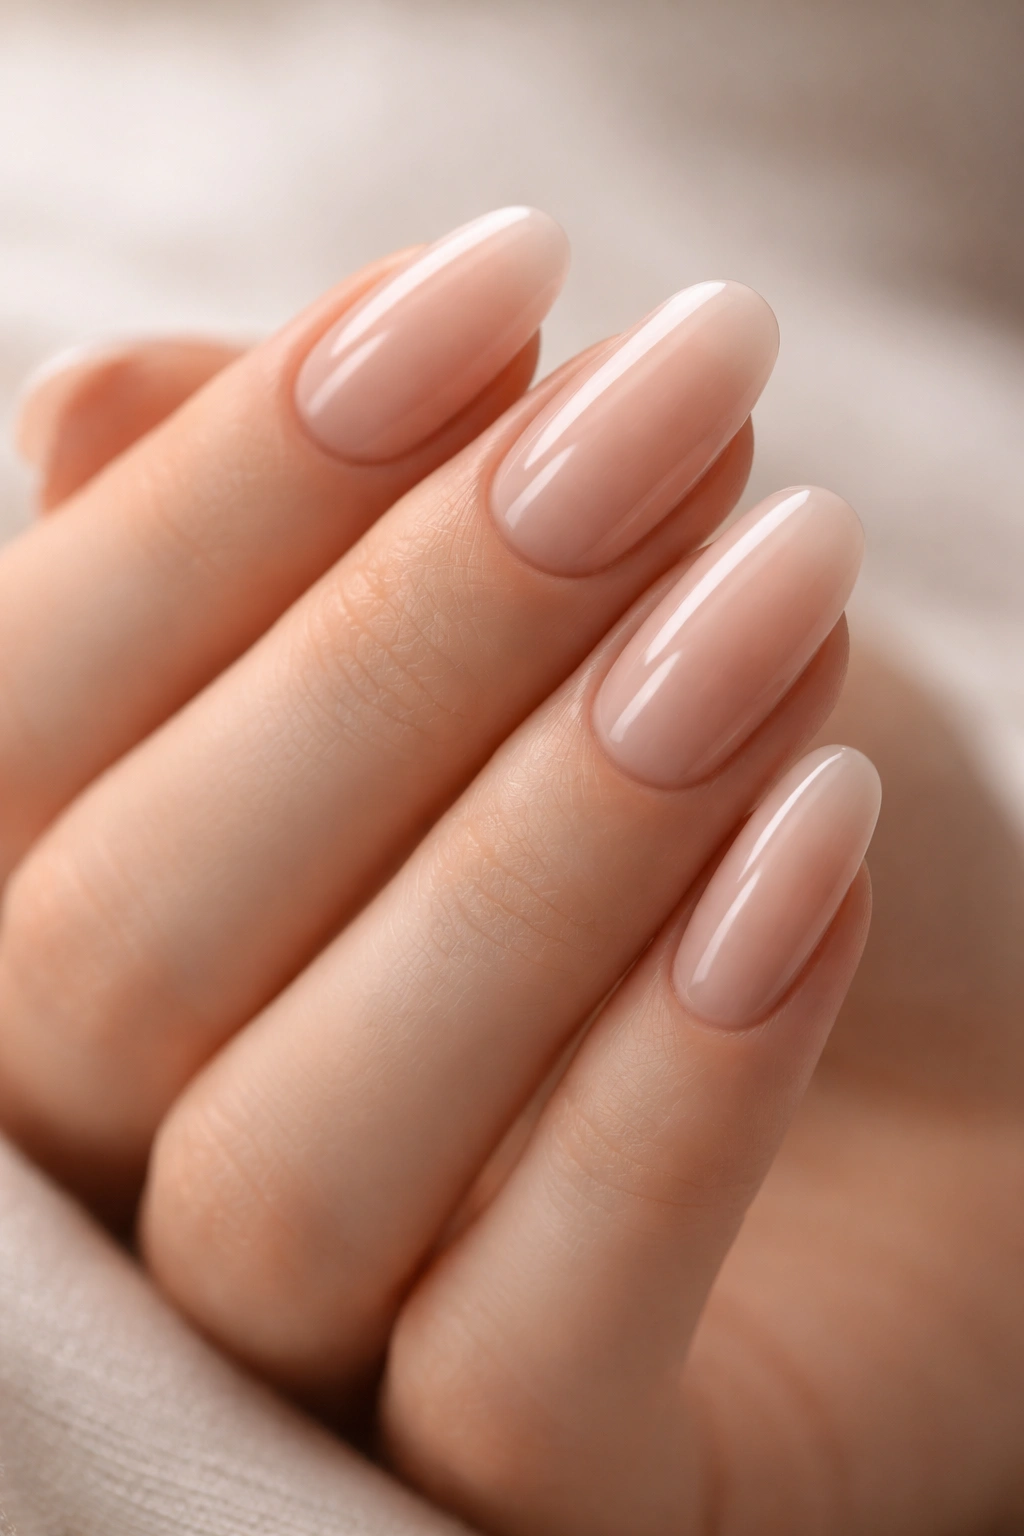
7. Translucent Nude With Visible Nail Bed Beneath

This is the “natural but intentional” look taken to its logical conclusion. A sheer pink or nude that’s so transparent your actual nail bed shows through clearly creates an effect that’s almost more elegant than solid color because it feels so honest. Your nails still look polished and cared for, but they read as authentically you rather than as a construct.
The Transparency Sweet Spot
You want enough pigment that it’s clear you’re wearing something, but not so much that it becomes opaque. This takes experimentation with specific products, but once you find the right sheer, it becomes your foundation. The beauty is that as your nails grow, there’s no obvious line between your “polish” and your natural growth — everything feels seamlessly integrated.
Durability With Sheer Finishes
- Sheer finishes are actually quite durable because they’re typically formulated with flexible resins
- Apply two coats for slightly more pigmentation and coverage
- A clear topcoat adds shine and protection without disrupting the sheer effect
- This look genuinely improves with a week or two of growth as the contrast deepens
- Reapply topcoat every 5-7 days for that polished appearance
Quick fact: Sheer products photograph more naturally than solid colors, and they’re forgiving with uneven application because the transparency hides tiny imperfections.
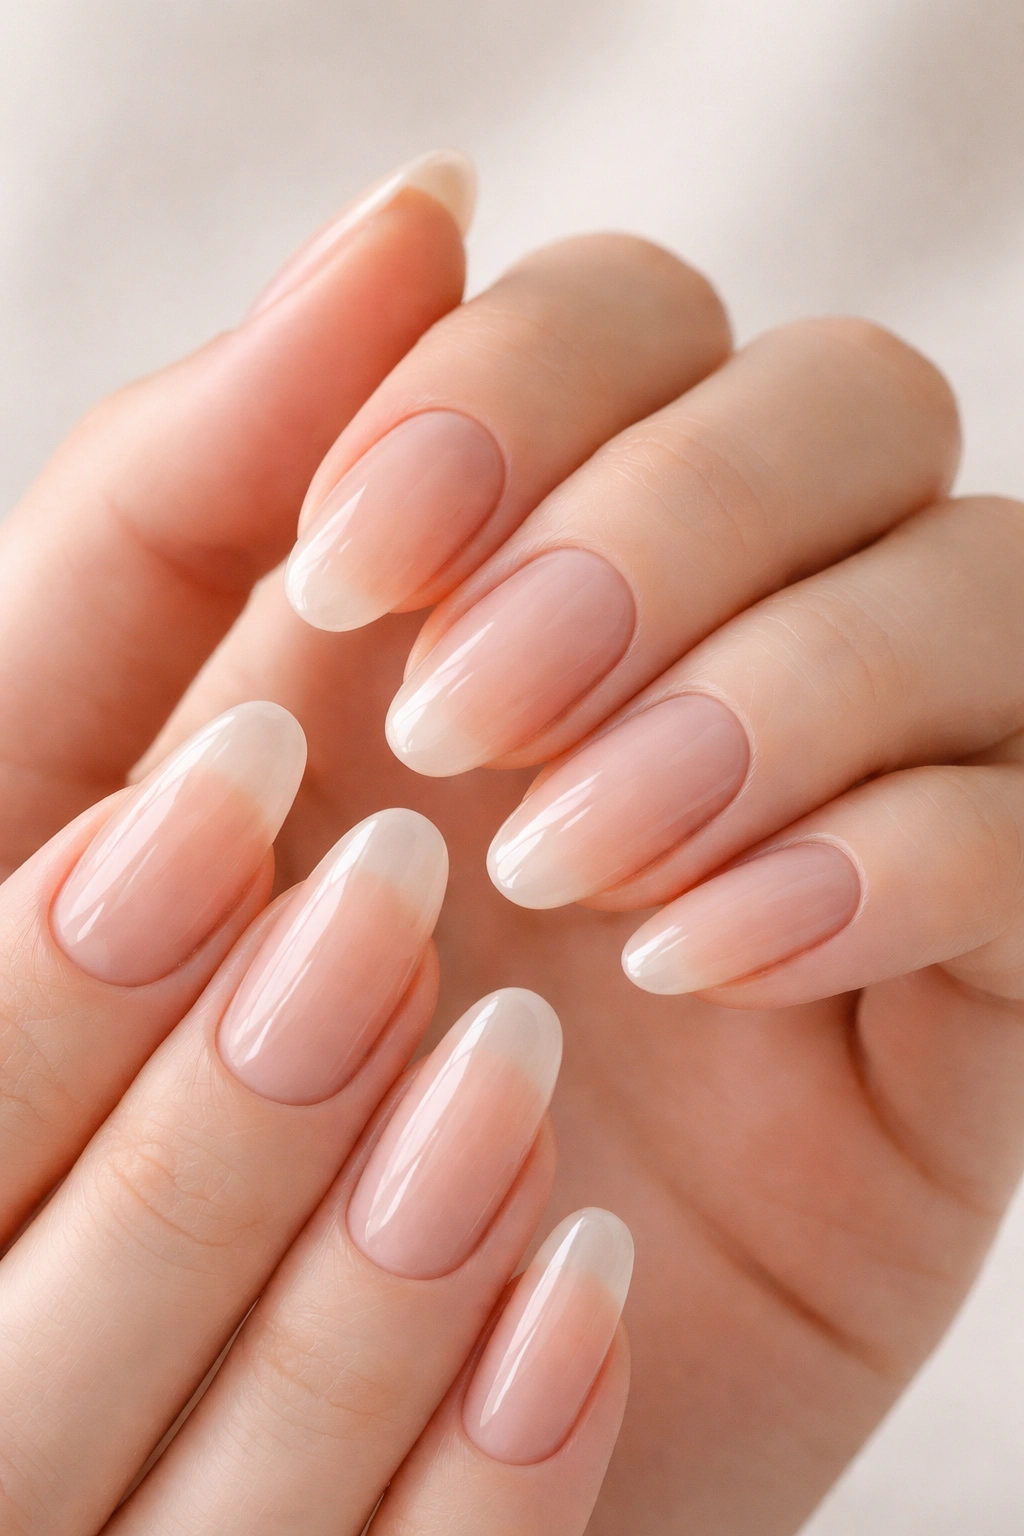
8. Soft Blush Pink With Barely-There Ombre
An ombre creates subtle gradation without the dramatic contrast of an obvious ombre. Your base is soft blush pink, and very gradually, almost imperceptibly, you shift toward a slightly more saturated version of the same pink at the tips. The shift should be so gentle that someone could look at your nails three times and not quite realize it’s an ombre.
The Technical Application
Ombre is honestly easier on long round nails than it is on other shapes because the curved tip naturally softens any harsh lines. You can use a sponge to blend, or you can use a dry-brush blending technique. The key is multiple thin layers rather than one thick application of color — three thin coats blended together always look better than two heavy ones.
Blending for Seamlessness
- Use a slightly damp makeup sponge to blend the color transition
- Apply color to the sponge, then press and bounce it onto your nail rather than rubbing
- Blend at the midpoint of your nail where the color shift happens
- If you mess up, just add more of the darker pink — there’s no “wrong” in blending
- Seal with topcoat, which naturally diffuses any remaining harshness
Pro tip: The ombre looks freshest for the first two weeks, then as the lighter base grows in, it becomes a more obvious ombre, which is actually still beautiful — just a different stage of the design.
9. Warm Beige With Subtle Pearl Finish
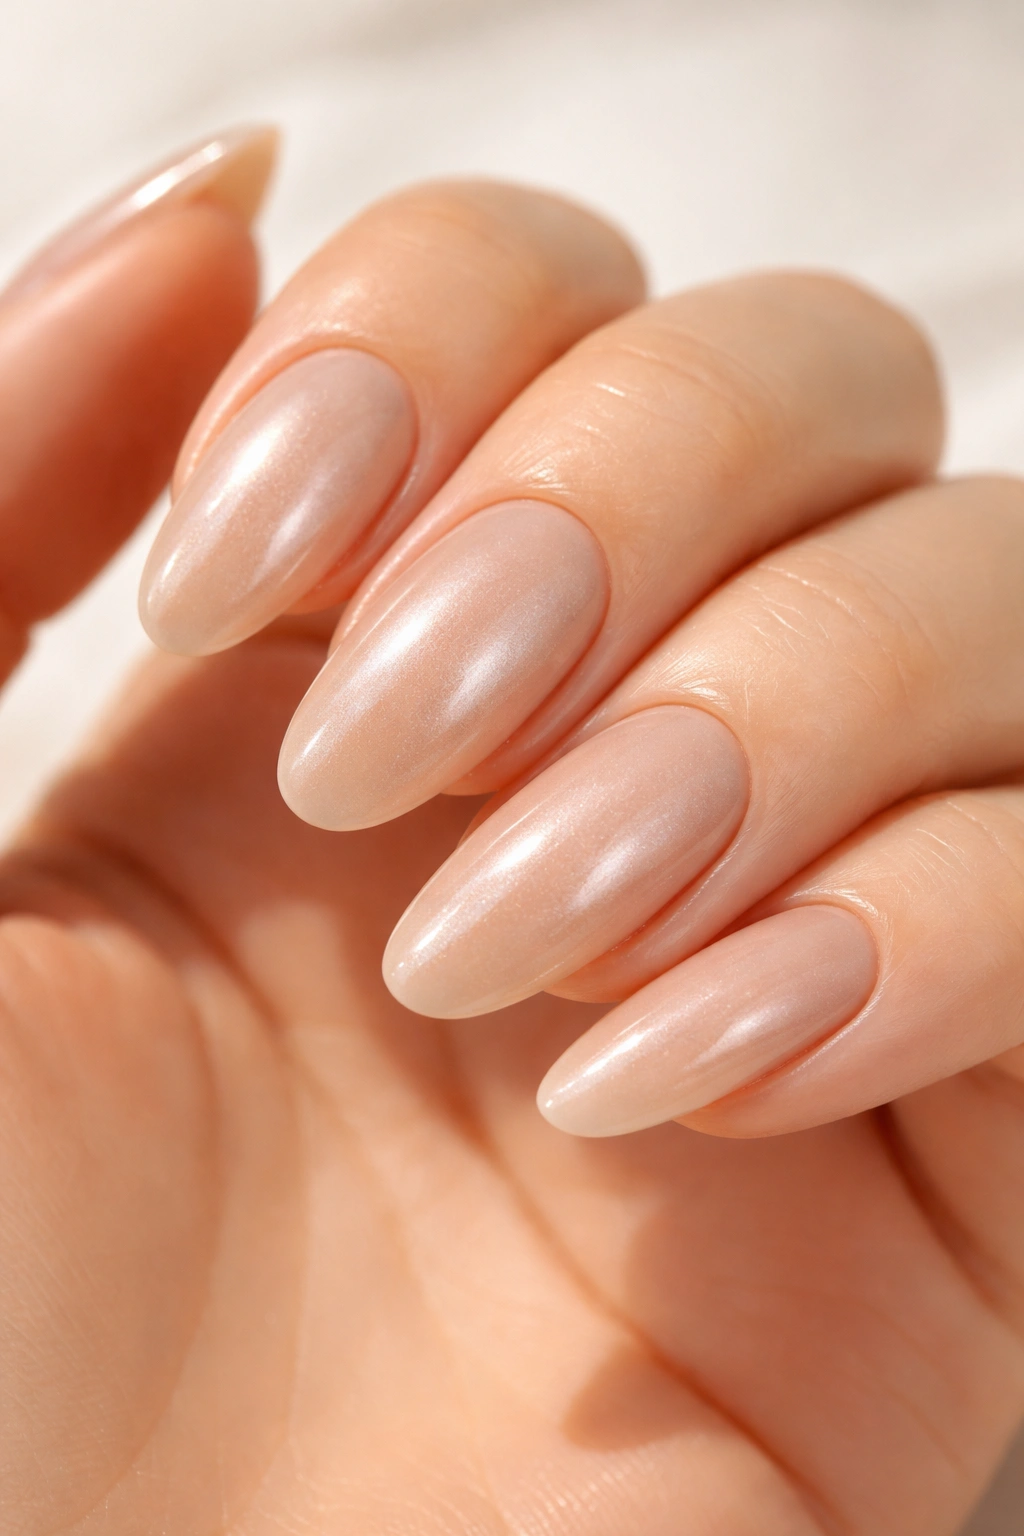
A warm beige is that universally flattering shade that somehow works regardless of undertone, season, or occasion. Add a subtle pearl finish, and you’ve elevated it into something that catches light beautifully without being overtly shimmery. Pearl and beige together read as expensive and sophisticated, like you had them professionally done at a high-end salon.
The Pearl Finish Distinction
Pearl isn’t the same as shimmer — it’s a more sophisticated light-reflecting finish that creates iridescence rather than sparkle. It’s visible enough that people notice something special about your nails, but subtle enough that it reads as polish quality rather than as you trying to be flashy. This is the finish that gets the most compliments because people can’t quite figure out what makes them so captivating.
Applying Pearl for Maximum Impact
- Pearl finishes work best with two coats of the base color
- Apply pearl topcoat as your final layer, or choose a polish that has pearl built in
- The pearl shows up more dramatically in certain lighting, so you’ll notice different effects in natural light vs. indoor lighting
- This is genuinely one of the easiest finishes to apply because imperfections basically disappear
- Reapply topcoat every 7 days; pearl polishes can look dull if the topcoat wears through
Worth knowing: Warm beige with pearl reads as significantly more expensive than the price tag suggests — people will assume you paid premium money for these nails.
10. Pale Pink With Negative Space at the Sides
Negative space (intentional, unpolished areas) on the sides of your nail creates a modern, almost architectural look that feels effortless because it’s so minimal. A pale pink base with clean, unpainted vertical strips on either edge is sophisticated and surprisingly interesting visually. The negative space actually makes your nail look longer and more delicate.
Strategic Unpainted Space
The unpainted sections should be narrow (maybe 2-3mm each) and perfectly clean. They run parallel to the edges of your nail, leaving your center polished. This creates a visual illusion that lengthens your nail by breaking up the width, and it’s infinitely more interesting than a solid manicure without reading as overly trendy or costume-like.
Creating Clean Negative Space Edges
- Use nail tape or a thin vinyl stencil to mask off the areas you want to leave unpainted
- Press the tape or stencil down firmly so no polish bleeds underneath
- Apply your pale pink in two coats over the exposed center section
- Remove the tape while the polish is still slightly tacky for cleanest edges
- If edges aren’t perfectly clean, gently clean them up with a small brush and acetone
Insider note: This design works best when your actual nail bed is in good shape — it draws attention to the health and quality of your nails, so any discoloration or irregularity becomes more noticeable.
11. Barely-There Peachy Nude With Rose Gold Micro Dots
This is understated decoration done right. A peachy nude base (the warmest, most flattering option for most skin tones) with randomly placed, tiny rose gold dots creates texture and interest without feeling busy. The dots are so small and scattered that they read as an intentional design rather than as decoration, and the overall effect is delicate and feminine without being precious.
Dot Placement That Looks Intentional
The dots shouldn’t follow any obvious pattern — they should feel scattered and organic. Some nails get more dots, some get fewer. Place them across the surface rather than lined up or clustered, so the eye has something to land on everywhere. The randomness is what makes it look effortless rather than calculated.
Executing the Micro Dots
- Use a dotting tool (available at any beauty supply store) or the end of a bobby pin
- Dip the tool into rose gold gel or metallic paint
- Gently press onto your base coat and lift straight up — don’t twist
- Micro dots should be maybe the size of a sesame seed or slightly smaller
- Apply 5-8 dots per nail, scattered across the surface
Quick fact: Rose gold dots work across a massive range of skin tones because the peachy undertone connects to nearly every complexion warmly.
12. Ivory With Just the Slightest Warm Undertone and Glass-Glossy Finish
An ivory nail (off-white rather than true white or cream) with a completely transparent, glass-like glossy finish is the final evolution of the effortless manicure. It’s barely there as a color — almost nude, but with enough visible presence that it reads as intentional. The glass-glossy finish makes them look impossibly shiny without looking fake, like light is literally reflecting off them.
Ivory as the Sophistication Sweet Spot
Ivory works because it’s warm enough to not look clinical, but neutral enough to work with every outfit and every context. It reads as higher-end than true white (which can feel a bit costume-y), but it’s more impactful than a true nude. The balance is perfect for someone who wants their nails to look exceptional without dominating their appearance.
Achieving Glass-Glossy Perfection
- Use a polish specifically formulated for ultra-high shine (many brands market these)
- Apply two thin coats rather than one thick coat for even finish
- The topcoat is crucial — use a premium glossy topcoat that hardens with UV light if possible
- Don’t apply topcoat too soon after your base; wait 30 seconds for it to set slightly
- These nails will look freshest for 10-14 days before the gloss fades slightly
Pro tip: If your glossy finish starts to look dull after two weeks, reapplying just the topcoat brings back that glass effect without reapplying the base color.
Wrapping Up
The through-line connecting all twelve of these styles is that they work because they respect what long round nails actually are — a shape that’s already elegant on its own. Every single one of these looks succeeds because it enhances rather than overcomplicates. Whether you’re going for absolutely bare-bones minimal or adding subtle details, the key is knowing that the length and shape are doing most of the heavy lifting for you.
The best part about embracing natural-looking long round nails is that they age beautifully. As they grow, they don’t scream “hello, I need a manicure,” and when you do eventually get a fill or refresh, the grow-out phase feels like a natural progression rather than an obvious gap. You’re not fighting against your own nails; you’re working with them, and honestly, that’s where true effortlessness comes from. Pick the one that resonates with how you want to feel, and let your nails do the quiet work of making you look polished without trying.
