

Short squoval nails are having a serious moment — and for good reason. The squoval shape sits in that perfect sweet spot between the practical strength of a square and the flattering elegance of an oval, making it one of the most wearable nail shapes across different hand shapes and lifestyles. Builder gel specifically works magic with short squovals because it allows technicians to create dimension, add length gradually without the brittleness of natural nails, and build intricate designs that actually last through your busy week without chipping.
If you’ve been scrolling through nail inspiration and feeling a bit overwhelmed by endless options, or if you’re sitting in the technician’s chair with a blank stare when they ask what you want, this is the guide you need. We’re breaking down ten stunning short squoval builder gel designs that range from minimalist and modern to bold and decorative — giving you real, achievable ideas you can bring to your appointment or recreate yourself if you’re doing your own nails at home.
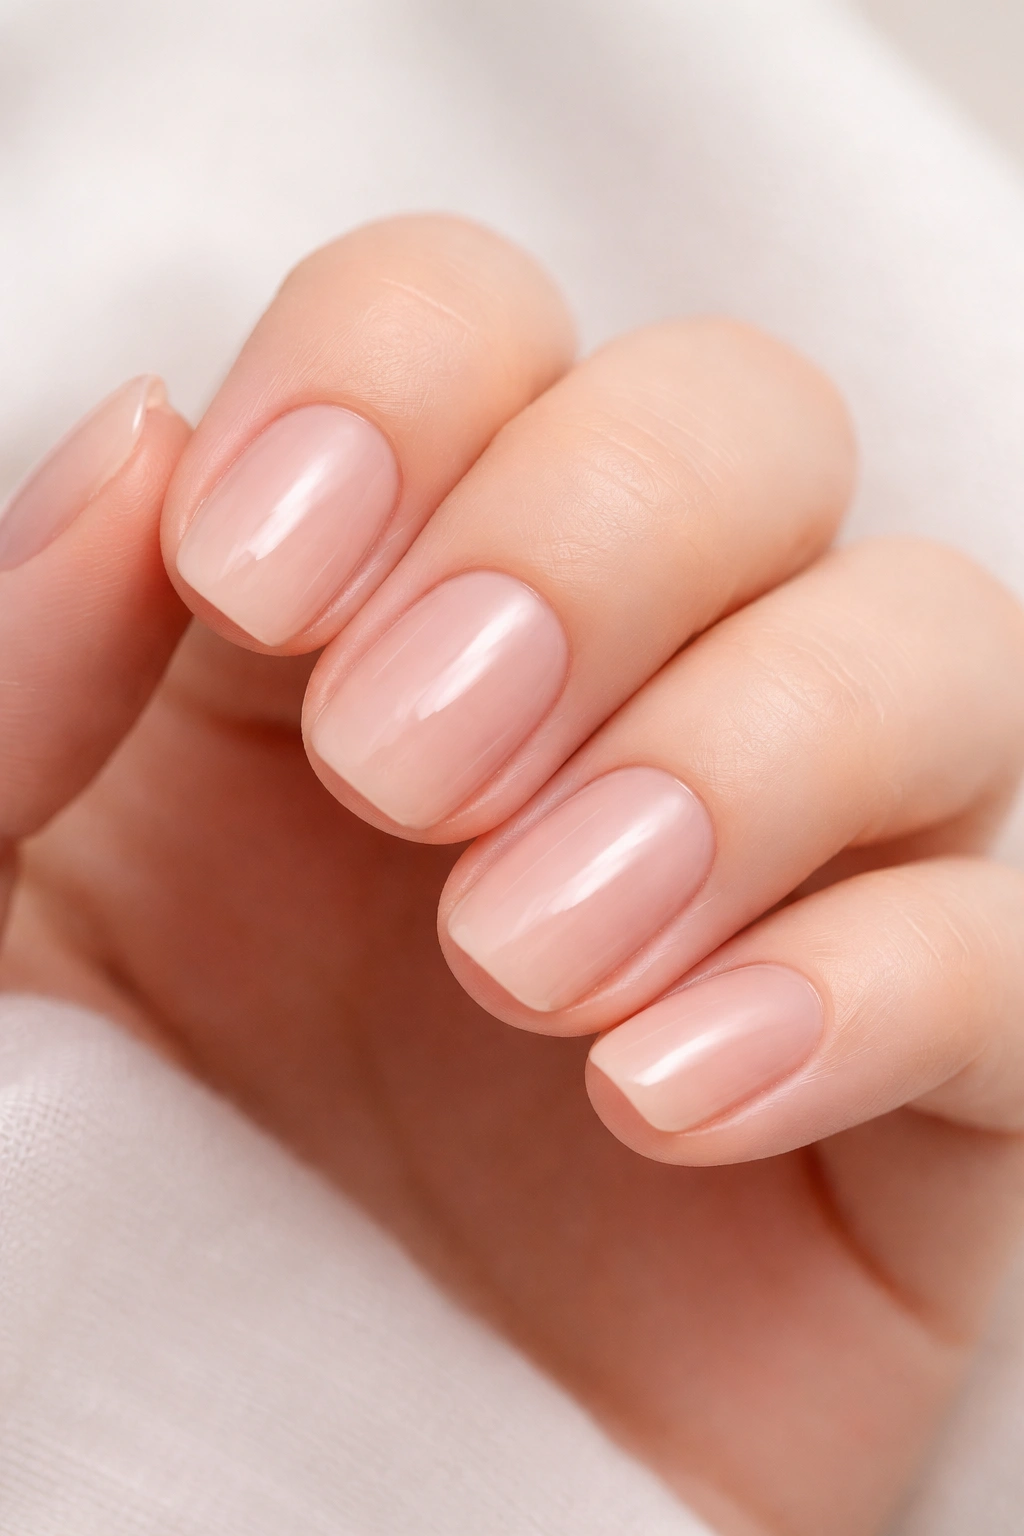
1. Soft Glazed Nude with Minimal Gold Detailing
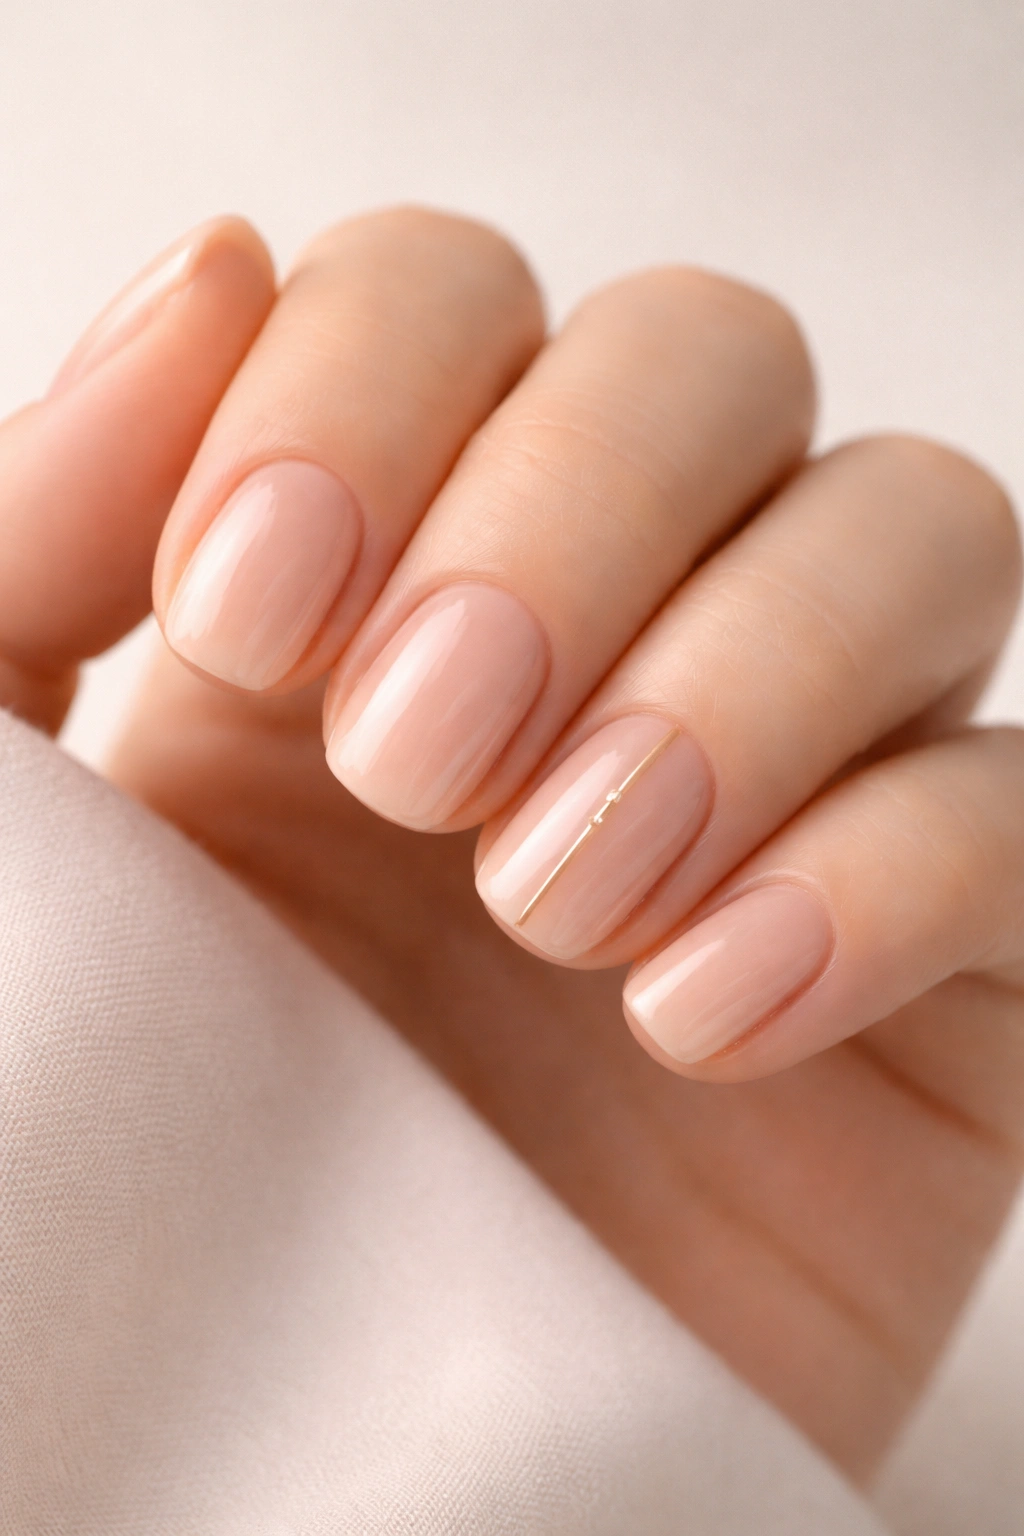
This is the design you’ll reach for when you want sophisticated without trying too hard. A soft, slightly warm nude base in builder gel creates a canvas that feels polished and professional while maintaining an understated elegance that never dates. The gold accent comes in the form of a thin, nearly hair-thin line running down the center of one nail, or occasionally a geometric accent on just the pinky — enough to catch the light and add interest without overwhelming the look.
Why It Works for Short Squovals
The beauty of this design lies in its restraint. Short nails sometimes look better when they’re not heavily decorated, and the squoval shape actually shows off a clean, minimal design more effectively than a heavily embellished one. The nude-plus-gold combination works because it’s classic enough to pair with literally any outfit, yet specific enough to feel intentional and curated rather than basic. Builder gel applies smoothly in this neutral range, and the minimal detailing means the design photographs beautifully and holds up without needing constant touch-ups.
Application and Maintenance Tips
- Use a builder gel in a true nude or warm beige shade — something that matches your skin tone or sits just slightly lighter. This blurs the line between where your nail ends and your skin begins, creating an illusion of length even on shorter nails.
- Apply the gold line using a thin liner brush and either gold gel, or layer actual gold leaf and seal it under a coat of clear builder gel for extra dimension.
- Build the nail with minimal apex (the high point of the structure) since this design relies on a smooth, natural-looking profile rather than dramatic sculpting.
- Seal with a glossy top coat for a cream-like finish that highlights the subtle sophistication of this look.
Pro tip: If you’re worried about the nude shade clashing with your undertone, match it to your concealer shade rather than your foundation — your nails sit closer to your face, making this the better reference point.
2. Classic Red with Crisp White Smile Line
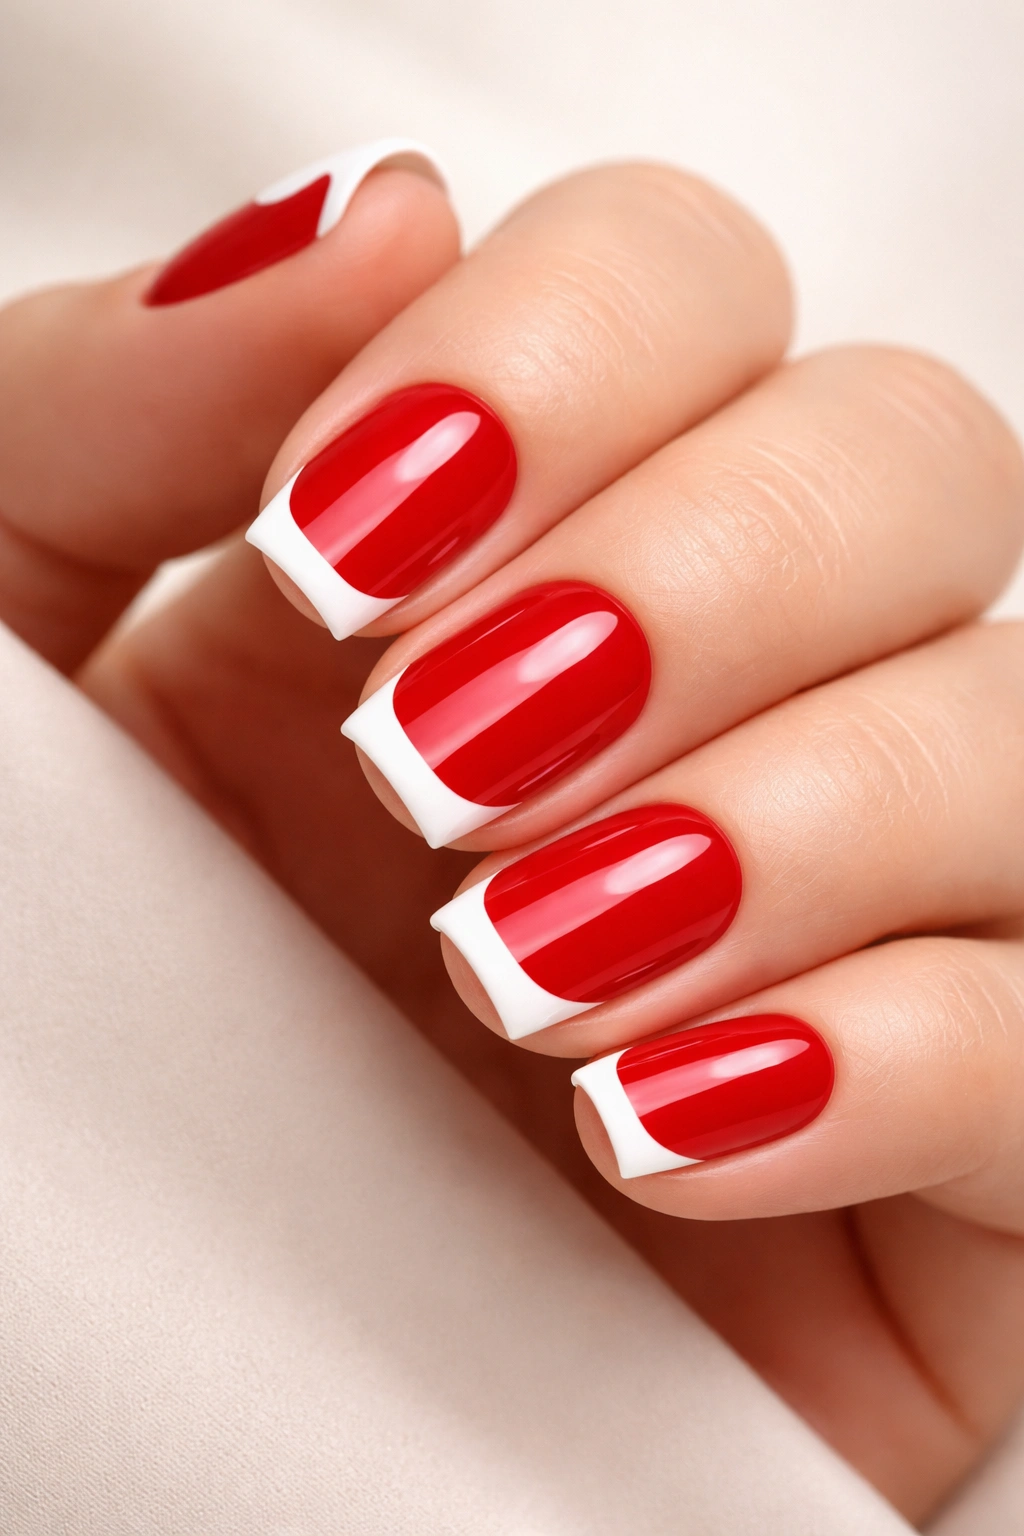
You can’t improve on a timeless combination, and short squoval nails prove it. A classic red builder gel base paired with a crisp, clean white smile line (the tips painted in white) creates a design that feels retro, bold, and utterly wearable on short nails. The squoval shape prevents this traditional look from feeling old-fashioned — instead, it reads as a modern take on a vintage classic.
The Psychology of This Design
Red nails have been associated with confidence and polish for decades, and there’s actual research suggesting they make your hands look more refined and your nails appear longer. On a short squoval, the contrast between the red and white immediately draws the eye to the nail, making them feel more prominent than they are. The white smile line adds a structured geometric element that feels intentional and carefully done — never accidental.
Getting the Clean Line Right
- Use a pure red builder gel in a shade with slight blue undertones (like a true red or burgundy-red) rather than orange-reds, which can appear garish on short nails.
- Create the white smile line using either a white gel and a steady hand, or use a thin striping tape as a guide if you’re less confident in freehand work. With builder gel, you can also use a white gel pen or nail art pen for extreme precision.
- Build the white line slightly thicker than a traditional polish version — builder gel allows you to create more dimension here, and the thicker white actually adds visual length to short nails.
- Seal everything under a high-shine top coat that makes the color appear deeper and more luxurious.
Worth knowing: This design works brilliantly with gel because you can layer the red and white applications for true color opacity in a single application, preventing the streaking you might see with regular polish.
3. Soft Pink Ombré with Sparkle Gradient
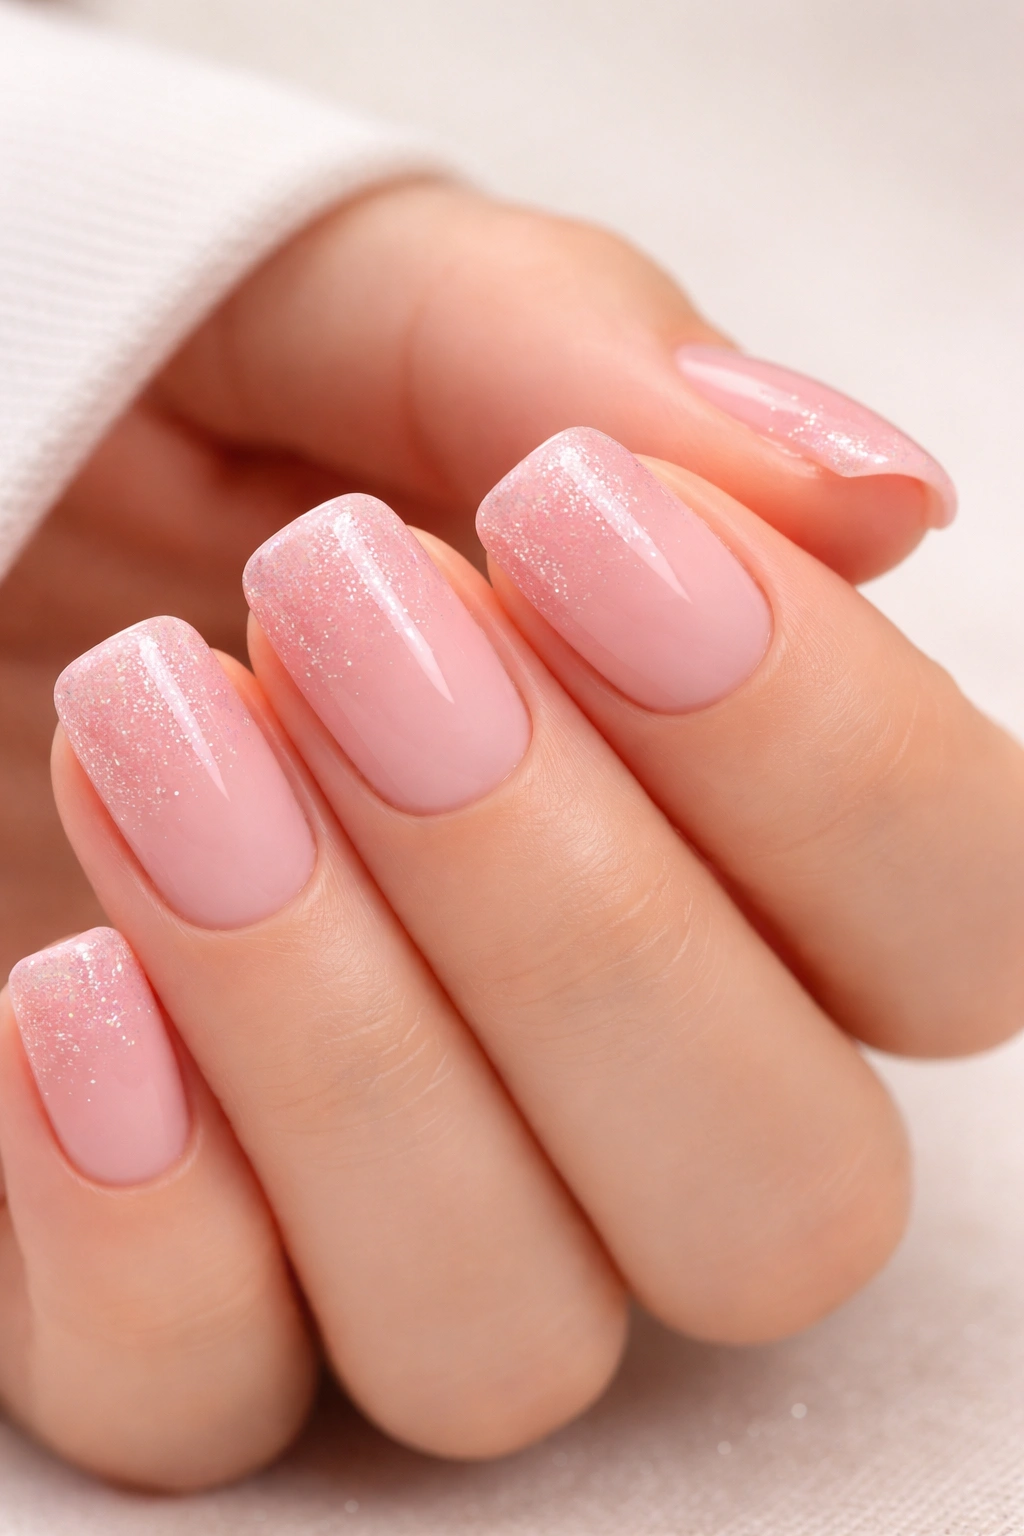
Ombré or gradient nails in builder gel create a professional, salon-quality look that’s nearly impossible to achieve with regular polish. A soft pink ombré — transitioning from pale pink or nearly white at the base to a deeper dusty rose toward the tips — reads as both elegant and modern on short squoval nails. Adding sparkle or glitter that’s concentrated toward the tips intensifies the gradient effect and adds movement and light-catching beauty.
Building the Gradient in Builder Gel
Builder gel actually makes ombré application easier than you might think. Unlike traditional polish, builder gel stays where you place it and doesn’t blend on its own, which means you need to build the gradient deliberately. The typical technique involves creating the gradient on a palette, then transferring it to the nail with a sponge or by layering different shades directly on the nail with careful placement.
Technique Breakdown
- Start with a pale base — nearly white, ivory, or the palest pink you can find in builder gel.
- Layer a slightly deeper pink over the middle third of the nail.
- Add an even deeper rose or dusty mauve tone to the final third and tip.
- Use a makeup sponge or blending sponge to feather the transitions if you want a soft, seamless ombré, or leave slight color blocks for a more modern gradient aesthetic.
- Add glitter builder gel or sprinkle cosmetic-grade glitter into the top layer of builder gel while it’s still wet (before curing), concentrating it toward the tips.
Pro tip: This design benefits from a matte or satin top coat rather than glossy — the matte finish makes the gradient more visible and the sparkle appear more sophisticated rather than overly festive.
4. Almond Toe-Inspired Modern French
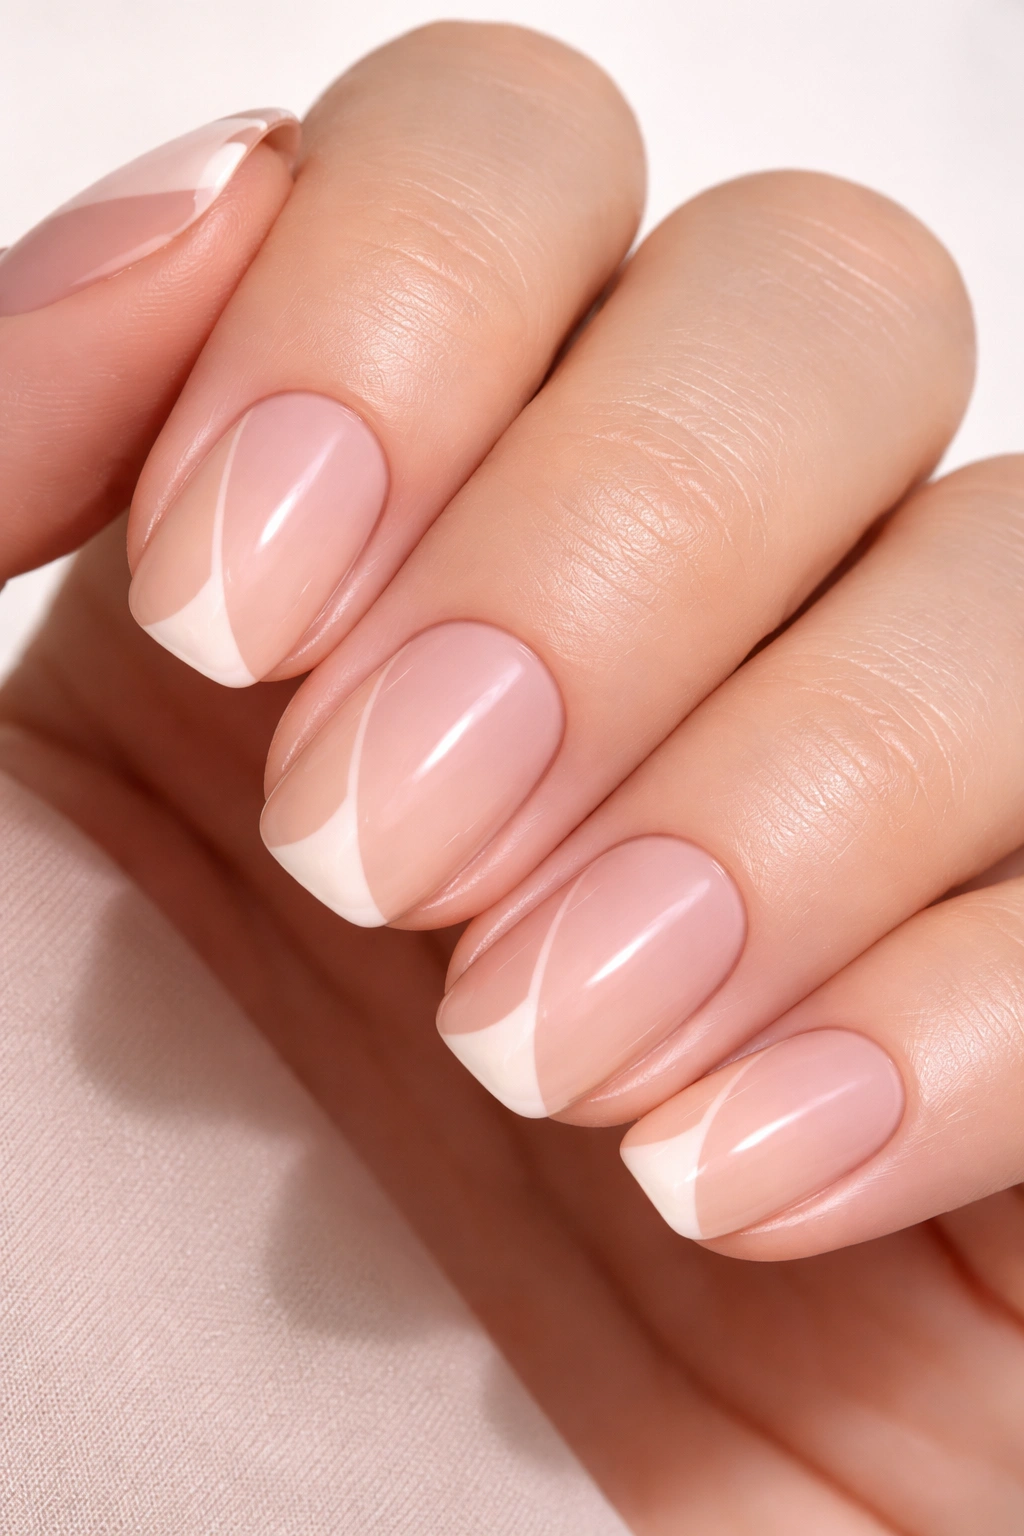
A modern twist on the French manicure, this design takes inspiration from the almond-shaped negative space trend and reimagines it on short squovals. Instead of a traditional white tip, this design features a thin line of negative space (unpainted nail showing through) along the tip edge, with color blocking in complementary shades on either side. Think a pale nude with a thin clear line, then a soft blush or rose shade filling the very tip.
Why the Squoval Makes This Work
The squoval’s straight sides with softly rounded corners create the perfect proportion for this negative space design. The shape is defined enough that the empty space reads as intentional and graphic, rather than looking like an incomplete manicure. On longer or more curved shapes, this design can look unfinished, but on a short squoval, it appears deliberate and modern.
Executing Negative Space Cleanly
- File your nails into the squoval shape first, paying special attention to creating straight sides with a gentle curve at the tip.
- Apply a base color (typically nude or pale pink) to the entire nail and cure.
- Using a thin liner brush and a complementary shade, paint a small section at the very tip, leaving a thin unpainted line between the base color and the tip color.
- This unpainted line is what creates the negative space effect — it should be approximately 1-2mm wide for short nails.
- Seal with a top coat, and the negative space will remain clearly visible.
Key detail: Make sure your cuticles are completely pushed back and the nail plate is smooth before applying this design — any imperfections become more visible when you’re working with negative space.
5. Chocolate Brown with Caramel Swirls
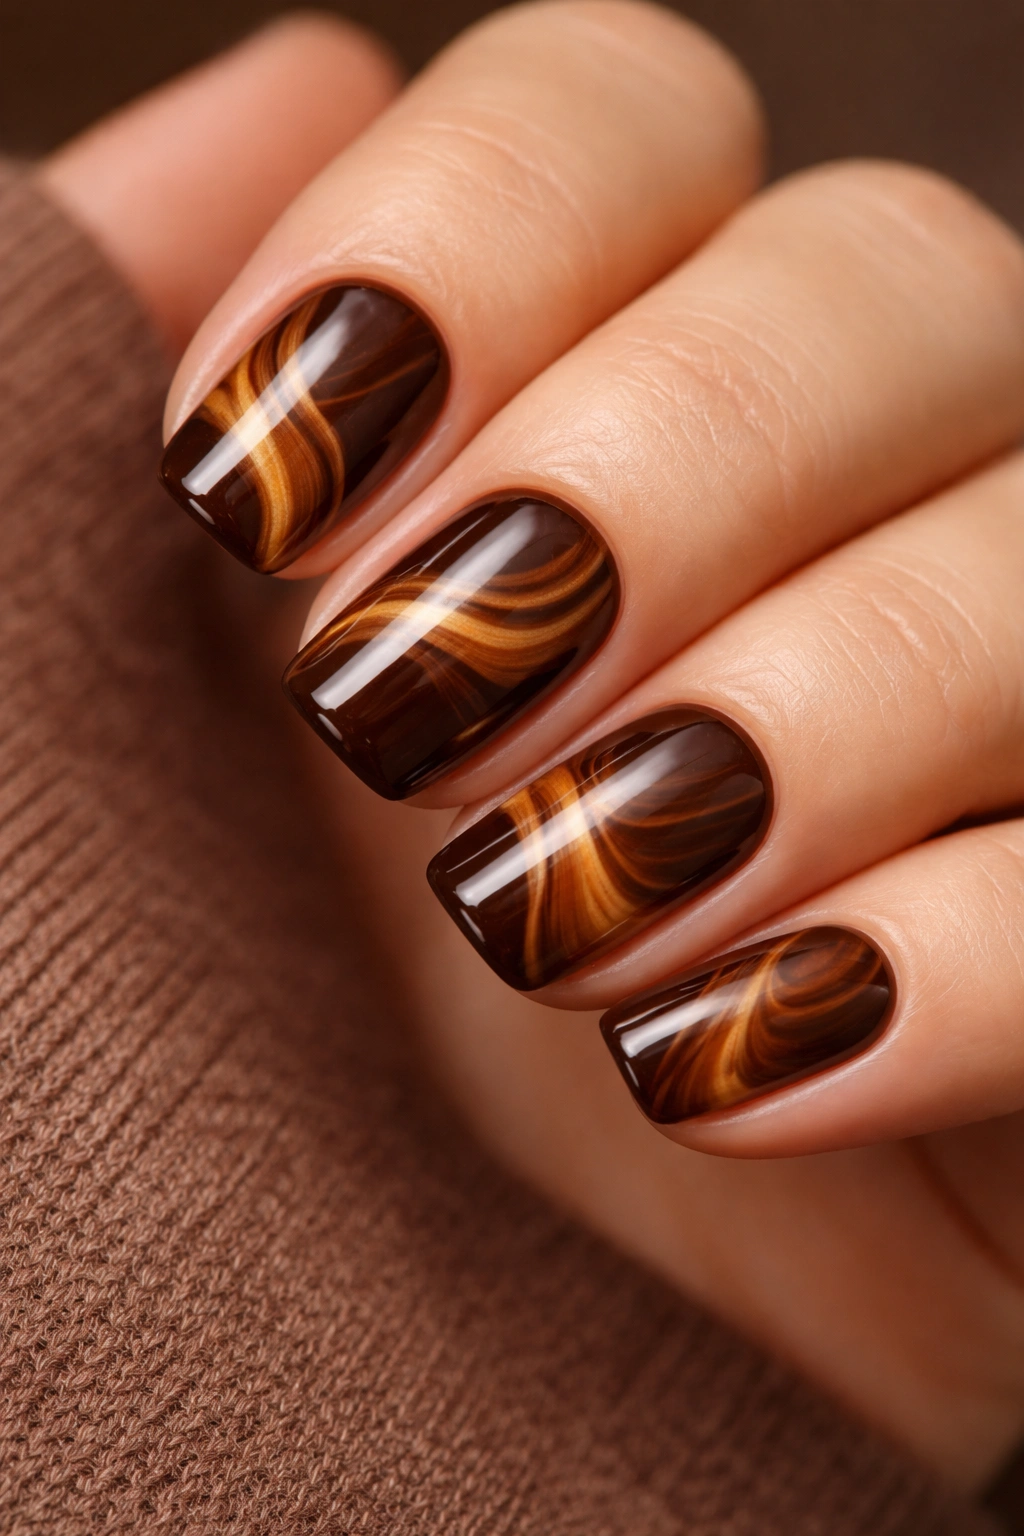
This earthy, warm design brings to mind rich chocolate and caramel candies, and it’s surprisingly versatile for any season. A deep chocolate brown builder gel base provides a sophisticated backdrop for caramel or tan-colored swirls, creating an organic, almost marbled effect. The color combination is warm, grounding, and works beautifully on short squoval nails because the darker base makes the nail appear longer and more defined.
The Art of the Swirl
Creating swirls in builder gel requires a steady hand and a thin brush, but the effect is worth the practice. The key is to work with a slightly thinner consistency of gel so it flows without running all over the place. You can also create swirls by layering a darker shade and then dragging a lighter shade through it with a toothpick or fine brush for a more controlled effect.
Color Theory Applied
- Deep chocolate brown (almost black-brown) as your base provides contrast and visual interest.
- Use a caramel, tan, or warm honey shade for the swirls — something in the warm neutral family that complements rather than competes with the brown.
- The swirls should feel organic, not perfectly symmetrical — asymmetry actually makes them look more intentional and artistic.
- Apply a glossy top coat to make the design look polished and complete.
Insider note: This color combination looks particularly striking on deeper skin tones, where the chocolate and caramel read as warm and luxurious rather than muddy. On lighter skin tones, using a lighter brown base (like a milk chocolate shade) prevents the design from looking too heavy.
6. Cream with Pressed Flower Inclusions
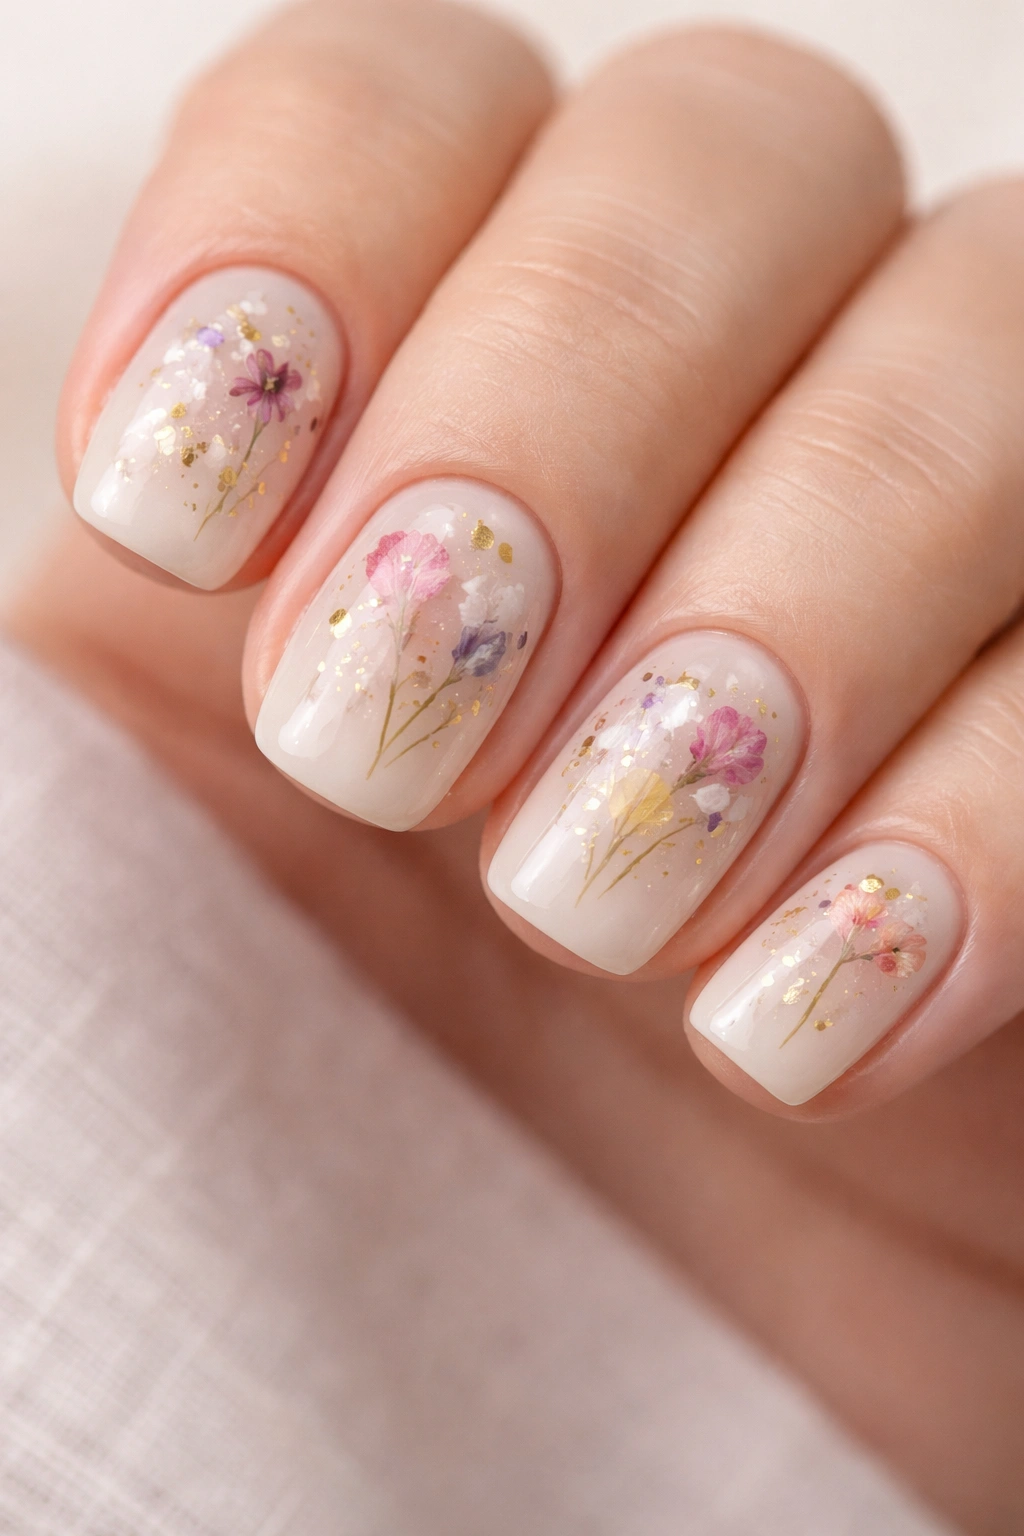
Pressed flowers or botanicals under clear or cream-colored builder gel create a romantic, nature-inspired design that feels both delicate and modern. Real dried flowers, rose petals, or fern leaves are encapsulated in the builder gel, creating a three-dimensional element that looks expensive and refined. On short squovals, the pressed flowers add visual interest without making the nails feel cluttered.
The Practical Side of Flower Inclusions
Working with real botanicals requires some planning. The flowers must be completely dry and flat, and they need to be sealed properly so they don’t deteriorate under the gel. The best approach is to create a layer of clear or cream builder gel, place the pressed flower while that layer is still slightly tacky (but not uncured), then seal it with another layer of builder gel on top.
Step-by-Step Inclusion Process
- Cure a thin base layer of builder gel or use a sticky layer that some builder gels have.
- Prepare your pressed flowers — they should be paper-thin and completely dry. You can press flowers yourself using parchment paper and heavy books, or purchase pre-pressed botanicals from craft suppliers.
- Using tweezers, place the flower carefully on the sticky layer before it fully cures.
- Seal immediately with another layer of clear or slightly tinted builder gel and cure thoroughly.
- This sealing layer is crucial — it prevents moisture from entering and keeps the flower vibrant.
Pro tip: If you’re not confident with real flowers, high-quality floral decals or dried flower confetti designed specifically for gel nails offer a similar aesthetic with more predictable results.
7. Deep Burgundy with Silver Chrome Accents
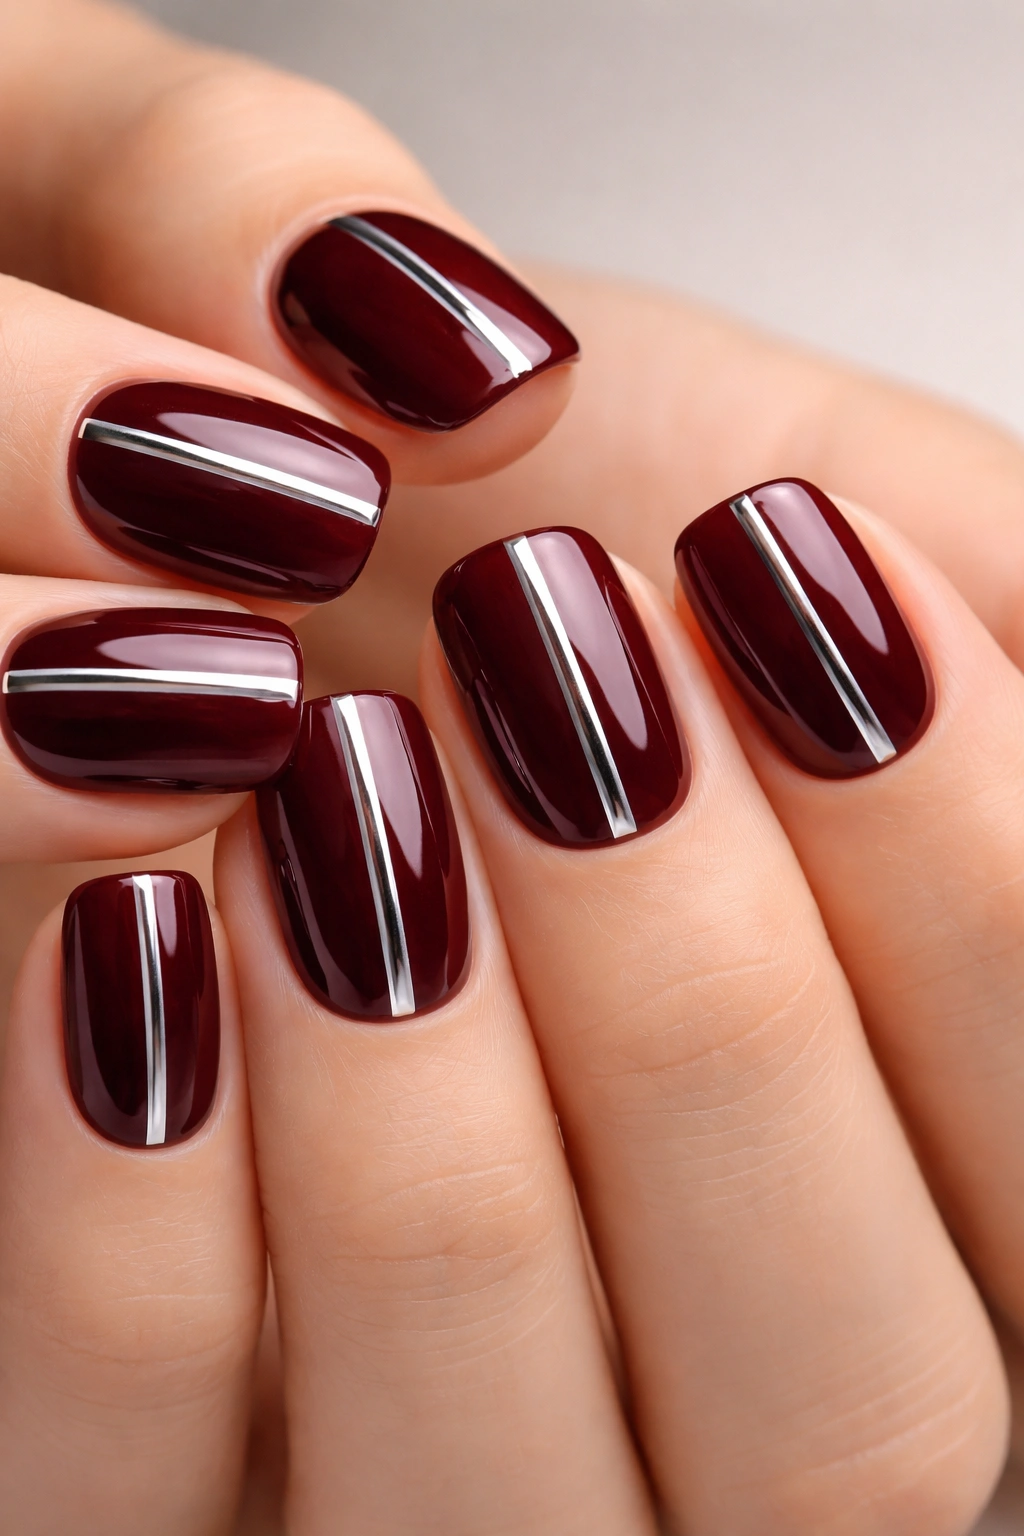
For a dramatic yet wearable design, deep burgundy builder gel paired with silver chrome creates a design that feels luxurious and bold. The burgundy base is dark enough to appear sophisticated rather than Halloween-themed, and the chrome accents — typically applied to one accent nail or as a thin stripe running down the center of each nail — catch the light and add sparkle without being over the top.
Understanding Chrome in Builder Gel
Chrome powder is a metallic pigment that creates a mirror-like, reflective finish when applied correctly. It’s not a builder gel on its own but a powder that gets pressed into uncured builder gel or applied over a sticky top coat. The application requires a light hand because a little chrome powder goes a long way — too much can look artificial.
Chrome Application Technique
- Apply your burgundy builder gel base and cure it completely.
- If you want a full chrome nail, apply a sticky top coat or a thin layer of clear builder gel.
- Using a dry brush or applicator, lightly press chrome powder into the tacky surface. Work in sections — pressing small amounts of powder rather than dumping it on.
- Buff away excess chrome powder and seal with a top coat.
- The result should be a smooth, metallic surface that looks intentional and polished.
Worth knowing: Chrome powder comes in different finishes — holographic chrome has rainbow reflections, while silver chrome is more mirror-like and neutral. For a burgundy base, silver chrome tends to look more sophisticated than the more playful holographic version.
8. Ballet Pink with Micro Glitter and Metallic Tips
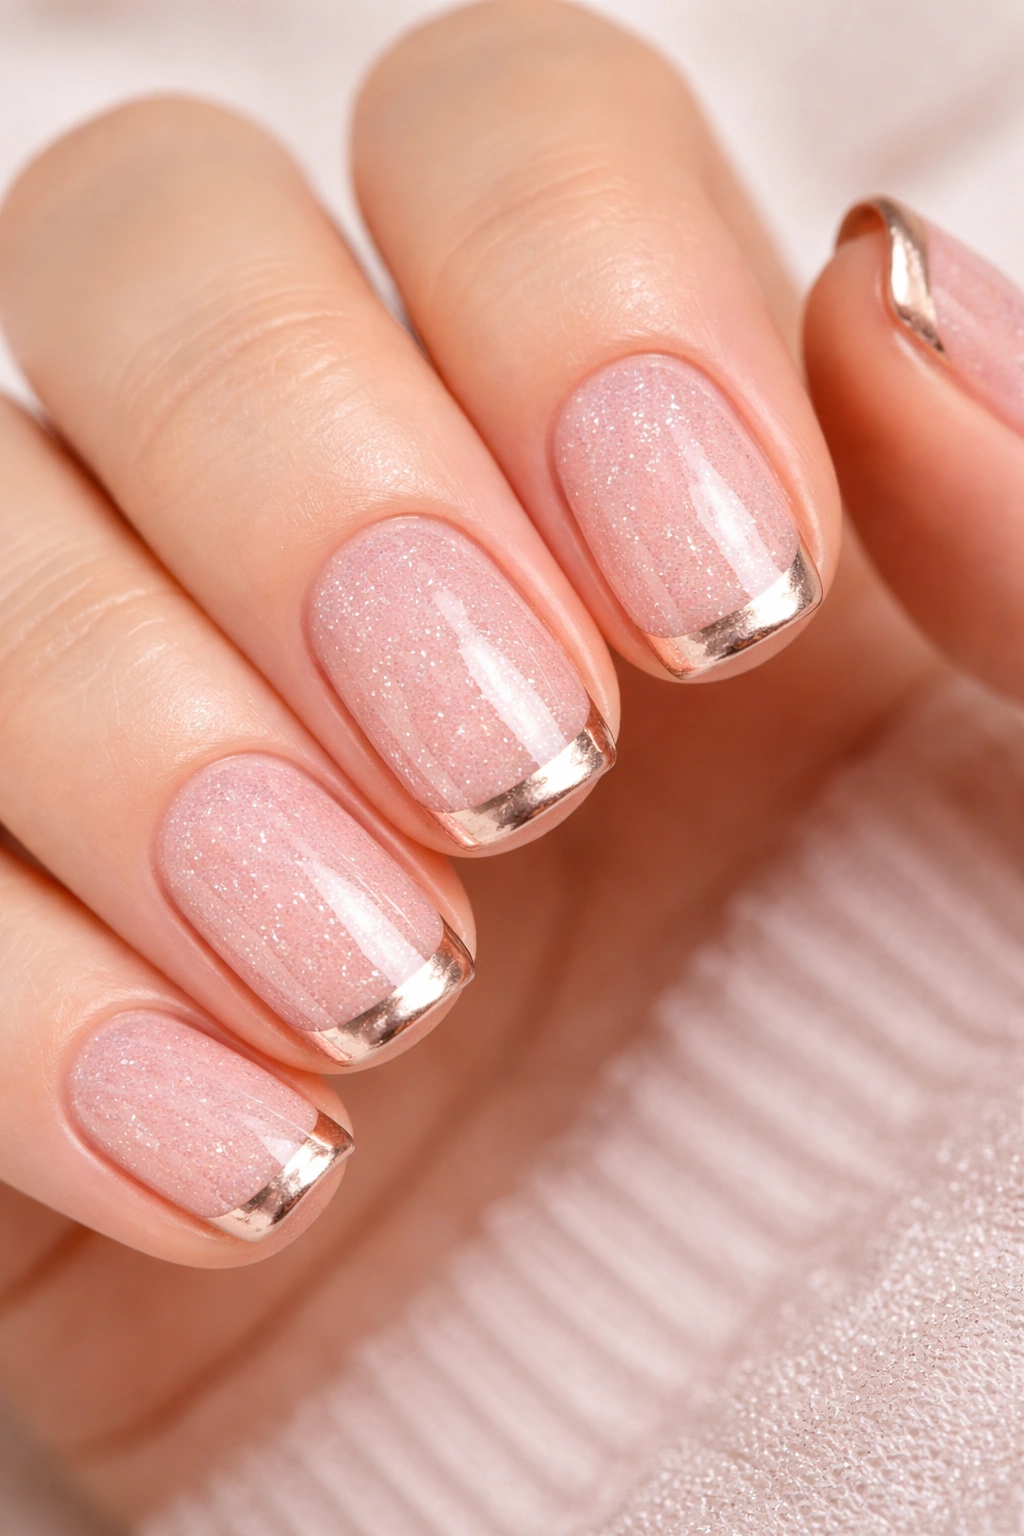
This design channels the elegance of ballet with a soft, romantic color palette. A ballet pink (warm, slightly muted pink — not hot pink) builder gel base is combined with barely-there micro glitter that catches the light subtly, and metallic tips in champagne or rose gold add a refined finishing touch. The overall effect is soft, feminine, and sophisticated — perfect for short squovals because the pale color makes the nails feel delicate.
The Micro Glitter Advantage
Micro glitter is finer than traditional glitter, which means it doesn’t create the chunky sparkle effect that can look dated. Instead, it catches light in a way that reads as luminous and sophisticated. For builder gel, you can either mix micro glitter into clear builder gel before application, or apply it to a sticky layer of gel.
Layering for the Perfect Effect
- Apply a base of pure ballet pink builder gel and cure.
- Create a second layer by mixing clear builder gel with micro glitter and applying it over the entire nail, or just concentrating it toward the tips for a subtle gradient.
- For the metallic tip, use a thin brush and either metallic builder gel or metallic gel polish in champagne or rose gold, creating a thin line at the very tip of the nail.
- Seal with a glossy top coat to amplify the sparkle and create a polished finish.
Pro tip: Champagne metallics look more sophisticated on cool-toned skin, while rose gold metallics flatter warm undertones. Choosing the right metallic tone makes the entire design feel more intentional and flattering to your specific coloring.
9. Forest Green with Gold Geometric Patterns
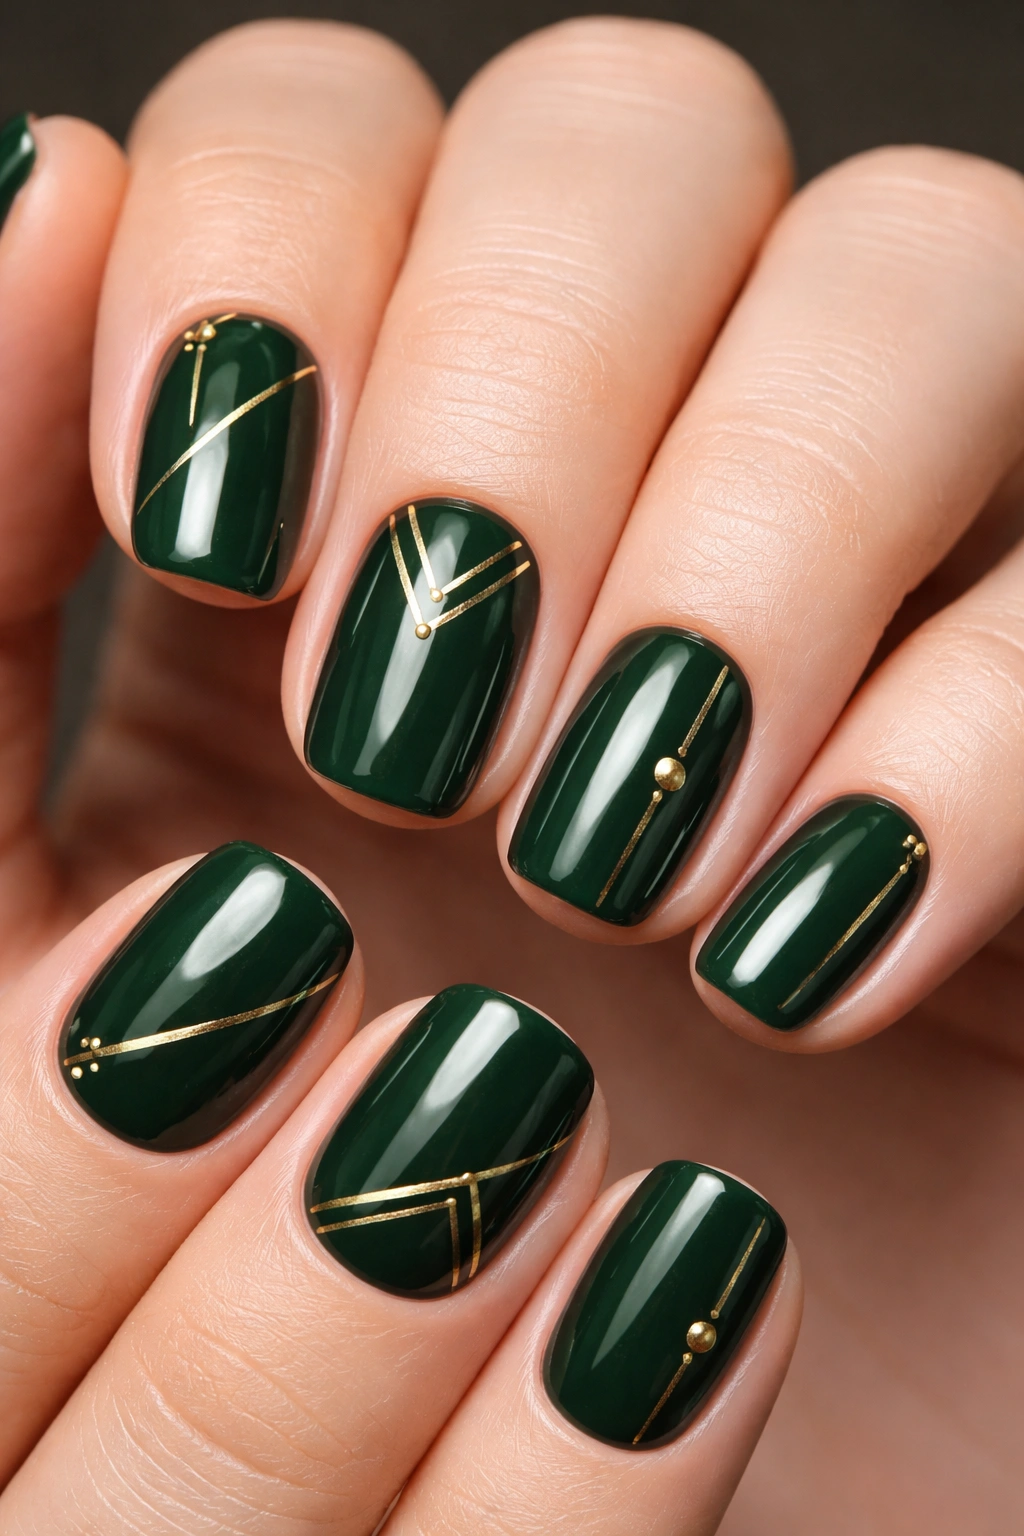
A rich, deep forest green builder gel provides a moody, sophisticated base for delicate gold geometric patterns. The patterns might be thin lines forming triangles, abstract angular shapes, or even tiny gold dots arranged in geometric formations. The combination of green and gold feels luxurious and unexpected, making this design memorable without being loud.
Geometric Design Planning
Planning geometric designs ahead of time prevents them from looking random or chaotic. You can either draw your design on a paper template first, or visualize it as simple repeating shapes — triangles, lines, or angular blocks. The key is balance: the geometric elements should feel intentionally placed, not scattered.
Application Method
- Apply forest green builder gel as your base and cure completely.
- Using a thin liner brush and gold builder gel or gel polish, draw your geometric pattern. Common patterns include: vertical lines down the center of each nail, small triangles at the tips, or abstract angular lines that don’t follow traditional shapes.
- Keep the gold elements relatively minimal — they should accent the green, not cover it.
- You can also use gold foil or gold leaf over a sticky top coat, then seal it with clear builder gel for a different texture and finish.
Design tip: If you’re worried about symmetry, asymmetrical geometric patterns actually look more modern and intentional than perfectly matched designs across all nails. Let one nail be the focal point with more detailed patterns, and keep the others simpler.
10. Nude Base with Pearlescent Rainbow Shift
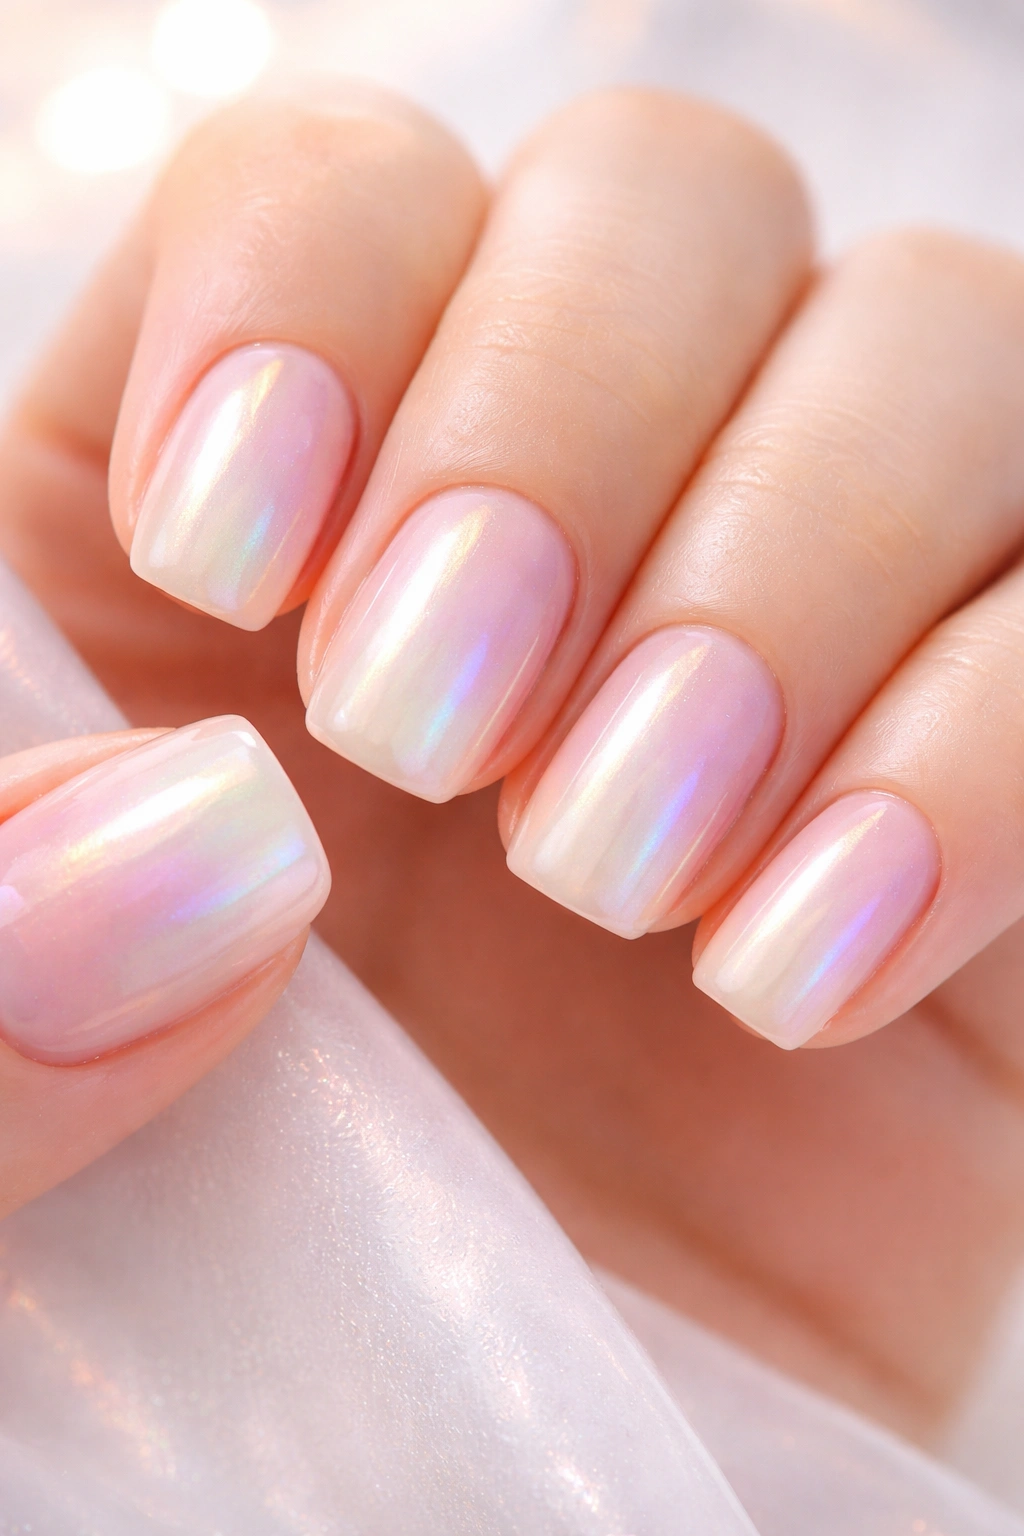
This design is the ultimate sophistication for those who want subtle color without obvious brightness. A neutral nude builder gel base is combined with pearlescent or shift pigments that create color-changing effects depending on the angle and light. The shift might show hints of pink, purple, blue, or green depending on how you move your hand — creating a magical, almost opalescent effect that feels modern and luxurious.
Understanding Pearlescent and Shift Pigments
Pearlescent and shift pigments are different from chrome. Rather than a mirror-like reflection, they create subtle color changes through light refraction. Pearlescent pigments glow with a subtle iridescence (often called “multichrome” when they shift between multiple colors), while shift pigments show more dramatic color changes. Both are suspended in clear or neutral-toned builder gel.
Creating the Shift Effect
- Apply a nude or neutral builder gel base and cure completely.
- Mix pearlescent or shift pigment into clear builder gel, or apply the pigment to a sticky top coat and seal it.
- The pigment distribution matters — you can create a gradient by concentrating more pigment toward the tips, or distribute it evenly for an all-over shift effect.
- Cure thoroughly, then seal with a high-shine top coat to maximize the light-catching properties.
- The shift effect is most visible in different lighting conditions, so photograph your nails in sunlight and indoor light to see the full range of color possibilities.
Insider knowledge: Pearlescent pigments show their best color shifts in natural sunlight and bright LED lighting. Indoor incandescent lighting tends to mute the effect, so if you’re mostly indoors, choose a shift pigment with colors that look beautiful in warm light as well.
Final Thoughts
Short squoval builder gel nails offer the perfect balance of practicality and beauty — the shape is strong enough for real life while the builder gel formula allows for professional, gallery-quality designs that last. Whether you’re drawn to minimalist elegance like the nude-and-gold look, classic drama like the red French, or more creative designs featuring colors and textures, the squoval shape flatters every aesthetic and hand shape.
The magic of builder gel lies in its versatility and durability. Unlike regular polish, builder gel builds structure into your nails, allowing technicians to create dimension, texture, and intricate details that remain flawless through wear. Choosing a design you genuinely love — rather than just what you see trending — means you’ll feel confident and excited every time you look at your hands.
When you’re sitting down for your appointment, bring photos of designs that inspire you, but also trust your technician’s expertise. A skilled nail artist can help you adapt these ideas to your hand shape, skin tone, and lifestyle, creating something that feels uniquely you. And if you’re creating these designs yourself, remember that builder gel has a learning curve — each time you work with it, you’ll develop a better feel for application, curing time, and the techniques that work best for your hands. Short squovals are incredibly forgiving to work with, making them an excellent choice as you’re building your skills.
