

Squoval nails have completely transformed how people think about nail shape — they’re that perfect hybrid that gives you the sophisticated edge of an almond while keeping the strength and durability of a square. Long squovals, specifically, hit that sweet spot where you get dramatic length without the fragility of stiletto nails, and they photograph incredibly well for anyone who’s documenting their manicure on their phone. The shape flatters virtually every hand shape, elongates your fingers naturally, and honestly, there’s something deeply satisfying about having that extra real estate to work with when designing a nail look.
What makes long squoval nails so versatile is that they work equally well with minimalist designs, intricate nail art, classic solids, and experimental textures. Whether you’re into chrome finishes, detailed hand-painted designs, delicate line work, or bold statement looks, the squoval canvas seems to make everything look more intentional and polished. The length gives you breathing room for detail without feeling cramped, and the shape keeps everything looking refined instead of chaotic.
If you’ve been scrolling through nail inspiration but keep coming back to the same five designs, it’s time to branch out. These twenty designs showcase everything from timeless elegance to bold trendsetting looks — each one is designed to give your nail technician clear direction (or to guide your own at-home application) and to last you way longer than a casual weekend manicure.
1. Nude Cream with Gold Geometric Lines
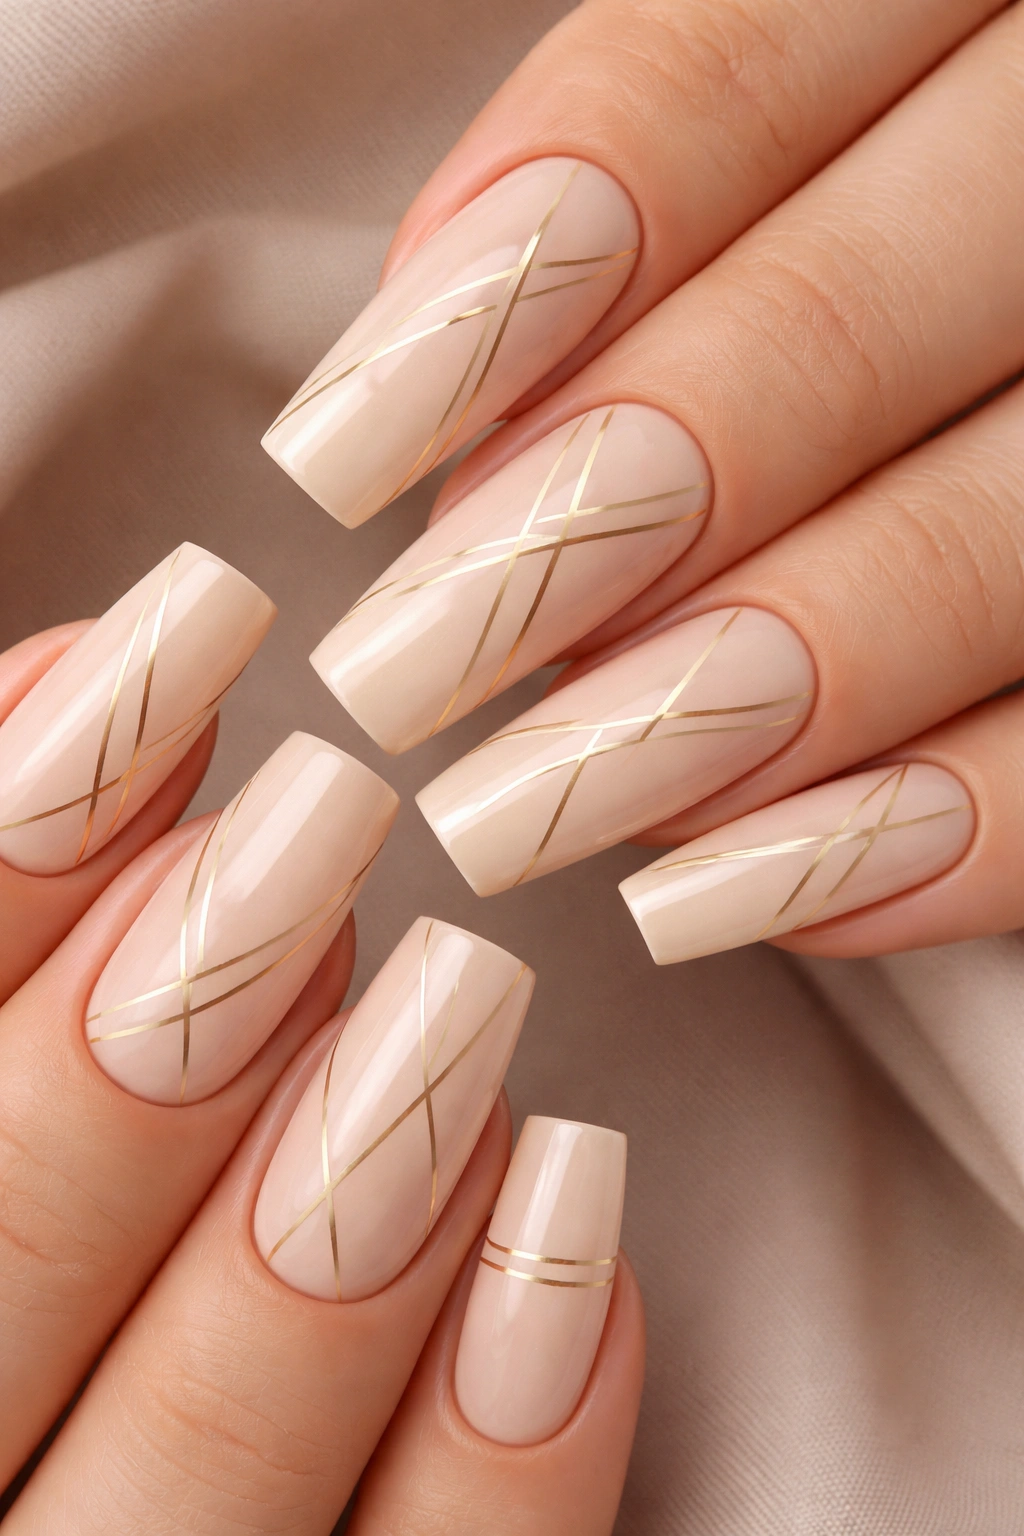
This design strips things back to pure sophistication using a warm, creamy nude as your base — think the color of your skin but just slightly warmer and slightly more polished. Over that, you’re painting thin, intentional gold lines that create geometric shapes: hexagons, triangles, or simple linear patterns running vertically down the center or horizontally across the nail.
Why This Design Works Beautifully
The geometric gold lines against creamy nude create a high-end, almost architectural quality that reads as both timeless and contemporary. The line work is clean enough that it doesn’t overwhelm the length of the squoval, but detailed enough that the design never feels boring. This is the kind of manicure you can wear to literally anything — business meetings, dinner dates, everyday life — and it elevates your whole presentation without screaming for attention.
How to Execute It Correctly
- Use a gel or high-quality polish base in a warm, peachy-nude tone (not too pink, not too yellow)
- Allow the base to fully cure if using gel
- Use a thin, precise brush or a striping brush with gold gel or polish to create clean, confident lines
- Gold should be opaque enough to pop against the nude without requiring three coats
- Seal with a glossy topcoat that makes the gold lines appear to sit on top of the nail surface
- Keep lines straight by using a steadying hand technique or a striping tape guide
Pro tip: This design is easier than it looks — even slightly imperfect geometric lines read as intentional modern art rather than mistakes, so don’t stress about absolute precision.
2. Soft Ombre Pink to White with Rhinestone Accent
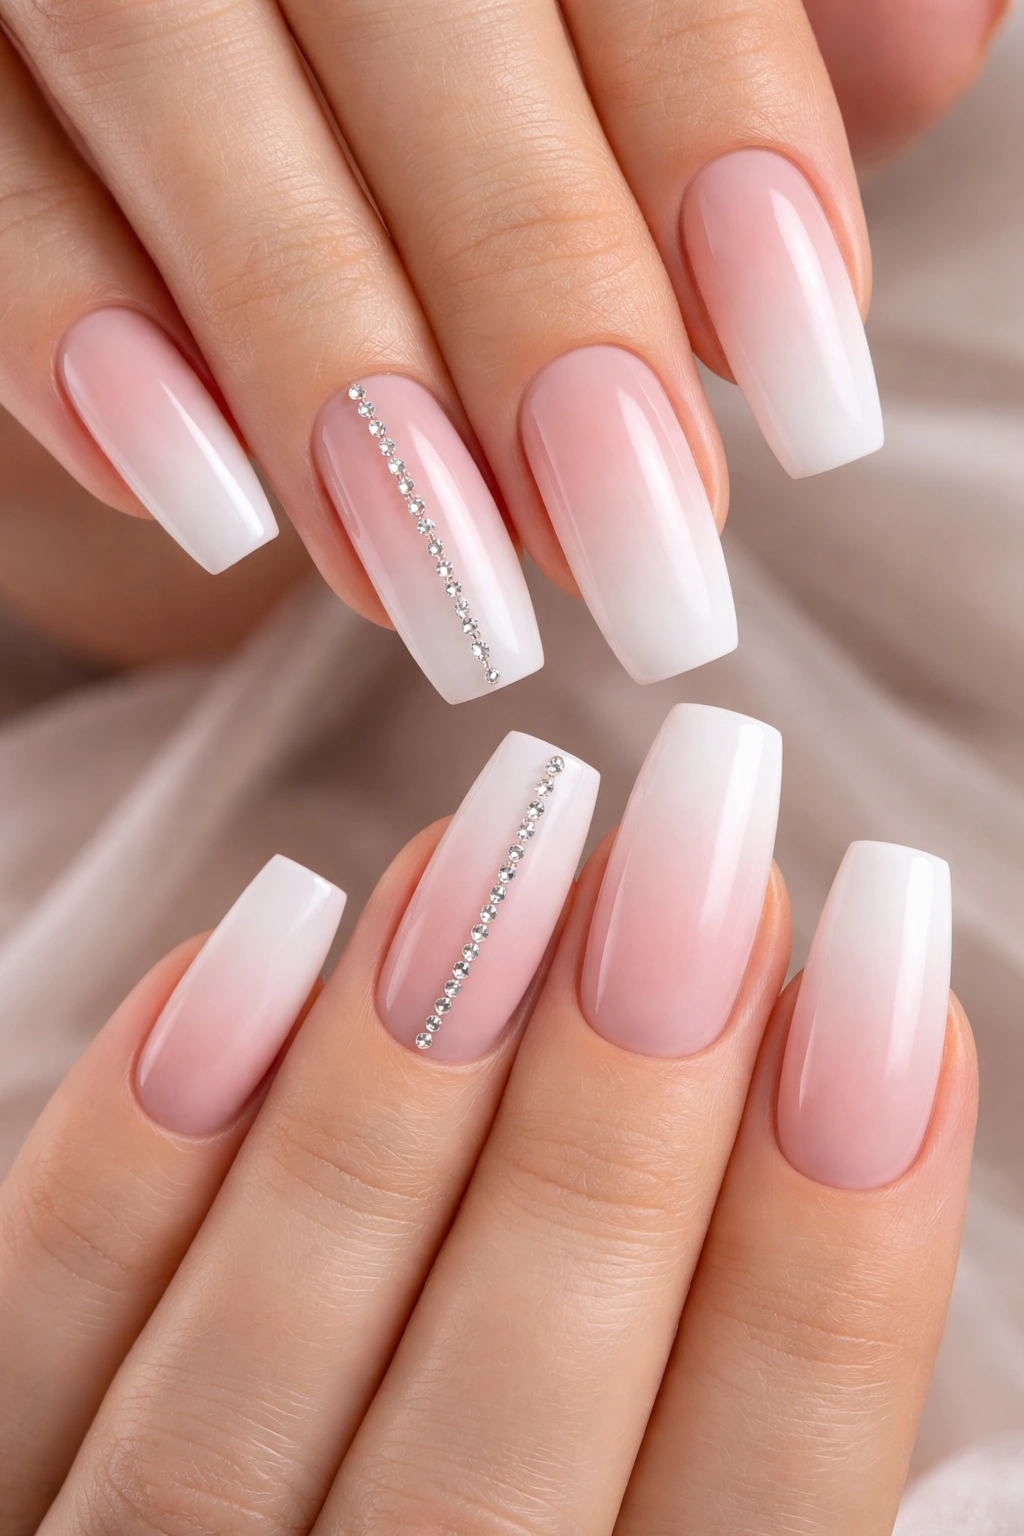
Create a gradient that melts from a soft blush pink at the cuticle to pure white at the tip, then add a single vertical line of delicate rhinestones down one nail per hand (usually the ring finger). The ombre effect should be completely seamless, like the color is naturally transitioning rather than two distinct colors butting up against each other.
The Appeal of This Soft Gradient Look
Soft ombre designs are deeply romantic and photograph with incredible dimension — the gradient creates the illusion of length while the rhinestones catch light and add just enough sparkle to feel special without being over-the-top. The blush-to-white gradient is the nail equivalent of a “my nails but better” look, and the rhinestone line adds that whisper of glamour that transforms it from everyday to special occasion.
Steps for Flawless Blending
- Apply a bright white polish to the entire nail first as a base for true color accuracy
- Apply blush pink to just the nail bed area (lower half)
- While both colors are still wet or slightly tacky, use a clean, damp sponge to dab where the two colors meet, blending the line upward toward the tip
- Build the ombre gradually — it’s easier to add more gradient than to dial back what you’ve done
- Once the ombre is set, apply rhinestones in a thin vertical line using tweezers and a tiny dot of gel or nail glue
- Seal everything with a glossy topcoat
Worth knowing: The quality of your rhinestones matters — cheap ones won’t reflect light the same way, so invest in glass or Swarovski crystals if you’re paying for the application.
3. Deep Burgundy Matte with Chrome Gold Tips
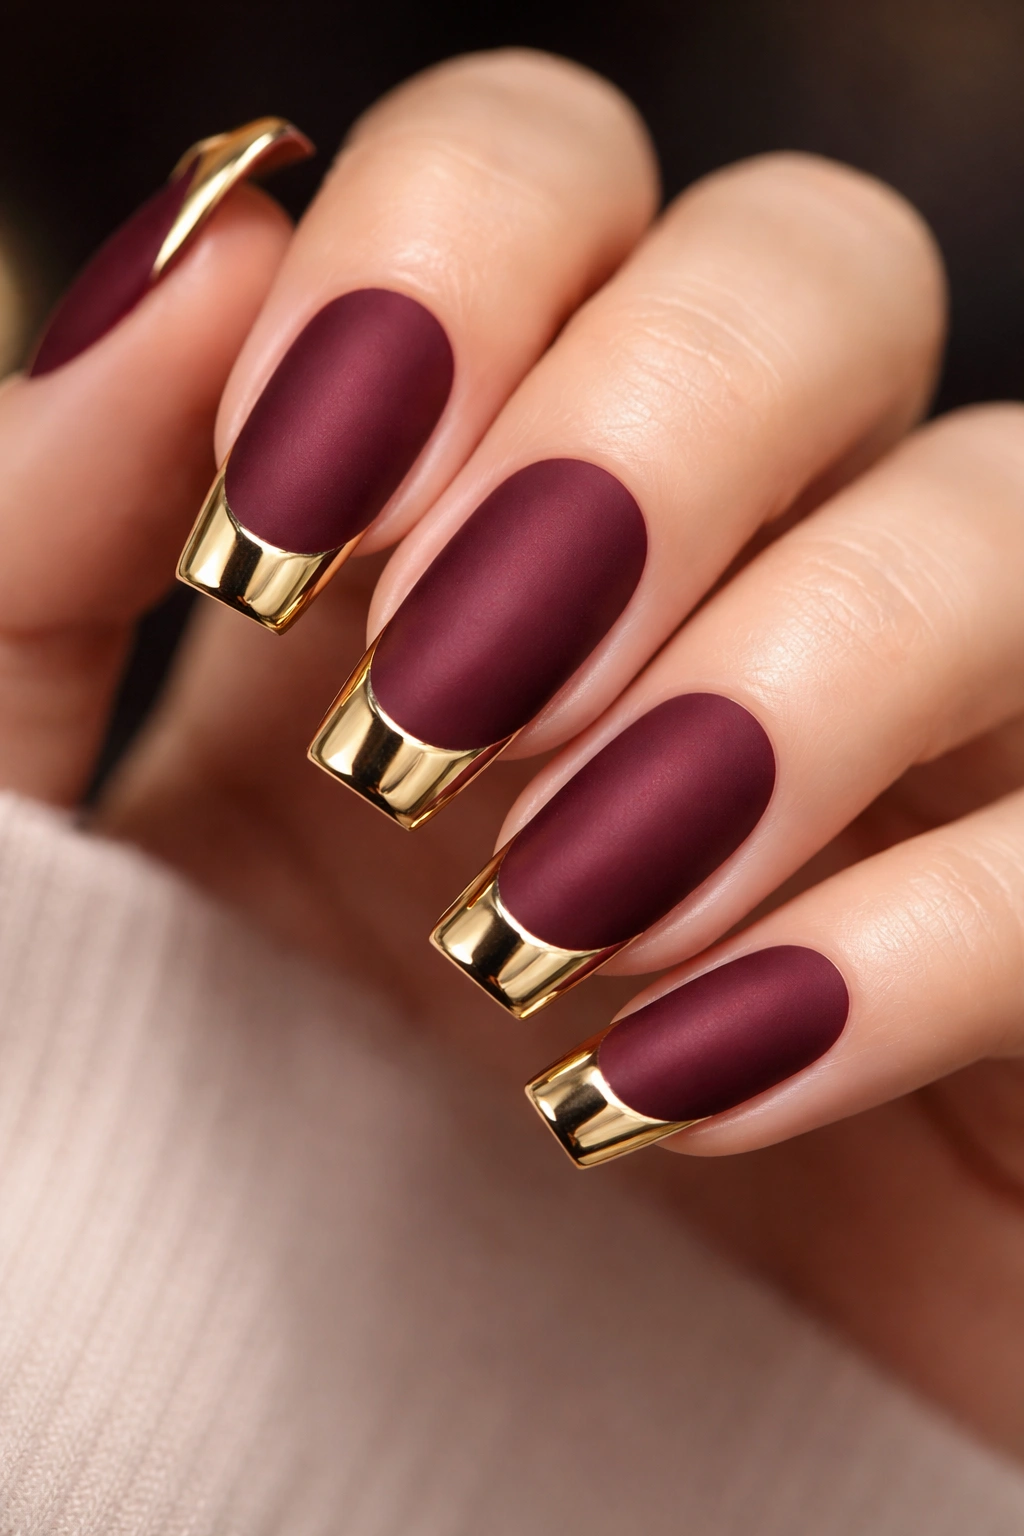
Start with a rich, vampy burgundy base in matte finish that covers the entire nail, then create a chrome or chrome-ombre effect on the tips in warm champagne gold. The contrast between the soft matte burgundy and the reflective metallic tips creates a look that’s equal parts moody and glamorous.
Why Matte + Chrome Is So Effective
Matte finishes are enjoying a renaissance in nail design because they soften everything they touch — they make bold colors feel less aggressive and add a velvety, luxe quality. Pairing that with metallic chrome tips creates visual interest and dimension without requiring complicated nail art. The two finishes working together also make the design feel intentional and editorial rather than accidental.
Application Breakdown
- Apply burgundy gel or polish in two coats to fully cover and cure if using gel
- Switch to a matte topcoat and cure to create the velvety finish
- Apply chrome powder to the tip area using a chrome brush, pressing it firmly into a gel base for maximum reflection
- Cure the chrome tips completely
- Apply a clear matte topcoat over the entire nail to seal everything uniformly
- The matte topcoat will slightly dull the chrome, so use a glossy topcoat only on the tips if you want maximum shine contrast
Pro tip: Burgundy and gold are a classic color pairing that never dates, so this design is genuinely something you’ll still love in five years.
4. Milky Nude with Delicate Rose Gold Leaf Details
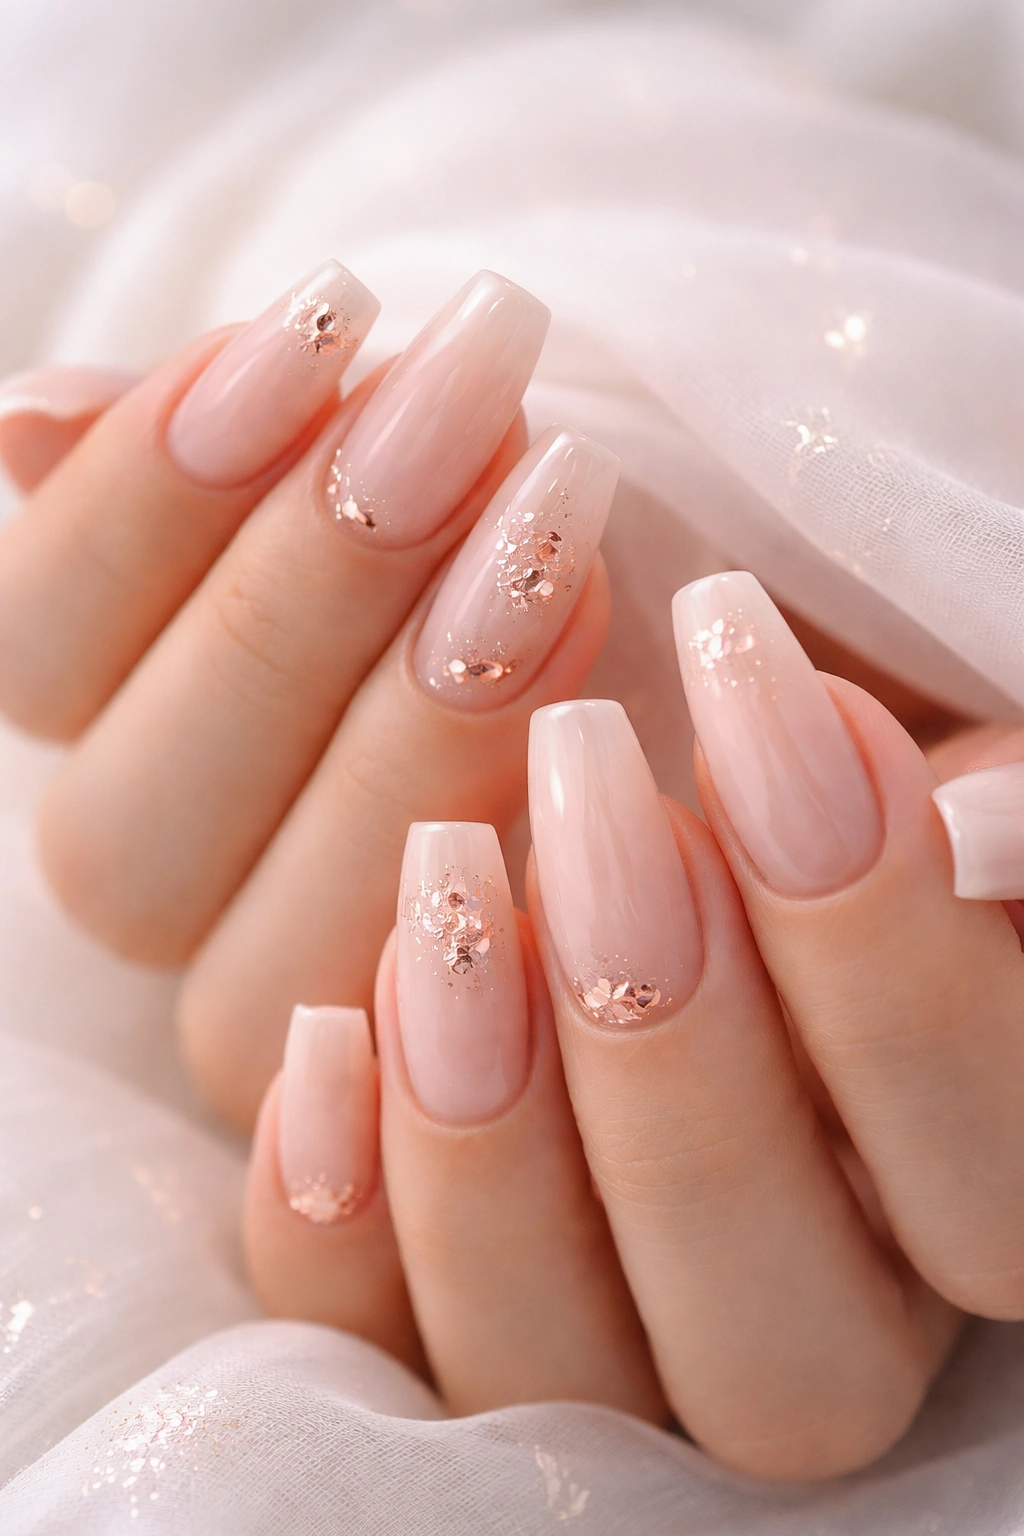
Use a soft, translucent milky nude polish as your base — the kind that looks almost sheer but creates a warm, glowing nude tone when applied in two coats. Then place tiny rose gold leaf flakes or fragments in clusters, typically near the cuticle area or scattered asymmetrically across a few nails. The overall effect is ethereal and organic rather than structured.
The Understated Elegance Factor
This design is pure luxury because it whispers instead of shouts. The milky nude alone is already a gorgeous, skin-tone-matching base, and the rose gold leaves add just enough texture and warmth to keep it from feeling flat. It reads as expensive and intentional because the restraint is part of the design — you’re not covering every millimeter with decoration, you’re strategically placing subtle elements.
Getting the Translucent Nude Right
- Milky nude polishes are somewhat difficult to find — look for sheer, warm nude gels rather than opaque ones
- Apply thin coats rather than thick ones to maintain the translucent quality
- Apply at least two coats to build color without making the polish opaque
- Once your nude base is cured (if using gel), apply a thin layer of sticky gel or a tacky base coat to the areas where you want to place the leaf details
- Press rose gold leaf fragments into the sticky layer using a dotting tool or tweezers
- Seal with a glossy or natural topcoat depending on how much shine you want
- If using regular polish, apply the leaves while the top coat is still slightly wet so they’ll adhere
Real talk: Rose gold leaf details show up best over milky or nude bases — they can disappear against darker polishes.
5. Black Base with White Negative Space Line Design
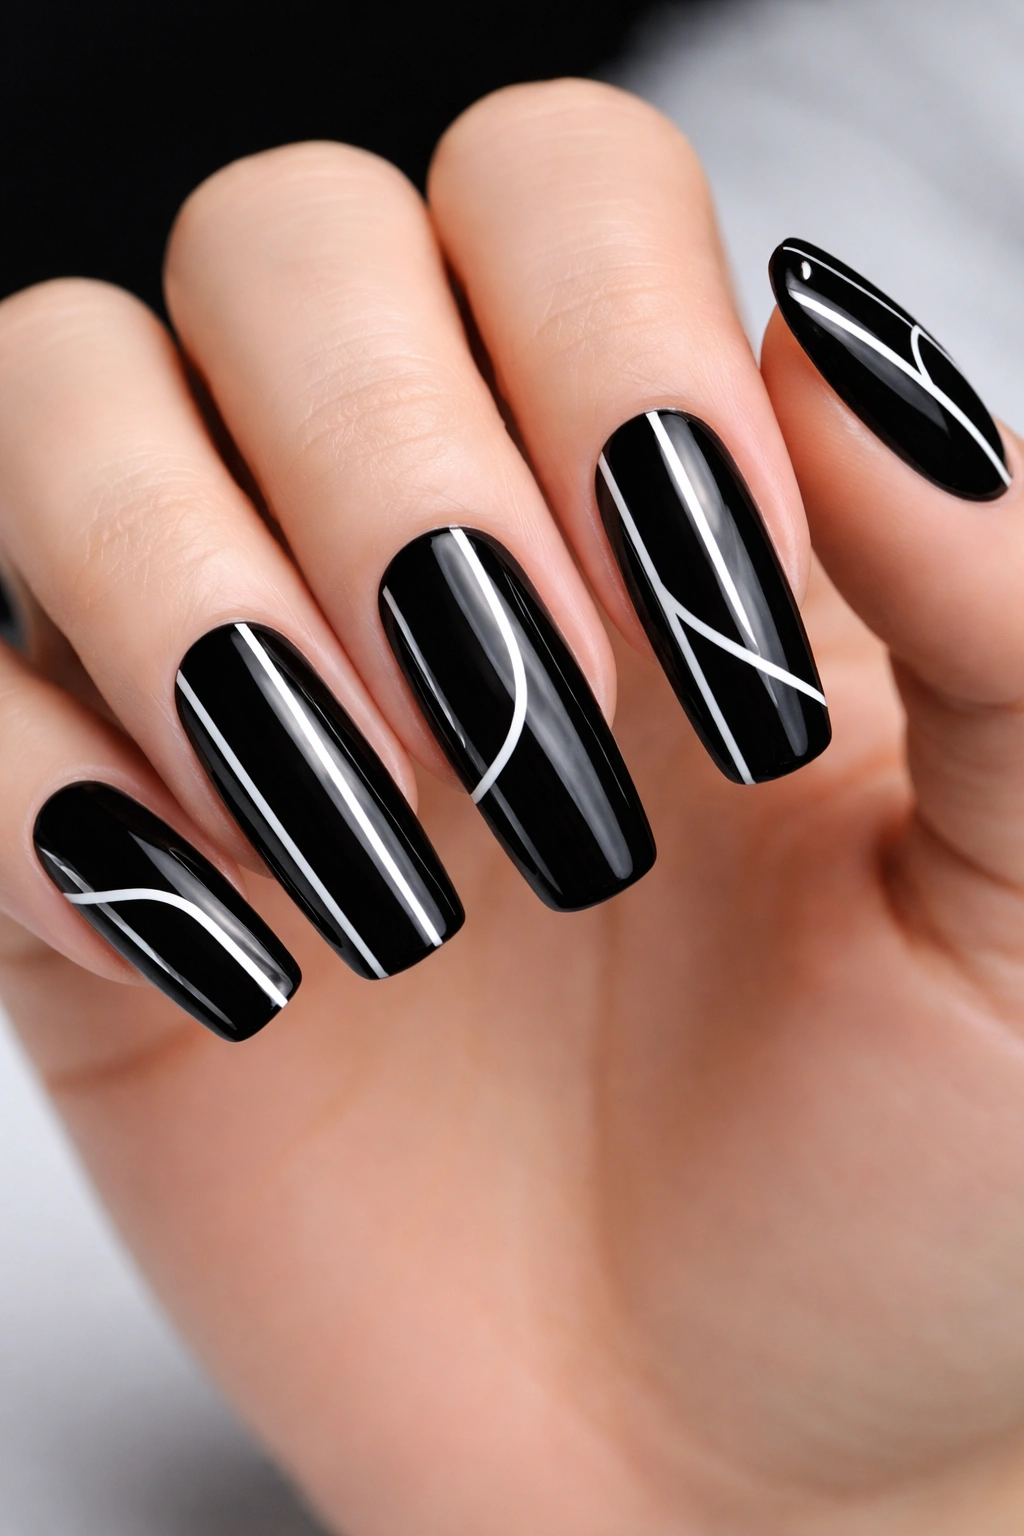
Create a striking design using pure black polish as your base, then paint clean, confident white lines that create negative space patterns. Think vertical lines from cuticle to tip, or geometric shapes where the white lines intersect to create triangles or rectangles that frame sections of the black polish underneath.
The Bold Graphic Quality This Brings
Black and white is arguably the most striking color contrast available in nail design, and negative space work (where the design element is the white line and the black is the background) reads as incredibly modern and editorial. The squoval shape elongates beautifully with vertical line work, and the high contrast ensures the design reads clearly from any distance.
Executing Clean Negative Space Lines
- Apply black gel or polish in two coats to ensure full, opaque coverage
- Cure if using gel and allow to fully dry if using regular polish
- Using a thin striping brush or detail brush with white polish or gel, paint thin, straight lines with a confident, fluid motion
- Straight lines read as intentional — slightly wobbly lines read as imperfect, so take your time and use hand-steadying techniques
- For geometric shapes, use striping tape or a nail art ruler to guide your lines and ensure they’re perfectly straight
- Apply white in thin coats rather than one thick coat to maintain clean edges
- Cure each color fully before applying the next layer to prevent colors from bleeding into each other
- Seal with a glossy topcoat for maximum contrast
Insider note: White polish can be tricky to work with because it’s often streaky — use a high-quality brand or apply extra-thin coats to prevent visible brushstrokes.
6. Gradient Blue to Purple with Scattered Pearls
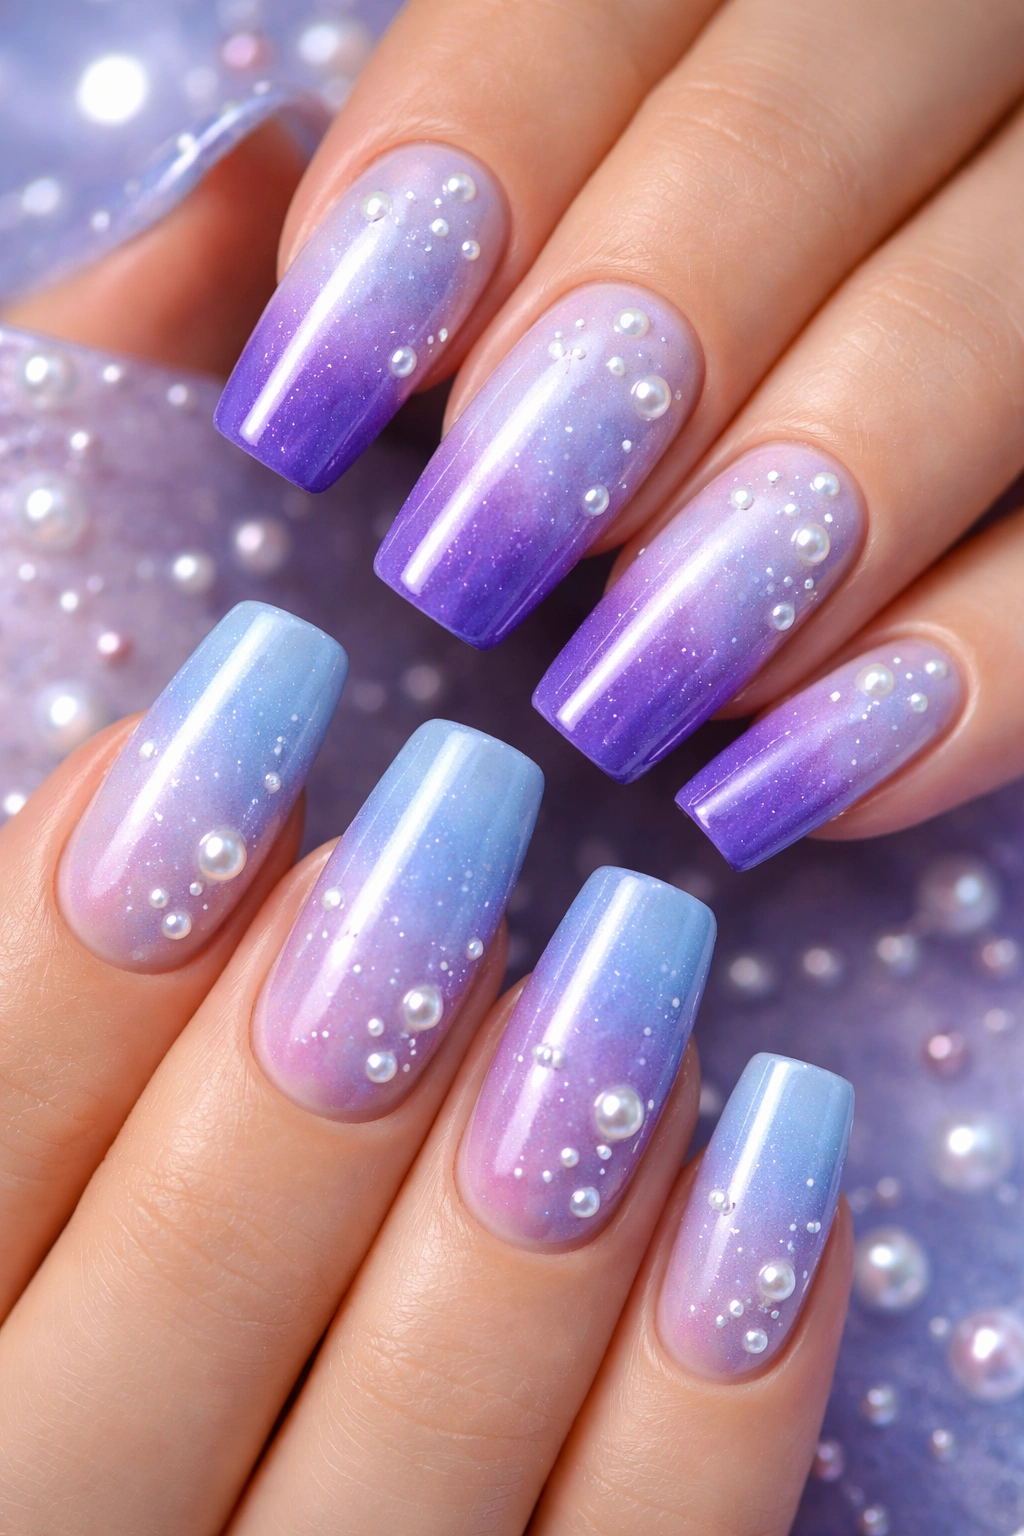
Build a stunning gradient from a cool, icy blue at the cuticle that melts into a rich royal or lavender purple at the tip. Once the gradient is set, scatter small faux pearls or pearl-effect nail studs across the surface — they should look like dewdrops or stars scattered across the color gradient rather than organized in rows.
Why This Design Feels Mystical and Luxe
The blue-to-purple gradient taps into something inherently sophisticated (jewel tones immediately read as expensive), and the pearl accents add dimension and texture without overwhelming the gradient itself. The scattered placement of pearls keeps it organic and dreamy rather than rigid. This design works especially well for anyone with cool undertones in their skin — the blue-to-purple gradient will make their skin glow by contrast.
Pearl Placement and Adhesion Technique
- Create your blue-to-purple gradient using the sponge-blending method, building the colors gradually
- Once your gradient is fully cured if using gel, apply a thin layer of gel or nail glue to the areas where you want to place pearls
- Use tweezers to pick up individual pearl studs or small faux pearls and place them strategically
- Pearl placement should feel organic — vary the spacing and don’t place them in obvious rows or patterns
- Press each pearl firmly into the adhesive to ensure it won’t pop off during regular use
- Seal around the pearls with a clear topcoat, being careful not to displace them
- Allow everything to fully cure before using your hands normally
Pro tip: Larger pearls (3-4mm) read better on long nails than tiny ones — they show up clearly and don’t get lost in the overall design.
7. Forest Green Velvet with Gold Foil Accent Nail
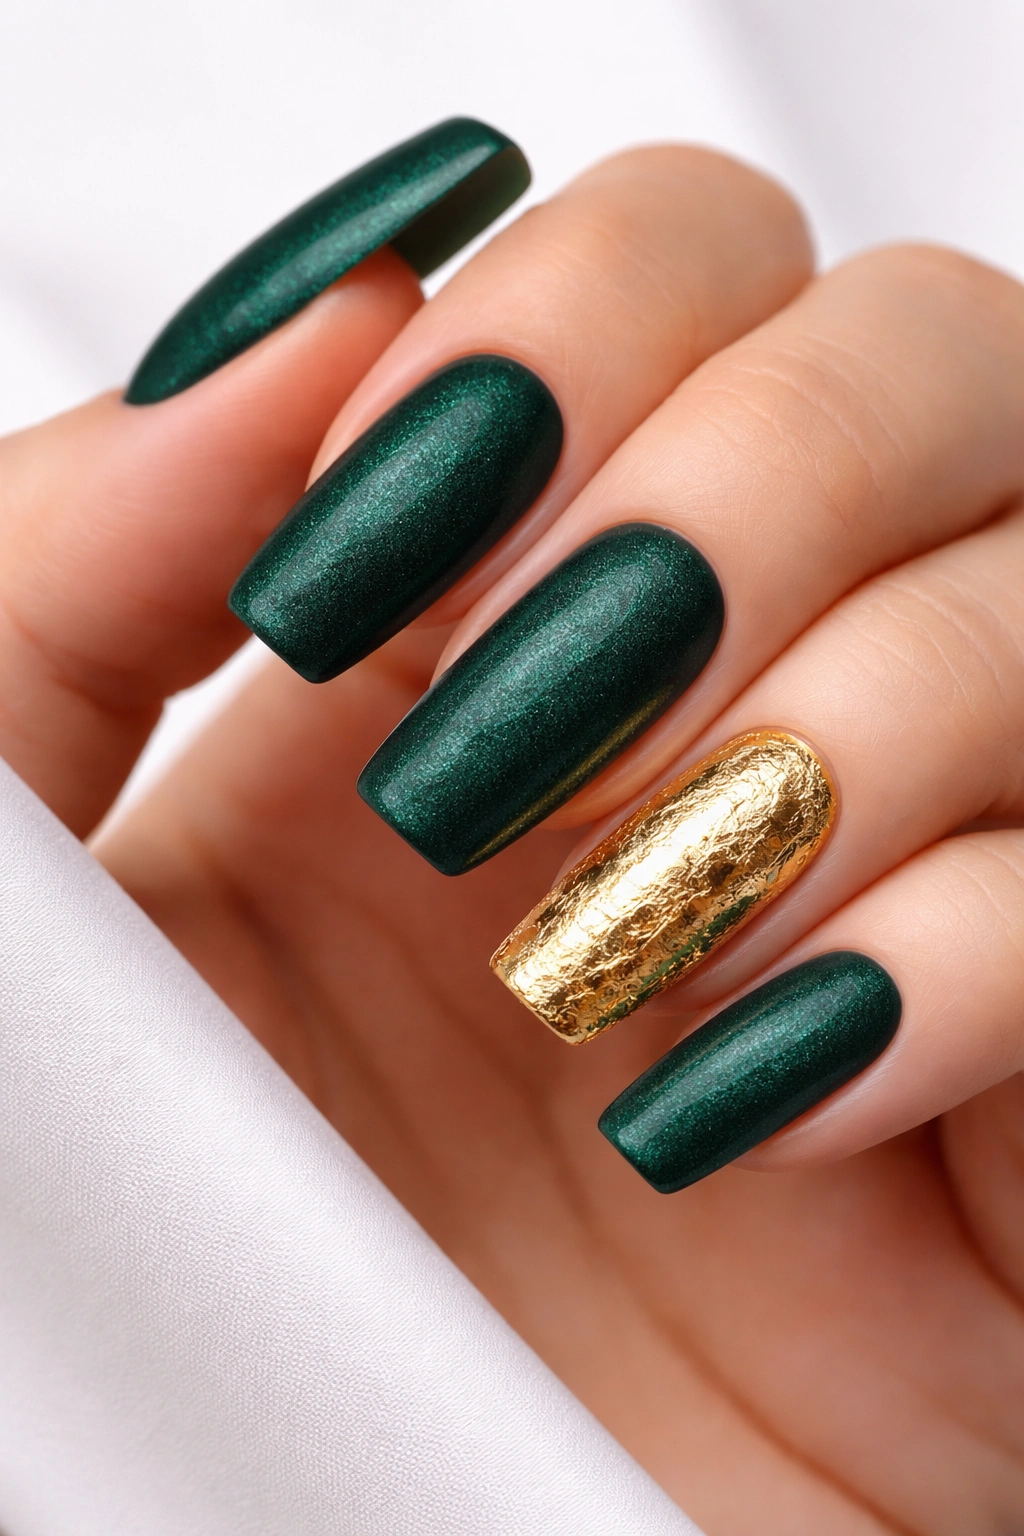
Paint most of your nails a rich forest green with a soft matte or velvet finish, then pick one accent nail (usually ring finger) and cover it completely with gold leaf or chrome foil. The gold nail will catch light dramatically while the matte green nails provide an elegant base that frames it beautifully.
The Drama-to-Elegance Ratio
This design walks a beautiful line between making a statement and maintaining sophistication. The forest green is rich enough to feel jewel-toned and luxurious but muted enough that the occasional gold accent nail never feels costume-y. The matte finish on most of your nails makes the chrome/foil accent even more striking by contrast — the difference in shine becomes part of the design itself.
Achieving the Velvet Effect
- Apply forest green gel or polish in two coats, ensuring full coverage
- Instead of a regular topcoat, apply a specialized matte topcoat or matte builder gel that creates the velvety, light-diffusing finish
- This matte finish should feel slightly soft to the touch (though it’s still sealed)
- For your accent nail, apply a thin layer of gel or dedicated foil adhesive
- Press gold leaf or chrome foil firmly onto the adhesive, pressing from multiple angles to ensure full coverage
- Gently remove the backing to reveal the reflective surface
- Seal the foil with a clear topcoat that won’t yellow it over time
- Matte nails and shiny foil nails should be sealed with separate topcoats to maintain the contrast
Worth knowing: Chrome foil stays more reflective longer than traditional gold leaf, which can tarnish or dull over time.
8. Soft Pink with White Diagonal Stripe and Negative Space Heart
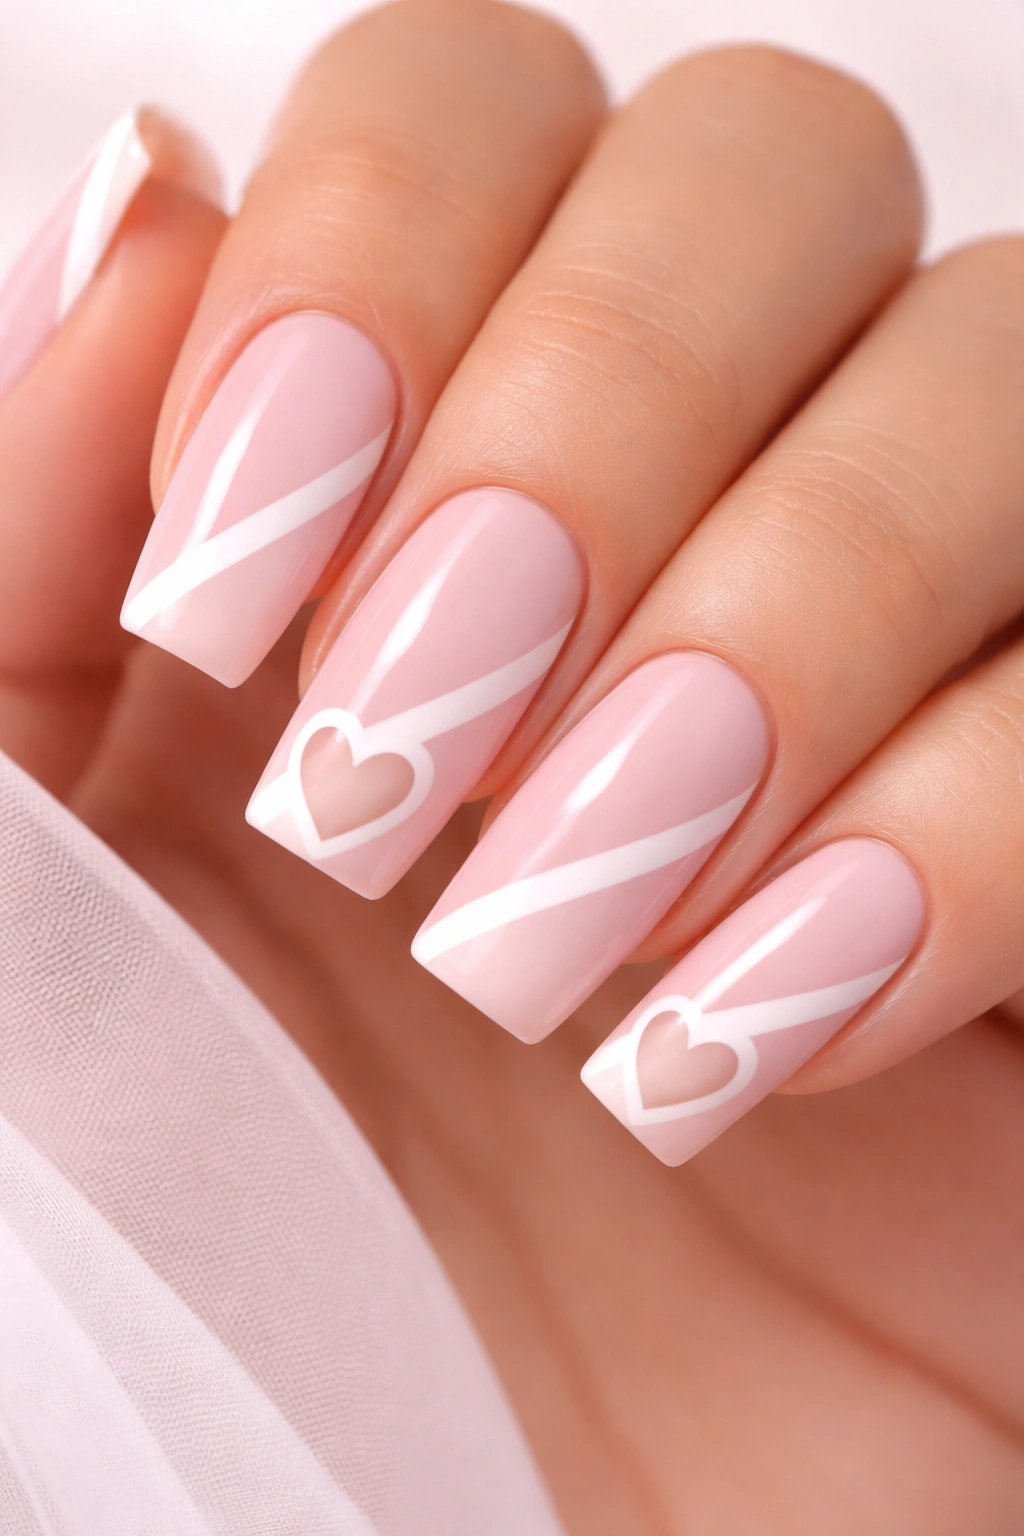
Use a warm, soft pink as your base color, then paint a clean white diagonal stripe running from the lower left to the upper right across the nail. At the tip, create a small negative space heart using white — essentially, remove the pink in a heart shape and let the nail underneath (or a white backing) show through.
Why This Simple Combination Works
Sometimes the most effective designs are the ones that combine a few simple elements and let them do the heavy lifting. The diagonal stripe adds movement and draws the eye across the length of the squoval, while the heart cutout at the tip adds just enough personality to keep it from feeling generic. It’s sweet but not saccharine, playful but polished.
Creating Perfect Negative Space Shapes
- Paint two coats of soft pink as your base
- Paint a clean diagonal white stripe using a striping brush or striping tape as a guide
- Cure the stripe fully if using gel
- For the negative space heart, you have two options: apply a white heart sticker or template under a clear topcoat, or carefully paint a white heart shape and then use a topcoat to seal it
- The easiest method is using heart-shaped nail stickers designed for negative space work
- Position the sticker precisely at the tip of the nail and press firmly to ensure no bubbles
- Apply topcoat carefully around the sticker to avoid displacing it
- The sticker will create a clean, defined negative space when removed
- Alternatively, freehand the heart using a thin brush and white polish, keeping the edges clean and defined
Real talk: Heart shapes are harder to freehand than they look — stickers remove the guesswork entirely.
9. Champagne Ombre with Smoke Gray Accents and Rhinestones
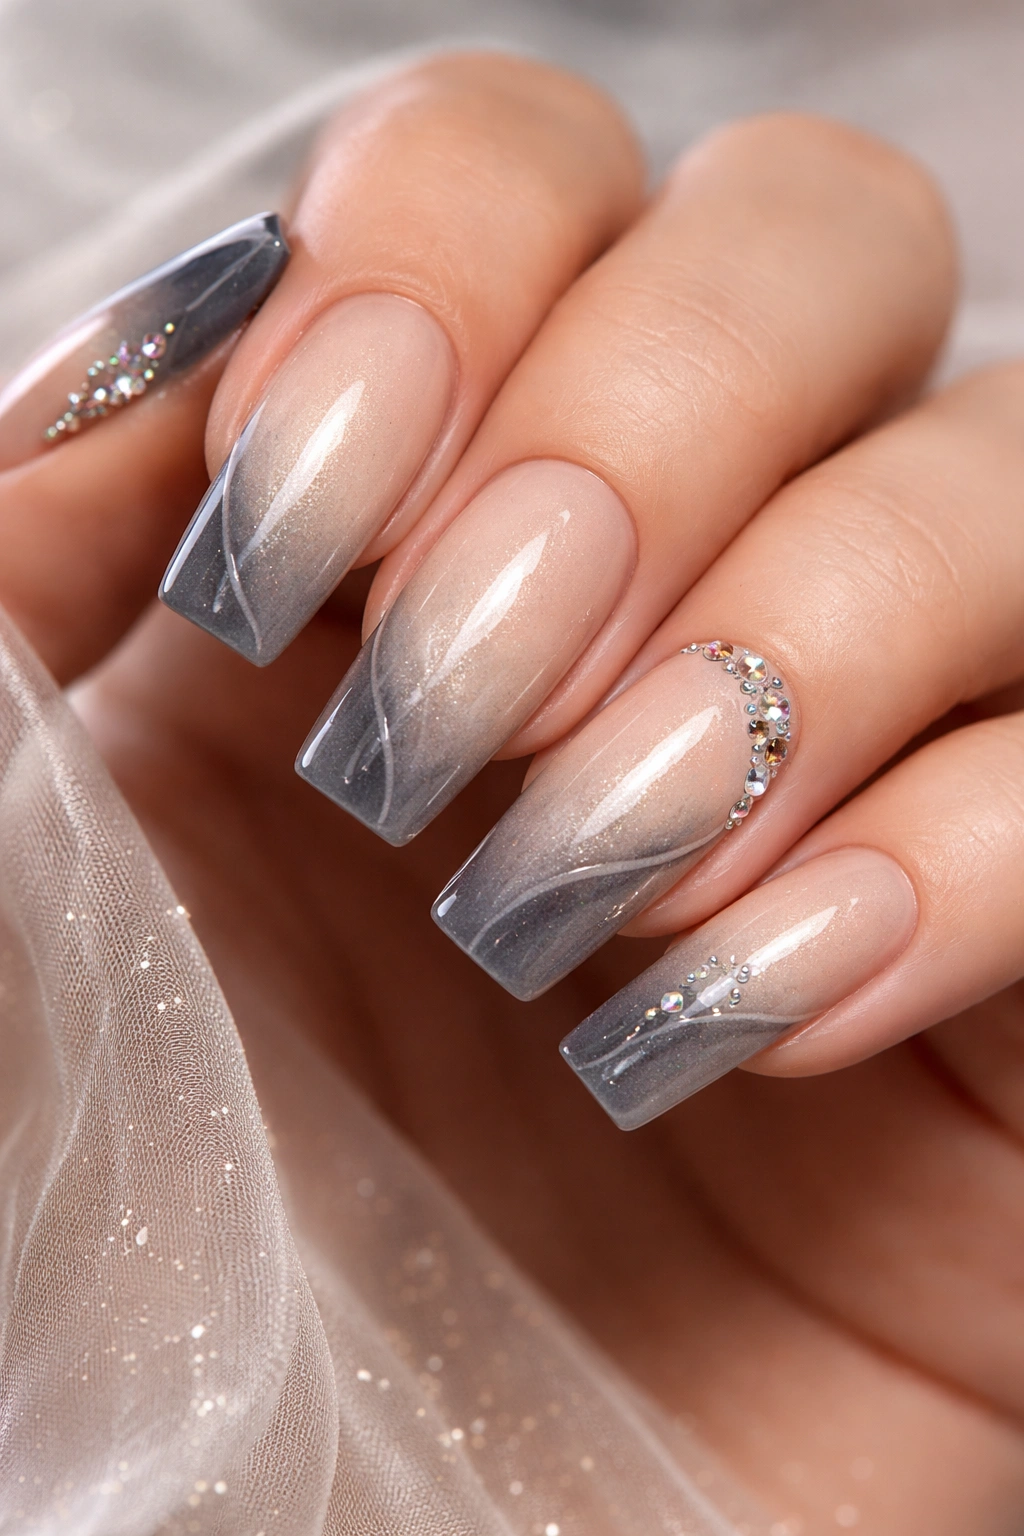
Create a delicate ombre that moves from champagne beige at the cuticle to soft, smoky gray at the tips. Along the free edge and perhaps a thin line down the sides, add a subtle smoke gray accent color, then place rhinestones strategically to catch light and add dimension.
The Sophisticated, Neutral Appeal
This design is pure class because it lives entirely in the neutral-to-warm spectrum, which means it goes with everything in your wardrobe and flatters all skin tones. The champagne-to-gray gradient feels upscale (it’s almost reminiscent of luxury home décor color palettes), and the rhinestone accents add just enough sparkle for evening wear without being too obvious for daytime.
Building This Delicate Ombre
- Start with a pale champagne or beige base applied to the entire nail
- Using a clean, slightly damp makeup sponge, begin applying soft gray polish to just the tip area
- Work the gray upward very gradually, blending as you go, creating a soft fade rather than a harsh line
- Build the gray opacity gradually — it’s easier to add more than to tone down what you’ve done
- The transition zone should be fuzzy and blended, not a clear dividing line
- Once you’re happy with the ombre, apply a glossy topcoat to seal it
- Add small rhinestones along the free edge using tweezers and a tiny amount of gel or adhesive
- Seal the rhinestones with another layer of topcoat, being careful not to move them
Pro tip: The quality of your rhinestones determines how much this design costs to create — invest in real Swarovski crystals for maximum sparkle and longevity.
10. Deep Plum with Silver Geometric Line Work and Matte Finish
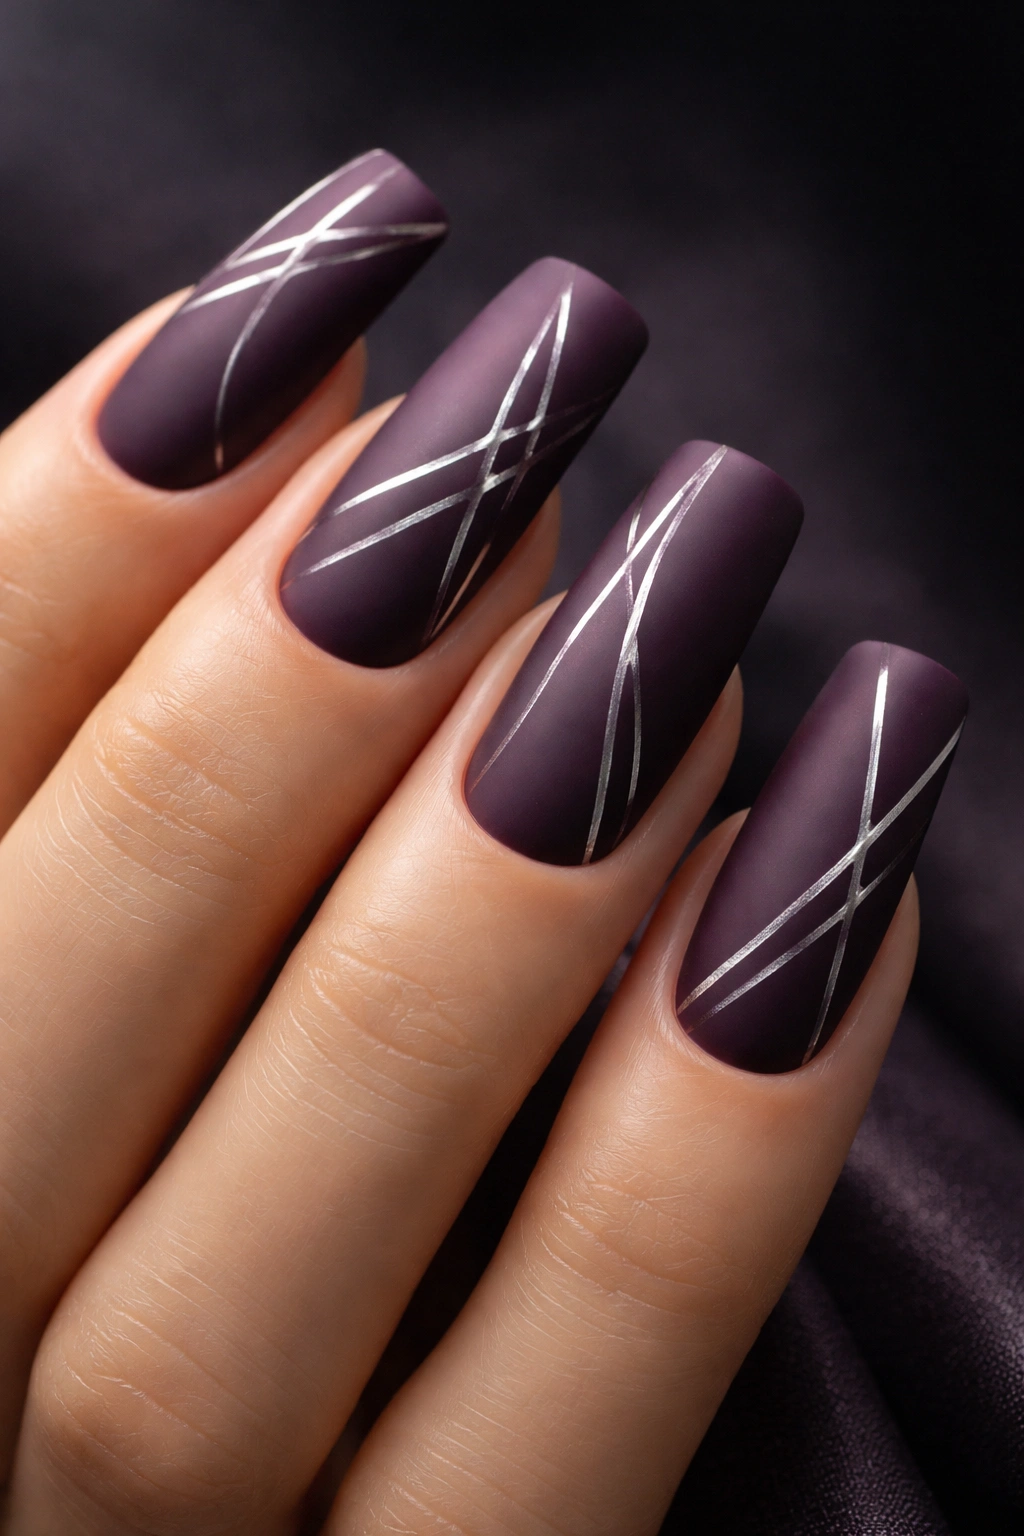
Choose a deep, jewel-toned plum that reads as both moody and elegant, apply it in matte finish, then add intricate silver geometric line work using thin lines that create abstract patterns. Think interconnected hexagons, triangular patterns, or angular designs that use the length of the squoval as part of the overall composition.
The Editorial, High-Fashion Quality
Deep jewel tones with metallic line work is the language of luxury nail design — it’s what you see in high-end fashion editorials and on red carpets. The matte plum creates a sophisticated base that makes the silver lines pop without overwhelming, and the geometric patterns feel intentional and contemporary rather than dated.
Precision Line Work Technique
- Apply plum polish in two coats and allow to dry completely
- Apply a matte topcoat and cure if using gel — this creates your finished base that you’ll be working over
- Using a thin striping brush and silver gel or polish, begin painting your geometric line pattern
- Geometric line work requires confidence and a steady hand — paint quickly with fluid motions rather than slowly and carefully, as hesitation shows
- Use striping tape or guides to help maintain straight lines if that makes you more confident
- Build your pattern gradually, stepping back frequently to check balance and spacing
- Once all your line work is complete and cured, seal with a clear topcoat to protect the silver and add shine just to the metallic details
- The matte base will contrast beautifully with the slightly shinier topcoat over the silver lines
Insider note: Geometric line work looks more impressive than it actually is — most people overestimate the difficulty because they’re intimidated by the precision required.
11. White Base with Hand-Painted Black Ink Floral Design
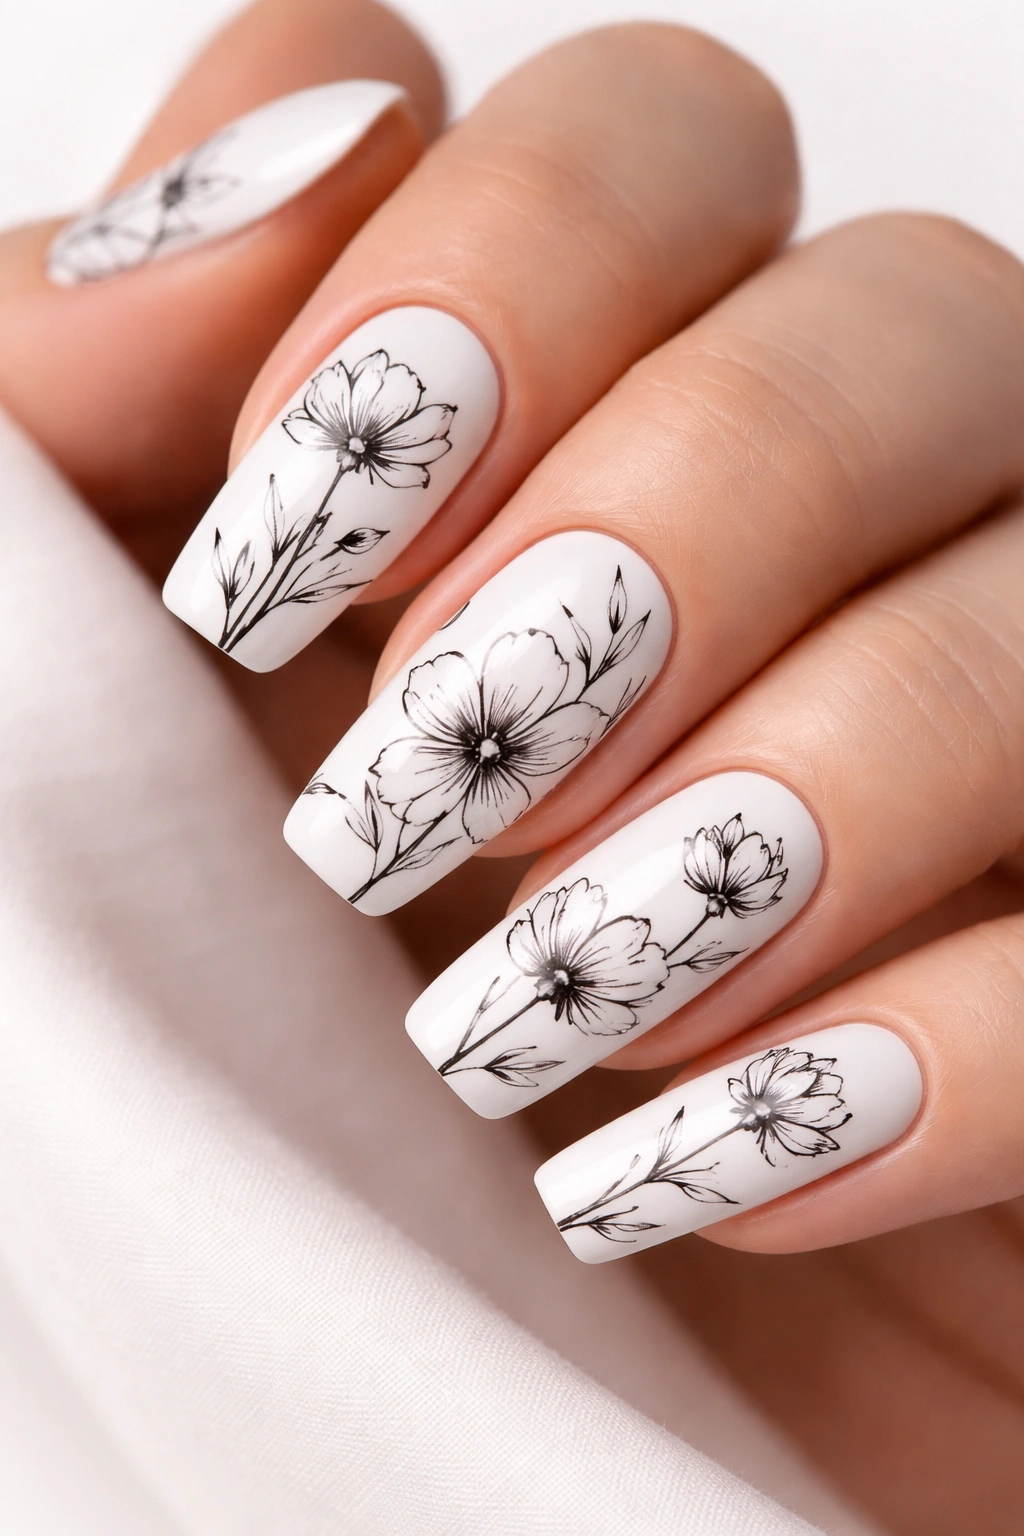
Start with a clean white base as your canvas, then paint delicate black ink floral designs — think minimalist flowers with thin stems and leaves, or abstract botanical elements. The flowers should look hand-drawn and organic rather than perfectly symmetrical or stamped-looking, with black ink appearing to flow across the white surface.
The Artistic, Gallery-Quality Appeal
This design reads as genuinely artistic because the hand-painted quality is part of the aesthetic. The white-and-black color combo is timeless and works with everything, while the botanical subject matter adds personality and warmth. The beauty of hand-painted florals is that slight imperfections actually enhance the artisanal quality — perfect symmetry would feel less authentic.
Hand-Painting Florals That Actually Look Good
- Apply white gel or polish in two coats and cure completely if using gel
- Thin your black polish or gel slightly with a mixing medium so it flows more smoothly
- Use a very thin detail brush (size 0 or smaller) with black polish or gel
- Start with the main flower shape — petals radiating from a center point
- Add a thin stem using a single confident brushstroke from bottom to top
- Add small leaves off the stem using two-stroke leaf shapes (two brushstrokes that meet at a point)
- Space your flowers asymmetrically across the nail — don’t center them or space them evenly
- Use varying sizes of flowers to create visual interest
- Once your design is complete and dry, apply a clear topcoat to seal and protect your artwork
Pro tip: If hand-painting feels intimidating, use floral nail stickers or temporary tattoos as a starting point, then seal them with topcoat.
12. Soft Nude with Copper Gradient and Metallic Dust
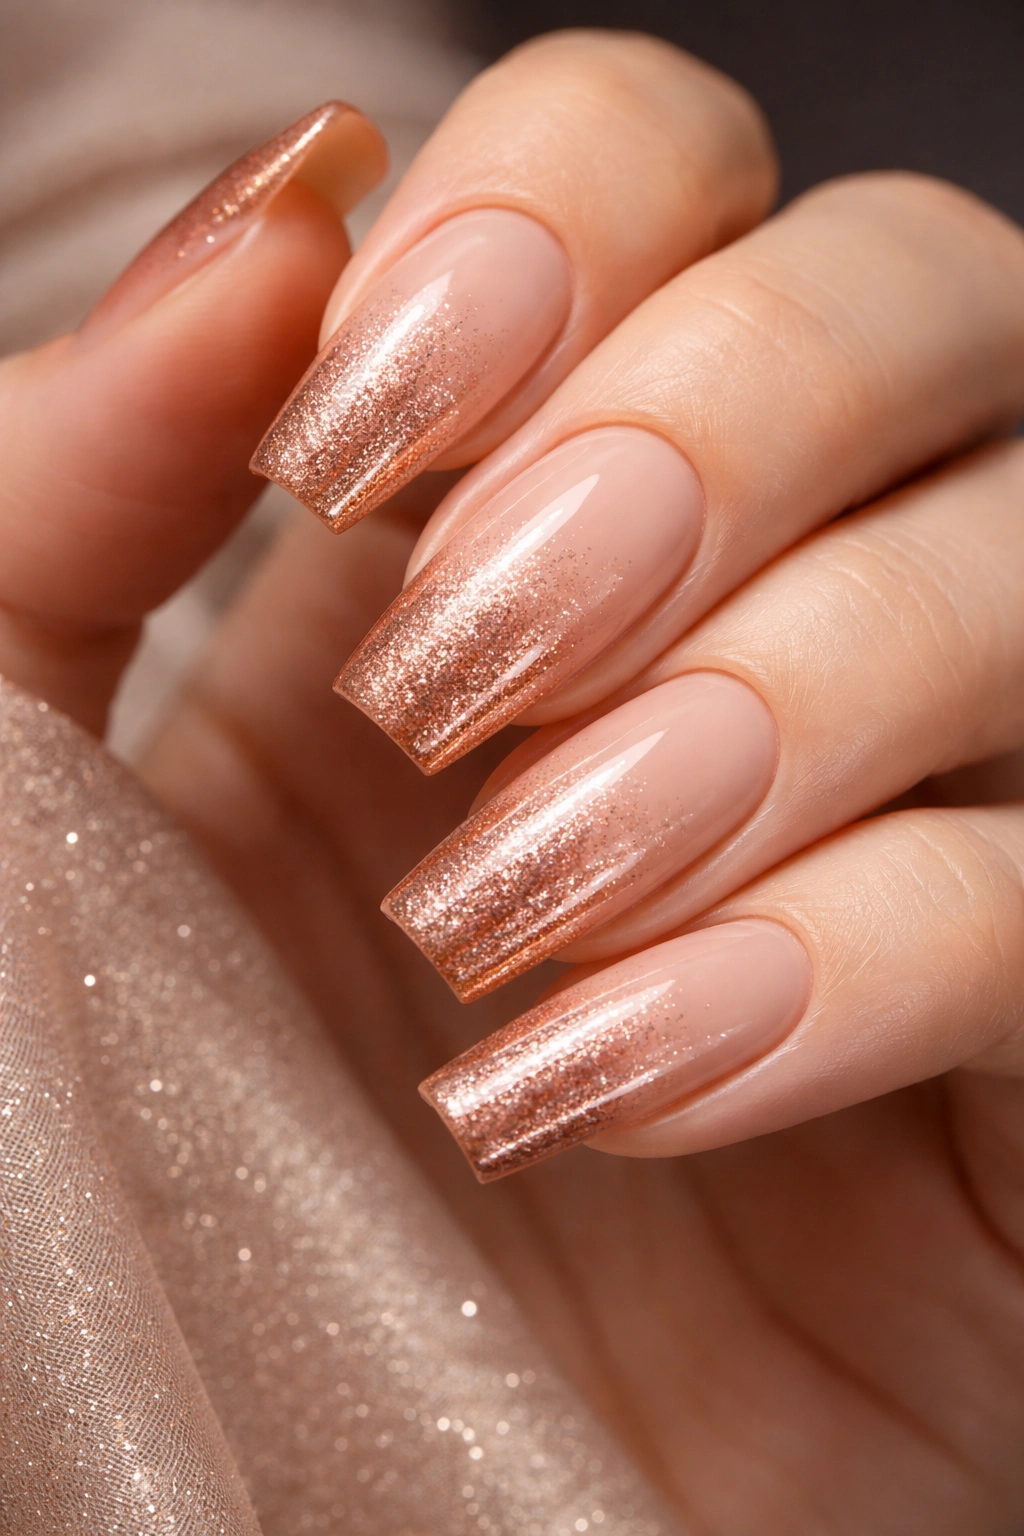
Create a barely-there nude base, then add a subtle copper gradient that increases in intensity toward the tip. The final touch is a dusting of copper or rose gold shimmer powder applied to the entire nail, creating a soft, luminous quality that makes the nail glow from within.
Why Copper Dust Feels Impossibly Luxe
Shimmer dust or chrome powder is one of those ingredients that instantly makes a manicure look expensive and intentional. The dust particles catch light from every angle, creating dimension and glow that regular polish can’t achieve. Paired with a gradient base, it adds depth and movement without requiring complex nail art.
Applying Shimmer Dust Without Mess
- Apply soft nude base in one or two coats — it should be sheer enough that you can see through it slightly
- Create a subtle copper gradient using a sponging method, building the copper concentration toward the tip
- Allow your base and gradient to cure fully if using gel
- Apply a thin layer of sticky topcoat or a dedicated dust base to the entire nail
- Using a small, fluffy brush, apply copper or rose gold shimmer dust to the entire nail surface, pressing firmly to embed the particles
- Brush away excess powder with a clean, soft brush
- Apply a clear topcoat to seal all the dust particles and create a smooth, sealed surface
- The sealed dust should feel smooth to the touch, not grainy or scratchy
Worth knowing: Cheaper shimmer dusts can look chalky or gray — invest in quality brands where the particles are truly reflective.
13. Burgundy Wine with Gold Filigree and Matte Finish
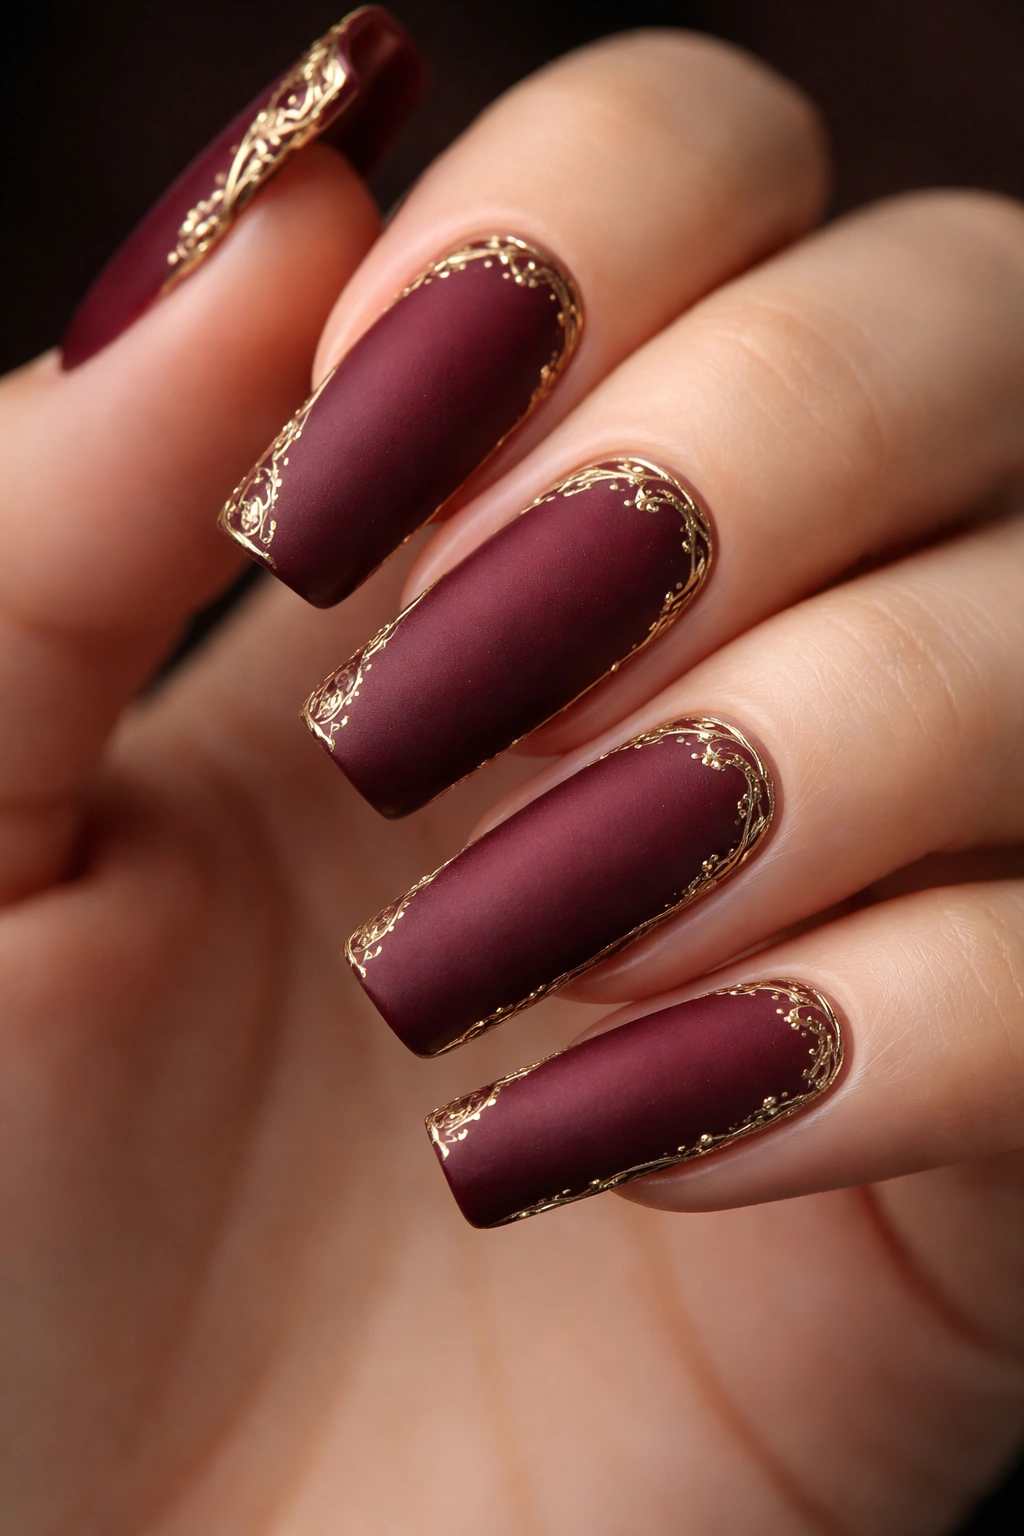
Paint a gorgeous burgundy wine base in matte finish, then add delicate gold filigree designs — intricate, lace-like patterns that look like they’re been etched into the nail surface. The filigree should be thin, detailed, and concentrated along the sides or in a frame around the edges rather than covering the entire nail.
The Vintage Luxury Feel
Filigree patterns tap into something deeply elegant and timeless — they’re reminiscent of fine jewelry and antique design. On a burgundy wine base with matte finish, they feel incredibly luxurious and special occasion-worthy. The restraint of the design (it’s not covering the whole nail) is part of what makes it feel so refined.
Creating Fine Filigree Detail
- Apply burgundy wine gel or polish in two coats and cure
- Apply a matte topcoat to create the velvety base — cure if using gel
- Using a very thin detail brush with gold gel, paint your filigree patterns
- Filigree typically features symmetrical, lace-like curving lines with small flourishes and details
- Paint slowly and deliberately, allowing your hand to flow with the curve of the nail
- Consider creating a vertical filigree stripe down the center, or frame the sides with filigree patterns
- Allow your gold filigree to cure fully before adding a final topcoat
- Seal with a clear or matte topcoat that won’t alter the appearance of your careful design work
- The contrast between matte burgundy and shiny gold is essential to this design’s impact
Pro tip: If intricate filigree feels too ambitious, use lace nail stickers as a starting point and seal them with topcoat.
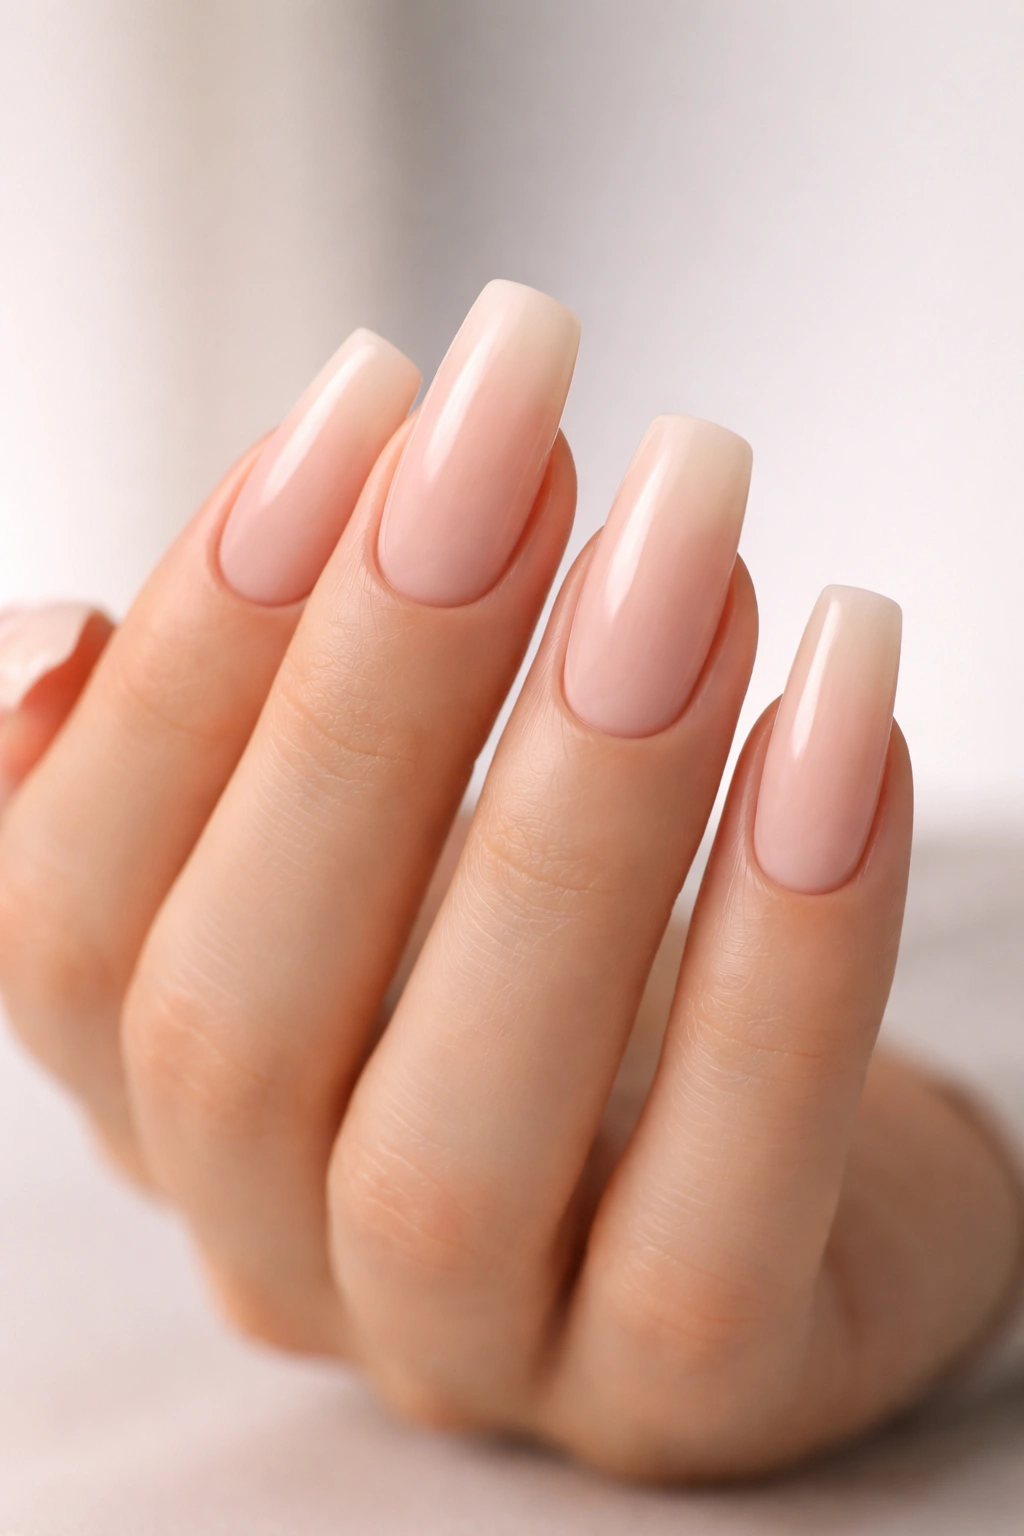
14. Milky White with Soft Pink Gradient and Pearl Accents
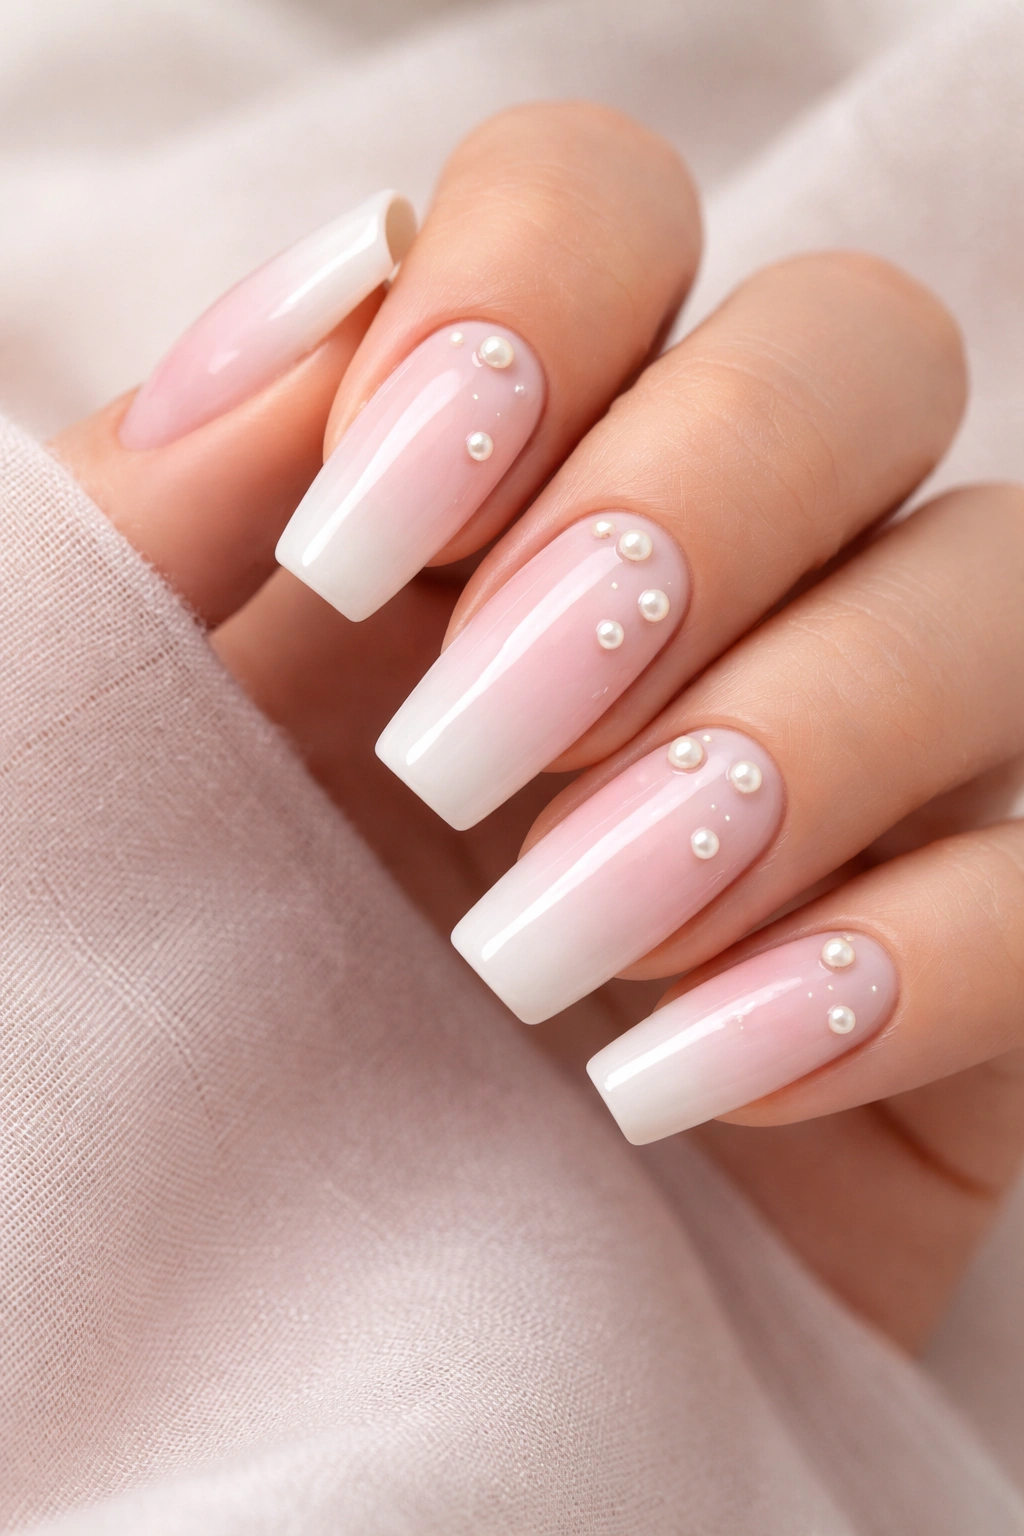
Use a milky white or opaque nude base, then create a soft pink gradient that flows from the center or sides toward the edges — the white should remain visible at the cuticle area, creating a two-tone ombré effect. Scatter pearl studs or pearl stickers across the gradient for dimension and luxury.
The Soft, Romantic Aesthetic
This design has an inherently romantic, dreamy quality that feels fresh and feminine without being saccharine. The milky white base keeps everything soft and wearable, while the pink gradient adds color without overwhelming. Pearls are having a major moment in nail design because they add luxury and texture in a way that feels current.
Building the Soft Pink Gradient
- Apply milky white base in two coats to create an opaque, slightly translucent finish
- Using a sponge and soft pink polish, begin applying pink to the center or outer edges of the nail
- Blend the pink toward the white using gentle dabbing motions with a clean, damp sponge
- Build the gradient gradually, making sure the transition is soft and blended
- The white should remain prominent at the cuticle area, with pink concentrating toward the tip
- Once your gradient is set and cured, apply pearl studs using a tiny amount of gel or nail adhesive
- Scatter the pearls asymmetrically across the gradient — vary sizes if using multiple pearl sizes
- Press each pearl firmly into place and allow adhesive to fully set
- Seal with a clear topcoat, being careful around the pearl placement
Real talk: Pearls require commitment — they can pop off if you regularly bash your nails against things, so this design works best for people who are careful with their hands.
15. Black with Holographic Rainbow Gradient and Matte Accents

Create a bold black base as your starting point, then apply a holographic rainbow gradient that shifts across the nail surface, catching light in multiple colors. Use matte topcoat selectively on some nails while keeping others glossy to create texture and movement across the full set.
The Modern, Gender-Neutral Appeal
This design completely breaks the mold of traditional femininity while remaining undeniably artistic and intentional. The holographic effect reads as cutting-edge and futuristic, while the black base keeps it grounded and wearable. The mix of matte and glossy finishes adds another layer of visual interest and makes the design feel three-dimensional.
Applying Holographic Effect
- Apply black gel or polish in two coats and cure fully
- Holographic effects typically come as powders, foils, or specialty polishes
- If using holographic powder, apply a sticky topcoat first, then press the holographic powder into it using a soft brush
- The powder should create a rainbow effect when light hits it from different angles
- Allow the powder to cure and then seal with a clear topcoat for protection
- Apply glossy topcoat to some nails, and matte topcoat to others, creating a pattern across your full set
- The holographic effect will shift slightly depending on the topcoat finish you apply
Insider note: Holographic powders are some of the most dramatic products available in nail design — a little goes a long way in terms of visual impact.
16. Nude with Delicate Lace Nail Stickers and Subtle Glitter
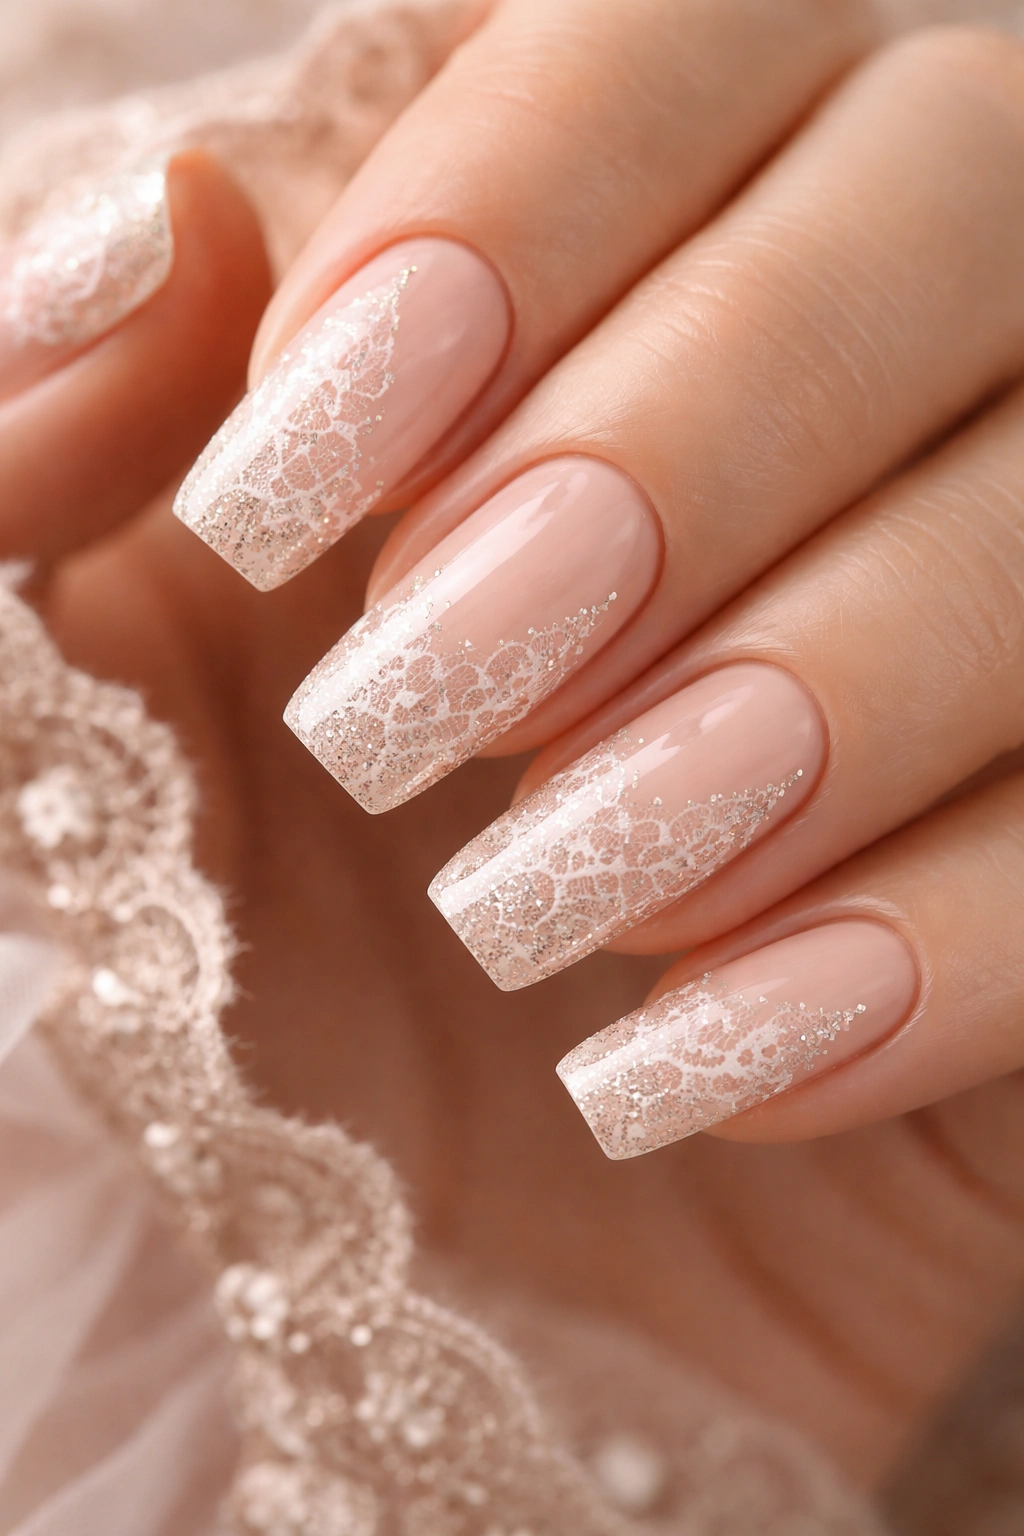
Use a warm, neutral nude as your base, then apply delicate lace nail stickers that cover portions of the nail (usually the tips or sides), creating a vintage-inspired look. Dust subtle glitter or shimmer powder around the lace accents and at the free edge to add sparkle without overwhelming the design.
The Vintage Romance Angle
Lace is intrinsically romantic and feminine, but when applied thoughtfully on a neutral nude base, it feels sophisticated rather than overly girly. The glitter accents add just enough sparkle for special occasions while the overall design remains wearable and timeless. This is nail design that feels effortlessly elegant.
Layering Lace with Glitter
- Apply nude base in two coats and allow to dry completely
- Carefully peel a lace nail sticker and position it on the nail where you want it
- Press firmly from all angles to ensure no bubbles under the lace
- Once the lace is fully adhered, apply a glossy topcoat over it to seal it in place
- While the topcoat is still slightly tacky, dust subtle glitter or shimmer powder around the edges of the lace or at the free edge
- Use a soft brush to apply glitter, pressing gently so it adheres to the tacky topcoat
- Allow the topcoat to fully cure
- Apply a final thin topcoat to seal all the glitter and create a smooth surface
- The combination of matte lace against shimmering glitter creates visual dimension
Pro tip: Lace nail stickers are surprisingly affordable and come in countless styles — keep a variety on hand for quick design inspiration.
17. Rich Emerald with Gold Leaf and Negative Space Moon Shape
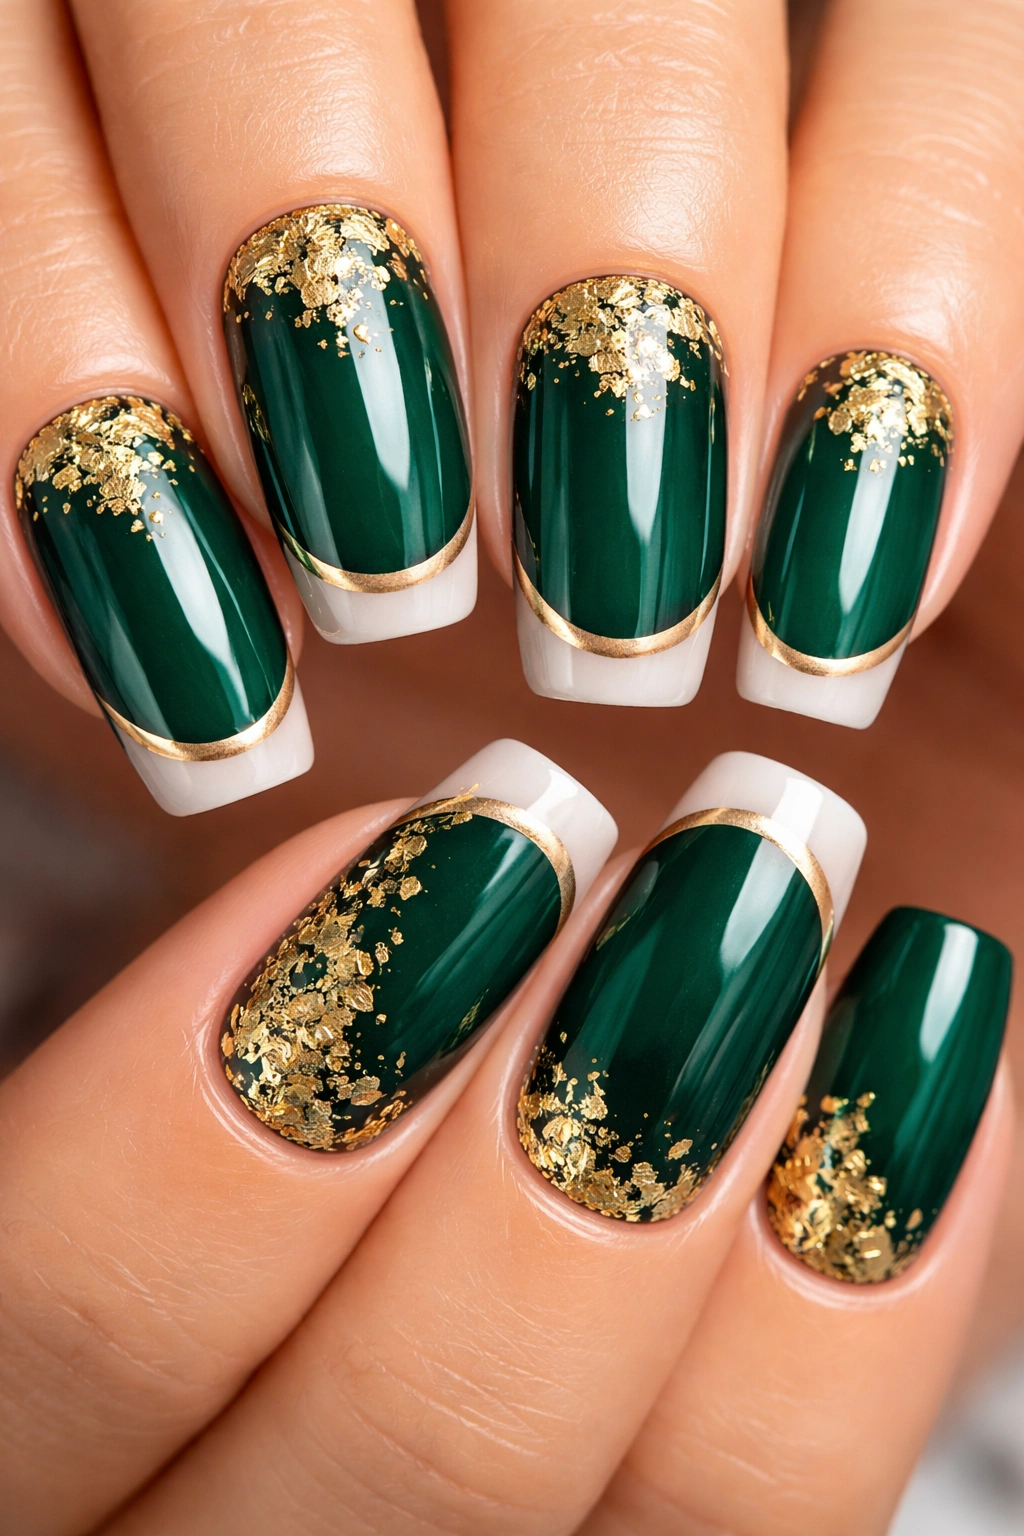
Paint a gorgeous rich emerald green base, then apply real gold leaf accents in organic shapes or scattered patterns. At the tip, create a thin negative space crescent moon shape in white or leave it as bare nail, creating an unexpected detail that surprises people when they notice it.
The Sophisticated Color Moment
Emerald green is having a major moment because it’s rich enough to feel luxurious but neutral enough to work in professional and casual settings. Paired with gold, it creates instant sophistication. The negative space moon detail adds surprise and personality — it’s the kind of detail that makes people ask “how did you do that?”
Creating Perfect Negative Space Detail
- Apply emerald green gel or polish in two coats and cure
- Apply real or high-quality gold leaf using a dedicated gold foil adhesive
- Press the gold leaf firmly onto the adhesive and gently remove the backing
- Once your gold accents are complete and cured, plan your negative space moon shape
- You can create this using a nail sticker, or by carefully painting around it with white polish
- The easiest method is using moon-shaped stickers specifically designed for negative space work
- Position the sticker at the nail tip and press firmly to ensure a clean edge
- Apply topcoat carefully around the sticker
- Remove the sticker to reveal clean, defined negative space
- Seal everything with a clear topcoat
Worth knowing: Negative space designs read better on longer nails where you have room to make the shape visible and intentional.
18. Peachy Orange with Sunset Gradient and Holographic Shimmer
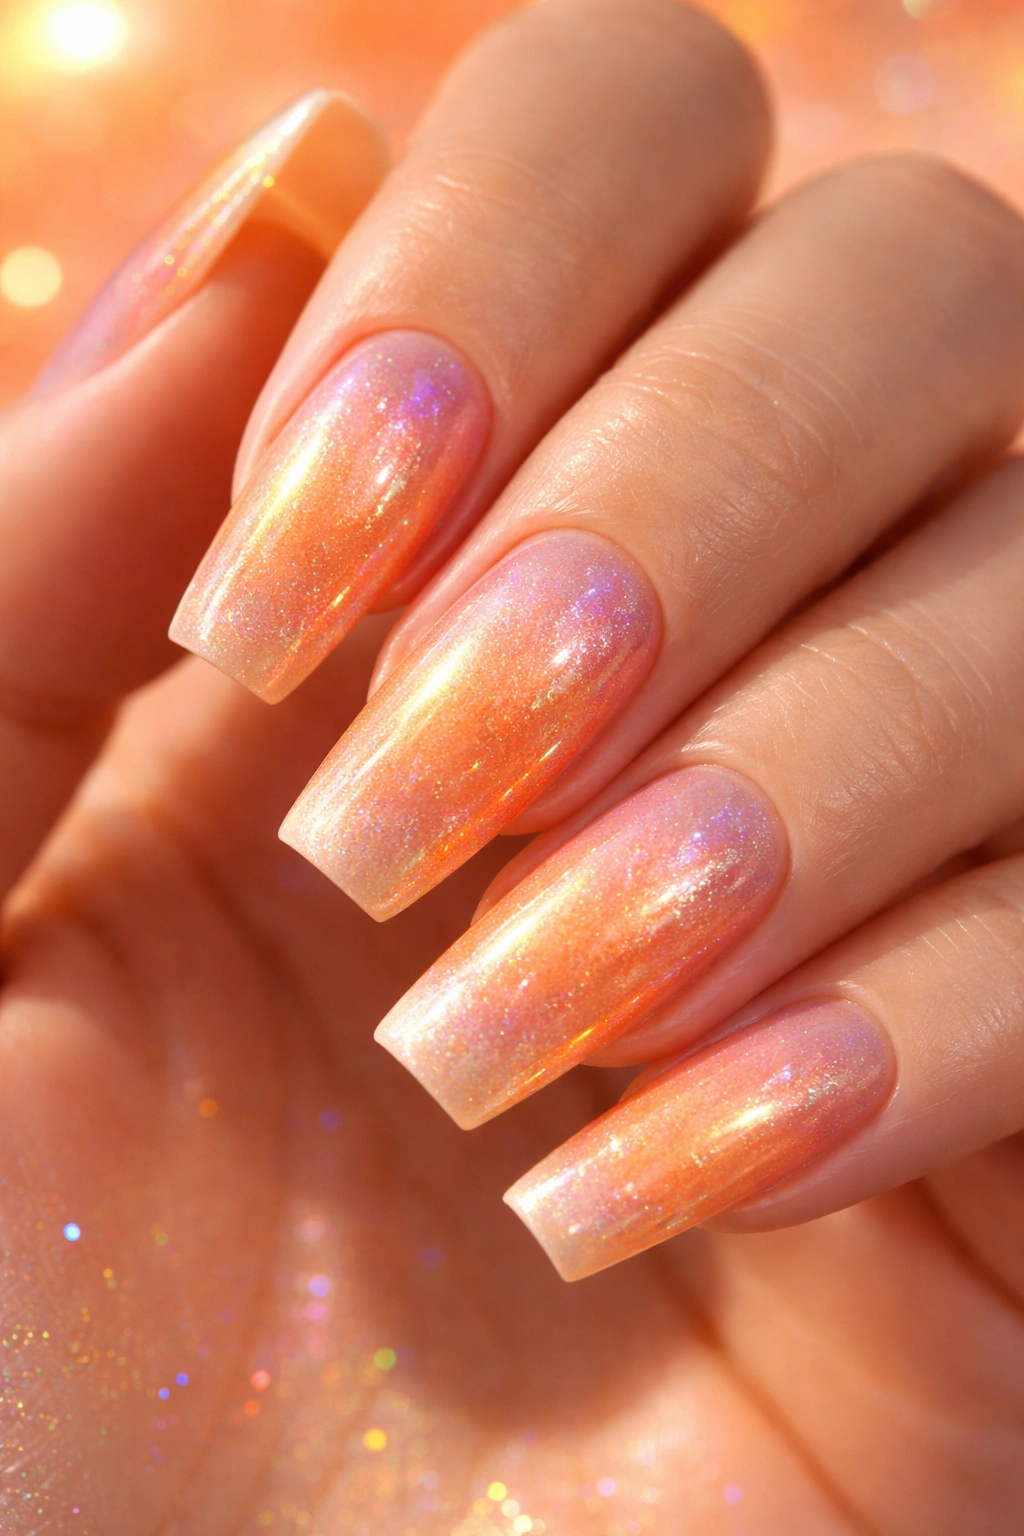
Create a warm, peachy-orange gradient that shifts from peachy tones at the cuticle toward deeper orange at the tip, mimicking a sunset. Apply holographic shimmer powder or flakes throughout the gradient to create a sun-catching, dimensional effect that looks different in various lighting.
The Warmth and Movement
This design captures the feeling of a gorgeous sunset in nail form — it’s warm, it’s dimensional, and it photographs beautifully. The holographic elements mean the design constantly shifts and changes based on how light hits your nails, so people will notice something new every time they look at their hands. It’s dynamic and engaging without being loud or over-the-top.
Gradient Plus Holographic Technique
- Apply a pale peachy-orange base in one coat
- Use a makeup sponge to gradually build deeper orange toward the tips, creating a soft gradient
- Build the gradient slowly so the transition is smooth and blended
- Once you’re happy with the gradient and it’s fully cured, apply a thin sticky topcoat
- Using a soft brush, press holographic powder or flakes into the topcoat, building up gradually
- You want enough shimmer that it catches light but not so much that it obscures your gradient
- Allow the topcoat to cure fully with the holographic elements intact
- Apply a final clear topcoat to seal everything and protect the holographic effect
- This final topcoat will slightly tone down the holographic intensity but will protect it from wear
Pro tip: Holographic effects look most dramatic in natural sunlight and fluorescent lighting — check your design in different lighting to appreciate the full effect.
19. Soft Mauve with Thin Silver Stripes and Minimal Accent Nail
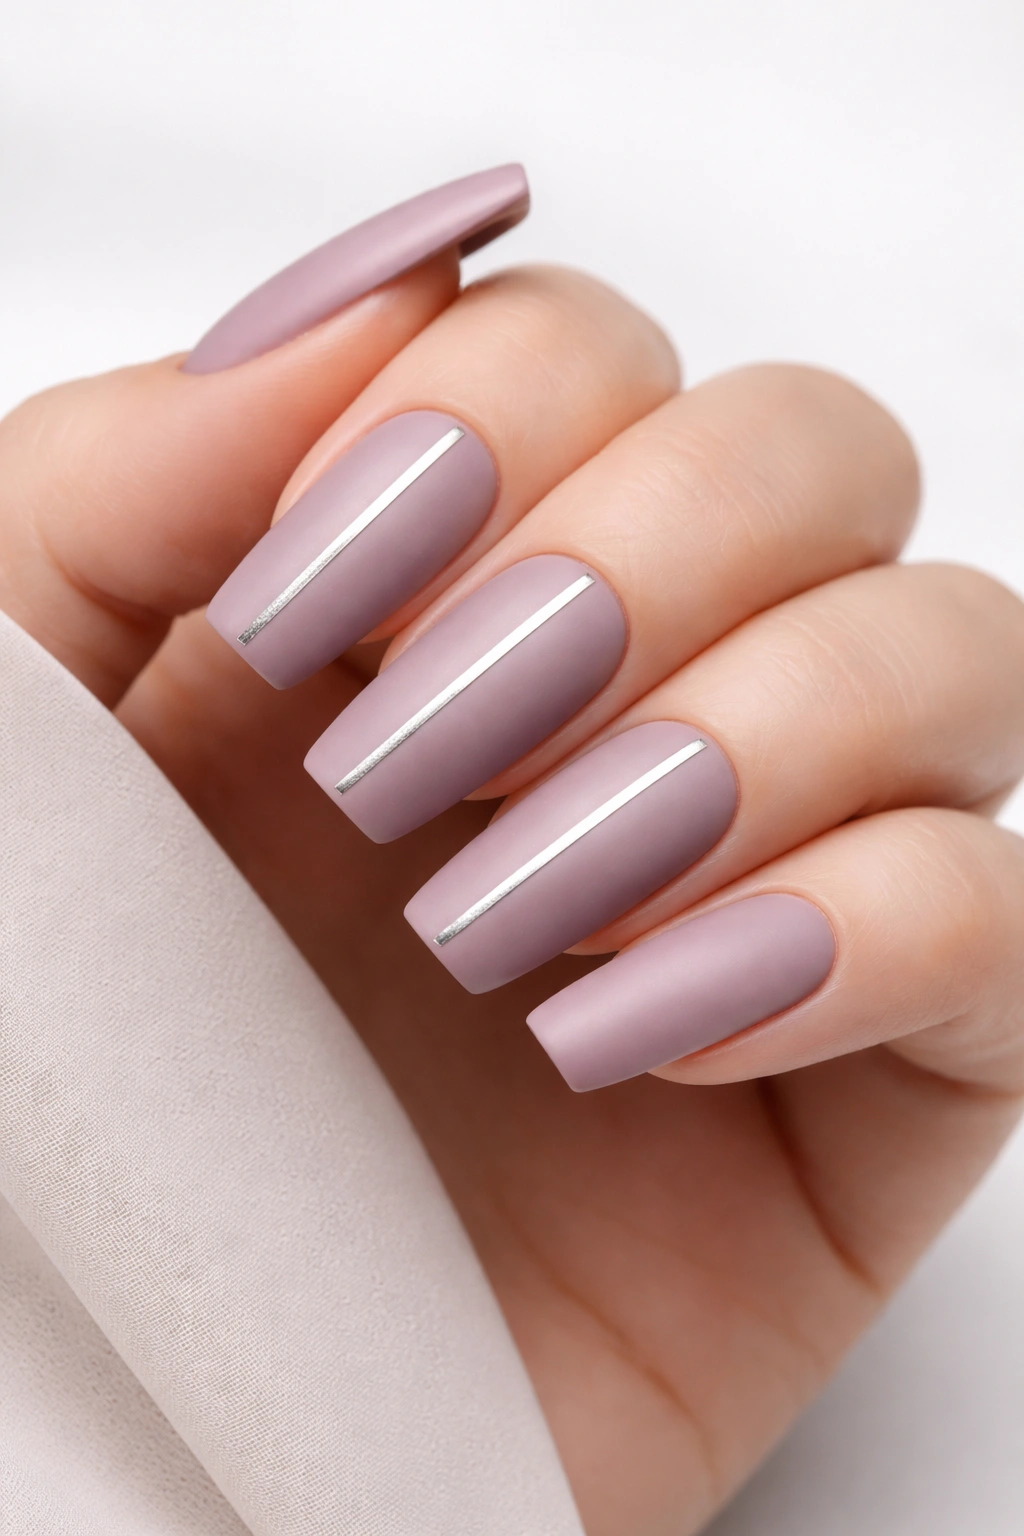
Paint the majority of your nails a soft, dusty mauve using a matte or satin finish, then add thin vertical silver stripes using a striping brush. Keep one accent nail (usually the middle finger) completely matte mauve with no stripes, creating a subtle point of emphasis.
The Minimalist Luxury Approach
This design proves that you don’t need elaborate art or heavy embellishment to create something beautiful and refined. The mauve alone is gorgeous and wearable, the silver stripes add just enough visual interest, and the one accent nail creates balance. It’s the kind of design that feels effortlessly elegant rather than trying too hard.
Silver Stripe Application
- Apply soft, dusty mauve in two coats — use a matte or satin topcoat for a velvety finish
- Once your base is cured, use a thin striping brush or striping tool to paint thin silver lines vertically down each nail
- Space your stripes evenly and make them the same width across all nails — consistency reads as intentional
- Silver should be opaque enough to show clearly against mauve without needing multiple coats
- Keep your stripes thin — thick stripes can overwhelm the delicate mauve
- On your accent nail, skip the stripes entirely and keep it as a solid matte mauve
- Seal all nails with a topcoat appropriate for your finish (matte topcoat to maintain the matte look)
Real talk: The silver stripes should be perfectly vertical and evenly spaced — use striping tape if you’re not confident freehand.
20. Blush Pink with Rose Gold Ombre and Nude Matte Accent Nail
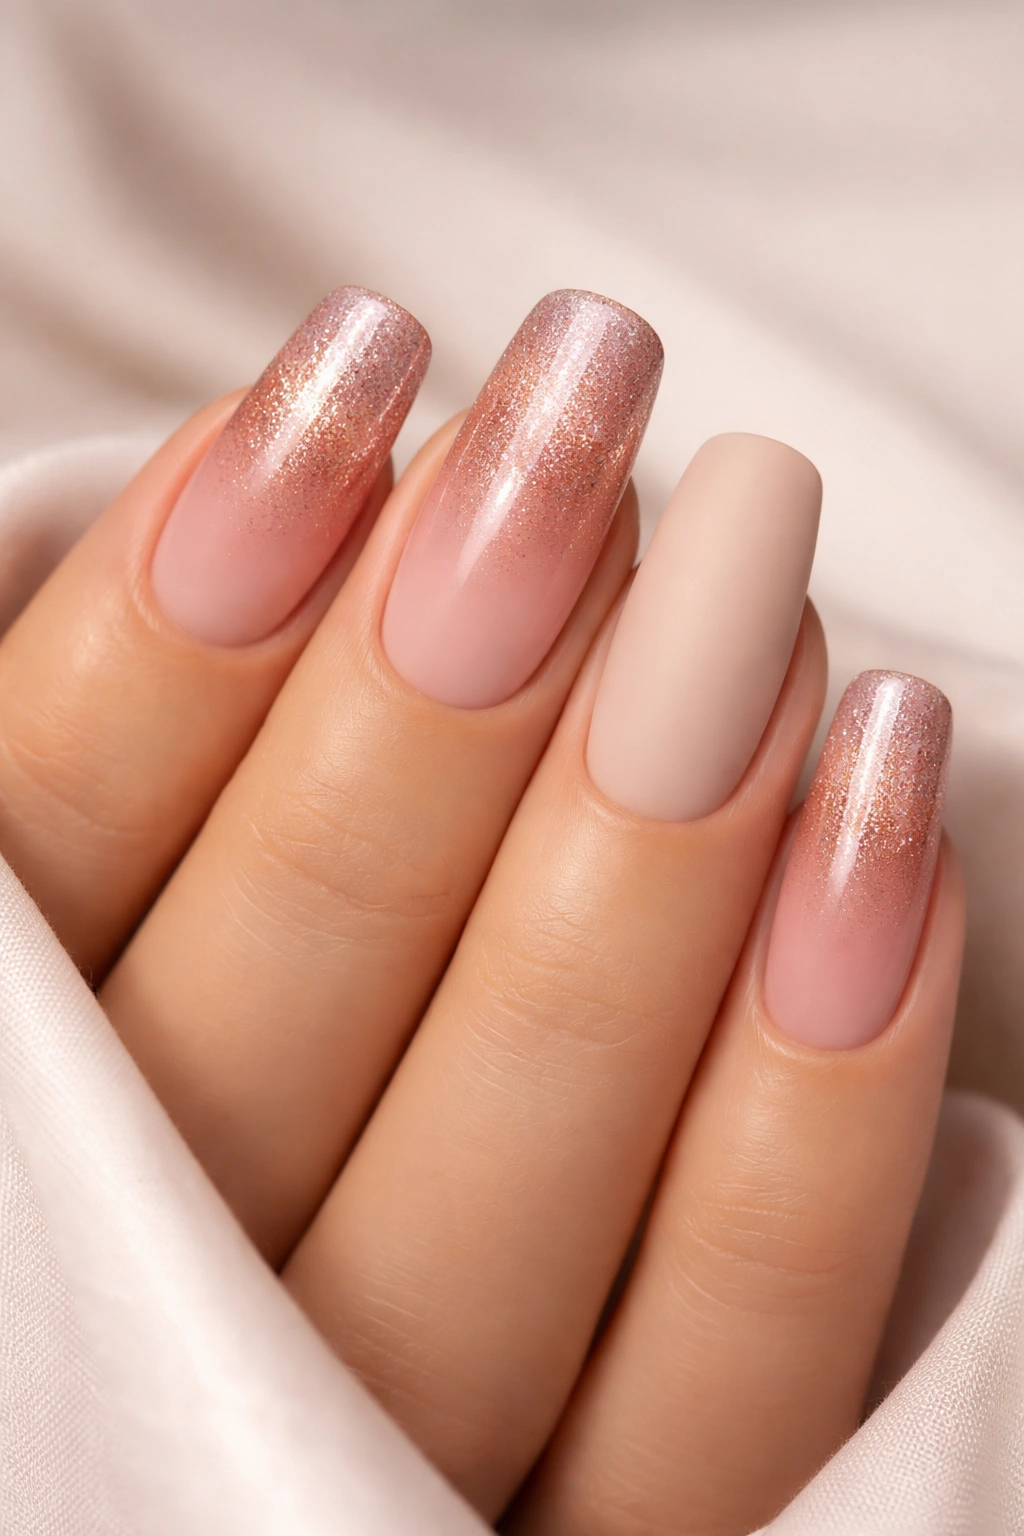
Create a gradient using blush pink at the cuticle that gradually transitions into rose gold shimmer toward the tips, creating a warm, glowing effect. Include one accent nail that’s entirely matte nude, creating a sophisticated contrast point within your full manicure.
The Balanced, Wearable Glamour
This final design brings together everything that makes squoval nails work: the gradient adds dimension and catches light, the rose gold shimmer is luxe without being over-the-top, and the matte accent nail provides grounding sophistication. It’s the kind of manicure you can wear everywhere — to the office, out at night, on vacation — because it’s beautiful without screaming for attention.
Blending Shimmer into Gradient
- Apply blush pink base in two coats to the entire nail and cure
- Using a makeup sponge, begin applying rose gold shimmer polish or gel to just the tip area
- Gradually work the shimmer upward, blending it into the blush pink using gentle dabbing motions
- Build the shimmer concentration gradually so the transition is soft and glowing rather than harsh
- The blush pink should remain visible at the cuticle area, with rose gold intensifying toward the tip
- Your gradient should look like light is hitting it and illuminating the rose gold shimmer
- Once your gradient is complete and cured, apply glossy topcoat to enhance the shimmer effect
- For your accent nail, apply the blush pink base, then apply a matte topcoat instead of glossy
- The contrast between glossy, shimmering gradient nails and the matte accent nail creates visual balance
- Seal your matte nail with matte topcoat to protect it
Pro tip: The matte accent nail prevents this design from feeling too shiny overall, which is why the balance between the two finishes matters so much.
Final Thoughts
Long squoval nails give you the perfect proportion of length without fragility, which means you have space to get creative and detailed with design. The beauty of these twenty designs is that they range from minimalist and professional to artistic and bold, which means you can find inspiration for literally any occasion or mood. Whether you’re drawn to graphic black-and-white designs, soft romantic gradients, luxe metallics, or artistic hand-painted details, squoval nails are the ideal canvas.
The shape itself is forgiving because it naturally flatters hands and photographs beautifully, so even if you’re trying a design for the first time, squovals usually make it look intentional and polished. Pick a design that speaks to you, bring the image to a nail technician, or bookmark it as inspiration for your next at-home manicure. Your nails deserve to feel as good as they look, and long squovals with thoughtful design do exactly that.
