

Stiletto nails have become the ultimate statement of bold confidence, and when you pair that sharp, elongated silhouette with the timeless power of red and pink, you’re creating something truly magnetic. There’s a reason these colors dominate the nail art world — red commands attention and exudes sophistication, while pink ranges from playful and romantic to sultry and modern depending on the shade and design you choose. The combination of stiletto-shaped nails with these classic colors isn’t just about looking polished; it’s about embracing a nail aesthetic that flatters virtually every skin tone, works for everything from a night out to a power meeting, and gives your hands an instantly elongated, elegant appearance.
The beauty of red and pink stiletto nail designs is their incredible versatility. You can go minimalist with a sleek solid color, venture into intricate nail art with detailed patterns and embellishments, experiment with ombre gradients, or play with textures like matte finishes and glitter effects. Each design idea in this collection has been chosen for its real-world wearability, its ability to showcase the stunning stiletto shape, and the way it photographs — because let’s face it, great nails deserve to be shown off. Whether you’re a nail art enthusiast looking for fresh inspiration or someone new to the stiletto nail game, you’ll find designs here that speak to your personal style.
1. Classic Crimson Elegance
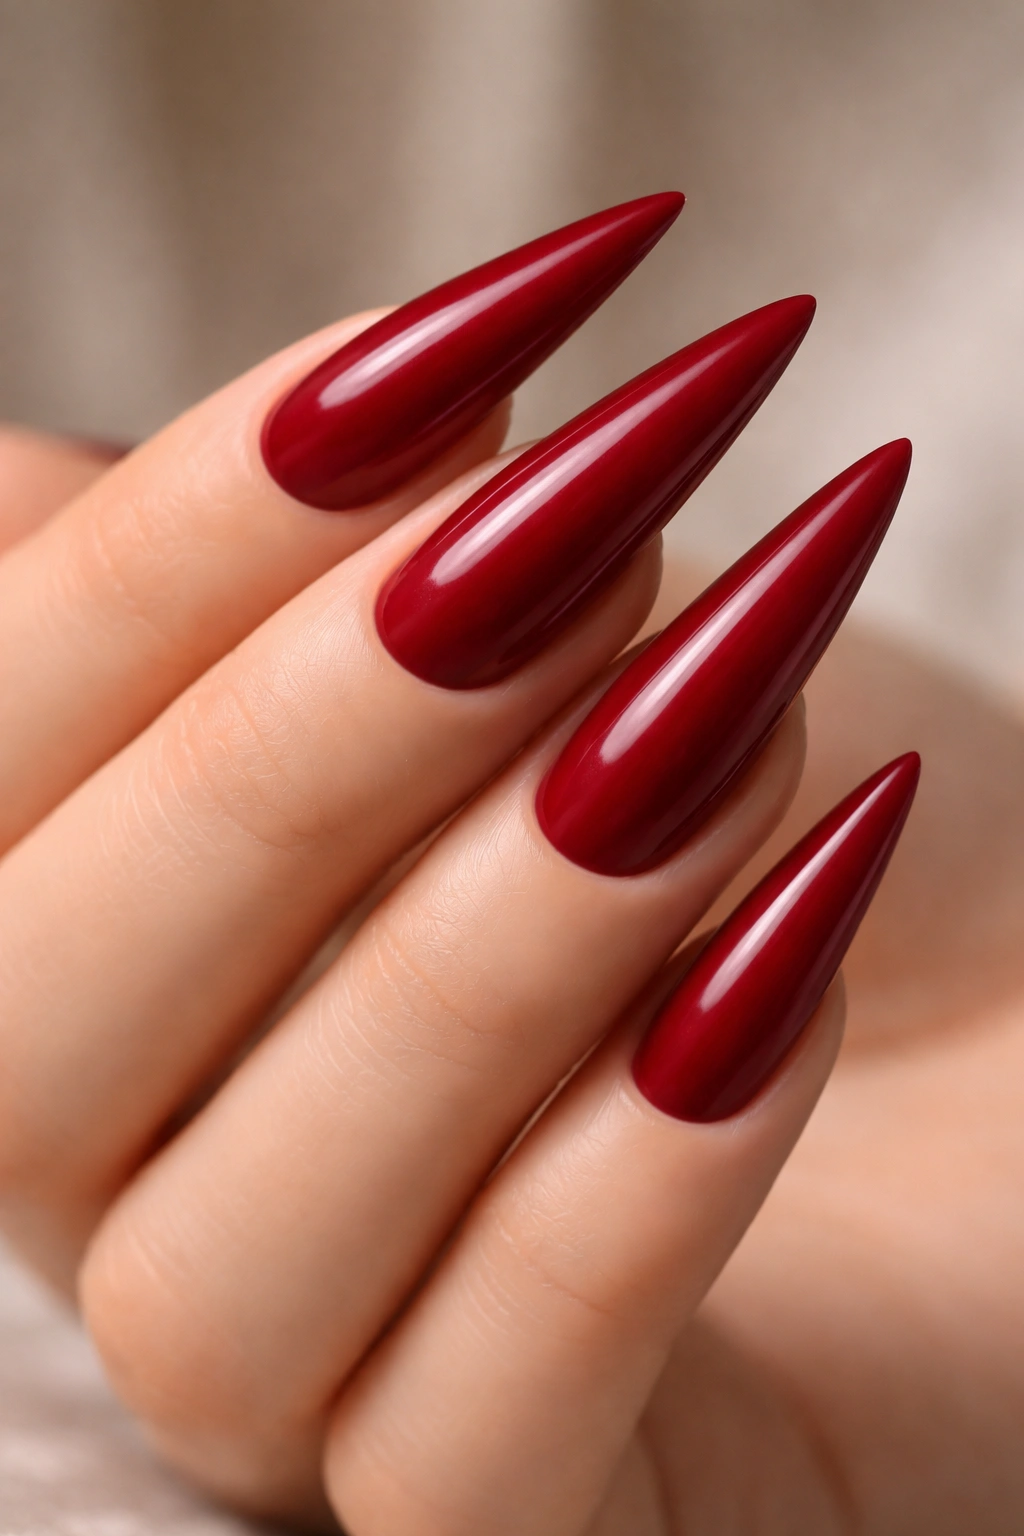
A true crimson red is the foundation of timeless nail sophistication, and on stilettos, this shade becomes instantly dramatic and refined. This design works because it requires nothing but a flawless application of a deep, pigmented red polish in a classic cream or satin finish — letting the stunning length and shape of the nail do all the talking. The key to pulling this off is ensuring the red is perfectly opaque, which usually requires two careful coats, and that your base coat and top coat are applied with precision to prevent visible streaks.
Why This Design Never Gets Old
Deep red nails have been a symbol of power and elegance for decades, and that’s not changing anytime soon. The color works on every season, every occasion, and every skin tone — it’s a design that proves you don’t need complexity to make an impact. Stilettos in this shade instantly elongate your hands and draw attention to your nail shape itself.
Application and Longevity Tips
- Use a ridge-filling base coat to create a smooth canvas for the red polish
- Apply thin, even coats rather than one thick coat to avoid bubbles and streaking
- A high-quality top coat protects the color and adds a luxurious shine that makes the red pop
- This design typically lasts 3-4 weeks before needing a touch-up, though the tip may chip first
Pro tip: If you want extra staying power and a salon-quality finish, have this applied as a gel polish rather than regular polish — it’ll last twice as long without chipping.
2. Ombré Pink to Red Gradient
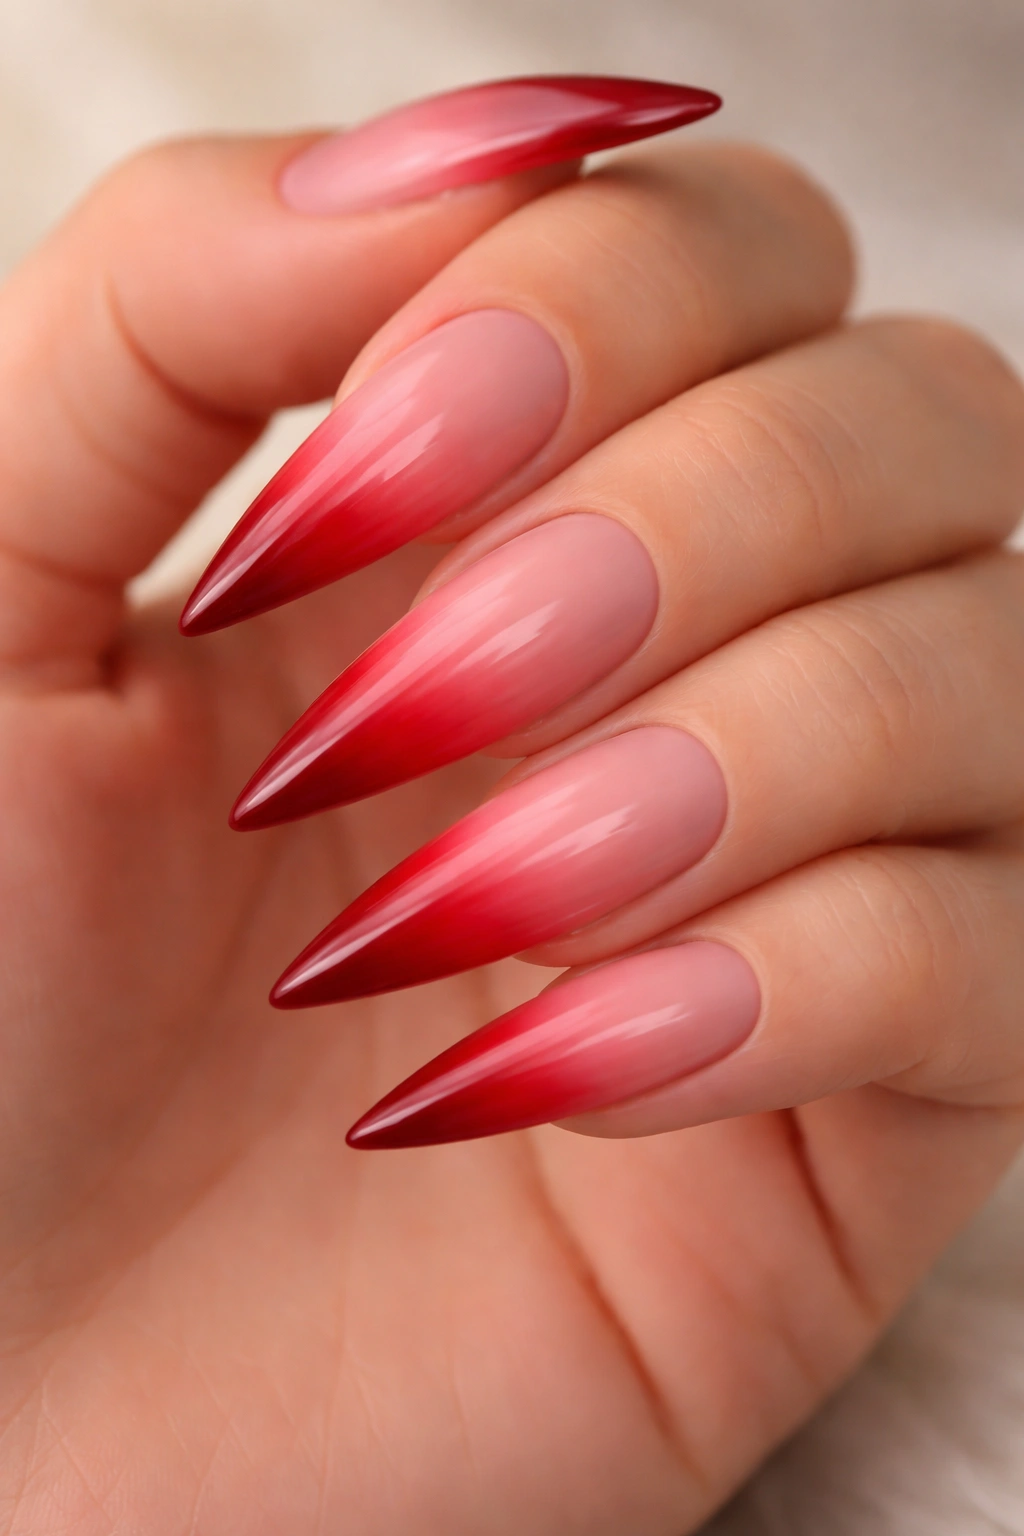
An ombré from blush pink to deep red creates visual interest while staying within a cohesive color story, and the gradient effect actually makes stilettos look even longer because your eye follows the color flow from base to tip. This design is achieved by blending two or more shades across the nail surface, either through a traditional hand-blended ombré technique or by using a nail art sponge to dab and blend the colors together.
The Visual Magic of Color Gradients
When you apply an ombré effect on stiletto nails, the gradient accentuates the nail’s length because the color transition creates subtle visual movement. The lighter shade at the base makes the nail bed appear longer, while the deeper red at the tip adds drama and definition. This is a design that looks especially stunning on longer stilettos.
How to Achieve a Flawless Ombré
- Start with a white or nude base coat to help the gradient colors appear more vibrant
- Apply the lightest shade to the base of the nail
- Use a makeup sponge to dab and blend the middle shade where the colors meet
- Add the deepest red shade to the tip and blend upward
- Seal everything with a glossy top coat to smooth out any visible sponge texture
- Gel polish works beautifully for this design and makes the colors last much longer
Worth knowing: The sponging technique takes practice, so don’t be discouraged if your first attempt isn’t perfect — even slightly imperfect gradients look intentional and artistic on stilettos.
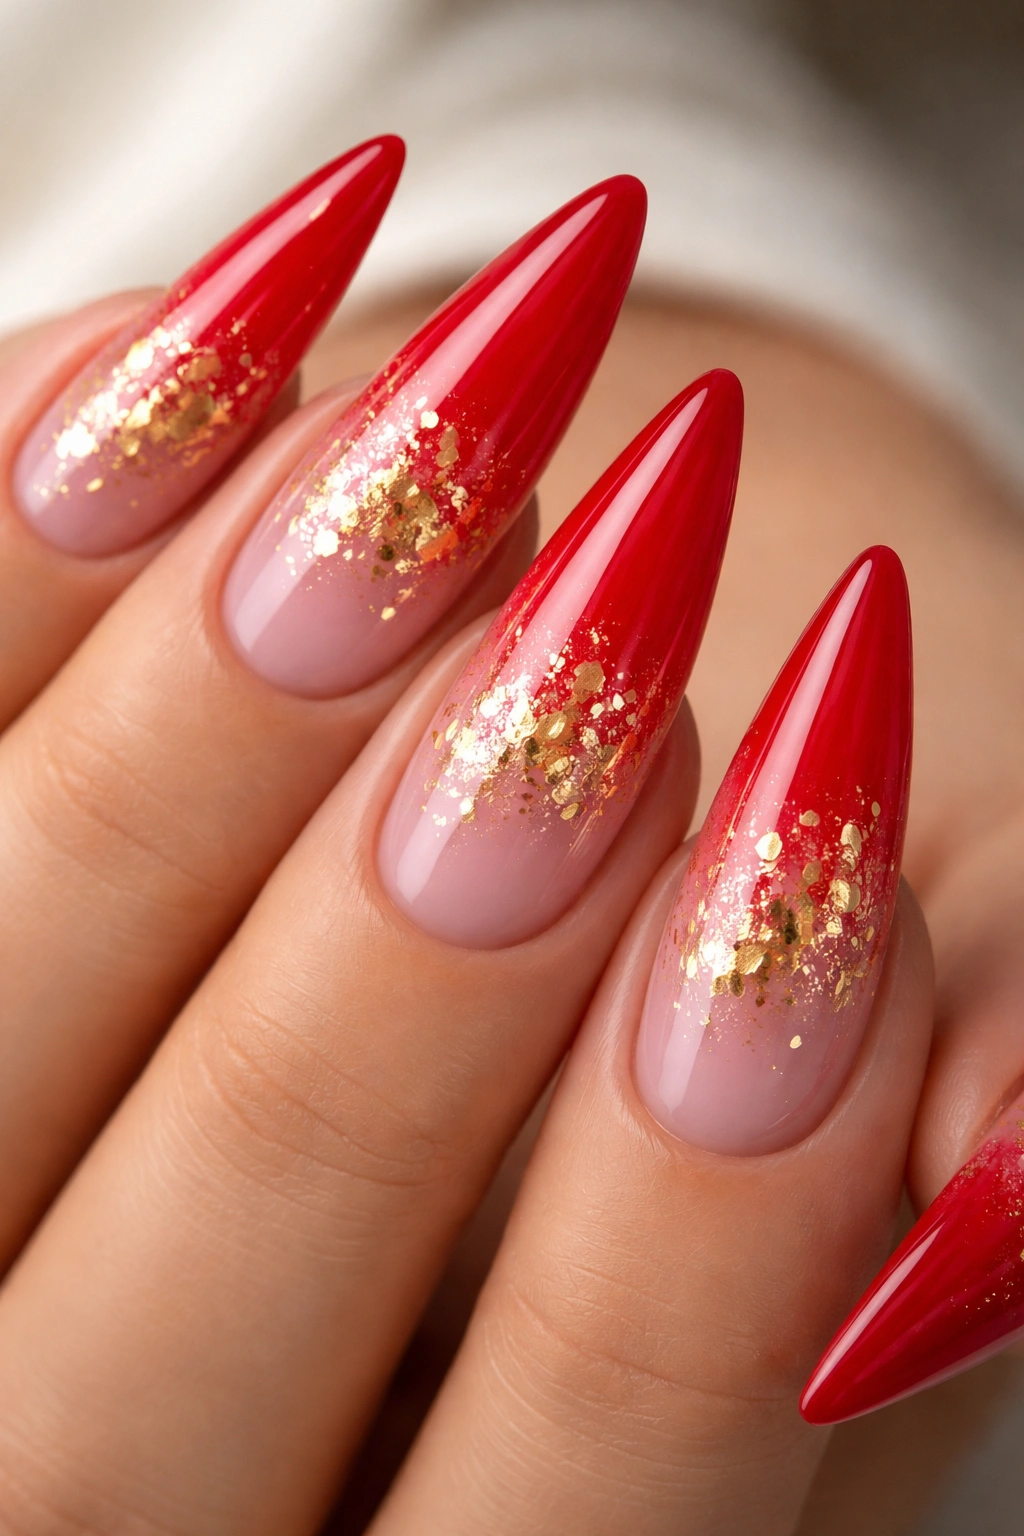
3. Glossy Red with Gold Foil Accents
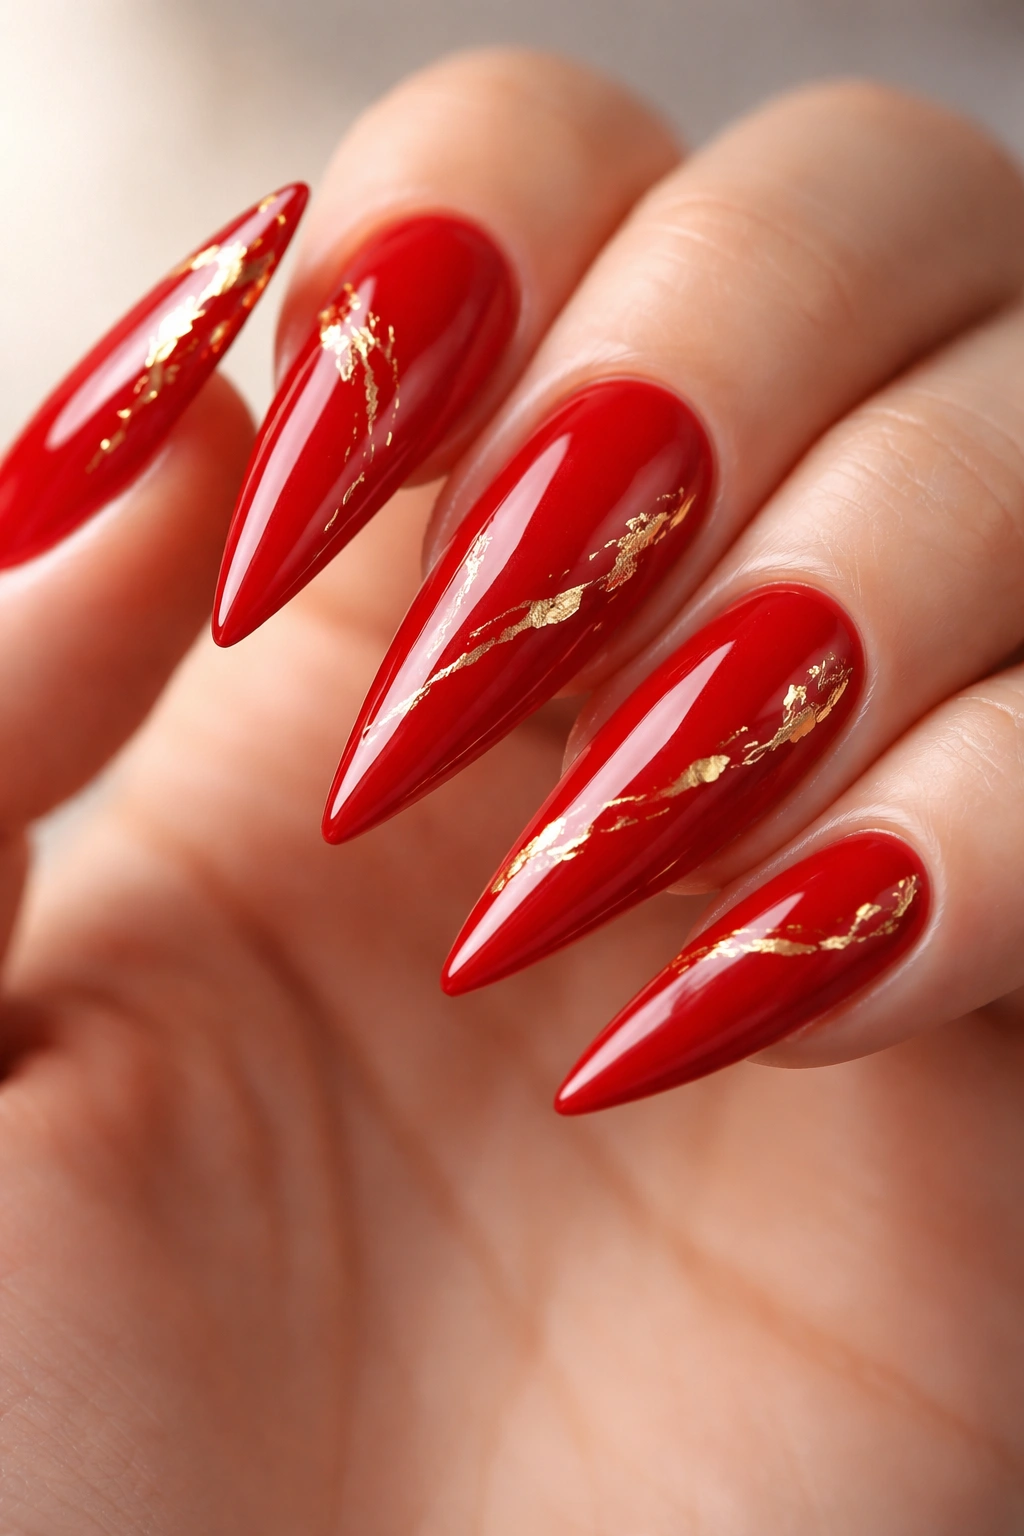
Red stilettos become absolutely luxurious when you add delicate gold foil accents — think thin gold stripes down the center of each nail, gold leaf scattered across the surface, or a gold geometric pattern on the ring finger as a standout feature. The combination of deep red with warm gold creates a rich, expensive-looking aesthetic that works for everything from cocktail nights to everyday wear with a touch of glam.
Creating Dimension with Metallic Details
Gold foil against red doesn’t just add visual interest; it catches the light in a way that makes your nails impossible to ignore. The key is using real nail foil or premium gold leaf — not cheap metallic polish — because the reflective quality is what creates that luxury aesthetic. Placement matters too; strategically positioned accents are more sophisticated than covering the entire nail.
The Right Way to Apply Foil
- Paint your base red and let it dry completely
- Apply a tacky foil adhesive (often included in foil kits) to the areas where you want the foil
- Cut or tear gold foil into strips or shapes
- Press the foil firmly onto the sticky adhesive and peel away the backing
- Seal with a glossy top coat to keep the foil secure and add shine
Insider note: If traditional foiling intimidates you, gold leaf flakes mixed into a clear gel polish over red creates a similar luxe effect with less precision required.
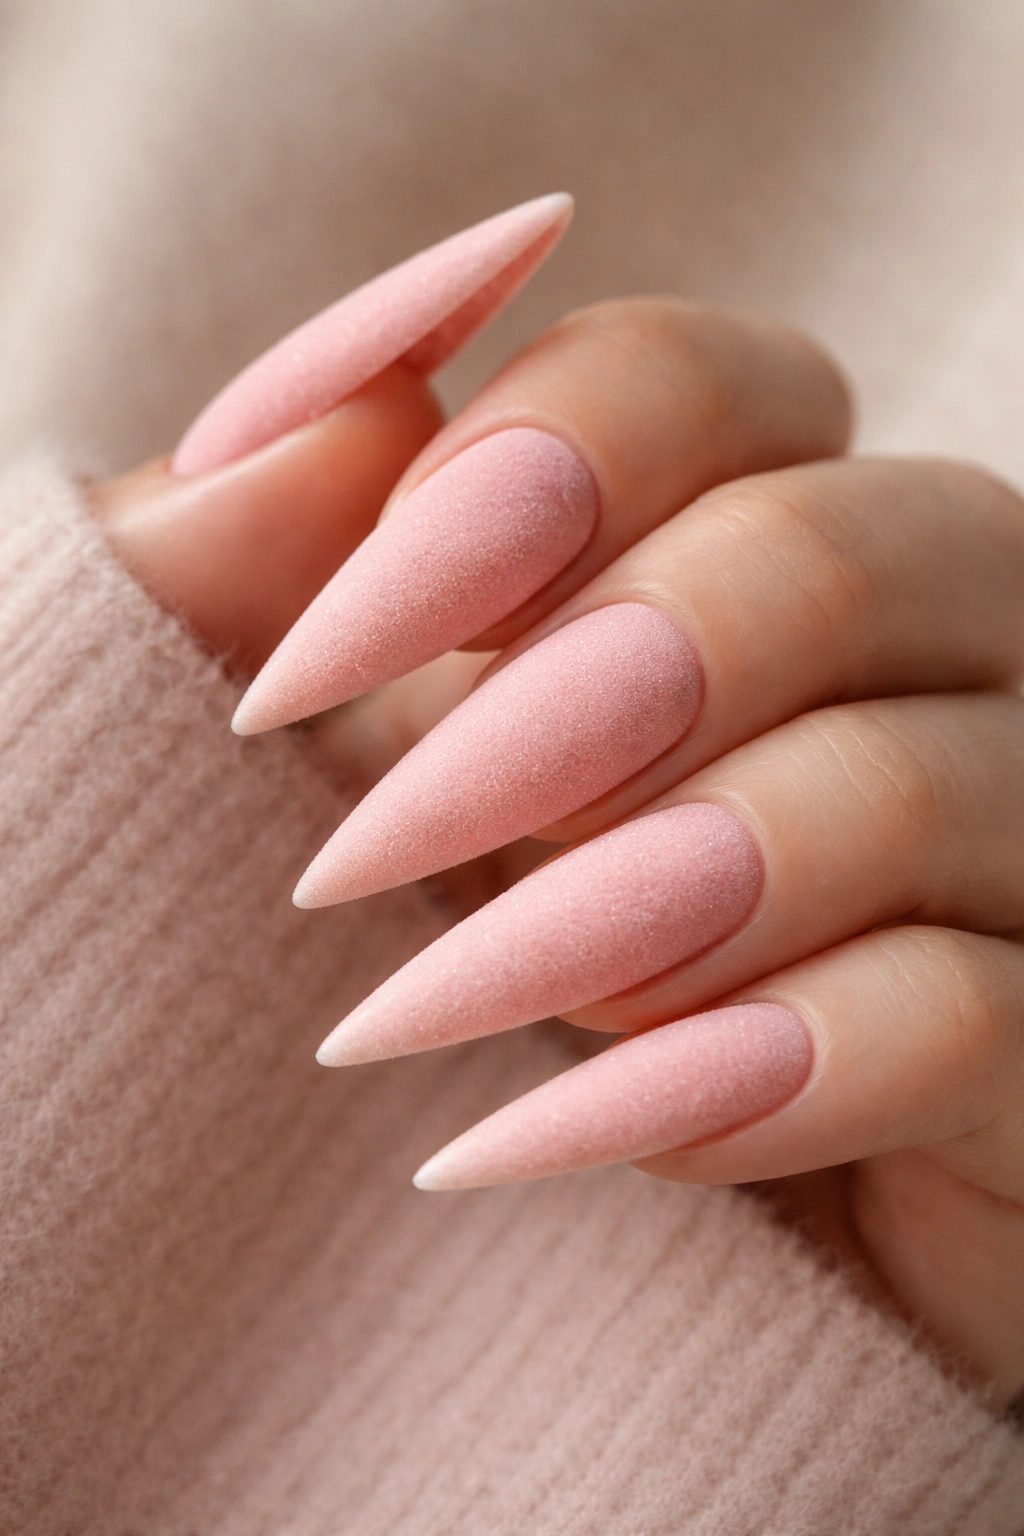
4. Matte Blush Pink with Rhinestone Detail
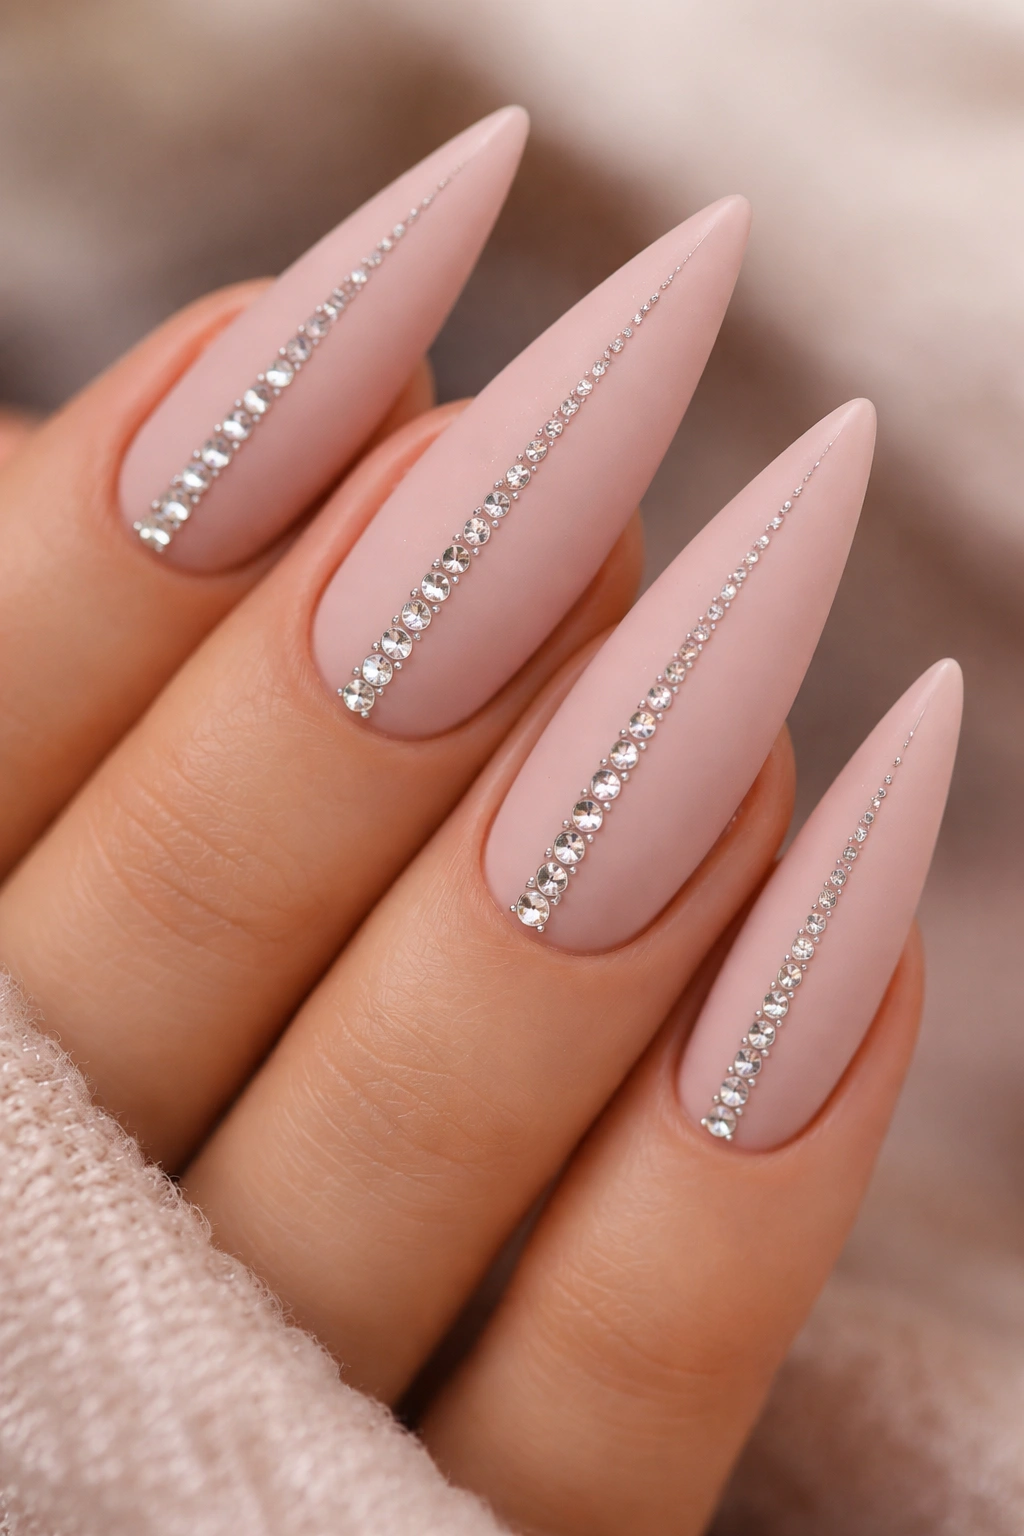
Matte finishes completely transform how a color reads on nails, and blush pink in a matte formula feels soft, modern, and surprisingly edgy on stilettos. Adding rhinestones — either a vertical line down the center of each nail or clustered on your accent nail — creates focal points that draw the eye without overwhelming the design. This combination feels both romantic and contemporary, depending on how you style it.
Why Matte Finishes Make Nails Look Longer
A matte finish eliminates shine, which changes how light plays across the nail surface. On stilettos, this actually emphasizes the nail’s shape and length because there’s no glossy reflection to distract from the silhouette. The rhinestones act as anchors for the eye, making the length between them feel even more pronounced.
Securing Rhinestones for Lasting Wear
- Use a thick builder gel or a dedicated nail rhinestone adhesive (regular glue won’t hold up to daily wear)
- Press each rhinestone firmly into the adhesive at a slight angle so it catches light
- Let the adhesive cure completely before removing your hands from under the lamp
- Seal over the rhinestones with a clear top coat, or skip the top coat directly over them if you want maximum sparkle and light reflection
- Rhinestones stay secure for the full wear cycle if applied properly, so this design lasts as long as your base color
Pro tip: Choose rhinestones in clear crystal for maximum sparkle, or select champagne-colored stones to complement blush pink beautifully.
5. Deep Wine Red with Burgundy Marble
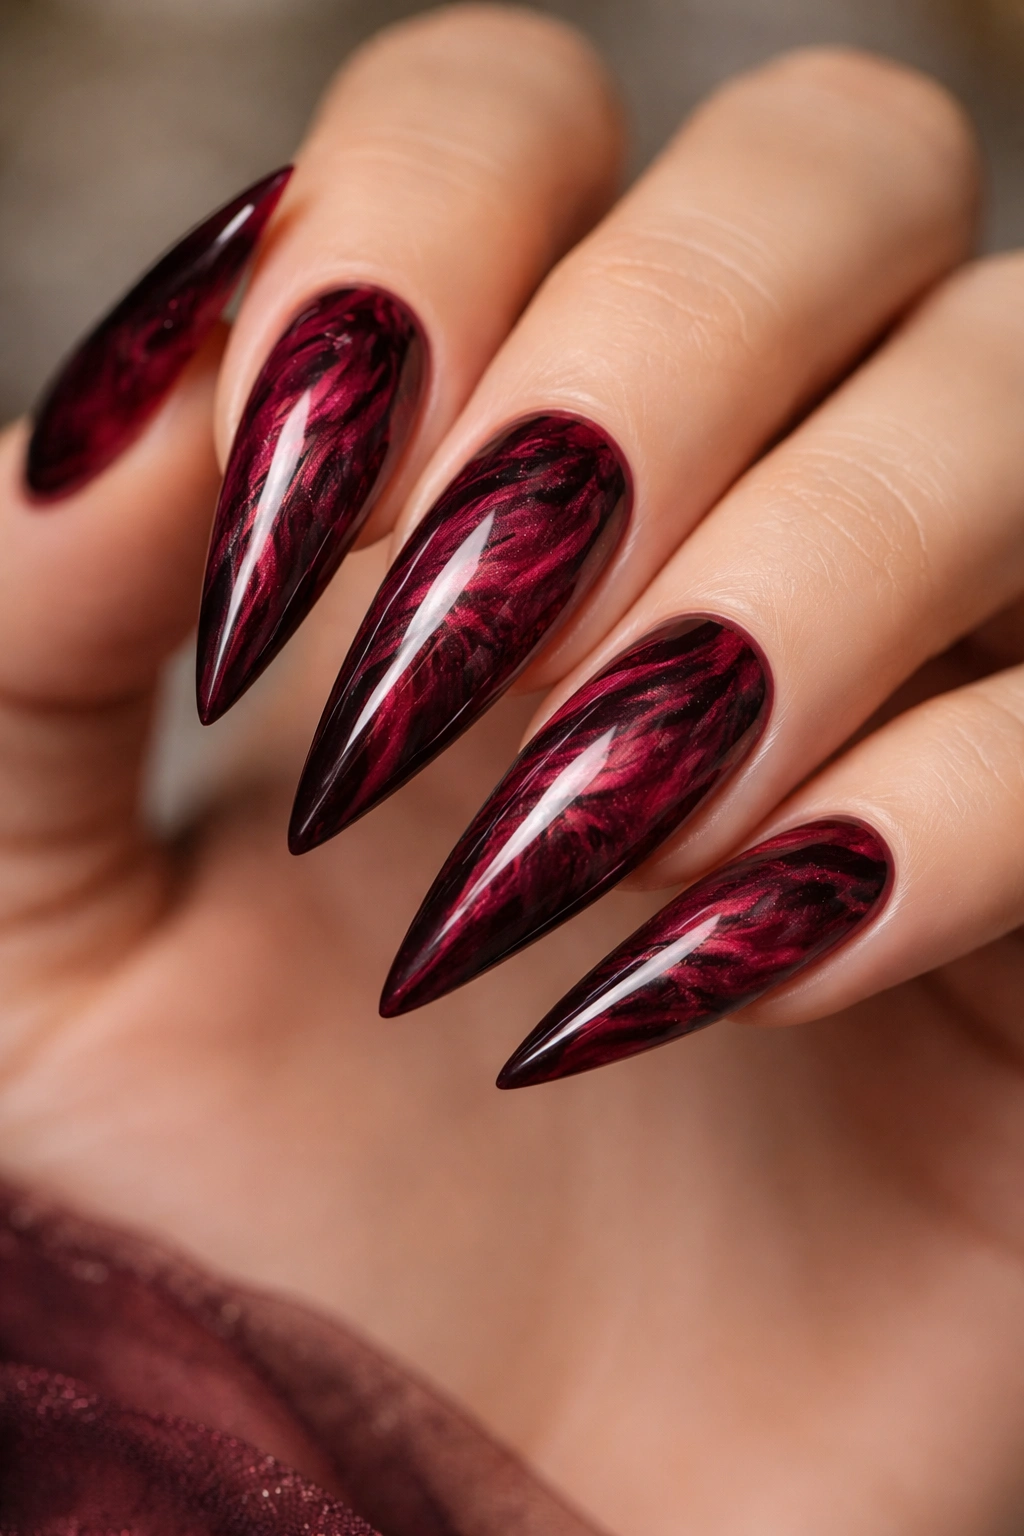
Marbling two shades of red together — a deep wine red base with burgundy swirls — creates sophisticated, organic patterning that feels high-end without requiring perfectly precise lines. On stilettos, this design adds texture and visual complexity while keeping the color palette cohesive and moody. The abstract nature of marble means small imperfections actually add to the authentic, artistic feel.
Marble Techniques That Actually Work
Marbling is achieved by dropping small amounts of two polish shades into a cup of water, swirling them together with a toothpick, then dipping your nail into the pattern. It requires a steady hand and practice, but the results look incredibly professional once you get the hang of it. Some nail artists prefer using a thin brush to hand-paint marble lines instead, which gives you more control over placement.
Making Your Marble Design Last
- Always use a ridge-filling base to ensure polish adheres evenly
- Apply marble designs using gel polish if possible — regular polish marble designs are less durable
- Seal with a thick, protective top coat because marbled nails have more texture and are more prone to chipping
- The marble effect is visible for the full wear cycle, though small chips may appear around edges first
Worth knowing: Deep wine and burgundy shades photograph beautifully, so if you’re planning to show off your nails on social media, this design is especially Instagram-worthy.
6. Ballet Slipper Pink with Thin Red Outline
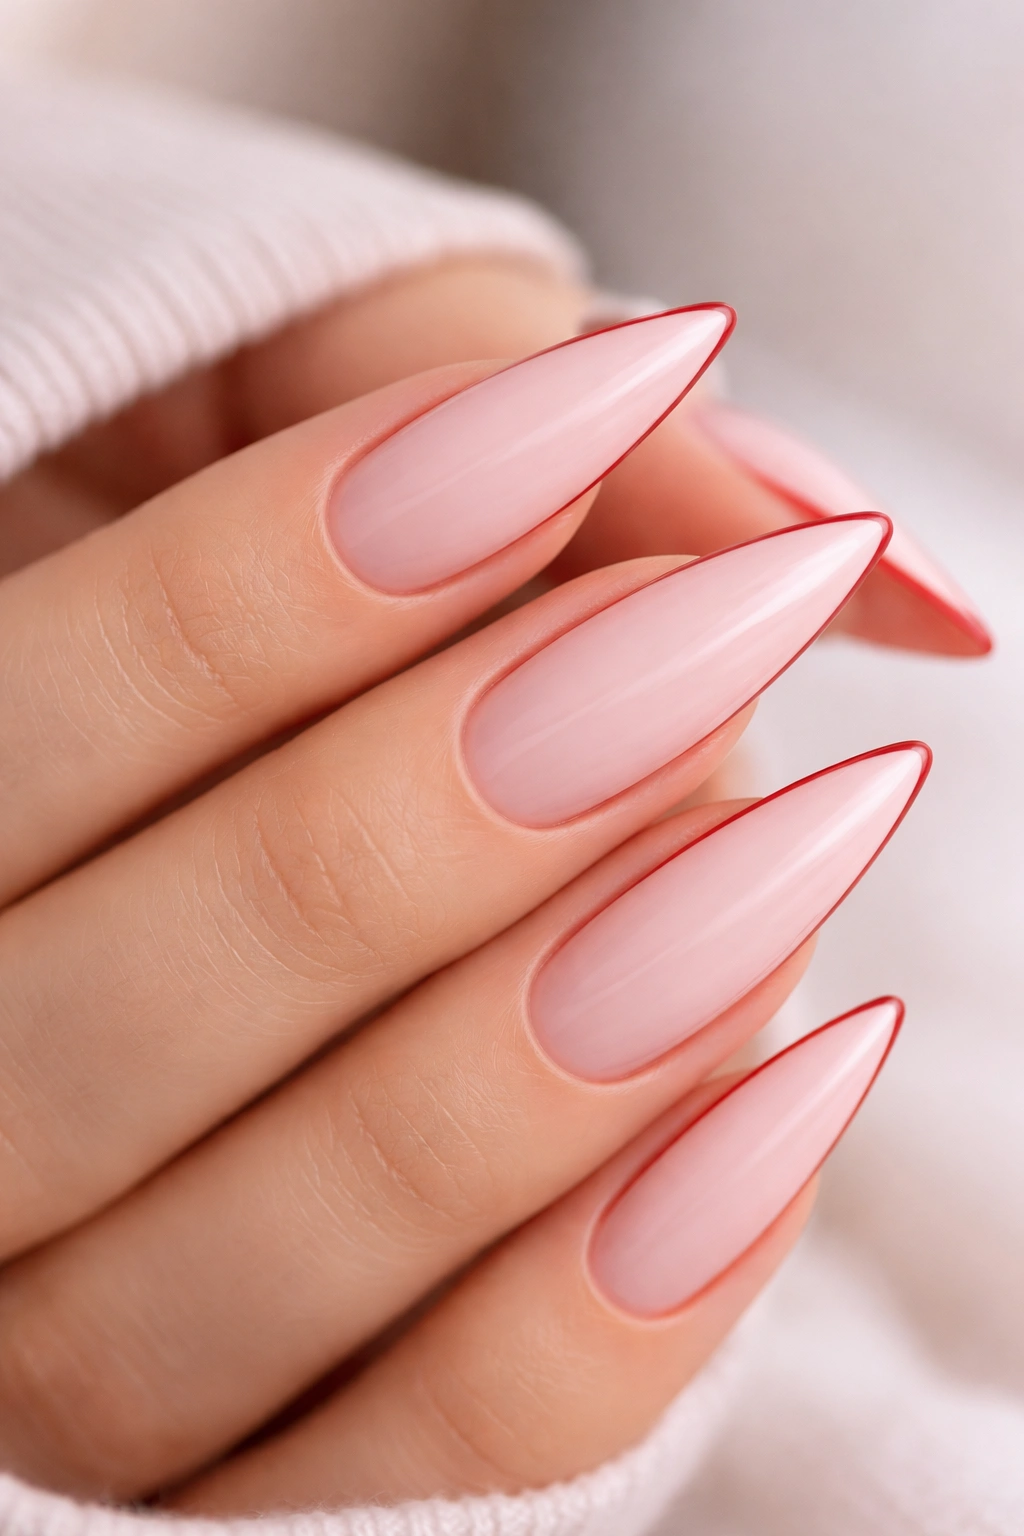
This design takes minimalism and adds just enough detail to feel intentional and chic — paint your stilettos in a soft, ballet slipper pink (almost nude), then add a thin red outline or negative space design. The thin red line can be painted down the center of the nail, around the edges creating a frame effect, or in a geometric pattern. This design elongates the nail visually because the outline divides the space in a way that makes each section feel longer.
The Power of Negative Space
Negative space designs, where you leave the nail color visible and paint only outlines, create visual interest through what you don’t paint. On stilettos, this is especially effective because the outline against the pale pink creates high contrast without making the nail feel crowded. The eye follows the red line, making the nail shape feel even more defined and sharp.
Creating Precise Red Lines
- Use a thin striping brush or a fine-tipped gel polish pen to paint thin red lines
- Start at one point and move steadily across the nail without lifting the brush
- If you make a mistake, let the gel polish cure and gently buff away the error, then repaint
- Seal everything with a smooth top coat to keep the lines sharp and prevent them from catching on anything
Insider note: Thin outlines work best when applied with gel polish because regular polish lines tend to bead up and look thicker than intended.
7. Coral-Red Ombré with French Tip
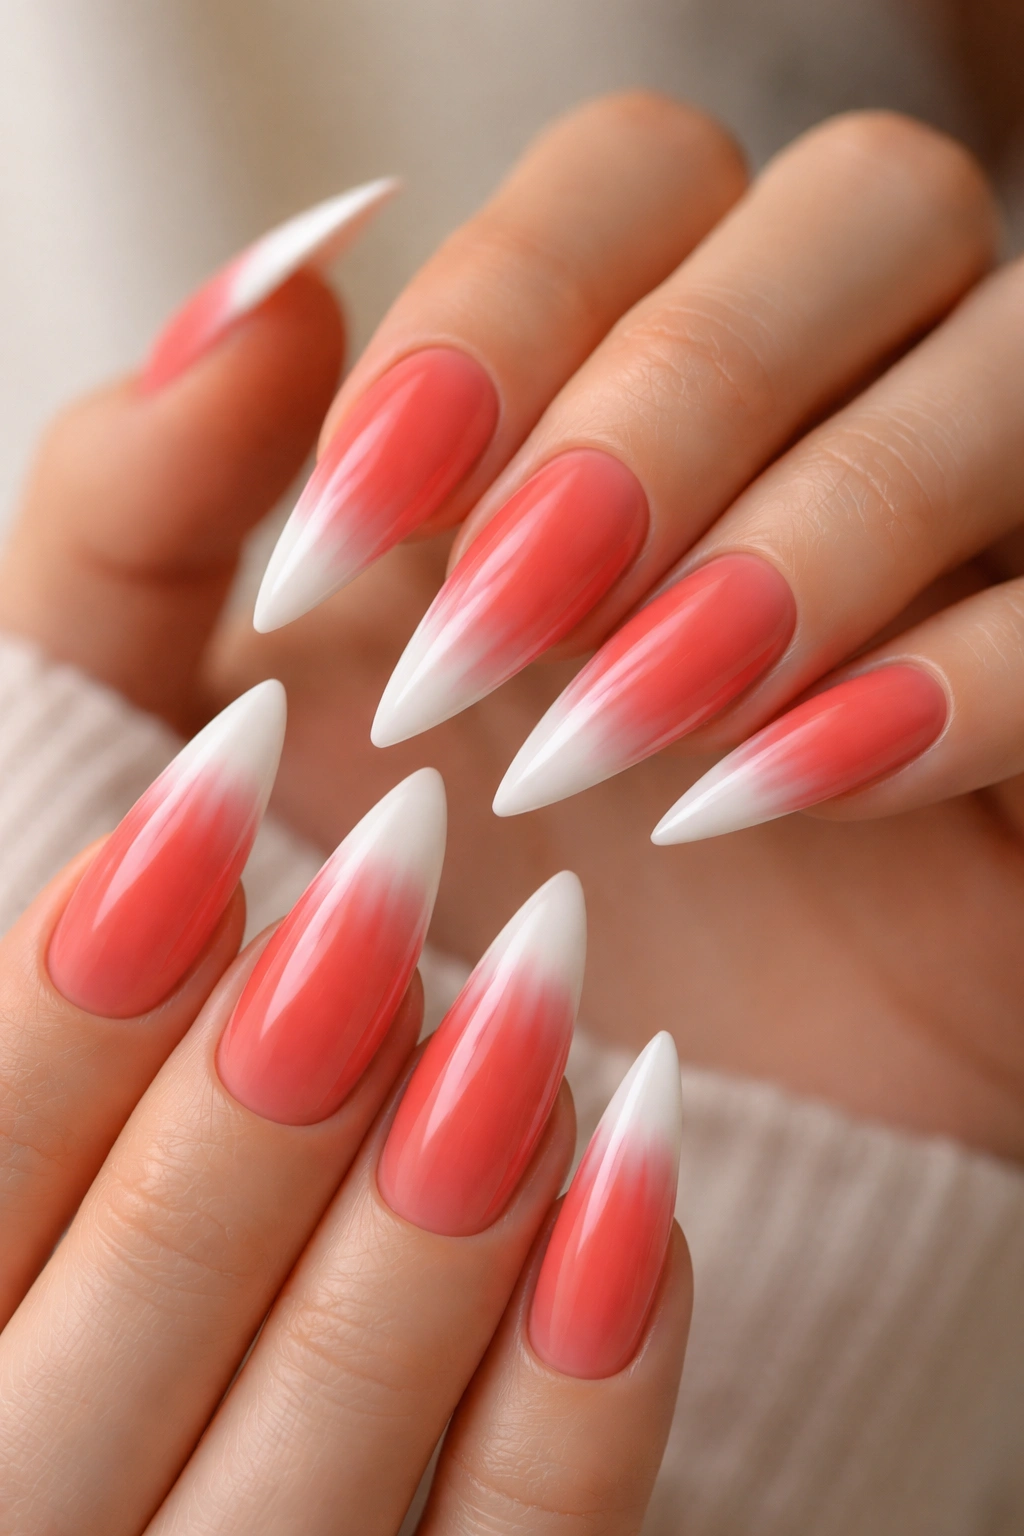
Coral-red shades sit in that beautiful space between red and orange, adding warmth and energy while still maintaining sophistication. When you combine a coral-red ombré effect with a classic white or cream French tip, you get a design that’s modern, playful, and genuinely flattering on most skin tones. The French tip creates a clean endpoint for the ombré gradient and adds an extra element of polish to the overall look.
Why Coral-Red Works on Every Skin Tone
Coral-red has enough warmth to flatter deeper skin tones while being bright enough to stand out on lighter complexions. The ombré effect ensures that the color isn’t overwhelming, while the French tip keeps the design feeling refined rather than trendy. This is a design that feels fresh and current without looking dated within a year.
Achieving the Ombré-to-French-Tip Blend
- Create your coral-red ombré using a sponging technique from the base upward
- About one-quarter of the way down from the tip, transition to a white or cream shade using the same sponging method
- Define the French tip line with a fine striping brush or nail pen if needed
- Seal with a glossy top coat for a polished, salon-quality finish
- The entire design works beautifully in gel polish and holds its color intensity for 3-4 weeks
Pro tip: The gradient works best when you fade the coral-red gradually rather than creating a sudden color change, which makes the transition to the French tip feel more intentional.
8. Crimson Red with Black Geometric Patterns
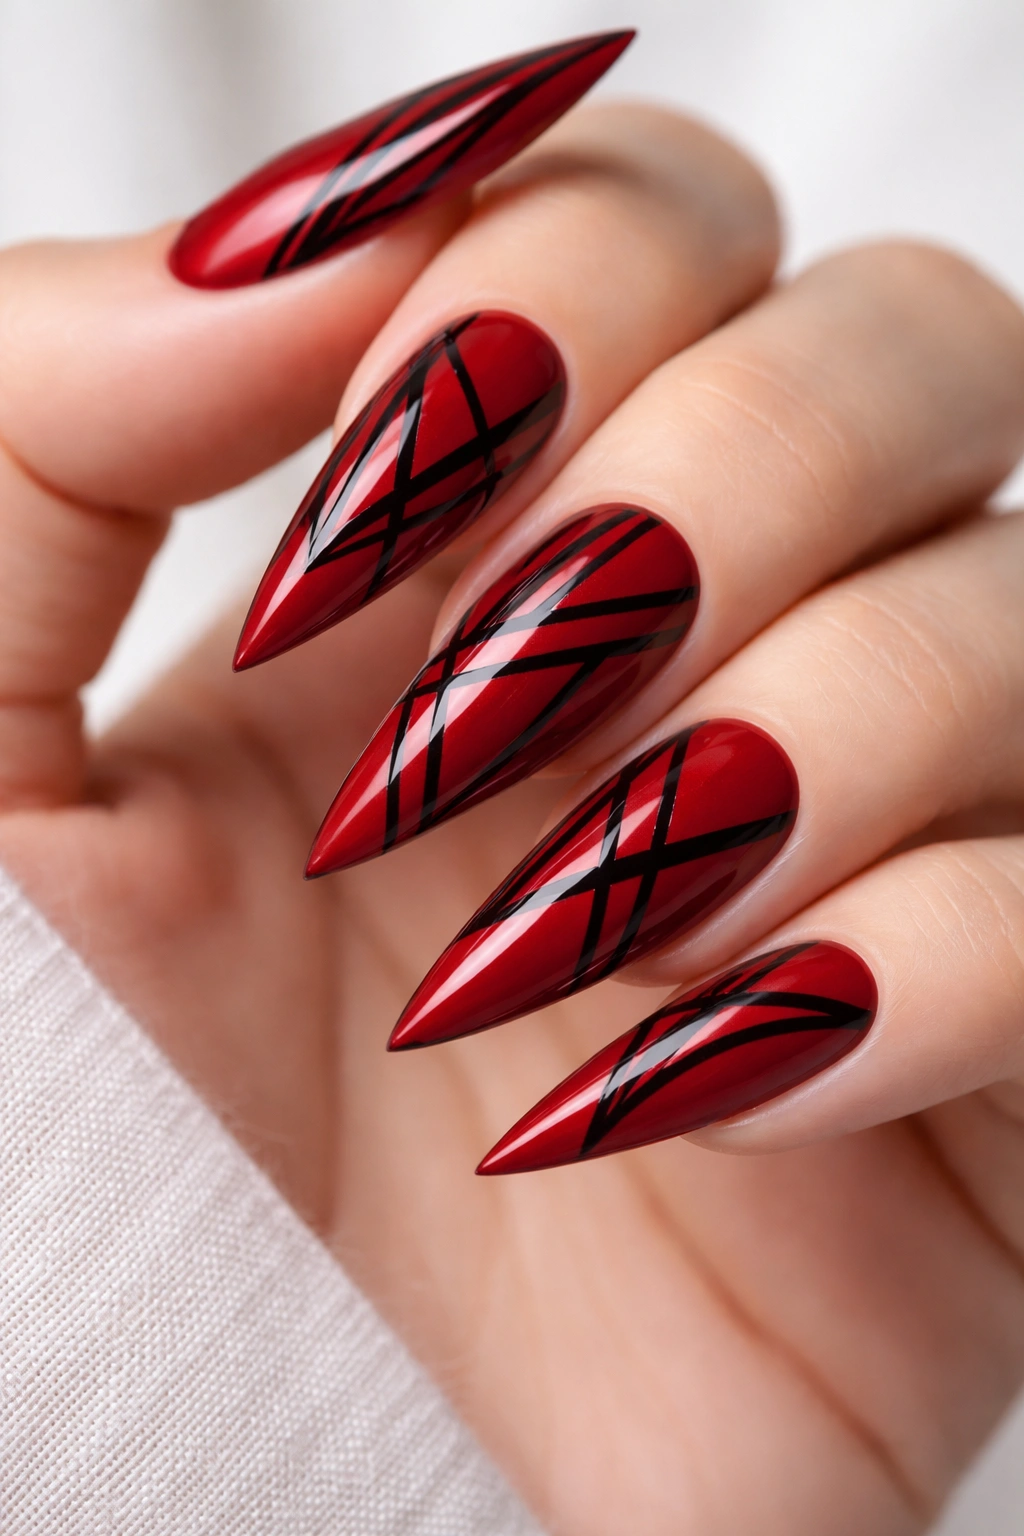
Geometry lovers will adore this design — crisp black lines creating triangles, stripes, or abstract shapes against a bold crimson red base. The high contrast between black and red makes every line pop, and geometric patterns feel contemporary and artistic. On stilettos, these sharp angles actually complement the sharp shape of the nail itself, creating a cohesive aesthetic from base to tip.
Why Black Elevates Red
Black against red creates maximum contrast and visual impact. Geometric shapes add a modern edge to the classic red color, making it feel fashion-forward rather than traditional. The straight lines of geometric designs also emphasize the clean, sharp edges of a stiletto nail shape.
Executing Crisp Geometric Designs
- Start with a flawless crimson red base coat, allowing it to dry completely
- Use a thin striping brush or a nail art pen with black gel polish to draw your geometric shapes
- Work on one nail at a time so the black doesn’t dry before you’ve finished your design
- Take your time with straight lines — they’re more forgiving on stilettos because the narrow surface area means less room for error
- Seal with a glossy or matte top coat depending on the overall aesthetic you’re going for
Worth knowing: If freehand geometric designs stress you out, nail stencils exist for most common geometric patterns and take the guesswork out of placement and proportion.
9. Dusty Rose with Pearl Finish
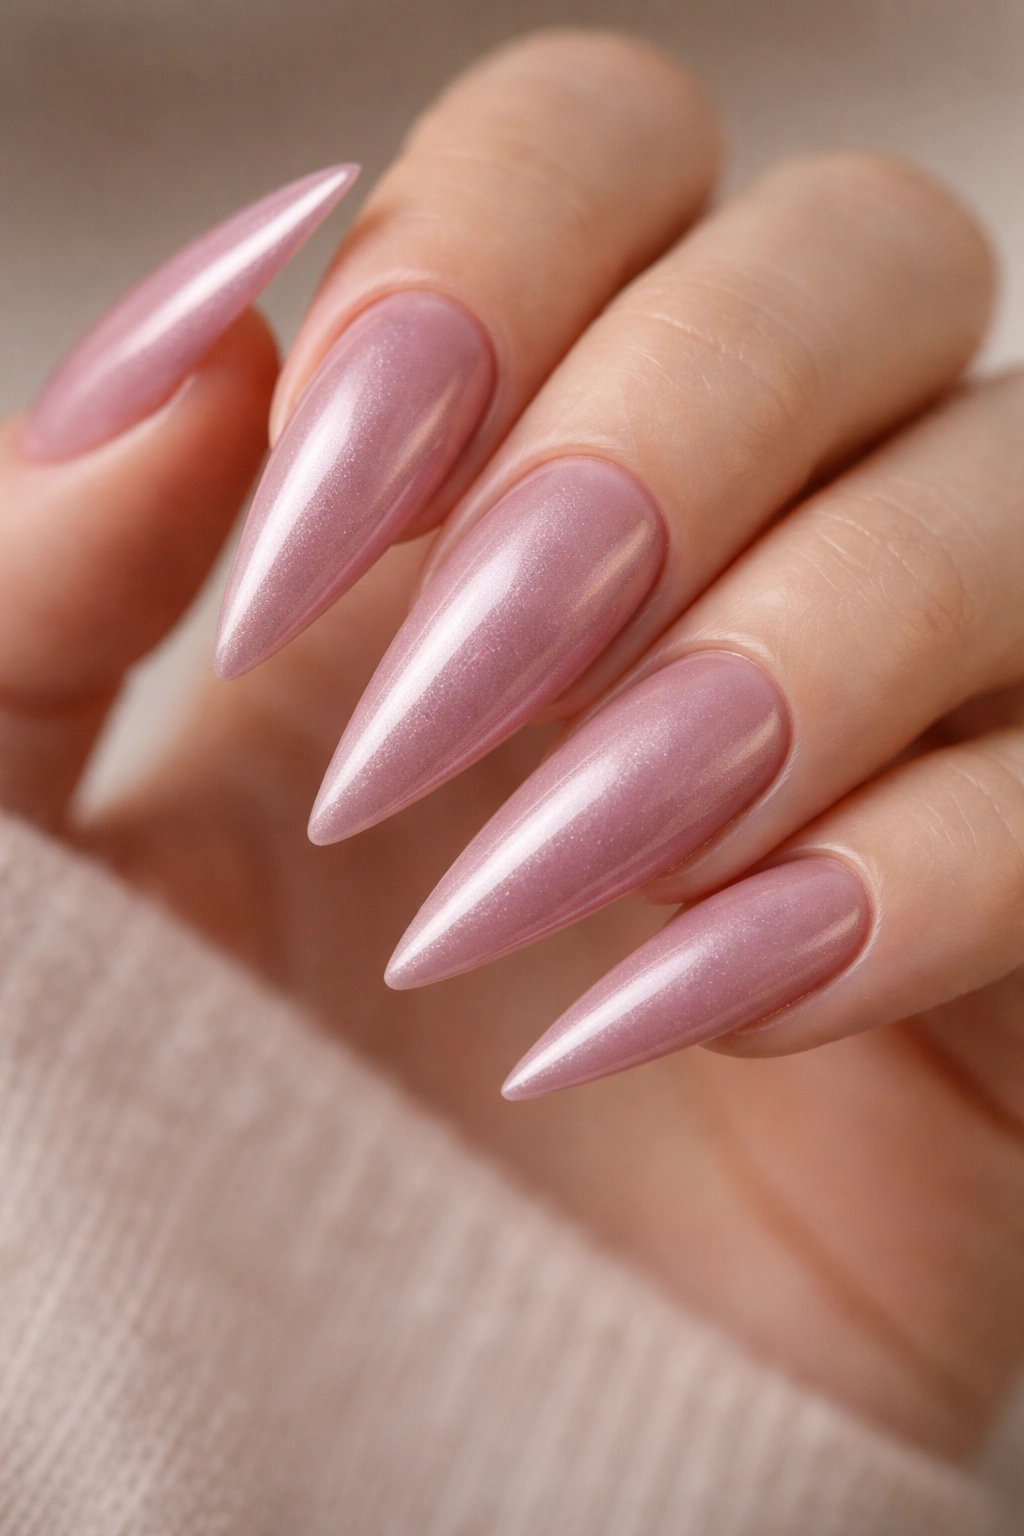
Dusty rose — a muted, cool-toned pink — looks incredibly sophisticated on stilettos, especially when finished with a pearl or shimmer coating that creates a subtle light-catching effect. This shade bridges the gap between pink and mauve, making it wearable for any occasion while still feeling special. The pearl finish means the nail catches light beautifully without being glittery or over the top.
The Elegance of Understated Shimmer
A pearl finish creates dimension without loudness. Rather than a flat color, your nails have subtle depth and movement, which is especially visible when your hands are in motion or catching natural light. On stilettos, this gives the nail shape even more definition without adding any visual weight or making the design feel busy.
Applying Pearl Finish for Best Results
- Use a dusty rose polish or gel with an integrated pearl finish, or apply a pearl top coat over a dusty rose base
- If using a separate pearl coat, make sure your base color is completely cured before applying the pearl layer
- Two thin coats of pearl finish create more visible shimmer than one heavy coat
- Seal with a clear glossy top coat to smooth out any texture and add longevity
- Pearl finishes last beautifully for 3-4 weeks in gel format
Insider note: Dusty rose with pearl finish photographs with incredible softness and elegance, making it perfect if you’re going for an Instagram aesthetic.
10. Hot Pink with White Polka Dots
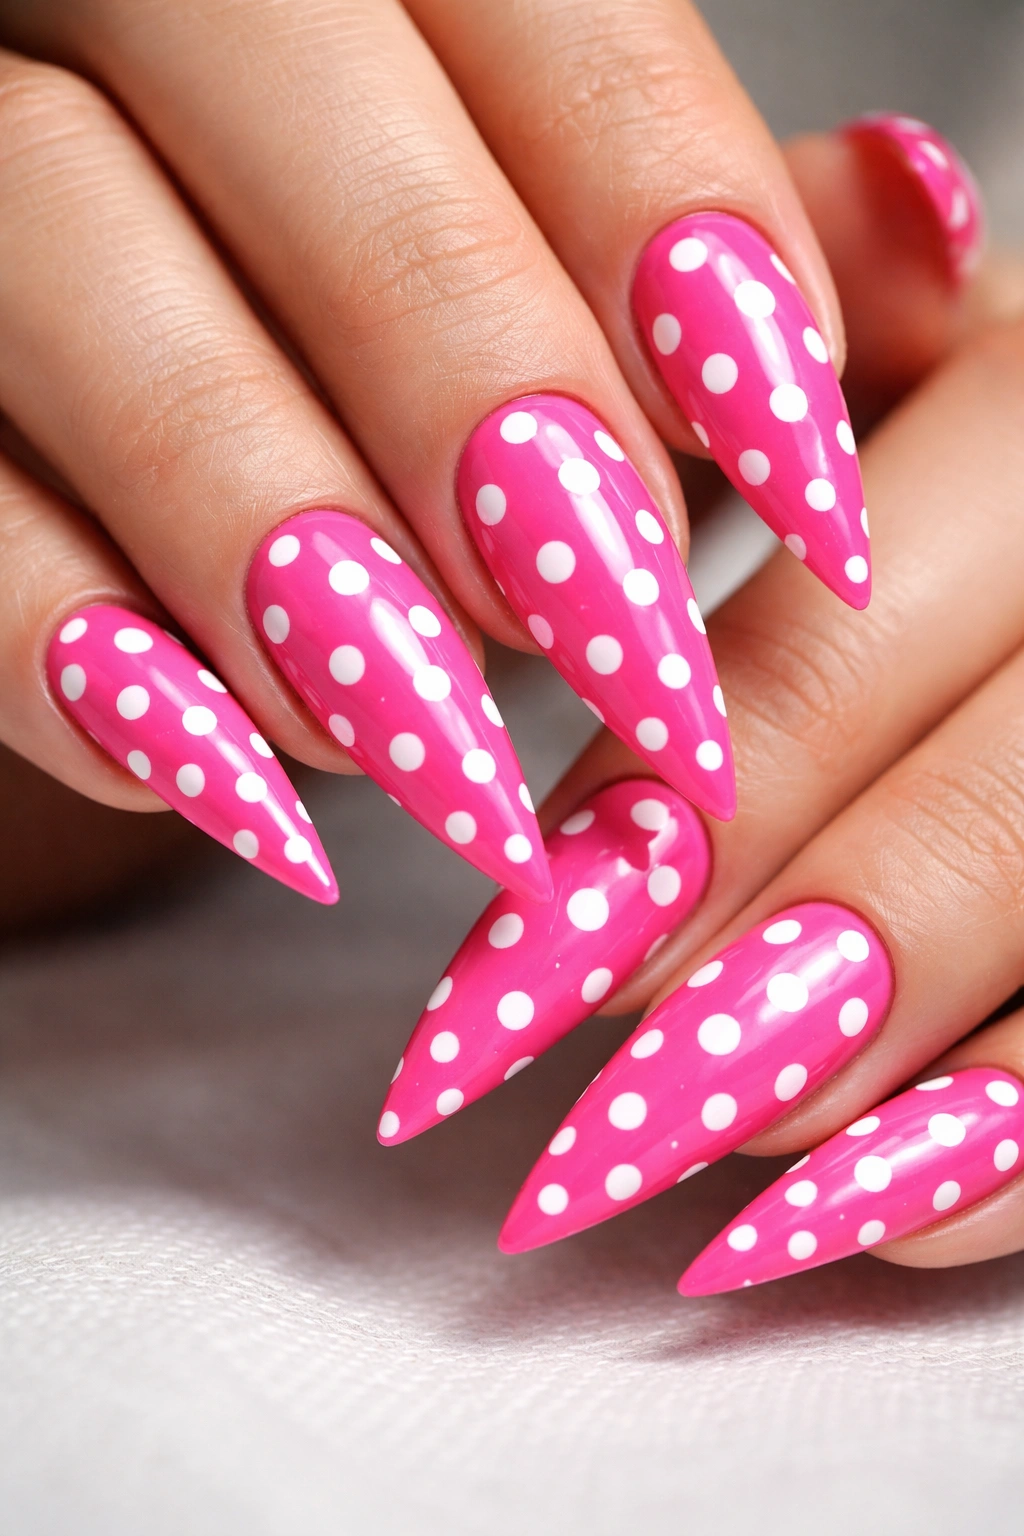
This design brings playful energy while maintaining the sophisticated shape of stilettos — a vibrant hot pink base covered with small white polka dots scattered randomly across each nail. The contrast between the hot pink and white is high and cheerful, and the polka dot pattern feels retro-modern, working equally well whether you’re channeling a ’50s aesthetic or a contemporary pop-art vibe.
Creating Polka Dots That Actually Look Good
Polka dots seem simple but require the right technique to look intentional rather than accidental. The dots should be consistently sized (use a dotting tool or the end of a bobby pin to create uniform circles), and they should be randomly distributed so they feel natural rather than grid-like. On stilettos, the smaller surface area actually makes dots easier to place than on longer nails.
The Best Tools for Polka Dots
- A professional dotting tool (available at any beauty supply store) in several sizes for variety
- White gel polish or acrylic paint applied with a light hand so dots stay opaque
- Each dot should be completely dry before moving to the next nail to avoid smudging
- Seal with a top coat that doesn’t disturb the wet dots — apply gently and avoid overworking
- Polka dots are durable and last the full wear cycle without chipping if applied correctly
Pro tip: If your polka dots aren’t perfectly round, they actually look more artistic and intentional — don’t stress about perfection.
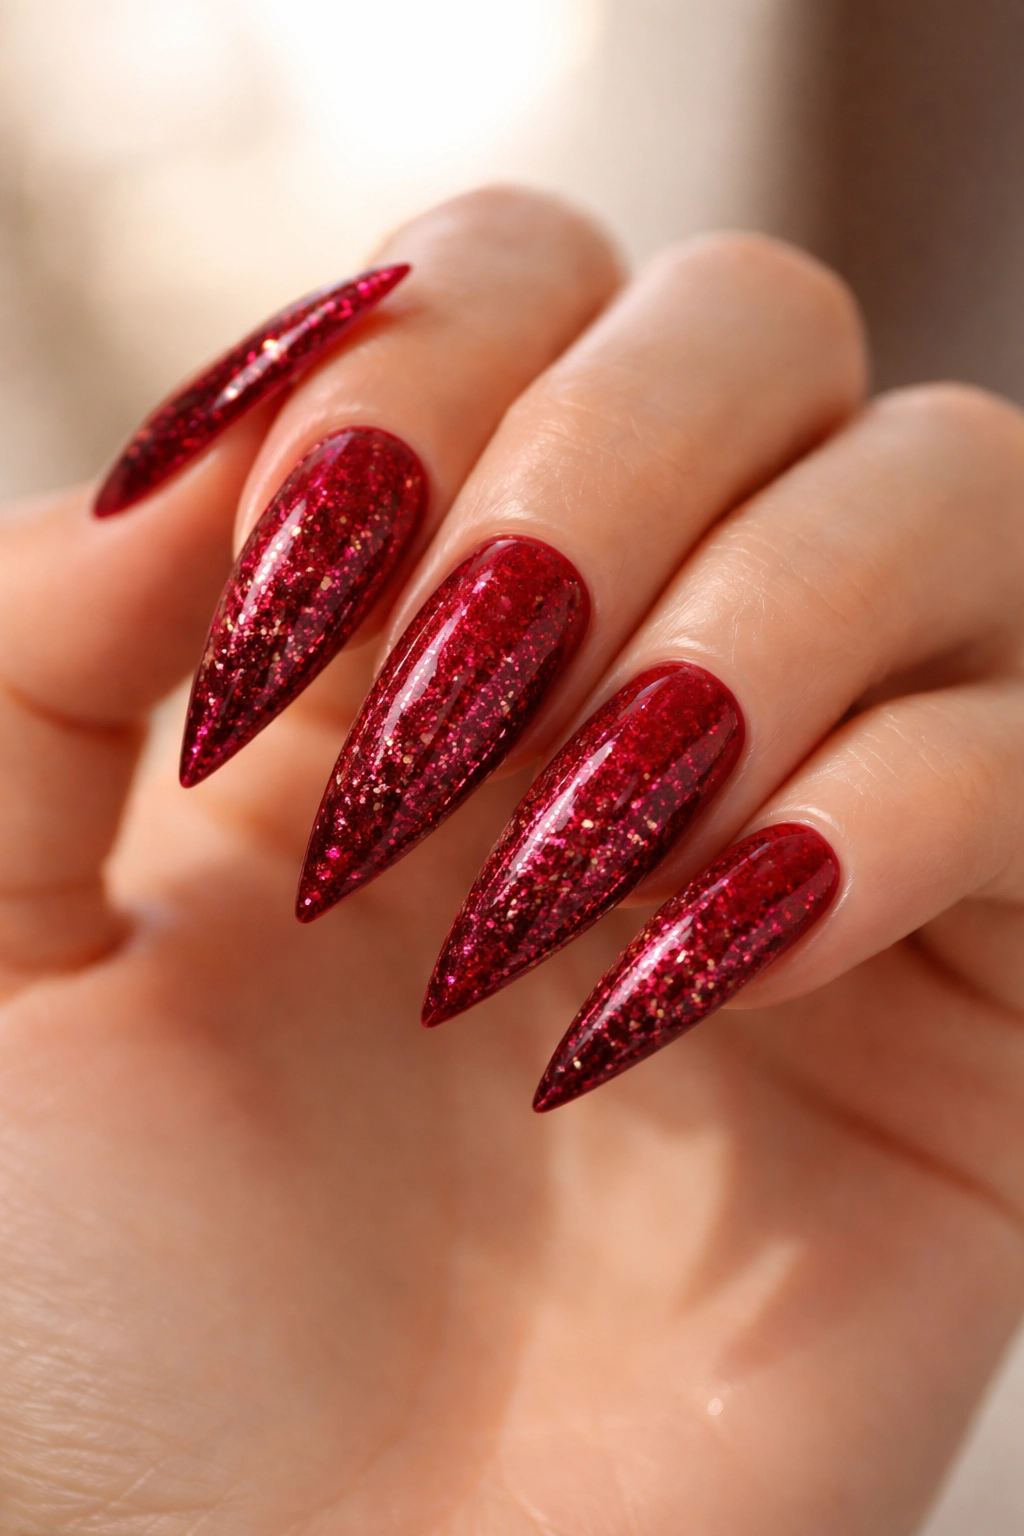
11. Berry Red with Micro Glitter
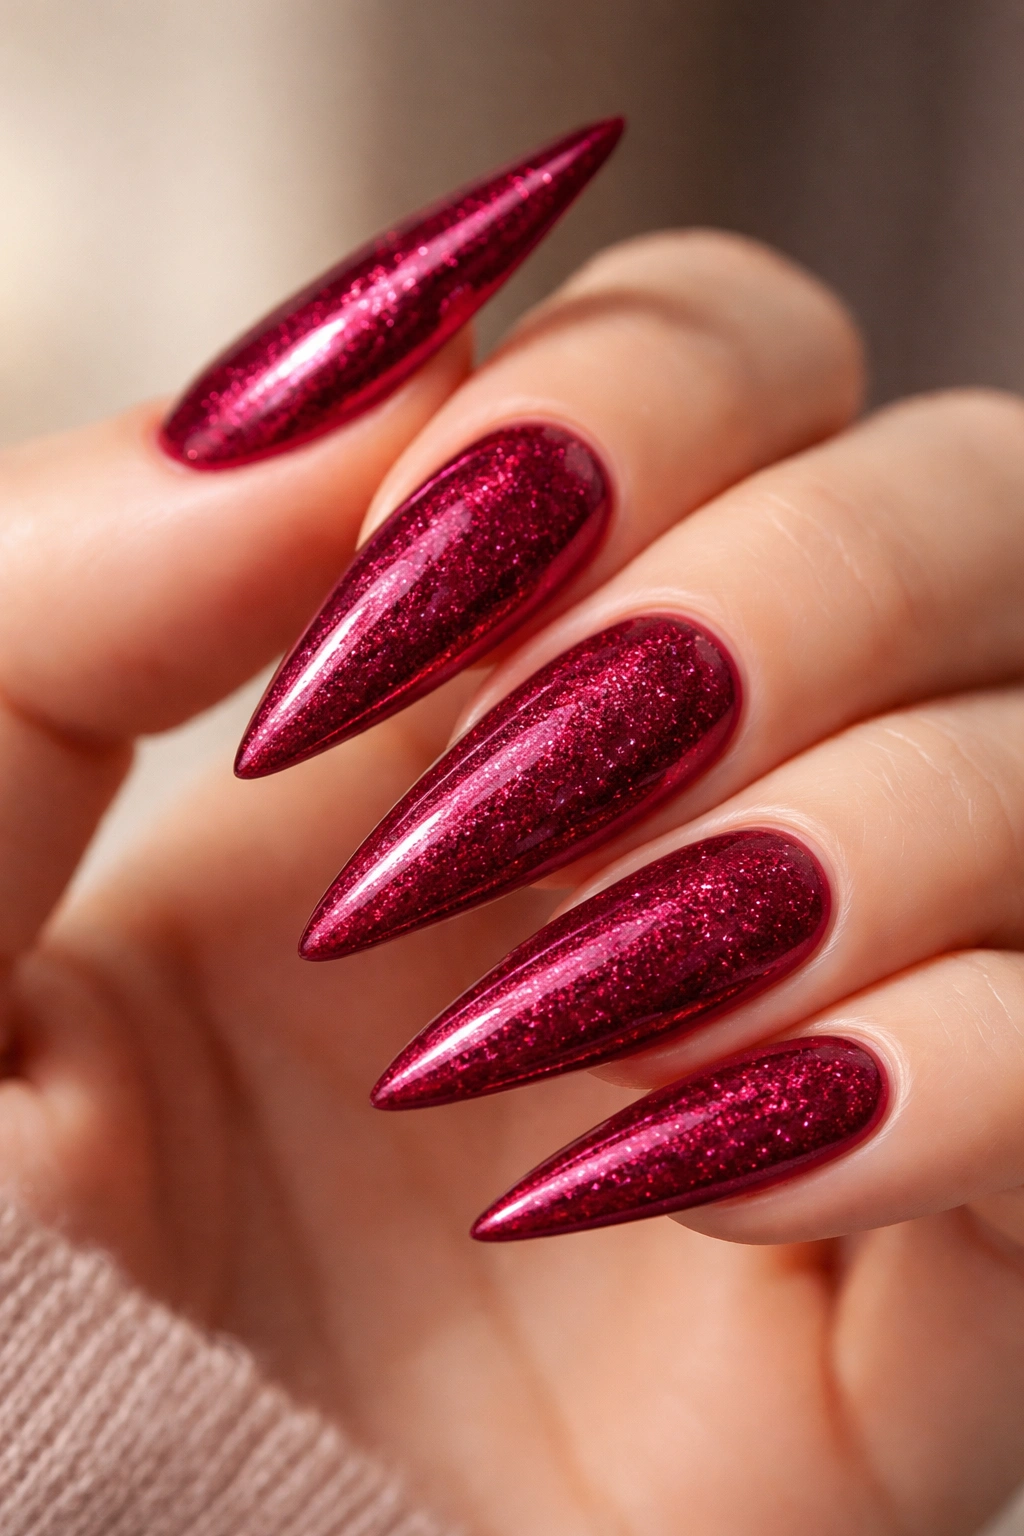
Berry red is deeper and slightly cooler-toned than a bright red, giving it an autumn-ready, sophisticated vibe. When you add micro glitter (tiny sparkles suspended in a clear polish or gel), the nails catch light continuously without the over-the-top effect of chunky glitter or rhinestones. This design feels celebratory and special while remaining wearable for daily life, which is a rare balance to strike.
How Micro Glitter Changes the Look
Micro glitter reflects light so subtly that it’s almost invisible indoors but absolutely sparkles in natural light or under photography flashes. On stilettos, this creates an elegant, shimmering effect that draws the eye along the entire length of the nail. The berry red base keeps everything grounded and sophisticated while the glitter adds festive energy.
Applying Glitter Evenly
- Use a berry red gel or polish as your base and let it cure completely
- Apply a layer of micro glitter gel or use a clear gel mixed with loose micro glitter
- Make sure the glitter is evenly distributed by gently pushing stray particles around with a brush before curing
- If using loose glitter, seal it immediately with a thick top coat so it doesn’t shift
- Micro glitter designs last beautifully for 4+ weeks in gel format
Worth knowing: Micro glitter is easier to remove than chunky glitter when you eventually take your nails off, which is another advantage over larger sparkle elements.
12. Red with Nude Marble and Gold Flecks
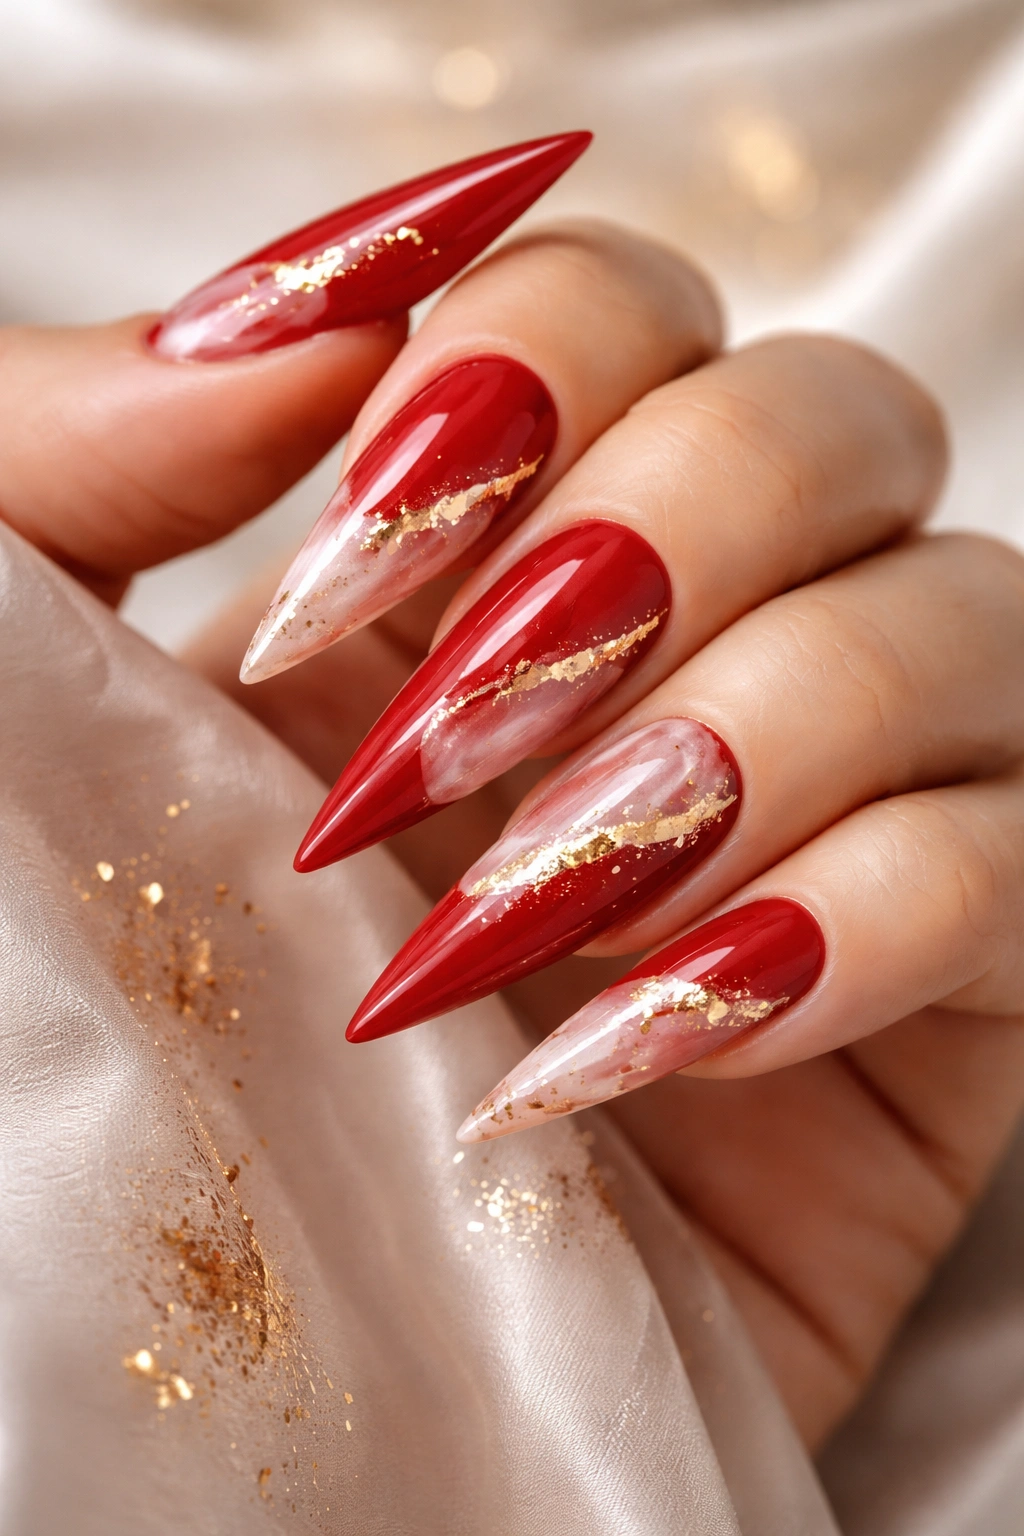
This design combines three elements — a red base, nude marble swirls, and gold foil flecks — to create something truly luxurious and multi-dimensional. The nude marble adds softness and breaks up the intensity of the red, while gold flecks scattered throughout add warmth and catching-light appeal. On stilettos, this design feels expensive and carefully curated without being overwhelming.
Layering Multiple Design Elements Successfully
When combining marble, foil, and solid colors on one nail, the order of application matters. Start with your base red, add the marble swirls on top, let everything cure, then apply foil or foil flecks last. This ensures each layer is visible and protected. The combination of matte marble, reflective foil, and shine from the top coat creates incredible depth.
Building This Complex Design
- Apply red base and let it cure
- Create nude marble swirls using a sponging technique or hand-painted approach
- Allow marble to cure completely
- Apply foil accents or scatter gold flecks into a clear gel layer
- Seal everything with a protective top coat
- This design is best achieved with gel polish for durability and color vibrancy
Insider note: This design takes longer to create than simple ones, so budget extra time when booking an appointment or planning to do it yourself.
13. Passion Pink with Ombre to Clear Tips
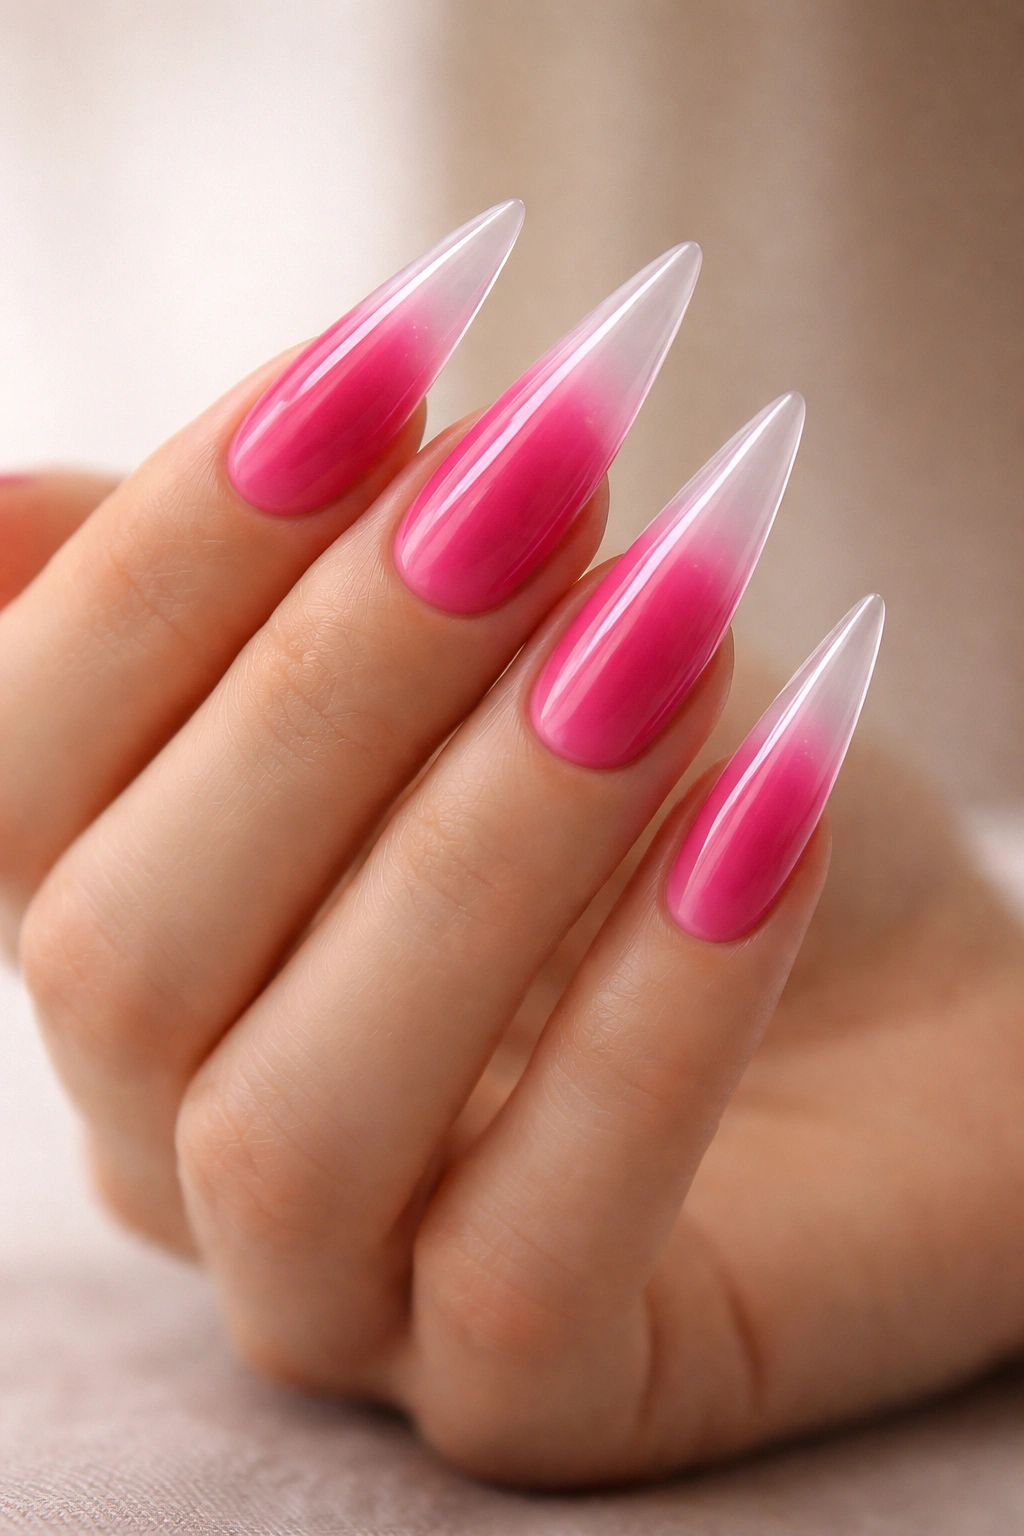
Passion pink — a vibrant, fully saturated pink — paired with an ombre effect that gradually fades to clear tips creates an interesting visual that works particularly well on stilettos because the fading effect accentuates length. The nail appears to extend beyond where it physically ends because the color gradient creates the illusion of extension. This is a sophisticated design that feels modern and a bit daring while remaining elegant.
The Psychology of Ombre to Clear
Fading to clear is an advanced technique that makes nails appear longer than they actually are. The eye follows the color fade and continues upward even after the color ends, which is a powerful visual trick for making stilettos feel impossibly long. Clear tips also show off the actual length of your nail, creating a dual effect of elegant length.
Achieving a Smooth Fade to Clear
- Start with a passion pink base
- About one-third of the way to the tip, start blending in a lighter pink shade using a sponge
- About halfway up the nail, begin blending in white or clear
- The final third of the nail transitions completely to clear
- Multiple thin layers of blending create smoother transitions than trying to do it in one sponge application
- Seal with a clear top coat for a smooth, finished appearance
Pro tip: This design looks particularly stunning in natural lighting because the color fade is so visible and dramatic.
14. Red Velvet Matte Finish
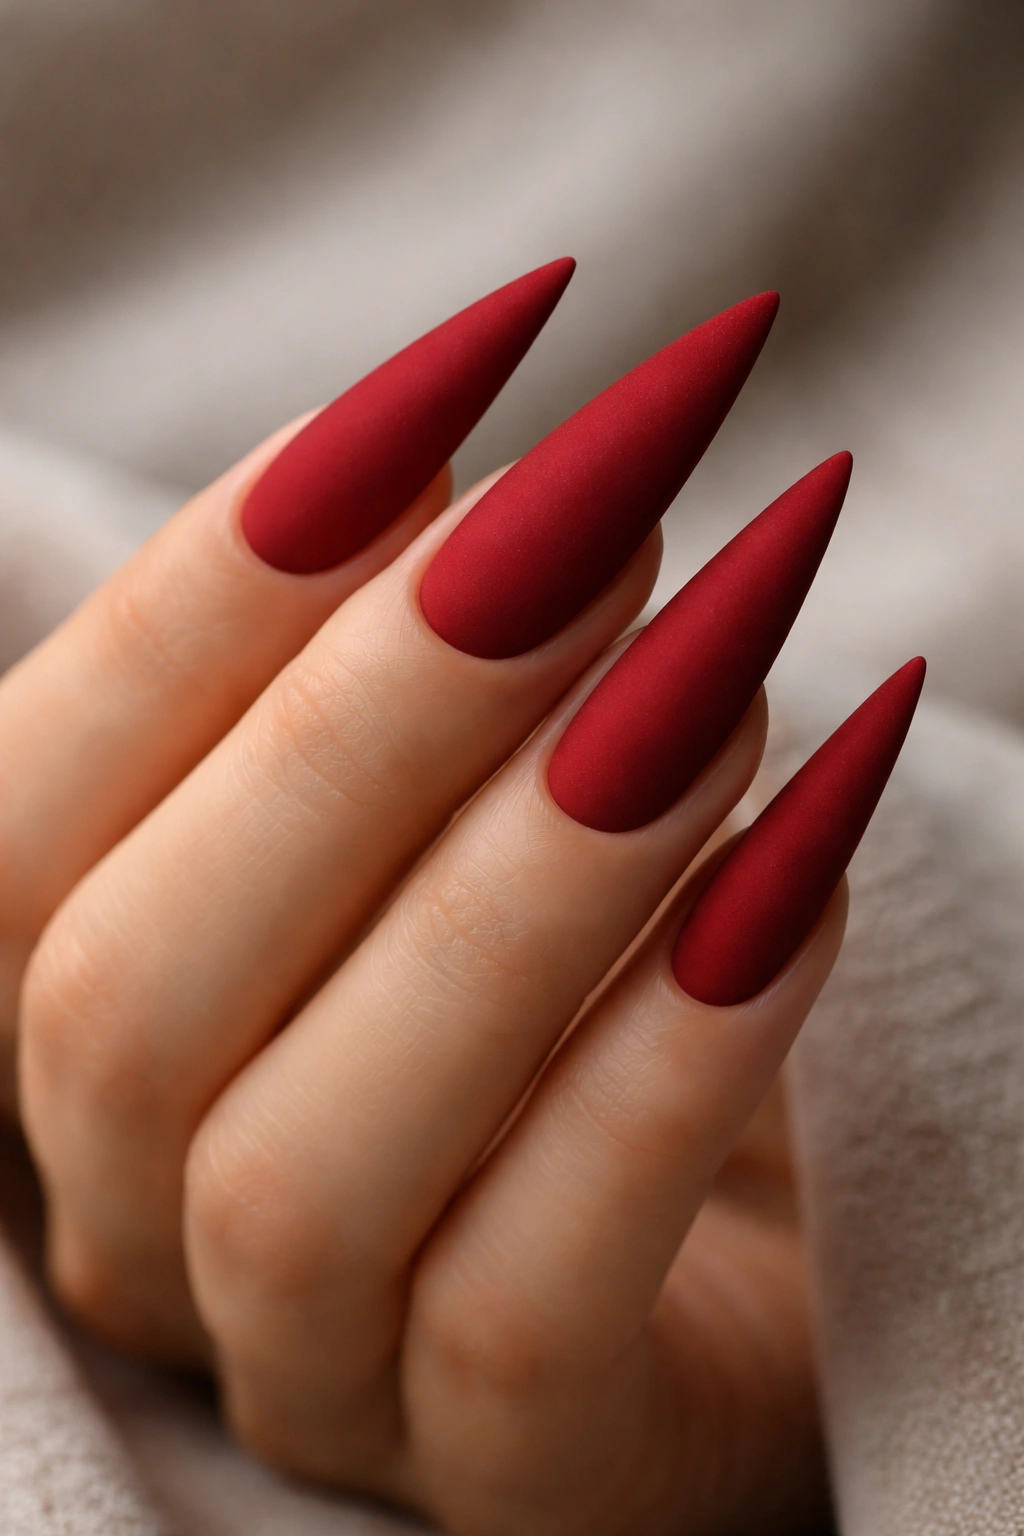
Red velvet matte nails feel luxurious and tactile — the finish is so smooth and rich-looking that people often want to touch your nails to feel the texture. On stilettos, a matte finish actually emphasizes the nail’s shape more than a glossy finish because there’s no reflective shine to distract from the silhouette. This design is simultaneously modern and vintage-feeling, making it endlessly wearable.
Why Matte Finishes Photograph Better
Matte finishes eliminate gloss reflection, which means photos of your nails look clearer and more true-to-color. The nail itself becomes the focus rather than light reflections, which is especially beneficial on stilettos where you want the shape to be the star. Matte red has a depth that glossy red sometimes lacks.
Creating and Maintaining a Matte Finish
- Use a red matte polish or gel polish designed for matte wear
- A thin base coat ensures proper adhesion without showing through the matte finish
- Two coats of matte red create full opacity and rich color
- Skip the glossy top coat — matte finishes are designed to stay matte and aren’t sealed with shine
- If you accidentally apply glossy top coat, you can re-matte the nails with a matte top coat or buffing
- Matte finishes last just as long as glossy finishes but may appear to dull slightly at the 3-week mark
Worth knowing: If you love the matte look but worry about durability, gel matte polish holds up better than regular matte polish and maintains its finish for the full wear cycle.
15. Pink and Red Striped Design
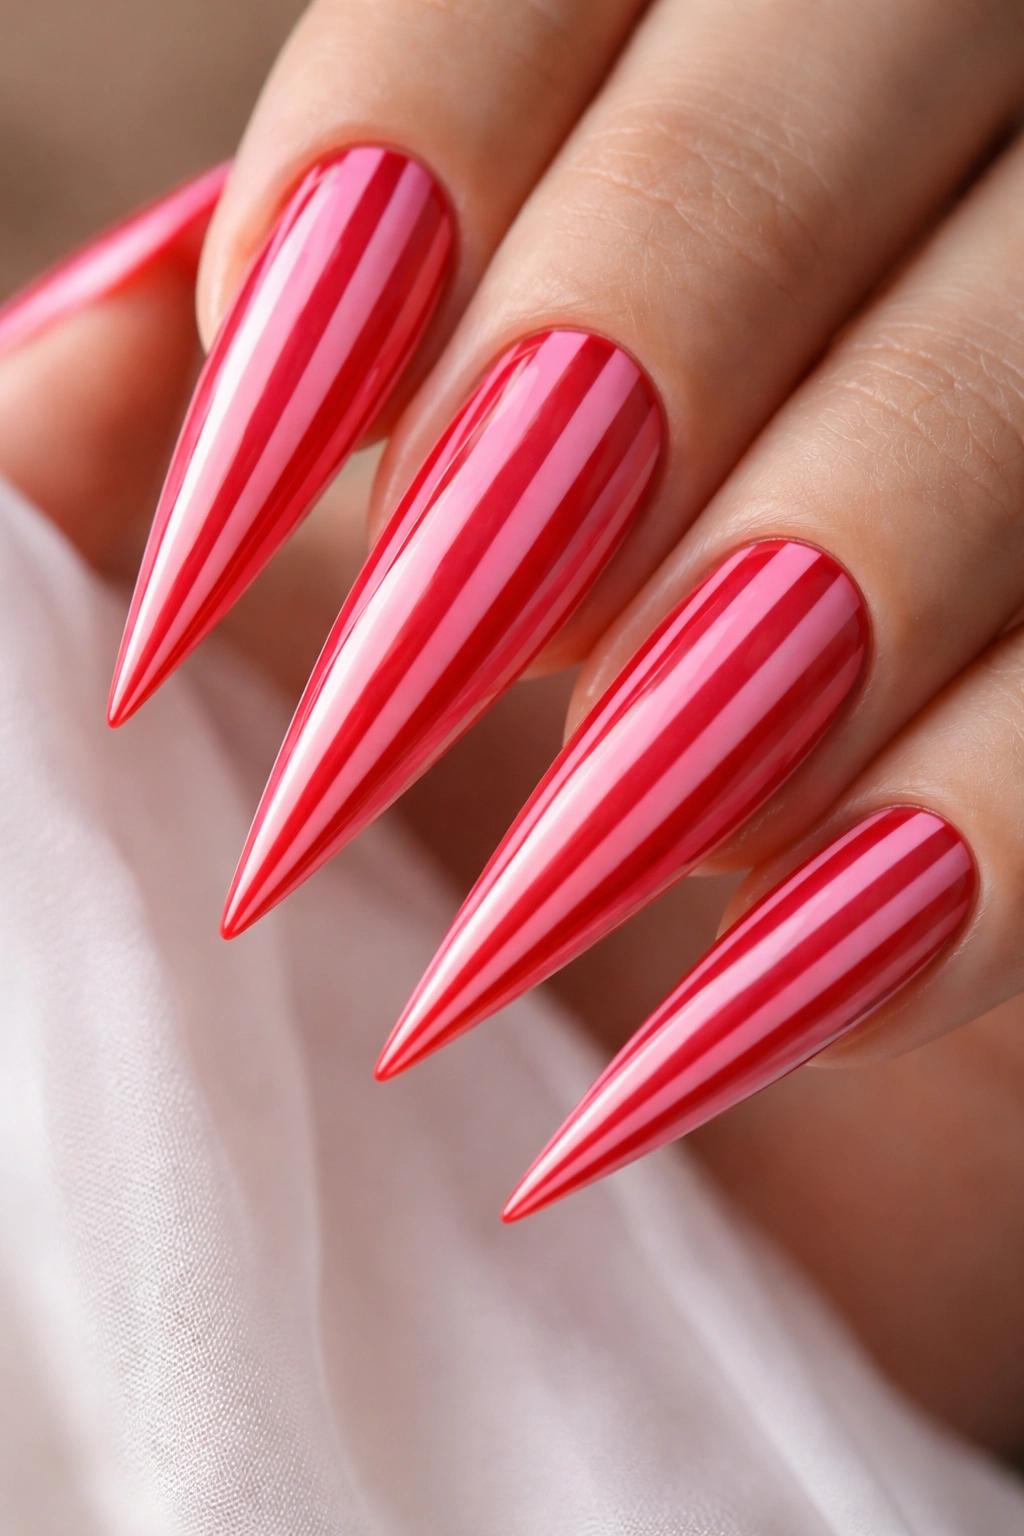
Thin horizontal or vertical stripes alternating between pink and red create a playful, dynamic design that works particularly well on stilettos because the stripes accentuate the nail’s length. You can do fine stripes for a delicate look, wider stripes for something bolder, or even diagonal stripes for added visual interest. The contrast between the two colors makes every stripe pop without requiring any additional embellishments.
Stripe Patterns That Elongate
Vertical stripes are famous for creating elongation illusions, which is already the inherent benefit of stilettos — combining them together creates an almost impossibly long visual effect. Horizontal stripes work differently, creating width perception, which is why they’re less common on long nails. Diagonal stripes feel modern and move the eye in an intentional direction.
Creating Precise Stripes
- Choose whether you want vertical, horizontal, or diagonal orientation
- Use a thin striping brush and one color at a time to paint alternating stripes
- Start with one color, space out your stripes evenly, then fill in the gaps with the other color
- Allow each color to dry before applying the next to prevent bleeding or color mixing
- Seal with a glossy or matte top coat to protect your design
- Striped designs work beautifully in gel polish and last for weeks without chipping
Insider note: If painting even stripes stresses you, nail striping tape exists and creates perfectly spaced lines with minimal effort.
16. Crimson Red with Negative Space Moon Design
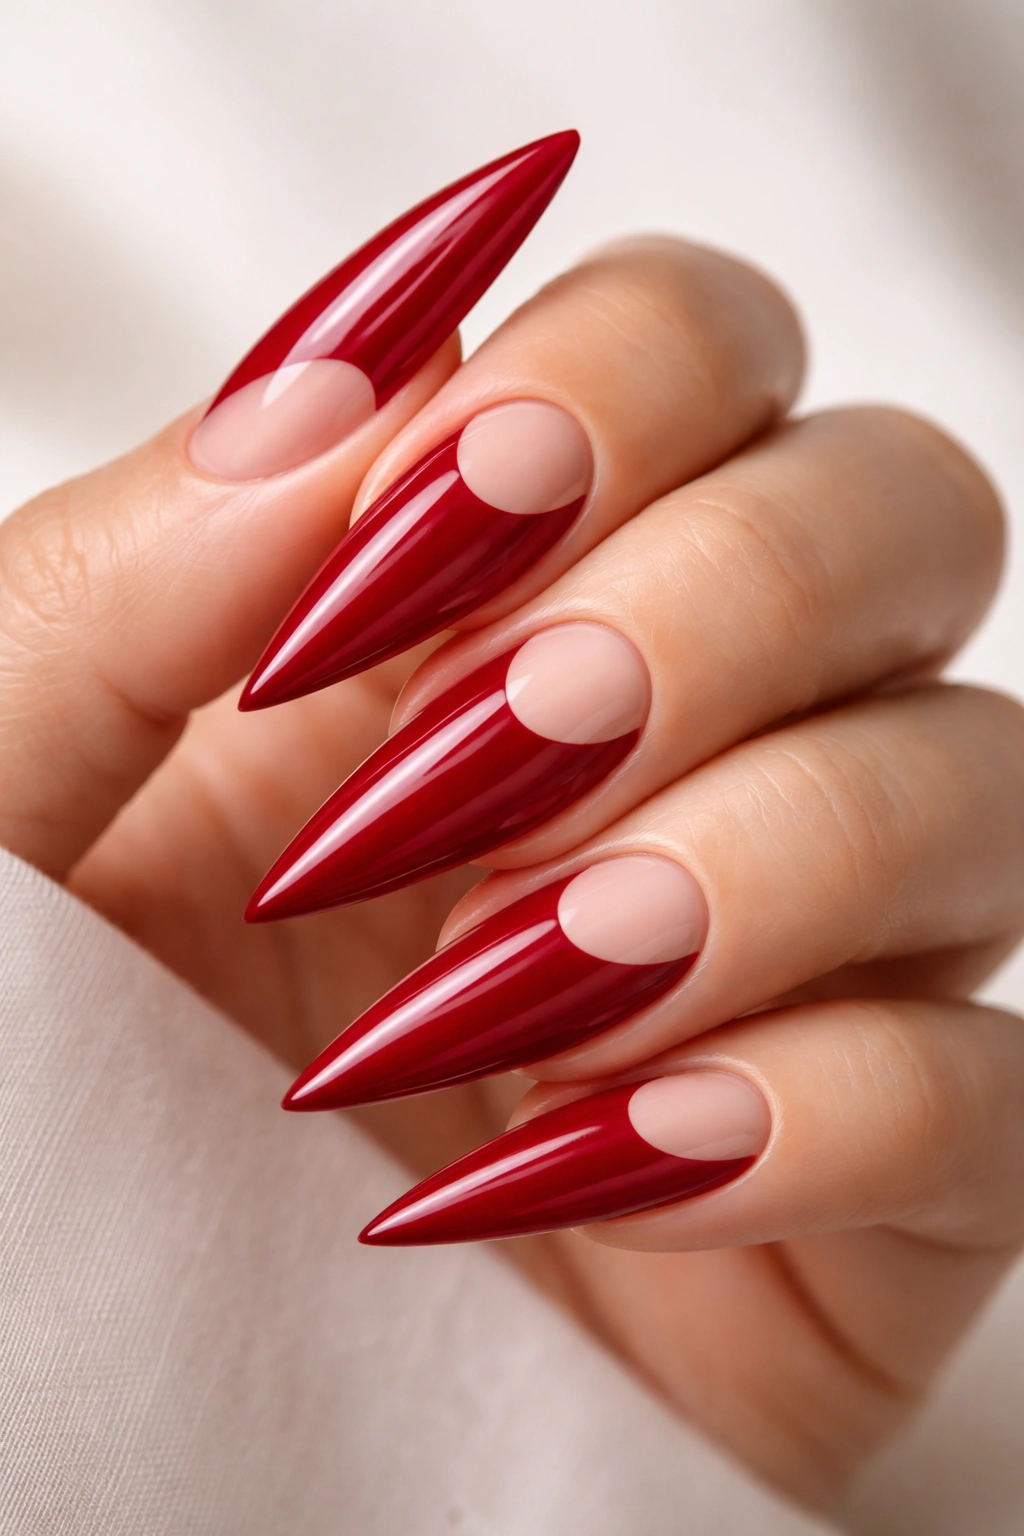
Negative space designs create visual interest by showing the natural nail or nail bed beneath the polish. A moon design — where you leave a curved half-moon shape unpainted and paint the rest of the nail crimson red — creates a striking, modern aesthetic. On stilettos, the geometric curve of the moon design complements the sharp shape of the nail itself, creating a cohesive, intentional look.
The Elegance of What You Don’t Paint
Negative space designs feel artistic and contemporary because they require confidence — you’re letting the natural nail show through intentionally rather than covering it completely. This design works especially well on stilettos with healthy, attractive nail beds. The moon shape creates a visual element that’s impossible to miss without adding any texture or embellishments.
Creating a Clean Moon Design
- Use nail stencils (shaped like a half-moon) to outline your design, or mark the area with a pencil
- Paint the crimson red carefully around the moon shape, being precise at the edges
- Allow the red to cure, then remove any stencils carefully
- You can seal the design or leave it unsealed — leaving it unsealed keeps the nail bed area completely natural
- This design works in gel polish and lasts for 3-4 weeks
Pro tip: Make sure your natural nail bed looks its best before doing a negative space design since it’ll be on full display.
17. Blush Pink with Micro Texture or Flocking
Flocking is a texture technique where tiny fibers are applied to wet polish, creating a velvety, tactile surface. On blush pink, flocking creates a sophisticated, touchable finish that feels modern and luxurious. The texture adds visual depth and catches light differently than smooth polish, making your nails feel dimensional and special. On stilettos, texture emphasizes shape in a different way than traditional polish.
Understanding Flocking vs. Other Textures
Flocking creates a velvet-like texture that’s incredibly soft to the touch, while other texture techniques might create a rougher finish. Flocking is applied only to the top layer of polish, so it doesn’t compromise the structural integrity of your nails. The effect is surprisingly durable for a texture technique and lasts well through normal daily wear.
Applying Flocking Successfully
- Apply your blush pink base and cure it completely
- While the top coat is still tacky (wet), immediately apply flocking powder by gently pressing it into the polish
- Shake off excess powder and allow it to cure
- Seal with a glossy top coat to protect the texture and keep it from shedding
- Flocked nails last 3-4 weeks but may lose some texture at the edges first
- When removing, be gentle around the flocked areas to avoid pulling
Worth knowing: Flocking requires a skilled hand or professional application, so this is a design to bring to a nail technician rather than attempting alone.
18. Deep Red with Gradient Glitter Fade
Gradient glitter is a technique where glitter density increases from the base to the tip of the nail, creating a subtle-to-dramatic effect. On deep red, gradient glitter starts nearly invisible at the base and builds to fully sparkly tips, which creates a striking visual that feels celebratory without being costume-like. This design works beautifully on stilettos where the increasing sparkle draws the eye upward along the length of the nail.
How Gradient Glitter Creates Drama
Because the glitter fades in gradually, the design doesn’t feel overwhelming. The sparse glitter near the nail bed keeps the overall aesthetic grounded, while the heavy sparkle at the tips ensures the design is visible and striking. On stilettos, this creates a visual journey that emphasizes the nail’s length.
Building a Gradient Glitter Effect
- Start with a deep red base and let it cure
- Apply a layer of glitter-free polish or gel to the base of the nail
- Add a light layer of small glitter particles about one-quarter of the way up the nail
- Increase glitter density as you move toward the tip
- The final quarter of the nail should be completely covered in glitter
- Seal with a protective top coat that smooths everything into one unified surface
- Gel polish holds this design beautifully for 3-4 weeks
Insider note: You can create gradient glitter by hand, but pre-made gradient glitter gels exist and make the process much easier and more evenly distributed.
19. Hot Pink with Chrome or Mirror Finish
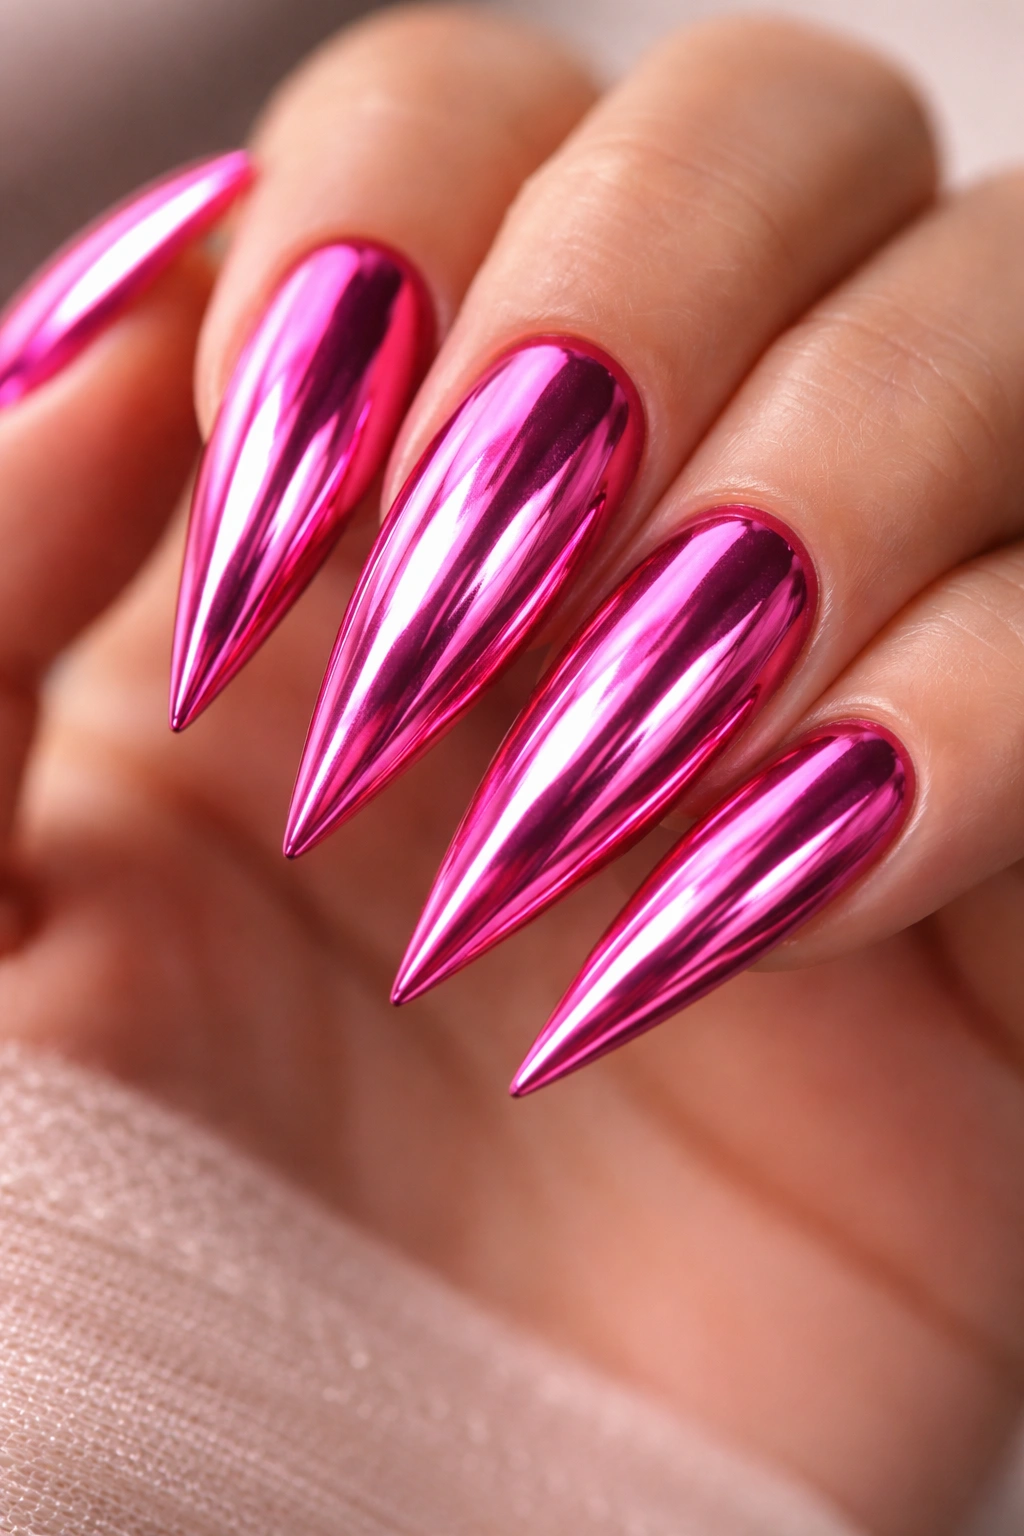
Chrome finishes on nails create a reflective, metallic effect that looks futuristic and incredibly eye-catching. On hot pink, chrome creates an almost liquid, holographic appearance that seems to shift and change as the light hits it differently. This design feels bold and modern, perfect for someone who wants their nails to be the absolute focal point of their appearance. On stilettos, the chrome finish makes the sharp shape appear almost three-dimensional.
Understanding Chrome and Mirror Finishes
Chrome and mirror finishes are created using special metallic powders applied to wet gel polish. The effect is incredibly reflective and transformative — the same hot pink can look completely different depending on lighting and angle. This is a design that photographs differently in every setting, which makes it endlessly interesting.
Achieving a Flawless Chrome Effect
- Apply hot pink gel polish as your base
- While the base is still slightly tacky after curing, apply chrome powder using a small brush
- Press the powder into the polish firmly and evenly
- Brush away excess powder carefully
- Seal with a top coat, which may slightly dull the chrome effect — this is normal
- Chrome designs last 3-4 weeks but the effect may become slightly less reflective with time
- When removing, be gentle since chrome powder can shed if nails are scratched
Pro tip: Chrome works best in bright, outdoor lighting where its reflective properties are most visible — indoor lighting may make it appear more subtle.
20. Red-Pink Ombré with Encapsulated Gold Leaf
This final design combines everything — a gradient from deep red to soft pink, with gold leaf encapsulated (sealed) inside the layers of gel. The gold leaf creates visible sparkle and luxury without the worry of it coming loose or shedding. On stilettos, the color gradient creates length perception while the encapsulated gold adds dimension and refinement that makes this design feel like the most sophisticated choice possible.
The Advantage of Encapsulation
Encapsulated designs seal delicate elements like gold leaf between layers of gel polish, protecting them completely while keeping them visible. This technique creates durability that loose foil or leaf can’t match. On nails you plan to wear for weeks, encapsulation ensures your design looks perfect throughout the entire wear cycle.
Creating an Encapsulated Gold Leaf Design
- Apply a red base gel and cure it
- While still slightly tacky, apply small pieces of gold leaf to the nail
- Apply a thin layer of clear gel over the leaf to encapsulate it
- Cure this layer, then continue building your ombré gradient from red to pink on top
- The gold leaf will be visible through all the layers
- This design requires multiple gel layers, so plan for longer application time
- Encapsulated designs last 4+ weeks and look pristine at removal
Worth knowing: This is definitely a professional-application design unless you have serious nail art experience — the layering and precision required make it challenging for DIY enthusiasts.
Final Thoughts
Red and pink stiletto nails aren’t just about following trends or trying something new — they’re about tapping into a nail aesthetic that’s been loved for years and will continue to be relevant long into the future. Whether you choose a simple, elegant crimson red or venture into something as complex as encapsulated gold leaf designs, stilettos give you the perfect canvas to express your style. The shape itself is a statement, and the color just amplifies that confidence.
The best design for you is the one that makes you feel incredible when you look at your hands. Some of these designs are beginner-friendly and perfect for at-home application, while others deserve professional attention and investment. Start with whatever speaks to you most — whether that’s the simplicity of classic crimson or the complexity of a multi-element masterpiece — and remember that your nails are always an extension of your personal style. The versatility of red and pink means you truly can’t go wrong with any of these approaches.
