

Black stiletto nails are an absolute powerhouse when it comes to making a statement. There’s something undeniably chic about the combination of that sharp, elongated shape paired with a deep, sophisticated black shade — it reads as confident, polished, and effortlessly elegant no matter the occasion. But here’s what many people miss: you don’t need elaborate nail art or weeks of growth to pull off stilettos that actually look intentional. Some of the most striking looks come from subtle touches that enhance the shape without requiring a steady hand or professional-level detail work.
The beauty of black stilettos is their versatility. Whether you’re going for boardroom-appropriate understated elegance or weekend drama, black works with absolutely everything in your wardrobe. The trick is understanding which simple additions — a metallic edge, a strategic accent, a texture shift — will elevate your base without overwhelming the clean lines that make stilettos so visually compelling. Below are ten ideas that strike that perfect balance between simple enough for a beginner to execute and sophisticated enough to turn heads.
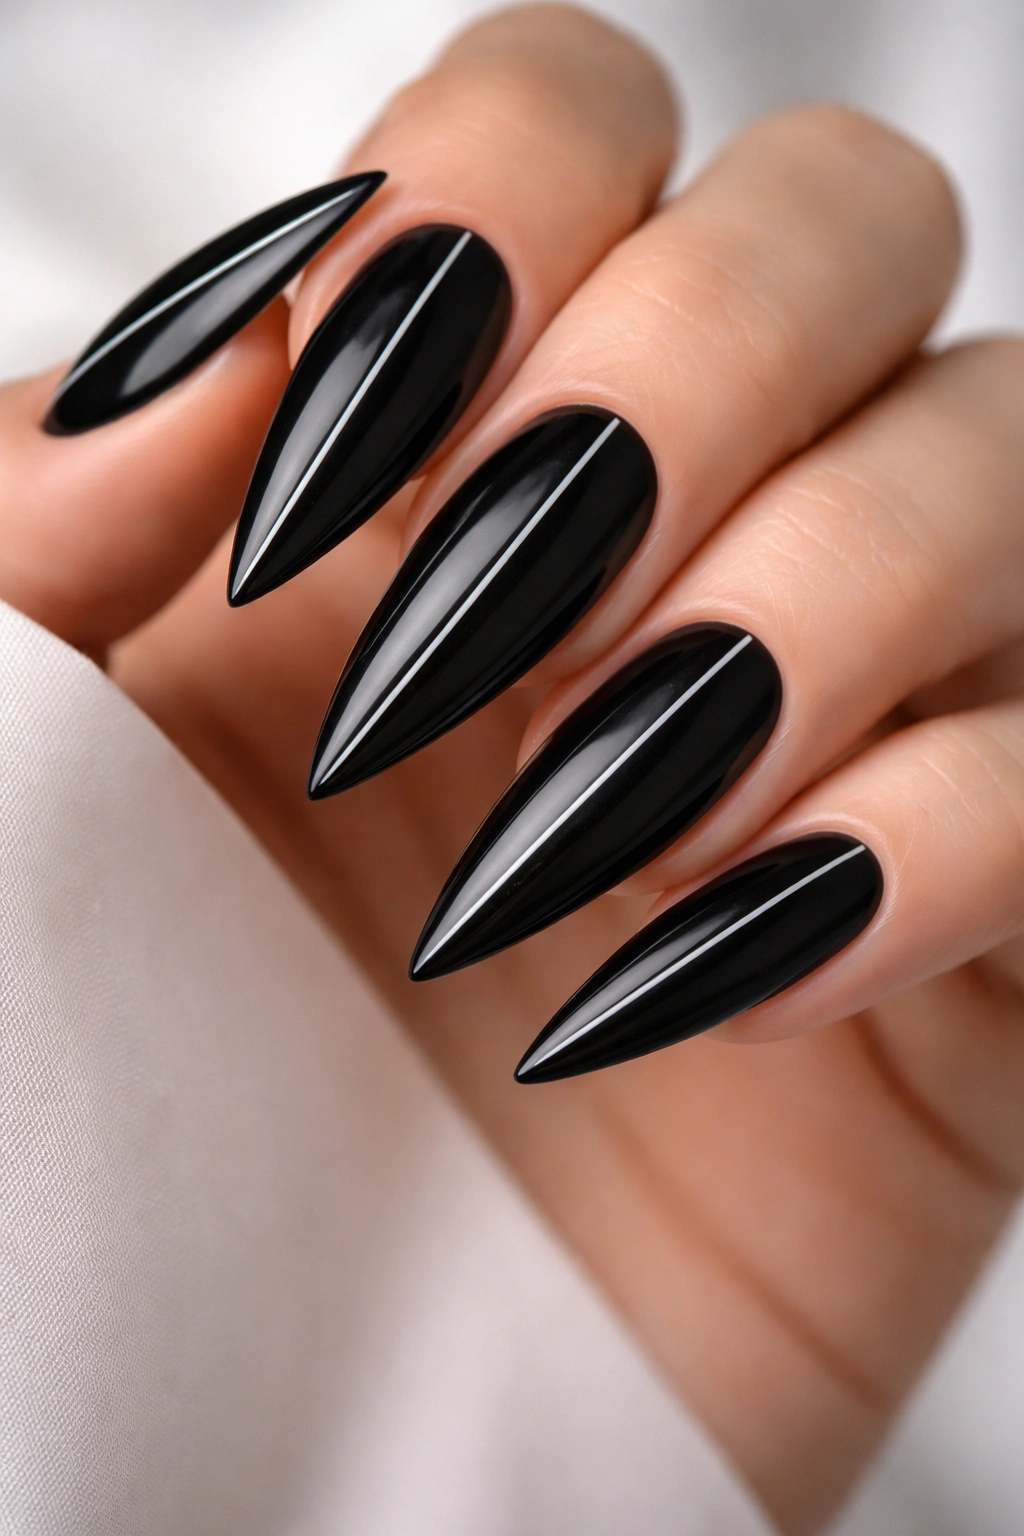
1. Classic Solid Black
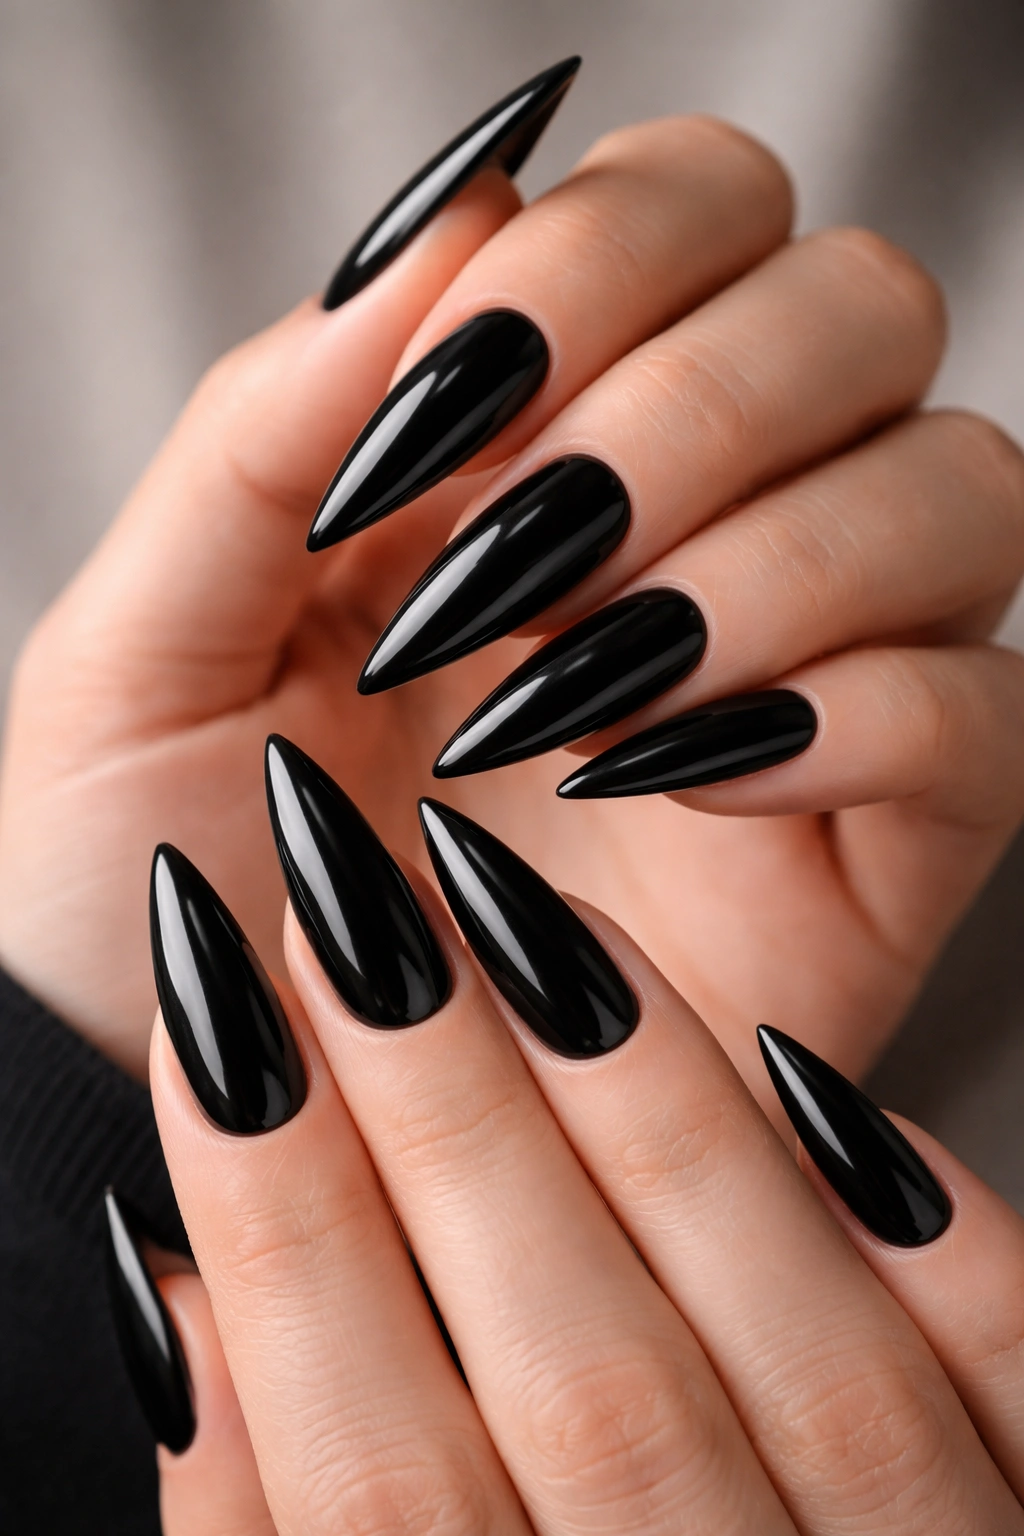
There’s a reason this is the gold standard: a perfectly executed solid black stiletto needs nothing else. The color is so deeply flattering and inherently chic that it becomes a blank canvas for whatever aesthetic you’re building that day. Apply a good base coat first — this prevents staining and creates a smooth foundation for the black polish to adhere to. Paint two thin coats of a quality black nail polish rather than one thick coat; this prevents bubbling and gives you a smoother, more professional-looking finish. Finish with a shiny topcoat that’s specifically formulated for longevity, as black polish can show every smudge and dust particle on the topcoat.
Why It’s the Perfect Foundation
The solid black stiletto is so effective because it creates an unbroken visual line that makes your nail beds and fingertips look longer and more refined. The stark contrast between the black tip and your skin tone naturally draws the eye to your hands in the most flattering way possible. This simplicity is exactly why it’s been a red-carpet staple for decades.
What to Know Before You Apply
- A dense, pigmented black formula matters infinitely more here than on other designs — the polish itself is your entire design, so quality and finish are everything
- Bring polish bottles to room temperature before applying for better consistency and smoother application
- Keep the brush strokes in the same direction (rather than scrubbing back and forth) for a streak-free finish
- Let each coat dry completely before applying the next one, even if it seems dry within a minute
Pro tip: Seal your solid black stilettos with a glossy topcoat, then add a second topcoat layer. This double seal keeps the shine looking wet and fresh for at least two weeks longer than a single topcoat application.
2. Black with Gold Accents Along the Sides
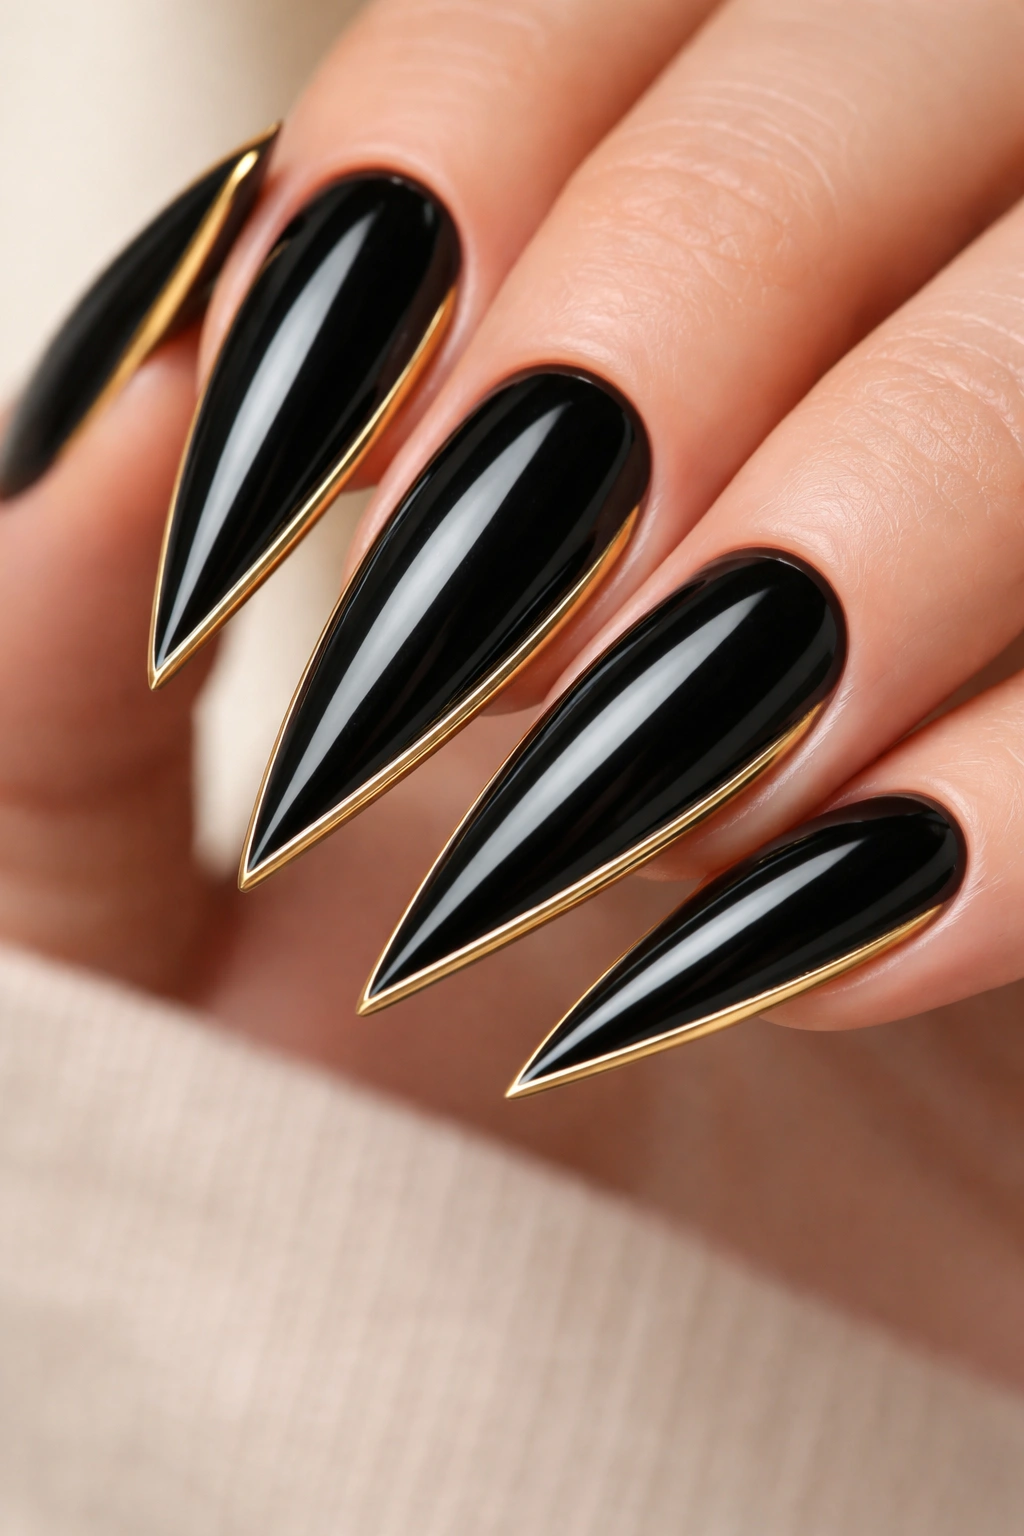
This design takes your solid black base and adds a touch of luxury through thin gold lines that run along one or both side edges of the nail. The gold catches light differently than the black, creating visual depth and a subtle 3D effect without being loud or over-the-top. Start with your solid black base as described above, then use a thin gold striping brush or a gel pen to paint delicate lines down the sides of each nail. The lines should sit about an eighth of an inch from the edge — close enough to frame the nail but not so close that it looks like the edges are wearing away.
How to Execute the Gold Accent Perfectly
Thin accent lines work best when you’re using a specialized tool rather than a standard nail brush. A gel striping brush (which has longer, thinner bristles) or a thin gel pen gives you the control needed to create clean, deliberate lines. If you’re using a striping brush, load it with gold gel polish and let gravity do most of the work — guide the brush gently down the edge rather than pressing hard. Steady your hand by resting your pinky finger on the table for support while you paint.
Pro Techniques for This Design
- Use a complementary gold shade, not a bright yellow-gold; champagne gold or rose gold often looks more refined on black
- Paint the gold lines on both sides of each nail for symmetry, or just on one side if you prefer a more asymmetrical, modern look
- Apply the gold accent lines after your topcoat has dried; this creates a subtle separation between the black and gold layers that makes the accent pop
Pro tip: If your striping brush feels unwieldy, use a very thin gel pen designed for nail art. The tip has more precision, and you can draw with it almost like writing on paper, which many people find easier to control than a traditional nail brush.
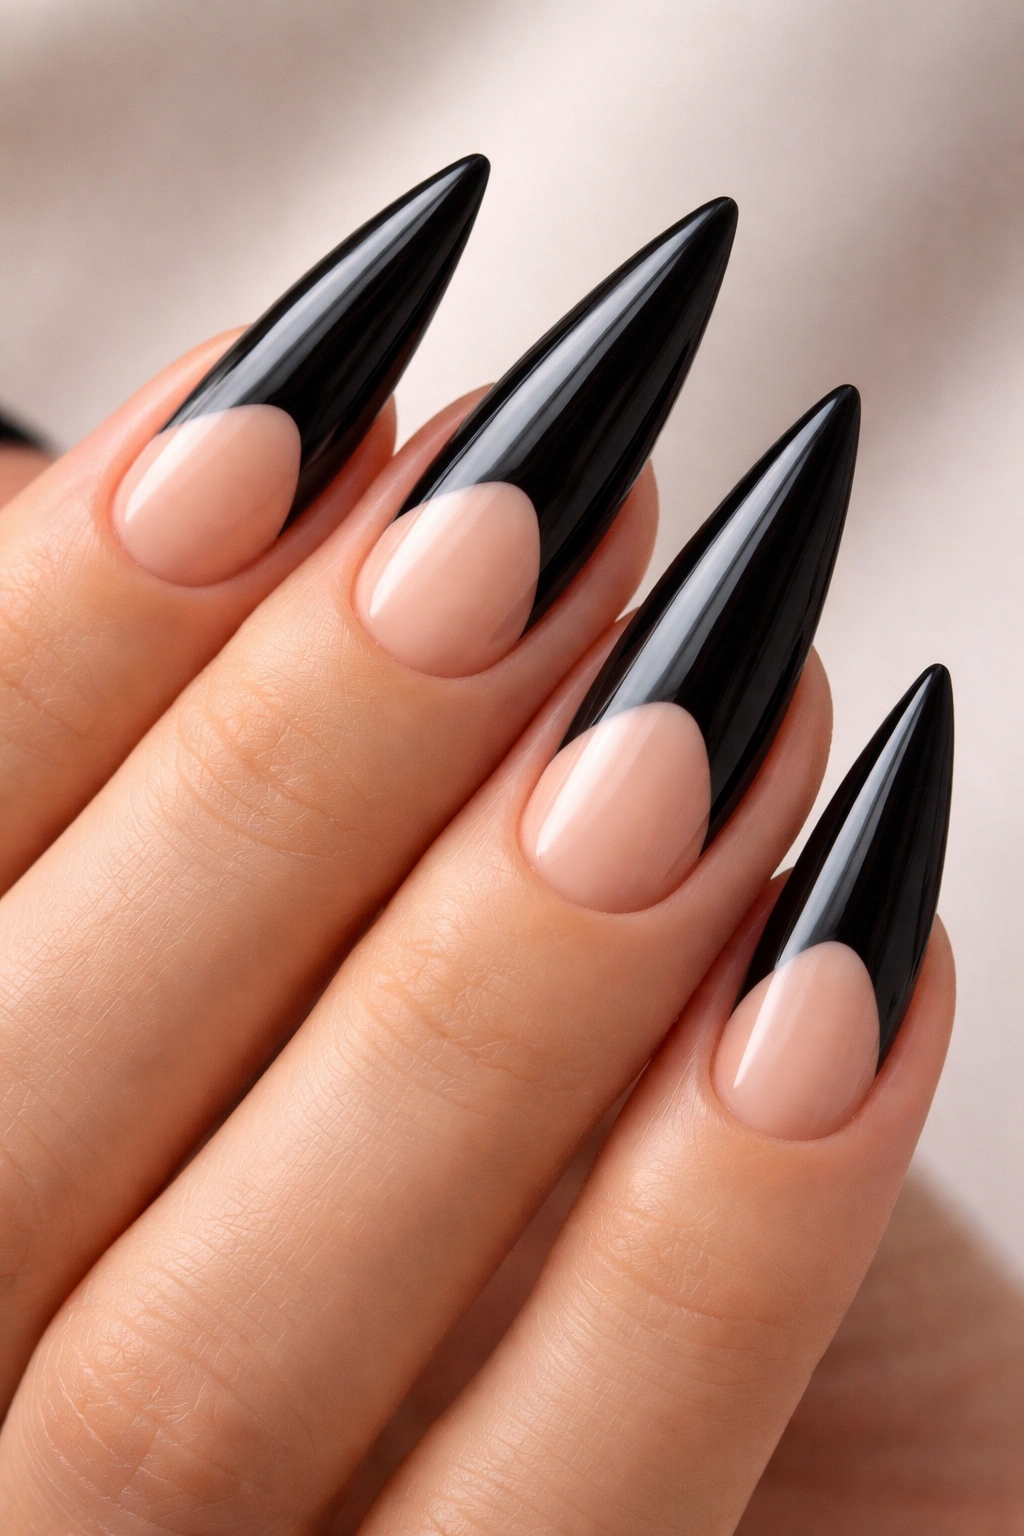
3. Black French Tips with White Edges
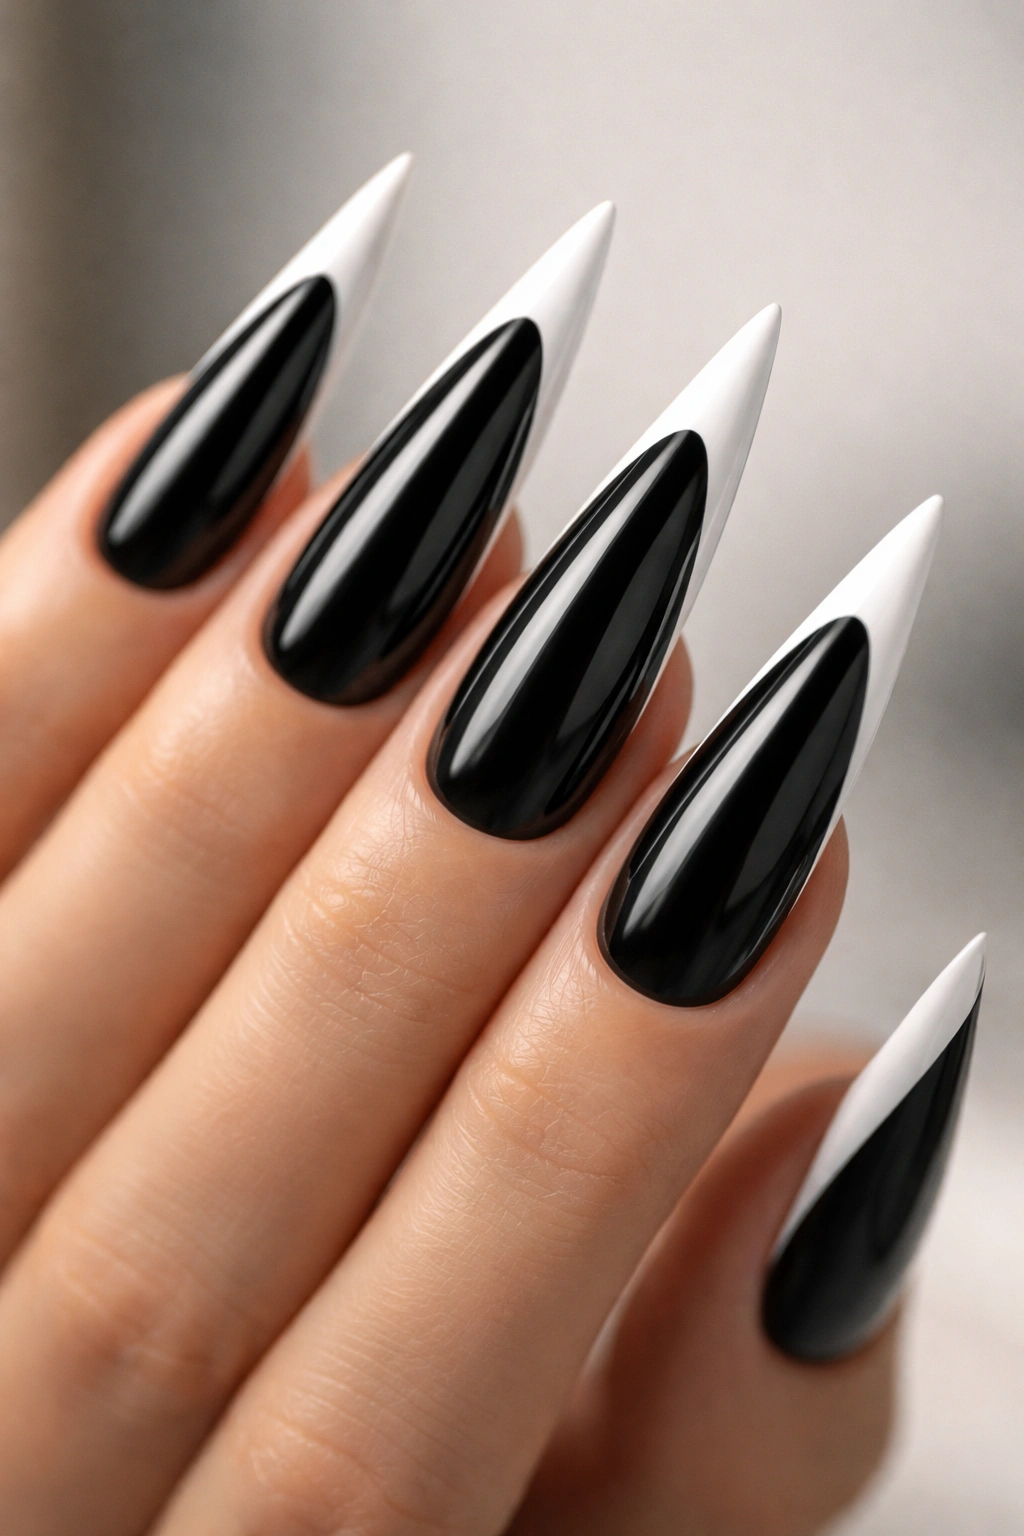
The French tip is a timeless manicure style, but instead of the classic soft pink and white combination, you’re creating contrast by keeping the nail bed black while adding a crisp white tip. The white edge should be clean and defined — about a quarter inch of white at the very tip of the nail. This style works beautifully on stilettos because the length of the nail gives you plenty of space to create a visible white edge, and the geometric shape naturally frames the white tip perfectly.
Building a Crisp White Edge
The key to nailing a French tip (literally) is creating a sharp line where the black meets the white. You can achieve this in a few ways: use a thin tape line to guide where the white begins, or simply free-hand if you have a steady hand and good brush control. Apply your black base completely, then use white polish with a thin brush to create the white tip. Paint the tip from underneath when possible — angle your finger so you can see the underside and paint the white up toward the black rather than trying to paint down from the black toward the white. This gives you much better control over where the line sits.
What Makes This Design Work
- The contrast between matte black and glossy white creates visual interest automatically
- French tips elongate the appearance of your nails even more than solid color does, making the stiletto shape feel even more dramatic
- This design is completely professional-appropriate while still feeling intentional and polished
- It reads as “classic” rather than trendy, so you won’t feel the need to change it frequently
Pro tip: Apply a very thin line of top coat precisely at the point where the black meets the white to seal that edge and prevent chipping from starting right at that vulnerable junction.
4. Black with Thin White Geometric Stripes
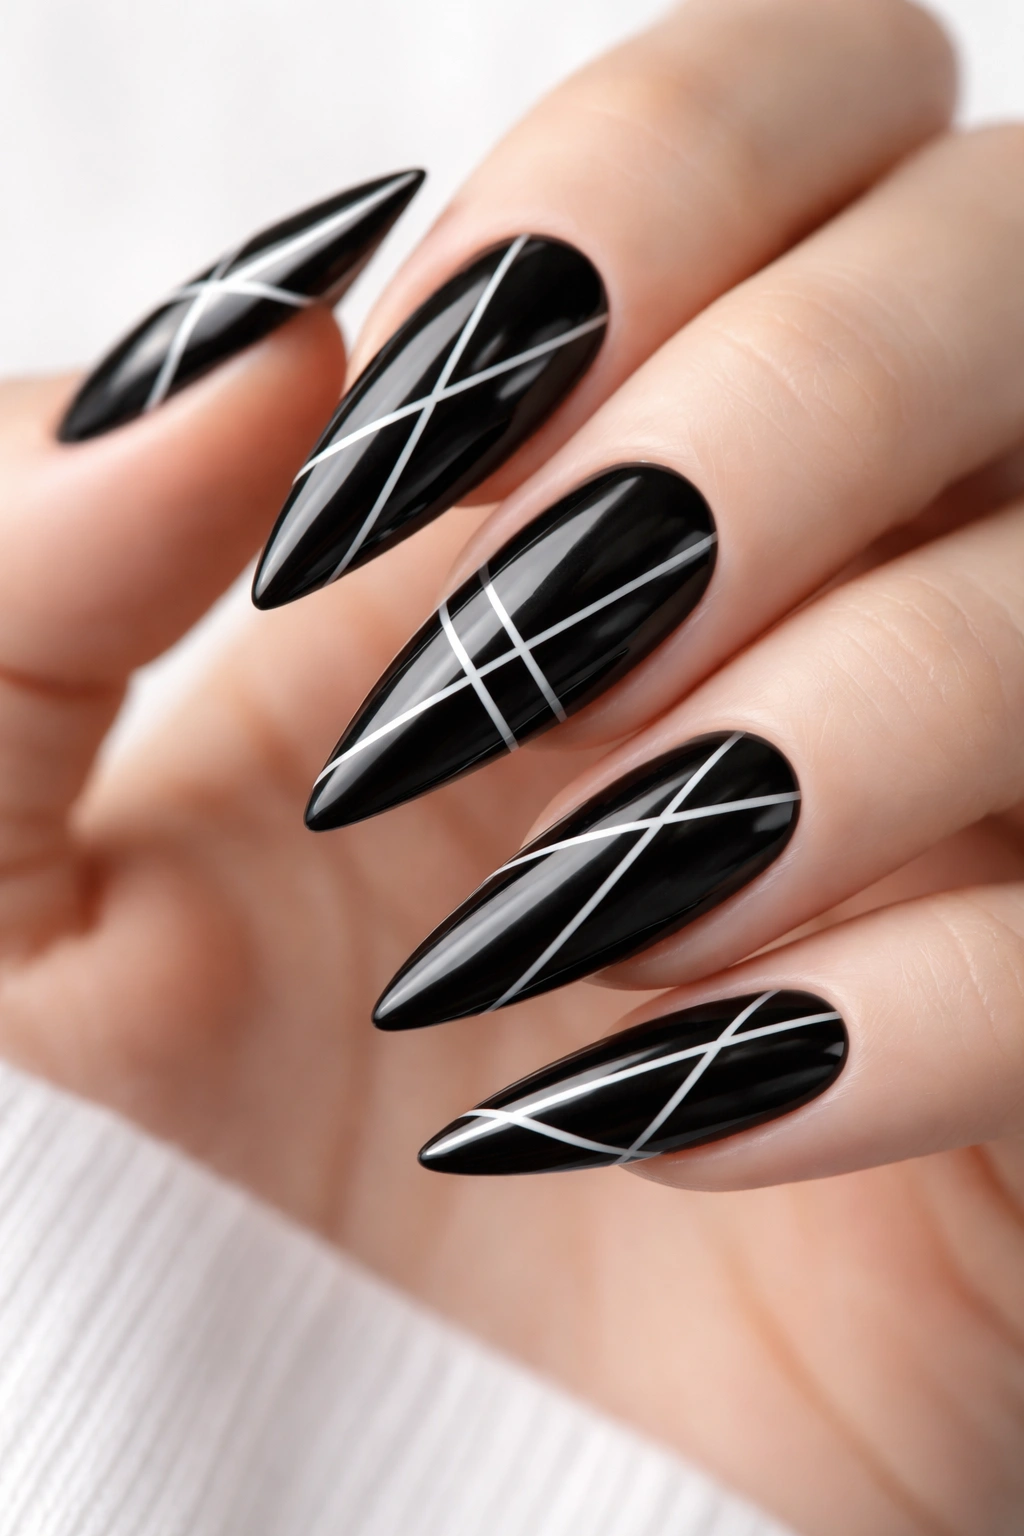
This design layers minimalist white lines across your solid black stiletto nails in a repeating pattern — perhaps thin horizontal stripes, or a few vertical stripes, or a mix of both. The lines should be thin enough to let the black be the dominant color, but visible enough to create a clear graphic element. Start with your solid black base, then use a thin white striping brush or gel pen to paint your chosen pattern. The spacing between lines should be consistent — roughly a sixteenth to an eighth of an inch apart — to create a deliberate, intentional look rather than a random design.
Pattern Options That Look Intentional
- Horizontal lines stacked evenly across the nail look architectural and modern
- Vertical lines create an elongating effect that emphasizes the stiletto length
- A combination of two or three horizontal lines plus a few vertical lines creates a subtle woven or grid effect
- A single diagonal line from one corner can feel artistic and asymmetrical in a sophisticated way
Application Tips for Crisp Lines
- Rest your striping hand’s pinky and ring finger on the table for maximum stability
- Load less product on the brush than you think you need — thin lines require less polish than thick ones
- Paint slowly and deliberately rather than trying to rush; a slow, confident line looks intentional, while a shaky fast line looks accidental
- Paint from one corner of the nail toward the opposite corner in a smooth motion rather than stopping and starting partway across
Pro tip: Use a white shade with a slight shimmer or metallic finish rather than a flat white. This catches light differently and prevents the design from looking too stark or graphic.
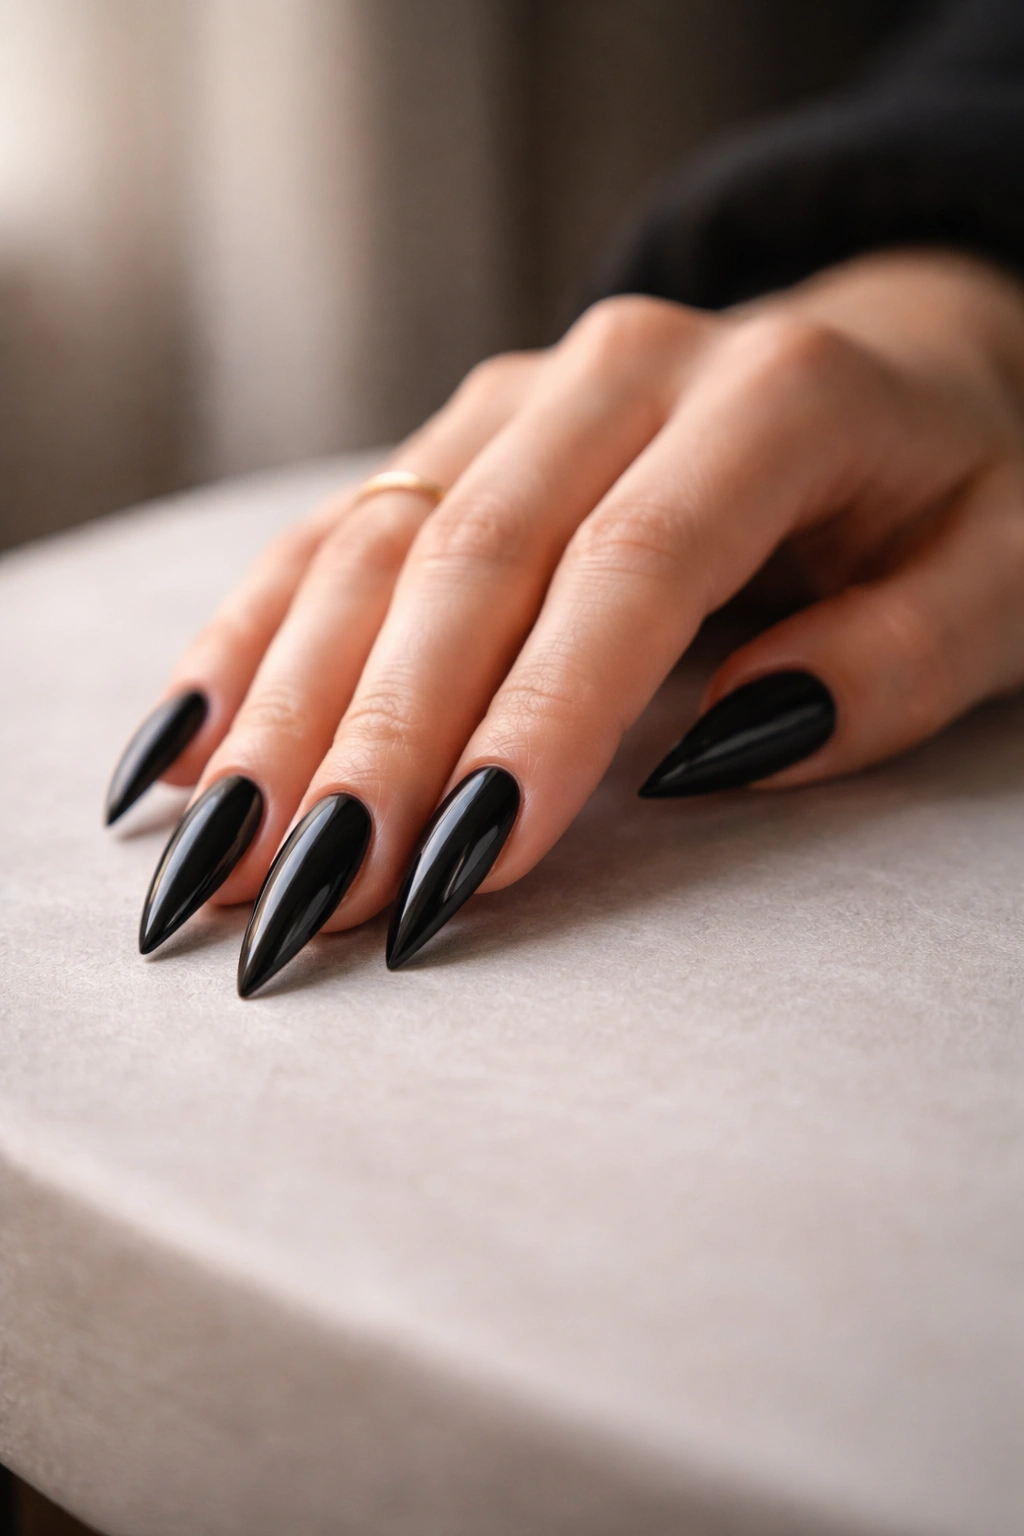
5. Black Matte Stilettos
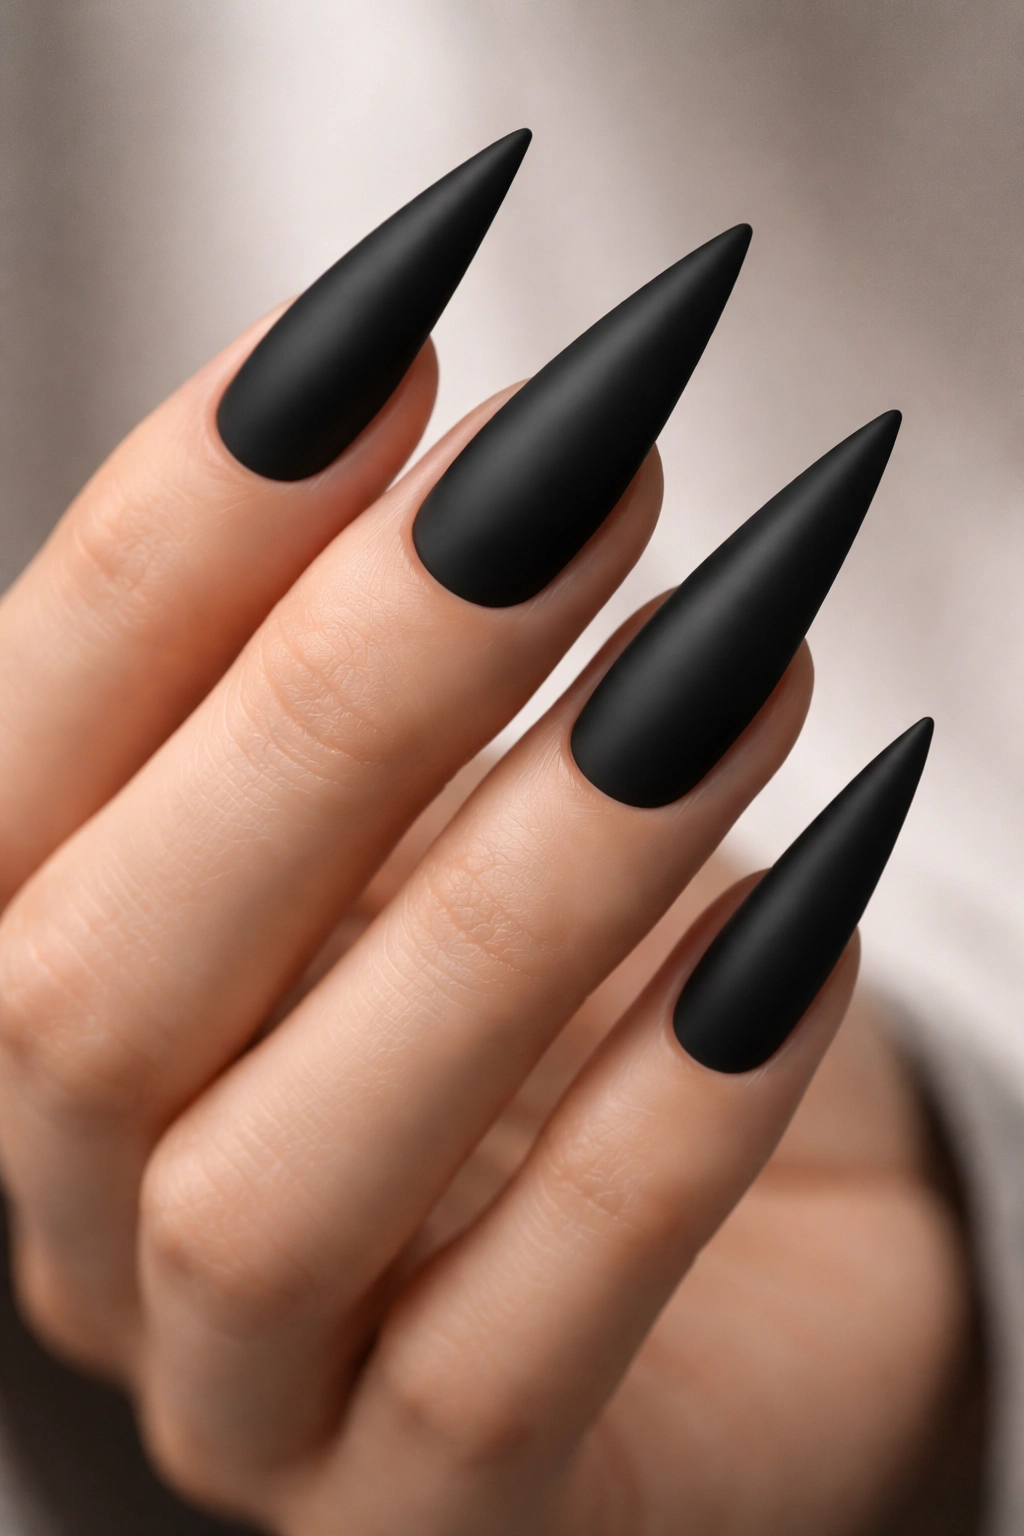
Trading the glossy topcoat for a matte finish completely transforms the mood of black stiletto nails. A matte black nail feels more modern, more minimalist, and somehow more architectural than glossy black — it has a sophistication that reads as intentional and designer-forward. Apply your black polish exactly as you would for a glossy version, but instead of using a shiny topcoat, use a matte topcoat designed specifically for nail polish. The matte topcoat removes the shine and creates a velvety surface that’s genuinely striking.
Why Matte Changes Everything
The texture and light-absorption of matte polish creates a visual heaviness and sophistication that glossy finishes can’t quite achieve. Your nail shape is actually more visible in matte because the absence of reflection makes every contour of the nail stand out more sharply. Matte black draws less visual attention through shine and more through pure shape and color — which is perfect for stilettos where the shape is already doing most of the work.
Caring for Matte Nails
- Matte topcoats can sometimes feel slightly sticky or tacky for the first few hours after application — this is normal and passes as they fully cure
- The matte finish can make your nails appear slightly less long than glossy nails, so the stiletto shape is even more important to the overall design
- Matte nails show dust and fingerprints differently than glossy nails; they show dust more readily, so quick hand washing throughout the day keeps them looking sharp
- You can refresh the matte appearance by lightly buffing the surface with a soft buffer if the shine starts to return from regular use
Pro tip: Layer a matte topcoat over a glossy topcoat. Apply your shiny topcoat first, let it fully dry, then apply the matte topcoat on top. This creates a more durable matte finish that lasts longer than a single layer.
6. Black Ombre Fading to Clear
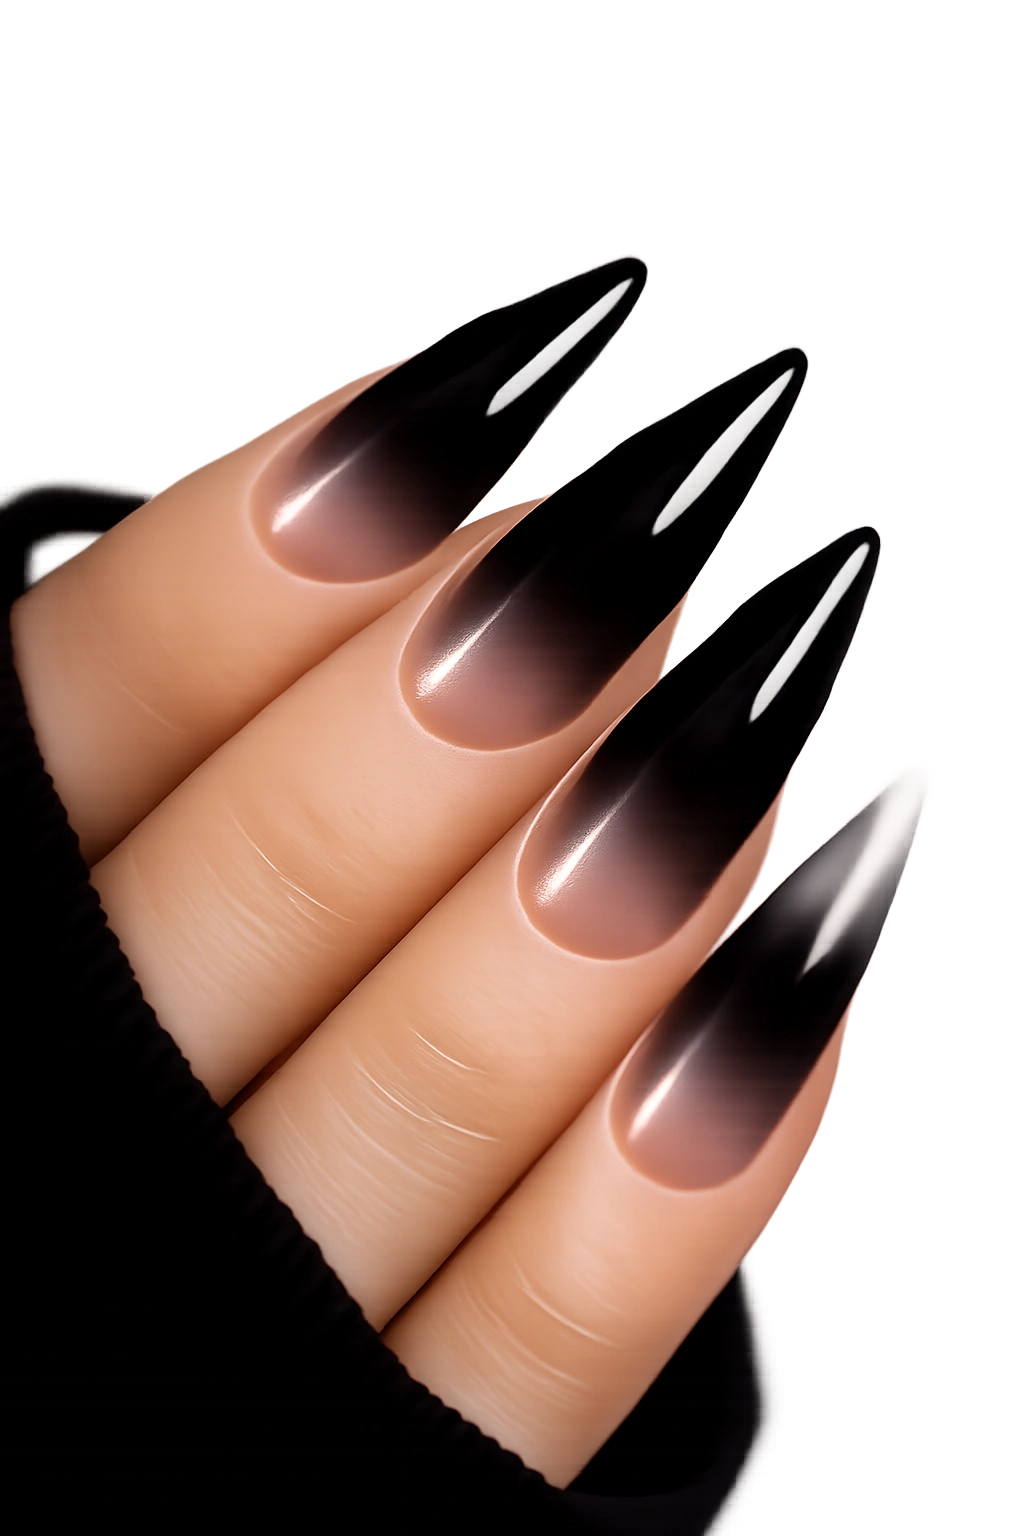
An ombre effect from solid black at the base of the nail to completely clear at the tip creates an illusion of even more length and an ethereal, gradient sophistication. The black gradually becomes lighter as it moves down the nail, eventually disappearing into transparent or nude near the tip. This creates a fading effect that’s visually dynamic without being complicated. You can achieve this using sponging technique: apply black polish to one corner of a makeup sponge, then dilute the color gradually by dabbing that corner onto a clear surface with increasing amounts of white space between dabs, then sponge the gradient onto your nails.
Building the Gradient Effect
The key is patience and repetition. Apply thin layers of the black-to-clear gradient one nail at a time, building depth gradually rather than trying to create the full ombre in a single sponge application. Dab the sponge onto the nail in a patting motion from the base toward the tip — don’t swipe or drag, as this creates lines rather than a smooth gradient. After each sponge application, use a fine-tipped brush or sponge corner to blend the edges where darker and lighter tones meet, softening any visible lines.
Alternative Application Methods
- Use a brush to hand-paint the gradient, blending from black at the base to clear at the tip using feathering strokes
- Apply black to the base third of the nail, then use a clean sponge dampened with topcoat to gradually blend it toward transparency
- Use multiple shades of gray between black and clear to create more distinct gradient layers
Pro tip: Apply the ombre gradient, let it dry completely, then seal it with a glossy or matte topcoat. The topcoat protects the gradient and also intensifies the depth perception of the effect.
7. Black Stilettos with Rhinestone Details
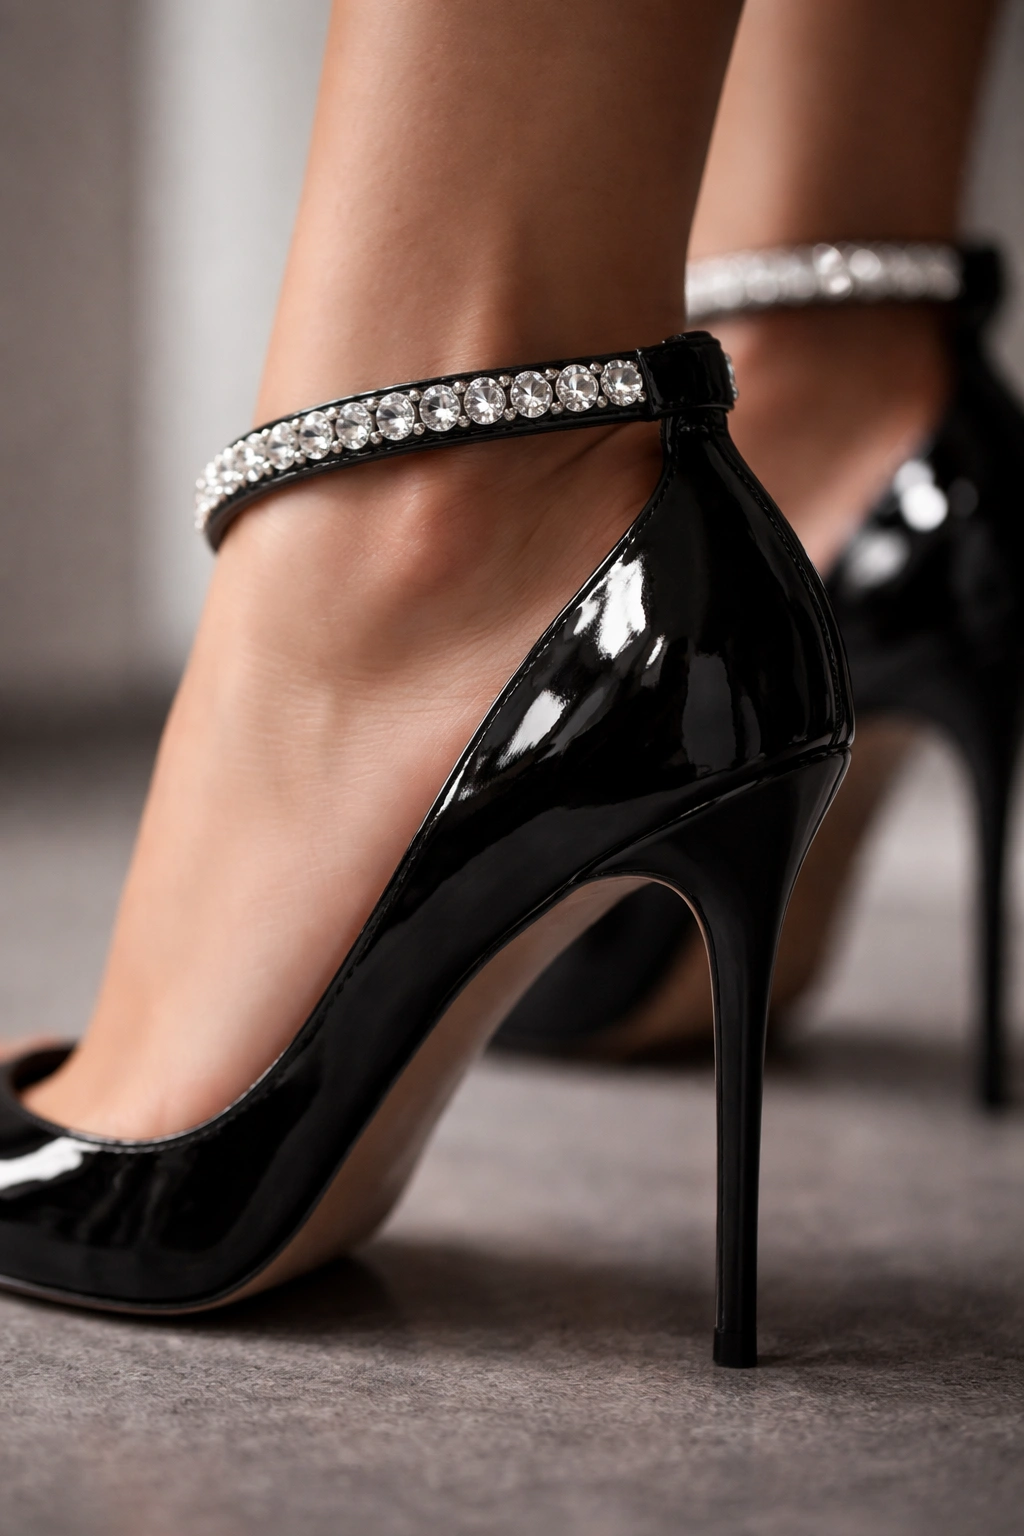
Strategic placement of rhinestones or crystal accents on black stilettos adds instant glamour without overwhelming the design. Use small- to medium-sized rhinestones — placement matters much more than quantity here. You might create a sparse constellation of stones along the side of each nail, or cluster a few stones at the base where the nail meets the nail bed for an accent point, or add a single statement stone at the very tip. The black background makes any crystal shine and sparkle intensely, so even a few stones have dramatic impact.
How to Secure Rhinestones Permanently
Don’t just place rhinestones on wet polish and hope they stick — use a dedicated rhinestone glue or nail adhesive that’s specifically formulated for this purpose. Apply a tiny dot of adhesive to the back of each rhinestone, then press it gently onto the nail surface. Hold it in place for a few seconds to ensure good contact. Once all rhinestones are placed and the adhesive is completely dry, seal everything with a topcoat to lock the stones in place and prevent them from catching on fabric.
Rhinestone Placement Ideas
- A line of small stones down the center of each nail creates an elegant vertical emphasis
- Three or four stones clustered at the very tip creates an accent that looks intentional without dominating the design
- A single larger stone at the base of each nail feels minimal and sophisticated
- Rhinestones only on the accent nail (one nail per hand treated more heavily than the others) draws attention to that nail while keeping the others mostly minimal
Pro tip: Use clear or slightly iridescent rhinestones rather than colored ones. They let the black underneath show through while catching and refracting light, making them sparkle more intensely than colored stones would.
8. Black and Nude Contrast Tips
This design pairs your black nail bed with a nude, beige, or skin-tone tip — essentially a reverse French tip where the color blocking is inverted from the traditional style. The nude tip creates a soft contrast against the black without the starkness of white, making it feel more organic and less graphic. The effect makes your nails look longer because your actual nail tip (the transparent part) blends with the nude polish, creating the illusion that your nail extends beyond where it actually does. Apply solid black to the upper two-thirds of the nail, then carefully paint nude polish on the lower third and tip area, creating a clean line where the two colors meet.
Choosing the Right Nude Shade
The nude you choose dramatically affects how this design reads. A shade that matches your actual skin tone creates a seamless, elongating effect. A slightly warmer or cooler nude than your exact skin tone looks more intentional and designed. A more saturated beige reads as more intentional and modern than a perfect skin-tone match. Test your chosen shade on a single nail first and live with it for a day to see how it photographs and how it reads in different lighting before committing to all ten.
Creating a Clean Color Divide
The line where black meets nude should be crisp and intentional, not blurred. Use a thin striping brush with nude polish and paint the line by placing the brush at an angle across the nail, creating a diagonal or slightly curved line. The gentler the curve, the more elegant it feels; too sharp an angle can read as harsh. Paint the nude section beneath that line carefully and completely, filling all the way to the edge of the nail tip.
Pro tip: The nude tip should cover your actual nail tip and extend onto the nail bed area noticeably — if the nude section is too small or sits only on the very edge, it looks unintentional rather than designed. Make the nude section roughly one-third to one-half of the visible nail length.
9. Black Minimalist Line Details
Black nails with ultra-thin minimalist line details — perhaps just one single thin white or nude line running down the center, or two delicate lines hugging the sides — feel incredibly modern and sophisticated. The line should be so thin that it’s almost a whisper of detail rather than a bold statement. This works beautifully on stilettos because the sharp geometric shape of the nail is complemented by the clean line work. A center line elongates the nail even further, while side lines frame it. Start with your solid black base, then use an extremely thin brush or nail pen to paint your chosen line pattern.
Line Placement for Maximum Impact
- A single line running vertically down the center of each nail creates a strong elongating effect and feels architectural
- Two thin lines on either side of each nail, about an eighth of an inch from the edge, create a framing effect
- A single diagonal line from one corner toward the opposite corner feels artistic and less formal than vertical lines
- Thin lines only on the accent nail, with completely solid black on the other nine nails, balances detail with restraint
Keeping Lines Crisp and Intentional
- Use a nude or champagne shade rather than bright white for a softer, more sophisticated look
- Make sure your line is genuinely thin — if it looks thick, it shifts from “minimalist” to “bold”
- Paint the line slowly and with confidence; a shaky line reads as accidental, while a slow, deliberate line reads as designed
- Let your black base dry completely before adding the line details to prevent the line from dragging through wet polish
Pro tip: Use a gel nail pen designed for fine-line details rather than a traditional nail brush. The pen gives you much more control and precision, and you can draw with it like a real pen, which most people find more intuitive.
10. Black with Metallic Tips
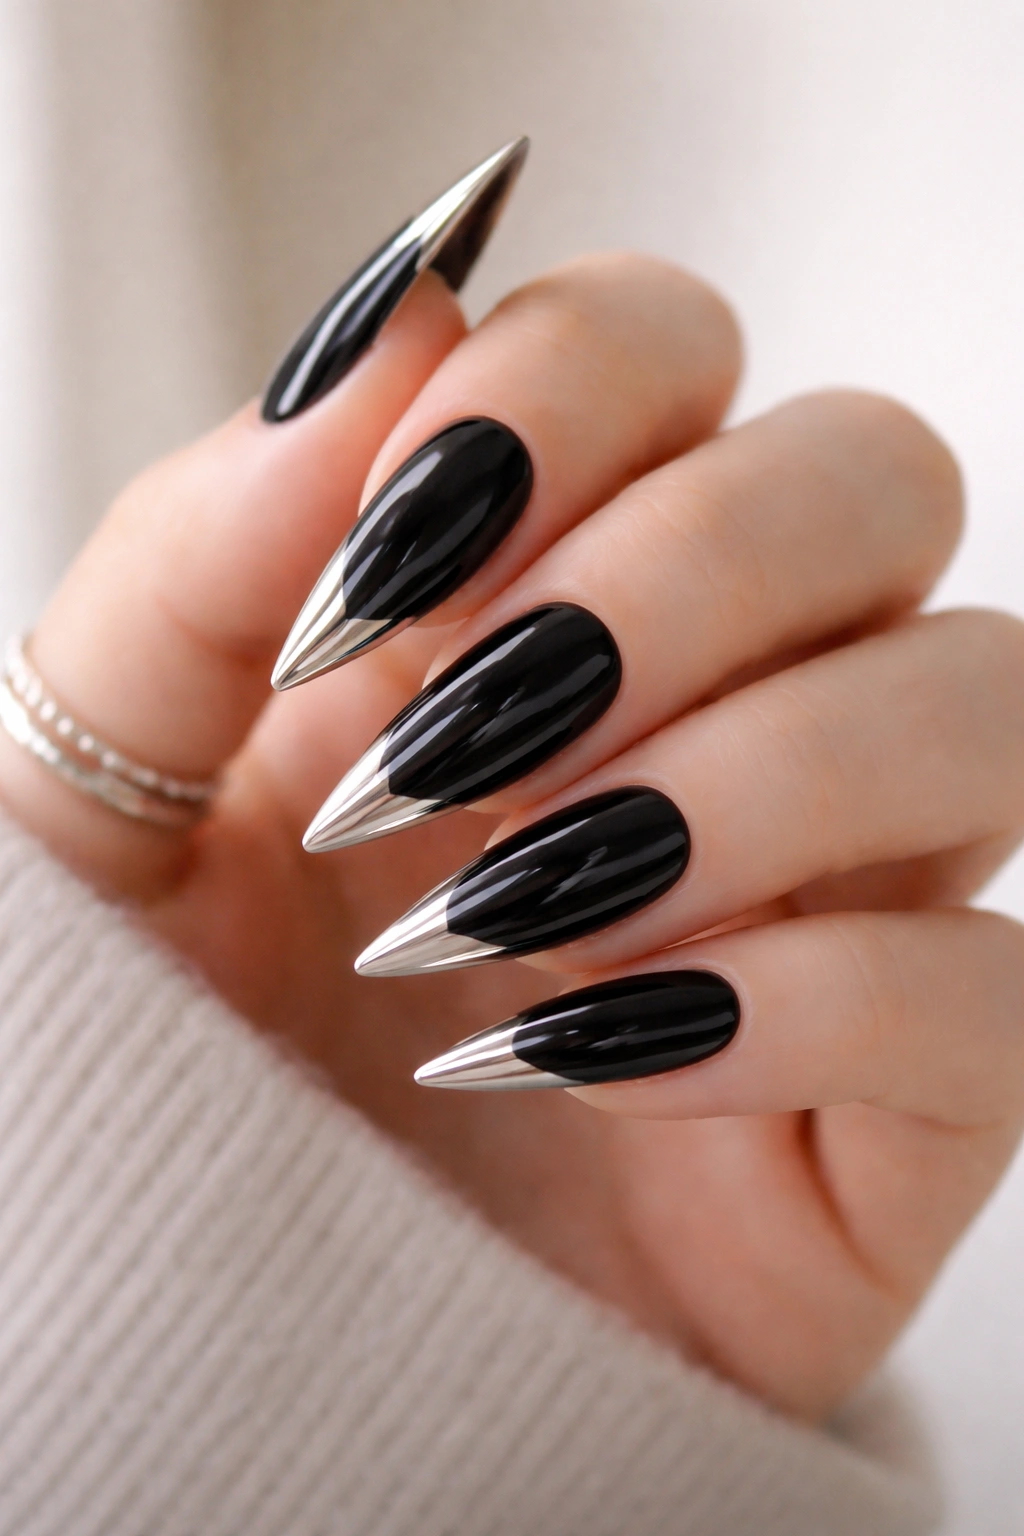
Instead of a French tip in white, create the tip in metallic gold, silver, rose gold, or copper polish. The metallic finish catches light dramatically against the black, creating an effect that’s both elegant and eye-catching. The metallic tip works especially well on stilettos because the length gives you adequate space for the metallic section to be visibly substantial — roughly a quarter to a third of the nail length. Apply your black base completely, let it dry, then carefully apply your chosen metallic polish to the tip section, using a thin brush to create as clean a line as possible where the black transitions to the metallic color.
Metallic Shade Selection
Gold and rose gold lean warmer and feel more luxe and evening-appropriate. Silver and chrome feel more modern and tech-forward. Copper sits somewhere in between, offering warmth without the classic luxury feel of gold. Consider your usual color palette and what metals you typically wear — choose a metallic tip shade that complements your existing jewelry and accessories, so it feels like an intentional extension of your overall aesthetic.
Creating a Sharp Color Transition
The line between black and metallic should be crisp and intentional, not fuzzy or blended. Angle your brush so you can see exactly where the black ends and you can paint the metallic from that point forward. Paint slowly, following the curve of your nail tip and using steady, confident strokes. If the line feels wobbly, you can clean it up by using a thin brush dipped in black polish to neaten up the edge where needed.
Making the Metallic Finish Last
Metallic finishes can sometimes chip more easily at the edges than solid colors. Seal your metallic tips with a strong topcoat to protect that transition point and extend the wear time. Some metallic polishes benefit from a second topcoat layer for added durability.
Pro tip: Use a metallic gel polish instead of regular polish for the tips if possible. Gel metallics have more intense color payoff and durability, meaning your tips will stay shiny and brilliant for the full two to three weeks of wear without looking dull or losing their reflective quality.
Final Thoughts
Black stiletto nails are endlessly adaptable because the base — that deep, sophisticated color paired with an elongated shape — is so inherently striking. Whether you go completely solid or add minimal details, the effect is always polished and intentional. The designs above prove that you don’t need elaborate art or professional-level skill to make a statement. Often the most impactful nails are actually the simplest ones.
The real power of any of these designs is repetition and commitment. Pick one that resonates with you and wear it consistently for at least two manicure cycles. Your hands will start to feel like the best version of themselves when they have the right nails. Black stilettos have this magical quality of making everything else you’re wearing — your clothes, your jewelry, your confidence — feel more elevated. There’s a reason they’re always in style, and there’s absolutely a version here that fits perfectly into your personal aesthetic.
