

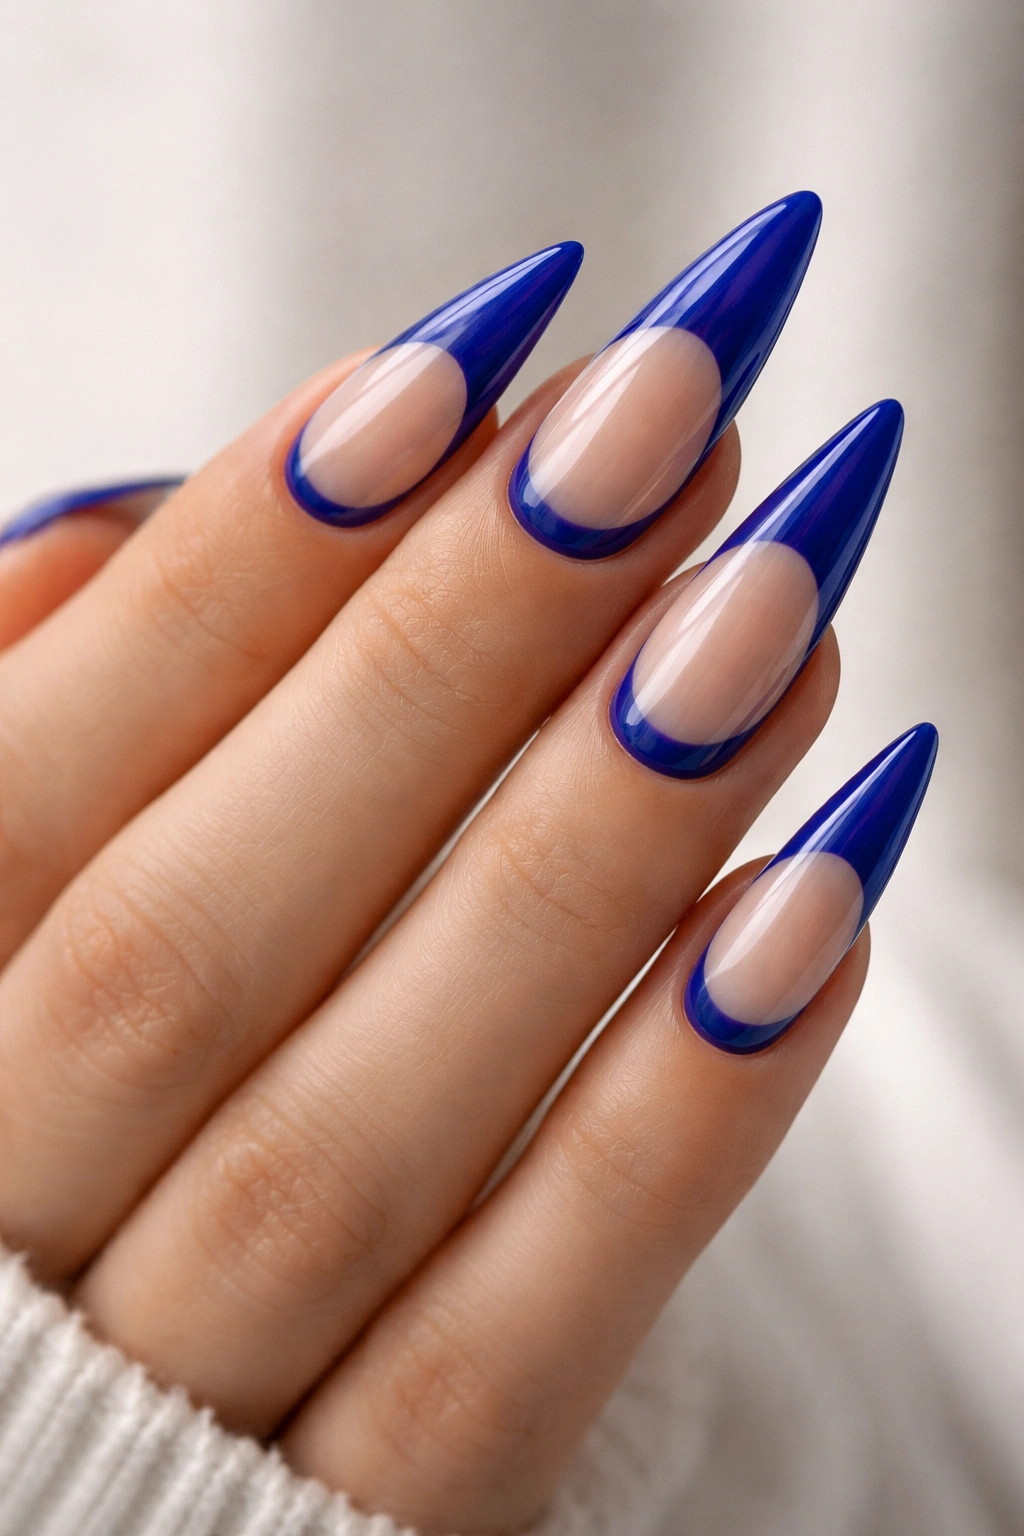
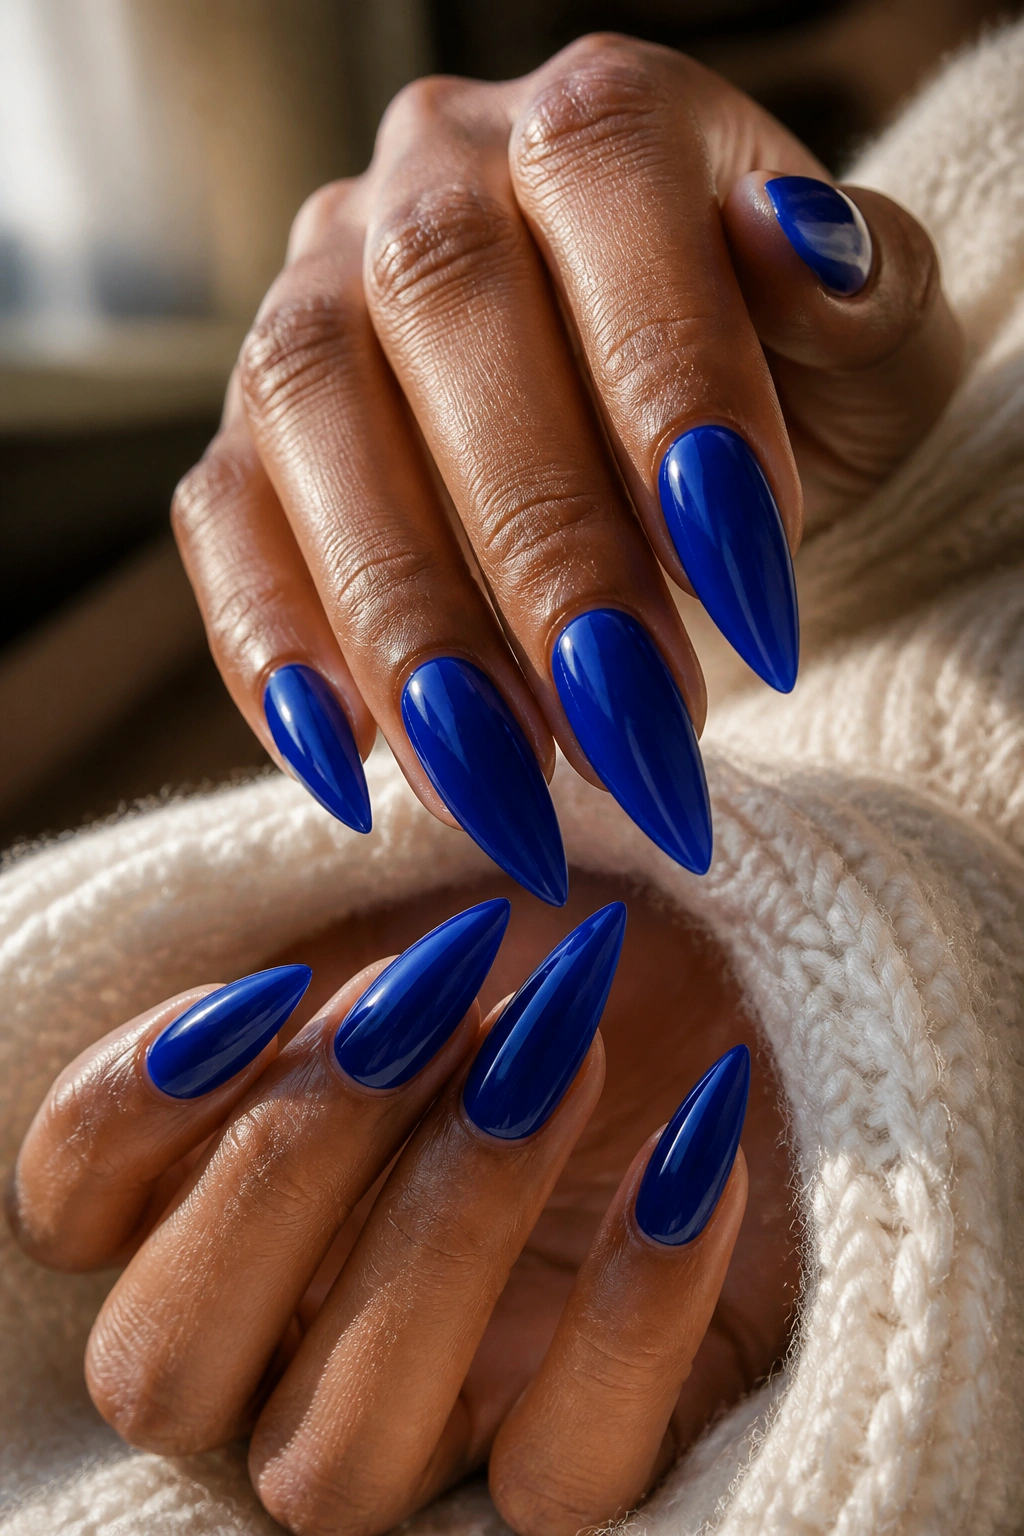
Royal blue stiletto nails are the perfect balance of boldness and sophistication. There’s something about this rich, jewel-toned shade that commands attention without screaming for it — it’s regal, confident, and works equally well at a boardroom meeting or a night out. Stiletto nails already make a statement with their dramatic length and pointed edges, so when you add royal blue into the mix, you’ve created something genuinely striking. The beauty of this color is that it pairs beautifully with almost any skin tone, from deep undertones to fair complexions, and the deep blue shade actually photographs differently depending on the lighting and finish you choose. Whether you’re looking for something timeless and classic or wanting to experiment with more adventurous embellishments, royal blue stilettos offer endless possibilities that don’t just look expensive — they feel luxe every time you catch your nails in the light.
1. Classic Gloss with Gold Foil Accents
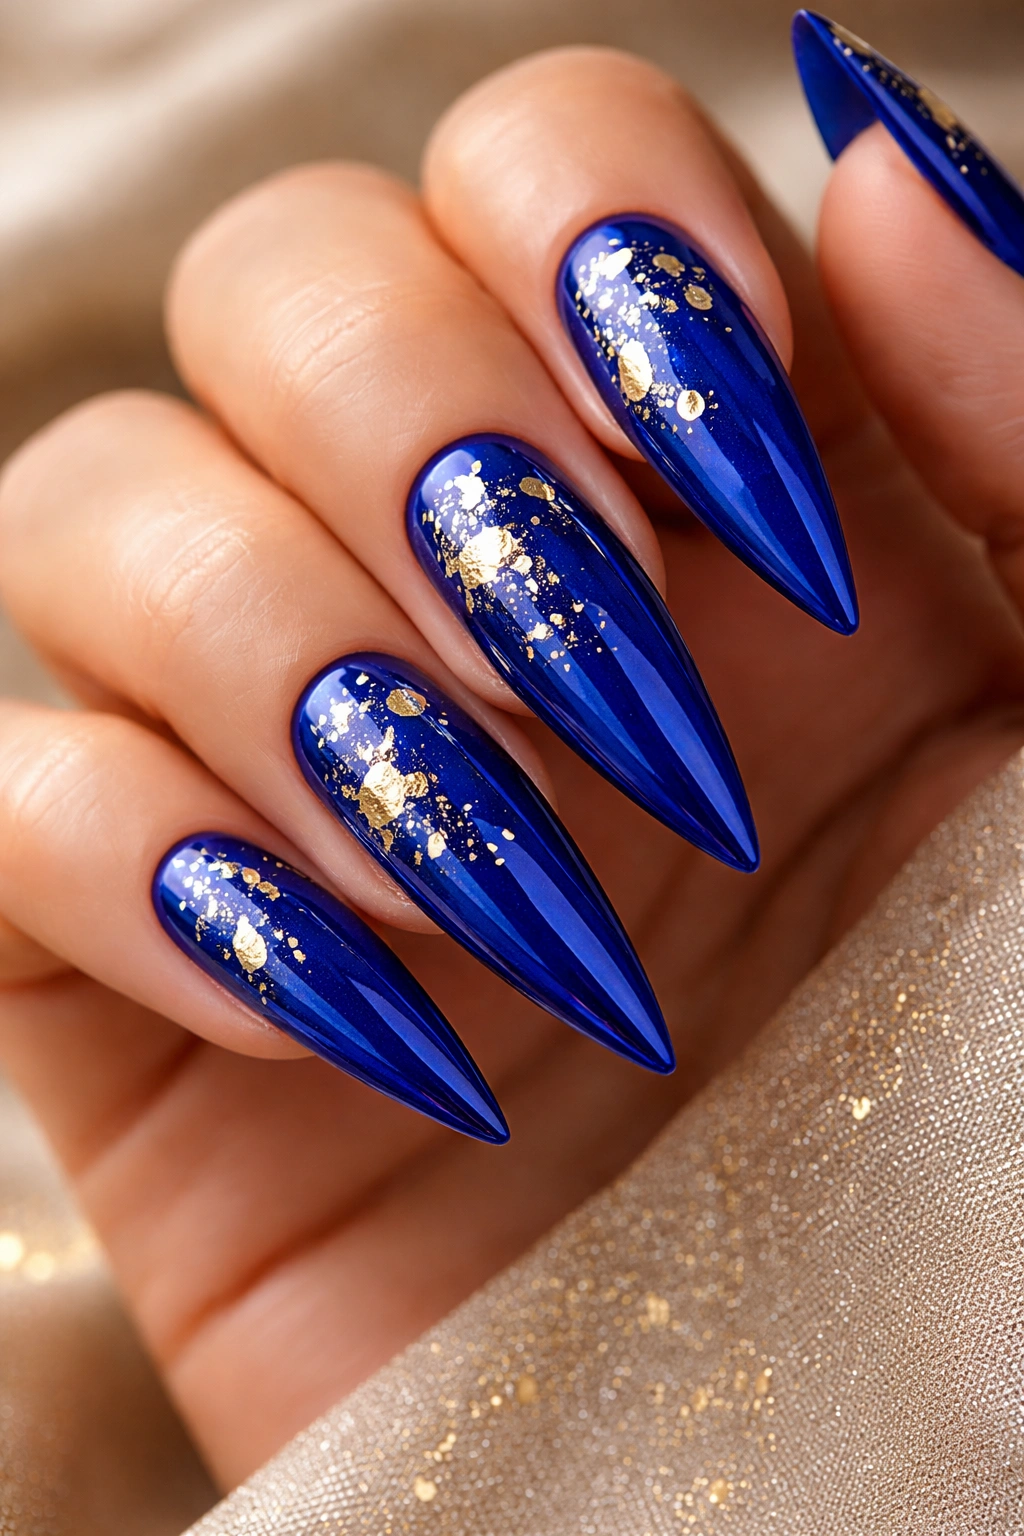
A glossy royal blue base with strategic gold foil details is the definition of understated elegance. The gloss finish makes the blue pop with depth, catching the light in a way that screams intentionality, while the gold accents keep things from feeling too monotone. You can apply the foil in several ways — across just one accent nail, scattered asymmetrically, or in delicate stripes across multiple nails.
Why This Design Works for Any Occasion
The combination of royal blue and gold is historically associated with luxury and royalty (hello, the name of the color), so there’s an inherent sophistication baked into this pairing. Gold is warm and welcoming, which softens the intensity of the blue and makes it feel less harsh. The glossy finish reflects light beautifully, giving your nails dimension that even a casual observer will notice.
How to Achieve It at Home
- Use a high-quality royal blue nail polish with natural shine (you want at least 2-3 coats for full opacity and that deep, lustrous blue)
- Allow the base to fully cure (or use a UV lamp if using gel)
- Apply adhesive foil sheets or brush on foil accents with a specialized foil polish or gel
- Seal everything with a clear topcoat for protection and extra shine
- The foil will last longest if you avoid excessive water exposure for the first 24 hours
Pro tip: If you’re using adhesive foils at home, press them down gently but firmly with a wooden cuticle pusher to avoid air bubbles that’ll make them lift prematurely.
2. Glitter Gradient Royal Blue Fade
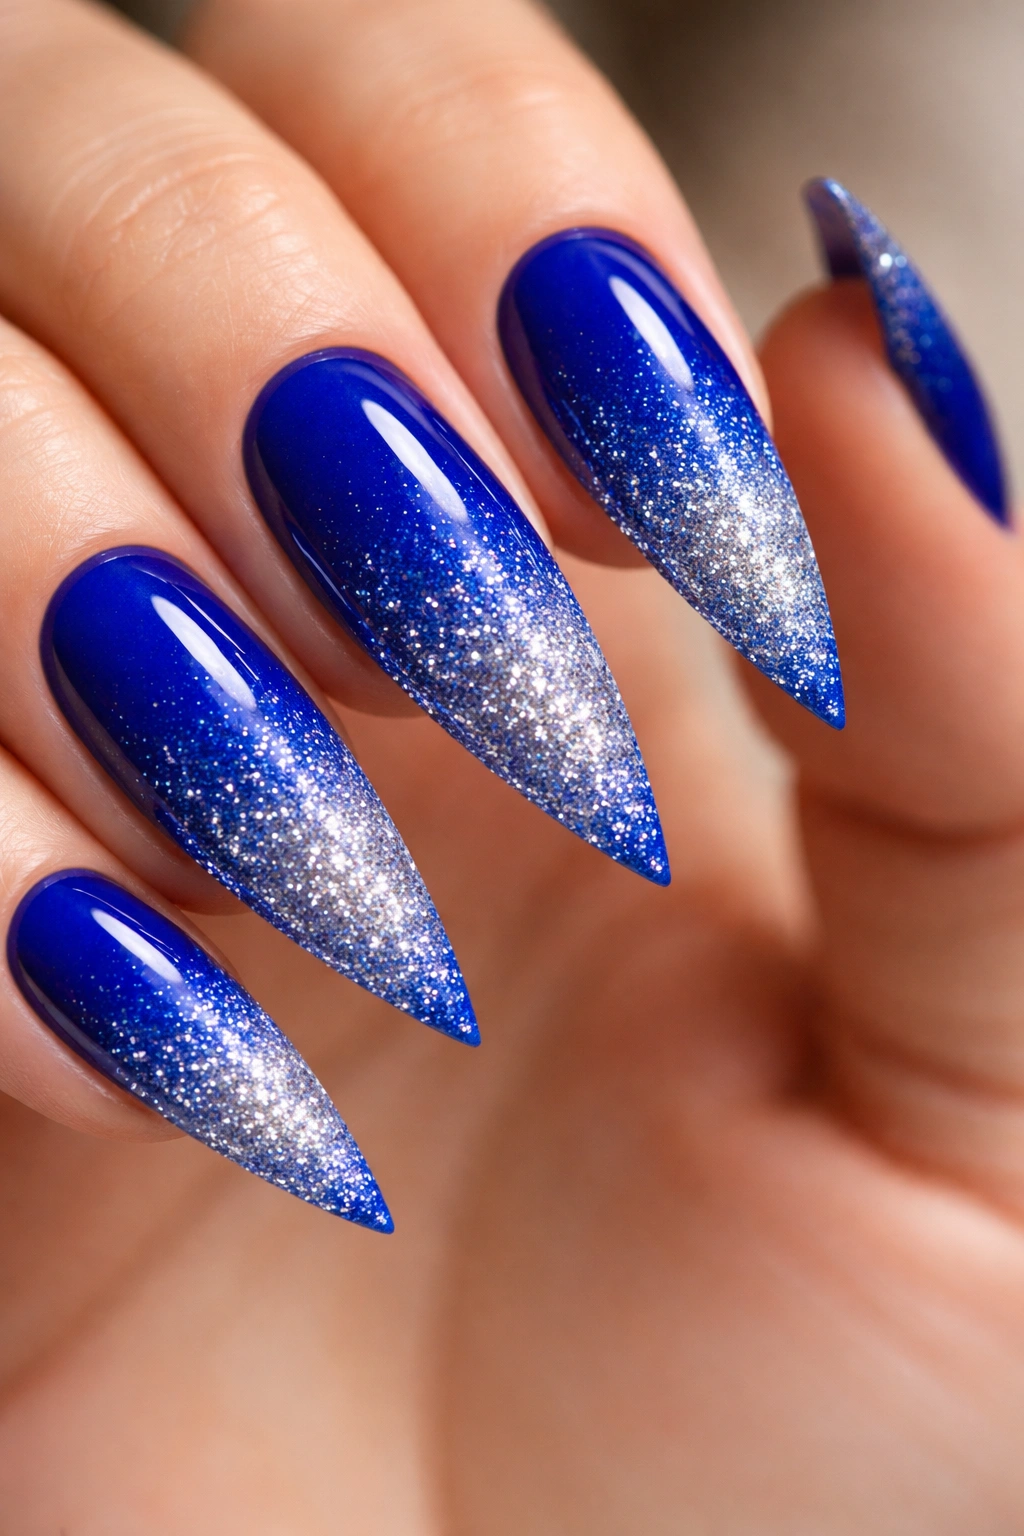
A gradient that flows from solid royal blue at the nail bed to sparkling glitter toward the tips creates movement and visual interest without overwhelming the nail. The glitter gradually gets denser as it approaches the edge, giving a sense of transition that draws the eye downward along the nail shape.
Creating Dimension Through Layering
The gradient technique works particularly well on stilettos because the elongated shape gives glitter room to “travel.” Start with your solid royal blue as the base, then use a makeup sponge to dab on clear polish mixed with glitter (or use a pre-made glitter gradient topcoat) in progressively heavier layers. This creates a natural fade that looks intentional and expensive rather than accidental.
Application Tips for Perfect Blending
- Apply the solid royal blue first with 2-3 coats for saturation
- Use a damp makeup sponge to blend where the glitter begins — this softens the transition
- Opt for fine or medium-cut glitters rather than chunky ones (they’ll catch the light consistently without looking juvenile)
- Build the glitter density gradually across multiple thin layers rather than one heavy application
- Seal with a glossy topcoat that’ll flatten and protect the glitter
Worth knowing: Gel-based glitter products blend more smoothly than traditional glitter polish, so if you’re willing to invest in gel, this design looks even more polished (literally).
3. Metallic Tips with Deep Blue Base
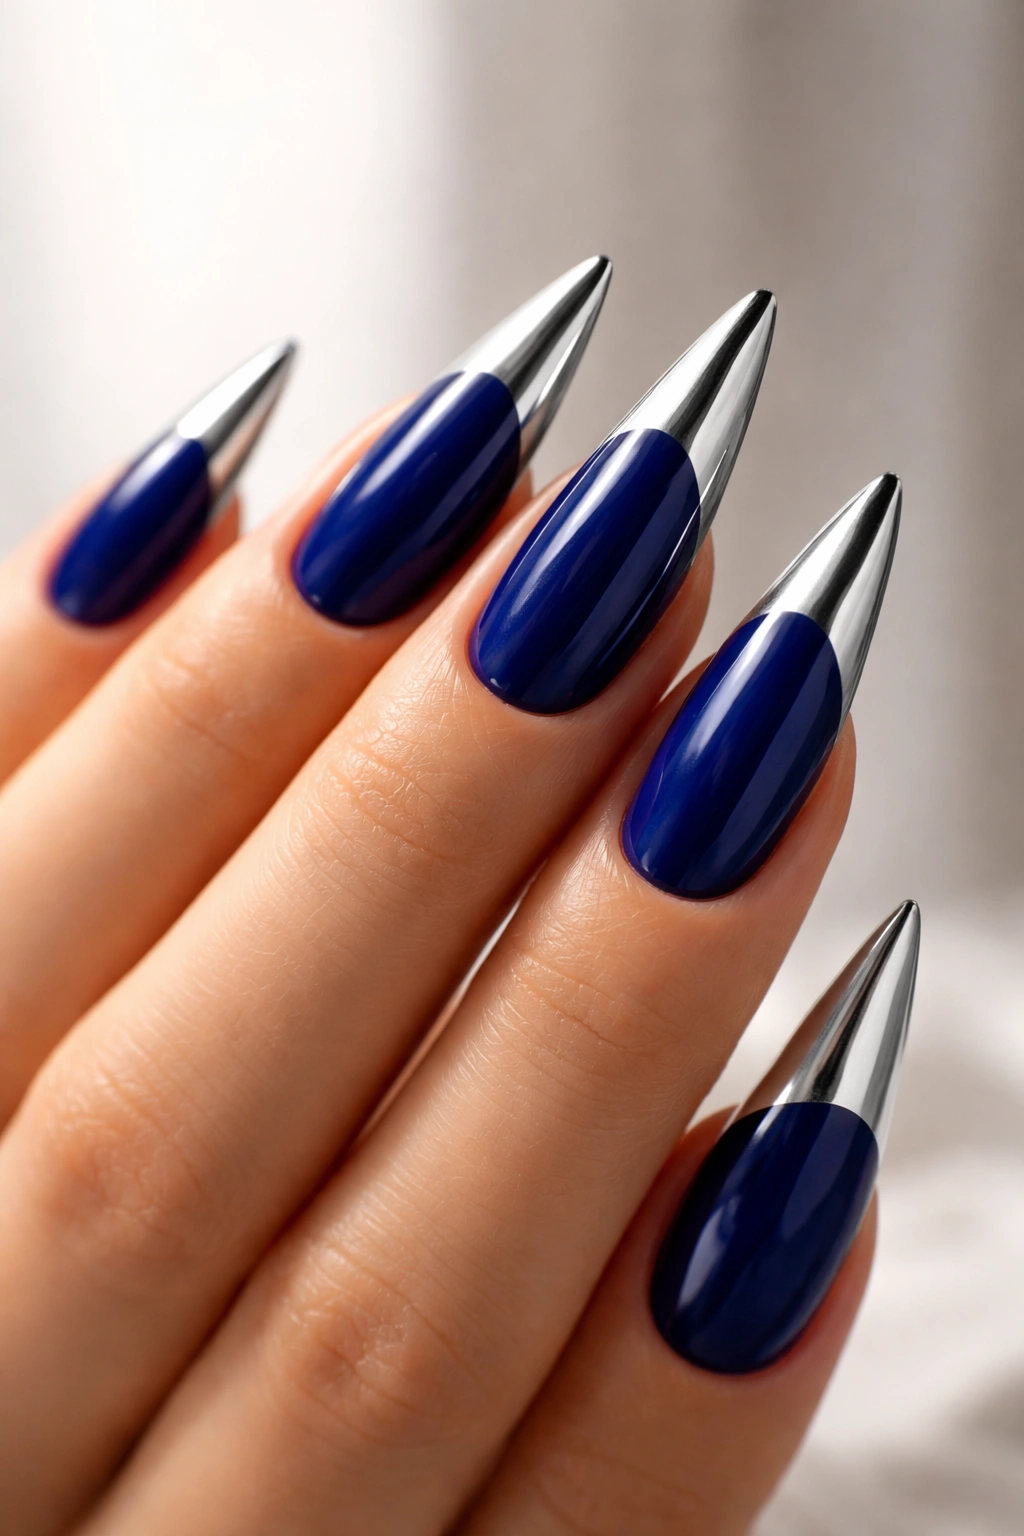
Flip the classic French manicure script by keeping your nail bed in royal blue and creating a metallic statement at the tips. Chrome, rose gold, or traditional gold can all work beautifully, but chrome gives a truly futuristic edge that contrasts dramatically with the richness of the blue base.
Why Metallic Tips Elevate Stilettos
The pointed tip of a stiletto nail already draws attention, so capping it with something shiny makes logical sense. Metallic finishes have a way of catching light from different angles, which means your nails stay visually interesting as you move throughout the day. This design reads as intentional and modern rather than accidental.
Getting a Clean Metallic Line
- Apply 2-3 coats of royal blue to the entire nail and let it fully cure
- Use a thin art brush or a striping tool to create a clean line where the metallic begins (typically around where the white would start in a traditional French manicure)
- Apply metallic polish carefully along that line — it helps to use a metallic powder with a clear binder rather than traditional metallic polish, as powders are easier to control
- Alternatively, use adhesive foil or metallic sticker strips for a perfectly straight edge
- Seal with topcoat, being extra careful around the edge to prevent chipping
Pro tip: If your hand isn’t steady enough for freehand lines, use a thin piece of tape as a guide — secure it where you want the line to be, paint over it, and remove the tape while the polish is slightly wet for a crisp edge.
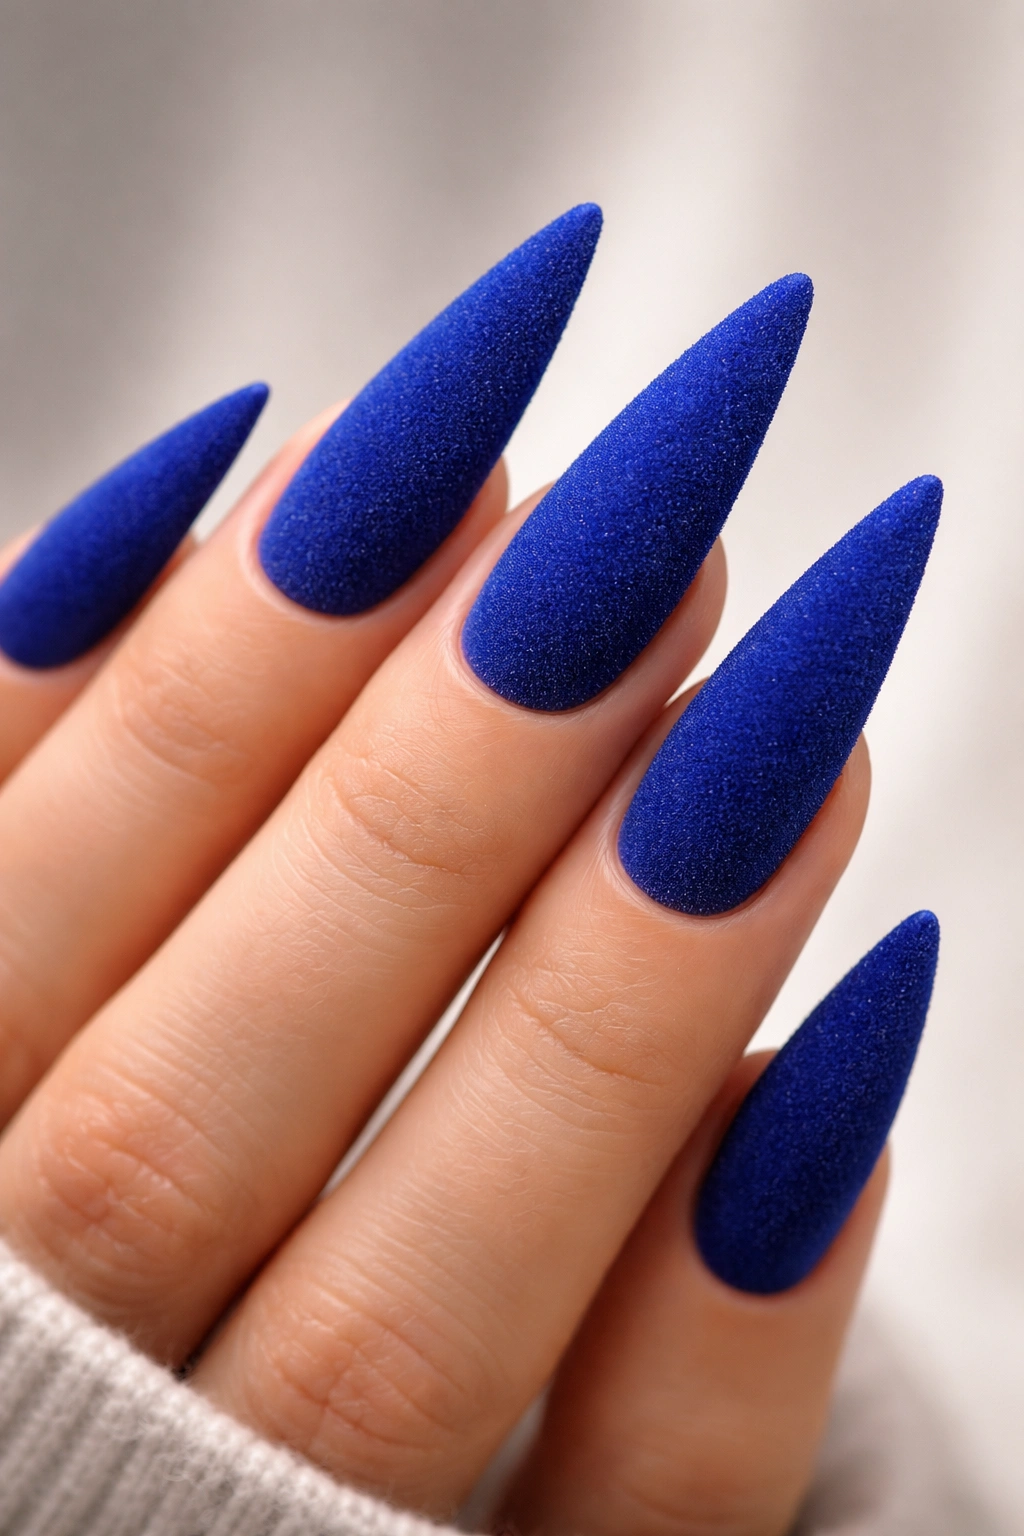
4. Matte Royal Blue with Jewelry Stones
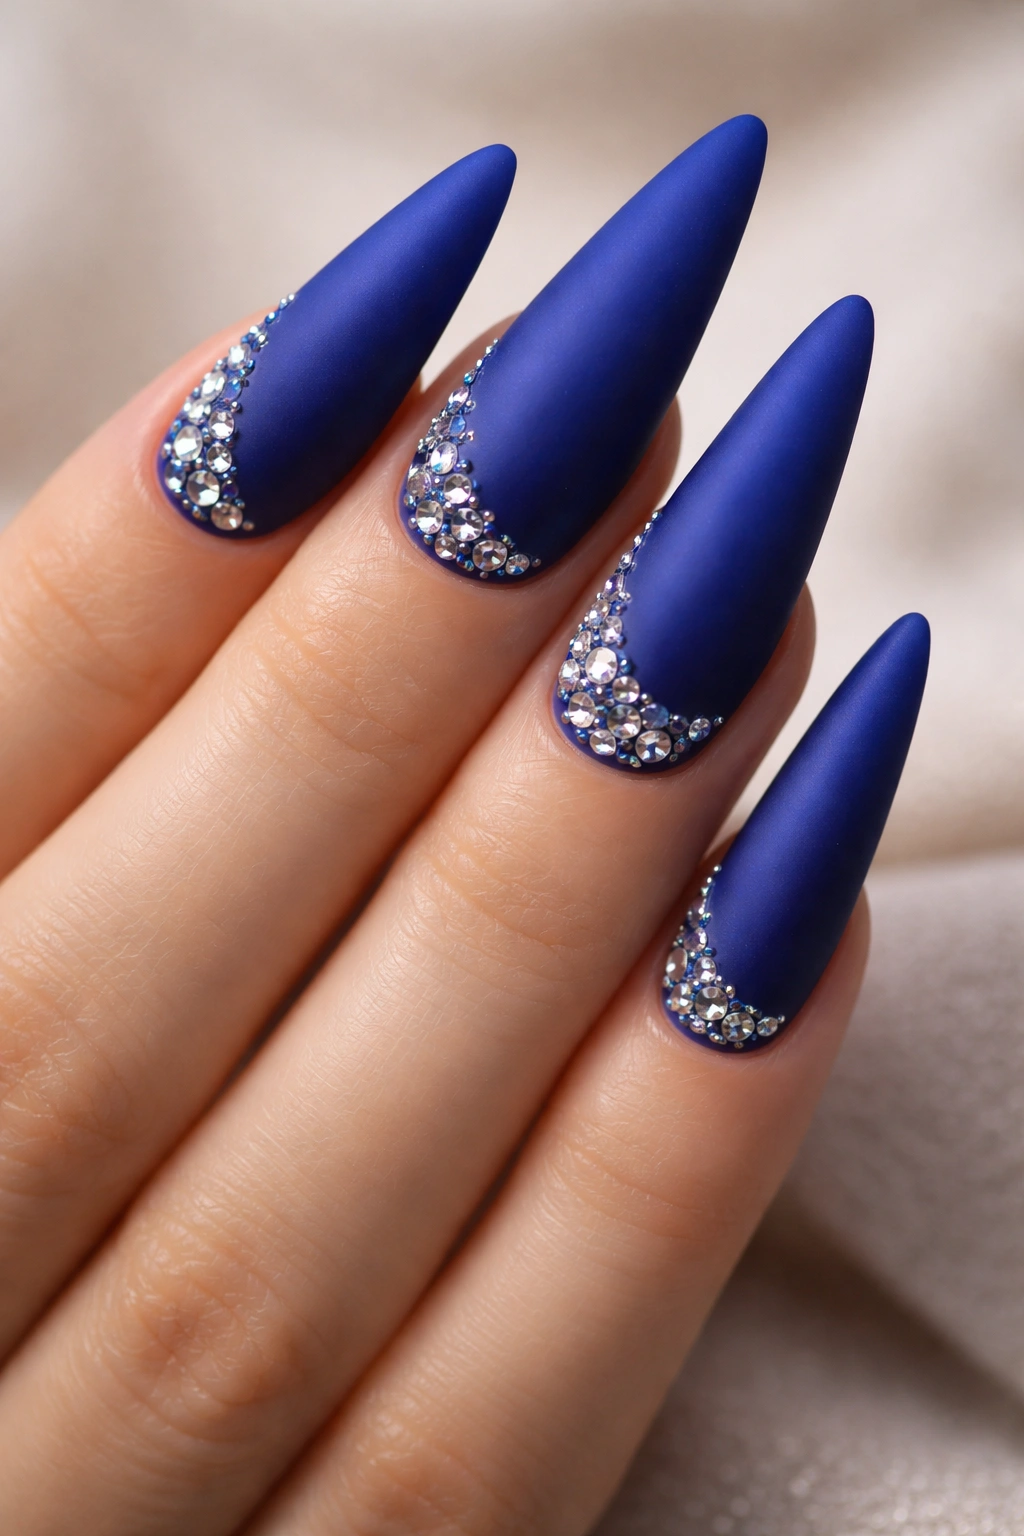
Matte polish creates an entirely different vibe than glossy — it’s softer, more modern, and gives royal blue an almost velvety quality. Adding sparkling rhinestones or hand-placed jewelry stones elevates it from everyday to special occasion territory instantly.
The Luxe Factor of Matte Plus Sparkle
Matte finishes have become increasingly popular because they feel current and less “done up” than their glossy counterparts, yet they’re still deeply saturated in color. When you add stones to a matte base, the contrast is even more striking — the dull finish makes the sparkle pop harder. This is genuinely one of the easiest ways to make your nails feel like a professional manicure even if you’re applying it yourself.
Applying Stones to Matte Nails
- Apply 2-3 coats of matte royal blue polish — many brands sell matte-finish polishes specifically, or you can use a matte topcoat over regular polish
- While the final coat is still slightly tacky, place stones using a dotting tool or the small end of a jewelry pick (grabbing the stone in the tiny adhesive dot at its base)
- Press gently to secure without smooshing the polish
- Once the polish is fully set, seal with a glossy topcoat to lock stones in place (this creates a subtle contrast — matte base with a slight shine from the topcoat)
- Allow at least 48 hours of careful wear before heavy activity
Worth knowing: The larger and heavier the stones, the more likely they are to eventually catch on things and potentially lift. Consider reserving the largest stones for your accent nail only.
5. Two-Tone Royal Blue and Silver
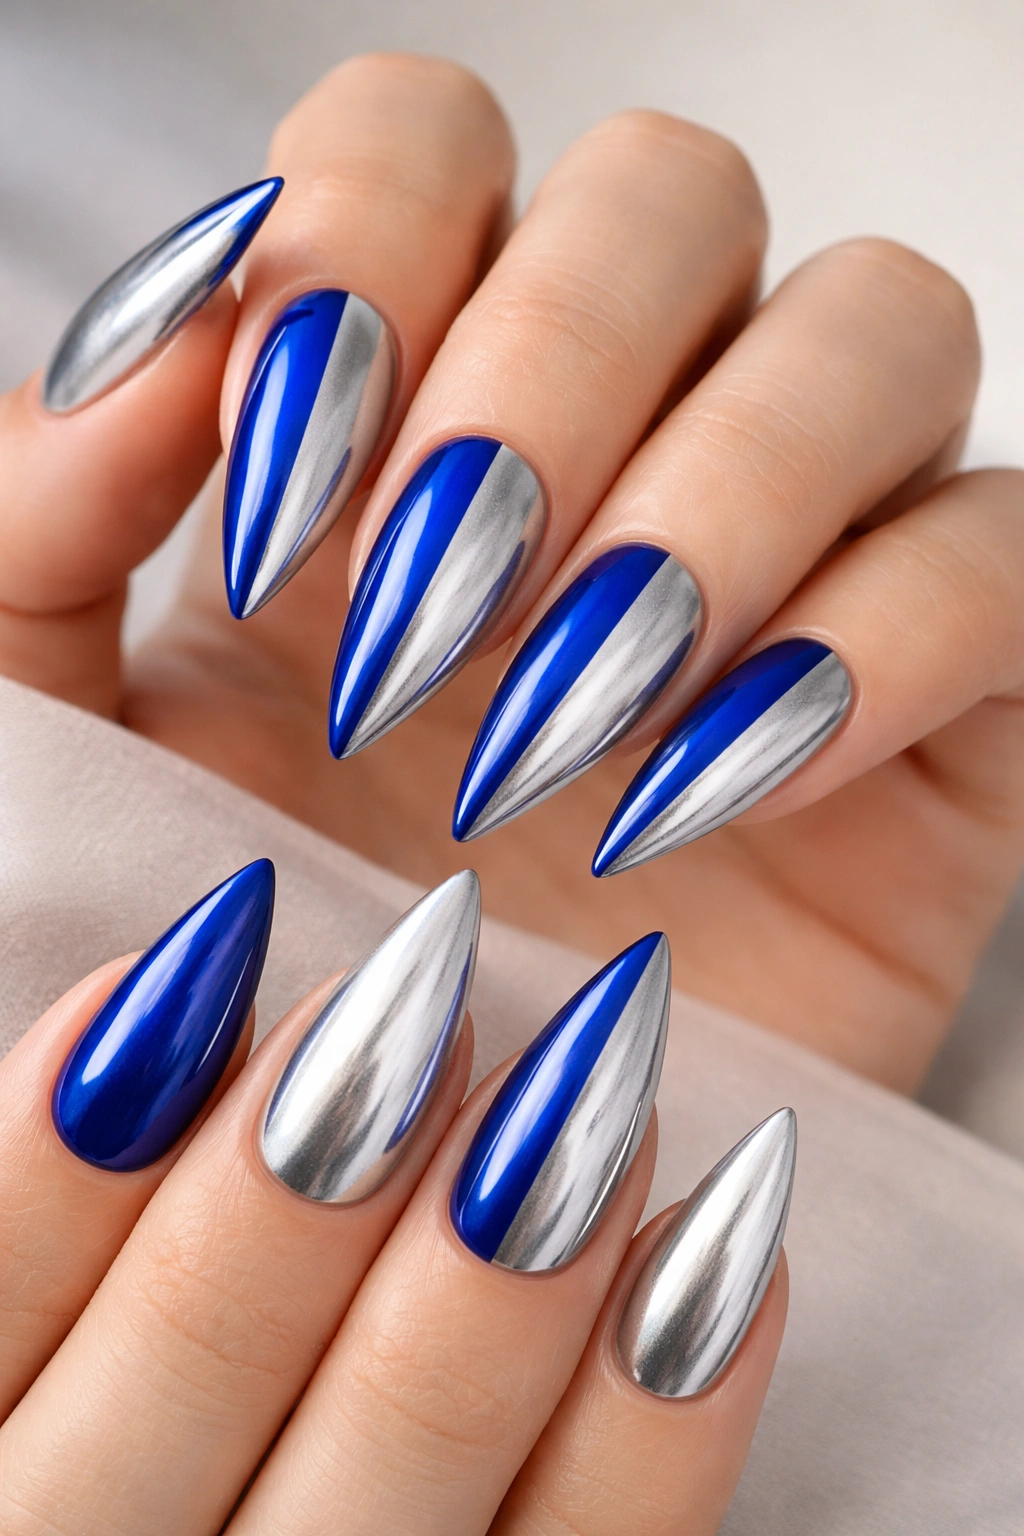
A two-tone design splits the nail vertically, diagonally, or horizontally into royal blue on one side and metallic silver (or chrome silver) on the other. This creates a bold, geometric effect that’s particularly striking on the elongated canvas of a stiletto nail.
Design Variations Within the Two-Tone Concept
The simplest approach is a vertical split down the center — royal blue on one half, silver on the other. A diagonal split (which follows the natural line of the nail at an angle) feels more organic and less rigid. You could also try a horizontal split with blue on top and silver below, or create a more abstract interpretation where the colors intermix in an ombré transition zone rather than a hard line.
Achieving Clean Color Boundaries
- Apply your first color (royal blue) to the entire nail and let it cure
- Use painter’s tape or a thin striping tape to create a clean line where the second color will begin
- Apply silver metallic polish carefully up to the tape line
- Remove the tape while the polish is just barely wet for the cleanest edge possible
- Seal with topcoat — use a glossy topcoat to make both colors shine equally
Pro tip: If you’re not confident with tape placement, consider using a thin striping brush to paint a very fine line of silver along the division, then fill in one side completely. It gives you more control and looks intentional even if the line isn’t perfectly centered.
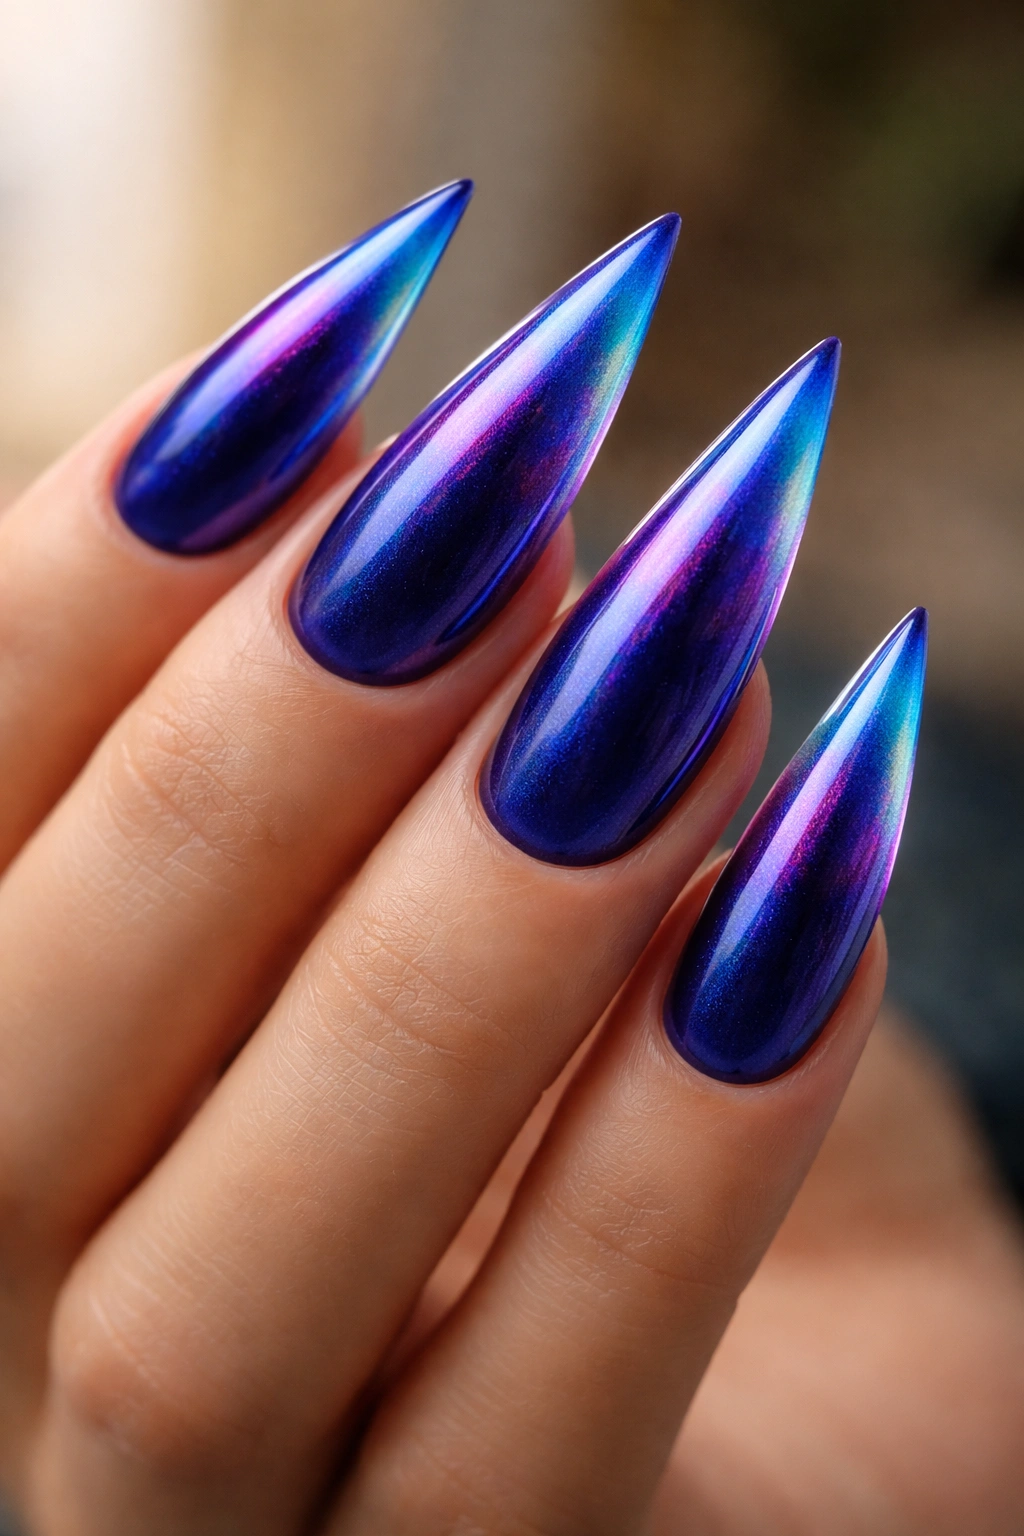
6. Royal Blue Ombre with Chrome Shift
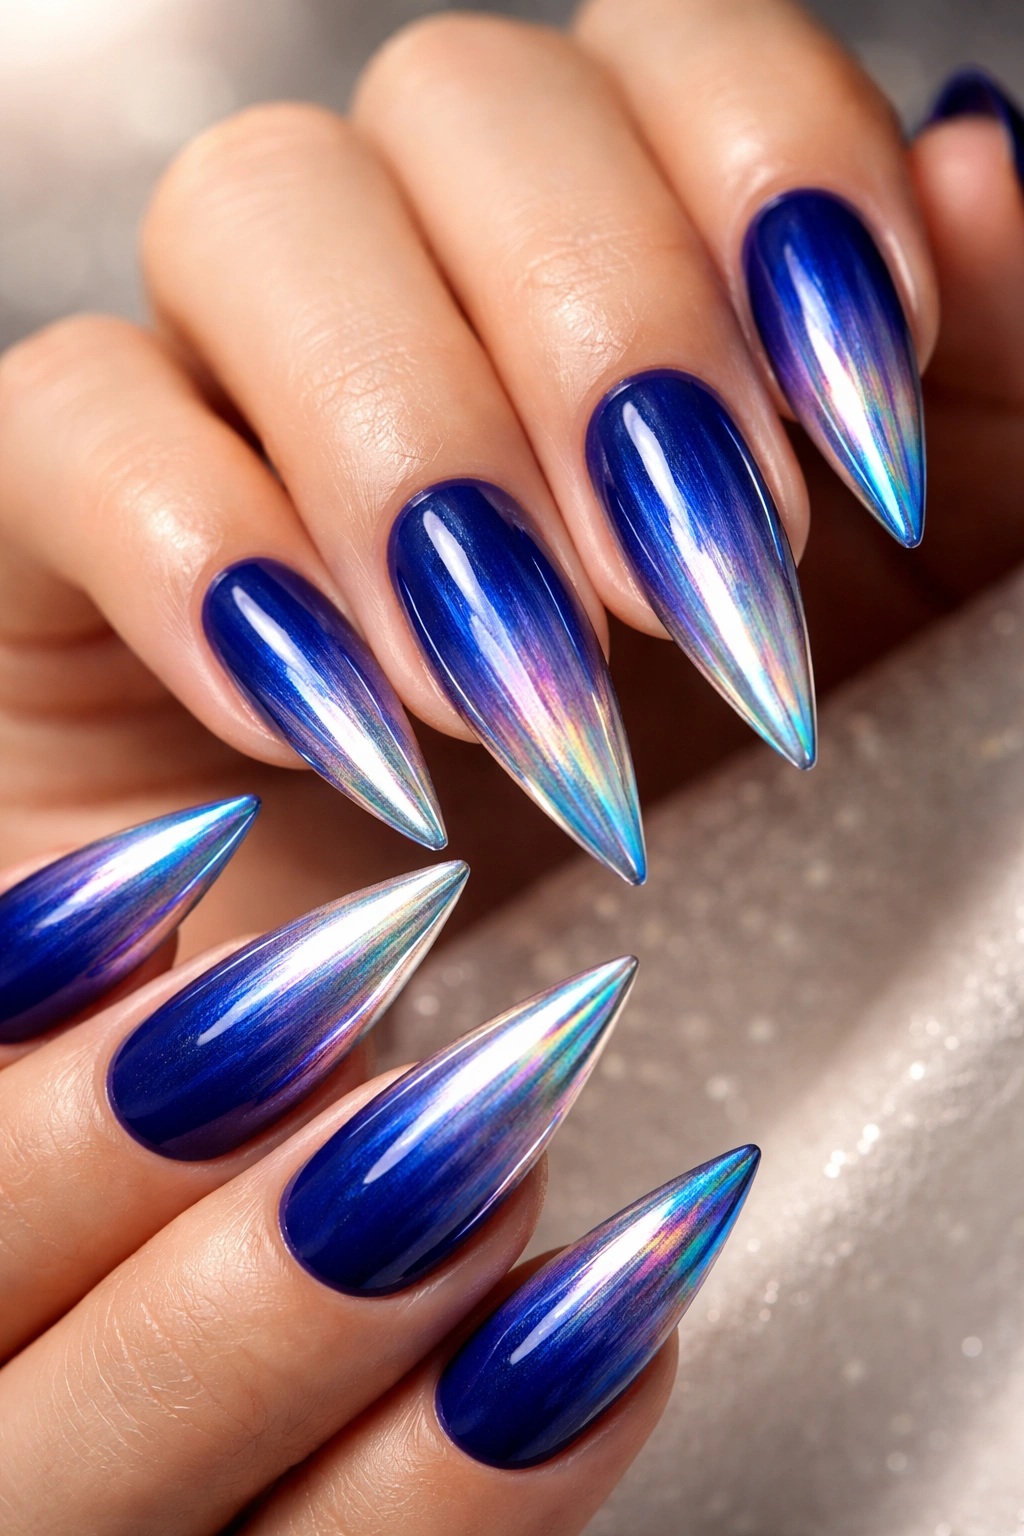
An ombre that transitions from deep royal blue at the base to a shimmering chrome or holographic silver at the tips creates depth and dimension. This design is less about distinct color zones and more about a fluid, gradient transition that catches light differently depending on the angle.
The Science Behind Shimmering Ombré
Chrome and holographic finishes contain microscopic particles that reflect light across the visible spectrum. When applied over a deep blue base, these particles scatter differently depending on how light hits them, creating an effect that looks different (almost multi-colored) depending on viewing angle. On stiletto nails, this means the tips shimmer with rainbow or silver undertones while the base maintains its rich blue depth.
Blending for a Smooth Gradient
- Apply 2-3 coats of royal blue to the full nail
- Use a makeup sponge to apply a clear topcoat or base in the ombre zone (the upper third to half of the nail)
- While still wet, press chrome or holographic powder into that zone with the sponge
- Blend the edges where the chrome meets solid blue using gentle sponge dabbing
- Build the chrome density gradually — you want to see the blue showing through slightly rather than a harsh line
- Seal with a clear topcoat that’ll help the chrome settle and last longer
Worth knowing: Chrome and holographic products are delicate and can chip if exposed to excessive friction. This design is stunning but requires careful wear and regular topcoat maintenance.
7. Geometric Patterns in Royal Blue
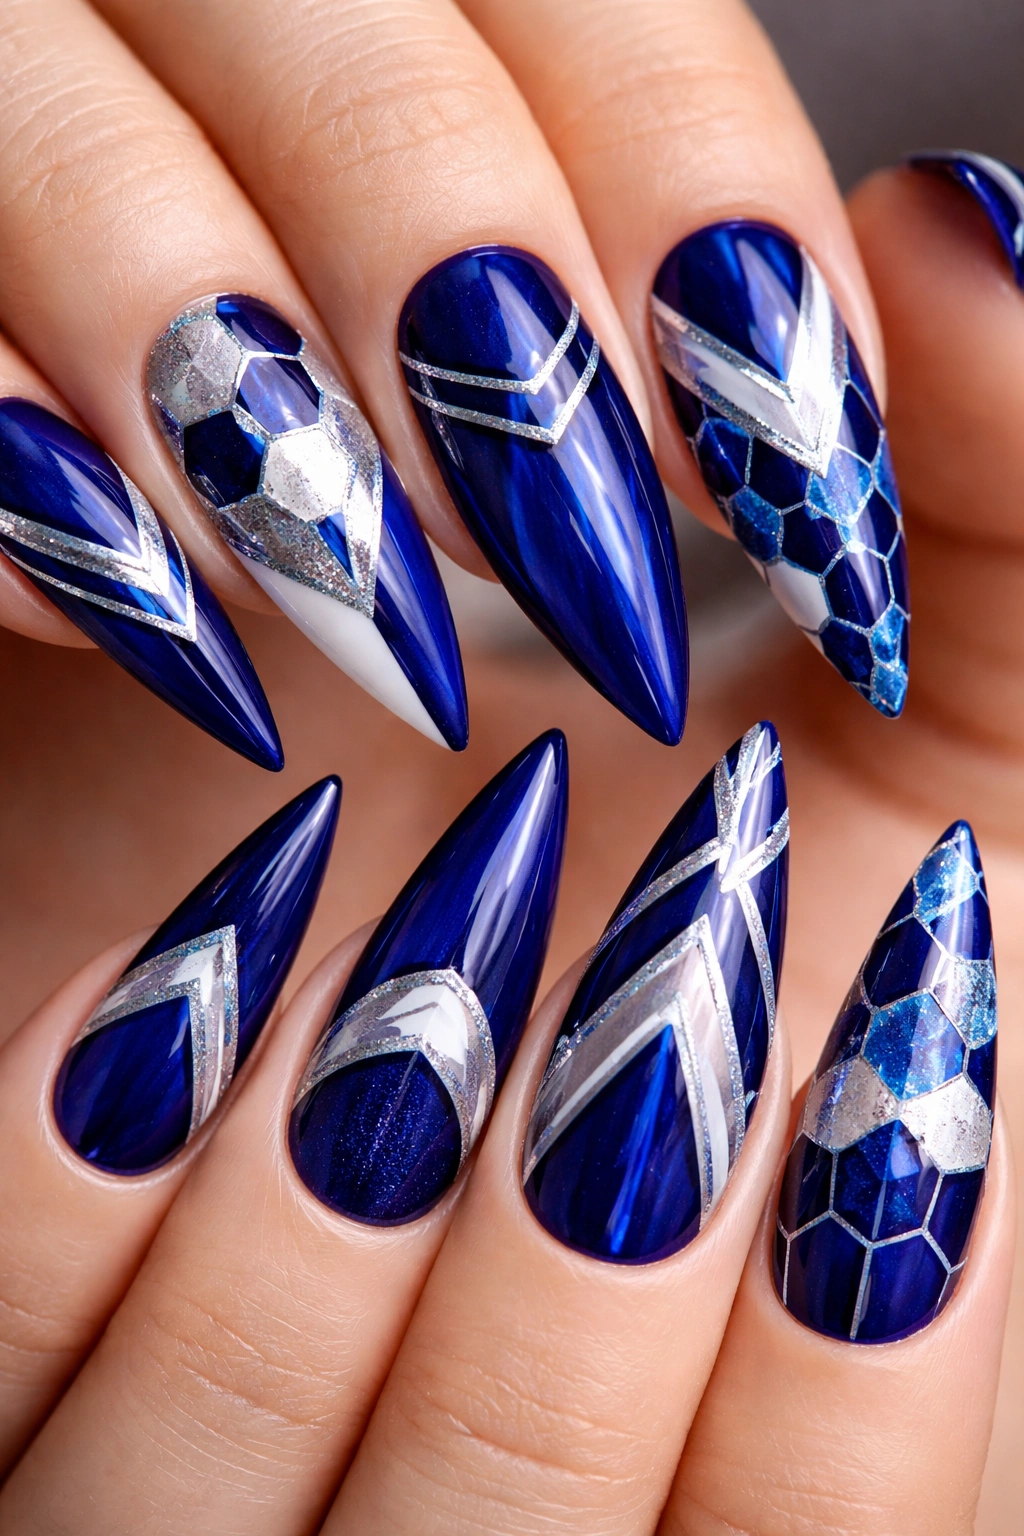
Geometric designs — think triangles, hexagons, stripes, or angular shapes — create a modern, artistic aesthetic when done in various shades of blue (royal blue as the base with navy, lighter blue, or white accents) or with contrasting colors like white, silver, or black on a royal blue background.
Design Ideas That Work on Stilettos
Thin vertical or diagonal stripes create elongation and movement. Geometric half-moons or partial circles (especially near the cuticle) create a sophisticated, sometimes Art Deco vibe. A starburst pattern radiating from the center feels bold. Abstract angular shapes scattered across the nail look modern without being overwhelming. You could even alternate which nails get the pattern — solid royal blue on some, patterned on others, for a cohesive but not monotonous look.
Executing Clean Geometric Lines
- Apply 2-3 coats of royal blue as your base
- Use a thin striping brush, detail brush, or art pen to sketch your pattern in contrasting color
- If you’re not confident freehand, use stencils, striping tape, or even toothpicks dipped in polish to create dots that form geometric shapes
- Thin, clean lines always look more polished than thick, wobbly ones — use a barely-wet brush and make several thin passes rather than one heavy stroke
- Seal with topcoat once everything is completely dry
Pro tip: Test your geometric design on a piece of paper or a practice nail wheel first. Even small refinements to line thickness or spacing make a huge difference in the final look.
8. Velvet or Flocked Royal Blue
Velvet and flocked nails have a soft, matte, almost fabric-like texture that’s completely different from any glossy or glitter finish. Flock is tiny fibers that adhere to tacky polish, creating that signature fuzzy effect that feels unusual and looks incredibly tactile.
The Appeal of Textured Nails
Velvet and flocked finishes are inherently attention-grabbing because they break the expectation of what nails should feel like. Royal blue in flocked or velvet form has a sophisticated, high-fashion quality — it’s the kind of thing you’d see on a runway. The texture also feels luxurious and is genuinely pleasant to touch, which makes these designs personally satisfying even when no one else is looking at your nails.
Creating the Textured Effect
- Apply 1-2 coats of royal blue to the entire nail
- While the final coat is still tacky (don’t let it fully cure), apply flock fibers by either sprinkling them on or using a flock brush to press them into the wet polish
- Let the flock set completely before handling the nails — typically 15-30 minutes
- Some flocked finishes are sealed with a topcoat; others are left matte — check your specific product instructions
- Be aware that flocked nails require extra-careful wear since the texture can snag on fabric
Worth knowing: Flocked nails feel luxurious but are higher-maintenance. The texture can collect lint from sweaters or snag on pantyhose. Reserve this design for occasions where you’ll be mostly showing off your hands without heavy activity.
9. Royal Blue with Hand-Painted Details

Hand-painted designs allow for artistic expression — think hand-painted flowers, vines, abstract brushstrokes, miniature scenes, or detailed patterns that feel bespoke and one-of-a-kind. The royal blue acts as a rich canvas for whatever artistic elements speak to you.
Design Directions for Hand-Painted Art
Delicate florals (roses, baby’s breath, botanicals) feel romantic and timeless. Gold-leafed vines or branches add elegance. Abstract brushstrokes or watercolor-style washes create a contemporary feel. Tiny landscapes, cityscapes, or scenes give something to admire on closer inspection. Even simple elements like feathers, butterflies, or geometric mandala patterns can elevate the look significantly. The key is choosing designs that work at the scale of a nail — overly detailed artwork gets lost, while simpler designs read clearly and impact.
Hand-Painting Techniques for Beginners
- Apply 2-3 coats of royal blue and let it fully cure
- Use a very fine detail brush (size 0 or 00) with contrasting polish color (white, gold, or a lighter blue)
- Practice your design on paper or a practice wheel first — there’s nothing wrong with sketching the outline lightly in pencil first, then painting over it
- Use thin, deliberate strokes rather than trying to hide mistakes with heavy application
- Allow each painted element to dry fully before moving to the next
- Seal with glossy topcoat for protection and shine
Pro tip: If hand-painting feels too intimidating, use water-slide nail decals (pre-printed designs you slide onto wet topcoat) — they give an artistic look without requiring freehand skill.
10. French Tips Reversed in Royal Blue
A reversed French manicure (also called a “reverse French” or sometimes a “V-tip”) puts the contrasting color on the nail bed and leaves the tips clear, nude, or a lighter shade. In this case, a deep royal blue forms a thick stripe or gradient at the base, while the tips remain clear or soft nude.
Why Reverse French Feels Modern
Traditional French tips have been done to death and can feel dated in the right (or wrong) context. A reverse French flips that expectation — the color focuses on the nail bed and cuticle area, which creates a different visual proportion. On stilettos, this means the intense color sits where the hand is and fades as it extends outward, which somehow feels more refined and less “costume-y” than traditional French.
Executing a Reverse French on Stilettos
- Apply 2-3 coats of royal blue to the entire nail
- Either freehand or with painter’s tape, create a curved or straight line that defines where the royal blue ends and the lighter color (or clear) begins
- For a traditional reverse French line, this should be roughly where a normal French tip would end — about ¼ to ⅓ of the nail length from the tip
- Fill the tip area with clear polish, a nude shade that matches your skin tone, or a very pale pink
- Seal with glossy topcoat
- The blend/transition line is key — a harsh line reads as amateur, while a slightly softened edge looks intentional
Worth knowing: Reverse French works best with a slight gradient or soft blend rather than a razor-sharp line. Use a makeup sponge to gently dab along the boundary to blur it slightly.
11. Royal Blue Aura or Shifting Effect
An aura nail features a glowing halo effect around the outer edges of the nail with a lighter or more transparent center, created using specialized aura powders or chrome dusts that shift colors depending on light and angle. When applied over royal blue, the effect is otherworldly and absolutely eye-catching.
Understanding Aura and Shifting Finishes
Aura finishes contain pigments that reflect light in ways that make them appear to glow or shift color. Applied correctly over a deep royal blue base, these powders create an almost 3D effect — like there’s light radiating from inside the nail outward. The color shifts slightly depending on how the light hits it and the angle from which you’re viewing it, which means your nails look different (but always stunning) throughout the day.
Application for Best Aura Effect
- Apply 2-3 coats of royal blue gel polish as your base — gel works better than traditional polish for this technique since the powder adheres more consistently
- While the final coat is tacky but not wet, use a brush or applicator to apply aura powder, starting at the outer edges and edges of the nail, then gently working inward to create a gradient toward the center
- The center should be lighter or more transparent than the outer edges for that signature aura glow
- Seal immediately with a thick layer of clear gel — aura powders need to be encapsulated to last
- Cure under a UV or LED lamp per your products’ specifications
Pro tip: Aura finishes look most striking in natural or bright light — the shifting quality truly shines in daylight rather than under indoor lighting. The longer the exposure to light, the more you’ll notice the color variation.
Final Thoughts
Royal blue stiletto nails are a commitment to confidence. Whether you choose something classic and timeless like a glossy finish with gold accents, or you go bold with an aura effect or hand-painted details, you’re making a statement that says you put thought into your appearance and you’re not afraid to stand out.
The most important thing is choosing a design that actually makes you feel good when you look at your nails. There’s no point in having an expensive manicure if it doesn’t spark joy or make you feel like the best version of yourself. Royal blue works with virtually any style — corporate, casual, creative, bold, minimal — which means you can absolutely find a variation that fits your personality and lifestyle.
If you’re getting these done professionally, show your chosen design to your nail artist ahead of time. If you’re DIY-ing, don’t stress about perfection on the first attempt. Nail art is genuinely forgiving — chips and imperfections add character, and you can always file and reapply if something truly bothers you. The investment in taking time with your nails, whatever design you choose, is always worthwhile. That small moment of admiring your own hands multiple times throughout the day creates a genuine dopamine hit that extends far beyond the aesthetics alone.
