

Stiletto nails have become the ultimate canvas for bold self-expression, and if you’re ready to move beyond basic colors and venture into truly exotic territory, you’re in for a creative journey. The elongated, dramatic shape of stilettos is practically made for intricate nail art, dimensional designs, and eye-catching embellishments that would look overwhelming on shorter nails but absolutely stunning on these sharp, statement-making tips. Whether you’re drawn to mystical themes, nature-inspired patterns, or luxe metallics, there’s a stiletto nail design waiting to elevate your entire look.
The beauty of exotic stiletto designs is that they bridge the gap between wearable art and practical glamour. You don’t need a special occasion to rock an intricate design—these nails are designed to turn heads on an ordinary Tuesday or make a memorable impression at any gathering. The key to pulling off exotic stiletto nail ideas is finding designs that reflect your personal style while maintaining enough visual balance that the nails enhance your appearance rather than overwhelm it. Each design in this guide offers multiple color variations and customization options, so you can adapt them to your skin tone, personal aesthetic, and the occasion.
What makes stiletto nails particularly versatile for exotic designs is how the elongated surface area allows artists to layer multiple techniques—think negative space combined with chrome finishes, hand-painted details over ombré gradients, or gemstone placements that create a cascading visual effect. The pointed tip naturally draws the eye upward, making intricate details pop even more dramatically than they would on shorter, rounder nail shapes. Whether you prefer maximalist designs that make a statement or sophisticated exotic patterns with subtle embellishment, the stiletto shape gives you the platform to make it work.
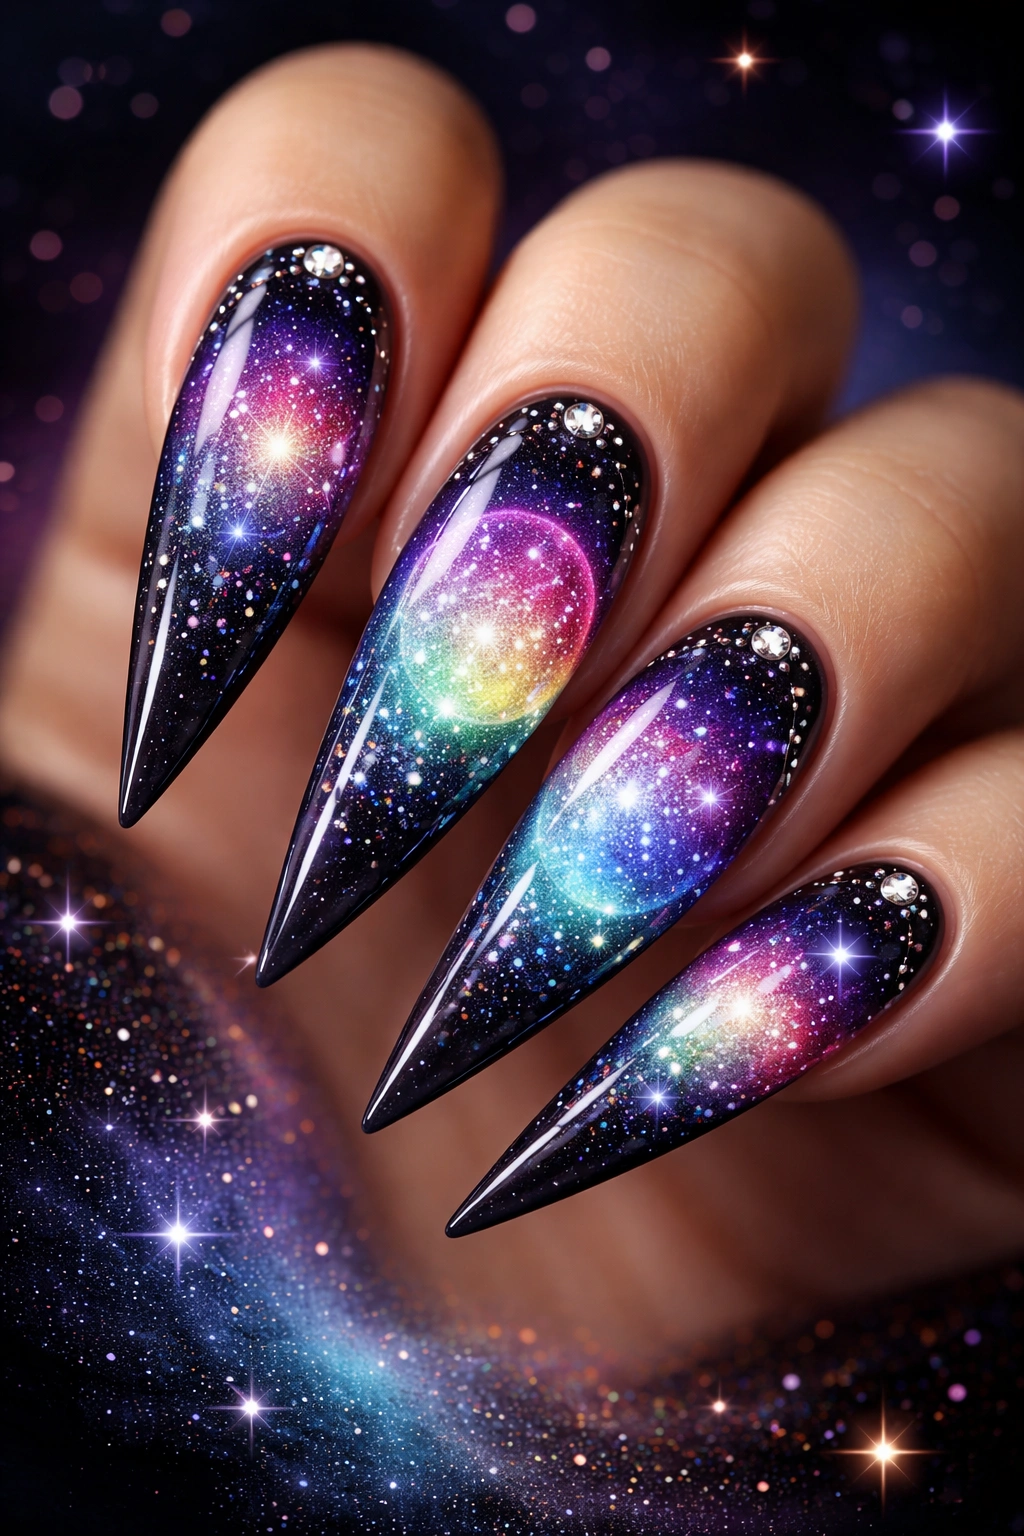
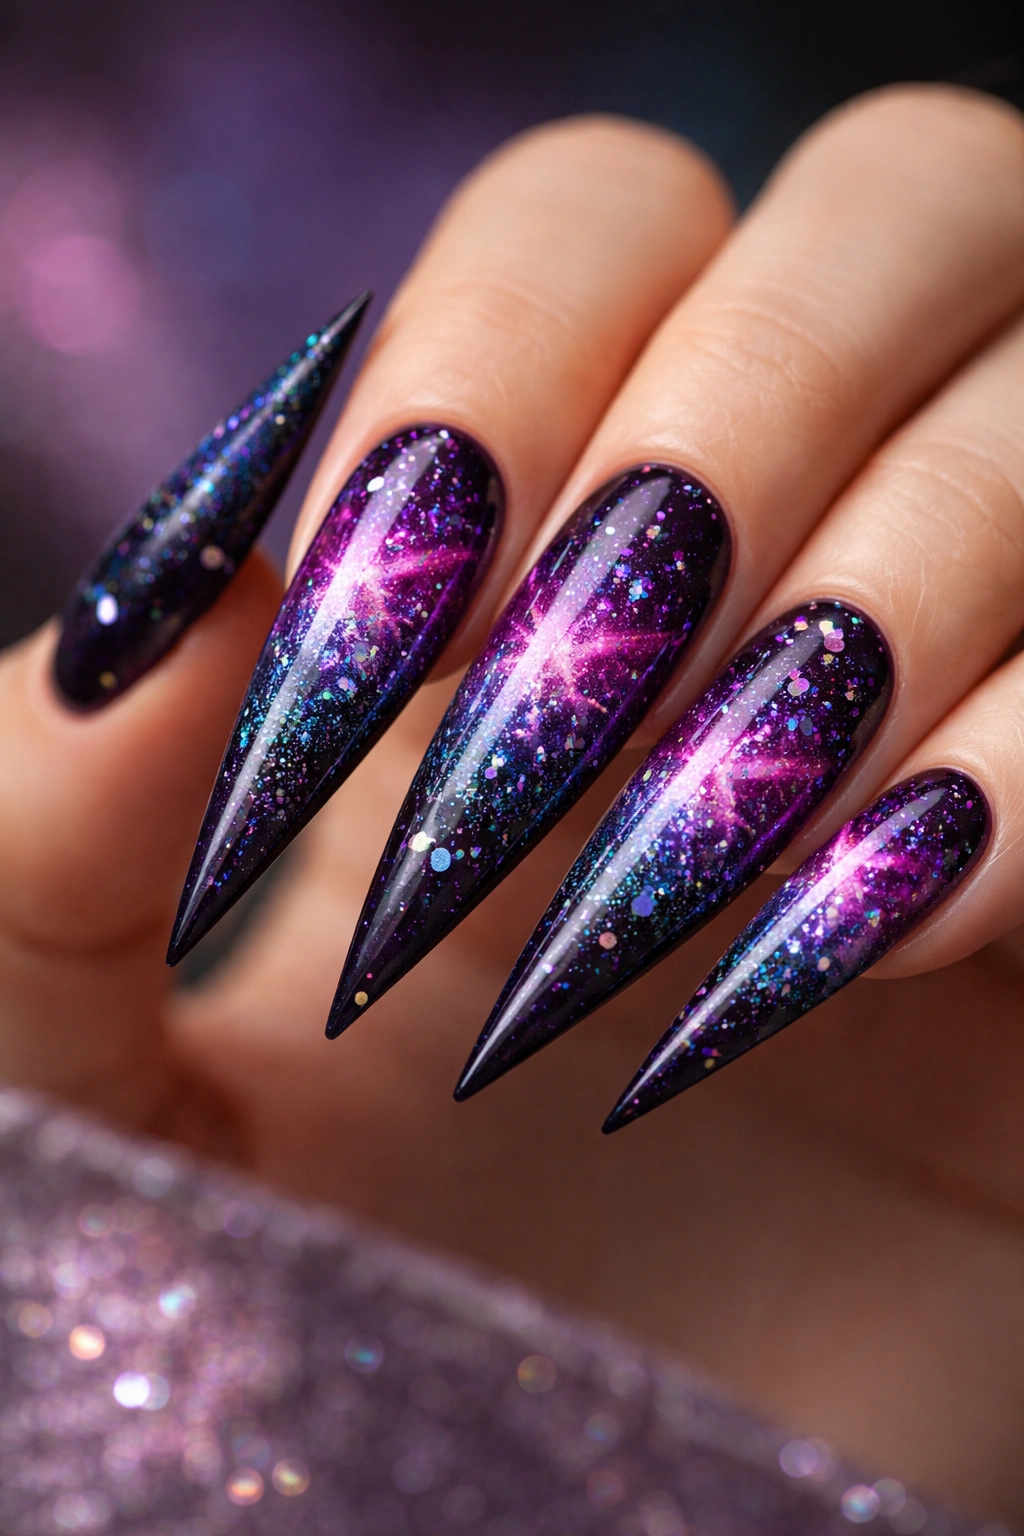
1. Galaxy-Inspired Cosmic Nails with Glitter Nebula
Cosmic nails transport your fingertips into deep space, featuring swirling nebula clouds in jewel tones like deep purple, midnight blue, and rich magenta blended together in dreamy, paint-splash patterns. The design captures the ethereal quality of distant galaxies and distant stars with layers of glitter—fine iridescent sparkles mimicking stars, holographic micro-glitter scattered across the gradient, and deeper glitter placement creating depth and dimension. What makes this design exotic is the combination of multiple shimmer finishes layered over gradient backgrounds, creating an almost three-dimensional effect that shifts and sparkles with every hand movement.
How to Create the Cosmic Effect
The nebula base requires a soft ombre technique, blending two to three jewel-toned colors (navy, purple, and mauve work beautifully together) using a makeup sponge dabbed gently onto the nail. Once the base dries, the artistic magic happens through glitter application and detail work. Fine glitter is scattered across the entire surface to create the “star field,” while holographic dust adds an iridescent shimmer that catches light from every angle. Some artists add tiny hand-painted white dots or star shapes for even more precision, and a glossy top coat seals everything while magnifying the sparkle effect.
Design Customization and Layering Techniques
- Choose your color palette based on your mood: deep jewel tones for evening elegance, pastels with star glitter for a softer cosmic look, or black base with rainbow holographic for maximum contrast and sparkle
- Layer different glitter sizes for visual texture—combine chunky holographic pieces with fine rainbow dust for a complex, multifaceted shimmer
- Add white gel pen details to draw constellation patterns if you want something more structured and personalized
- Matte top coat over the glitter creates a sophisticated cosmic dust effect, while glossy preserves maximum sparkle and shine
Pro tip: Apply a clear base coat before your gradient to prevent staining—jewel-tone polishes can sometimes be deep pigmented and cause discoloration if applied directly to the nail plate.
2. Metallic Chrome and Marble Fusion Design
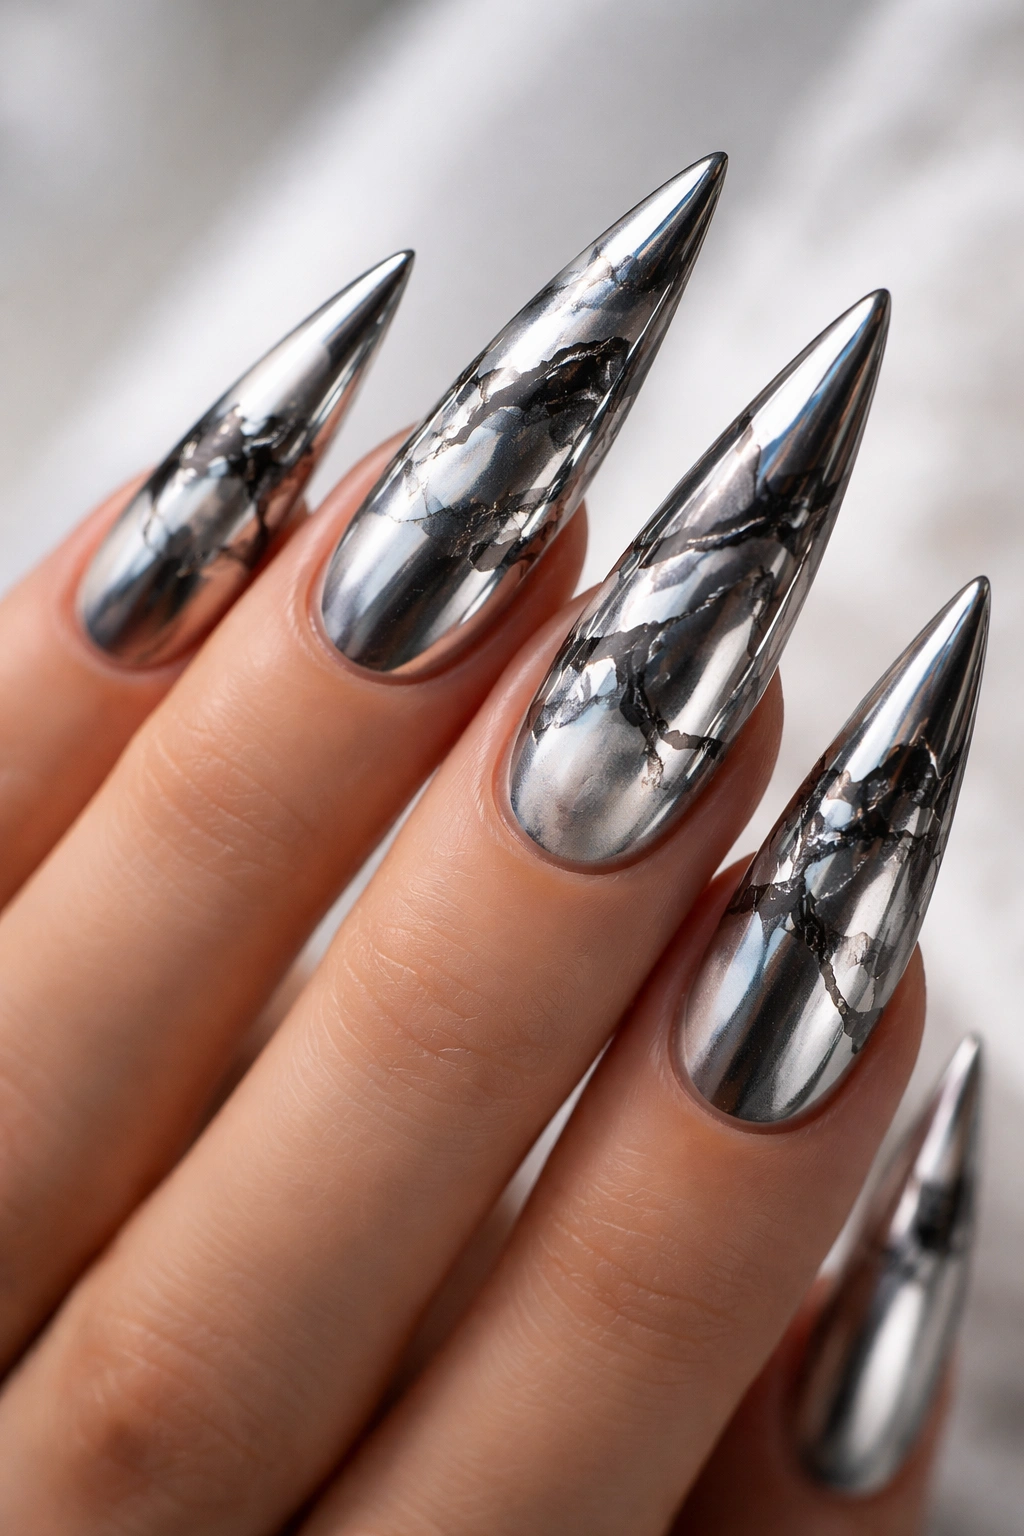
Chrome nails have evolved from simple mirror finishes into sophisticated, sculptural designs, especially when fused with classic marble veining patterns. This exotic hybrid combines the liquid-metal shimmer of chrome powder with delicate black or gray marble lines, creating an otherworldly effect that looks like polished metal with natural stone deposits running through it. The marble veining is applied over the chrome base using thin brushes or specialized nail pens, creating organic, flowing patterns that echo natural stone formations while the metallic background gleams beneath.
Achieving the Perfect Chrome-Marble Balance
Creating this look requires two distinct steps—first, the chrome powder application over a sticky gel base, then the marble details added after the chrome cures. Chrome powder requires a special gel base coat and careful buffing technique to activate the metallic particles and create that flawless mirror finish. Once the chrome is perfected, ultra-thin marble veining is painted on using a detail brush with dark gel or polish, creating flowing lines that look like they’re naturally embedded in the chrome rather than painted on top. The final glossy top coat unifies the layers and creates seamless dimension.
Color Combinations and Finish Variations
- Silver chrome with black marble creates classic, high-contrast elegance that works for any occasion
- Rose gold chrome with dusty taupe marble veining delivers warm, romantic luxury
- Holographic chrome base with iridescent marble lines creates a color-shifting, dimension-rich design that changes in different lighting
- Champagne chrome with white marble lines offers a subtle, sophisticated look ideal for professional settings
- Mix matte and glossy sections—matte chrome with glossy marble creates textural contrast that makes the design pop even more
Worth knowing: Chrome powder requires proper sealing and careful maintenance since the metallic particles can shift or dull if the top coat isn’t applied correctly or if the nails experience heavy friction.
3. Aquatic Ombre with Hand-Painted Sea Creatures
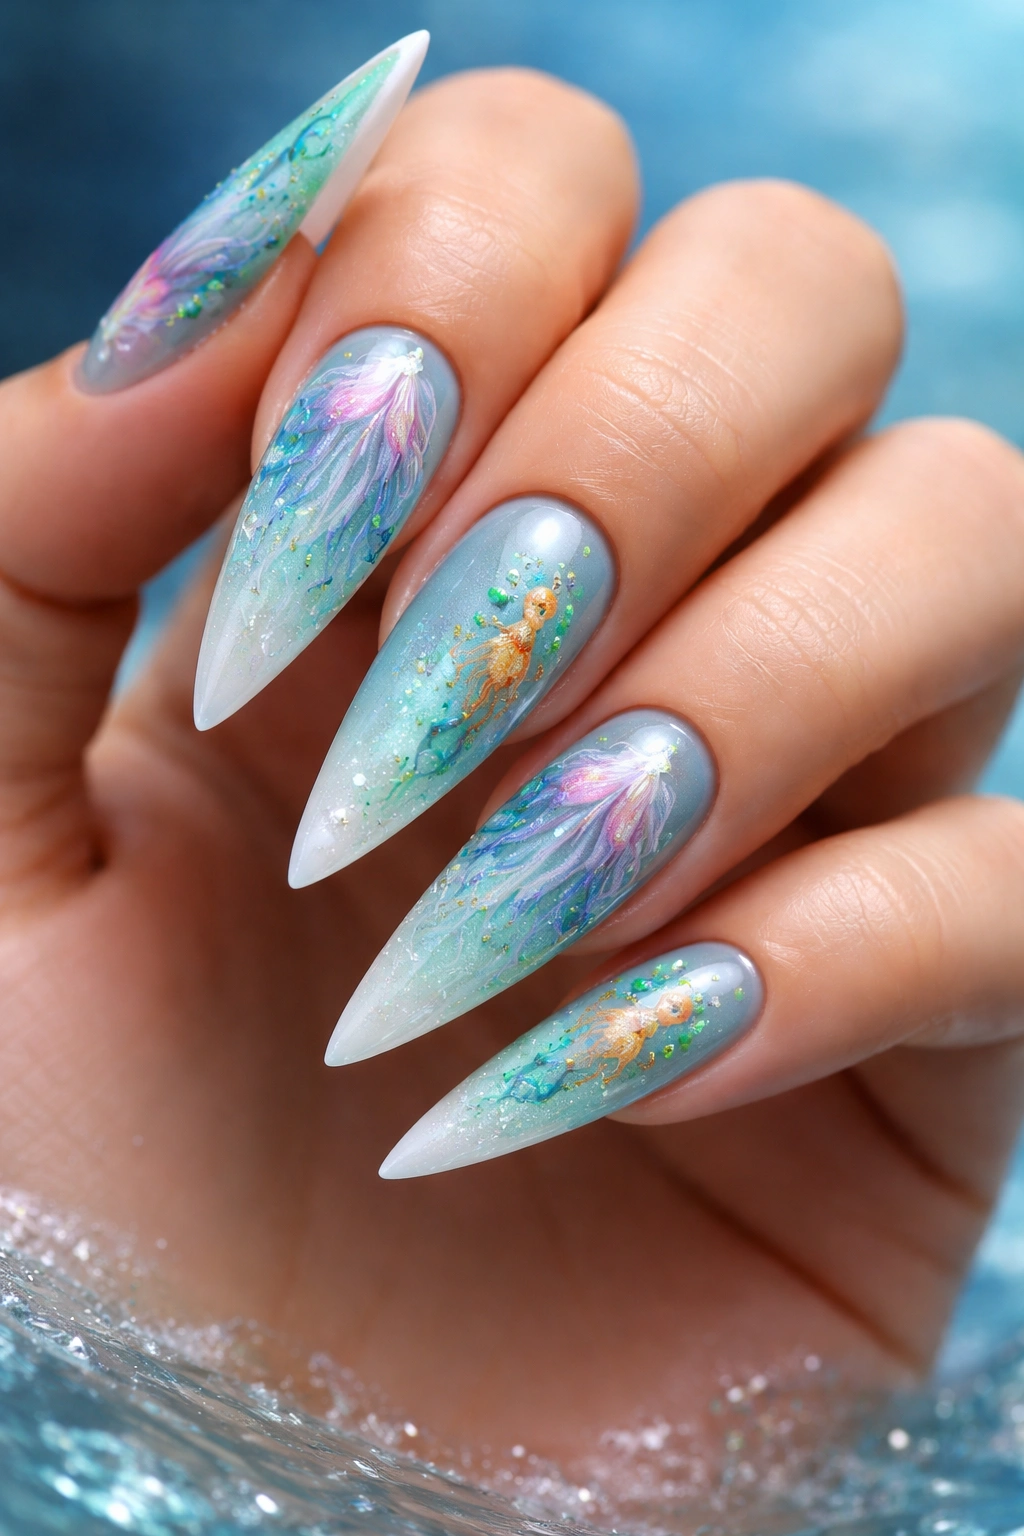
Aquatic-inspired stiletto nails feature a dreamy gradient from turquoise and seafoam at the base to soft white and pearl shimmer at the tips, with delicate hand-painted details of jellyfish, seahorses, tiny fish, or other sea creatures floating across the ombre. This design combines technical gradient work with artistic detail painting, creating a narrative that feels immersive and imaginative. The creatures are painted with fine detail work—transparent wings on jellyfish, intricate patterns on seahorse bodies, or schools of tiny fish that seem to be swimming through the gradient water effect.
Painting Realistic Sea Creatures and Movement
Hand-painted sea creatures require steady hands and thin brushes, but the effect is absolutely worth the effort. Start with a stable aquatic ombre base (turquoise fading through aqua and seafoam into white), then use gel pens or ultra-fine brushes with contrasting colors to add creature details. Jellyfish work particularly well on stilettos because their long, flowing tentacles echo the elongated nail shape—paint translucent tentacles using thin strokes and add tiny dots for suction cups. Seahorses benefit from curved body shapes and detailed tail spirals, while small fish can be painted in schools for added visual movement and depth.
Layering Details and Creating Water-Like Effects
- Apply the gradient when nails are completely clean and dry for the smoothest blend
- Paint creatures with slight opacity using semi-transparent gels so they appear to float within the water rather than sitting on top
- Add fine white highlights to creature eyes and fins to create dimension and life-like quality
- Consider adding air bubbles (tiny white dots in varying sizes) to enhance the underwater feeling
- A glossy top coat magnifies the water effect and makes creatures appear to shimmer beneath the surface
Insider note: This design photographs beautifully because the hand-painted elements are unique and the ombre-to-white gradient creates natural framing that makes the creatures pop visually.
4. Holographic Rainbow Prism with Geometric Patterns
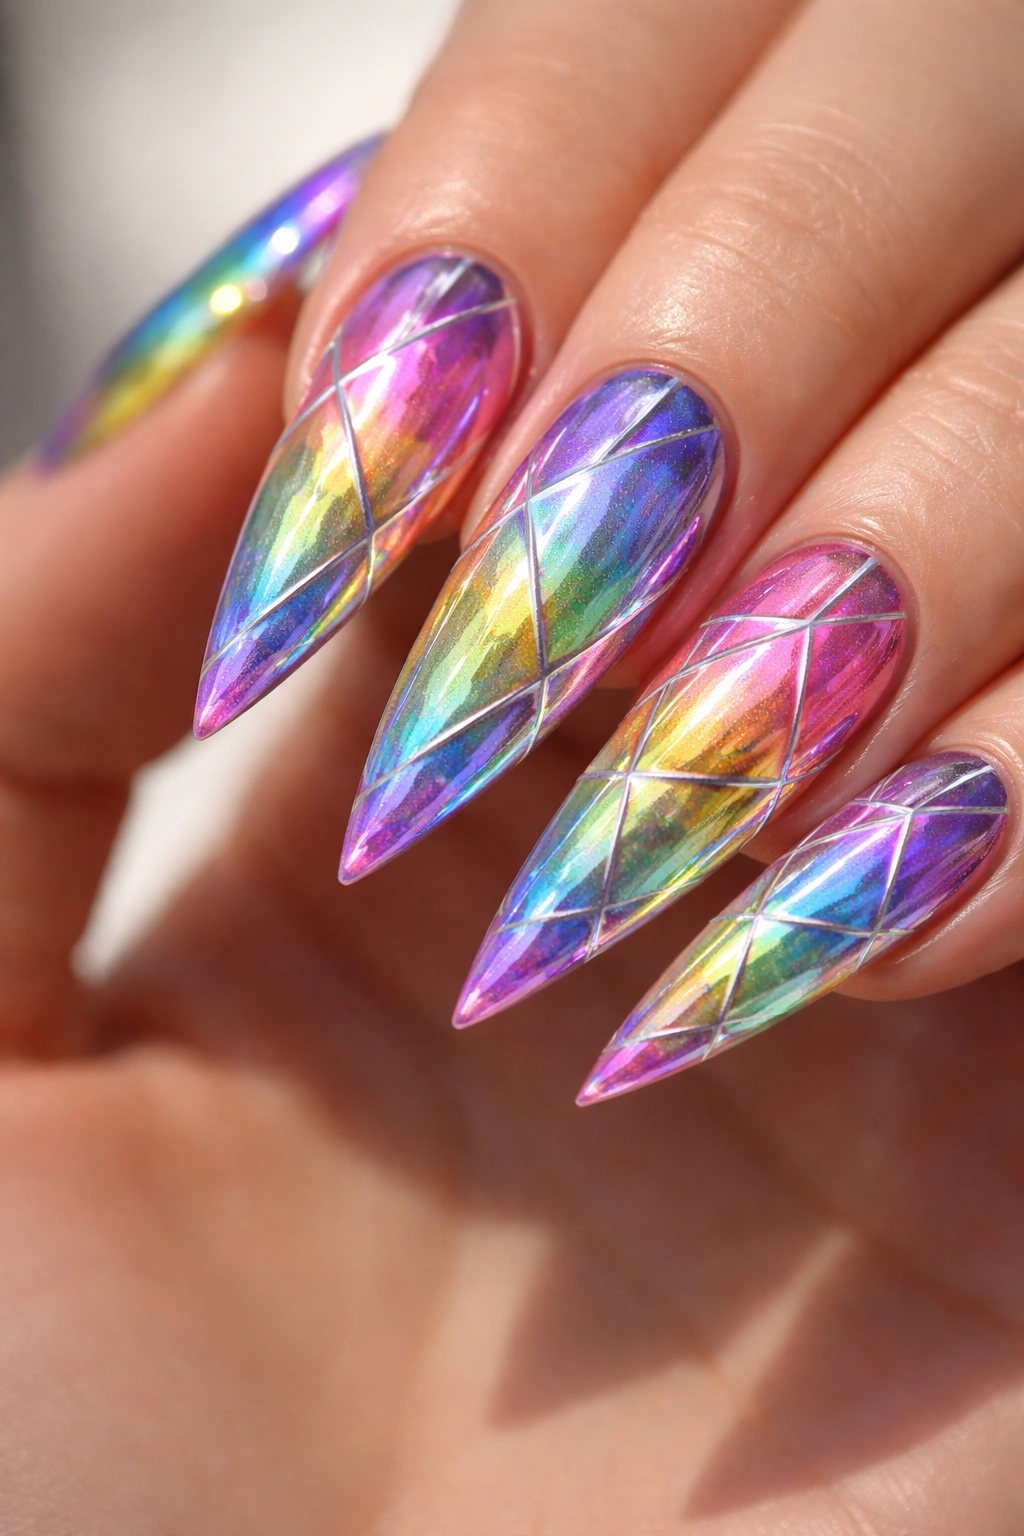
Holographic stiletto nails capture the full spectrum of light, shifting between purple, pink, blue, green, and yellow depending on the angle and lighting. The exotic element comes from layering holographic polish with bold geometric patterns—sharp angular lines, triangular sections, or chevron stripes that divide the nail into color blocks and create an almost stained-glass effect. Each section catches light differently, creating a dazzling prism effect that’s impossible to capture in a single photo and absolutely mesmerizing in person.
Building Geometric Patterns Over Holographic Base
Start with a holographic base coat applied to the entire nail for that foundational rainbow shimmer. Once dry, use striping tape or a thin gel pen to create geometric divisions—vertical lines splitting the nail into sections, diagonal stripes creating chevron patterns, or triangular shapes that form an art deco aesthetic. The contrast between the holographic shimmer and crisp geometric lines creates sophisticated visual tension. Some artists enhance this by using different holographic shades in each geometric section, so each divided area shifts through the color spectrum independently.
Pattern Variations and Color Blocking Techniques
- Simple vertical stripes create clean, modern elegance while letting the holographic shimmer do the heavy lifting
- Chevron or herringbone patterns add movement and sophistication to elongated stiletto shapes
- Triangle blocking (creating a mosaic of triangular sections) delivers an almost jewelry-like appearance
- Negative space designs (geometric shapes filled with negative space rather than color) create optical illusions and striking visual impact
- Ombré holographic with geometric overlays combine the shimmer of gradient with the structure of pattern
Pro tip: Use gel polish striping tape rather than traditional striping tape—it adheres better to curved nail surfaces and creates cleaner lines that truly pop against the holographic background.
5. Luxe Gold Leaf and Marble Effect with Nude Base
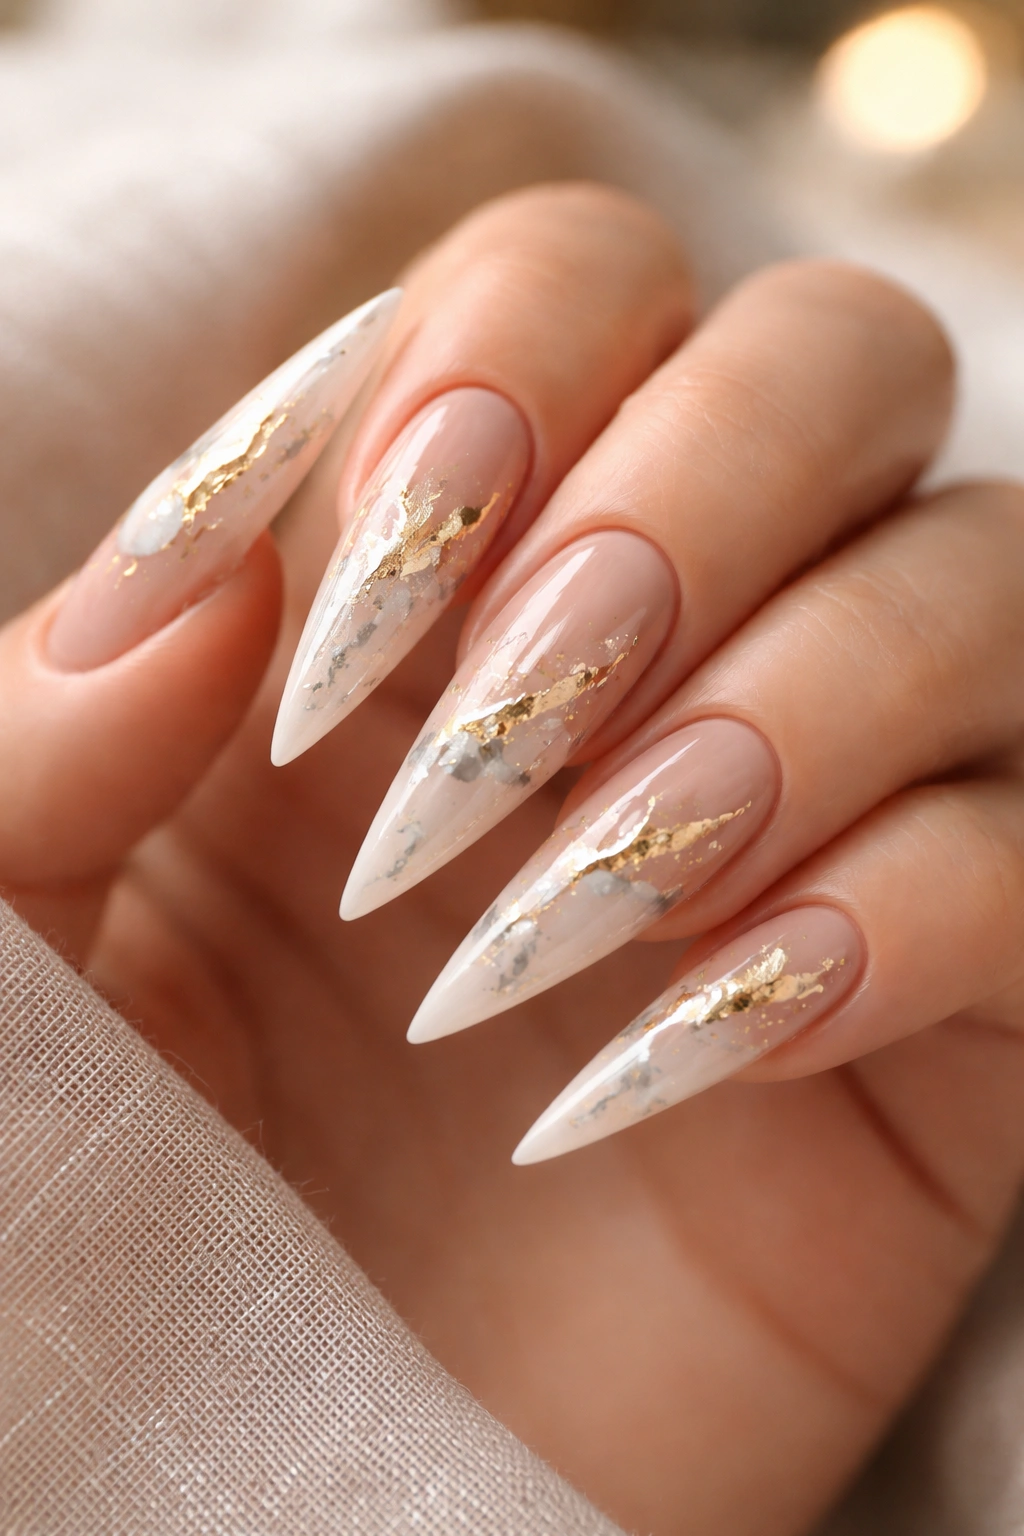
This design channels high-end elegance by combining a creamy nude or soft pink base with delicate gold foil accents and subtle marble veining. Real or faux gold leaf is applied strategically across the nail—sometimes in a full coverage pattern that creates a crackled effect, sometimes in flowing organic shapes, and sometimes as precise geometric borders. Soft gray or taupe marble lines weave through the gold, creating an effect that feels both timeless and contemporary, like polished marble countertops with precious metal deposits running through them.
Application Techniques for Gold Leaf and Marble Integration
Gold leaf application requires a specialized leaf adhesive or gel base that’s sticky enough to hold delicate foil in place. Apply your nude base coat, then paint the adhesive on specific areas—full coverage for a crackled effect, or strategic patterns for more controlled placement. Press gold leaf carefully onto the adhesive, and the friction creates that beautiful crackled, organic appearance. Once the gold is sealed with top coat, add marble veining using a thin brush and dark gel or polish, creating flowing lines that appear to sit beneath the metallic layer. The final glossy top coat unifies everything and creates that luxe, high-shine finish.
Base Color and Leaf Pattern Options
- Creamy ivory with champagne gold creates warm, romantic luxury
- Soft pink or mauve with rose gold and taupe marble delivers a sophisticated feminine aesthetic
- Warm nude with yellow gold and warm gray marble suits warm undertones beautifully
- Cool pink or cool beige with white gold creates a sleek, contemporary look
- Full-coverage crackled gold creates maximum impact, while scattered leaf placement offers more subtle elegance
Worth knowing: Gold leaf is delicate and can lift if top coat isn’t applied carefully. Use a brush-on top coat rather than soaking nails in liquid to prevent leaf displacement, or use the dip method gently.
6. Mystical Crystal Ball Design with Gradient Stars
Imagine peering into a crystal ball on your nails—this design centers on a large circular gradient that resembles a shimmering, translucent crystal sphere in the center of each nail, filled with color-shifting gradients of purple, pink, blue, and silver. Surrounding the crystal ball on the rest of the nail is a mystical night sky in deep purple or black, scattered with tiny stars, moons, and celestial symbols. The focal point is absolutely the gradient crystal effect, which creates dimension and appears three-dimensional, like you’re looking into an actual glowing orb.
Creating the Crystal Ball Focal Point
This design requires precise circular gradient work—you need to create a perfect circle of color-shifting gradient on the center of each nail, surrounded by contrasting night-sky base color. Use a makeup sponge with multiple colors blended together to create the gradient within your circular area, or use a gradient tool designed for circular effects. The colors should shift through purples, pinks, and silvers, with subtle white highlights added to create the “light reflection” that makes the sphere appear three-dimensional and glowing. Some nail artists add a tiny white dot at the highlight point for extra dimension.
Celestial Details and Mystical Symbolism
- Tiny hand-painted stars scattered around the crystal ball create balance and a cohesive night-sky theme
- Moon phases, crescent moons, and full moons add narrative mystical quality
- Small sparkles or star dust effects (glitter placement) around the crystal ball enhance the magical feeling
- Constellation patterns connecting tiny stars add personalized, meaningful elements
- Consider adding mystical symbols like zodiac signs, sun symbols, or spiral patterns for added personalization
Pro tip: Use a white gel pen to add highlight accents to the crystal ball—a small crescent on one side creates realistic light reflection that makes the entire design pop in 3D.
7. Sunset Ombre with Hand-Painted Palm Silhouettes
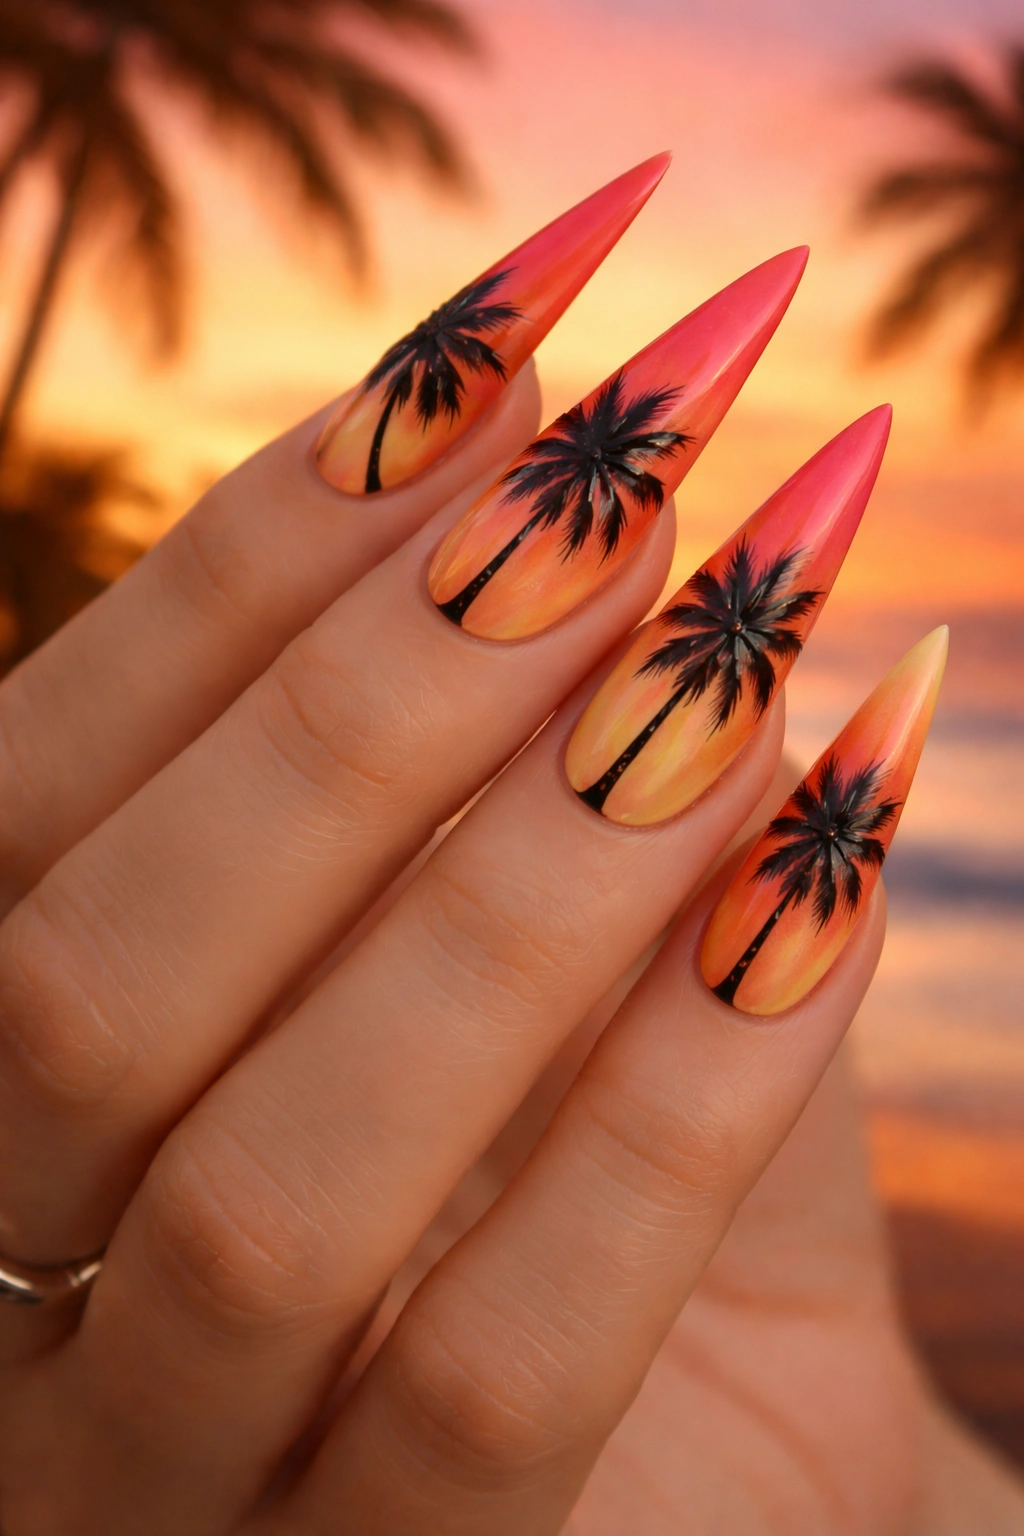
Transport yourself to a tropical beach with sunset-inspired stiletto nails featuring a warm gradient from deep orange and coral at the base transitioning to soft peach and pale yellow toward the tips. Hand-painted black or dark silhouettes of palm trees, tropical leaves, and distant shoreline elements overlay the gradient, creating a scenic landscape that feels like watching the sun disappear over ocean water. The contrast between warm gradient and dark silhouettes is what makes this design exotic and visually striking—the silhouettes appear almost photographic against the glowing sunset background.
Gradient Blending and Silhouette Placement
Start with a warm neutral or white base, then build your sunset gradient using a sponge or gradient tool. Begin with deep burnt orange at the base, transition through vibrant coral and peach, and finish with soft yellow and cream toward the tips. This gradient should be smooth and blended, mimicking the way colors fade and shift during an actual sunset. Once the gradient is complete and sealed, use a thin brush and black gel or polish to paint silhouettes—palm fronds extending upward, tree trunks reaching from the base, and a simple horizon line if desired. The black silhouettes should have clean edges to create that photograph-like quality.
Color Variations and Tropical Elements
- Classic sunset ombre with palm tree silhouettes is timeless and universally flattering
- Add distant birds (tiny V-shapes) flying across the sunset for added depth and movement
- Include beach grass or tropical foliage silhouettes for a more lush, garden-inspired feel
- Use dark burgundy or deep teal instead of black for silhouettes if you want a less dramatic contrast
- Consider adding a thin glitter gradient layer over the sunset (before sealing) for extra shimmer and magic
Worth knowing: Black silhouettes require extremely fine brushwork to look clean and intentional rather than smudged. Practice on a practice wheel before attempting on natural nails, or work with an experienced nail artist.
8. Encapsulated Dried Flowers and Translucent Resin Effect
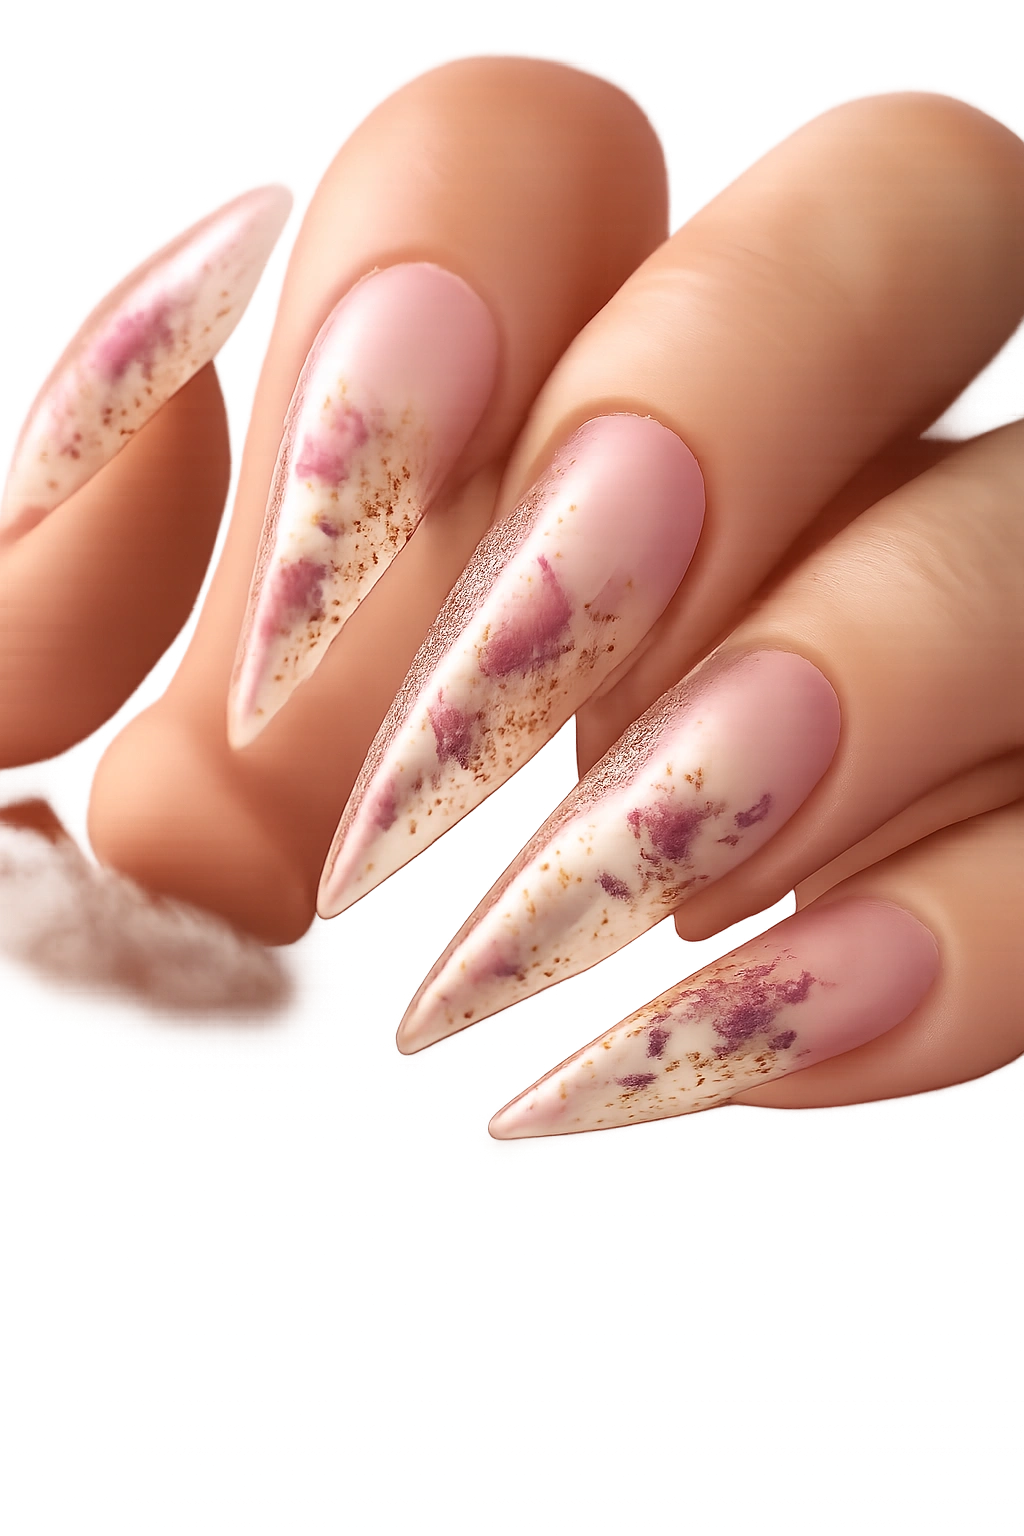
This exotic design encapsulates real dried flowers, delicate botanicals, and tiny leaves between layers of clear gel or resin, creating a transparent “window” into the nail itself. The dried flowers might be pressed baby’s breath, miniature roses, tiny ferns, or delicate wildflowers suspended in clear gel with a soft nude, blush, or transparent pink surrounding layer. The effect is both romantic and botanical, creating the illusion that nature is embedded within the nail structure rather than painted on top. Different flowers and botanical elements create entirely different moods—romantic with roses, earthy with ferns, ethereal with baby’s breath.
Encapsulation Technique and Material Selection
This design requires the right materials—specifically, a clear builder gel or UV resin that allows light to pass through while securing the flowers. Lay a thin base of clear builder gel, carefully arrange your dried flowers using tweezers or a small brush, then seal with another layer of clear builder gel. The key is creating a complete seal around the flowers so they’re protected and suspend beautifully within the transparent layers. Some artists add a second outer layer of soft color (pink, nude, or white) around the clear flower layer, so the flowers float within a colored frame. The result looks like botanical specimens preserved in clear amber or resin jewelry.
Flower Choices and Aesthetic Variations
- Real pressed roses and baby’s breath create romantic, delicate aesthetics perfect for weddings or feminine styles
- Tiny ferns and greenery deliver earthy, naturalistic, botanical vibes
- Mix small flowers with gold or silver leaf for a more luxe, jewel-like effect
- Monochromatic flower choices (all white flowers on white base, for instance) create subtle elegance
- Colorful wildflower mixes create playful, boho artistic appeal
Worth knowing: Dried flowers must be completely dry and prepared correctly to prevent mold or degradation inside the sealed gel. Work with a nail artist experienced in encapsulation to ensure proper sealing and longevity.
9. 3D Sculptural Gemstone and Rhinestone Cluster Design
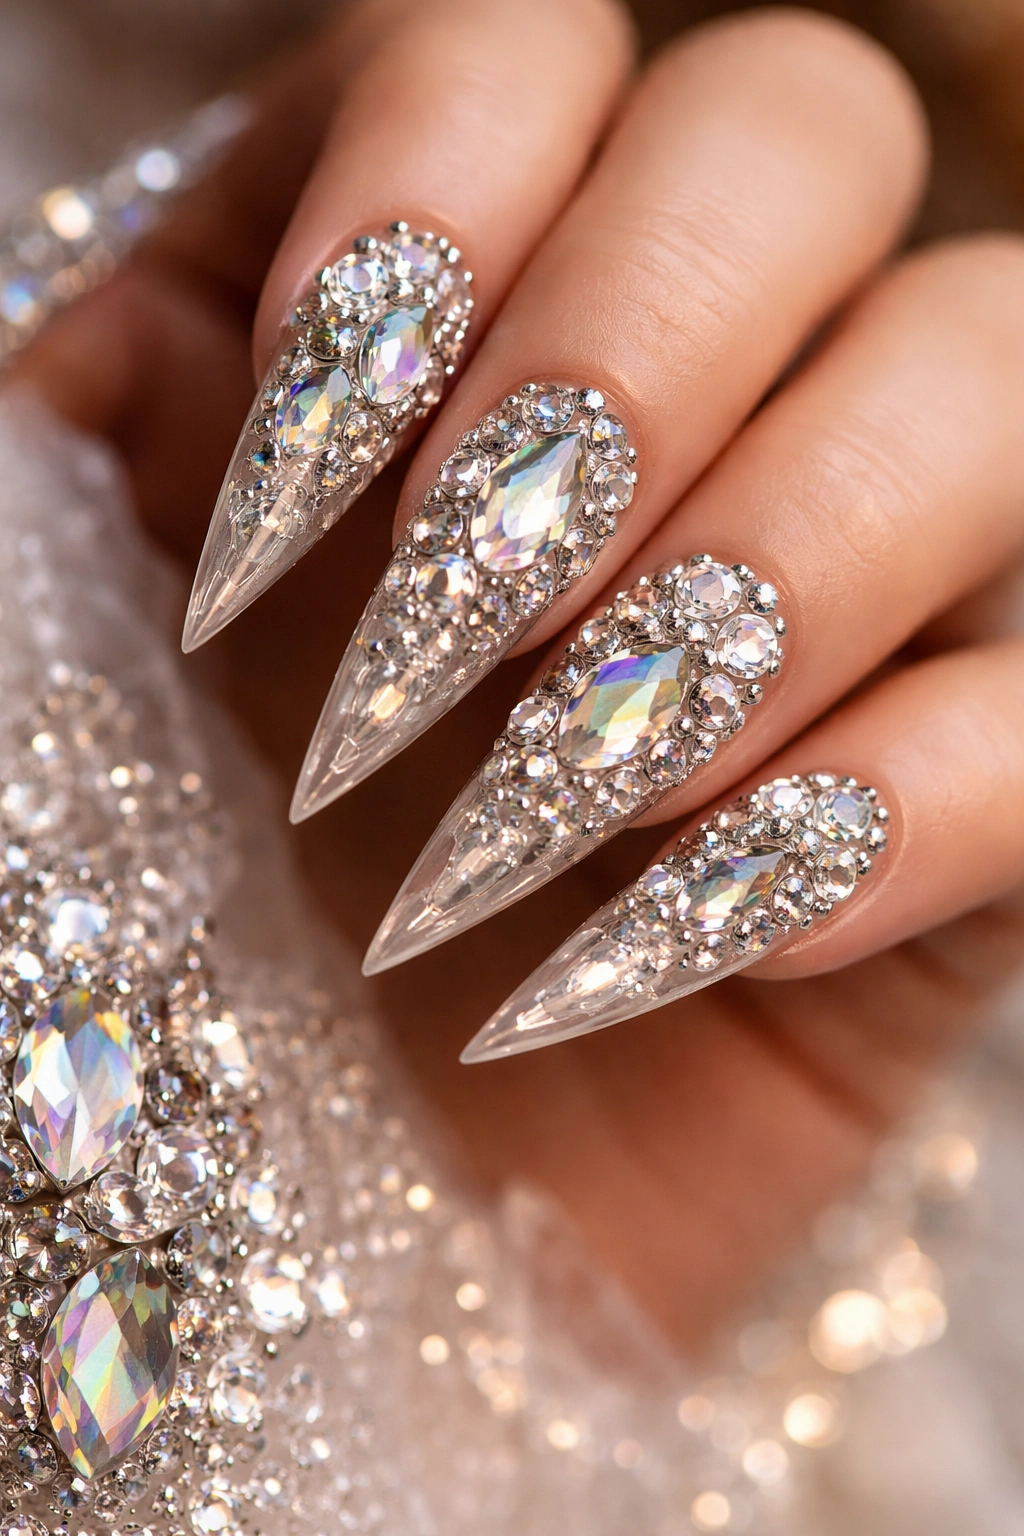
For maximum drama and luxury, 3D stiletto nails featuring sculptural layers of varying gemstones, rhinestones, and dimensional elements create a jewelry-like appearance that catches light from multiple angles. This isn’t just nail art—it’s wearable sculpture. The base is typically a glamorous color like nude, black, or metallics, with an elaborate cluster of gemstones, crystals, and embellishments rising from the center or covering significant portions of the nail in a carefully arranged composition. Each stone is placed intentionally to create visual balance and maximum sparkle.
Building 3D Sculpture and Stone Placement Strategy
Creating 3D designs requires strong adhesive gel or specialized jewelry adhesive designed for nail art. Start with your base color and allow it to cure completely. Then, using careful tweezers or placement tools, position each gemstone onto a small dot of adhesive. Begin with larger focal point stones (perhaps crystals or larger rhinestones), then layer smaller stones around them, creating visual balance and flow. The arrangement should follow the elongated shape of the stiletto, perhaps creating a cascading effect from the base toward the tip, or a centered focal cluster. Build up layers—stones don’t have to be flat against the nail; they can sit at different heights for maximum dimension.
Stone Selection and Color Coordination
- Crystal AB rhinestones create maximum sparkle and suit any base color
- Gradient stone sizes (large focal stones surrounded by progressively smaller stones) create sophisticated visual hierarchy
- Sapphire blue and diamond clear stones on black nails create classic evening elegance
- Rose gold and pink stones on nude create romantic, feminine luxury
- Hologram or iridescent stones create colorful shifts and movement with every hand gesture
Pro tip: Seal your gemstone design carefully with a thick layer of top coat—either paint it on around stones or use the builder gel method to ensure stones stay secure through daily wear and washing.
10. Matte Black Cat Eye with Chrome Accents and Geometric Line Work
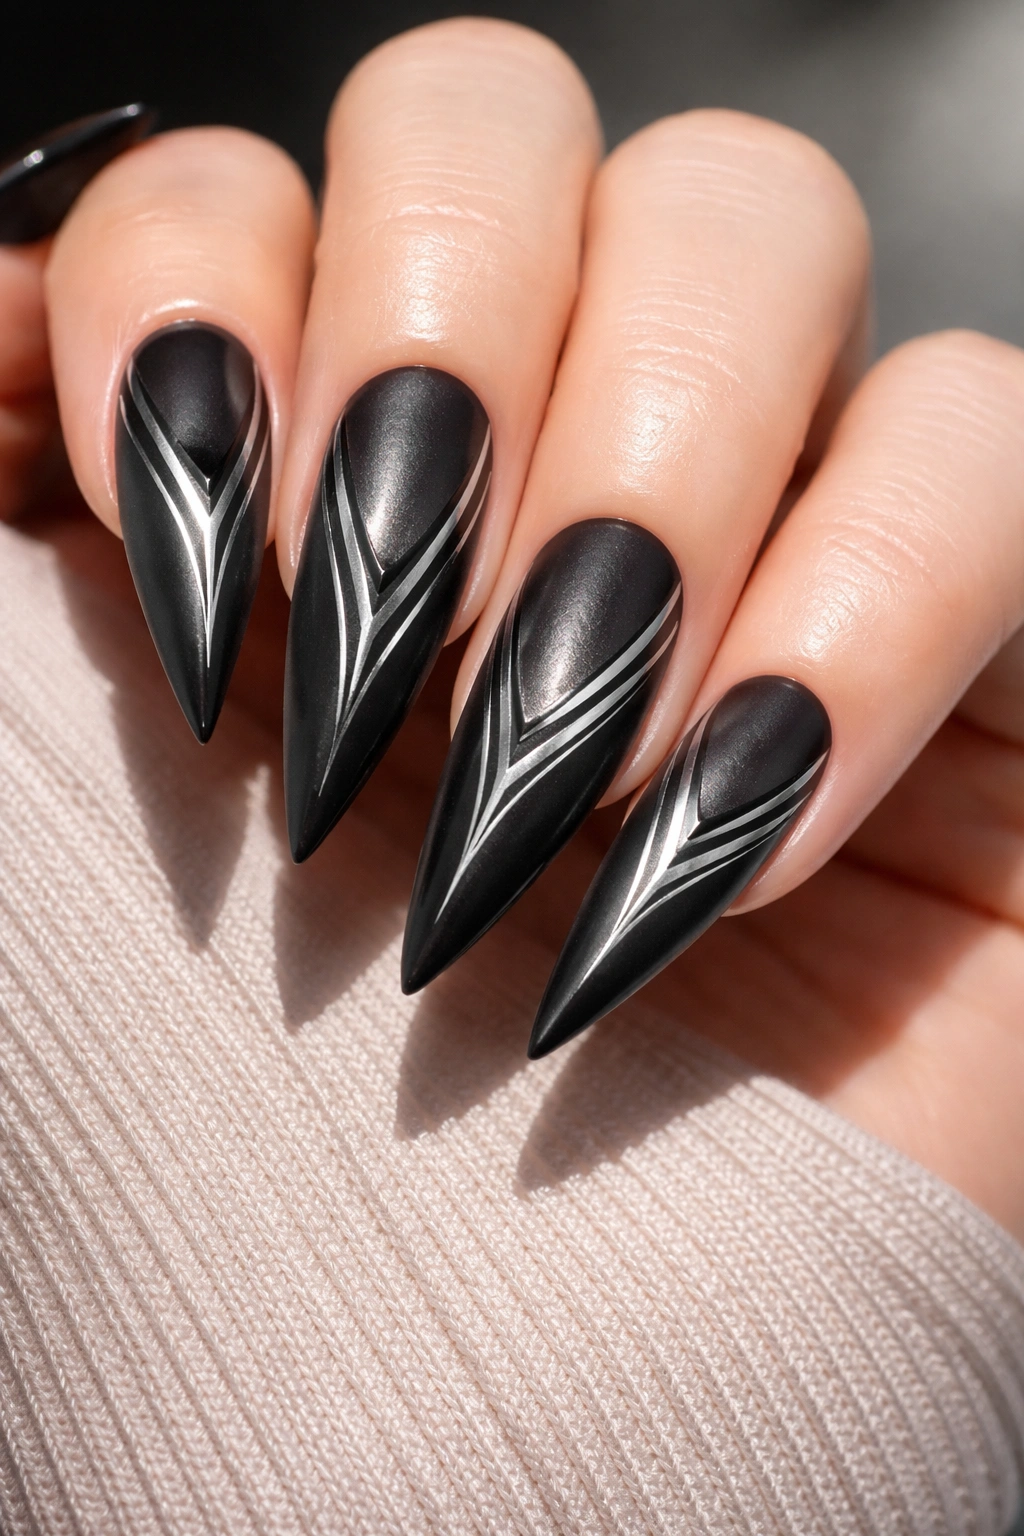
This sophisticated design combines matte black polish with sharp geometric line work using chrome gel, creating a high-contrast design that’s edgy, modern, and undeniably exotic. The black matte base provides a dramatic canvas for precise chrome lines—think angular stripes, triangular patterns, or sharp geometric borders that catch light with that signature chrome shine. The contrast between the matte and metallic finishes creates optical interest and makes the geometric patterns appear to float above the surface. This design feels contemporary, artistic, and bold without being overly complicated.
Achieving Clean Geometric Lines on Matte Base
Start with a solid matte black base coat, cured completely. Then, using chrome gel and either a thin brush or striping tape, create your geometric pattern. Chrome gel requires precise application—too thick and it appears sloppy, too thin and the metallic effect diminishes. Apply chrome in controlled strokes following your planned pattern, allowing it to cure between layers if building dimension. The contrast between matte and glossy chrome creates the visual magic. Some artists create negative space designs where chrome outlines geometric shapes rather than filling them, creating sophisticated negative space effects that feel fashion-forward and intentional.
Geometric Pattern Options and Variations
- Vertical chrome stripes on matte black create clean, modern simplicity
- Diagonal striping or chevron patterns add movement and dynamic energy
- Triangular chrome designs create art deco aesthetics with geometric sophistication
- Negative space geometric shapes (chrome outlines only, matte black interior) create subtle, refined elegance
- Chrome borders or frame designs create minimalist framing that highlights the nail shape itself
Worth knowing: Matte finishes require different top coat handling than glossy—if you want to preserve the matte effect while protecting chrome, use a specialized matte top coat over the entire design, which creates a unified appearance while still allowing metallic details to shine through.
Final Thoughts
Exotic stiletto nail designs are all about combining technical skill with bold creative vision—whether that’s blending multiple gradient techniques, incorporating three-dimensional elements, hand-painting intricate details, or experimenting with unexpected material combinations. The elongated shape of stiletto nails gives you the canvas to try designs that might be overwhelming on shorter nails but absolutely stunning on these dramatic tips. Each of the designs covered here can be customized in countless ways through color choices, detail variations, and personal embellishments that reflect your individual style.
The most important element when choosing an exotic nail design is selecting something that genuinely excites you—something that makes you happy when you look at your hands and reflects your personality. Whether you prefer cosmic dreaminess, luxe metallics, botanical delicacy, or bold geometric statements, there’s an exotic stiletto design that’s perfect for you. Consider your daily activities, work environment, and personal comfort level with detailed nail art when choosing, but don’t let practicality completely override your desire for self-expression through nail design.
Taking care of stiletto nails with intricate designs requires commitment to regular maintenance, gentle handling, and proper hydration for your nail beds and cuticles. Schedule regular touch-ups if you’re working with a nail artist, maintain your designs by avoiding excessive water exposure and harsh chemicals, and give your natural nails recovery time between extended wear periods. The stunning visual impact of exotic stiletto nail designs is absolutely worth the care and attention they require.
