

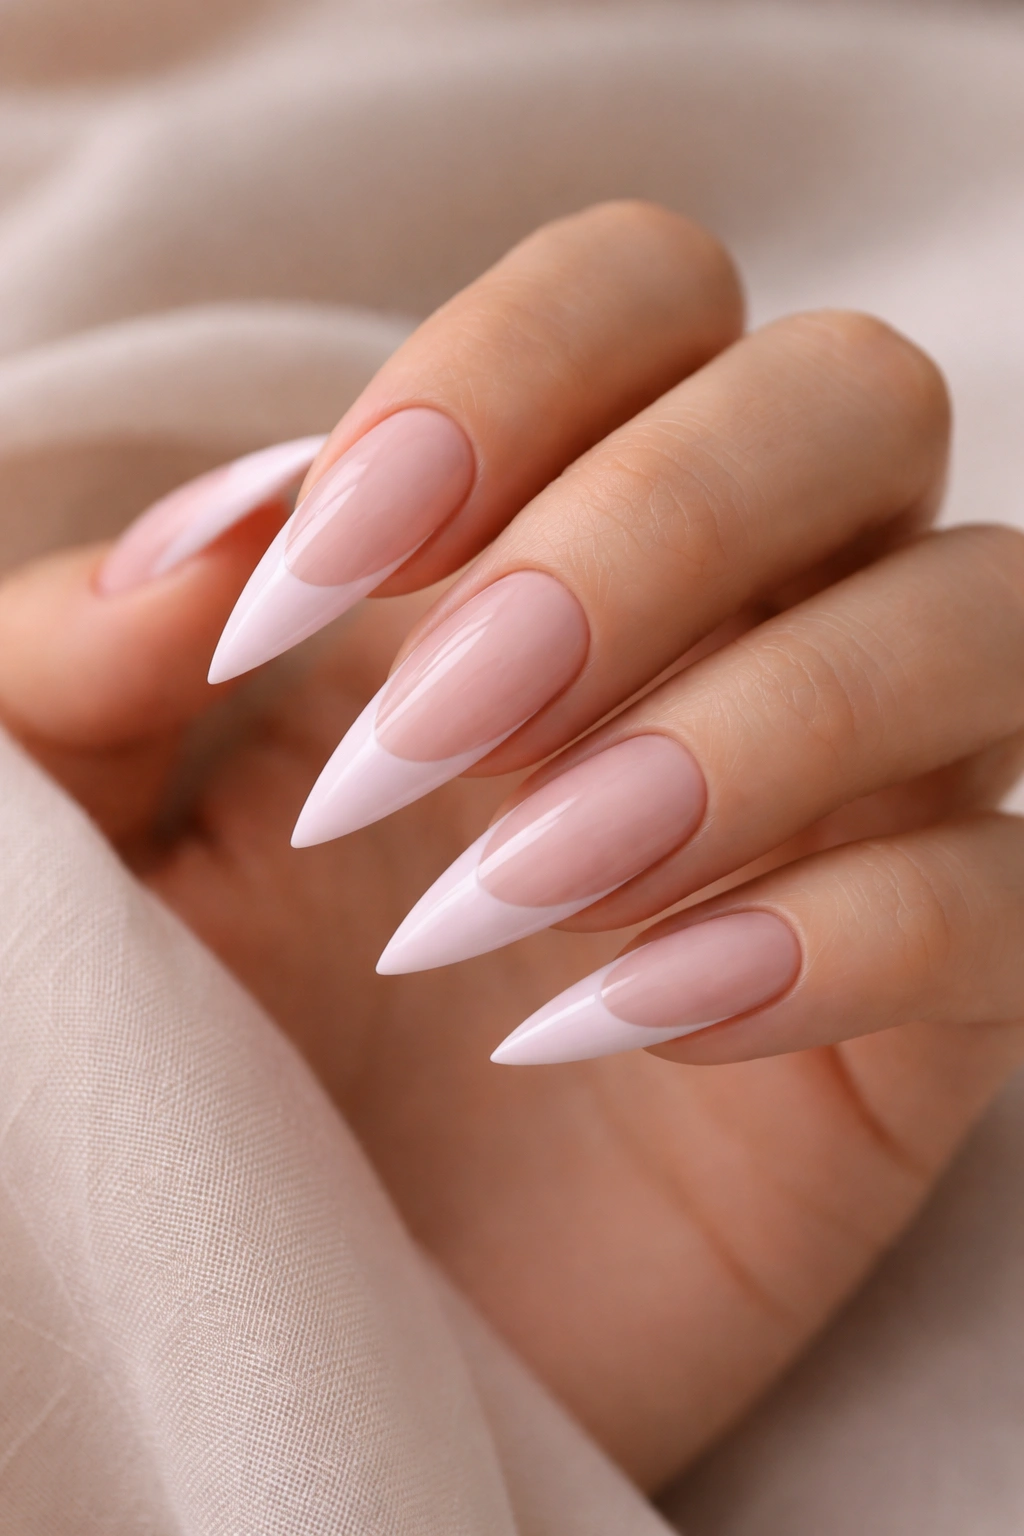
Light pink French tips on stiletto nails represent the perfect intersection of timeless elegance and contemporary edge. There’s something almost irresistible about that delicate rosy tone paired with the dramatic length and sharp angles of stiletto nails — it’s feminine without being fussy, sophisticated without feeling stuffy, and versatile enough to work from the office to an evening out. The light pink base creates a subtle backdrop that lets accent details shine, while the white (or near-white) French tip maintains that iconic look that never goes out of style. What makes this combination so compelling is that it flatters every skin tone, works with virtually any outfit, and provides just enough neutral canvas to experiment with different design elements.
If you’ve been considering light pink French tips but weren’t sure how to make them feel fresh and individual, you’re in the right place. These ten design ideas move beyond the basic French manicure — each one adds a distinctive twist that transforms the classic into something genuinely special. Whether you’re drawn to minimalist restraint, sparkly glamour, or artistic detail work, there’s an approach here that’ll speak to your personal style.
1. Minimalist Gold Accent Line
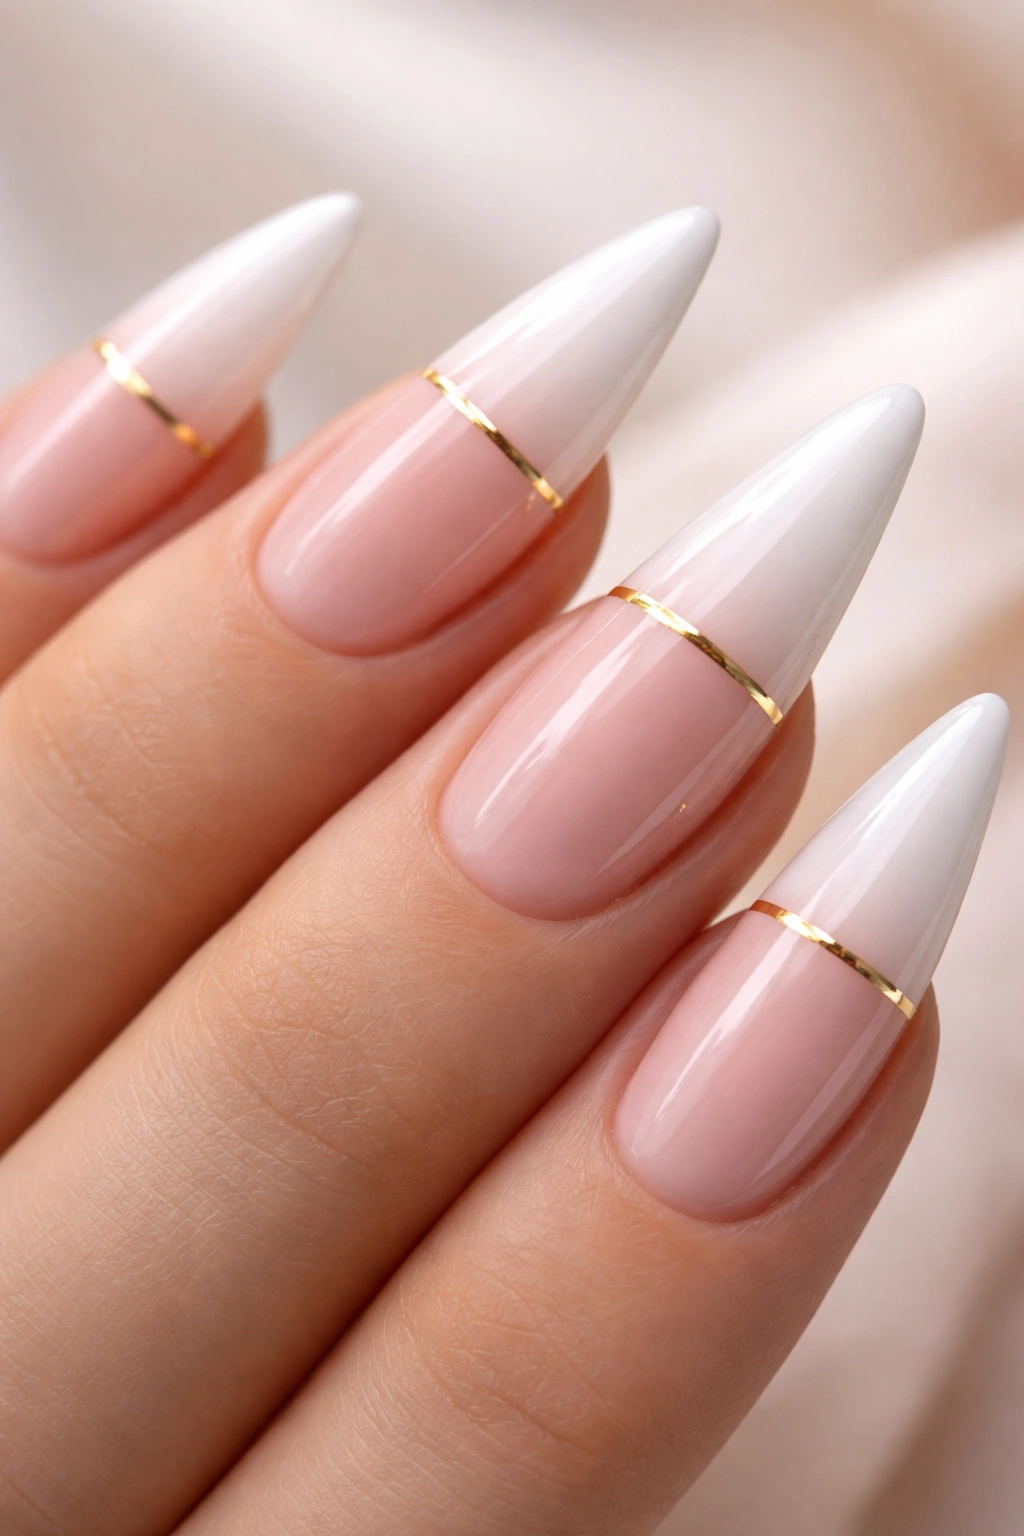
This design cuts through unnecessary detail with a single thin gold line running horizontally through the white French tip portion, creating a modern, almost architectural feel. The line sits roughly one-third of the way down from the tip edge, adding just enough visual interest without overwhelming the clean simplicity that makes stilettos so striking. The geometric precision of a gold stripe feels contemporary and pairs beautifully with the inherent minimalism of the elongated stiletto shape.
Why This Design Works
A single metallic accent line creates visual separation and dimension without complicating the overall look. Gold naturally complements light pink because it adds warmth without clashing — it lifts the design into something more intentional and curated than a plain French tip, but still maintains an understated elegance that reads polished rather than trendy. The horizontal placement mirrors the natural line of the nail, emphasizing length.
How to Achieve It
Ask your nail technician for a thin gold gel liner or metallic gel applied in a straight, precise horizontal line. If you’re doing this at home, use a thin striping brush and metallic gel polish, or try a gold nail pen designed specifically for nail art. The steadiness of the line matters here — uneven placement will read as accidental rather than intentional. One coat of clear top coat seals everything beautifully.
Pro tip: This design works especially well on nails with extra length because the line becomes a focal point that draws the eye along the nail’s length, making them appear even more elongated.
2. Glitter Gradient Fade
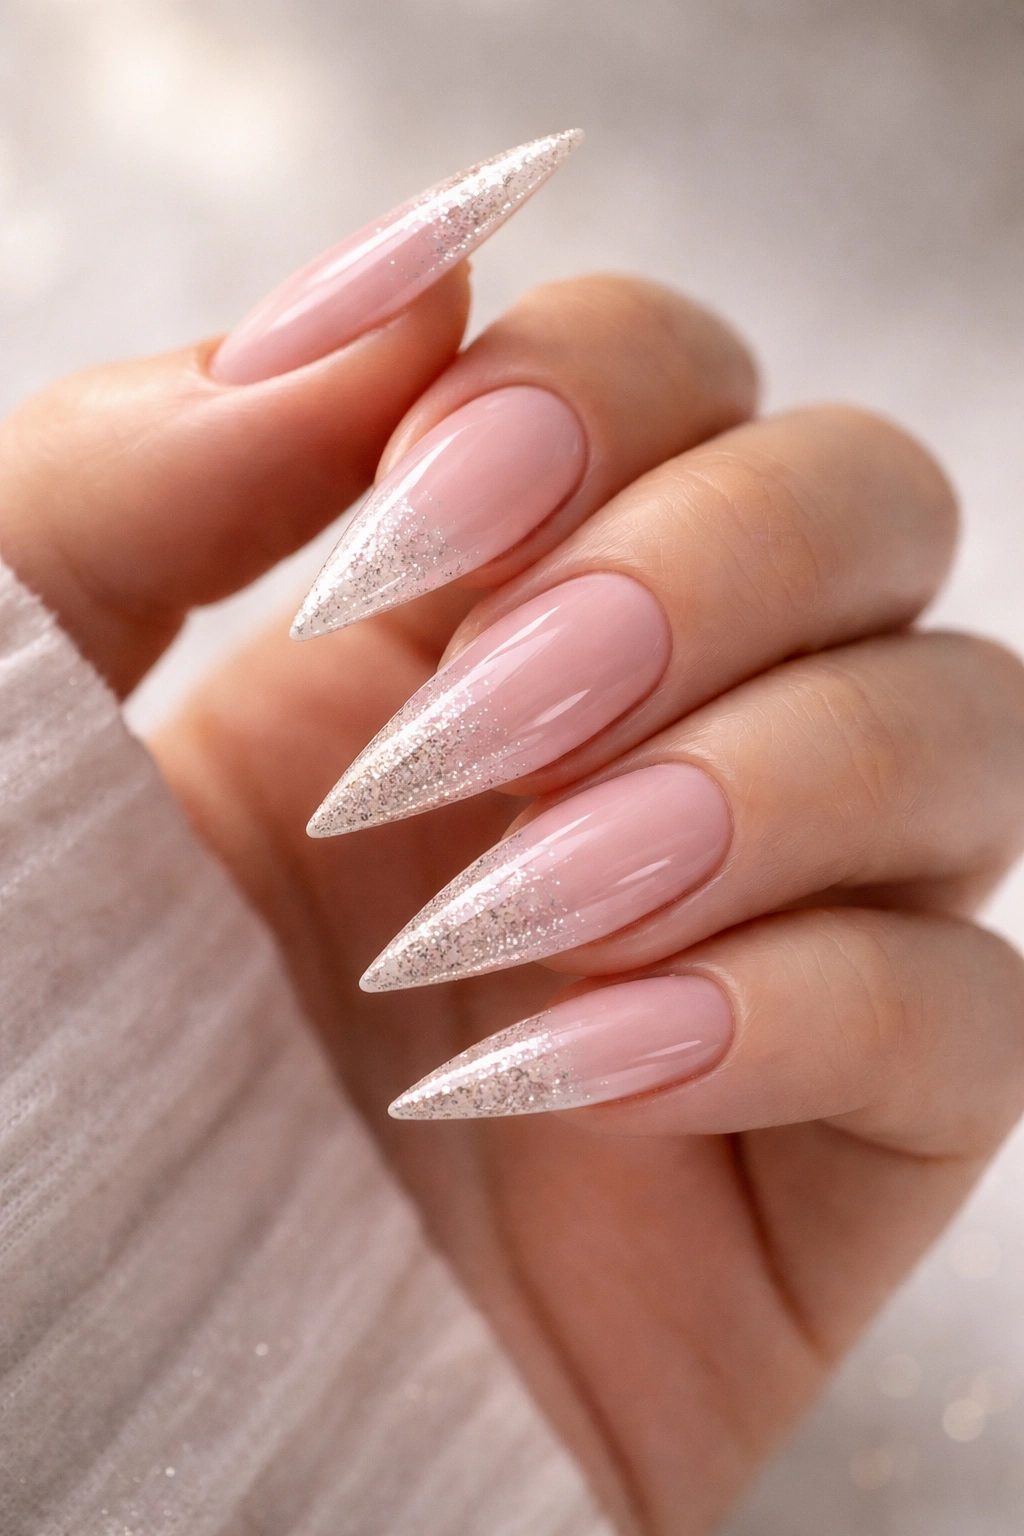
Imagine your white French tip gradually transitioning into sparkle as it reaches the very edge of the nail — that’s the essence of this design. Fine glitter particles suspended in a clear or slightly tinted base create an ombré effect that catches light as your hands move, adding dimension and texture without covering the entire tip. The gradient can be soft and subtle or more pronounced, depending on the concentration of glitter and the depth of the fade zone.
The Visual Impact of Glitter
Glitter gradient designs create movement and light-catching properties that make nails feel more dynamic and alive. When you start with minimal glitter at the white-pink line and increase density toward the very tip edge, the eye naturally follows that progression toward the point. Light pink stilettos with this treatment look elegant during the day because the glitter is concentrated only at the very edge, yet glamorous enough for evening wear without any additional adjustments.
Application Technique for Best Results
Start with your standard light pink base and white French tip. While the white is still slightly tacky (not fully cured), use a fine glitter in champagne, silver, or rose gold and apply it densely to just the outer edge of the white tip. Gradually feather it back with a lighter hand, creating a fade effect. Seal with a glossy top coat that will grip the glitter and make it appear even more luminous. The key is layering your glitter density gradually — fewer particles at the fade line, more at the edge.
Worth knowing: RGB or holographic glitter creates a more playful rainbow effect, while champagne or silver glitter keeps the look sophisticated and wearable for professional settings.
3. Marble Swirl Design
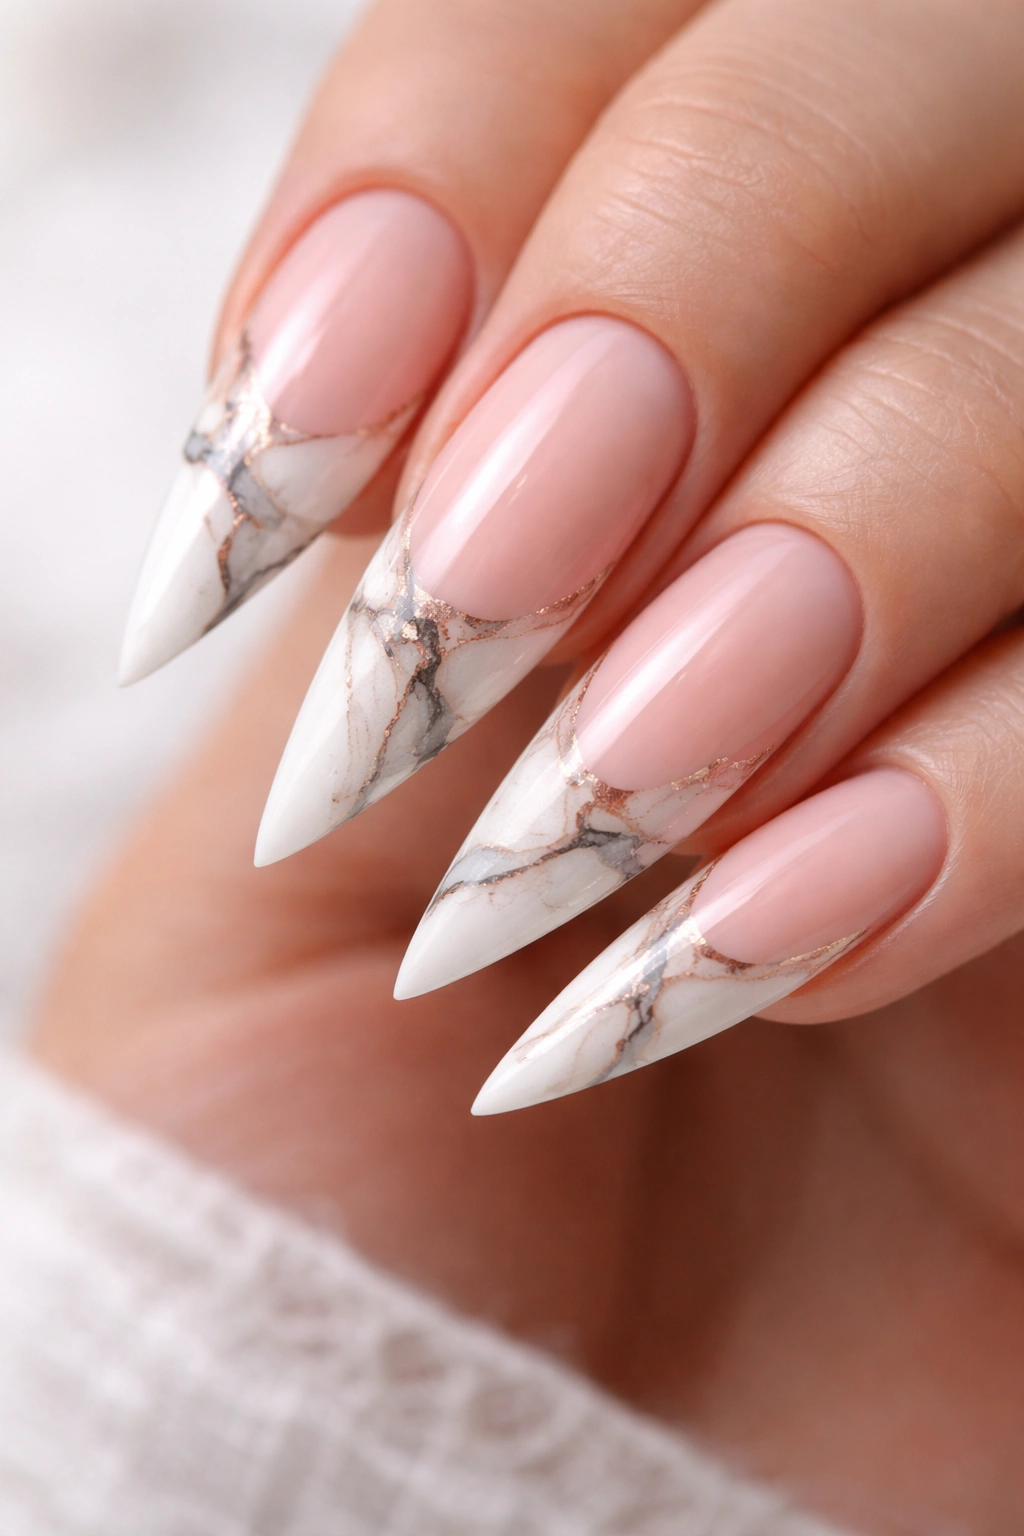
Abstract marble patterns in soft gray, black, or even rose gold tones create an organic, artistic quality on the white French tip portion of your nails. The swirling veins look like natural stone, and the contrast between the veined tip and the uniform light pink base creates a modern look that feels gallery-worthy. Each nail will be slightly different, which adds to the handcrafted, intentional aesthetic.
Why Marble Feels Contemporary
Marble design work brings an art installation quality to your nails — it signals creativity and sophistication because the pattern requires skill and doesn’t follow a rigid template. The contrast between the chaotic beauty of marble veining and the clean geometry of the stiletto shape creates visual tension that’s genuinely compelling. Soft gray or black marble reads as luxe without being loud; it’s confident without screaming for attention.
Creating Marble Veining
Marble designs typically use a gel stamping plate or freehand application with thin gel liners. If you’re at a salon, many technicians now specialize in custom marble work — bring reference images to show the specific vein pattern and color palette you want. For at-home attempts, use a thin gel liner in charcoal gray or black and create irregular, flowing lines across the white tip. Varying the line weight and letting some veins fade helps create authenticity.
Insider note: Starting with a slightly off-white tip (just barely warm-toned) instead of pure white creates better contrast for marble veining and feels less stark.
4. Pearl Embellishment Stripe
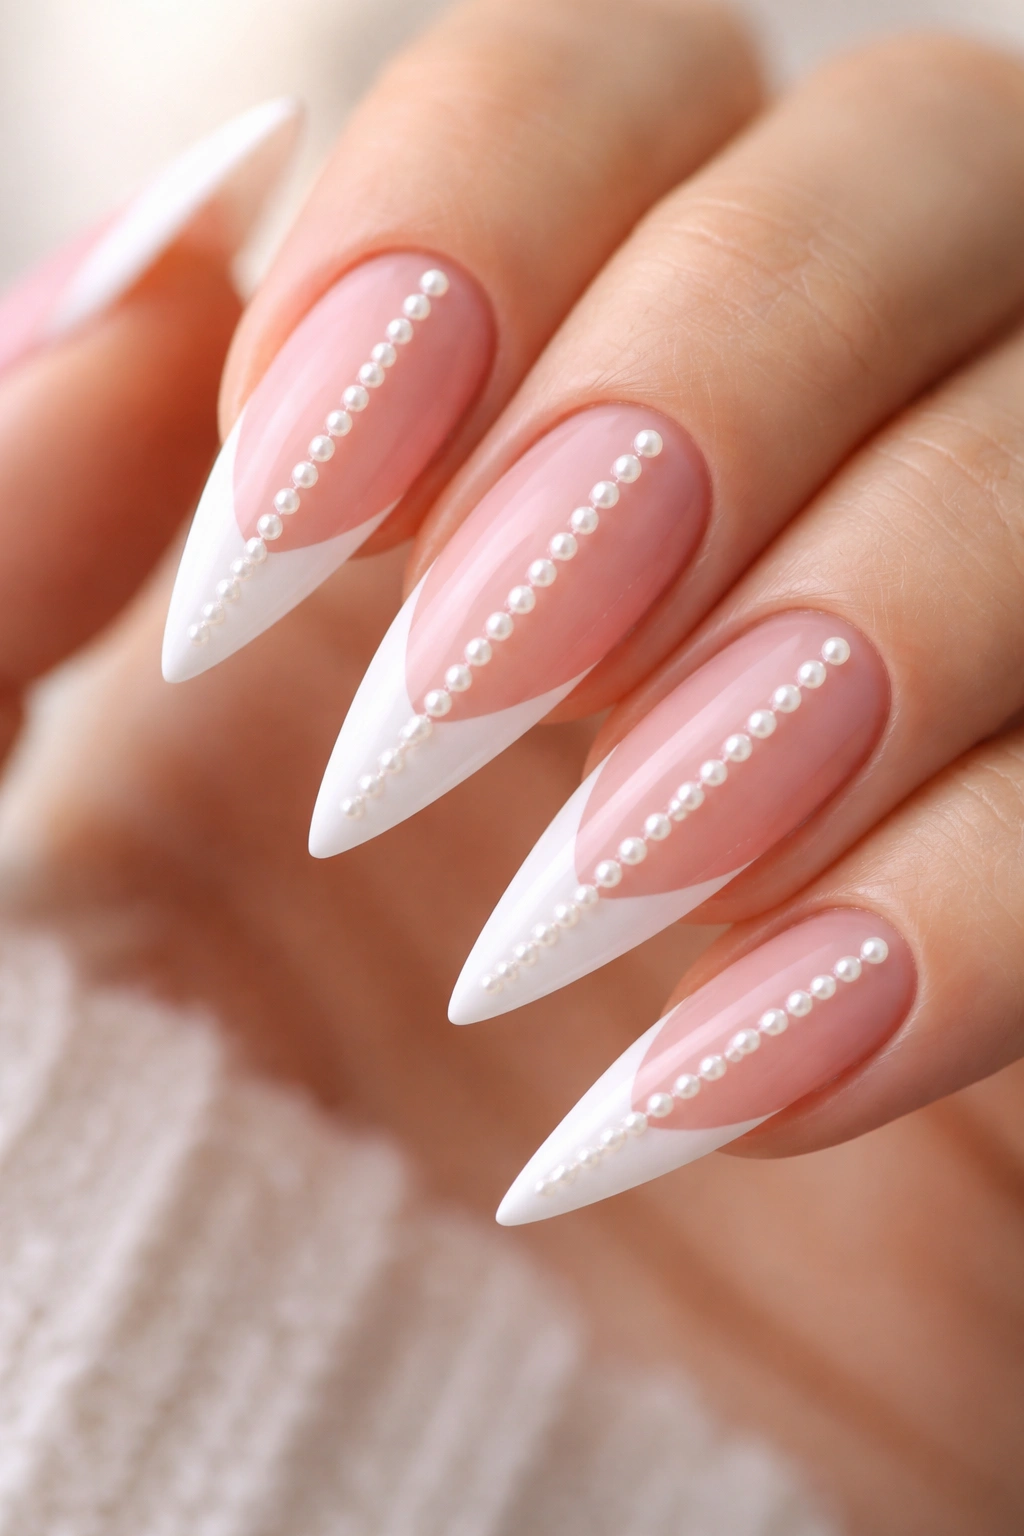
A perfectly placed vertical line of tiny pearl beads or gemstones runs down the center of the French tip, catching light like dewdrops. Pearls work especially well because their creamy, iridescent quality complements light pink beautifully, and they add tactile luxury without feeling costume-y. The gems sit in the white portion only, leaving the light pink base clean and unadorned, which maintains the sophistication of the overall look.
The Elegance of Strategic Embellishment
Using embellishments on only one design element (the tip accent, not scattered across multiple nails) keeps the look refined rather than overdone. Pearls specifically feel timeless — they don’t read as trendy or temporary because pearl jewelry has been a luxury staple for centuries. When light hits the pearls at different angles as your hands move, it creates movement and draws attention to your hands in a way that feels intentional and luxe.
Securing Gemstones Permanently
Quality matters here — use genuine or high-quality faux pearls or diamonds that won’t lose their shine or fall off after a few days. Your technician should apply gems using a specialized gem adhesive before the top coat, then seal everything with a thick layer of clear gel and cure. This ensures the stones stay put through daily wear. At-home gem kits exist, but salon application guarantees better longevity.
Pro tip: Spacing gems about 2-3mm apart down the center of the tip creates an elegant, uniform look; random placement feels less intentional.
5. Rose Gold Metallic French Tip
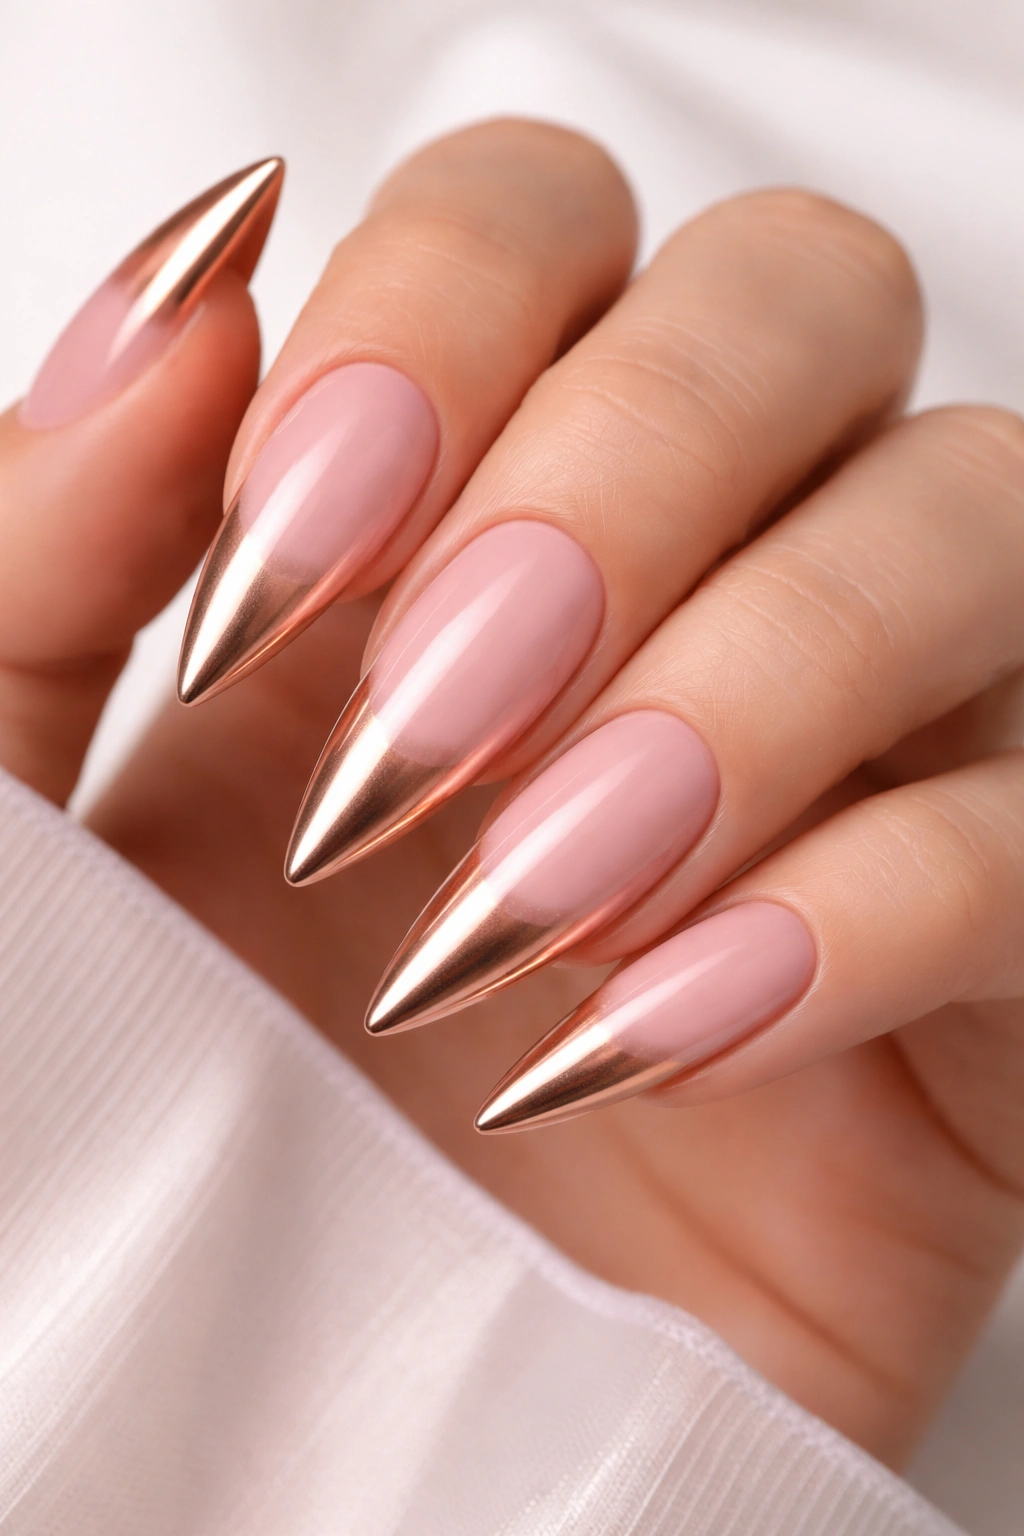
Instead of white, the tip portion is rendered in rose gold chrome or metallic rose gold gel, creating a warm, glowing gradient from soft pink to shimmering rose gold. The transition area where light pink meets rose gold becomes the focal point, and the entire effect feels cohesive because rose gold and light pink are natural color companions. This eliminates the stark contrast of traditional white tips, replacing it with something more blended and luxe.
Why Rose Gold Changes Everything
Rose gold has become a cultural shorthand for refined femininity — it’s warm, it’s flattering, and it photographs beautifully. By using it as the French tip color instead of white, you’re committing to a more cohesive, harmonious palette. The metallic properties catch light and add dimension that reads as higher-end than a standard French tip. It’s particularly flattering during evening wear or for special occasions where you want nails that photograph well.
Achieving the Rose Gold Finish
Ask your technician for either a rose gold chrome (pigment powder applied to a sticky base gel layer and buffed smooth) or a high-quality rose gold metallic gel polish. Chrome finishes create a mirror-like shine and tend to be more durable; metallic gels are slightly easier to maintain but may need buffing to stay glossy. The transition from light pink to rose gold works best when it’s slightly blended rather than a hard line — a thin feathering of lighter rose tones in the transition zone creates sophistication.
Worth knowing: Rose gold chrome can be prone to fingerprints and smudging, so many people opt for a matte top coat over it, which softens the shine while keeping the luster.
6. Nude Ombré French Tip
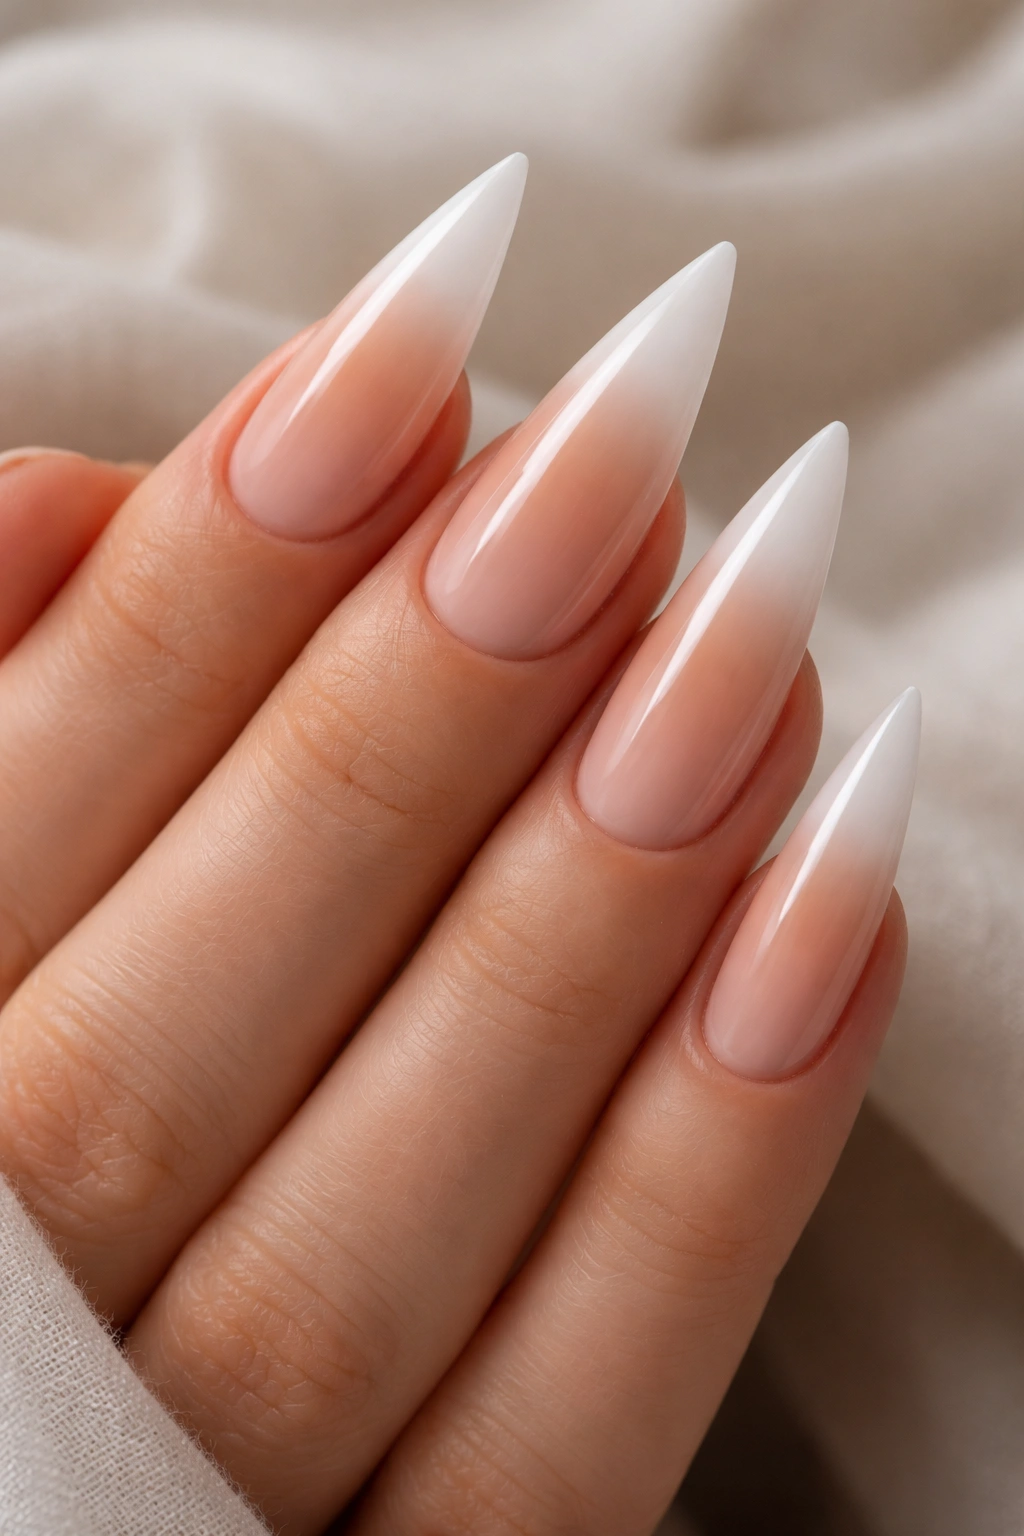
The white French tip transitions gradually into a warm nude or beige tone that’s slightly darker than the light pink base, creating an almost invisible nail line. This design relies on subtle color progression rather than contrast, creating an elongated effect that makes the nail appear even longer than it already is. The monochromatic approach feels effortlessly elegant and works across every season and dress code.
The Psychology of Ombré
Ombré designs work because they use color to create depth and continuity rather than creating jarring transitions. A nude ombré French tip essentially extends the natural appearance of your nail while adding intentional design — it looks like a carefully thought-out choice but also feels understated enough for professional settings. The lack of high contrast makes this design feel modern and architectural rather than decorative.
Creating a Seamless Gradient
This design requires patience and a steady hand (or an excellent technician). Start with light pink as your base, then layer progressively darker nude tones toward the tip edge. Rather than using a strict French tip template, feather the colors into each other using a sponge application technique or careful brushwork. The goal is a gradient so smooth that it looks almost airbrush-applied. Each shade should blend slightly into the next, with no visible lines between color zones.
Pro tip: Using nude and beige tones from the same undertone family as your light pink base ensures the ombré feels harmonious — all warm, all cool, all neutral together.
7. Delicate Floral Accent
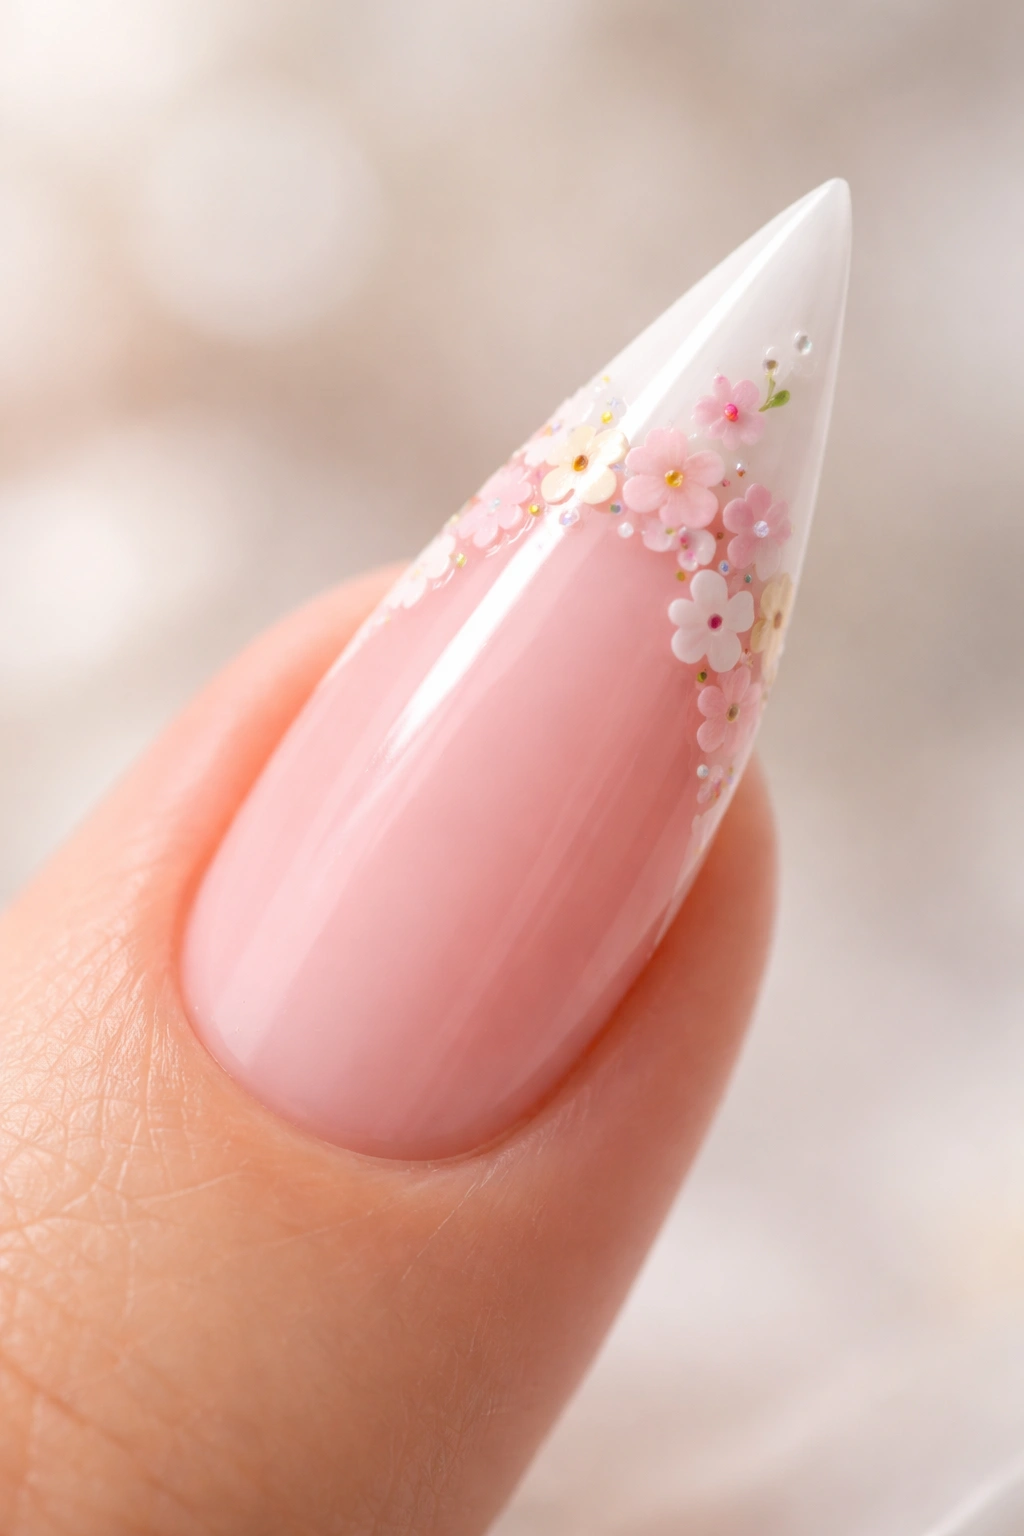
Tiny hand-painted flowers in soft colors — pale peach, lavender, cream, or even the same light pink as the base — sit scattered or clustered on the white French tip portion. Each flower is small enough to feel delicate rather than decorative, positioned strategically so they enhance rather than overwhelm the clean lines of the stiletto shape. This design requires genuine nail art skill but rewards with an utterly unique, personalized look.
Expressing Artistry Through Floral
Floral designs feel inherently feminine but, when executed with restraint and placed strategically, they read as artistic and intentional rather than overly pretty. Placing flowers only on the tip (not scattered across the entire nail) keeps the design focused. Small-scale florals work better than large blooms on stilettos because oversized designs compete visually with the dramatic shape.
Hand-Painting Florals Successfully
This requires a nail artist with genuine painting skills — it’s not something most gel systems can easily replicate. Reference a portfolio of their previous floral work before booking. Expect this to be more expensive than standard designs because true hand-painting is time-intensive. Designs typically start with the base colors cured, then flowers are painted freehand with tiny brushes and fine gel or acrylic paints, then sealed. The curing process locks everything in place permanently.
Worth knowing: Botanically inspired designs (single stems, scattered petals) feel more contemporary than fully rendered garden-style florals, which can read as dated.
8. Chrome Finish French Tip
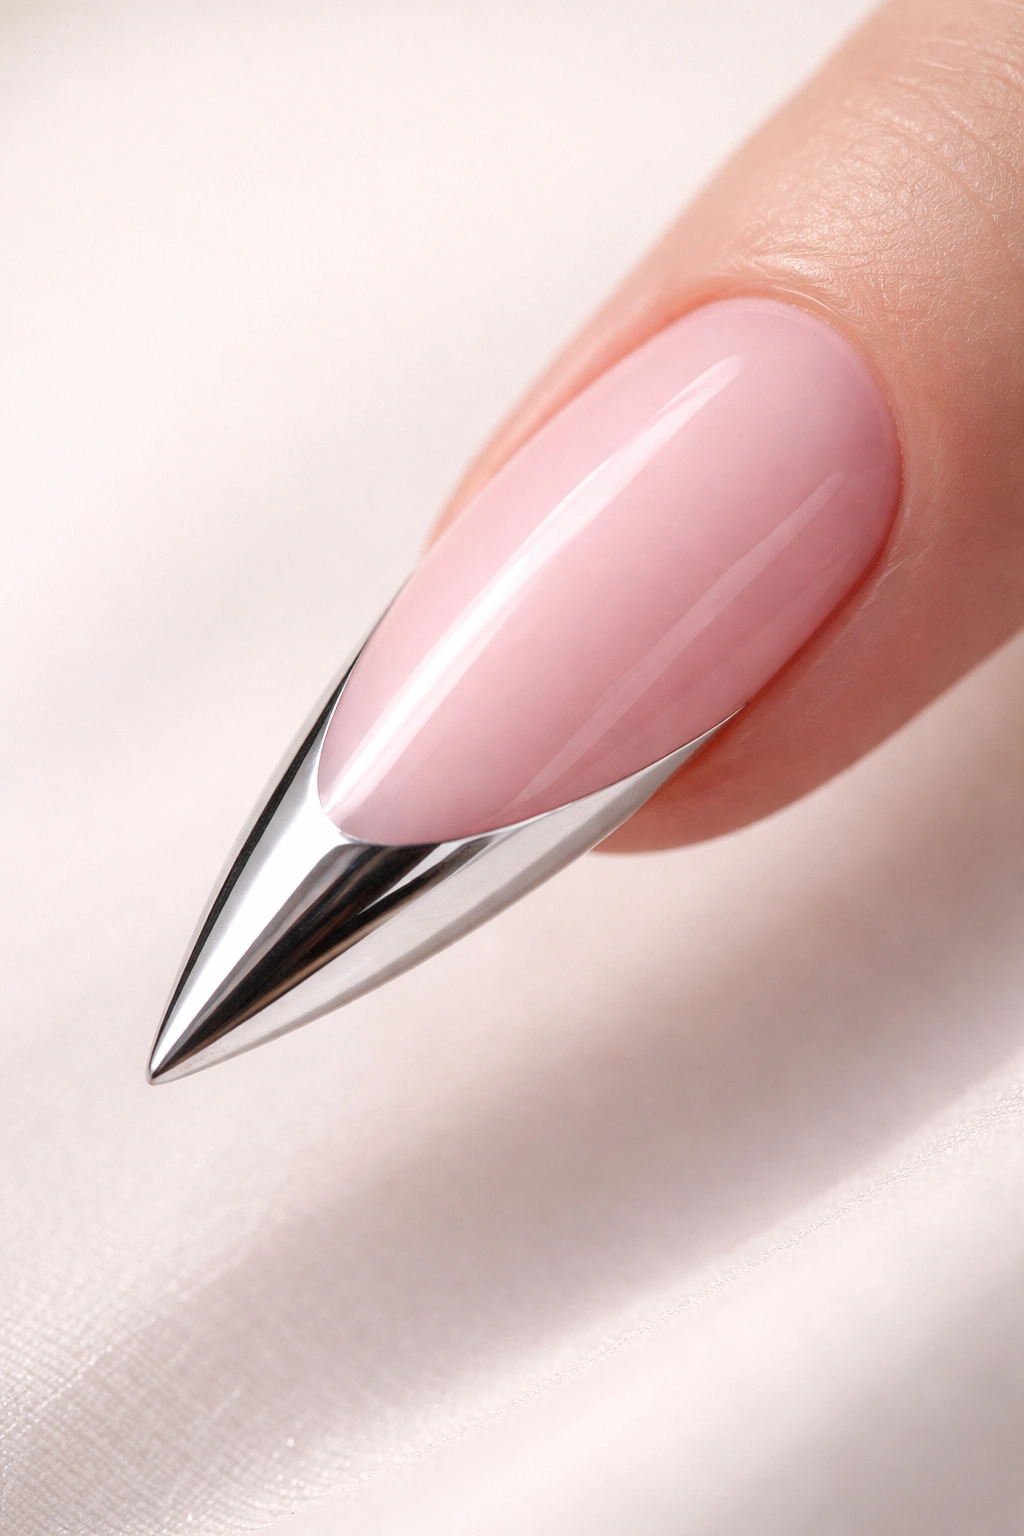
The entire white French tip portion becomes a high-shine mirror finish — reflective, dimensional, and genuinely striking. Chrome reflects light so dramatically that it creates an almost 3D effect; your nails become literal light-catchers. Paired with the subtle light pink base, this creates a design where the tip essentially glows. The metallic intensity makes this feel appropriate for evening events or situations where you want nails that make a statement.
The Drama of Chrome
Chrome finishes represent the high end of nail design — they’re expensive, require specific application skill, and don’t last quite as long as standard gel because the surface can dull with daily wear. But they’re absolutely stunning, especially in person where the reflective quality becomes obvious. Chrome reads as luxe in a way that even other metallic finishes don’t quite match because it’s almost alien in its shine — clearly not a natural nail finish, intentionally theatrical.
Getting Chrome Right
Chrome powder (also called chrome dust or mirror powder) is applied over a sticky base layer of gel that hasn’t been cured yet. Your technician gently presses the powder onto the adhesive surface, then carefully buffs away excess powder with a soft brush. The more you work the powder, the more intense the chrome finish becomes. Seal with a glossy or matte top coat depending on the effect you want. Maintenance involves buffing with a soft cloth because the finish will dull faster than regular gel.
Pro tip: Chrome works best in person and in photos; it’s genuinely less noticeable in certain lighting conditions, so consider where you’ll be wearing it.
9. Crystal Stone Studded Tips
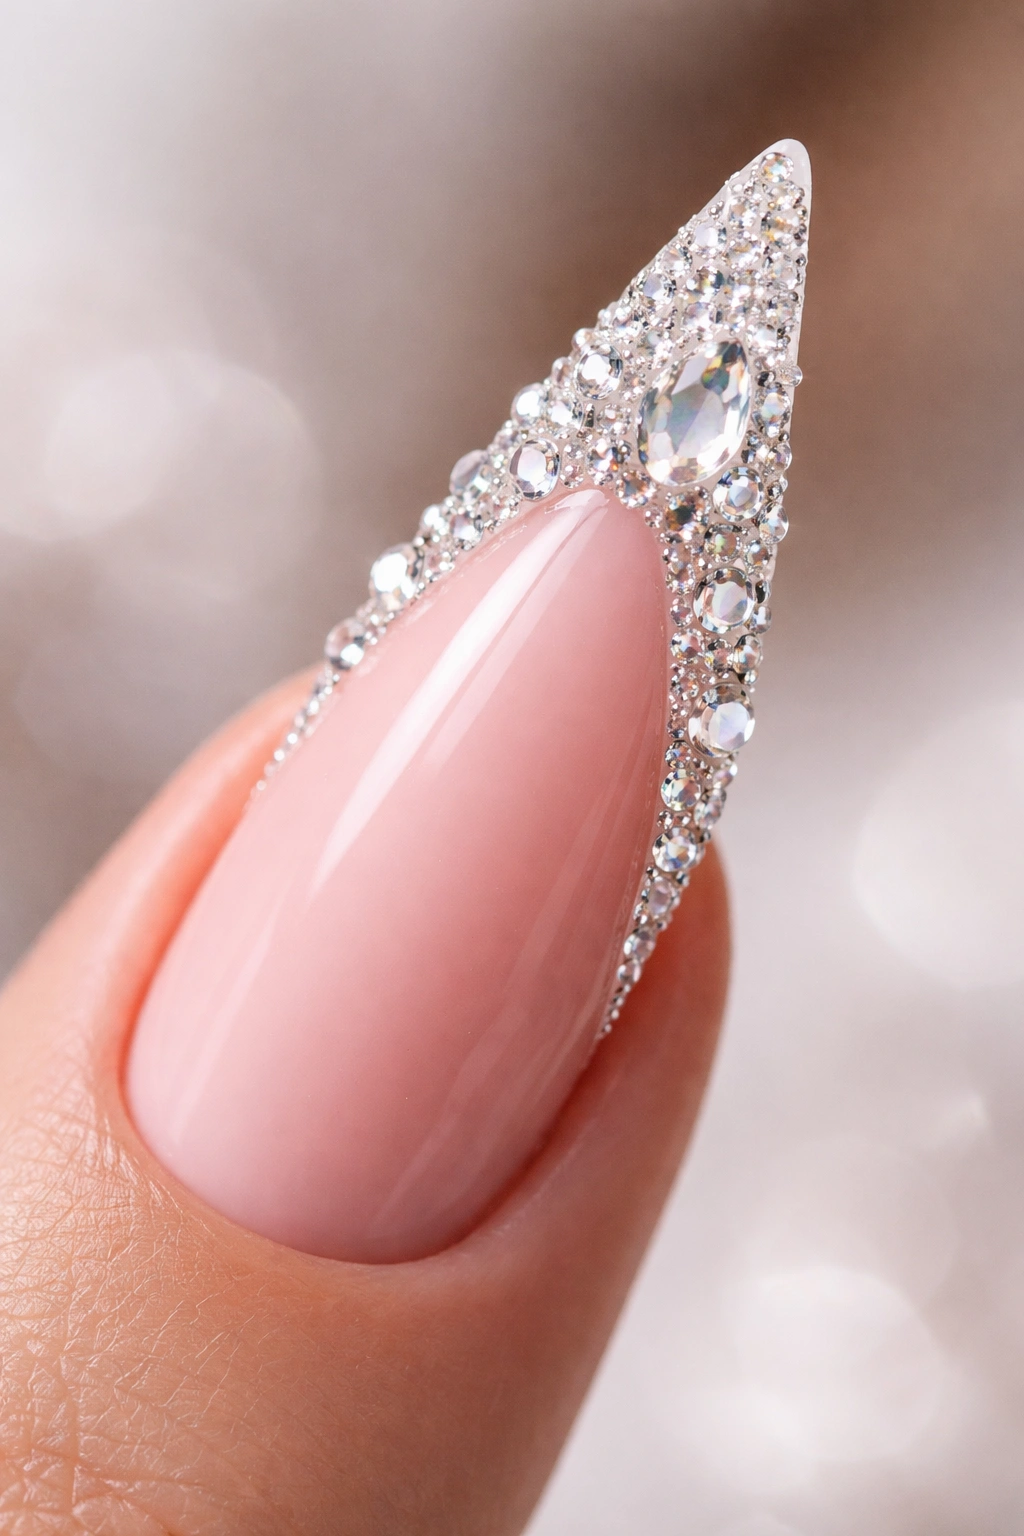
Larger, more luxurious gems — cubic zirconia, Swarovski crystals, or high-quality faux diamonds — are strategically placed across the white French tip in a pattern or scattered artistically. Unlike pearl embellishments, these stones are bigger and bolder, catching light dramatically and creating genuine sparkle. Place them densely at the very edge of the tip with slightly sparser placement toward the pink transition, creating a graduated effect that draws the eye outward.
Statement Through Sparkle
Crystal-studded nails make an unapologetic fashion statement — they’re for moments when you want nails that are clearly jewelry rather than neutral accessories. The combination of light pink (soft and subtle) with crystal-studded tips (bold and dramatic) creates an interesting contrast that somehow works because the base provides calm while the tips provide glamour. This design reads as luxe and intentional, not random or overdone.
Professional Application for Durability
Gems should be applied by a technician using proper adhesive between base gel and top coat layers. Cheap gems fall off quickly; quality matters genuinely here. Larger stones (4-6mm) stay in place better than tiny rhinestones and create more impact. The curing process locks everything permanently in place. Expect this design to be one of the pricier options because it requires quality materials and skilled application.
Worth knowing: Mixing stone sizes (some larger centerpiece stones with smaller gems around them) creates more visual interest than uniform sizing.
10. Negative Space Geometric

Geometric shapes — triangles, lines, angles — are removed from the white French tip portion, revealing the light pink nail underneath and creating a design composed of both color and the absence of color. The negative space technique works beautifully on stilettos because the pointed shape pairs naturally with angular, geometric designs. Strategic gaps in the white create visual complexity while maintaining the clean, modern aesthetic of the entire look.
Why Negative Space Feels Contemporary
Negative space designs feel intentional and artistic — they require planning and precision to execute well. The combination of what’s there (light pink nail, white portions, geometric gaps) creates a more interesting visual than either alone. This approach feels very current without being trendy; geometric designs have proven timeless across design disciplines. The technique also makes long nails feel even more architectural and deliberately shaped.
Creating Clean Geometric Gaps
This design requires precise application using nail guide stickers or tape to maintain clean lines, or freehand painting if your technician has that skill level. Start with your full French tip cured, then apply stickers in the geometric pattern you want, then paint over them with white gel. When you cure and remove the stickers, you’re left with light pink showing through in those shapes. Alternatively, reverse the process: apply stickers to the light pink areas you want to keep uncovered, paint white gel everywhere, then remove stickers.
Pro tip: Large geometric shapes (bigger triangles, bold stripes) read more deliberately than tiny geometric patterns, which can accidentally read as damage or imperfection.
Final Thoughts
Light pink French tip stiletto nails offer a canvas that’s simultaneously elegant and experimental — formal enough for professional environments, but creative enough to feel genuinely personal. The beauty of this combination is how adaptable it is; each of these ten approaches approaches the classic French tip from a different angle, proving that there’s no single way to wear this timeless design.
The most important element across all these ideas isn’t the specific embellishment or technique, but the quality of execution. A perfectly smooth light pink base and crisp, clean white tip line — whether you enhance them or keep them minimal — creates the foundation that makes everything else work. Whether you choose something minimal like the gold accent line or bold like the crystal-studded tips, the key is making sure every element feels intentional rather than random.
Start by showing your nail technician reference images of the design that speaks to you, discussing timeline and maintenance, and being honest about your lifestyle. A design that requires weekly salon visits might not work if you’re on a tight schedule, but having those conversations upfront means you’ll end up with something you genuinely love to wear. Your nails are one of the few accessories that’s always visible, always moving, always catching light — they deserve to reflect your personal aesthetic and make you feel confident.
