

Stiletto nails with glitter are basically the ultimate confidence boost wrapped around your fingertips. There’s something about the sharp, dramatic shape combined with the sparkle and shine of glitter that makes you feel instantly elegant, bold, and put-together — whether you’re heading to an event or just want to feel like you’re celebrating life on a Tuesday afternoon. The beauty of glitter stilettos is that they work for virtually every skin tone, every season, and every occasion, from casual everyday wear to black-tie glamour.
The trick to nailing this look isn’t complicated, but it does require a little strategy. You want the glitter to catch the light without looking chaotic, the stiletto shape to feel sharp and intentional (not accidental), and the whole thing to last without chipping before the week ends. The good news? There are infinite ways to combine glitter and stilettos to create something that feels uniquely yours — whether you prefer understated sparkle that whispers elegance or bold, mirror-bright glitter that announces your presence in a room.
In this guide, you’ll find twenty different approaches to glitter stiletto nails, each with specific techniques, color combinations, and styling tips that you can take straight to your nail artist or recreate at home. Some of these designs use fine glitter for a delicate, refined effect, while others embrace chunky, reflective glitter for maximum drama. You’ll find nude and neutral bases paired with sparkle, jewel tones that glow, and gradients that shift as you move your hands. Each design includes practical advice about what works, why it looks good, and how to adapt it to match your personal style.
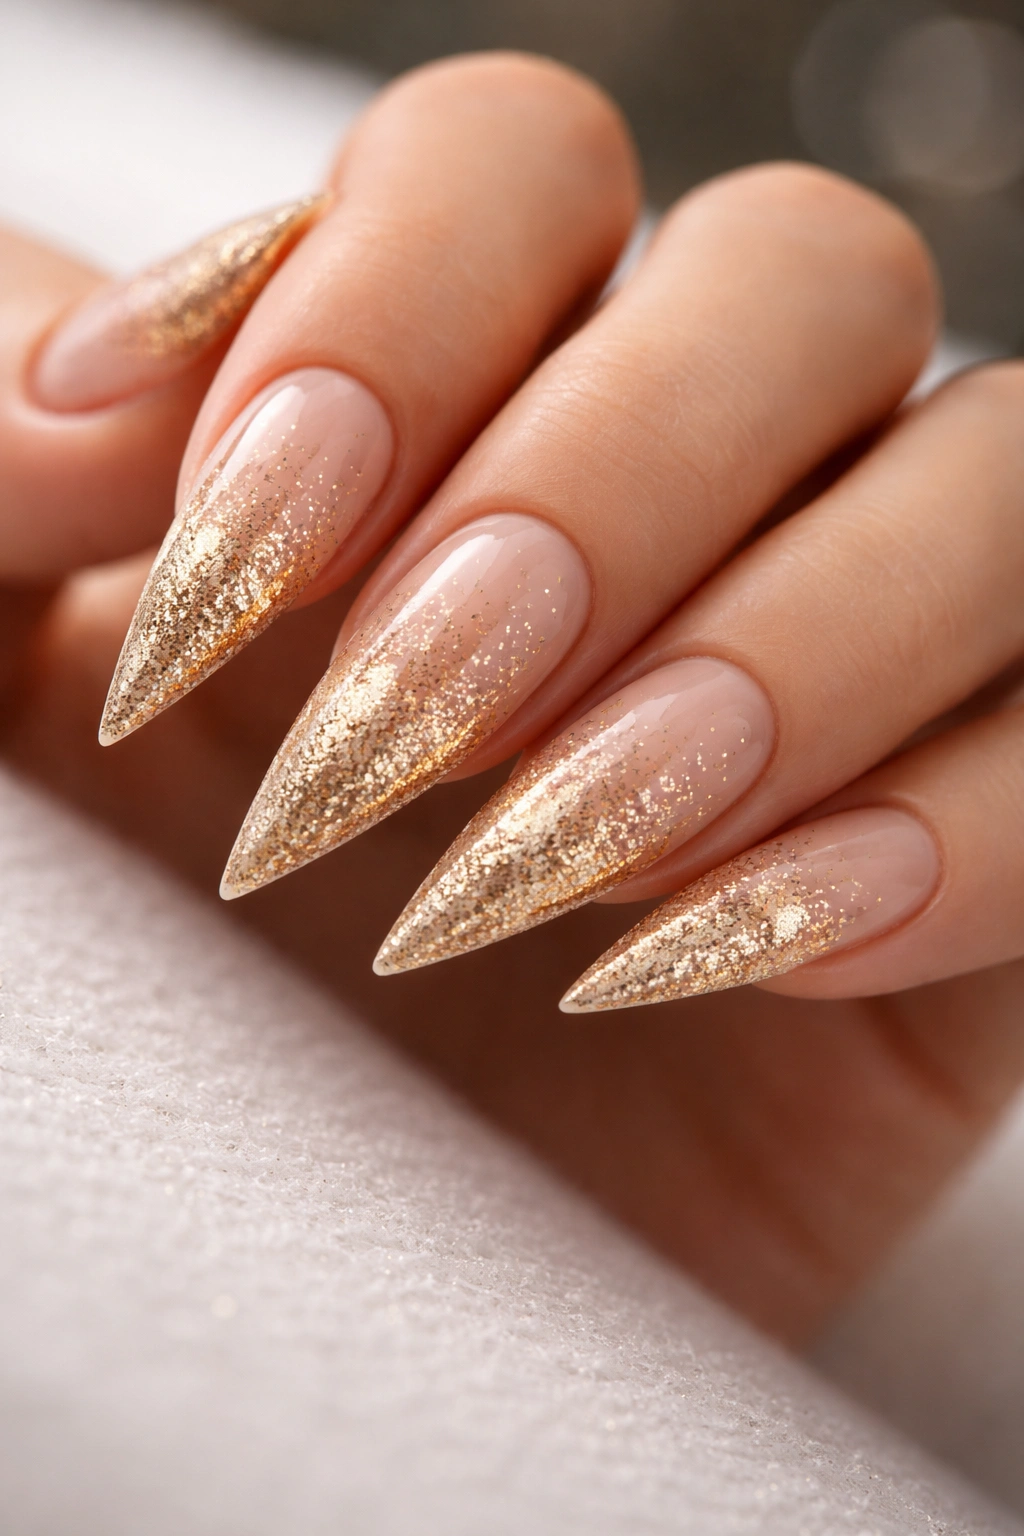
1. Gold Ombre Glitter Fade
This design starts with a nude or pale pink base at the nail bed and gradually transitions to a rich gold at the tips, with fine gold glitter distributed throughout the ombre for a seamless, luxurious effect. The beauty of this approach is that it’s not overwhelming — the gradient helps the glitter feel blended and intentional rather than simply dumped on top.
Why This Creates Timeless Elegance
Gold has a warmth that complements almost every skin tone, and the ombre technique adds dimension without requiring high contrast. The glitter density increases toward the tips, so the effect feels graduated and sophisticated rather than costume-like. This design works beautifully in professional settings where you want just enough sparkle to catch light during a handshake or when typing.
How to Execute It Right
- Start with a nude or light pink base coat and let it dry completely
- Apply a slightly darker peachy or warm nude shade to the tips, but leave the nail bed bare
- Blend the two shades together using a damp sponge with a stippling motion in the transition zone
- Mix fine gold glitter into a clear gel or top coat and apply it over the entire nail, adding slightly more product to the tips
- Seal with a high-shine top coat for maximum dimension
Pro tip: Use a bouncy sponging motion rather than dragging the sponge — this creates a softer, less obvious blend line that reads as intentional gradient, not accidental blending.
2. Holographic Sparkle on Clear Base
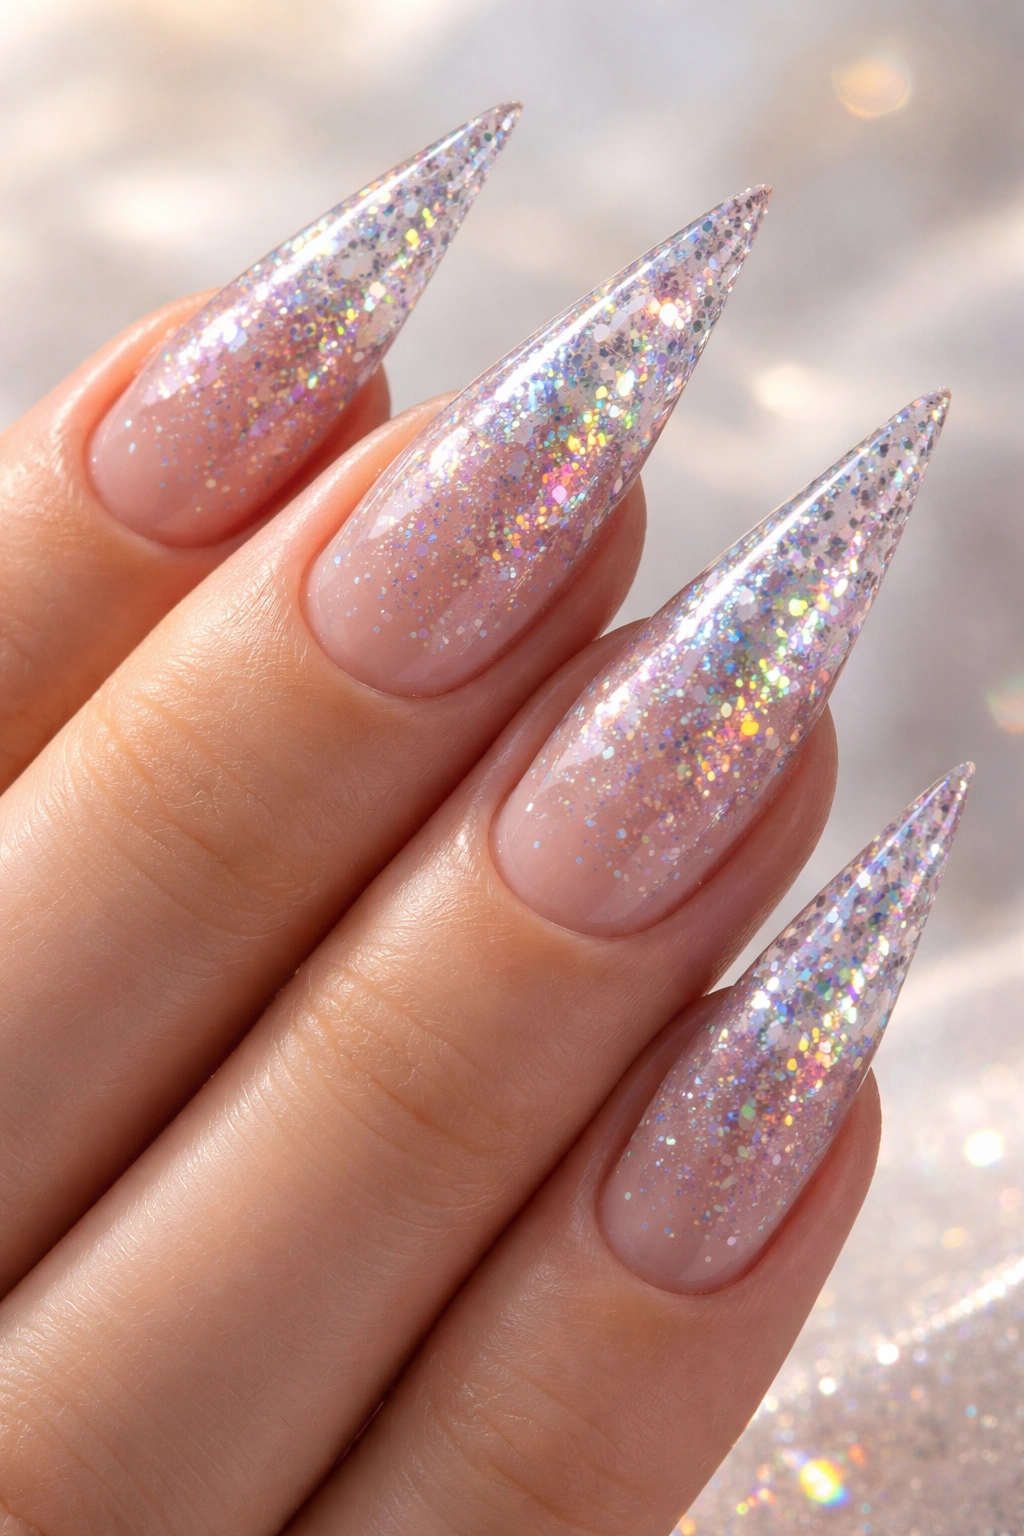
Holographic glitter catches light in multiple directions at once, creating a prismatic rainbow effect that’s absolutely mesmerizing on stilettos. Against a clear or barely-there nude base, the holographic particles seem to float and shift with every angle of your hand, creating endless visual interest.
Why Holographic Glitter Stands Out
Unlike regular metallic glitter that reflects one color, holographic glitter contains micro-facets that refract light into the full spectrum. This means your nails will look different in sunlight versus indoor light, and they’ll shimmer with hints of pink, blue, green, and purple simultaneously — it’s like wearing tiny prisms on your fingertips without looking over-the-top.
Application and Coverage Tips
- Apply a clear or very pale pink gel base to create a subtle canvas
- Sprinkle fine-to-medium holographic glitter over the wet base, or use a clear gel mixed with holographic particles for more controlled coverage
- For maximum impact, apply glitter densely over the tips and more sparingly toward the cuticle
- Use a gel top coat to seal and protect the glitter from lifting or peeling
- Cure under UV light to harden and set the design
Worth knowing: Holographic glitter shows up best under bright light, so this design shines (literally) at evening events, clubs, or anywhere with good lighting.
3. Chrome Glitter Hybrid
This design blends chrome powder with loose glitter to create a mirror-finish effect with added sparkle and texture. The chrome gives you smooth, reflective shine, while the glitter adds dimension and catches light at slightly different angles for a hypnotic finish.
What Makes This Combination Unique
Chrome and glitter together create visual depth that neither texture achieves alone. The chrome mirrors your surroundings, making your nails look futuristic and sleek, while the glitter prevents the chrome from feeling flat or one-dimensional. The result is a nail that looks completely different depending on the lighting and the colors in your environment.
Step-by-Step Application
- Apply a thin, smooth gel base coat and cure
- Apply a thin layer of gel top coat and, while still wet, apply fine to medium glitter
- Let this cure under UV light for about 15 seconds to tack down the glitter
- Buff the surface gently with a soft nail file to blend the glitter slightly with the base
- Apply chrome powder using a concentrated brush, working in small sections and buffing with a soft cloth
- Seal with a matte top coat followed by a shine top coat for a polished finish
Pro tip: Chrome powder applies best to a slightly tacky surface, so don’t fully cure your gel before applying chrome — leave it at the tackiness stage for best adhesion.
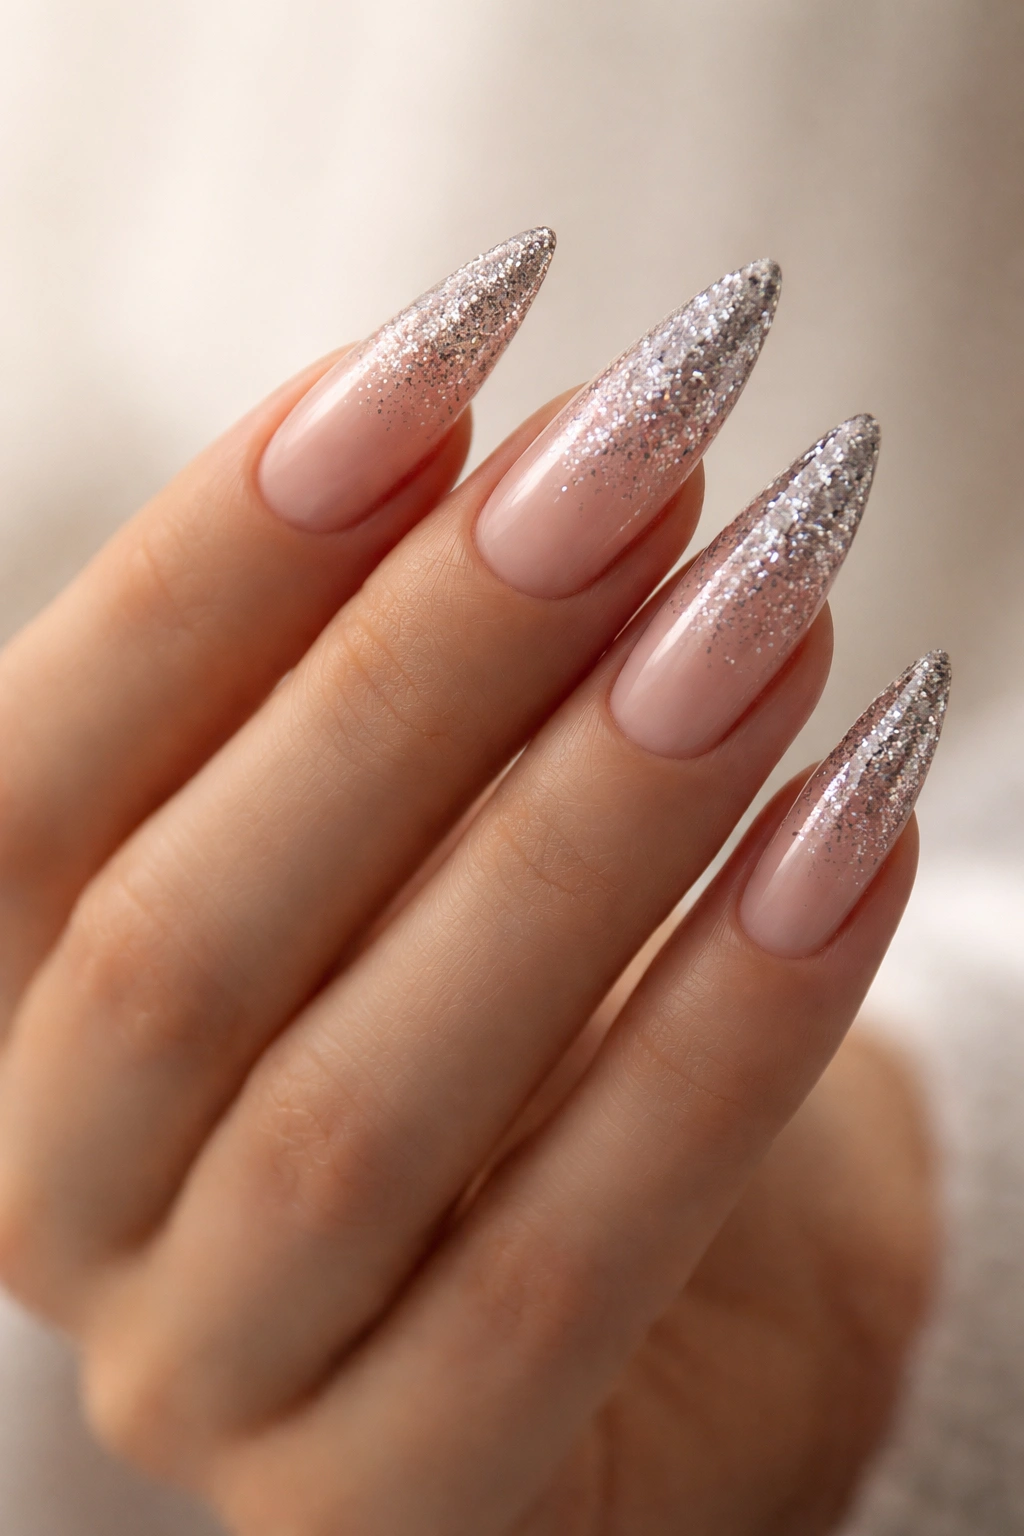
4. Nude Base with Glitter Tip Ombre
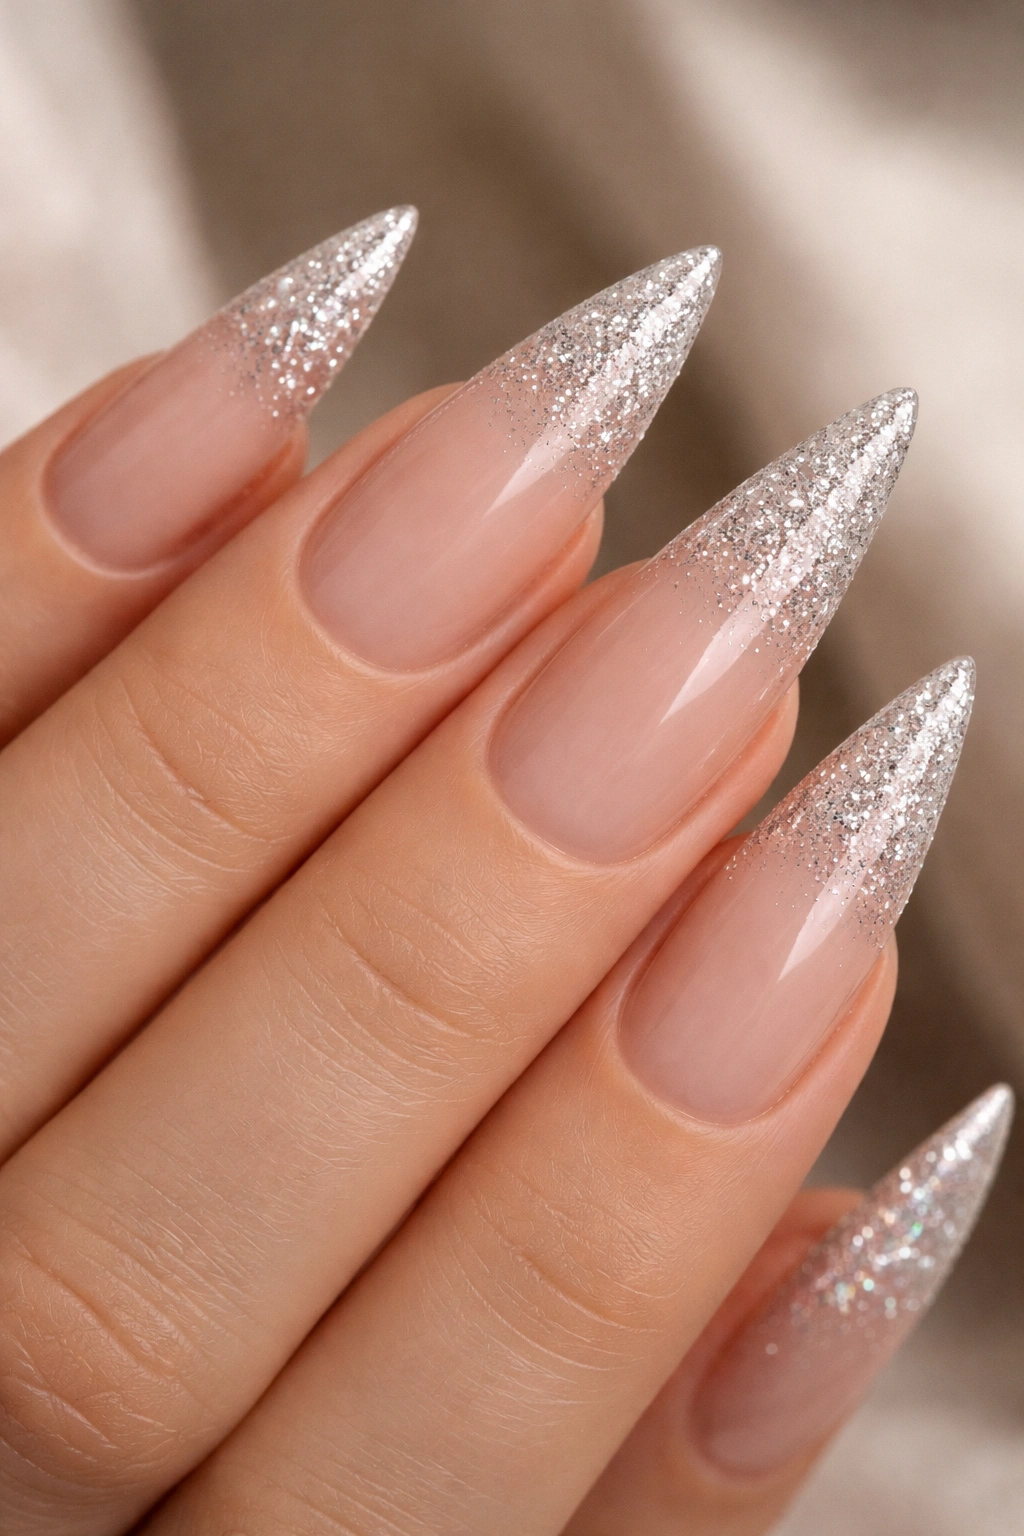
This approach keeps the nail bed completely solid and nude, then gradually introduces glitter starting about halfway down the nail, with the tips becoming fully encrusted in sparkle. The contrast between solid nude and glitter creates a clean, intentional look that feels modern and controlled.
Why the Gradient Effect Works Here
By leaving the nail bed clean and solid, you establish a professional baseline that keeps the design from feeling too costume-like. The glitter only appears on the tips, which emphasizes the stiletto shape and creates a point of focus. This is ideal if you want shimmer without committing your entire nail to sparkle.
The Technique for Clean Transitions
- Apply two coats of nude gel (in a shade that matches or complements your skin tone) over the entire nail
- Starting about one-third of the way down from the tip, begin applying a glitter-heavy top coat using a thin brush
- Work the glitter upward in layers, adding more glitter product toward the tip
- Use a clean, dry brush to blend the transition zone slightly, feathering the glitter particles into the solid base
- Cure and top with a glossy finish for maximum shine
Worth knowing: The cleaner your transition zone, the more polished and intentional the design looks — avoid a harsh, obvious line.
5. Rose Pink Gradient with Sparkle
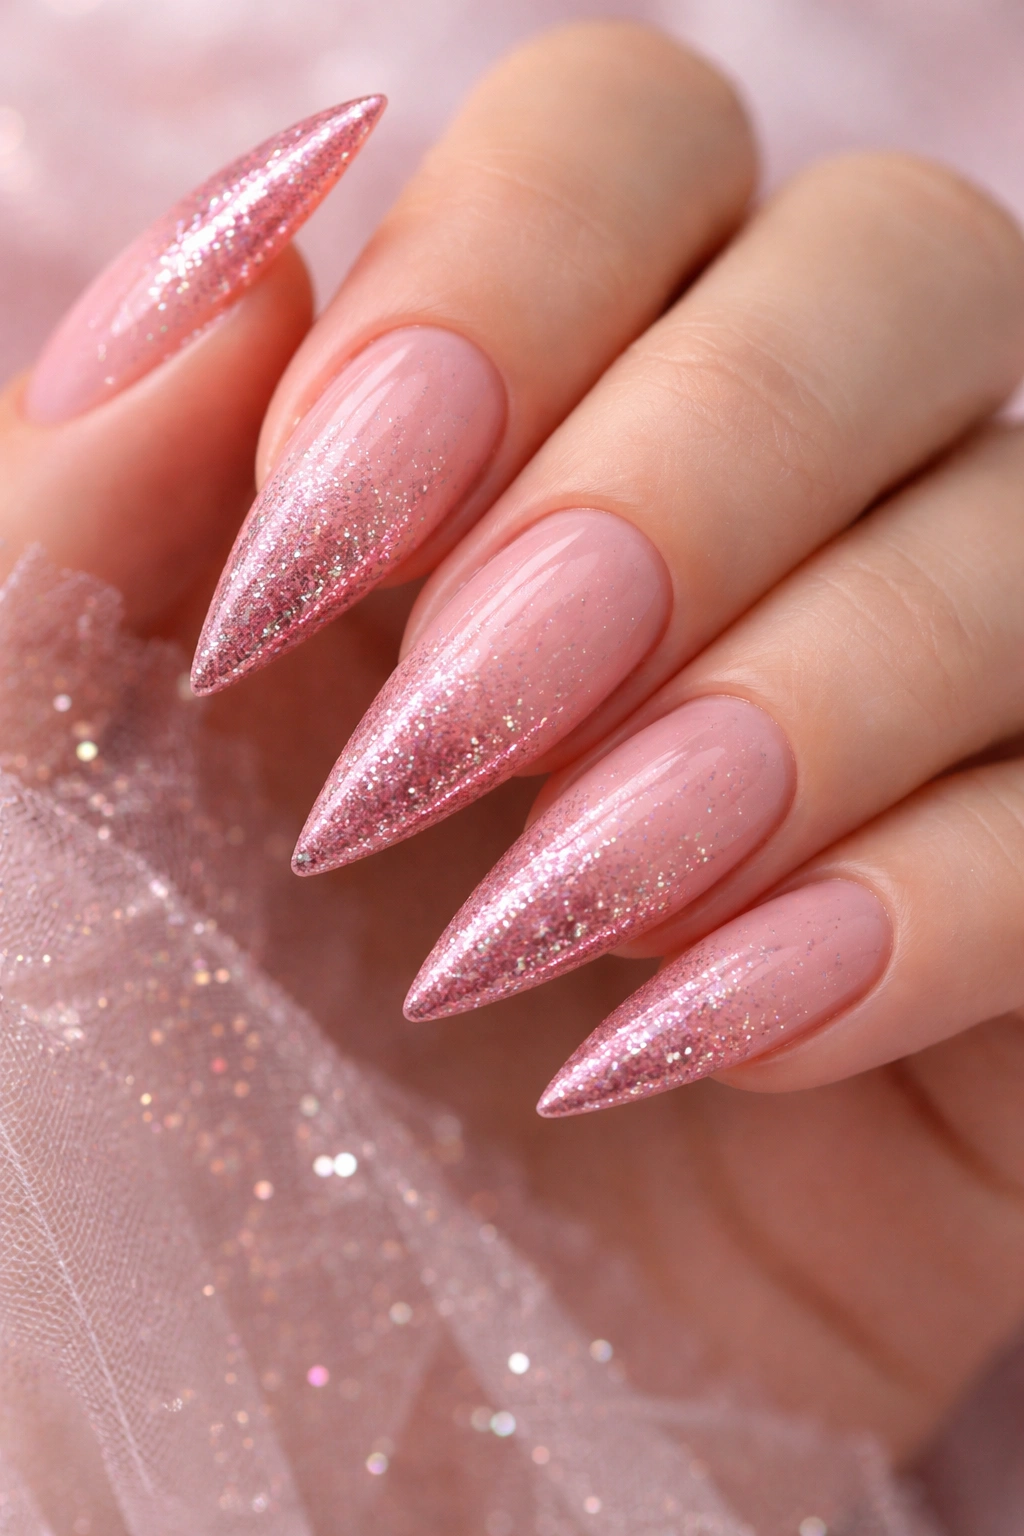
A soft rose or mauve pink base that gradually deepens as it moves toward the tips, with fine glitter embedded throughout the entire gradient creates a romantic, elegant look that’s equally at home at a wedding or a night out. The rose tones are flattering on virtually every complexion.
Why Rose Pink Feels Effortlessly Chic
Rose and mauve are naturally sophisticated colors that don’t require boldness to make an impact. When paired with glitter, they feel celebratory without being loud. The gradient keeps the eye moving from cuticle to tip, emphasizing the stiletto shape, and the sparkle adds a celebratory edge without ever tipping into costume territory.
Building the Gradient with Glitter
- Start with a pale dusty rose gel and apply it to the full nail
- Mix a slightly deeper rose or mauve into a clear gel, and apply this over just the tips (about one-third of the nail)
- Use a damp sponge to blend the two shades together in the middle third, creating a soft transition
- While the sponged section is still wet, add fine glitter and stipple it in with the sponge
- Build the glitter density toward the tips by adding more glitter product
- Seal with a high-shine top coat for a luminous finish
Pro tip: Blush pink and mauve pair beautifully with gold, rose gold, or even subtle silver glitter for added warmth.
6. Black Stilettos with Gold Glitter
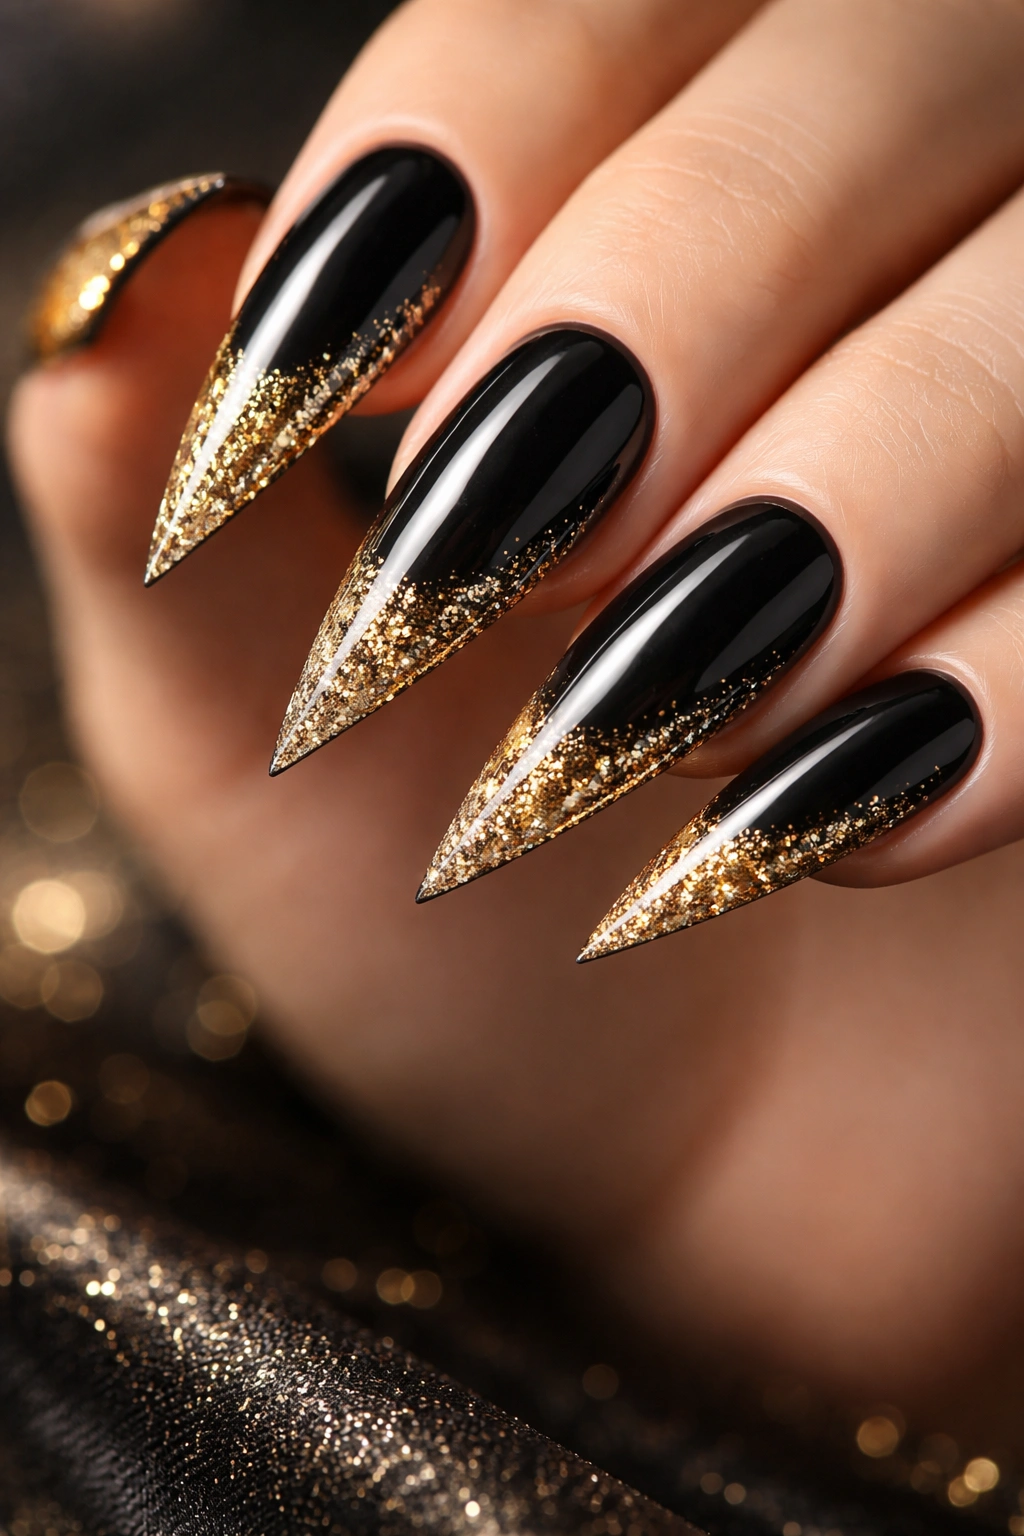
Classic black stilettos never fail — they’re dramatic, elegant, and instantly commanding. Adding gold glitter to just the tips or along the edges creates a striking contrast that feels simultaneously sophisticated and bold, perfect for anyone who loves a statement nail.
The Power of High-Contrast Sparkle
Black absorbs light, making glitter stand out even more brilliantly against it. The contrast between deep matte black and reflective gold creates visual drama without requiring any color blending or complexity. This design reads as intentional and bold, never accidental or everyday.
Creating the Gold-on-Black Look
- Apply two coats of black gel to the entire nail and cure completely
- Apply a thin layer of clear gel over just the tips (approximately one-quarter to one-third of the nail)
- While the clear gel is still wet, apply medium gold glitter densely over the tips
- For an extra dimension, you can create a thin line of gold glitter along the outer edges of the black nail
- Cure under UV light and seal with a glossy top coat
- Optional: Add a thin gold line along the cuticle line for a framing effect
Worth knowing: If you want less glitter, focus it entirely on the very tip for a “French” effect with sparkle instead of the traditional white line.
7. Rainbow Glitter Burst
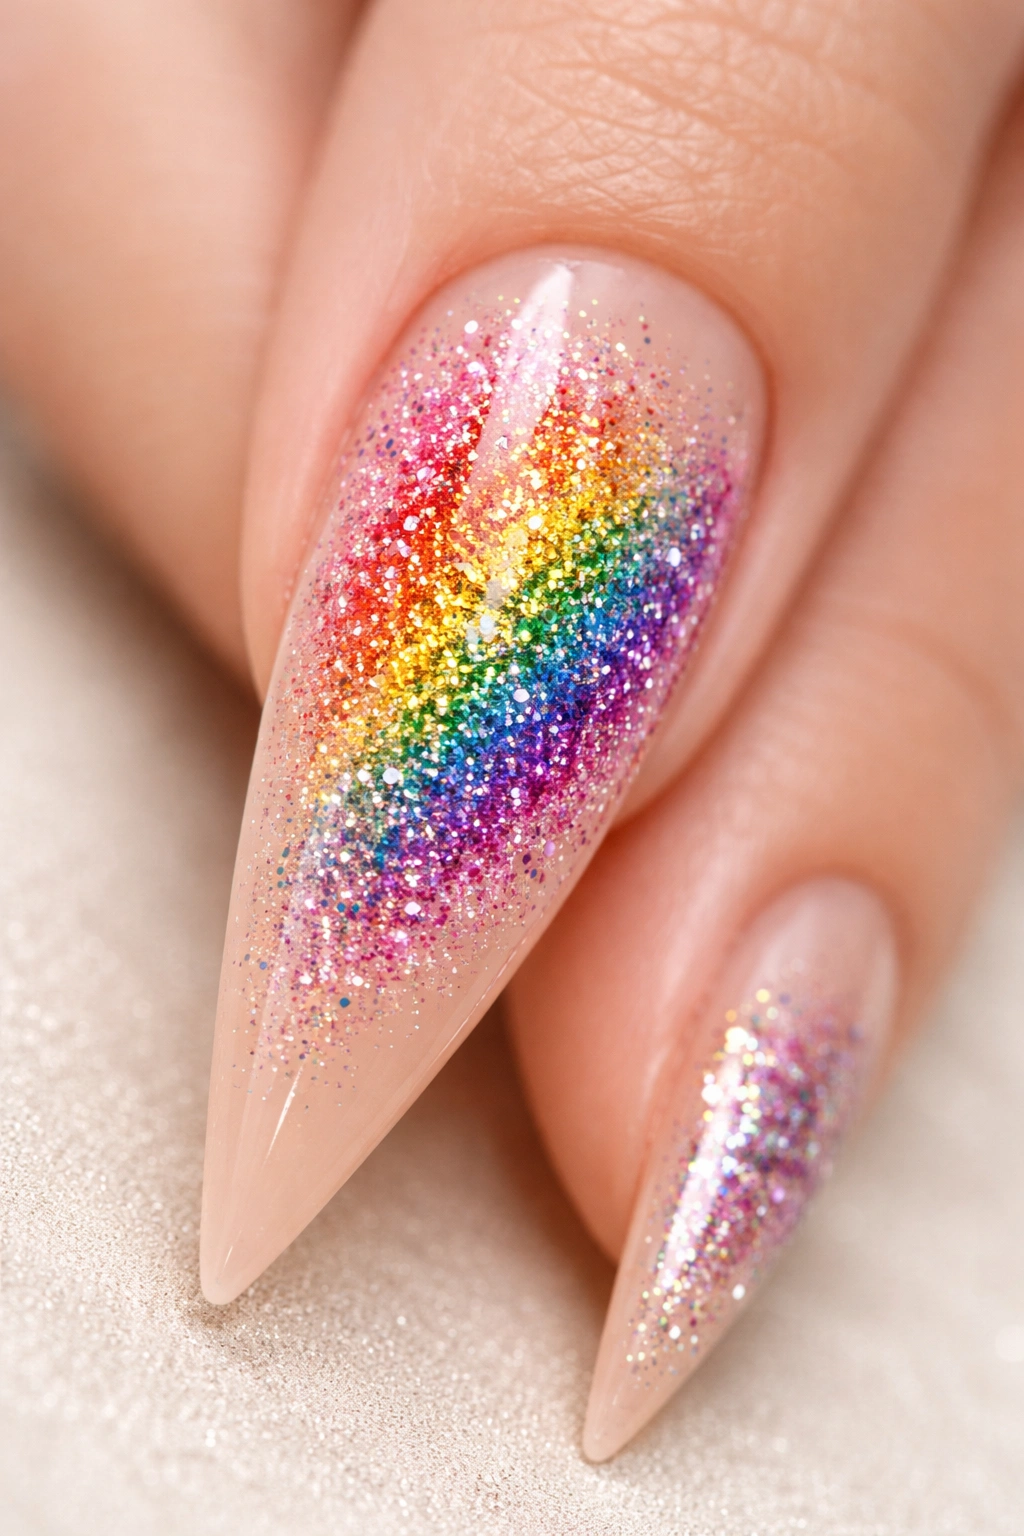
This design explodes with color — multicolored glitter (a mix of red, orange, yellow, green, blue, and purple particles) distributed across a clear or nude base creates a festive, joyful aesthetic that’s perfect for anyone who loves color and isn’t afraid to stand out.
Why Rainbow Works on Stilettos
The dramatic shape of stilettos can handle bold color and multiple glitter hues without feeling chaotic — in fact, the sharp lines help organize the visual impact. Rainbow glitter feels celebratory and playful without looking childish, especially when applied with intention and sealed properly.
Achieving Controlled Rainbow Sparkle
- Start with a clear base or a pale nude/pink base — this lets the glitter colors shine
- Apply a glitter top coat (clear gel mixed with rainbow glitter particles) to the entire nail
- For a “burst” effect, concentrate more glitter in the center of the nail, fading it toward the edges
- Use different sizes of rainbow glitter if possible — mix fine and medium particles for depth
- Avoid applying glitter too densely, or it becomes muddy; aim for visible glitter with clear base showing through
- Cure and finish with a glossy top coat that doesn’t yellow the colors
Pro tip: Rainbow works best with a bit of white or clear space between sparkle particles so each color reads distinctly rather than blending into a muddy tone.
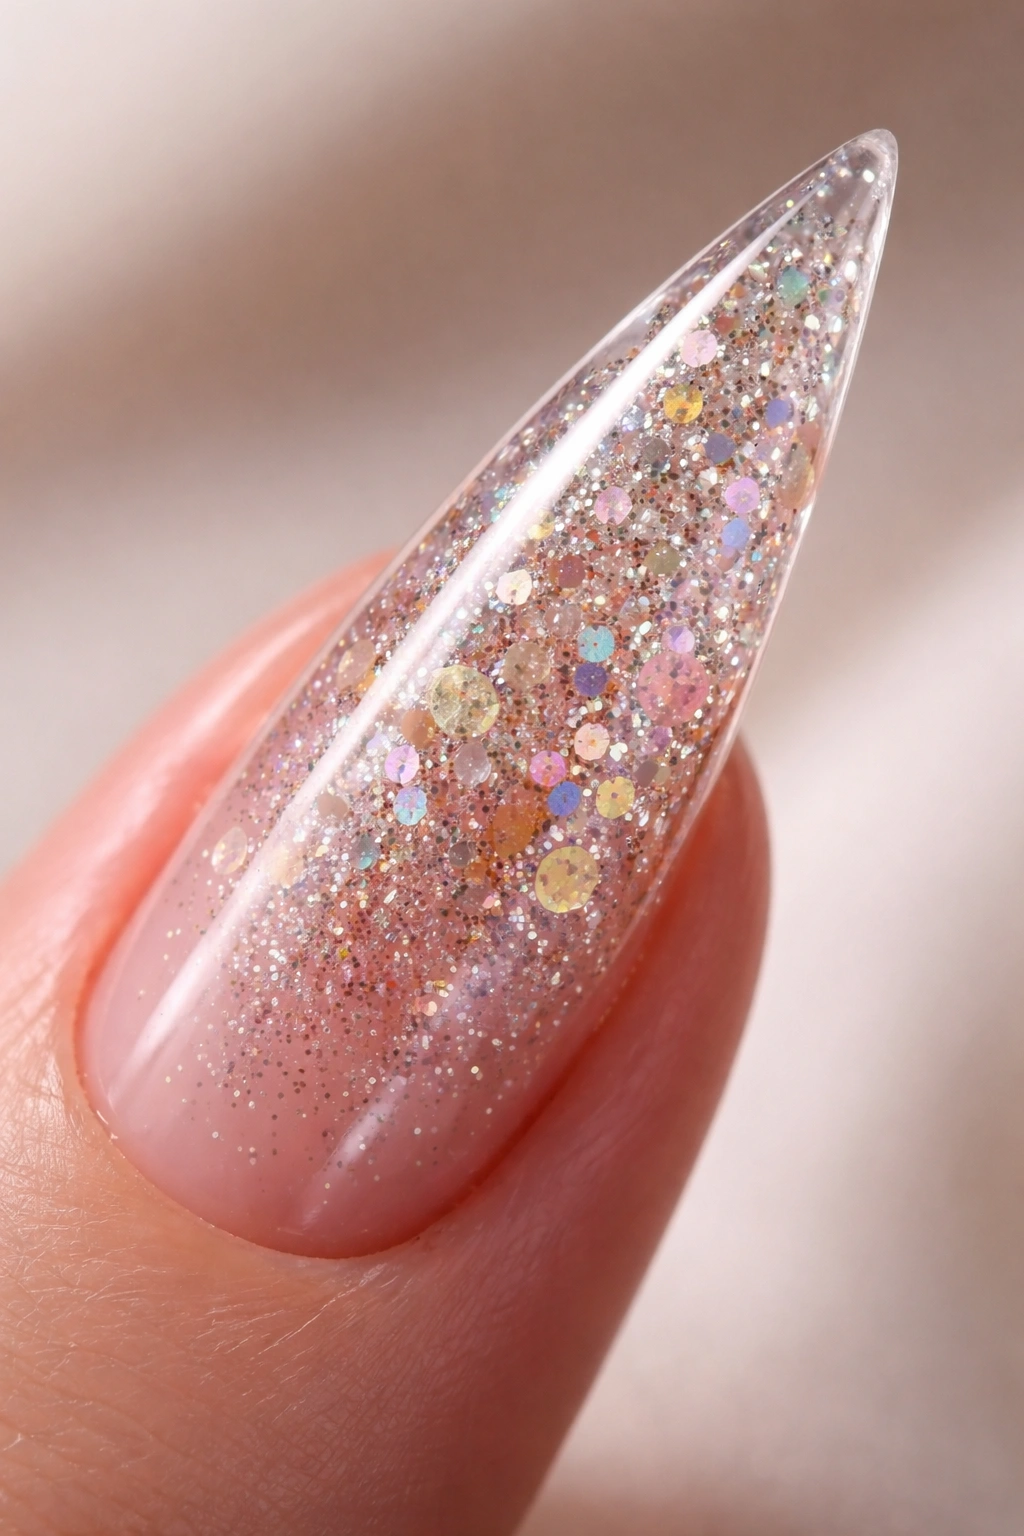
8. Full Glitter Coverage on Nude Stilettos
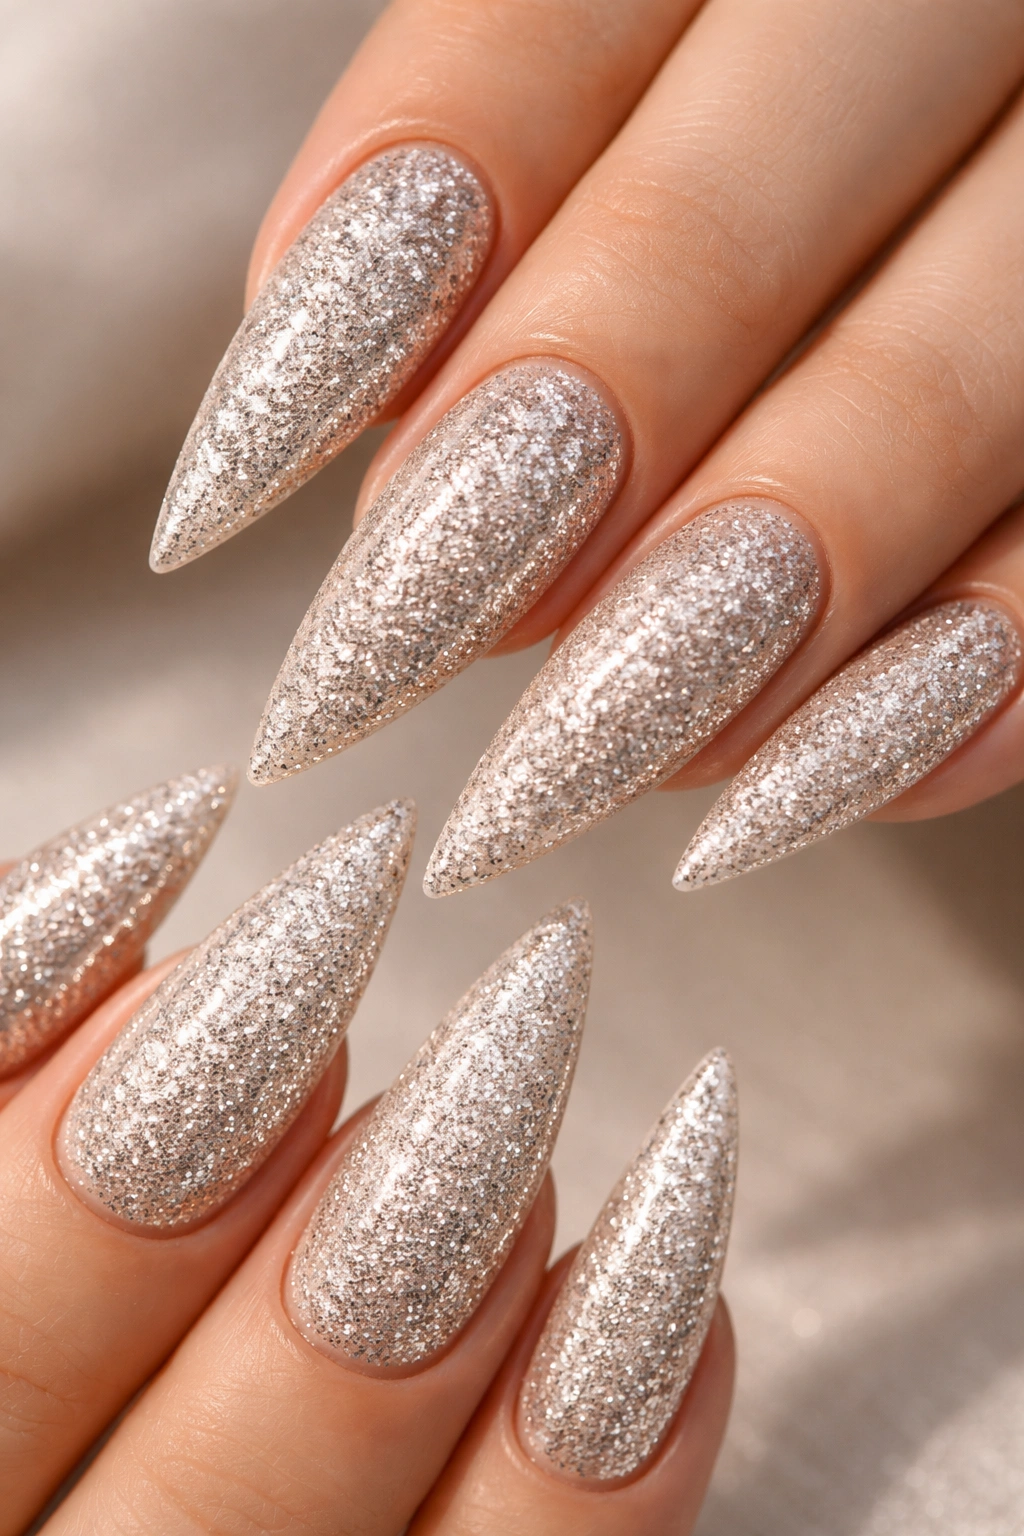
This is the “completely covered in sparkle” approach — your entire nail, from cuticle to tip, is encrusted in glitter, creating an all-over sparkly effect that’s undeniably glamorous. The nude base shows through the glitter just enough to keep it from looking costume-like, while the coverage keeps it feeling intentional and polished.
Why Full Coverage Can Still Look Elegant
When you commit fully to glitter, the key is using fine to medium glitter particles (not chunky, oversized ones) and ensuring complete, even coverage. The glitter should look deliberately applied, not scattered or sparse. On a nude base, this reads as glamorous rather than chaotic.
The Technique for Even, Full Coverage
- Apply a nude or pale pink gel base in two coats and cure
- Apply a clear gel layer over the entire nail while it’s still in the curing phase (don’t fully cure the nude base first — you want tackiness)
- While the clear gel is still wet, apply fine glitter across the entire nail using either a sprinkle method or by rolling the nail in glitter
- Use a soft brush to distribute the glitter evenly and fill any bare spots
- Cure under UV light for 30 seconds to tack the glitter down
- Apply a second thin layer of clear gel over the glitter and cure fully
- Finish with a high-shine top coat for a polished, jewelry-like appearance
Worth knowing: Two-layer glitter application (glitter-clear gel-cure-clear gel again) keeps the glitter trapped and prevents shedding throughout the week.
9. Deep Red with Champagne Glitter Tips
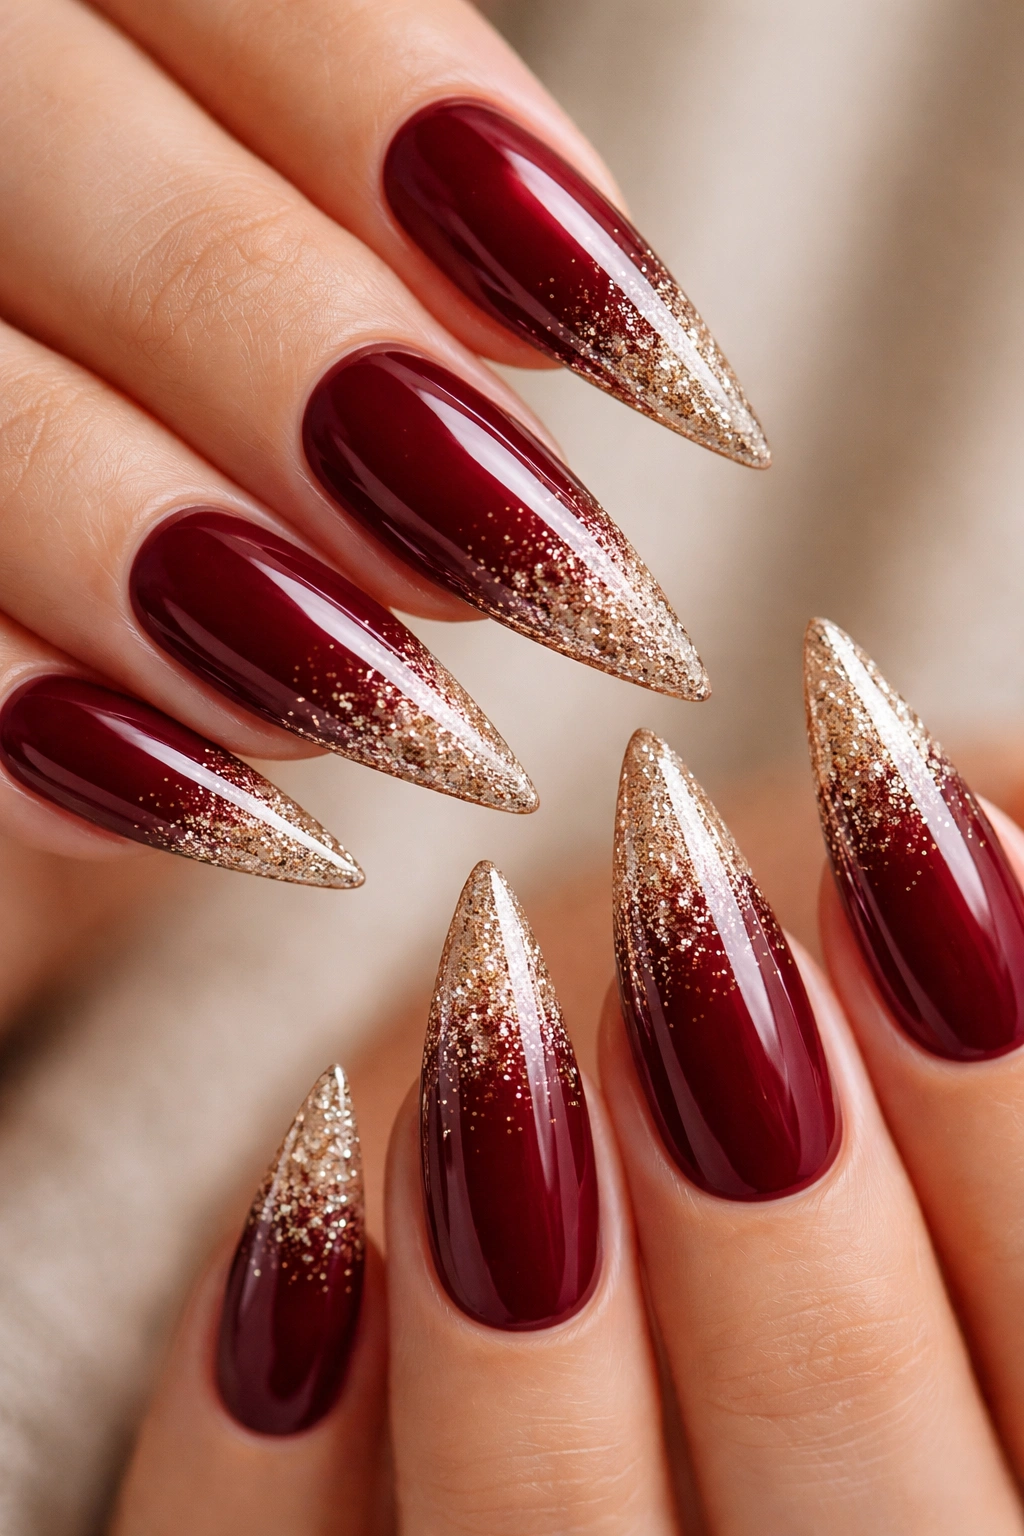
A sophisticated design pairing a deep burgundy or classic red nail with champagne or pale gold glitter concentrated on the tips. This combination feels luxurious and refined, perfect for evening wear or anyone who wants a nail design that says “I have impeccable taste.”
Why Red and Champagne Is a Timeless Pairing
Deep red is dramatic and bold, while champagne glitter is soft and subtle — together, they create balance. The champagne tones down the intensity of the red, making it feel elegant rather than aggressive, while the red gives the champagne sparkle something rich to sit against.
Application for Maximum Impact
- Apply two coats of deep red or burgundy gel to the entire nail and cure
- Apply a glitter-infused clear top coat to just the tips (approximately the top third of the nail)
- Use a small brush to apply champagne or pale gold glitter to the wet clear gel, concentrating on the very tip
- Create a soft gradient by reducing glitter density as you move toward the middle of the nail
- Use a clean, dry brush to feather and blend the glitter area slightly
- Cure and seal with a high-shine top coat
Pro tip: Champagne reads differently on different skin tones — test your glitter choice under the lighting where you’ll wear them most often (office, evening, natural daylight).
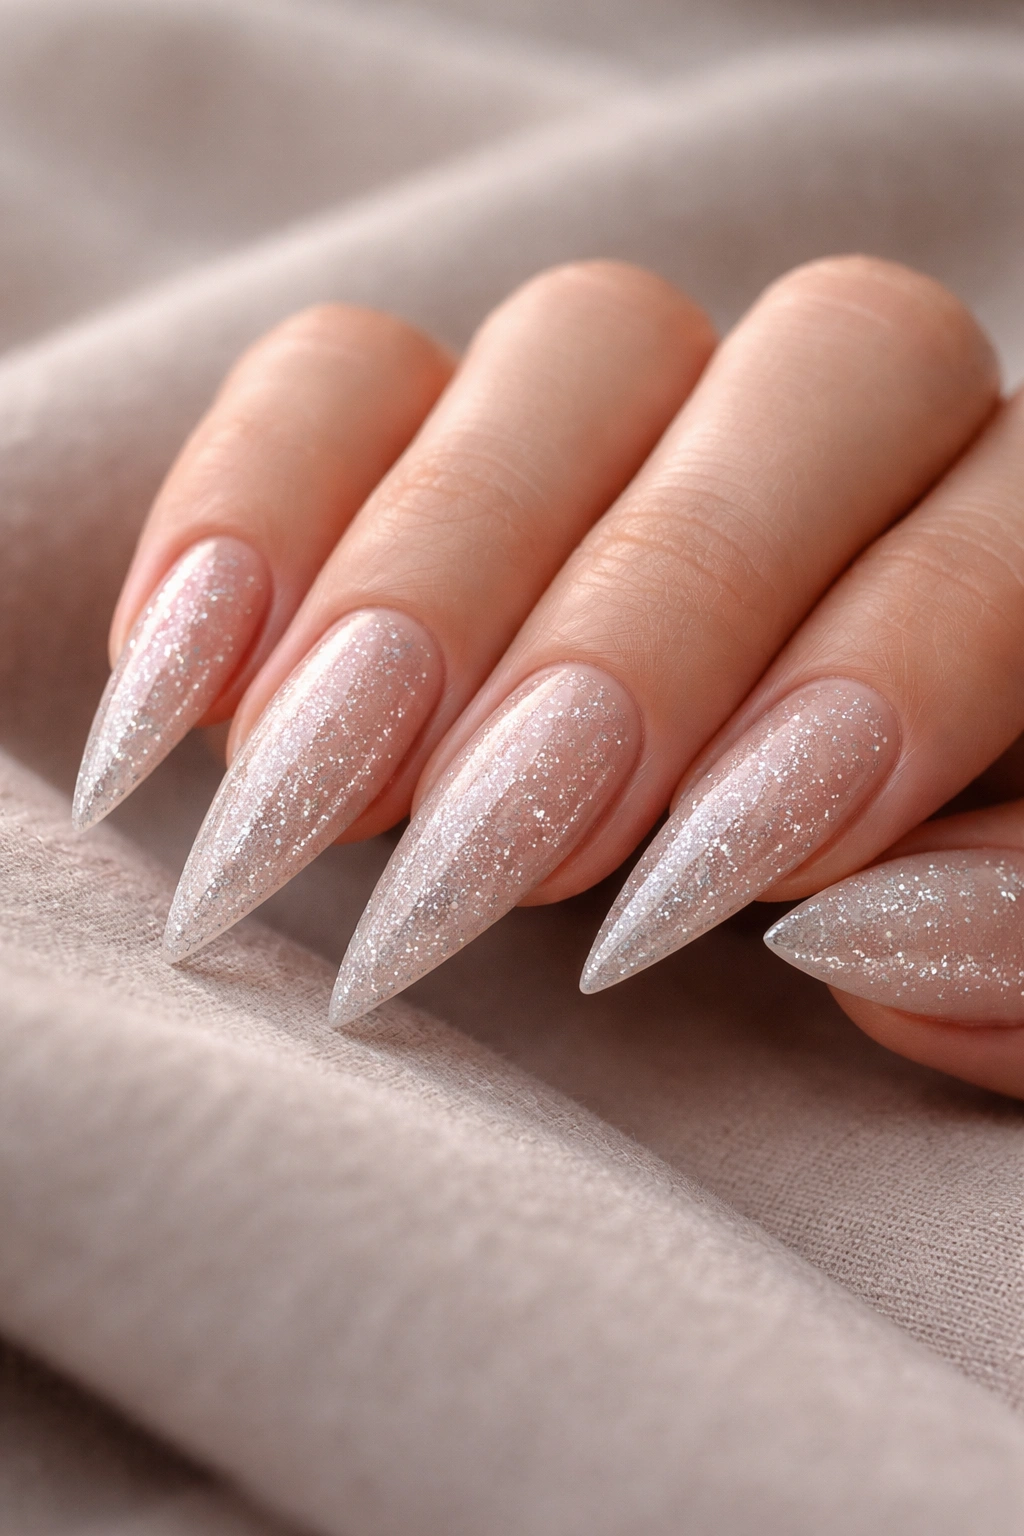
10. White Glitter on Translucent Nude Base
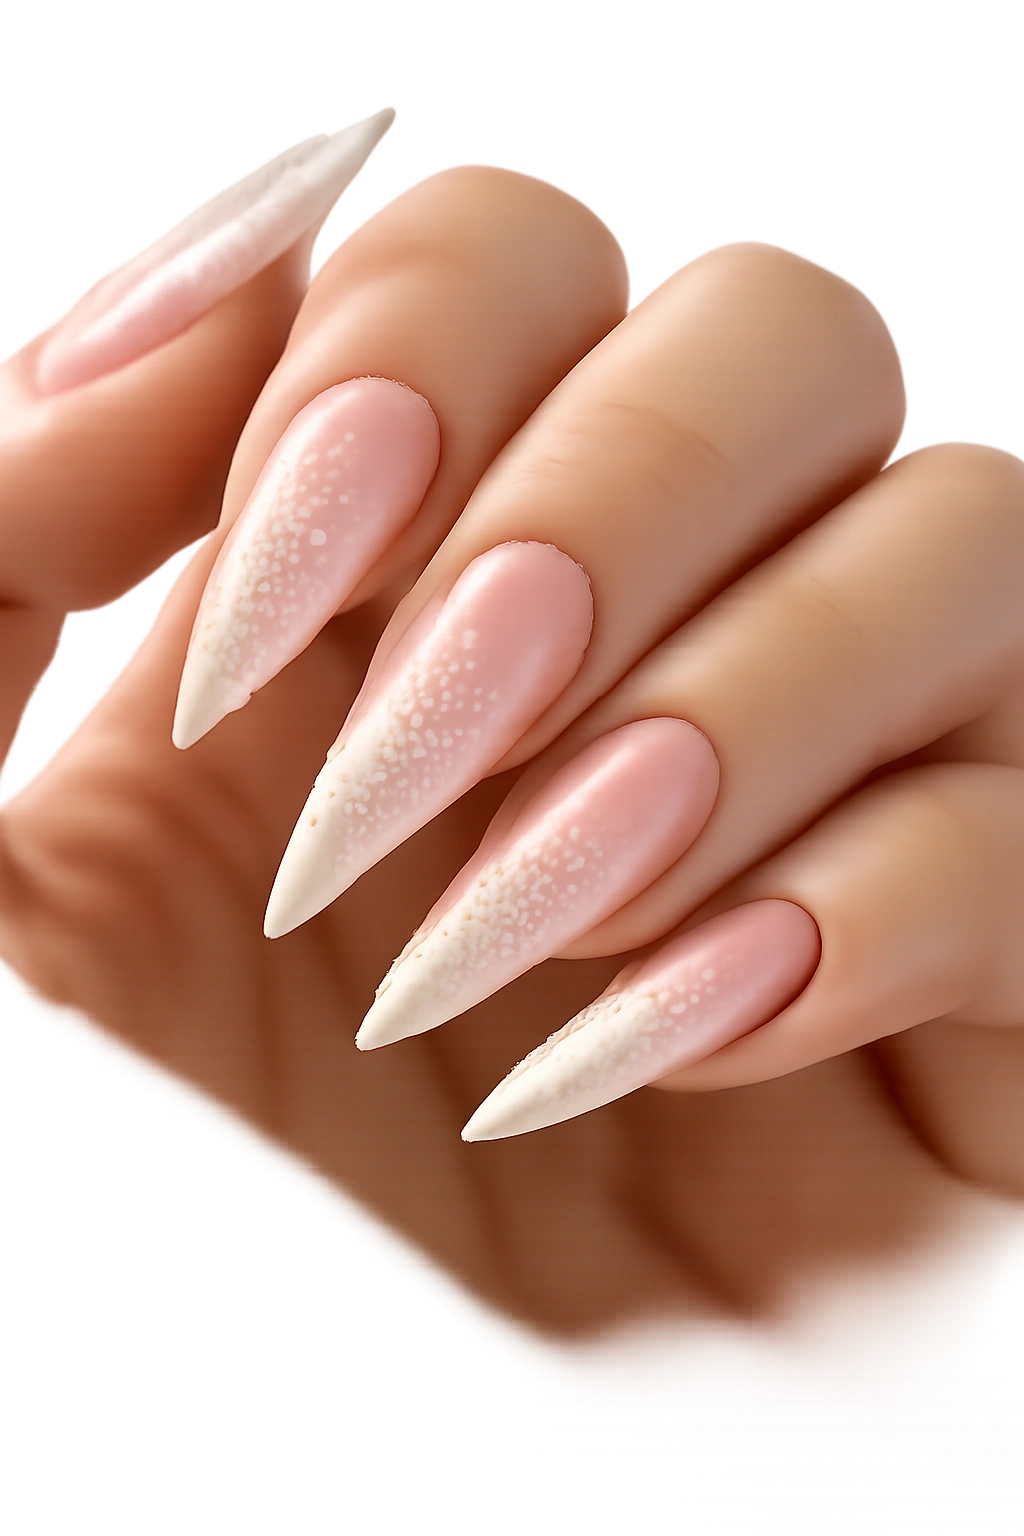
A pale, almost flesh-toned nude base with pristine white or pearl glitter creates a clean, modern look that’s surprisingly striking. The white glitter pops against the translucent base, creating a subtle but sophisticated sparkle that works in professional settings and casual wear alike.
The Minimalist Sparkle Approach
This design is proof that you don’t need bold colors or heavy glitter coverage to make an impact. The white-on-nude combination is inherently elegant and reads as intentionally minimal rather than boring. The glitter adds just enough dimension to catch light and draw attention without overwhelming.
Achieving Clean, Bright White Sparkle
- Apply a sheer nude gel base (the kind that’s barely tinted, showing mostly your natural nail underneath) in two coats and cure
- Apply a clear gel layer over the entire nail
- While still wet, apply fine white or pearl glitter across the entire nail or concentrate it toward the tips for a gradient effect
- Use a soft brush to even out coverage and remove excess
- Cure under UV light and apply a second thin clear gel layer
- Finish with a high-shine top coat for a glass-like, polished appearance
Worth knowing: White glitter reads brightest under cool lighting, so this design shines especially beautifully in modern offices with LED lighting or at evening events.
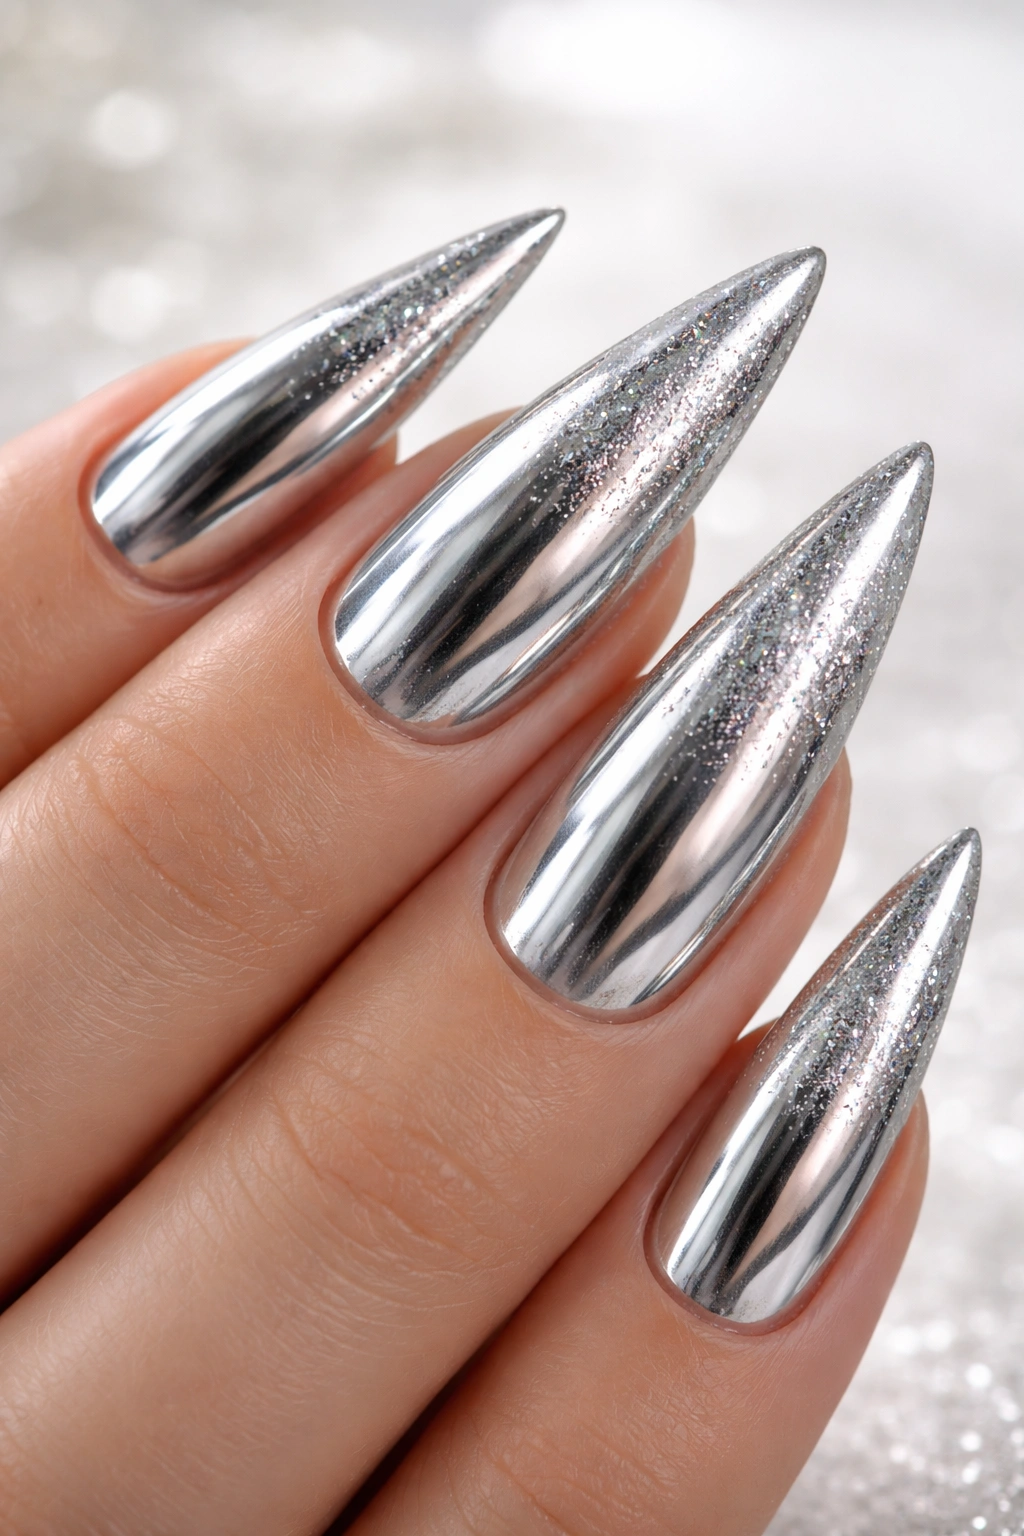
11. Silver Mirror and Loose Glitter Mix
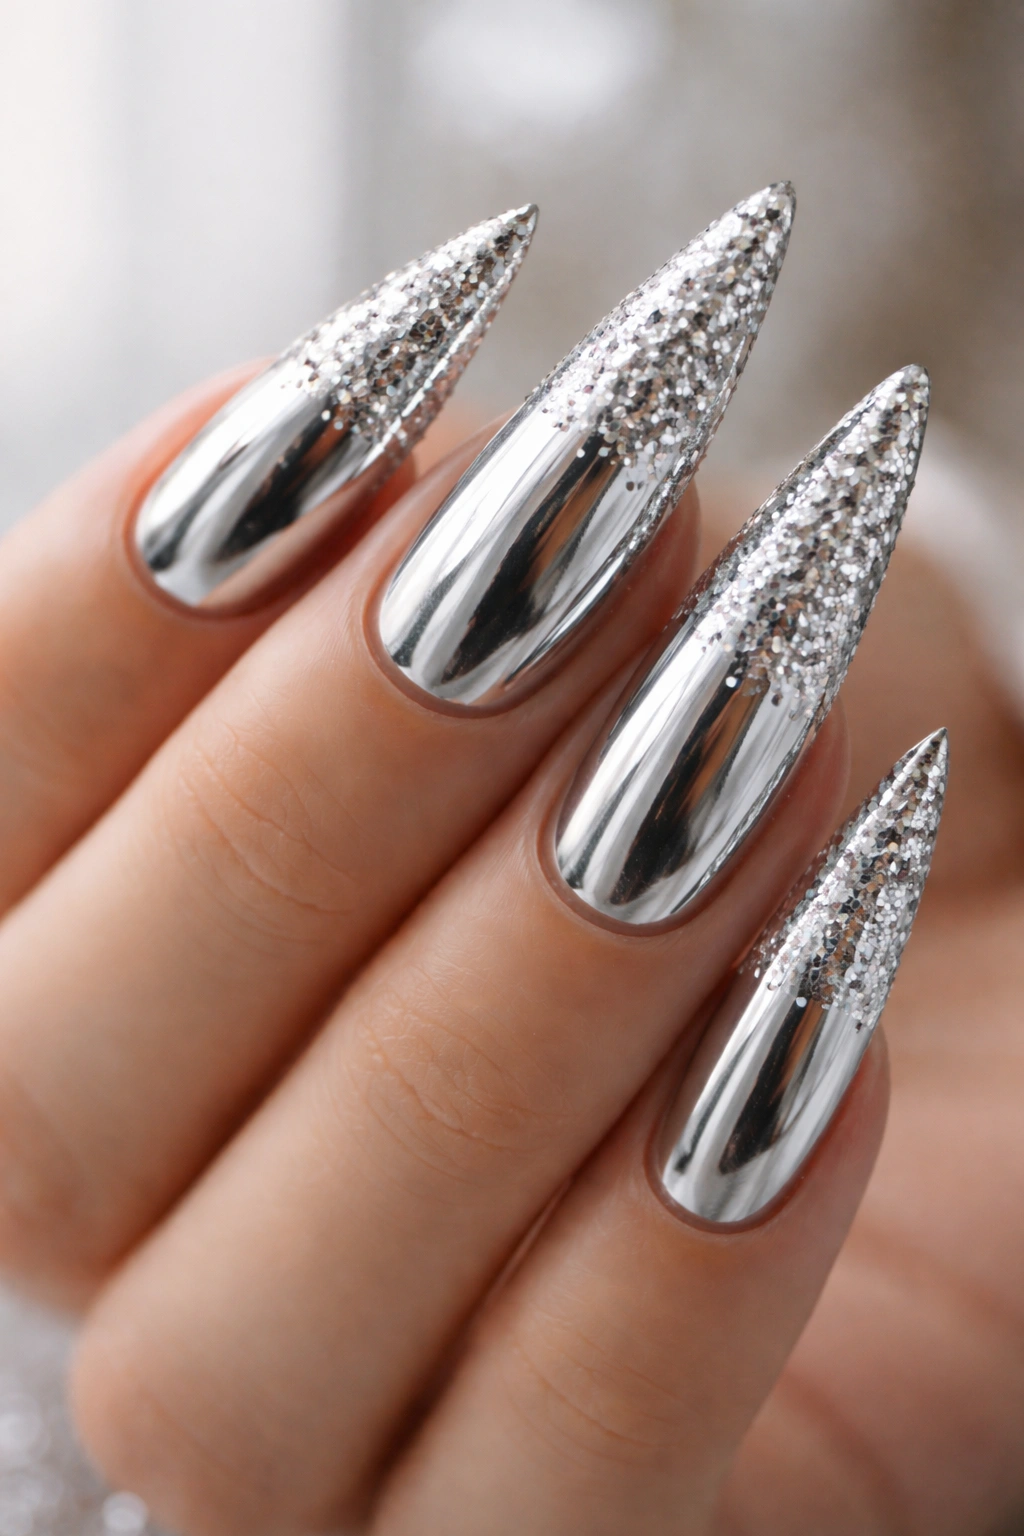
This hybrid design combines a mirrored chrome effect with loose metallic glitter scattered across the surface, creating a texture and dimension that pure chrome can’t achieve alone. The result is futuristic and eye-catching while still feeling intentional and wearable.
Why Texture and Shine Together Create Impact
Chrome gives you reflectivity; loose glitter gives you sparkle and movement. Together, they create a nail that looks different as you move your hands, catching light at multiple angles. This design is perfect for anyone who wants their nails to be a conversation piece.
Layering Chrome and Glitter
- Apply a smooth gel base coat and cure
- Apply a thin layer of top coat and, while wet, sprinkle fine to medium silver or holographic glitter across the nail
- Cure for just 15 seconds to tack the glitter down (don’t fully cure)
- Very gently buff the surface with a soft nail file to blend the glitter slightly and create an even texture
- Apply chrome powder in sections, using a concentrated brush and buffing with a soft cloth
- Build the chrome effect gradually — it’s easier to add more than to remove excess
- Seal with a glossy top coat to protect both the glitter and chrome finish
Pro tip: Work quickly when applying chrome powder, as it adheres best to a fresh surface — if it starts to dry, it becomes harder to blend.
12. Rose Gold Glitter Stiletto
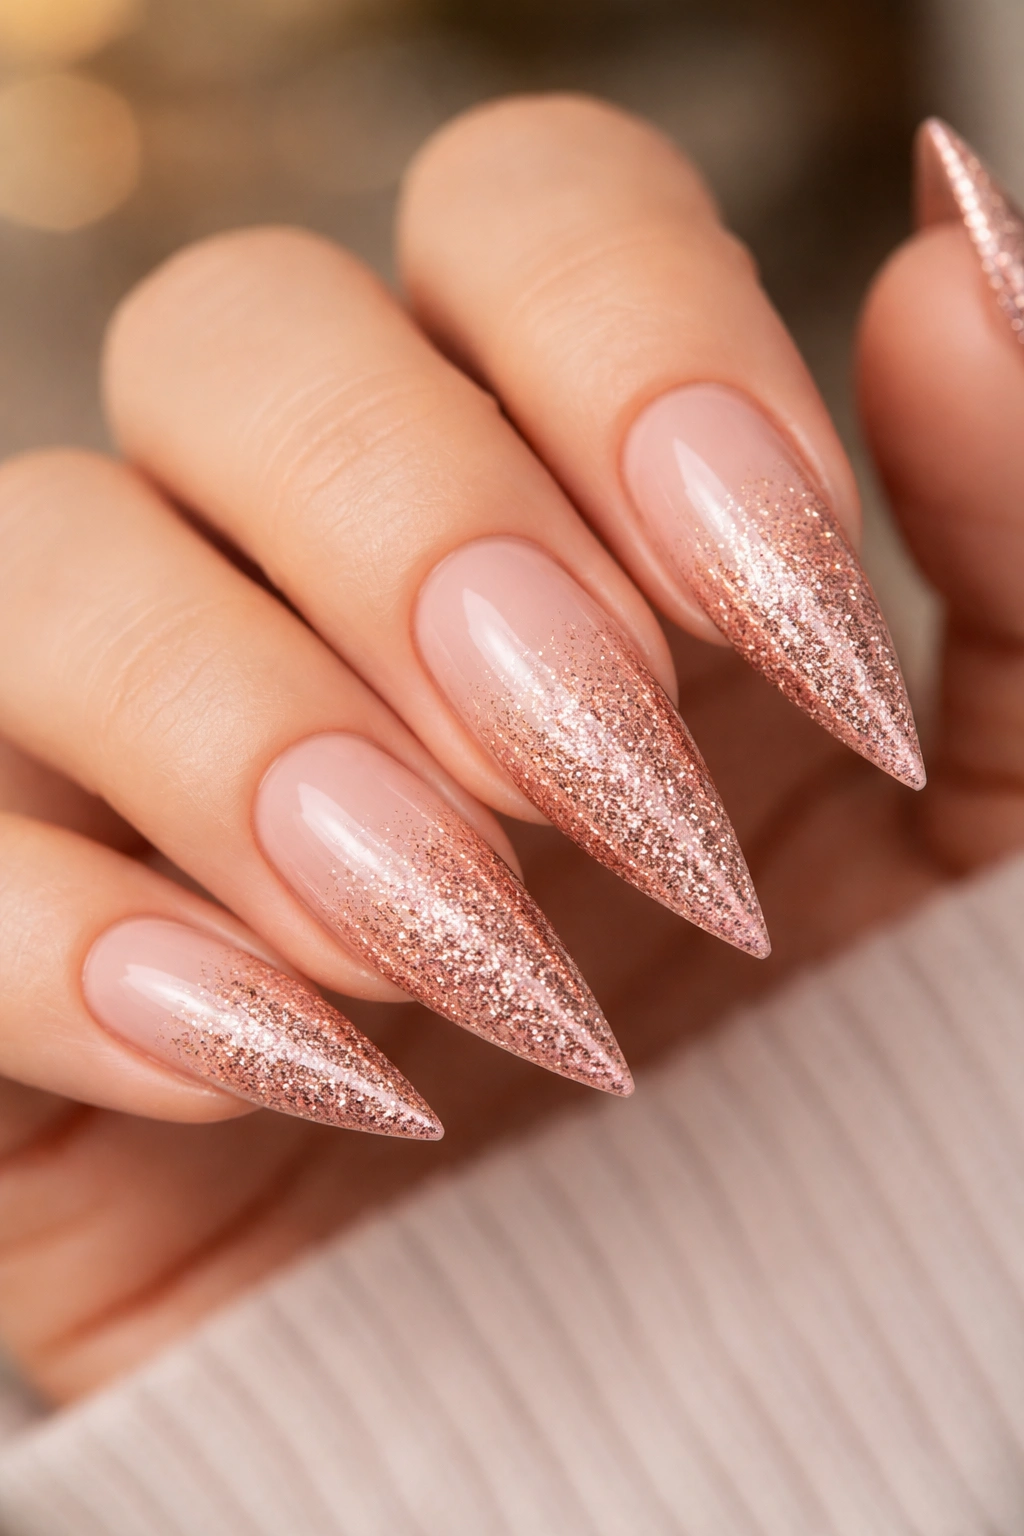
Rose gold is the warm, romantic middle ground between yellow gold and silver, making it flattering on almost every skin tone. A rose gold glitter application — whether full coverage or tips only — feels modern, feminine, and universally flattering without being overly trendy.
Why Rose Gold Feels Right for Everyone
Rose gold has warmth without being as traditional as yellow gold, and it has cool sophistication without the coldness of silver. When applied as glitter on stilettos, it catches light beautifully and creates a luxurious shimmer that feels appropriate for both casual and formal occasions.
Creating the Rose Gold Sparkle
- Choose your base: a nude, blush pink, or even a very pale champagne shade provides a beautiful canvas for rose gold glitter
- Apply your base in two coats and cure
- Apply a clear gel layer and, while wet, add fine to medium rose gold glitter across the nail or concentrated toward the tips
- You can use pure rose gold glitter, or create your own mix by combining rose-toned and gold particles
- Distribute the glitter evenly using a soft brush, working out any clumps or bare spots
- Cure and finish with a high-shine top coat for maximum sparkle and reflection
Worth knowing: Rose gold glitter looks especially beautiful when the nail bed underneath is completely clean and smooth — any bumps will disrupt the light reflection.
13. Purple Gradient with Glitter Fade
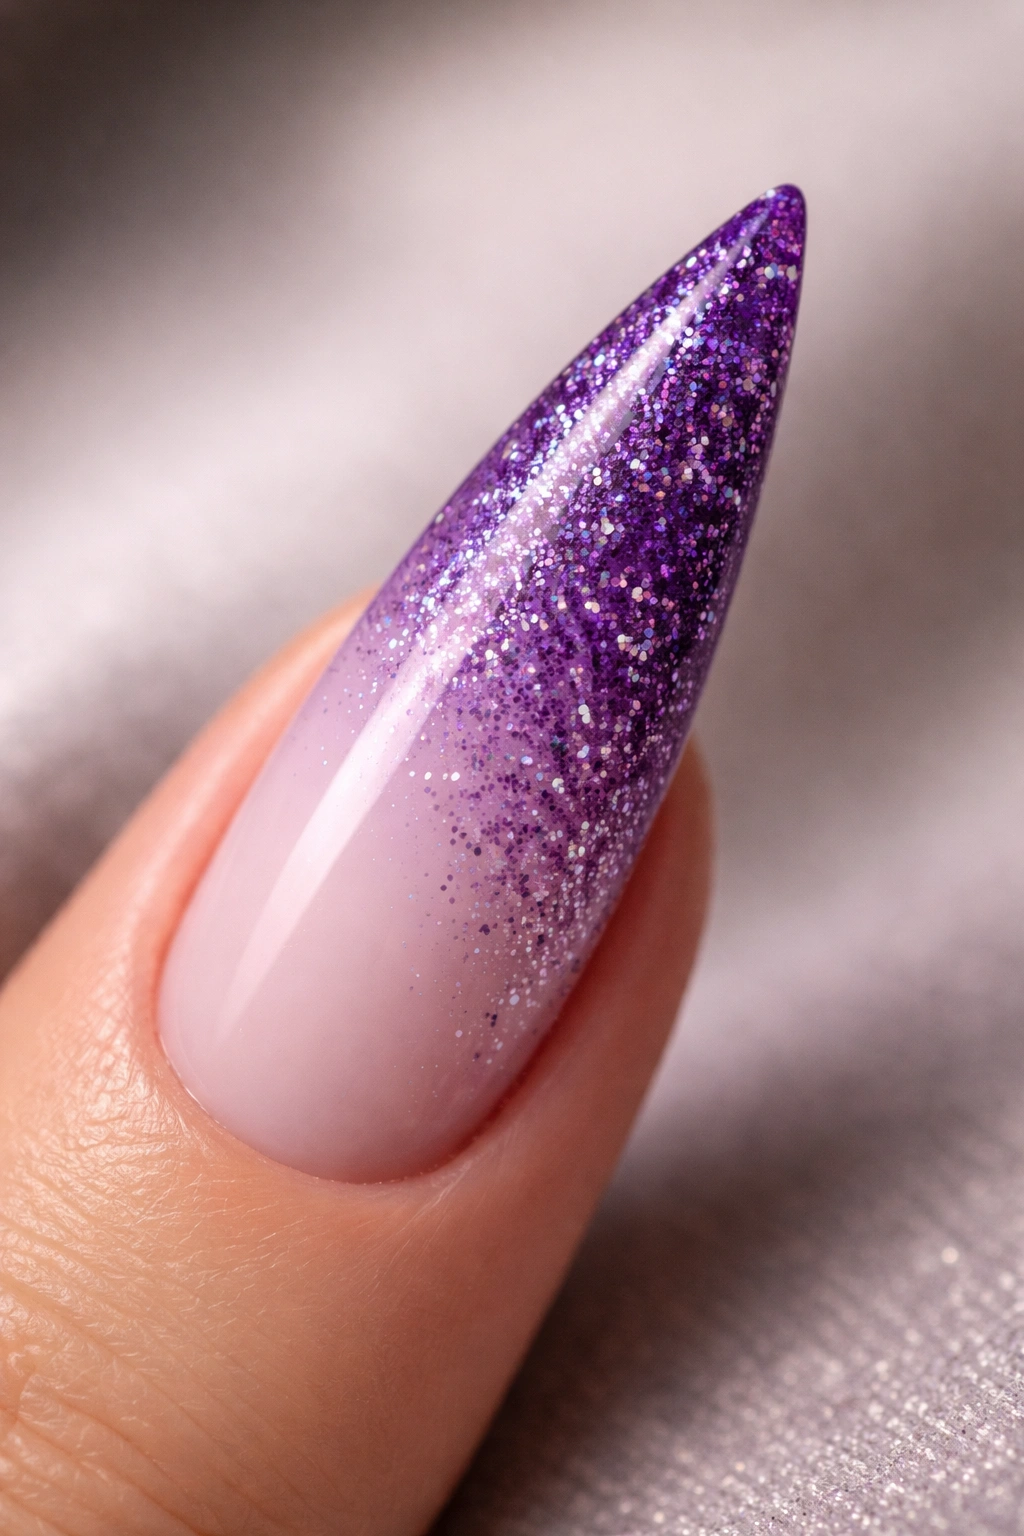
A gradient moving from pale lavender at the base to deep purple at the tips, with glitter density increasing toward the tip, creates a moody, elegant design that feels sophisticated and artistic. Purple is underrated in nail design, but it’s deeply flattering and unexpectedly versatile.
The Psychology of Purple Plus Sparkle
Purple automatically reads as creative, luxurious, and slightly mysterious — adding glitter to a purple gradient keeps it from feeling dark or heavy. The sparkle adds celebratory lightness that balances the depth of purple, creating a design that’s both moody and joyful simultaneously.
Building the Purple Gradient with Glitter
- Apply a pale lavender gel to the full nail
- Mix a deeper purple into a clear gel and apply just to the tips (top third)
- Use a damp sponge with a stippling motion to blend the two shades in the middle third, creating a gradient
- While the blended section is still wet, add fine purple or lavender glitter and stipple it into the wet product
- Add more glitter density as you move toward the tips
- Cure and apply a glossy top coat with a hint of shimmer for added dimension
- Optional: Add a touch of fine gold or rose gold glitter toward the very tip for warmth and contrast
Pro tip: Pair this design with deep jewel-toned makeup or clothing to make both the nails and overall look cohesive and elevated.
14. Glitter Encapsulated Between Gel Layers
This technique involves trapping glitter between two layers of clear gel, creating a completely smooth, durable surface where the glitter sits suspended inside the nail rather than on top. It’s a technique that extends the longevity of the glitter significantly while creating a high-fashion, professional appearance.
Why Encapsulation Changes Everything
Encapsulated glitter can’t shed, scratch off, or catch on fabric because it’s completely sealed inside the gel. This makes it ideal for long-lasting wear and for anyone who wants their glitter to survive a full week without degradation. The smooth surface also reflects light differently, creating a gem-like rather than sparkly appearance.
The Encapsulation Process
- Apply a thin base layer of clear gel and cure fully
- Apply a thin layer of clear gel (not fully cured — leave it tacky)
- Sprinkle or apply your chosen glitter over the entire tacky layer while it’s still wet
- Carefully apply a second thin layer of clear gel over the glitter, sealing it inside
- Be gentle to avoid disrupting the glitter particles — use smooth, even strokes with your brush
- Cure under UV light for 2-3 minutes until completely hardened
- Apply a glossy top coat and cure
- File and shape as usual — the glitter is now completely protected inside
Worth knowing: Encapsulated glitter looks best when you use medium to larger glitter particles that can be seen clearly through the gel layers.
15. Geometric Glitter Pattern

Rather than applying glitter randomly or across the entire nail, this design uses glitter to create intentional geometric shapes — stripes, triangles, half-moons, or abstract angles. The geometric structure keeps the glitter looking sophisticated and artistic rather than chaotic.
Why Structure Elevates Sparkle
A geometric pattern creates visual interest and intentionality that scattered glitter can’t achieve. It signals that your nail design is deliberate and artistic, not random or careless. Geometric patterns also create visual movement and can make your nails look longer or your hands look more elegant depending on the pattern you choose.
Creating Clean Geometric Glitter Designs
- Choose your base color (nude, solid color, or a color-blocked background)
- Sketch your geometric pattern lightly on the nail with a toothpick or fine brush so you can see where glitter should go
- Apply clear gel to only the area where you want glitter, using a thin brush for precise edges
- Apply glitter to the wet gel, staying within your geometric boundaries
- Use a clean, dry brush to remove excess glitter from outside your pattern lines
- Cure and seal with a glossy top coat
- Optional: Add nail striping tape as a guide for perfectly straight lines or defined angles
Pro tip: Vertical or diagonal stripes make fingers look longer; horizontal stripes or half-moon shapes emphasize the nail shape; triangles pointing toward the tip enhance the stiletto shape.
16. Aqua Shimmer with Glitter Accents
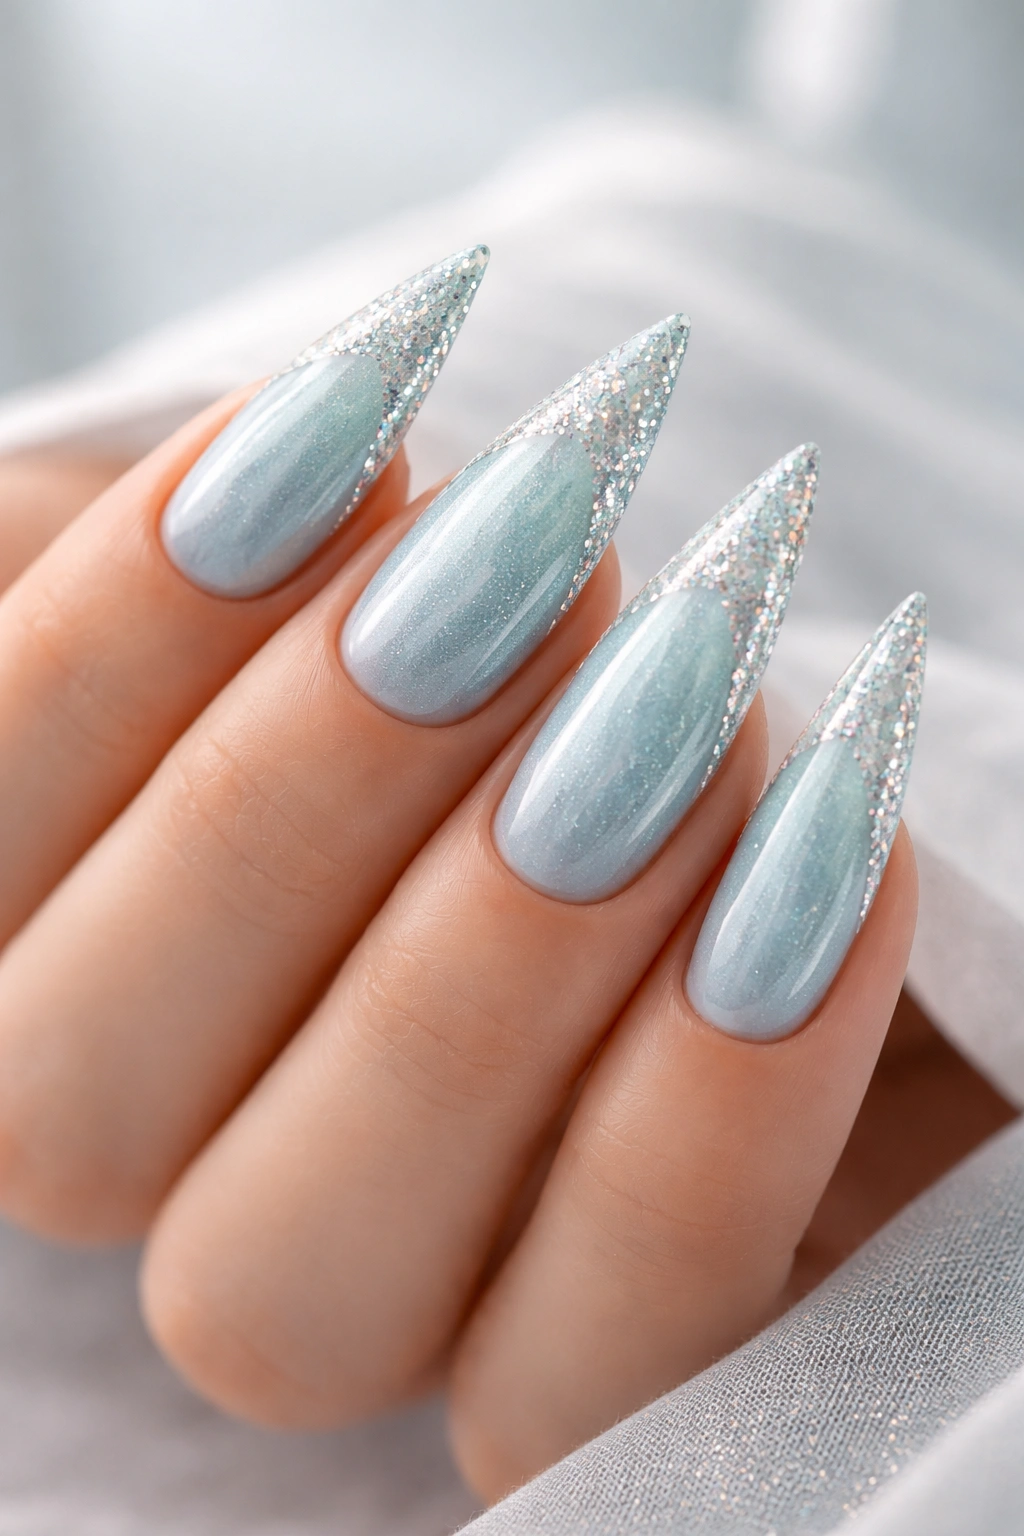
A soft aqua or turquoise base with strategic glitter placement creates a cool-toned, fresh design that feels summery and uplifting without being juvenile. Aqua is unexpectedly sophisticated when paired with the right glitter and base finish.
Why Aqua Reads as Elegant
Aqua feels modern and unexpected in nail design, yet it pairs beautifully with both warm and cool-toned glitters. The color is inherently calming and sophisticated, and when combined with shimmer and sparkle, it creates a design that feels high-fashion and intentional.
Building the Aqua Shimmer Design
- Apply two coats of a soft, true aqua gel and cure
- Create a thin glitter top coat using fine to medium silver, white, or holographic glitter mixed into clear gel
- Apply this glitter top coat over the entire nail, or concentrate it on the tips and along the edges for a framing effect
- Use a brush to distribute the glitter evenly
- Cure and finish with a high-shine top coat that preserves the aqua tone without yellowing it
- Optional: Add a thin stripe of deeper teal or turquoise gel along one edge before applying glitter for dimension
Worth knowing: Aqua looks best with cool-toned glitters (silver, white, holographic) rather than warm golds, which can clash with the cool base color.
17. Burgundy with Copper Glitter
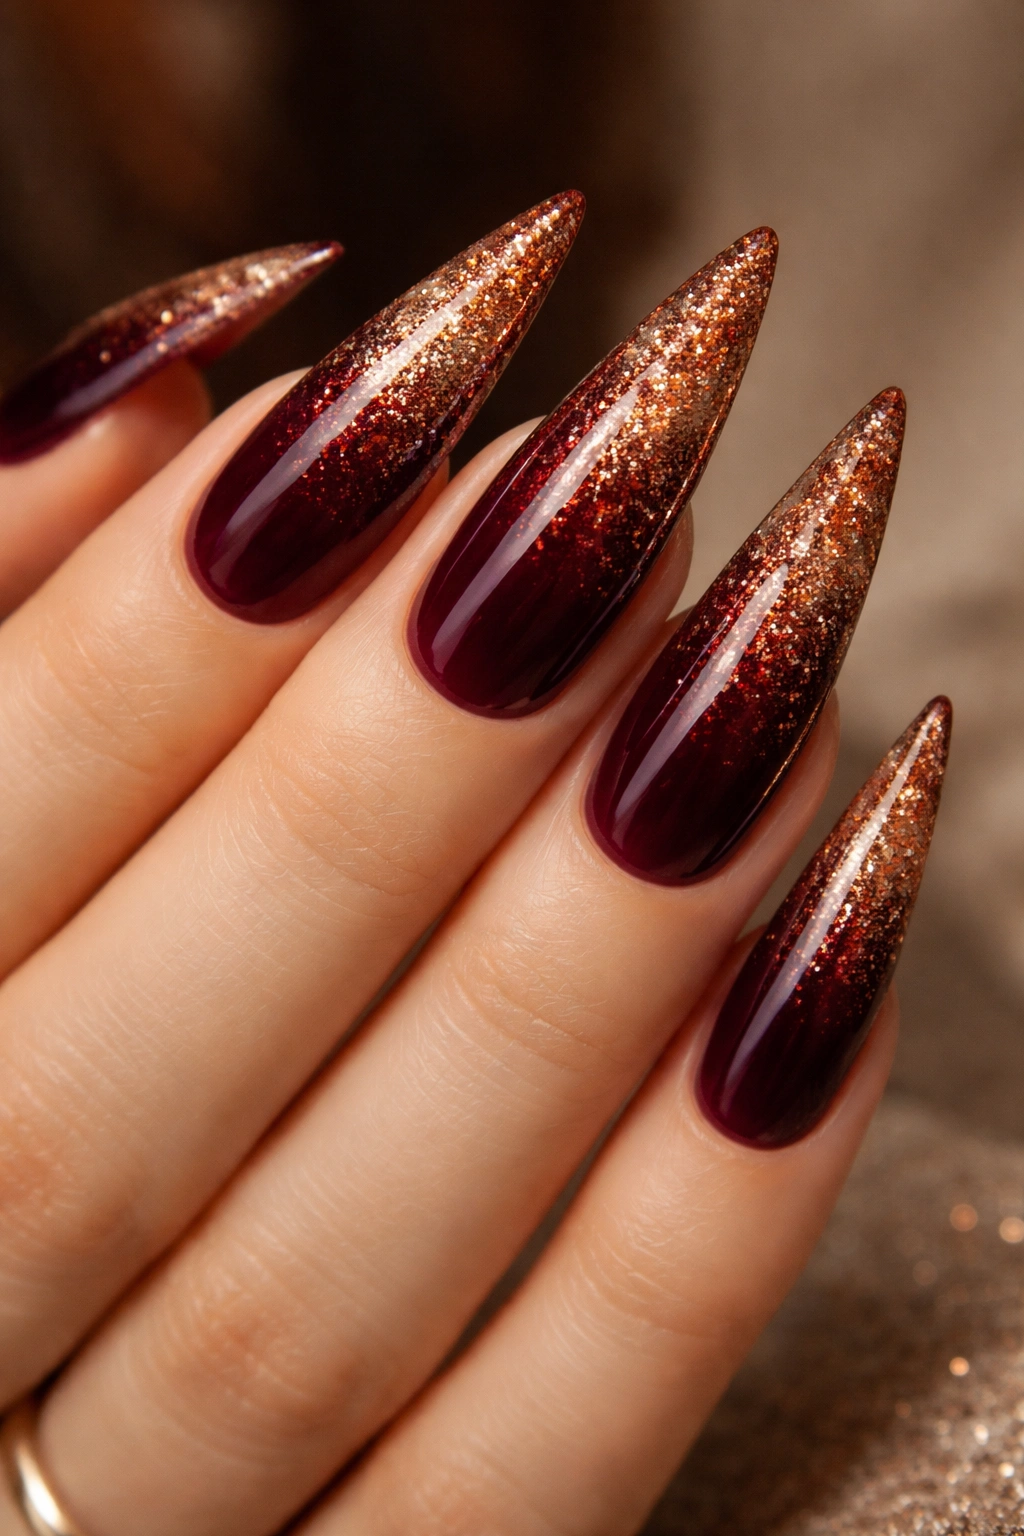
Deep burgundy (a rich, wine-toned red) paired with warm copper or bronze glitter creates a luxe, autumnal aesthetic that feels both modern and timeless. This combination is especially flattering on deeper skin tones and works beautifully year-round in professional or formal settings.
The Warmth of Burgundy and Copper Together
Burgundy is one of the most sophisticated colors available for nails, and copper glitter enhances its richness without competing for attention. The warm tones complement each other, creating a cohesive, intentional look that reads as expensive and carefully curated.
Applying Burgundy with Copper Sparkle
- Start with two coats of deep burgundy gel in a true wine or oxblood shade and cure
- Apply a thin layer of clear gel over the tips (top third of the nail) or across the entire nail, depending on your preference
- While wet, apply fine to medium copper or bronze glitter over the clear gel layer
- Concentrate more glitter toward the tips for a gradient effect, or distribute evenly for full coverage
- Use a soft brush to even out the glitter and eliminate clumps
- Cure under UV light and seal with a glossy top coat for maximum reflection
- Optional: Create a ombre by applying darker burgundy near the cuticle and lighter burgundy on the tips before adding copper glitter
Pro tip: Pair burgundy and copper nails with warm-toned clothing, jewelry, and makeup for a completely cohesive, polished look.
18. Glitter Under Clear Topcoat
This approach applies glitter to your nail and then seals it completely under a thick, smooth clear topcoat, creating a polished, glass-like finish that’s both durable and luxurious-looking. The glitter is protected and visible, but the smooth surface feels refined rather than textured.
Why the Sealed Approach Is Superior
A clear topcoat over glitter creates several benefits: the glitter can’t shed or scratch off, the surface is smooth and safe to touch, and the light reflection through the clear gel creates a jewel-like appearance. This technique makes glitter appropriate for professional environments where textured nails might be discouraged.
The Perfect Seal Technique
- Apply your base color (nude, solid color, or gradient) and cure fully
- Apply a thin layer of clear gel and, while wet, add your chosen glitter
- Use a soft brush to distribute glitter evenly and remove excess
- Cure for 15-20 seconds to partially set the glitter (still slightly tacky)
- Apply a generous layer of clear topcoat over the entire nail, smoothing carefully so the surface becomes completely smooth and level
- Cure fully under UV light — aim for 2-3 minutes to ensure complete hardening
- The result should be a completely smooth surface with glitter visible underneath, like a piece of jewelry
Worth knowing: This technique works best with fine to medium glitter; very chunky glitter won’t smooth down under topcoat and will create an uneven surface.
19. Ombré Glitter Fade Across All Nails
Rather than a gradient on a single nail, this design creates a glitter gradient that spans across multiple nails, transitioning from minimal or no glitter on the pinky finger to full glitter coverage on the pointer finger. This creates a visual flow and makes the hand look more elongated.
Why Flow Across Multiple Nails Creates Impact
A gradient that spans your entire hand creates movement and visual interest that a single-nail gradient can’t achieve. It’s a technique used in high-end nail art because it’s sophisticated and requires intentional planning. The effect draws the eye along your hand in a flattering direction.
Creating the Multi-Nail Gradient
- Choose your base color and apply it to all nails — this should be the same shade on every nail
- Plan your glitter progression: pinky (no glitter or minimal), ring finger (light glitter), middle finger (medium glitter), pointer finger (heavy glitter), thumb (your choice — full glitter or back to light for balance)
- Apply glitter in increasing amounts to each nail, adjusting the density as you move across your hand
- Use the same glitter color and type across all nails so the progression looks intentional
- Cure each nail section and finish with a consistent topcoat across all nails to unify the look
- Optional: Add subtle color shifts to each nail (slightly darker toward the pointer finger) to enhance the gradient effect
Pro tip: Step back and look at your hand as a whole while designing — this multi-nail gradient should feel like a choreographed visual flow, not random variation.
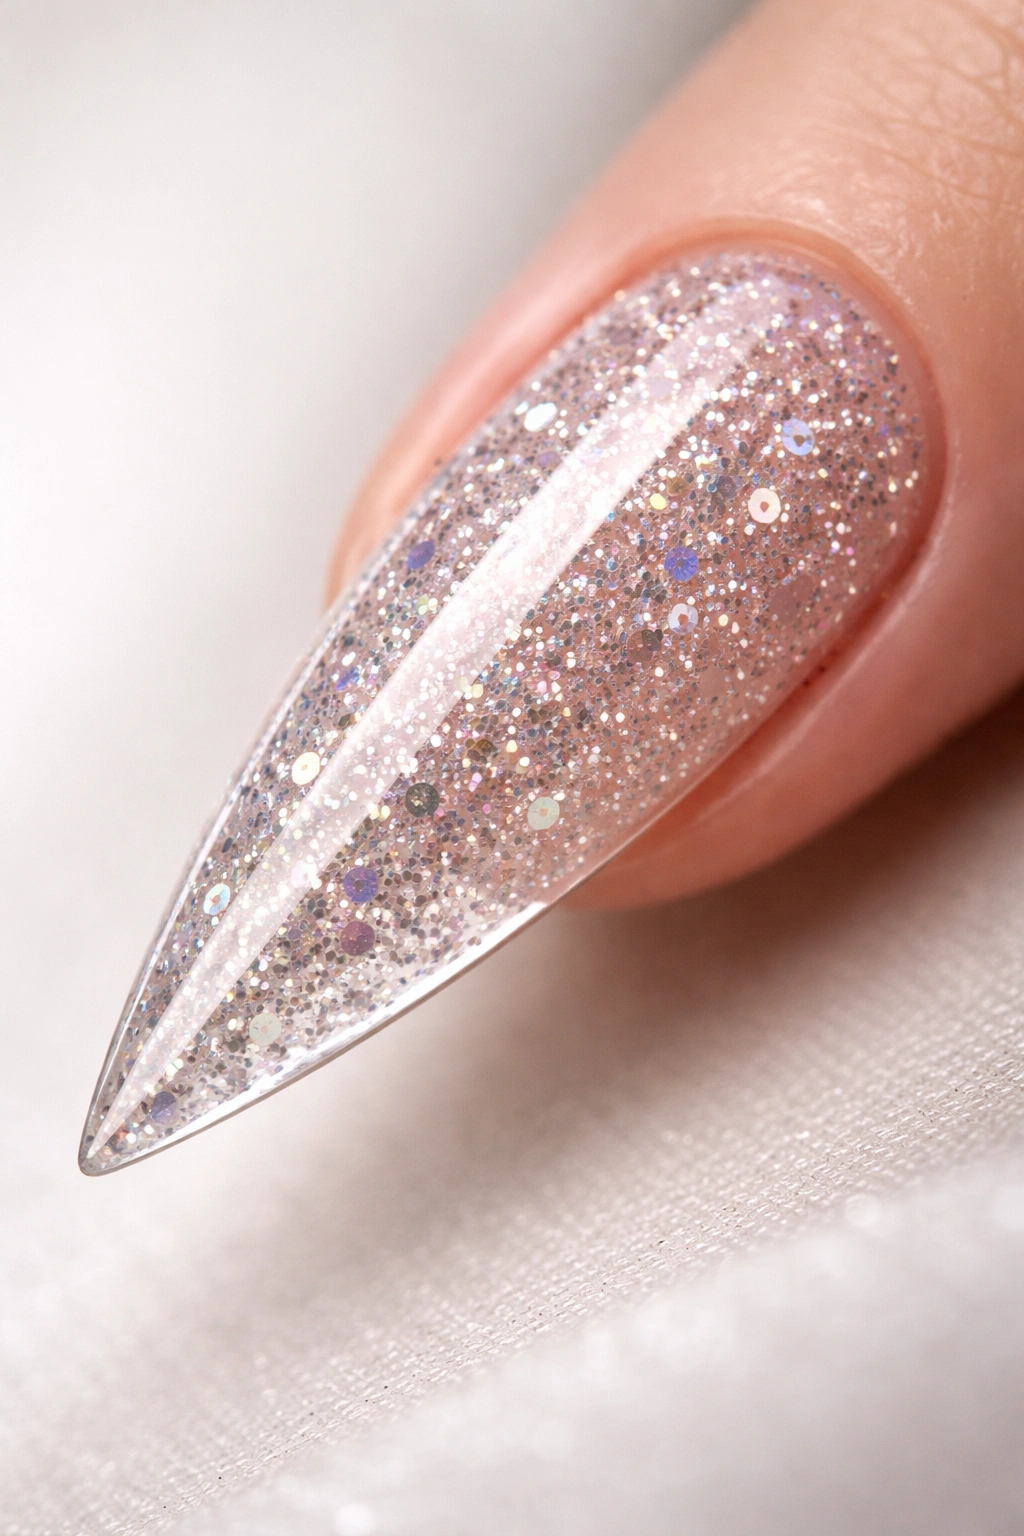
20. Diamond Dust Glitter Effect
This design uses ultra-fine glitter that has a subtle, almost crystalline appearance, creating the illusion that your nails are dusted with diamonds or crushed glass. The effect is sophisticated, delicate, and catches light in a unique way that feels more refined than traditional chunky glitter.
The Subtle Luxury of Diamond Dust
Diamond dust glitter is about understated elegance — it gives you sparkle and shine without announcing itself loudly. This is perfect for anyone who wants glitter sophistication without the “party nail” aesthetic. The effect is especially beautiful under natural light and in professional settings.
Applying Diamond Dust for Crystalline Perfection
- Apply a nude, blush, or champagne base in two coats and cure
- Mix ultra-fine diamond dust glitter (the finest size available) into a clear gel top coat
- Apply this mixture across the entire nail in a smooth, even layer using a brush designed for gel application
- Be meticulous about smoothness — any bumps or uneven texture will disrupt the delicate effect
- Cure under UV light and apply a second very thin layer of clear gel over the diamond dust layer
- Cure again and finish with a high-shine, ultra-smooth topcoat
- The result should be a nail that sparkles subtly with every movement, like it’s been dusted with crushed diamonds
- Cure one final time and gently file any rough edges to perfect the finish
Worth knowing: Diamond dust requires careful application and a steady hand — take your time and don’t rush the process, as this delicate effect demands precision to look its best.
Final Thoughts
Glitter stiletto nails are endlessly customizable, and the designs above are just starting points for your own creativity. The truth is, glitter works beautifully on stilettos because the sharp, dramatic shape provides structure that keeps sparkle from feeling chaotic — the geometry of the nail does half the work for you. Whether you prefer subtle, barely-there sparkle or full-coverage, show-stopping glitter, there’s a technique and a style here that matches your personality and aesthetic.
The longevity of your glitter nails depends partly on the application method you choose. Encapsulated glitter lasts longest because it’s sealed and protected; loose glitter applied over the top can shed, but it’s easier to apply and adjust. Full coverage glitter creates impact, but minimal glitter positioned strategically can feel just as sophisticated in the right context. Consider your lifestyle when choosing a design — if you use your hands constantly for work or sports, encapsulation or sealing under topcoat is your friend.
The most important thing about any glitter stiletto design is that it makes you feel confident and beautiful. Take these ideas, adapt them to your preferences, and don’t be afraid to ask your nail artist for custom variations. The best nail design is the one that reflects your personal style and makes you happy every time you look at your hands.
