

Red stiletto nails have an almost magnetic pull—they command attention, project confidence, and work for practically any occasion, from boardroom meetings to night-out glamour. But here’s what most people get wrong: not every red stiletto design works equally well on medium nails. The length matters more than you’d think. Medium nails are the sweet spot where you get that sleek, pointed silhouette without the drama of ultra-long acrylics, and they can actually showcase intricate nail art designs better than their longer cousins. The right red shade combined with thoughtful embellishments, finishes, and patterns transforms medium stilettos from simple to sophisticated in seconds.
Whether you’re drawn to classic elegance, bold statements, or artistic flair, there are red stiletto nail designs that’ll make your manicure feel custom-made for your hand shape and style. The trick is understanding which shades, textures, and details elevate the look versus which ones feel flat or try too hard. That’s exactly what this rundown covers—fifteen stunning red stiletto options, each with its own personality, technique notes, and real reasons why it works beautifully on medium-length nails.
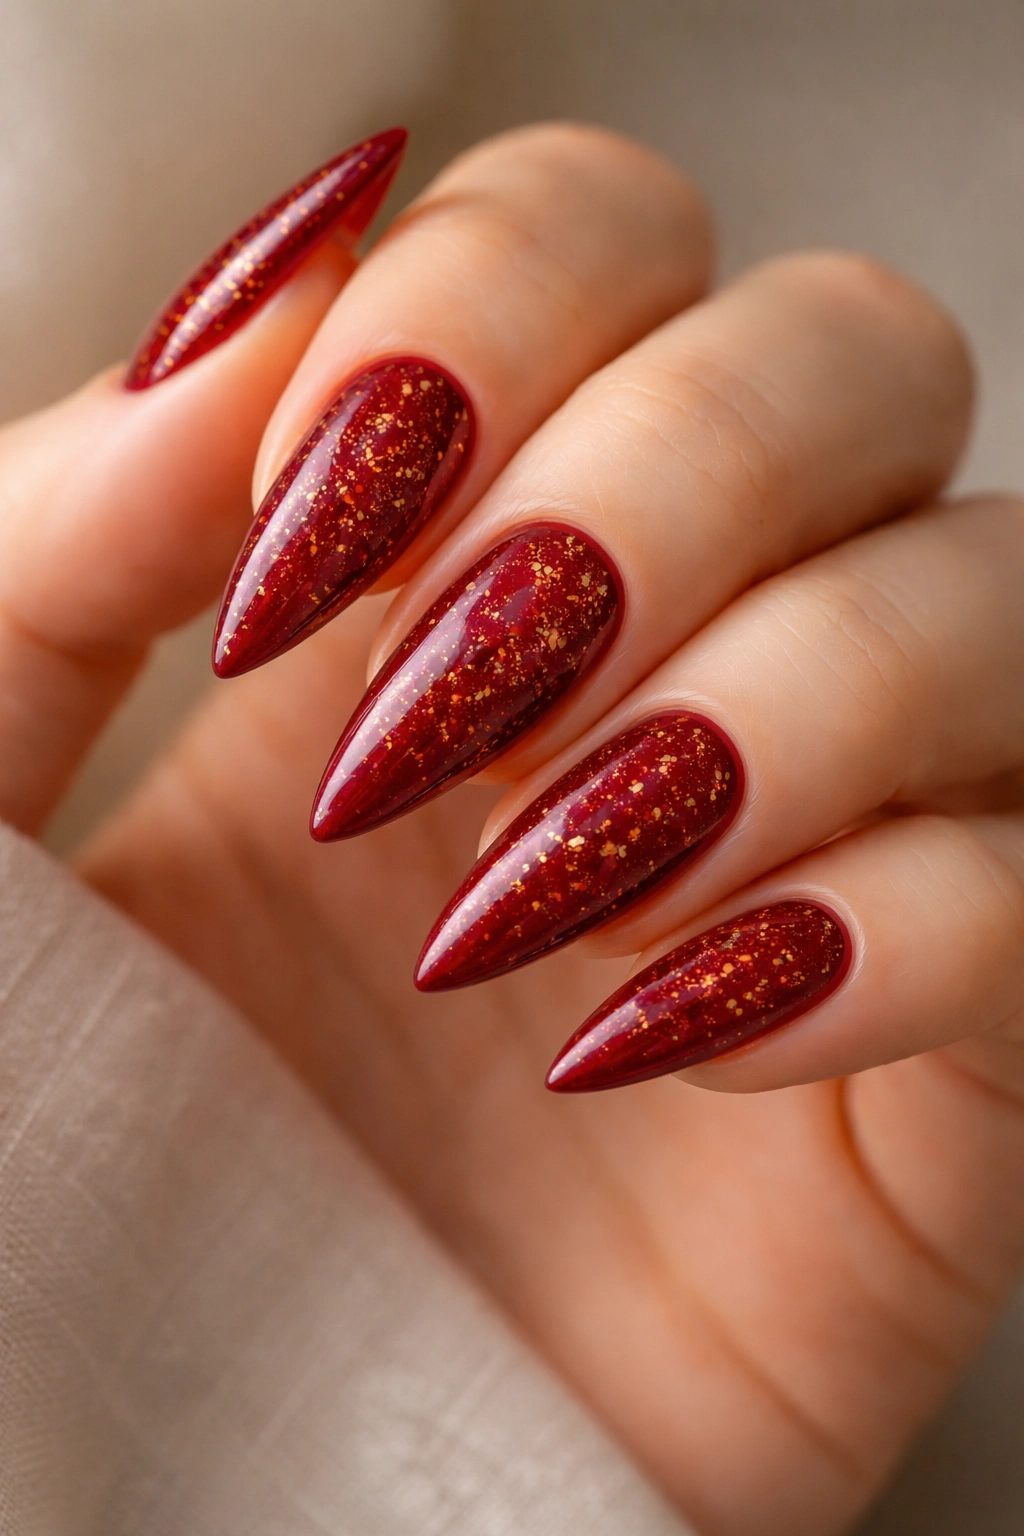
1. Classic Deep Red with Gold Flecks
A deep, sophisticated red—think burgundy leaning closer to true red—becomes instantly luxe when you layer in fine gold flecks scattered across the surface. This design works because it’s formal enough for professional settings but interesting enough to feel intentional and curated. The gold catches light and adds depth to what could otherwise read as a simple one-color manicure.
Why This Works on Medium Nails
The medium length gives you just enough nail surface to showcase the gold detail without overwhelming the design. On longer nails, scattered flecks can feel lost; on shorter nails, the pattern crowds. Medium nails hit the balance perfectly, letting each fleck read clearly while the pointed stiletto shape keeps everything sharp and refined.
How to Achieve This Look
- Start with a deep red base coat—aim for shades like Pantone’s Oxblood or a burgundy-forward cardinal red
- Use a thin brush or toothpick to hand-apply gold flecks once the base is fully dry, or use a gold fleck gel and cure
- Seal with a high-shine top coat that makes those gold specks genuinely sparkle
- For extra dimension, apply matte top coat over the red base, then add glossy top coat only over the gold areas
Pro tip: This design stays fresh longer than solid colors because the flecks disguise minor chips beautifully.
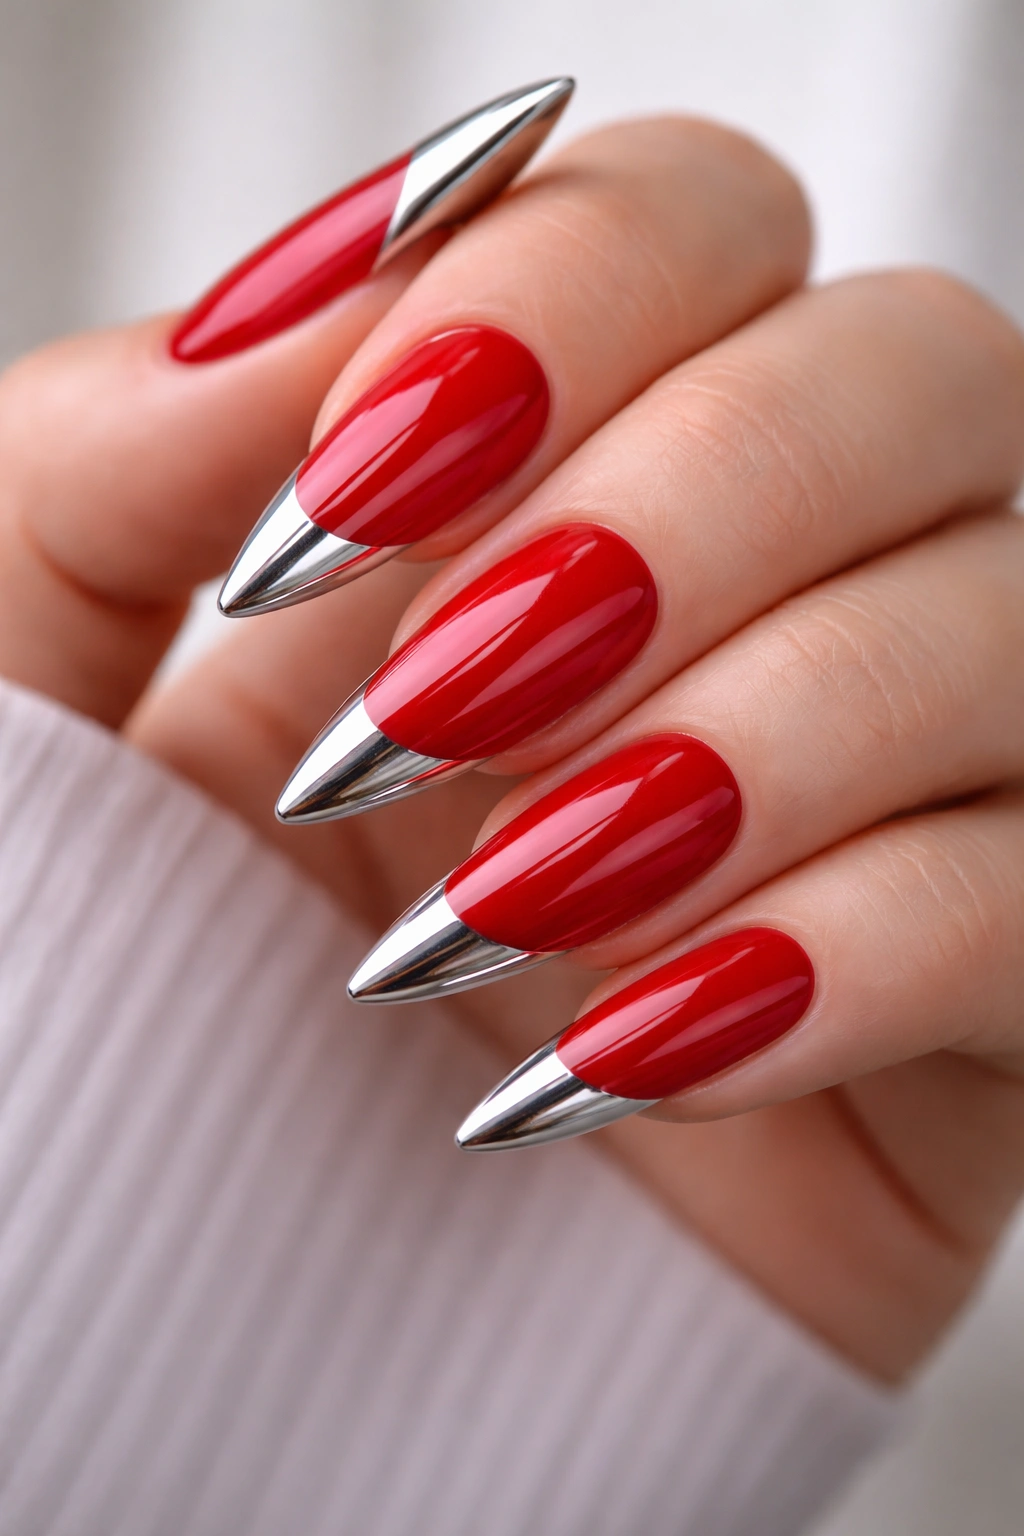
2. Burgundy Stilettos with Metallic Accents
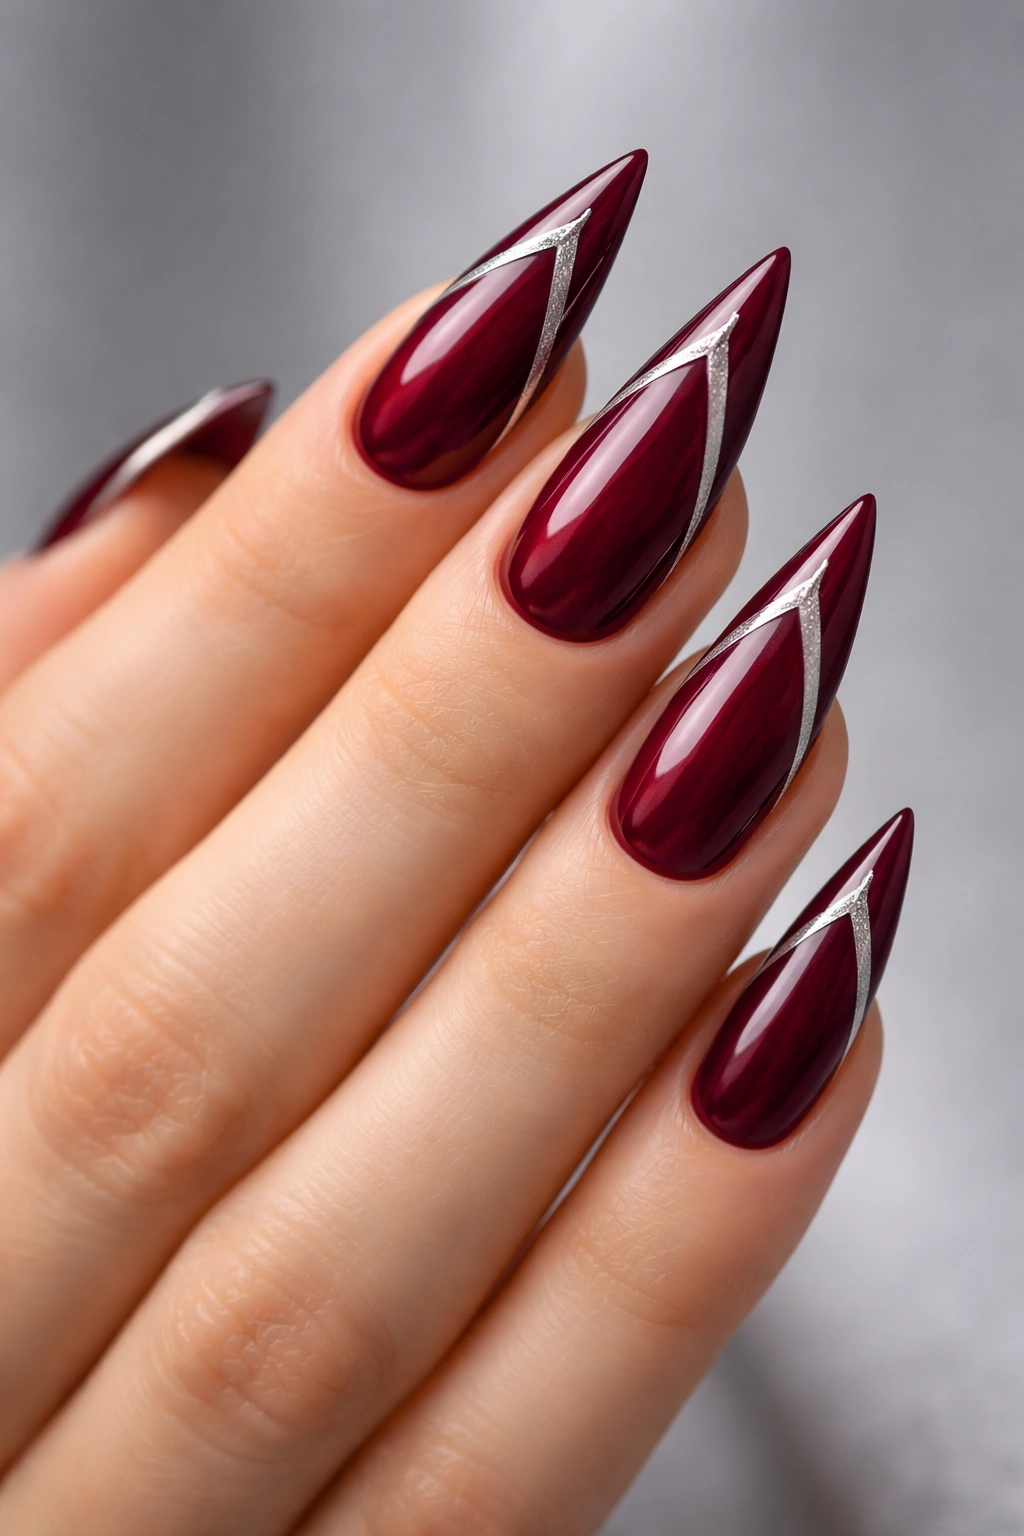
Burgundy is red’s more introverted cousin—it’s rich, wine-colored, and carries serious sophistication. When you frame it with metallic accents (typically silver chrome or rose gold lines along the sides or around the tip), the whole design shifts from understated to gallery-worthy. This is the red stiletto nail that makes people assume you have an artist on speed dial.
The Psychology of Burgundy on Medium Nails
Burgundy reads as mature and intentional. On medium nails, it avoids the “trying too hard” vibe that sometimes comes with very long burgundy stilettos, while still delivering that refined, put-together energy. The metallic frame adds structural interest that makes the design feel architectural rather than just pretty.
Building This Design Step by Step
- Apply a rich burgundy base—the kind that photographs almost black in low light but reveals deep red in daylight
- Once completely dry, use a thin metallic gel or nail pen to create clean lines: a thin stripe down each side of the nail and across the tip
- Make sure lines are symmetrical and precise—measure if you need to
- Seal with a glossy top coat that makes the chrome pop against the matte burgundy
Worth knowing: Metallic accents show every smudge, so invest in high-quality metallic gels or pens that bond cleanly to the nail.
3. Neon Red Statement Nails
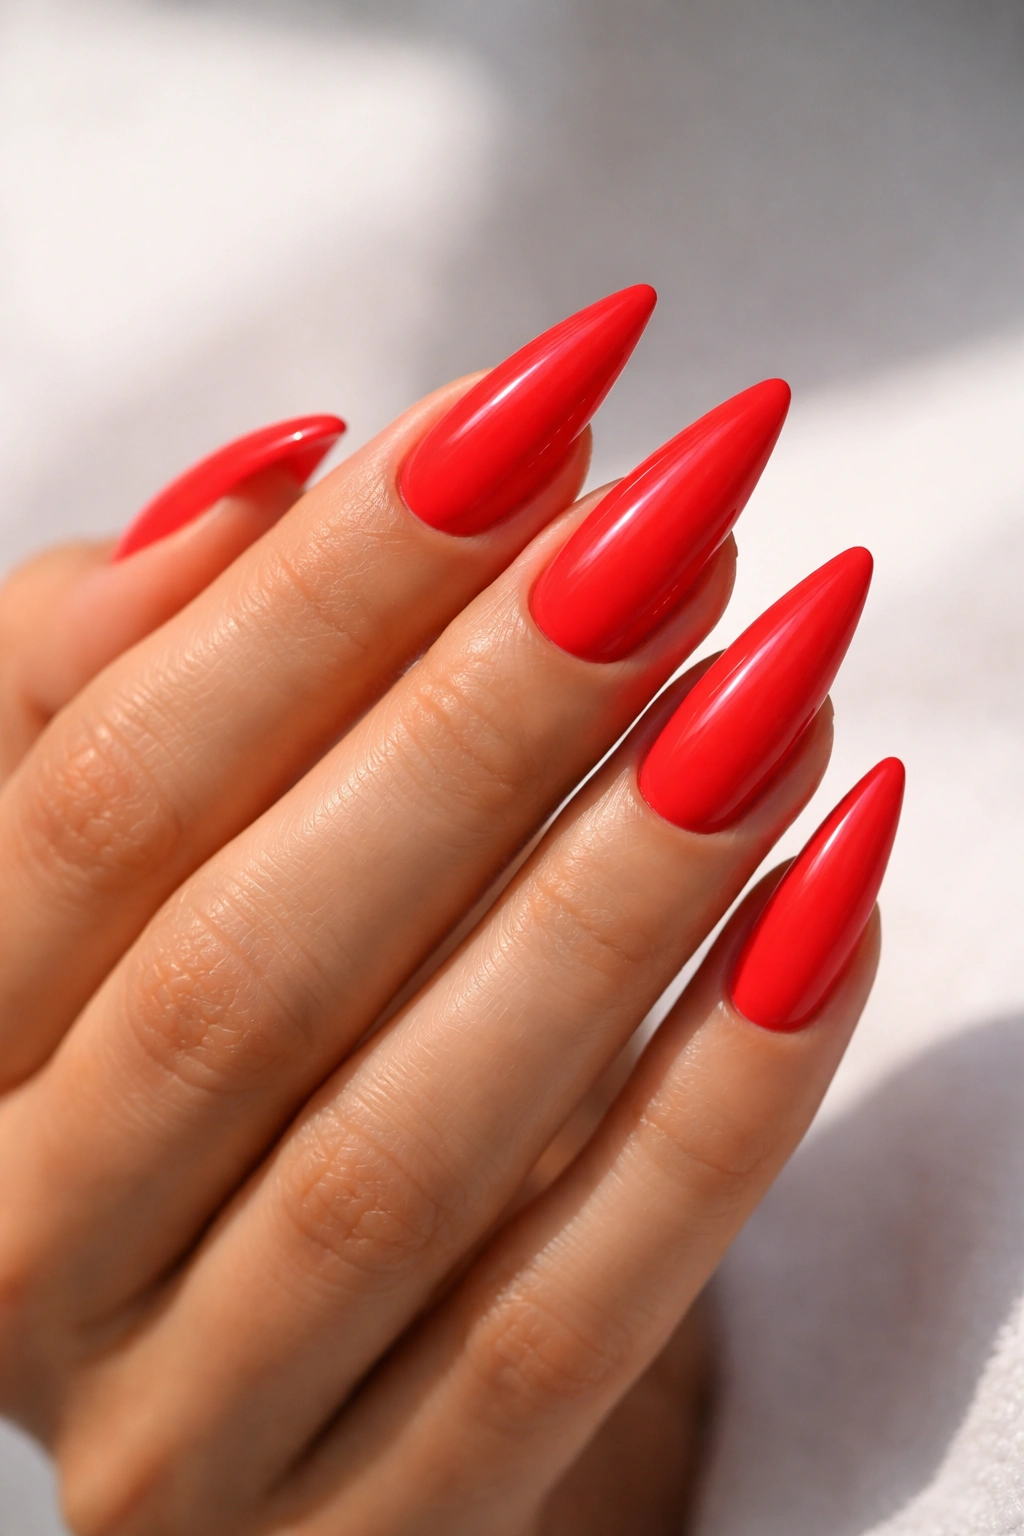
Not everyone’s first instinct, neon red on stilettos actually reads as bolder and more fashion-forward than classic reds. It’s unapologetic, modern, and refuses to blend in. The stunner part is that neon red works beautifully on medium nails because the length gives enough surface area to appreciate the shade without looking costume-like.
When Neon Red Works Best
This design shines at casual gatherings, creative professional environments, or anywhere you want to signal that you don’t follow the rulebook. The medium length prevents it from feeling overly dramatic—it’s confident without being confrontational. The pointed stiletto shape actually tempers some of the neon intensity, keeping it elegant rather than chaotic.
Nailing the Neon Application
- Use a neon red gel that’s specifically formulated to be opaque in one or two coats—cheap neon gels often need three layers and still look muddy
- Apply under LED light for the truest color payoff
- Pair with either a high-shine or matte top coat depending on mood (matte makes neon feel more intentional; glossy feels more playful)
- Consider adding a clear or nude base to ring the tip if you want to dial back intensity slightly
Insider note: Neon red photographs worse than almost any other shade—in person it looks vibrant and intentional; in photos it can look flat or fluorescent. If you’re doing this for photos, test it first.
4. Crimson with Black Geometric Patterns
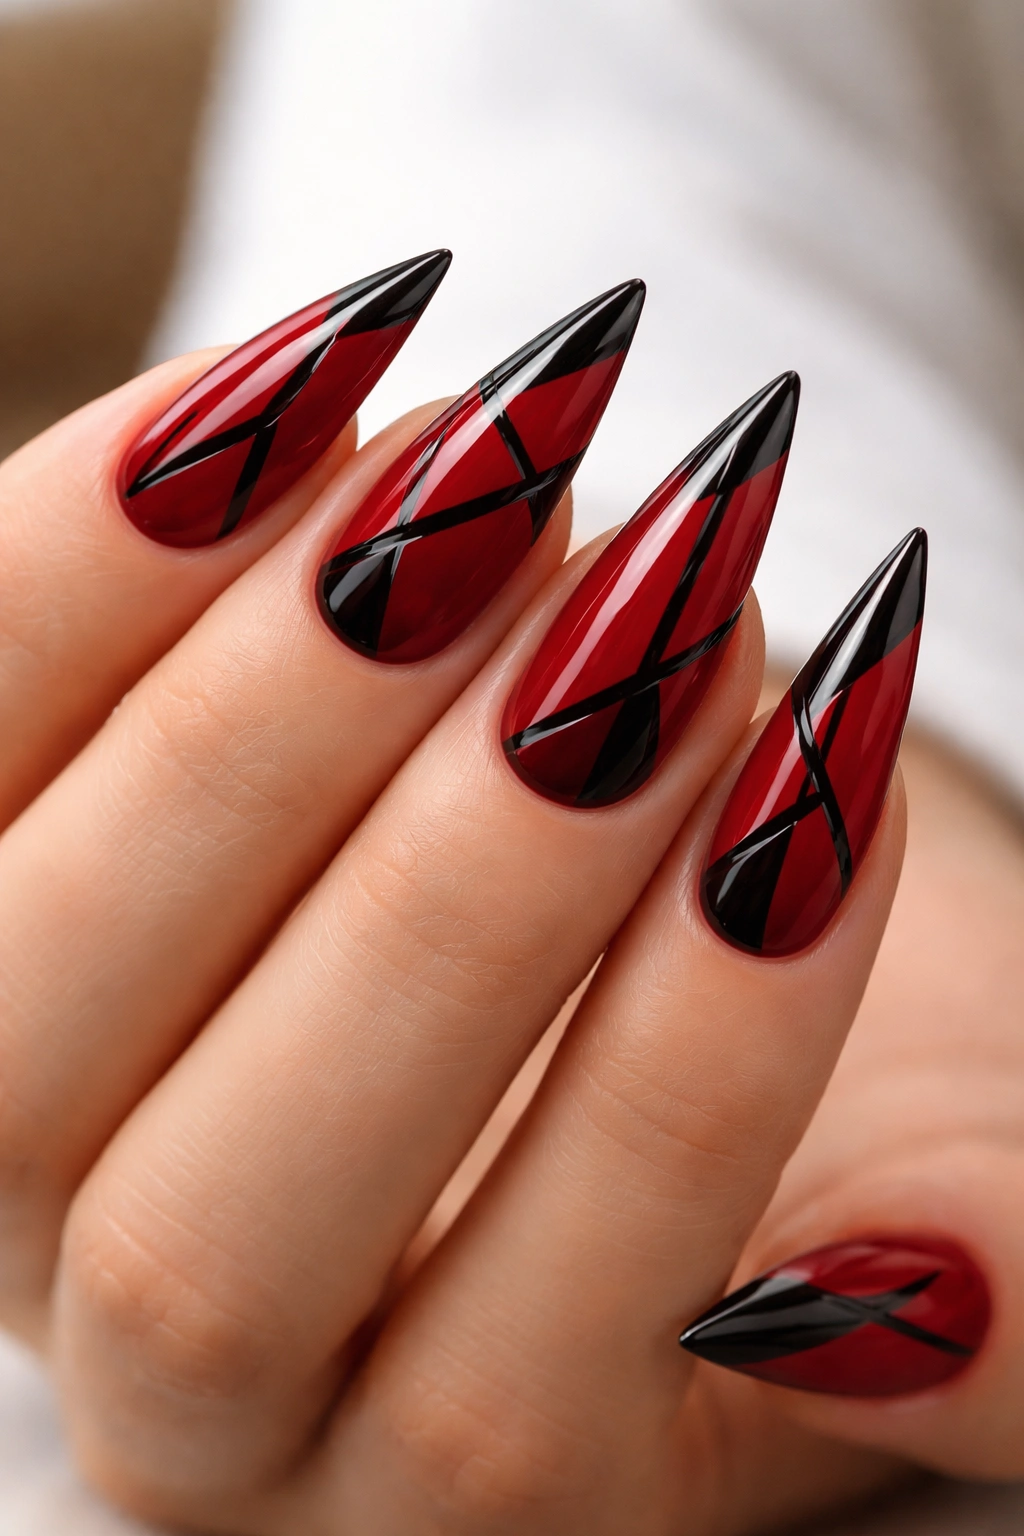
Crimson—a pure, warm red without brown undertones—paired with clean black geometric patterns creates a design that feels both modern and timeless. Think triangles, negative space blocks, or sharp angular lines that divide the nail into zones of solid color and pattern. This is graphic design translated to your fingertips.
Why Geometry Elevates the Design
Geometric patterns take red from traditional to contemporary. The black provides contrast that makes both the red and the design itself pop. On medium nails, geometric patterns have room to breathe and read clearly; they don’t feel cramped or over-detailed. The pointed tip naturally becomes part of the design, almost like an arrow pointing downward.
Technique for Sharp Geometric Patterns
- Base coat with crimson gel
- Once cured and dry, use a thin brush or nail art pen with black gel to map out your geometric pattern
- Keep lines clean and precise—shaky lines will make this design feel amateur
- If freehand feels risky, use thin tape or guides to create straight-edged blocks
- Seal with glossy top coat that emphasizes the contrast between red and black
Real talk: This design takes steadier hands than some others, but the visual payoff is absolutely worth taking your time.
5. Ruby Red Glossy Finish
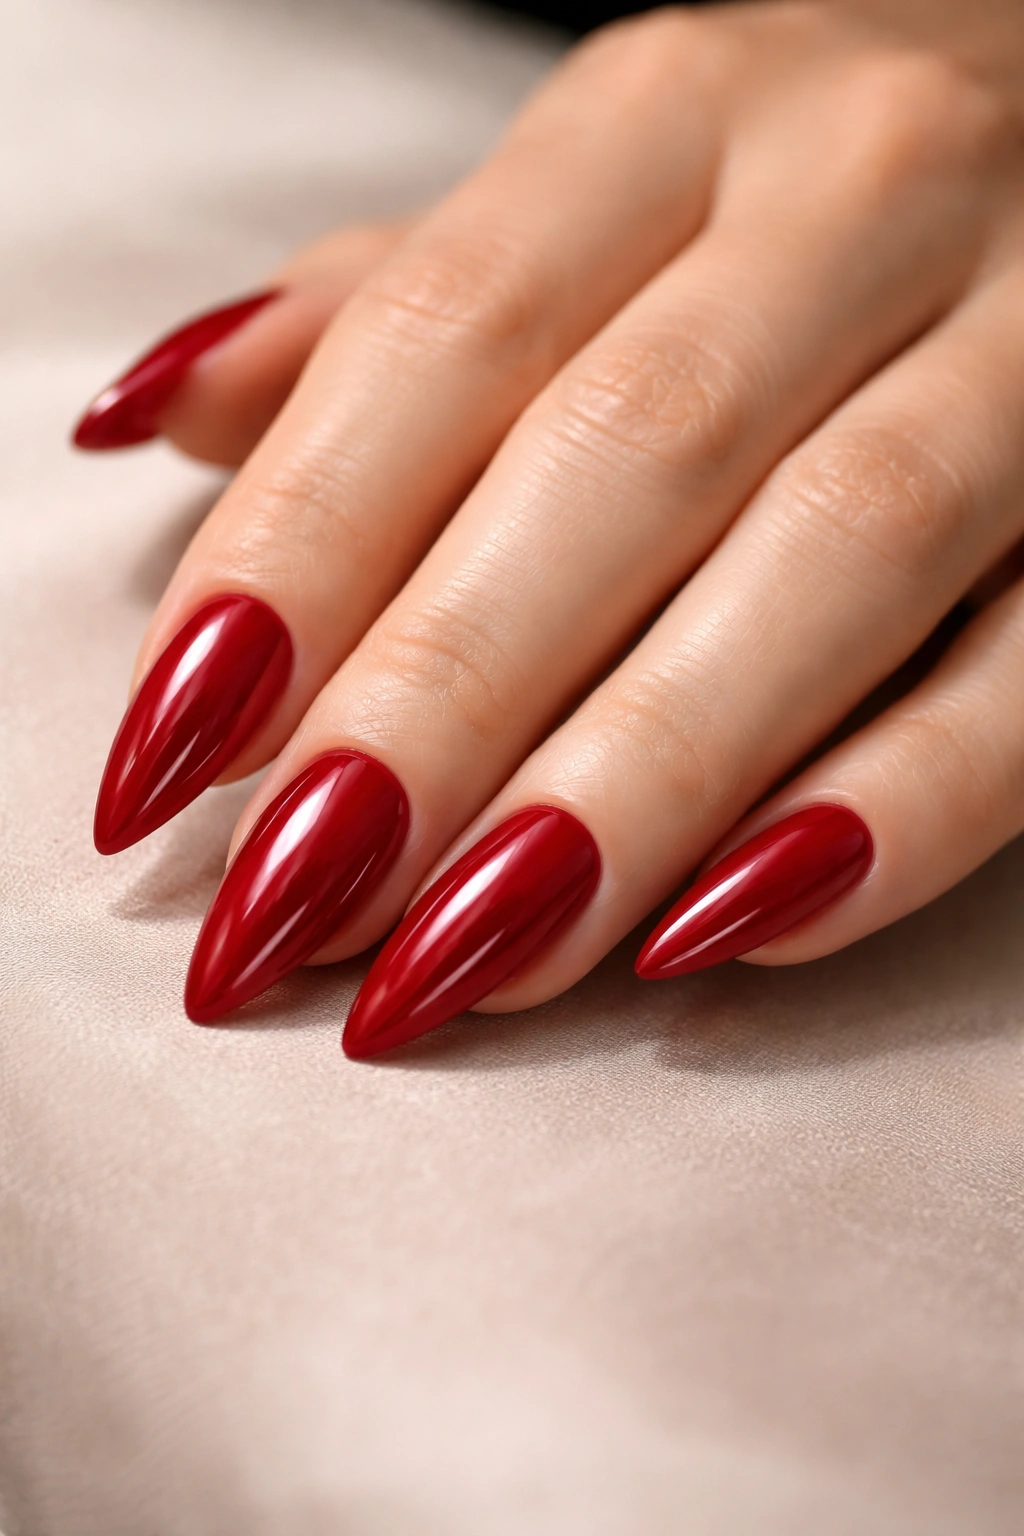
Sometimes the most powerful choice is the simplest one. A true ruby red—that fire-engine tone that sits right between blue-red and orange-red—in a mirror-bright glossy finish is the nail equivalent of a perfect red lip. It’s timeless, unfussy, and works everywhere. Medium stilettos in ruby red are the design that pairs with everything and still feels intentional.
The Magic of True Ruby Red
Ruby red is flattering on virtually every skin tone because it contains both warm and cool undertones in balance. The glossy finish amplifies the shine and makes the nail look expensive and well-maintained. The pointed stiletto shape gives it edge; without the point, it would feel softer and less dramatic.
Achieving Mirror-Bright Gloss
- Choose a ruby red that’s opaque in two coats maximum
- Apply in thin, even layers using a quality brush
- Use a gel top coat designed for high shine (some top coats are formulatd for matte or satin finish, so check the label)
- Cure under LED light; some gels require two short cures for optimal shine
- Between appointments, apply cuticle oil daily to keep the finish looking fresh and hydrated
Pro tip: This design needs regular touch-ups to stay pristine because chips are immediately visible against the bright color and glossy finish. Plan for a fill or refresh every two to three weeks.
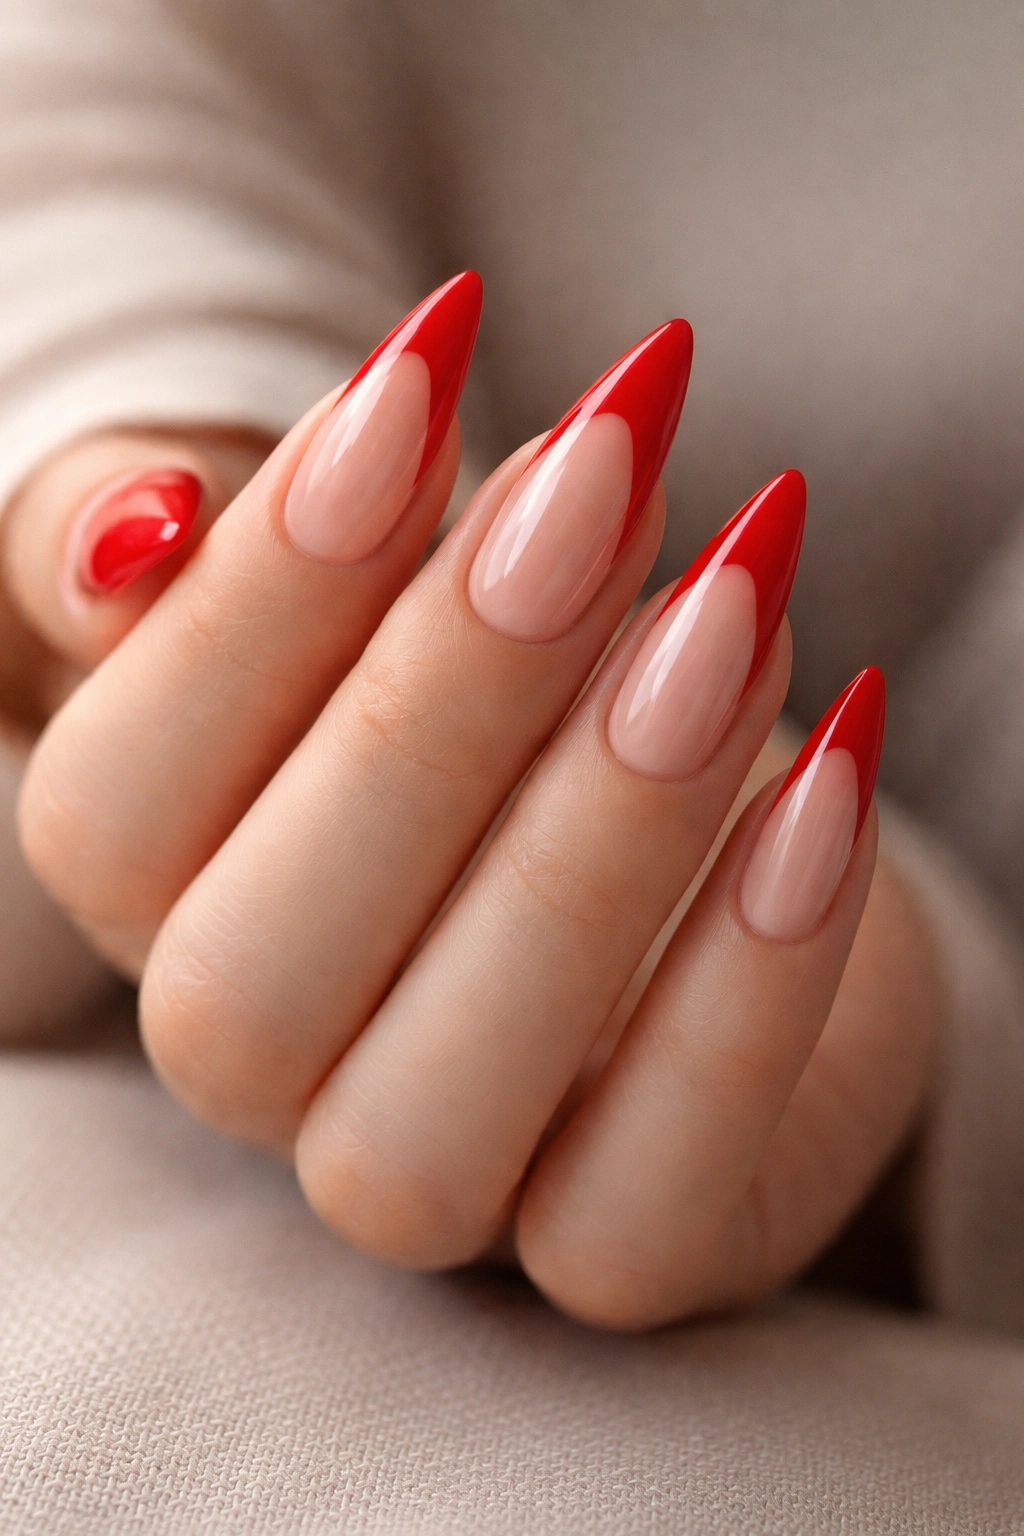
6. Red with White French Tips
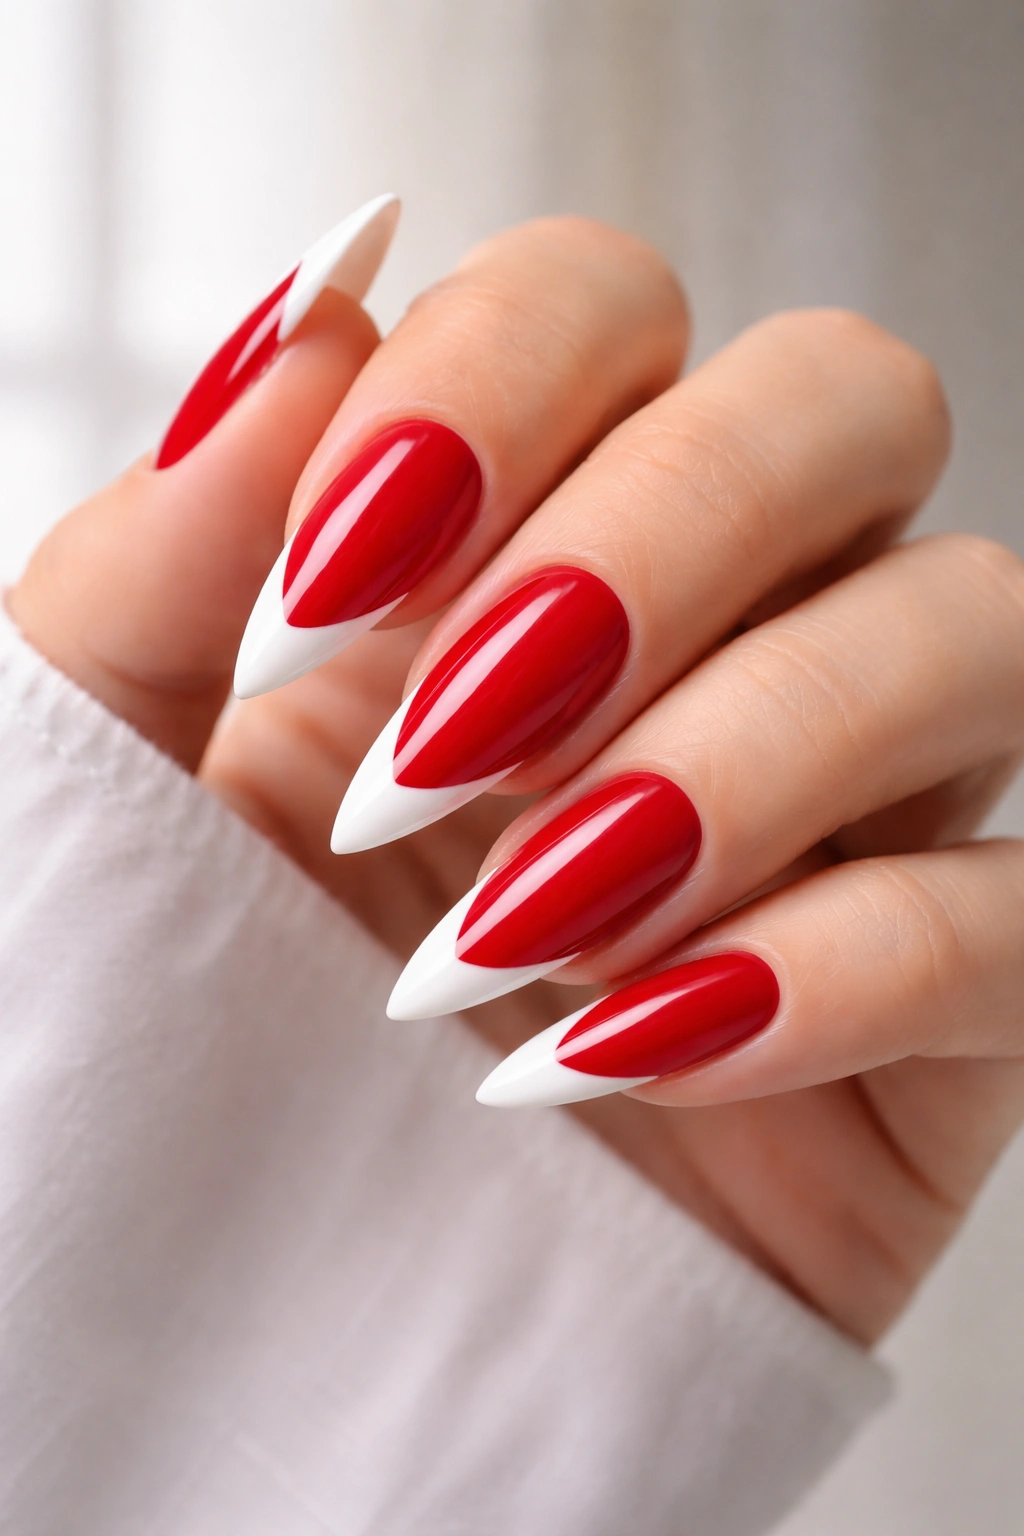
The red-and-white french tip is a fresh take on the original french manicure. Instead of nude nails with white tips, you swap the base to a clean red. This design works beautifully on medium stilettos because the white tip follows the natural pointed shape, creating a visual arrow that emphasizes the stiletto profile. It reads modern, slightly feminine, and infinitely wearable.
Why This Design Works Universally
The white acts as a palate cleanser against the red, keeping the overall look from feeling heavy or overly dramatic. The crisp white line creates definition and makes hands look fresh and manicured. On medium nails, the proportions feel balanced—the white tip isn’t too pronounced, and the red base commands attention without overwhelming the design.
Creating a Clean White Tip
- Apply red gel base and cure fully
- Use a nail guide or thin tape to mark where the white tip should begin (aim for about a quarter-inch of white at the very edge)
- Apply white opaque gel carefully along the tip, keeping the line as straight as possible
- Remove the guide and clean up any edges with a thin brush and isopropyl alcohol
- Seal with glossy top coat
- Optional: add a thin gold or nude line between the red and white for a luxury touch
Worth knowing: White shows every smudge and discoloration, so if you choose this design, commit to keeping nails very clean and immediately fixing any chips.
7. Matte Red Velvet Stilettos
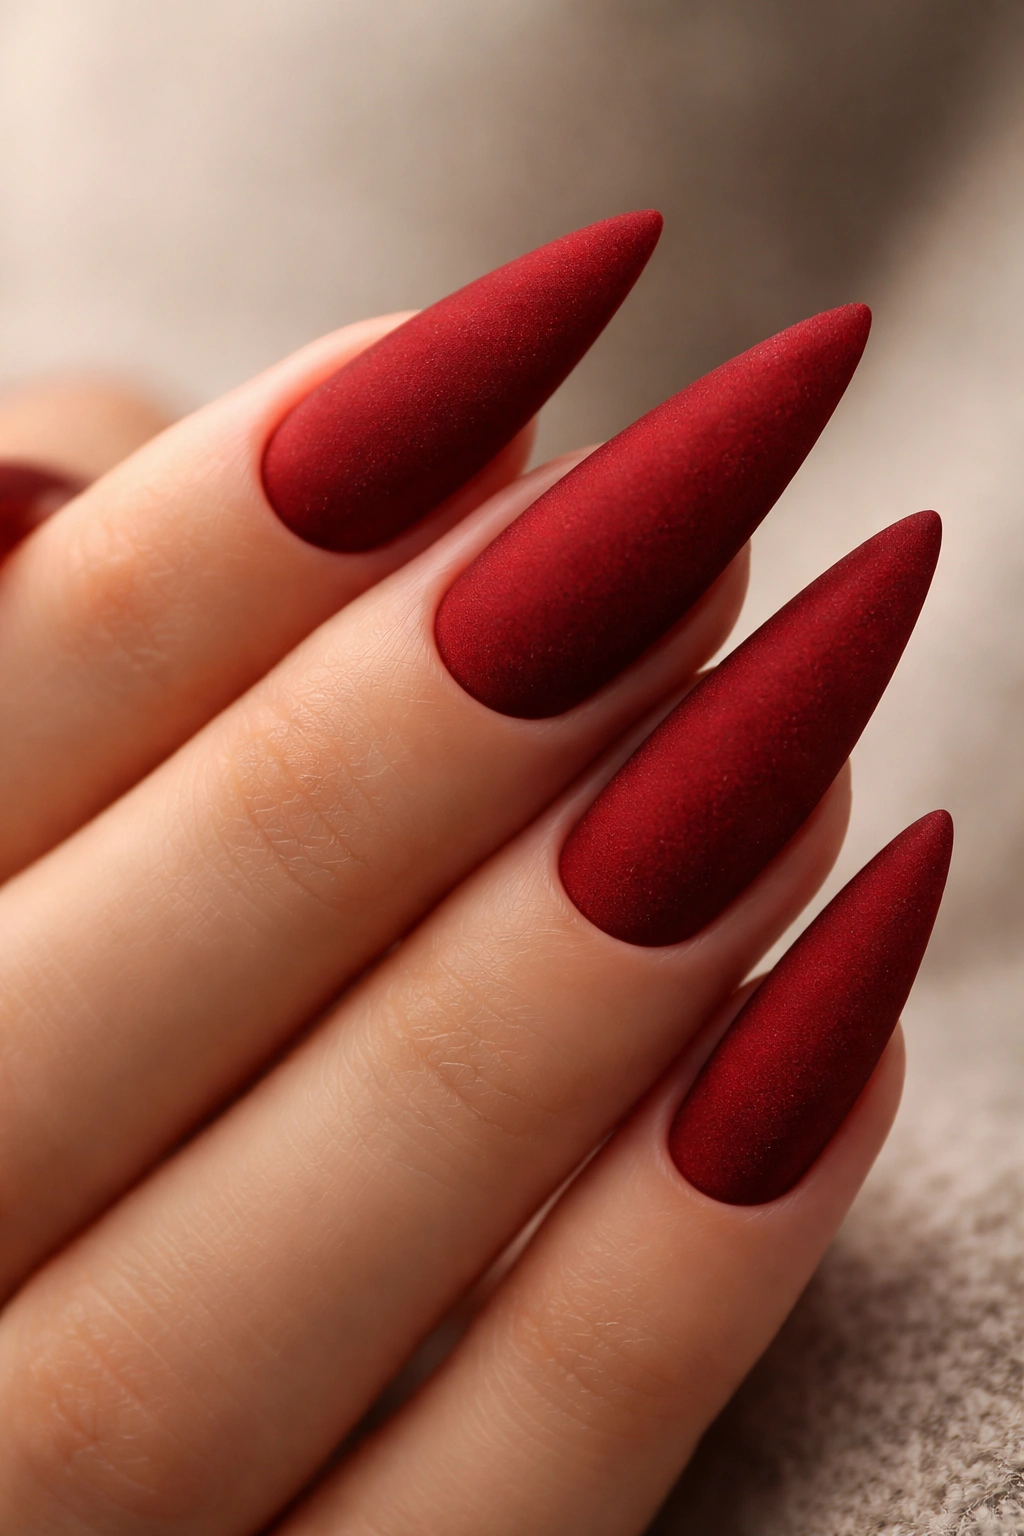
Matte finishes feel like velvet fabric translated to fingernails—soft to the eye, with depth and texture that glossy finishes can’t match. A matte deep red or crimson has an almost velvety appearance that reads incredibly sophisticated and modern. The matte texture makes the design feel intentionally chosen rather than simply unfinished.
The Matte Red Advantage
Matte red is forgiving in ways glossy red isn’t. Tiny imperfections, dust particles, and minor swirl marks in the application basically disappear under a matte top coat. The design feels intentional and deliberate—it reads as a style choice, not a lack of shine. On medium nails, matte finishes actually draw more attention to the nail shape itself, which is ideal for highlighting that pointed stiletto silhouette.
Applying Matte Red Correctly
- Use a red gel designed for or compatible with matte finishes (not all gels look good matte)
- Apply in thin, even coats—matte finishes can look patchy if application is uneven
- Use a matte top coat specifically formulated for the finish (regular gloss top coat over matte gels can look muddy)
- Cure between each layer according to product instructions
- If the matte finish starts looking dull over time, a quick matte top coat re-application restores the velvet look instantly
Insider note: Many people find matte red easier to maintain than glossy red because it doesn’t show water spots, dust, or minor scratches nearly as obviously.
8. Red Ombre to Pink Gradient
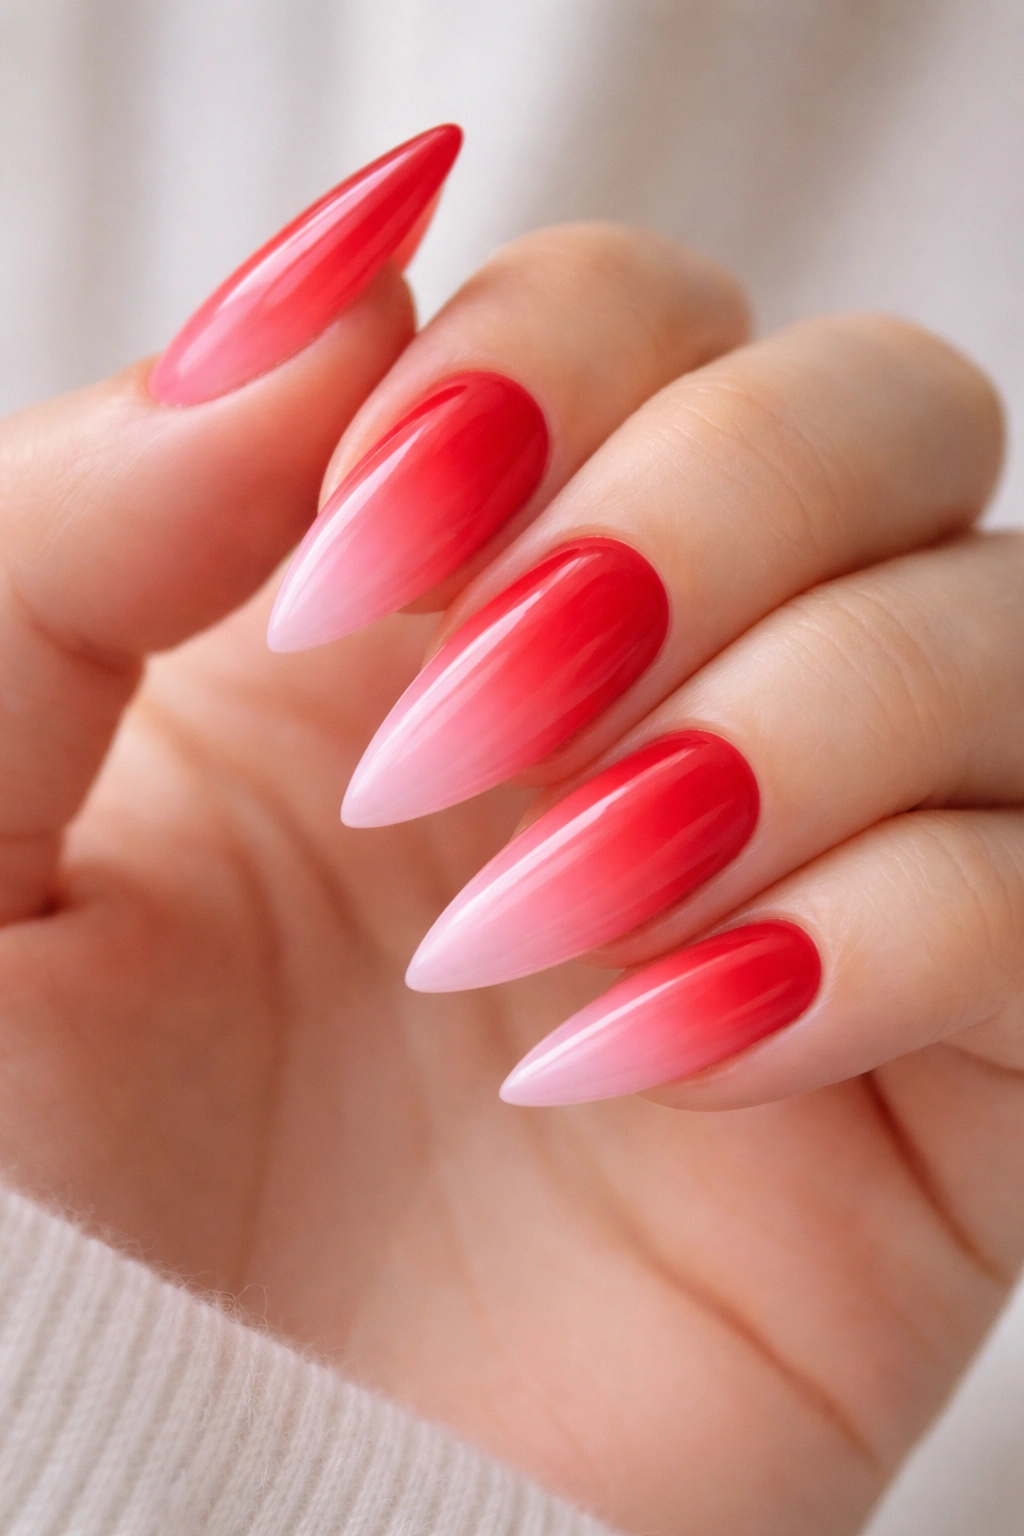
An ombre design that transitions from deep red at the base to soft pink at the tip creates a gradient that feels effortless and dreamy. This design works especially well on medium stilettos because the length gives you enough space for the color to transition gradually and naturally. The pointed tip in pale pink becomes almost ethereal.
Creating a Flawless Ombre Effect
Ombre on nails requires either hand-blending or a sponge technique. The sponge method gives you more control: you mix your red and pink gels on a makeup sponge, then gently press the sponge onto the nail, moving from base to tip. This creates a gradient that looks intentional and artistic without requiring freehand blending skills.
Step-by-Step Ombre Application
- Apply a light pink or neutral base gel and cure
- On a makeup sponge, apply red gel to one area and pink to another, with some overlap in the middle
- Press the sponge gently onto the nail, starting at the base and moving toward the tip
- Repeat as needed to build opacity and gradation
- Seal with a glossy top coat that blends the colors and adds dimension
- Clean up any excess around the cuticle and sides
Pro tip: Practice on a nail wheel first—ombre is a technique that improves dramatically with repetition, and you’ll feel more confident once you’ve done it a few times.
9. Blood Red with Rhinestone Details
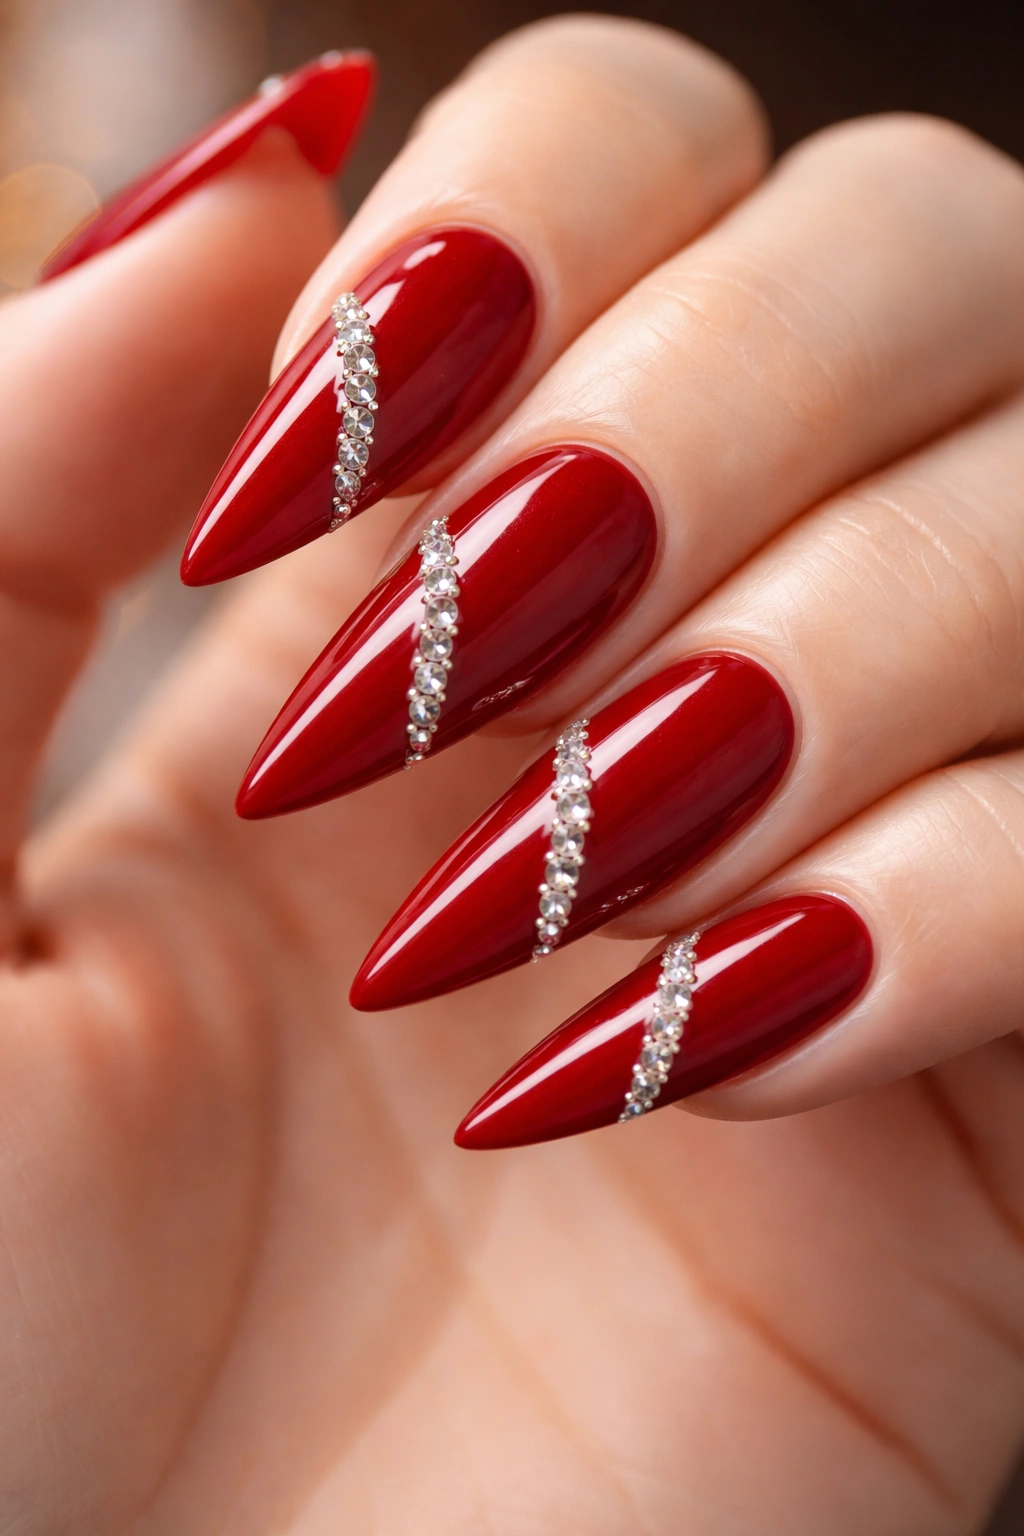
Blood red—a deep, dark red with burgundy undertones—becomes pure glamour when you add rhinestones in strategic places. This design walks the line between edgy and elegant. Rhinestones catch light and add dimension, transforming what could be a heavy dark red into something sparkling and intentional.
Where to Place Rhinestones for Maximum Impact
The most effective placement is typically a diagonal line from the inner corner of the nail to the outer edge, or a cluster of stones near the tip. On medium nails, a line of 4-6 mid-sized stones feels balanced; too many stones look costume-y, and too few feel random. Varying stone sizes adds visual interest—mix larger faceted stones with smaller ones for depth.
Securing Rhinestones That Actually Stay
- Apply blood red gel base and cure fully
- Apply a thin layer of gel on top (this serves as an adhesive for stones)
- Use a stone picker or wax pen to place stones exactly where you want them
- Once all stones are placed, cure under LED light to set them
- Apply a final glossy top coat over the entire nail (this seals the stones in place)
- Make sure the top coat covers all stones to prevent them from catching on fabric
Worth knowing: Quality rhinestones make a massive difference. Cheap stones fall out quickly and look dull; professional-grade rhinestones stay put and sparkle for weeks.
10. Fire Engine Red with Chrome Tips
Fire engine red—that bright, saturated, slightly orange-toned red—gets elevated when you add a chrome tip. Chrome creates a mirror-bright metallic finish that feels ultra-modern and high-tech. The combination of classic fire engine red with futuristic chrome creates a design that feels both bold and innovative.
Chrome Finish: What You Need to Know
Chrome powder is applied to a sticky gel layer and requires careful technique. You apply the chrome powder using a brush or sponge, press it into the gel, then brush away excess powder. The result is a finish that looks like liquid metal. On medium stilettos, chrome tips (typically applied to the top 3-5mm) create a stunning visual contrast without overwhelming the design.
Applying Chrome for Best Results
- Apply fire engine red gel base and cure
- Lightly roughen the surface of the tip area with a buffer (this helps chrome adhere)
- Apply a chrome-specific sticky gel layer to the tip area only
- While the gel is still sticky, use a brush to apply chrome powder, working it into the gel
- Brush away all excess powder with a soft brush
- Seal with a glossy top coat designed for chrome (some top coats are chrome-specific)
Insider note: Chrome powder is messier to work with than other finishes, so have paper towels and a good brush dedicated to removal. The finish is worth the extra effort.
11. Red Marble Effect Stilettos
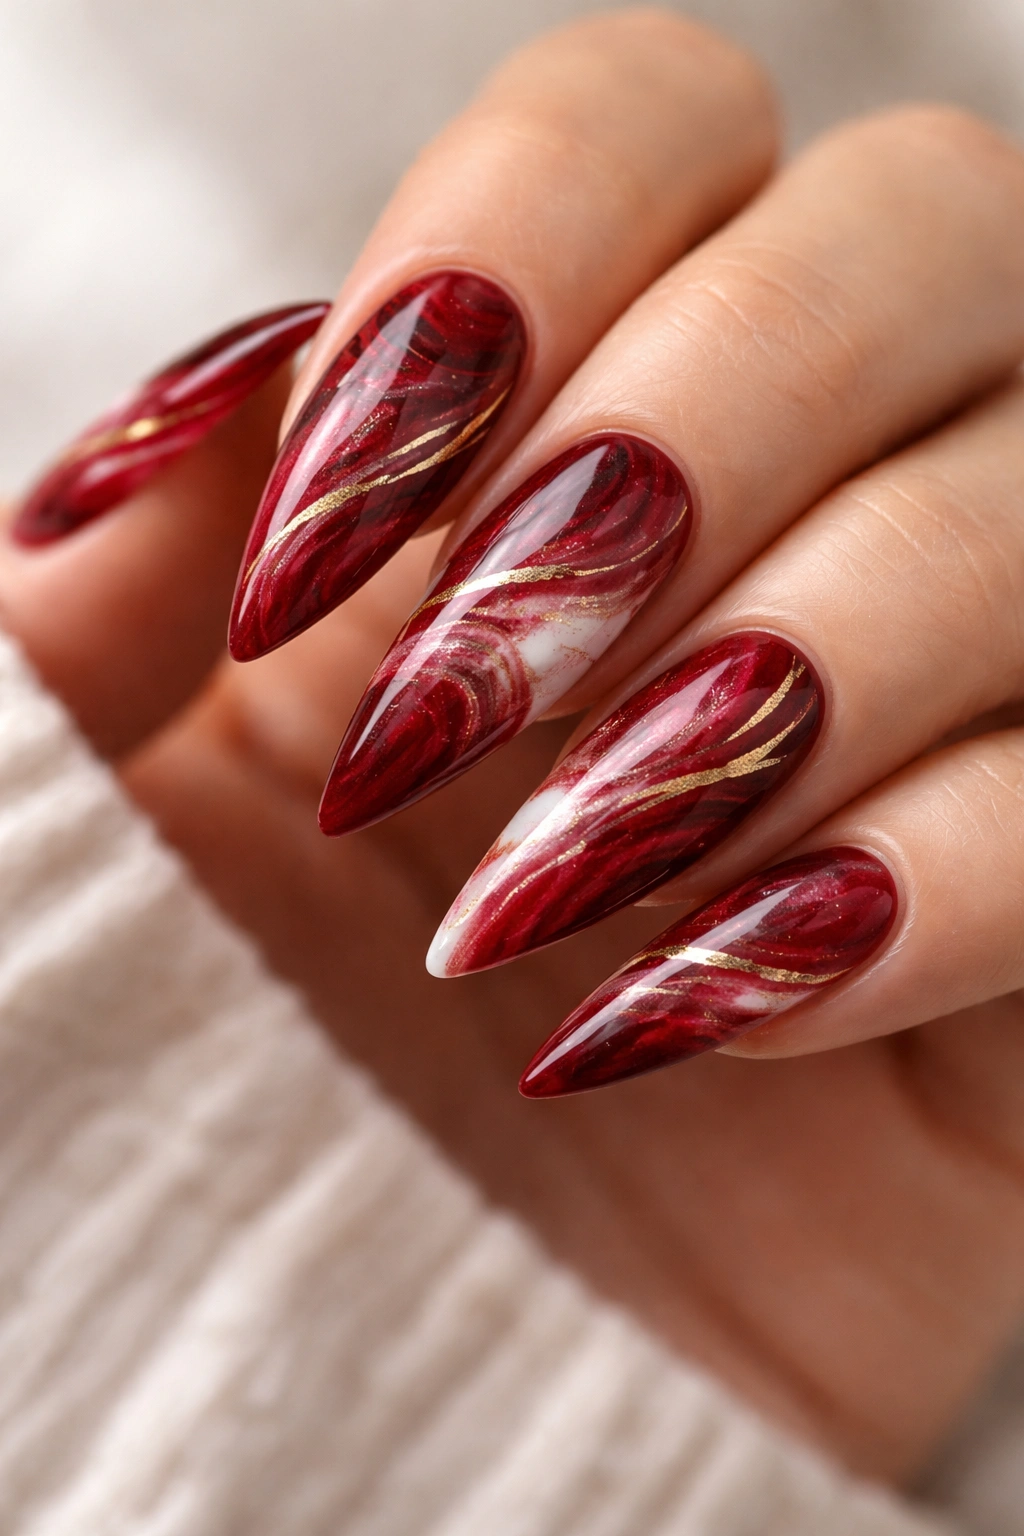
Marble nails create organic, swirled patterns that look artistic and intentional. A red marble design uses varying shades of red and burgundy swirled together, often with touches of white, gold, or black for contrast. This design is sophisticated because it feels like it could hang in an art gallery—the pattern is unique every time you create it.
Creating a Marble Pattern That Looks Intentional
Marble can be achieved through water marbling, gel swirling, or specialized marble gels. The gel swirl method works best on nails: you apply different shades of red gel to the base layer, then use a thin brush to swirl and feather the colors together before curing. The key is not over-working it—let the gels blend partially on their own for that organic, marble-like effect.
Marble Application Technique
- Apply a light nude or pale pink base gel and cure
- Drop small amounts of different red shades onto the nail surface (don’t apply a full base layer first)
- Use a thin brush to swirl and blend the reds in loose, organic patterns
- Add touches of white, gold, or black if desired, swirling them slightly to blend
- Cure, then seal with glossy top coat
- The design should look unique and slightly different on each nail
Real talk: Marble nails take practice to look good—your first attempts might look muddy. Give yourself grace and try a few times before deciding it’s not for you.
12. Candy Apple Red with Glitter
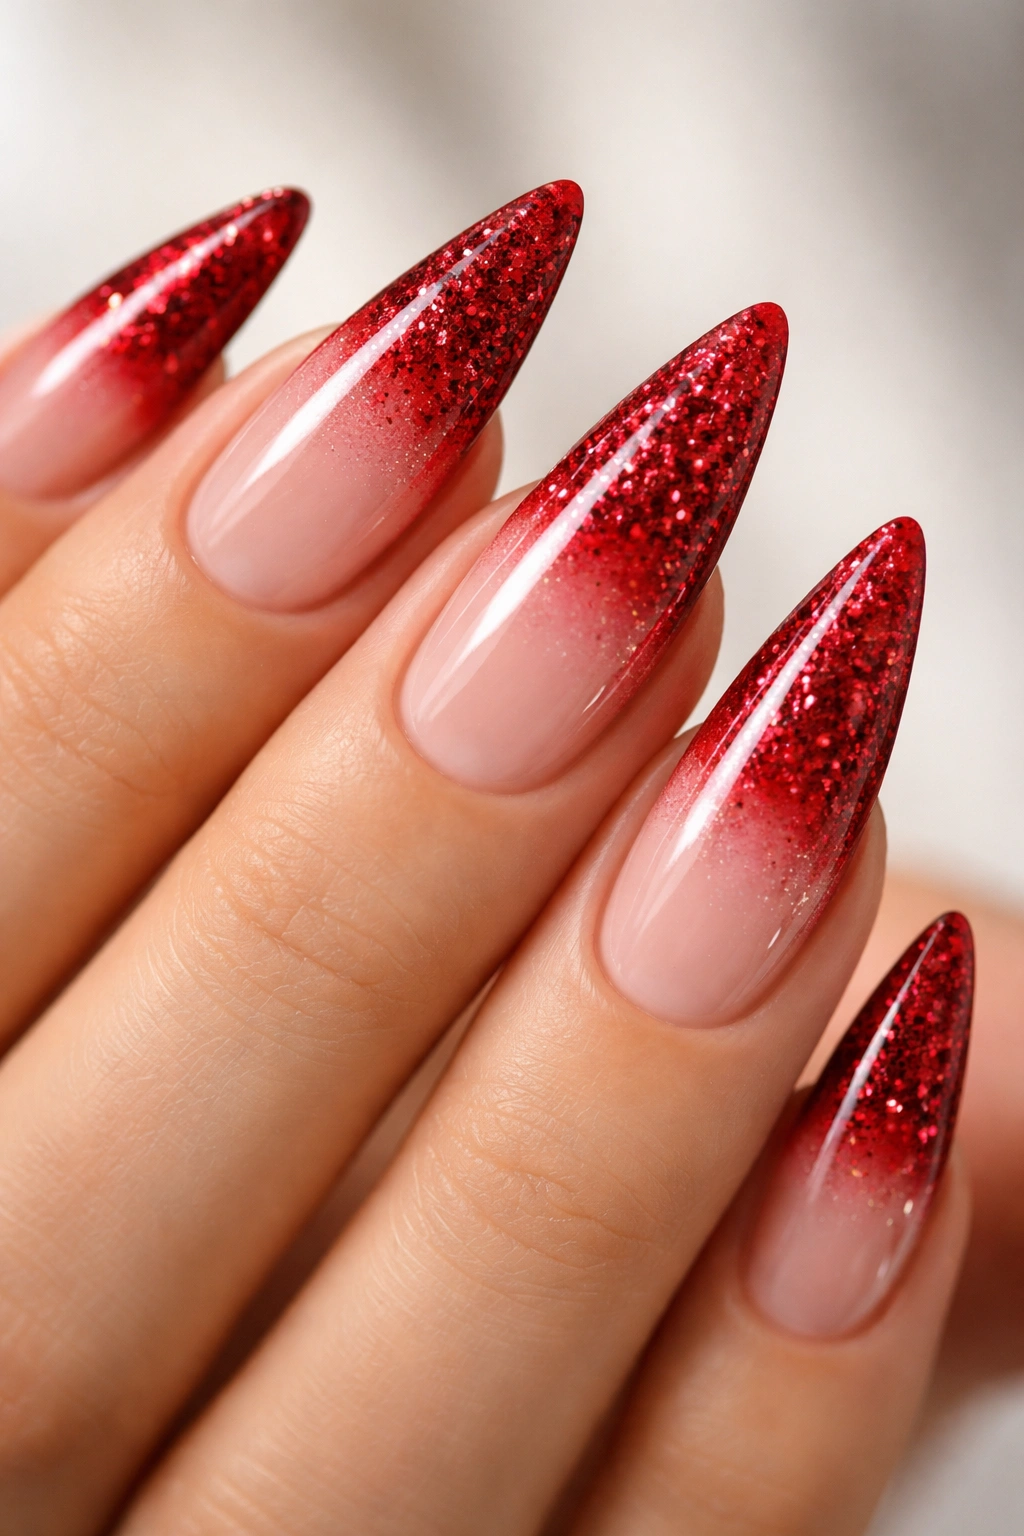
Candy apple red—that bright, slightly translucent red that looks almost edible—pairs beautifully with glitter. Think fine holographic glitter, chunky cosmetic glitter, or glitter that transitions from density at the base to sparse toward the tip. This design is playful without being juvenile, sparkly without being over-the-top.
Choosing the Right Glitter
Fine glitter looks more sophisticated than chunky pieces; holographic glitter catches light in multiple colors and adds dimension. For medium stilettos, a concentration of glitter at the tips that fades out toward the base looks intentional—it’s like the glitter is being pulled toward the pointed edge. You can also create a glitter ombre effect where glitter density decreases from base to tip.
Applying Glitter Smoothly
- Apply candy apple red gel base, making sure it’s translucent enough to show through glitter
- While the base is still sticky, sprinkle or press glitter onto the nail
- Use a brush to distribute glitter evenly, or leave it concentrated where you want emphasis
- Cure under LED light
- Apply glossy top coat, pressing gently to ensure glitter is sealed beneath the top coat (not loose on top)
Pro tip: If you use loose glitter that isn’t sealed completely, it’ll shed everywhere. Always make sure glitter is locked beneath a top coat.
13. Oxblood Red with Gold Striping

Oxblood red—that deep, brownish-red that looks almost brown in low light but reveals rich red in daylight—is an incredibly sophisticated base. When you add thin gold striping (think clean vertical lines, or geometric stripes), the design becomes almost architectural in its elegance. This is the red stiletto nail that says you have sophisticated taste.
Why Oxblood + Gold Is So Effective
Oxblood is a shade that conveys maturity and intention. It’s not the red everyone reaches for, which is exactly why it stands out. Gold stripes add richness without glitz. On medium nails, this combination feels refined and intentional—the striping adds visual interest without the design feeling busy.
Creating Clean Gold Stripes
- Apply oxblood base gel—use two coats for full opacity
- Cure fully, then lightly buff the surface to remove shine (this helps the stripes adhere)
- Use a thin brush or specialized striping pen with gold gel to create vertical lines down the nail
- For symmetry, measure and mark where lines should be, or use thin tape as guides
- Keep stripes evenly spaced and uniform in width
- Seal with glossy top coat
- Option: add a thin horizontal gold line at the tip to frame the design
Worth knowing: Gold gel can be tricky to apply smoothly; practice on a nail wheel first to get the hand motion down.
14. Bright Red with Nude Base
A two-tone design where the nail bed is nude or barely-there pink and the tip is bright red offers balance and sophistication. The nude base elongates the finger and creates a blank canvas that makes the bright red pop. This design is refined because the nude base prevents the design from feeling too bold, while the red tip adds the drama you want.
Why Nude + Red Works
The contrast between muted and bright creates visual interest. Nude bases also make hands look longer and more elegant—the nail doesn’t look like it starts at the visible tip line, but rather blends seamlessly with the skin tone. The bright red at the pointed tip draws focus to the elegant shape without overwhelming the entire nail.
Building a Nude-to-Red Design
- Apply a nude gel that matches your skin tone very closely (test the match in natural light)
- Once the nude base is applied and cured, mask off the tip area where red will begin (use thin tape or a nail guide)
- Apply bright red gel to the exposed tip area
- Remove the mask and clean up the line
- If the line between nude and red feels harsh, soften it slightly with a thin brush and some nude gel blended at the edge
- Seal with glossy top coat
Insider note: The closer your nude matches your actual skin tone, the more elegant and elongated your fingers will appear. Don’t choose a nude that’s too peachy or too pale.
15. Red Stilettos with 3D Embellishments
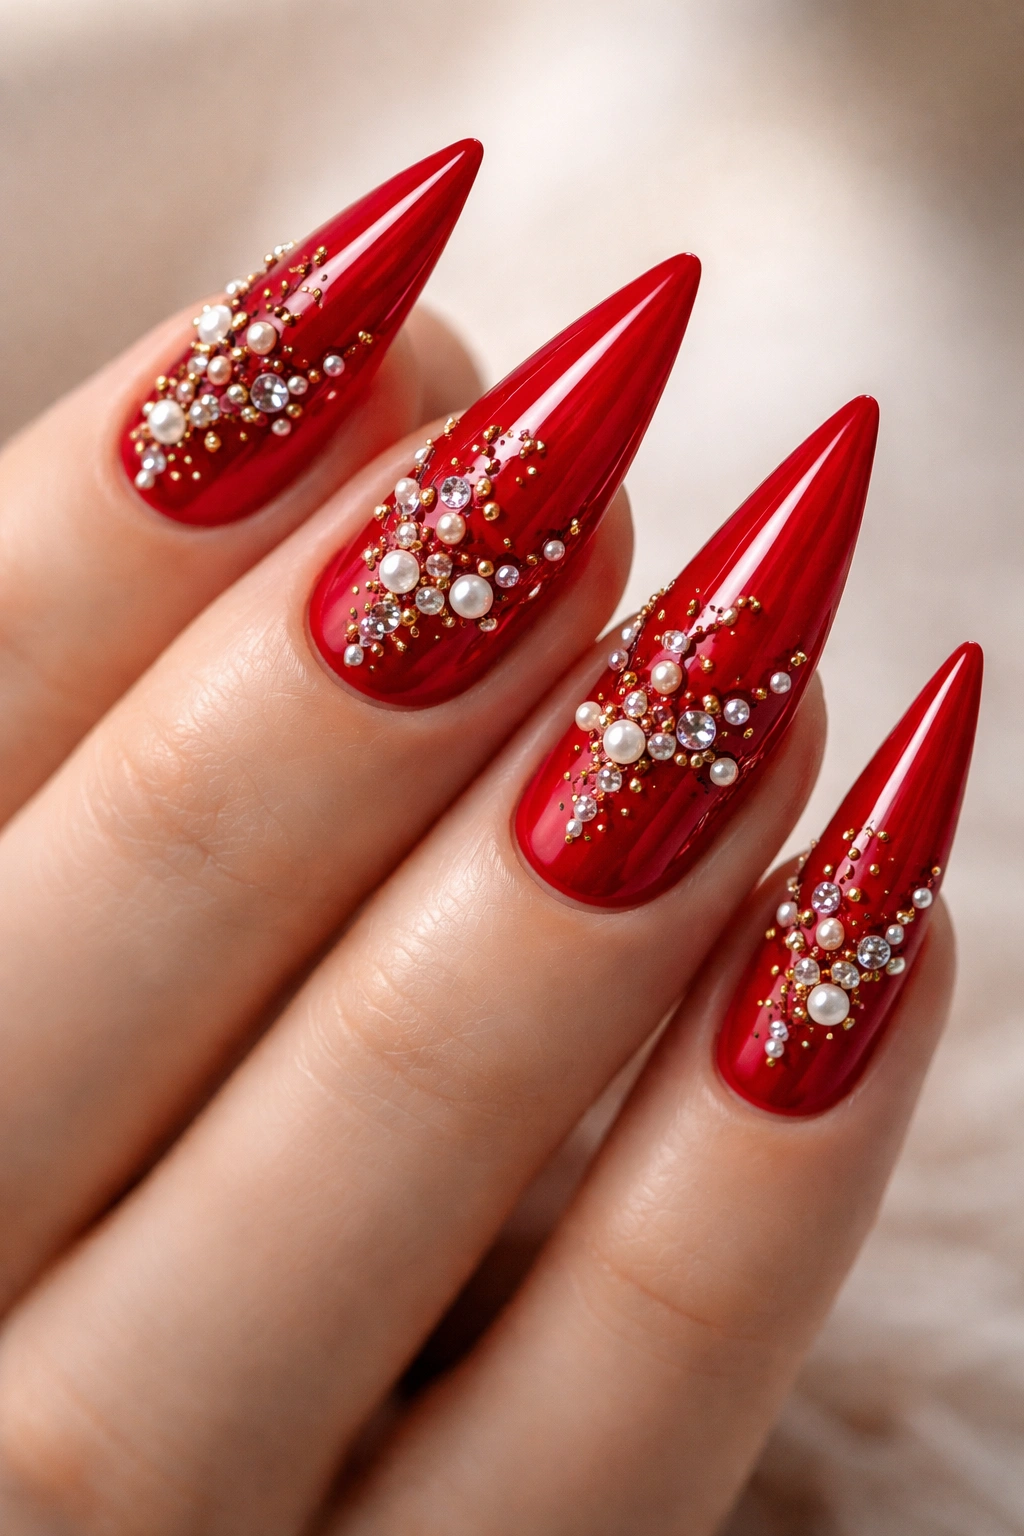
Taking red stilettos to the ultimate expression of glamour, 3D embellishments—tiny studs, beads, tiny charms, or dimensional elements—create a design that’s truly statement-making. This design shines at special occasions where “understated” isn’t the goal. The 3D elements catch light and add texture that flat designs simply can’t achieve.
What 3D Elements Work Best
Small metal studs create a punky, modern vibe; tiny pearls or gems add bridal glamour; small charms or tassels create playful personality. On medium nails, less is more—a few strategically placed 3D elements create impact without looking chaotic. A cluster of studs at the tip, or a single charm hanging from the nail edge, creates a focal point that elevates the entire design.
Securing 3D Elements for Longevity
- Apply your red base gel and cure fully
- Apply a sticky gel layer on top (this is the adhesive for 3D elements)
- Place 3D elements using a brush handle or specialized picker
- Cure under LED light to lock elements in place
- Apply a glossy top coat, being careful not to cover the 3D elements completely—you want them to remain tactile and dimensional
- For elements that protrude (like charms on a chain), you may not want them sealed entirely under top coat
Real talk: 3D nails are gorgeous for photos and special occasions, but they catch on fabric and can be uncomfortable for daily wear. Save this design for events where you’re not doing detailed hand work.
Final Thoughts
Red stiletto nails work on medium nails because the length hits that sweet spot—long enough to feel intentional and dramatic, but short enough to remain practical and wearable. Whether you choose a classic deep red with gold flecks, a modern neon statement, or an ornate 3D embellished design, the key is selecting a shade and finish that feels authentically you. The designs that photograph best and last longest are the ones you genuinely love, because you’ll take better care of them and actually wear them with confidence.
The right red stiletto design isn’t just about the manicure—it’s about how it makes you feel when you look at your hands. That moment of catching your reflection and noticing that your nails are perfect, that small confidence boost that carries you through your day. Medium-length stiletto nails deliver that feeling without requiring a second mortgage, and the fifteen designs above prove that there’s a red stiletto option for literally every mood, occasion, and style preference. Pick the one that makes you smile, book an appointment, and enjoy the compliments that inevitably follow.
