

Black and gold is the ultimate power combination — it’s elegant, confident, and works with absolutely everything from casual jeans to formal evening wear. Stiletto nails amplify this sophistication even further, giving you that elongated, runway-ready aesthetic that commands attention. The good news? There’s way more versatility here than you might expect. Whether you’re drawn to bold geometric patterns, shimmering accents, or subtle luxury vibes, black and gold stilettos offer endless design possibilities that feel both timeless and modern.
The beauty of this color pairing is that it flatters every skin tone and works across all seasons. Gold brings warmth and glamour to the classic elegance of black, creating nail art that photographs beautifully and makes a statement without feeling overdone. You don’t need to be a professional nail artist to pull off these looks either — many designs work with simple tools and basic supplies that most people already have at home.
1. Classic Gold Stripe Vertical Design
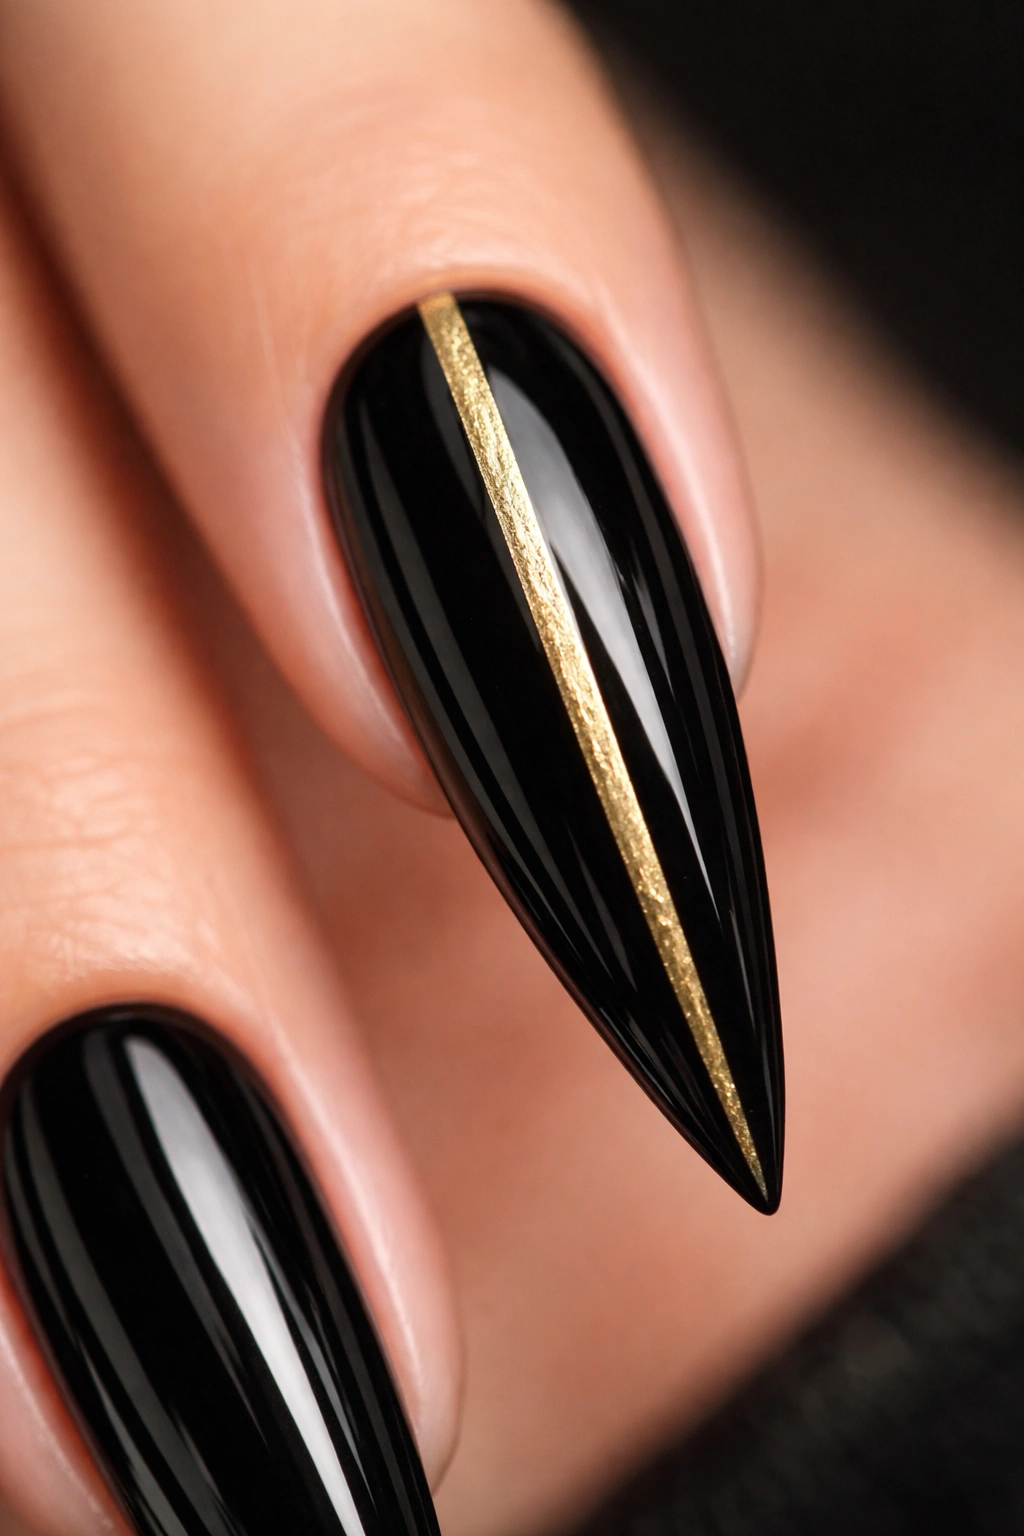
This is the nail art equivalent of a perfectly tailored blazer — timeless, sophisticated, and impossible to get wrong. A single vertical gold stripe running down the center of a glossy black stiletto nail creates an elongating effect that makes your fingers appear even more slender and elegant.
Why It Works So Well
The vertical line naturally emphasizes the length of the nail and creates a clean, architectural look that reads as intentional and polished. Gold on black provides maximum contrast, so even a thin stripe delivers serious visual impact without requiring perfect precision or multiple coats.
How to Achieve This Look
- Paint your stiletto nails with 2-3 coats of high-quality black nail polish, allowing each layer to dry completely between applications
- Use a thin striping brush or a nail art pen loaded with gold metallic polish to draw a straight line down the center of each nail
- Start the line at the cuticle and drag it smoothly toward the tip — the key is a steady hand and letting the brush do the work rather than forcing it
- Seal everything with a glossy top coat for shine and protection
Pro tip: If your hand shakes, use a gold nail tape strip instead of painting freehand. Apply it down the center before your black polish fully dries, press gently, and peel it away carefully once the polish is completely dry for a perfectly crisp stripe.
2. Black Base with Gold Ombre Gradient
Ombre nails create an illusion of depth and movement, and when you layer gold from pale champagne to deep bronze across black, the effect is luxuriously dimensional. This design works particularly well on stilettos because the length gives you space to show the full gradient transition.
The Visual Impact of Gradient Design
A gradient pulls the eye upward along the length of the nail, making stilettos look even longer. The soft fade from dark to light gold over a black base creates an almost three-dimensional effect that catches light beautifully and looks more complex than it actually is to create.
Step-by-Step Application
- Apply 2-3 coats of black polish as your base and let it cure fully
- Cut a makeup sponge into a small rectangle — this is your gradient-blending tool
- On the sponge, dab three shades of gold polish (light, medium, and deep) in vertical stripes without blending them together yet
- Press the sponge firmly onto the tip of your nail and bounce it gently several times to transfer the polish
- Blend the edges slightly with a damp makeup brush if you want a softer transition, or leave them distinct for a bolder look
- Clean up around the nail with a thin brush dipped in acetone, then seal with top coat
Worth knowing: This technique works best when you apply the black base the day before, as fresher black polish can pick up when you press the sponge on it. Letting it set overnight ensures a stable foundation.
3. Half-Moon Gold Accent on Black Stilettos
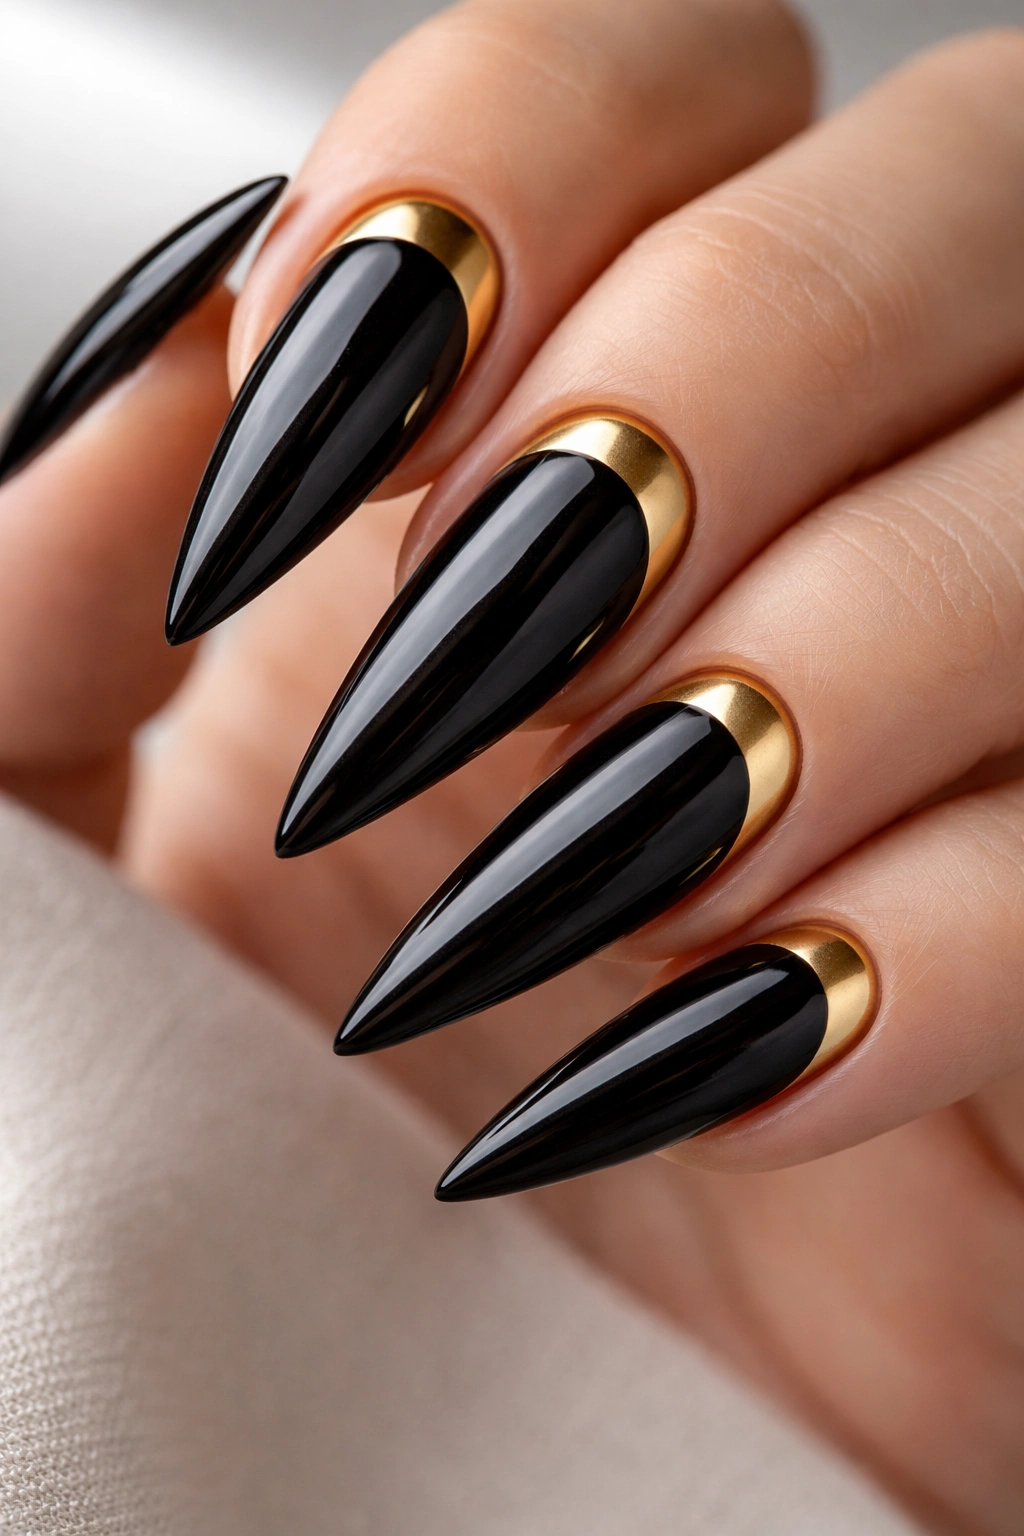
The half-moon design (also called a reverse French manicure) places the color statement at the base of the nail instead of the tip. With black as the main color and a gold arc at the cuticle, you get an unexpected twist on this classic shape that feels modern and architectural.
Why This Design Flatters Stiletto Length
The horizontal gold line at the base creates a visual anchor and adds proportion to the nail bed. Even though stilettos are long, this design prevents them from feeling unbalanced by framing the foundation beautifully.
Creating Perfect Half-Moon Shapes
- Paint your entire nail with black polish (2-3 coats) and allow it to dry completely
- Use a curved striping brush or a thin bent brush loaded with gold polish
- Position the brush at the left side of the cuticle area and sweep it in a gentle arc across to the right side
- The arc should be smooth and about ¼-inch thick — let the curve of the brush do the work rather than trying to paint it freehand
- If the line isn’t perfect, clean up the edges with a thin brush and acetone before sealing with top coat
Insider note: A gold nail art stencil made for half-moon designs removes the guesswork entirely. Stick it on your nail, paint over it with gold, and peel away the stencil for a flawlessly curved line every single time.
4. Gold Glitter Gradient That Fades Into Black
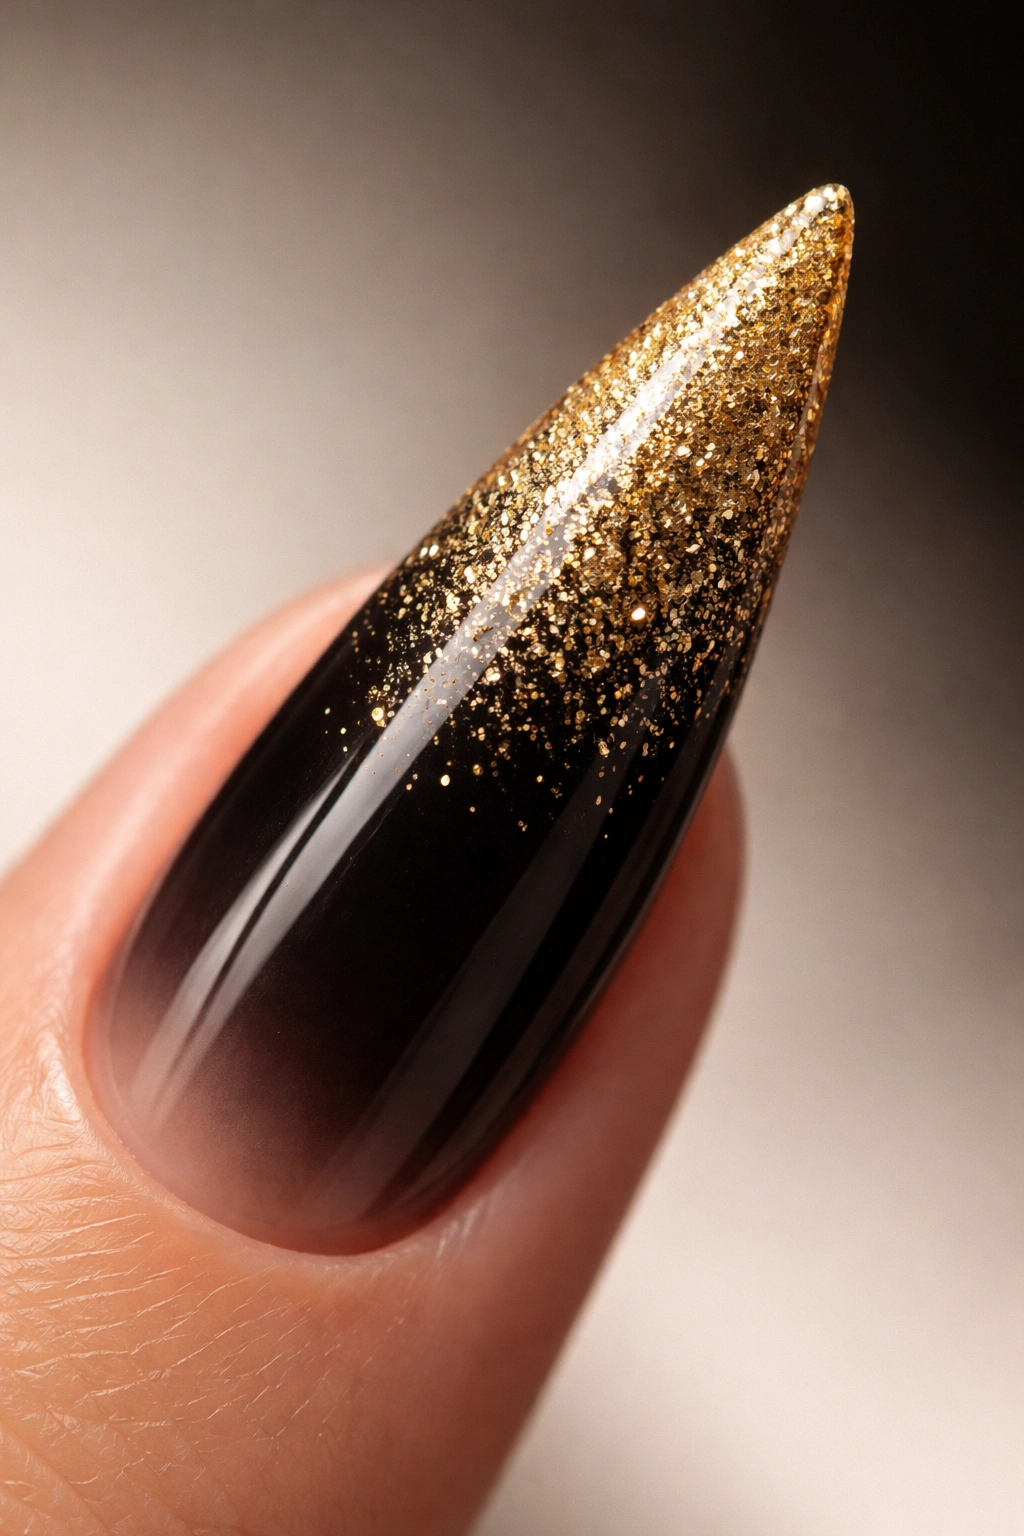
Glitter is inherently glamorous, and when you use it strategically as a gradient that fades from saturated at the tips into the black base, you get a design that’s textured, eye-catching, and appropriate for both day and evening wear.
Texture and Shimmer Impact
Gold glitter catches light with every hand movement, creating an animated, dynamic look that keeps the eye engaged. Starting thick at the tips and fading into the black base prevents the glitter from feeling overwhelming while maintaining serious visual presence.
Application Technique for Seamless Glitter Gradient
- Paint 2-3 coats of black as your base and seal with a thin layer of top coat
- Mix gold glitter polish with a small amount of clear gel or regular top coat to create a diluted version — this helps the glitter settle more evenly
- Apply the pure gold glitter polish to the tip of the nail (about ⅓ of the nail length)
- In the middle section, apply the diluted glitter mixture so it has less density and blends gradually
- Brush the very edge with just a tiny bit of glitter to create the fade effect into pure black
- Seal everything with a glossy top coat, pressing gently so you don’t disrupt the glitter placement
Pro tip: Gel polish holds glitter more securely than traditional polish, so if you’re planning to wear this design for more than a week, go the gel route for longevity.
5. Geometric Gold Pattern on Matte Black
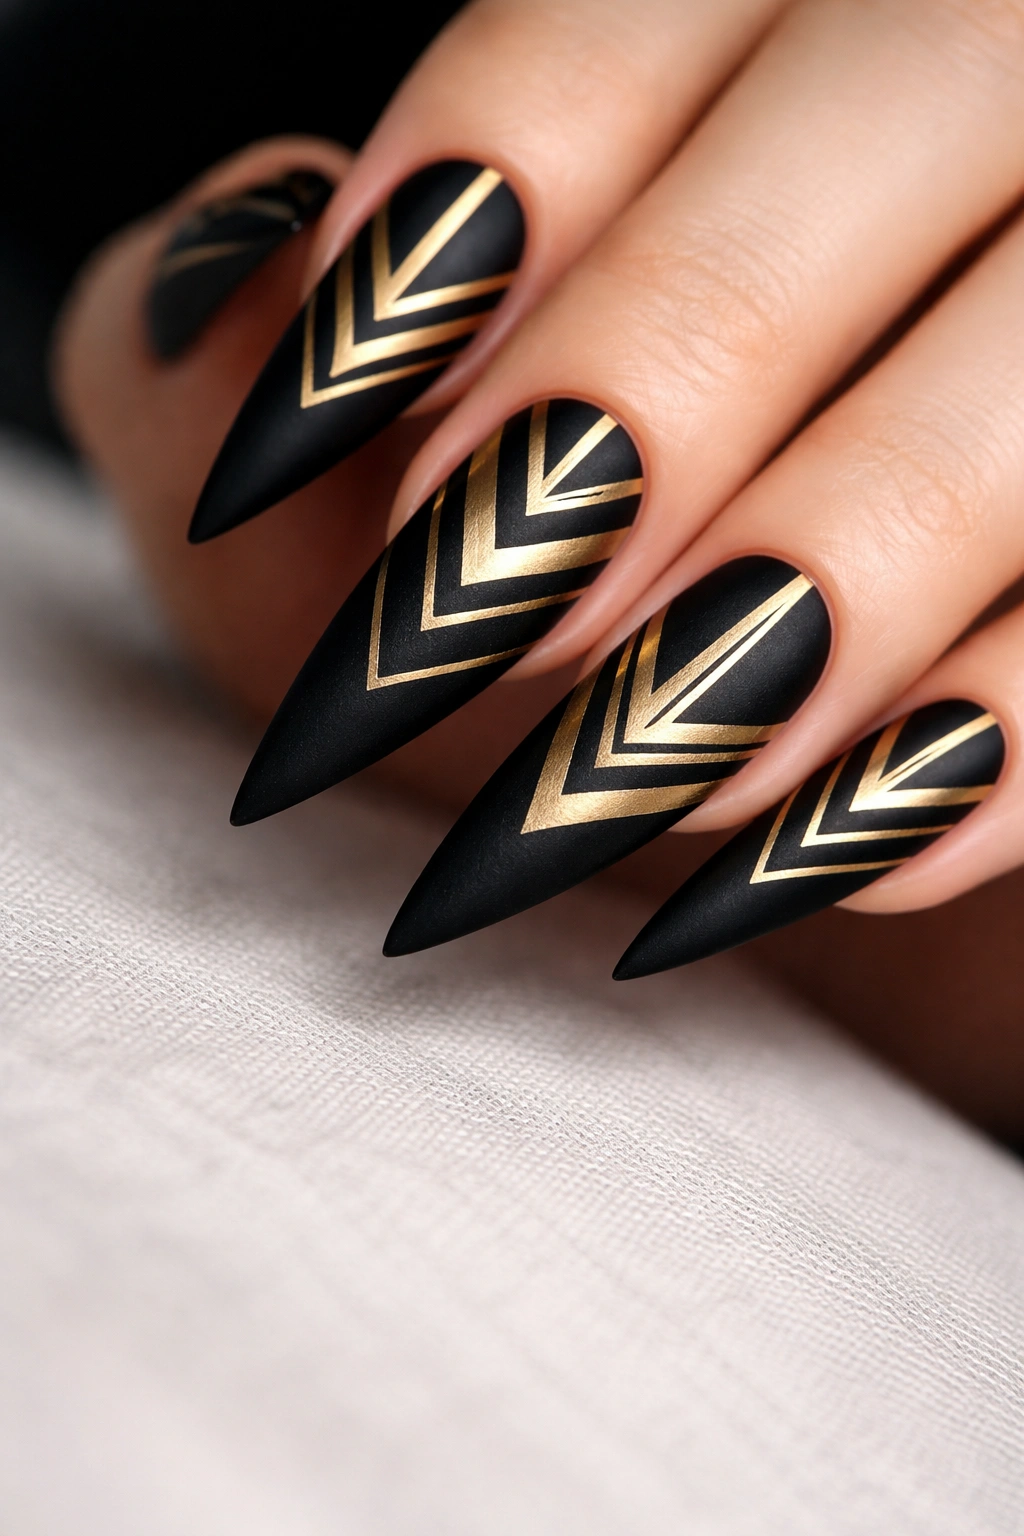
Geometric designs feel contemporary and precise, and they work beautifully on the long canvas that stilettos provide. Think triangles, chevrons, or abstract angular patterns in gold against a matte black base — it’s graphic, intentional, and instantly elevates your entire look.
Why Matte Finishes Enhance Geometric Designs
Matte polish makes geometric patterns read even more sharply because there’s no shine competing for visual attention. The flat finish creates a sophisticated, almost architectural quality that complements clean lines and angular shapes perfectly.
Painting Geometric Patterns
- Apply 2-3 coats of matte black polish and allow it to dry completely
- Sketch your geometric pattern lightly with a gold nail art pencil first so you have a guide
- Use a thin striping brush or angled brush loaded with gold metallic polish to paint your pattern — steady strokes work better than trying to paint everything in one continuous motion
- Paint triangles by creating three connected lines, or chevrons by painting V-shaped stripes pointing up or down the nail
- Let the gold polish dry before adding a top coat — matte top coat maintains the matte effect, or use glossy if you want to create contrast between the matte black and shiny gold
Worth knowing: If freehand seems intimidating, gold nail stickers with geometric patterns save time and guarantee precision. Apply them over the matte black base and seal with top coat.
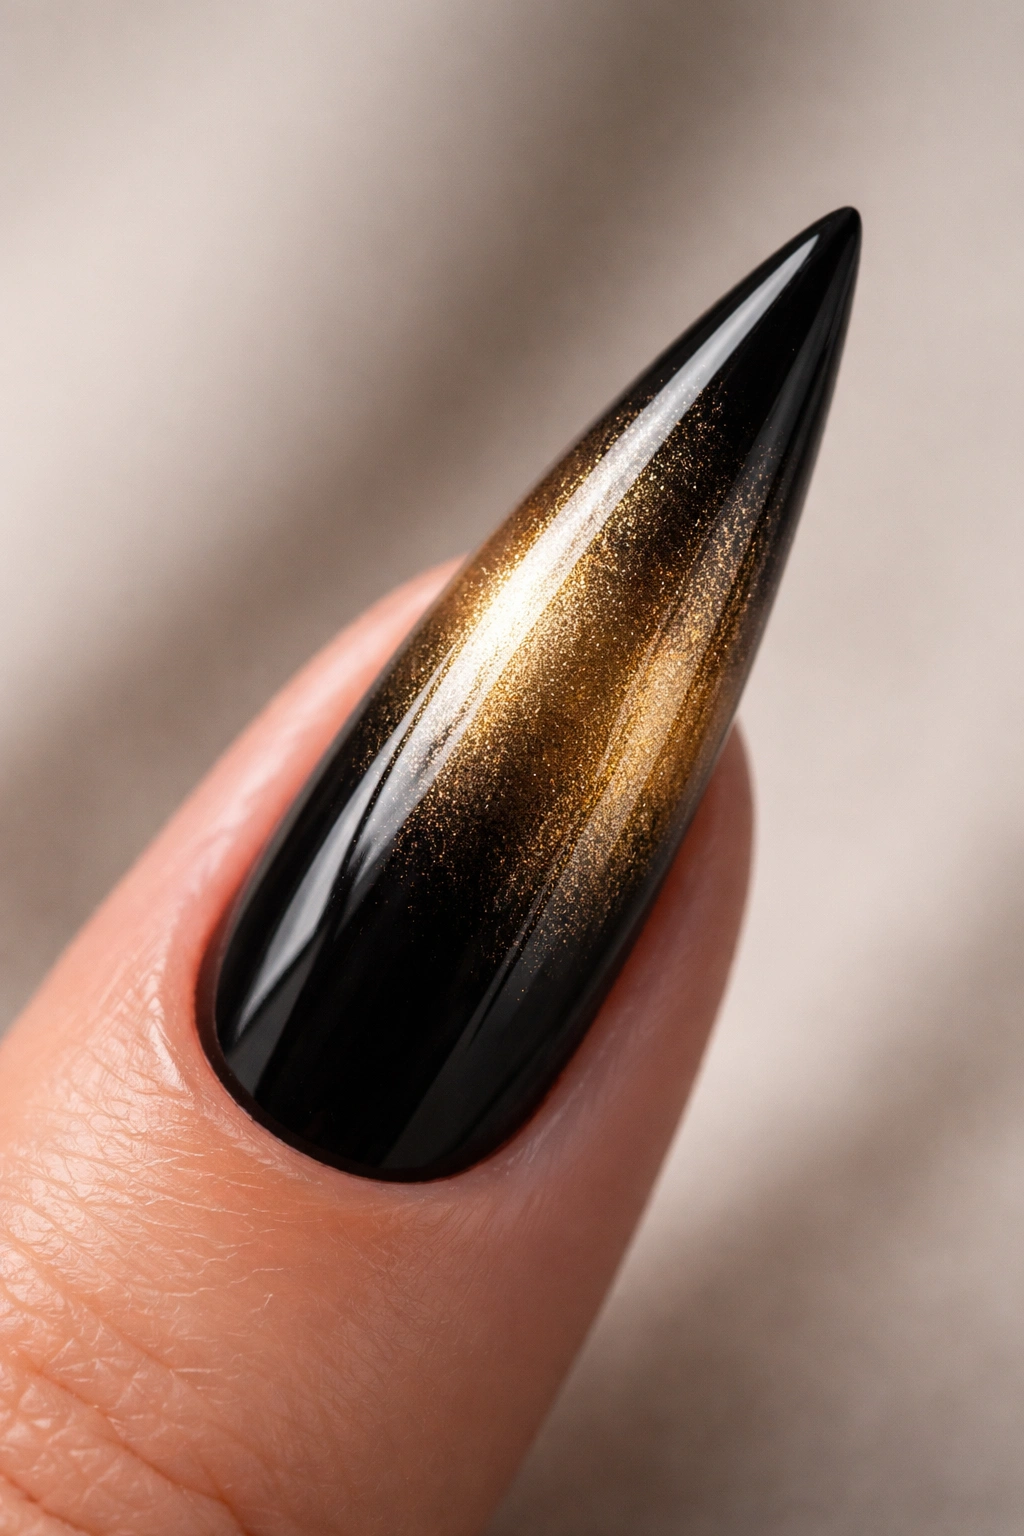
6. Black Cat Eye Effect with Gold Accent
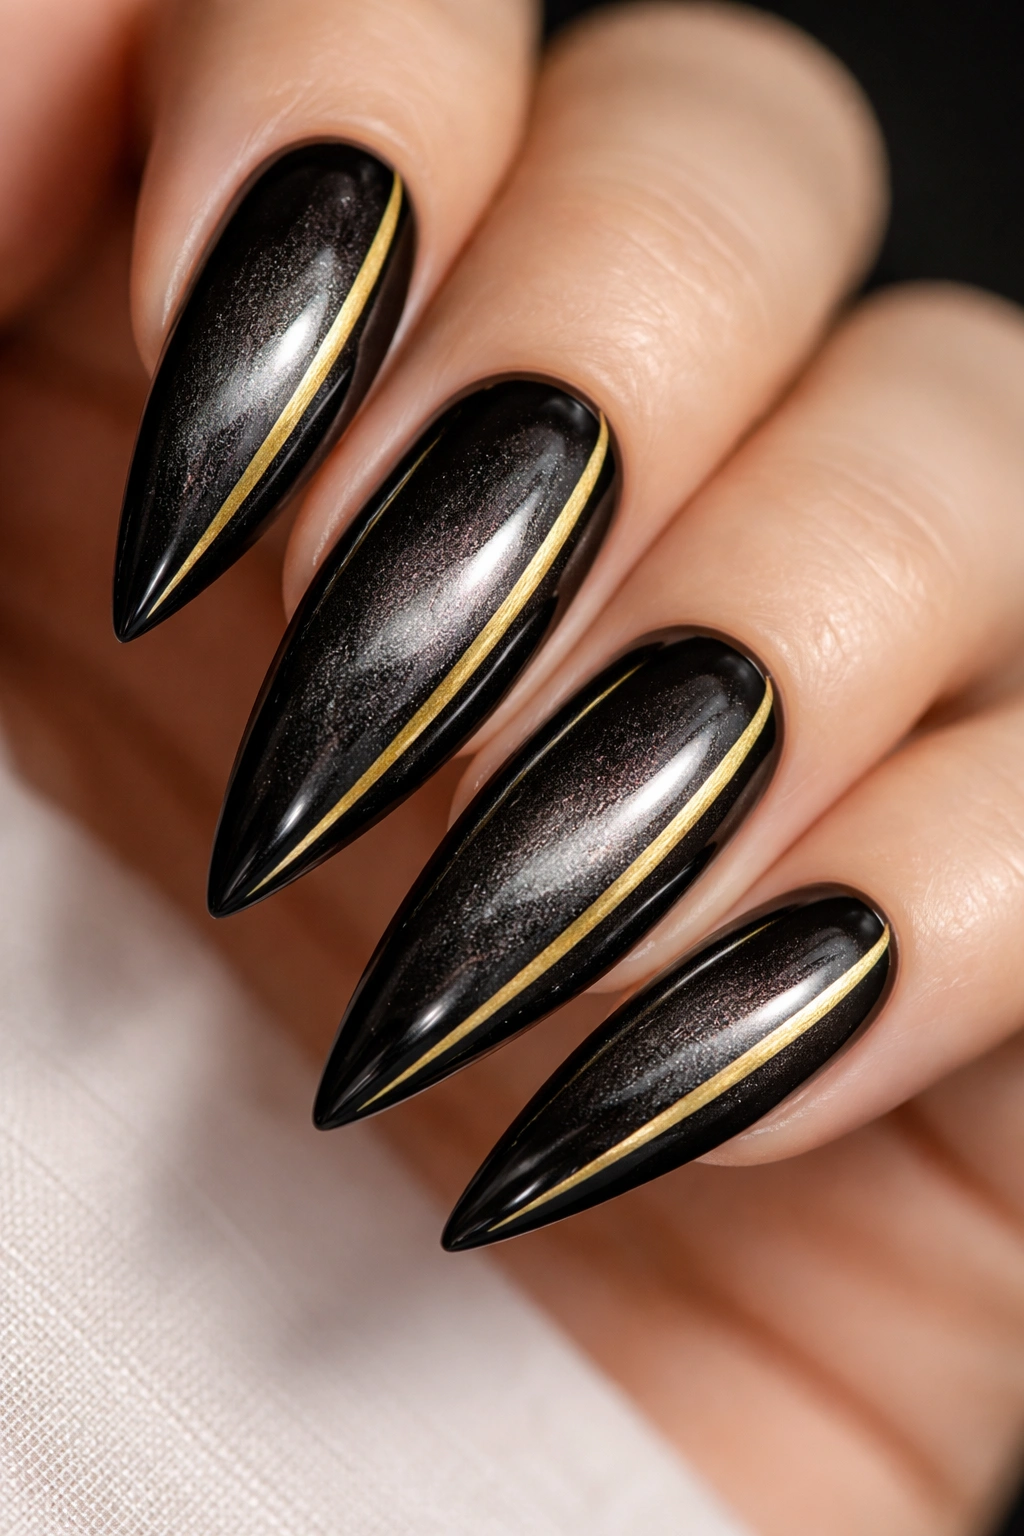
Cat eye nail art uses a special magnetic polish that creates a sleek, reflective line down the center of the nail — like a cat’s pupil. Combining this reflective black with a gold accent stripe creates an ultra-modern, almost futuristic look that feels both edgy and elegant.
The Magnetic Polish Technique
Magnetic gel or regular magnetic polish contains iron particles that respond to a magnet. When you apply the polish and hold a magnet near the surface, the particles align to create a distinct line or pattern. On black, this line appears as a reflective stripe that shifts and catches light beautifully.
Achieving the Perfect Cat Eye
- Apply 2-3 coats of black magnetic polish, allowing each to dry slightly
- While the final coat is still wet, hold the magnetic tool about ½-inch above your nail for 3-5 seconds
- The magnet will pull the iron particles toward it, creating a vertical line down the center
- Once the black polish is fully dry, add a thin stripe of gold polish next to the cat eye line for extra dimension
- Seal with a glossy top coat to enhance the reflective effect and add shine
Pro tip: The strength and distance of the magnet affects the intensity of the line. Experiment with how close or far you hold it to create thinner or thicker cat eyes based on your preference.
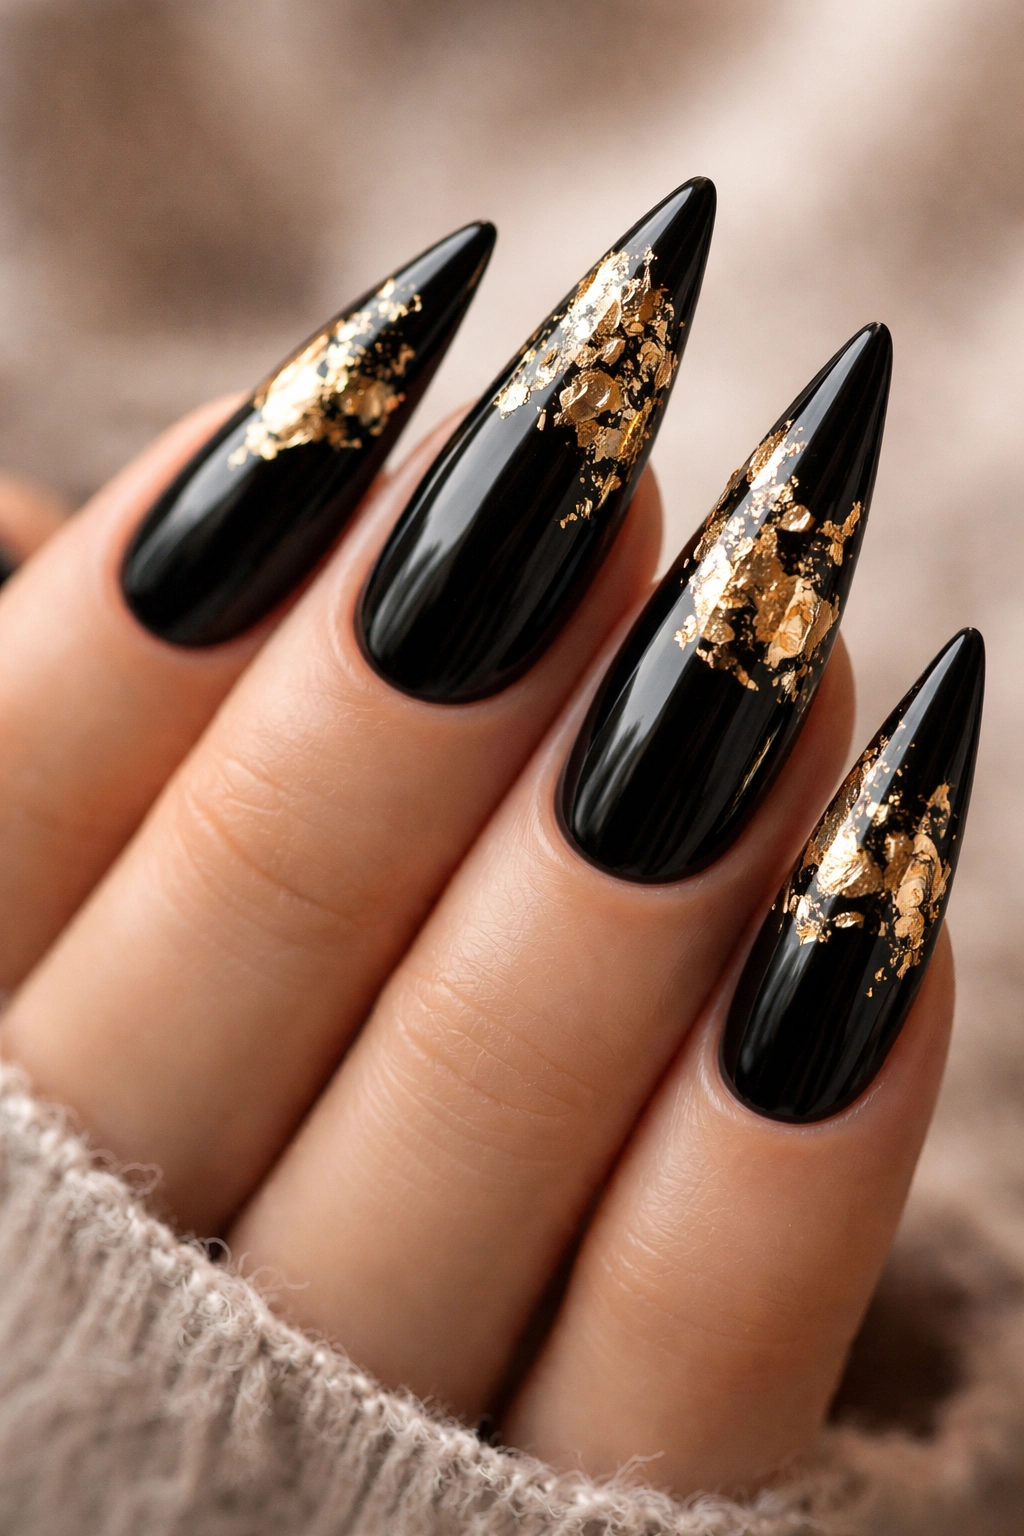
7. Real Gold Foil Flakes Embedded in Black Polish
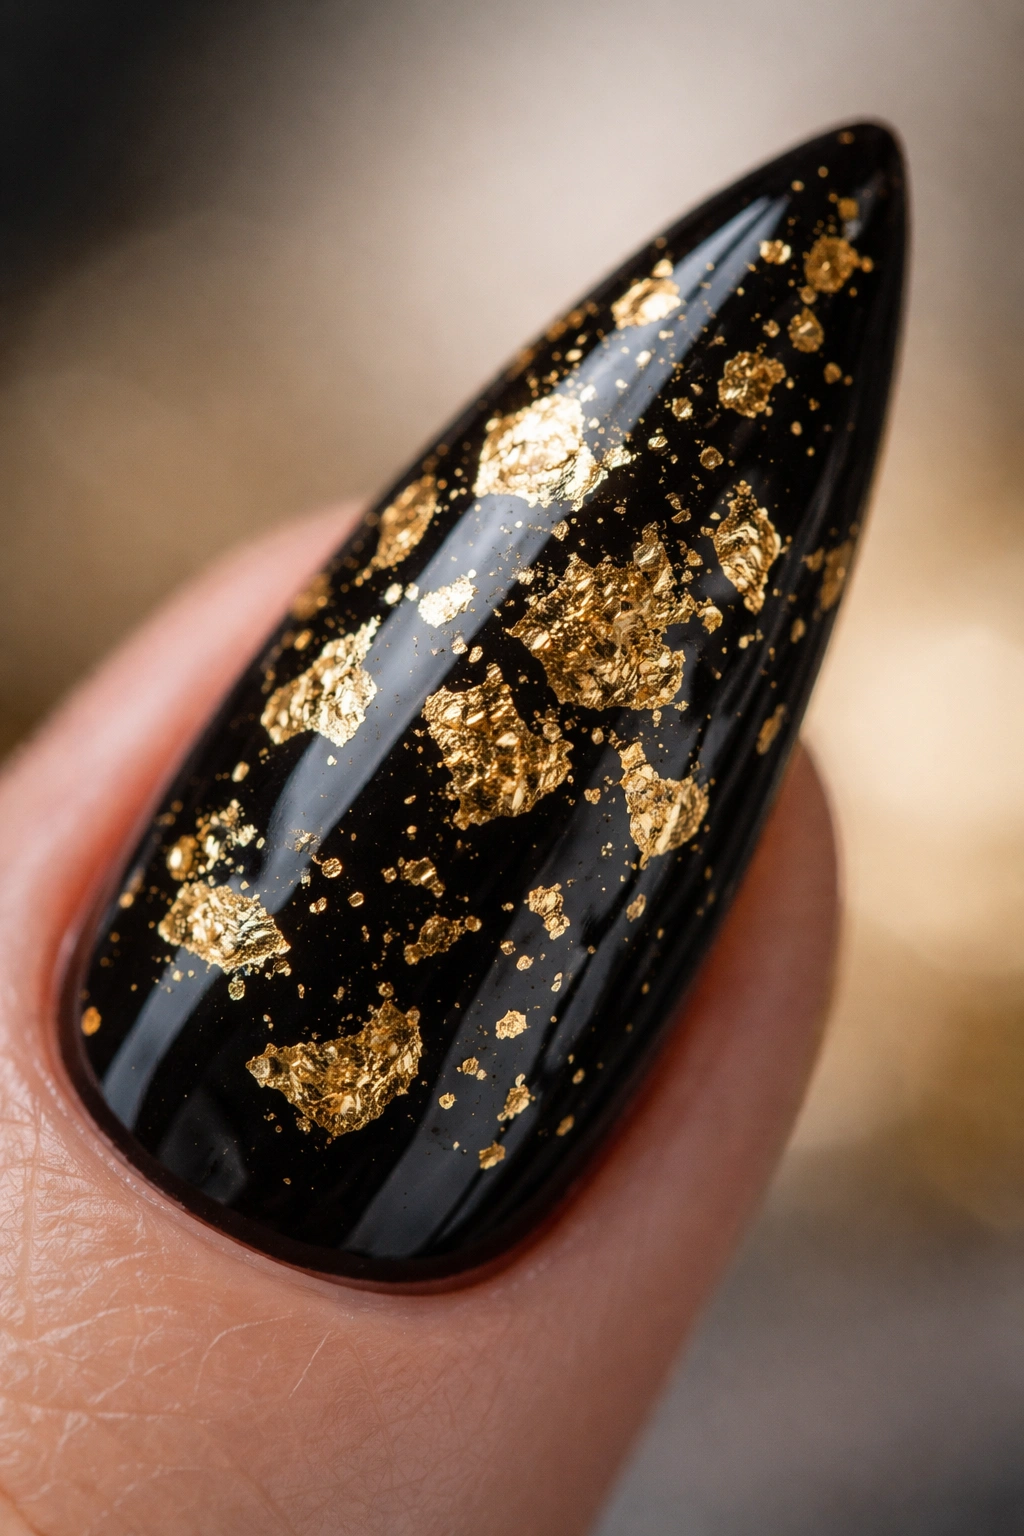
Actual gold foil (not glitter, but actual metallic sheets) mixed into black polish creates a luxury-level effect that looks like your nails are studded with actual gold. This is the kind of detail that makes people do a double-take and ask if your nails are professionally done.
Why Gold Foil Feels More Luxe Than Glitter
Gold foil creates larger, more reflective pieces that catch light differently than glitter does. The irregular shapes and sizes give an organic, almost raw-gold appearance that reads as high-end and intentional rather than sparkly.
Embedding Gold Foil Into Polish
- Paint 2-3 coats of black polish and seal with a thin layer of clear top coat while it’s still slightly tacky
- Tear small, irregular pieces of gold foil (you can buy foil sheets designed for nail art, or use actual gold leaf)
- Use a small brush or tweezers to place foil pieces randomly across the nail surface, pressing them gently into the tacky top coat
- They’ll adhere as the polish dries
- Once the foil is set, apply another layer of clear top coat to seal everything and create a smooth, wearable surface
Worth knowing: The foil pieces should be small enough that your nails still feel comfortable and don’t snag on clothing. Think scattered accents rather than a foil-covered surface.
8. Matte Black with Thin Gold Liner Detail
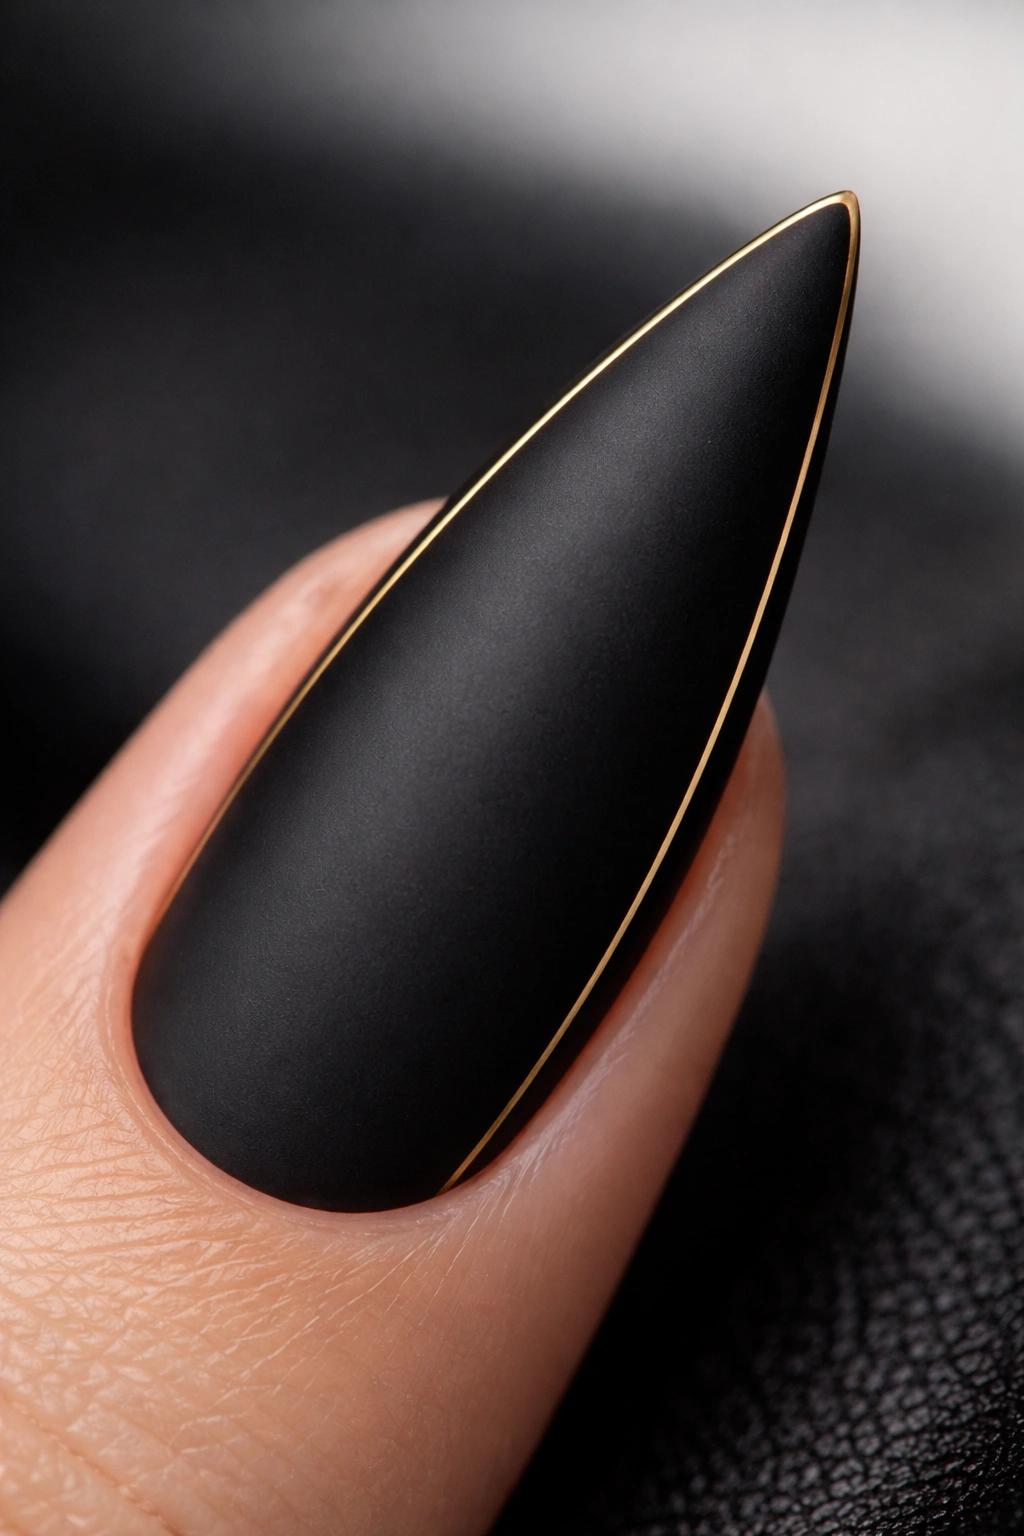
Minimalism in nail art means maximum impact when executed with precision. A matte black stiletto nail with just a thin gold outline around the perimeter or along the sides creates a refined, understated look that signals sophistication through restraint.
The Power of Negative Space
Nail designs don’t need to cover the entire surface to make a statement. A single fine gold line creates definition and focus without overwhelming the nail. This approach works especially well on stilettos because the shape itself makes a statement — the design just needs to enhance it.
Creating a Precise Gold Outline
- Paint your nails with 2-3 coats of matte black polish
- Use a very thin striping brush or nail art pen loaded with gold polish
- Paint a thin line around the entire perimeter of the nail, about 1mm from the edge
- Keep your hand steady and let the brush glide smoothly — rushing causes wobbly lines
- For a side-line variation, paint a thin vertical gold line down each side of the nail instead of outlining the entire perimeter
- Seal with matte top coat to maintain the finish
Pro tip: If your hand isn’t perfectly steady, use gold nail tape designed for nail art. It’s thin enough that it won’t create a bulky edge, and it gives you a perfectly crisp line every time.
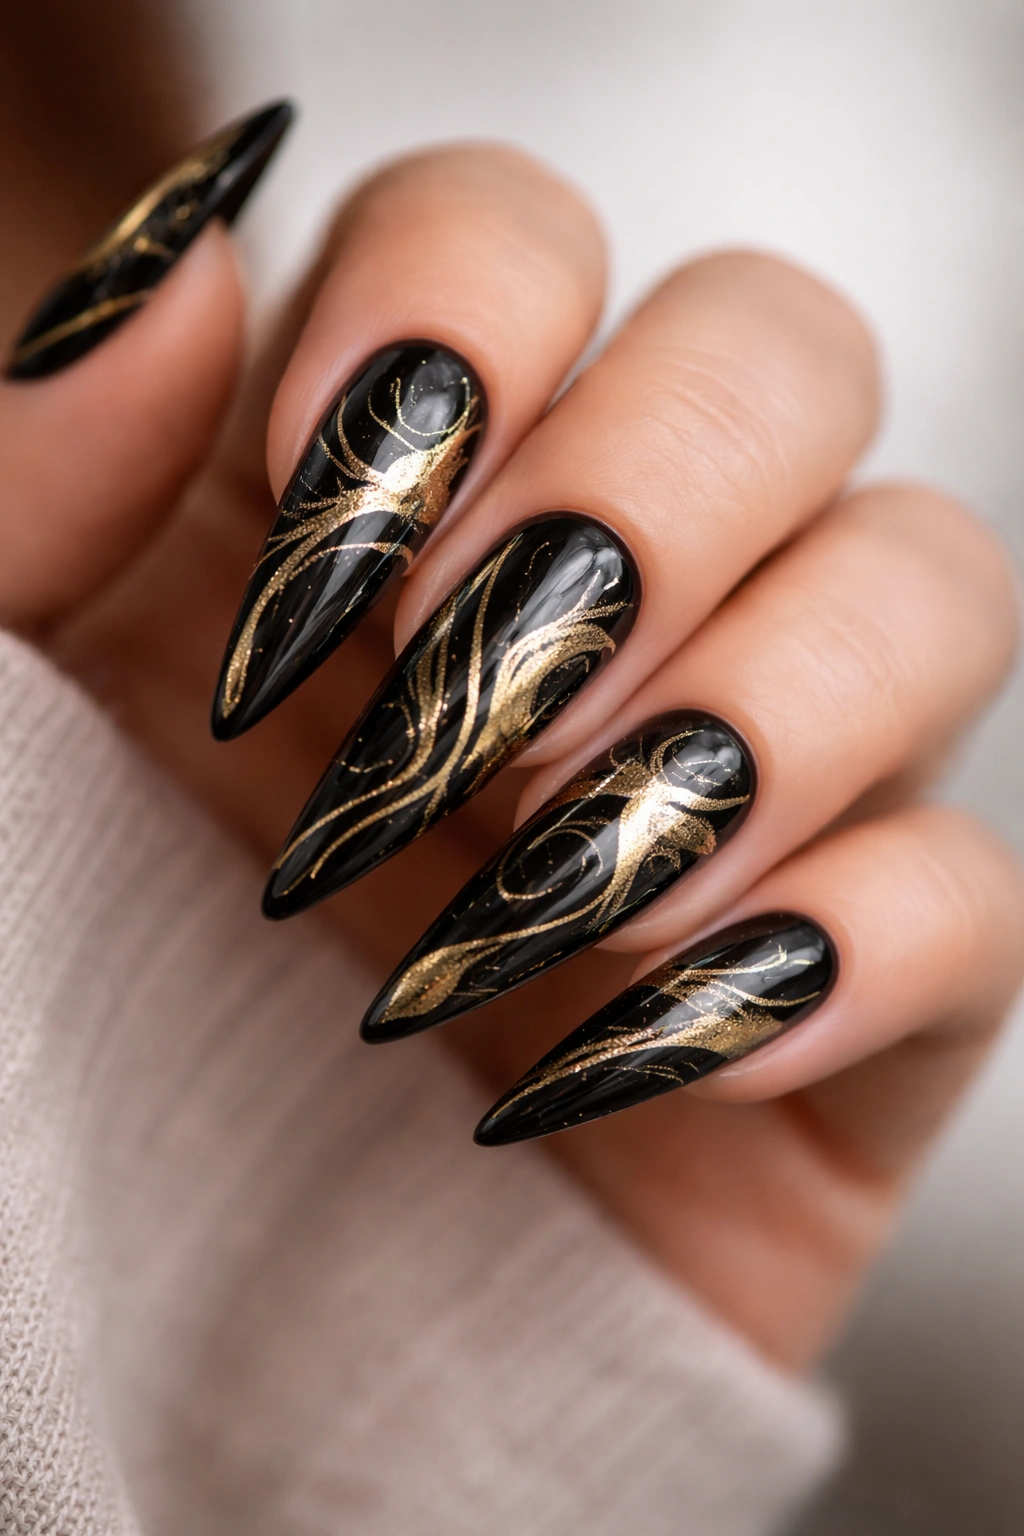
9. Black and Gold Marble Nail Art
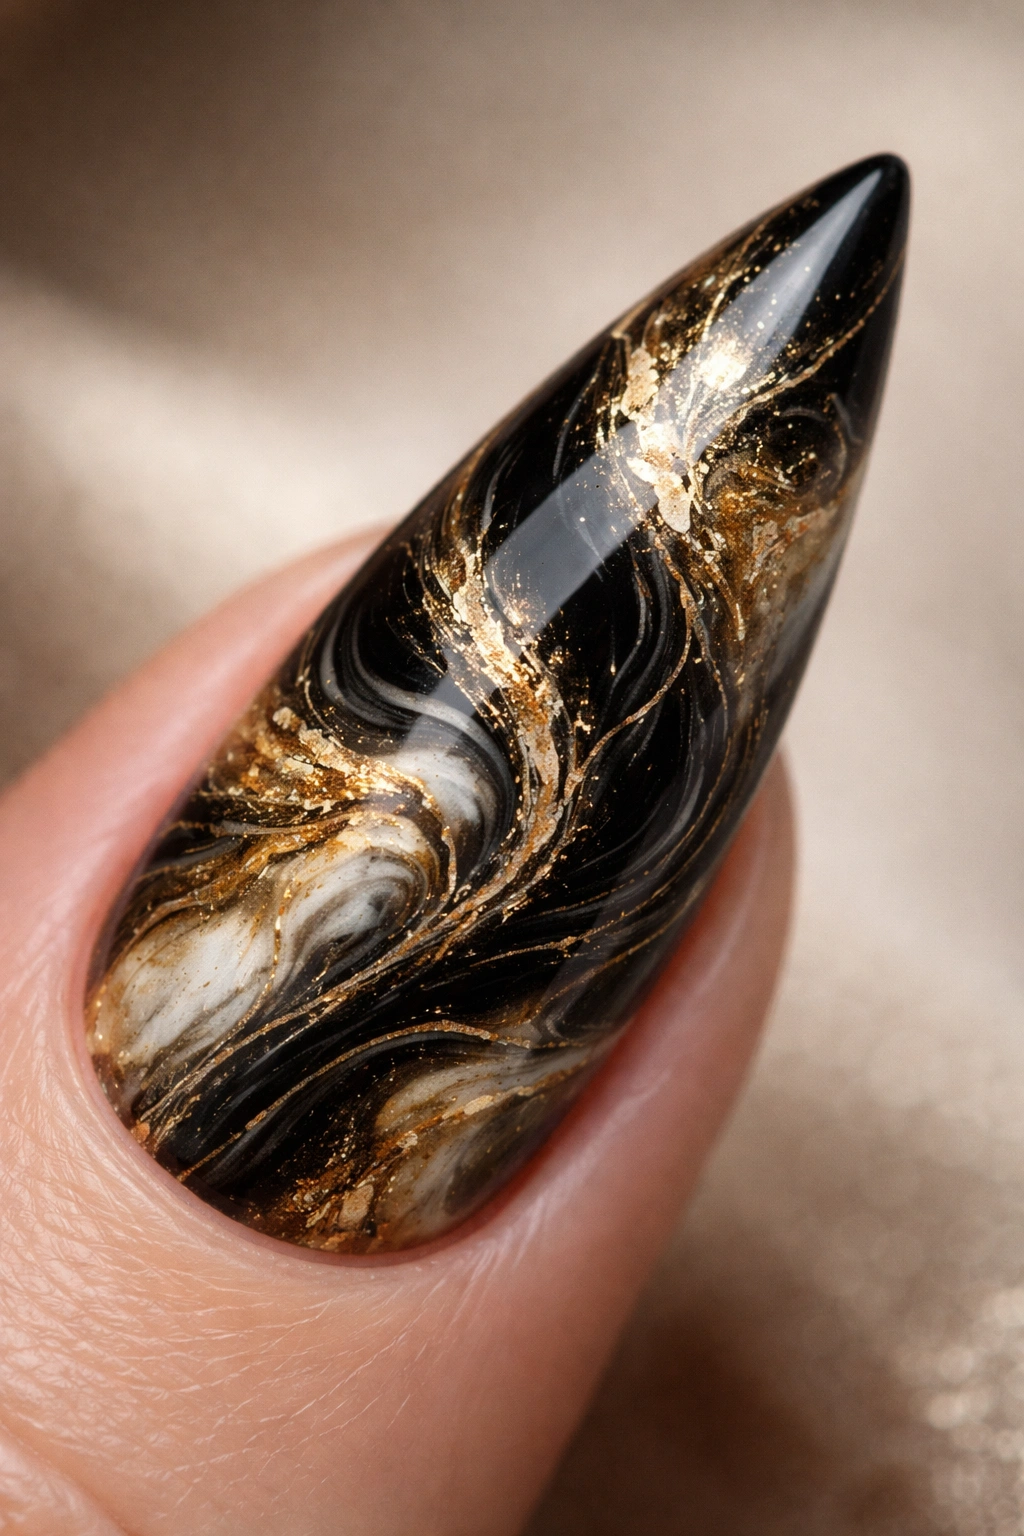
Marble designs create an organic, sophisticated aesthetic that never looks the same twice. When you swirl black and gold together, you get a design that feels both artistic and luxurious — each nail is genuinely unique.
Creating Authentic Marble Patterns
Marble is about the interplay between two colors without a clear division between them. The goal is organic swirls and veining that look natural rather than geometric or planned.
Water Marble Technique for Black and Gold
- Fill a shallow bowl with room-temperature water (not hot, which can make polish separate too quickly)
- Drop a blob of black nail polish into the water, then a blob of gold, alternating back and forth a few times
- Use a thin brush or toothpick to swirl the colors together, creating marble-like patterns
- Dip your nail at a slight angle into the water, pressing it through the polish pattern on the surface
- The polish will stick to your nail and wrap around as you pull it out — the excess will fall back into the water
- Immediately dip your finger in water to stop the process, then gently peel away excess polish from your finger
- Once dry, trim and clean up the edges with acetone, then seal with top coat
Worth knowing: Water marble takes practice — expect your first few attempts to be imperfect. The technique gets easier each time you do it, and imperfect marble still looks intentional and artistic on nails.
10. Negative Space Black and Gold Design
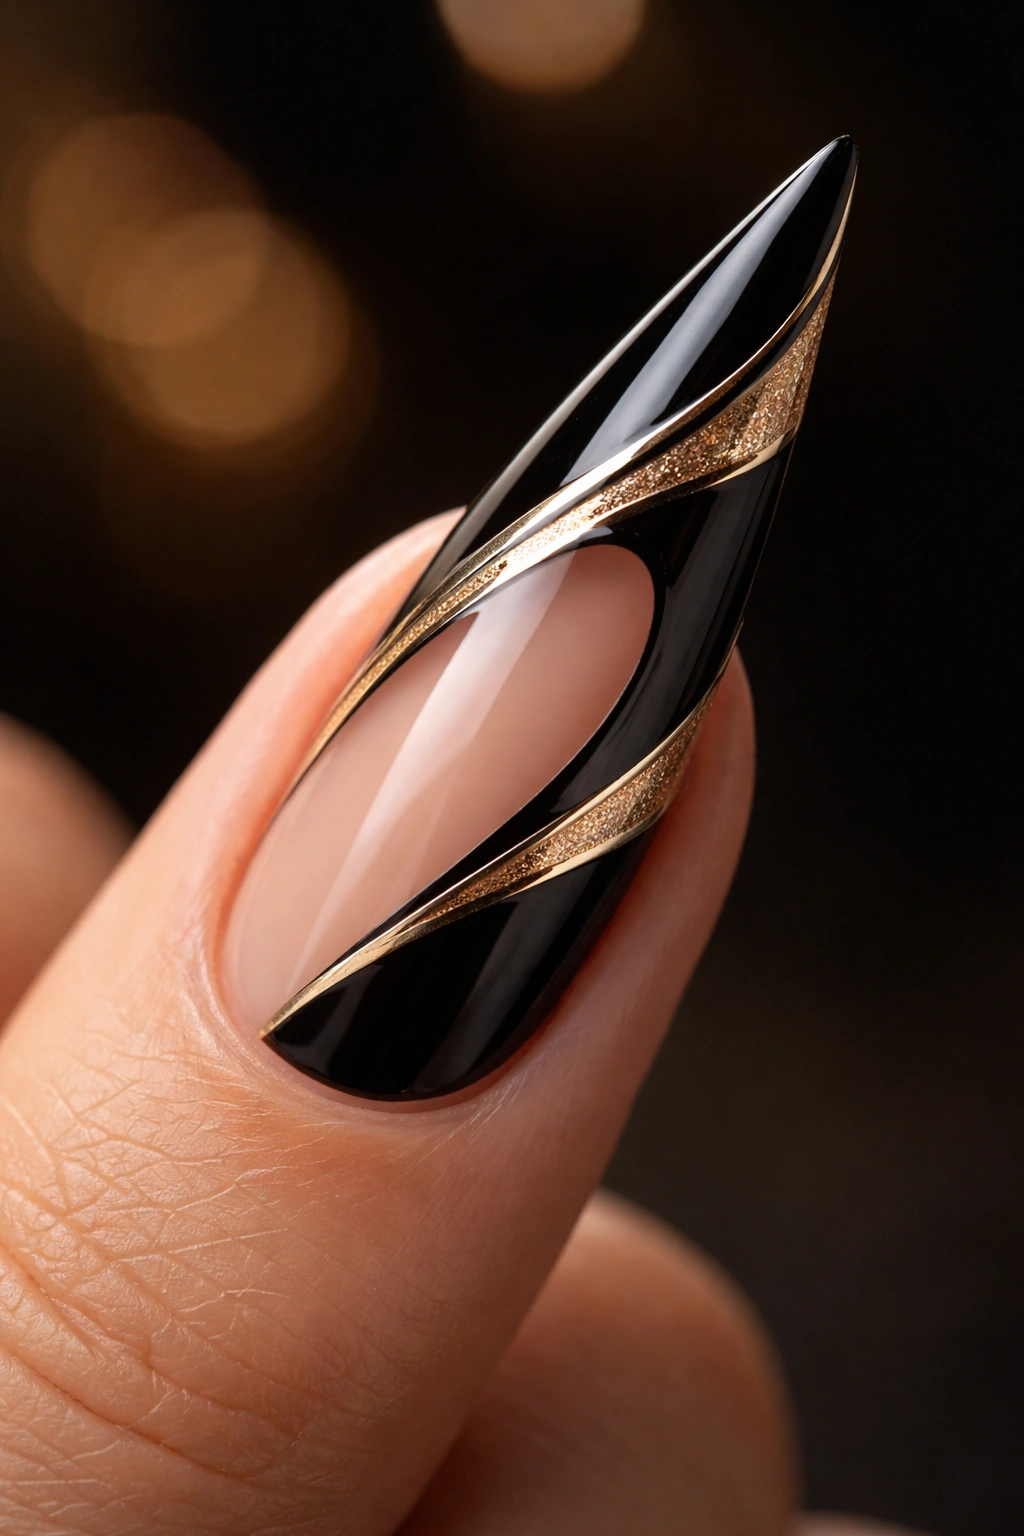
Negative space designs leave parts of the nail bare (showing your natural nail or a base color), creating contrast and a modern, editorial aesthetic. Black and gold in a negative space design feels contemporary and intentional rather than just “incomplete.”
Why Negative Space Works on Stilettos
The elongated shape of a stiletto nail is perfect for negative space because the bare areas contribute to the visual length. Rather than filling the entire nail, you’re creating sections and breaks that emphasize the nail’s length and shape.
Negative Space Design Ideas
- Leave a thin horizontal stripe of bare nail running across the middle with black above and gold below
- Paint black on the left half and gold on the right half, leaving a thin unpainted line between them
- Create a geometric void — paint a black triangle at the base and a gold triangle at the tip, leaving negative space in between
- Paint an outline only (black outline at the perimeter, gold outline in the middle) with the nail bed showing through the center
Apply these designs by using nail stickers or tape to mark off the areas you want to leave bare, paint your colors, and remove the tape once the polish is fully dry.
Pro tip: If you leave natural nail exposed, make sure your nail bed is clean and polished — negative space designs show imperfections more readily than full coverage.
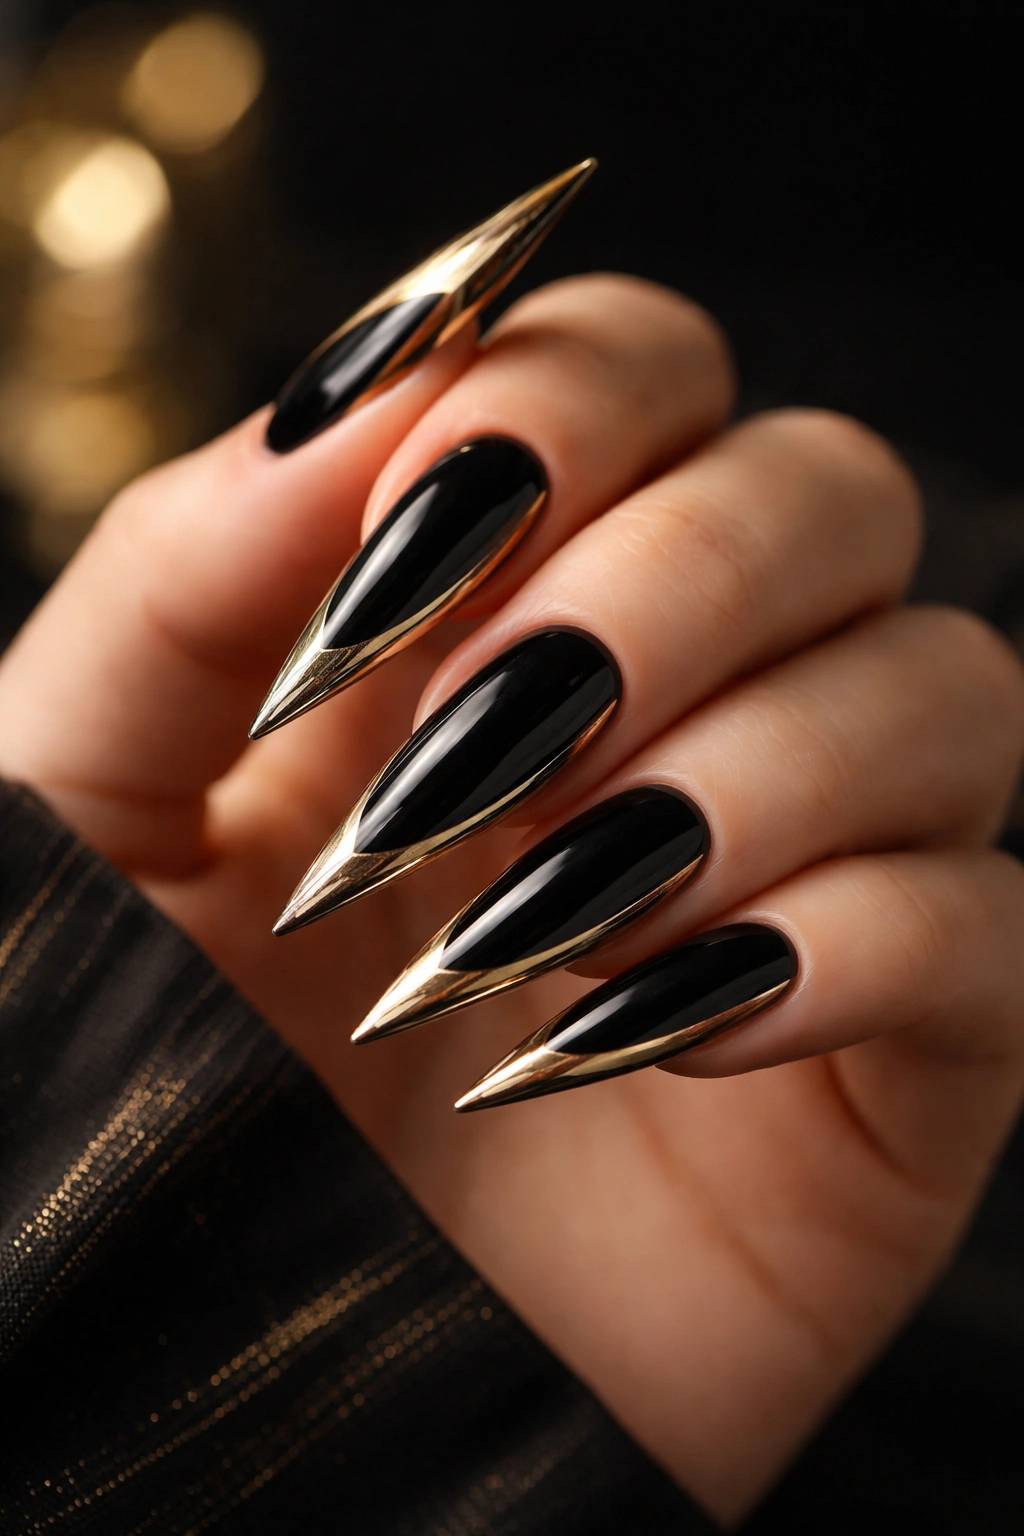
11. Gold Metallic Tips with Black Base
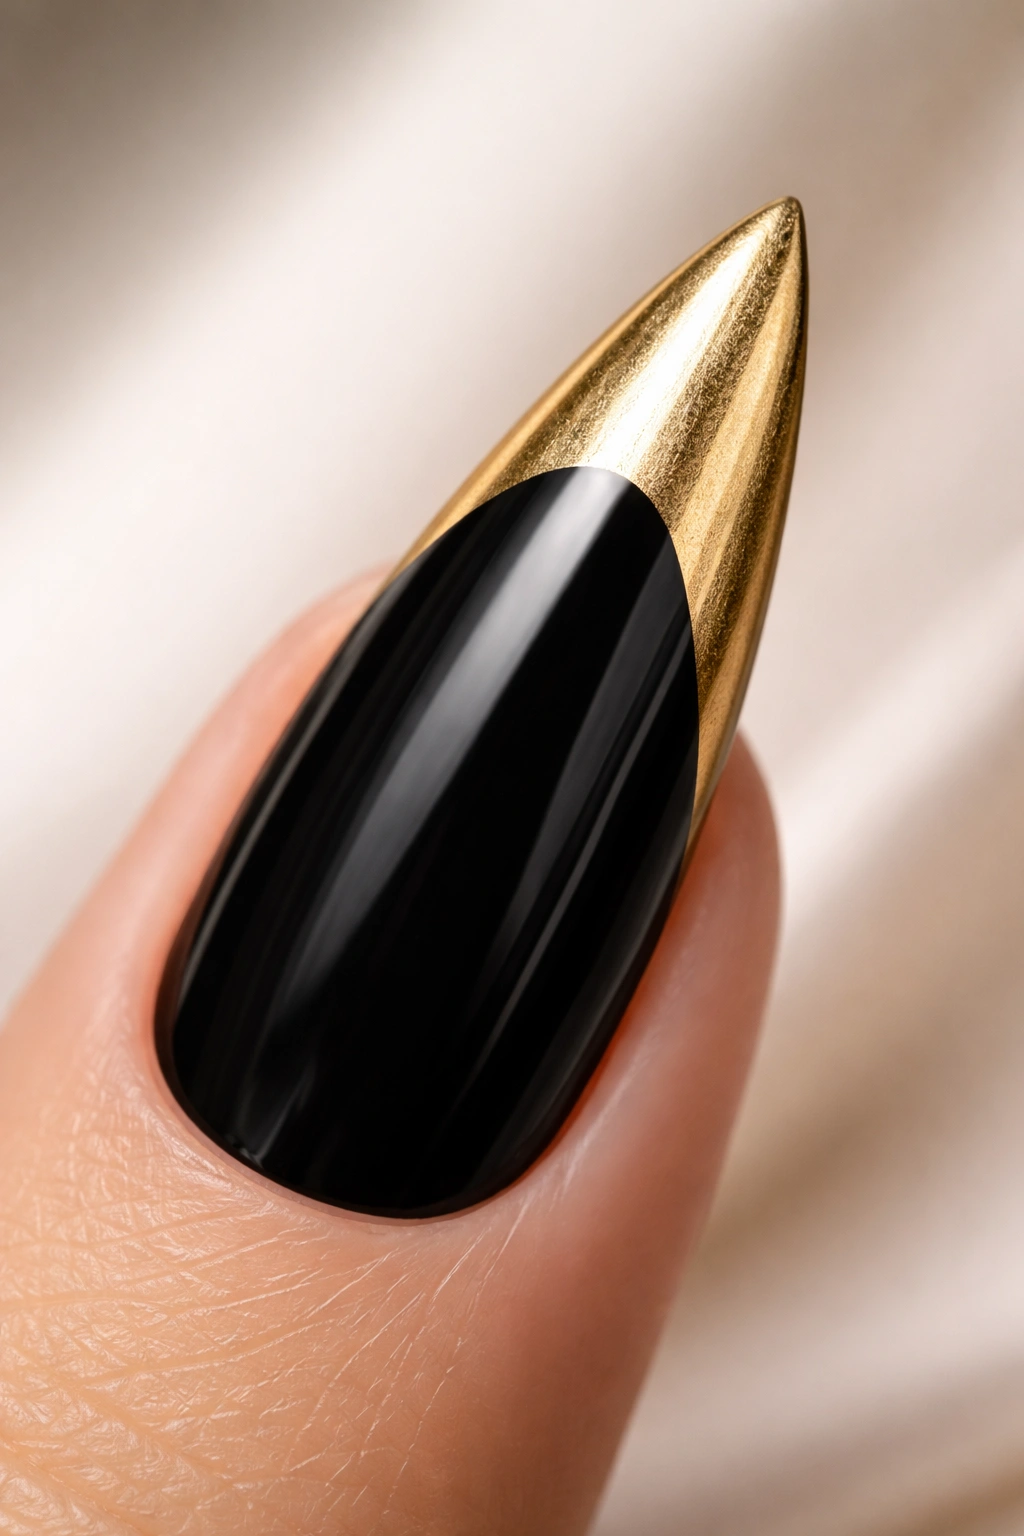
A modern take on the French manicure, this design uses a thick metallic gold tip against a black base. It’s bold, it’s contemporary, and it emphasizes the length of your stiletto nails while keeping the overall look clean and wearable.
The Contemporary French Alternative
Traditional French tips use white or nude — gold tips are the modern evolution that feels current without being trendy. Gold reads as luxury, while the black base keeps it sophisticated rather than playful.
Creating Bold Gold Tips
- Paint 2-3 coats of black polish on the entire nail and allow it to dry completely
- Using a thick striping brush or angled brush, paint a gold metallic tip that covers approximately the top ⅓ of your nail
- The line where black meets gold doesn’t need to be perfectly straight — a slightly curved or slightly angled edge often looks more intentional and flattering
- Make sure the gold polish is completely opaque with no black showing through — you may need 2 coats just for the gold tip
- Seal everything with a glossy top coat to enhance the metallic finish and add shine
Worth knowing: If you want a perfectly straight line between the black and gold, use a gold striping tape applied at an angle across the nail. Paint the black above it and the gold below, then remove the tape once everything is dry.
12. Luxury Damask Pattern in Gold on Black
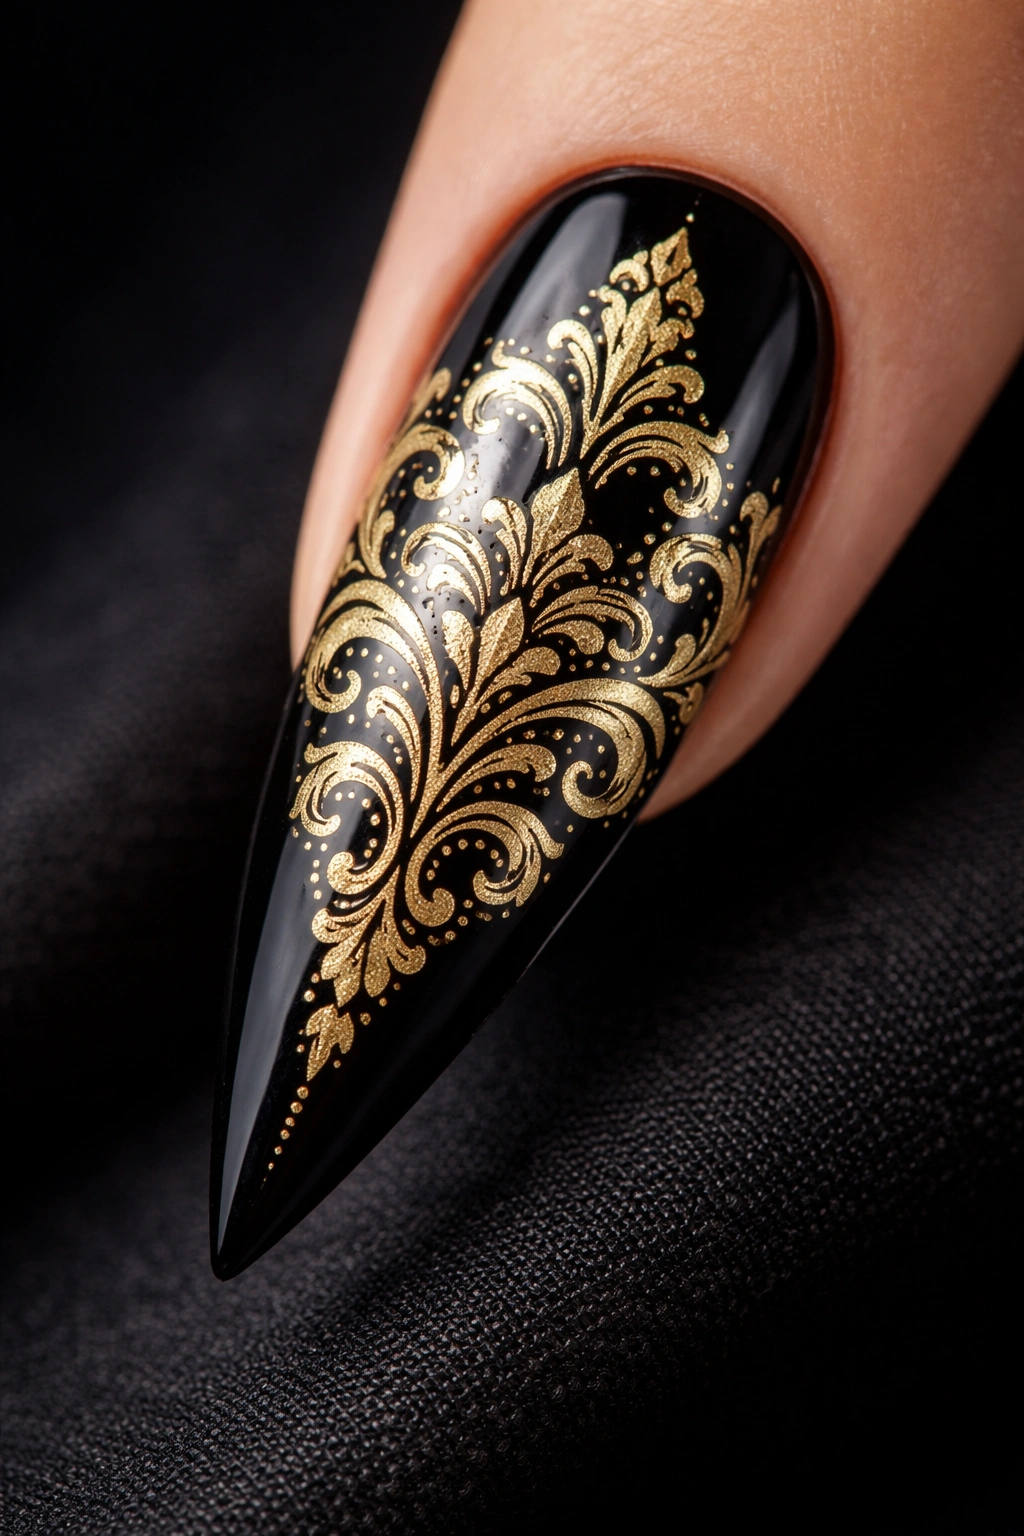
Damask is an ornate, symmetrical pattern with baroque vibes that instantly communicates elegance and opulence. A delicate damask design in gold on a black background looks expensive and feels like something you’d see on a runway or in a luxury magazine.
The Ornamental Appeal
Damask patterns are inherently sophisticated because they’re associated with wealth, classic design, and timeless elegance. Even a small damask detail on a nail elevates the entire look and makes a statement about refined taste.
Painting or Applying Damask Designs
- Paint your base with 2-3 coats of black polish
- For freehand painting: Use a very thin brush and gold polish to paint small damask details. Damask typically features curved flourishes, leaves, and symmetrical swirls. Start with a central curve and build out from there, keeping both sides balanced
- For easier application: Use damask nail stickers or stamping plates designed for nails. Nail stamping uses a special stamper tool and stamping polish to transfer pre-designed patterns onto your nails perfectly
- If using stamps, paint your black base, use the stamper to apply the gold damask pattern, then seal with top coat
- Seal all designs with a glossy top coat to enhance the gold and add shine
Pro tip: Damask works beautifully as an accent on just one or two nails rather than all ten. Paint all nails black and gold, then add damask details to your ring fingers or middle fingers for a custom, editorial look.
13. Abstract Gold Nail Art Over Black
Abstract art has no rules — lines, shapes, and patterns flow wherever they want. When you embrace this freedom on black nails with gold polish, you create something genuinely unique that reflects your personal style rather than following a predetermined design.
The Freedom of Abstract Expression
Abstract designs work because there’s no “right” way to do them. Imperfect lines, unexpected color placement, and organic shapes all read as intentional artistic expression. You don’t need precision or skill — you need confidence and willingness to experiment.
Creating Your Own Abstract Design
- Paint 2-3 coats of black as your base and let it dry completely
- Load a thin brush with gold polish and start making marks on your nail — lines, dots, squiggles, whatever appeals to you in that moment
- Don’t overthink it; let your hand move naturally and create as you go
- You can add layers of detail by letting each layer dry and then adding more gold marks on top
- Step back occasionally to see the overall composition and adjust if needed
- Once you’re satisfied, seal with top coat
Worth knowing: If your abstract creation doesn’t feel balanced, you can always add more gold to fill in empty spaces or paint over areas that feel too busy. Abstract art is inherently forgiving because there’s no template to deviate from.
14. Chrome Gold Effect on Black Stiletto Nails
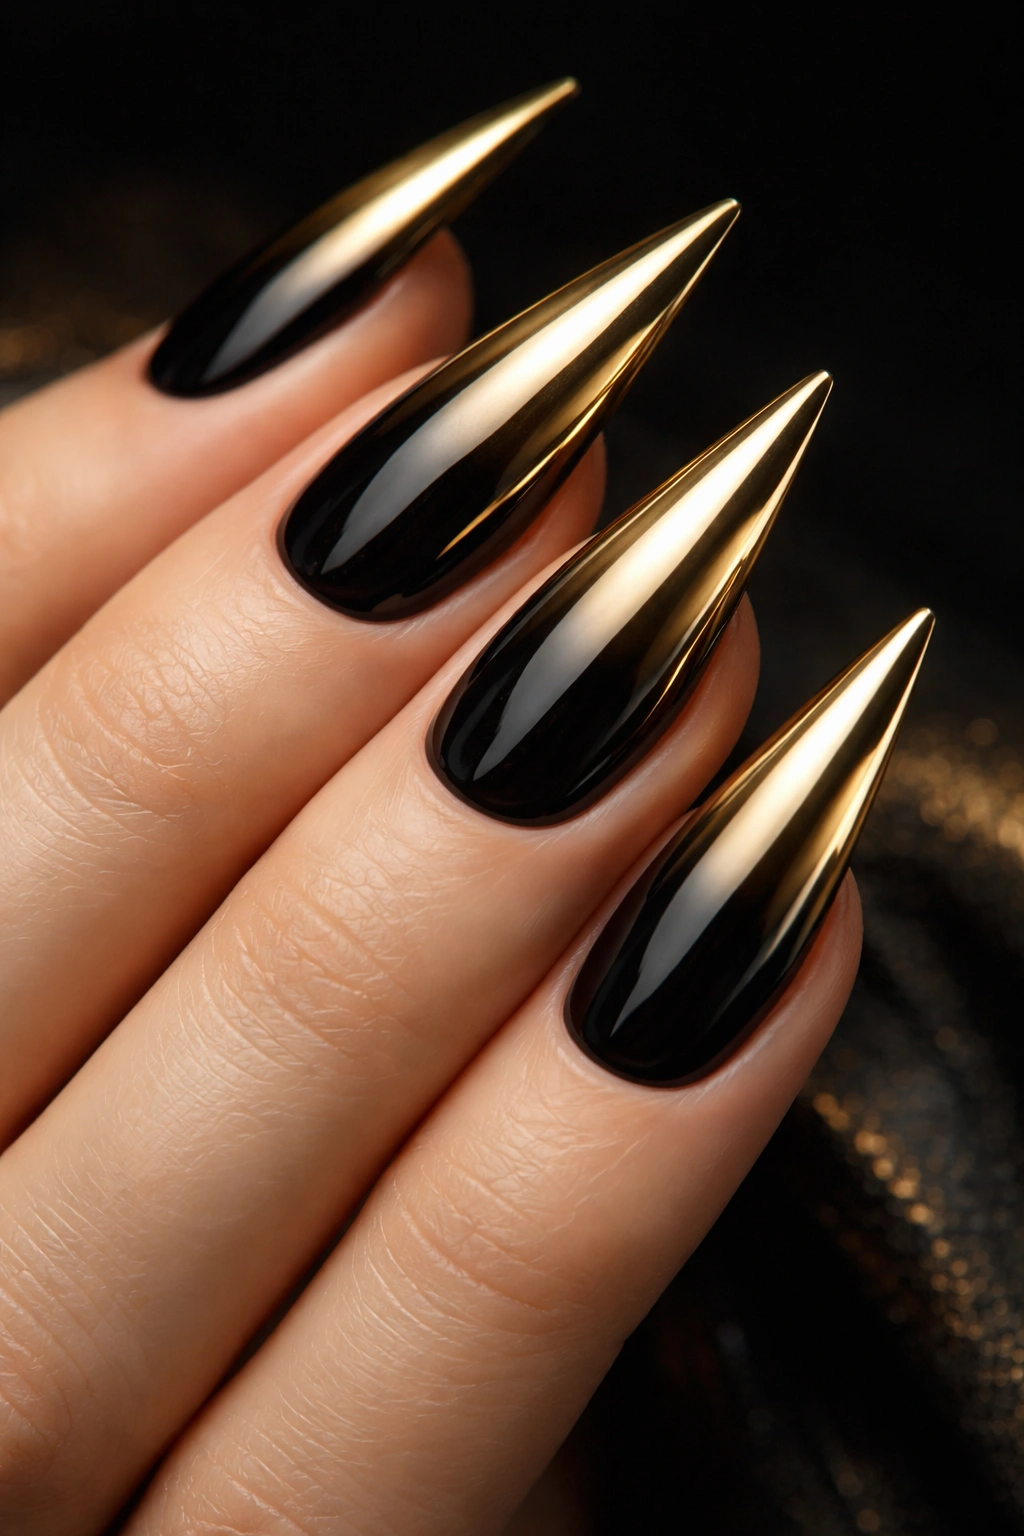
Chrome nails use a special mirror-finish powder that reflects light like actual metal. When you apply chrome powder over a black or dark base, it creates an otherworldly, high-shine effect that’s pure luxury and catches light from every angle.
The Science of Chrome Finish
Chrome powder contains pigments and reflective particles that create a mirror-like surface. Applied correctly, it looks like your nails are made of polished metal. It’s high-impact and photographs beautifully.
Achieving Chrome Finish
- Apply a dark base (black works perfectly) with gel polish or a specially formulated chrome base and cure it under a UV lamp
- While the base is still slightly tacky (or use a sticky base coat if your base has already fully cured), apply the chrome powder
- Use a velvet or special chrome application pad to buff the powder into the nail surface in circular motions
- The more you buff, the more reflective and mirror-like the finish becomes
- Seal with a clear top coat (gel or regular, depending on what you started with) to protect the chrome and lock it in place
Pro tip: Chrome powder is delicate and will rub off without proper sealing. A strong top coat is essential for longevity. Some people apply a second layer of top coat for extra protection.
15. Black and Gold Leopard Print Stilettos
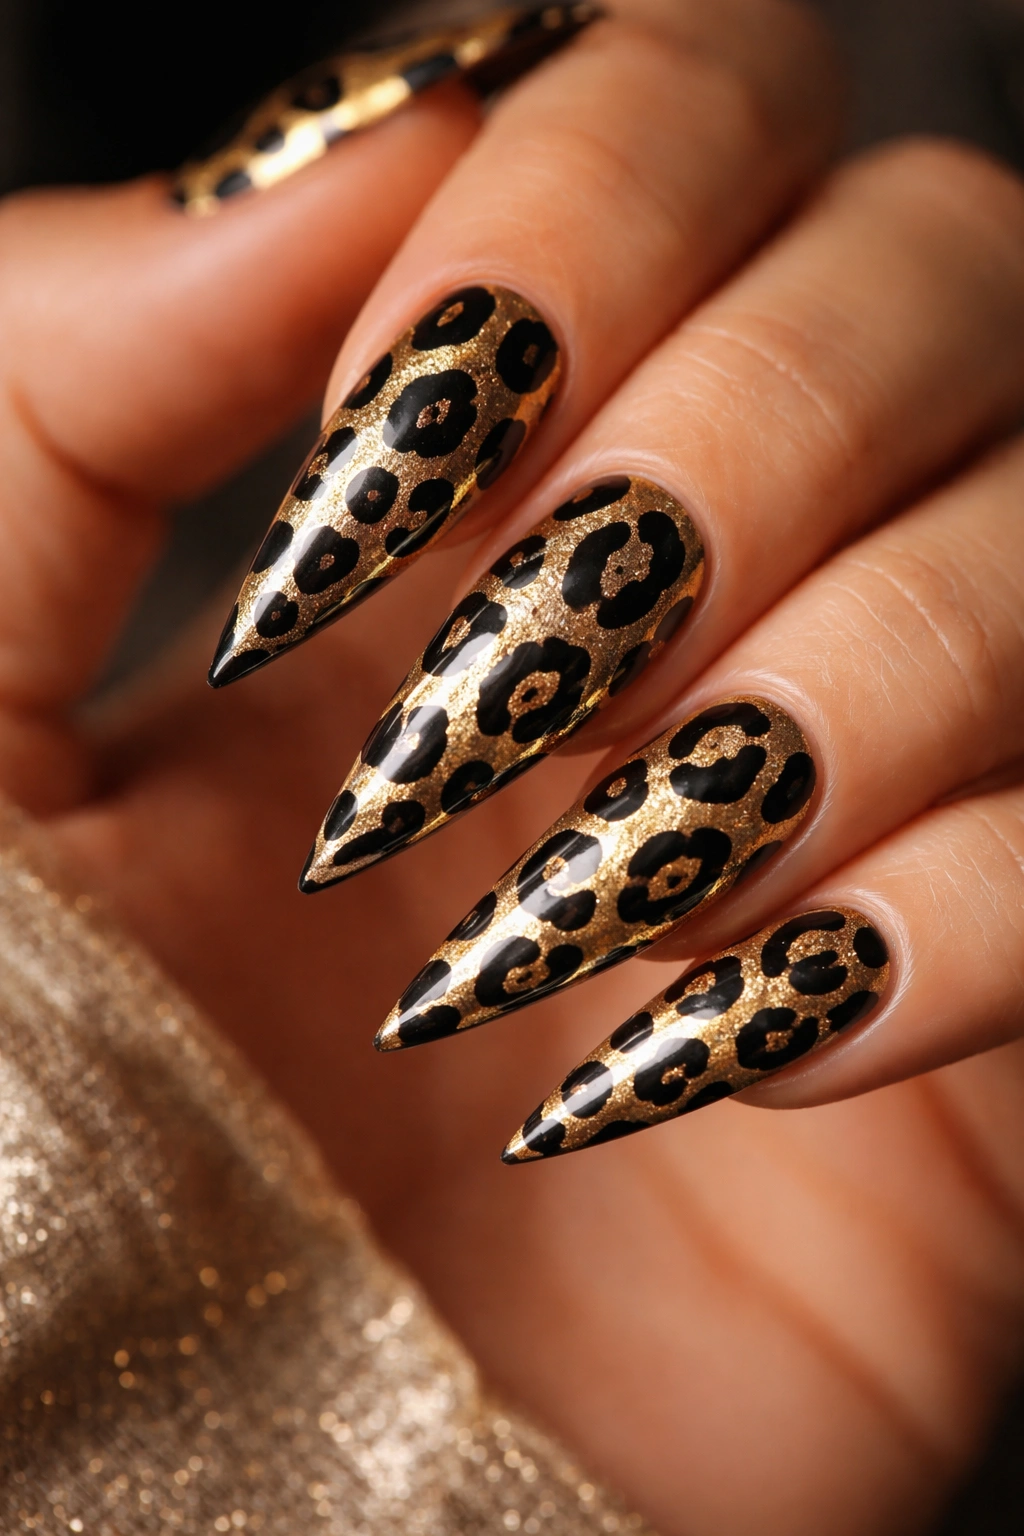
Animal print is inherently bold and glamorous, and leopard print specifically reads as both edgy and elegant. When you combine leopard spots with black and gold, you get a design that’s fierce, fashionable, and absolutely eye-catching.
Executing Leopard Print Pattern
Leopard spots aren’t perfectly round — they’re irregular ovals and curved shapes clustered together. This organic quality actually makes them easier to paint freehand because perfect precision isn’t the goal.
Painting Leopard Spots
- Paint your base with 2-3 coats of gold polish and let it dry completely
- Using a very thin brush or dotting tool loaded with black polish, paint irregular oval shapes across the nail
- Make some spots larger and some smaller for a natural, organic look
- The spots should cluster together but not completely cover the gold — leave areas of gold showing between the spots
- Add a thin black outline around some of the spots if you want extra definition
- Seal with a glossy top coat to finish
- Variation: Paint the base black and add gold leopard spots instead, or create a two-tone effect with some gold spots and some black spots on a lighter base
Worth knowing: Leopard print works well as an accent on just your ring fingers or thumbs while keeping other nails solid black or gold. This creates a balanced, editorial look rather than an all-over animal print.
16. Diagonal Striped Black and Gold Pattern
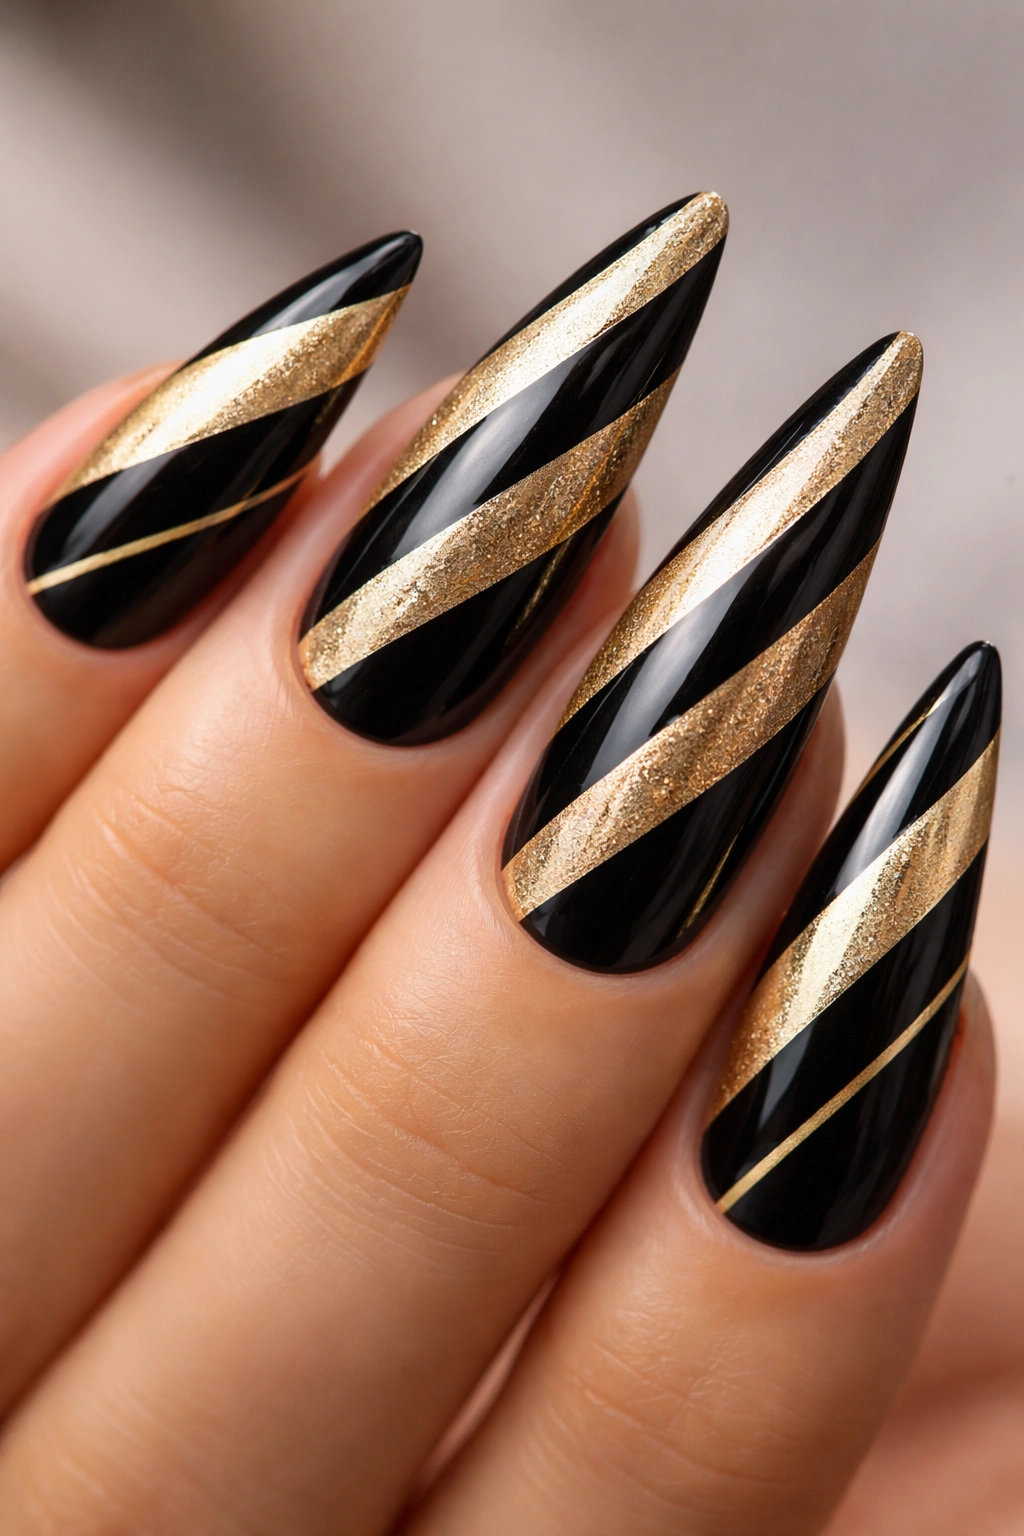
Diagonal stripes create movement and visual flow that feels dynamic and energetic. When you alternate black and gold stripes at a diagonal angle across your stiletto nails, you create a design that’s bold, geometric, and undeniably stylish.
Why Diagonal Lines Work Better Than Vertical or Horizontal
Diagonal lines create a sense of motion and direction that pulls the eye across the nail. They’re more visually interesting than straight vertical or horizontal stripes and create a sophisticated, almost Art Deco aesthetic.
Creating Perfect Diagonal Stripes
- Choose your base color — either black or gold, whichever color you want to use as the primary base
- Paint 2-3 coats of your chosen base color and let it dry completely
- Use gold or black striping tape (whichever color you didn’t choose for the base) to create diagonal lines across the nail at a consistent angle
- Apply the tape from approximately the lower left corner toward the upper right corner at about a 45-degree angle
- Space the tape strips about ¼-inch apart
- Paint your contrasting color over the entire nail surface
- Once the paint is completely dry, carefully peel away the tape to reveal clean, crisp diagonal stripes
- Seal with a glossy top coat
Pro tip: Striping tape is your best friend for this design because it guarantees straight lines and clean edges. Even if tape isn’t available, you can paint stripes freehand — they don’t need to be perfectly straight to look intentional.
17. Gold Leaf Accents on Black Stiletto Nails
Gold leaf creates a delicate, almost ethereal effect where thin sheets of real or imitation gold adhere to the nail surface. Unlike glitter or foil, gold leaf looks wispy and organic, like nature has dusted your nails with precious metal.
The Delicate Luxury of Gold Leaf
Gold leaf feels high-end and handcrafted in a way that screams artisanal luxury. It’s the kind of detail that makes people ask if you had it done professionally, even if you created it yourself.
Applying Gold Leaf
- Paint 2-3 coats of black polish as your base and seal with a clear top coat while it’s still slightly tacky
- Tear small pieces of gold leaf into irregular shapes — larger pieces create bolder accents, while tiny pieces create a more delicate effect
- Use a fine brush or tweezers to place gold leaf pieces onto the tacky top coat, positioning them wherever feels right (scattered around the nail, clustered at the tip, arranged along one side)
- Press gently to ensure they adhere, but don’t press so hard that you break the delicate leaf
- Once the top coat is fully dry, apply another layer of clear top coat to seal the gold leaf permanently
- The gold will shift slightly as you move your hands, creating an almost magical effect
Worth knowing: Gold leaf is fragile and can flake if not properly sealed. Make sure that final top coat is thorough and completely covers all the leaf pieces.
18. Black and Gold Ombré Fade Effect
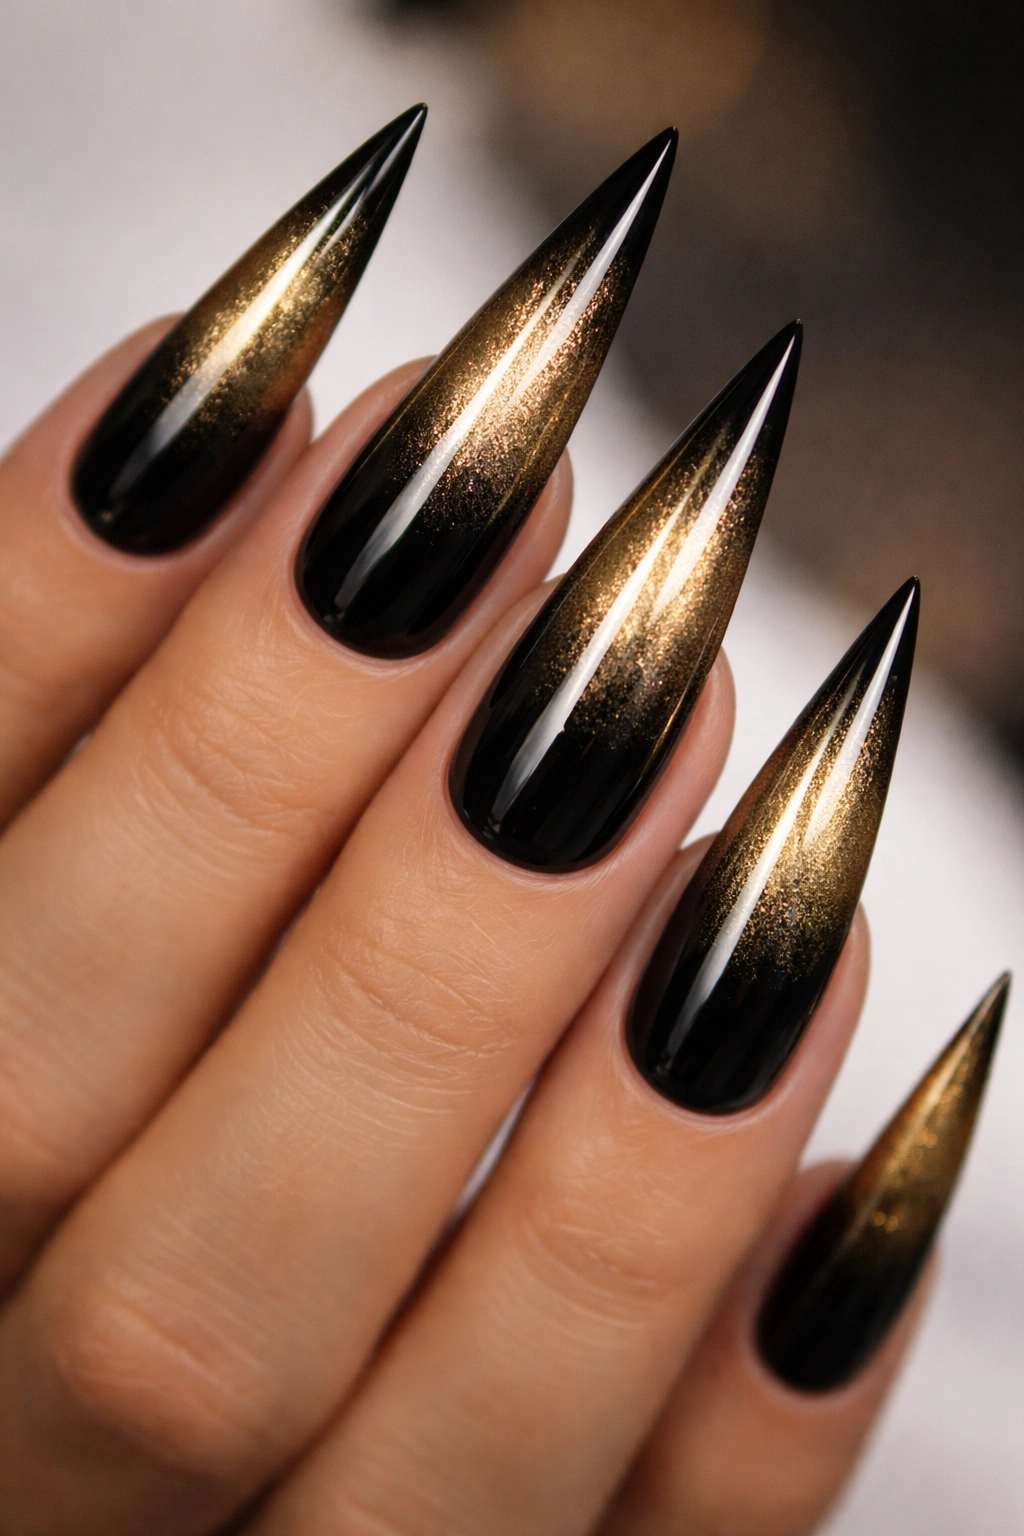
Ombré nails create a gradient transition from one color to another, and when it’s black fading into gold (or vice versa), you get a design that’s both sophisticated and visually dynamic. The gradient creates depth and makes the color transition itself part of the design.
The Visual Movement of Ombré
An ombré gradient draws the eye along the length of the nail in a smooth transition, which complements the elongated shape of stiletto nails beautifully. The effect is more subtle and refined than a sharp color block but more contemporary than a simple solid color.
Creating a Black-to-Gold Ombré
- Paint your entire nail with black polish as the base (2-3 coats) and allow it to dry completely
- On a makeup sponge, create a gradient by dabbing black polish on one end and gold on the other, with a small area where they can blend together in the middle
- Working quickly, press the sponge onto your nail starting at the base (where your nail is attached) and dragging toward the tip
- The black should be most concentrated at the base, gradually transitioning to pure gold at the tip
- You can build the gradient slowly with multiple sponge applications, building intensity as you go
- Clean up the edges with a thin brush and acetone to remove any polish that spread onto your skin
- Seal with a glossy top coat to blend the colors and add shine
Pro tip: If your sponge application looks too blotchy or uneven, use a damp makeup brush to blend the colors slightly once the polish is fully dry but before you apply top coat. Light feathering creates a smoother transition.
Final Thoughts
Black and gold stiletto nails offer something for every mood and occasion — from minimalist elegance to bold artistic expression. The combination itself is inherently sophisticated, which means even a simple design reads as intentional and polished. The length of stiletto nails gives you a perfect canvas to experiment with patterns, gradients, metallic finishes, and intricate details that might feel overwhelming on shorter nails.
The best design is the one that makes you feel confident and reflects your personal style. Whether you’re going for understated luxury or maximum glamour, these eighteen designs provide a foundation you can customize, combine, or adapt to match exactly what you’re envisioning. Start with a design that appeals to you most, practice the technique, and don’t be discouraged if your first attempt isn’t flawless — nail art improves dramatically with repetition, and even imperfect nails look beautiful when they reflect the care and creativity you invested in them.
