

There’s something undeniably powerful about stepping into a room with perfectly sculpted stiletto nails. The elongated, tapered shape commands attention, and when paired with the right design, color, or embellishment, stiletto extensions become a statement piece that elevates your entire look. Whether you’re drawn to timeless elegance, bold maximalism, or something in between, the possibilities for stiletto nail designs are genuinely endless—and far more diverse than most people realize.
The beauty of stiletto extensions lies in their versatility. The dramatic point and length create a stunning canvas for intricate artwork, bold colors, subtle sophistication, or eye-catching details that simply wouldn’t have the same impact on shorter nail shapes. From understated luxury to full-on glamour, stiletto nails can be customized to match your personality, lifestyle, and the occasion. The key is finding a design that feels authentically you while making you feel confident and styled every single time you glance down at your hands.
If you’re considering getting stiletto extensions or you’re already a devoted fan looking to switch up your current look, you’ll find inspiration in these fifteen distinctive design ideas. Each one offers its own mood, maintenance level, and visual impact—so you’re sure to discover at least a few that speak to you.
1. Classic Red Stiletto with Glossy Finish
A true red stiletto nail is the definition of timeless glamour, and there’s a reason this look has remained a go-to choice for decades. The rich, bold color commands immediate attention and pairs beautifully with virtually any skin tone when you choose the right shade of red—whether that’s a blue-based cherry, a warm tomato red, or a deeper burgundy that leans almost wine-colored.
Why This Design Never Goes Out of Style
The glossy red stiletto works because red is inherently energetic and confident. Paired with the elegant elongation of a stiletto point, the style reads as polished without feeling overdone. This is the manicure you wear to date nights, professional events, or simply when you want to feel like the best version of yourself. The simplicity actually works in your favor—there’s nowhere for imperfect application or low-quality polish to hide, which is why this look demands salon-quality execution and high-grade red lacquer.
Application and Maintenance Tips
- Use a semi-glossy or ultra-glossy topcoat to achieve that signature shine—shimmer-free red performs best for this classic aesthetic
- Red shows dust, fingerprints, and chips more visibly than many other colors, so you’ll want a strong topcoat and careful daily handling
- Apply thin, even coats rather than one thick application for the most vibrant, flawless color
- Red can stain lighter skin tones slightly, so use a quality base coat without exception
- Plan for touch-ups every 2-3 weeks if you’re prone to chipping, or opt for gel polish for extended wear
Pro tip: Pair your red stilettos with nude or neutral lips and let your nails be the statement—this balance keeps the look sophisticated rather than overwhelming.
2. French Ombre Stiletto with Gradient Tips
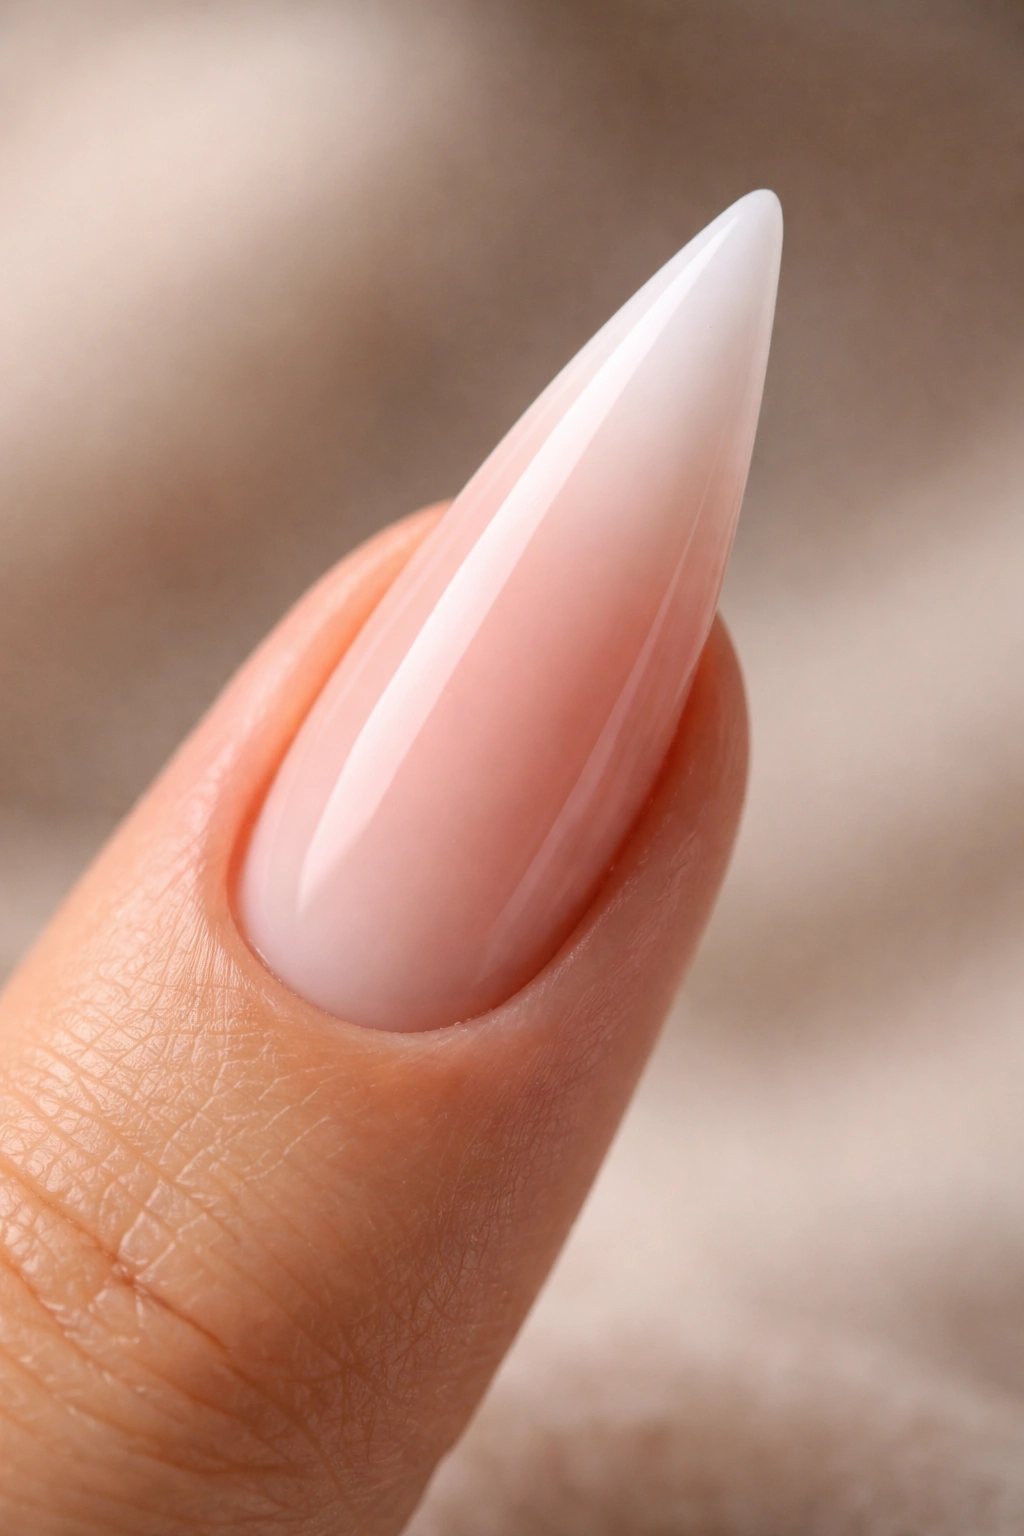
The French ombre stiletto reimagines the classic French manicure by replacing the crisp white line with a soft, diffused gradient that transitions from your natural nail base to a white, cream, or soft pink tip. This creates an incredibly elegant, elongated effect that complements the sharp geometry of the stiletto shape perfectly.
The Visual Power of Gradient Design
A gradient across the length of a stiletto extension creates a sense of movement and dimension that solid color simply can’t achieve. The ombre effect draws the eye along the entire length of the nail, emphasizing the elegant point. This design is sophisticated enough for professional settings yet polished enough for evening events. The softer aesthetic of ombre also feels more modern and less formal than a traditional French manicure, making it incredibly wearable for everyday life.
How to Achieve a Flawless Gradient
- Use a makeup sponge or nail sponge to blend two or three coordinating polish shades from base to tip
- Alternatively, ask your nail technician to use an airbrush, which creates the smoothest, most seamless gradient possible
- Gel ombre is easier to execute than traditional polish and lasts significantly longer without fading
- Practice blending in natural lighting—gradients can look different depending on the lighting environment
- Use a buffed nail base rather than a super shiny one so the gradient colors show true without too much reflection
Worth knowing: Keep gradient stilettos hydrated with cuticle oil and hand cream—dry nails make the polish look dull and can cause faster chipping at the gradient transition points.
3. Nude Stiletto with Glitter Gradient
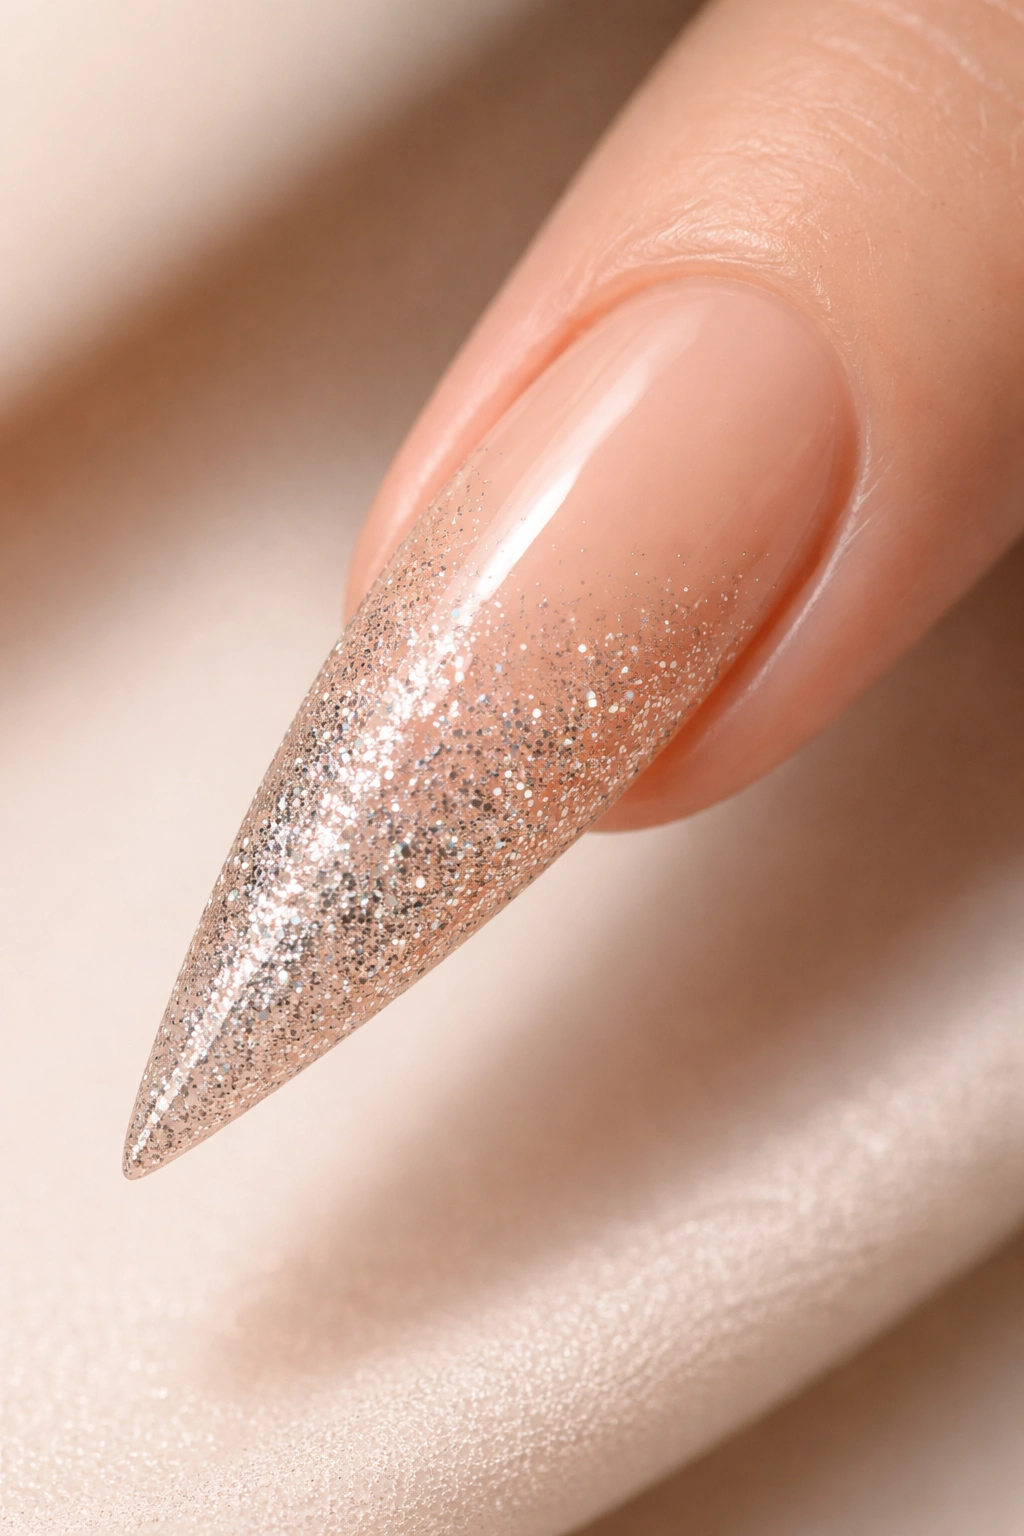
Start with a warm, creamy nude base that matches your skin tone almost exactly, then layer a glitter gradient that becomes denser and more concentrated as it moves toward the tip of the stiletto. This creates a sophisticated, low-key sparkle that catches light beautifully without screaming for attention.
Why Nude-Plus-Glitter Is Endlessly Flattering
This combination works because the nude base makes your fingers appear naturally longer and more refined, while the gradient glitter adds just enough interest and glamour to keep the manicure from feeling plain. It’s professional enough for office settings, elegant enough for formal events, and fun enough to feel like you’re wearing something special. The glitter gradient essentially bridges the gap between minimalist and statement nail design—you get sophistication and sparkle in one cohesive look.
Application Strategy for Maximum Impact
- Choose a nude shade that’s within one to two shades of your actual skin tone—too light or too dark breaks the elongating effect
- Use fine or medium glitter particles rather than chunky glitter, which can look dated or harsh on stilettos
- Apply the nude base in two coats, then create the gradient by placing glitter primarily on the outer third of the nail
- Use a gel topcoat to seal the glitter and prevent loose particles from catching on fabric or hair
- Consider adding a tiny touch of holographic or iridescent dust where the glitter is most concentrated for extra shimmer
Insider note: This design photographs beautifully in both natural and artificial lighting, making it perfect if you’re someone who documents your nails on social media.
4. Black Stiletto with Gold Veining
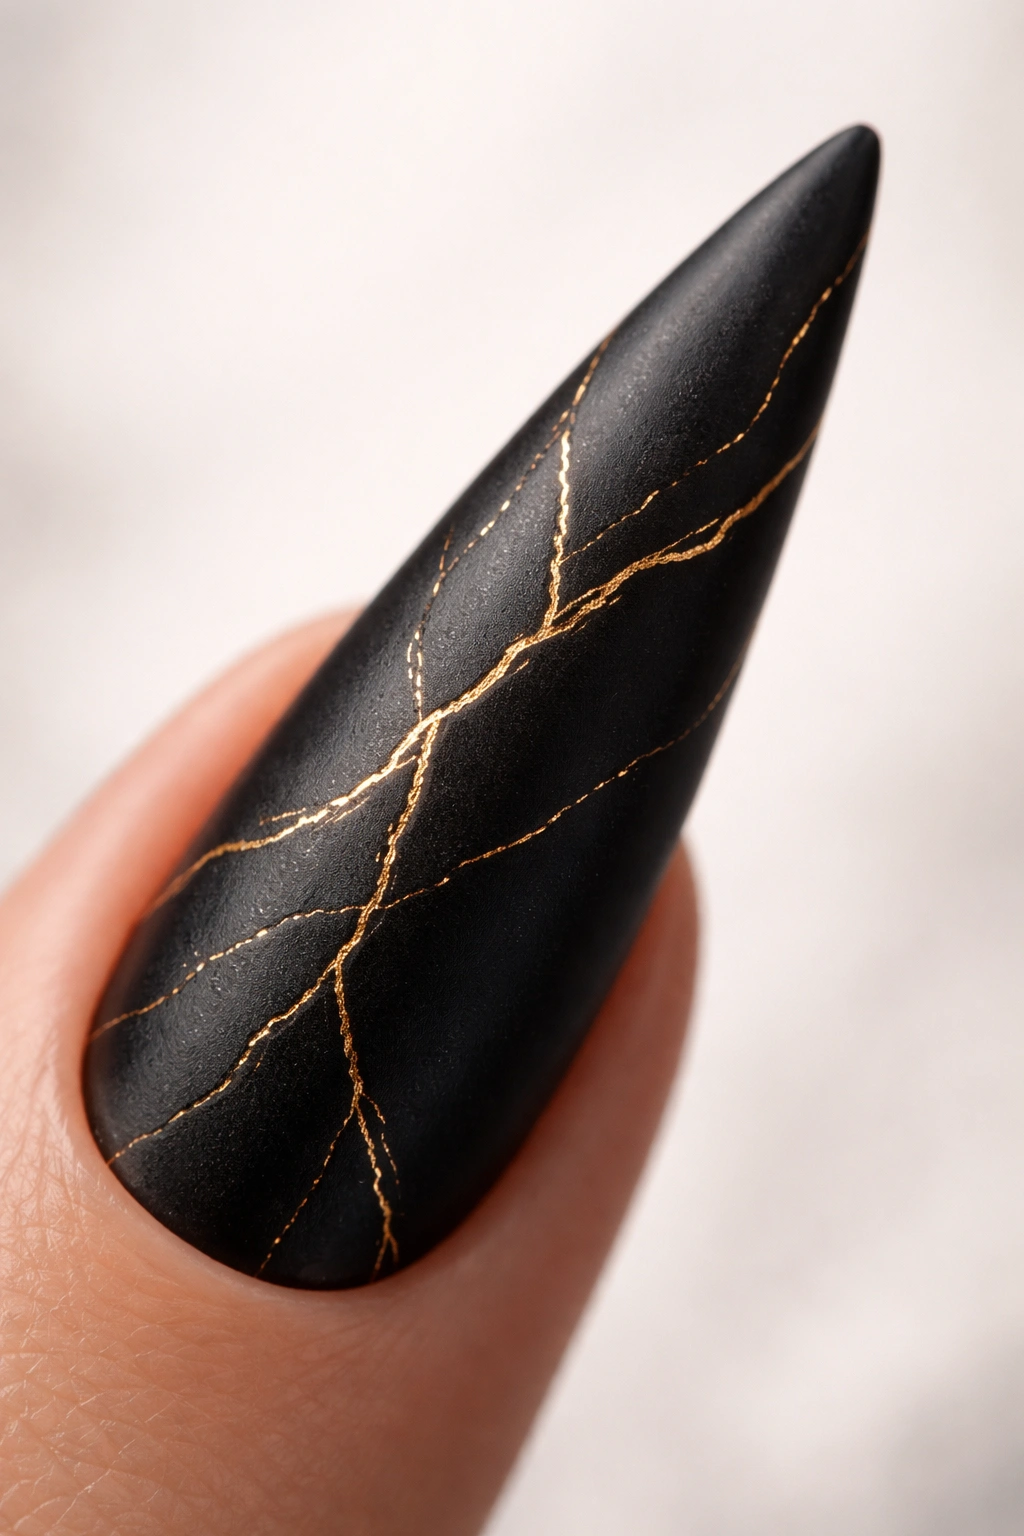
Deep matte black stilettos become absolutely stunning when you add delicate gold veining that mimics natural stone patterns. The fine gold lines create movement and visual texture across the black surface, resulting in a design that feels both edgy and elegant simultaneously.
The Drama of Black and Gold
Black and gold is a timeless luxury pairing—think tuxedos, high-end jewelry, and luxury cars. On stiletto nails, this combination creates an undeniably sophisticated, slightly rebellious aesthetic. The matte finish makes the gold veining pop even more prominently, and the overall effect reads as upscale and intentional. This is the design for someone who wants nails with attitude but maintains an air of polish and refinement.
Creating Realistic Veining Effect
- Use a fine gold detailing brush or specialized nail art tool to hand-paint delicate, irregular lines across the black base
- Study actual marble or agate photos to understand how natural veining flows—it’s rarely perfectly symmetrical
- Vary the width of your gold lines for a more organic, natural appearance
- Apply clear or glossy topcoat for a finished look, or keep the matte finish throughout for a more modern aesthetic
- Gold gel liners hold up longer than paint-on gold and won’t chip as easily on high-impact nails like stilettos
Pro tip: Leave small sections of the nail without veining to prevent the design from looking overwhelming—negative space actually makes the gold lines more striking.
5. Crystal-Embellished Stiletto with Swarovski Details
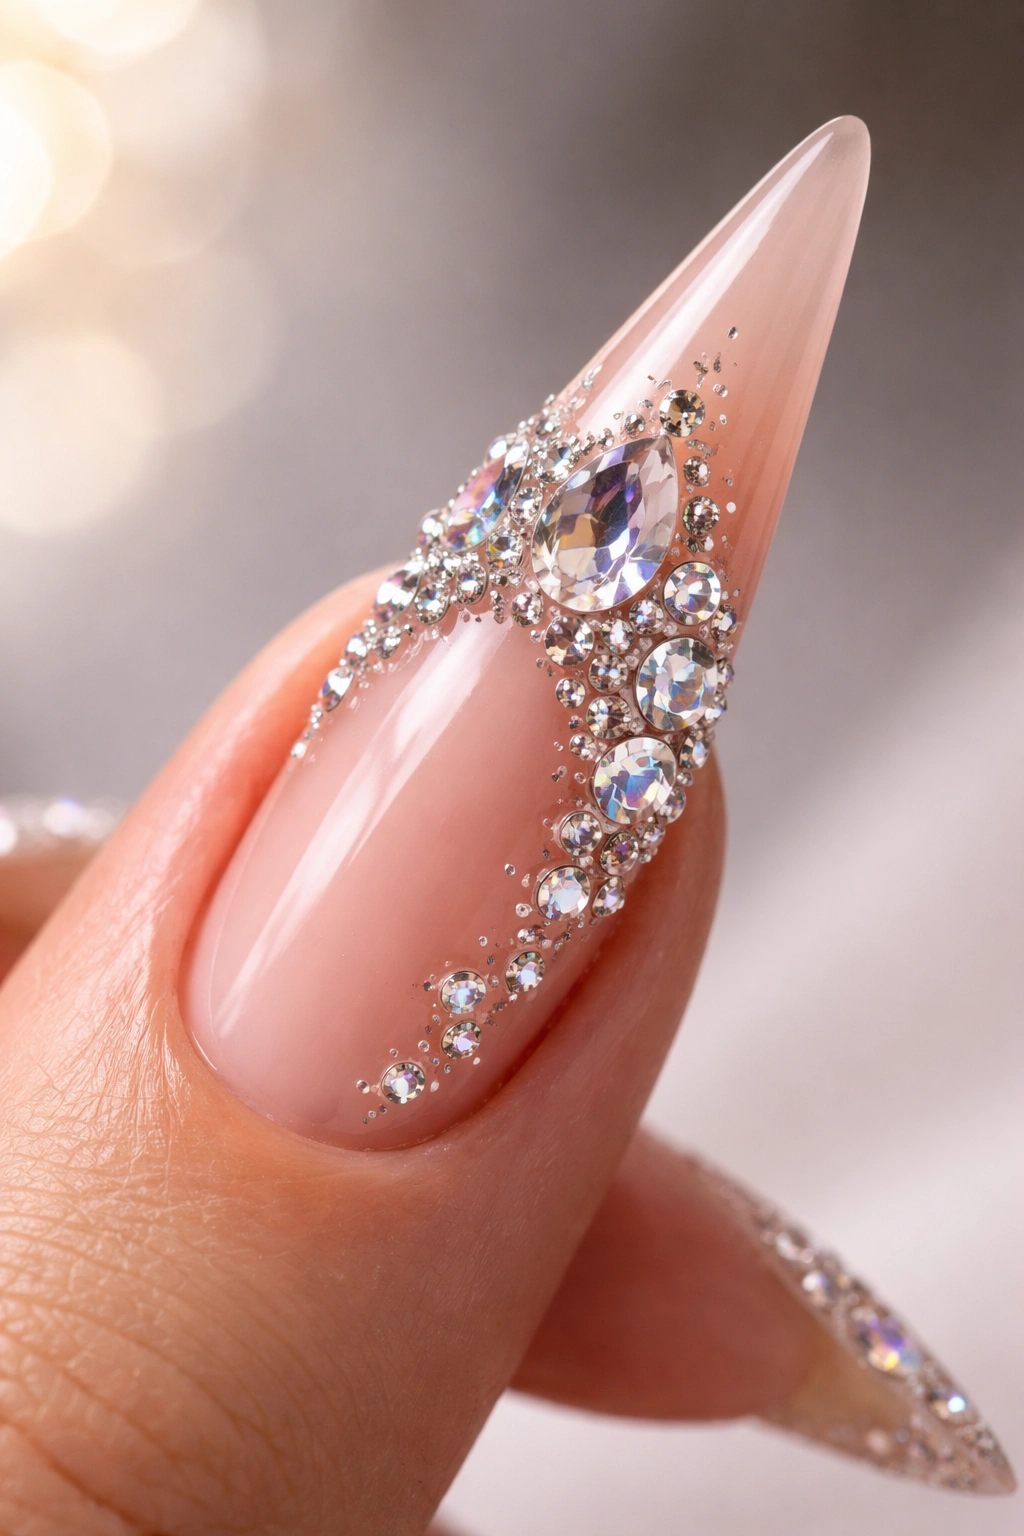
Start with a neutral, long-wearing base color—nude, soft pink, or champagne—then strategically apply genuine Swarovski crystals to create sparkle without covering the entire nail. Place larger stones toward the cuticle area in a clustered pattern, with smaller accents scattered across the rest of the nail for a luxe, dimensional effect.
Why Real Crystals Make All the Difference
Swarovski crystals and genuine gemstones catch and refract light in ways that rhinestones and plastic alternatives simply cannot replicate. Each crystal facet creates individual sparkle points that transform as you move your hands, making the effect genuinely hypnotic. This level of embellishment is perfect for special occasions, wedding season, or simply when you want to feel absolutely glamorous.
Application and Longevity
- Apply crystals to a sticky gel base or specialized nail glue—a topcoat seals them in place
- Larger crystals near the cuticle won’t interfere with daily tasks as much as scattered embellishments across the center of the nail
- Swarovski crystals are expensive, so place them intentionally rather than covering every millimeter
- Expect 2-3 weeks of wear before a stone or two may dislodge—this is normal and easily repaired by a technician
- Avoid harsh scrubbing when washing dishes or cleaning; gentle care extends the life of embellished designs
- Alcohol-based hand sanitizer won’t loosen crystals, but harsh chemicals may affect the adhesive
Worth knowing: Crystal-embellished stilettos require more careful handling than unadorned nails—avoid high-impact activities and be mindful when putting on clothing or accessories.
6. Chrome Mirror Finish Stiletto with Metallic Shine
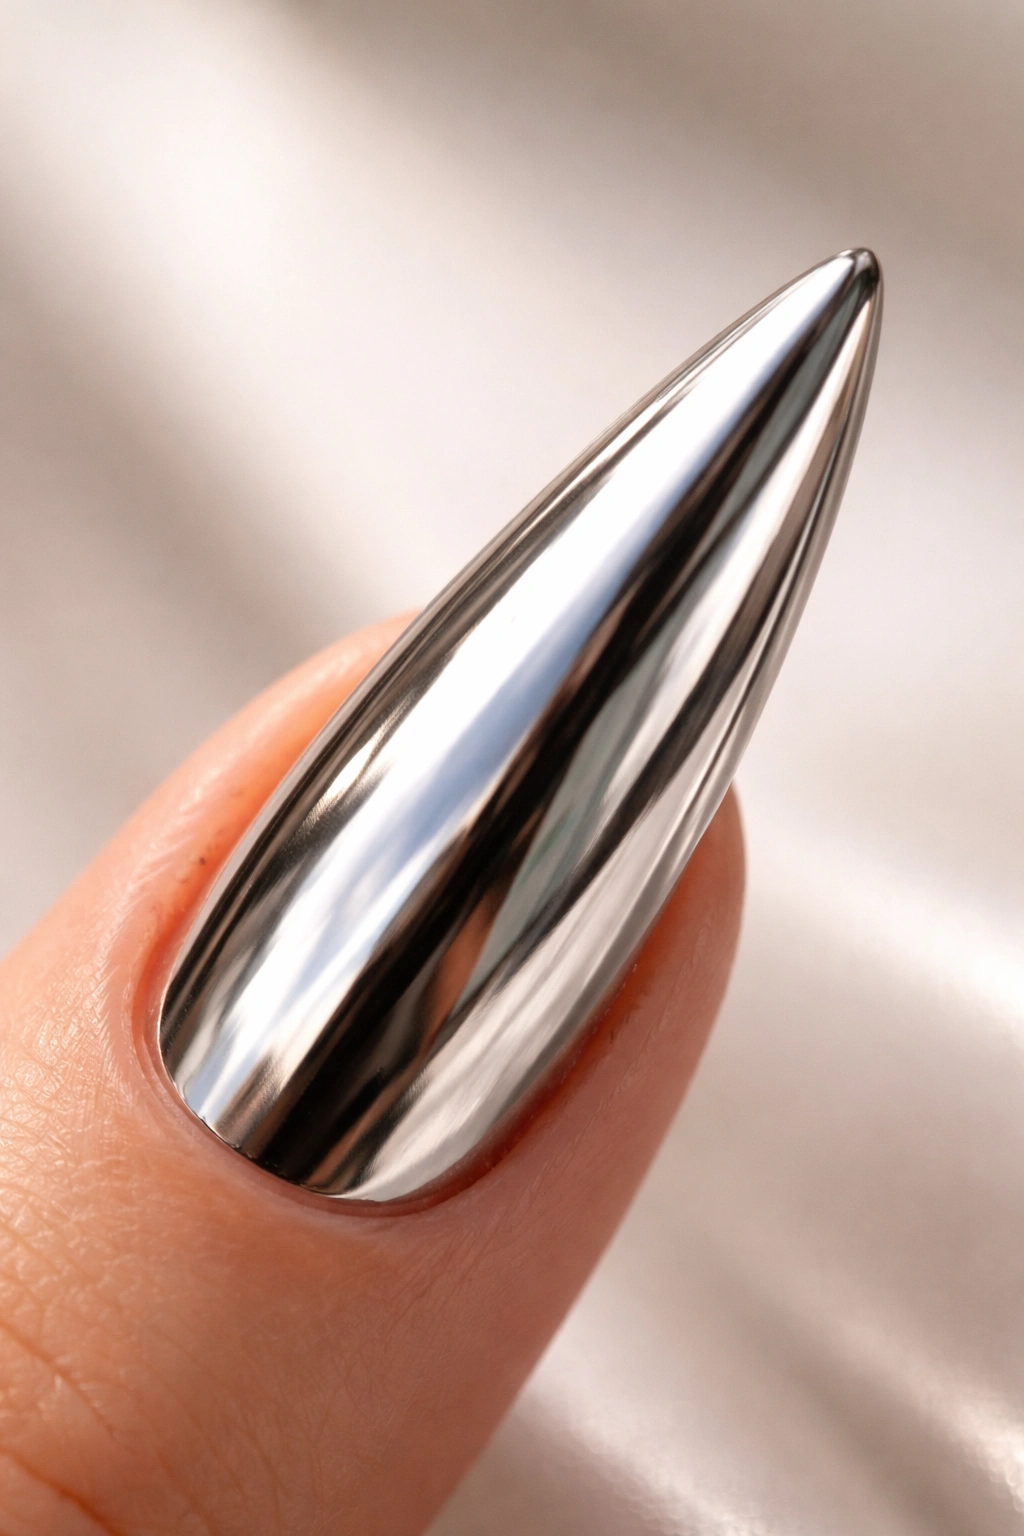
A full chrome or mirror finish transforms stiletto nails into reflective surfaces that literally shine like polished metal. Available in rose gold, silver, gold, or even holographic variations, chrome creates an ultra-modern, futuristic aesthetic that photographs brilliantly and catches light from every angle.
The Undeniable Impact of Chrome
Chrome is bold and impossible to ignore. The reflective finish creates an almost three-dimensional effect that makes nails appear even longer and more defined than they actually are. This is unquestionably a statement design—you’re announcing that you’re confident, fashion-forward, and unafraid to stand out. Chrome works especially well on stilettos because the geometric shape complements the high-gloss, ultra-smooth finish.
Achieving Flawless Chrome Application
- Chrome powder requires a specific base coat and sticky topcoat to adhere properly—regular polish won’t work
- A perfectly smooth, buffed nail surface is absolutely critical; any ridges or imperfections become glaringly obvious
- Apply chrome powder with a specialized brush or applicator, working in small sections for even coverage
- Seal with a gel topcoat for durability; chrome without proper sealing chips and flakes easily
- Some technicians use a chrome gel polish instead of powder, which tends to be slightly more durable
- Avoid directly rubbing your nails against rough surfaces—chrome will scratch more visibly than other finishes
Pro tip: Pair chrome stilettos with minimalist clothing and accessories to avoid looking overly futuristic or costume-like—let the nails be the statement piece.
7. Marble Print Stiletto with Abstract Swirls

Create a marble effect by painting abstract black, gray, white, and soft taupe swirls across a light neutral base. The key is making the pattern look organic and naturally flowing rather than precise or geometric—real marble patterns have beautiful randomness and irregularity.
The Sophistication of Marble Nail Art
Marble is an enduring design element because it evokes luxury, natural beauty, and understated elegance all at once. On stiletto nails, a well-executed marble design feels like wearable art. The pattern is intricate enough to demonstrate nail artistry without being overly busy or distracting. This design works for professional environments, casual settings, and everything in between.
Technique for Authentic Marble Appearance
- Start with a soft white, cream, or champagne base coat as your foundation
- Use a thin detailing brush or toothpick to create fine, flowing lines in black and gray polish
- Don’t plan the design—the beauty of marble is its spontaneous, organic flow
- Connect lines at angles and curves that feel natural; perfectly parallel lines look artificial
- Add subtle taupe and pink undertones to create depth and mimic actual stone coloring
- Seal with a glossy topcoat that enhances the luxe, polished appearance of marble
Insider note: Marble stilettos maintain their elegant appearance even as they grow out slightly, because the natural pattern camouflages regrowth—this is a practical advantage over solid colors that show new growth immediately.
8. Neon Accent Stiletto with Bold Pop of Color
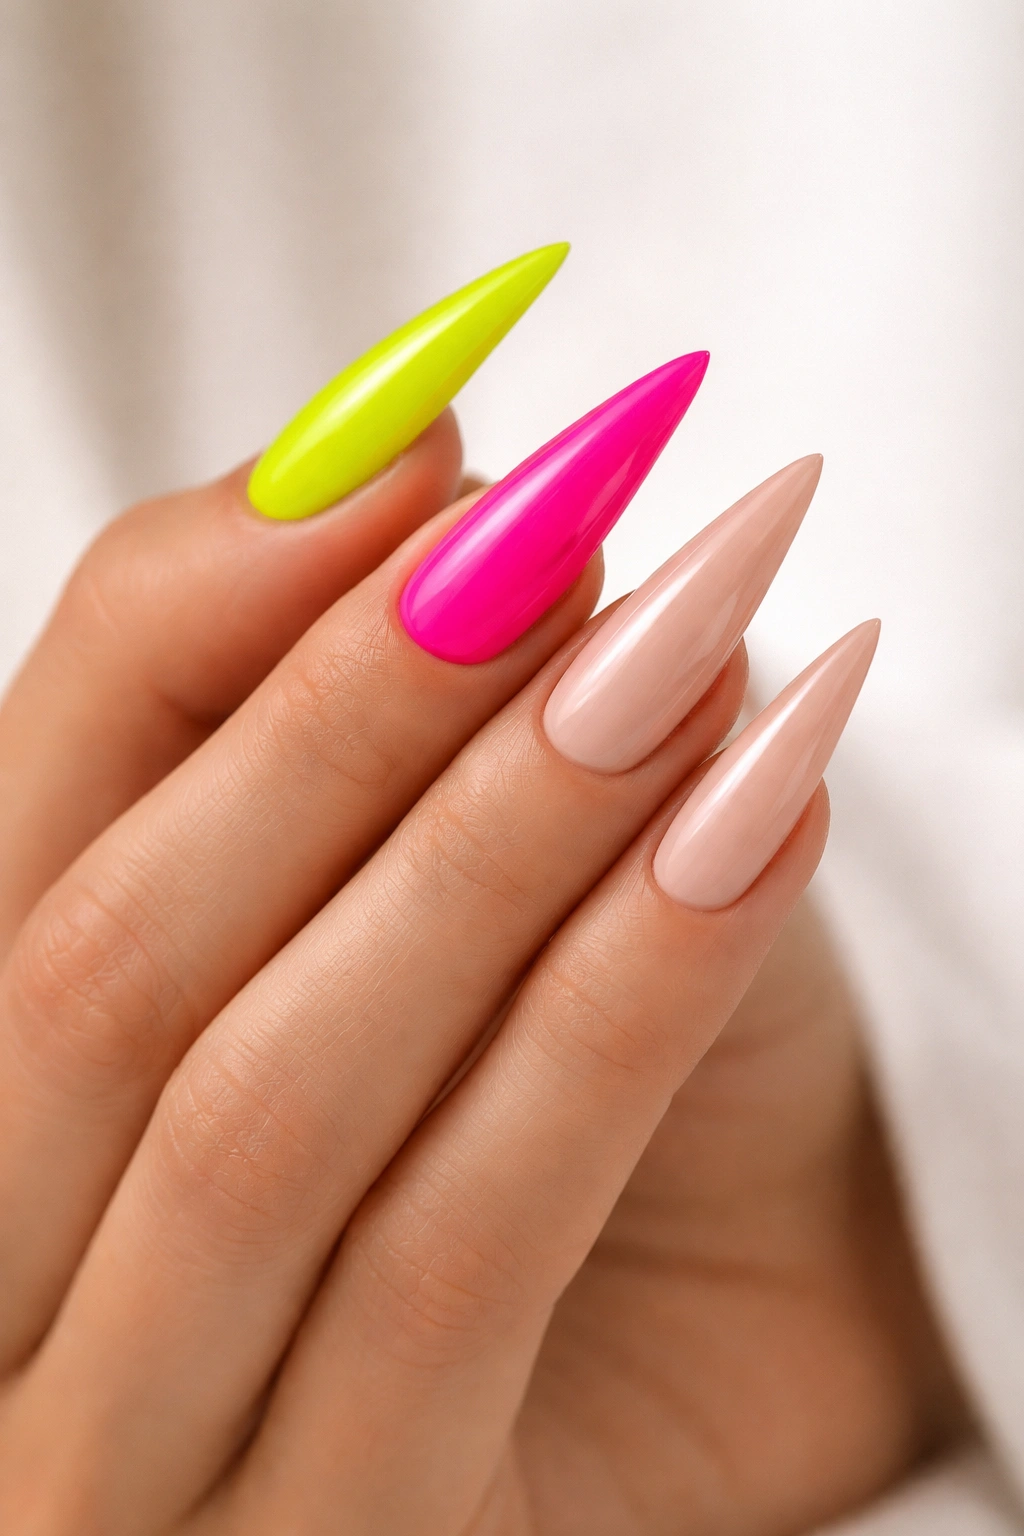
Keep three to four nails in a classic neutral shade—nude, white, or soft pink—then paint one or two accent nails in a vibrant neon color: hot pink, electric lime, or neon orange. The contrast between the muted majority and the one bold nail creates impact without feeling chaotic or overwhelming.
Strategic Use of Neon for Maximum Effect
A full set of neon stilettos can feel costume-like, but strategic neon accents create a perfectly balanced look that’s fun and fashionable. The neutral nails ground the design and keep it wearable, while the neon accent injects personality and playfulness. This approach works beautifully for social events, creative industries, or simply when you want to signal that you have a fun, confident personality.
Choosing and Applying Neon Successfully
- Neon shades are extremely bright and require opacity—use thin, even coats and expect to need two or three applications
- Not all neon polishes have the same quality; purchase from reputable brands that specialize in vibrant colors
- Apply neon to pristinely prepped nails with a flawless base coat—any imperfections show dramatically against bright colors
- Use a quality topcoat to prevent neon shades from fading, as UV exposure can dull them over time
- The neon accent nails should be positioned symmetrically—typically your ring fingers or thumbs work best
- Test the neon shade in your actual lighting conditions before committing; some shades read differently indoors versus outdoors
Pro tip: Pair neon accent stilettos with neutral clothing to avoid clashing or overwhelming your overall appearance—let the nails be the bright spot in your outfit.
9. Rose Gold Stiletto with Metallic Finish and Ombre Base
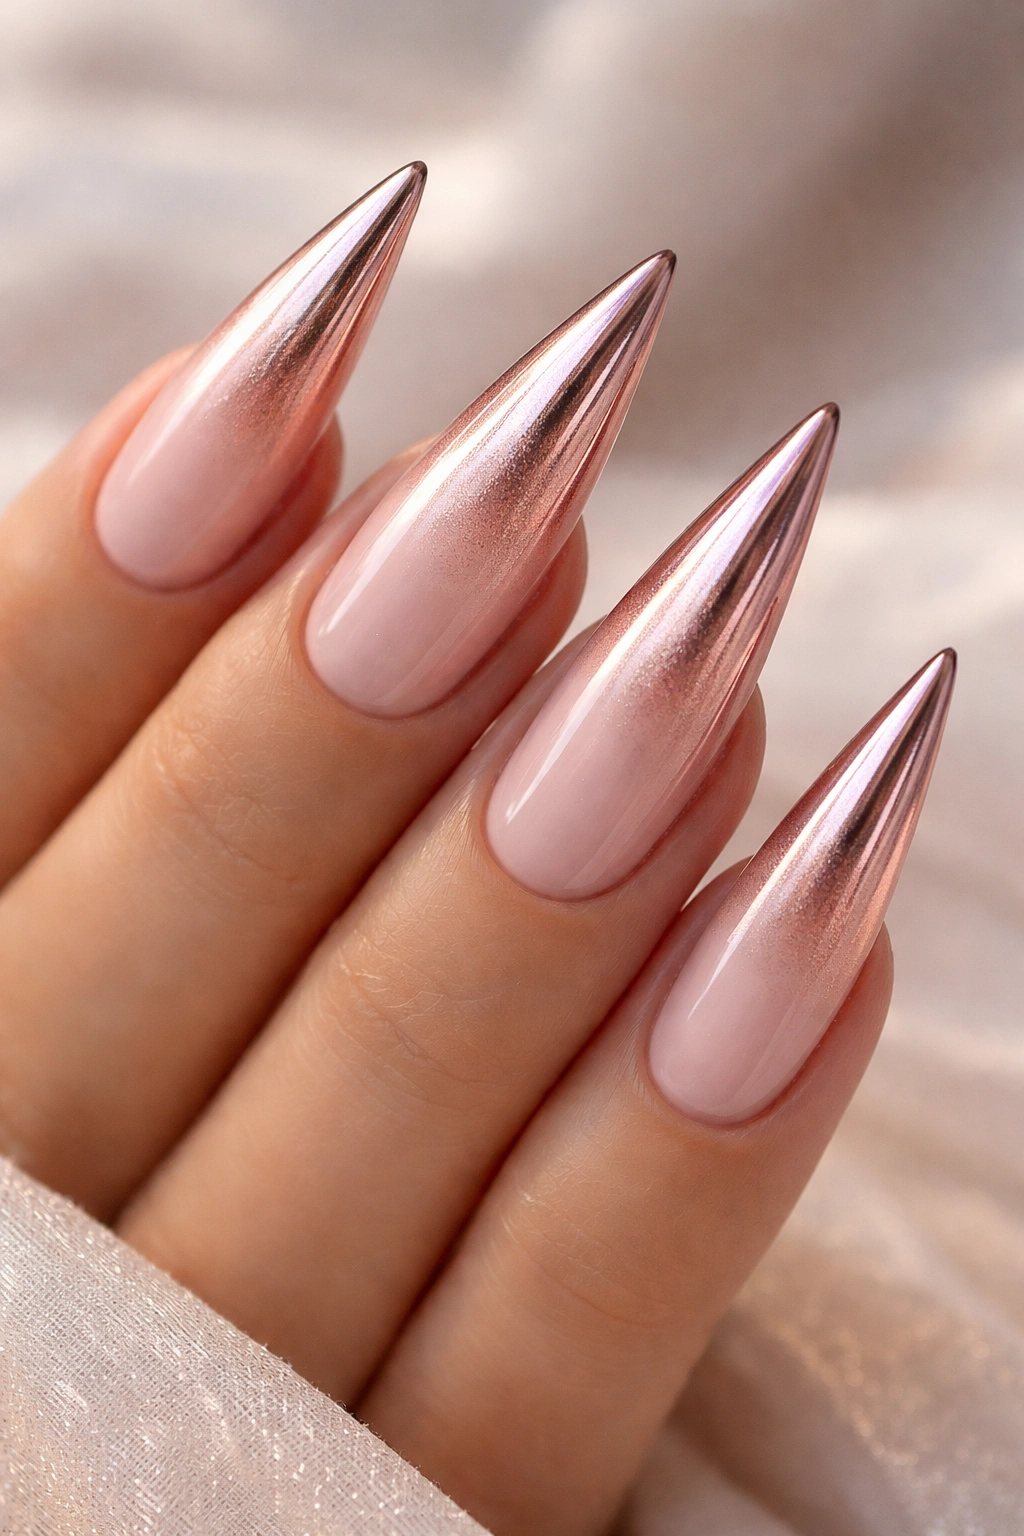
Build a soft pink or champagne base that gradually becomes more metallic as it moves toward the tip. The rose gold metallics take over, creating a seamless transition from soft color to lustrous shimmer. This elegant progression makes the stiletto appear even more elongated and sophisticated.
Why Rose Gold Is Universally Flattering
Rose gold sits in the perfect middle ground between warm and cool tones, making it exceptionally wearable for virtually all skin tones. The rosy warmth adds a romantic, feminine quality, while the metallic finish keeps things modern and polished. On stiletto nails, rose gold creates an effect that’s elegant without being overly formal, sparkly without being costume-like, and flattering without requiring daily maintenance beyond basic hand care.
Achieving a Seamless Metallic Ombre
- Begin with a pale pink or champagne gel base and cure thoroughly
- Mix rose gold shimmer into a clear gel medium in increasing concentrations from base to tip
- Apply the gradient using a sponge technique or airbrush for smooth, even blending
- Build the metallic concentration gradually—too much shimmer too quickly looks muddy
- Seal with a high-shine gel topcoat to enhance the lustrous, luxe appearance
- The ombre effect is most visible in natural daylight; test your design in window light
Worth knowing: Rose gold metallics look incredible when photographed in warm, golden lighting conditions—if you’re planning a special event, you’ll love how these nails photograph.
10. Matte Black Stiletto with Minimalist Line Details
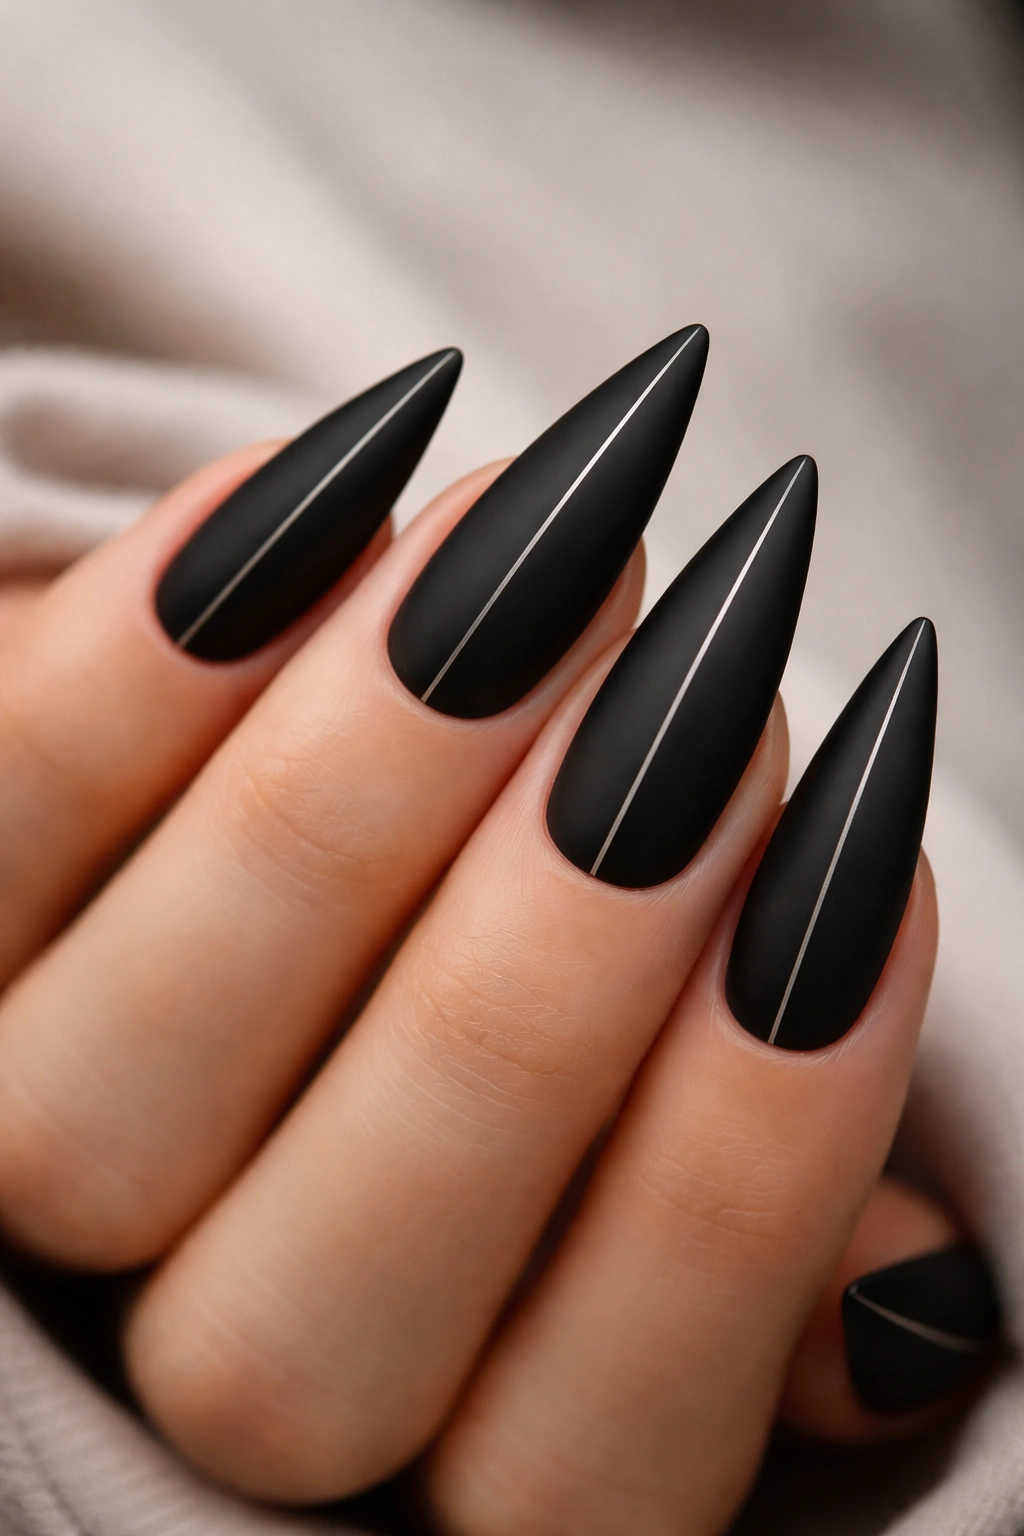
Polish every nail in opaque matte black, then add a single thin gold, silver, or white line that runs down the center of each nail from cuticle to tip. The minimalist line creates an understated geometric detail that transforms the design from plain to purposeful.
The Power of Minimalism on Stilettos
Sometimes the most impactful designs are the simplest ones. A matte black stiletto is inherently elegant and slightly edgy, and the addition of a single fine line elevates the design without overwhelming it. This is perfection for professionals, creatives, and anyone who appreciates the “less is more” aesthetic. The design reads as intentional and sophisticated rather than underdone.
Execution Details That Matter
- Use true matte topcoat rather than regular polish, which has subtle shine—the difference is noticeable
- The center line should be perfectly straight; use a thin brush or nail art pen for precision
- Gold lines appear warmer and more luxe, while white or silver reads as more modern and stark
- Keep the line the same width throughout its entire length for a clean, professional appearance
- Avoid sealing the matte topcoat with glossy topcoat, which will destroy the matte effect
- Matte finishes show fingerprints and smudges more visibly than glossy finishes, so have hand cream accessible
Pro tip: If a straight line feels too minimal, add a tiny triangle or geometric shape at the tip as a small accent—this maintains the minimalist aesthetic while adding subtle detail.
11. Pastel Ombre Stiletto with Soft Gradient Transition
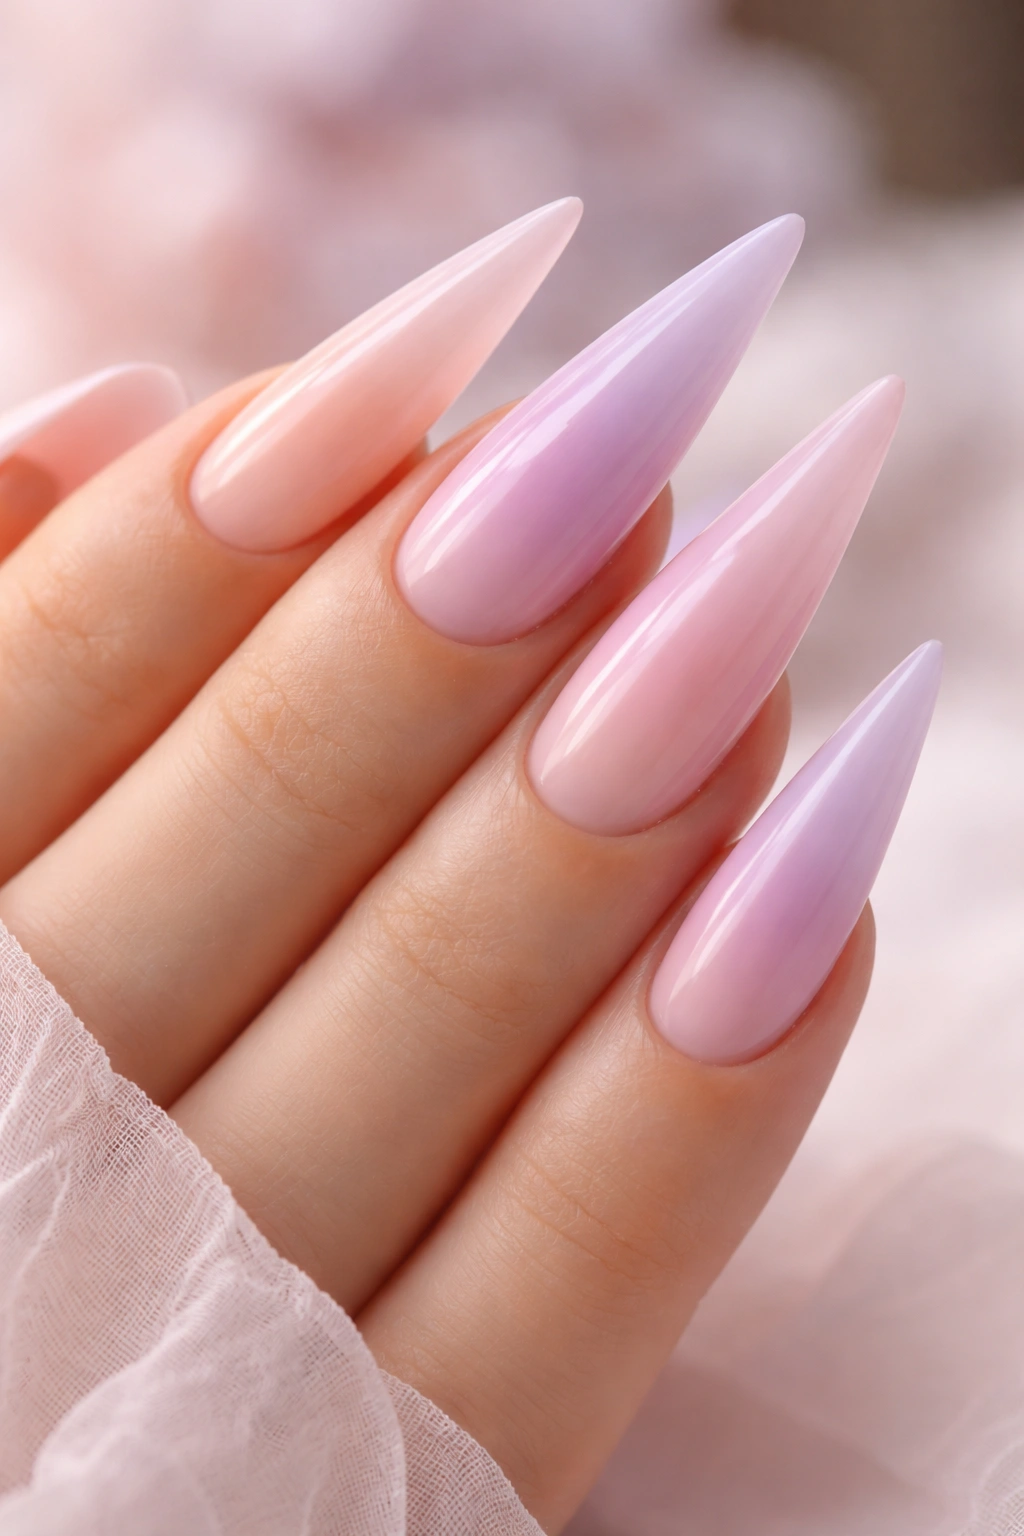
Create a gentle gradient that flows from a pale peachy or blush tone at the base through soft lavender, then into the palest pink at the tip. The pastel tones blend so seamlessly that the design looks like a watercolor painting—soft, romantic, and utterly dreamy.
The Romance of Pastel Gradients
Pastel ombre designs speak to a romantic, artistic sensibility. The soft color transitions are inherently soothing to look at, and the gentle gradient makes the elongation of the stiletto absolutely stunning. This design is perfect for spring and summer events, weddings, garden parties, or simply when you want your nails to feel soft and feminine without being overly cutesy.
Creating a Picture-Perfect Pastel Gradient
- Choose pastel shades that are genuinely soft and muted; overly bright colors aren’t true pastels
- Use three shades: a base color, a middle transition shade, and a tip color
- A makeup sponge works for nail polish gradients, while an airbrush creates the smoothest gel gradient
- Build the gradient gradually—pastels can look chalky if applied too heavily in a single coat
- Seal with a soft glossy topcoat that doesn’t add yellowish undertones (choose a cool topcoat)
- Cure gel ombre thoroughly; undercured gel won’t set properly and the colors may appear dull
Insider note: Pastel ombres look absolutely magical in natural window lighting and photograph beautifully in soft, diffused light—they’re less striking in harsh artificial lighting.
12. Holographic Stiletto with Rainbow Sparkle Effect
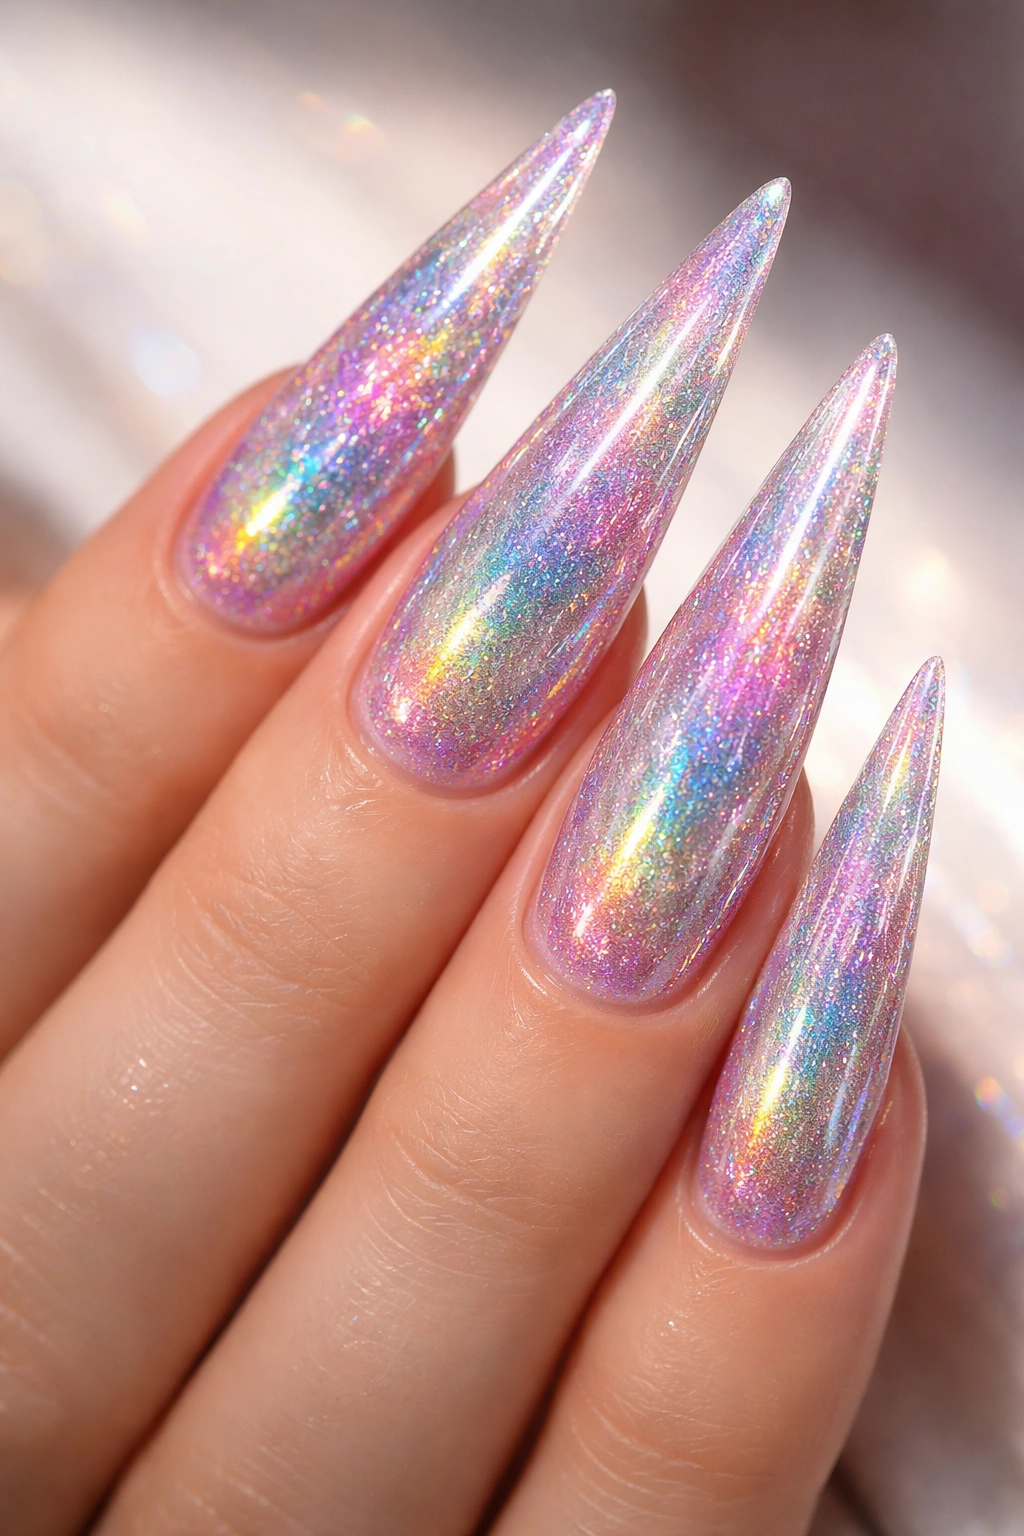
Apply a clear or neutral base, then coat the entire nail with holographic powder or holographic gel that creates a rainbow shimmer effect visible from every angle. The result is mesmerizing sparkle that shifts between colors as your hands move—it’s pure visual magic.
The Hypnotic Appeal of Holographic Design
Holographic is unquestionably eye-catching and fun. The way the color literally changes as you move your hands creates an almost magical quality that people can’t help but notice and compliment. Holographic stilettos are perfect for people who love drawing attention and enjoy expressing their fun, vibrant personality through their nails. This design is undeniably bold but in a playful, creative way rather than intimidating.
Getting Holographic Application Right
- Holographic powder or gel creates the best results—it’s more vibrant than holographic polish alone
- The nail surface must be absolutely pristine and smoothly buffed for the holographic effect to be visible
- Holographic shows every fingerprint and dust particle dramatically, so you’ll need to clean your nails frequently
- Apply a quality topcoat to protect the holographic finish from chipping or fading
- Different lighting conditions reveal different color aspects of holographic—test your design in various lights
- Holographic effects are most visible and impressive in bright, natural daylight
Pro tip: Pair holographic stilettos with otherwise neutral or minimalist outfits and styling—let your nails be the statement, and let them shine without visual competition.
13. Nude Stiletto with Three-Dimensional Stone Embellishment
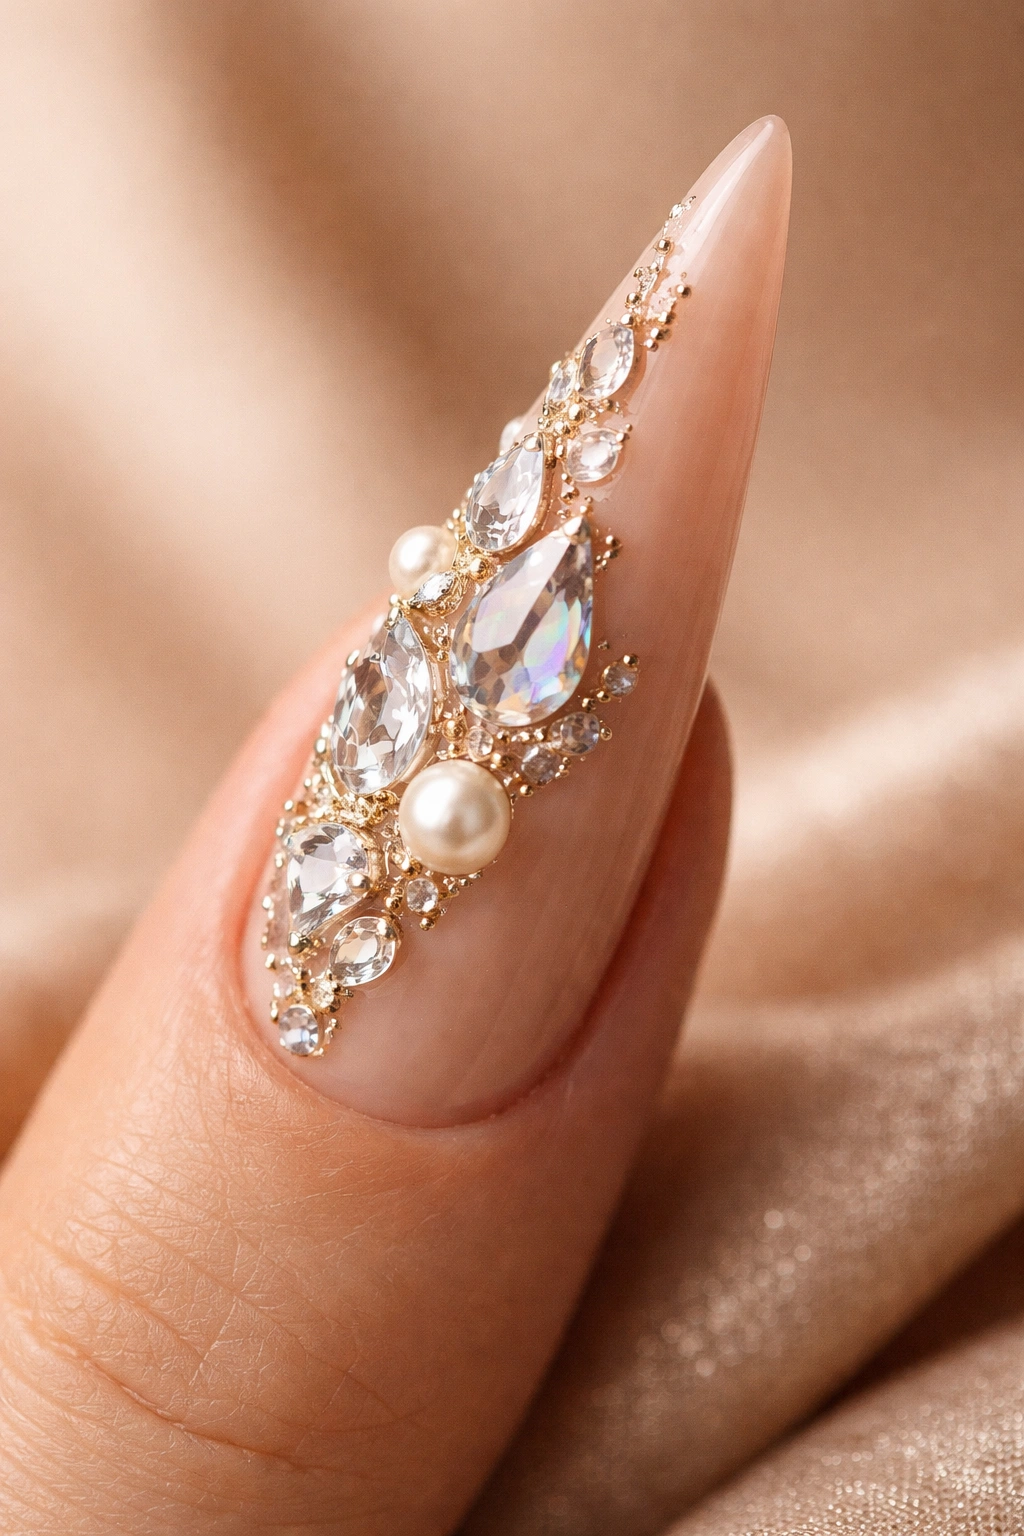
Begin with a warm nude base that matches your skin tone, then add depth and luxury with carefully placed three-dimensional stones, crystals, or even tiny pearl embellishments. Unlike flat rhinestones, 3D stones project out from the nail surface, creating actual dimension and movement.
Why 3D Elements Read as Truly Luxury
Three-dimensional embellishments feel special and expensive in a way that flat designs simply can’t replicate. The way light catches and reflects off raised surfaces creates a far more sophisticated, high-end appearance. On stiletto nails specifically, the elongated shape provides plenty of canvas for 3D details without making the nail feel top-heavy or unbalanced.
Strategic 3D Embellishment Placement
- Concentrate 3D stones toward the cuticle area where they won’t interfere with daily hand use
- Use fewer, larger stones rather than dozens of tiny ones—this maintains elegance over busyness
- Vary the height and size of stones for visual interest and organic appearance
- Seal everything with clear gel topcoat to ensure embellishments stay put
- Handle your nails gently; 3D elements can catch on fabric or catch the edge of a doorframe
- Expect occasional touch-ups; stones may loosen and need regluing every few weeks
Worth knowing: 3D embellished stilettos are stunning for special occasions but may feel impractical for daily work environments, especially jobs involving hands-on tasks.
14. Leopard Print Stiletto with Warm Neutral Base
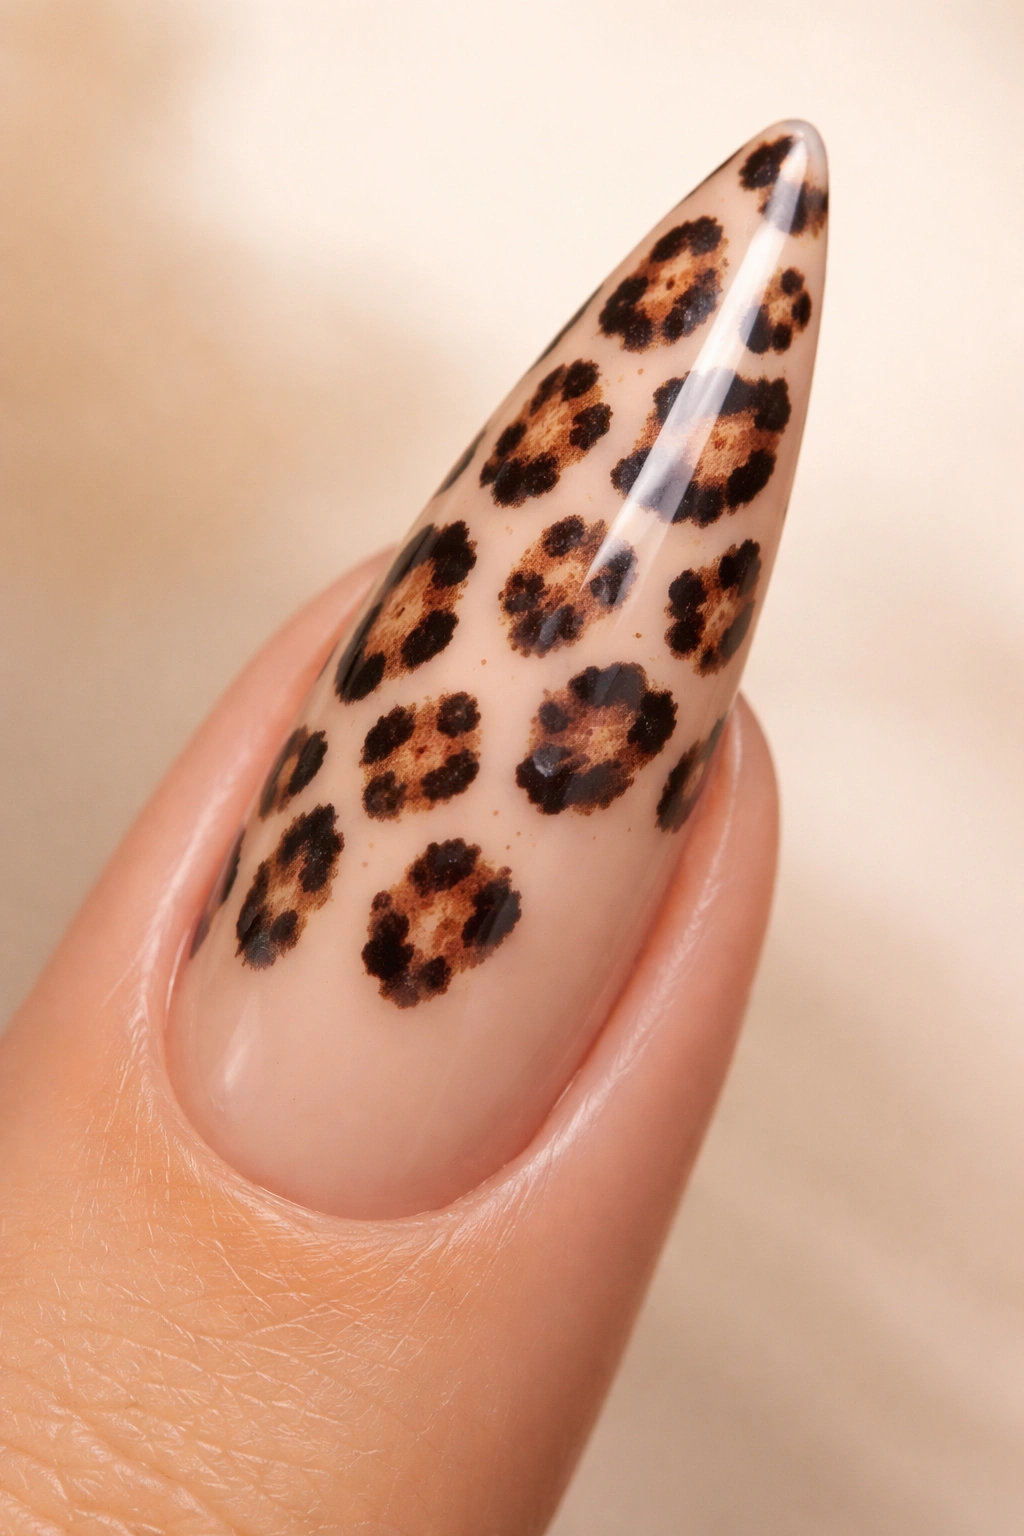
Design a subtle leopard spot pattern using warm browns, taupes, and blacks across a creamy nude or warm beige base. Keep the spots small and irregular rather than perfectly uniform, mimicking actual leopard fur patterns. Add a glossy topcoat to finish with shine.
The Timeless Appeal of Animal Prints
Leopard print is never truly out of style, and for good reason—the organic, irregular pattern is inherently beautiful. On stiletto nails, leopard print feels sophisticated and slightly wild, which creates an appealing contradiction. This design works for people who want something more interesting than solid color but prefer a subtle, wearable pattern over abstract nail art.
Creating Convincing Leopard Spots
- Start with a warm nude or light tan base that serves as the “fur” color
- Use a thin brush and brown or black polish to paint irregular rounded shapes across the nail
- Don’t make spots perfectly uniform or symmetrical; real leopard patterns are random
- Fill in some spots completely, leave others as just outlines for visual variety
- Add tiny dots inside some spots for dimension and realism
- Keep spots smaller on the tips of the nails and slightly larger toward the cuticle
Pro tip: Leopard print stilettos pair beautifully with nearly any outfit and read as classic rather than trendy, making them an excellent choice if you’re unsure about committing to something too bold.
15. White Stiletto with Negative Space Design
Paint the majority of each nail white, then strategically leave sections of the nail unpainted to show your actual nail or a contrasting color underneath. Use geometric shapes—triangles, lines, half-moons, or irregular sections—where negative space creates the design.
Why Negative Space Creates Impact
Negative space design is modern, artistic, and surprisingly impactful. By leaving portions of the nail empty or showing the natural nail beneath, you create visual contrast that draws the eye and makes the design feel intentional and architectural. This approach works beautifully on stilettos because the elongated shape provides plenty of room for interesting negative space patterns.
Executing Clean Negative Space
- Use striping tape or stencils to create sharp, clean edges where white meets negative space
- The natural nail showing through should be pristinely groomed—imperfections become visible in negative space
- Alternatively, use a contrasting color underneath the white (like nude or soft gray) where negative space appears
- Keep the negative space pattern symmetrical across all ten nails for a cohesive look
- Seal the entire design with glossy topcoat for a polished finish
- Negative space designs are easier to maintain than intricate nail art and show less obvious wear
Insider note: Negative space designs photograph beautifully in both natural and artificial lighting because the contrast between the white and the empty space creates clear definition and visual interest.
Key Takeaways
The incredible diversity of stiletto nail designs means there’s genuinely something for everyone. Whether your style leans toward classic elegance like a glossy red, sophisticated minimalism like matte black with a single line, or bold glamour like holographic or crystal-embellished designs, stiletto extensions provide the perfect canvas.
The most important factor is choosing a design that feels authentically you—something that makes you feel confident and comfortable wearing every single day. Consider your daily activities and lifestyle; some designs, like crystal embellishments or 3D stones, require more careful handling than others. Think about maintenance requirements too; chrome and holographic need frequent cleaning to maintain their appearance, while marble or leopard print hide minor imperfections beautifully.
Whatever design you ultimately choose, invest in quality application. Stiletto nails demand precision and excellent technique because the elongated shape shows imperfections more readily than shorter nails. Seek out experienced technicians who specialize in nail extensions and can execute your chosen design flawlessly. Your nails will look and feel better, last significantly longer, and give you that genuine confidence that comes from wearing truly beautiful things.
