

Light pink stiletto nails represent the sweet spot between sophistication and delicate femininity. They’re the go-to choice for anyone who wants polish that works for boardroom meetings, weekend brunches, and romantic evenings without ever feeling out of place. Unlike more dramatic nail colors, light pink acts as a blank canvas for creativity—you can layer it with accents, textures, and embellishments that transform a simple manicure into something genuinely stunning.
The beauty of this aesthetic lies in its versatility. Whether you’re drawn to minimalist elegance or ornate detail work, light pink stilettos provide the perfect foundation. They suit every skin tone, they photograph beautifully, and they have an inherent elegance that requires zero apology. The elongated stiletto shape amplifies the sophisticated quality of soft pink, creating nails that feel luxurious without screaming for attention.
What makes these designs particularly appealing is how wearable they are. You can transition from casual to formal settings without changing your nails, and the light pink base keeps everything feeling fresh and intentional rather than overdone. Let’s explore eighteen distinct approaches to wearing light pink stilettos—each one offering its own personality and wear-occasion potential.
1. Classic Nude Pink Ombre
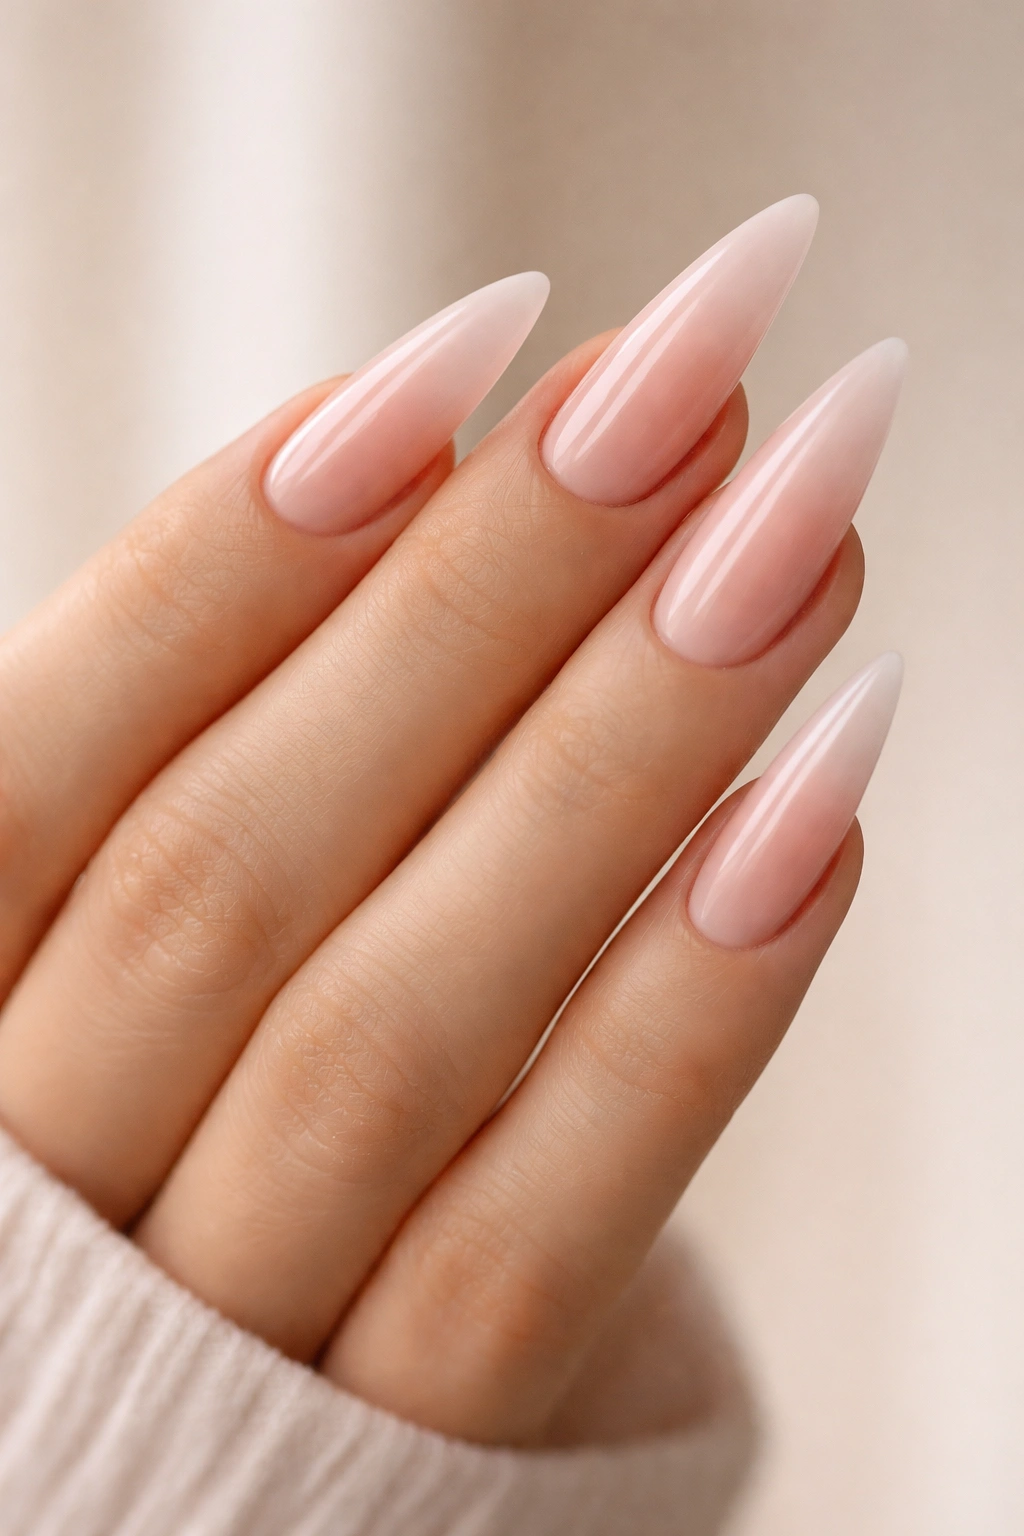
A gradient from sheer to deeper pink creates an effortless, elongated effect that’s endlessly flattering. This design works by keeping the nude tone very light at the tip and gradually deepening toward the base, with the transition so subtle it looks like a natural progression of your own nail bed.
Why This Design Stands Out
The ombre effect works beautifully on stilettos because the elongated shape gives you plenty of canvas for the gradient to develop. The color shift draws the eye down the length of the nail, which actually emphasizes how elegant and refined your hands look. It’s the kind of design that makes nails look expensive and professionally done, even when you’re doing it yourself.
What You’ll Need
- Light pink gel polish in two shades (baby pink and a slightly deeper rose)
- Ombre sponge or natural makeup sponge cut into small pieces
- Top coat for sealing the blended edges
- Gel lamp for curing between shades
Pro tip: Blend your ombre on the sponge before applying it to the nail—this prevents harsh streaks and creates that coveted seamless transition.
2. Milky Light Pink with Gold Leaf Accents
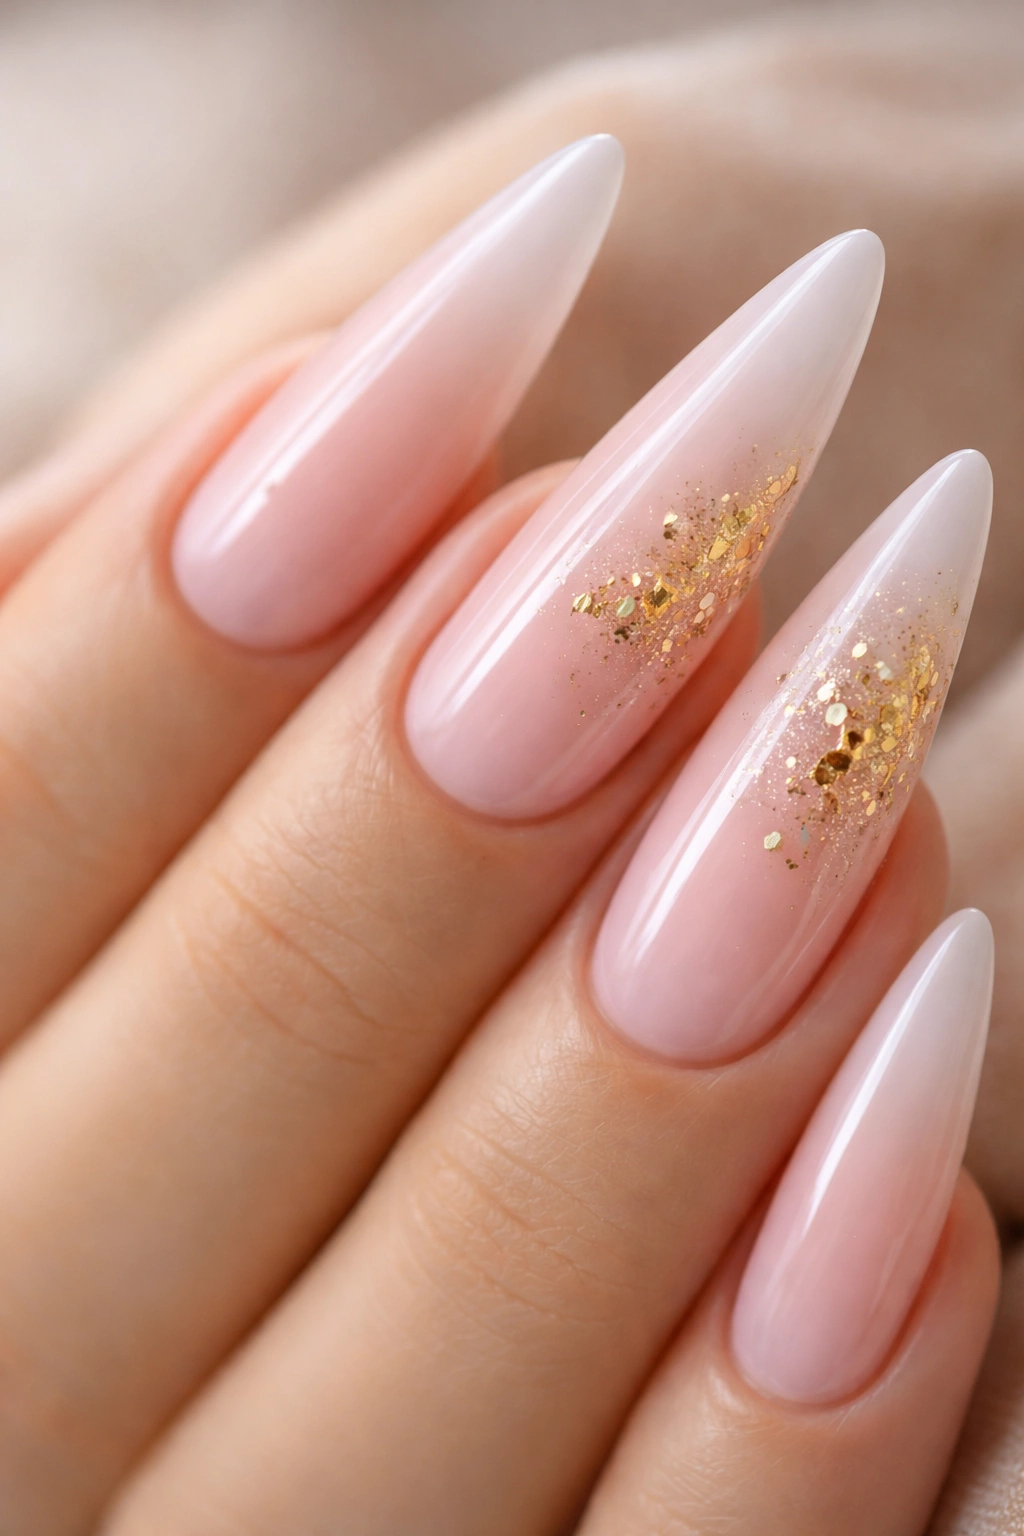
A semi-sheer, almost cloudy light pink base becomes a canvas for delicate gold leaf pieces scattered across the nail. The milky quality softens the whole look, while gold adds just enough sparkle to feel special without being overwhelming.
How the Texture Creates Visual Interest
The milky finish has a soft-focus quality that’s incredibly flattering—it blurs the line between polish and skin, creating an almost ethereal effect. When you add thin pieces of gold leaf strategically across two or three nails, you’re creating a balanced design that catches light differently depending on the angle. It’s subtle when you’re not moving, and subtly glamorous when you are.
The Application Strategy
- Apply your milky pink base (usually requires 2-3 coats for opacity)
- Once fully cured, lightly apply adhesive where you want to place the gold leaf
- Use tweezers to carefully press small pieces of gold leaf into place
- Seal everything with a glossy top coat to protect the leaf
Worth knowing: Gold leaf can shift and wrinkle if you’re not careful during application—work with small pieces and press down firmly but gently for the smoothest results.
3. Soft Pink with Micro Diamond Embellishments
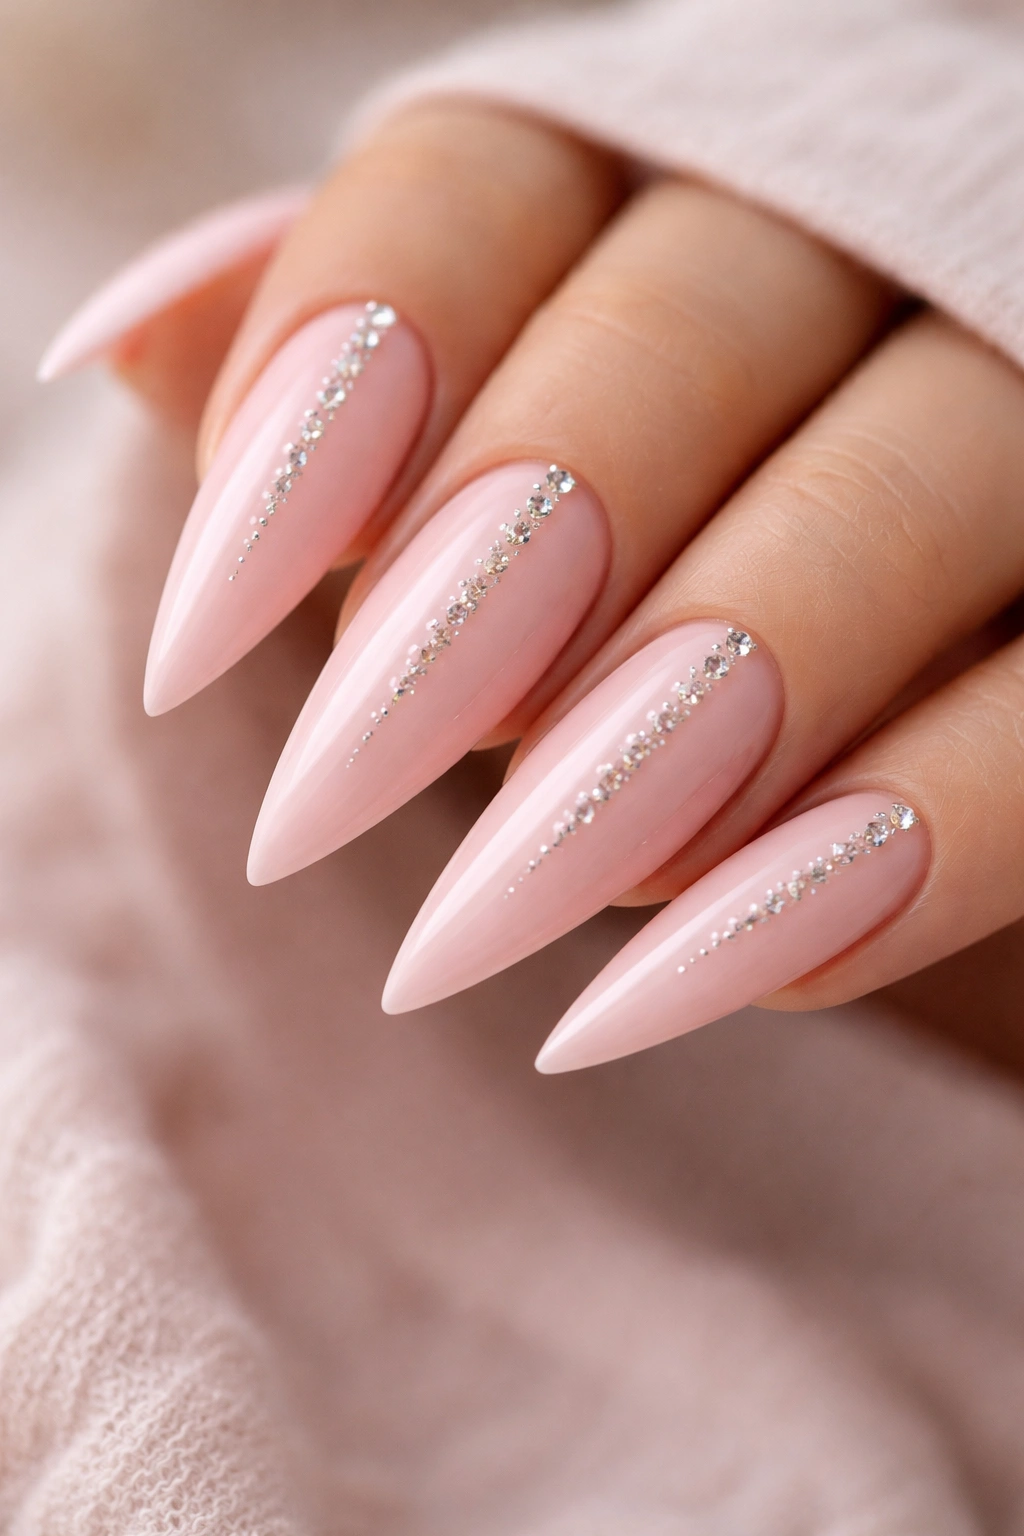
Tiny crystals or rhinestones placed strategically along the center line of each nail create an understated sparkle. The key is restraint—scatter them artfully rather than covering the entire nail, which keeps the design elegant rather than costume-like.
Why Micro Gems Work on Stilettos
The elongated shape of stiletto nails means you have more space to play with placement. You can create a gradient of diamonds (more concentrated toward the tip, fewer toward the base) or a clean line down the middle. Either way, the narrow width of the nail means even small stones create significant visual impact.
The Best Placement Patterns
- Graduated line: 3-4 small stones at the tip, 1-2 in the middle, none at the base
- Center stripe: Tiny stones in a precise vertical line from tip to base
- Scattered luxury: Just 1-2 key stones per nail, placed asymmetrically
- Tips only: Concentrate all stones in the top third for a dipped effect
Insider detail: Use gel adhesive under your stones instead of regular nail glue—it stays flexible and won’t crack as your nails naturally flex throughout the day.
4. Blush Pink Glazed Donut Nails
A light pink base with a slightly deeper pink or nude outline creates that trendy glazed donut effect. The darker “rim” defines the nail shape while keeping the overall aesthetic soft and feminine.
The Technique Behind This Look
The glazed donut effect works by creating a thin, darker outline around the perimeter of the nail while keeping the center lighter. On stilettos, this actually creates a subtle optical illusion—the outline frames the elongated shape and makes your nails look even more dramatic and defined.
Steps to Achieve Glazed Donut Nails
- Apply your light pink base coat and let it fully cure
- Use a thin striping brush with slightly deeper pink or light nude
- Create a thin outline around the entire edge of the nail (top and sides)
- The outline should be just 1-2mm wide for a subtle effect
- Seal with matte or glossy top coat, depending on preference
Pro tip: Use a matte top coat with glazed donuts for extra-trendy aesthetic, or high-gloss if you want the effect to read as more traditional and refined.
5. Blush Pink with White Marble Veining
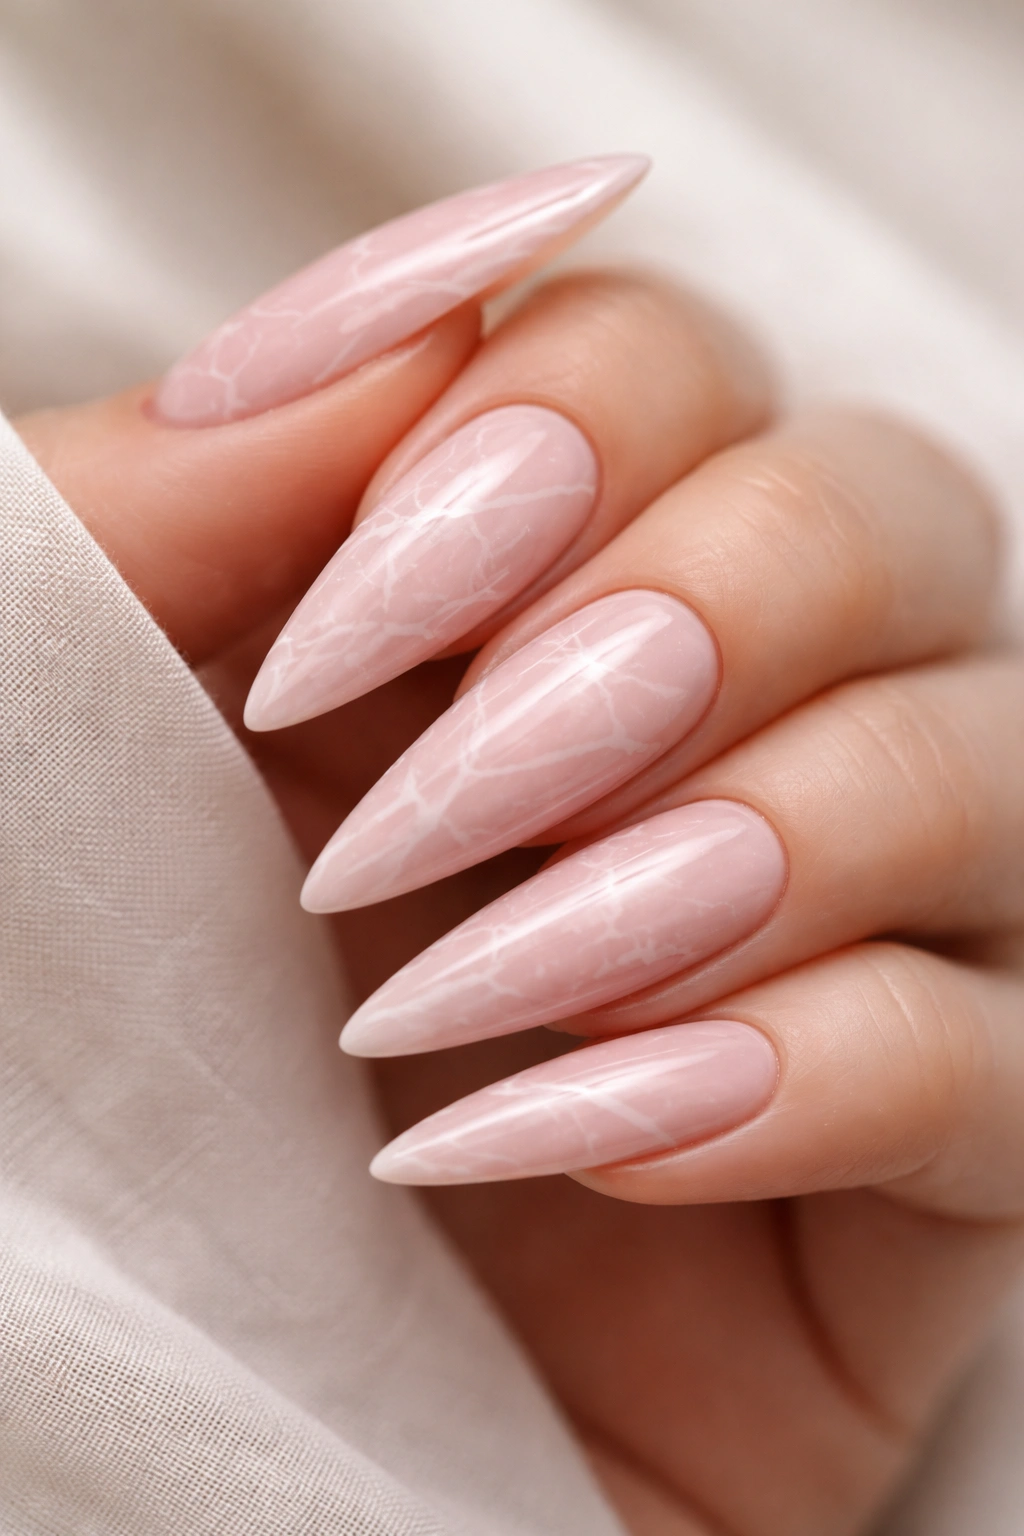
A light pink base with delicate white lines creating abstract marble patterns across the surface. The veining should feel organic and artistic, like natural stone, rather than perfectly geometric.
Creating Convincing Marble Lines
The key to gorgeous marble is using a very fine brush and letting your hand move naturally rather than trying to paint perfect lines. You want the white veining to feel random and organic—that’s what makes it look expensive rather than amateur. Stilettos actually make marble easier to execute because the narrow width gives you a clear canvas without too much surface area to cover.
The Execution Process
- Paint your light pink base and cure it completely
- Use a very thin striping brush with white gel or acrylic
- Paint thin, slightly curved lines that intersect organically
- Let some lines trail off rather than completing them fully
- Add just a few accent lines per nail rather than covering everything
- Seal with glossy top coat
What to watch for: If your white lines feel too structured or too numerous, the effect reads as tacky. Less is more with marble—three or four elegant veins per nail beats intricate detailing every time.
6. Soft Pink with Nude Negative Space Design
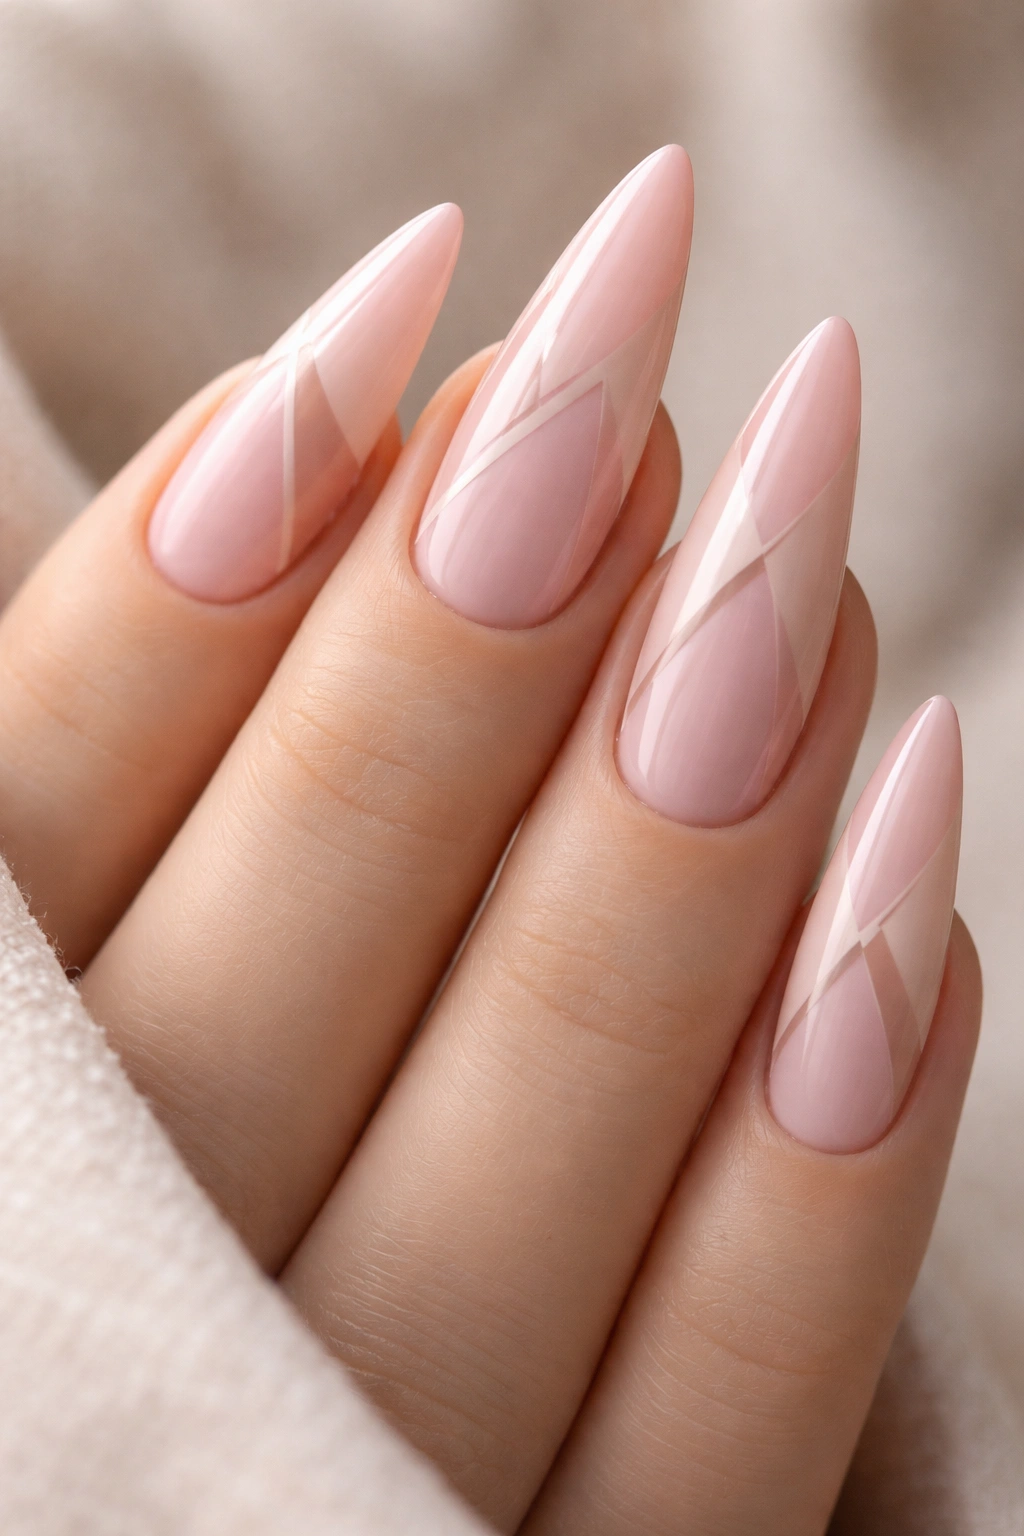
Instead of covering the entire nail, create intentional bare-nail space in a geometric pattern—perhaps a triangle at the tip or a stripe down the middle. The light pink polish frames the negative space, creating a graphic, modern look that still feels elegant.
Why Negative Space Changes Everything
Negative space designs feel contemporary and intentional in a way solid color never does. They also make nails look longer (your brain fills in the “missing” parts) and they’re easier to maintain since less surface area requires polish. On light pink, negative space reads as sophisticated rather than edgy.
Design Ideas to Try
- Inverted triangle at the tip showing bare nail
- Thin vertical stripe of bare nail running down the center
- Half-moon at the base (the reverse of traditional half-moons)
- Geometric cutout at the outer edge
- Alternating pattern where some nails have negative space and others don’t
Pro tip: Map out your negative space with a sticker or stencil first—this prevents accidental smudges and keeps your lines clean and precise.
7. Light Pink with Delicate Hand-Painted Florals
Tiny flowers—think baby’s breath, small roses, or simple daisies—painted freehand across a light pink base. The flowers should feel petite and charming, not bold or heavily textured.
The Art of Tiny Floral Details
Hand-painted florals on nails require a steady hand and a good-quality detail brush, but they don’t require professional-level painting skills. Simple flowers—just a few petals and a dot for a center—look charming even if they’re not perfectly symmetrical. The light pink base means any slight imperfection reads as “organic and handmade” rather than “unpolished.”
Floral Options That Work Best on Stilettos
- Baby’s breath: Tiny clusters of dots with minimal stems
- Simple roses: A few curved petals and a darker center
- Wildflowers: Minimalist interpretation with just a couple of lines and dots
- Leaves and stems: Fine line work suggesting botanical elements
- Scattered petals: Individual small petals placed artistically across nails
Worth knowing: Use a very thin brush and practice on a nail wheel first—florals are more forgiving than you’d think, and a second practice attempt dramatically improves your second set.
8. Strawberry Shortcake Pink with White Piping
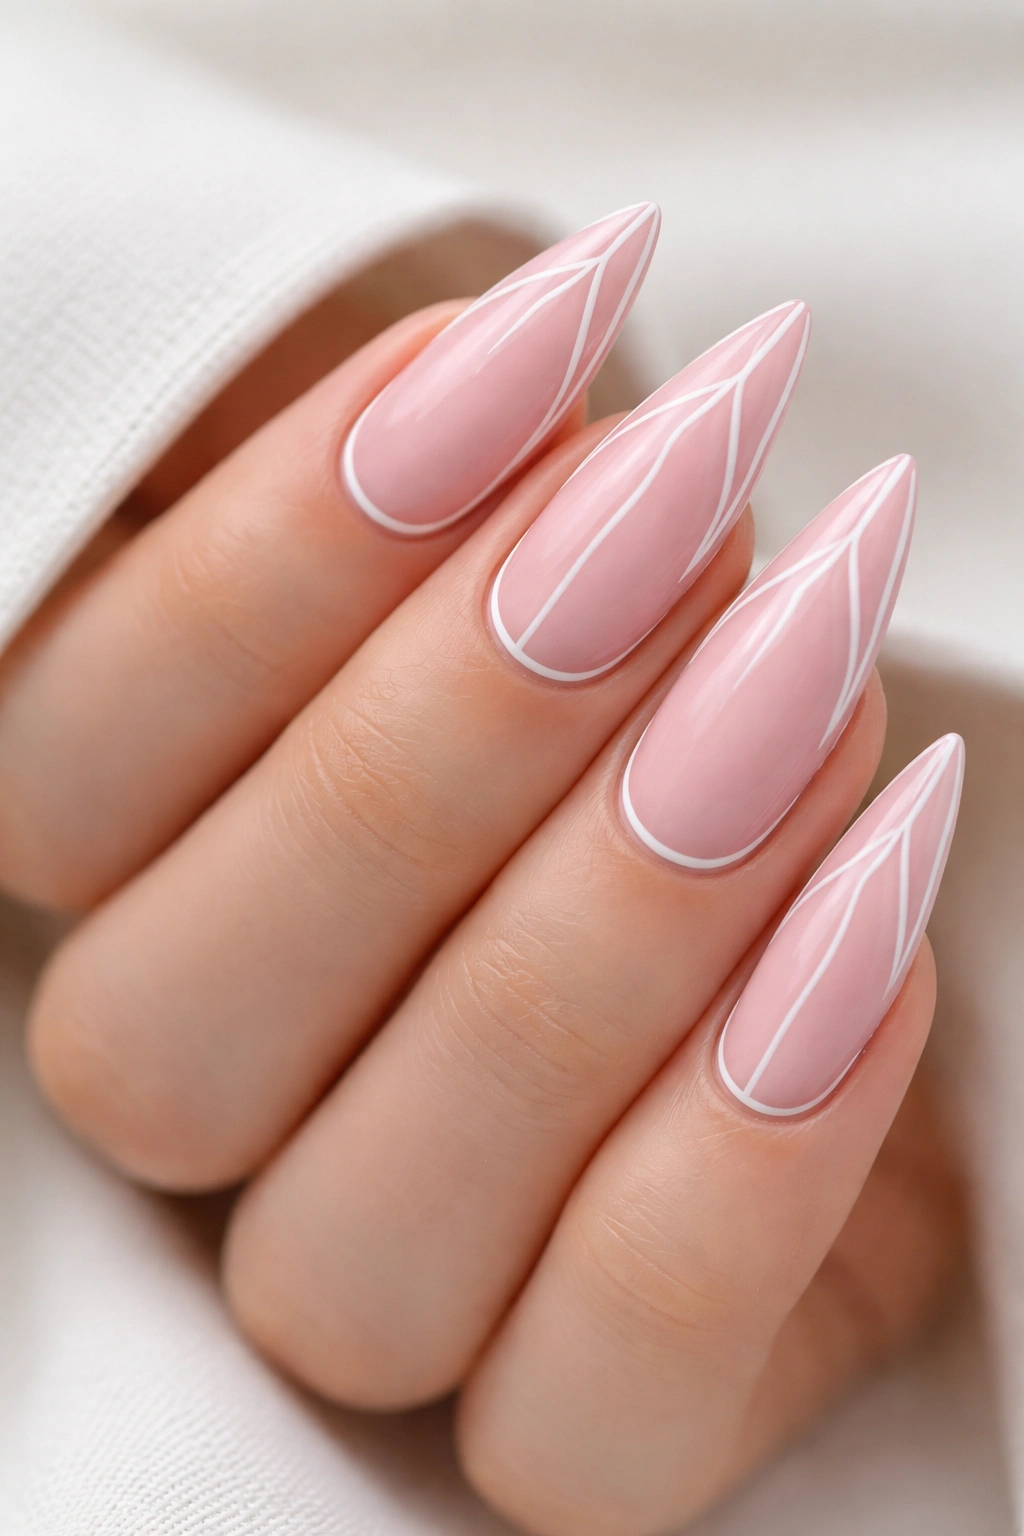
A deeper light pink with delicate white lines creating geometric patterns—think Art Deco angles or simple geometric frames around the edges. The white piping lifts the design from simple to structured and intentional.
How White Piping Elevates a Simple Base
Piping creates graphic interest and frames the color in a sophisticated way. Even thin, simple lines create visual structure that makes the design feel curated and intentional. On stilettos, piping down the center or around the edges emphasizes the nail’s elongated shape.
Piping Patterns That Look Professional
- Thin line down the center from base to tip
- Frame outline around the entire perimeter
- Diagonal stripes at consistent intervals
- Thin horizontal lines spaced evenly
- Half-frame (piping along just the outer edge)
Pro tip: Use a striping brush and move slowly for clean lines, or invest in a thin gel pen designed for nail art—some feel almost like using a regular pen and make precise work much easier.
9. Baby Pink with Sheer Ombre to Clear

A gradient that goes from opaque baby pink at the base to completely clear at the tips, creating an effect like the nail is dissolving into nothing. It’s ethereal and modern while still feeling sophisticated.
Why This Gradient Reads as High-End
The ombre-to-clear effect is relatively rare and feels editorial—like something you’d see in a high-fashion magazine. It’s also incredibly flattering because it emphasizes the length of your nails without looking overdone. The gradient needs to be smooth and the transition needs to feel intentional rather than patchy.
Application for Flawless Results
- Start with a completely sheer baby pink
- Apply the full shade at the base, covering about the bottom third
- Blend it lighter as you move toward the tip
- By the top third, you should be applying just a hint of color
- The very tip should be completely clear
- Seal with a high-gloss top coat for seamless appearance
Insider note: This design looks even better with a glossy top coat, which makes the gradient feel more blended and luxurious rather than showing distinct color zones.
10. Bubblegum Pink with Mirror Chrome Accents
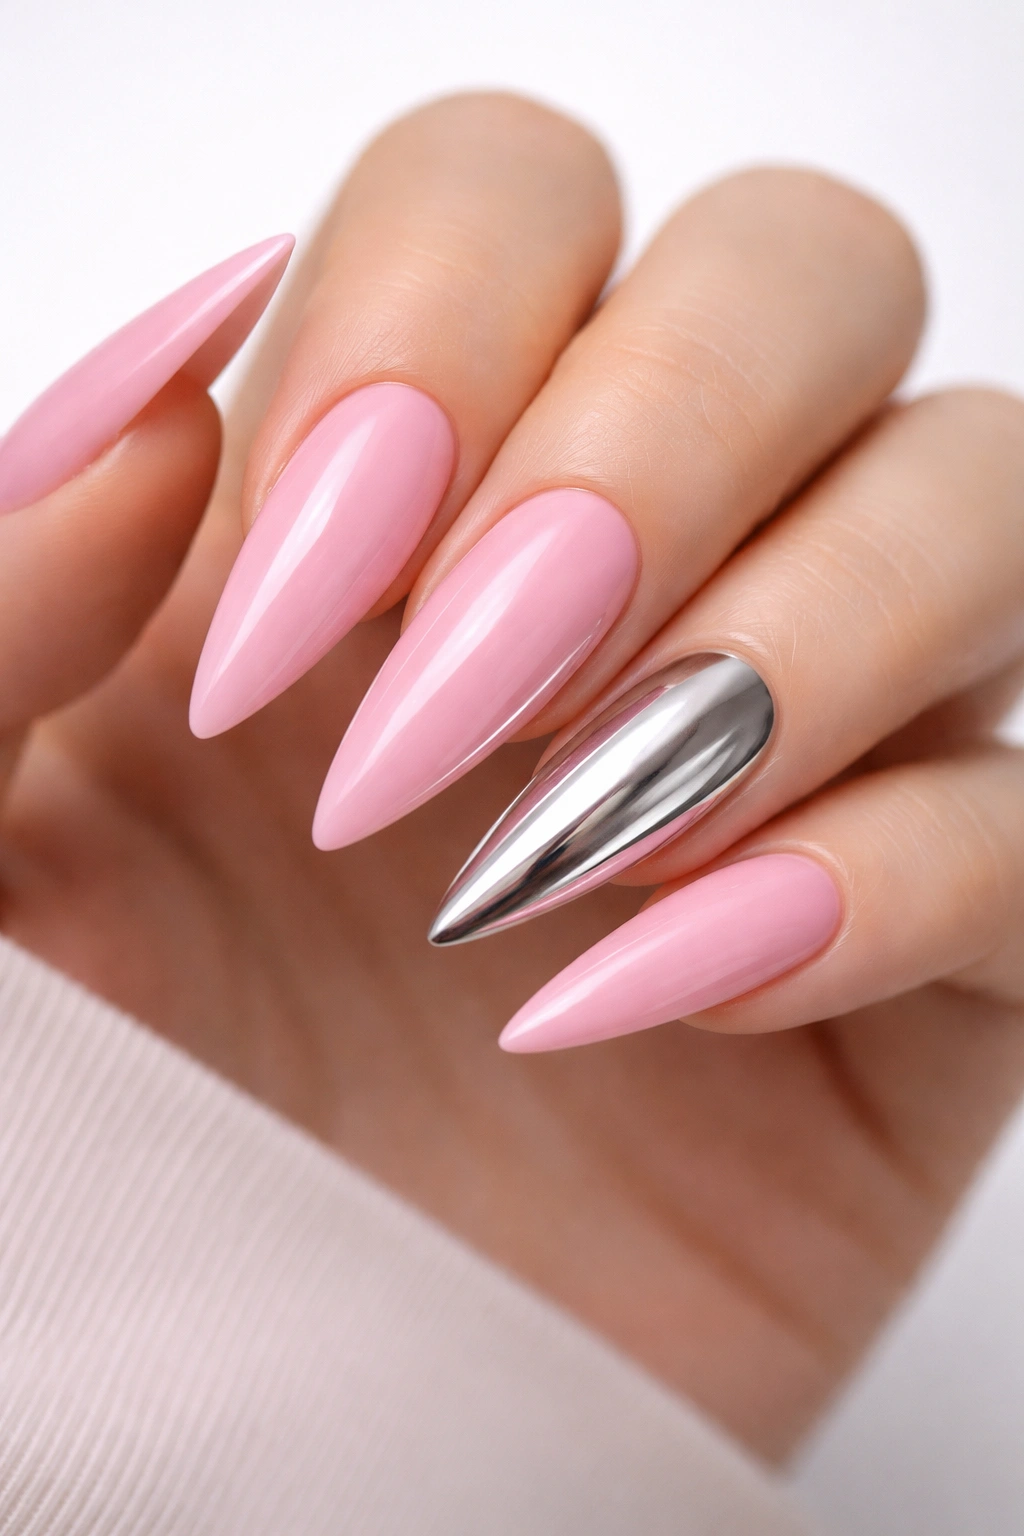
A light pink base with strategically placed chrome or mirror powder creating metallic accents. The chrome should be concentrated on one or two nails per hand rather than covering everything.
Why Chrome Feels Luxurious
Chrome or mirror powder reflects light differently than regular sparkle—it creates an almost liquid metallic effect that’s mesmerizing. Using it as an accent rather than a full coverage keeps the design elegant and wearable while still feeling indulgent and special.
Chrome Placement Strategies
- Full chrome coating on just your ring and pinky fingers
- Chrome on the tips only, leaving the base in light pink
- Chrome on one accent nail per hand for asymmetrical interest
- Chrome swept across diagonally from one corner to another
- Chrome applied to just the outer edge, creating a metallic frame
What to watch for: Chrome powder needs a very specific application process (usually applied to sticky gel base before curing) and can look cheap if it’s applied too heavily or unevenly—follow your product instructions carefully for best results.
11. Pale Pink with Holographic Glitter Ombré
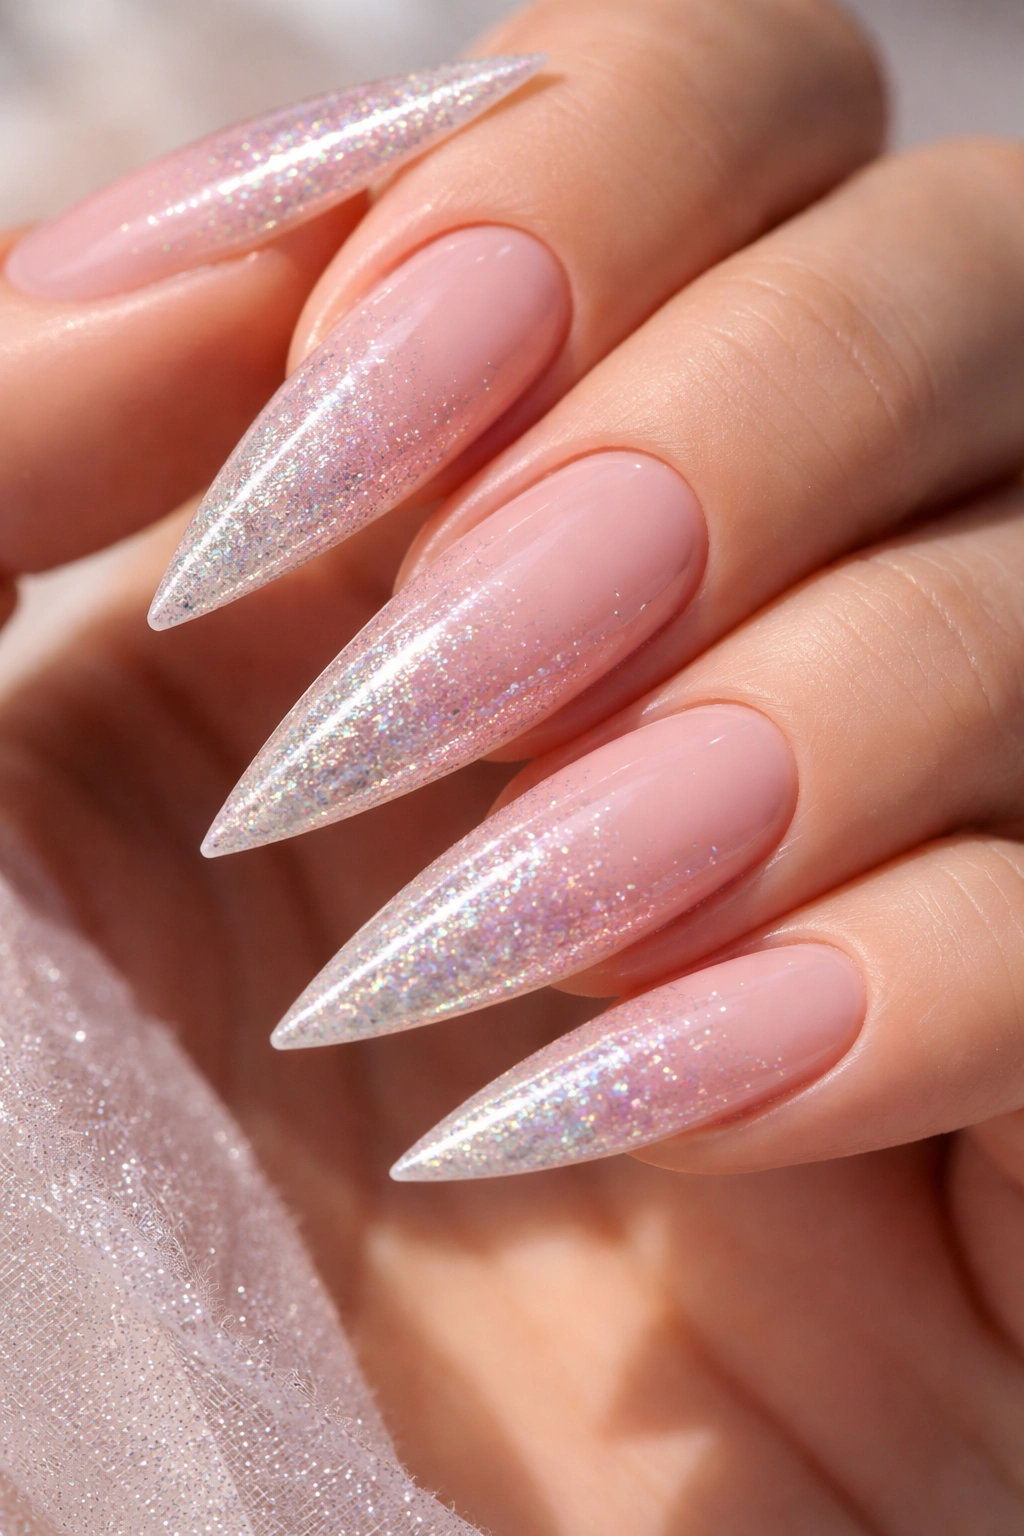
Holographic glitter mixed into the polish creates a multi-dimensional sparkle that shifts and changes color depending on the light. Keep the concentration lighter at the base and heavier at the tips for an ombré effect.
The Magic of Holographic Sparkle
Holographic glitter is different from regular glitter because it catches and reflects light in multiple colors simultaneously—it literally looks different as it moves. On light pink, this creates an effect that’s dressy enough for evening but soft enough for daytime wear.
How to Achieve Glitter Ombré
- Paint your light pink base as a foundation
- Apply clear gel with holographic glitter mixed in, starting light at the base
- Layer additional glitter-clear coats at the tips until you reach your desired sparkle level
- The gradient effect happens naturally as the glitter concentration increases
- Seal with gel top coat for ultra-smooth finish
Pro tip: Buy pre-made glitter gels designed for ombré if you’re new to nail art—mixing glitter into gel can be tricky, and commercial products are formulated to apply smoothly without clumping.
12. Champagne Pink with Silver Foil Flakes
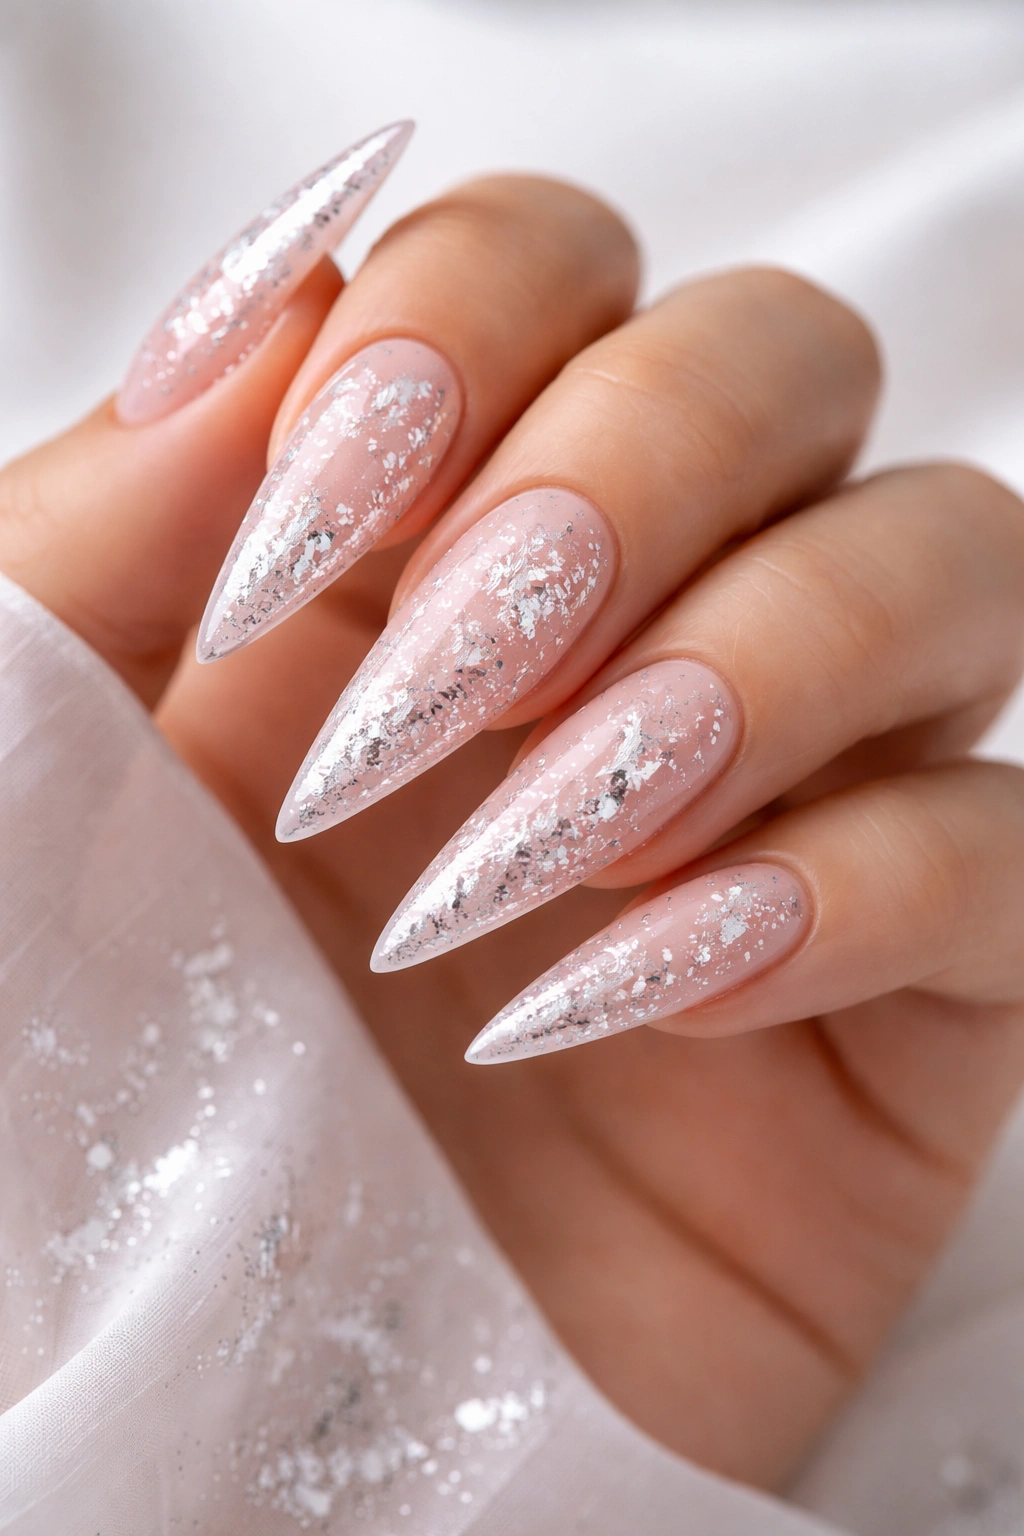
A soft champagne-leaning pink base embedded with tiny silver foil flakes that create a shimmery, textured appearance. The flakes catch light beautifully without the design feeling heavy or costume-like.
The Texture and Depth This Creates
Foil flakes add dimension that makes nails look more expensive and interesting than a flat polish. The silver reads as sophisticated against champagne pink—it’s an upscale color pairing that works for any occasion from casual to formal.
Creating a Polished Flake Effect
- Apply your champagne pink base in 2-3 coats
- Mix silver foil flakes (small pieces) into clear gel
- Apply the flake-gel mixture in a top layer
- The flakes should be visible but not so densely packed that they feel overwhelming
- Seal with a thick layer of top coat so flakes feel smooth rather than textured
Worth knowing: Foil flakes can sometimes shift and settle during application—work quickly and consider applying them to the still-slightly-tacky base for better adhesion.
13. Light Pink with Lace-Pattern Accent Nails
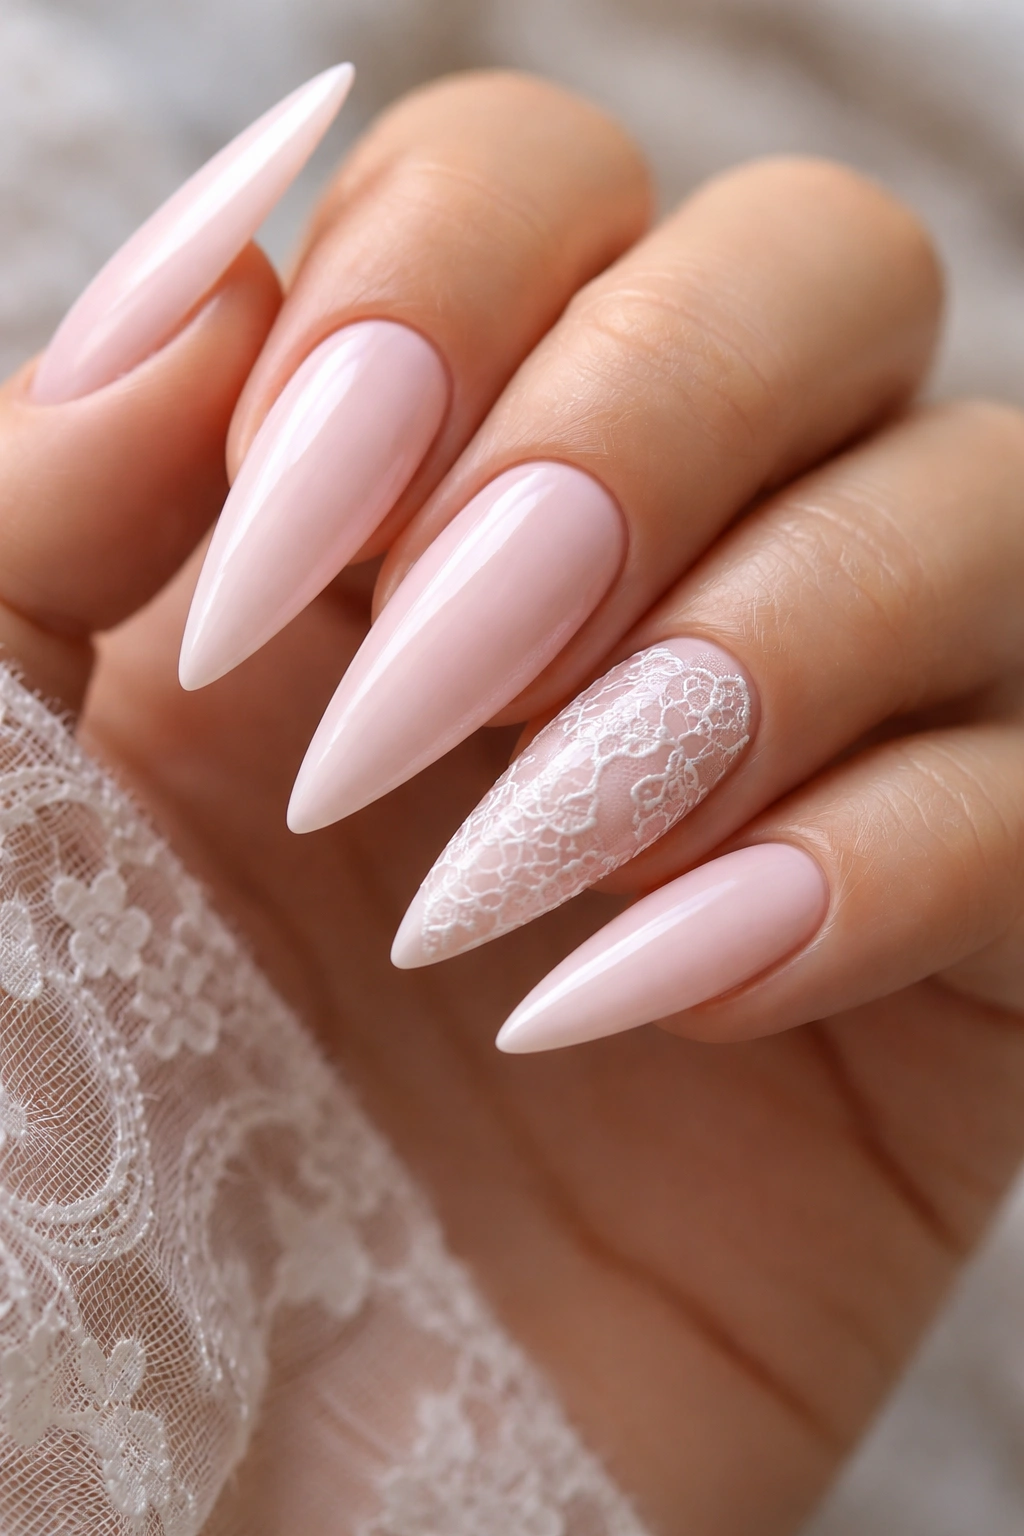
Paint the base of all nails in light pink, but create detailed lace patterns on just one or two accent nails using white or nude gel. The lace should feel delicate and intricate, like lingerie.
Why Lace Details Feel Feminine and Elegant
Lace is inherently romantic and sophisticated. Even when rendered simply with a thin brush, lace patterns create visual interest and texture that elevates the entire manicure. By using it as an accent on just one or two nails, you’re keeping the overall look balanced while showcasing detailed artistry.
Lace Patterns to Try
- Intricate geometric lace along the outer edge
- Full-coverage lace pattern on an accent nail
- Lace band across the middle of the nail
- Delicate scalloped lace pattern
- Fine line work mimicking vintage lace designs
Pro tip: Lace designs are easier than they look—sketch it lightly with a regular pencil on paper first to build confidence, then translate to nails using a very fine striping brush.
14. Pastel Pink with Soft Gradient to Purple
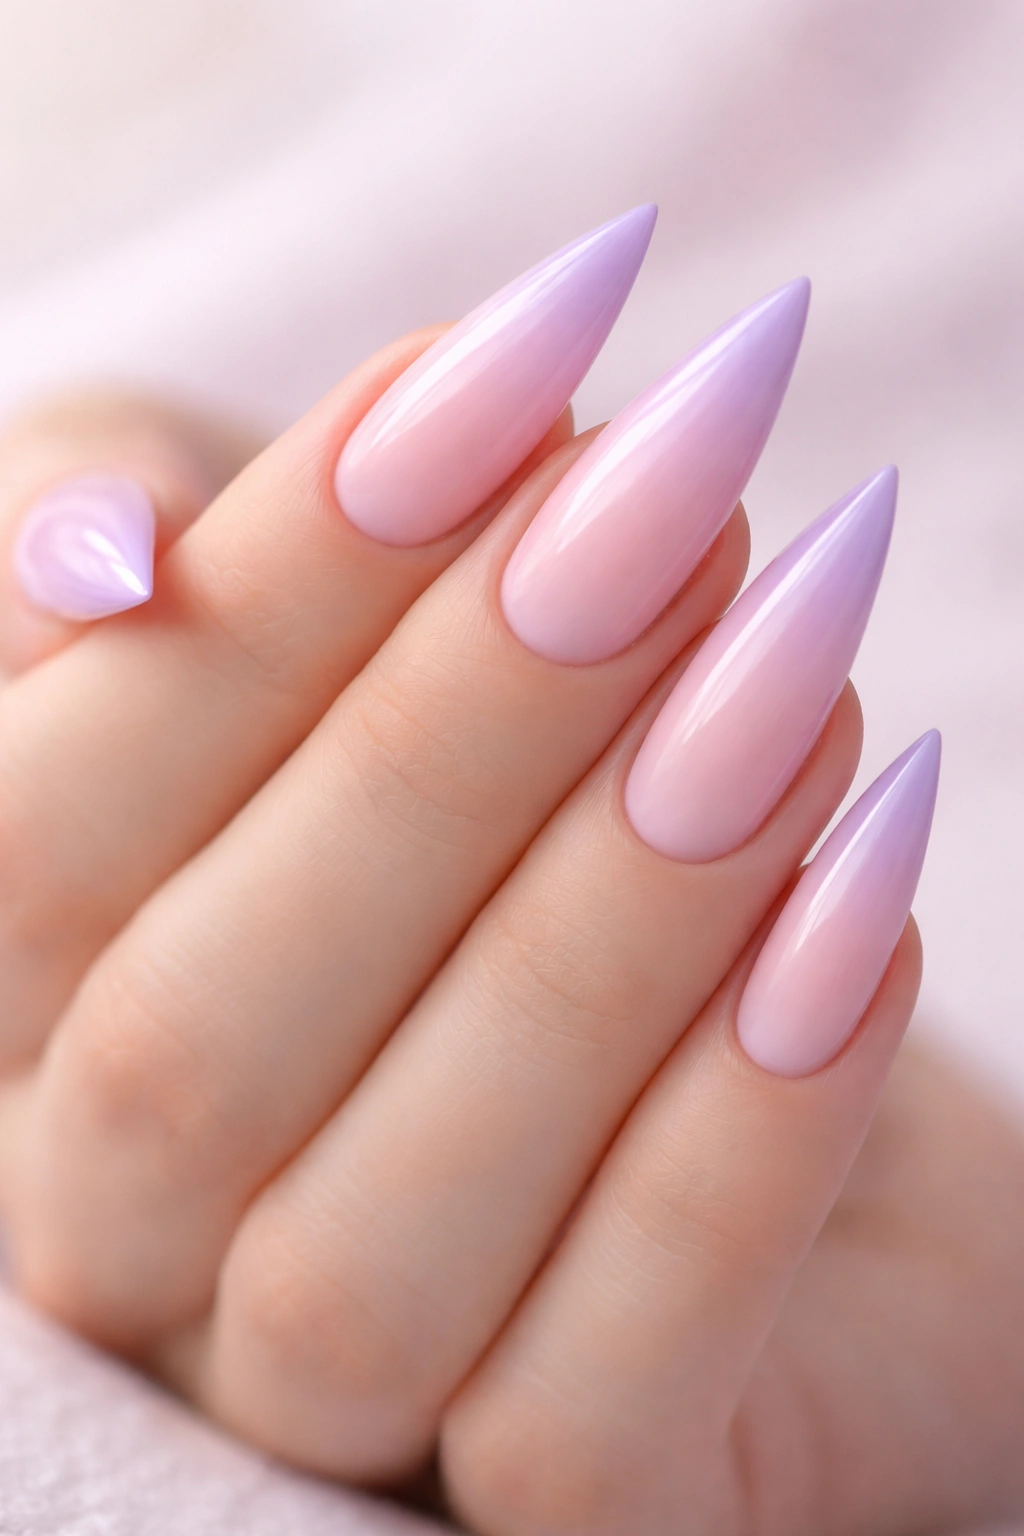
A gradient that transitions from light pink at the base through lavender-tinged tones to a soft mauve at the tips. It’s subtle but undeniably pretty, creating depth without looking heavy.
Why Color Gradients Feel Modern
Color gradients are having a major moment because they create visual interest while remaining sophisticated and wearable. The pink-to-purple gradient is particularly flattering because it works with virtually every skin tone and feels contemporary without being trendy in a way that dates quickly.
Achieving Smooth Color Transition
- Start with a light pink shade at the base
- Add the softest touch of lavender as you move toward the middle
- Gradually deepen the lavender as you approach the tips
- Finish with a soft mauve or deeper purple at the very tips
- Use a sponge for blending transitions, not a brush
Insider detail: The smoother your transitions, the more expensive the manicure will look—invest time in blending rather than rushing through application.
15. Blush Pink with Gold Geometric Nail Art
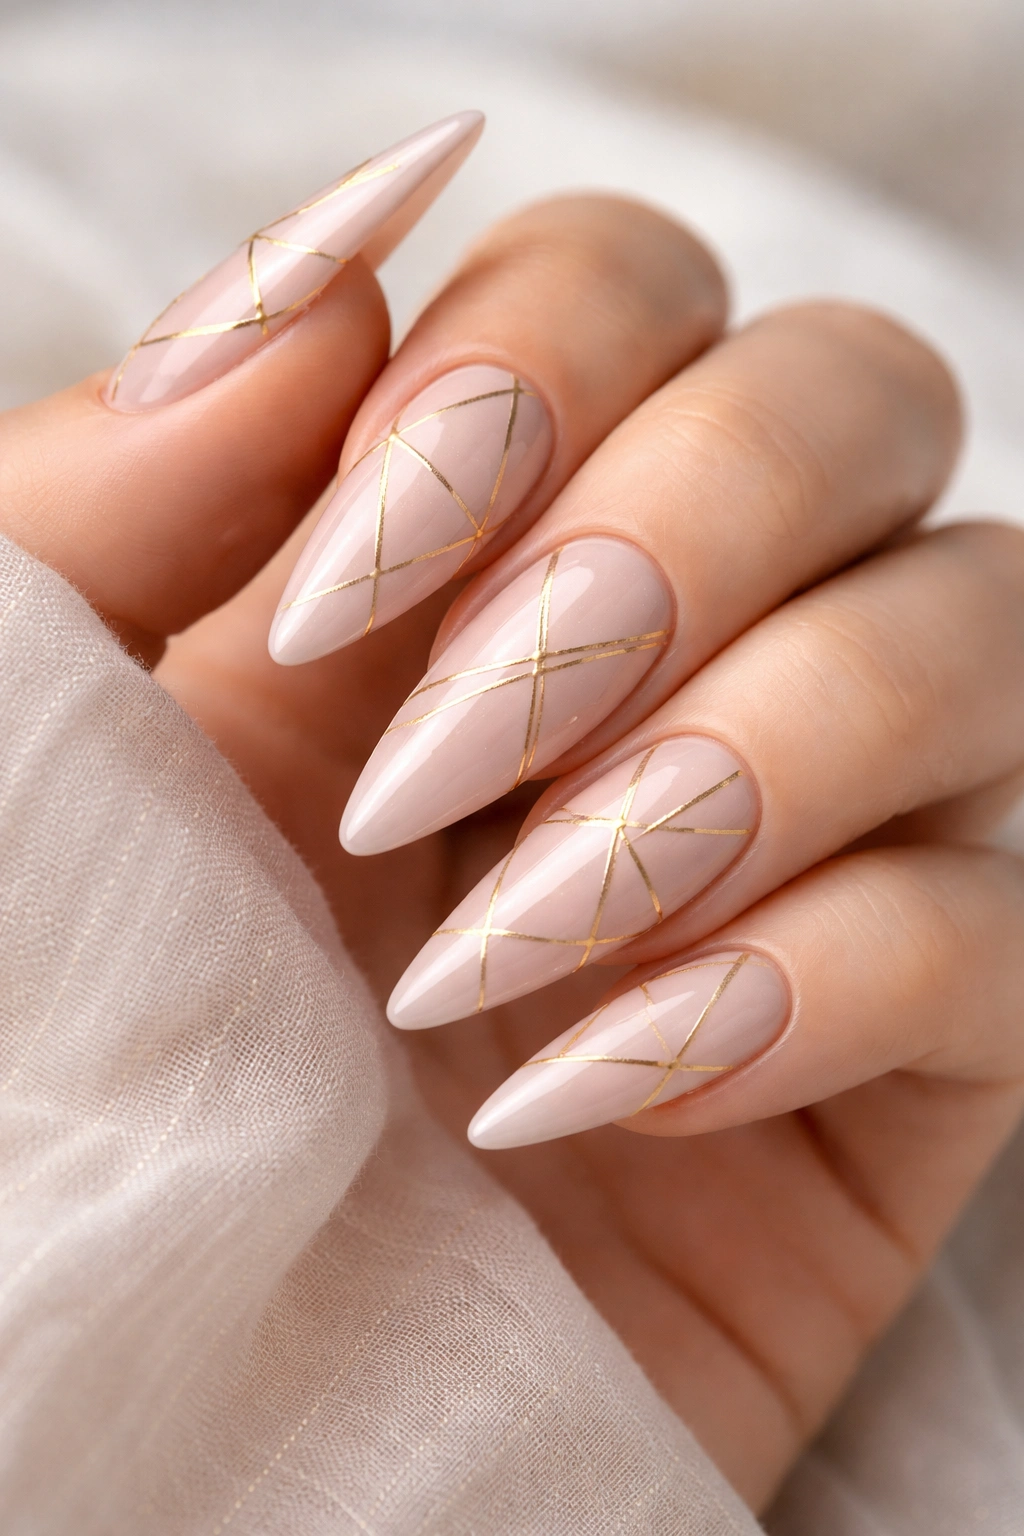
Clean, angular gold lines creating geometric shapes—triangles, hexagons, or abstract angular designs—across a light blush pink base. The geometric shapes should feel modern and intentional.
Why Geometric Design Feels Contemporary
Geometry reads as artistic and intentional in a way that organic designs sometimes don’t. The clean lines and sharp angles contrast beautifully with the softness of blush pink, creating a balanced design that feels both feminine and modern.
Geometric Design Ideas
- Golden triangles pointing toward the tip
- Hexagon frames around the perimeter
- Diagonal striping pattern in gold
- Abstract angular shapes scattered asymmetrically
- Minimalist geometric frame around just the tip
Pro tip: Use a striping brush or thin nail art pen for geometric designs—the precision these tools provide makes clean, sharp lines much easier to achieve than with a traditional nail brush.
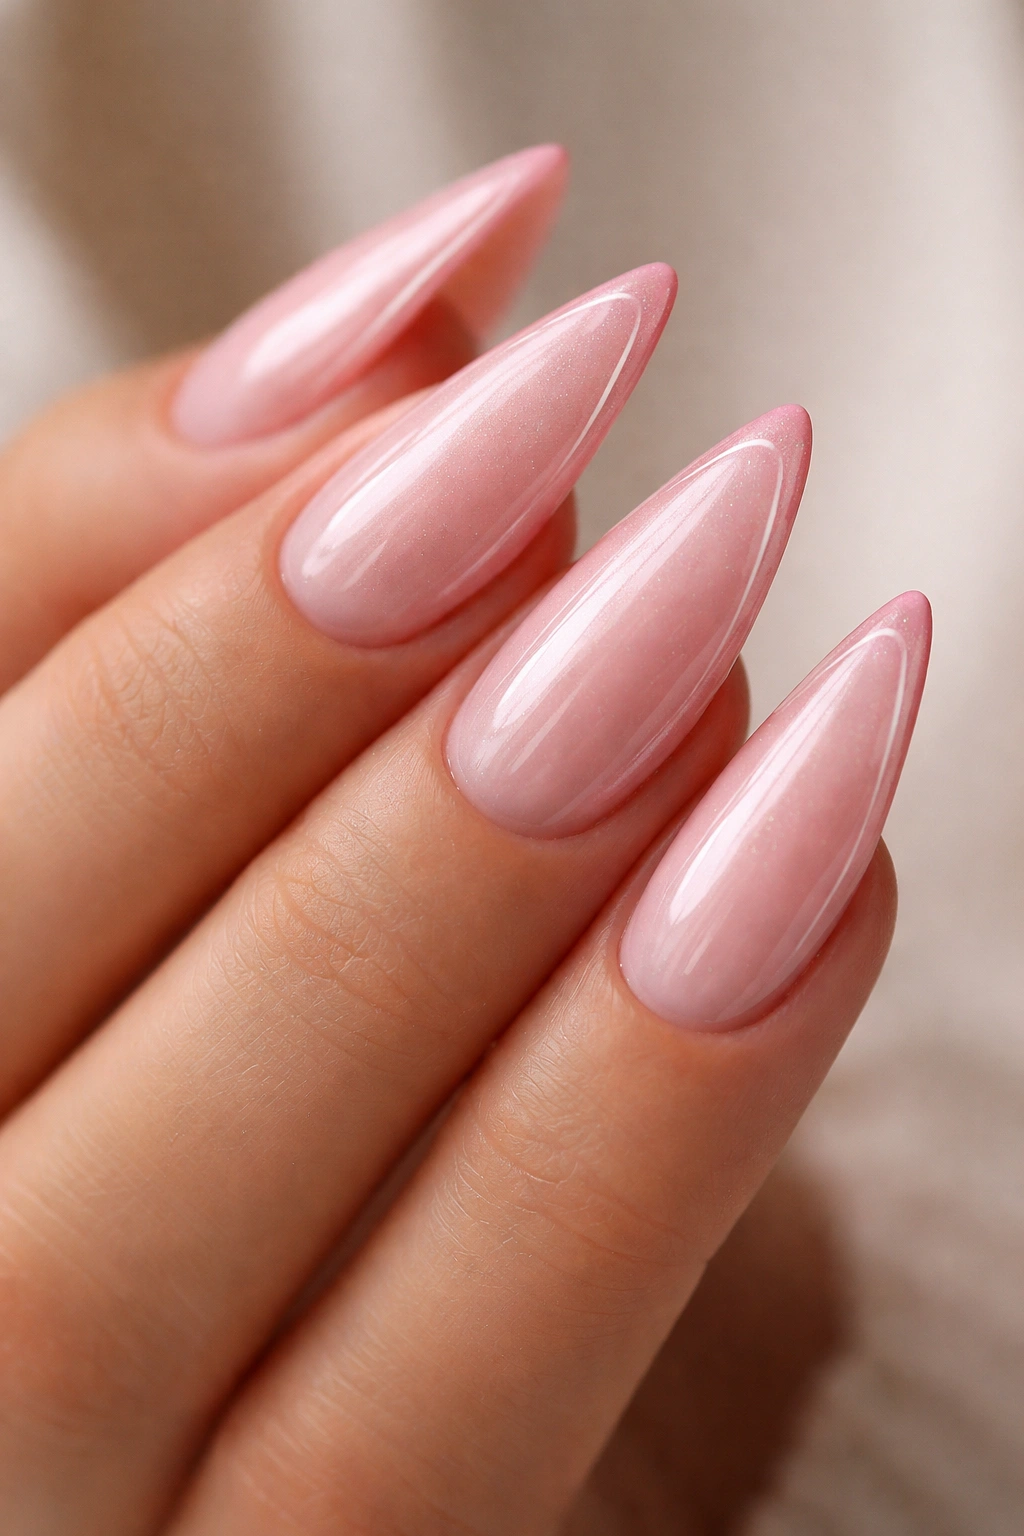
16. Ballet Pink with Mother-of-Pearl Shimmer
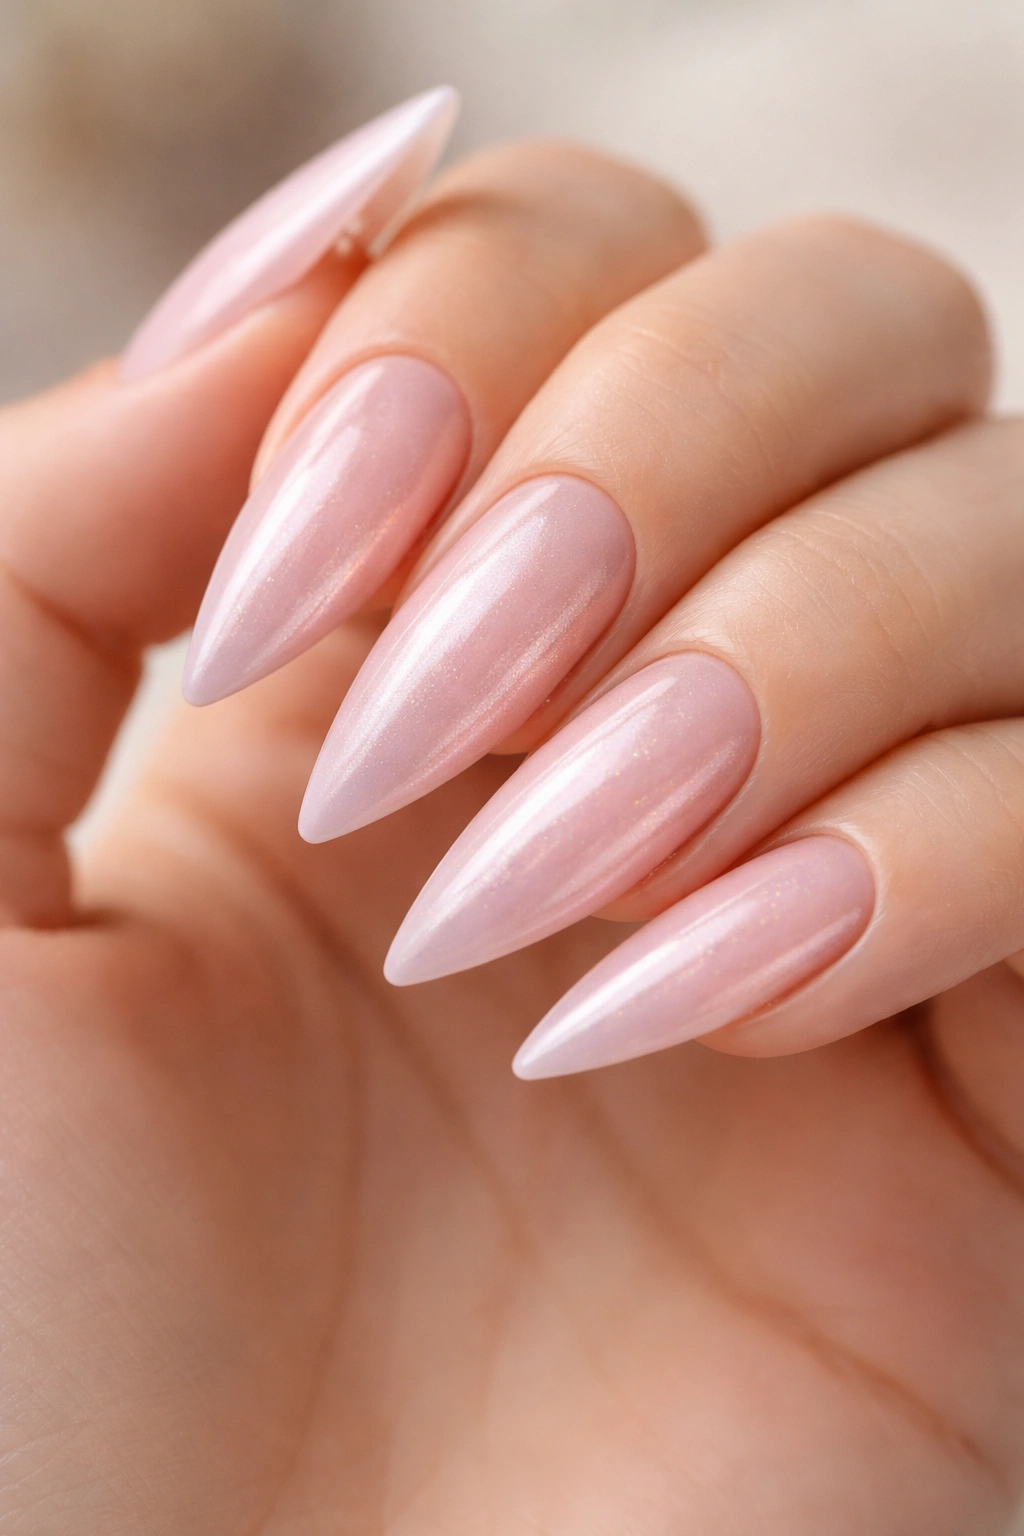
A ballet pink shade that naturally contains subtle mother-of-pearl shimmer, creating iridescent depth without additional embellishment. The pearl particles make the color shift slightly as you move, keeping the design feeling alive and dynamic.
The Sophistication of Subtle Shimmer
Sometimes the most elegant choice is a single sophisticated shade rather than multiple embellishments. A quality ballet pink with built-in shimmer accomplishes this beautifully—your nails look polished, refined, and intentional without requiring additional work.
What to Look For in This Shade
- A base color that leans slightly warm (not too cool or too icy)
- Visible but not overwhelming pearl particles
- A formula that applies evenly without needing excessive coats
- A finish that’s elegant whether matte or glossy
Worth knowing: This is one of the rare cases where buying a quality, expensive polish is genuinely worth the investment—the formulation quality makes a huge difference in how professional and refined the finished look is.
17. Rose Quartz Pink with White Marble Base

Create a white marble base with rose quartz pink veining instead of the traditional grey or black. The soft pink veining against white creates a romantic, gemstone-inspired look.
Flipping Traditional Marble on Its Head
Rather than starting with a dark base and adding light veining, this design inverts the concept—white becomes the primary color and soft pink provides the elegant detail. It reads as more feminine and romantic than traditional marble while maintaining that expensive, intentional aesthetic.
Creating Rose Quartz Effect
- Paint a clean white base as your foundation
- Use rose quartz or soft pink gel for your veining
- Create irregular, curved lines that feel organic
- Let some veins taper and fade rather than going edge-to-edge
- The result should evoke natural stone with a softer, more romantic palette
Pro tip: Study actual rose quartz images for inspiration on color and vein placement—nature is the best design reference for stone-effect nails.
18. Gossamer Pink with Pearl Gradient Tips
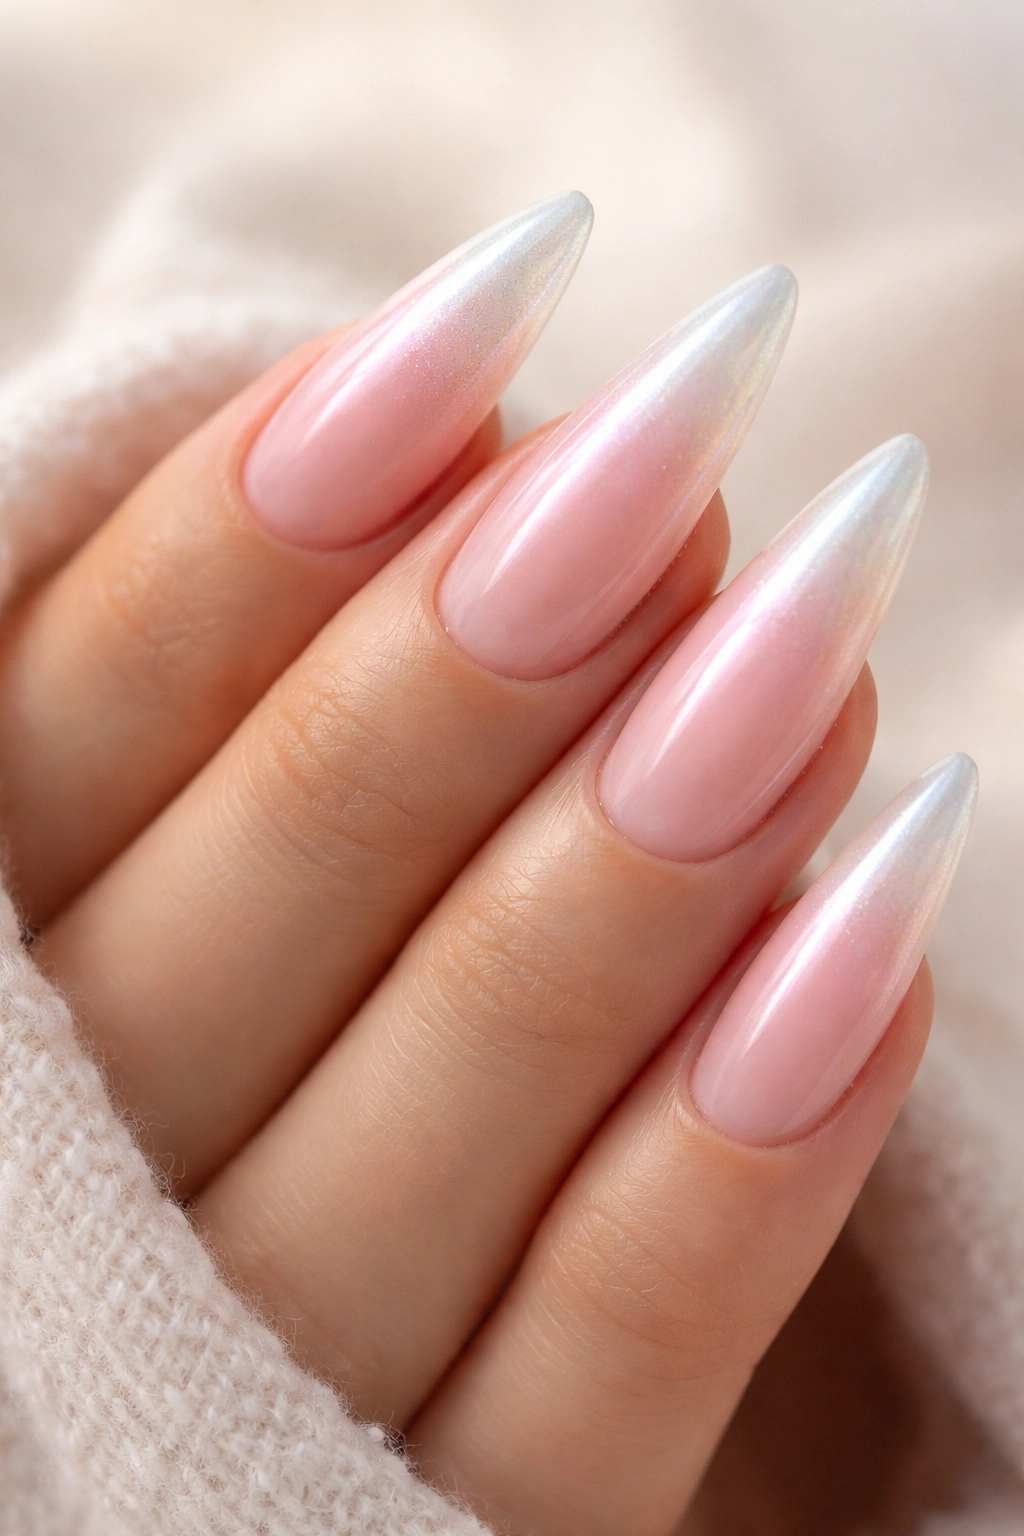
A barely-there gossamer pink base that transitions into pearlescent white tips, creating an effect like your nails are becoming pearl. It’s ethereal and sophisticated, with a subtle shimmer throughout.
The Ethereal Quality of Gossamer and Pearl
This is as close to a “barely-there” manicure as you can get while still having obvious intentional design. The gossamer pink is so sheer it almost reads as a nude, while the pearl tips create subtle glamour. It’s perfect for anyone who wants to feel polished without obvious color.
Application for Maximum Elegance
- Apply a single coat of gossamer pink to build the sheer base
- Add a second coat if needed for slight coverage, but keep it very sheer
- Create a gradient using pearl or pearlescent white
- Start the gradient about mid-nail, becoming fully pearl at the tips
- Seal with a glossy top coat for seamless, luxurious finish
Insider note: The most expensive-looking manicures are often the simplest ones—this design proves that you don’t need complexity to achieve genuine elegance.
Final Thoughts

Light pink stiletto nails offer endless possibilities for expressing your personal style while maintaining sophistication and wearability. Whether you choose the simplicity of a single elegant shade, the detail work of hand-painted flourishes, or the modern edge of negative space and geometric design, your light pink stilettos will work seamlessly across every part of your life.
The real magic of light pink lies in its adaptability. You can dress it up for evening events with chrome and crystals, keep it understated for professional settings with subtle marble or ombré, or make it romantic and artistic with delicate florals and lace. The color works with your skin tone regardless of how deep or fair you are, and it photographs beautifully in every light.
The most important thing is choosing a design that makes you feel confident and genuinely happy when you look down at your hands. There’s no such thing as a “wrong” light pink stiletto design—there’s only the one that speaks to you. Start with the styles that call to you most, invest in a few quality products, and don’t be afraid to ask your nail technician for their honest opinion on what would suit your lifestyle and aesthetic. Your perfect light pink stiletto manicure is absolutely within reach.
