

Duck nails have become a go-to choice for anyone wanting to make a bold statement with their manicure, and adding rhinestones takes these playful nails to an entirely different level of glamour. The distinctive squat, wide shape with a curved, almost webbed appearance creates the perfect canvas for sparkle and embellishment. Rhinestones catch light in ways that standard polish simply can’t, turning your fingertips into tiny works of wearable art that command attention whether you’re at a casual gathering or dressed up for a special event.
What makes duck nails with rhinestones so appealing is the combination of edgy nail shape with feminine, dazzling embellishments. The contrast between the bold geometry and the glittering details creates visual depth and personality. You’re not just painting your nails — you’re creating a statement piece that reflects confidence and creativity. Whether you prefer subtle rhinestone accents or full-coverage sparkle, there’s a duck nail design that matches your style and occasion.
The beauty of this nail trend is its versatility. Rhinestones come in endless colors, sizes, and finishes, so you can customize your duck nails to match any outfit, skin tone, or mood. From minimalist designs with just a few strategic stones to elaborate crystal-encrusted creations, these designs work for everything from everyday wear to red-carpet moments. Let’s explore 12 stunning duck nail designs featuring rhinestones that you can ask your nail technician to recreate or attempt yourself.
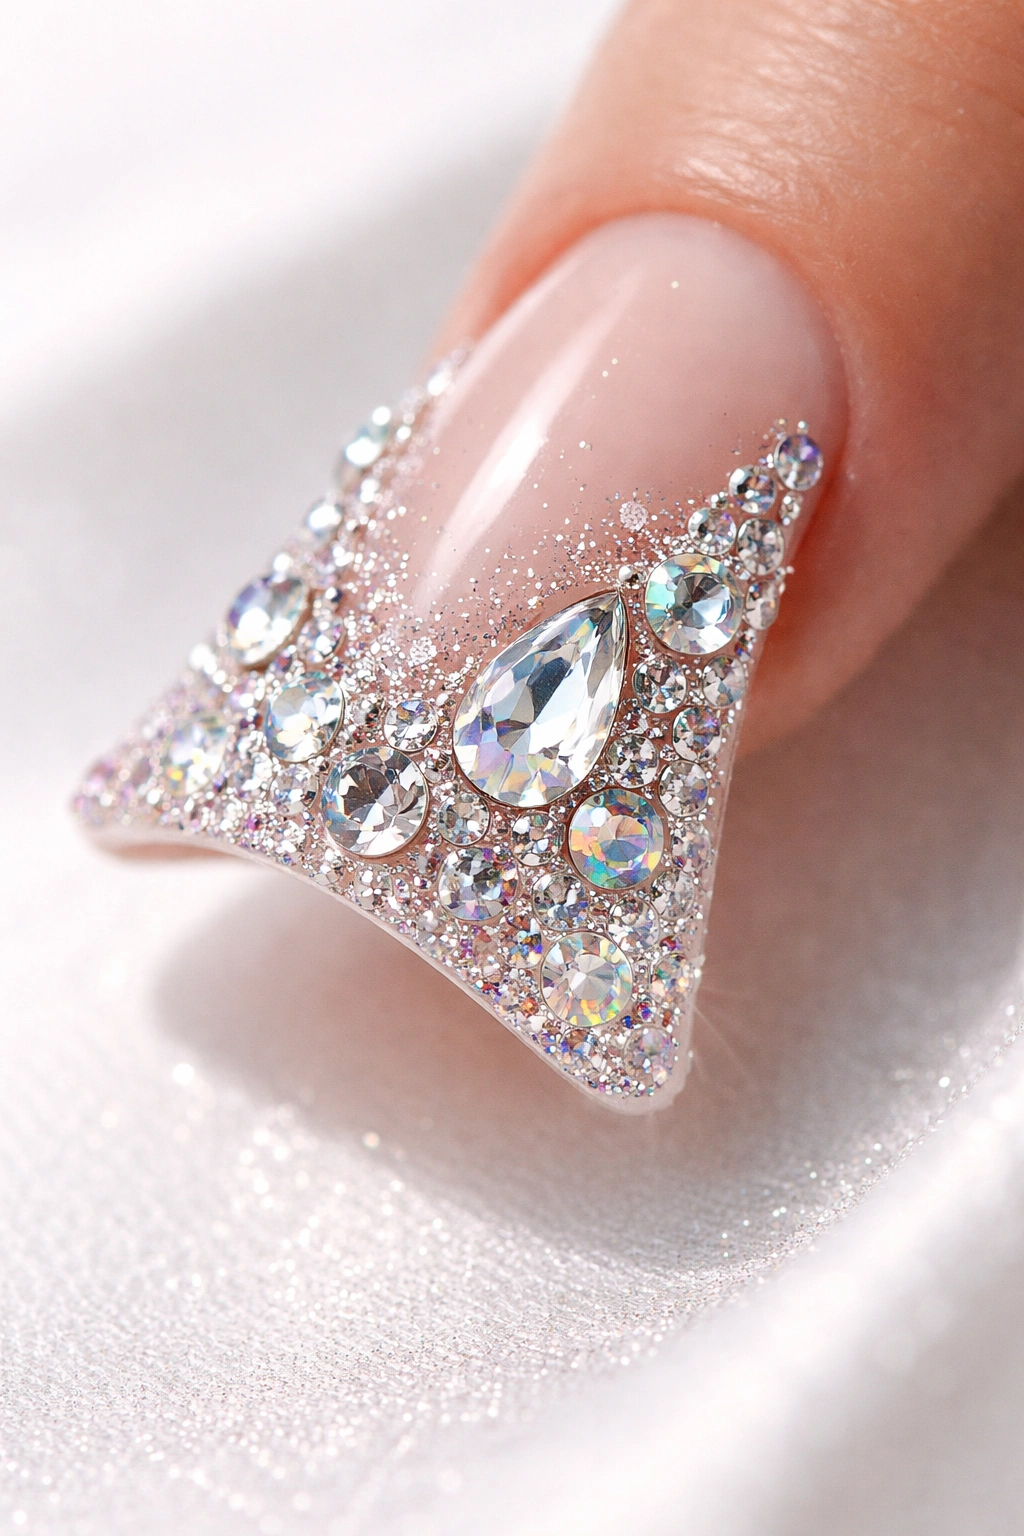
1. Classic Nude With Crystal Accent Nail
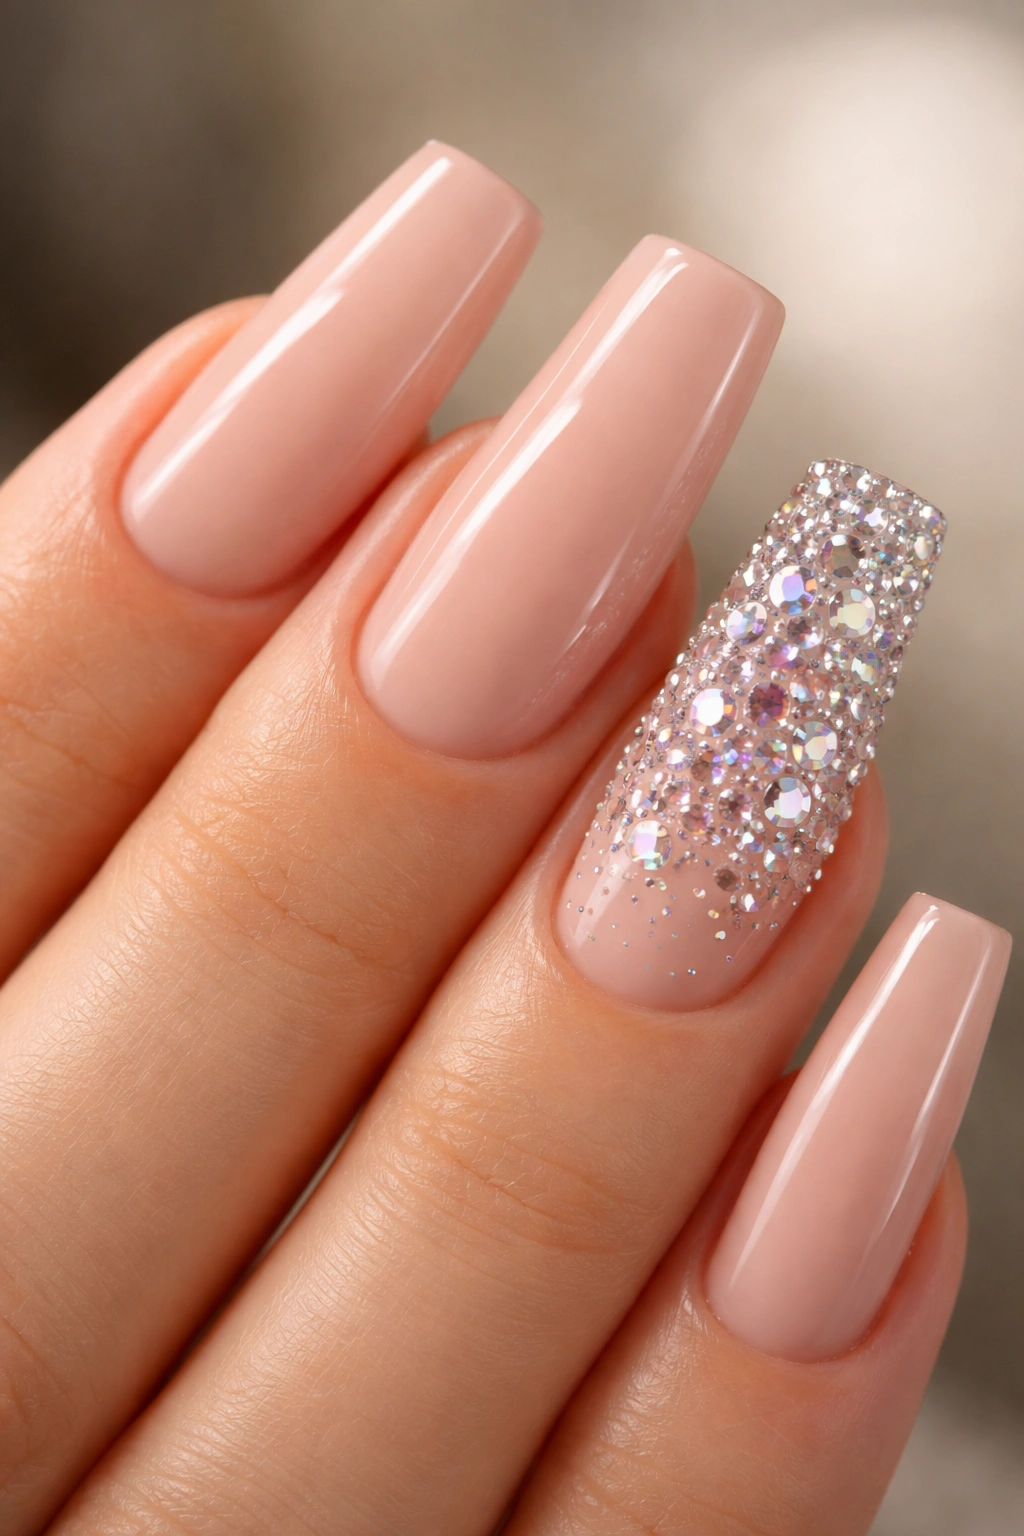
This design takes elegance back to basics by keeping most of your nails in a soft, neutral nude shade while reserving one accent nail for full rhinestone coverage. The nude base acts as the perfect backdrop, allowing the crystals to be the sole focus without competing colors. Most technicians use AB (aurora borealis) or clear rhinestones in various sizes, clustering them densely on the accent nail to create a gradient effect from thick coverage to sparse stones.
Why This Works for Any Occasion
Nude with rhinestones is the definition of versatile sophistication. The neutral tone won’t clash with any outfit, while the sparkle adds enough personality that your manicure never feels boring or corporate. This design transitions seamlessly from work to evening out, making it one of the smartest choices for someone who wants impact without going full-on bold.
Design Details and Placement
- One accent nail (typically the ring finger) covered entirely in clustered rhinestones
- Remaining nails in soft warm or cool nude, depending on your undertone
- Use 2-3 different rhinestone sizes for visual interest and depth
- AB crystals create rainbow sparkle; clear stones offer subtle shine
- Top coat seals everything and adds extra dimension
Pro tip: Place larger stones in the center of your accent nail and use smaller stones around the edges to create a subtle ombre effect.
2. White Duck Nails With Gold Rhinestone Borders
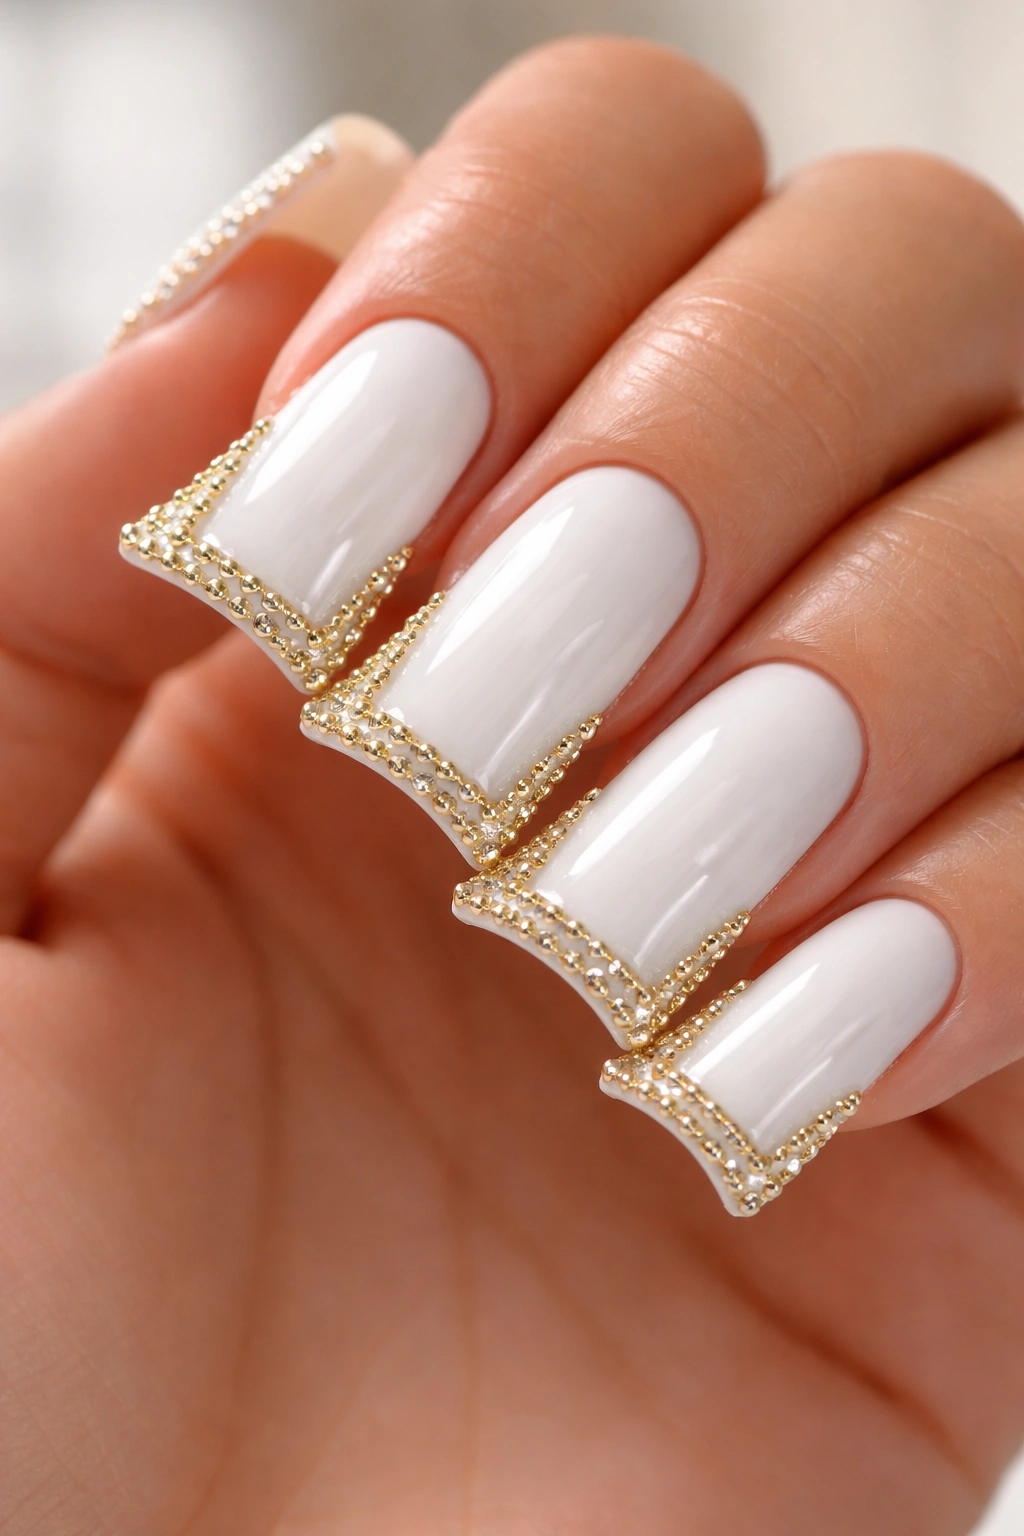
Crisp white duck nails paired with gold rhinestones create a design that feels both modern and timeless. This style uses the rhinestones as a decorative border, typically running along the edge where the nail curves or along the sides. The white base makes gold sparkle especially warm and rich, creating an effect that’s sophisticated without feeling overly flashy.
The Appeal of Metallic Accents
Gold rhinestones photograph beautifully and complement virtually every skin tone. The metallic quality adds a luxury feel that elevates a simple color combination into something special. White is also one of the easiest nail colors to work with — it’s bright, clean, and flattering, making it an ideal foundation for rhinestone designs.
How to Style This Look
- Start with opaque white polish on all 10 nails
- Create a precise line using gold rhinestones along the curved edge of each nail
- Space rhinestones evenly, about 2mm apart, for a refined look
- Use medium-sized stones (roughly 3-4mm) for visible sparkle without appearing cluttered
- Seal with thick top coat to protect the stones
Insider note: Ask your technician to apply stones while the top coat is tacky but not fully wet — this gives better adhesion than applying to fully dry polish.
3. Ombré Lavender With Purple Gradient Rhinestones
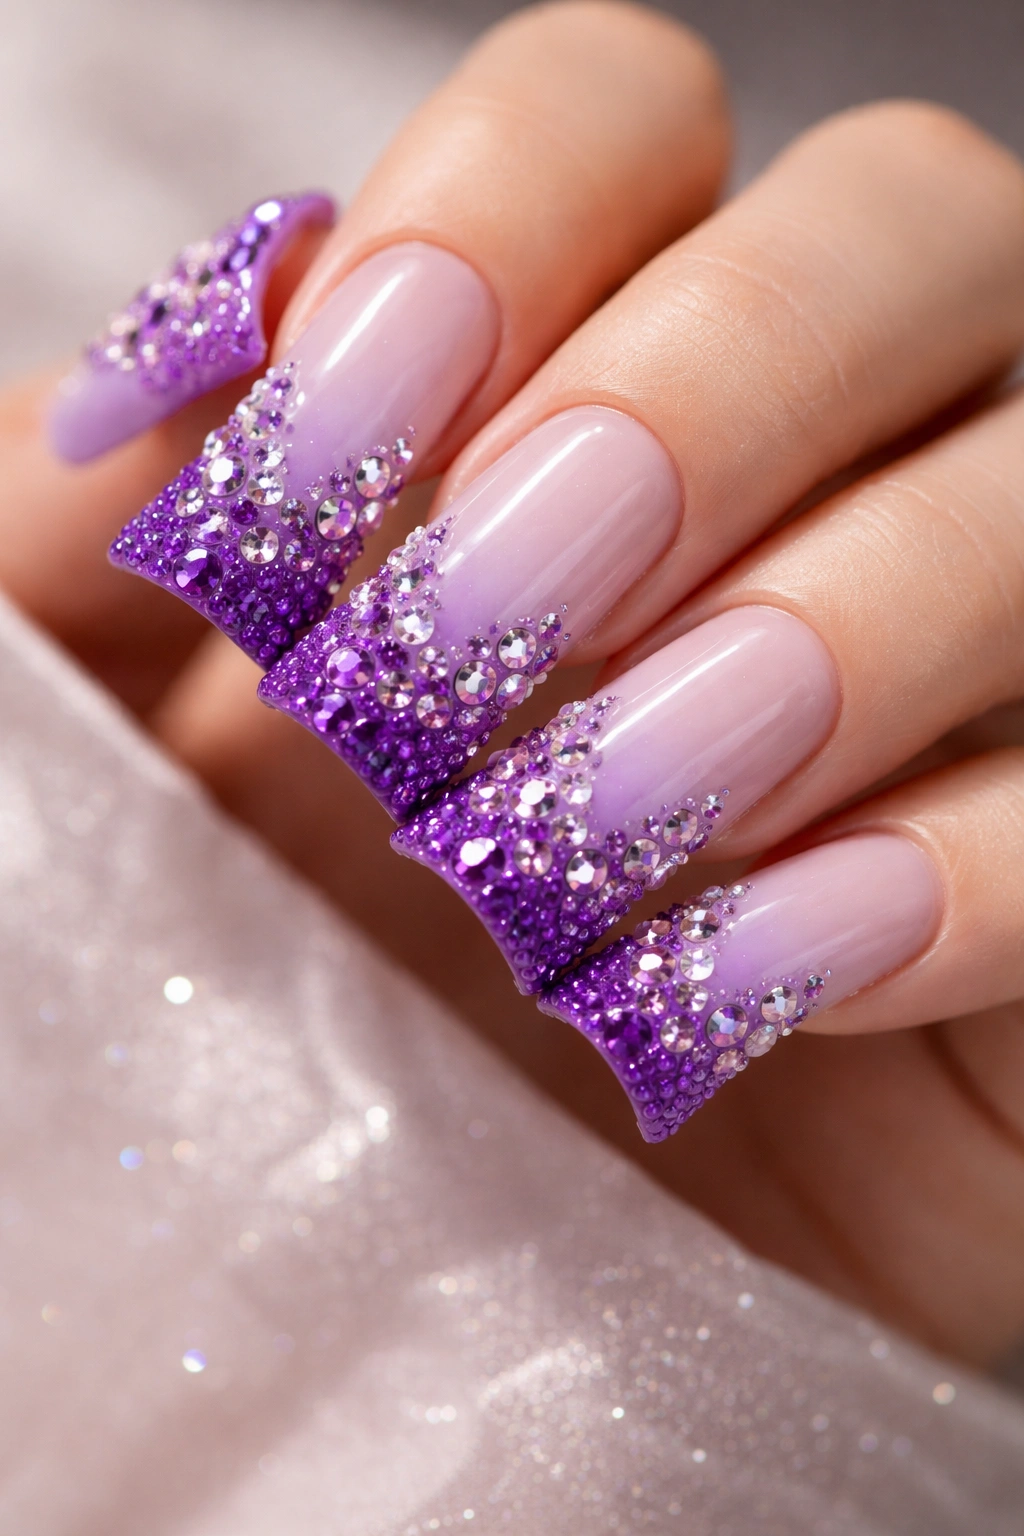
This design gradient-fades from pale lavender at the cuticle to deep purple at the nail tip, with matching rhinestones scattered across the entire nail in a way that follows the color flow. Using rhinestones in complementary purple tones creates a cohesive look that feels intentional and artistic. The ombré technique makes the sparkle feel like it’s emerging from the color rather than sitting on top of it.
Creating Depth With Layered Color and Sparkle
Lavender is a nostalgic, romantic color that pairs beautifully with sparkle. When you combine it with an ombré technique and matching rhinestones, you create visual depth that makes your nails appear more sophisticated. The gradient draws the eye downward across the nail, and the rhinestones follow that same path.
Application Technique
- Apply pale lavender to the base of each nail
- Blend to deep purple toward the free edge using a sponging technique with a makeup sponge
- Once dry, scatter medium rhinestones across the nail following the gradient
- Concentrate slightly more stones in the deeper purple area for visual balance
- Seal with a clear glossy top coat that enhances the ombré effect
Worth knowing: Ombré with rhinestones requires good lighting when applying because you need to see exactly where the color transitions occur. Ask your technician to work in bright, direct light.
4. Black Duck Nails With Silver and Crystal Mix
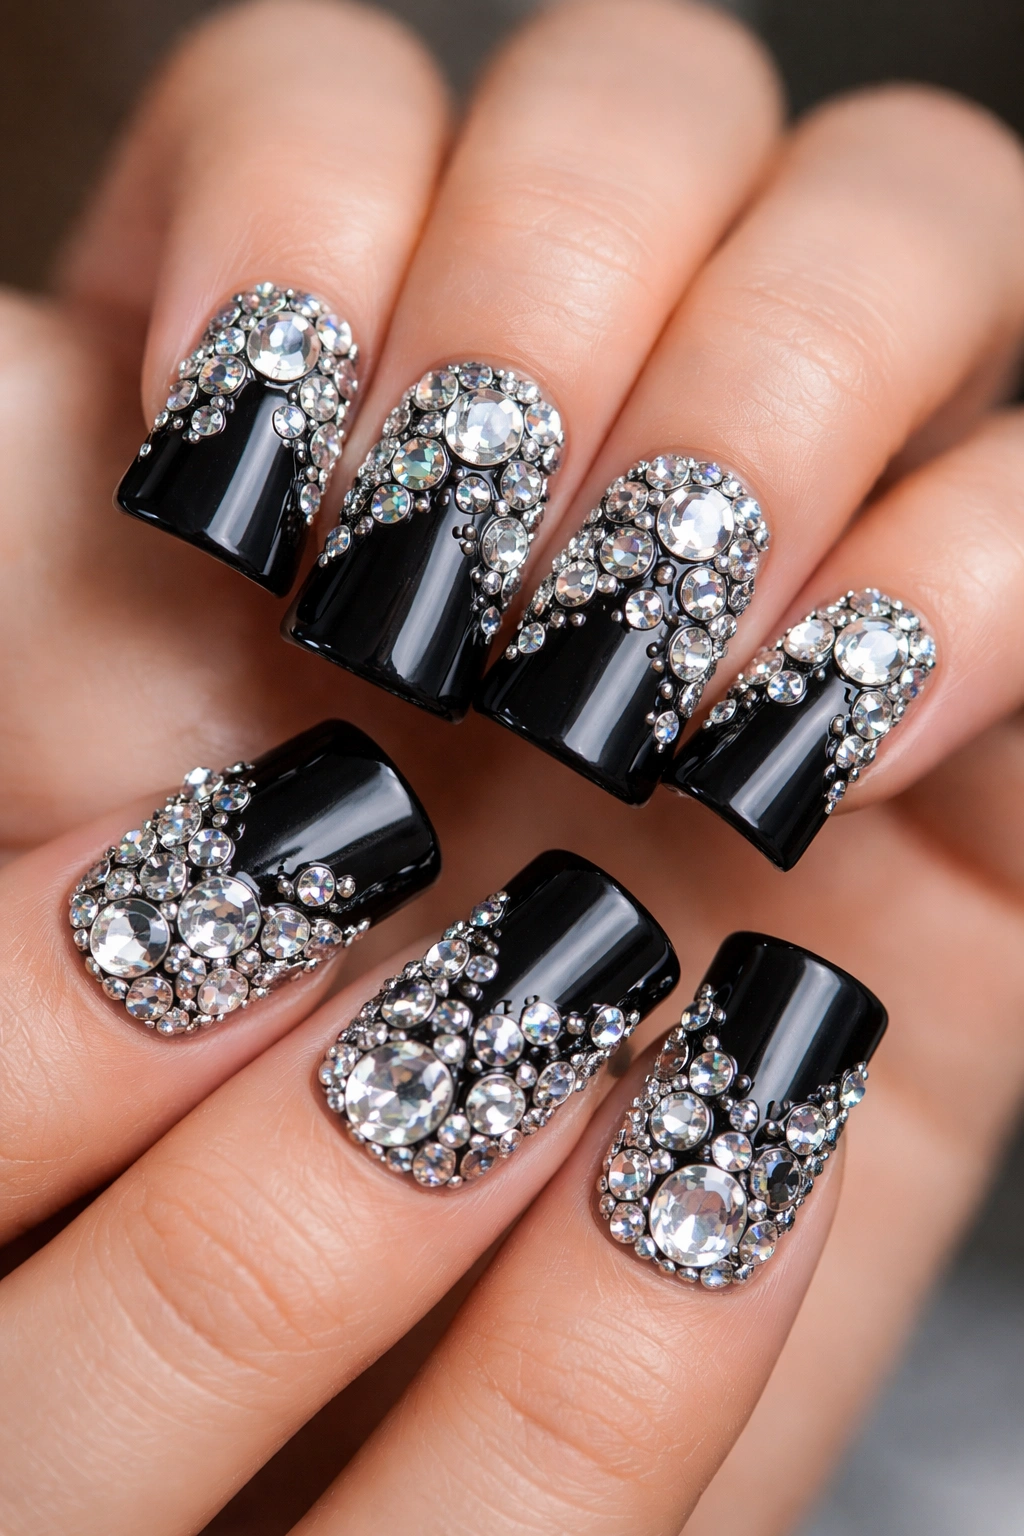
Bold black duck nails become drama-filled when you add a combination of silver and crystal rhinestones. The contrast between the dark base and sparkling stones is stark and striking, creating a design that looks expensive and fashion-forward. Mixing stone colors and finishes (matte, shiny, AB) adds complexity and prevents the design from feeling flat.
Why Black Serves as the Ultimate Neutral
Black is one of the most versatile nail colors in existence. It works with every skin tone, every outfit, and every season. When you pair black with rhinestones, you’re essentially creating a neutral canvas that lets the sparkle shine without color competition. This is perfect if you want your manicure to enhance your overall look rather than dominate it.
Stone Placement Strategy
- Cover approximately 60% of the nail with rhinestones in a seemingly random but actually balanced pattern
- Mix silver and crystal stones in 3mm, 4mm, and 5mm sizes
- Leave some black visible between stones so it doesn’t look like a full crystal cover
- Create slight clustering in one area (like off-center or toward the tip) for intentional design rather than scattered randomness
- Finish with a matte or glossy top coat depending on your preference
Pro tip: Black with crystal rhinestones is the perfect canvas for experimenting with different stone shapes — try mixing round stones with marquise or teardrop shapes.
5. Deep Emerald With Gold Foil and Rhinestone Detail
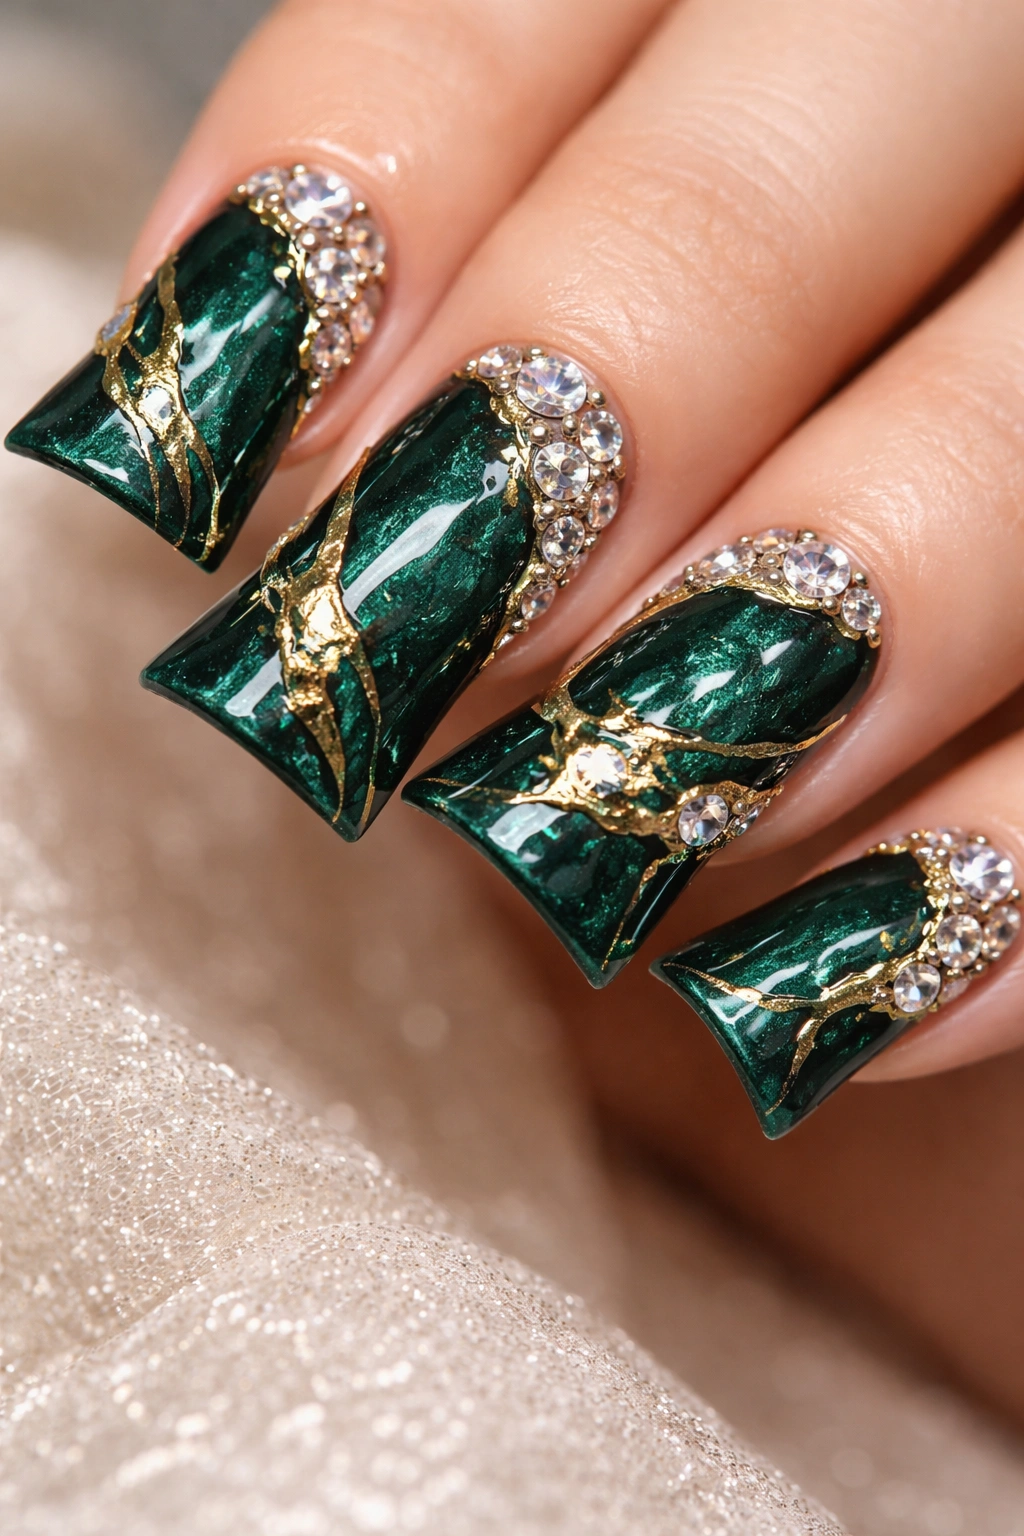
Deep emerald green duck nails accented with gold foil and rhinestones create a look that’s rich, luxurious, and undeniably glamorous. The gold foil (thin metallic leaf) adds texture and warmth that catches light differently than rhinestones alone. Together, they create a design that feels intentional and carefully curated rather than haphazardly sparkly.
The Luxury of Jewel-Tone Combinations
Emerald is a color traditionally associated with wealth and elegance. Pairing it with gold (another color of luxury) and rhinestones creates a design that tells a story of sophistication. This combination works beautifully for formal events, holiday parties, or anytime you want to feel extra polished.
Layering Foil and Rhinestones
- Paint all nails in rich emerald green
- Apply thin strips of gold foil along the sides of the nail or in a diagonal pattern
- Once foil is sealed, place small to medium rhinestones around or overlapping the foil sections
- Keep rhinestones in silver, crystal, or champagne tones to complement the gold
- Use a high-shine top coat to make everything gleam
Insider note: Foil should be sealed with gel or polish immediately after application, then rhinestones go on top. Never try to apply foil over rhinestones — it won’t adhere properly.
6. Soft Pink With Ombre Pink Gradient Rhinestones
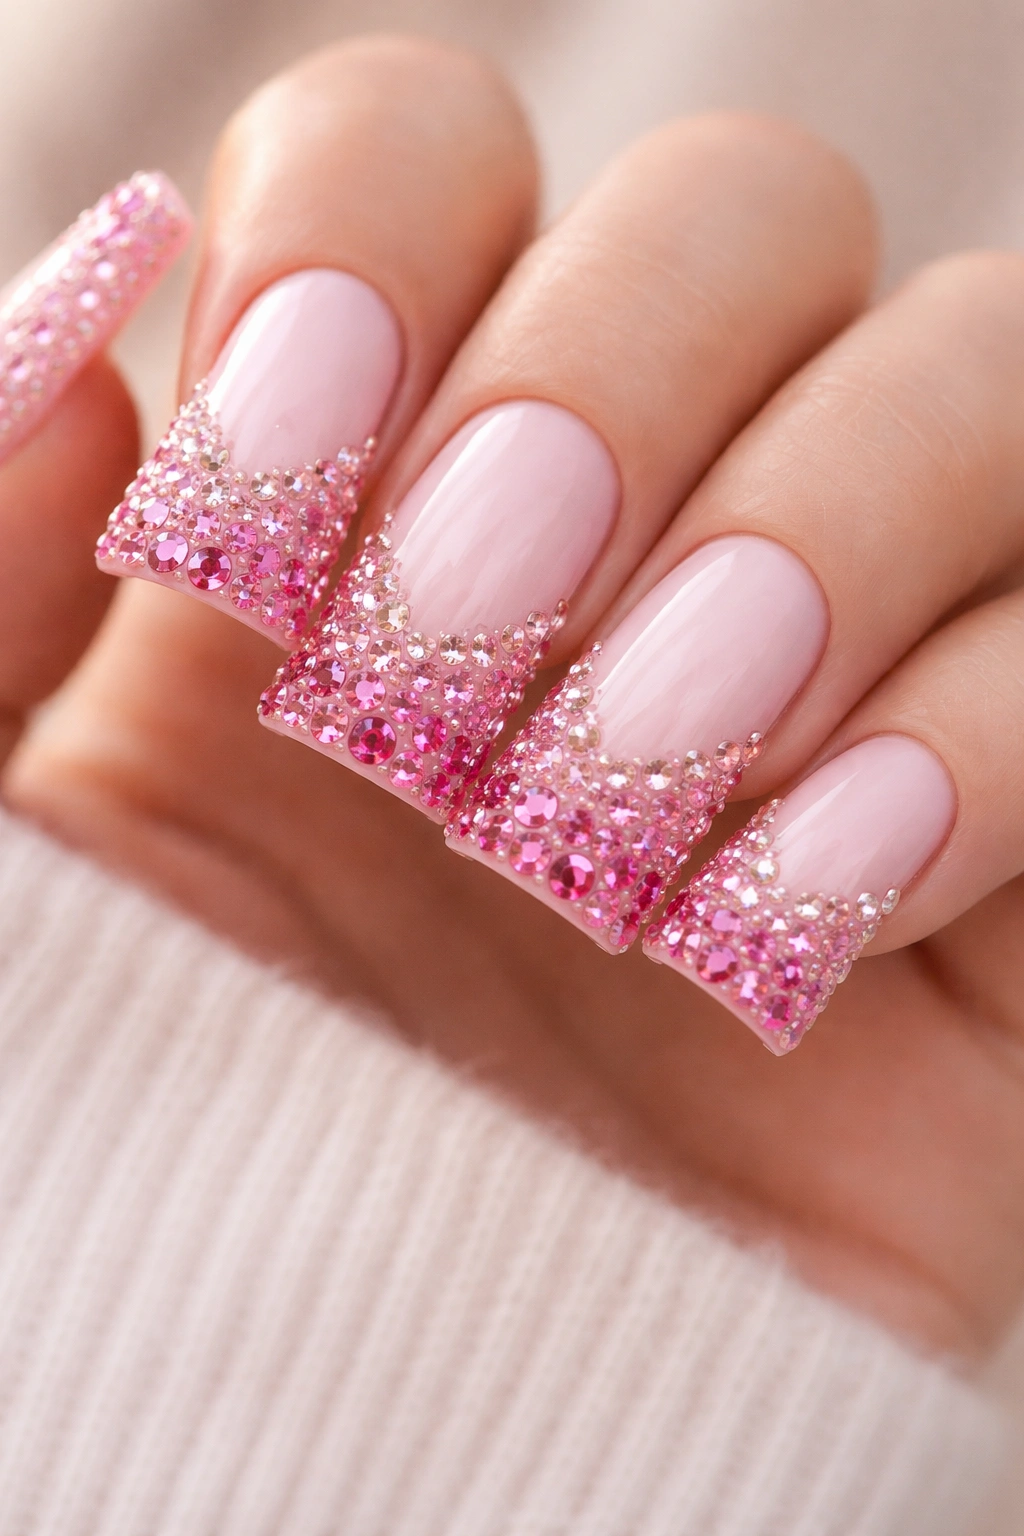
A design using soft baby pink as the base with a gradient of pink-toned rhinestones creates a look that’s subtle, feminine, and surprisingly sophisticated. By using stones in varying shades of pink — from pale blush to deeper rose — you maintain color harmony while adding dimension through sparkle. This approach is perfect if you love a cohesive, monochromatic aesthetic.
The Power of Monochromatic Sparkle
Monochromatic designs are underrated. Rather than feeling boring, a single-color palette with varying sparkle and intensity actually feels more refined and intentional than rainbow designs. Pink rhinestones on pink nails create a look that’s modern, elegant, and appropriate for professional settings or casual outings alike.
Creating Harmony With Tone Variation
- Paint all nails in soft baby pink
- Select rhinestones in pale, medium, and rose-pink tones
- Create a subtle gradient by placing palest stones near the cuticle, medium tones in the center, and deeper pink toward the tip
- Keep stone distribution even but not formulaic — aim for a flowing, organic placement
- Choose larger stones (4-5mm) to make the color variation more visible
Worth knowing: Pink rhinestones sometimes have a peachy or salmon undertone rather than true pink. Bring a reference photo to your appointment to ensure your technician selects the right shade.
7. Nude With Rainbow Glitter and Scattered Rhinestones
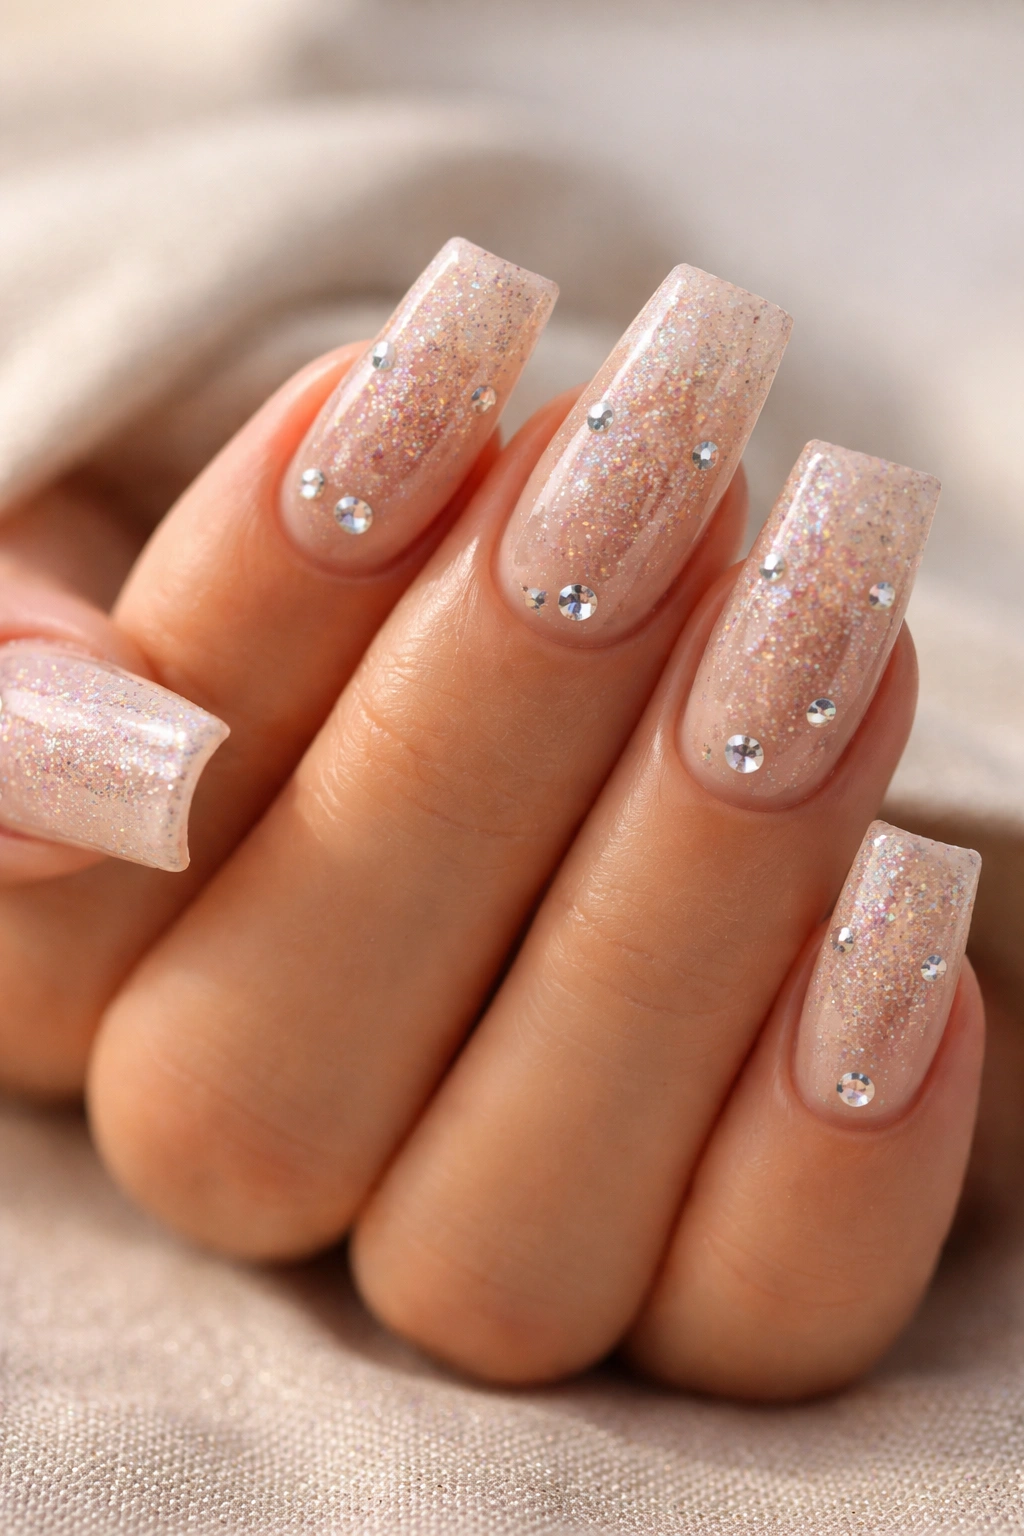
This design combines the sophistication of nude duck nails with the playfulness of rainbow glitter interspersed with rhinestones. Fine rainbow glitter in a clear base coat creates shimmer and movement, while strategically placed rhinestones add dimension and focal points. The combination feels festive without being overwhelming, especially if you keep rhinestone placement sparse and intentional.
Mixing Different Types of Sparkle
Not all sparkle is created equal. Glitter moves and shifts with light, while rhinestones are stationary. Together, they create a design that has both movement and presence. This approach works especially well if you want your manicure to feel fun and playful without crossing into costume territory.
Application Layers
- Paint nude base on all nails
- Apply one coat of clear polish mixed with fine rainbow glitter
- Once completely dry, apply your top coat partially
- While top coat is tacky, place 4-6 rhinestones per nail in a scattered but balanced pattern
- Finish with additional top coat to seal everything and create dimension
Pro tip: Sprinkle glitter while your first coat is wet, don’t layer it on afterward. This creates better integration with the polish and a more finished appearance.
8. Burgundy With Maroon Ombre and Jewel-Tone Rhinestones
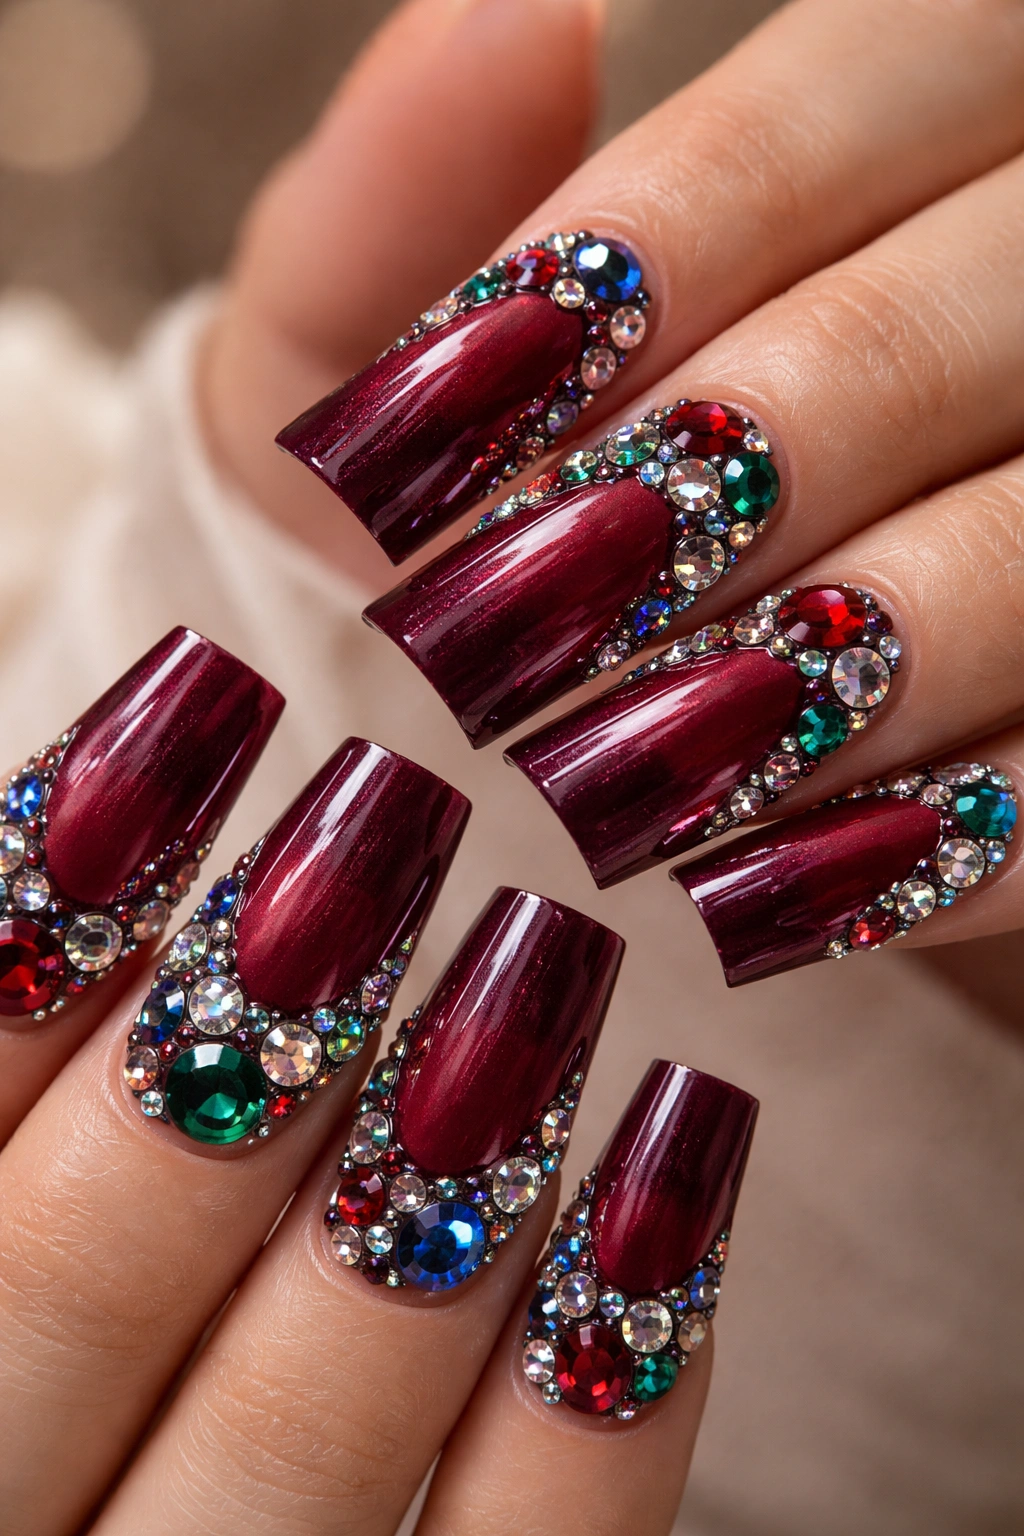
Deep burgundy duck nails fading to dark maroon, accented with emerald, sapphire, and ruby-colored rhinestones, create a regal and moody look. The burgundy base is warm and flattering on virtually every skin tone, while the jewel-tone rhinestones add a touch of unexpected color that elevates the design from simple to stunning. This combination works beautifully for fall and winter or anytime you want drama and sophistication.
The Psychology of Jewel-Tone Combinations
Jewel tones in close proximity to each other feel luxurious and intentional. Burgundy with emerald, sapphire, and ruby creates the visual impression of a vintage gemstone setting. The eye naturally assumes this is a carefully planned design, even though the placement can be somewhat casual and still look polished.
Color and Stone Placement
- Paint all nails in rich burgundy
- Ombré toward maroon on approximately the outer third of each nail
- Select rhinestones in emerald (green), sapphire (deep blue), and ruby (deep red)
- Distribute stones across the nail, placing more in the ombré area where they’ll contrast better
- Mix stone sizes (3-5mm) for visual texture and interest
- Apply with a glossy top coat to enhance the jewel-tone richness
Insider note: Jewel-tone rhinestones sometimes appear muddy under indoor lighting. Ask your technician to show you how they look under natural daylight before committing to placement.
9. Soft Coral With Peach Rhinestones and Gold Accents
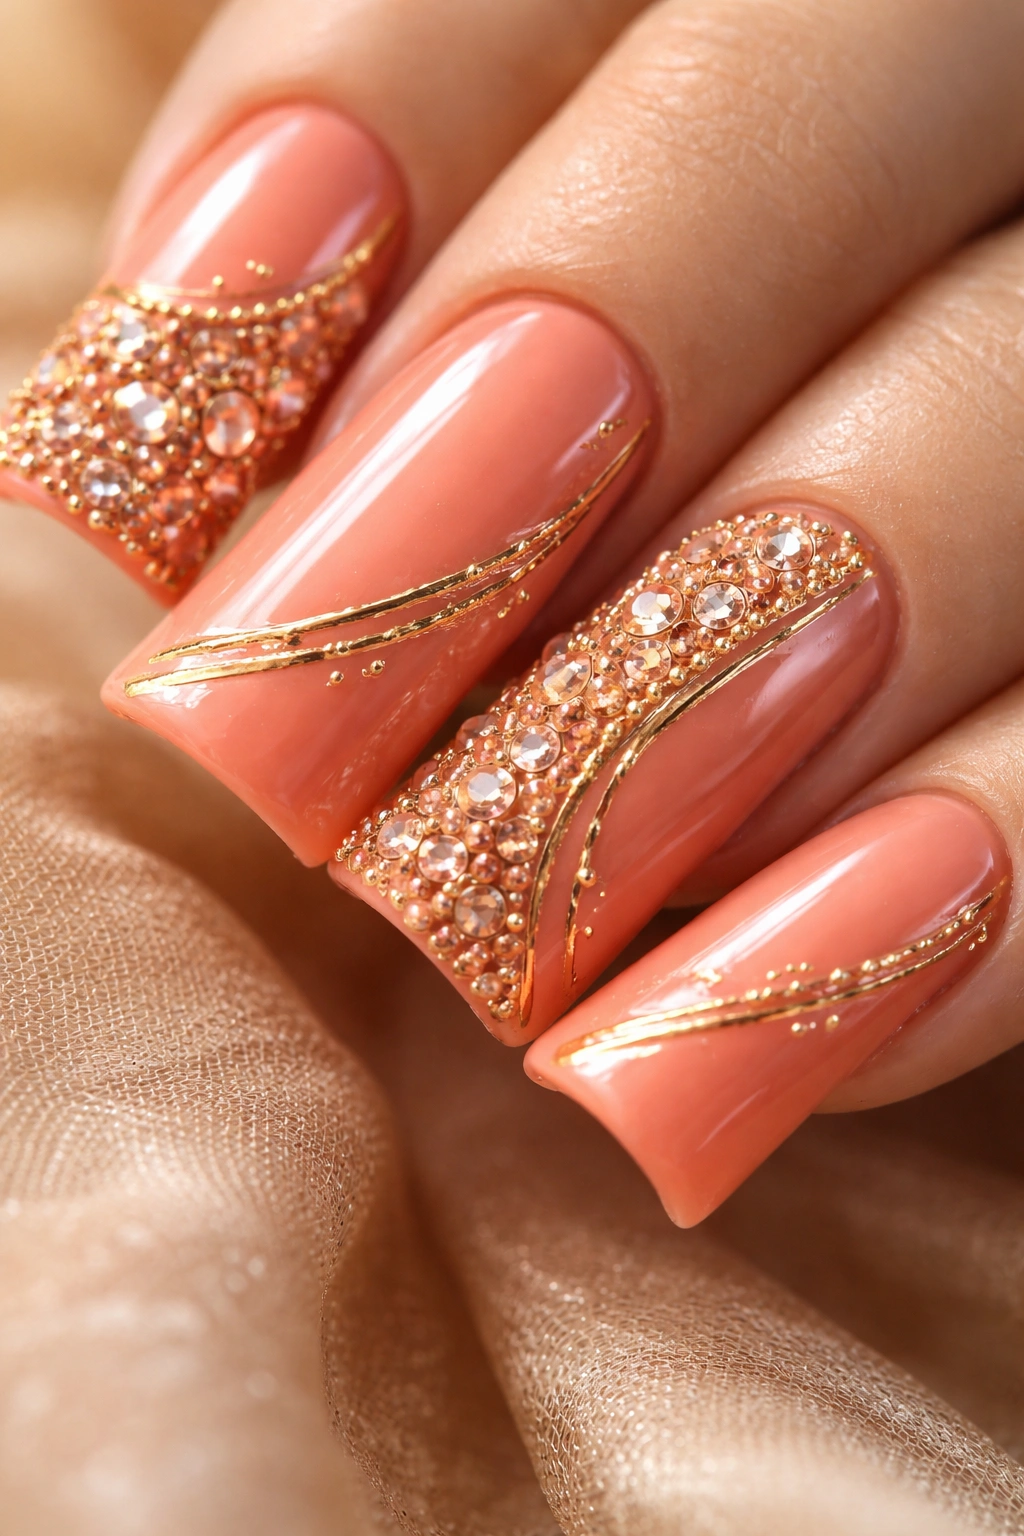
Warm, playful soft coral duck nails paired with peach-toned rhinestones and fine gold detailing create a design that’s cheerful, wearable, and utterly charming. The coral base feels modern and fresh, while peach rhinestones in the same color family keep the design cohesive. Gold accents (either as foil lines or metallic rhinestones) add a touch of warmth and luxury that elevates the entire look.
Why Warm Undertones Work Together
Coral and peach are adjacent on the color wheel, meaning they harmonize naturally. Adding warm gold as an accent creates a design that feels intentional and sophisticated rather than random. This color combination works year-round and complements warm skin undertones beautifully.
Balanced Application Approach
- Paint all nails in soft, warm coral
- Apply peach rhinestones densely on one section (like the outer half) and sparsely on the rest
- Add thin gold foil lines between the rhinestone sections or along the nail edge
- Keep the design asymmetrical but balanced — more sparkle on some nails than others, but not all concentrated on one finger
- Seal with a warm-toned top coat that enhances the peachy glow
Pro tip: If you want the gold to really pop, apply it directly to the nail before your coral color, then your top coat goes over everything. This ensures the gold shows through cleanly without getting muddy.
10. Navy Blue With Silver Rhinestones and White Tips
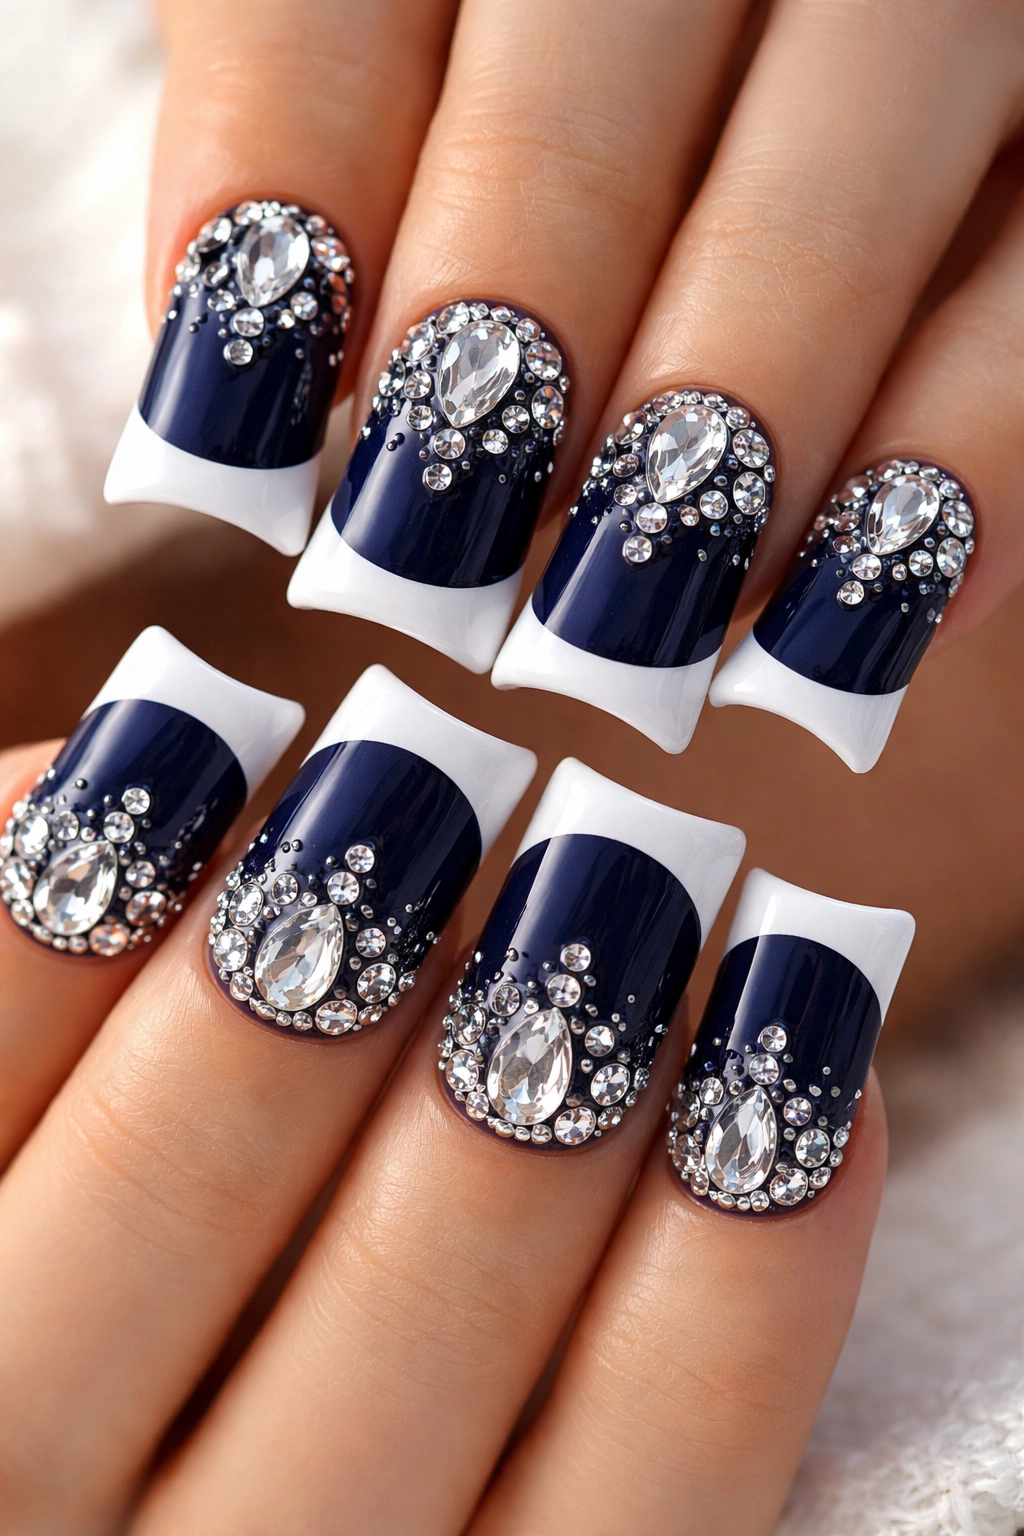
A sophisticated take on duck nails combines deep navy blue with glittering silver rhinestones and white polish on the free edge. The white tip creates definition and makes the nail shape more visible, while silver stones scattered across the navy create sparkle and movement. This design feels nautical without being kitschy, elegant without being overdone.
The Timeless Appeal of Navy and Silver
Navy and silver is one of the most reliably elegant color combinations in existence. It’s formal enough for professional settings, playful enough for casual outings, and appropriate for any season. The combination has a classic feel that transcends trends while still feeling current and fresh.
Creating Defined Sections With Color and Sparkle
- Paint the nail bed in rich navy blue
- Create a clean white tip by painting approximately the top third in bright white
- Place silver rhinestones across the navy section, with the heaviest concentration near where navy meets white
- Use medium-sized stones (3-4mm) for visibility without overwhelming the design
- Consider a matte top coat on the navy section and glossy on the white for added definition
Worth knowing: The line where navy meets white should be sharp and clean. Ask your technician to use tape for the sharpest possible edge, then remove tape before rhinestones are applied so you can place stones right up to the color line.
11. Blush Pink With Rose Gold Rhinestones and Champagne Details

A soft, romantic design uses blush pink as the base with a combination of rose gold and champagne-colored rhinestones. Rose gold has warmed up the jewelry world, and these rhinestones bring that same warmth to your manicure. The blush and rose gold combination creates a design that feels both modern and timeless, making it perfect for weddings, anniversaries, or anytime you want to feel effortlessly feminine.
The Romance of Warm Metallic Tones
Rose gold rhinestones feel more contemporary than yellow gold while still offering warmth. Paired with soft blush, they create a design that’s sophisticated without feeling dated. This color combination appeals to people who love sparkle but prefer warmth and subtlety to cool, dramatic contrast.
Layering Rose Gold and Champagne Tones
- Paint all nails in pale blush pink
- Select rose gold and champagne rhinestones in similar sizes (3-4mm)
- Alternate between rose gold and champagne stones in a pattern that feels organic rather than strictly geometric
- Create a focal point on one or two nails by clustering more stones, while keeping other nails sparser
- Use a glossy top coat that complements the warm metallic tones
Pro tip: Rose gold and champagne look their best under natural daylight and warm interior lighting. If your lighting at home is cool/blue, ask your technician to show you the design under warm overhead lights before you leave the salon.
12. Black With AB Rhinestones and Holographic Accents
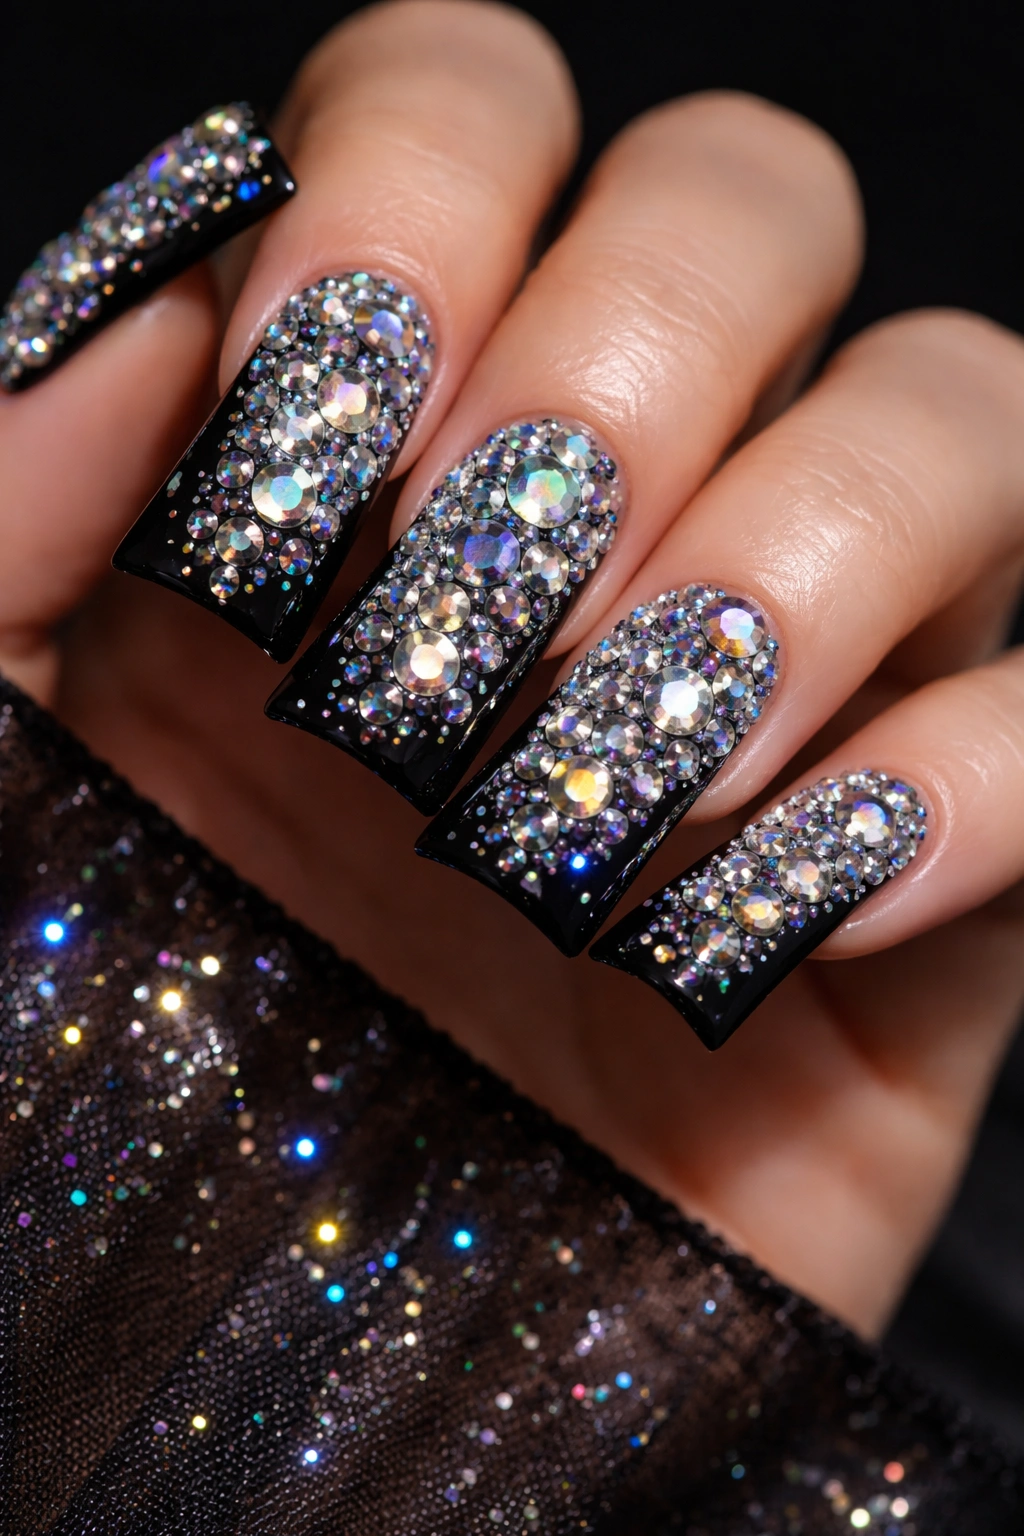
End with an avant-garde design that pairs classic black duck nails with AB (aurora borealis) rhinestones that shift through rainbow colors, plus fine holographic flakes for additional dimension. This design is bold and modern, perfect if you want to make a real statement. The AB stones catch light from every angle, creating movement and magic that’s impossible to ignore.
Embracing Sparkle Without Apology
Not all rhinestone designs need to be delicate or subtle. Sometimes, the most impactful designs are the ones that commit fully to sparkle and shine. Black provides enough contrast to make every stone pop, and the AB color-shifting quality means your manicure will look different under different lighting — it’s literally never the same twice.
Maximum Impact Sparkle Application
- Paint all nails in rich black
- Cover approximately 70-80% of each nail with AB rhinestones in varying sizes (3-6mm)
- Fill gaps between stones with tiny holographic flakes for additional rainbow shift
- Use a glossy top coat to amplify the sparkle and create a wet, jeweled appearance
- Consider requesting your technician seal everything with a protective gel top coat if you want longevity
Insider note: AB rhinestones show color shift best in natural light and under mixed lighting (part warm, part cool). They may look more white or clear under pure cool-toned LED lighting, so test them in your everyday environment before deciding if they’re right for you.
Final Thoughts
Duck nails with rhinestones offer endless possibilities for expressing your personal style, whether you gravitate toward minimalist elegance or full-on sparkle. The key to a rhinestone design that feels polished rather than chaotic is intentional placement, complementary color choices, and choosing stones that work with your nail base color rather than against it.
The beauty of this trend is its scalability. You can start simple with an accent nail and add more rhinestones as you get comfortable with the look, or go all-in with a fully embellished design that demands attention. Rhinestones are temporary, so experimenting with different designs, colors, and patterns is part of the fun.
When you choose a duck nail design with rhinestones, you’re committing to a manicure that makes you feel confident, special, and polished. Take your time selecting a technician who has experience with detailed work, bring reference photos of the design you love, and don’t hesitate to ask questions about stone placement, color choices, and longevity. Your nails deserve the same attention to detail as any other form of self-expression.
