

There’s something about combining two nail trends that shouldn’t work together — but absolutely do. French tips and duck nails (those adorable, rounded, almost cartoonish nail shapes) create this unexpectedly chic contrast that’s taken the nail world by storm. The sharp, elegant geometry of a French tip suddenly becomes playful and modern when you slap it on the curved, wider canvas of a duck nail shape. Long duck nails give you that perfect amount of length without the sharp, stiletto edge that can feel aggressive, and the French tip adds just enough sophistication to keep the whole look from veering into costume territory.
If you’ve been scrolling through nail inspo and feeling like regular French tips feel a bit boring, or full-coverage duck nails feel like they’re missing something, this is your sweet spot. Long duck nails with French tips work on multiple skin tones, suit pretty much every hand shape, and honestly? They photograph beautifully. The width of the nail bed gives that French tip plenty of room to breathe, and the length creates this elegant silhouette that makes your fingers look longer and your hands look more refined.
The best part is how versatile these are. You can go super classic with a crisp white tip and nude base, or you can lean into creative color combinations, gradients, glitters, and embellishments that push the look in completely different directions. We’re talking 10 different ways to style French tip duck nails so you’ve got options whether you’re going for boardroom-ready polish or weekend-statement nails.
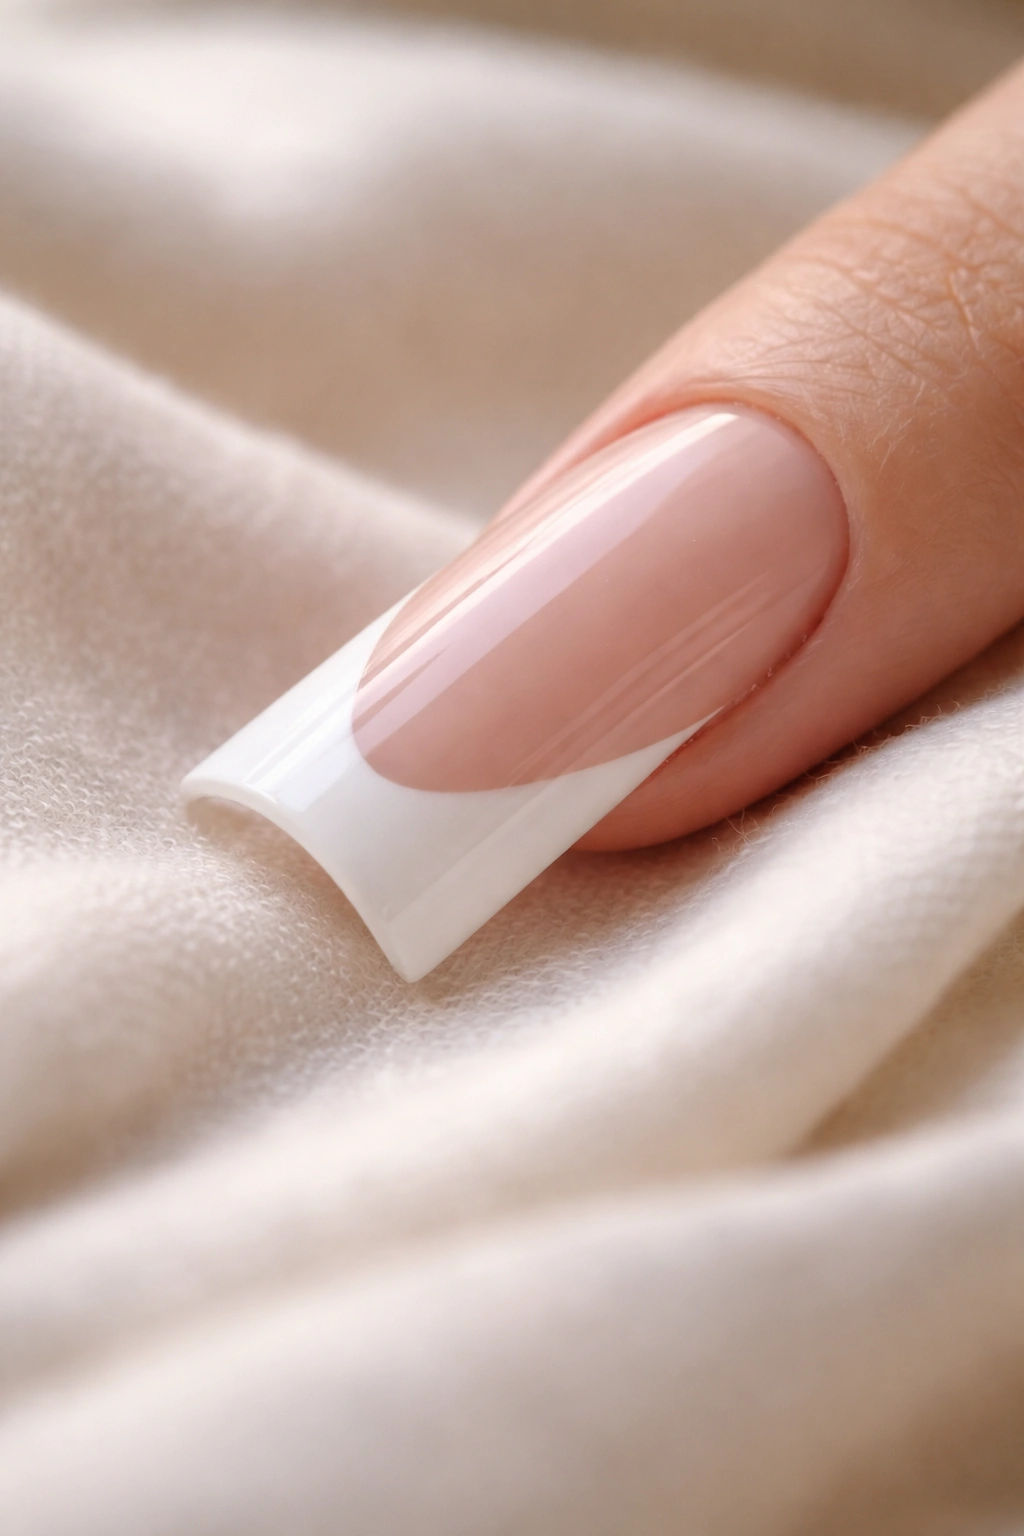
1. Classic Cream and Ivory French Tips
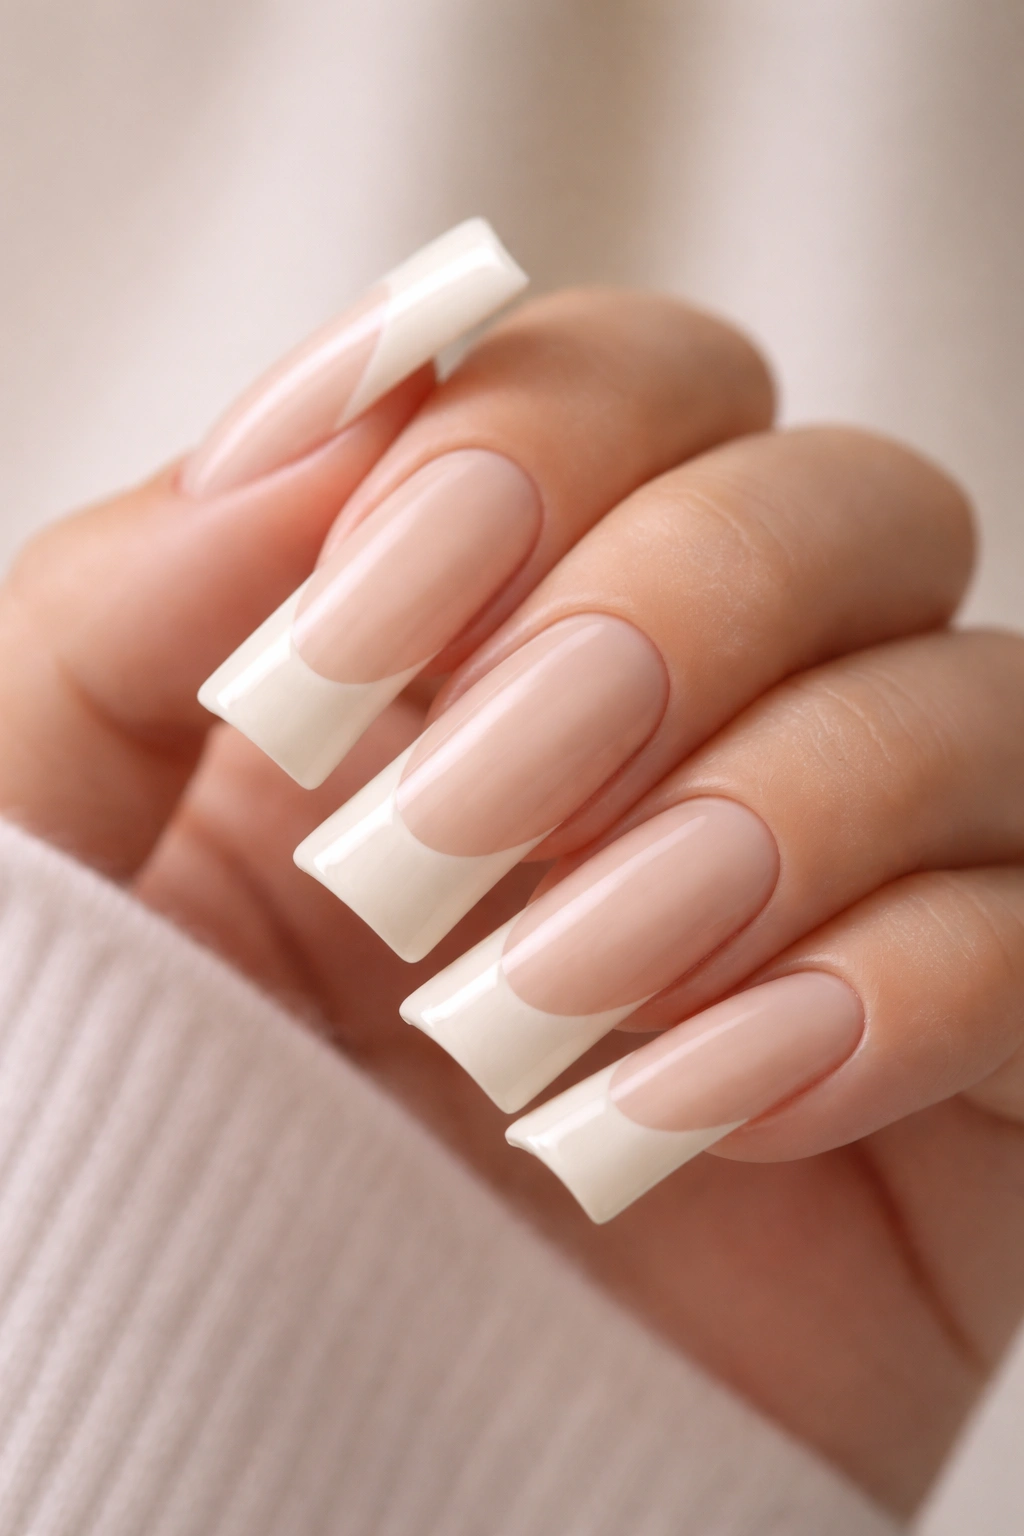
Let’s start with what made French tips iconic in the first place — but make it duckier. A soft, warm cream base paired with a crisp ivory tip is the definition of timeless elegance on long duck nails. This isn’t your mom’s French manicure though. The rounded duck shape softens what could otherwise feel corporate, giving it an unexpectedly modern edge.
Why This Works So Well
The cream base won’t show every speck of dust like pure white does, which means your manicure actually looks fresh for longer between salon visits. Ivory tips have more dimension against cream than white-on-white, and that subtle contrast is precisely what keeps this look from feeling flat or dated. The warmth of cream versus cool white creates this beautiful visual harmony that’s genuinely flattering on almost every complexion.
Application and Longevity Tips
- Start with a nail base coat to prevent staining from the cream polish
- Apply two thin coats of the cream base rather than one thick coat — this prevents bubbling and gives you a smoother surface
- Use a thin, flexible brush for your French tip line to get that precise edge
- Seal everything with a high-quality glossy top coat for that glass-like finish
- Plan on these lasting 3-4 weeks without chipping if you’re careful with your hands
Pro tip: If you’re doing this at home, painter’s tape works better than nail guides for achieving a straight French line — place it at your desired tip angle before applying the ivory polish.
2. Rose Gold Ombre French Tips
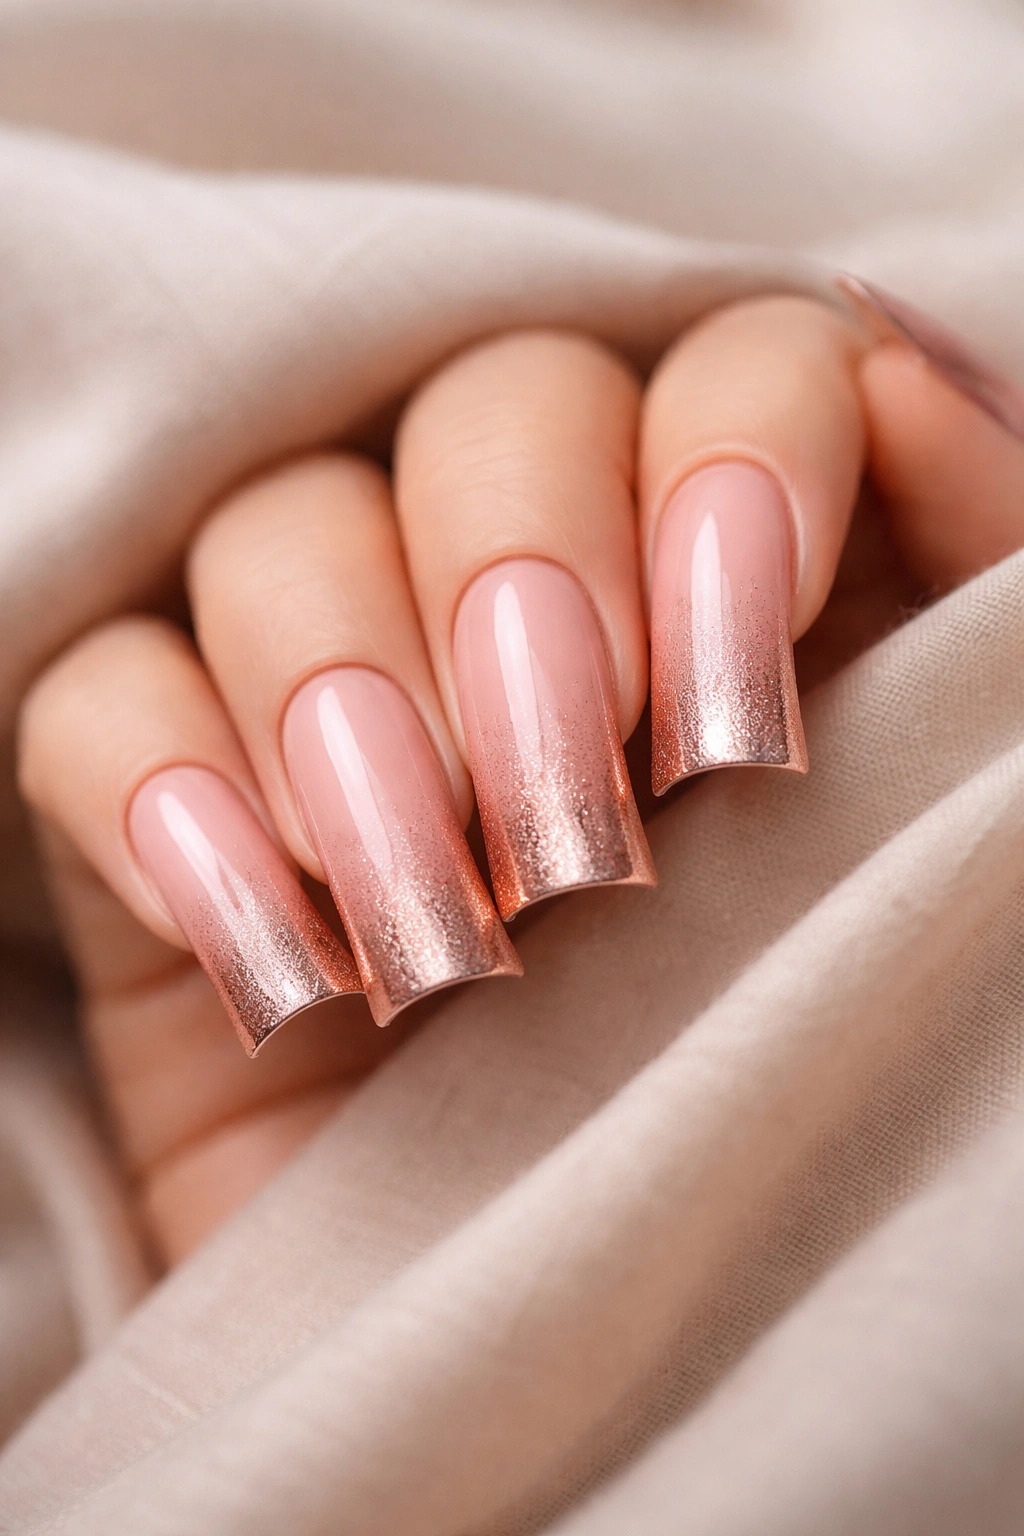
This one slides toward that luxe, romantic territory while keeping the French tip structure intact. A nude-to-rose-gold ombre from the nail bed to mid-nail, then a crisp rose gold tip, creates depth and dimension that reads expensive and fashion-forward. The ombre gradient means you’re not dealing with a harsh line of demarcation — instead, colors flow seamlessly into each other.
The Technique Behind the Look
Ombre on duck nails requires either a sponge gradient technique or an airbrush for the smoothest results. If you’re using the sponge method, dab your lighter shade (nude) first on a makeup sponge, then layer the rose gold on top with a dabbing motion rather than wiping, which would muddy the colors. The key is letting each color dry completely between layers so they blend without turning into an ugly brown.
Why Long Duck Nails Make This Better
The extra surface area of duck nails gives the ombre room to develop without looking cramped. With stiletto nails, an ombre can look like it’s missing something because the narrow shape compresses the gradient. On duck nails, the ombre has space to breathe and show off its depth.
- Requires 3-4 different polish shades to achieve the full range
- Apply thin layers to avoid the ombre looking muddy
- Set with a clear gel or glossy top coat to lock the colors and add shine
- Can take 20-30 minutes to achieve if doing the sponge gradient method
3. Burgundy and Gold Foil French Tips
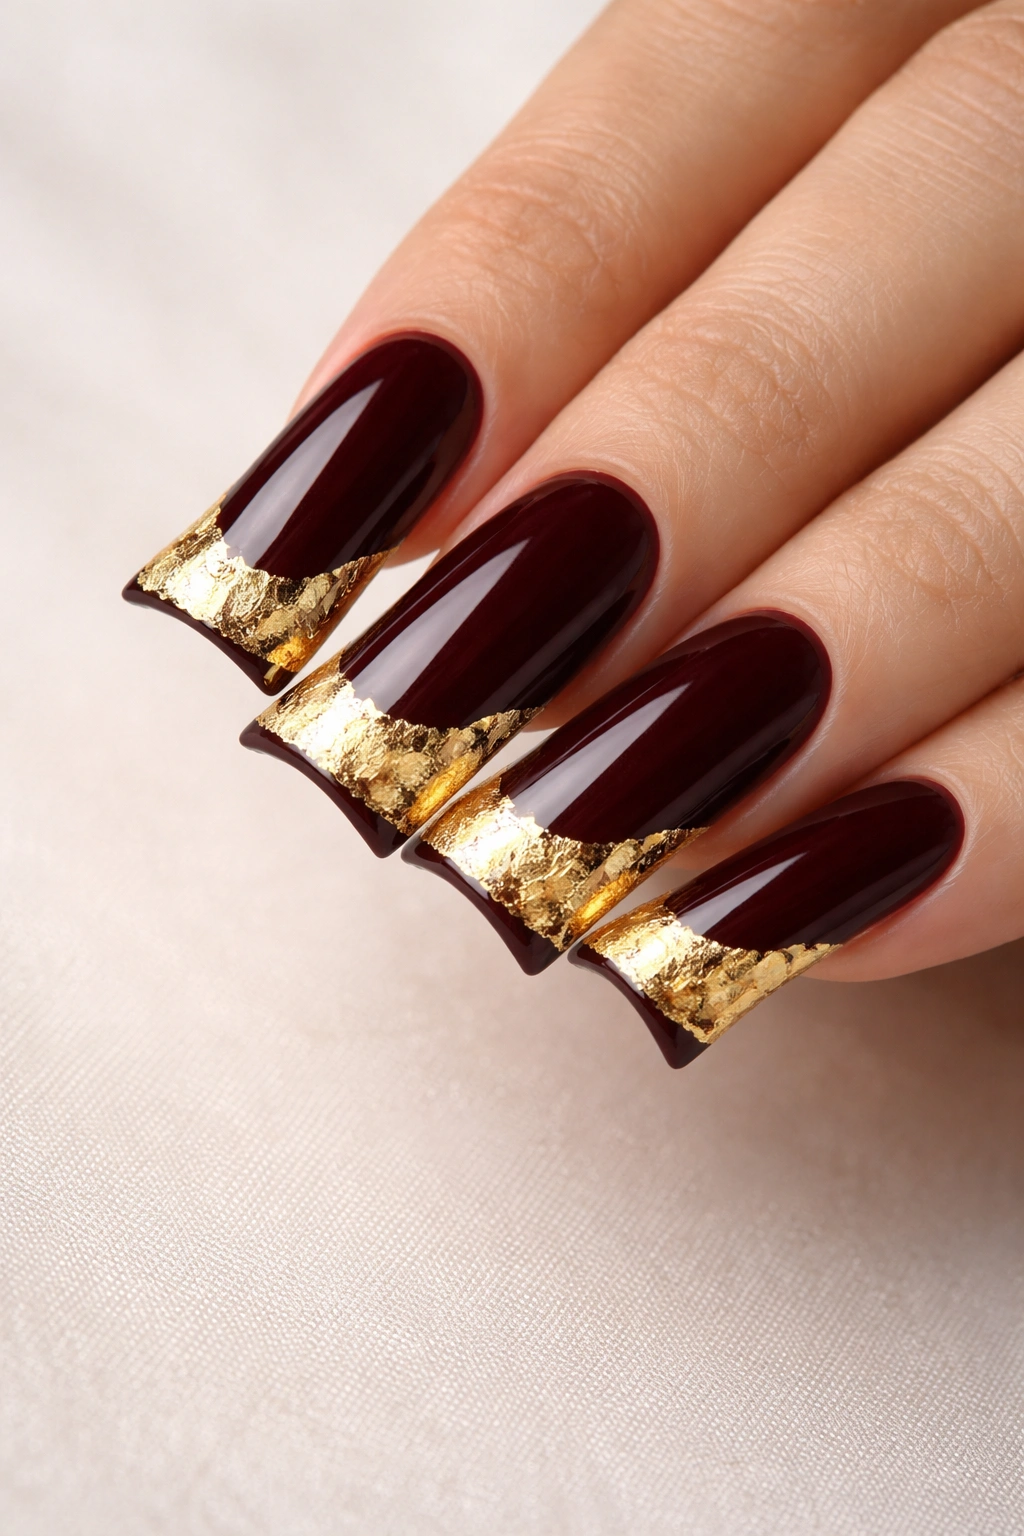
When you want drama that still reads sophisticated, this is your combination. A deep burgundy base with a gold foil or chrome finish on the tip transforms French nails from boardroom to bold statement. Burgundy is timeless — it flatters deeply pigmented skin beautifully and adds richness to cooler undertones. The gold foil catches light and keeps the look from feeling heavy.
Building the Drama
Burgundy shows every imperfection in your nail bed, so base coats become non-negotiable. Use a thin base coat that doesn’t add bulk but still protects your nail. The gold foil can be applied as a thin stripe across your French tip line, or you can use gold leaf for a more textured, dimensional effect. A matte burgundy base with a shiny gold tip creates beautiful contrast in finishes.
Making It Wearable
This color combination works year-round, though it especially shines during fall and winter. In spring and summer, it can feel seasonal, but pair it with the right outfit and it absolutely works any time of year. The key is your styling — these nails pair with leather, metallics, jewel tones, and moody color palettes.
- Use a corrector pen if you mess up the burgundy base — it’s very visible
- Gold foil adheres best to a tacky gel base or a sticky layer left from your top coat
- Seal everything well to prevent the foil from peeling at the edges
- This look demands well-groomed hands, so invest in good cuticle care
4. Pastel Rainbow Gradient French Tips
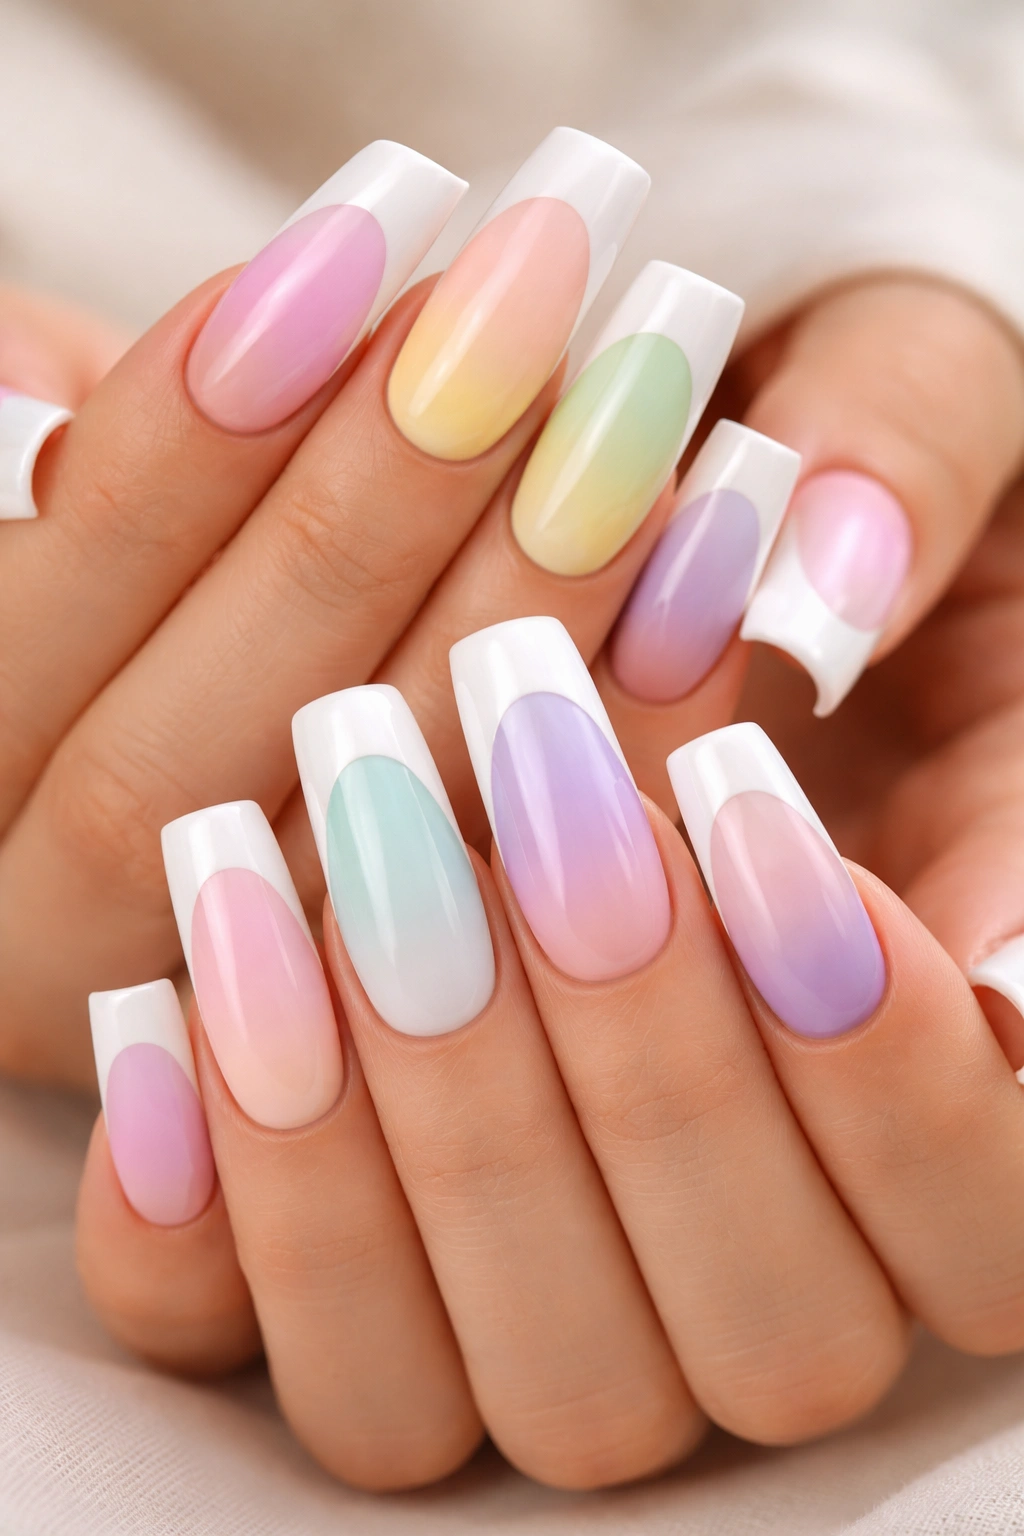
For anyone who wants color without chaos, a soft pastel rainbow that fades from one shade to the next across all ten nails is pure joy. Each nail features a different pastel hue — think soft pink, lavender, pale yellow, mint green — with a white French tip that ties the whole manicure together. Long duck nails give each pastel shade enough real estate to be appreciated.
The Pastel French Advantage
White French tips on pastel bases create clean, modern contrast. Because pastels are inherently softer and less saturated, they read as sophisticated rather than childish, especially on the elongated canvas of duck nails. The French tip structure brings formality to what could otherwise feel frivolous.
Color Selection Strategy
Pick pastels from the same tonal family rather than grabbing random soft colors. If you want a sunset gradient, move from peachy pink through soft coral to pale yellow. If you want a cool gradient, go lavender, pale blue, mint, and back toward lavender. This intentional progression makes the mani look curated rather than random.
- Apply opaque pastel polishes — they require two coats minimum for even coverage
- A thin white stripe for the French tip works best; thick tips can overwhelm delicate pastels
- Use matte, satin, and glossy finishes in alternation for visual interest (matte pink, glossy lavender, satin yellow, etc.)
- These work beautifully for spring and summer styling but can feel refreshing any time of year
5. Emerald Green with Pearl French Tips
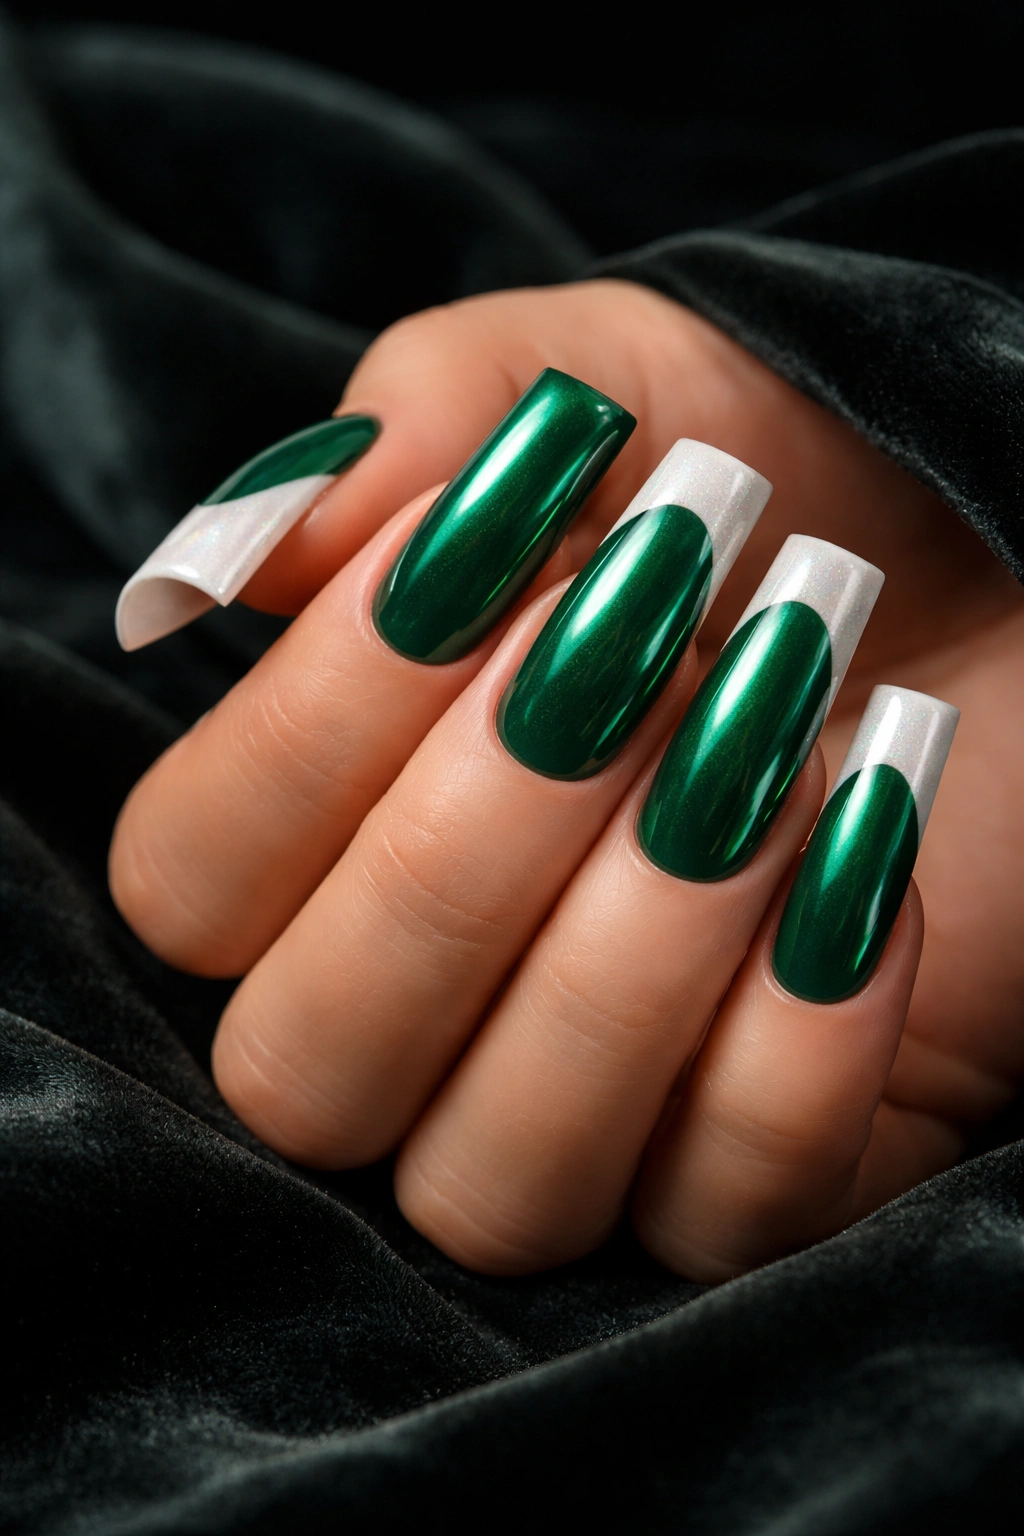
Rich, saturated emerald is having a major moment, and when you pair it with pearl or luminous French tips, you get instant luxury. Pearl French tips (achieved with a pearlescent or iridescent top coat over a white or pale base) have more dimension and shimmer than a flat white tip, catching light beautifully. Against the deep, jewel-toned emerald, the pearl tip looks almost ethereal.
Why Emerald and Pearl Match
Emerald is confident, bold, and undeniably luxurious. It reads as expensive and editorial. A basic white French tip could cheapen that feeling, but pearl keeps pace with the sophistication of the base color. The shimmer in the pearl reflects light in the same way that light dances across an emerald gemstone.
Achieving the Pearl Effect
True pearl French tips require either a specialized pearlescent gel polish or a combination of techniques. Apply white or pale nude base on the tip area first, then layer a pearl-finish top coat over just that section. The multi-layering creates the iridescence. Alternatively, use a dedicated pearl gel polish that already has shimmer built in.
- This look pairs beautifully with gold jewelry and metallic accents
- Emerald can stain your skin, so use a quality base coat and nail oil to prevent discoloration
- Pearl finishes can be delicate, so use a reinforcing top coat
- The combination feels most polished on very clean, well-maintained nails
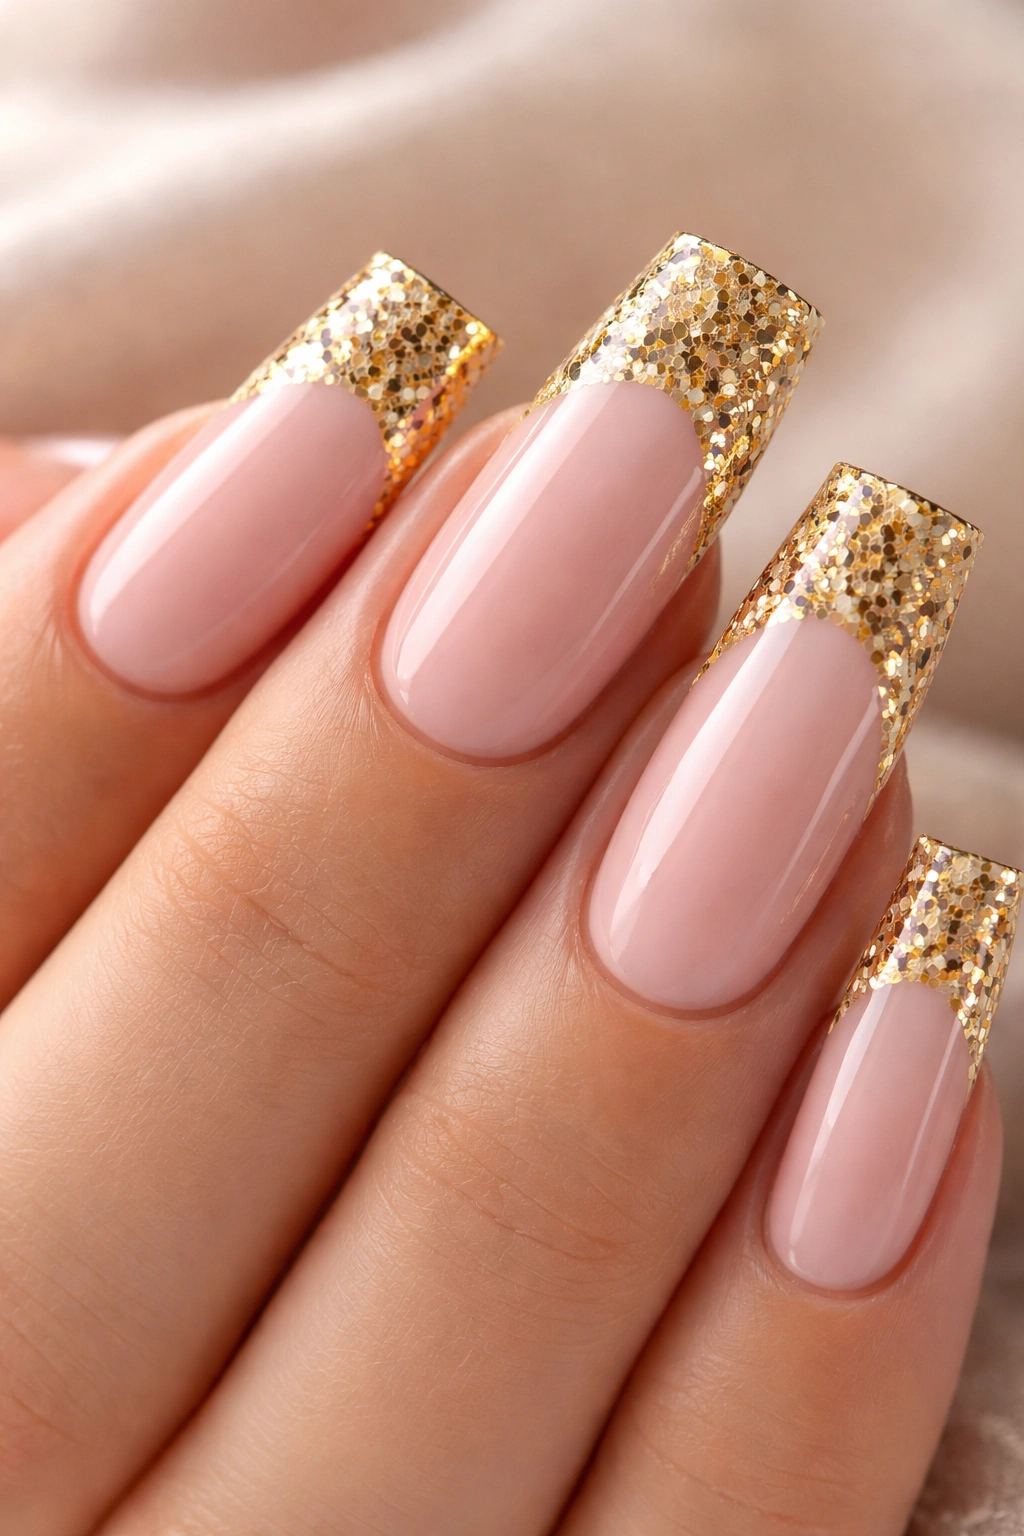
6. Nude Ombre to Glitter French Tips
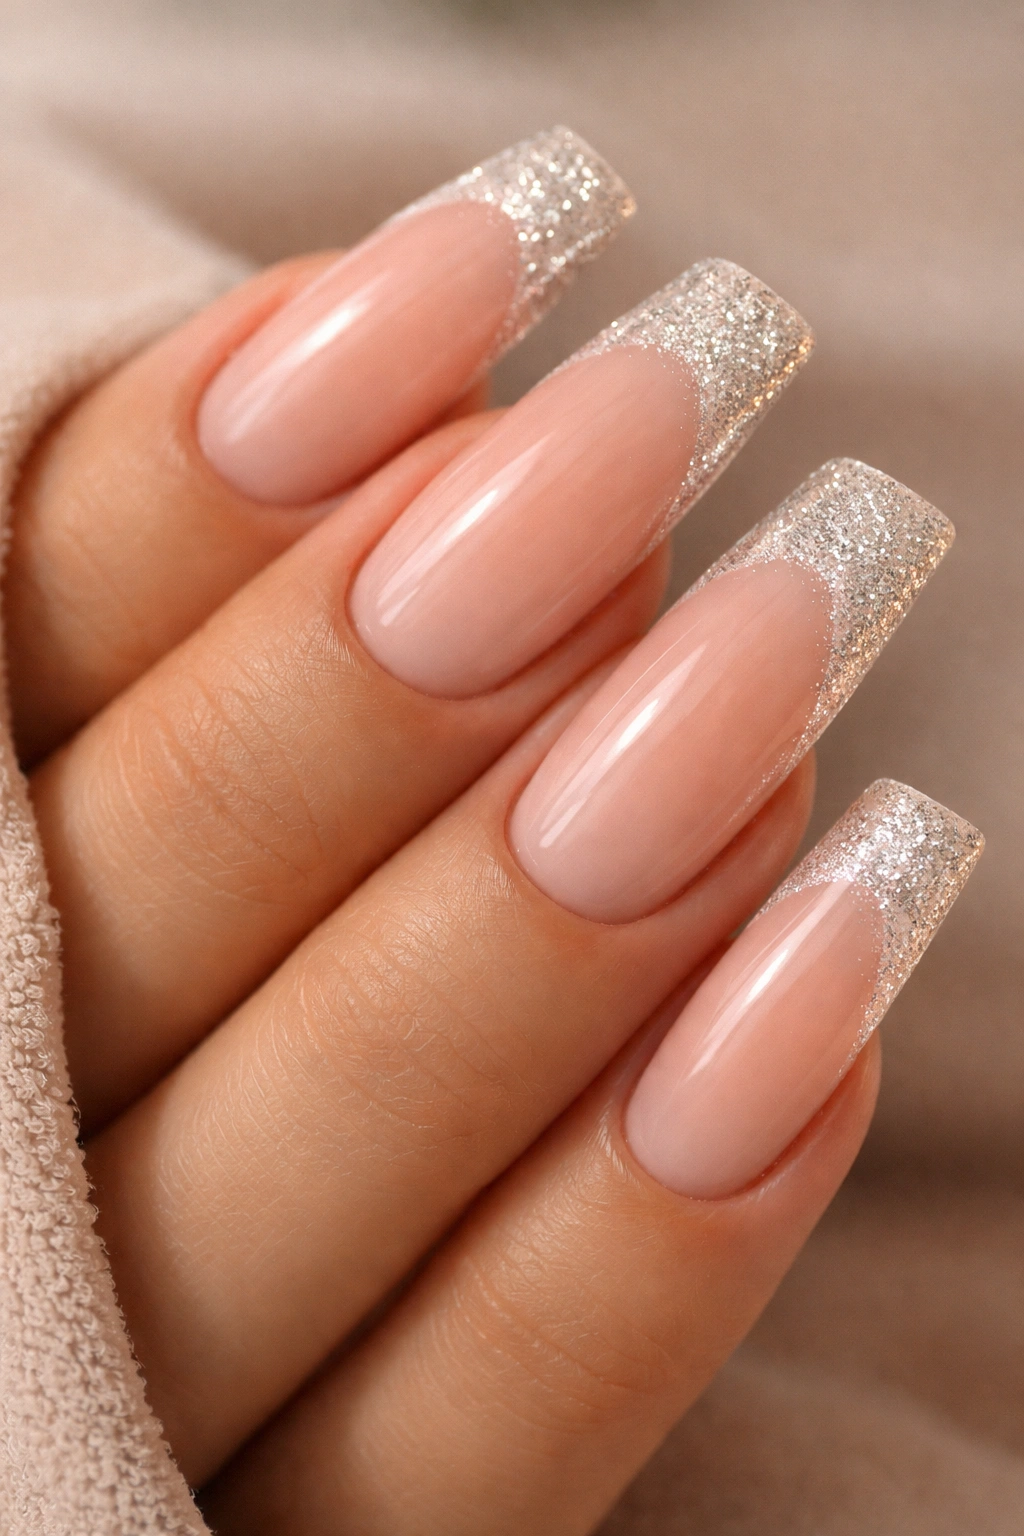
A gradient from a warm, creamy nude at the cuticle to translucent or pale at the tip, finished with fine glitter embedded in the French tip stripe, is chic understated glamour. This works because the nude ombre is basically invisible — it’s all about subtle depth and dimension — while the glitter French tip becomes the focal point without the nails feeling costume-y.
The Glitter Application
Glitter over gel works better than over traditional polish because gel is tacky and holds the glitter particles in place. Apply your nude ombre gradient (using the sponge method), then while the last layer is still tacky, dab fine glitter (or a pre-made glitter top coat) onto the French tip area. Seal with a shiny top coat to lock everything and add shine.
Why This Combination Succeeds
Glitter alone can feel like you’re getting ready for a concert. Glitter on an already-neutral gradient nail reads as sophisticated sparkle instead. The nude ombre disappears into your skin tone, so visually, you’re essentially reading as “long glittery French tips” — which is elegant rather than over-the-top.
- Use fine, uniform glitter for a polished look rather than chunky mixed glitter
- If applying glitter over gel, do it on the tacky layer before your final seal coat
- Two thin coats of glitter top coat work better than one thick coat, which looks clumpy
- These last incredibly well and stay sparkly for weeks
7. Soft Pink Ombre with Chrome French Tips
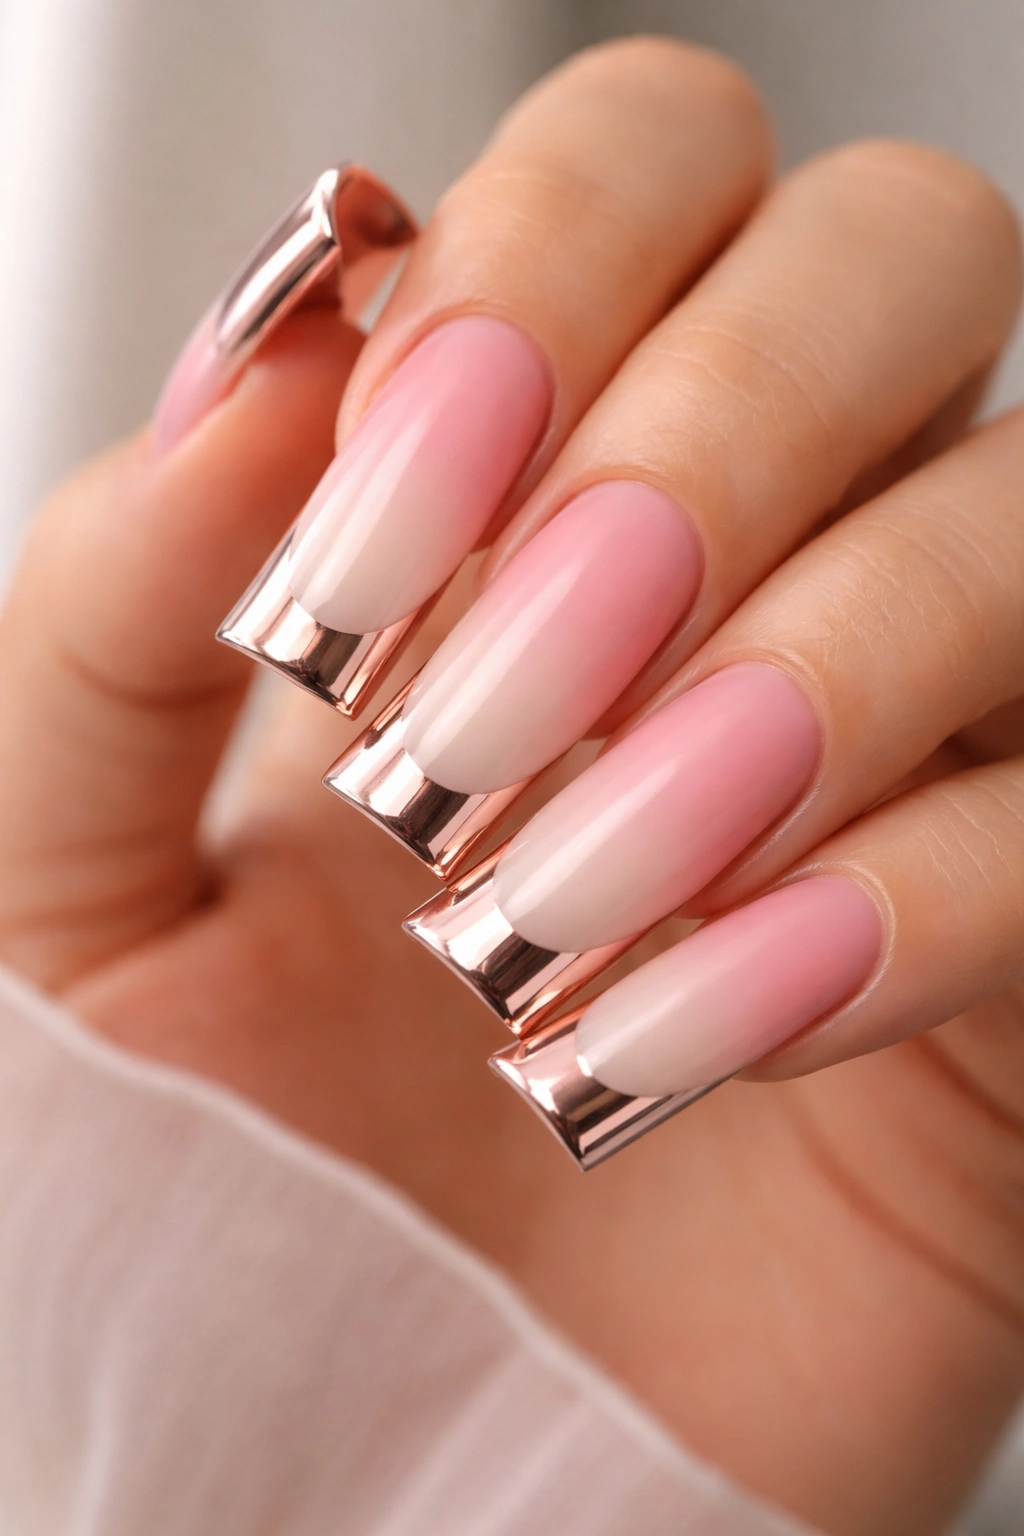
Blush pink melting into pale nude, topped with a brushed rose gold or champagne chrome French tip, is the sweet spot between romantic and modern. Chrome finishes have a metallic, mirror-like quality that brings contemporary edge to softer color palettes. On long duck nails, this combination looks utterly refined.
Understanding Chrome Polish
Chrome polish isn’t the same as regular metallic — it has a reflective, three-dimensional quality that shifts in the light. It photographs beautifully because it catches light and throws it back in ways flat metallics don’t. Applying chrome requires either a gel base (it adheres better to tacky gels) or a special chrome top coat over regular polish.
Why Duck Nails Elevate This
The width of duck nails shows off the chrome’s reflective properties better than narrow nail shapes do. You get full-on shimmer and reflection rather than a thin stripe of shine. The soft pink ombre keeps the chrome from feeling too heavy or masculine.
- Chrome finishes are sensitive to touch, so handle them carefully until fully set
- Use a chrome top coat specifically designed for the product you’re using
- Avoid using hard gel over chrome — stick with softer formulas that adhere without pulling the chrome off
- Keep the French line thin and precise; chrome shows every imperfection in the application
8. Nude Base with Iridescent Holographic Tips
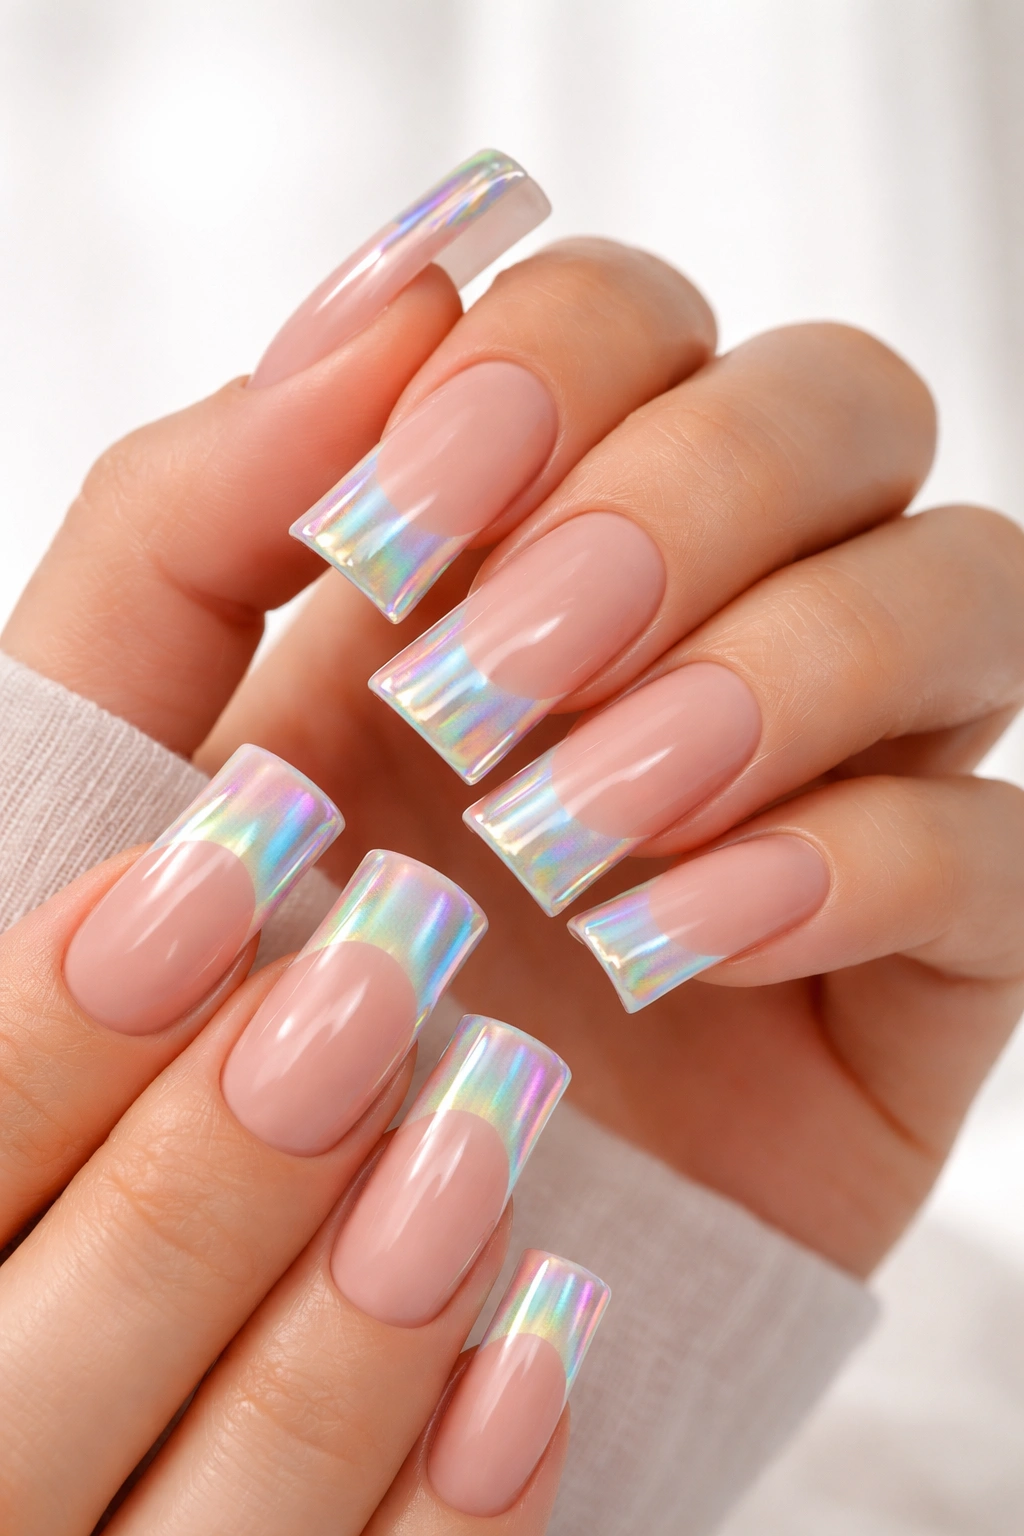
Holographic French tips create a rainbow prism effect in natural light — think subtle iridescent shimmer rather than obvious rainbow. Paired with a nude base, the holo tip becomes an unexpected sparkly element that adds personality without clashing. This look is inherently modern because holo effects are still relatively novel in traditional French manicures.
The Holographic Effect
Holographic polishes contain pigments that refract light at different angles, creating a subtle color-shift effect. In one light, the tip might look blue; in another light, it’s green or pink. This constant subtle shift is what makes it interesting and keeps people looking at your nails.
Application for Maximum Shine
Holographic polishes can be finicky because the refraction effect is sometimes minimized by top coat. Use a thin, clear gel top coat rather than a thick one. Some nail artists skip the top coat entirely over holo polish, instead using a high-gloss sealer specifically designed for holo finishes. The goal is maximum shine and color-shifting without cloudiness.
- Holographic polishes show dust and lint easily, so apply in a clean environment
- Three thin coats of holo polish work better than two thick coats
- Avoid matte or satin finishes — holo needs gloss to perform
- These photograph amazingly and catch light in person in ways other finishes can’t
9. Blush Pink with Gold Confetti French Tips
Confetti nails are fun but can feel chaotic. When you contain the confetti to just the French tip area on a long duck nail with a soft blush pink base, you get playful sophistication. The confetti reads as intentional rather than chaotic, and the solid blush base keeps everything grounded.
Building the Confetti Look
Apply your blush pink base completely. Once dry, apply a clear top coat or gel to the tip area only — this is your glue. While still tacky, sprinkle your confetti mix (gold foil squares, metallic spheres, small glitter) onto the tip only, using tweezers to place larger pieces. Seal everything with a thick layer of top coat, which should encapsulate the confetti and create an even, non-textured surface.
The Texture Question
Textured confetti nails can catch on things and feel rough. The trick is using a thick top coat that literally seals the confetti under glass, making the nail feel smooth despite what’s underneath. Some people do multiple top coats to ensure everything is fully encapsulated and the nail feels like glass, not craft project.
- Choose confetti pieces in a limited color palette (gold and blush, or gold, rose gold, and champagne)
- Avoid mixing too many different types of embellishments — 2-3 different elements is the sweet spot
- Seal confetti completely with at least two top coats
- These are semi-textured so keep them away from situations where you’re doing lots of typing or contact work
10. Black Base with White Negative Space French Tips
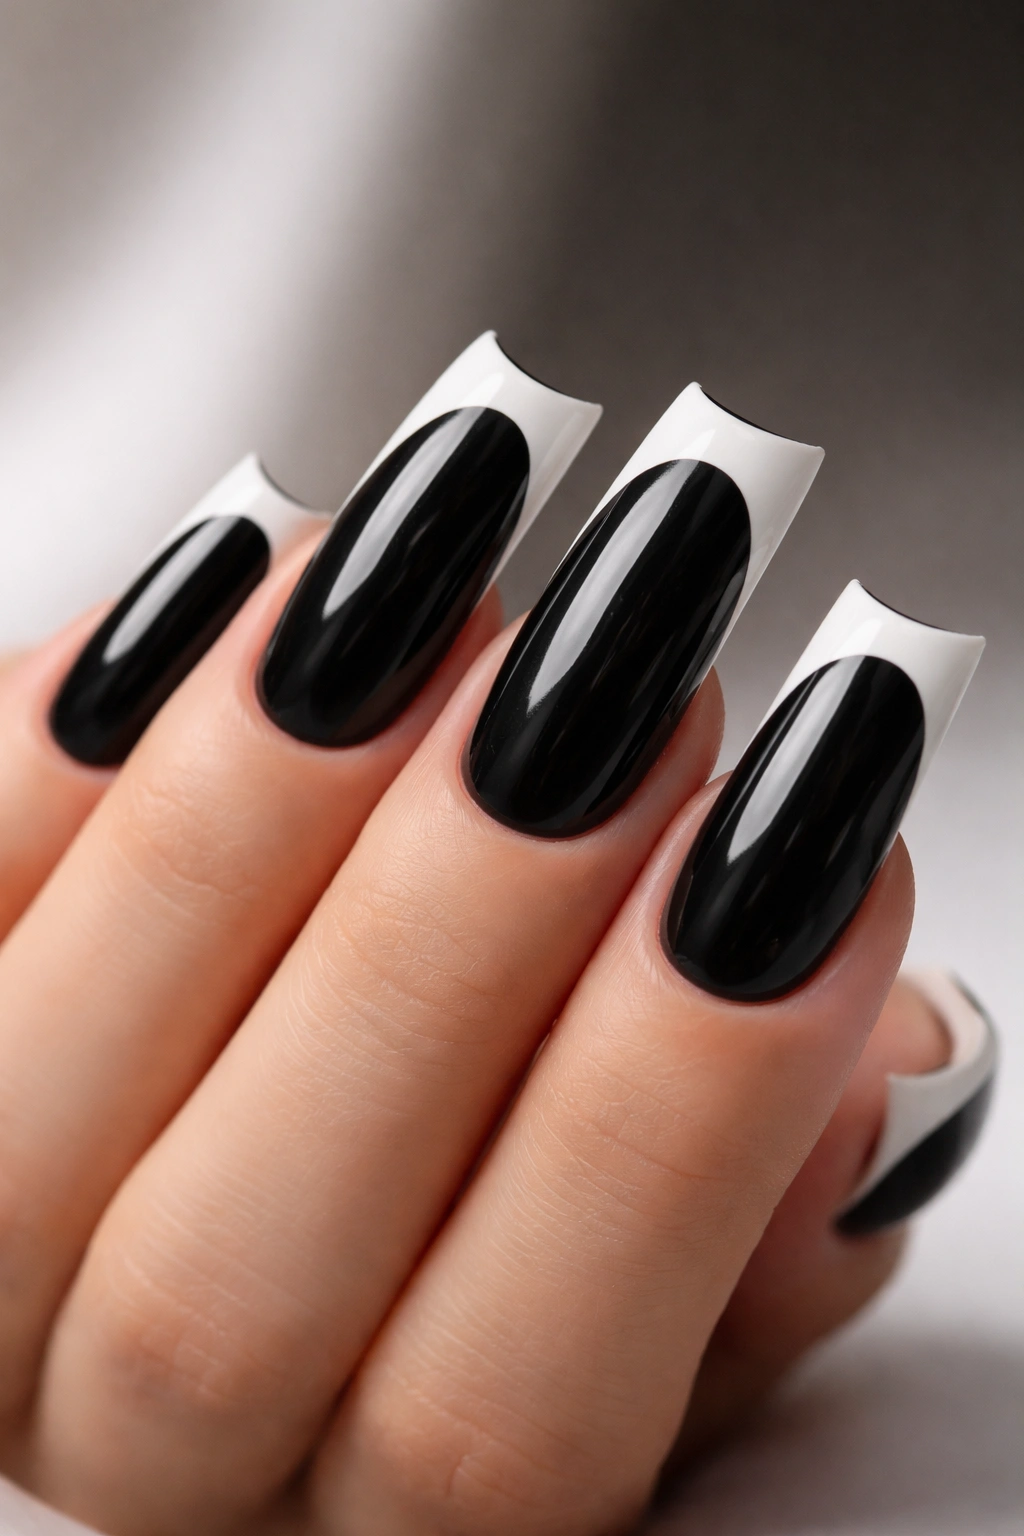
Here’s where duck nails get architectural and modern. A glossy black base with negative space French tips (meaning the white you see is actually your nail bed showing through, not polish) creates a striking, graphic look. On long duck nails, this becomes almost sculptural — the white space forms a perfect frame around the outer edge of the nail.
The Negative Space Technique
This requires precision. Tape off your French tip area with thin painter’s tape, creating the exact shape and width of white space you want. Paint your entire nail black, including over the tape. Once completely dry, carefully remove the tape to reveal clean white lines. Finish with a glossy or matte top coat depending on your preference (glossy for shine, matte for an edgier feel).
Why This Works on Duck Nails
The rounded duck shape means your negative space French tip curve beautifully rather than looking sharp and severe. The width of duck nails makes the negative space feel substantial rather than like a thin line. This look is undeniably modern and graphic — it reads expensive and intentional.
- Precision is absolutely crucial; even slightly wobbly lines will show
- Use thin, high-quality painter’s tape and press it down firmly
- Apply black polish in thin layers to prevent seepage under the tape
- Seal with at least one thick top coat for durability; matte finishes are more forgiving of minor imperfections than glossy
Final Thoughts
French tip duck nails hit that perfect sweet spot where you get length, elegance, and personality all at once. The key to making any of these styles work is investing in quality products and understanding that long nails require more maintenance and care than shorter nails. Your cuticles need regular oil, your polish needs quality base and top coats, and your technique needs precision — but the payoff is nails that actually turn heads.
The beauty of these ten styles is that they cover every mood and occasion. Whether you’re going for timeless elegance with the classic cream and ivory, or making a statement with the black and white negative space, each approach gives you a different version of French tip duck nails. Mix and match elements from different styles too — maybe you love the blush pink base with chrome tips from one example and the confetti concept from another. Create your own hybrid and own it.
Most importantly, choose the style that makes you feel confident. Long duck nails are an intentional choice, so make sure the design reflects who you are. Whether that’s classic and refined or bold and experimental, your nails should make you happy every single time you look at your hands.
