

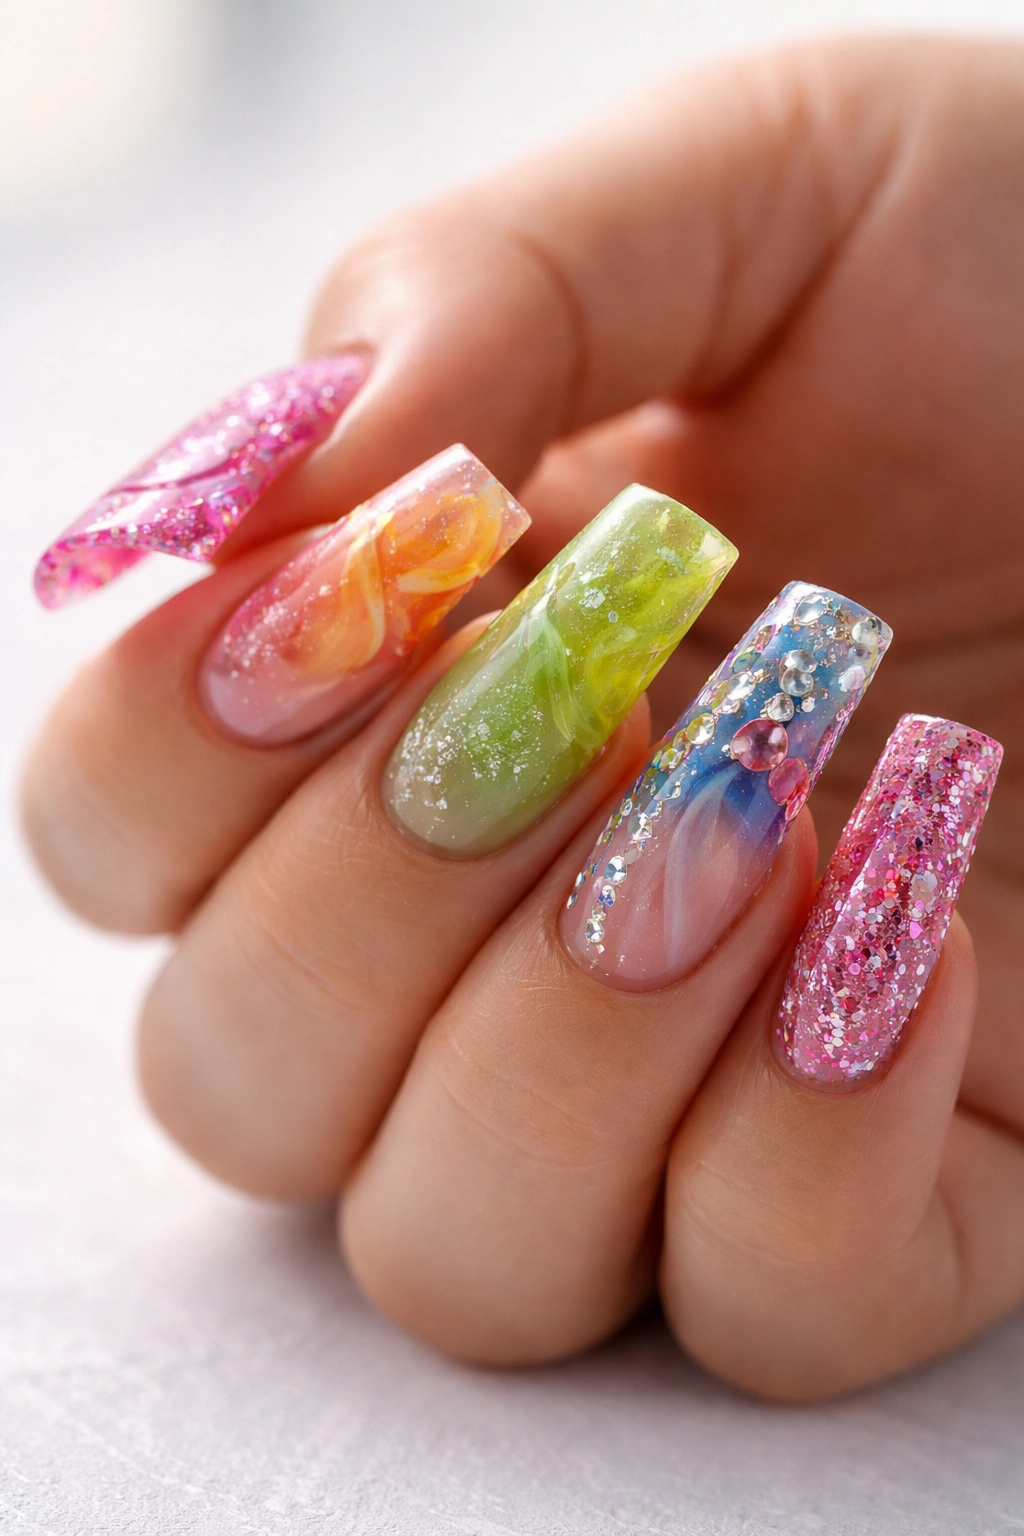
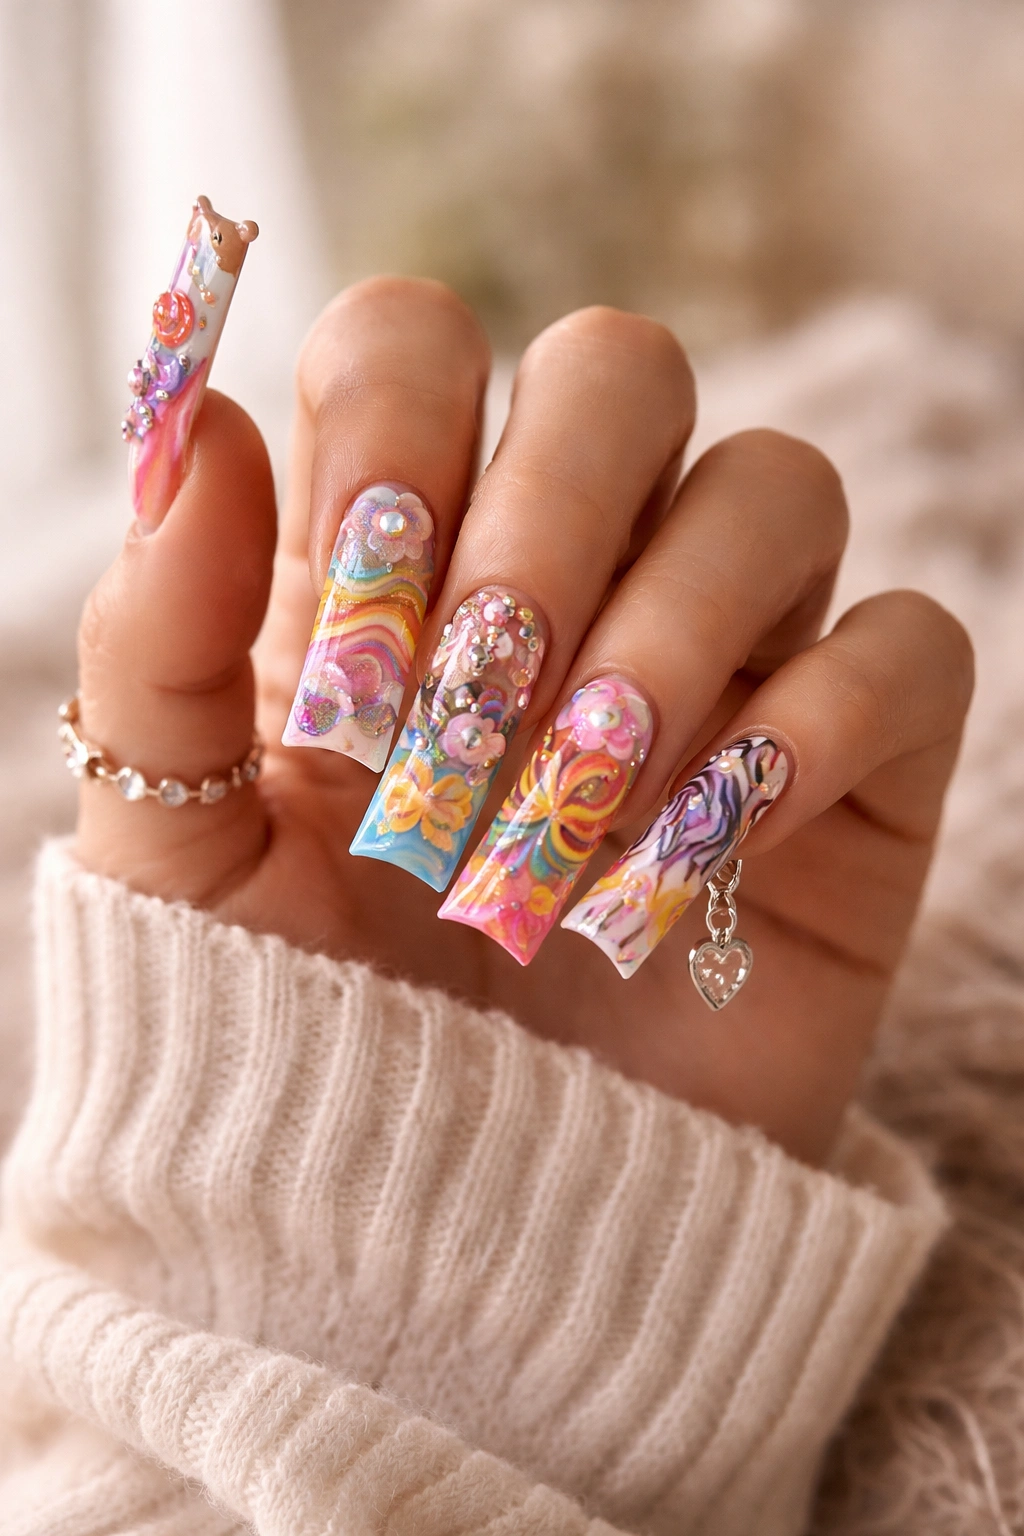
Freestyle duck nails represent one of the most creatively satisfying nail art trends, offering endless possibilities for those who want to break free from rigid designs and embrace organic, hand-painted expressions. Unlike structured nail art that follows precise patterns, freestyle duck nail designs celebrate imperfection and artistic flow — where brushstrokes matter less than the overall visual impact and where happy accidents often become the best design elements.
The beauty of freestyle duck nails lies in their accessibility. You don’t need years of formal nail art training or a steady hand that belongs in an operating room. Instead, you need curiosity, willingness to experiment, and the understanding that nail art is exactly as personal as you want it to be. Whether you’re drawn to bold color clashes, soft watercolor aesthetics, or complex marble effects, freestyle duck nails provide the canvas for your vision.
What makes duck nails such a perfect vehicle for freestyle designs is their distinctive curved shape. The elongated, slightly flared tip creates natural space for artistic expression — swirls have room to breathe, gradients can flow smoothly, and hand-painted details gain prominence rather than getting lost on a smaller surface. This guide explores eleven freestyle duck nail ideas that showcase different techniques, color philosophies, and artistic approaches, each one fully achievable at home with basic tools and a willingness to play.
1. Matte Finish with Glossy Gold Drip
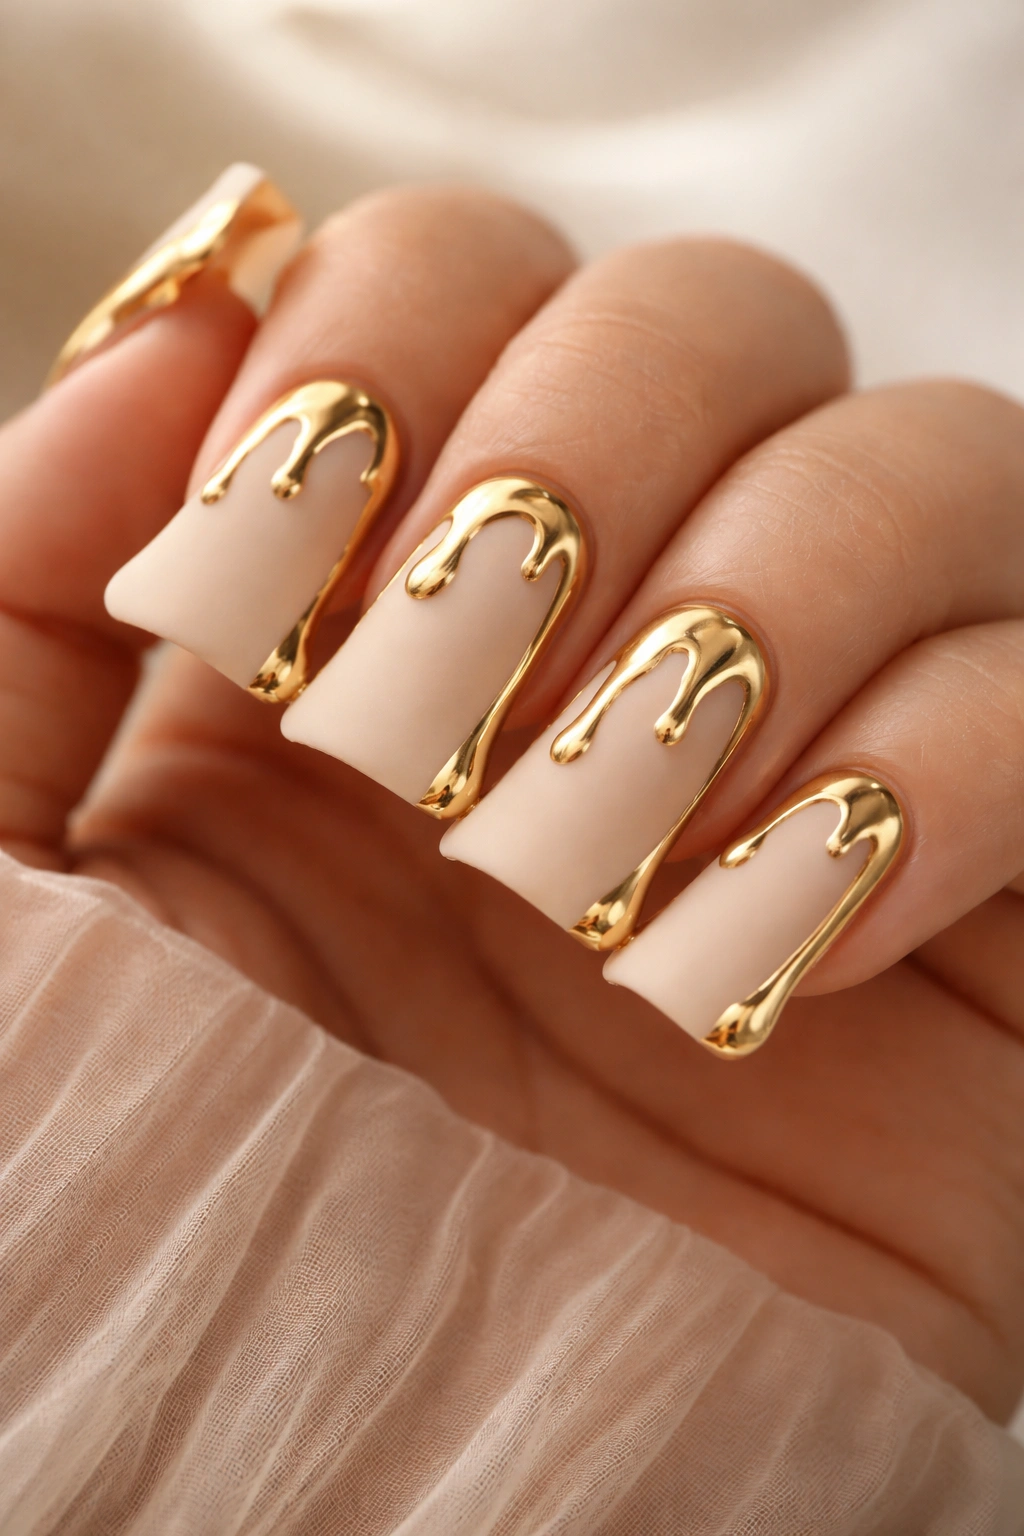
A matte base creates sophisticated contrast when paired with glossy metallic elements, and gold drips offer an elevated, intentional-looking detail that actually comes together far easier than it appears. This design works beautifully across all ten nails with slight variations, making it feel cohesive while maintaining that freestyle aesthetic.
Start with a matte top coat applied over your chosen base color — nude, blush, soft gray, or even dusty rose creates a modern, refined foundation. The matte finish instantly photographs well and feels contemporary without requiring technical precision. Once the base fully cures, you’ll add the gold drip, which is where the freestyle element truly shines.
Creating the Glossy Drip Effect
Use a thin nail art brush or a nail pen filled with glossy gold polish. Position the brush at the cuticle area or along one side of the nail, then allow gravity and a slow, deliberate stroke to create a natural-looking drip that flows toward the tip. Don’t aim for perfection here — slight wobbles in the line actually enhance the hand-painted quality. The drip can follow the center of the nail, trail down one side, or even twist around the edge for added movement.
Why This Design Stands Out
The matte-versus-glossy contrast creates visual interest with minimal effort, and gold works with nearly every skin tone and wardrobe. You can easily adjust the design by changing your matte base color or using different metallic finishes — rose gold feels romantic, silver feels edgy, and copper brings warmth. This design reads as intentional and polished while requiring far less precision than geometric patterns.
Design Variations to Try
- Apply multiple thin drips from different angles for a more complex look
- Use a matte top coat over a glossy base instead, reversing the texture contrast
- Add small geometric shapes (triangles or rectangles) along the drip path using the same gold polish
- Experiment with holographic or chrome finishes instead of solid metallics
Insider note: Matte top coats can sometimes look chalky if applied too thick — use thin layers built up gradually rather than one heavy coat for a smoother, more refined appearance.
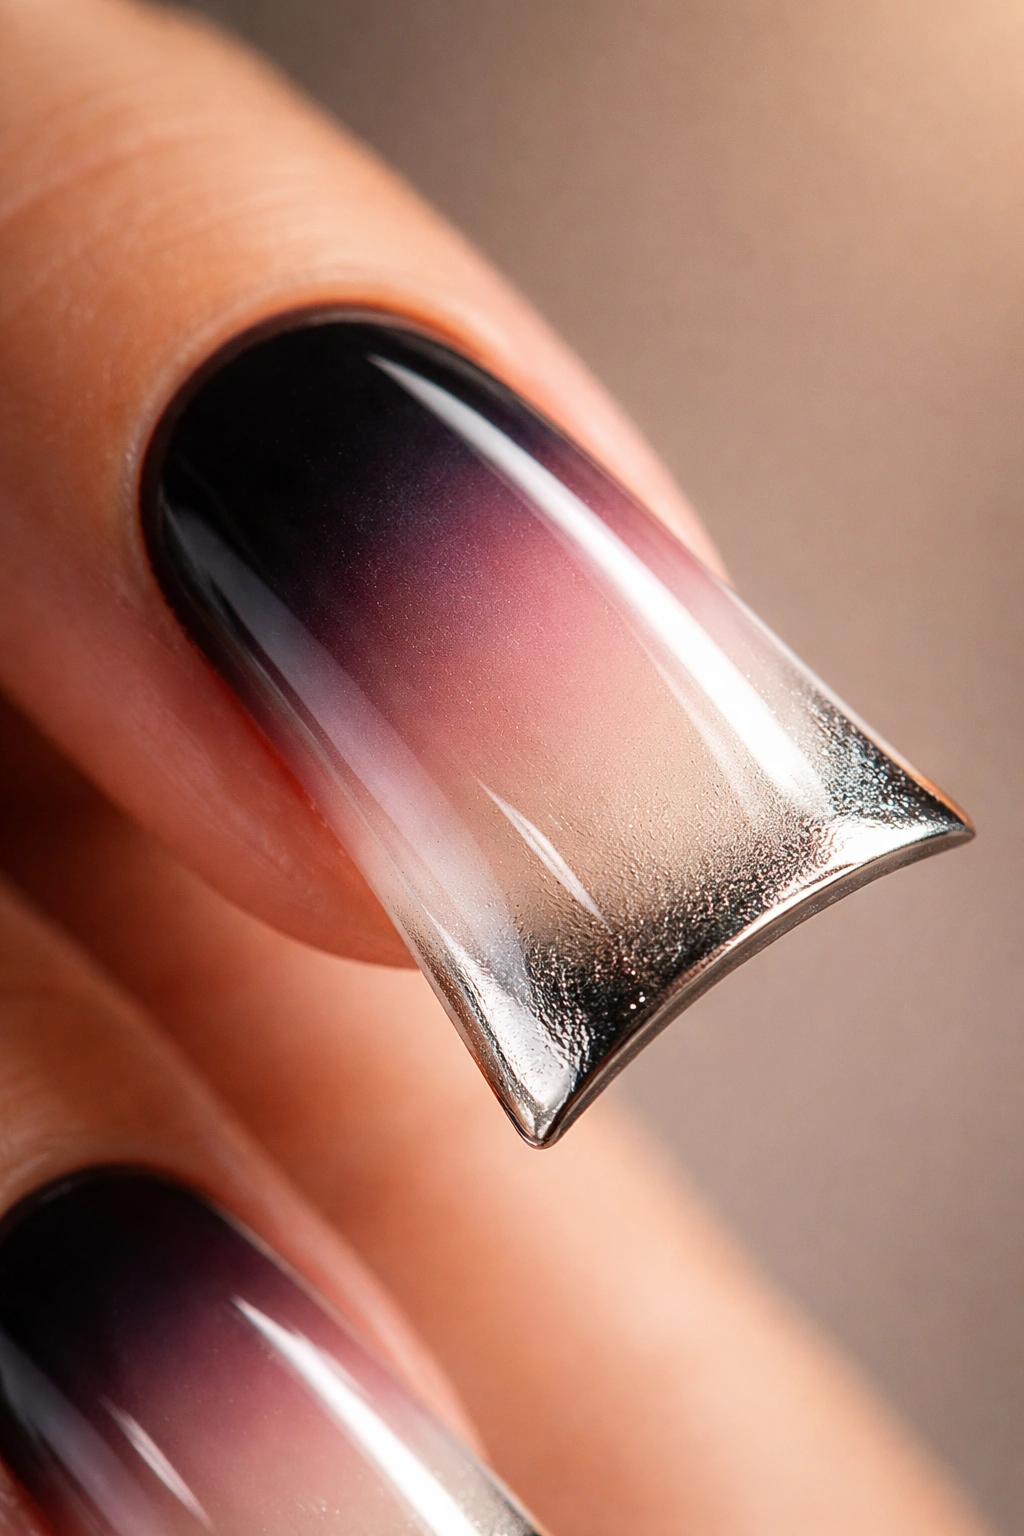
2. Ombre Fade From Pastel to Vibrant
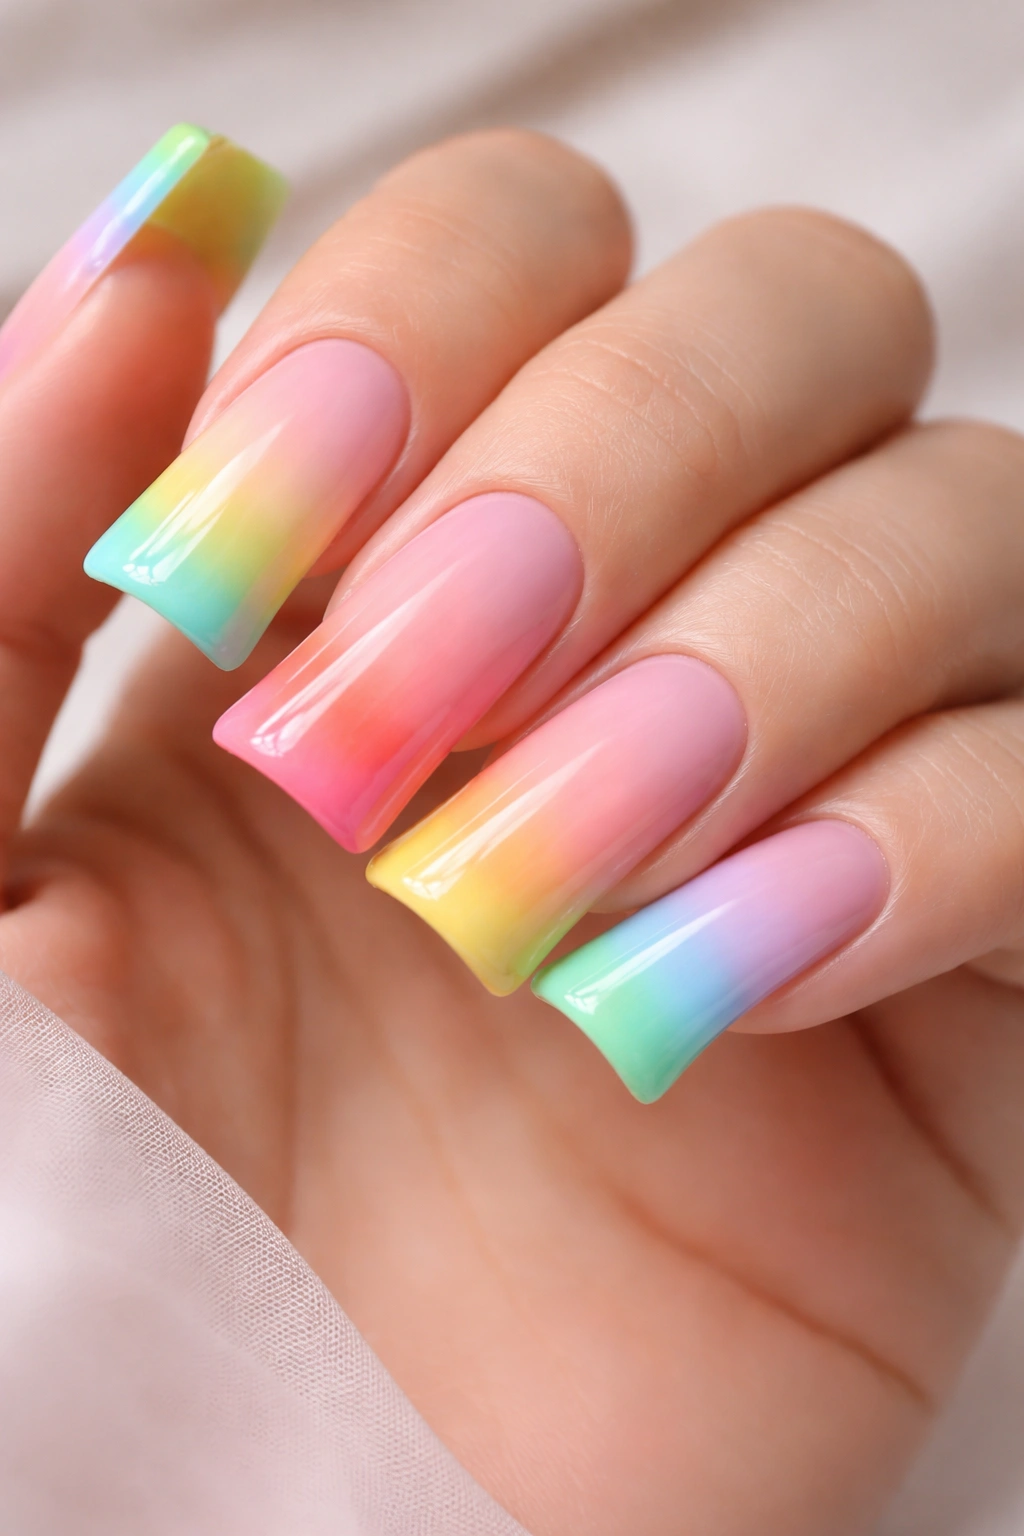
Ombre designs on duck nails create a stunning visual flow that guides the eye from the cuticle to the tip, and the elongated shape gives you plenty of room to play with color transitions. Pairing soft pastels at the base with increasingly vibrant hues toward the tip creates movement and visual interest while remaining wearable for everyday styling.
This design concept works particularly well with complementary or analogous color schemes. Consider fading from soft lavender to deep purple, pale peach to burnt orange, or icy blue to ocean teal. The key to a successful freestyle ombre is embracing the gradual nature of the transition — no harsh lines, no blending sponge required if you’re not comfortable with that technique.
The Wet-on-Wet Gradient Technique
Apply your lighter pastel shade as a full base and let it dry completely. Once cured, apply the slightly darker shade across the upper third of the nail while the pastel is still fully set. The separation of these layers prevents the colors from muddying together. Allow this to dry, then apply your darkest or most vibrant shade to the final third, focusing near the tip. The beauty of this approach is that the transition happens naturally through the layering process, with no need for blending.
Why This Design Stands Out
Ombre ombré on duck nails feels effortlessly elegant because the elongated shape naturally accommodates the gradient. The soft-to-vibrant transition works across multiple nails without needing to match exactly — slight variations between fingers actually strengthen the freestyle aesthetic. This design catches light beautifully and reads as more complex than the time investment required.
Specific Color Combinations Worth Trying
- Pale yellow → mustard → burnt amber (autumnal warmth)
- White → soft pink → hot pink (romantic energy)
- Pale sage → forest green → black (moody sophistication)
- Powder blue → teal → deep navy (calming gradient)
Pro tip: Avoid blending too much between colors — let the slight visible separation between shades create the freestyle charm rather than aiming for a perfectly blended result that requires more technique than is realistic for freehand work.
3. Marble Swirl with Chrome Accents
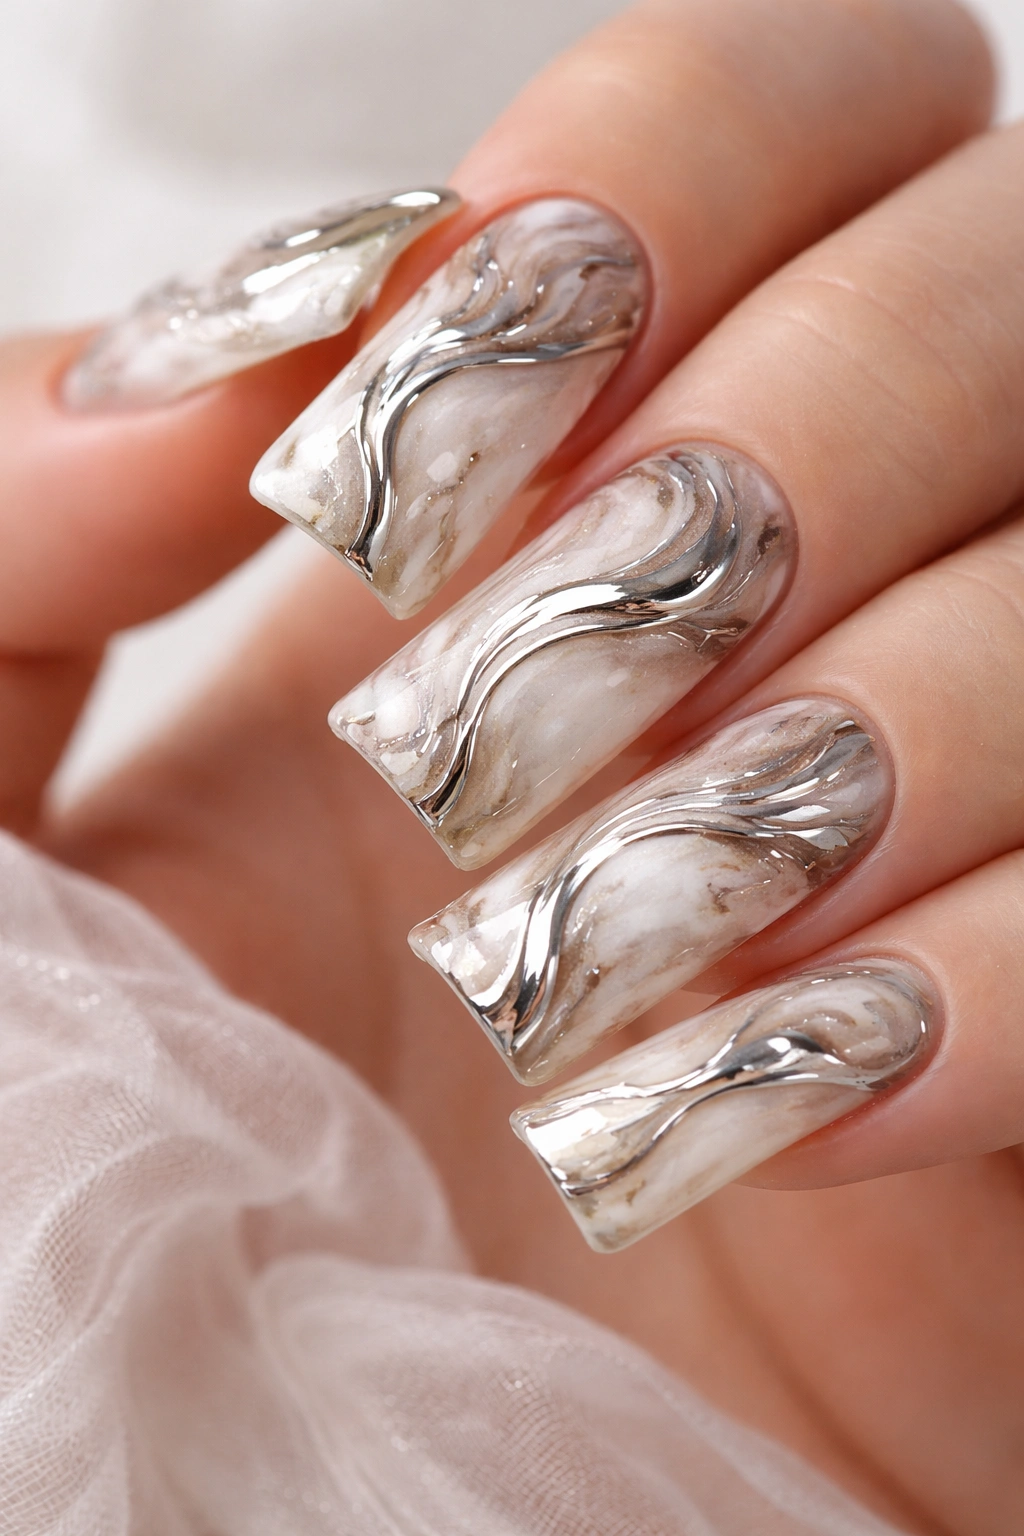
Marble effects have become a nail art staple, and for good reason — they create the impression of intricate patterning while actually celebrating unpredictability and creative play. On duck nails, marble swirls gain even more impact because the larger surface area allows the veining and color mixing to shine without feeling cramped or overly busy.
The freestyle approach to marble means abandoning the water-marbling technique (which requires specific conditions and equipment) and instead creating the effect through layered swirls and organic color mixing directly on the nail. This method feels more controllable and accessible, especially if you’re working with standard nail art supplies.
Building Marble Veining
Apply a light neutral base — white, cream, or pale gray work beautifully — and allow it to fully cure. Using a thin nail art brush or striping tool, drag thin lines of a contrasting color (black, deep purple, or forest green) across the nail in organic, meandering patterns. Don’t overthink the placement; let the lines flow naturally across the surface without following a predetermined pattern. Add a second accent color in the remaining spaces, keeping lines delicate and intentional.
Why This Design Stands Out
Marble patterns feel sophisticated and fine-art inspired without requiring flawless technique, because the nature of marble celebrates variation and organic flow. The chrome accents you add afterward (thin metallic stripes or small accent dots) catch light and elevate the design from simple to show-stopping. This combination works for nearly every occasion, from casual to formal.
Adding Chrome Accents
Once your marble is complete and fully dried, use chrome powder applied with a dedicated chrome brush or a traditional application method to add metallic accents. You might place small chrome dots at the nail centers, create thin chrome lines that follow some of your marble swirls, or reserve chrome for just the tips for a gradient effect.
Worth knowing: Cheaper chrome powders often appear chalky or dull — investing in quality brand chrome powder makes a noticeable difference in the final shine and reflective quality.
4. Negative Space Geometric Pattern
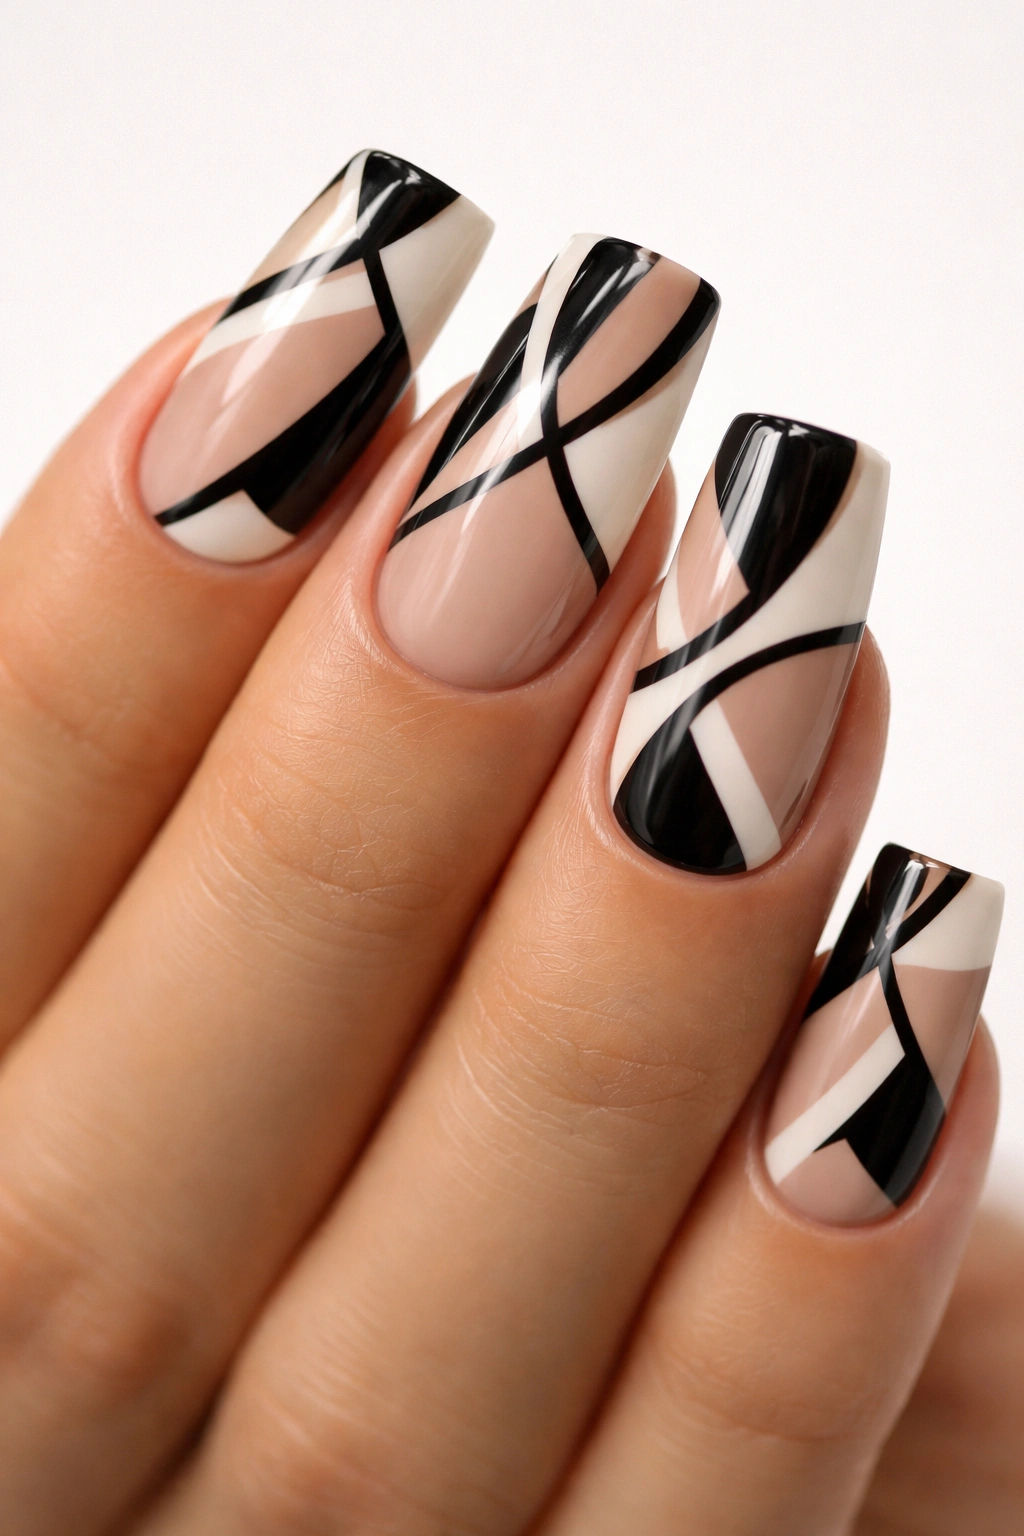
Negative space designs leverage the nail’s natural color or skin tone as an intentional design element rather than trying to cover every millimeter with polish. On duck nails, this approach creates striking visual interest and allows freestyle placement of geometric shapes that feels modern and intentionally incomplete rather than accidental.
This is one of the most forgiving freestyle designs because there’s built-in permission for imperfect lines — they simply read as more contemporary and hand-drawn. Whether you’re creating triangles, rectangles, hexagons, or abstract angular shapes, the negative space makes the design feel curated and intentional.
Creating Geometric Shapes
Use a thin striping brush or nail art pen to paint angular shapes across the nail, leaving significant portions of the nail bare. You might create a triangle at the tip with clean lines, or abstract geometric shapes scattered across the nail surface. The key is commitment — confident lines look intentional, while tentative ones look uncertain. If precision is challenging, slightly imperfect lines actually enhance the freestyle aesthetic.
Why This Design Stands Out
Negative space designs feel modern and architectural, offering a break from heavily decorated nails that some people find overwhelming. This approach works beautifully across professional environments because it reads as minimalist and intentional rather than decorative. The duck nail shape provides enough surface area that geometric shapes have room to breathe and make an impact.
Color and Pattern Options
- Single color geometric shapes (black on nude, white on pale pink, navy on cream)
- Gradient of colors across different geometric sections
- Mix solid and outlined shapes on the same nail for variety
- Metallic accents outlining the negative space shapes
Pro tip: Negative space designs look most intentional when you’re bold with the shapes — small, timid marks read as mistakes, while confident, defined shapes read as design choices.
5. Holographic Gradient Wave
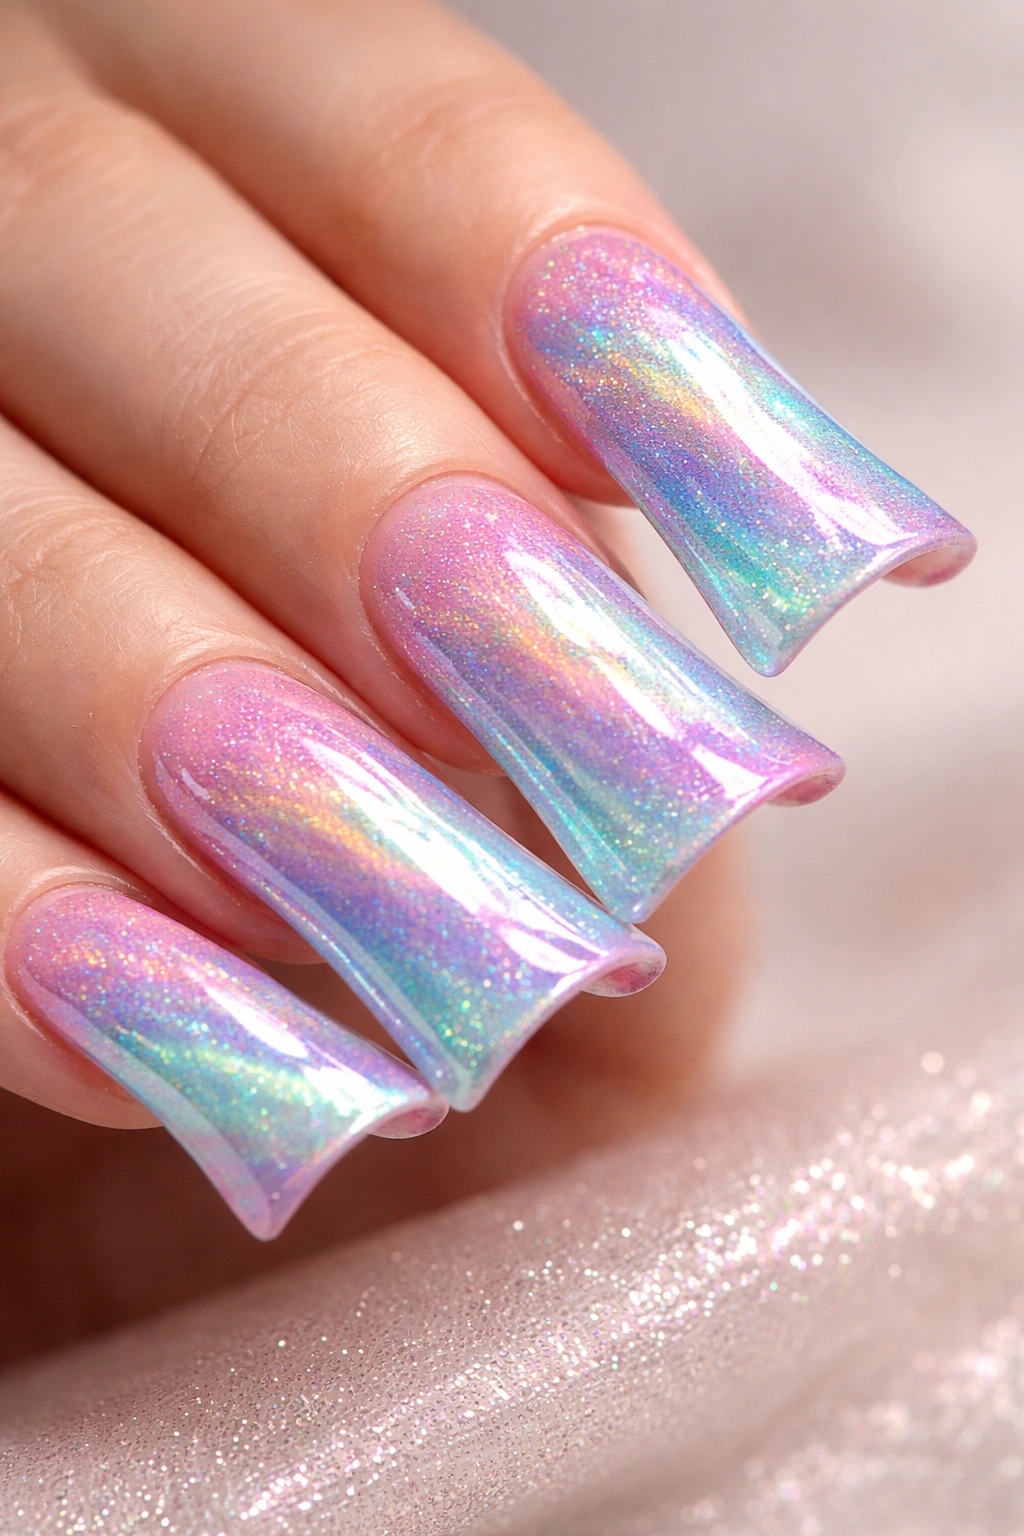
Holographic polishes create color-shifting effects that change throughout the day depending on light angle and reflection, making them inherently glamorous and freestyle-friendly. Applying these in a gradient formation across duck nails creates movement and visual intrigue without requiring any hand-painting skills beyond smooth color application.
The beauty of this approach is that the holographic particles in the polish do most of the visual work — your job is simply creating a smooth transition from one shade to another, which is actually simpler than detailed hand-painting because slight imperfections blend seamlessly into the effect.
Creating a Holographic Wave
Apply a base coat, then begin with your first holographic shade at the nail base. This might be a holographic pink, purple, or even silver depending on your preference. Using a clean, slightly damp sponge (or your fingertip if you’re comfortable), gently dab your second holographic shade over the first, allowing the colors to blend where they meet. Build the gradient gradually — it’s far easier to add more color than to remove it.
Why This Design Stands Out
Holographic effects automatically photograph beautifully and catch light in ways that solid colors simply cannot. The gradient adds movement and sophistication while remaining simple to execute. This design reads as considerably more complex than it actually is, making it perfect for someone who wants impressive results without intensive techniques.
Holographic Color Combinations
- Pink holographic → purple holographic → silver holographic (rainbow-adjacent)
- Blue holographic → green holographic (cool-toned shift)
- Yellow holographic → pink holographic (warm shift)
- Holographic to sparkle fade (adds texture variation)
Insider note: Holographic polishes often require two coats to show their full color-shifting properties — one coat can appear thin or muddy, while two coats reveal the true sparkle and shift.
6. Hand-Painted Floral Motifs
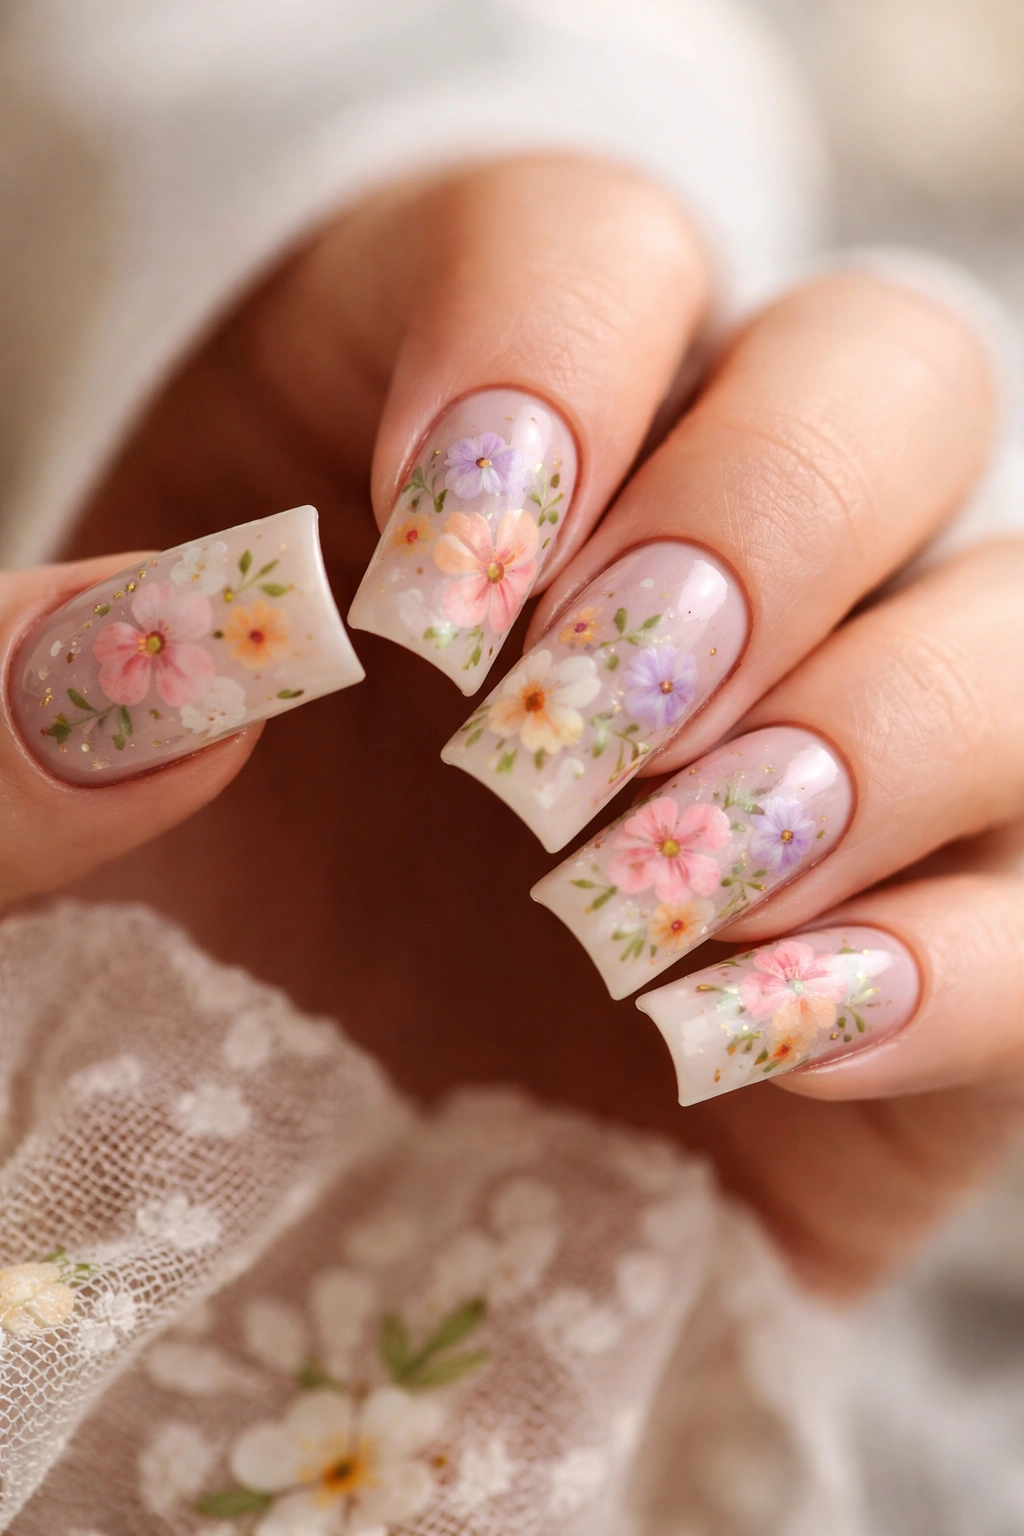
Floral designs immediately evoke artistic sensibility and creative expression, and the freestyle approach to florals means embracing loose, organic painting rather than pursuing photorealistic accuracy. On duck nails, hand-painted flowers gain prominence and become the visual focal point without feeling overly delicate or lost on the surface.
Don’t worry if you’ve never painted flowers before — the freestyle approach actually celebrates imperfect, stylized blooms that feel more contemporary and personal than technically perfect botanical art.
Painting Loose Floral Shapes
Using a thin dotting tool or the tip of a fine brush, create flower centers by placing small dots or circles in your chosen location. Then, using slightly longer strokes, create petals radiating from the center by flicking the brush outward in quick motions. The petals don’t need to be identical or symmetrically placed — this variation is what makes the design feel hand-painted and personal. Add leaves using thin curved strokes in contrasting colors.
Why This Design Stands Out
Florals feel inherently feminine and artistic while remaining appropriate for varied settings and occasions. The hand-painted quality adds genuine personality to your nails that no stamping plate could replicate. Each nail can feature slightly different florals, creating a cohesive set that celebrates variation rather than demanding perfection.
Floral Style Options
- Minimalist single-line florals (using negative space for parts of the bloom)
- Dotted flowers using multiple colors layered on top of each other
- Watercolor-style florals with soft color gradients
- Botanical-inspired with detailed leaf work
Pro tip: Start with small florals to build confidence — tiny flowers forgive imperfect brushwork more easily than large, detailed blooms. You can always add more flowers once you’re comfortable with the technique.
7. Glitter Gradient with 3D Elements
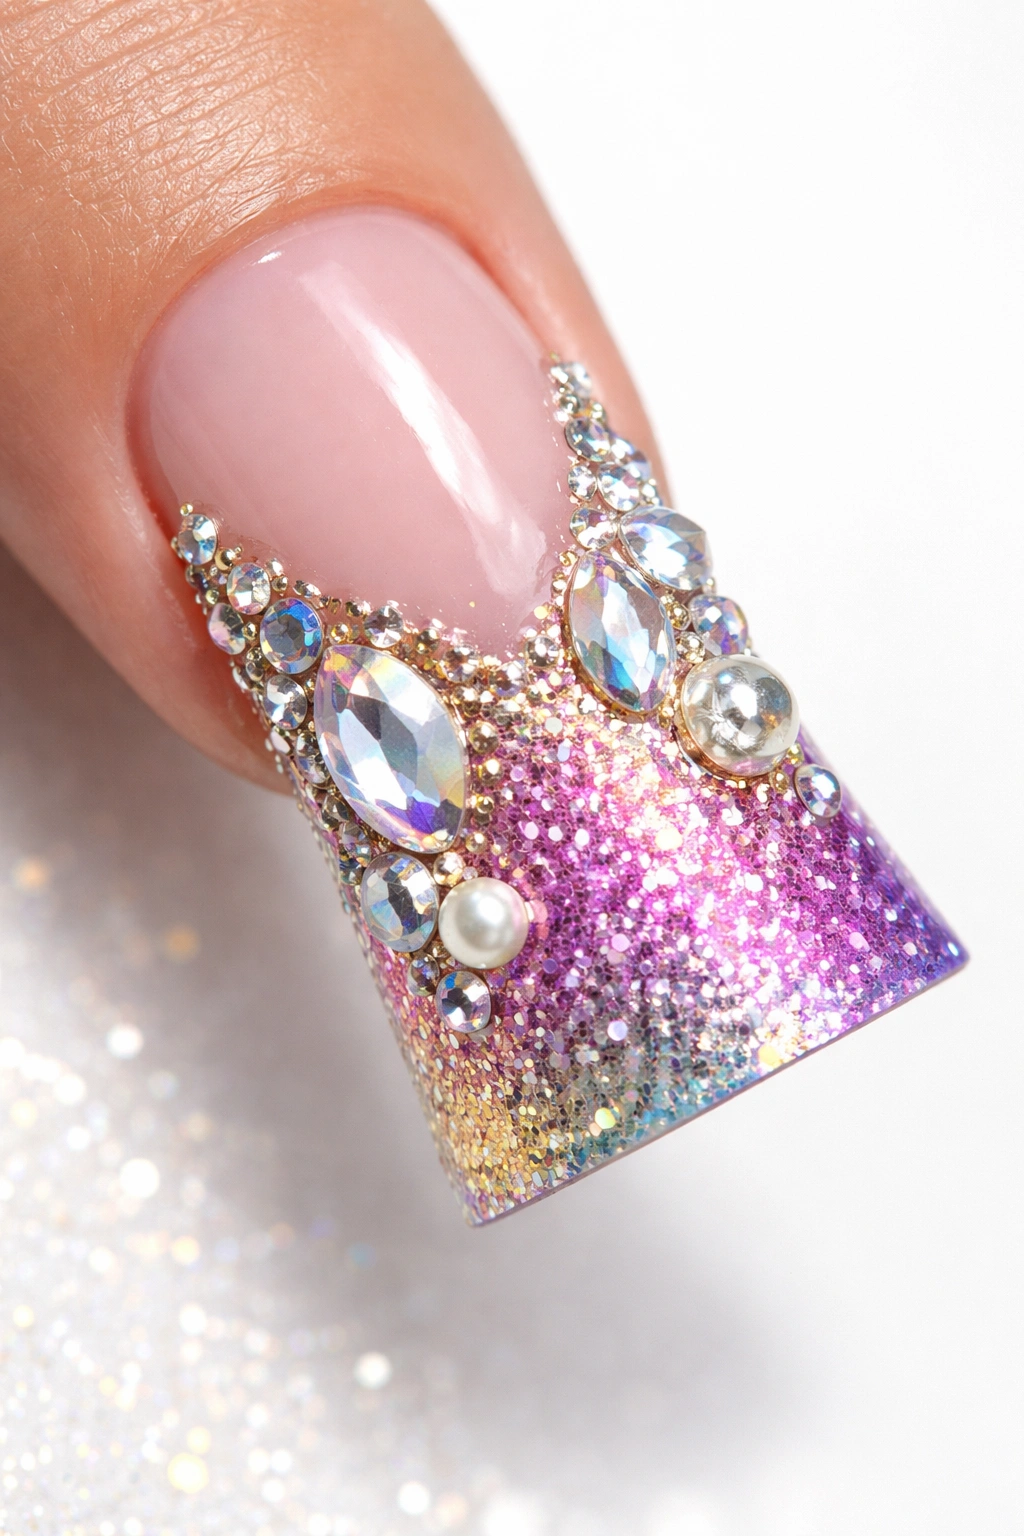
Glitter gradients transition from areas of heavy sparkle to more subdued shimmer, creating dimension and movement while the 3D elements (small beads, rhinestones, or chunky glitter pieces) add tactile interest and catch light in unexpected ways. This design celebrates the inherent drama of duck nails while remaining visually balanced.
The freestyle aspect here is in the placement of 3D elements — there’s no requirement for symmetry or perfect spacing, allowing you complete creative freedom in deciding where the sparkle should concentrate and where it should diffuse.
Building the Glitter Base
Apply a sticky base layer (a base coat that remains slightly tacky) and while it’s still wet, apply fine glitter using a brush or sponge, concentrating heavily on the nail tips and gradually using less toward the cuticles. Allow this to dry, then seal with a glossy top coat that won’t completely cure yet. While this top coat is slightly tacky, carefully place larger glitter pieces or small rhinestones where you want dimension, then seal everything with a final top coat.
Why This Design Stands Out
Glitter gradients feel celebratory and fun while the 3D elements prevent the design from looking flat or one-dimensional. This approach works beautifully for special occasions or whenever you want nails that make a genuine statement. The duck nail shape provides plenty of surface area for these elements without feeling crowded.
Placement and Element Ideas
- Rhinestones concentrated at the very tips, glitter fading toward the base
- Chunky glitter mixed with fine glitter for texture variation
- Small beads placed in a loose scattered pattern
- 3D elements following the curve of the nail in an organic line
Worth knowing: Placing 3D elements while the top coat is slightly tacky prevents them from slipping around, but you need to work fairly quickly before the coat dries completely.
8. Pastel Candy Swirl Design
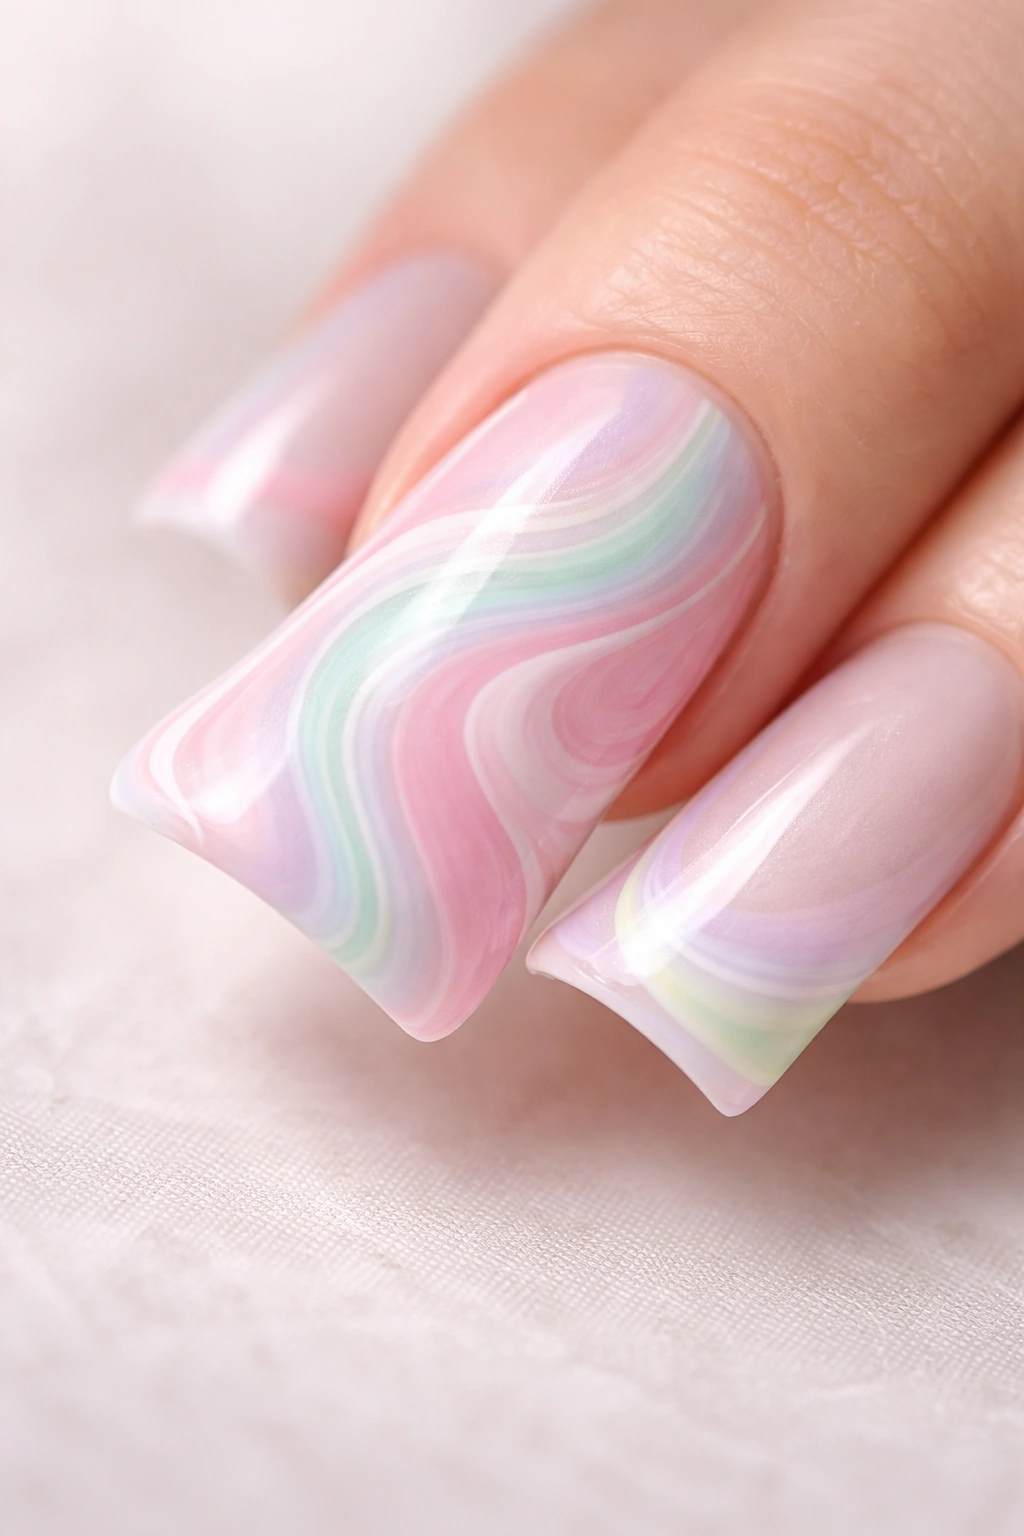
Pastel candy swirls celebrate playful, whimsical design by layering soft colors in loose, organic swirl patterns that evoke swirled ice cream or lollipops. On duck nails, these swirls gain room to be bold and expressive without feeling chaotic, and the soft color palettes maintain visual harmony even when multiple hues meet on the same nail.
This design is particularly forgiving because the swirling motion itself creates the visual interest — the actual execution is surprisingly simple despite how impressive the final result appears.
Creating Candy Swirls
Apply a light base color (pale pink, soft yellow, or lavender) and allow it to fully dry. Using a thin nail art brush loaded with a second pastel shade, create a gentle swirl across the nail — think soft, looping motions rather than tight spirals. Once this dries, add a third color in a contrasting area using the same swirling motion. The overlap of colors creates the candy-like appearance without requiring blending.
Why This Design Stands Out
Pastel candy swirls feel youthful and creative while remaining sophisticated rather than childish — the pastel colors keep everything elegant despite the playful swirling pattern. This design is highly Instagram-worthy and reads as considerably more complex than the straightforward execution requires. It works beautifully for anyone who loves color but prefers softer, less saturated palettes.
Color Palettes to Try
- Pale pink + soft mint + lavender (classic pastels)
- Peachy pink + pale yellow + soft white (warm pastels)
- Light blue + pale green + pale purple (cool pastels)
- Blush pink + cream + pale gold (warm neutrals)
Pro tip: Allow each color to fully dry before adding the next — wet-on-wet swirling causes the colors to muddy together rather than maintaining their distinct, pretty pastel separation.
9. Reverse Ombre with Metallic Tips
Reverse ombré inverts the traditional gradient by placing darker or more saturated colors at the nail base and fading to lighter shades toward the tips — a modern approach that draws the eye differently than traditional ombré. Adding metallic tips to this design creates a sophisticated finish that feels both trendy and timeless.
This design works particularly well on duck nails because the elongated shape allows the gradient to flow naturally, and the metallic tips create a polished conclusion to the color transition.
Building Reverse Ombré
Apply your darkest or most saturated color at the nail base and allow it to dry completely. Using the wet-on-wet layering technique, apply a slightly lighter shade over roughly the middle third of the nail. Once this dries, apply an even lighter shade over the upper third, creating a clear but soft transition from dark to light. Finally, apply a thin metallic shade (gold, silver, or holographic) across just the very tip of the nail.
Why This Design Stands Out
Reverse ombré feels modern and intentional, moving away from the more commonly seen light-to-dark gradient. The metallic tips prevent the design from feeling flat and add luxury-brand polish without requiring complex hand-painting. This combination reads as editorial and curated, perfect for anyone who appreciates trendy nail art that maintains sophistication.
Metallic Tip Variations
- Chrome polish for futuristic shimmer
- Matte gold for understated elegance
- Holographic for maximum light-catching
- Rose gold for romantic warmth
Insider note: Metallic polishes often appear thin when applied to just the tip — use two thin coats rather than one thick coat for more opaque, luxurious-looking coverage.
10. Art Deco Line Work Pattern
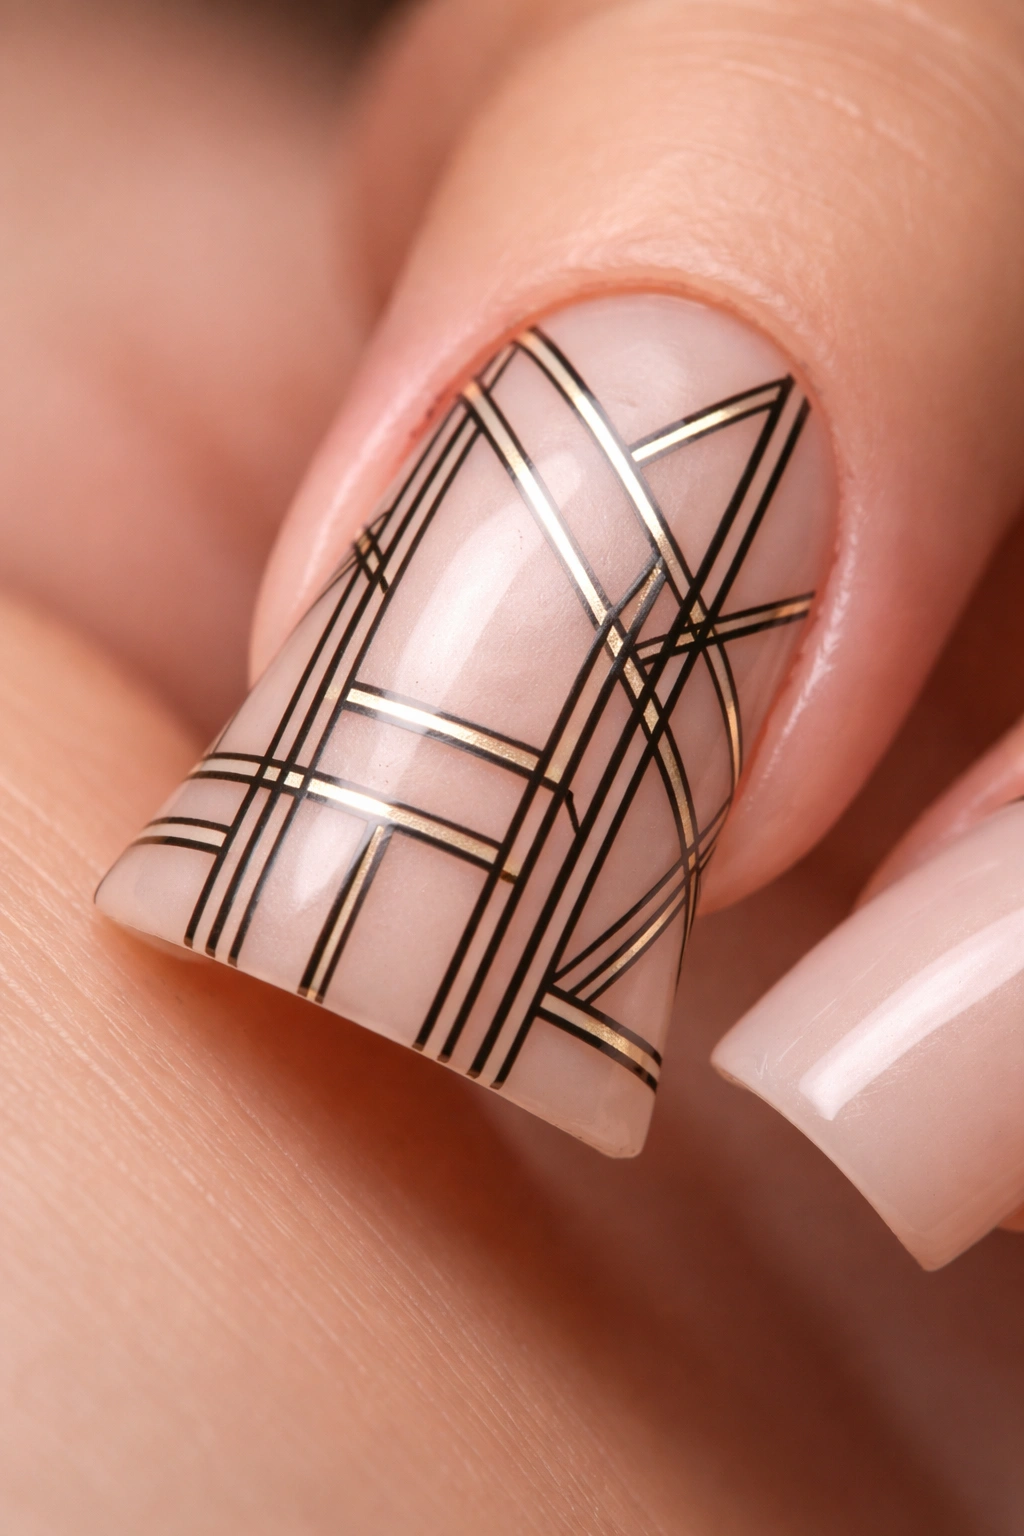
Art deco patterns celebrate geometric precision and symmetrical design, translated into a freestyle context through hand-drawn line work that celebrates the imperfect elegance of hand-created art. The straight lines and geometric shapes of art deco style feel inherently glamorous without requiring mechanical precision on freestyle duck nails.
This design appeals to minimalist aesthetics while making a genuine statement through controlled, intentional line placement.
Creating Art Deco Patterns
Using a thin striping brush or nail art pen, create thin parallel lines across the nail at various angles — some horizontal, some diagonal, some vertical — creating geometric sections. Add additional lines that intersect the first set, building an abstract geometric grid. You might fill some sections with contrasting colors or metallic polish while leaving others bare for negative space. The beauty is in the interplay of lines and shapes rather than in perfect symmetry.
Why This Design Stands Out
Art deco patterns feel sophisticated and vintage without actually requiring historical accuracy — the freestyle approach means your version is inherently modern and personal. These designs read as artistic and intentional while remaining wearable in professional settings. The geometric nature actually makes hand-drawn imperfections look intentional rather than like mistakes.
Design Elements to Include
- Thin parallel lines creating sections
- Small geometric shapes (triangles, hexagons) within the line work
- Metallic accents highlighting specific sections
- Negative space sections left completely bare
- Optional color blocking with two complementary hues
Pro tip: Start your line work lightly using a pencil or thin brush before committing to permanent polish — this gives you a chance to visualize the pattern before making it permanent.
11. Watercolor Splash Effect
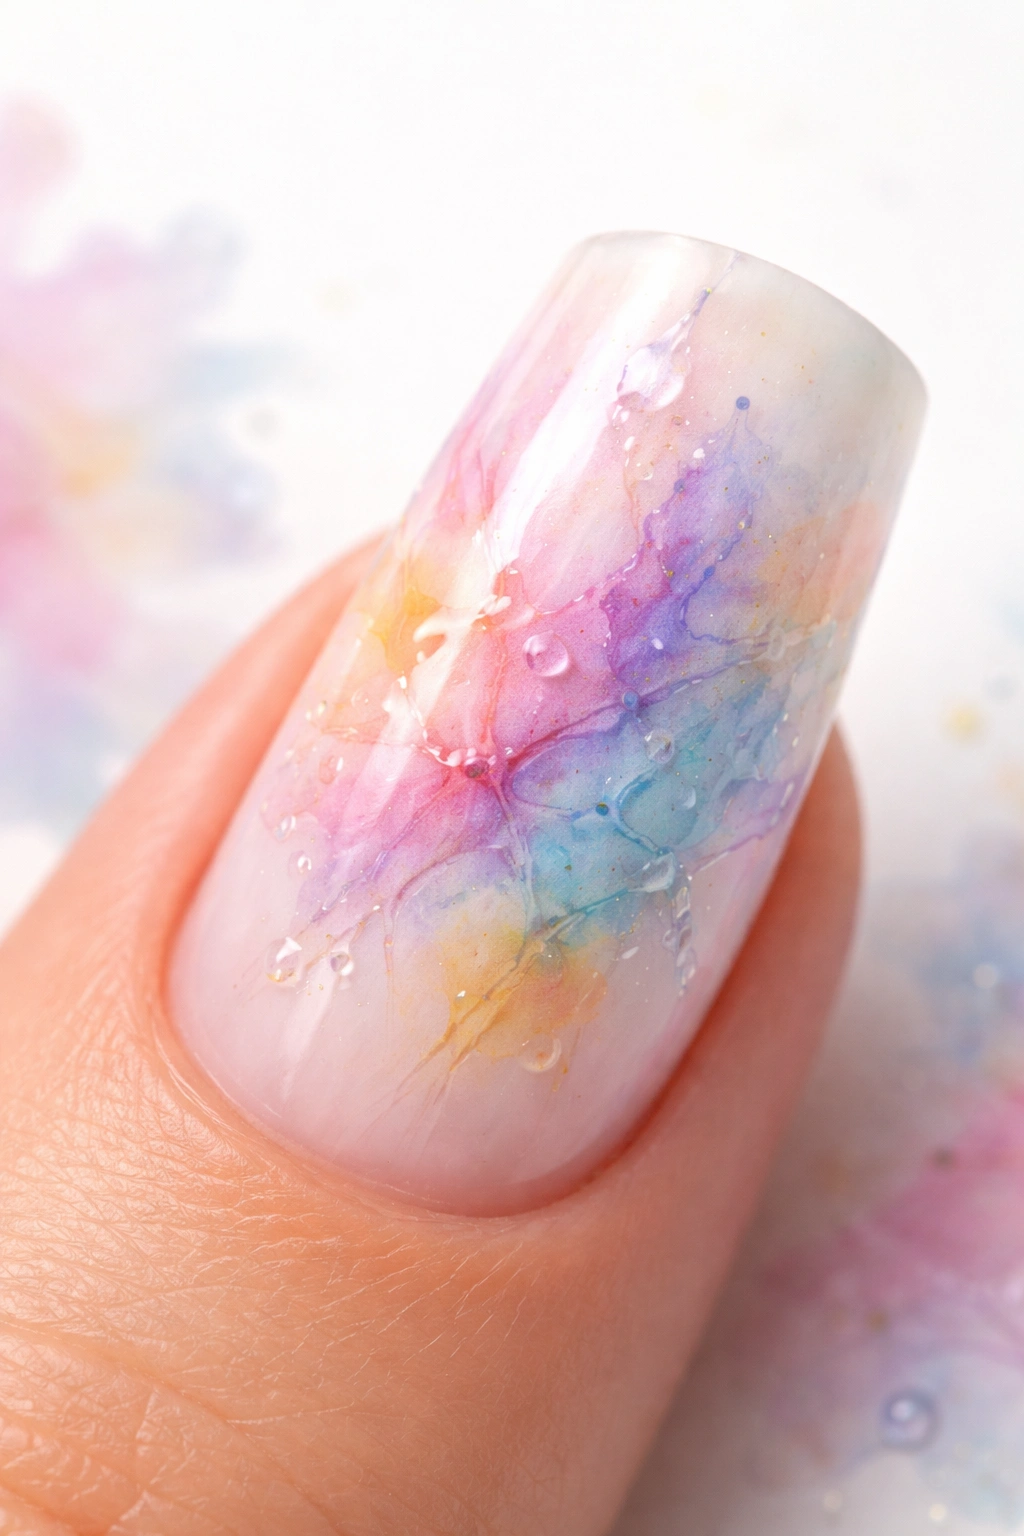
Watercolor effects translate beautifully to nail art, creating soft, organic color bleeding that feels artistic and contemplative. On duck nails, watercolor splashes have room to breathe and become true focal points without feeling cramped or overly busy, and the freestyle nature of watercolor effects means precision is genuinely not required.
This design celebrates the intersection of fine art and nail art, bringing museum-quality aesthetics to your fingertips through accessible techniques.
Creating Watercolor Effects
Apply a pale or white base coat for maximum color vibrancy. Using a thin brush loaded with diluted nail polish (mix polish with a drop of gel base coat or nail art medium to achieve a more translucent consistency), dab and drag the color across the nail in loose, organic motions. Allow colors to blend where they meet, but don’t overly manipulate the blending — let the colors flow naturally and create their own transitions. Add multiple colors in this manner, building the effect gradually.
Why This Design Stands Out
Watercolor effects feel genuinely artistic and fine-art inspired without requiring perfect technique or years of practice. The soft color transitions create visual interest and movement, while the organic nature of watercolor bleeds means imperfect application is actually part of the aesthetic. This design reads as considerably more sophisticated than the straightforward execution requires.
Watercolor Color Combinations
- Soft blues and greens with touches of gray (oceanic)
- Warm pinks, peaches, and golds (sunset)
- Multiple shades of the same color for tonal depth (monochromatic)
- Jewel tones bleeding into pale neutrals (sophisticated ombré)
Worth knowing: Watercolor effects photograph beautifully in natural light — these designs truly shine when you’re outside rather than under fluorescent lighting.
Tips for Perfecting Your Freestyle Duck Nails
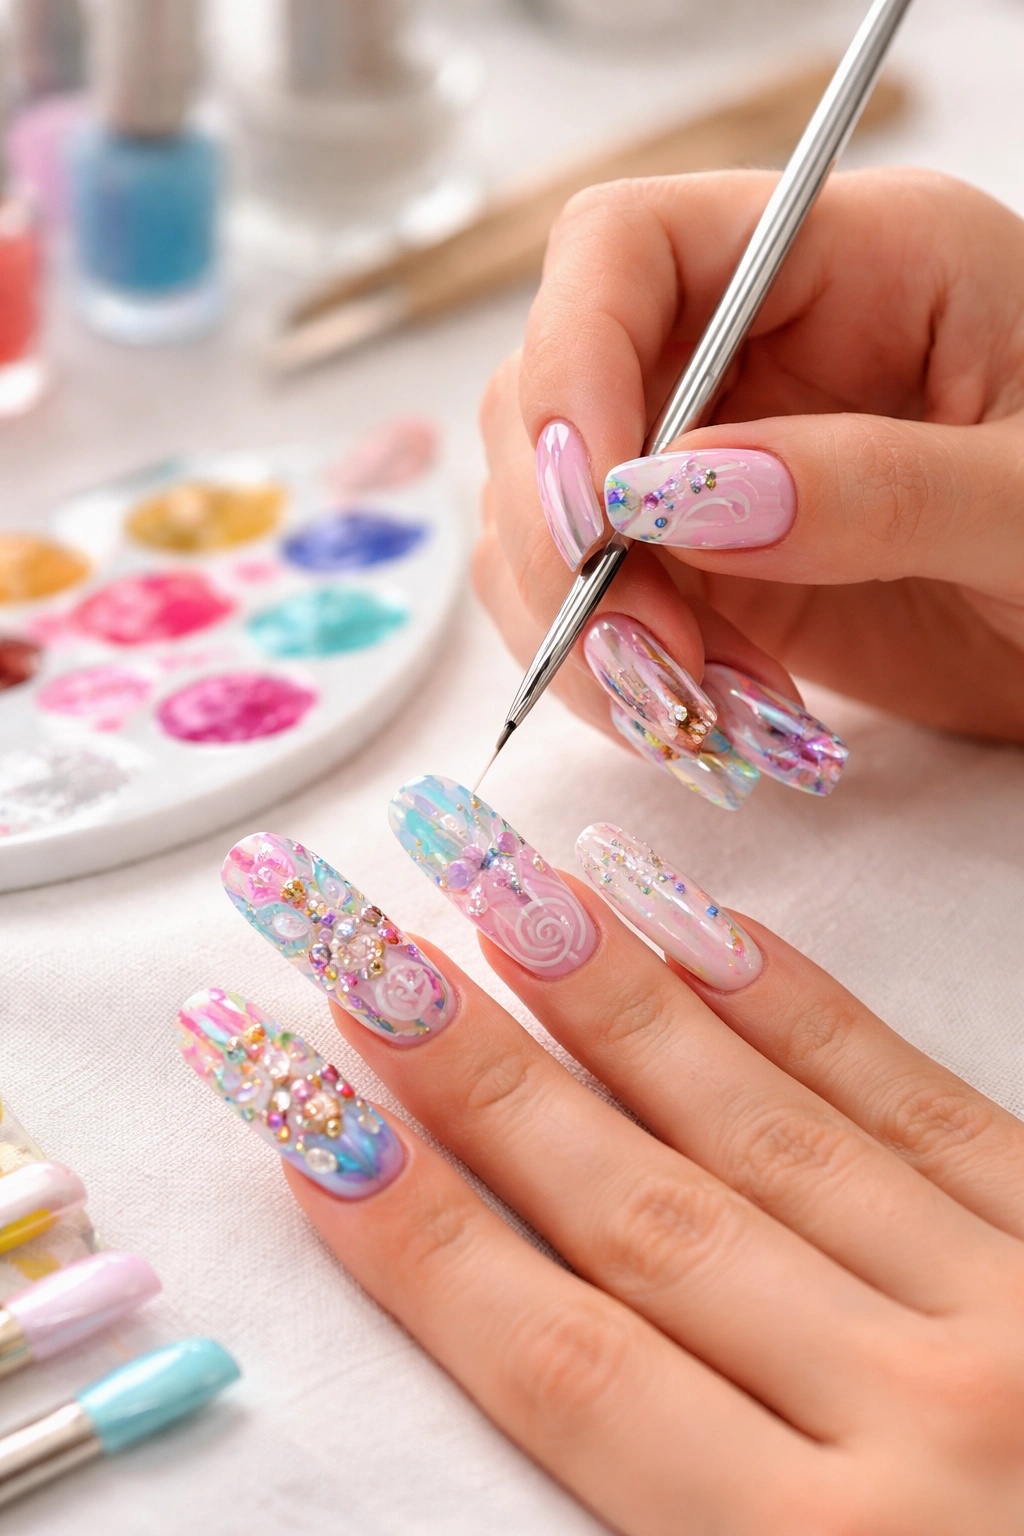
Freestyle design success depends less on technical perfection and more on developing a comfortable relationship with your tools and understanding how different techniques create different effects. Building confidence in your freestyle work happens through repetition and experimentation, not through watching tutorials until you feel ready — the actual doing builds skill far more effectively than passive watching ever could.
Invest in a quality thin brush and a few essential colors that work across multiple designs. You don’t need an overwhelming collection of nail art supplies — a thin striping brush, a medium detail brush, a fine dotting tool, and a handful of versatile colors (black, white, a few accent colors) covers nearly everything. Quality tools matter because cheap brushes shed bristles, hold less polish, and make precision extremely frustrating.
Practice on a nail wheel or even on paper before applying designs to your actual nails. This reduces anxiety about “wasting” a manicure and builds your confidence with brush control. Many people find that practicing on paper actually translates more effectively to nail application than practicing on artificial nail tips, since actual nails have a different curve and surface texture.
Allow generous drying time between layers — rushing this step is the single most common reason freestyle designs look muddy or smudged. Set a phone timer if you need to, and step away from your nails while layers cure rather than hovering and tempted to touch them before they’re fully dry.
Common Mistakes to Avoid
The most common mistake in freestyle duck nails is applying polish too thick, which not only extends drying time but also creates visible brush strokes, texture, and an unpolished appearance. Two thin layers always look better than one thick layer — resist the temptation to load your brush heavily and instead apply multiple thin coats.
Another frequent misstep is over-blending or over-manipulating areas that should remain distinct. Once you’ve placed color, step back and assess before adding more — many people instinctively try to fix or blend areas that actually look fine, inadvertently making the design worse. Freestyle art often improves when you show restraint and allow elements to remain slightly separated.
Choosing colors that don’t actually work well together is easy to do when you’re excited about trying multiple hues. Before committing to a multi-color design, hold the bottles up to each other in natural light and verify that the combination genuinely appeals to you rather than just grabbing colors that seem interesting in isolation. Colors behave differently on nails than they do in the bottle.
Attempting overly ambitious designs before building foundational skills with simpler patterns is another common pitfall. Start with ombré, swirls, and simple shapes before attempting complex multi-color hand-painted scenes. Building confidence with basic techniques makes more complex designs feel manageable rather than overwhelming.
Final Thoughts
Freestyle duck nails celebrate personal expression and artistic experimentation, offering permission to move beyond rigid templates and embrace designs that feel authentically yours. The elongated duck nail shape provides the perfect canvas for these designs, offering enough surface area for complexity while remaining practical for daily wear.
The skill of freestyle nail art develops through trying, through accepting imperfection as part of the aesthetic, and through understanding that your mistakes often contribute character rather than ruin designs. Every nail artist you admire started exactly where you are, creating wobbly lines and muddy color blends before developing the confidence to trust their instincts and brush control.
Your freestyle duck nails don’t need to match professionally created designs or follow established tutorials perfectly. The designs that feel most special are the ones that reflect your creativity, your preferred colors, and your personal aesthetic — not the ones that replicate someone else’s exact vision. Start with one of these eleven ideas, adjust it to match your taste, and allow your nails to become a genuine reflection of your artistic personality.
