

Duck nails have become one of the most beloved nail trends, and for good reason—they’re stunning, versatile, and photograph beautifully. When you combine that soft ombre gradient with black as your base shade, you get an instantly elegant look that works for everything from casual weekends to formal events. Adding charms takes this trend to the next level, introducing dimension, personality, and that coveted luxury feel that makes people stop and ask about your nails.
The beauty of black duck nails is that they work with virtually any charm aesthetic you’re drawn to. Whether you love minimalist sophistication, vintage glamour, celestial vibes, or sparkly glam, there’s a charm combination that brings your vision to life. Black provides the perfect neutral canvas—it doesn’t compete with your charms; instead, it lets them shine while creating that polished, intentional contrast. The gradient effect means your nails catch light differently depending on the angle, making even understated charms look more dynamic and interesting.
What makes black duck nails truly special is how forgiving they are to work with. The color hides imperfections beautifully, the gradient can be as subtle or bold as you want, and charms automatically elevate the design without requiring intricate hand-painted details. This is a look that feels high-maintenance but is actually achievable at home if you have a steady hand and basic gel or acrylic supplies. Even if you’re not a nail art pro, there’s a design here that’ll feel achievable and stunning on your hands.
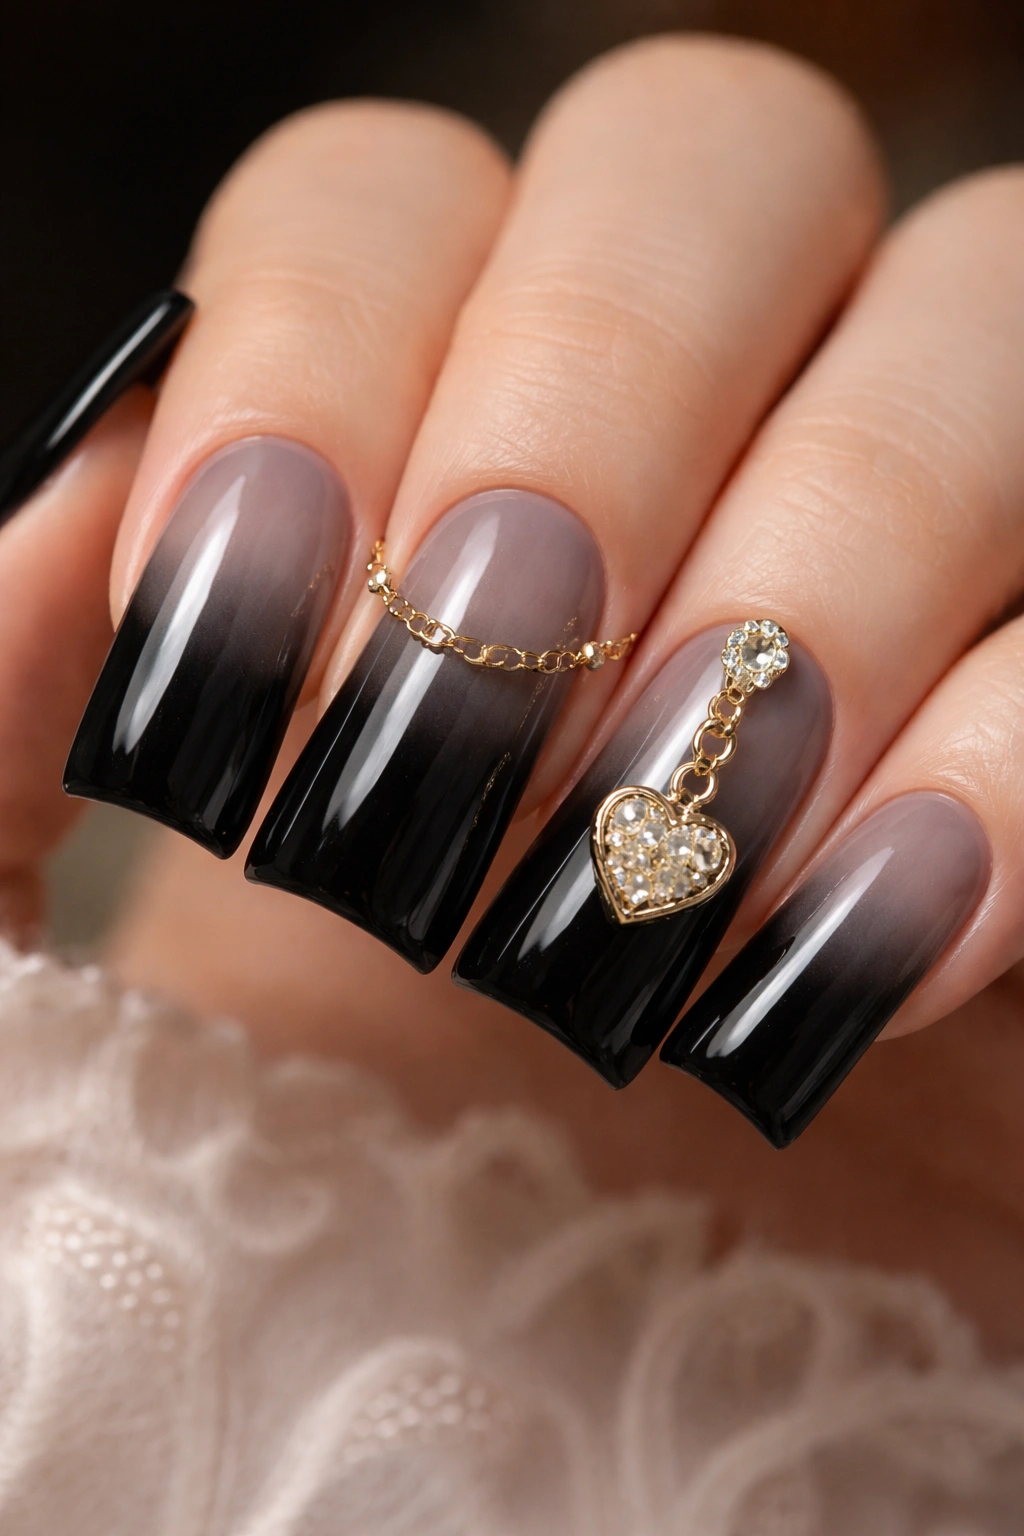
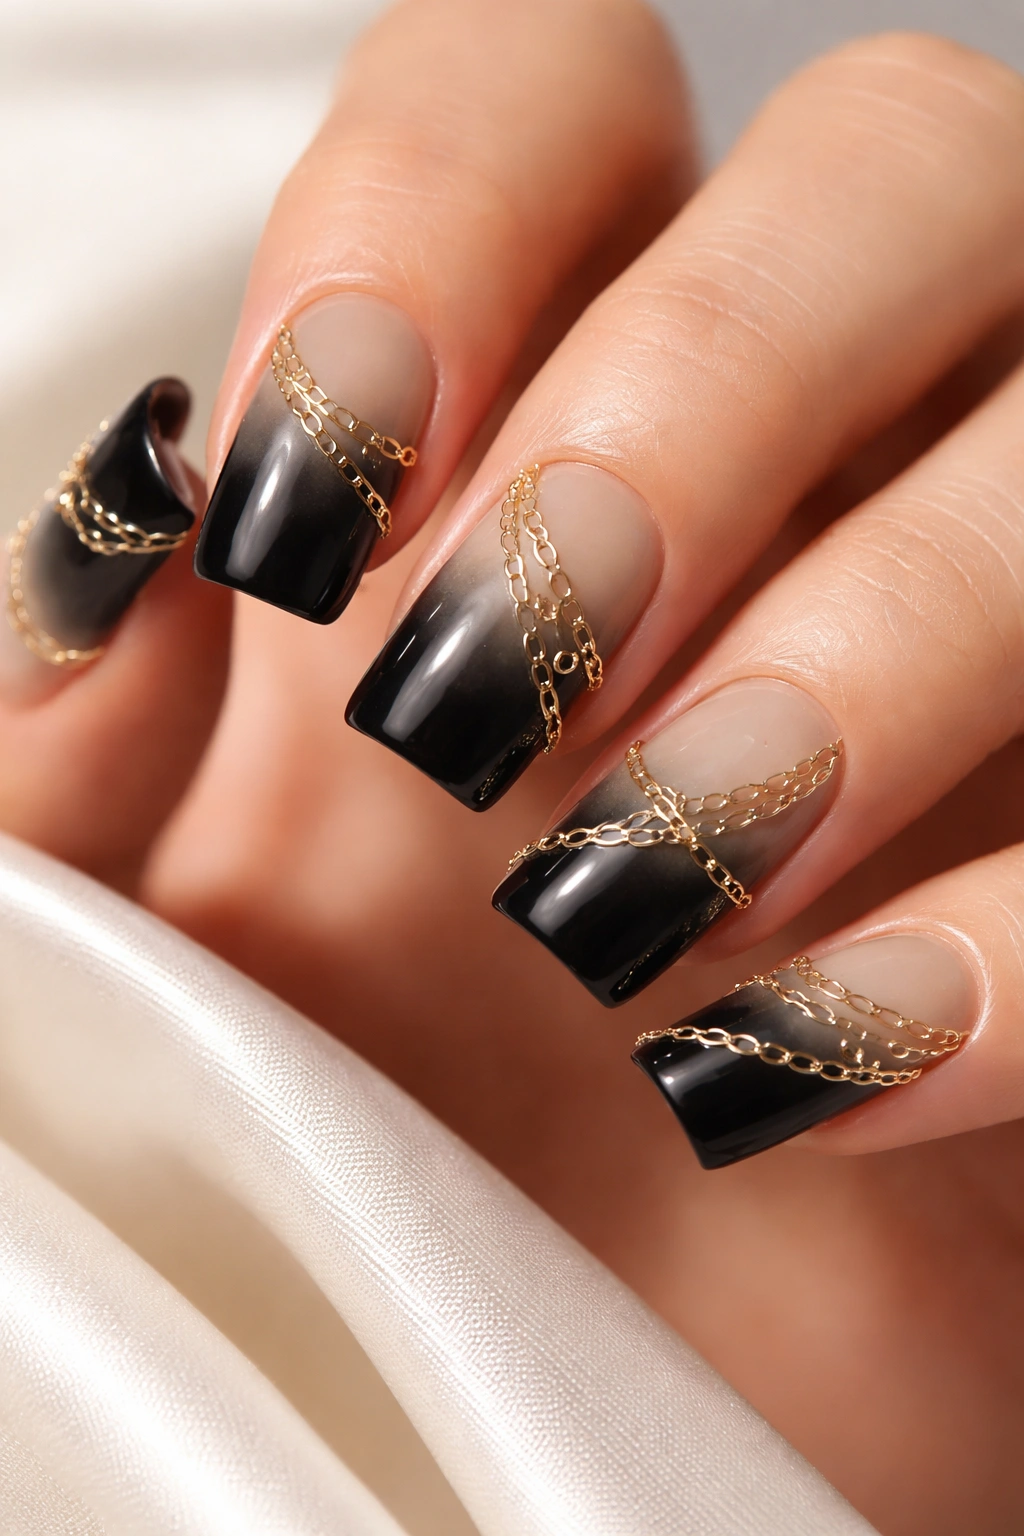
1. Gold Chain Link Charm Elegance
This design takes the sophistication of black duck nails and adds delicate gold chain links scattered across the nail surface. The chains don’t need to be uniform—random placement along the gradient actually looks more intentional and high-fashion. Use thin, dainty chain charms that don’t overwhelm the ombre effect; you want the chains to be a supporting detail that adds luxury rather than dominating the nail.
Why This Design Works
Gold chains create an instant luxury aesthetic that feels timeless rather than trendy. The metallic warmth against black creates striking contrast, and because chains have a three-dimensional quality, they catch light constantly. This design reads as both minimal and statement-making depending on how many chains you add and where you place them. It’s the kind of look that works whether you’re heading to brunch or getting ready for an evening out.
How to Execute It
- Start with a black base coat and create your ombre gradient (light gray at the tip, deepening to black at the base)
- Use nail glue specifically designed for charms and gems
- Place chain links randomly across 2-3 nails on each hand for balance
- Let the glue cure fully before touching anything
- Seal everything with a thick top coat to hold the charms secure
Pro tip: Slightly roughing up the back of each chain with a file helps the charm adhere better and last longer through daily wear.
2. Pearl Accent Drop Design
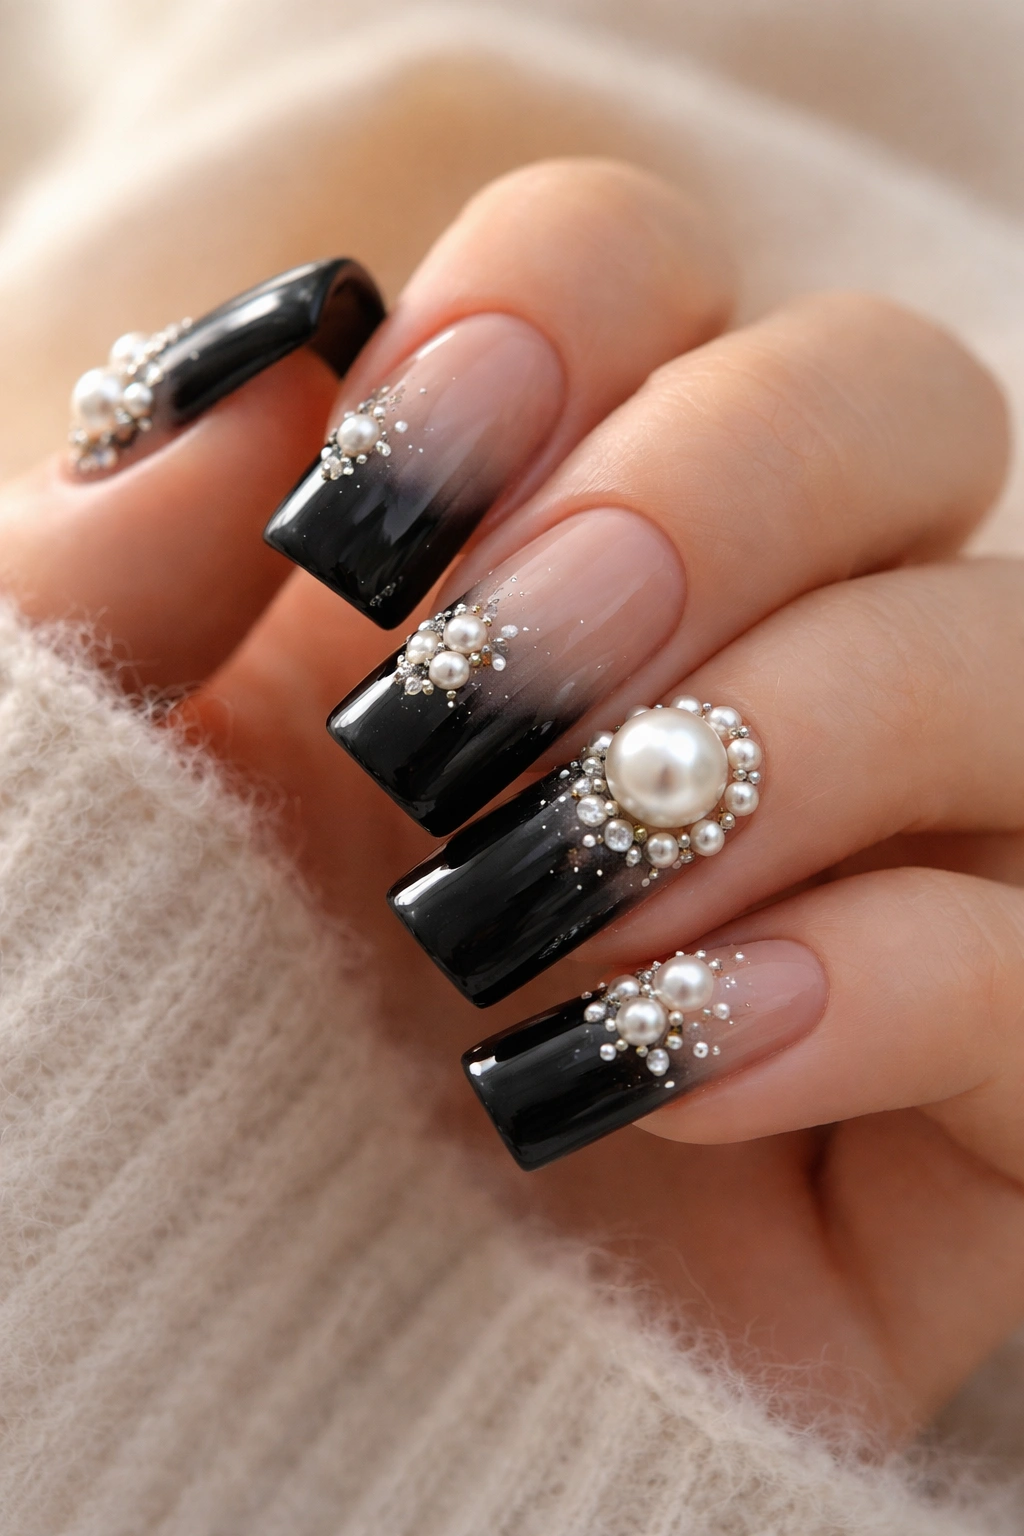
Pearl charms bring an entirely different energy to black duck nails—they soften the look while maintaining sophistication. Unlike sparkly rhinestones, pearls have a matte, lustrous quality that feels premium and understated. This design works beautifully with pearls of varying sizes, from tiny seed pearls clustered together to one statement pearl as a focal point on your ring finger.
The Aesthetic Appeal
Pearls against black create an almost vintage, old-money feeling. There’s something inherently elegant about this pairing; it doesn’t scream “trendy”—it whispers confidence. The pearlescent quality means pearls look different depending on the light and angle, so even when you’re not actively showing off your nails, they’re still eye-catching. This design particularly suits longer nails or almond shapes where pearls have more room to shine.
Design Placement Strategies
- Single statement pearl centered on the ring finger
- Small pearl trio clustered on the corner of the nail
- Scattered tiny pearls creating a constellation effect
- Line of pearls following the gradient transition
- Pearl at the cuticle area with gradient flowing toward bare tips
Worth knowing: Genuine mother-of-pearl charms last longer and look more luminous than synthetic pearl-look charms, though they do cost slightly more.
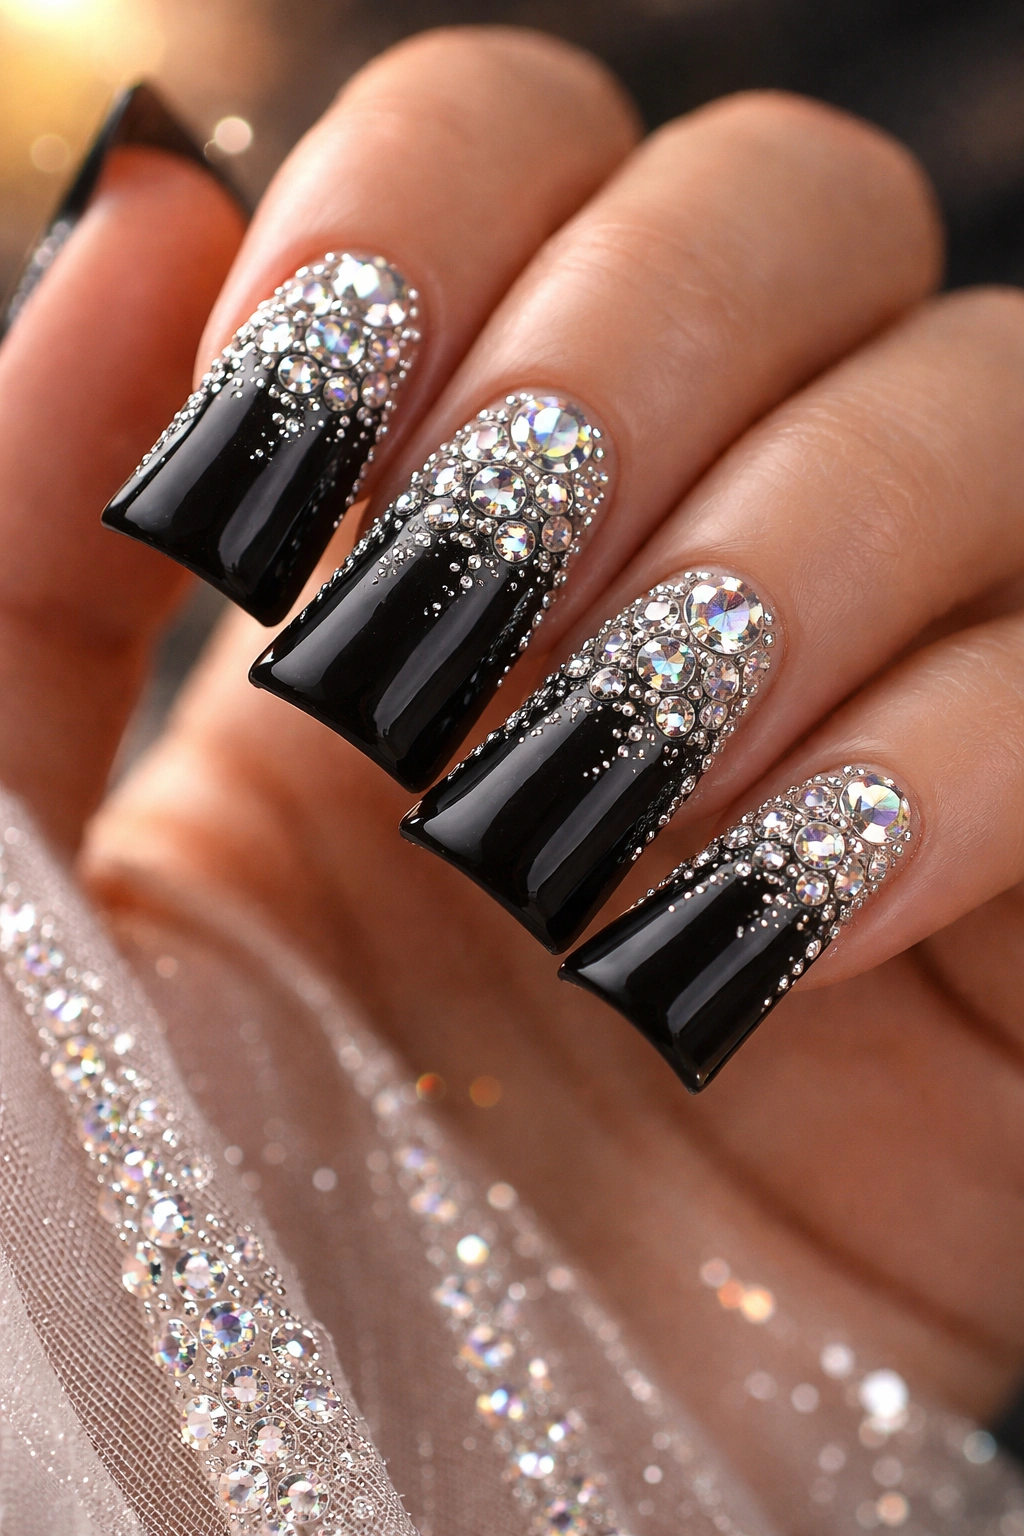
3. Crystal-Studded Gradient Cascade
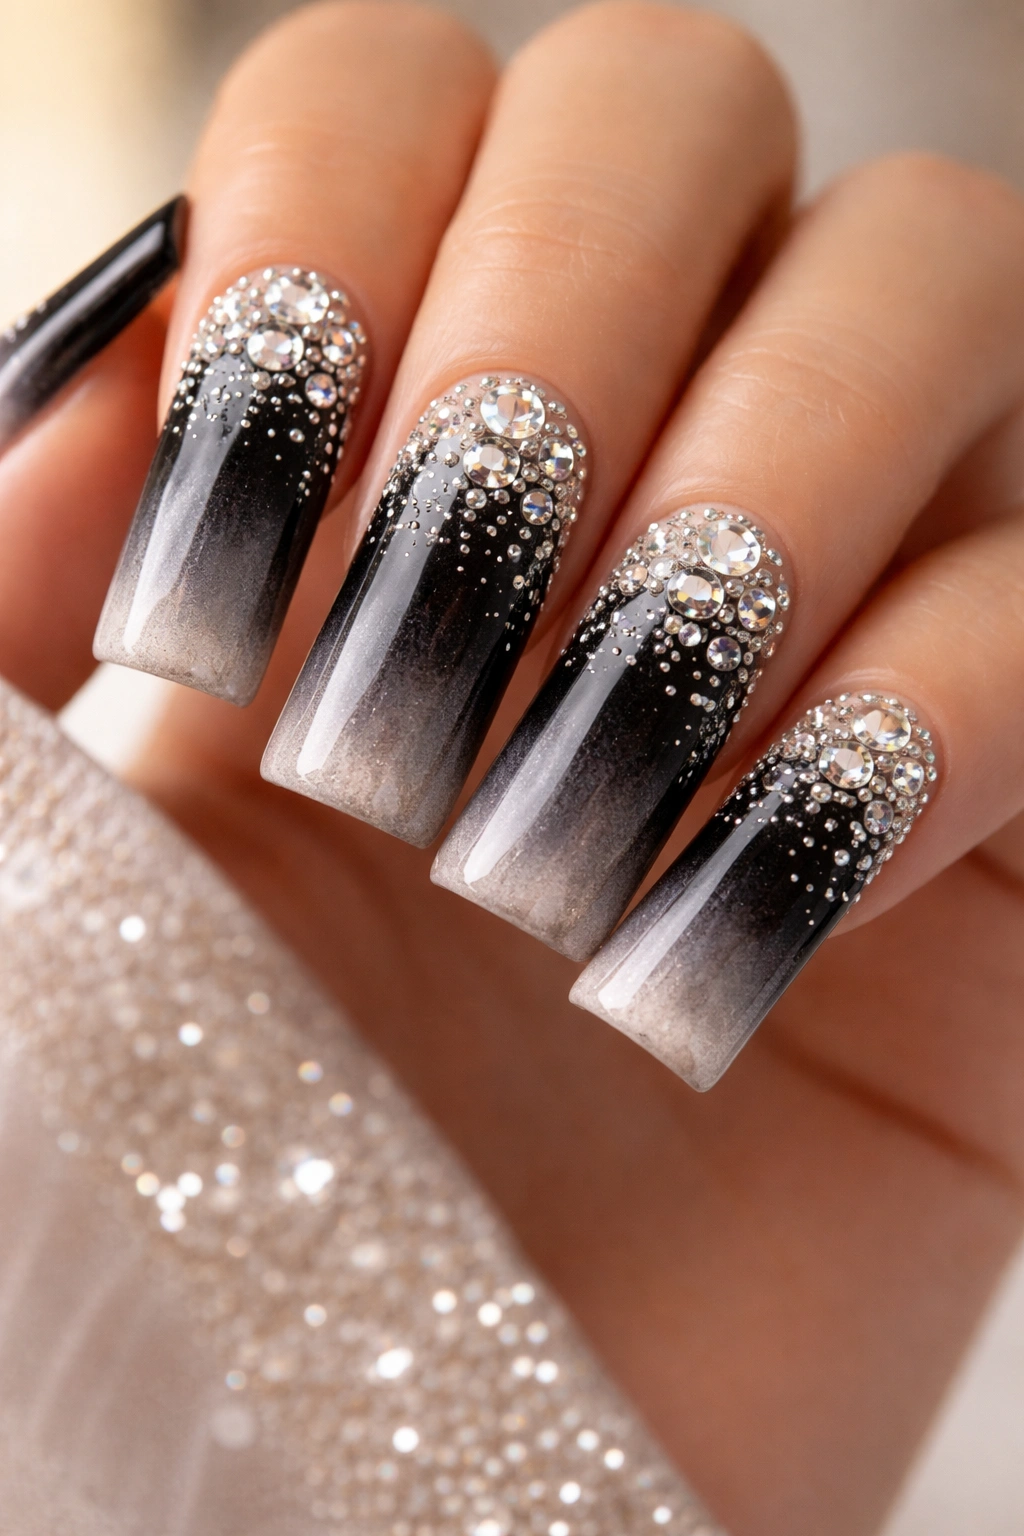
For maximum sparkle without overwhelming the design, studded crystals in a graduated pattern create that cascade effect. Start with larger crystals clustered near the cuticle, then gradually use smaller crystals as you move toward the tip. This creates visual movement and makes the gradient effect even more pronounced. The crystals catch light as they get smaller, almost like a diamond waterfall effect.
Building the Cascade Effect
The key to this design is varying the crystal sizes intentionally. Use AB crystals or clear crystals that reflect light beautifully and complement black perfectly. The cascade approach means your nails look intentionally designed rather than randomly decorated. This is a great design if you want maximum sparkle but still want to maintain that sophisticated duck nail gradient as the star of the show.
Crystal Arrangement Guide
- Row one: 5-7 larger crystals (3-4mm) near the base
- Row two: 3-4 medium crystals (2-3mm) in the mid-nail
- Row three: 2-3 small crystals (1-2mm) closer to the tip
- Leave the very tip clear to maintain the ombre effect
- Stagger the placement so crystals don’t form a perfectly straight line
Insider note: Swarovski crystals hold their sparkle longer and reflect light more brilliantly than cheaper alternatives, making them worth the investment for a design this visible.
4. Glitter Ombre Charm Blend
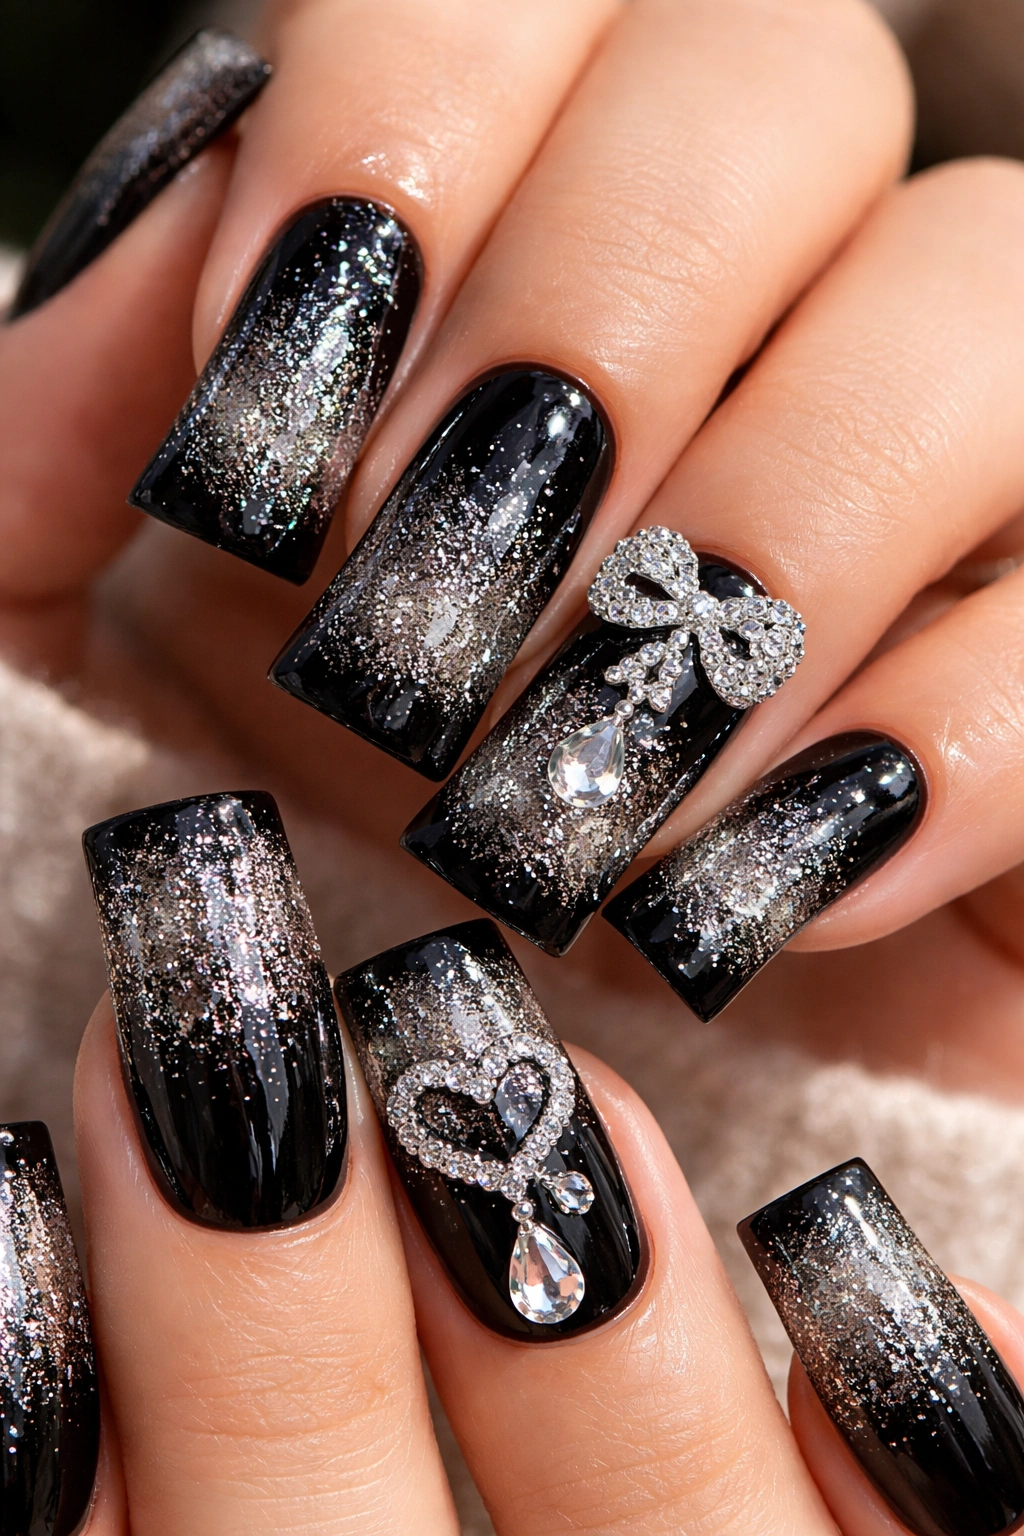
This design blends glitter directly into your duck nail gradient, then adds strategic charms for extra dimension. Instead of a smooth ombre, you’re creating texture with fine glitter that transitions from heavy concentration at the base to barely-there sparkle at the tip. Add 2-3 statement charms on accent nails to break up the glitter pattern and give the eye a focal point.
Creating the Glitter Gradient
Use loose or gel glitter in gold, silver, or holographic finish. Apply your base black, then use a sponge to dab glitter-mixed top coat onto the base, gradually reducing the amount as you sponge toward the tip. This creates that gradient effect naturally. The charms then sit on top, anchoring the design and adding jewelry-like detail that the glitter alone can’t provide.
Glitter and Charm Combination Ideas
- Gold glitter base with small gold star charms scattered across
- Holographic glitter gradient with clear crystal charms
- Silver glitter ombre with tiny moon and star charms
- Champagne glitter blend with delicate gold filigree charms
- Rose gold glitter fade with small heart charms on accent nails
Quick fact: Gel glitter tends to look more refined and lasts longer than loose glitter, which can shed even with a top coat. If budget allows, gel glitter is worth the upgrade.
5. Floral Charm Accent Pattern
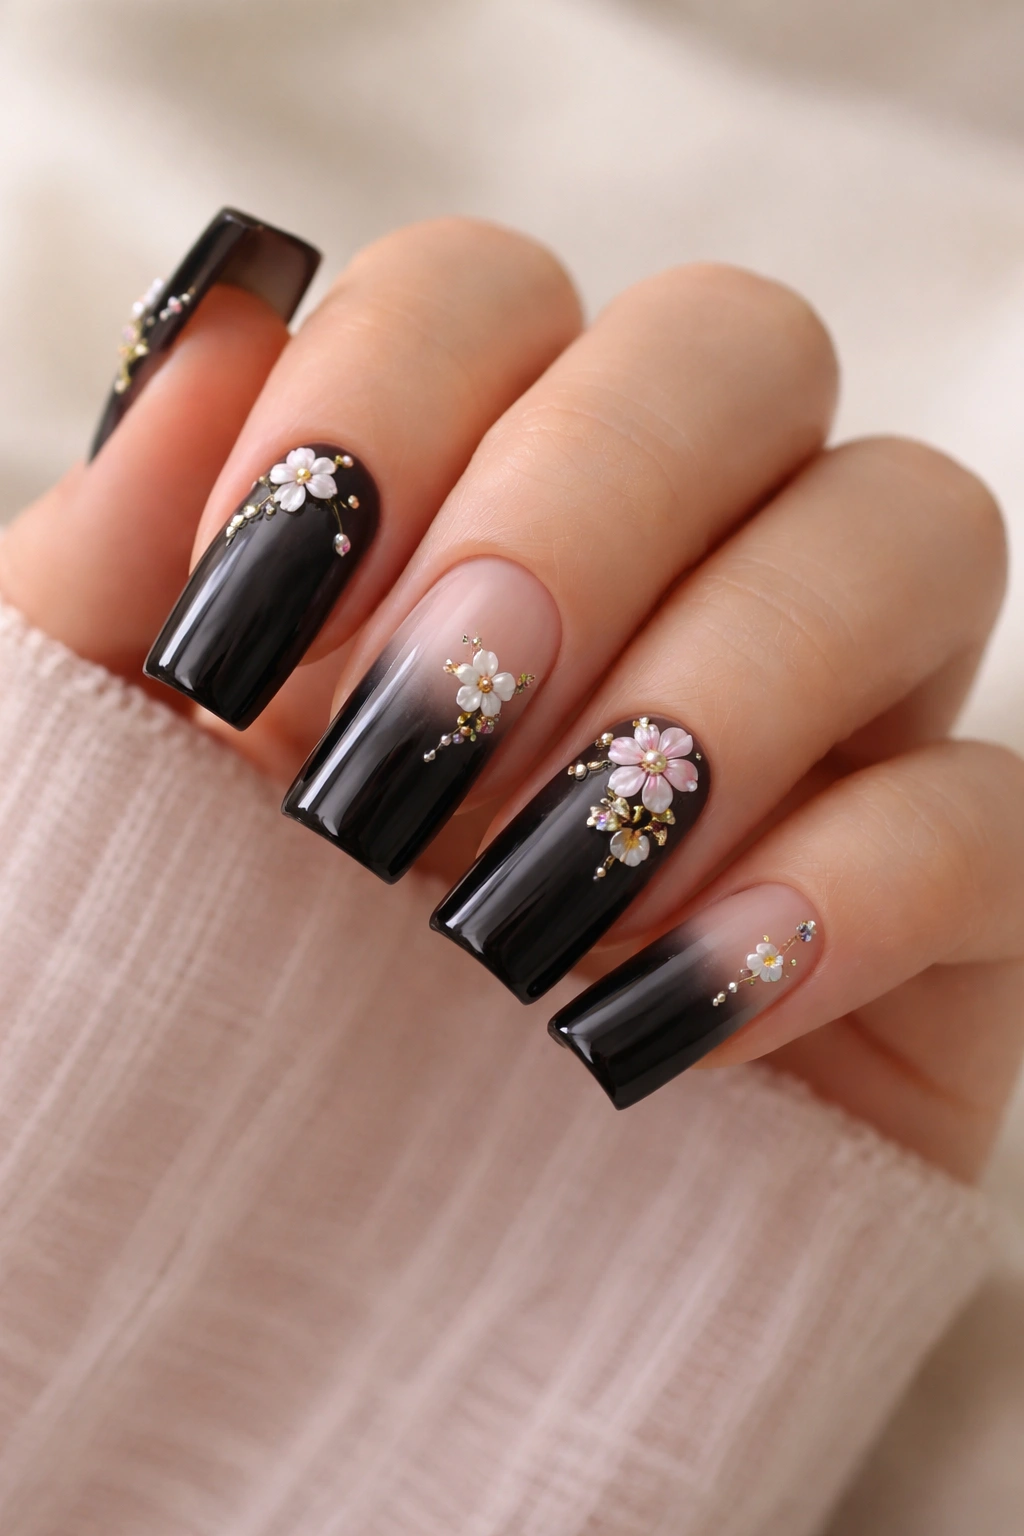
For those who love nature-inspired aesthetics, tiny floral charms create a romantic, garden-inspired look on black duck nails. Small rose, leaf, or wildflower charms scattered delicately across your nails add visual interest while maintaining the sophistication of the black gradient. This design works especially well if you’re pairing it with coordinating outfits or jewelry with floral themes.
Balancing Floral Elements
The key to making floral charms work on duck nails is spacing. You don’t want your nails to look like a flower garden—instead, aim for strategic placement that creates visual balance. A single charm on your accent finger, then one or two scattered on neighboring nails creates that intentional-looking asymmetry that reads as designed rather than accidental. The black ombre becomes the backdrop that lets your delicate charms stand out.
Floral Charm Placement Options
- One rose charm centered on ring finger, wildflower charms scattered on two other nails
- Tiny leaf charms following the gradient line across all nails
- Three-charm cluster on one accent nail, none on others
- One large floral charm as a statement, balanced with smaller leaf details
- Charms on alternating nails for asymmetrical balance
Pro tip: Enamel floral charms tend to have better detail and durability than resin versions, especially if you use your hands actively throughout the day.
6. Celestial Moon and Star Charm Design
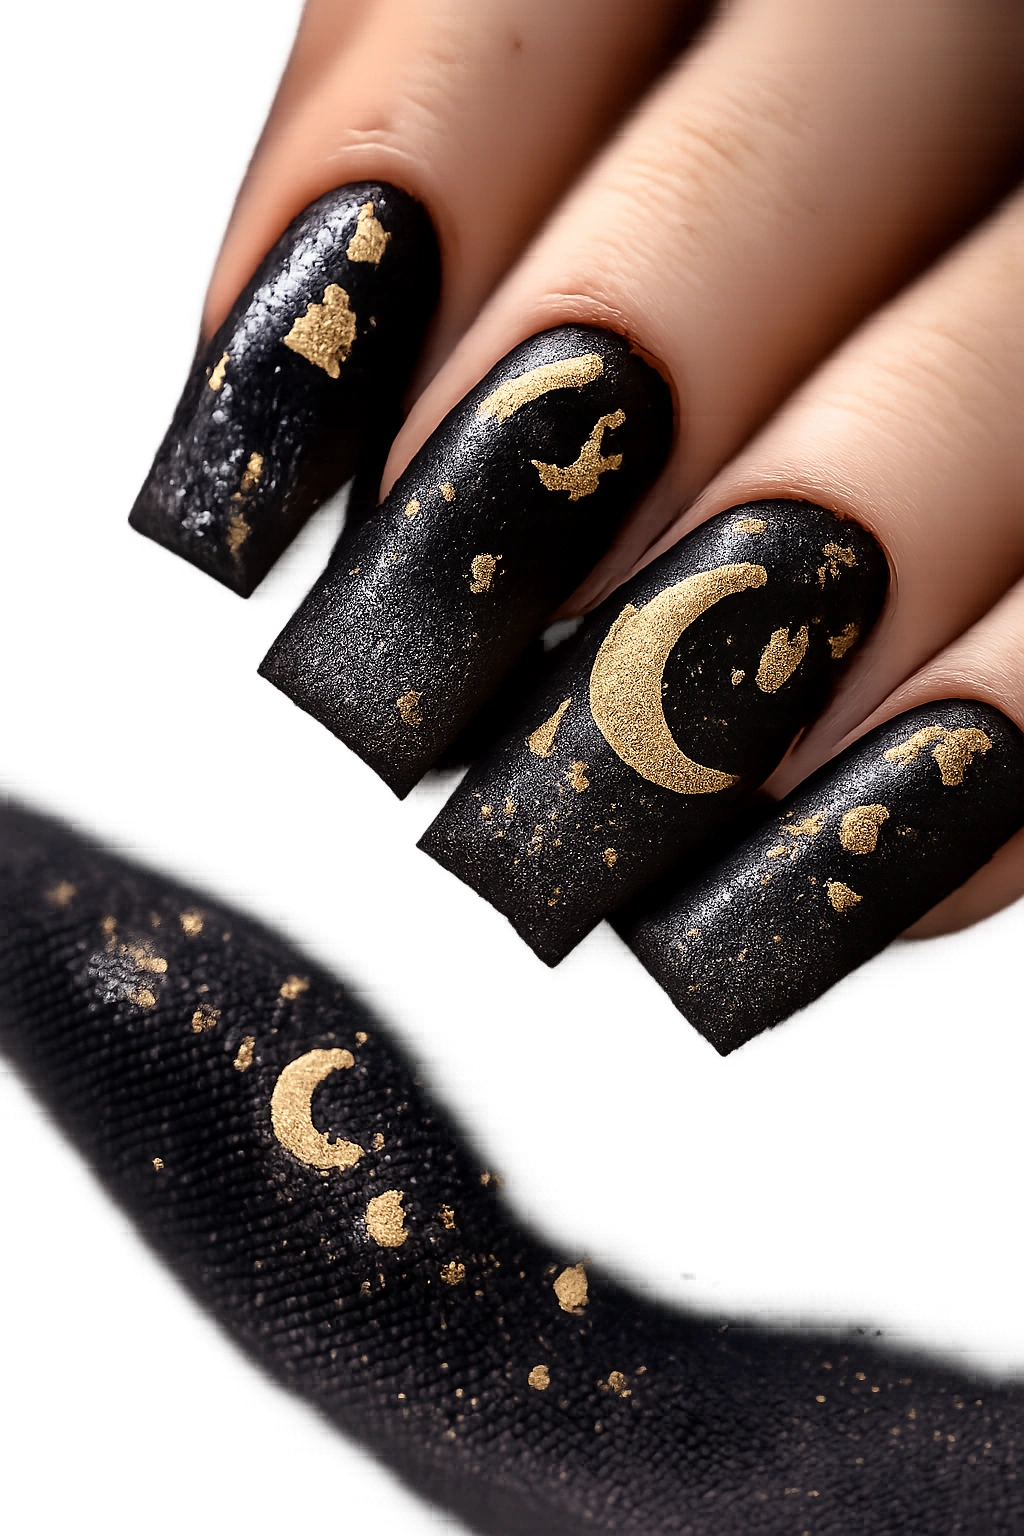
Black provides the perfect night-sky backdrop for celestial charms. Tiny moon and star charms scattered across your gradient create a mystical, dreamy aesthetic that’s surprisingly versatile. Mix crescent moons, full moons, and multi-pointed stars in gold or silver finishes, and suddenly your nails tell a story of night skies and cosmic wonder.
Arranging the Celestial Theme
The beauty of celestial designs is that they’re naturally balanced through asymmetry. A few moons and stars scattered across your hand look intentional and artistic rather than random. Consider placing a larger moon charm as a statement on one accent nail, then distributing smaller stars across your other nails. This creates focal points while maintaining the overall cohesive design.
Celestial Charm Combinations
- Gold crescent moon on ring finger with tiny gold stars on two other nails
- Mix of silver and gold charms for a gradient night-sky effect
- Three-charm cluster featuring one moon and two stars
- Moons on one hand, stars on the other for symmetrical balance
- Varying moon phases (crescent, half, full) across multiple nails
Worth knowing: Enamel celestial charms in gold finishes tend to complement black better than silver, though this is entirely personal preference. Silver works beautifully too—test both if you’re unsure.
7. Geometric Charm Mixed Metal Design
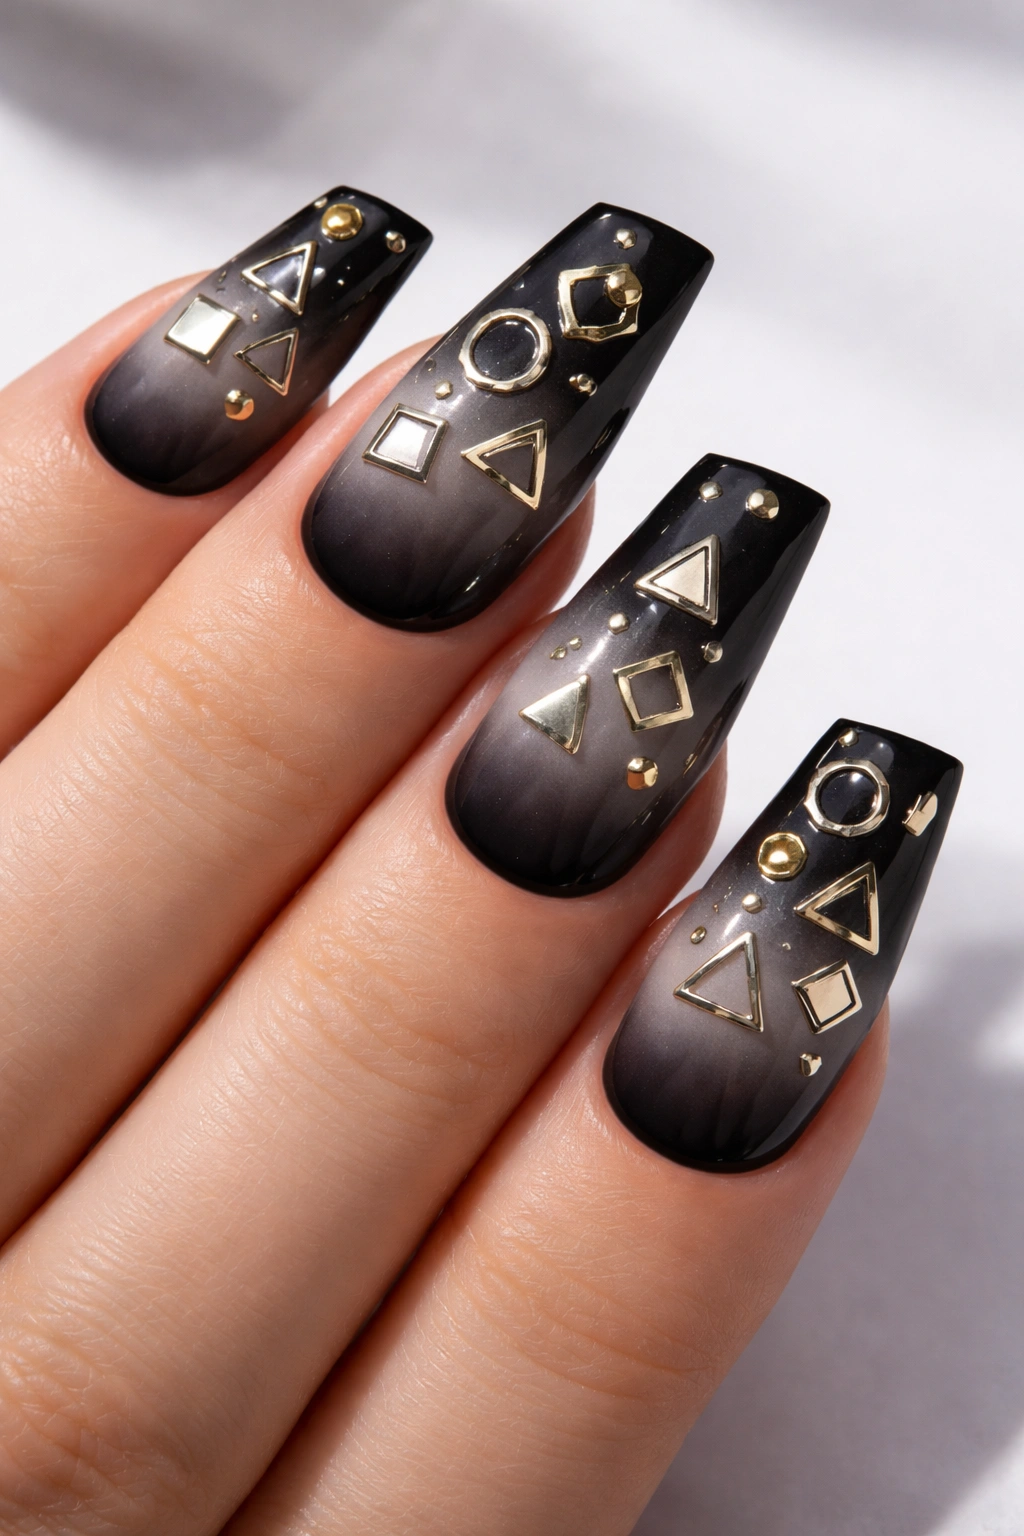
Geometric charms like tiny triangles, squares, circles, and hexagons create an ultra-modern aesthetic against black duck nails. By mixing metals—gold and silver together—you add visual interest and an intentional, edgy vibe. This design appeals to anyone who loves contemporary, minimalist style but wants their nails to make a statement.
Balancing Multiple Geometric Shapes
The key to making mixed geometric charms work is creating a rhythm to your placement. You might alternate shape types across your nails, or cluster one shape per nail with mixed metals. The black gradient becomes a sophisticated backdrop that lets your charms be the focus without overwhelming them. This design particularly suits angular nail shapes like stiletto or coffin shapes where the geometry is already emphasized.
Geometric Charm Arrangement Ideas
- Alternating gold triangles and silver circles across nails
- Gold hexagons on one hand, silver squares on the other
- Cluster of mixed shapes (triangle, circle, square) on accent nail only
- Vertical line of geometric charms following the gradient
- Each nail features a different single shape repeated twice
Quick fact: Stainless steel geometric charms resist tarnishing better than some other metals and look sharp for months, making them ideal for geometric designs.
8. Gold Leaf Accent Detail
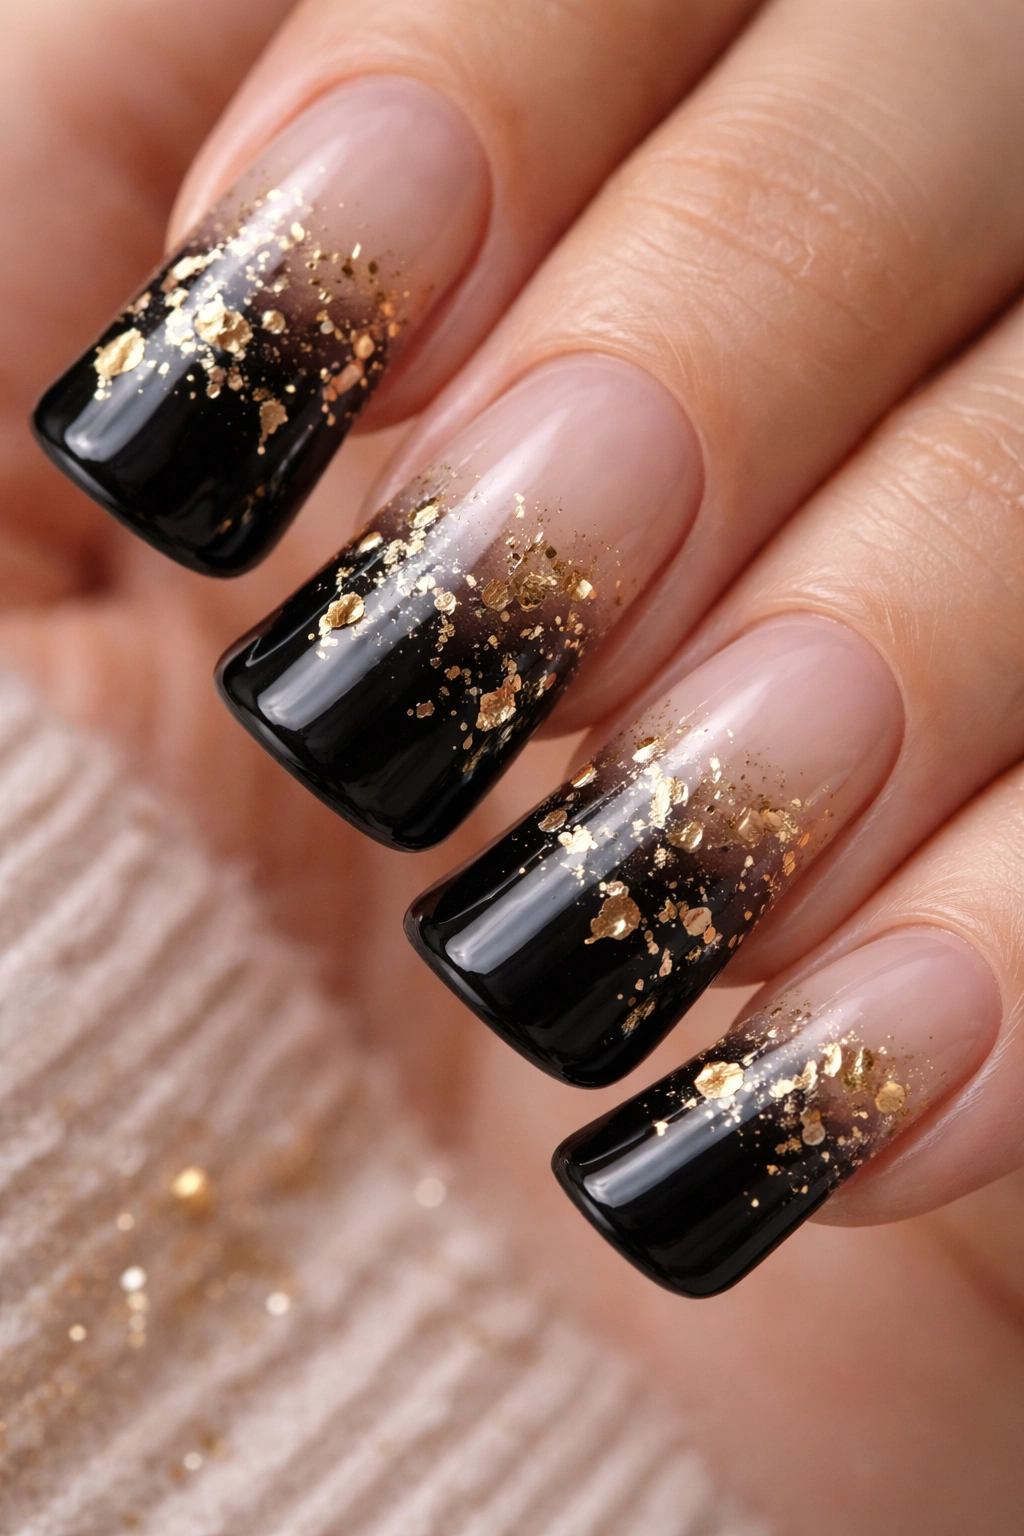
Instead of traditional charms, ultra-thin gold leaf flakes scattered across your black duck nails create an organic, luxe effect. This design blends the minimalism of duck nails with the richness of gold accents. Layer the leaf carefully for that imperfect, artisanal look—you’re aiming for “accidentally gorgeous” rather than “meticulously placed.”
Creating the Gold Leaf Effect
You have two approaches here. Either apply gold leaf directly to wet top coat (it’ll set as the coat dries) or use gold leaf pieces embedded in clear gel. The second method gives longer-lasting results. Apply your base black, create your gradient, then carefully place small torn pieces of gold leaf across your nails before sealing with top coat. The organic shape of torn leaf creates more visual interest than perfectly cut pieces.
Gold Leaf Application Techniques
- Small pieces randomly scattered across all nails
- Concentrated clusters on accent fingers only
- Following the gradient line with a trail of gold leaf
- Subtle pieces in corners and cuticle area
- Larger pieces on some nails, tiny flecks on others for variety
Pro tip: Applying a sticky base coat before placing gold leaf helps it adhere better and last through daily wear without peeling.
9. Diamond Dust Crystal Effect
Create an ombre effect using diamond dust or crushed crystal pieces mixed directly into your gradient base. This is different from glitter—diamond dust creates a textured, dimensional surface that catches light in a completely different way. Adding small crystal charms on top creates a layered luxury effect that looks almost jeweled.
Layering Diamond Dust for Impact
Apply your black base, then mix diamond dust into gel or acrylic as you apply your gradient. Concentrate the dust heavily at the base, reducing it as you approach the tip. Once this base is set, add strategic crystal charms—perhaps a statement charm on your ring finger and smaller accents elsewhere. The combination of textured dust and shiny charms creates sophisticated depth.
Diamond Dust and Charm Layering Ideas
- Heavy diamond dust base with small round crystals scattered on top
- Diamond dust ombre with single statement oval charm as focal point
- Mix fine and coarse diamond dust for texture variation, add tiny crystal accents
- Diamond dust concentrated on tips, larger crystals at the base
- Dust on three nails, charms as anchors on two accent nails
Worth knowing: Diamond dust costs more than glitter but lasts longer and looks distinctly more upscale. For a design this detailed, the investment pays off in longevity and appearance.
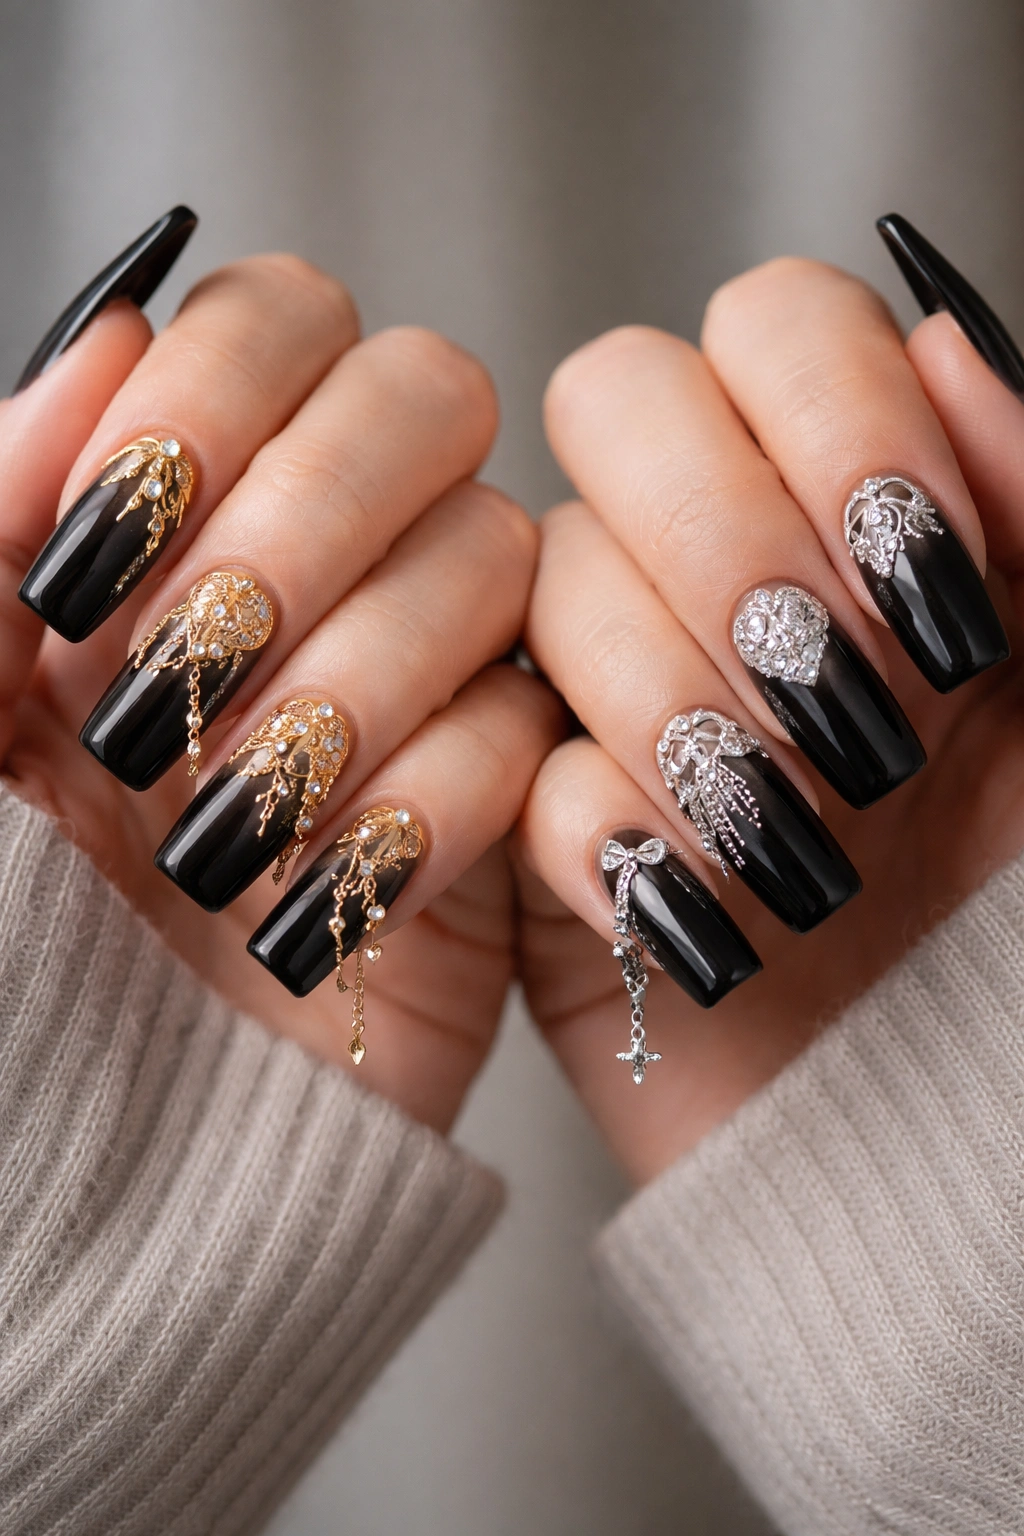
10. Vintage Chain and Locket Charm Design
Channel old-world elegance with tiny vintage-style chain charms paired with miniature locket or pendant details. This design has a romantic, heirloom quality that feels intentional and thoughtful. It works beautifully if you appreciate antique jewelry aesthetics or Victorian-inspired beauty.
Creating Vintage-Inspired Balance
The key to vintage chains and lockets is not overdoing it. A single delicate chain spanning across one nail with a tiny pendant, then perhaps one small locket charm on an accent nail creates that refined, collected-jewelry feel. The black gradient provides a dramatic backdrop that makes vintage details pop. This design suits longer nails where the charms have visual space to breathe.
Vintage Charm Placement Strategies
- Single chain with tiny locket pendant on ring finger
- Chains on two nails, one locket as statement charm on ring or pinky
- Mixed chain styles with one focal locket charm
- Cluster of small vintage charms on accent nail only
- Delicate chain at base with locket charm at cuticle area
Insider note: Antique-finish or patina-look charms read more authentically vintage than shiny new-looking pieces. Look for oxidized gold or silver finishes rather than bright metallics.
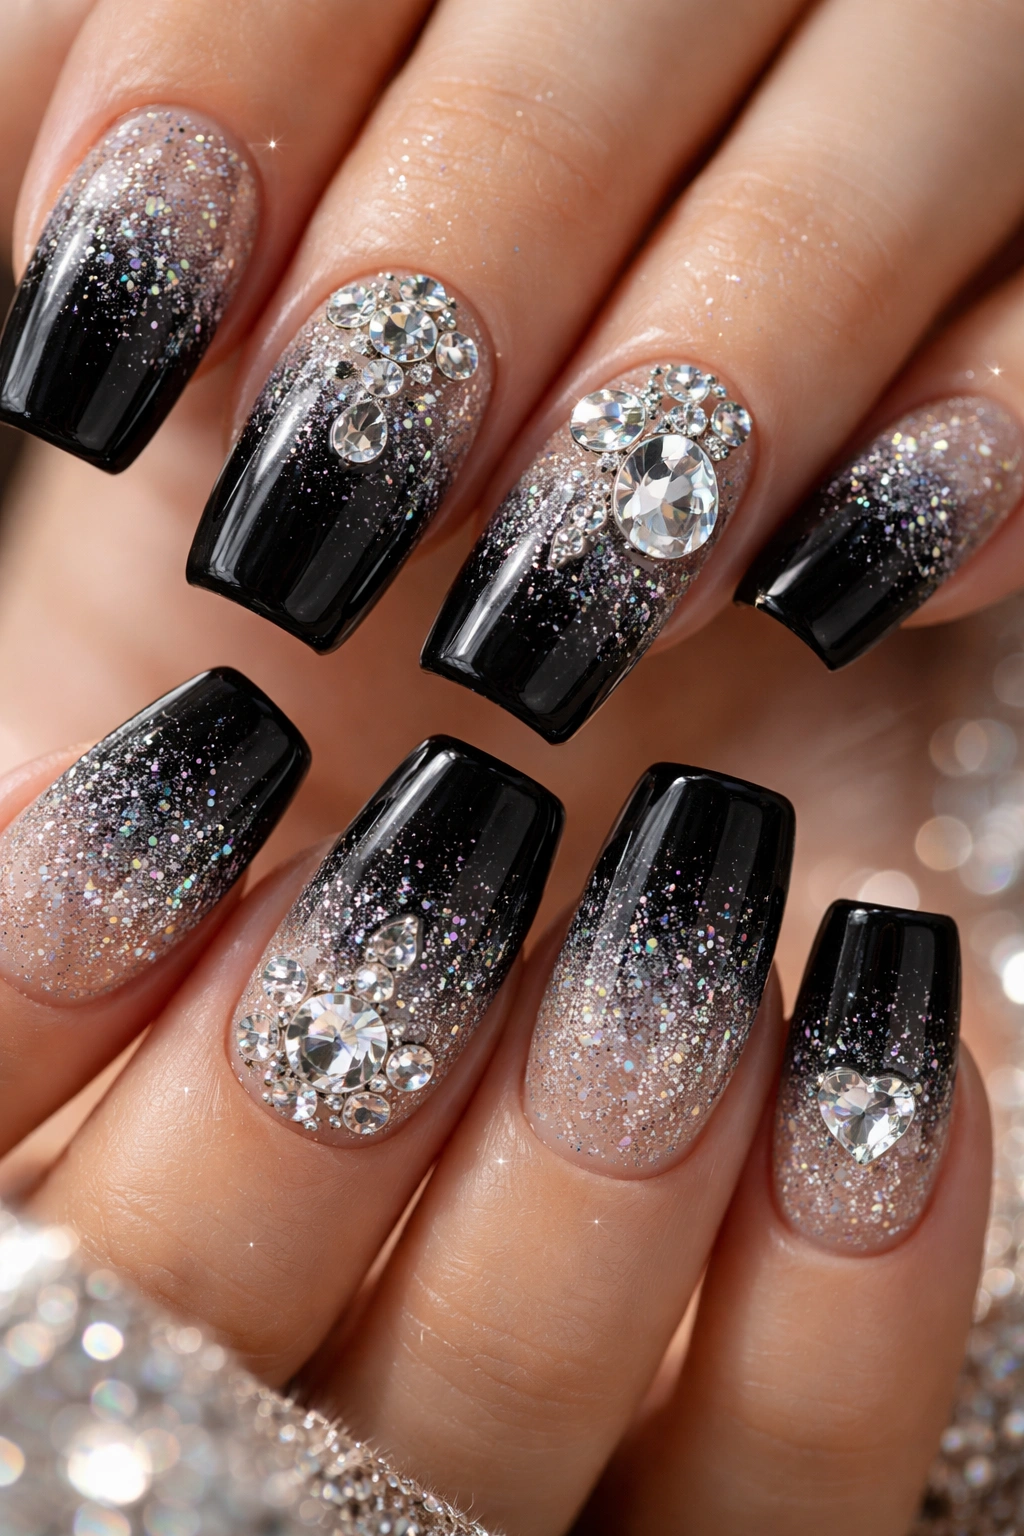
11. Rhinestone Cascade Luxury Design
Rhinestones are the classic nail charm, and for black duck nails, they create undeniable glamour. This design uses the cascade technique—larger rhinestones clustered at the base, graduating to tiny rhinestones toward the tip. The effect is that of jewelry draped across your nails, creating a cohesive luxury aesthetic.
Creating the Rhinestone Waterfall
Start with larger rhinestones (4-5mm) near the cuticle area, then layer progressively smaller stones as you move toward the tip. This creates visual movement and emphasizes your ombre gradient. Use AB finish rhinestones or clear stones that reflect light beautifully. The gradient effect naturally complements the sparkle cascade, making the design feel intentional and editorial.
Rhinestone Cascade Patterns
- Dense cluster of large rhinestones at base, sparse tiny stones at tip
- Every other nail features full cascade, others stay bare
- Diagonal cascade following the nail shape
- Concentrated on three accent nails, minimal on others
- Alternating sizes creating a rhythmic pattern
Quick fact: Swarovski rhinestones hold their sparkle and durability longer than cheaper glass alternatives. For a design this sparkly, premium rhinestones are genuinely worth the cost.
12. Minimalist Single Charm Focal Point
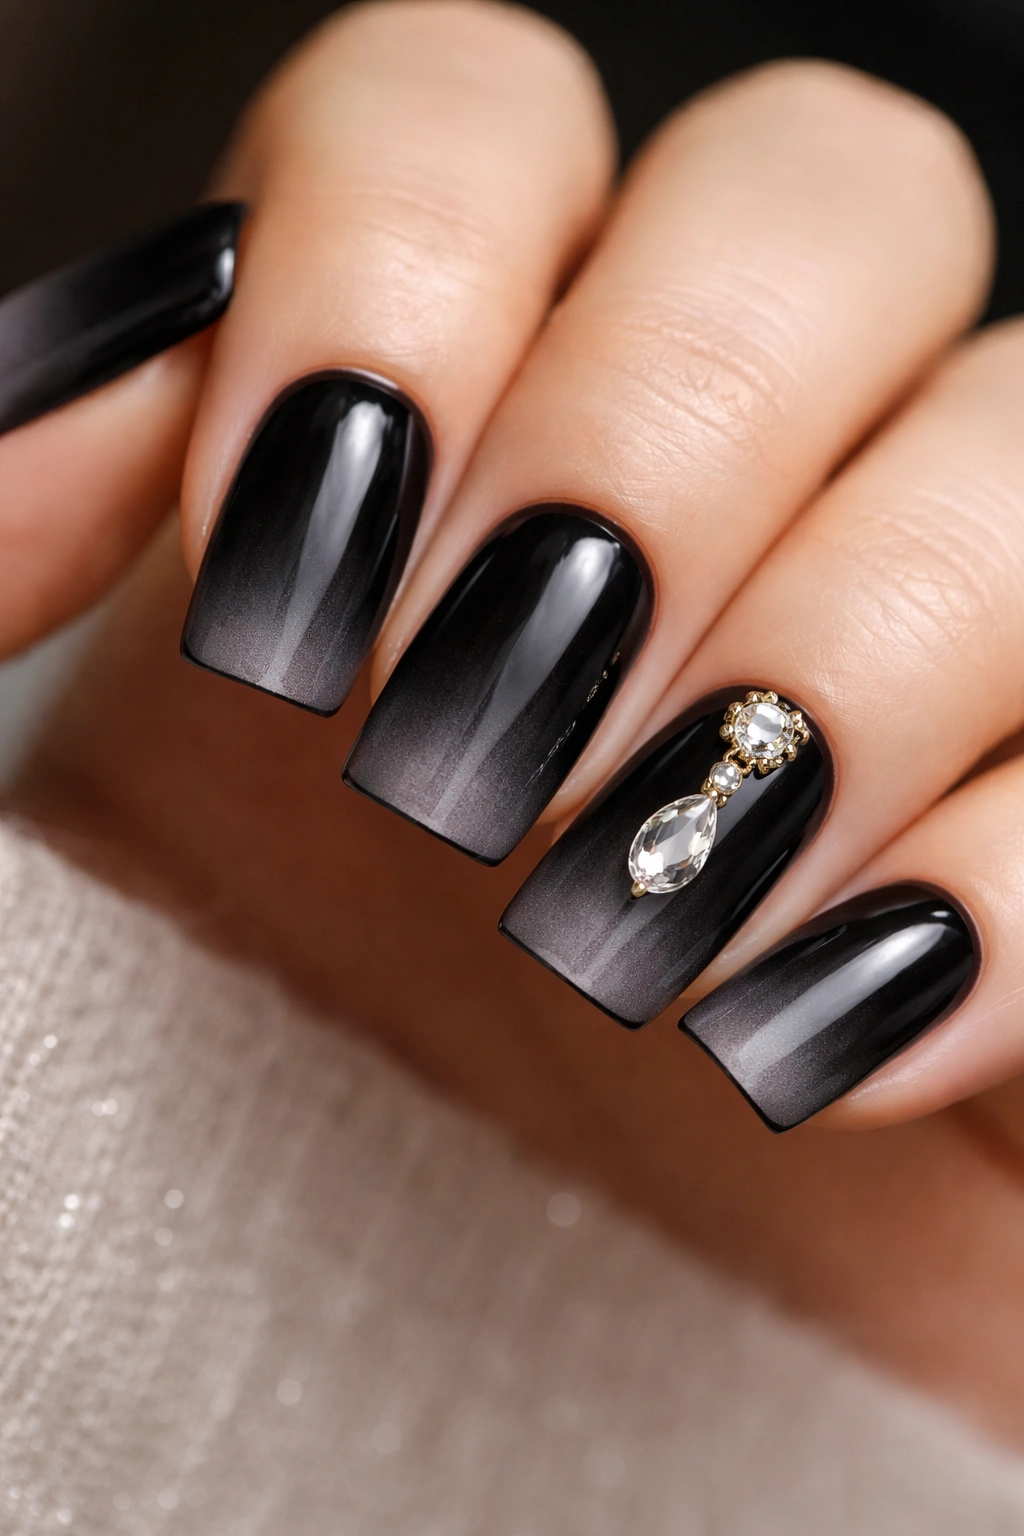
Sometimes less is more, and this design proves it. A single, exquisite charm on your ring finger nail becomes a statement piece when paired with the sophistication of black duck nails. This approach suits anyone who loves understated luxury and believes quality matters more than quantity.
The Power of Single Charm Simplicity
One perfect charm—whether it’s an ornate filigree piece, a delicate gemstone, or an elegant geometric shape—becomes the entire focus of your design. The black ombre gradient frames the charm, making it appear even more special. This design is ideal if you wear jewelry that’s detailed or statement-making; your nails complement rather than compete with your accessories.
Single Charm Statement Ideas
- Large oval crystal as ring finger centerpiece
- Delicate filigree charm in gold positioned at the nail center
- Single pearl as subtle luxury detail
- Small geometric charm (diamond, hexagon) as modern accent
- Ornate vintage locket as nostalgic focal point
Pro tip: Positioning your single charm slightly off-center often looks more intentional and interesting than perfectly centered placement.
13. Two-Tone Metal Charm Split Design
Create visual interest by using two distinctly different charm styles on each hand—gold charms on one hand, silver on the other. Or split your accent nails so that two feature gold charms and two feature silver. This approach creates sophisticated asymmetry that reads as designed and intentional rather than random.
Creating Balanced Two-Tone Impact
The black ombre doesn’t compete with either metal finish; instead, it lets both stand out individually. You might use delicate gold chains on one hand and crystal charms on the other, or geometric shapes in gold on one and filigree details in silver on the opposite hand. This design creates a cohesive look across both hands while maintaining visual variety and interest.
Two-Tone Charm Split Strategies
- Gold charms on right hand, silver on left
- Gold on accent fingers of both hands, silver on others
- Ring and middle finger gold, pinky and index silver
- Gold on three nails, silver on two per hand
- Gold chains on one hand, silver chains on the other
Worth knowing: Mixing gold and silver finishes sounds like it shouldn’t work, but against black, both metals complement each other beautifully while creating sophisticated contrast.
14. Pearl and Gold Luxury Blend Design
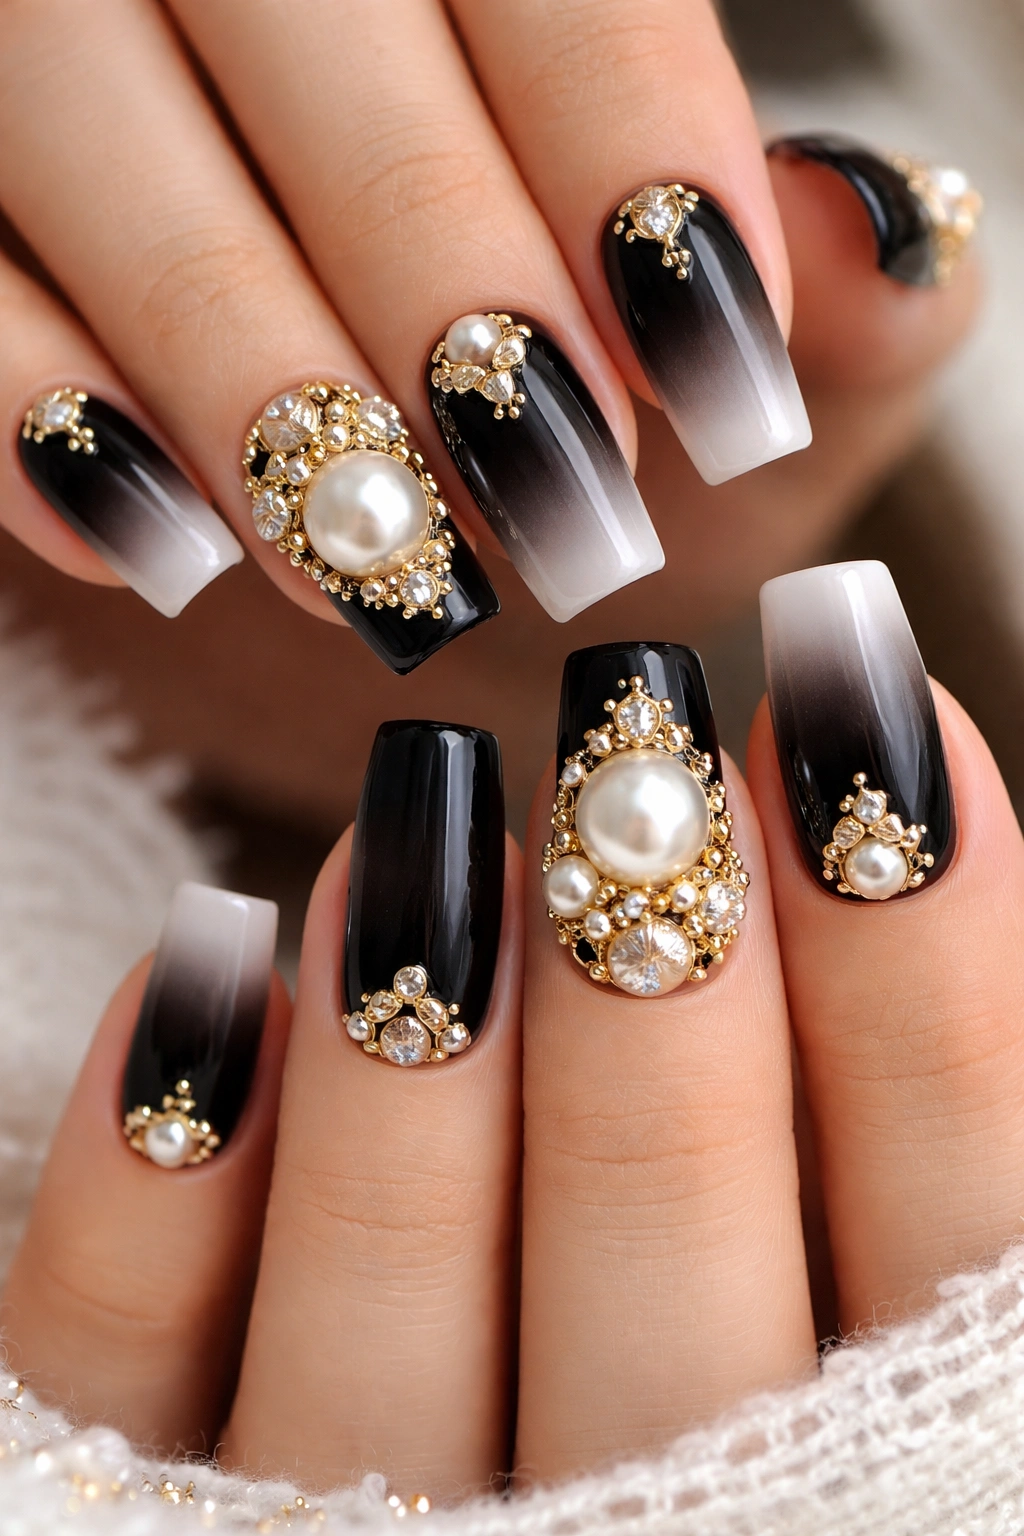
Combine the understated elegance of pearls with the warmth of gold charms for an ultra-luxe, timeless aesthetic. This design merges two different luxury elements into one cohesive look that feels expensive and refined. The pairing suggests confidence—you don’t need to prove you have style; you simply do.
Balancing Pearl and Gold Elements
Use larger pearls as statement pieces on accent nails, then scatter smaller gold charms across your other nails. Or reverse it—small pearls clustered together with one gold charm as the focal point. The black ombre provides a dramatic backdrop that elevates both elements. This design particularly suits classic, timeless style preferences and works across age groups and fashion aesthetics.
Pearl and Gold Combination Ideas
- Large pearl on ring finger, small gold stars scattered on three other nails
- Alternating pearls and gold charms across all five nails
- Pearl cluster on one hand, gold on the other
- Single pearl with small gold leaf accents
- Pearls and gold together on accent nail only, other nails bare charms
Quick fact: Freshwater pearls tend to have more unique coloring and character than cultured pearls, giving a more high-end, curated appearance.
Final Thoughts
Black duck nails with charms represent the sweet spot between sophisticated minimalism and statement-making sparkle. Whether you lean toward delicate pearls, bold rhinestones, vintage chains, or celestial dreams, there’s a charm aesthetic that matches your personal style. The black gradient provides such a perfect neutral canvas that whatever charms you choose become instant focal points without the nails feeling cluttered or overdone.
The beauty of this trend is that it’s genuinely achievable at home if you’re willing to practice a few times. The ombre effect is forgiving—slight imperfections actually add to the organic, handmade appeal—and adding charms doesn’t require any artistic skill whatsoever. What you’re really doing is selecting charms that speak to you and carefully gluing them into place. Anyone can do that.
Start with one design from this list that genuinely excites you. Get the supplies, practice the gradient technique a couple times, and add your chosen charms with confidence. You’ll be amazed at how a simple black ombre nail paired with the right charm becomes a conversation-starting accessory that feels uniquely yours.
