

Duck nails have become a beloved nail art trend that celebrates everything adorable about these charming waterfowl. If you’ve got long nails and you’re looking to add some whimsy and personality to your manicure, duck-themed designs offer an incredible range of creative possibilities — from playful and cartoonish to elegant and sophisticated. Long nails provide the perfect canvas for detailed duck designs, allowing nail artists and enthusiasts to really showcase intricate details, vibrant colors, and dimensional effects that simply wouldn’t work on shorter nail beds.
What makes duck nails particularly appealing is their versatility. Whether you prefer minimalist line art, bold graphic designs, or realistic watercolor interpretations, there’s a duck nail aesthetic to match your personal style. The cuteness factor is undeniable — there’s something inherently charming about a little yellow duckling peeking out from your fingertip, or an entire flock of ducks swimming across an aqua-blue background. Long nails let you tell a more complete story with your nail art, turning each finger into its own miniature canvas.
Beyond the aesthetic appeal, duck nails work beautifully for any season or occasion. They’re quirky enough to express personality at casual gatherings, yet polished enough to wear confidently in professional settings when executed with the right color palette and design sophistication. Whether you’re heading to brunch, celebrating spring, or just wanting to brighten your daily routine with some nail art joy, duck designs deliver charm without being overly trendy or temporary-feeling.
1. Classic Yellow Duckling Design
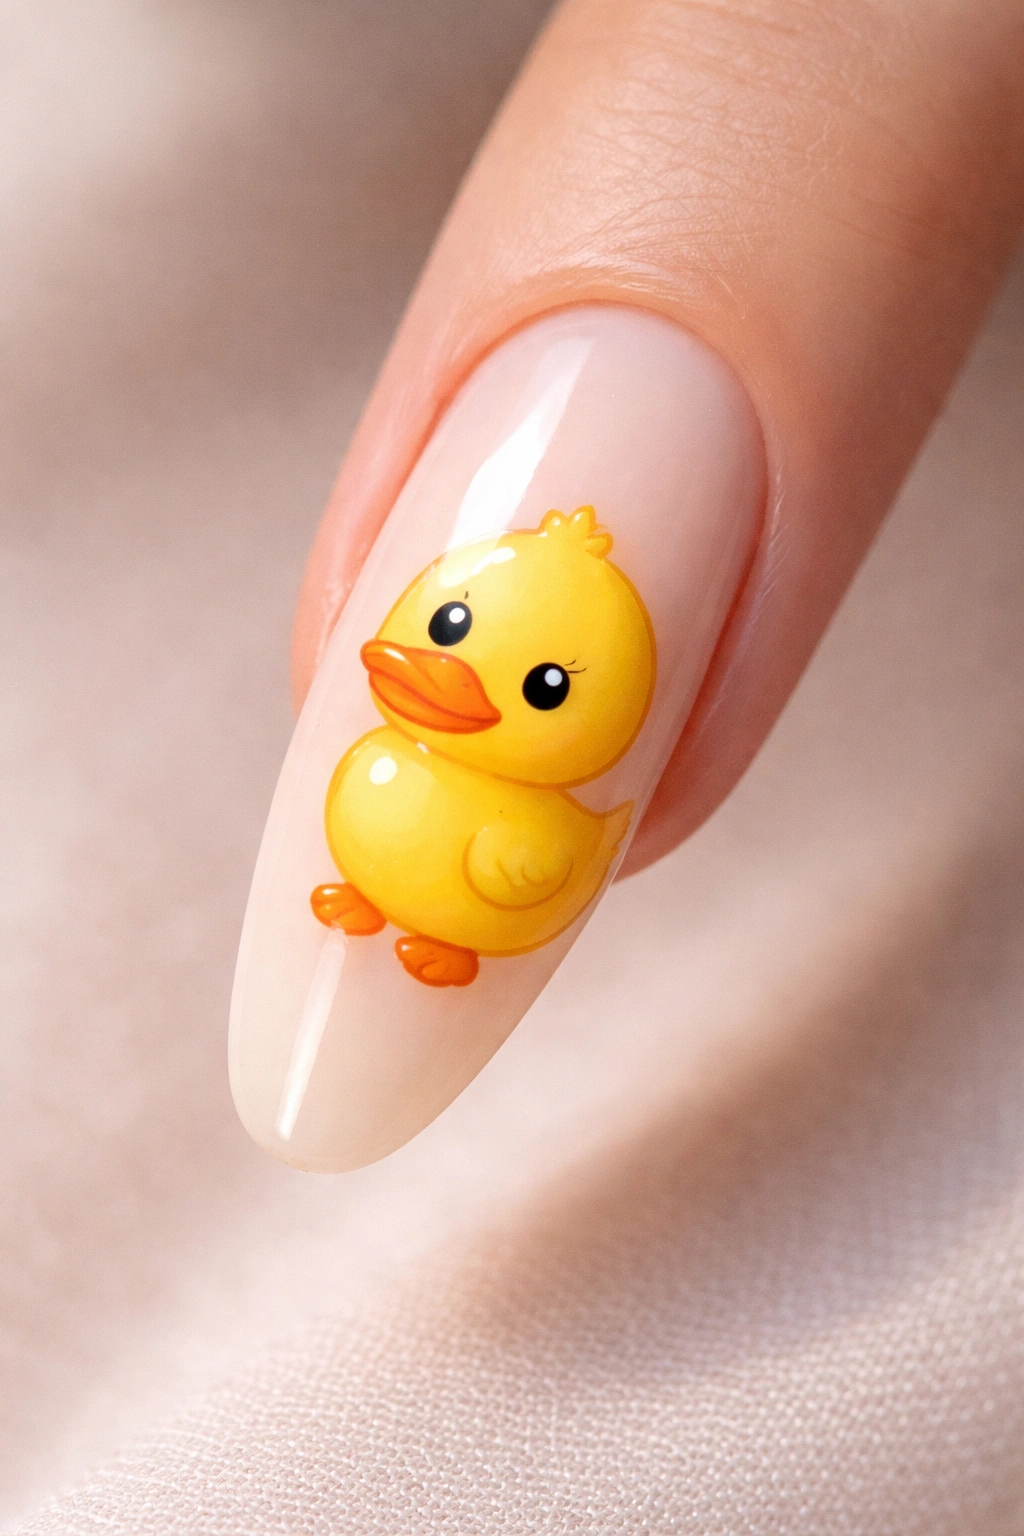
This is the quintessential duck nail design that serves as the perfect starting point for long-nail canvas creativity. A bright, cheerful yellow duckling takes center stage on each nail, rendered in a cute, cartoonish style that’s instantly recognizable and endlessly charming. The design typically features a round yellow body, an orange beak, a tiny black eye, and perhaps a little orange foot peeking out — everything simplified down to its most adorable essence.
Why This Design Works on Long Nails
Long nails give you room to add personality and dimension to your duckling character that wouldn’t be possible on a shorter nail. You can paint subtle details like wing feathers, a little tuft on the head, or even tiny toe details that make the duckling feel more three-dimensional and lifelike. The expanded nail real estate also means you can pair your ducklings with complementary background elements — a light blue sky, a few clouds, or simple water ripples beneath the duck — without the design feeling cramped.
Application Tips and Best Practices
- Start with a crisp white or pale cream base coat to make your yellow truly pop and feel fresh
- Use a yellow shade that leans slightly warm (think golden yellow rather than neon) for a more sophisticated, less cartoonish appearance that still reads as cute
- Thin your orange paint slightly when creating the beak and feet — a 1:1 ratio of paint to water creates a more controllable consistency that won’t bloat your lines
- Lock in your details with a matte top coat for that storybook illustration quality, or use glossy if you prefer a more polished, modern feel
- Pro tip: Paint your ducklings on alternating nails rather than all ten fingers — this breaks up the visual repetition and creates a more intentional, curated nail art look that feels purposeful rather than busy.
2. Ombré Duck Gradient Design
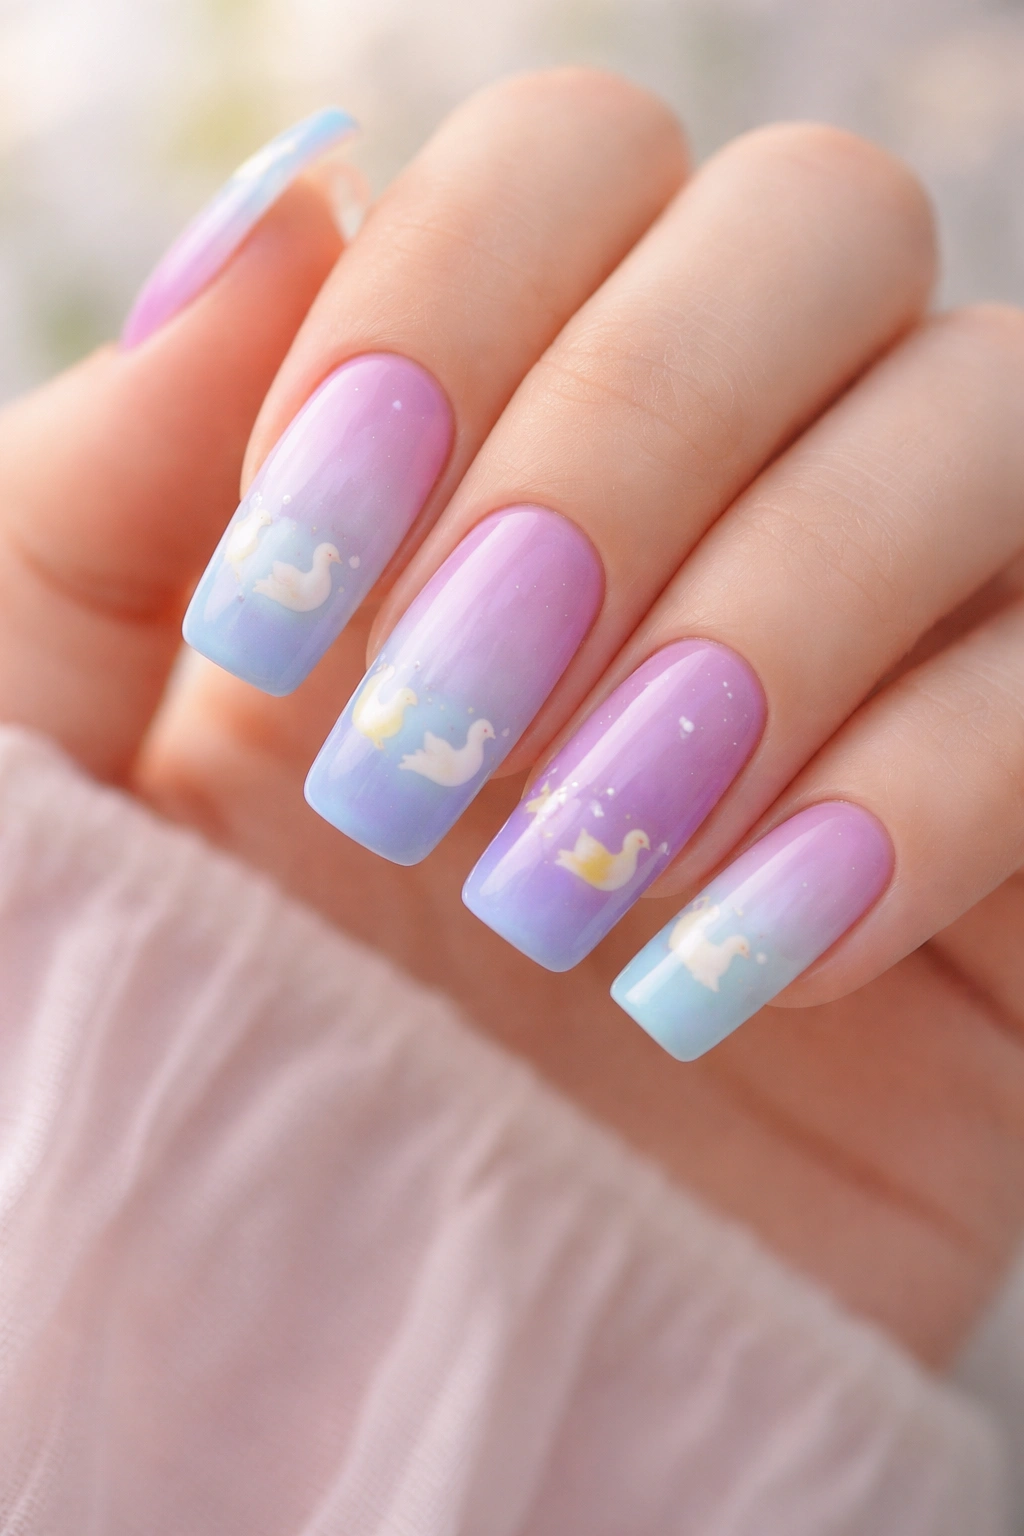
An ombré gradient transforms duck nails into something soft, dreamy, and unexpectedly sophisticated. This design blends multiple shades of blue, purple, or even peachy tones across the length of your nail, with little ducks — usually rendered in silhouette or simplified line form — scattered throughout the gradient. The color transition creates a painterly, watercolor-like quality that feels artistic and intentional.
The Color Transition Magic
Ombré duck nails work particularly well on long nails because the gradient has actual space to breathe and develop. Short nails compress the color transition into just a couple of shades, but long nails allow you to include 3-4 distinct color tones that blend seamlessly into one another. A classic blue-to-purple gradient mimics a sunset reflected in water, while a peach-to-pink gradient evokes a softer, more romantic aesthetic. The key is choosing colors that sit close to each other on the color wheel so the transition feels natural rather than jarring.
Creating Smooth Color Transitions
- Use a makeup sponge cut into a small piece to sponge your color transitions — this creates softer blending than a brush ever could
- Apply each color in overlapping zones across your nail, working from one color into the next with a light dabbing motion
- Use a medium-toned color as your “bridge” between two very different shades — this helps the transition feel less abrupt
- Once your gradient is set and dried, add your duck silhouettes in a contrasting color (white or black work beautifully) using a thin detail brush or nail pen
- Worth knowing: Ombré designs benefit enormously from a glossy, glass-like top coat that emphasizes the color depth and creates an almost liquid appearance.
3. Minimalist Line Art Duck
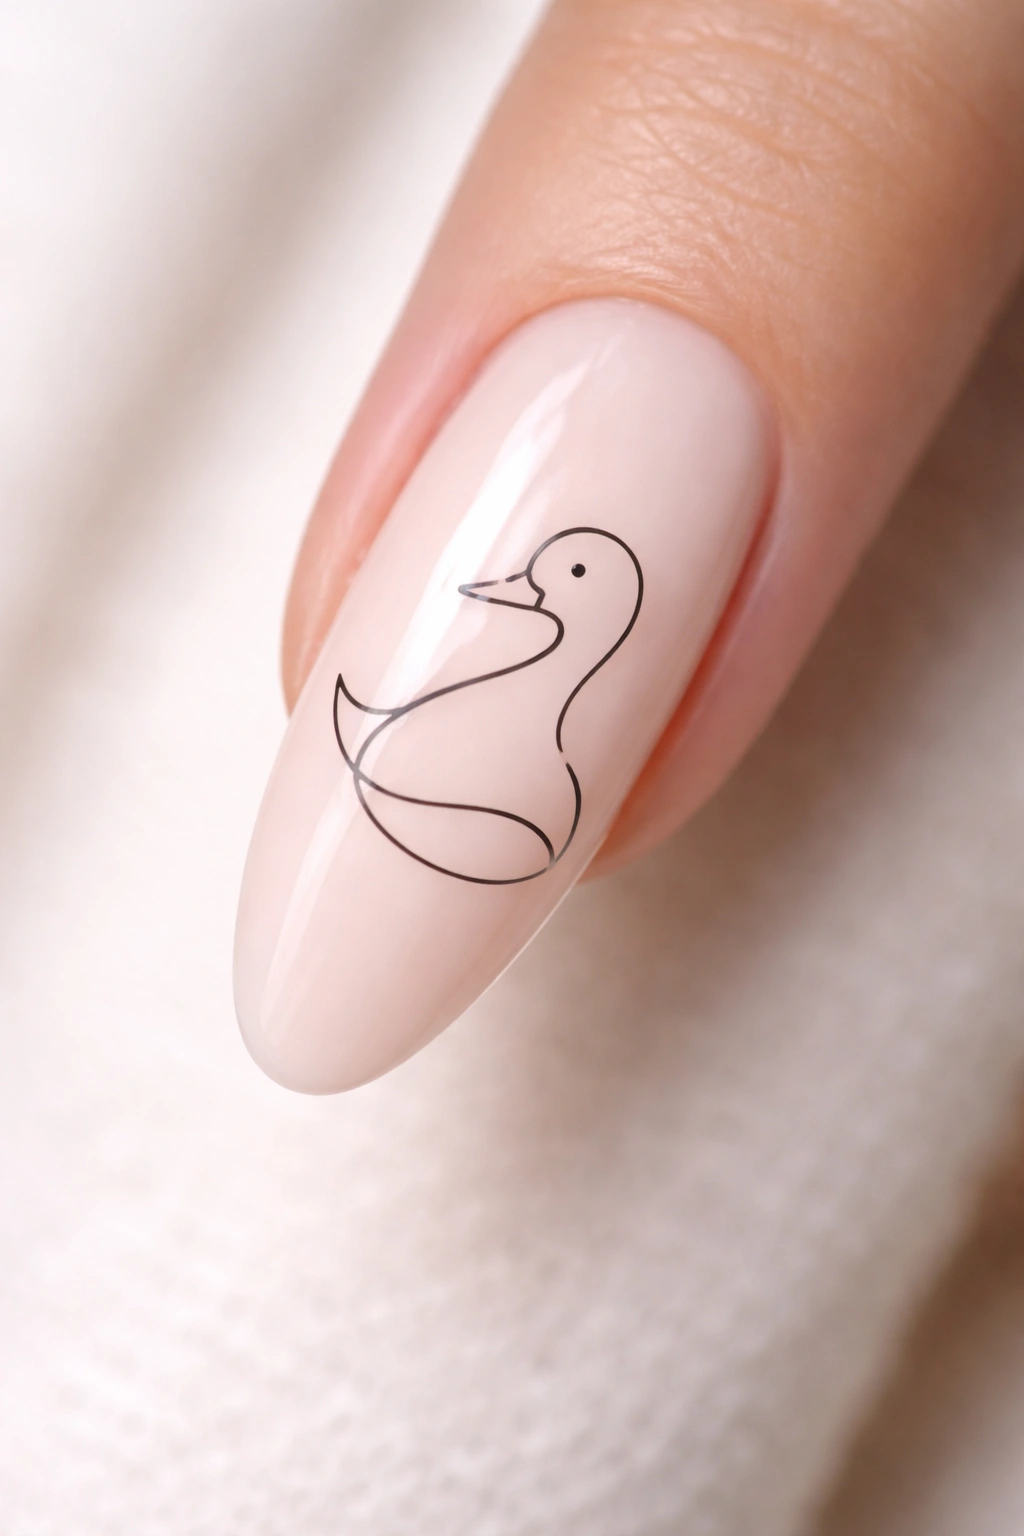
For those who prefer understated elegance over bold statements, minimalist line art ducks deliver maximum impact through simplicity. This design features a single continuous line — or just a few carefully placed lines — that forms a recognizable duck profile. The duck is rendered entirely in thin black or dark gray lines against a neutral background (white, cream, or pale pink), creating an artistic, gallery-quality aesthetic.
The Power of Simplicity on Long Nails
Minimalist designs might seem like they’d be “wasted” on long nails that have space for more complex art, but the opposite is true. Long nails provide enough surface area for your line art duck to feel substantial and intentional without looking sparse or unfinished. You can add a second duck facing the opposite direction, or create a small flock of line-art ducks at different scales, building a compositional balance that wouldn’t be possible on shorter nails.
Execution and Precision
- Use a gel pen or an extra-fine brush (000 or smaller) to maintain consistent line weight throughout your duck
- Practice your line on paper first — minimalist art forgives nothing, so confident, clean lines are essential
- Consider varying your line weight slightly (thicker in some places, thinner in others) to create visual interest and dimension
- Add tiny details selectively — a hatched wing, a dotted eye, or textured water ripples beneath the duck can elevate the design without compromising its minimalist aesthetic
- Insider note: A matte top coat enhances the artistic, sketch-like quality of line art designs, making them feel more intentional and gallery-worthy.
4. Rubber Duck Bath Vibes Design
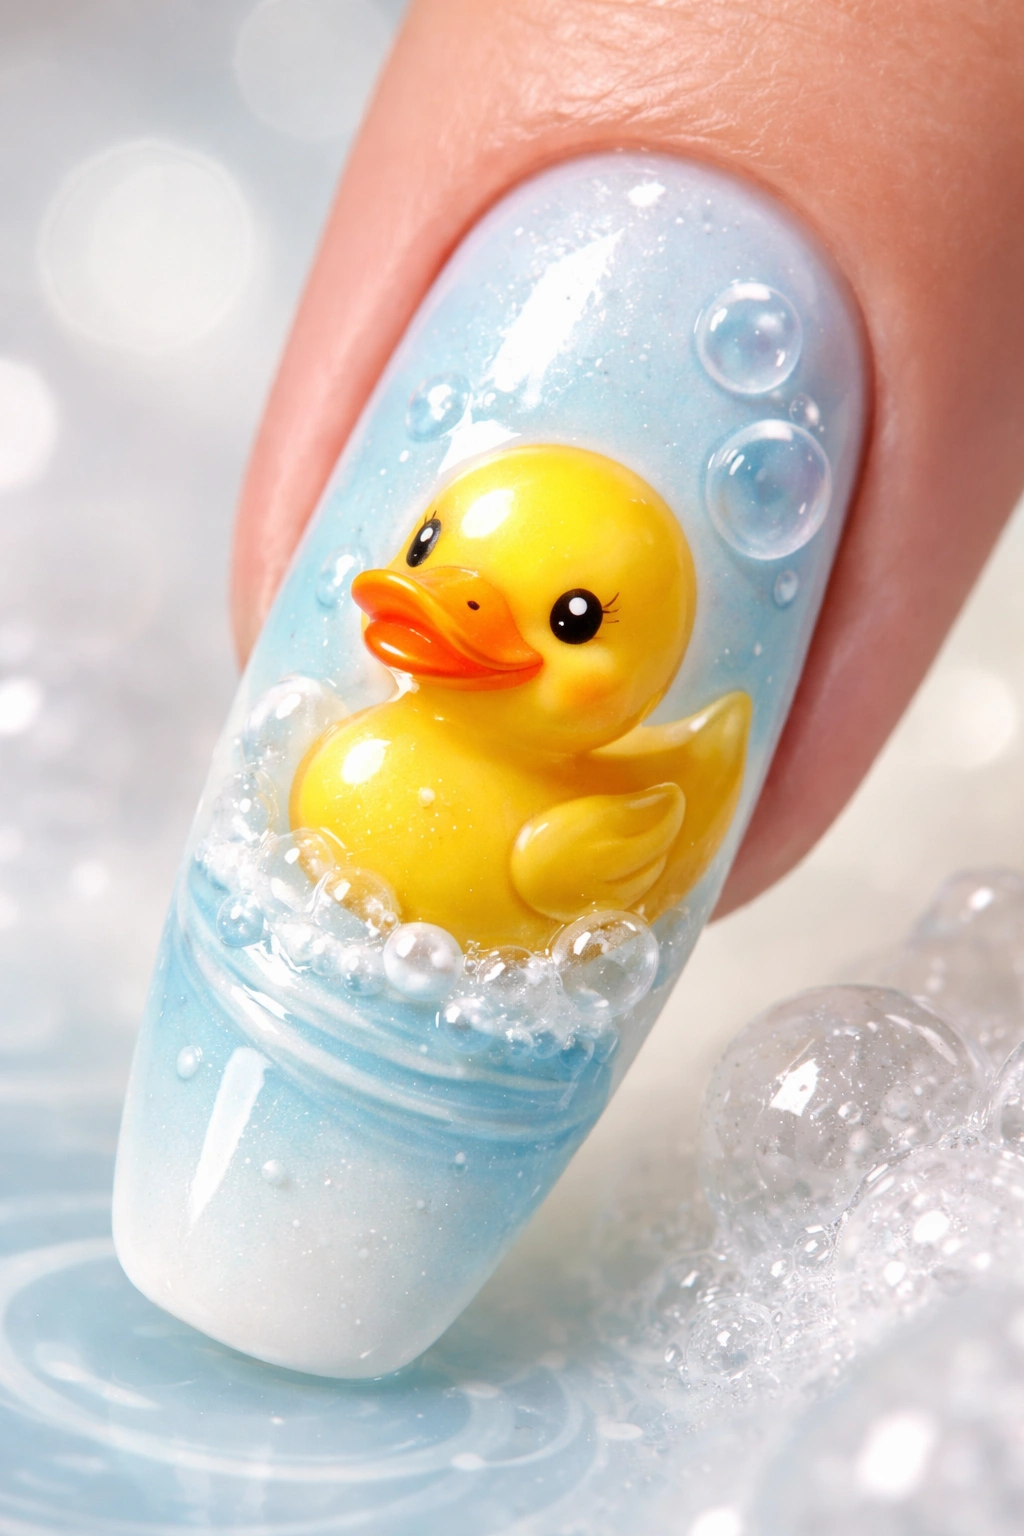
This playful design celebrates the beloved classic rubber duck, rendered in bright, nostalgic colors against elements that evoke a relaxing bath scene. Think yellow ducks with orange beaks against backgrounds of light blue or white, perhaps with bubble details, soap suds, or tiny bath toys scattered across the nail. This design taps into cozy, self-care energy and works beautifully for someone who wants their nail art to radiate warmth and comfort.
Setting the Bath Scene
Long nails give you room to build an entire narrative around your rubber duck. One nail might feature the duck itself front and center, while another shows bubbles floating upward, a third captures a splash of water, and another includes little bath accessories like a loofah or bath bomb. This storytelling approach transforms your manicure into a cohesive visual narrative rather than just a repeated motif across ten fingers.
Color Palette and Texture Ideas
- Pair your yellow rubber ducks with soft, spa-adjacent colors: pale blue, creamy white, soft pink, or pale lavender
- Add white dots to represent bubbles, varying their size from tiny pinpricks to larger circles for visual interest
- Create simple wave details with light blue curved lines that suggest water movement without being realistic
- Use a glitter or shimmer top coat in coordinating colors to add a playful, soap-bubble-catching-light quality
- Quick facts about this design:
- Works wonderfully as a summer pedicure or year-round self-care aesthetic
- Particularly charming combined with spa-themed nail art (cucumber slices, jade rollers, etc.)
- Reads as playfully nostalgic rather than childish when executed with a sophisticated color palette
- Long nails allow you to include enough detail that the design feels intentional and complete
5. Duck Face Nail Art Design
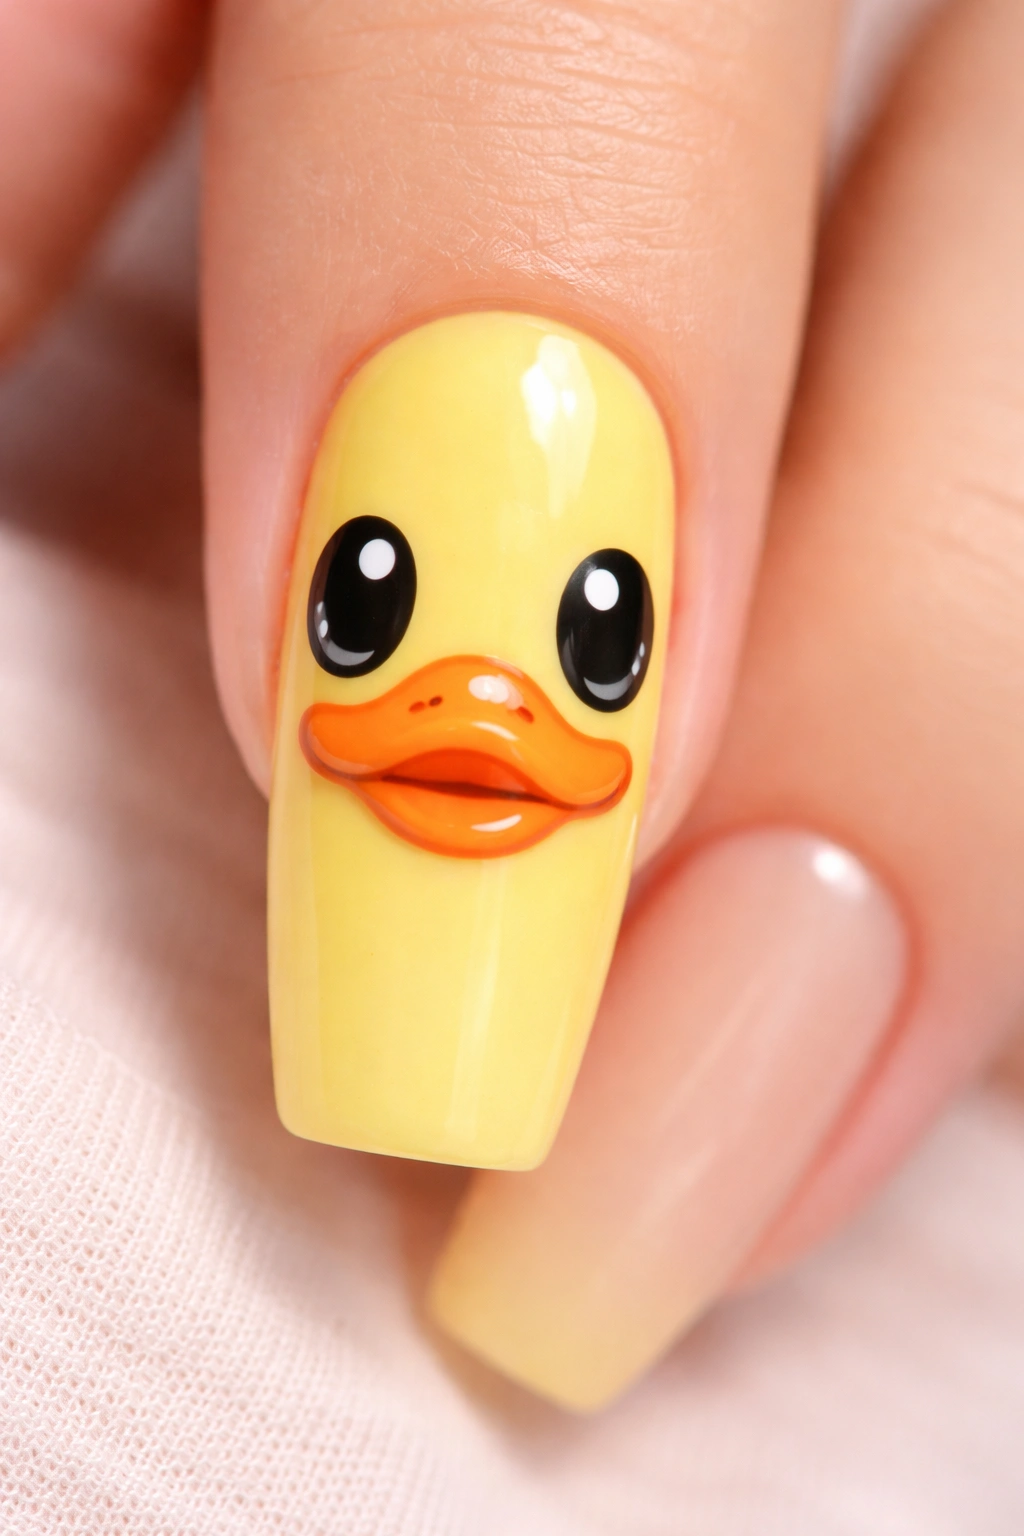
Duck face designs take the cute factor to another level by focusing on the duck’s actual facial features in exaggerated, expressive detail. This approach renders the duck’s face close-up and large, filling most of the nail with an endearingly simple expression — big round eyes, a prominent orange beak, and minimal other details. The design reads immediately as charming and approachable, with a touch of humor in its simplicity.
Maximizing the Close-Up Format on Long Nails
Long nails prevent your duck face from feeling cramped or overly compressed. The expanded space allows you to render the eyes with greater dimension — perhaps adding a small highlight or catchlight that makes them sparkle. Your duck’s beak can be rendered with depth (a hint of shading or a slightly overlapping second layer), and you have room to include neck or body details that ground the face and prevent it from feeling isolated.
Expression and Personality
- Decide on your duck’s emotional expression before you begin — a slight smile makes it feel friendly, while wide eyes create surprise or enthusiasm
- Add tiny details that suggest personality: feather textures on the head, a slight blush on the cheeks, or even a tiny crown if you want to crown your duck as royalty
- Vary the size and style of the eyes — one larger and one smaller can create a wonderfully quirky, endearing quality
- Consider adding a second, smaller duck or a duck sibling on a neighboring nail to create a family or friendship narrative
- Pro tip: Paint the duck’s face on every other nail with a coordinating solid color or subtle pattern on the alternate nails — this breaks up visual repetition while maintaining cohesion across your manicure.
6. Pastel Rainbow Duck Design
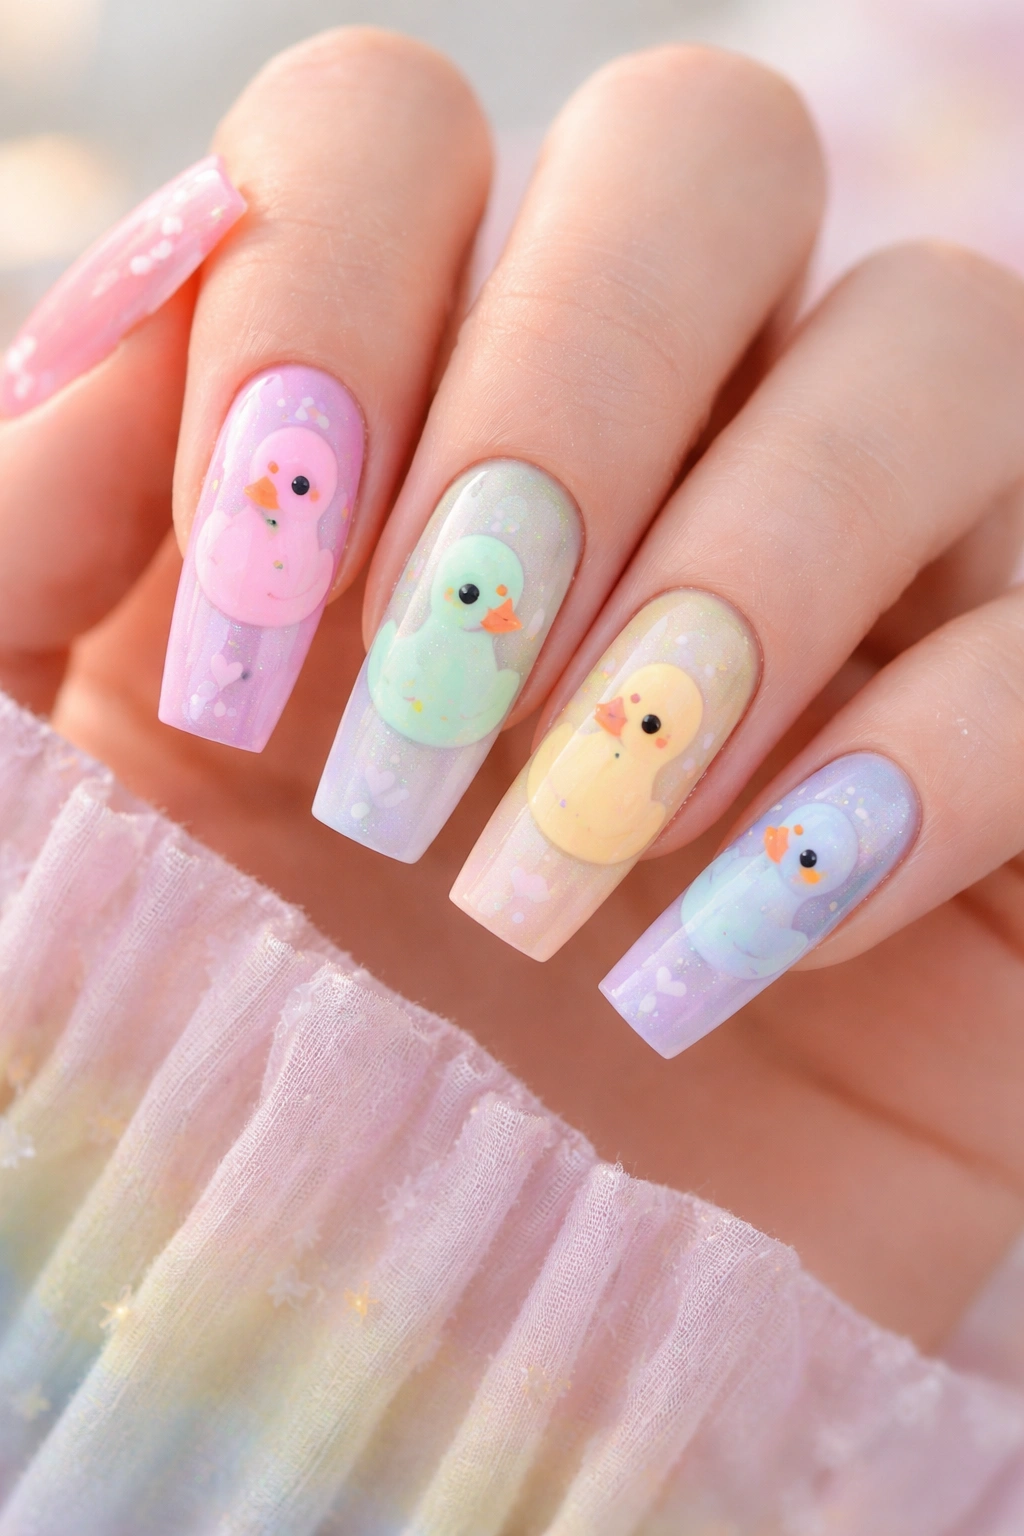
This design celebrates ducks in every color of a soft, dreamy rainbow palette. Rather than the traditional yellow, this interpretation renders ducks in pastel pink, lavender, mint green, pale yellow, peachy, and soft blue shades — each duck a different delicate color. The design combines whimsy, color theory, and an undeniably cute aesthetic that appeals to anyone who loves both ducks and rainbow imagery.
Building Color Harmony on Long Nails
Long nails allow you to feature multiple ducks in different pastel shades on the same nail without creating visual chaos. You might paint the thumb in one pastel shade, the index finger in another, creating a rainbow gradient across your hand. Alternatively, you can paint all five ducks (one per nail on each hand) in the same order, creating a cohesive, recognizable pattern. The key is maintaining soft, muted saturation across all your colors so they feel harmonious rather than clashing.
Pastel Color Selection and Application
- Choose true pastels (colors mixed with white rather than just desaturated versions) for that soft, cotton-candy quality
- Soft pink, lavender, mint green, peachy cream, pale yellow, and powder blue are classic pastel duck shades
- Paint each duck with a white or cream base first, then layer your pastel color on top for maximum softness and coverage
- Add tiny white details (eyes, beak highlights, or belly markings) that create contrast and definition without overwhelming the delicate color
- Include coordinating elements: soft clouds, tiny hearts, or abstract squiggles in complementary pastels to unify your design across all nails
- Worth knowing: Pastel designs photograph beautifully and work wonderfully for events like baby showers, bridal showers, or anyone celebrating their birthday — they photograph with a soft, dreamy quality that reads as extra special.
7. Holographic Duck Design
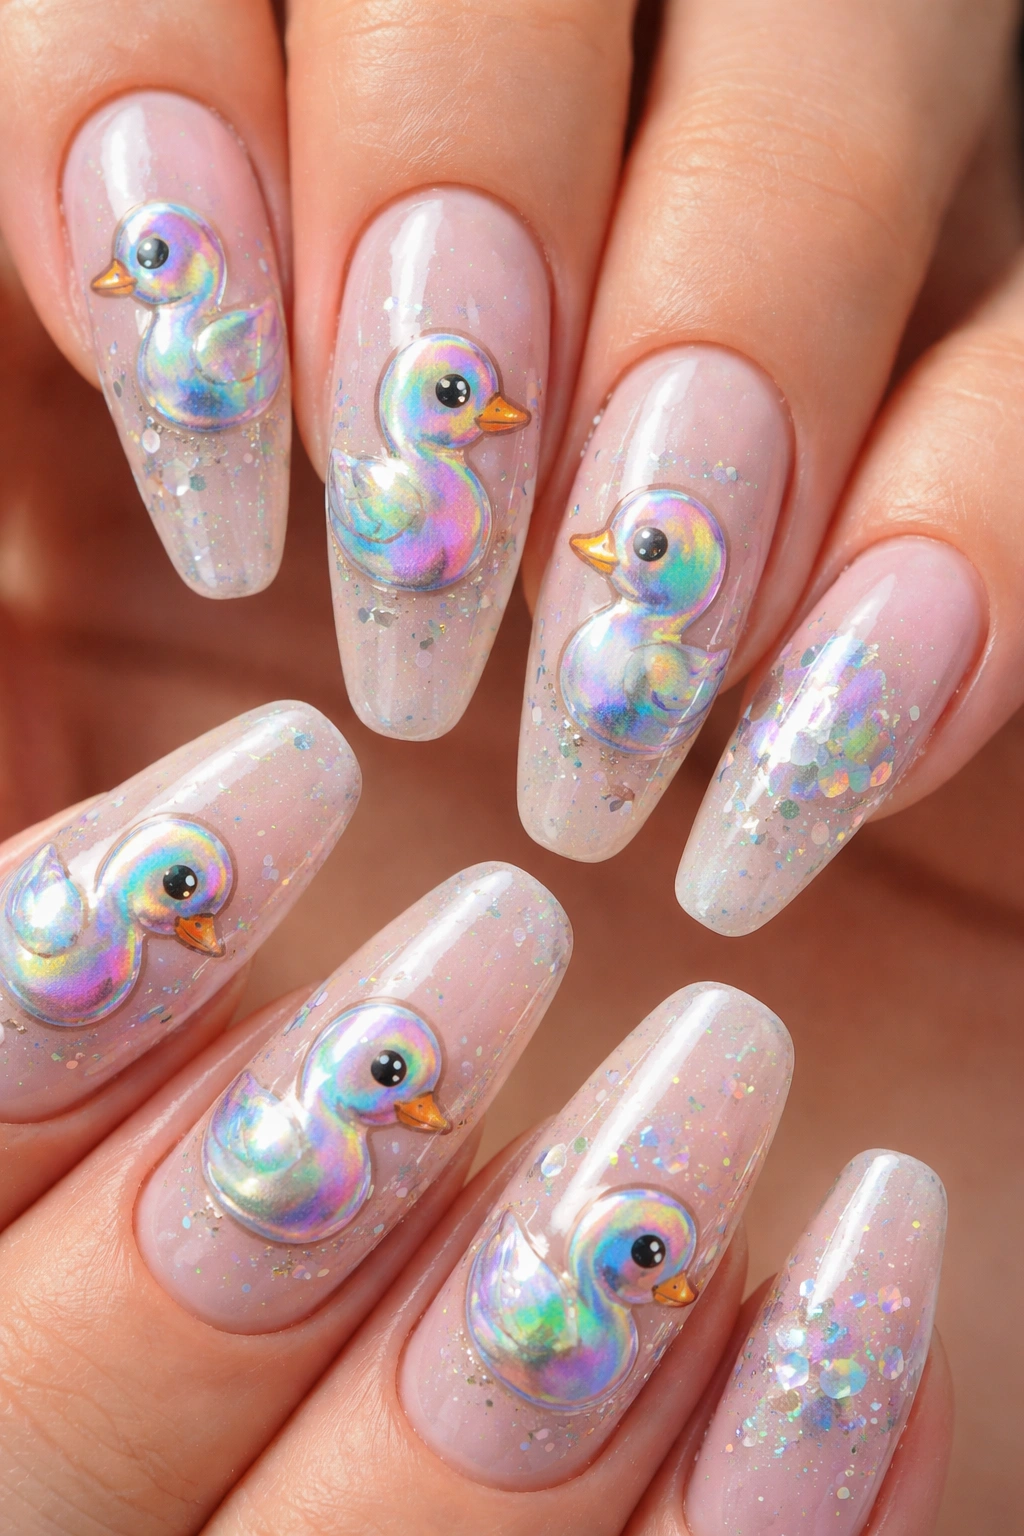
For those who love sparkle and visual impact, holographic duck designs deliver maximum glitter factor. This design features ducks rendered in holographic or aurora chrome finishes that shift between multiple colors as the nail catches light from different angles. The effect is almost magical — your ducks seem to glow and transform, creating an iridescent quality that’s impossible to ignore.
Achieving the Holographic Effect on Long Nails
Holographic elements shine brightest against minimal, neutral backgrounds that don’t compete for attention. Paint each long nail in a soft white, pale silver, or nude shade, then use holographic chrome powder, foil, or specialized holographic polish to create your ducks. The light nail background maximizes the reflective qualities of the holographic finish, making your ducks seem to float and shimmer. Long nails provide enough uninterrupted surface to really showcase the color-shifting magic.
Application Techniques for Holographic Elements
- Use a holographic chrome powder with a gel base or tacky top coat, applying with a soft brush in dabbing motions to build the reflective surface
- Layer holographic foil over a slightly sticky gel base for a more opaque, defined duck silhouette
- Alternatively, use holographic nail polish as your base duck color, building coverage with 2-3 thin coats
- Create duck outlines first in a dark color (black or dark gray), then fill the interior with your holographic product
- Add white or pale details (eye highlights, beak definitions) to create contrast and prevent the duck from disappearing into its shimmery background
- Quick facts about holographic designs:
- They photograph with an almost magical quality in natural light
- Most striking when viewed in bright or natural lighting (artificial office lighting diminishes the effect)
- Work beautifully as a statement manicure for events or celebrations
- Require a patient application process but reward you with genuinely stunning results
8. Duck Silhouette Black and White Design
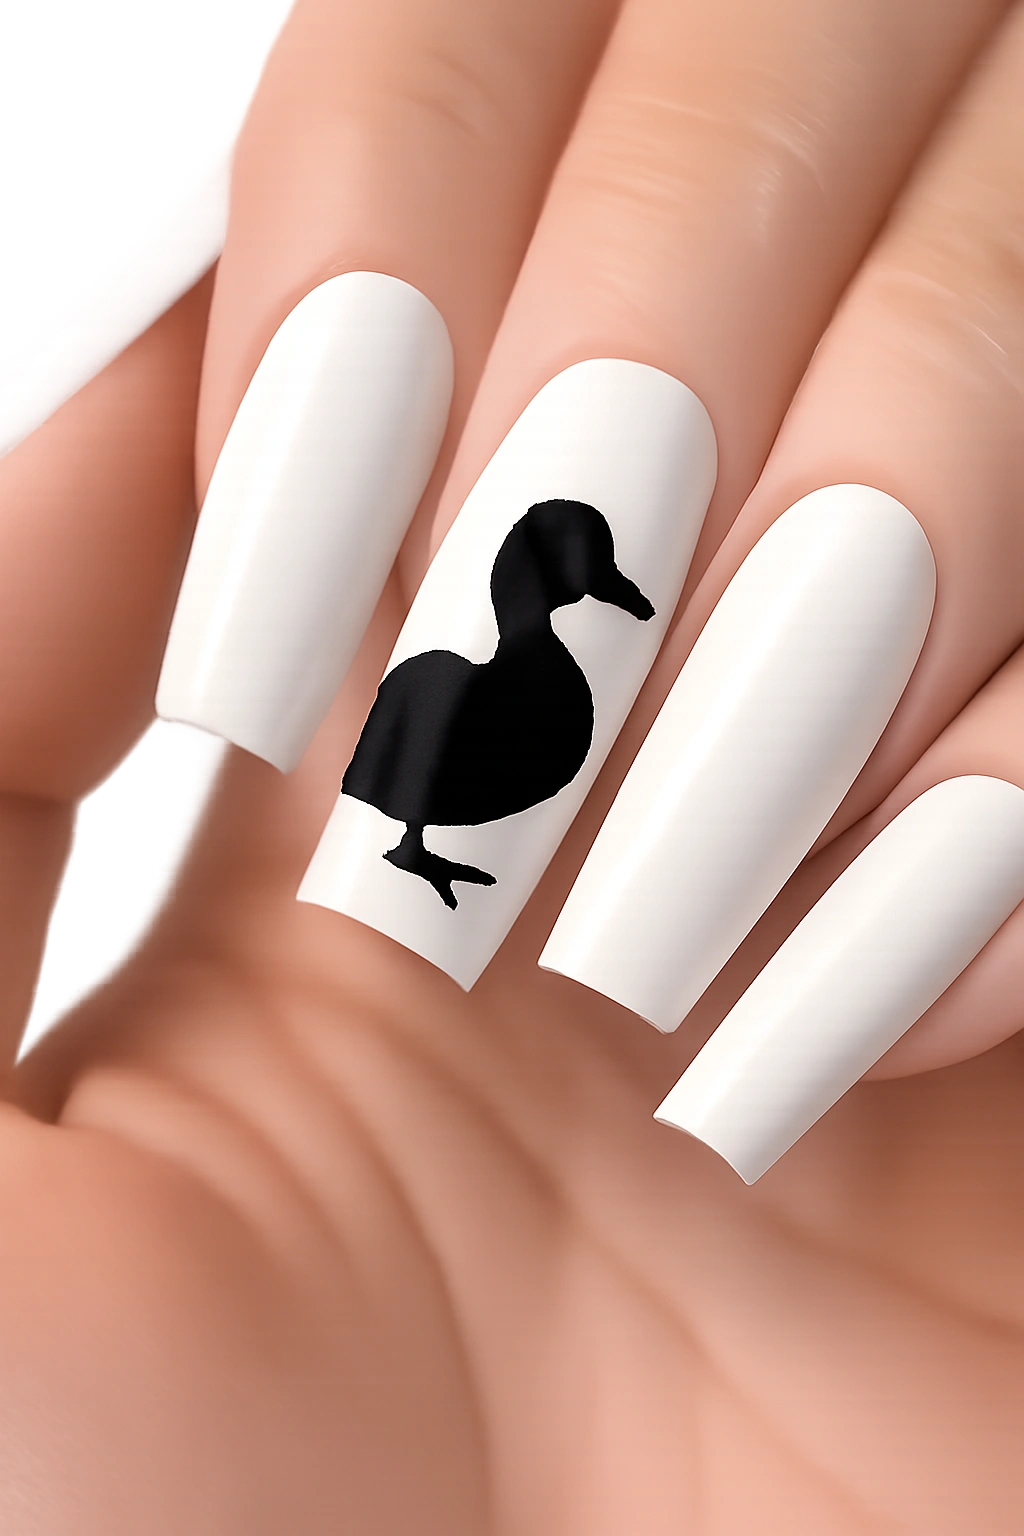
This elegant, graphic design strips duck imagery down to pure silhouette form — the duck’s complete profile rendered entirely in solid black against a clean white nail, or inverted (white duck on black). The result is a bold, almost logo-like aesthetic that reads as modern and intentional. This design bridges the gap between artistic nail art and graphic design, creating something that feels simultaneously playful and sophisticated.
Composition and Visual Balance
Long nails provide space to arrange your duck silhouettes with intentional composition. You might paint one large duck centered on the nail, or create a flowing arrangement of ducks in various scales and orientations swimming across your nail canvas. Some nails could feature multiple ducks, others just one, building a composition that feels balanced across your entire hand. The graphic quality of solid black and white makes this design feel gallery-worthy rather than cutesy.
Technical Execution
- Use a thin brush or nail pen to paint your duck silhouette — the solid black fills in the entire shape without interior detail
- Map out your duck profile lightly with a pencil first, then fill in with confident black strokes
- Keep your silhouette edges clean and crisp for a professional, graphic quality
- Vary the scale of your ducks — mix larger focal ducks with smaller supporting ducks to create depth and visual hierarchy
- Add accent lines in your background color (white lines on black nails or black lines on white nails) to suggest water, movement, or simple graphic elements
- Insider note: This design style feels unexpectedly upscale and works beautifully for professional settings or upscale events where overtly cute designs might feel less appropriate.
9. Cute Duckling with Accessories Design
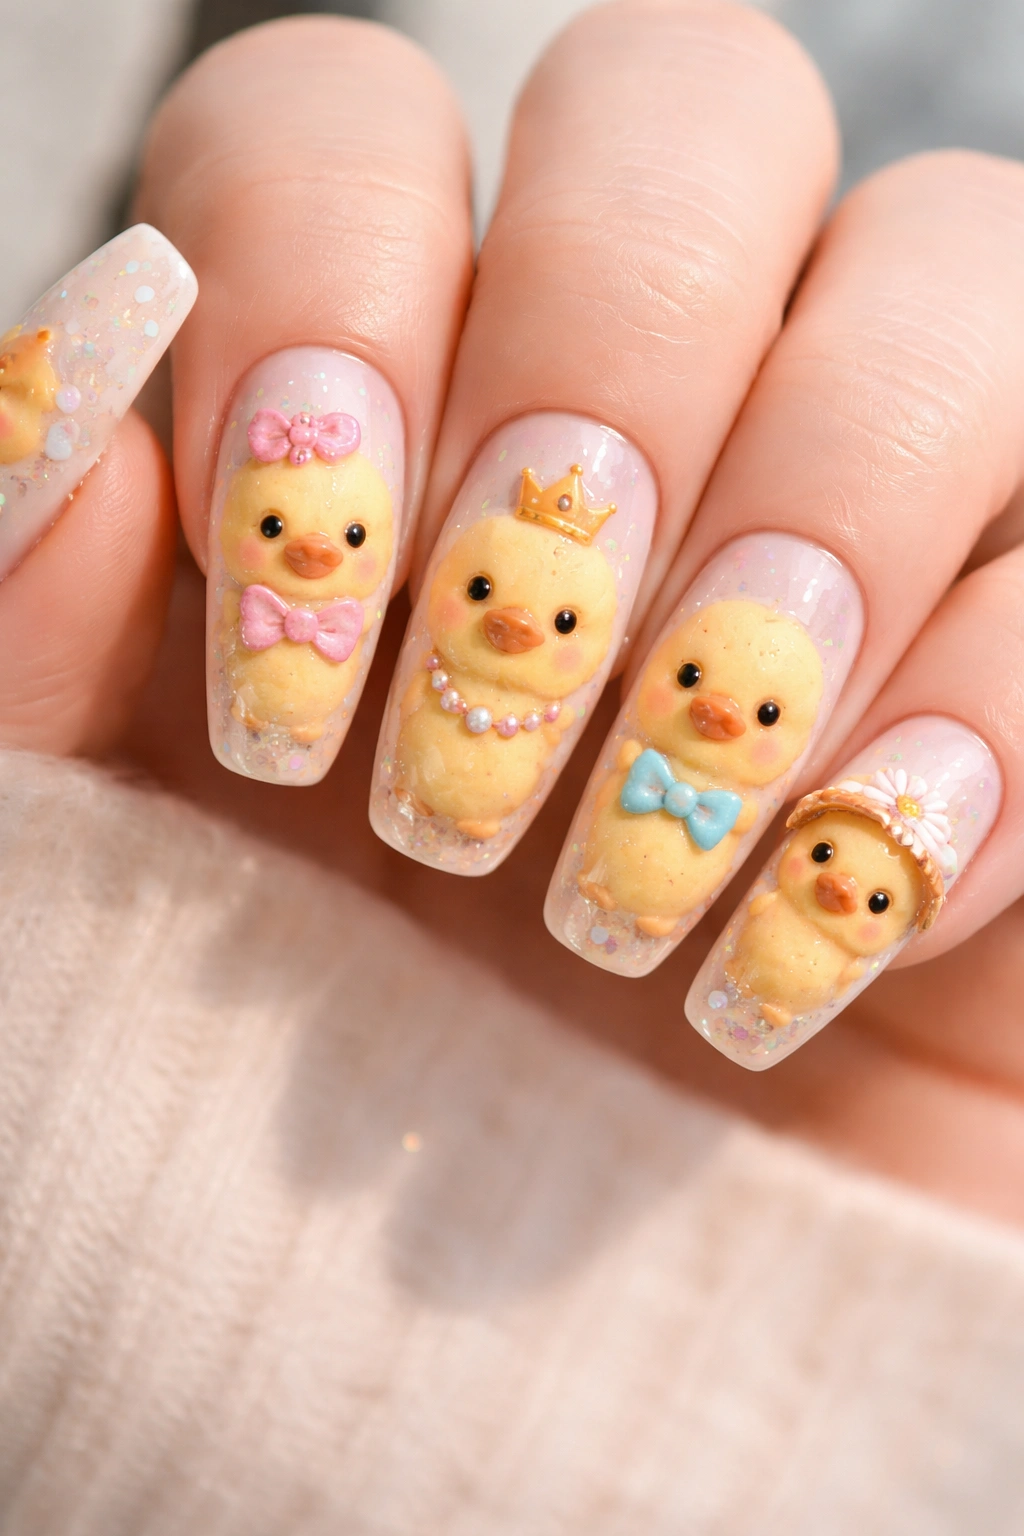
Take the charm of a duckling and amplify it with adorable accessories — a tiny bow tie, a crown, a little sailor hat, sunglasses, or a scarf wrapped around its neck. This design celebrates the duckling as a character with personality and style, rather than just a simple waterfowl. Each duckling becomes a unique individual, rendered in the traditional yellow with orange beak but elevated through the accessories you add.
Character Development Through Details
Long nails give you genuine room to add distinctive accessories and details that make each duckling feel like its own character. One nail might feature a bow-tie-wearing duckling, the next a duckling in tiny sunglasses, another with a crown, and so on. This approach transforms your manicure into a little cast of characters, each with its own personality and style. It’s charming, playful, and creates a narrative continuity across your hand.
Accessory Ideas and Styling
- Small bow ties (painted in contrasting colors like pink, blue, or patterned) tied at the duck’s neck create instant charm
- Tiny crowns or tiaras suggest royalty and whimsy — particularly perfect for an “extra” energy
- Sunglasses or oversized fashion glasses add a cool, trendy vibe
- Little scarves or bandanas in patterned fabrics (stripes, polka dots, florals) add texture and style
- Hats (sailor hats, sun hats, berets, crowns) suggest different personalities and moods
- Pro tip: Keep your ducklings’ base colors consistent (traditional yellow with orange beak) so the varying accessories become the focus and create visual cohesion despite the diversity of styling.
10. Glitter Duck Nails Design
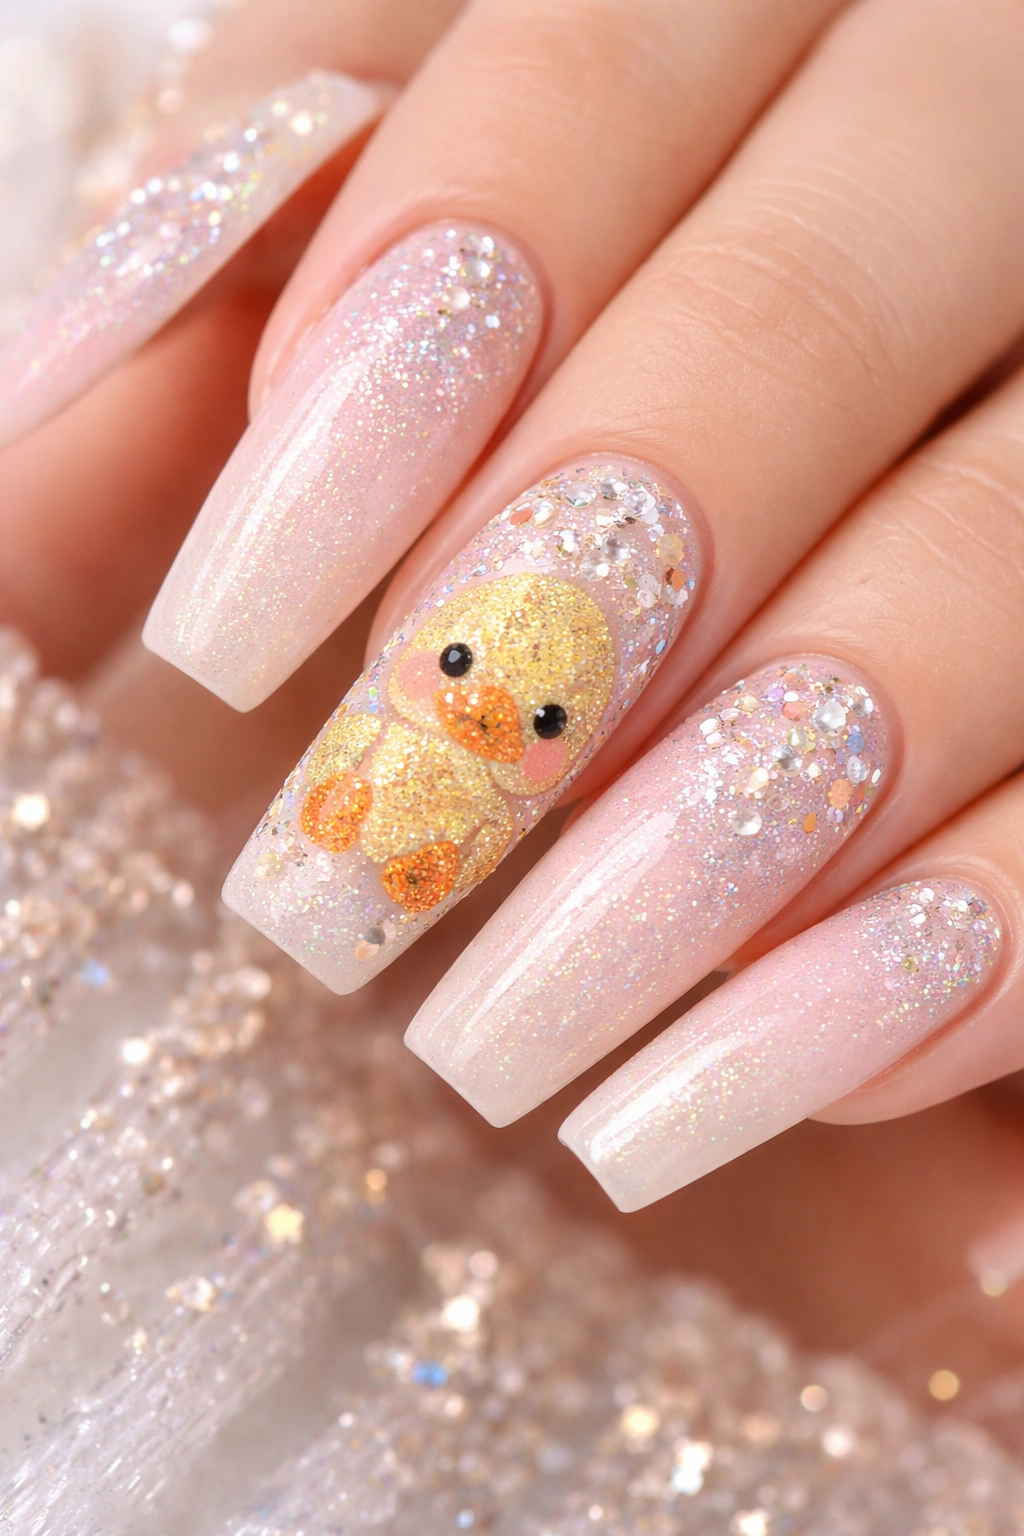
For maximum sparkle and visual celebration, glitter duck designs combine the charm of duck imagery with the undeniable joy of glitter. This might mean ducks rendered in glitter itself, ducks surrounded by scattered glitter elements, or ducks set against a glittery background. The result is festive, eye-catching, and undeniably fun — a manicure that feels celebratory and special.
Glitter Integration Strategies
Long nails provide space for subtle or bold glitter integration without the design feeling overwhelming. You might paint your duck in traditional yellow, then add a glitter top coat that gives it a subtle sparkle. Or you could render the entire duck in glitter itself — a yellow glitter body with orange glitter beak creates a cohesive, all-sparkle effect. Another approach involves keeping the duck solid while surrounding it with glitter elements: scattered glitter particles, a glitter gradient background, or glitter accents on accessories the duck might be wearing.
Glitter Application and Longevity
- Use quality, cosmetic-grade glitter rather than craft glitter for a more refined appearance and longer-lasting wear
- Apply glitter over a gel base or tacky top coat for maximum adhesion and easier application
- For “duck-shaped” glitter, use chunky or confetti glitter in complementary colors for dimensional texture
- Create glitter gradients by densely packing glitter near the nail edges and leaving more negative space toward the center
- Mix fine and chunky glitter for varied visual interest — fine glitter creates shimmer while chunky glitter creates drama
- Worth knowing: Glitter designs require more careful removal to avoid damaging your nail surface — soak nails in acetone rather than picking at stubborn glitter particles.
11. 3D Duckling Designs
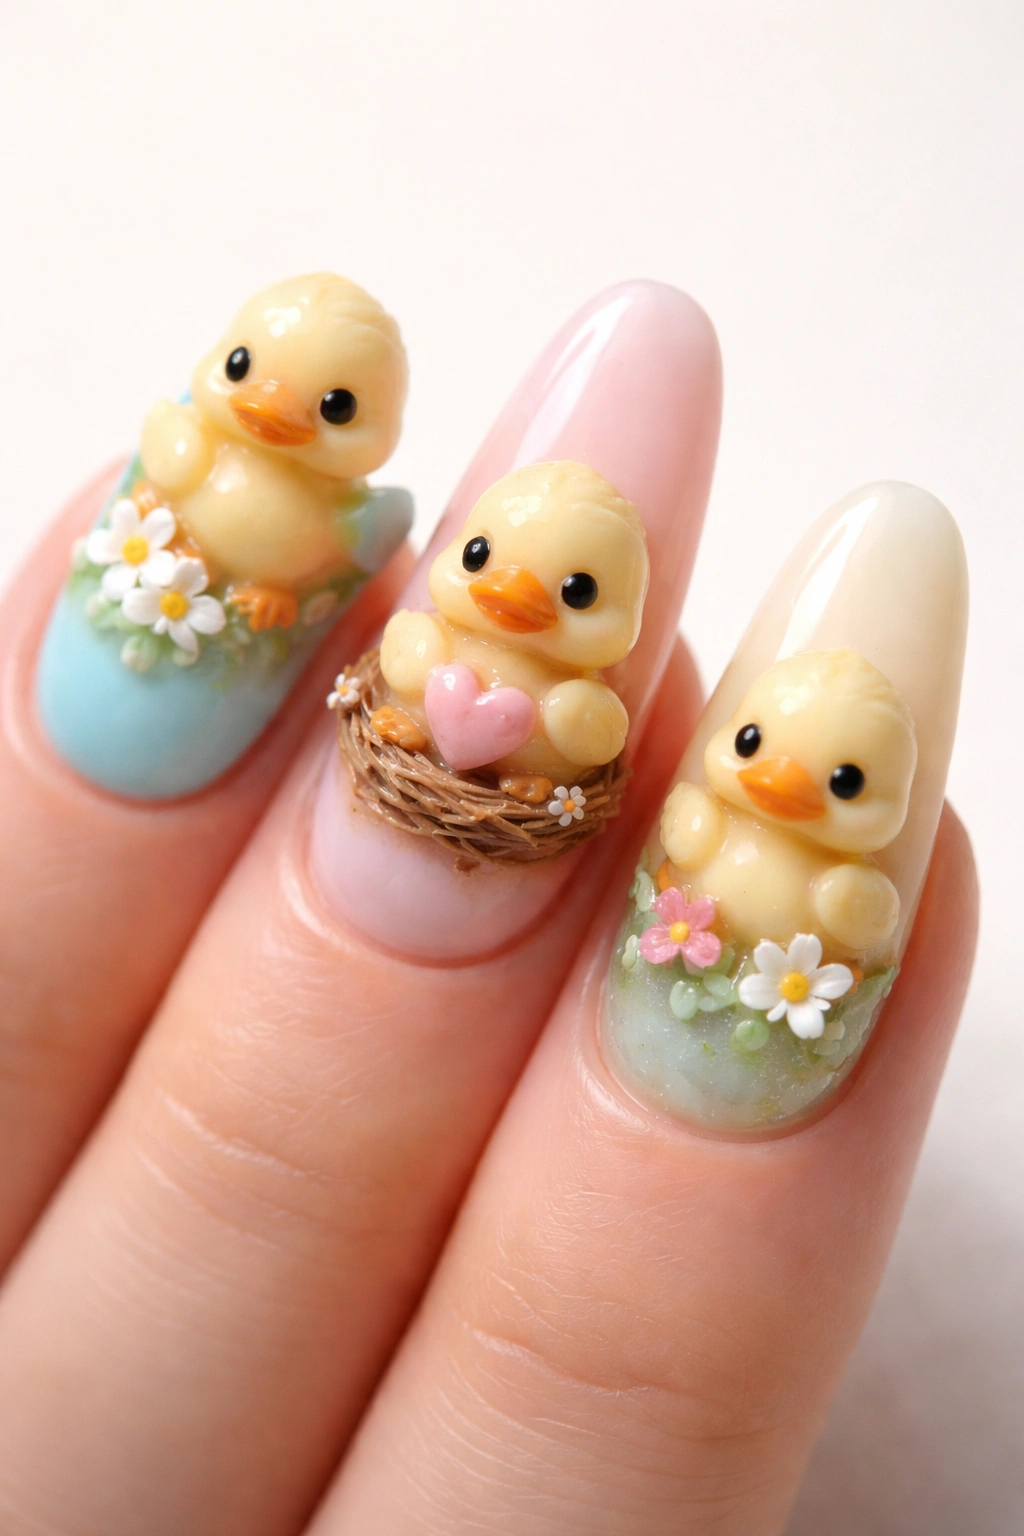
Three-dimensional duck nail art takes the cuteness factor to the next level by creating actual dimensional elements on your nail surface. This might include acrylic or gel duckling sculptures that sit on top of the nail, tiny embellishments that create shadows and depth, or detailed relief elements that make your ducks seem like they’re popping off the nail. The result is tactile, deeply charming, and impossible to ignore.
Creating Dimension and Depth
Three-dimensional designs absolutely shine on long nails. The extended nail surface provides space for your 3D elements to exist without looking cramped or uncomfortable. You might sculpt a cute duckling head that sits centered on one nail, surrounded by a flat background scene (water, reeds, clouds) painted on the nail surface. The contrast between the dimensional duck and the flat background creates a wonderfully charming composition that reads as thoughtfully designed rather than random embellishment.
Materials and Techniques for 3D Elements
- Acrylic or builder gel can be sculpted into duckling shapes, then shaped and detailed with tools and brushes
- Embellishments like tiny rhinestones, pearls, or beads can create texture and sparkle while adding dimension
- Relief elements (raised details created with thick gel or acrylic) can define wings, feathers, or facial features without requiring full sculpture
- Paint details onto your 3D elements just as you would a flat nail — the dimensional structure simply provides a raised canvas
- Use contrasting colors and matte finishes on your 3D duck against glossy backgrounds to enhance depth perception
- Quick facts about 3D designs:
- Require a patient application process and genuine skill with nail sculpting
- Benefit from professional application — DIY attempts often look less polished than intended
- More suited to special occasions than daily wear (they’re higher maintenance and catch on things)
- Absolutely photograph like works of art and generate attention and compliments
12. Watercolor Duck Art Design
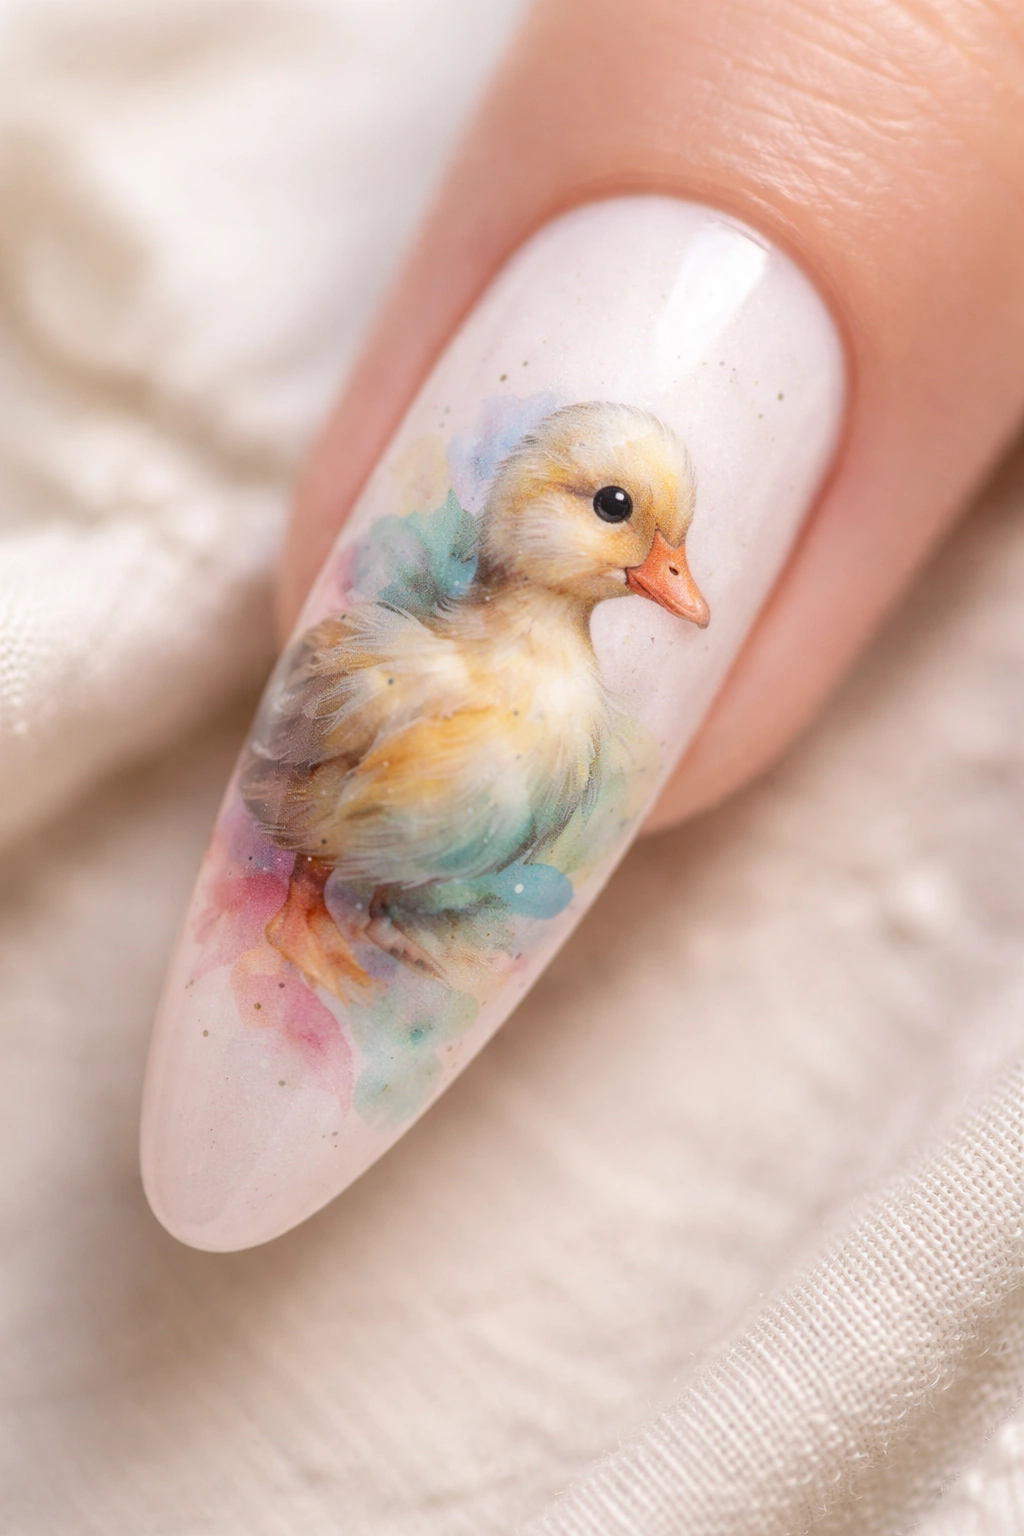
Watercolor duck designs embrace the soft, flowing, slightly imprecise aesthetic of actual watercolor paintings. Your ducks are rendered with loose, blended brushstrokes in watercolor paint applied over gel or acrylic nails, creating a naturally artistic, slightly abstract quality. The result is sophisticated, beautiful, and undeniably unique — your duck nails read as genuine artwork rather than typical nail design.
Achieving Authentic Watercolor Effects
Watercolor’s greatest strength is the soft bleeding of color into color, something that’s surprisingly achievable on nail canvas with the right technique and materials. Long nails provide enough space for watercolor effects to really develop — you can create larger wet-on-wet sections where colors blend, and smaller detailed areas where you maintain more control. The contrast between loosely blended areas and more defined duck details creates visual interest and sophistication.
Watercolor Techniques on Nail Canvas
- Use water-based acrylic paints (thinned to watercolor consistency) or specialized watercolor nail products
- Apply your base color while the nail surface is slightly wet, allowing colors to diffuse and blend naturally
- Define your duck shape while paint is still wet — this creates soft edges that feel authentically watercolor
- Add details and darker values once your base layers have dried, creating contrast and definition
- Let your brushstrokes show — don’t over-blend to perfection; the visible brushwork is part of watercolor’s charm
- Layer transparent washes rather than dense opaque colors for authentic watercolor luminosity
- Insider note: This design pairs beautifully with other artistic elements — perhaps watercolor florals or abstract backgrounds — creating a cohesive artistic aesthetic across your manicure.
Final Thoughts

Duck nails offer an endless array of creative expression possibilities, whether you’re drawn to playful cartoonish designs, elegant minimalist art, or sophisticated watercolor interpretations. Long nails provide the perfect canvas for showcasing detailed duckling imagery — they give you actual space to work with, room to add personality and dimension, and enough surface area that your design feels intentional and complete rather than cramped or overly simplified.
The beauty of duck nail art lies in its versatility and the genuine joy these charming waterfowl inspire. You can lean into maximum cuteness with accessories and expressive faces, channel sophisticated elegance through minimalist silhouettes and watercolor effects, or embrace pure fun with rainbow pastels and sparkly holographic finishes. Whatever your style, there’s a duck design approach that resonates with you.
When choosing your duck nail design, think about what resonates with your personal aesthetic and what you’ll actually wear confidently. A design that makes you genuinely happy every time you look at your hands is infinitely more valuable than following trends that don’t align with your vision. Long nails are an investment in your appearance and require maintenance, so they deserve to showcase designs you genuinely love. Whether you choose one of these designs exactly as described or use them as inspiration for your own creative hybrid, let your duck nails be a reflection of your unique style, personality, and the joy these adorable creatures bring to the world.
