

Duck nails—those adorable, slightly flared tips with a curved point that resembles a duck’s bill—have become a beloved nail trend for anyone who loves a bit of personality and playfulness with their manicure. The thing is, many people assume duck nails only work on longer nail beds, thinking short nails can’t pull off this whimsical shape. That’s actually not true. When you work with the proportions of shorter nails and choose the right colors and designs, duck nails absolutely shine—and green is one of the most versatile, sophisticated, and flattering colors to work with.
Green duck nails are particularly special because green has this unique ability to feel both calming and bold at the same time. Whether you’re drawn to soft pastels, rich jewel tones, or anything in between, there’s a shade of green that’ll complement your skin tone and personal style. Short nails, in particular, benefit from green because the color creates visual interest that draws the eye to your hands without requiring tons of length. The duck shape on short nails actually looks more refined and wearable in everyday life—you get the fun, trendy factor without the practical hassles of long nails.
The challenge with short duck nails is finding designs that don’t feel cramped or visually overwhelming. You need designs that scale beautifully to shorter proportions, that work with the curved duck shape rather than against it, and that still feel current and intentional. I’ve put together 12 specific, tested green duck nail designs that look stunning on short nails, from minimalist approaches to more decorative styles. Each one includes exactly what makes it work and how to actually achieve it.
1. Sage Green with Gold Accents
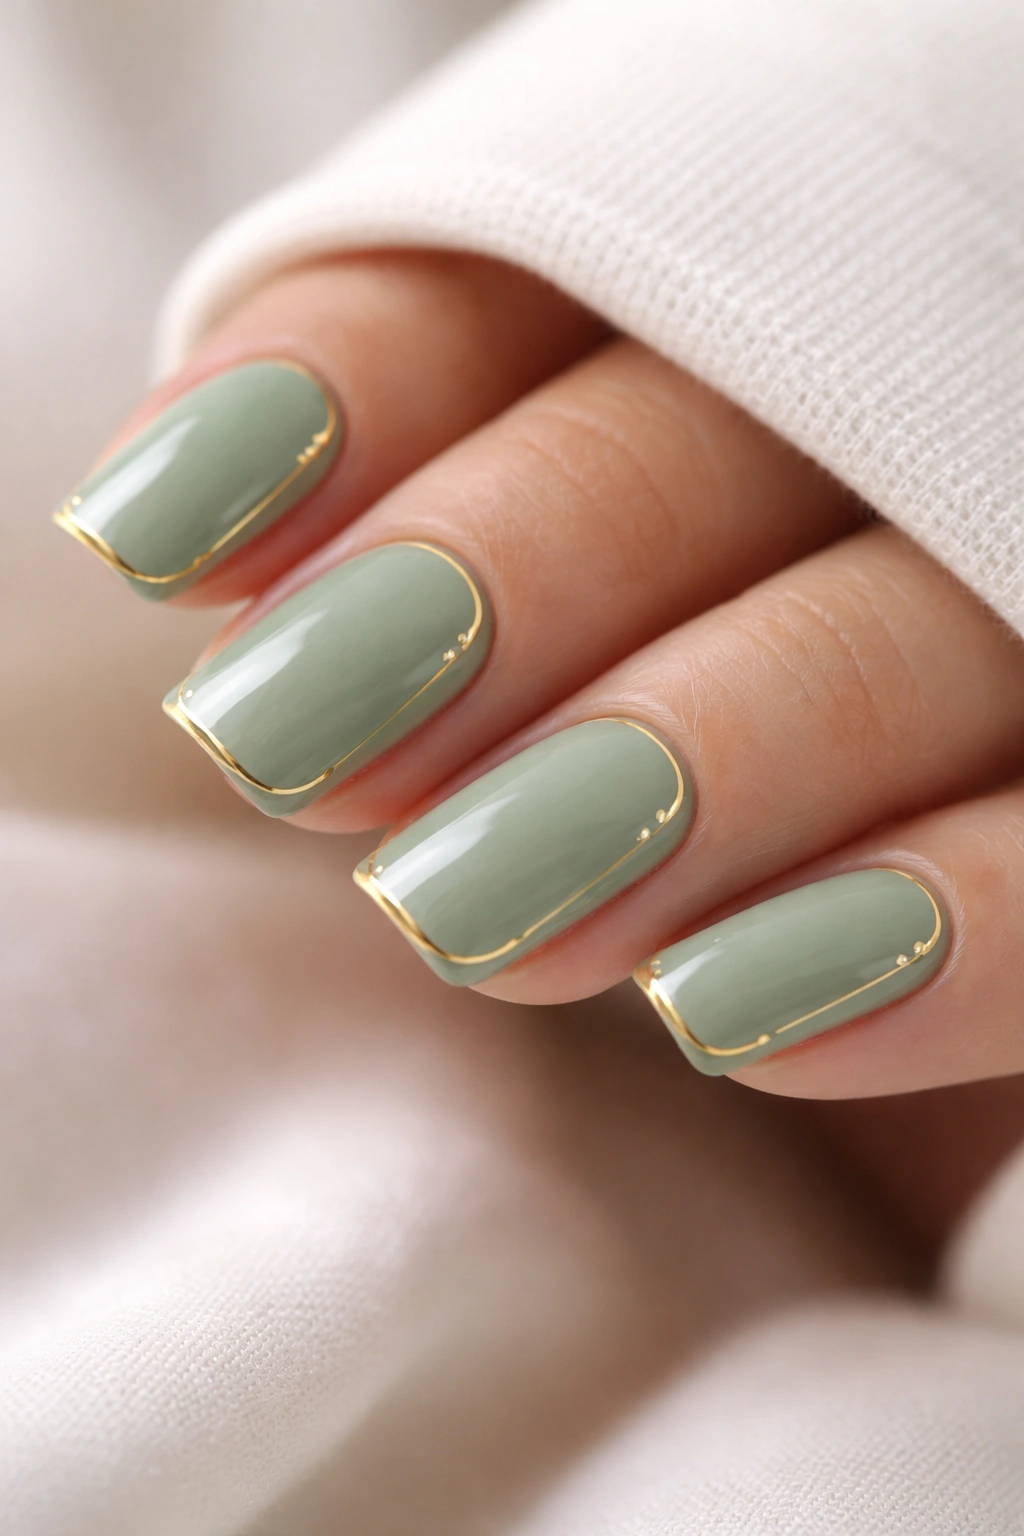
Sage green sits in that perfect middle ground—it’s soft and muted enough to feel sophisticated, but with enough warmth to prevent it from looking washed out on short nails. When you pair it with gold accents, you get a combination that reads as elevated and intentional rather than fussy. The dusty, slightly grayed-out quality of sage green is incredibly forgiving and works across most skin tones, which is why it’s such a reliable choice for short nails where every bit of surface matters.
Why This Design Works on Short Nails
The muted sage tone doesn’t fight for attention the way a bright or highly saturated green might. This means your short nail bed still has room to breathe visually, and the duck shape reads clearly without feeling cramped. Gold accents add dimension and luxury without requiring extra length or complicated nail art.
How to Apply This Look
- Start with a creamy sage green base coat (two thin coats for even coverage—thin coats always apply better on short nails than one thick coat)
- Use a fine-tipped gold brush or a thin liner to paint a delicate gold outline around the cuticle area, creating a thin frame effect
- Add 2-3 tiny gold dots or dashes along the sides of the nail bed, spacing them evenly from cuticle to tip
- Apply a glossy top coat to seal everything and add shine—glossy finishes make short nails look more intentional and polished
Pro tip: If you don’t have a steady hand for gold liner work, use thin gold striping tape instead. Peel it off carefully before the top coat fully hardens for crisp, clean lines with zero wobble.
2. Olive Green Minimalist Design
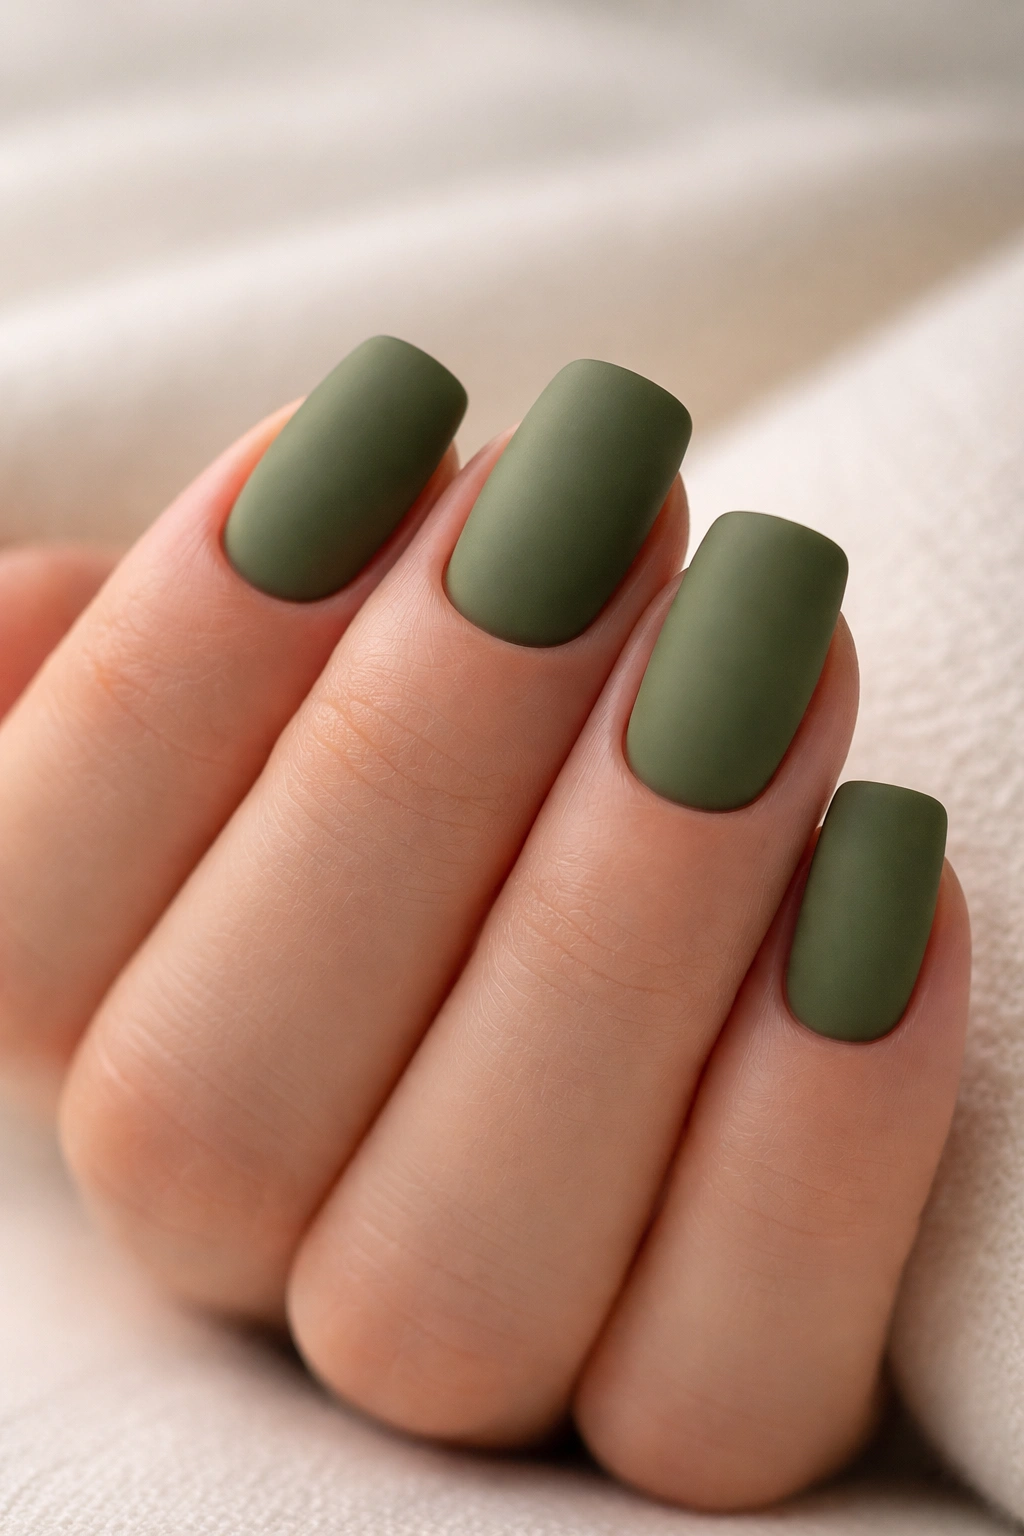
Olive green is one of those unexpected colors that somehow works for everyone. It has a sophisticated, almost understated vibe that looks especially good on short nails because the design philosophy is “less is more.” This shade leans slightly toward brown while still reading clearly as green, which makes it feel grown-up and wearable in any professional setting.
Why Minimalism Suits Short Nails
Short nails naturally demand restraint in design. When you lean into that constraint rather than fighting it, you get designs that feel intentional and modern. A single-color manicure on short nails—especially with a quality finish—reads as intentional and polished, not limited.
Application Details
- Apply two thin coats of olive green, ensuring complete coverage without streaking
- Use a matte top coat for a modern, velvety finish (matte transforms how short nails look—it makes them feel more substantial and fashionable)
- If you want any detail at all, add a barely-there shimmer: one coat of clear top coat mixed with a tiny pinch of green or gold mica powder, applied only to the tip of the nail for an ombré-subtle effect
- Finish with a glossy seal coat over the whole nail for protection
Worth knowing: Olive green shows dust and fingerprints more readily than some shades, so you’ll want to moisturize your cuticles frequently to make the manicure look fresh. A tiny dab of cuticle oil applied around the nail edges keeps everything looking polished.
3. Mint Green with White Ombre
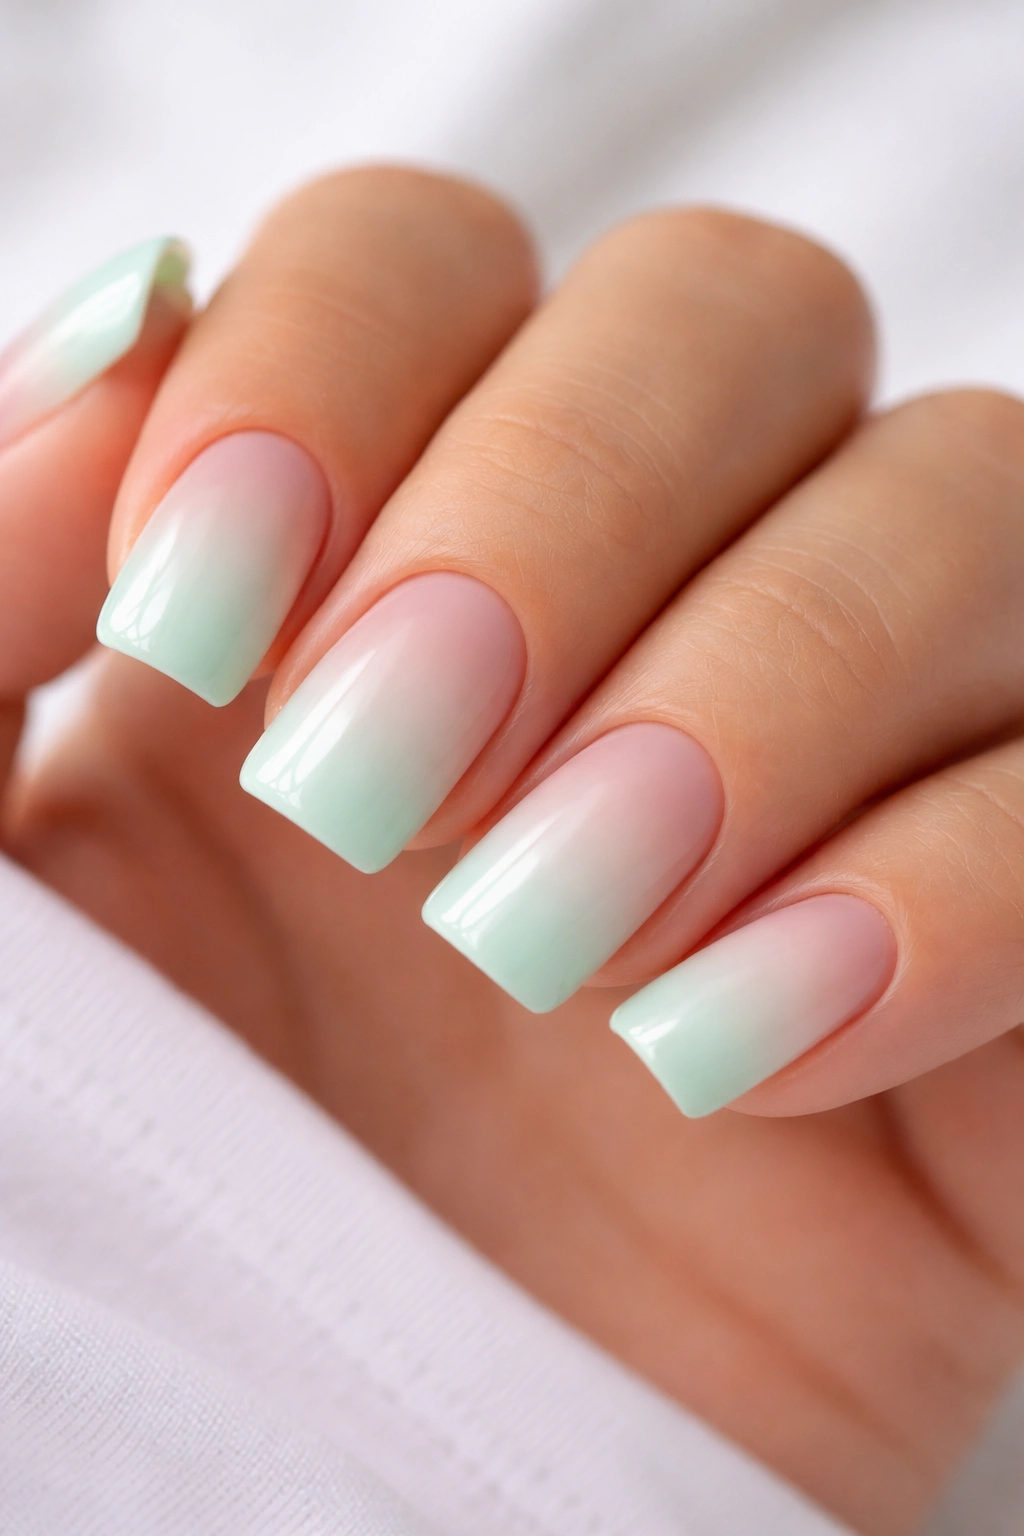
Mint green is the approachable green—it reads as fresh and friendly rather than bold. When you combine it with a white ombre fade that concentrates the white at the tip, you create a design that feels more interesting than a solid color, but the gradual transition ensures short nails don’t look cluttered. The white ombre also creates an illusion of slightly more length because the eye follows the lighter color up the nail.
Why the White Transition Works
The ombre transitions the focus toward the tip, which is exactly where you want the eye on short duck nails. You’re essentially using color gradation to draw attention to the shape. White fades beautifully against mint without creating stark contrast that would feel heavy on small nail real estate.
How to Create the Ombre Effect
- Paint two coats of mint green as your base
- Use a makeup sponge (yes, literally a cosmetic sponge—it’s the easiest tool) and dab white polish onto the sponge
- Gently bounce the sponge onto just the tip third of the nail, working the color upward in light, dabbing motions (not wiping—that removes the base color)
- Do 2-3 light passes to build the white gradually rather than one heavy application
- Seal with a glossy top coat to blend the sponge marks into a cohesive gradient
Quick tip: The sponge technique is messier than a brush, so do this over a paper towel or old cloth and have makeup remover handy to clean up around the cuticles immediately after application.
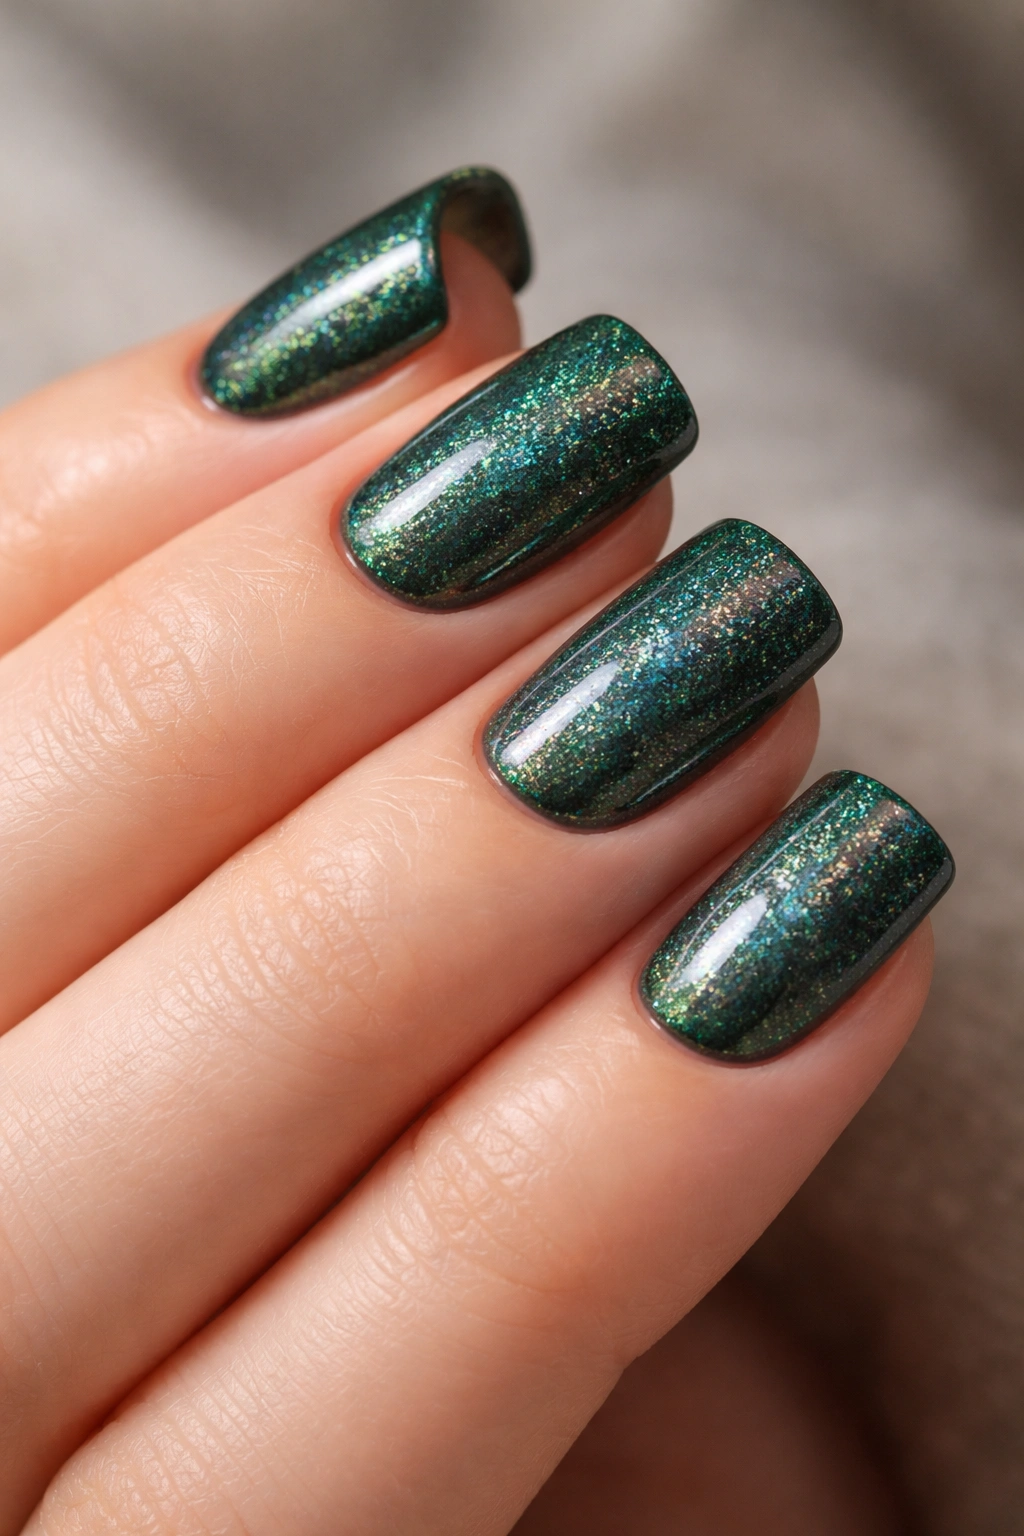
4. Forest Green with Glitter Tips
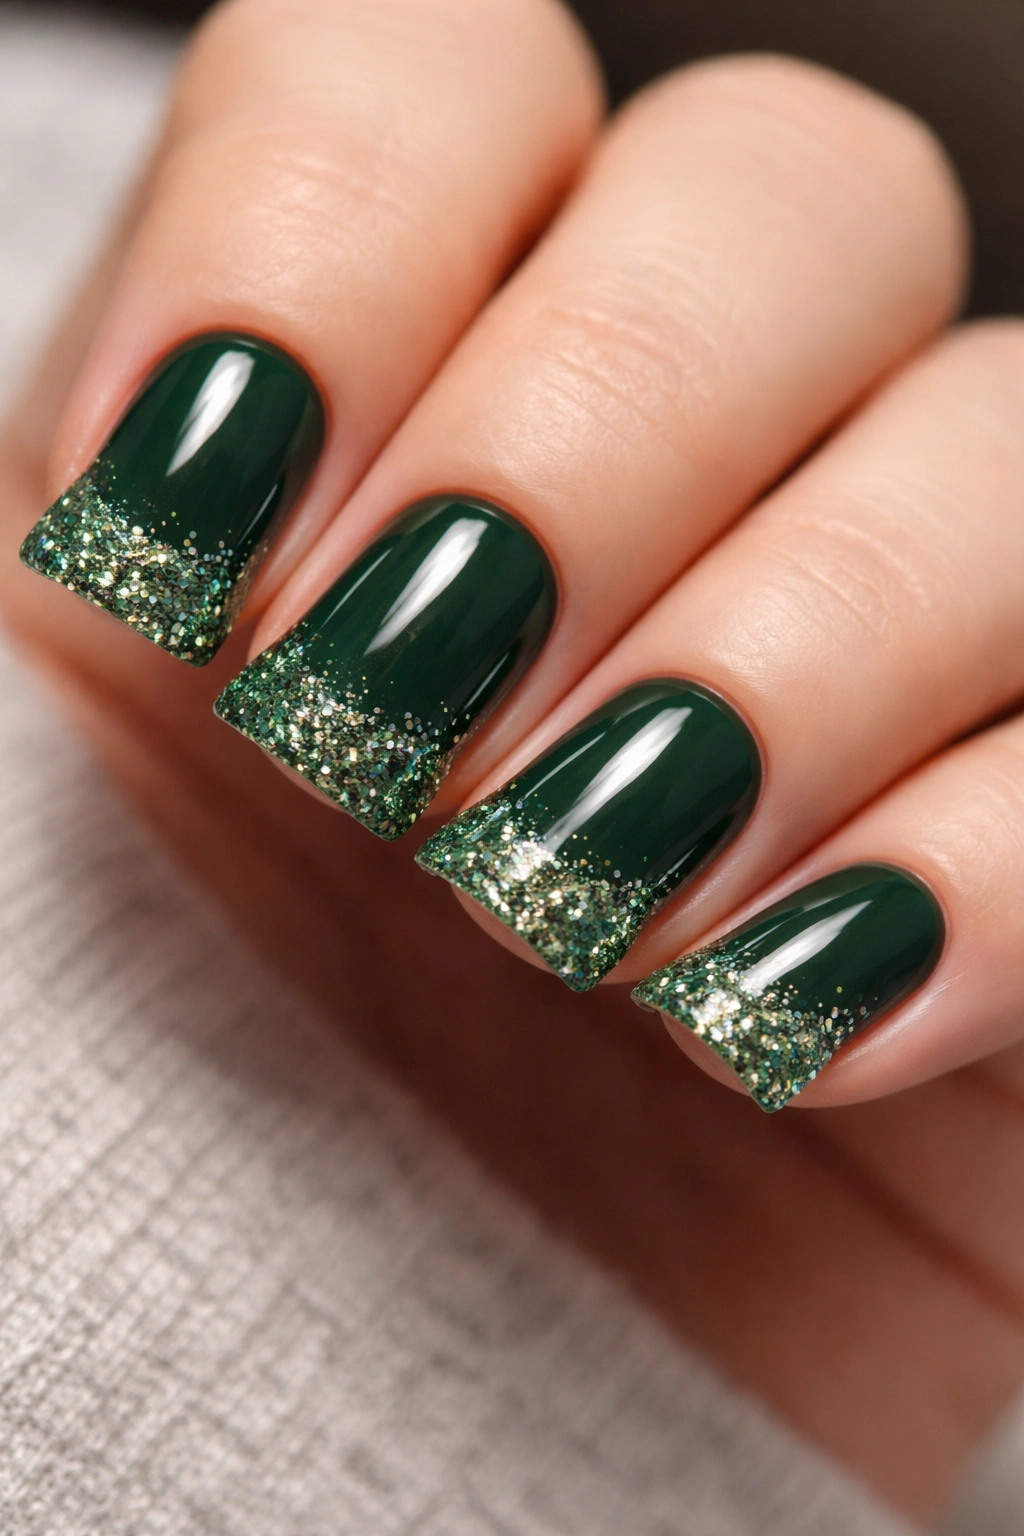
Forest green is deep enough to feel luxe and mysterious, but it’s not so dark that it makes short nails feel heavy. When you add glitter only to the tips—concentrating the shine and sparkle where the duck curve peaks—you get a design that feels celebratory without being overdone. Glitter on short nails works best when it’s applied strategically to specific zones rather than covering the whole nail.
Why Glitter Works on Short Nails
Glitter catches light and draws the eye, which means it creates visual interest that compensates for actual surface area. By placing glitter only at the tip, you’re using it as a design element rather than filling space. This is the key to making short nails feel intentional rather than cramped.
Application Technique
- Apply two coats of forest green and let it dry completely
- Mix glitter pieces (not glitter polish—loose glitter particles) with a small dab of clear top coat in a tiny dish
- Using a small brush, apply the glitter mixture only to the upper third of the nail, concentrating more glitter right at the curve of the duck tip
- Apply a generous seal coat of clear top coat over everything to trap the glitter and create a smooth surface
- This prevents glitter from snagging on things, which is especially important on short nails
Insider note: Chunky glitter reads better on short nails than fine shimmer. Larger particles are more visible on smaller surfaces and create more noticeable sparkle without requiring as much coverage.
5. Seafoam Green French Tips
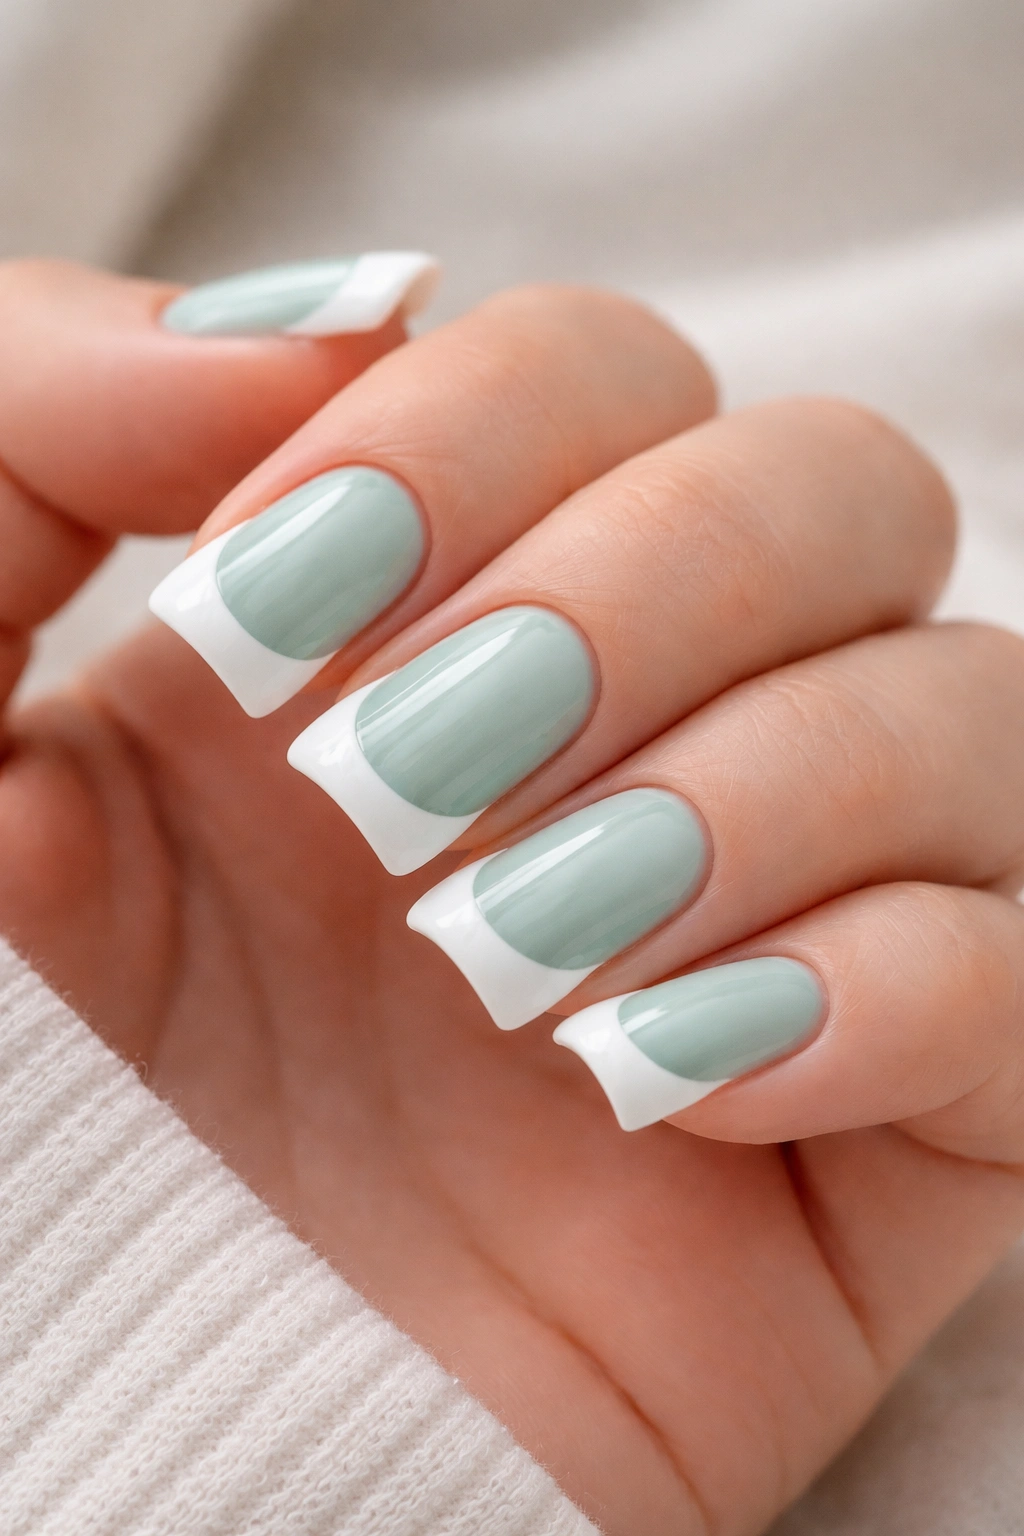
Seafoam hits that sweet spot of being a true green without being too saturated or too muted. French tips on short duck nails are brilliant because the white accent at the tip reinforces the duck shape itself—your natural nail already has a white edge, so you’re essentially playing with the proportion and depth of that natural feature. This design feels classically elegant while still embracing the trendy duck shape.
Why French Tips Suit Short Duck Nails
The French tip design naturally draws focus to the tip of the nail, which is where your duck shape is most visible and dramatic. You’re using a classic design principle—negative space and color contrast—to emphasize the shape. On short nails, this is essentially free visual interest because you’re working with a shape that already exists.
Creating Clean French Tip Lines
- Paint your entire nail with two coats of seafoam green
- Use a thin striping brush or angled liner brush and white polish to paint a curved line across the nail, roughly 2-3mm from the tip (on short nails, this distance matters—too thick and it looks childish, too thin and it disappears)
- Paint over that line a second time to ensure opacity and crisp edges
- If your line isn’t perfectly straight, use a correcting brush dipped in seafoam green to clean up the edges while the white is still wet
- Seal with a glossy top coat
Worth knowing: The best French tips on short nails use a slightly thicker line than traditional French manicures on long nails. Your proportions are different, so a thinner line that works on long nails actually disappears on short nails. Embrace slightly bolder proportions.
6. Emerald Green with Geometric Patterns
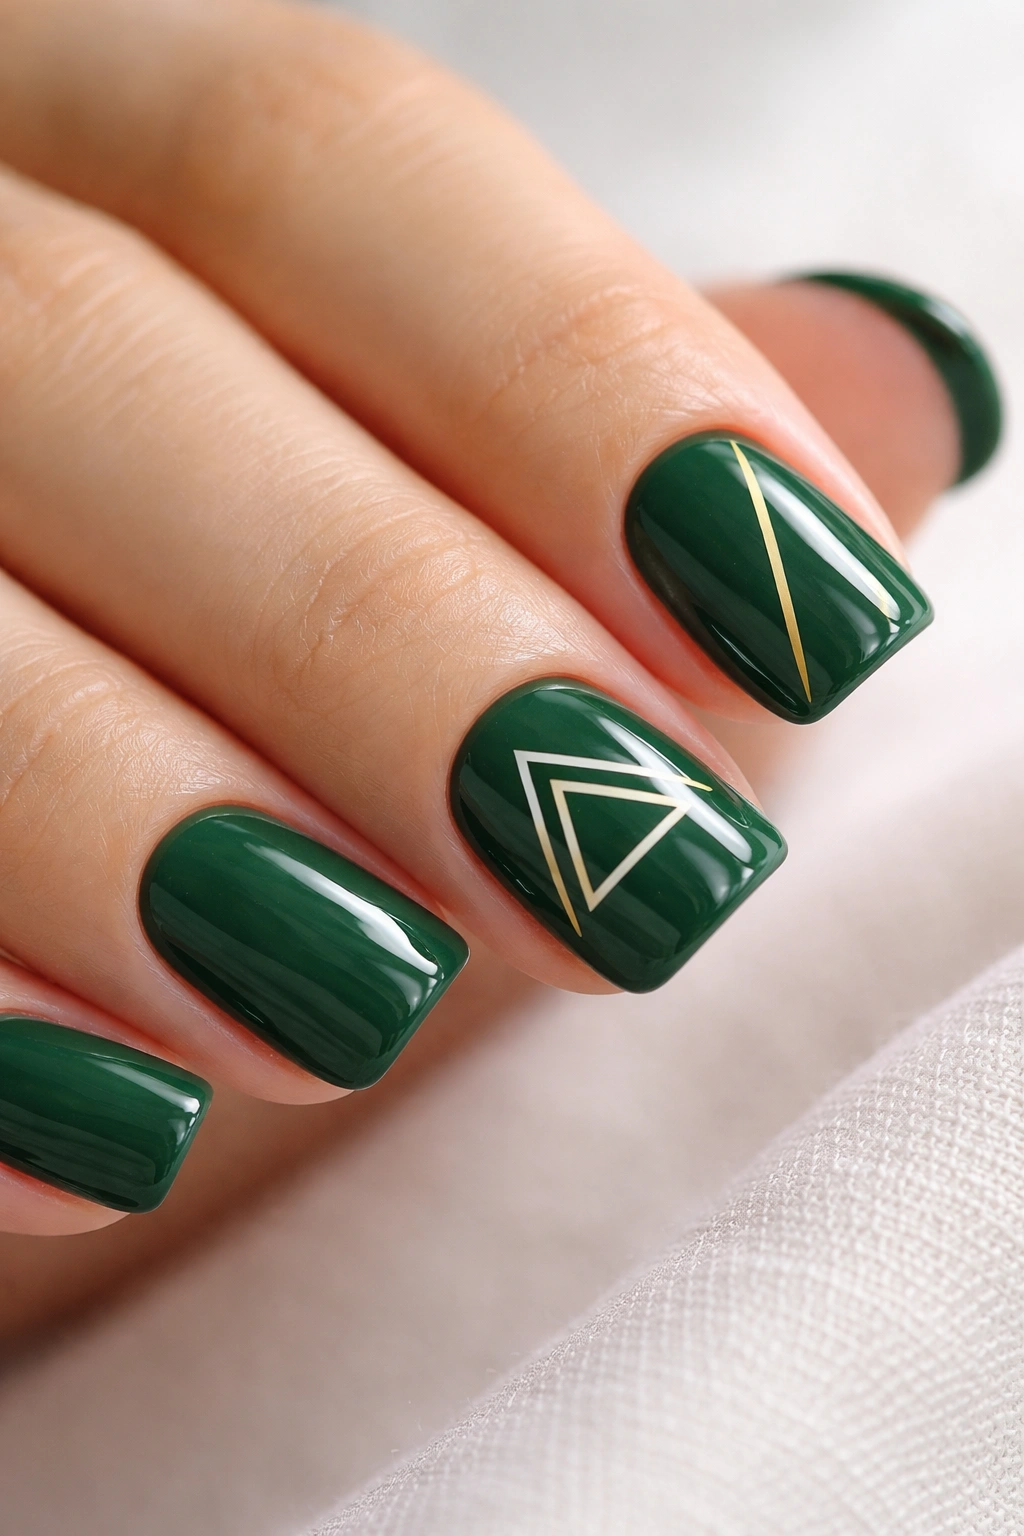
Emerald green is where green gets dramatic and jewel-like. It’s bold without feeling overwhelming, especially when you pair it with geometric patterns that feel modern and intentional. Geometric designs work beautifully on short nails because the shapes themselves create visual interest and sophistication—you’re not trying to cram a complex scene into a small space, just arranging clean lines and forms.
Why Geometry Enhances Short Nails
Geometric patterns—triangles, lines, dots, and angular shapes—play to the strengths of short nails. They’re abstract, so they don’t require space to “make sense.” They read as intentional and designed rather than cramped or limited. A single geometric element per nail is all you need.
Simple Geometric Execution
- Paint two coats of emerald green as your base
- Use a thin liner brush and white or gold polish to paint a single geometric shape on each nail: perhaps a small triangle in the corner, thin vertical stripes running from cuticle to tip, or a small angular shape near the tip
- Keep the pattern on only one or two nails—having geometry on all ten reads as too busy on short nails
- Seal with glossy top coat
Pro tip: If hand-painting geometry feels risky, use thin striping tape to create perfectly straight lines. Painter’s tape for nails is sticky enough to adhere and comes off cleanly without damaging polish, making it your secret weapon for clean geometric lines.
7. Lime Green with Chrome Details
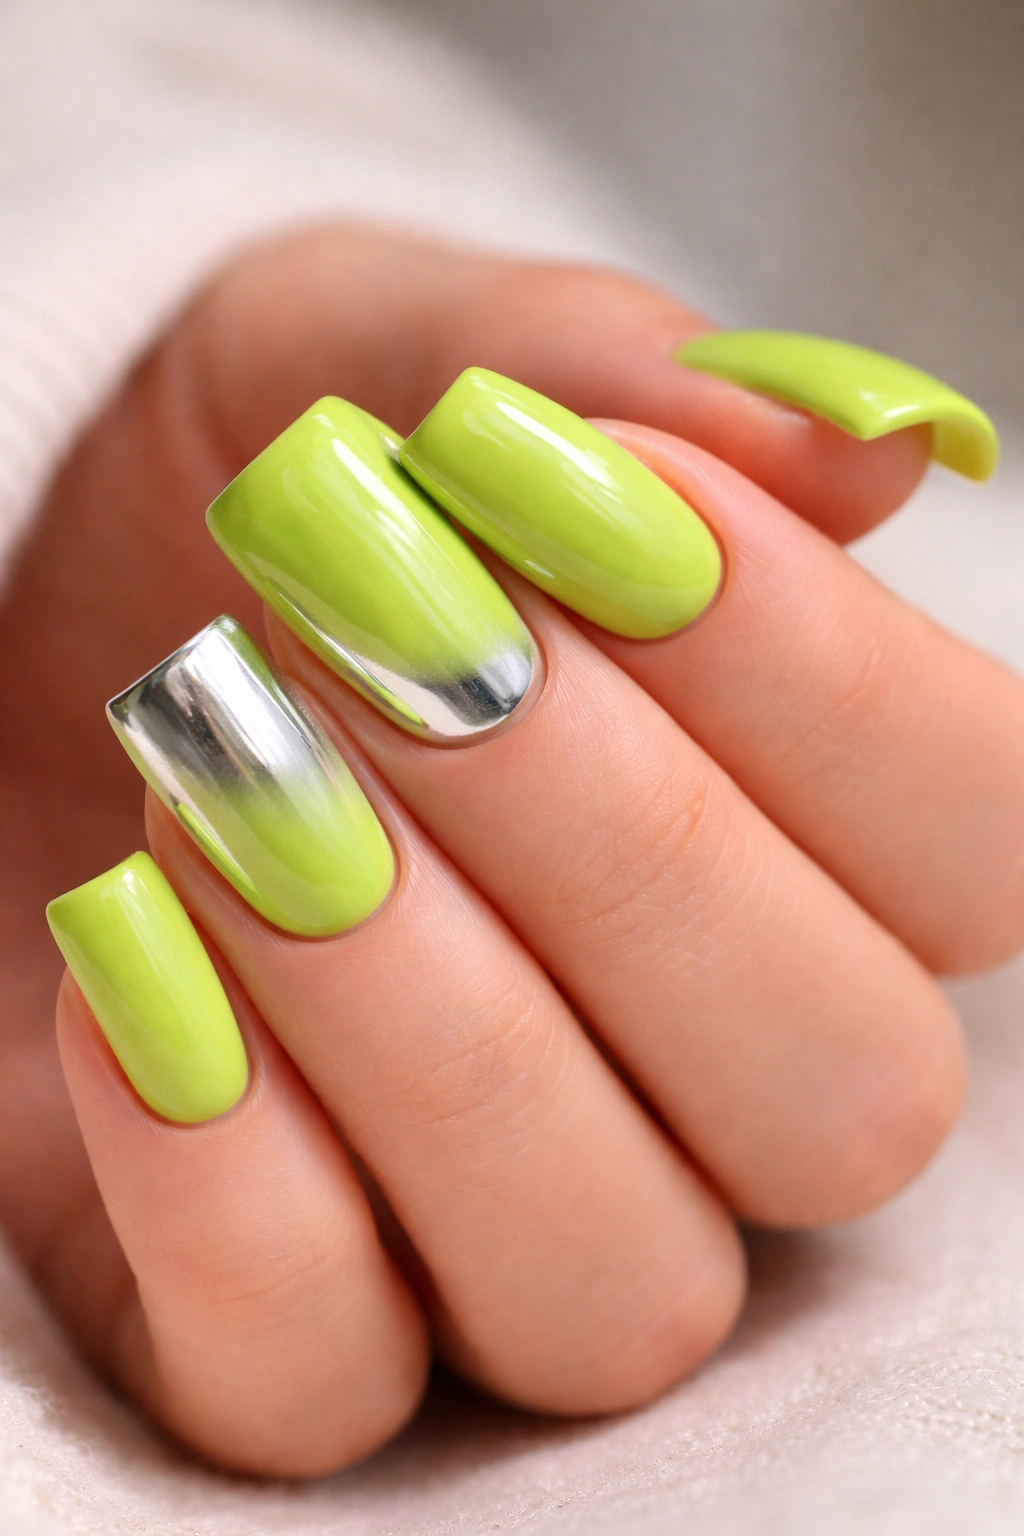
Lime green is the brightest, most playful option on the green spectrum. It’s unapologetically fun and contemporary. When you add chrome details—a mirrored, metallic finish applied in accents—you elevate the design from fun to fashion-forward. Chrome on short nails is particularly striking because it’s such a high-impact finish; you don’t need much to create serious visual impact.
Why Chrome Works as an Accent
Chrome is intensely reflective and catches light dramatically, so even a small application reads as significant. On short nails, this is perfect—you get luxury and impact without requiring actual length or complex application. Chrome is also trendy enough that it signals you’re aware of current nail aesthetics.
How to Apply Chrome Accents
- Paint two coats of lime green on all nails
- On 2-3 accent nails (perhaps your ring fingers and one other), apply a tiny amount of chrome powder using a velvet-topped applicator brush (these come with most chrome powder sets)
- Apply the powder only to specific zones: the very tip curve of the duck nail, a small circular area on the nail bed, or a thin stripe running vertically
- Seal carefully with a top coat designed to work with chrome (regular top coat can sometimes dull the effect)
- Don’t overuse chrome on all ten nails—the power of chrome is that it’s selective
Heads up: Chrome powder requires a slightly different application than regular polish. It needs to be compressed into the surface, then sealed immediately. Don’t skip the sealing step, or your chrome will wear off within days.
8. Pistachio Green Marble Effect
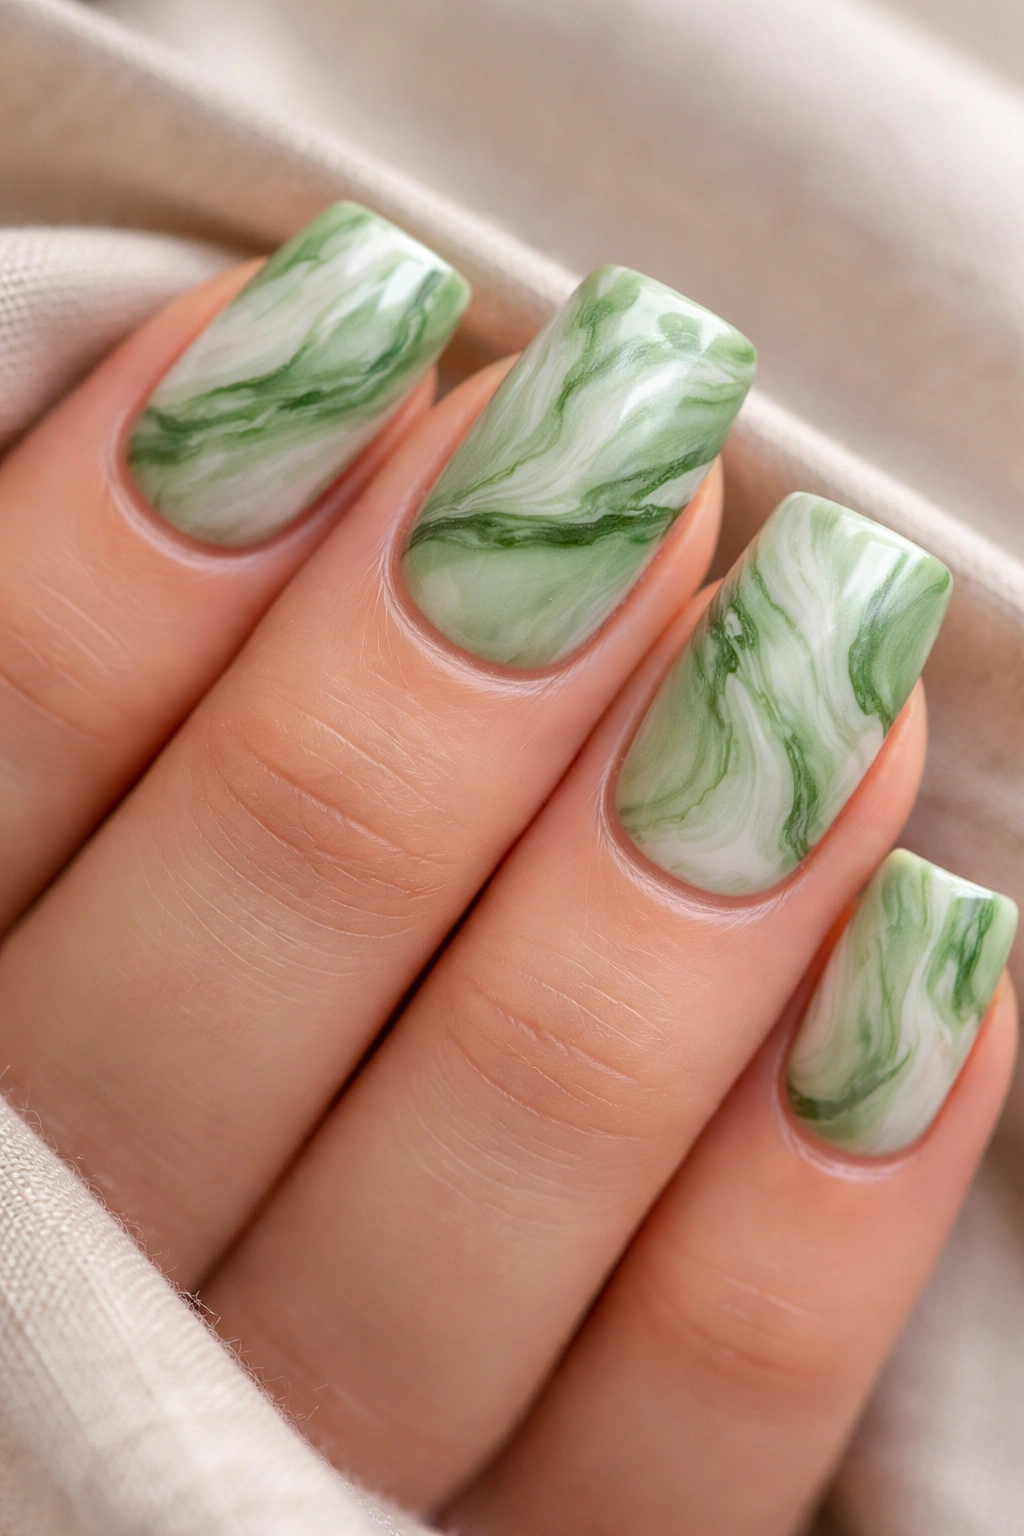
Pistachio green is soft and creamy—it feels almost edible. Marble effects play beautifully with softer colors because the swirled, organic patterns feel naturally delicate rather than trying too hard. Marble on short nails works because the design is abstract and organic—there’s no “right” way for it to look, so whether you nail the technique or not, it reads as intentional. This is genuinely one of the most forgiving designs to attempt.
Why Marble Suits Short Nails
The swirled, irregular pattern of marble design means there’s no small or large space needed for it to read as complete. A marble-effect short nail looks just as intentional as a long one. The organic quality of marble also prevents short nails from feeling geometric or cramped—they feel natural and artistic instead.
Marble Technique for Short Nails
- Paint two coats of pistachio green as your base
- Mix a tiny bit of white polish with a slightly darker pistachio or forest green shade to create a marble swirl shade
- Using a thin brush or dotting tool, paint irregular swirls and curves across each nail in the darker shade
- Don’t overthink this—the less controlled it looks, the more authentic the marble effect becomes
- You want roughly 30-40% of the nail covered in the swirl color, leaving plenty of the base pistachio visible
- Seal with a glossy top coat (glossy finishes make marble effects look more luxurious)
Real talk: Your first marble attempt might not be perfect, and that’s completely fine—and honestly, it probably won’t even show. The whole point of marble is that imperfection is the point. You’re aiming for organic, not precise.
9. Hunter Green with Holographic Shimmer
Hunter green is that forest-meets-gray tone that feels sophisticated and almost architectural. It’s confident without being intimidating. When you layer holographic shimmer over it—not as a coating, but as a subtle scatter of particles that catch light at different angles—you create depth and movement. On short nails, holographic shimmer feels modern and a little bit luxe because of how dramatically it catches light.
Why Holographic Details Matter
Holographic finishes are prisms—they split light into rainbow components depending on the angle and light source. This means they’re constantly changing and catching the eye from different angles. On short nails, this constant visual interest is genuinely valuable. The eye keeps being drawn back because there’s always something new catching light.
Layering Holographic Shimmer
- Paint two coats of hunter green as your base and let dry completely
- Apply a clear base coat over the green (this gives the shimmer something to adhere to and prevents it from mixing with the color)
- While the clear coat is still slightly tacky, apply holographic shimmer powder or holographic gel (these are different products—use whichever you’re comfortable with)
- The tacky clear coat will grab the particles and hold them in place
- Apply holographic elements only to the tips or in a concentrated area—avoid covering the whole nail, which can look costume-y
- Seal with a top coat designed to work with holographic elements
Quick fact: Holographic effects show up best under certain lighting conditions. In natural or bright light, they’re stunning. In warm indoor lighting, they’re more subtle. This makes them perfect for work settings where you want something that’s there without being loud.
10. Celadon Green with Floral Accents
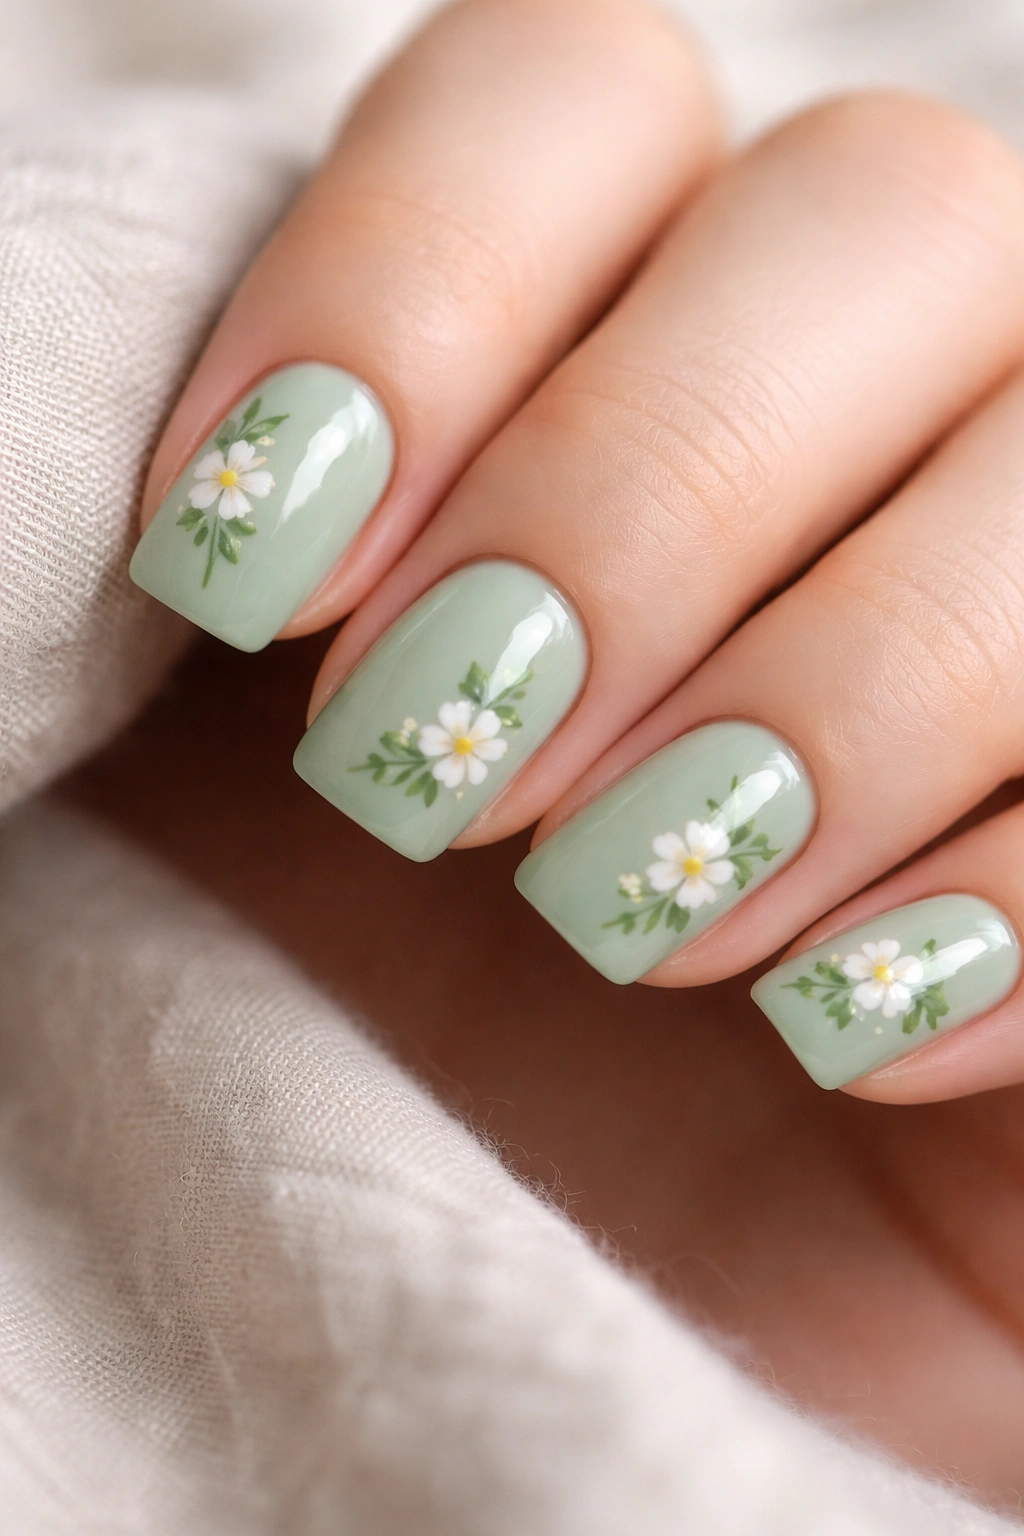
Celadon green is that pale, soft green that feels almost like porcelain—it’s delicate without being baby-ish. Floral accents work beautifully with celadon because the whole combination reads as refined and artistic. Small florals on short nails don’t need to be photorealistic or detailed—simple, stylized flowers with just a few brushstrokes are often more effective than fussy detail work.
Why Florals Work on Short Nails
Florals feel intentional even at tiny scales because they have cultural weight—we recognize flowers as a design choice that signals artistic taste. You don’t need much floral detail to communicate that you went for something considered and beautiful. This is one of those designs where “less is more” actually strengthens the overall effect.
Simple Floral Painting
- Paint two coats of celadon green
- Using a very thin brush and white or pale yellow polish, paint tiny flowers: a simple five-dot circle (petals) with a tiny center dot on 2-4 nails
- Add one or two leaves using green or deeper celadon with a single curved brushstroke
- Space flowers around the nail so they feel positioned, not random
- If you’re nervous about hand-painting, use small floral decals instead (these are pre-printed stickers specifically designed for nails and available everywhere)
- Seal with glossy top coat
Pro tip: Decals are genuinely excellent and not cheating in any way. Professional nail artists use them all the time. The trick to making them look natural is sealing them carefully so there’s no visible edge and ensuring they’re smoothly adhered with no bubbles.
11. Green with Nude Gradient
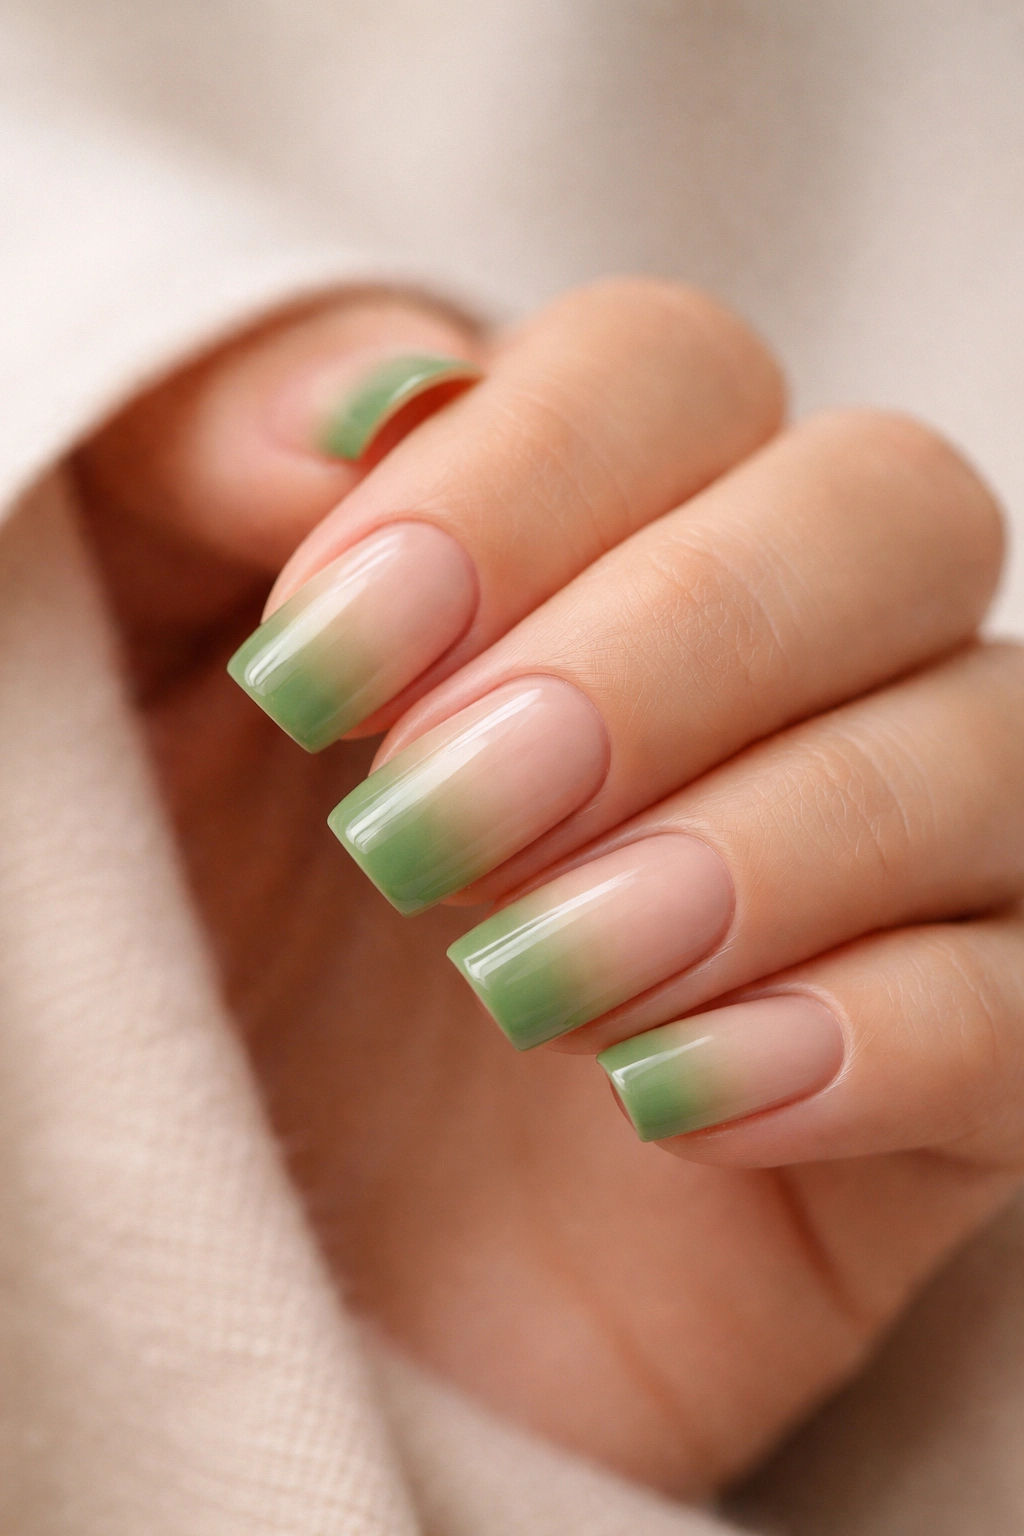
This combination bridges green and neutral territory, making it incredibly versatile and wearable for virtually every setting. A gradient from green at the base to nude at the tip elongates the visual appearance of short nails (the eye follows the transition upward, which creates an illusion of more length). The nude tone softens what green alone might do, making the whole design feel balanced and sophisticated.
Why Gradients Elongate Short Nails
Gradients work because they create movement that draws the eye vertically, and vertical lines always feel lengthening. The transition from one color to another also feels intentional and designed—it signals that your manicure is thoughtful, not just a color applied. This psychology is especially valuable when working with short nail beds.
Creating the Green-to-Nude Gradient
- Paint your entire nail with a creamy, warm nude polish (this is your base) and let it dry completely
- Mix a small puddle of your chosen green polish with clear polish on a palette (roughly 50/50 ratio to soften the green and make it transparent)
- Using a sponge or gradient brush, apply the watered-down green only to the lower third of the nail, working it upward in feathering motions to blend it into the nude
- Do 2-3 passes to build the gradient gradually
- The goal is that by the time you reach the tip, the green is barely visible and the nude takes over
- Seal with a glossy top coat to blend and polish everything
Worth knowing: The sponge technique is messier but easier; the gradient brush requires more control but less cleanup. Choose based on your comfort level. Both methods produce beautiful results on short nails.
12. Kelly Green with Metallic Stripes
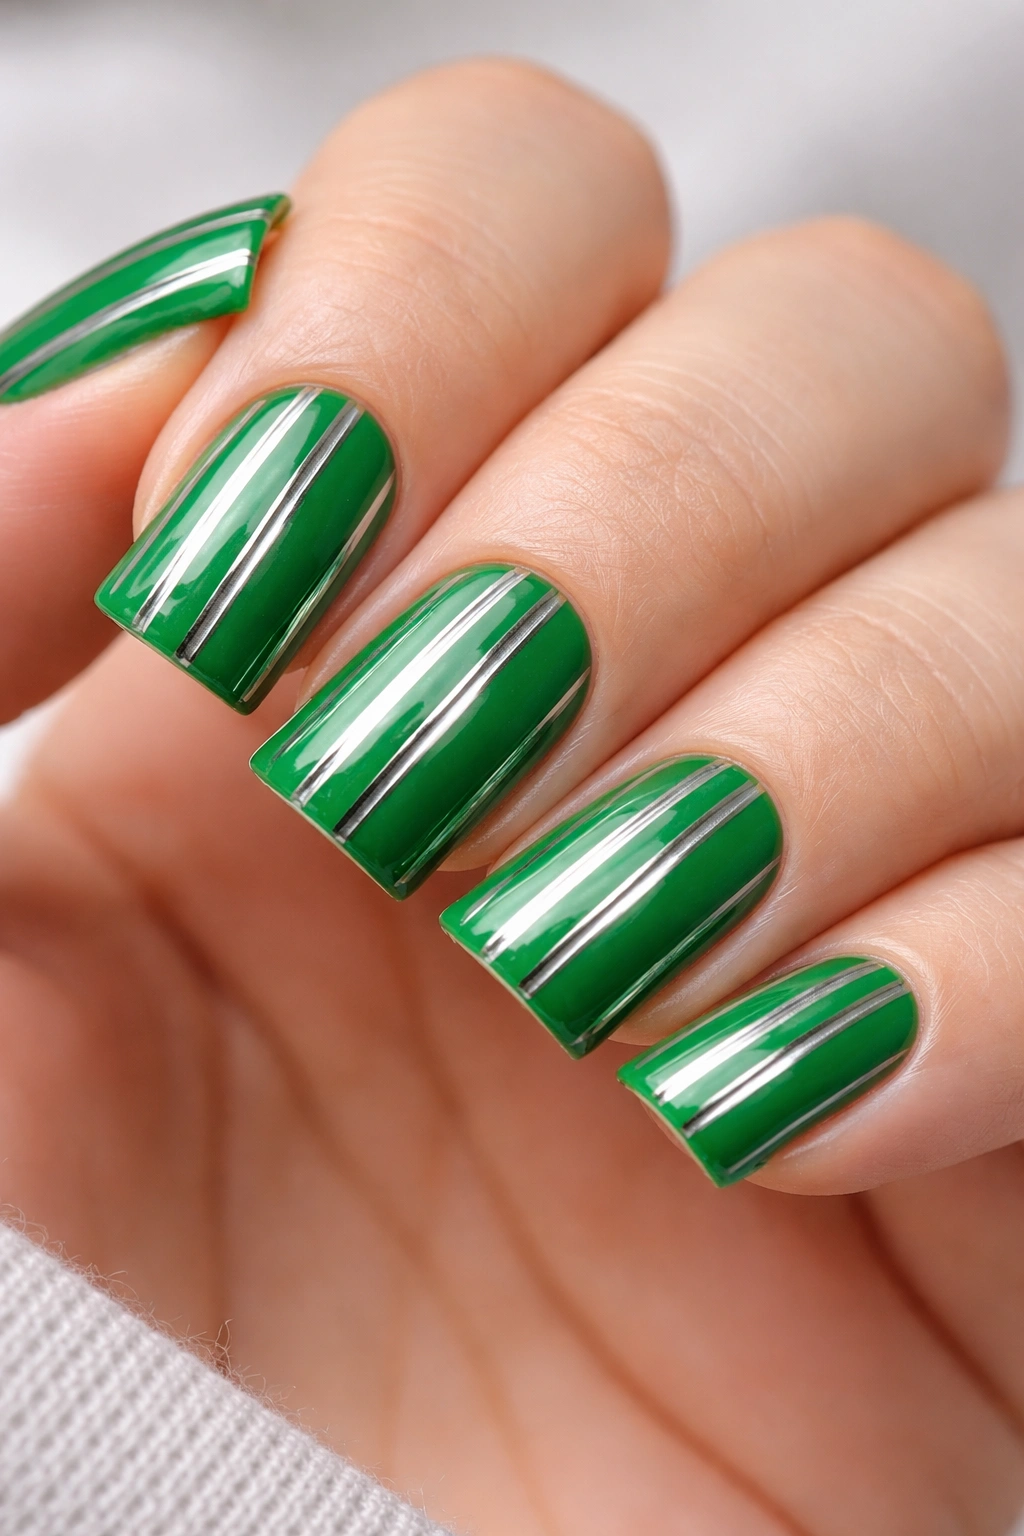
Kelly green sits right in the middle of the green spectrum—it’s vivid enough to feel confident, but not so dark that it looks heavy or heavy on short nails. Metallic stripes running vertically create a visual lengthening effect while adding a design element that feels contemporary and fashion-forward. The vertical direction is key—horizontal stripes would visually shorten nails, while vertical ones do the opposite.
Why Vertical Stripes Enhance Length
Vertical lines are lengthening in fashion, design, and nail art. They draw the eye up and down rather than across, which creates a sense of height. On short nails, this optical trick is genuinely useful. Metallic stripes in particular catch light, so they’re noticed and appreciated even if they’re quite thin.
Creating Vertical Metallic Stripes
- Paint two coats of kelly green as your base
- Use either thin metallic striping tape (easiest approach) or a thin liner brush and gold or silver polish
- If using tape: apply thin strips running vertically from cuticle to tip, spacing them roughly 3-4mm apart (too close looks cluttered, too far looks empty)
- If using polish: paint thin vertical lines with a steady hand, keeping them evenly spaced and straight
- Paint only 2-3 vertical stripes per nail—more than that reads as too busy on short nails
- Seal with glossy top coat (this rounds out the stripes visually and gives them dimension)
Pro tip: Metallic striping tape is your friend if you’re worried about paint application. It adheres cleanly and peels off without damaging the green base, giving you professional results without the steadiness requirement of hand-painting.
Final Thoughts
Green duck nails on short nails aren’t a contradiction—they’re actually a perfect pairing when you choose designs that scale beautifully to shorter proportions. The key across all of these 12 designs is that you’re being intentional with color choice and design element, which actually signals more sophistication than trying to fill space on longer nails. Whether you gravitate toward soft, muted greens that feel understated or bold, jewel-toned shades that command attention, there’s a duck nail design here that’ll make your short nails feel intentional, fashionable, and genuinely beautiful.
The short nail advantage you might not have considered: maintenance and growth. Short nails with duck shape stay healthy and strong longer because the actual structural stress on the keratin is lower. This means your manicure will look fresh and intentional for longer before needing a fill or refresh. Invest in quality base coats and top coats, and your designs will last beautifully. The most polished short nail manicure in the world starts with healthy nail beds and ends with a good seal coat—everything in between is just artistry and personal expression.
