

Duck nails have become the go-to statement shape for anyone wanting a modern, elongated silhouette with serious edge. When you combine the duck nail’s distinctive pointed-but-rounded contour with the timeless elegance of French tips, you get a nail design that somehow feels both classic and daring at the same time. The elongated canvas that duck nails provide is absolutely perfect for showing off creative French tip variations—far beyond the standard white-on-pink combo that most people think of when they hear “French manicure.”
The beauty of French tip duck nails lies in how the shape amplifies the design. That dramatic length and the subtle duck bill silhouette draw attention directly to your nail art, making even minimal designs feel intentional and polished. Whether you’re drawn to color-blocked geometry, ombre fades, metallic accents, or intricate nail art layered over the classic French base, duck nails give you the real estate to actually show what you’re creating. The pointed tip and slightly flared sides create natural focal points that make French tip variations look even more refined than they would on a traditional oval or square shape.
What makes French tip duck nails particularly versatile is that they work for nearly every occasion and aesthetic. You can keep them minimal and understated for professional settings, elevate them with gems and chrome for special events, or push them into artistic territory with seasonal colors, gradient fades, and mixed nail art. This guide covers twelve of the most striking French tip duck nail designs worth trying—each one different enough to feel like a completely fresh look, yet all rooted in that elegant French base that keeps them feeling intentional rather than chaotic.
1. Soft Ombre French Tips
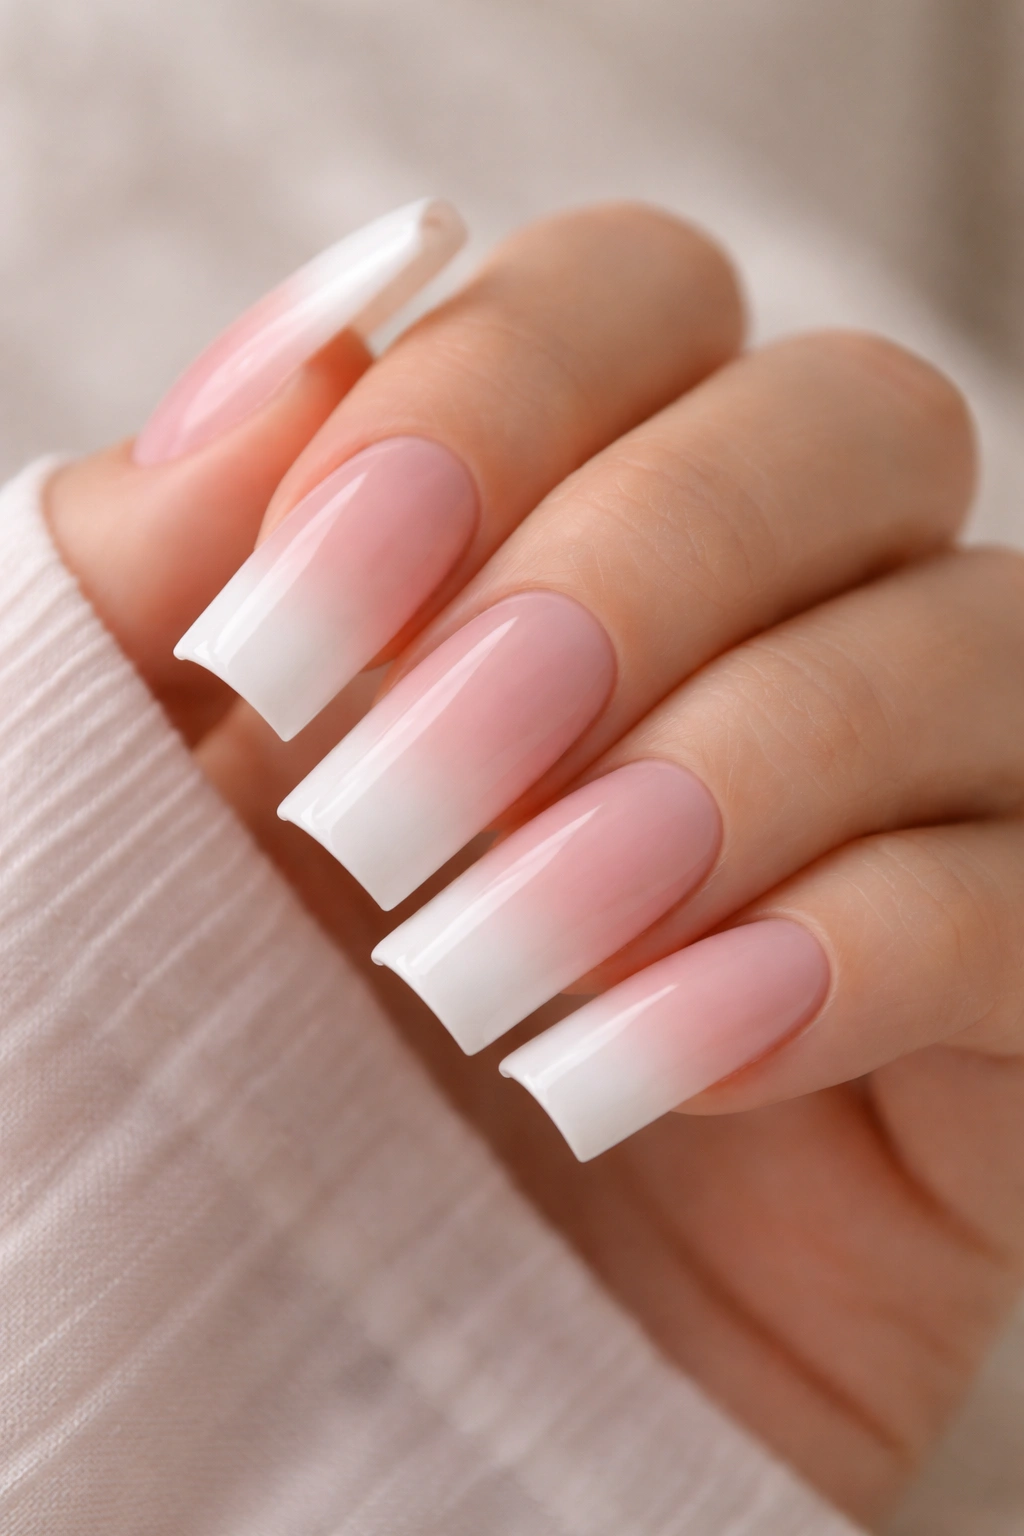
A soft ombre transitioning from pale pink at the base to white at the tip creates an incredibly sophisticated version of the traditional French manicure. Instead of a hard line between colors, this design uses a gradient technique to blend the two shades seamlessly, giving your duck nails an ethereal, almost airbrushed quality that photographs beautifully in any lighting.
The Technique That Makes This Work
The ombre effect requires either a sponge gradient method or a traditional airbrush, depending on your skill level and available tools. Start by applying a base coat of your nude-to-pink shade, then gradually sponge white into the tip area, building the gradient slowly with light, dabbing motions rather than aggressive pressure. The key is working in multiple thin layers—this gives you better control and creates a smoother, more natural-looking transition between your base color and white rather than a stark division.
Why This Design Stands Out
- The gradient feels more modern and intentional than a flat French tip, without straying into busy territory
- The soft pink-to-white transition is deeply flattering on nearly every skin tone when you choose your base pink carefully
- This design works equally well with natural light or artificial nail lamps—there’s no harsh line to look unfinished
- It’s surprisingly forgiving to maintain; regrowth is less noticeable than with a traditional sharp French line
Pro tip: Use a makeup sponge specifically designated for nails (or cut a small piece from a regular sponge) and dampen it slightly before starting your gradient—this helps the polish blend rather than just sit on top of the sponge in globs.
2. Double-Line Gold French Tips
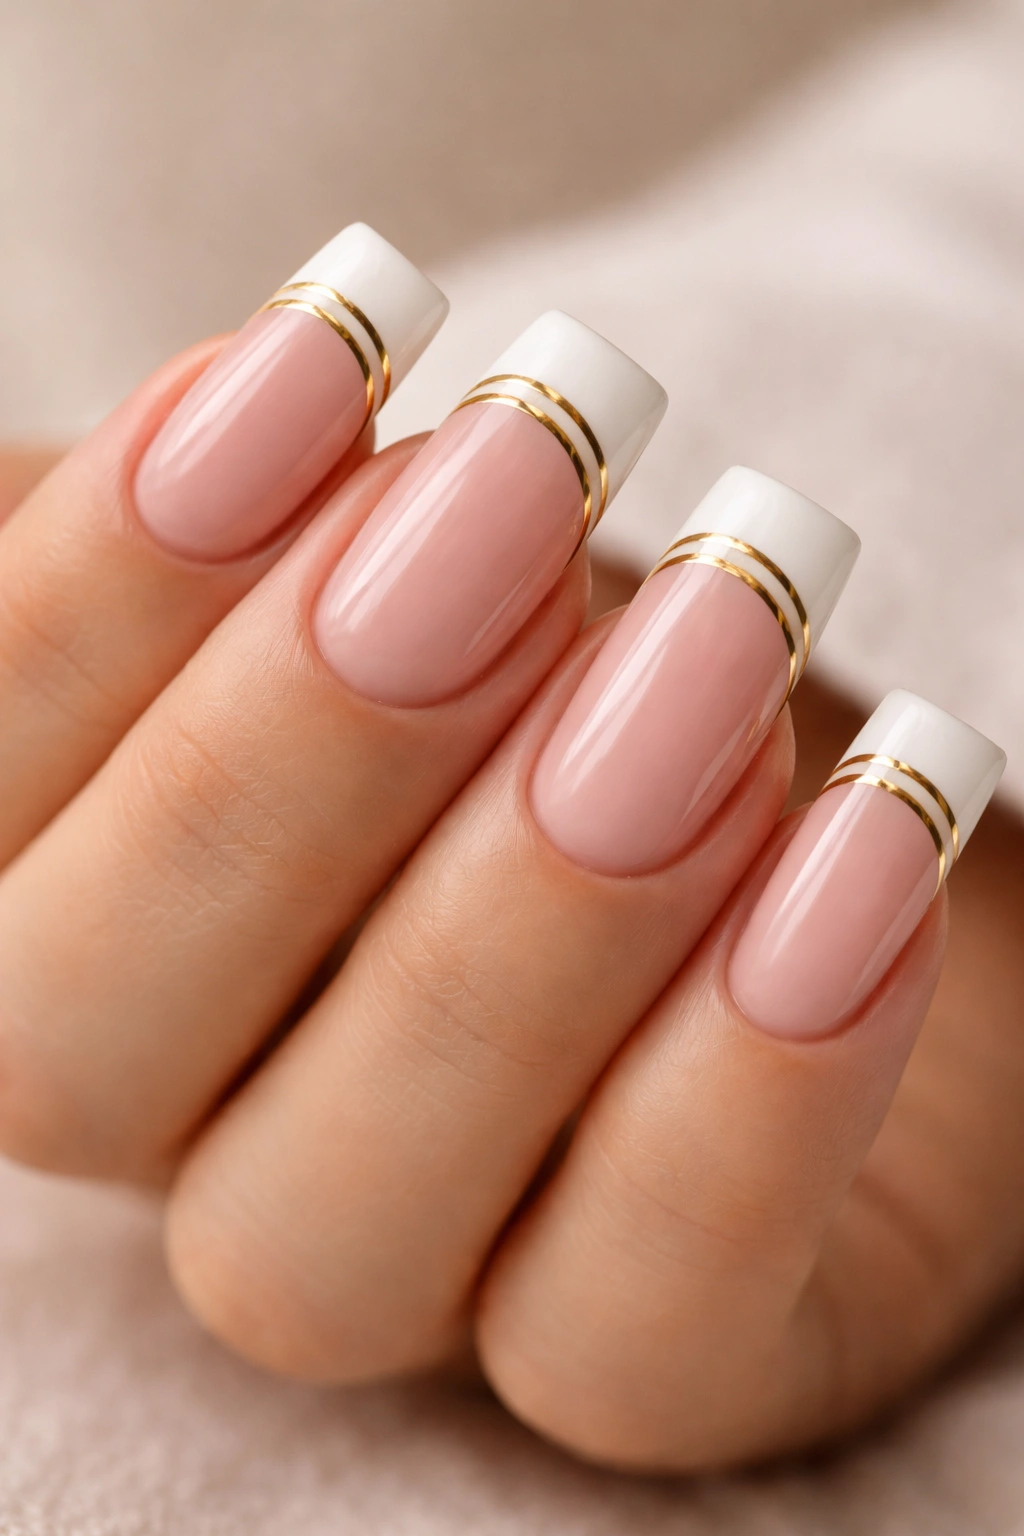
Create architectural interest by adding a thin gold line between your pink base and white tip, essentially dividing your French tip into two distinct zones with a metallic separator. This geometric approach feels more intentional and modern than a standard French tip while keeping the overall look clean and wearable.
Building the Metallic Division
After your base color dries completely, use an extremely fine striping brush or even a toothpick to apply a thin, clean line of gold (or chrome) polish approximately one-third of the way down from the tip. The thinner you can make this line while still keeping it visible, the more elegant the final result. Once the gold is completely dry, apply your white tip above it, and the color division becomes a deliberate design choice rather than just a manicure boundary.
Why This Design Stands Out
- The gold accent prevents the design from feeling boring while maintaining a professional aesthetic
- The geometric division creates a visual sense of balance and intentionality
- This works beautifully with rose gold, champagne, or even gunmetal finishes depending on your color preference
- It’s one of the few modifications to the French tip that feels elevated rather than just decorated
Worth knowing: The most important step is letting your base pink dry completely before adding the gold line—any tackiness will drag your fine line and ruin the clean, precise effect you’re going for.
3. Reverse French Tips with Nude Base
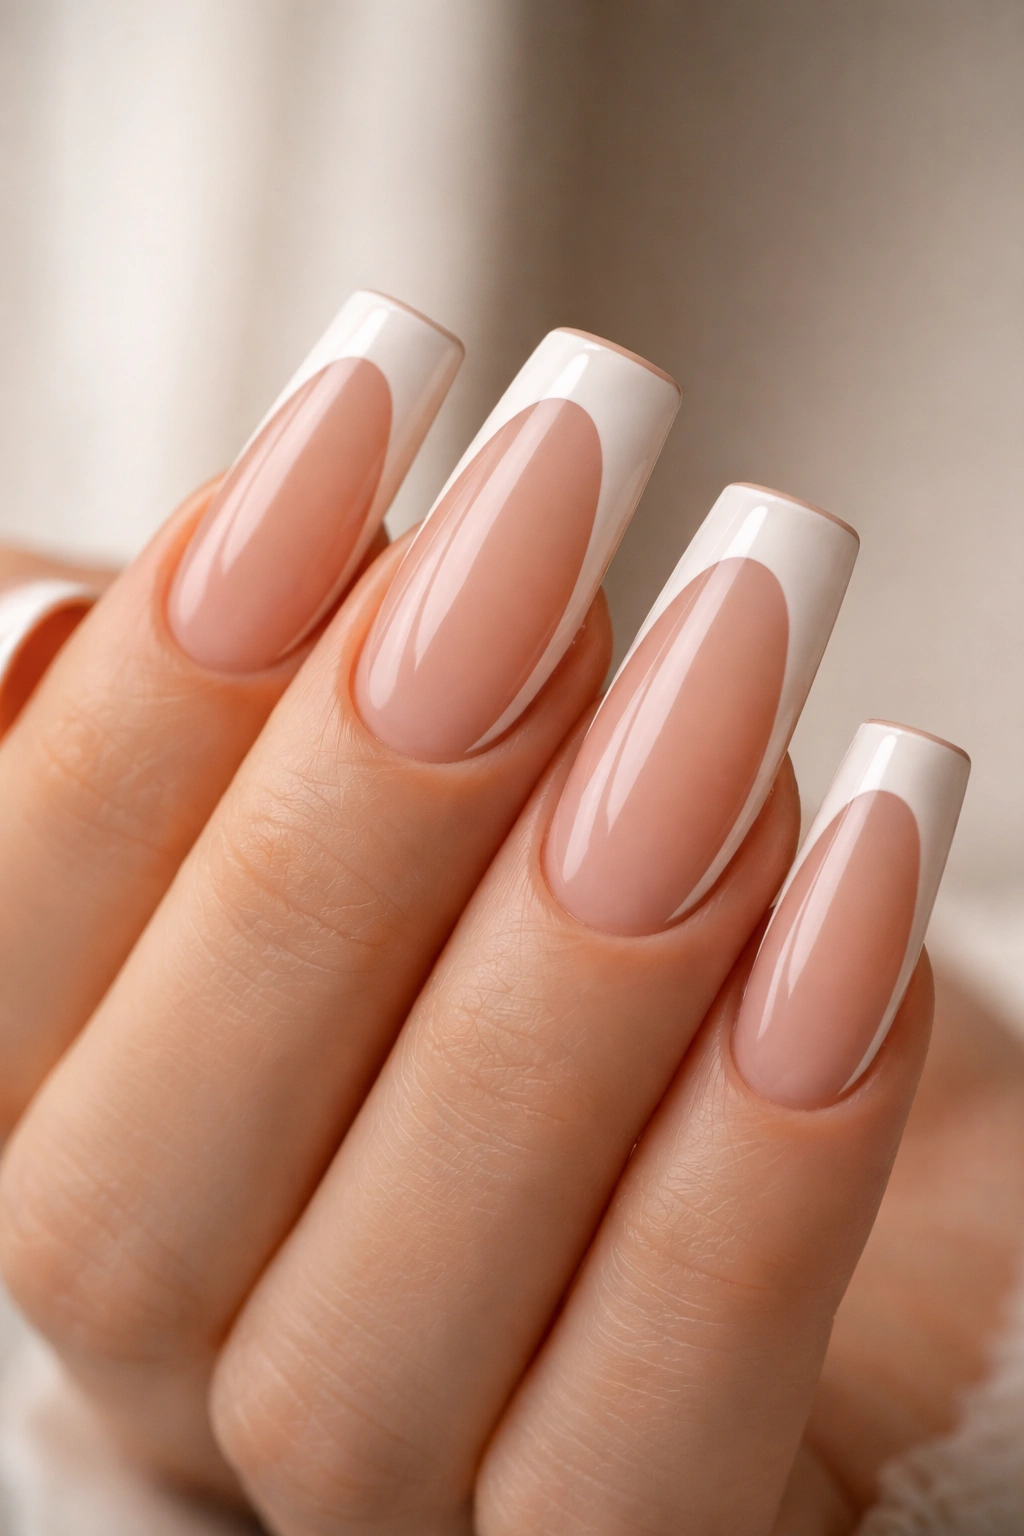
Instead of coloring the tip white and leaving the base nude, flip the traditional formula: paint your duck nails white with a nude or soft pink French tip that sits along the side edges and upper portion of the nail. This inverted take on the classic creates an unexpectedly modern, artistic feel that still reads as intentional rather than accidental.
The Visual Impact of Reversal
Reverse French tips play with our expectations of what a French manicure should look like, which makes them feel fresh and deliberate. The white provides the base canvas while the nude or pale pink creates strategic accent lines. On elongated duck nails, this reversal feels particularly striking because the extended length gives the nude accent room to really make a statement without overwhelming the design.
Why This Design Stands Out
- It feels like you planned this deviation, not like you made a mistake with a traditional French
- The reverse effect is flattering on deeper skin tones where traditional white tips can sometimes feel harsh
- It pairs beautifully with metallic accents—a thin gold or rose gold line along the nude edge creates even more dimension
- Reverse French tips photograph incredibly well and feel fresh without being trendy in a way that dates quickly
Pro tip: Keep your reverse French tip line slightly thicker than you would with a traditional tip—the extra pigment makes it read more clearly as an intentional design choice rather than looking like you didn’t quite get the white to cover fully.
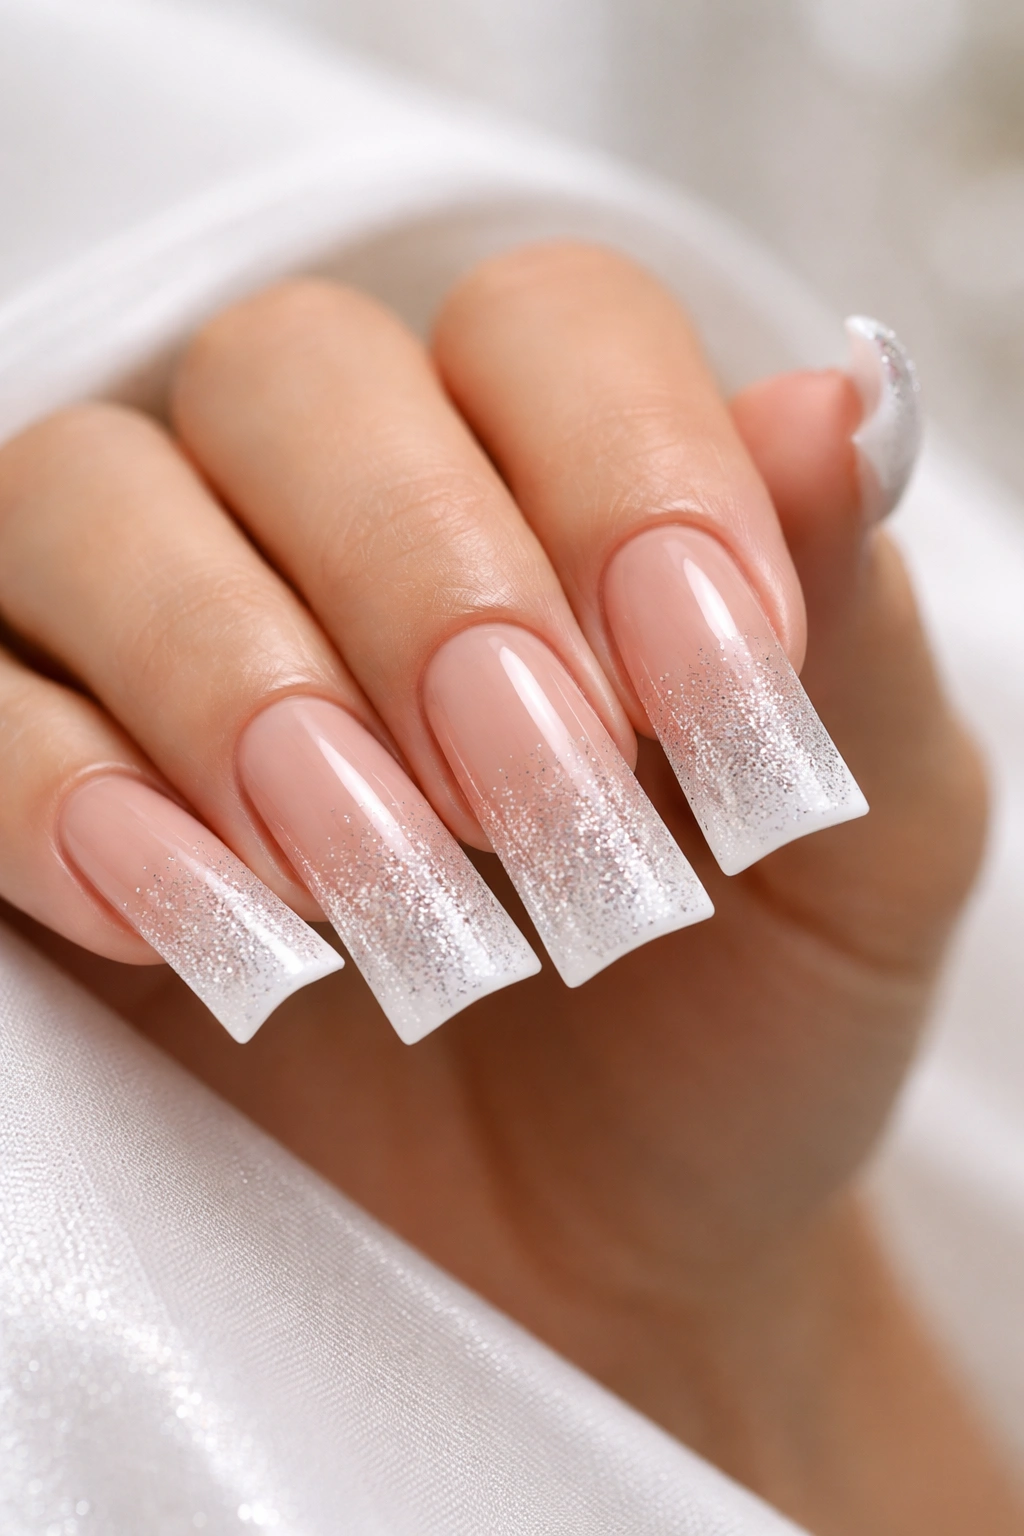
4. Sparkle-Ombre French Tips
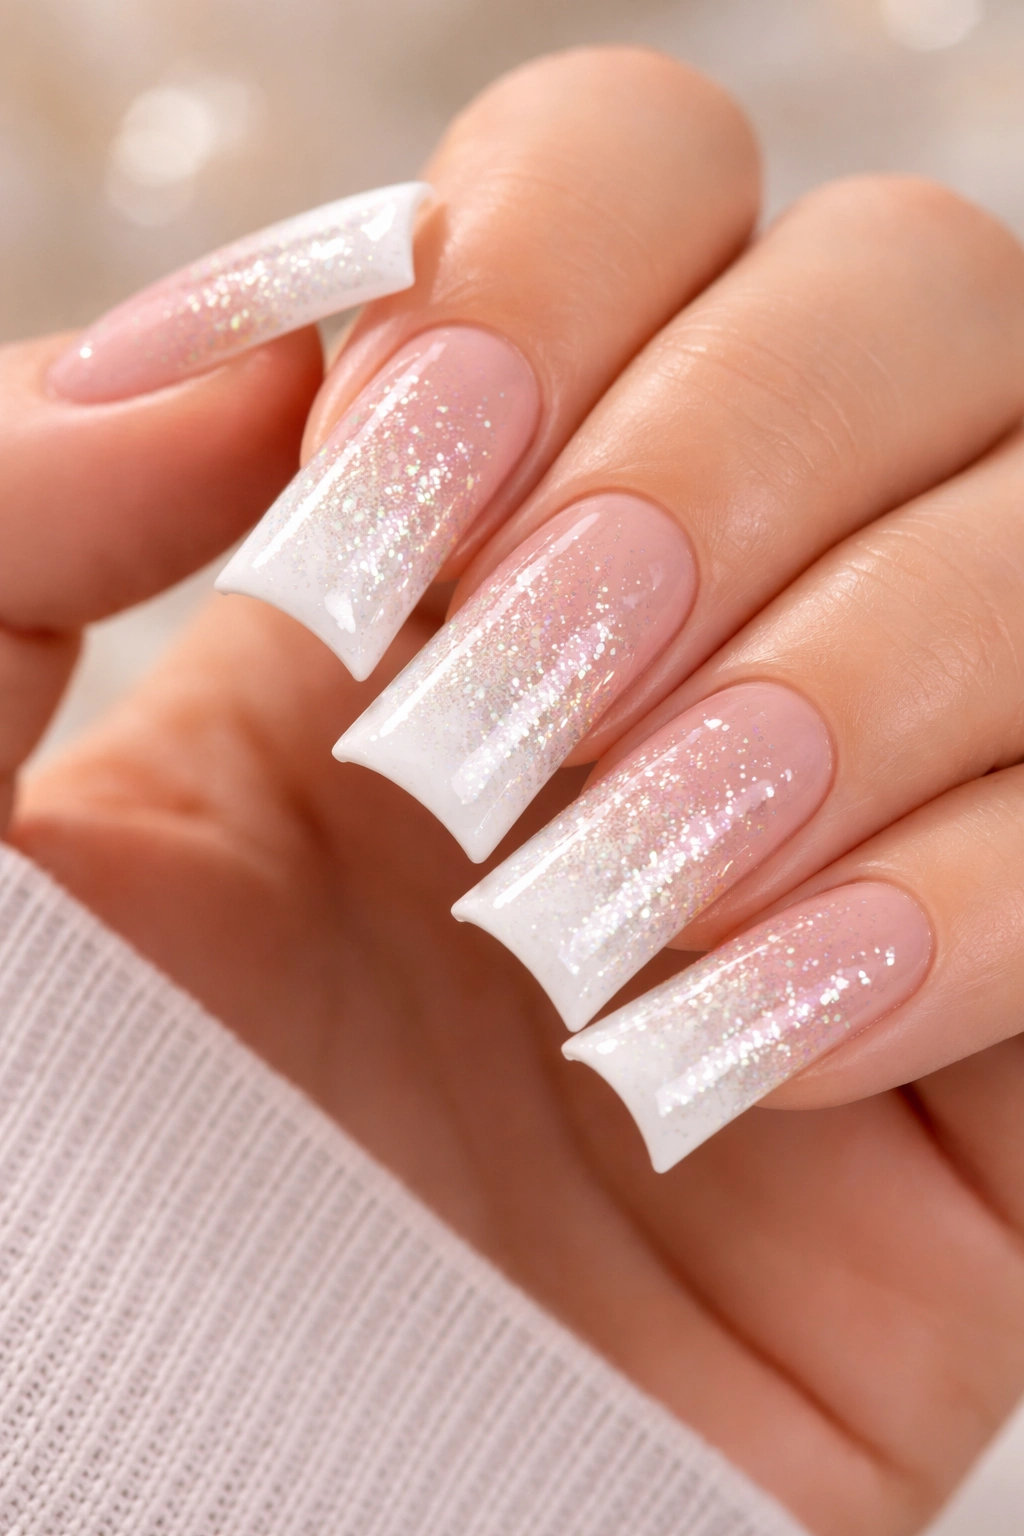
Layer a glitter gradient over your traditional white French tip, building the sparkle density gradually from a light scatter at the base to concentrated glitter at the very tip. This design gives you the elegance of a French manicure with a celebratory, eye-catching shimmer that catches light with every hand movement.
Creating the Perfect Glitter Density
Use a clear or milky base polish to create a sticky layer, then apply your glitter in strategic layers. Start with a sparse, random scatter of small glitter particles across the white tip area, then gradually increase the density as you move toward the very tip of the nail. This graduated approach prevents the glitter from looking clumpy while ensuring it still reads as intentional rather than accidental. Using different sizes of glitter—fine micro-glitter mixed with slightly larger sparkle particles—adds visual interest and dimension.
Why This Design Stands Out
- Glitter adds celebration and personality without destroying the classic French manicure structure
- Duck nails’ pointed tip becomes a focal point for the densest glitter concentration
- The gradient density creates movement and prevents an overly flat appearance
- This design works beautifully for special occasions while still feeling manicure-adjacent rather than costume-like
Quick facts:
- Use a thin top coat to seal and smooth the glitter layer rather than applying it thick
- The best glitter for this effect is non-adhesive glitter mixed into clear polish rather than loose glitter on top
- Removing this design requires soaking in rubbing alcohol or using a proper glitter dissolving soak
5. Nude Marble French Tips
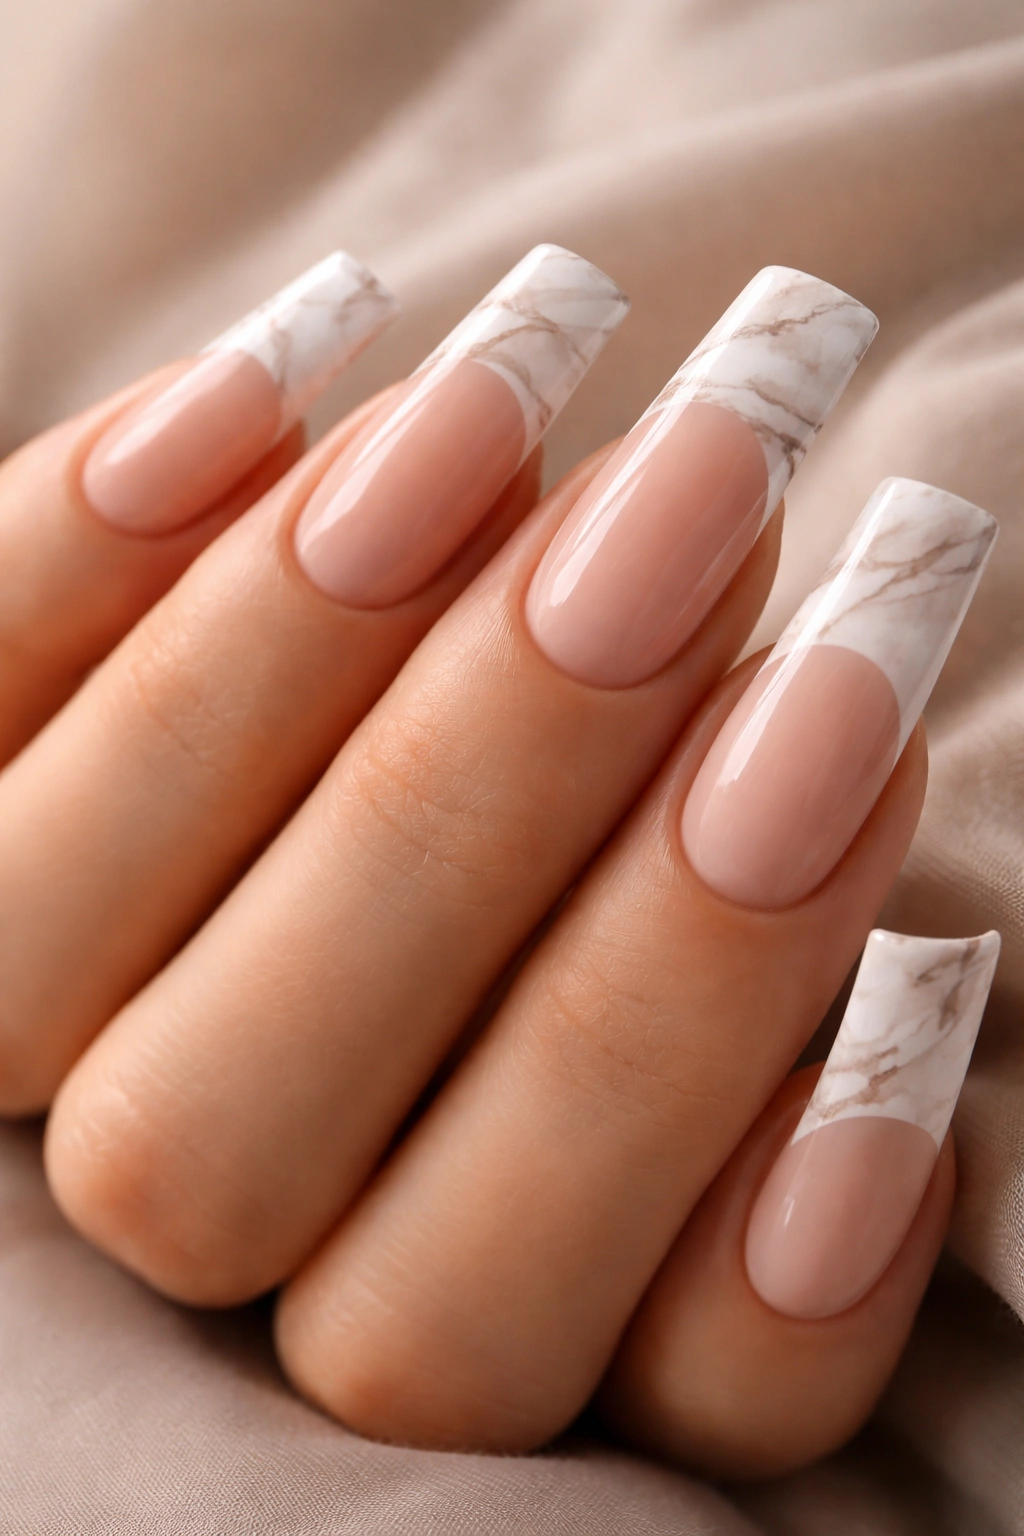
Introduce subtle marbling into your white French tip using earthy tones—taupe, warm gray, or soft brown—to create an organic, stone-like pattern that feels sophisticated and intentional. The marbling technique combined with the French tip structure gives you a design that’s visually interesting without straying into loud or juvenile territory.
The Marbling Technique for French Tips
Apply your white tip first and let it dry. Once dry, use a thin detail brush or even a toothpick to paint thin, irregular lines of your chosen accent color (taupe, gray, or warm brown) directly onto the white tip area. The lines should meander and cross each other somewhat randomly, mimicking natural stone veining rather than following any geometric pattern. The more organic and imperfect these lines, the more realistic the marble effect becomes.
Why This Design Stands Out
- Marbling adds visual complexity and interest without feeling busy or chaotic
- Nude tones complement virtually every skin tone and work in professional settings
- The irregular nature of marbling means minor imperfections are actually part of the design aesthetic
- This design feels more editorial and thoughtfully curated than a standard French tip
Pro tip: Work with a very small amount of polish on your detail brush—you want thin, precise lines rather than thick, opaque strokes that look like accidental drips.
6. Chrome French Tips with Matte Base
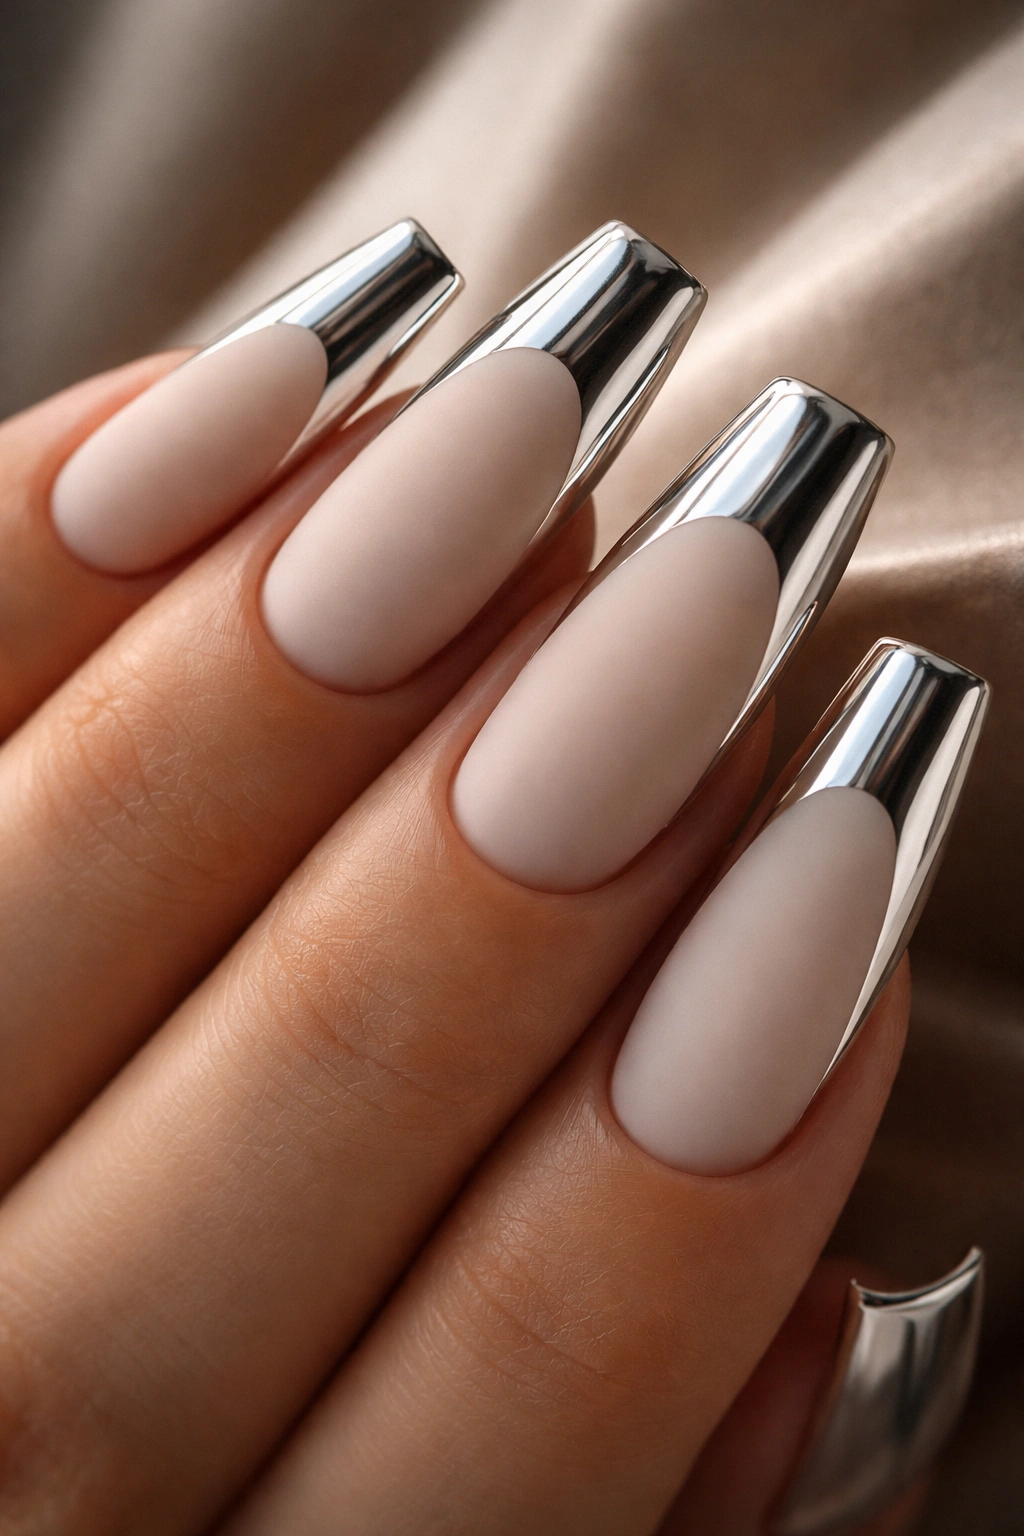
Paint your duck nails in a soft matte finish (nude, pale pink, or even soft gray) and add a shimmering chrome white French tip. The contrast between matte and reflective finishes creates dramatic visual interest and a sense of movement across your nails that feels surprisingly luxe for such a simple formula.
Creating the Matte-to-Chrome Contrast
Start with your chosen matte base color and a good matte top coat to seal it. Once completely dry, carefully apply your chrome or mirror powder along the white French tip area, working in thin layers to build the reflective shine gradually. The matte base actually makes the chrome stand out even more dramatically because the flatness creates a stark contrast with the high-shine reflection. The matte finish also helps anchor the design, preventing it from feeling like you’ve gone too shiny.
Why This Design Stands Out
- The texture contrast (matte plus shiny) creates visual and tactile interest that most people won’t expect from a French manicure variation
- Chrome tips photograph beautifully and catch light in ways that look intentional and editorial
- The matte base keeps the overall look grounded and wearable despite the dramatic chrome top
- This combination works for both everyday wear and special occasions
Worth knowing: Chrome powder requires a tacky base to adhere properly—your polish top coat must still be slightly wet when you apply the chrome, so work quickly and carefully. A dust-off technique using a soft brush helps remove excess powder and reveals the true reflective shine.
7. Color-Blocked Geometric French Tips
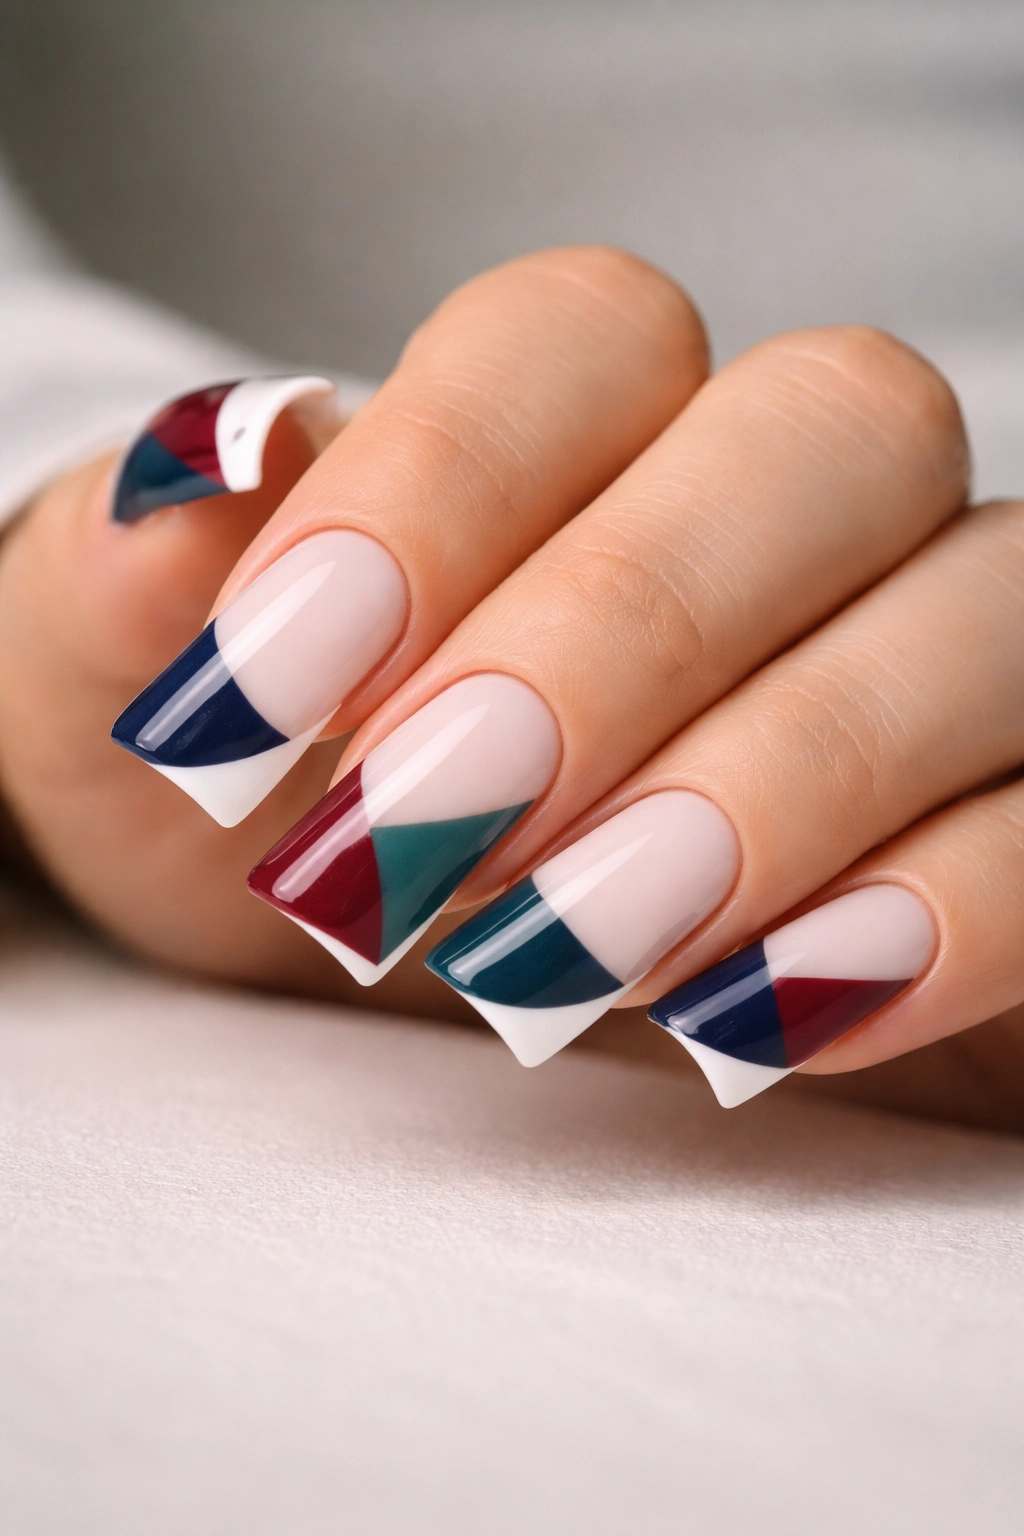
Instead of a traditional white tip, create bold geometric shapes using contrasting colors—think a navy block, a burgundy triangle, or a deep teal rectangle defining your French tip zone. This modern approach takes the French manicure from timeless into contemporary artistic territory while still maintaining the essential structure that makes a French tip work.
Planning Your Geometric Pattern
Sketch your geometric shape onto the nail using a light pencil or nail marker before committing to polish. Common options include a clean rectangle, a triangle pointing downward from the tip, diagonal color blocking that runs from one corner to the opposite side, or even a small square offset toward one side of the tip. Once you’ve established clear lines with tape or freehand precision, fill in your chosen color carefully using a small, flat brush for clean edges.
Why This Design Stands Out
- Geometric color blocking feels intentional, artistic, and deliberately modern
- The bold colors transform a French manicure into a statement look without feeling costume-like
- Duck nails’ elongated shape provides ample space for geometric patterns to actually read clearly
- This design works beautifully with complementary color combinations—navy with coral, burgundy with gold, teal with white
Quick facts:
- Use painter’s tape or liquid nail tape to create clean, sharp edges for your geometric shapes
- A matte finish on your geometric blocks often reads as more intentional and artistic than a glossy finish
- This design pairs well with a nude or pale base color that lets the geometric shapes shine as the focal point
8. Floral French Tips
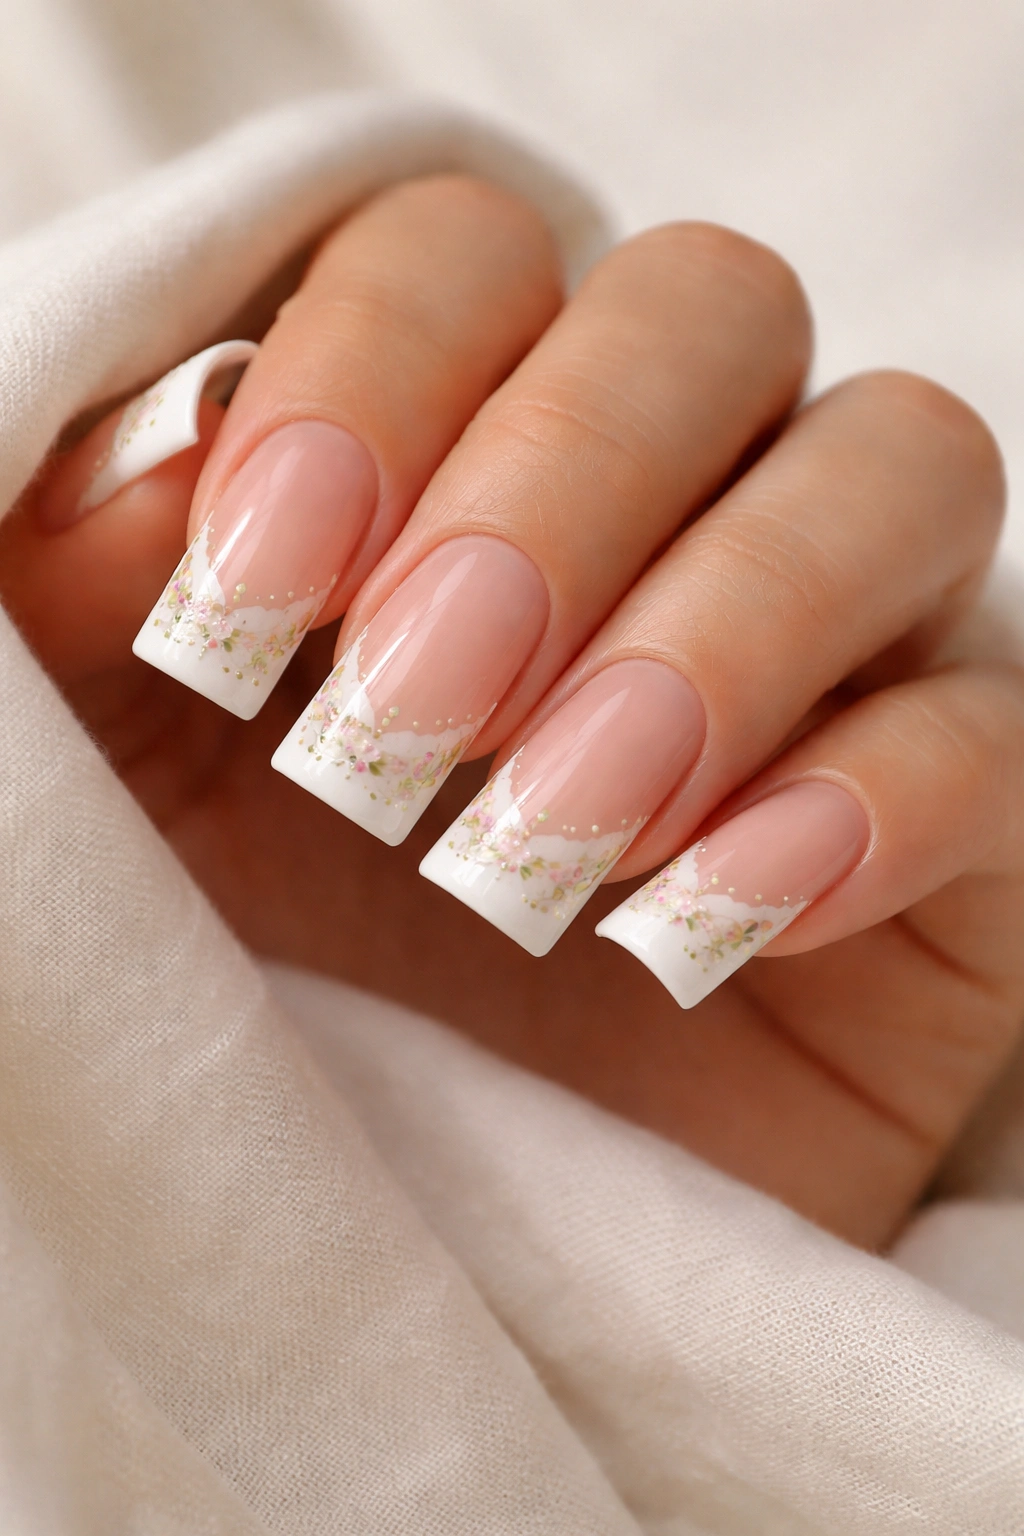
Paint delicate florals directly onto your white French tip—tiny flowers, subtle botanical details, or even a small cascading vine design that draws the eye to the tip of your nail. This romantic take on the French manicure brings artistic depth while keeping the overall aesthetic elegant rather than busy.
Executing Fine Floral Details
Start with your white tip completely dry, then use an extremely fine detail brush (size 00 or 000) and thin polish or specially formulated nail art paint to add your floral elements. Common options include small five-petaled flowers scattered across the tip, a delicate vine with tiny leaves that winds along the edge, or even miniature succulents or garden flowers if you’re feeling more ambitious. The key is keeping the flowers small and somewhat sparse—you want them to feel like a carefully considered accent rather than a chaotic garden on your nail.
Why This Design Stands Out
- Florals bring softness and femininity while the French structure keeps everything polished and intentional
- Fine botanical details show genuine nail art skill and creativity
- This design works for romantic occasions, wedding season, or anytime you want femininity without sweetness
- Floral designs age beautifully and don’t feel dated the way some heavily decorated nails can
Pro tip: If freehand florals feel intimidating, press decals or thin stickers designed for nails onto your dried white tip, then seal everything with a clear top coat—you get the floral detail without the pressure of creating it yourself.
9. Ombre French Tips in Jewel Tones
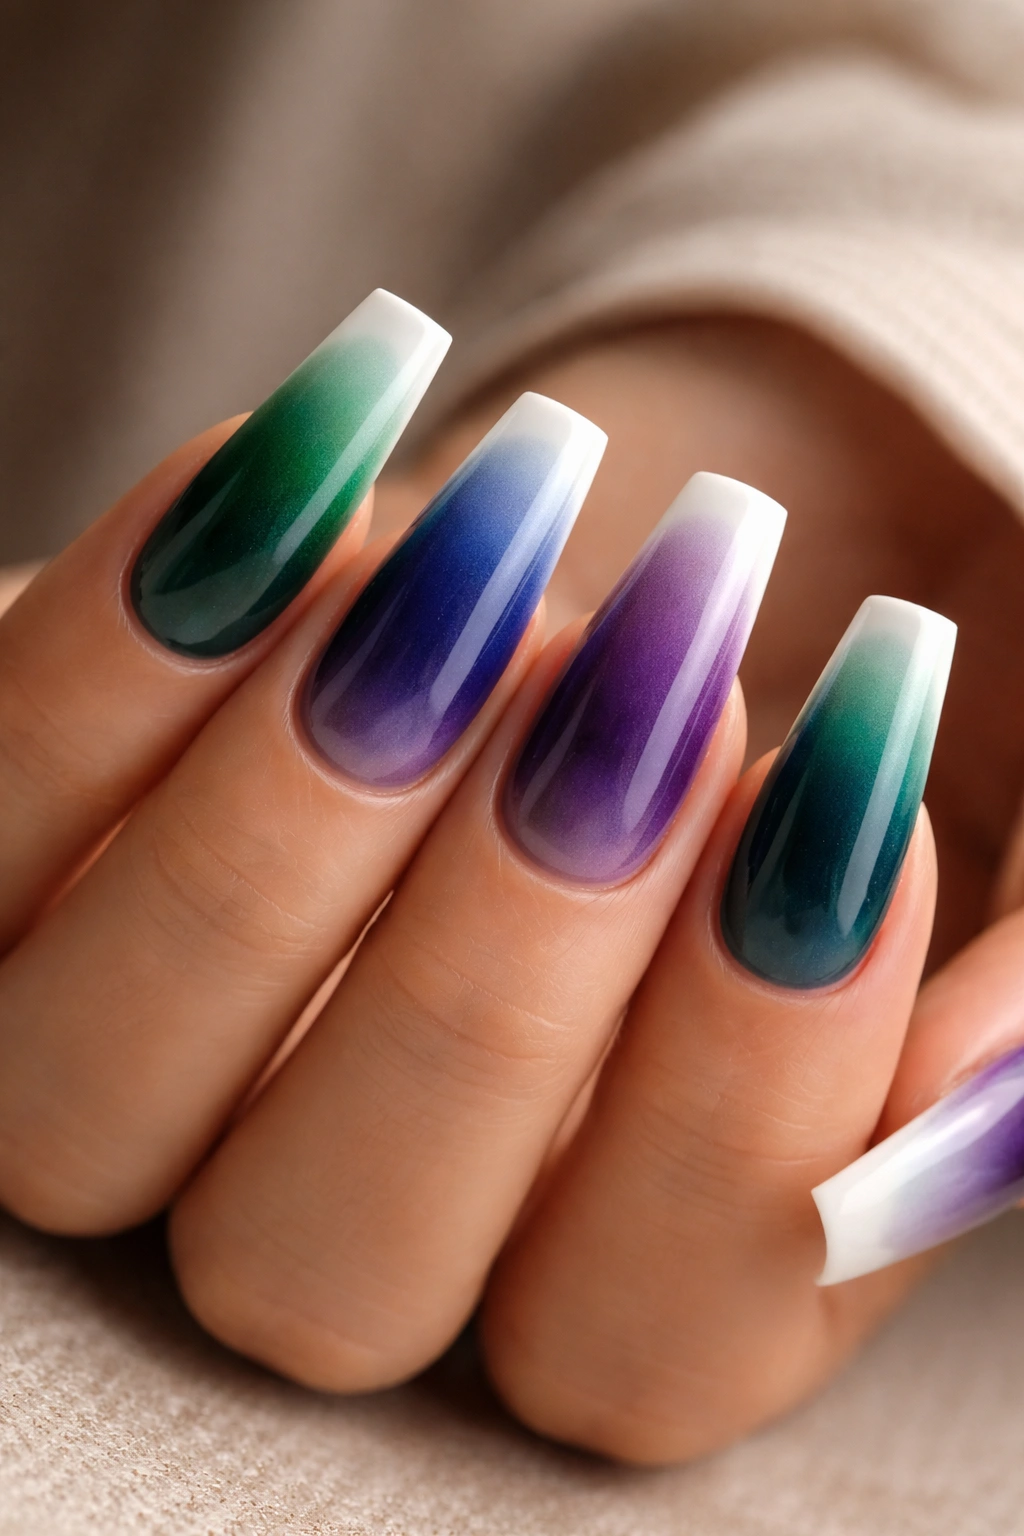
Choose a rich jewel-tone base—emerald, sapphire, amethyst, or deep burgundy—and create an ombre gradient that transitions to white at the tip. This approach maintains the French tip structure while bringing serious color and luxury to your duck nail design, perfect for someone who wants elegance with personality.
Building the Jewel-Tone Gradient
Apply your chosen jewel tone as a full base coat. Once dry, use the sponge gradient method to blend white into the tip area, gradually creating a transition that moves from your saturated jewel tone to pure white. The jewel tone base makes the white tip stand out even more dramatically than it would against a nude base, creating a striking visual contrast that feels upscale and intentional. Work in thin, light layers to prevent the sponge from picking up too much of your base color and muddying the transition.
Why This Design Stands Out
- Jewel tones feel luxurious and intentional in a way that bright or pastel colors don’t quite capture
- The ombre gradient brings modernity to the classic French structure
- This design works beautifully for evening occasions while still reading as a manicure rather than costume
- Jewel-tone bases photograph gorgeously and photograph true to real-life color
Worth knowing: The deeper and more saturated your base color, the more striking the white ombre will appear—don’t be afraid to go deep with your jewel tone for maximum visual impact.
10. Glitter-Fade French Tips
Create a French tip where the white gradually fades into a glitter gradient, so the very tip is densely sparkly white while the transition zone blends glitter into your clear or nude base. This design combines the refined structure of a French manicure with the festive, celebratory energy of glitter without creating an overly costume-like effect.
Layering Glitter Into Your Gradient
Start with your base color or clear polish. Once dry, begin adding glitter particles into the tip area, starting very sparse near the base of your white zone and gradually increasing density toward the actual tip. Use a sticky top coat or specialized glitter suspension medium to hold the glitter in place without it sliding around. The gradual density creates beautiful dimension and prevents the glitter from feeling like a heavy, costume-like layer sitting on top of your nail.
Why This Design Stands Out
- The glitter fade feels more sophisticated and intentional than standard glittery manicures
- This design works for both everyday wear and special occasions depending on the intensity of glitter
- The French tip structure anchors the glitter, preventing it from looking overwhelming
- Duck nails’ pointed shape creates a natural focal point for the densest sparkle concentration
Quick facts:
- Use clear gel polish or a specialized glitter medium rather than regular top coat to prevent glitter from shifting during wear
- Mixing fine and medium-sized glitter particles creates more visual interest than a single size
- This design removes more easily if you use glitter specifically formulated for nail art rather than loose craft glitter
11. Metallic Gradient French Tips
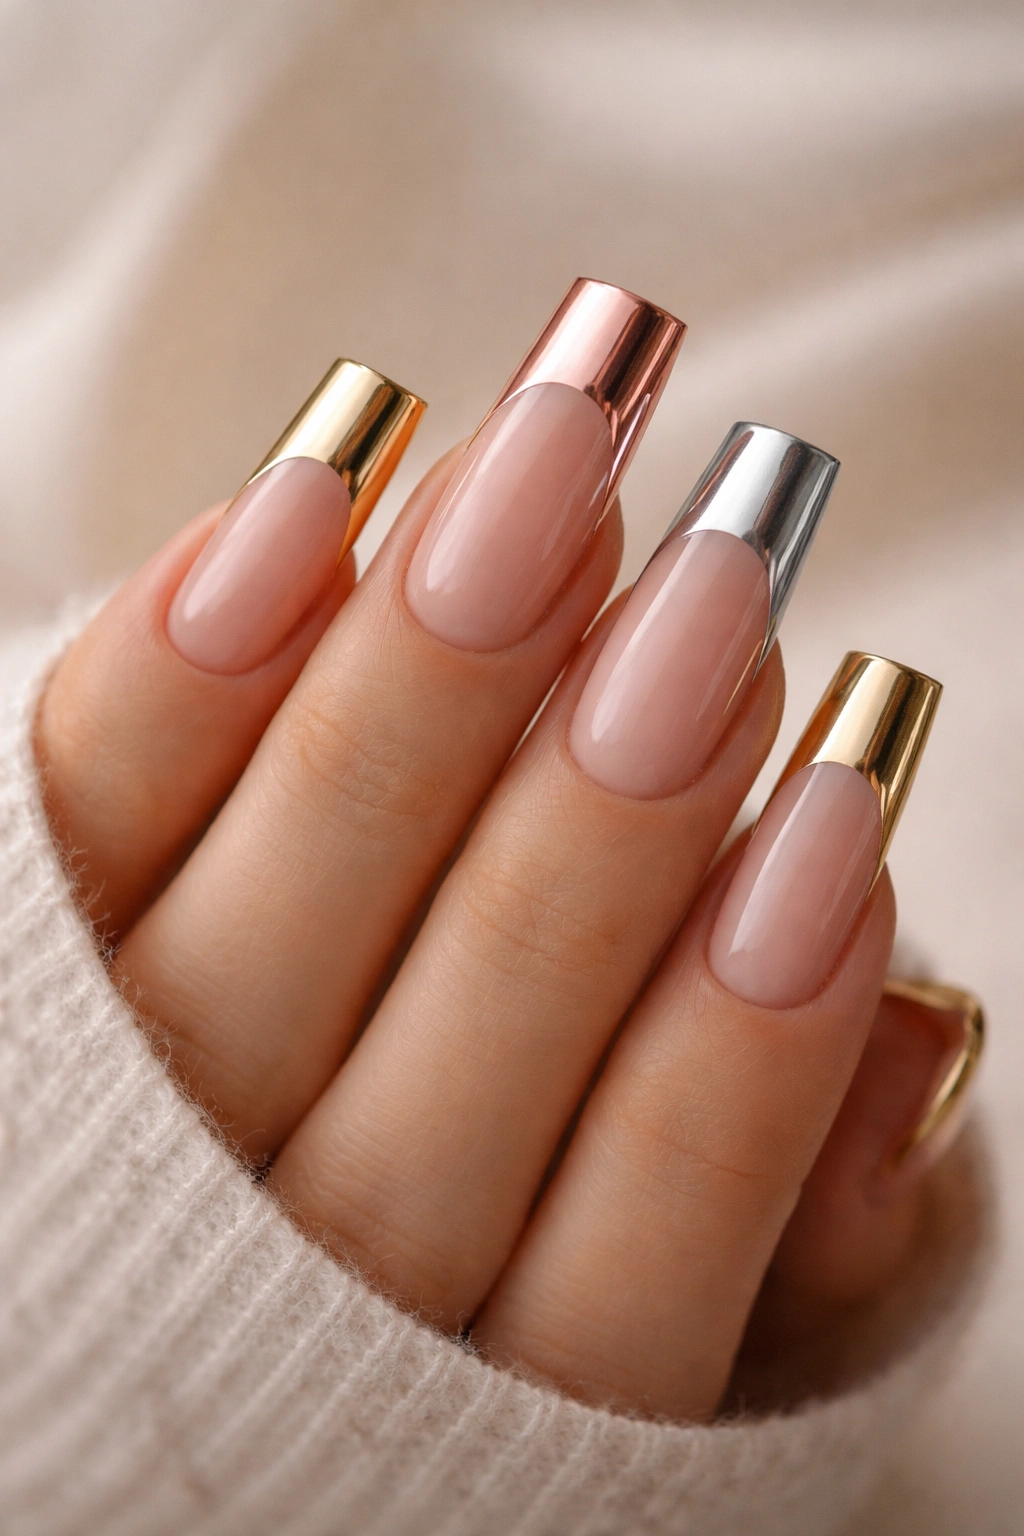
Create a gradient effect using metallic polish in gold, rose gold, or silver that fades from a soft, muted version at the base to a full, brilliant chrome effect at the tip. This design transforms the French manicure into something with serious shimmer and dimension while maintaining the elegant structure that makes the French tip timeless.
Building Your Metallic Gradient
Apply a base coat of metallic polish in your chosen finish (gold, rose gold, or silver) diluted slightly with clear polish to create a more muted, transparent version. Use a sponge to gradually transition toward undiluted metallic polish, building the chrome effect gradually as you move toward the tip. The result is a soft shimmer at the base that intensifies into full mirror-like reflection at the very tip—maximum impact where it counts.
Why This Design Stands Out
- Metallics feel luxurious and intentional without being overly trendy or dated
- The gradient approach prevents the metallic from looking heavy or chaotic
- This design works beautifully in professional settings where solid metallics might feel too bold
- The movement and light-reflection of metallics keep your nails looking interesting at all times
Pro tip: Metallic polish can sometimes look patchy or streaky if applied carelessly—work in very thin, intentional layers and use a soft sponge with light dabbing motions rather than aggressive rubbing for the smoothest, most even result.
12. Pearl Essense French Tips with Iridescent Shimmer
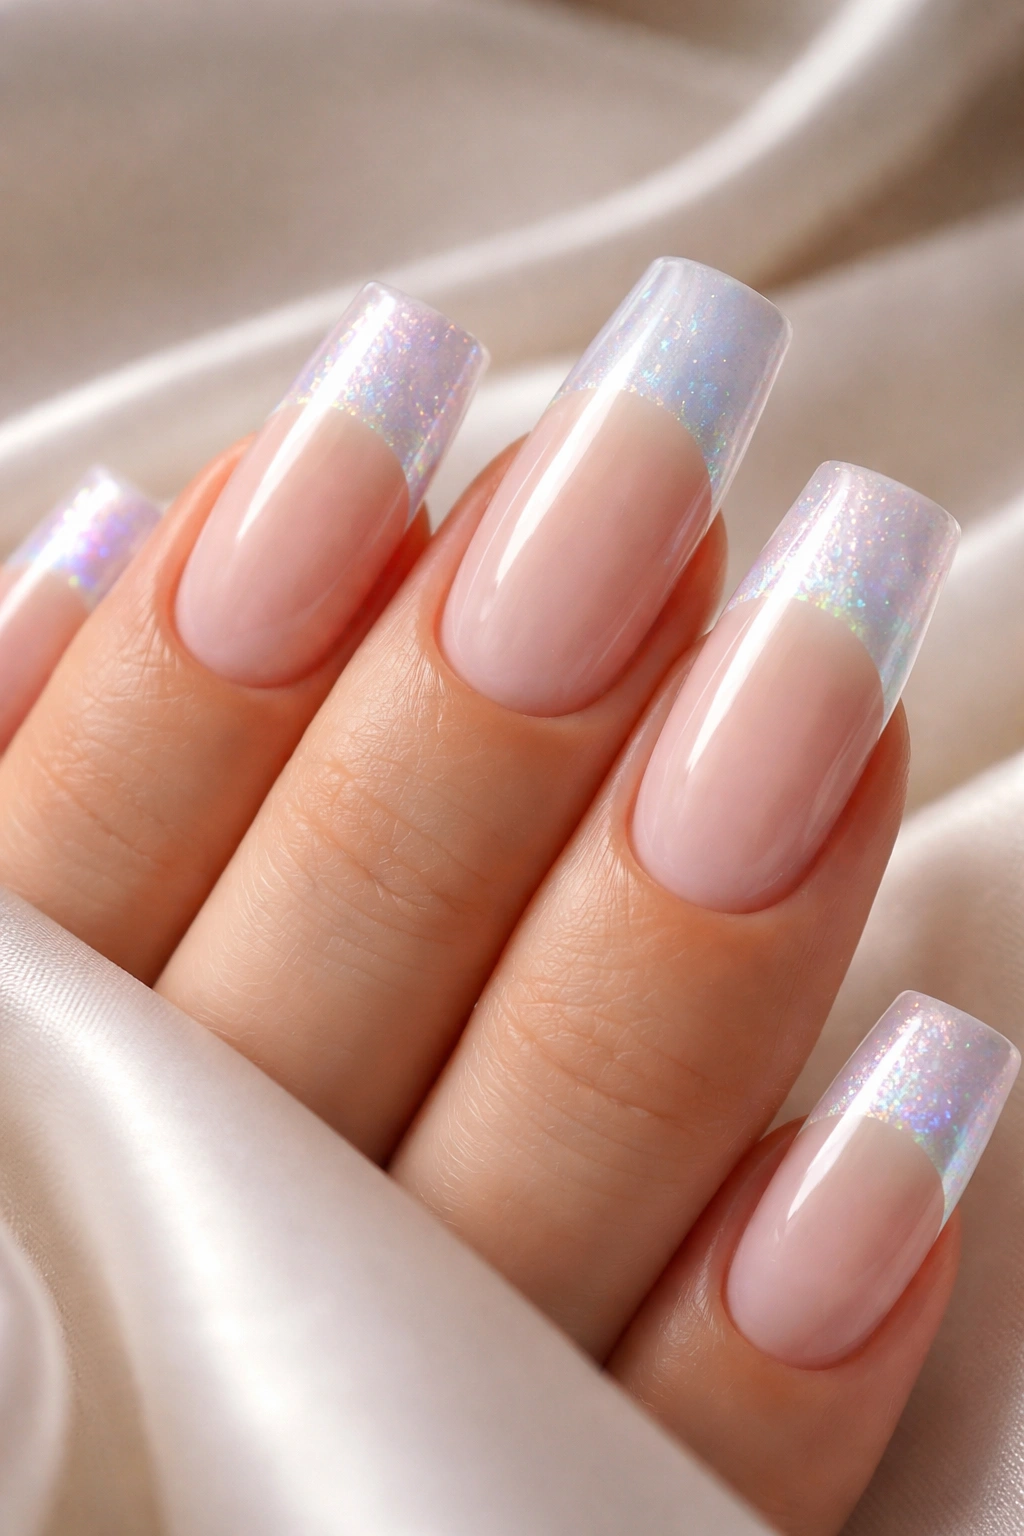
Paint your duck nails in a creamy pearl or ivory base, then add iridescent shimmer across the entire nail with concentrated sparkle at the white French tip. This design feels soft, luminous, and deeply sophisticated—the iridescent shimmer catches light beautifully while the pearl base keeps everything refined and wearable.
Creating the Pearl-and-Shimmer Combination
Start with a creamy pearl or ivory base polish applied in thin, even coats for a luminous finish. Once completely dry, use an iridescent top coat or dust iridescent powder across the entire nail, concentrating the strongest shimmer in your white French tip zone. The iridescence creates a subtle color-shift effect that changes depending on the angle and light—from soft pink to lavender to blue—making your nails feel dynamic and intentional rather than static.
Why This Design Stands Out
- Pearls and iridescence together feel elegant and modern without being trendy in a way that dates quickly
- The subtle color-shift of iridescence keeps people interested in your nails while the pearl base keeps everything refined
- This design works beautifully in any setting from professional to celebratory
- The luminous quality of pearl and iridescent shimmer is incredibly flattering under any lighting condition
Quick facts:
- Iridescent powders must be applied to a sticky top coat or they’ll fall right off—don’t try to apply them to a dried, non-sticky base
- The angle of light dramatically changes how iridescent shimmer reads—the color-shift effect is part of what makes this design special
- This design pairs beautifully with duck nails because the shape means your tips catch and reflect light constantly
Final Thoughts
French tip duck nails represent the perfect balance between timeless elegance and modern creativity. Each of these twelve variations takes the essential structure of a French manicure—that clean, elongated line that defines polish and sophistication—and reinvents it with color, texture, and intentionality. The duck nail shape amplifies every detail you add, giving you a larger canvas to work with and creating natural focal points that make even minimal designs feel deliberate and polished.
The beauty of this combination is that there’s genuinely something for every aesthetic and occasion. If you prefer understated elegance, the soft ombre or metallic gradient options deliver sophistication without drama. Looking for something with more personality? Geometric color blocking, florals, and jewel-tone ombres bring artistic depth while maintaining that French manicure polish. Want celebration and sparkle? Glitter fades and pearl-iridescent combinations give you shimmer that photographs beautifully and catches light constantly.
Rather than feeling locked into one specific design for months, you can rotate through these variations depending on your mood, season, and what occasion you’re dressing for. A French tip duck nail design you love is one you’ll actually wear and maintain, so start with the variation that speaks to you most and build your nail art confidence from there. Your duck nails are the perfect canvas—these twelve designs are just the beginning of what you can create.
