

Duck nails have become a favorite among nail enthusiasts who want something bold, edgy, and impossible to ignore. The distinctive elongated shape with that signature curved edge creates a dramatic canvas that’s begging for artistic expression. When you pair the duck nail shape with grunge aesthetics—think dark, moody, rebellious vibes—you unlock some truly striking nail art possibilities that scream attitude and creativity.
What makes grunge duck nails so compelling is the way the shape amplifies the mood you’re trying to create. The exaggerated length naturally draws attention, and grunge design elements like distressed textures, muted palettes, and edgy details feel right at home on this bold base. Whether you’re into 90s nostalgia, dark romance, or just love the contrast between a delicate shape and a rough aesthetic, grunge duck nails offer endless customization options that work for any occasion—from everyday wear to special events where you want to make a statement.
The best part? You don’t need to be a nail art expert to pull off these looks. Many of these designs work with simple techniques like sponging, stamping, and layering polish. Let’s explore twenty creative grunge duck nail ideas that blend the elegance of the duck nail shape with the raw, moody power of grunge design.
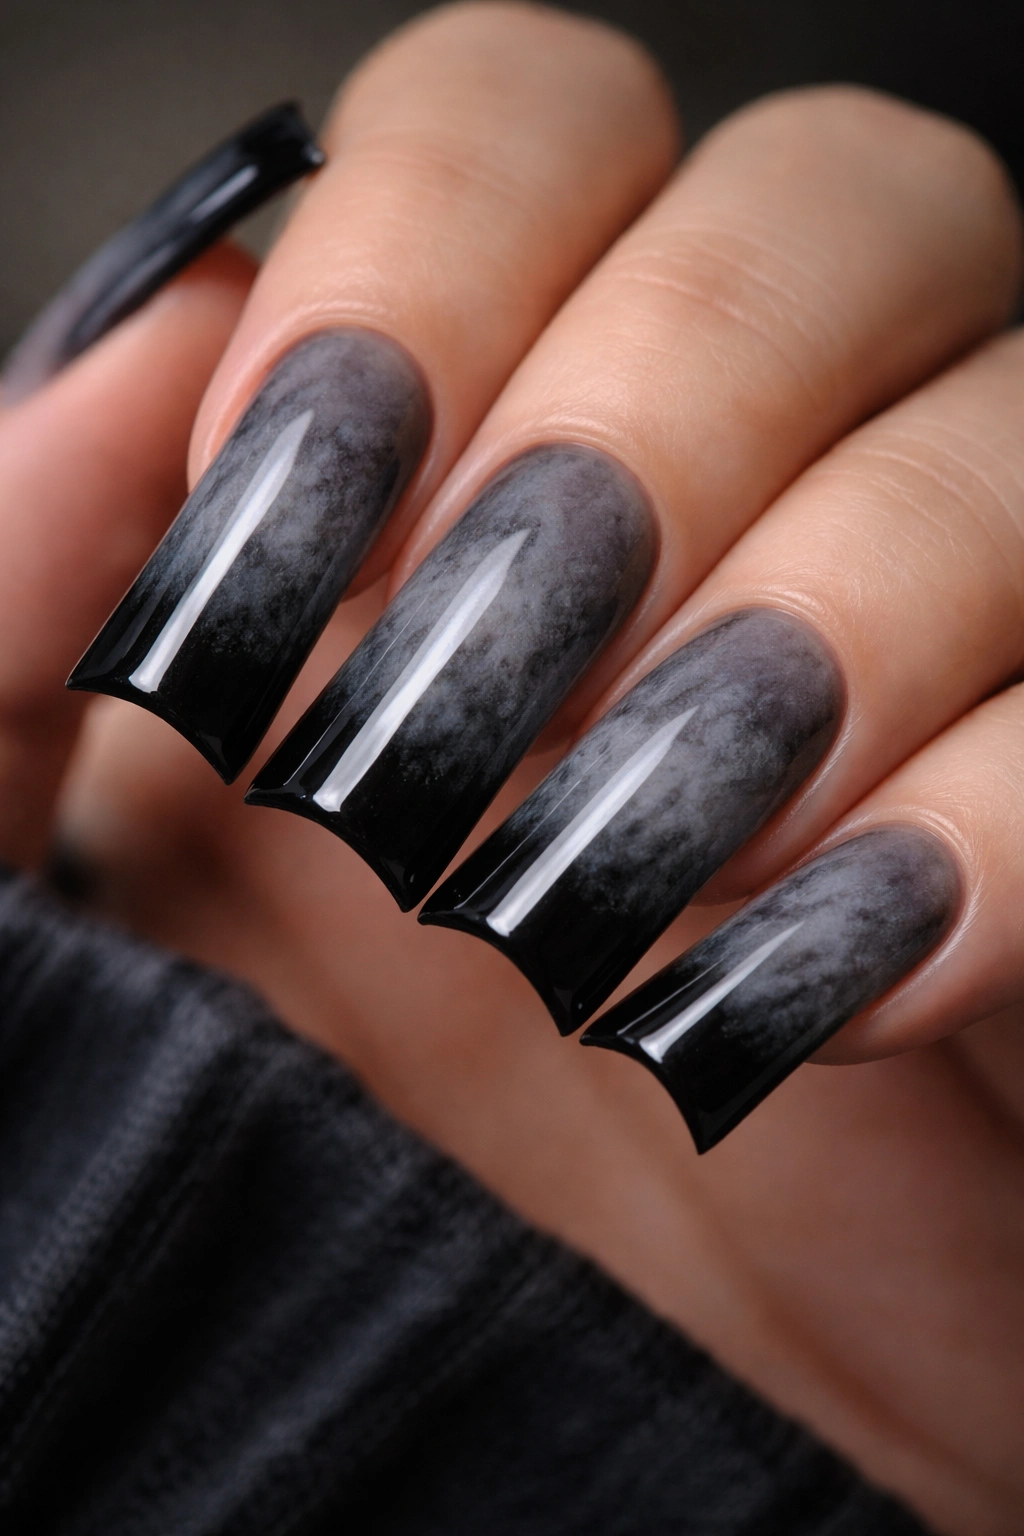
1. Charcoal Smoke with Black Tips
Start with a charcoal gray base that instantly evokes that moody, atmospheric feeling grunge demands. The smoke effect creates dimension and movement across the nail bed, making even a simple design feel dynamic and textured.
Why This Design Works for Grunge
Charcoal gray sits perfectly in the grunge color spectrum—it’s darker than regular gray but less harsh than pure black, giving you that weathered, worn-in aesthetic without feeling completely dark and heavy. When you layer black tips over the smoky base, you get an ombré effect that feels both sophisticated and edgy. The gradual transition mimics the look of ink bleeding or paint smudging, which is very on-brand for grunge styling.
How to Execute It
- Paint all nails with a base coat of charcoal gray polish
- While the base is still slightly tacky, use a makeup sponge to dab black polish across the tips and edges, blending it upward with a dabbing motion
- Apply a top coat to seal in the smoky texture and add shine
- Layer a matte top coat on top if you want to subdue the shine and make it look more authentically weathered
Pro tip: Don’t blend too evenly—let some charcoal show through the black tips so the effect looks organic and intentional, not like a gradient manicure.
2. Distressed Black with Silver Splatter
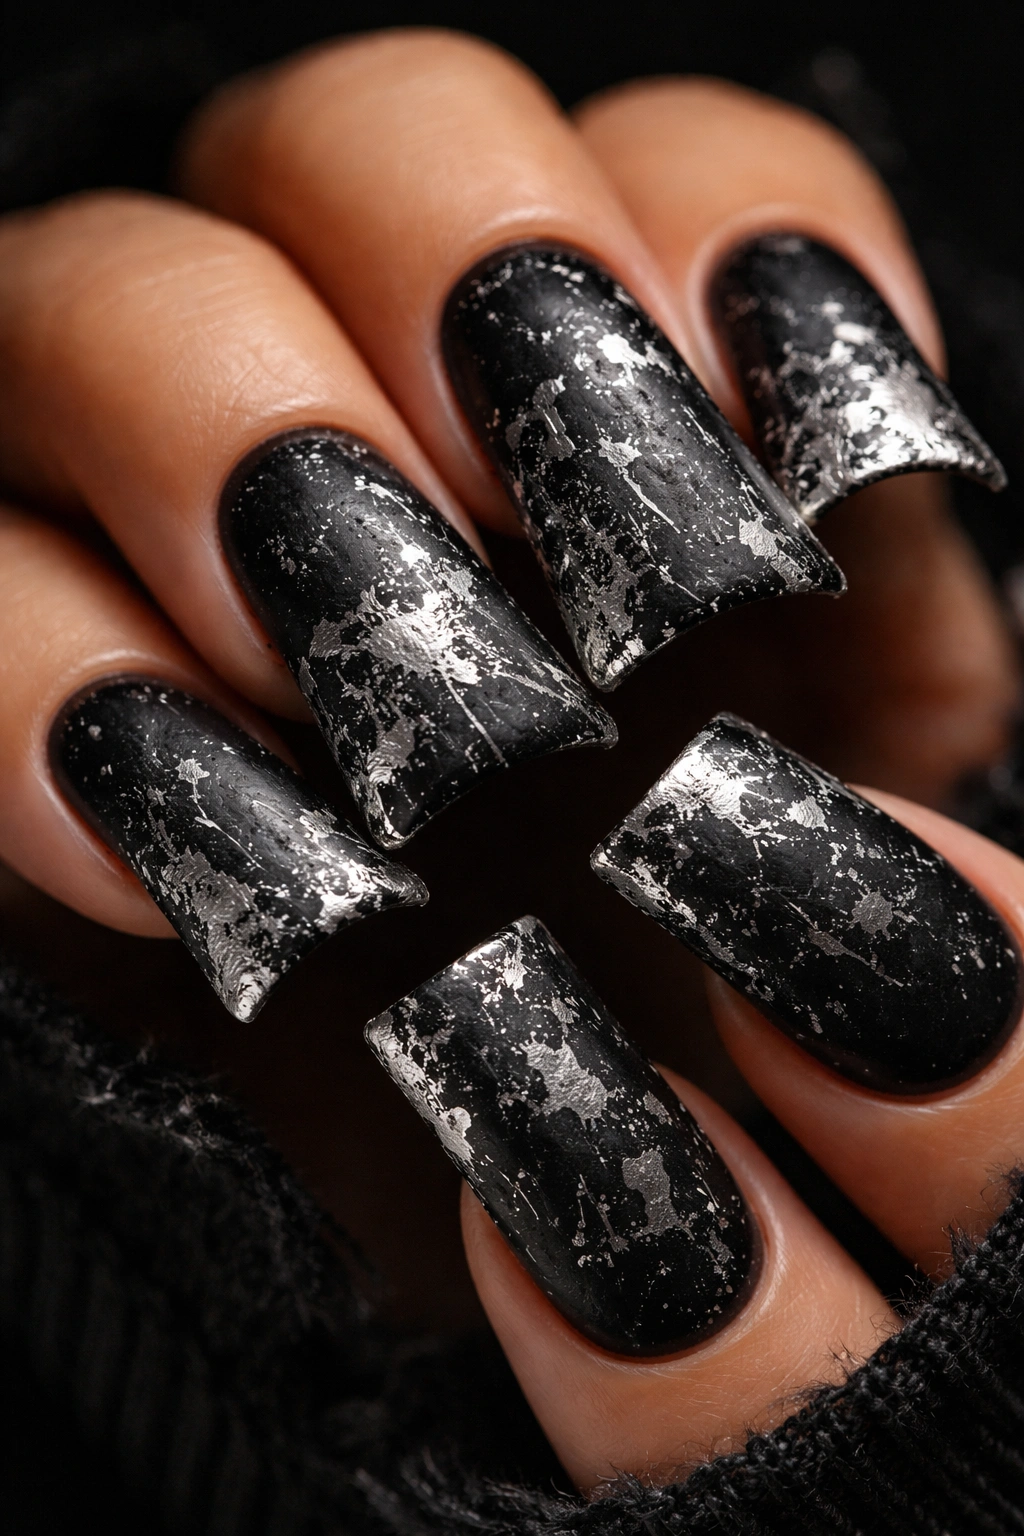
Black is the foundation of grunge, and distressed black nails take that aesthetic to another level. Silver splatter over the top adds metallic edge without making it feel polished or glamorous.
The Raw Appeal of Distressed Finishes
Distressing techniques mimic wear, damage, and imperfection—which is exactly what grunge celebrates. Instead of painting solid black, you’ll layer, chip, and scratch intentionally to create a look that appears aged and lived-in. The silver splatter breaks up the darkness and adds visual interest while keeping the overall vibe moody and rebellious.
Application Steps
- Apply two coats of black polish to create a solid base
- Once fully dry, use a dry brush or old toothbrush to randomly scrape away small sections, creating the appearance of chipping and wear
- Dip a toothbrush bristles in silver metallic polish and flick them across the nail for scattered splatter effect
- Seal with matte top coat to enhance the weathered appearance
Worth knowing: This design actually looks better when it appears imperfect, so don’t aim for symmetry or precision—embrace the chaos.
3. Deep Plum with Gold Foil Accents
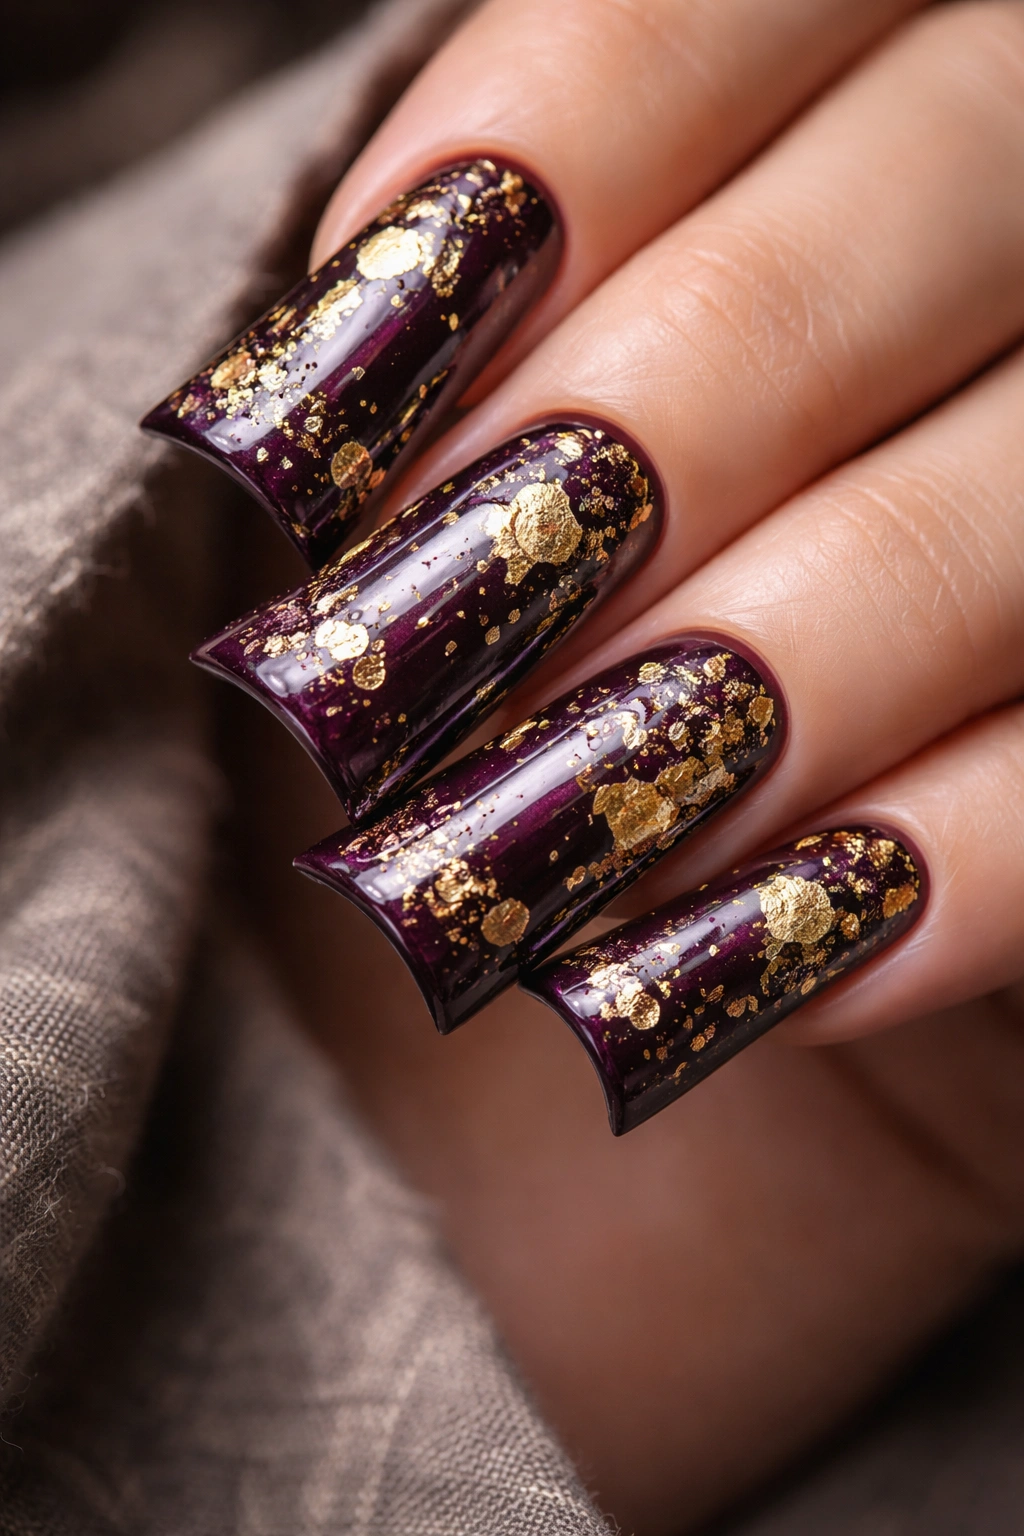
Plum brings sophistication to grunge, and when you pair it with torn gold foil, you get a design that feels both moody and luxe. The contrast between the deep wine tone and metallic highlights creates real visual pop.
Why Deep Plum Enhances Grunge Style
Plum sits in that sweet spot between purple and burgundy—it reads as dark and muted rather than bright or cheerful. This color naturally photographs well, looks flattering against most skin tones, and feels inherently more luxurious than basic black while maintaining complete grunge credibility. Gold foil scattered randomly adds texture and light-catching elements that make the nails feel more intentional and artistic.
Creating the Foil Effect
- Paint nails with two coats of deep plum polish
- Tear or cut small irregular pieces of gold foil (adhesive backing foil works best)
- Press them onto the nail at random angles across the surface—some on the tips, some mid-nail, some near the cuticle
- Apply a glossy top coat to seal everything down and create a dimensional, faceted appearance
Insider note: Foil placement looks best when it appears random and organic rather than perfectly placed, so embrace imprecision here.
4. Matte Black with Negative Space Geometry
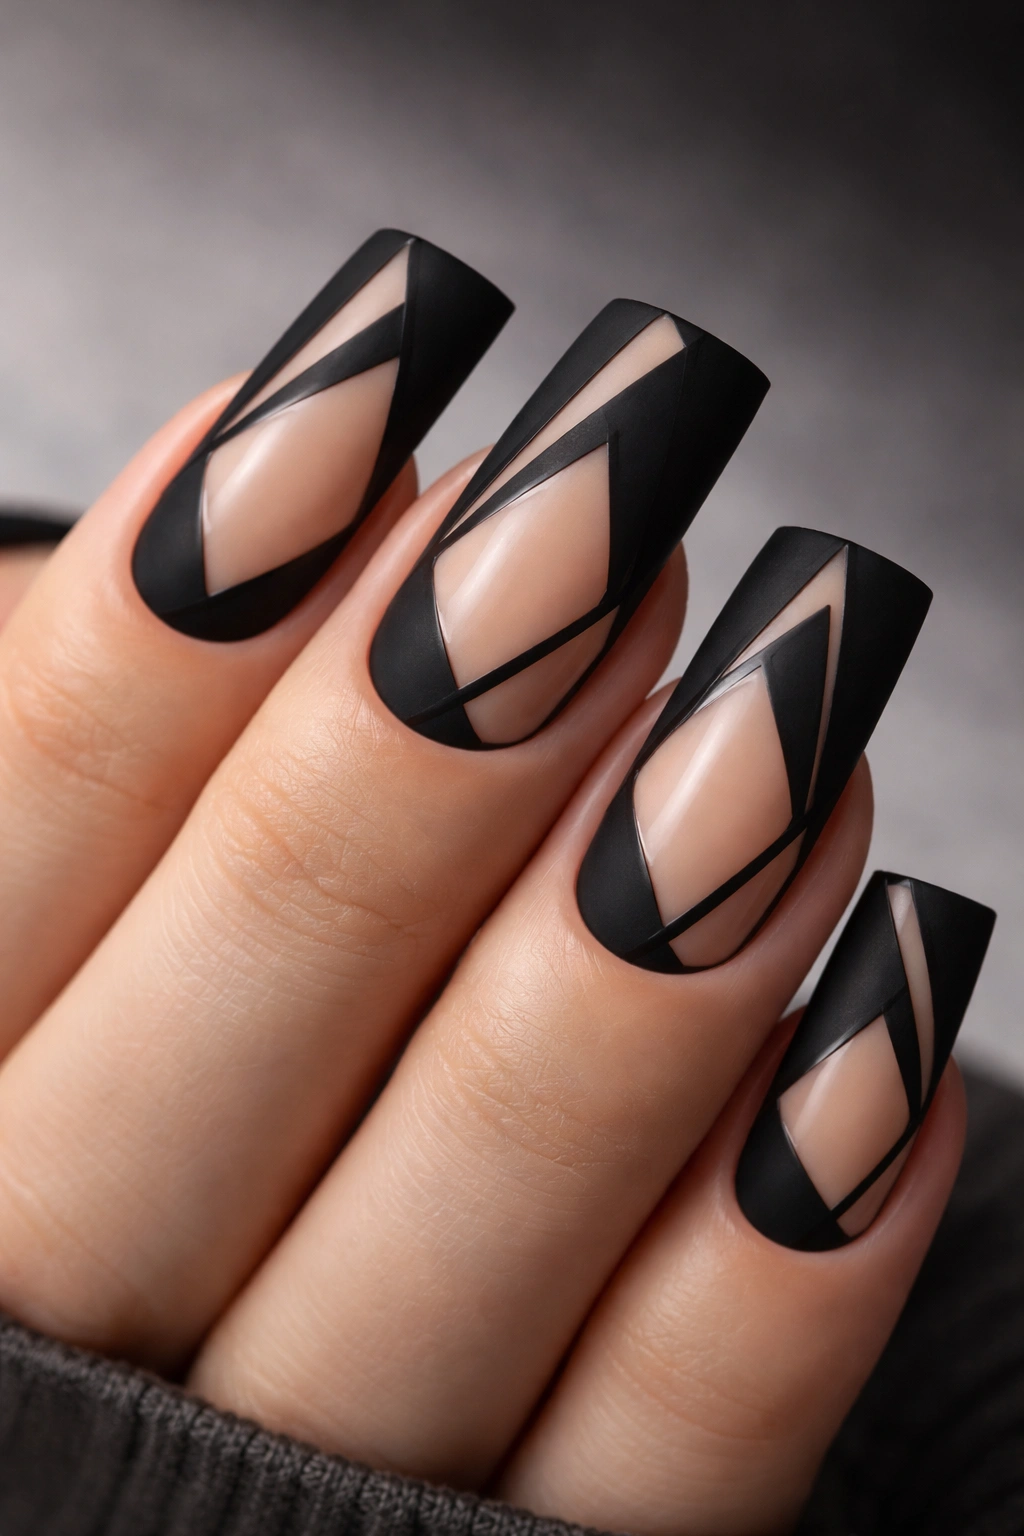
Matte black forms the canvas for clean geometric negative space—exposed nail or nude base showing through in sharp lines and shapes. This design feels minimalist and modern while staying completely grunge through its stark, edgy aesthetic.
The Power of Negative Space in Grunge
Negative space creates contrast and visual interest without adding extra elements. By leaving portions of the nail exposed, you create clean lines that cut through the darkness. Geometric shapes—triangles, lines, angular patterns—feel inherently edgy and align perfectly with grunge’s raw aesthetic. The stark black-and-nude contrast reads as intentional and design-forward rather than playful or delicate.
Execution Method
- Apply a nude or clear base coat
- Using a thin striping brush or nail art pen, draw precise geometric patterns with matte black polish—try triangles pointing from corners, diagonal lines, or angular shapes
- Keep lines sharp and clean for maximum impact
- Finish with a matte top coat (or keep it matte by using matte black polish throughout)
Pro tip: Practice your design on a nail wheel or fake tips first—geometric designs demand precision, so there’s no room for happy accidents here.
5. Forest Green with Black Spiderweb Details
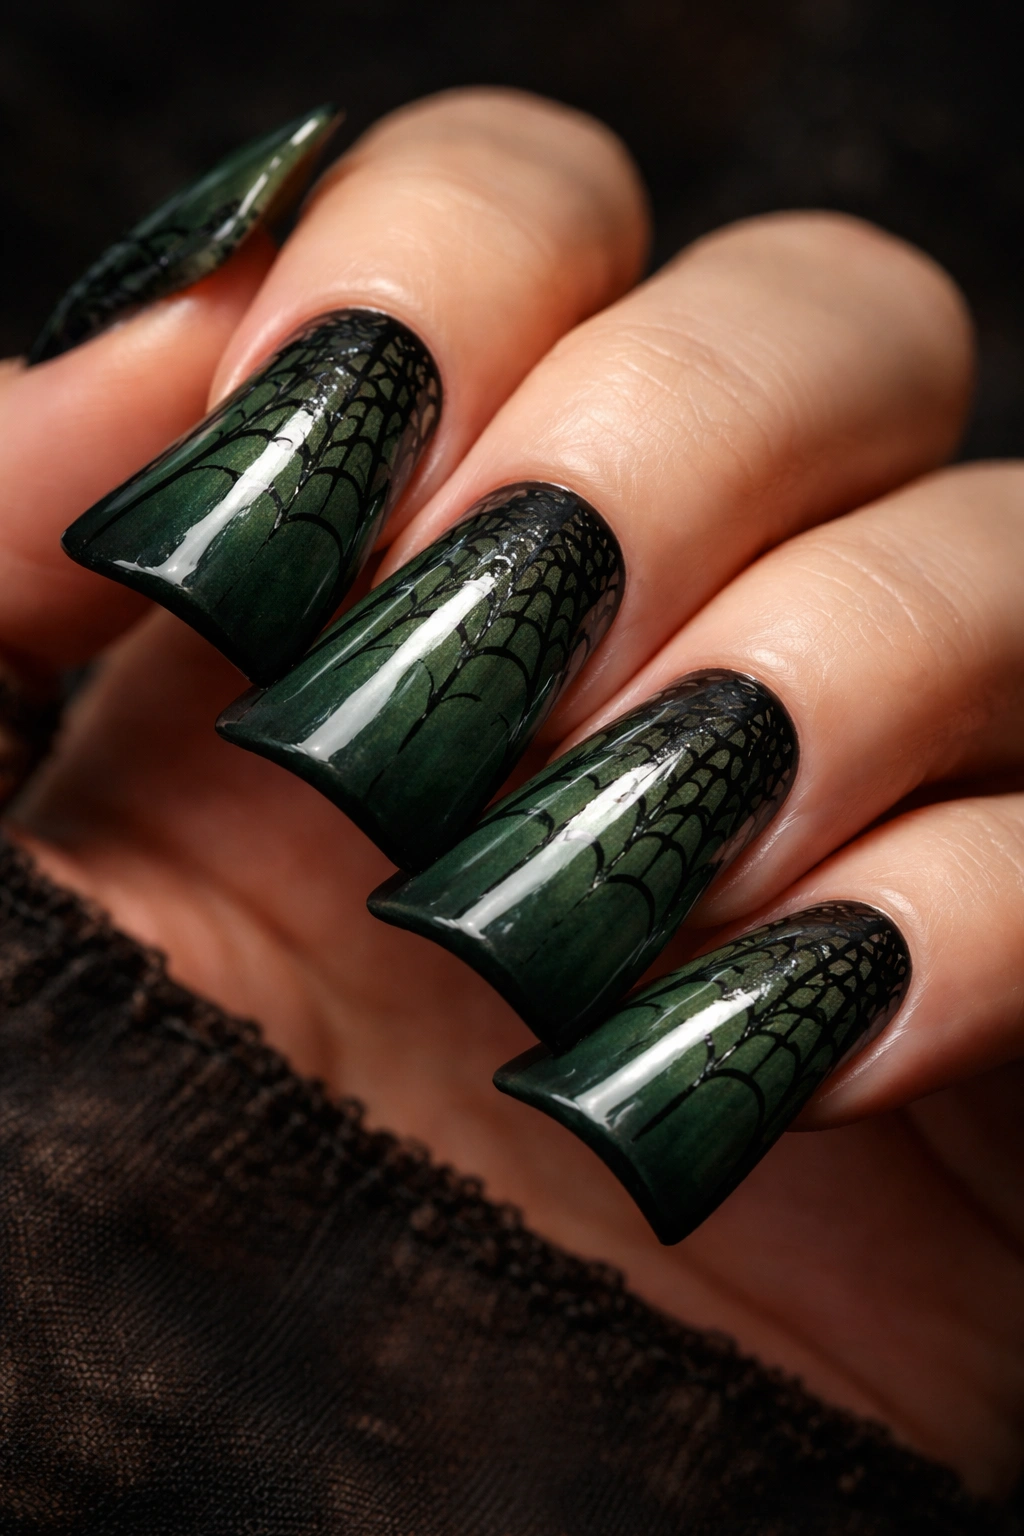
Forest green gives you that dark, earthy grunge color without defaulting to gray or black. Black spiderweb details layered on top create an eerie, edgy aesthetic that feels perfectly on-theme for grunge style.
Why Forest Green Works in Grunge
Dark green evokes nature, decay, and earthiness—all elements of grunge aesthetics. It’s dark enough to feel moody and rebellious but visually interesting enough to stand out from basic black or gray. When you add spiderweb details, you’re tapping into grunge’s darker, slightly spooky side without veering into costume territory.
Drawing the Spiderweb
- Paint all nails with two coats of forest green
- Using a thin black striping brush or nail art pen, draw one line from corner to corner diagonally across the nail
- Create parallel lines crossing the diagonal to form a grid pattern
- Add curved connecting lines to create the spiderweb webbing effect
- Start from the upper corner and expand the web across the nail surface
- Finish with a glossy top coat to seal in the detail
Worth knowing: Spiderweb designs look best when they’re imperfectly rendered—slight irregularity in the web lines actually enhances the grunge vibe.
6. Charcoal Base with Torn Newspaper Print
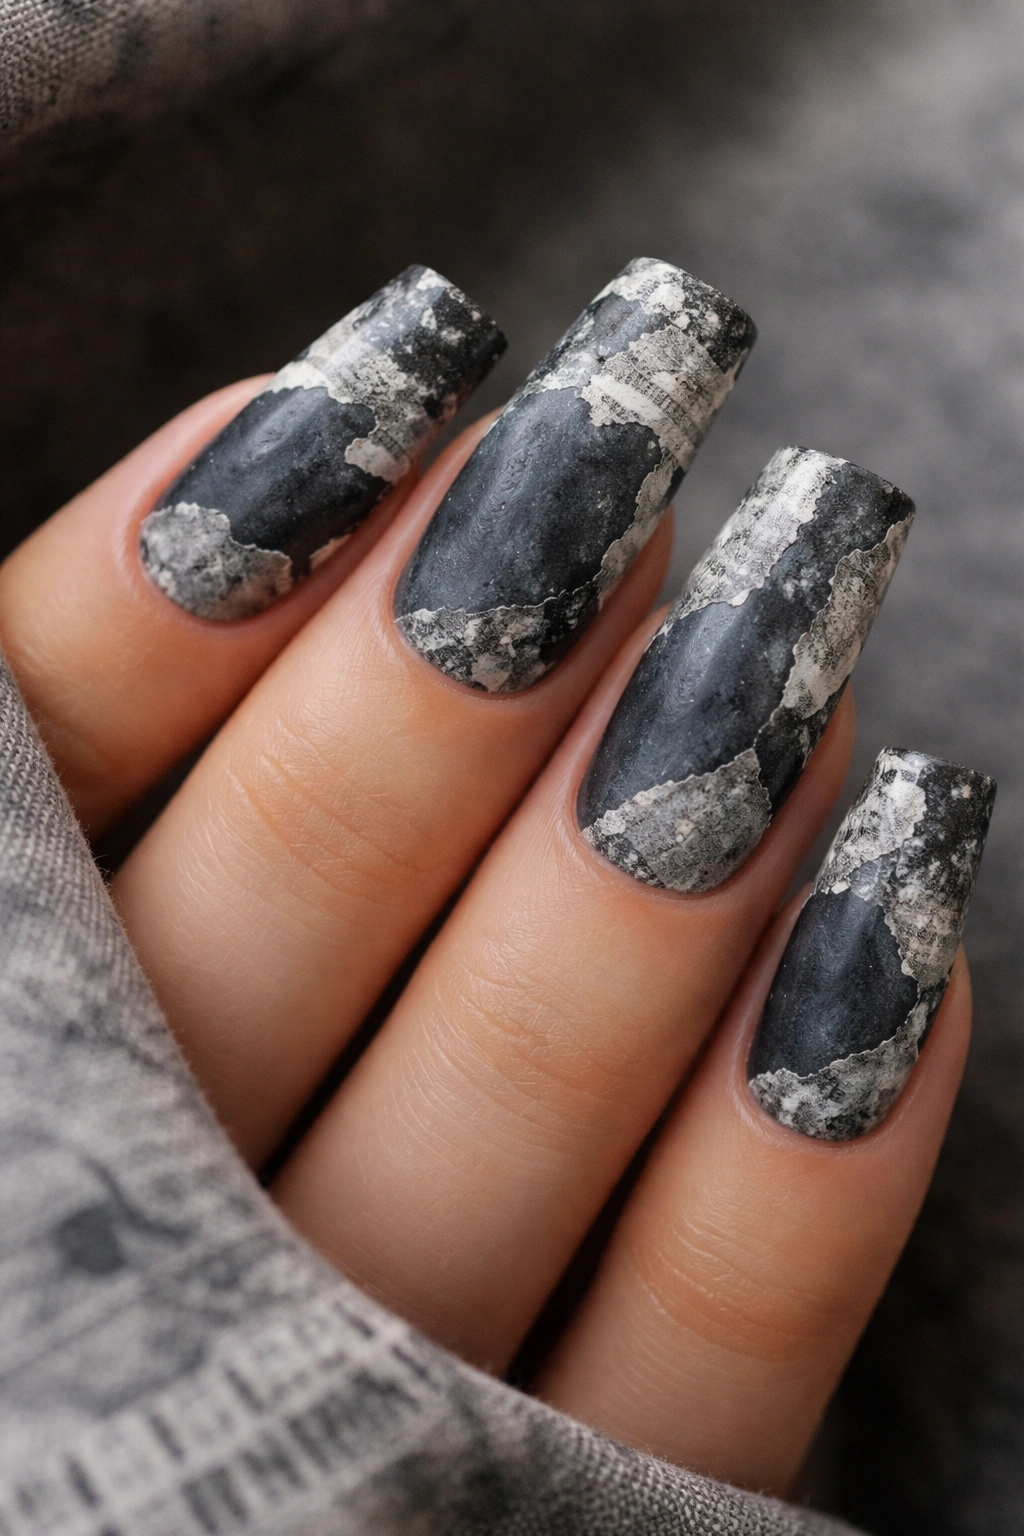
Newspaper print overlay adds texture and a distinctly 90s grunge aesthetic. The illegible text fragments create visual complexity and reference the cut-up, collage-based design philosophy of grunge culture.
Newspaper Print as a Design Element
Newspaper imagery connects directly to grunge’s roots in DIY culture and magazine-influenced aesthetics. The black newsprint against a charcoal base creates tonal harmony while the textural quality of printed text adds depth and interest. This design feels artistic and intentional rather than just decorative.
How to Add Newspaper Texture
- Paint nails with charcoal gray base coat
- Tear small pieces of newspaper or printed text into irregular shapes
- Apply a strong-hold nail glue or adhesive to the back of each piece
- Press newspaper pieces onto the wet base coat at random angles
- Once dry, seal everything down with a glossy or matte top coat depending on your preference
Pro tip: Use newspapers with bold headline fonts—they show up better than small body text when transferred to nails.
7. Black with White Splatter and Drip Design
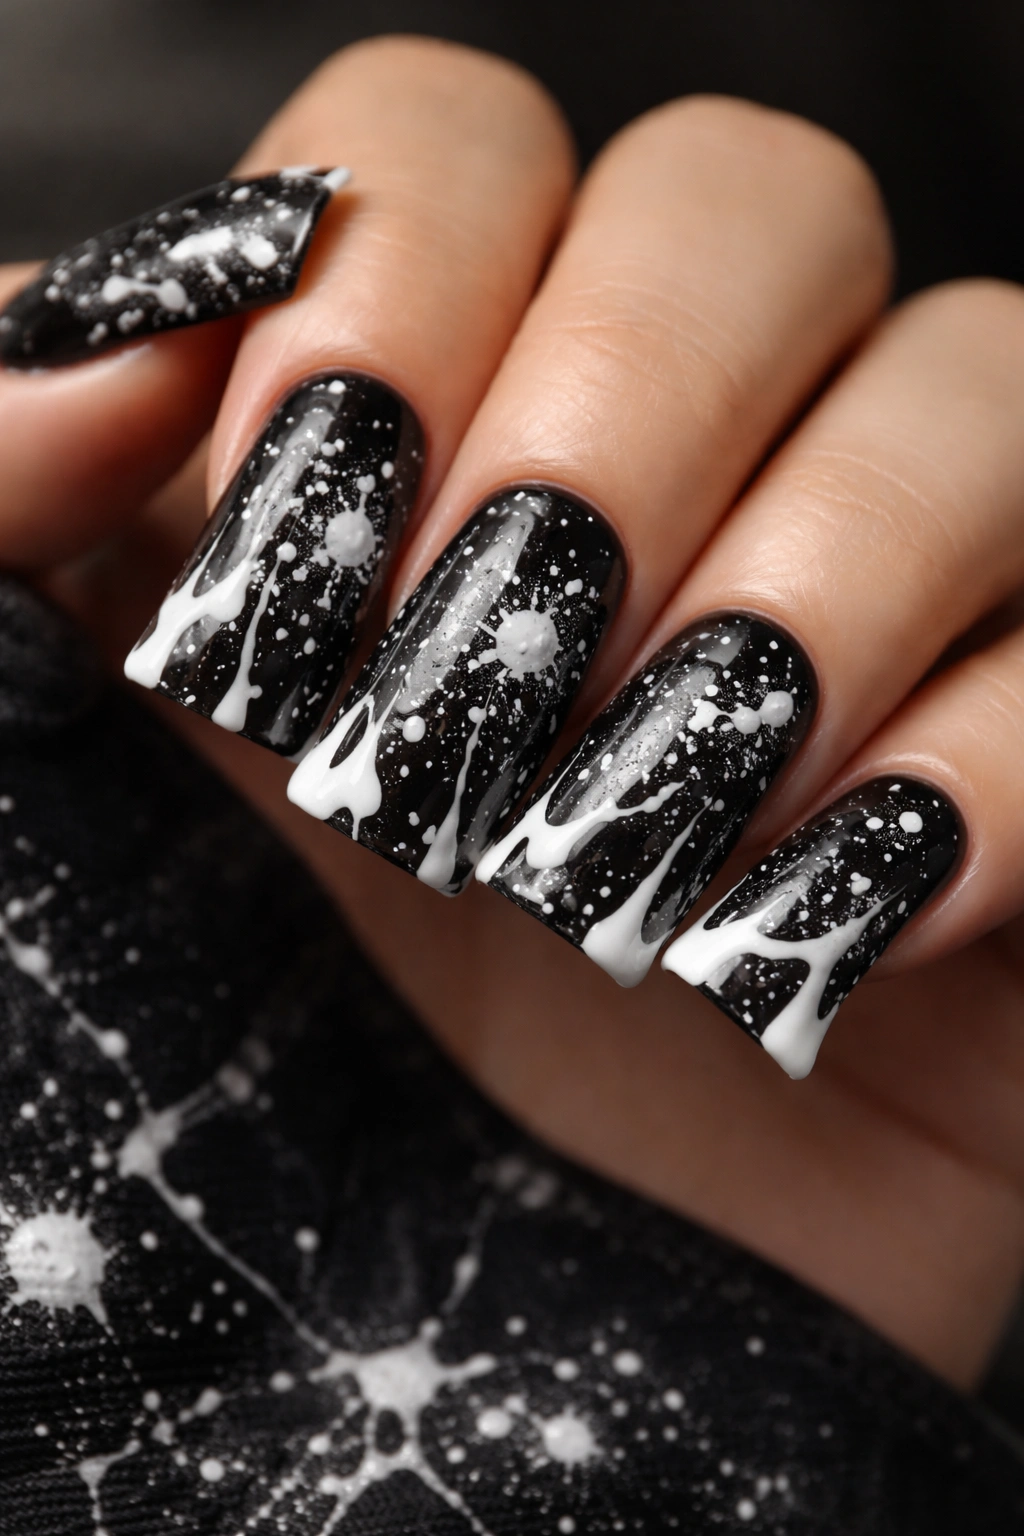
Splatter and drip techniques scream grunge and street art. Black and white contrast creates maximum visual impact while the chaotic splatter pattern feels raw and uninhibited.
The Grunge DNA of Splatter Art
Splatter design directly references Jackson Pollock, street art, and the intentional chaos that defines grunge aesthetics. Unlike symmetrical or carefully planned nail art, splatter embraces randomness and imperfection. White splatter over black creates stark contrast that reads as bold and confident rather than delicate or feminine.
Creating Splatter and Drip Effects
- Apply two coats of black polish as your base
- Dip a toothbrush into white polish and flick the bristles toward the nail to create splatter
- Alternatively, use a striping brush dipped in white to create thin dripping lines starting from the top of the nail, letting them run downward
- Layer splatter and drips at different densities—some areas more concentrated, others more sparse
- Seal with glossy top coat
Insider note: Do your splatter work on a practice nail wheel first so you get a feel for the amount of pressure and flick motion needed.
8. Deep Burgundy with Gold Crackle Effect
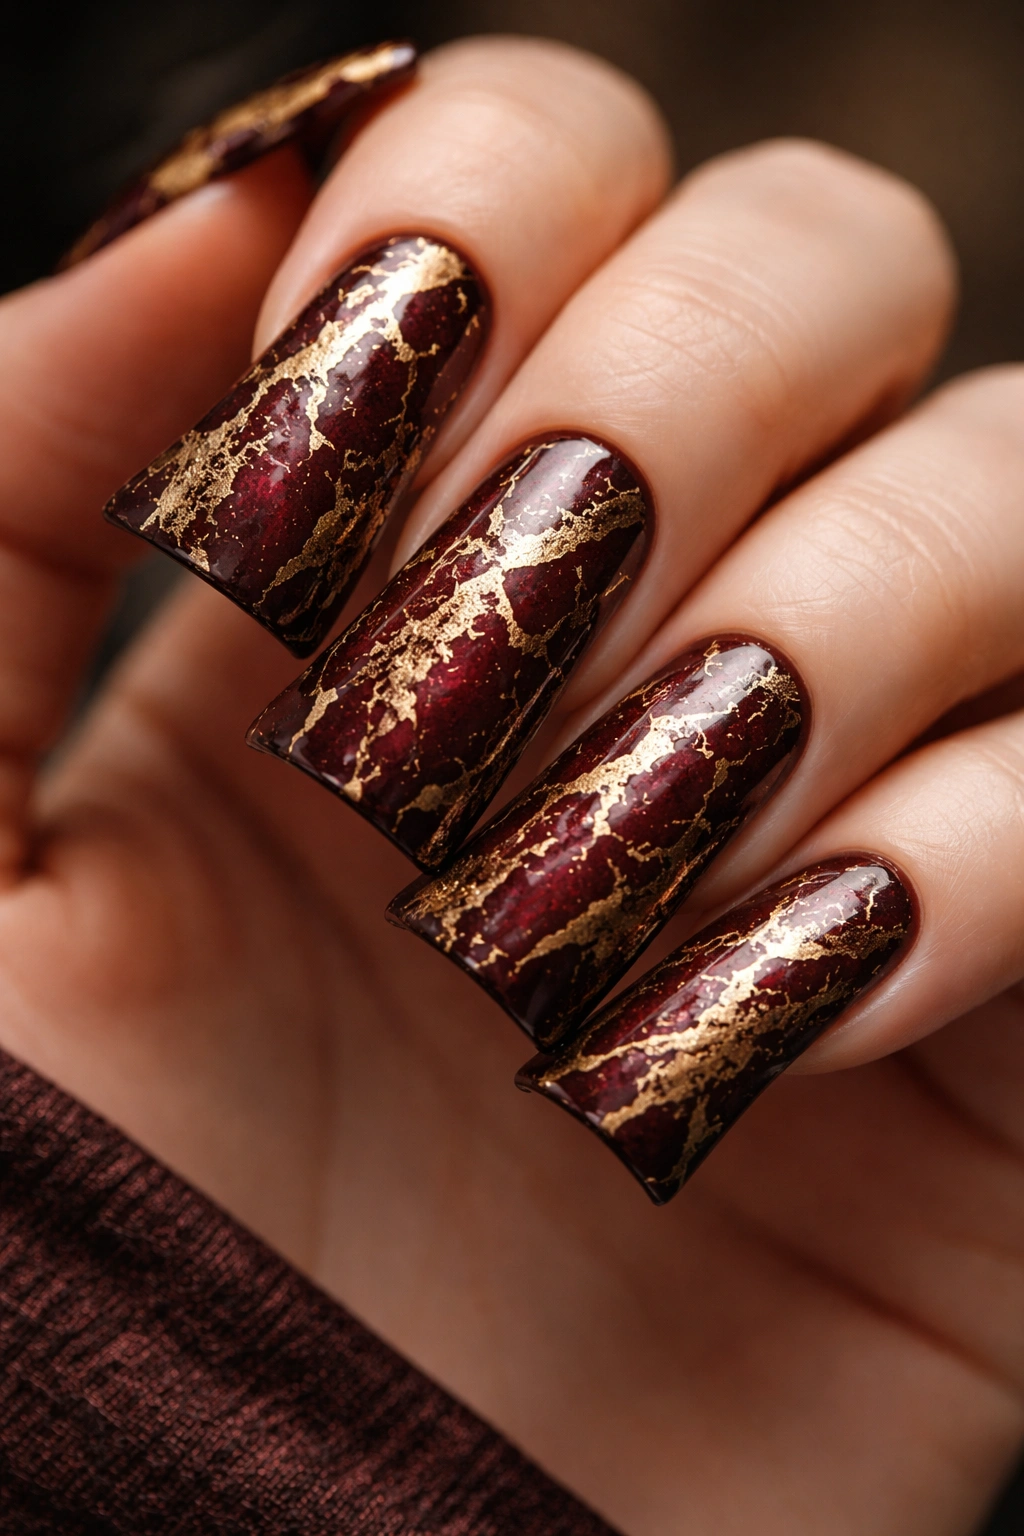
Burgundy feels luxurious and moody while crackle polish creates instant texture and that deliberately broken, aged appearance grunge loves. Gold crackle over burgundy feels both edgy and elegant.
Crackle as a Grunge Texture Tool
Crackle polish mimics cracked paint, dried mud, and broken surfaces—all textures that feel authentically worn and weathered. When you layer gold crackle over deep burgundy, you get visual complexity without relying on hand-painted details. The effect appears intentional and professional while maintaining that rough, imperfect aesthetic grunge demands.
Application Process
- Paint two coats of deep burgundy as your base
- Apply crackle polish according to product instructions (usually one thin coat—the thinner the application, the smaller the cracks)
- Watch as the polish dries and creates the crackled texture
- Apply a top coat to seal (note: most crackle polishes don’t need top coat, but check your product)
- The gold metallic showing through the burgundy cracks creates dimension automatically
Worth knowing: Crackle effect works best on a perfectly smooth, even base coat, so make sure your burgundy base is flawless before applying the crackle layer.
9. Dark Gray with Black Geometric Stripes
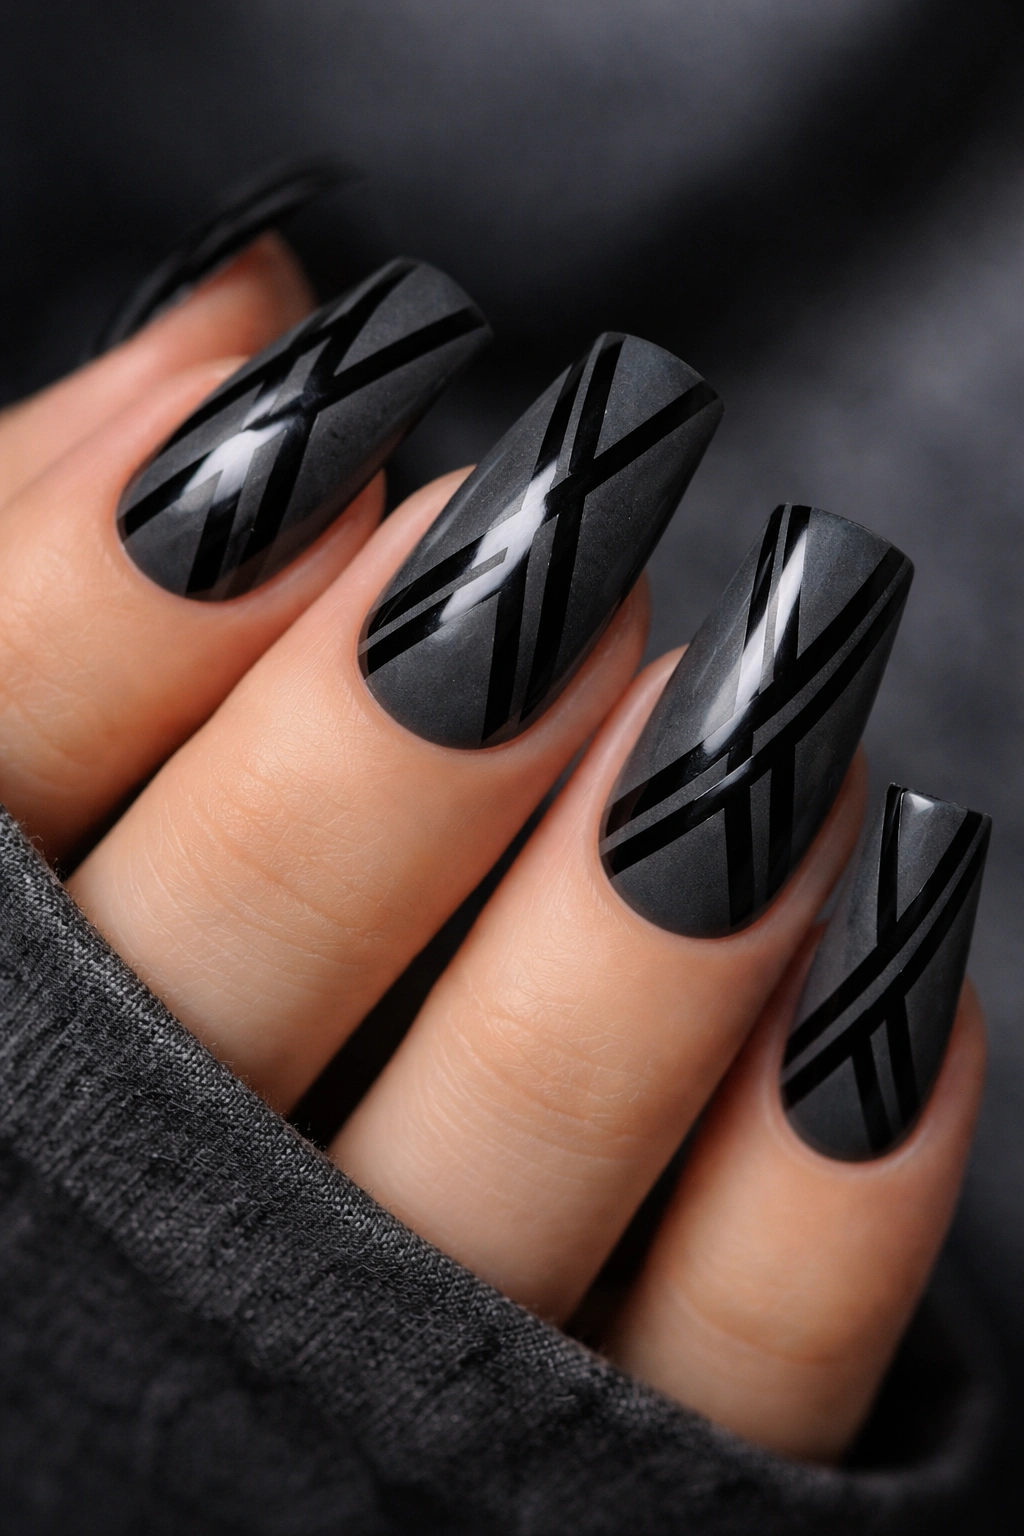
Geometric stripes combine precision with edge. Dark gray base with black stripes creates tonal sophistication while maintaining a distinctly edgy, modern grunge aesthetic.
Geometry Meets Grunge
Geometric designs feel structured and intentional, which creates interesting contrast against grunge’s typically chaotic elements. By using a limited color palette of dark grays and black, you maintain the moody aesthetic while clean lines add visual sophistication. This design works for both everyday wear and more formal settings.
Stripe Technique
- Paint all nails with dark gray base coat (two coats for coverage)
- Using a striping brush and black polish, paint vertical, horizontal, or diagonal stripes across the nail
- Space stripes evenly for a planned appearance, or vary spacing for more organic feel
- Create stripes at different widths—some thin, some thicker—for visual interest
- Seal with matte or glossy top coat depending on desired finish
Pro tip: Use painter’s tape to create perfectly straight stripes—place tape where you want the stripe boundaries, paint over the tape, then remove it immediately for clean edges.
10. Matte Black with Holographic Dust Accents
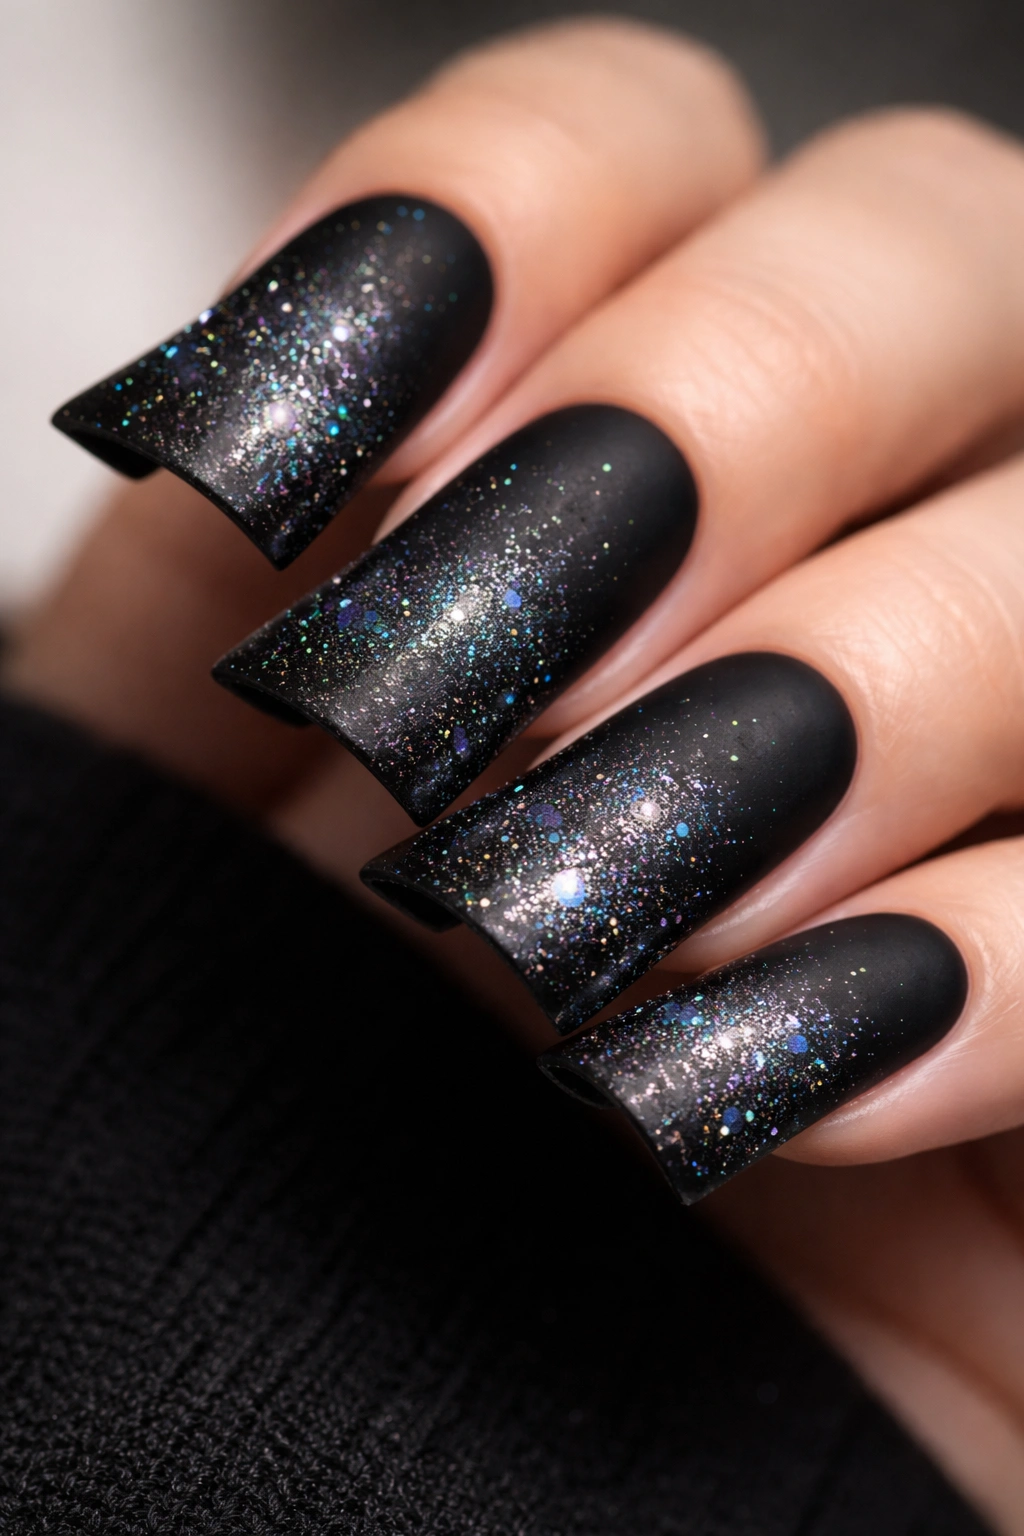
Holographic dust adds dimension and light-catching shimmer without compromising the matte, dark aesthetic. Scattered holographic particles on matte black create a look that’s simultaneously dark and multidimensional.
Why Holographic Works With Grunge
Holographic elements seem contradictory to grunge’s dark mood, but when used sparingly on a matte base, they create intrigue and sophistication. The shifting color in holographic dust catches light and creates movement across the nail while the matte base keeps everything grounded and edgy. This combination feels unexpected and fashion-forward.
Adding Holographic Texture
- Paint nails with matte black polish (or apply matte top coat over glossy black)
- While the matte finish is still slightly tacky, dab holographic dust or flakes across the nail surface using a small brush or applicator
- Focus dust on the tips or scattered across the surface depending on your preference
- Seal with a clear top coat (gloss or matte depending on desired finish)
- The holographic particles will still be visible and catch light through the top coat
Insider note: A little holographic dust goes a long way—you want scattered accents, not full coverage, so use a light hand.
11. Charcoal with Peeling Black Paint Effect
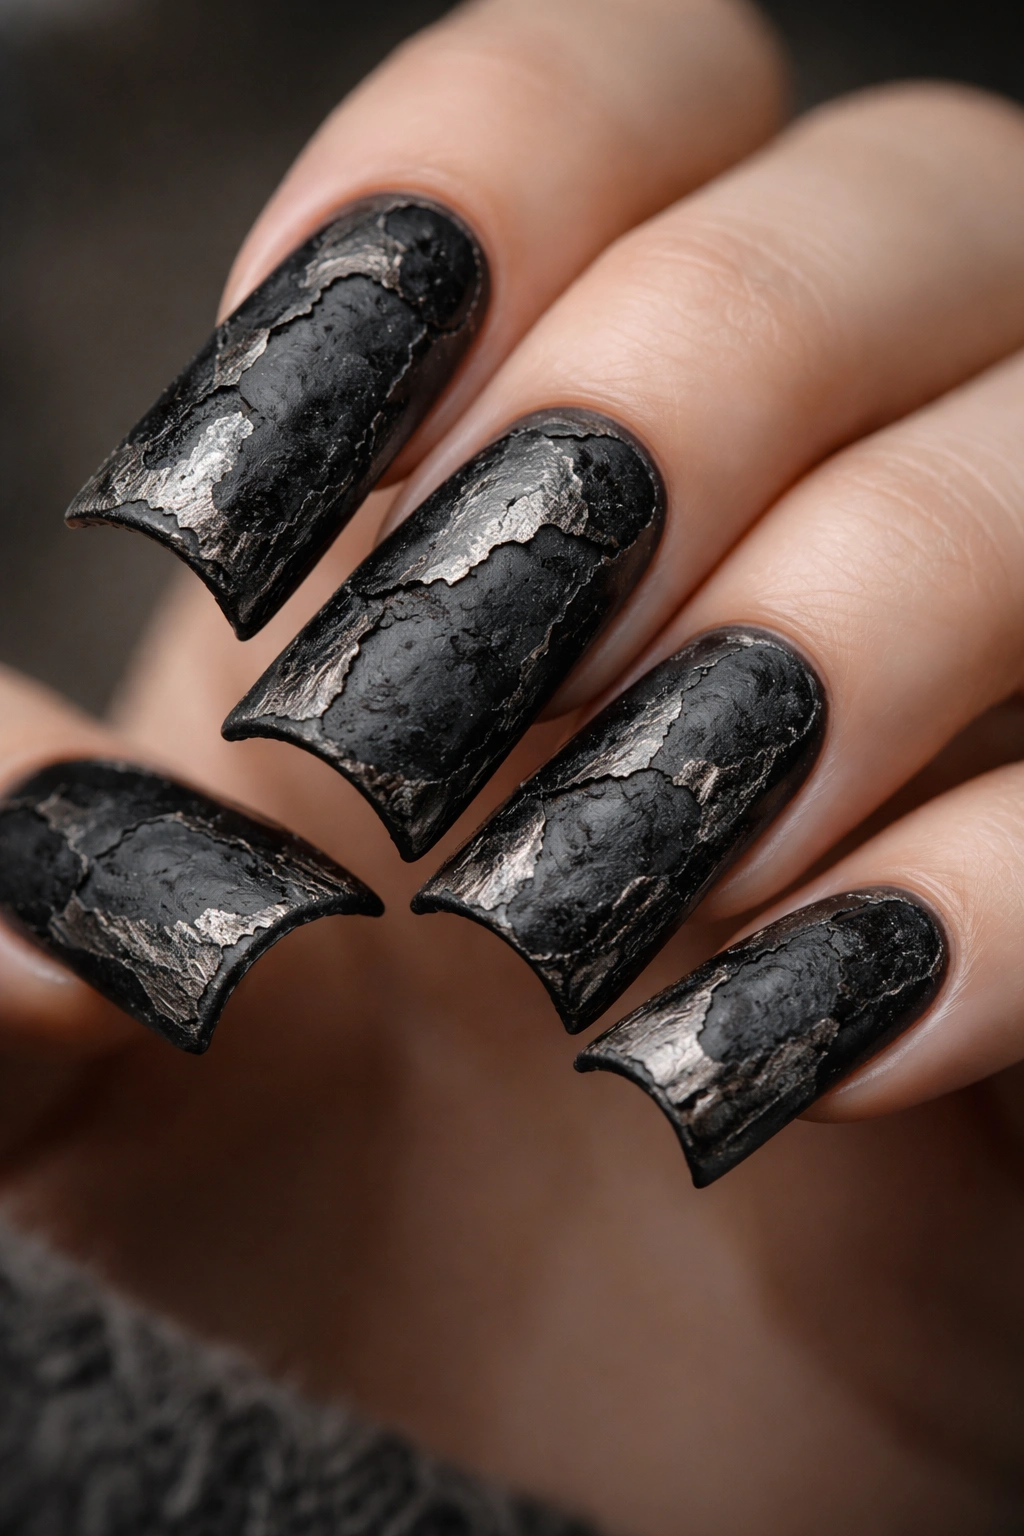
This design mimics peeling or chipped black paint on charcoal underneath, creating the illusion of layered, aged surfaces. It looks like your nails have been through some wear and tear, which is perfectly grunge.
The Beauty of Layered Imperfection
Peeling paint suggests time, weathering, and natural decay—all aesthetic elements grunge celebrates. This design doesn’t require perfect hand-painting because the imperfect, irregular edges of peeling paint are the whole point. The underlying charcoal showing through creates visual depth and that authentic worn-in appearance.
Creating the Peeling Effect
- Apply two coats of charcoal gray base polish
- Paint black polish on top, but apply it unevenly—don’t cover the entire nail
- While the black is still slightly wet, use a thin brush handle or dotting tool to scrape away edges and create irregular peeling patterns
- Let some charcoal show through in patches and edges
- Dry completely, then apply a matte top coat to enhance the aged appearance
Worth knowing: The less controlled your peeling pattern, the more authentic it looks—resist the urge to make it symmetrical.
12. Deep Teal with Black Oil Slick Effect
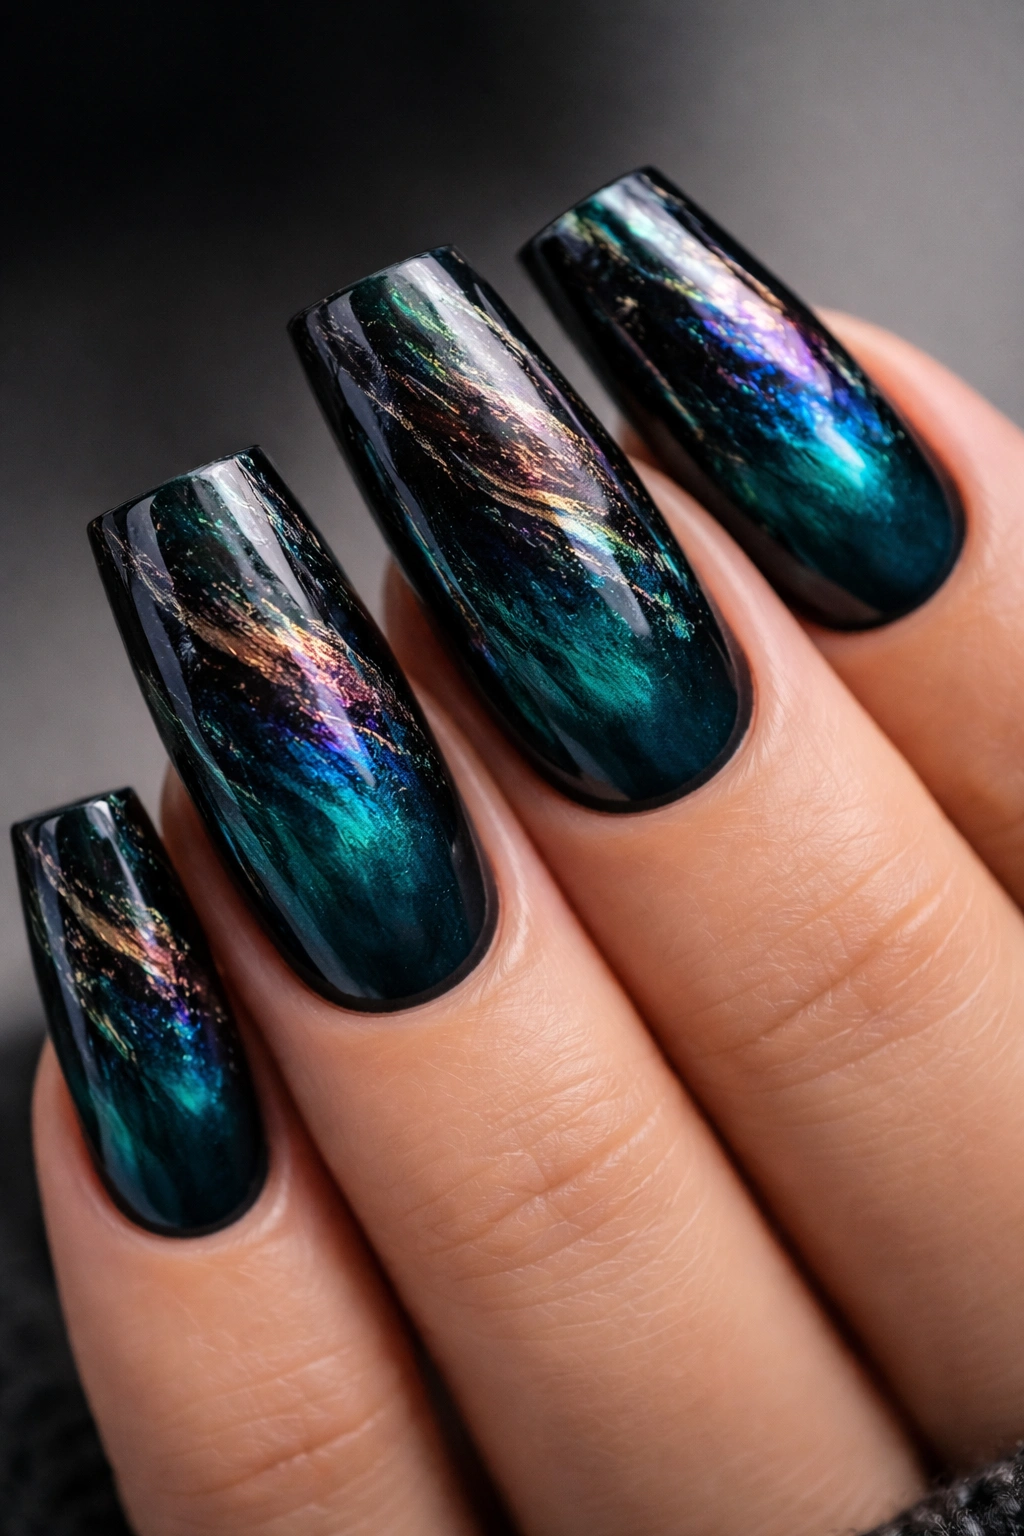
Deep teal serves as a bold dark base while the oil slick effect (created with iridescent polish or color-shifting products) adds that mysterious, multidimensional quality. The combination feels moody and otherworldly.
Dark Teal as a Grunge Color
Teal is dark enough to feel serious and moody while remaining more visually interesting than basic gray or black. It has an inherent coolness that pairs perfectly with grunge aesthetics. When you layer an oil slick effect on top, you add iridescence and mystery without compromising the dark mood.
Creating Oil Slick Layers
- Paint nails with deep teal base (two coats for full coverage)
- Apply thin layers of color-shifting or iridescent polish on top—these products naturally create that oil slick, rainbow-but-muted effect
- Let each layer dry before adding the next to create depth
- The colors should shift subtly when the nail catches light—purples, golds, and teals bleeding into each other
- Finish with glossy top coat to emphasize the oil slick sheen
Pro tip: Oil slick effects look best in natural light and indoor artificial light—test them in multiple lighting conditions before committing to the full manicure.
13. Black with White Marble and Gray Veining
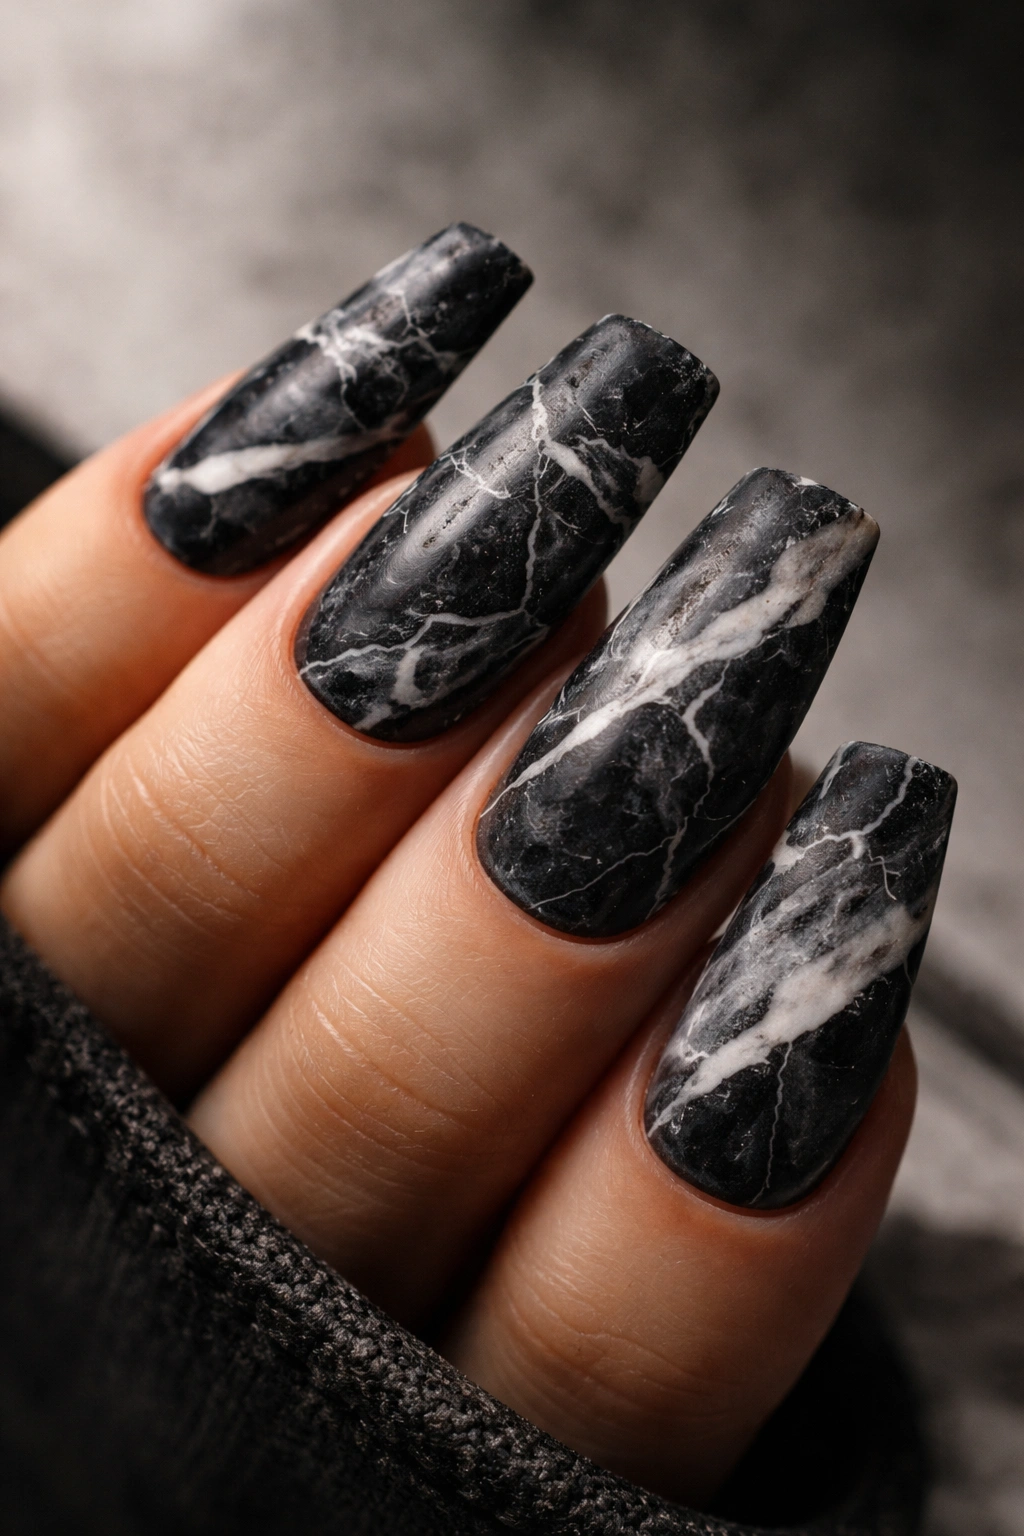
Marble effect brings sophistication and organic texture to grunge styling. Gray veining across black and white creates a naturally complex design that feels both polished and edgy.
Marble as Grunge Material
Marble suggests weathered stone, aged surfaces, and natural decay. Unlike glossy, pristine marble, grunge marble feels ancient and worn. The gray veining creates the illusion of depth and natural variation rather than a perfectly uniform design.
Water Marble Technique
- Paint base coat of black polish
- Fill a small cup with room-temperature water
- Drop concentric circles of white and gray polish into the water
- Use a thin tool to drag through the circles creating veining patterns
- Dip your nail at an angle into the water to pick up the pattern
- Wipe away excess water and allow to dry completely
- Apply top coat to seal
Insider note: Water marble has a learning curve—practice on several nails or tips before you feel confident, and make sure your water temperature is just right (too hot and the polish spreads too much).
14. Matte Charcoal with Metallic Drip Lines
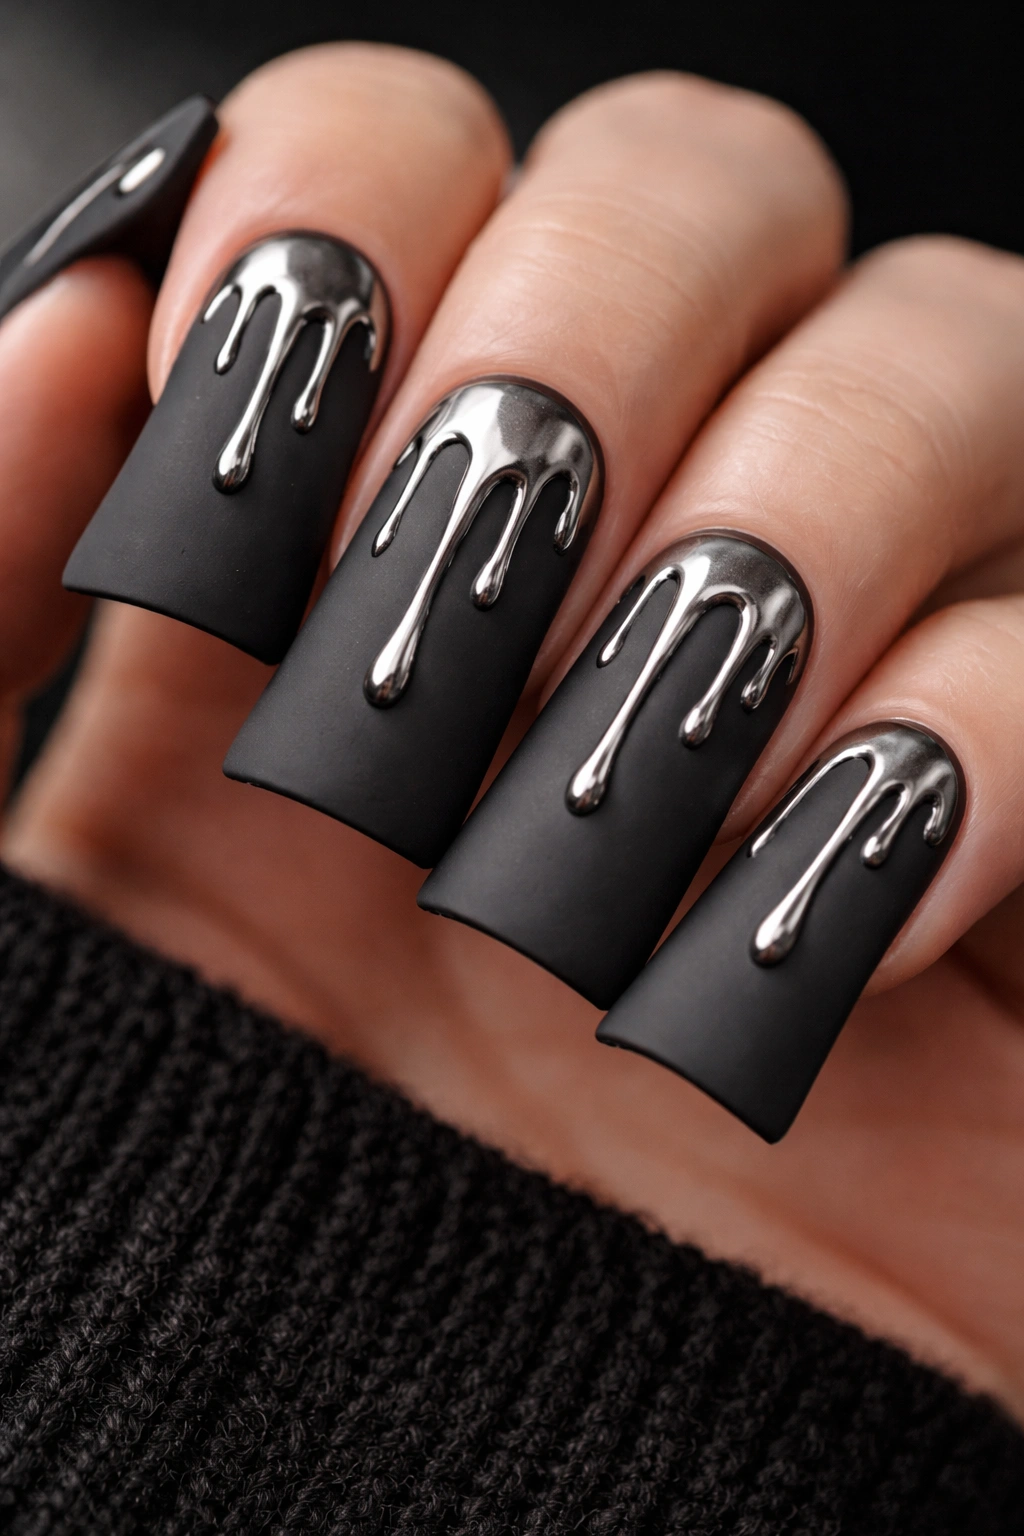
Metallic drip lines descending from the top of the nail create movement and dimension on a matte charcoal base. The contrast between matte and metallic surfaces adds visual interest.
Drips as a Design Element
Drip designs suggest liquid, flow, and movement—they add dynamism to an otherwise static surface. Metallic drips catch light and draw the eye downward along the nail. On a matte base, metallic elements really pop and feel intentional rather than overly decorative.
Creating Drip Effects
- Paint all nails with matte charcoal polish
- Using a metallic polish (silver, gold, or copper) and a thin striping brush, paint lines starting from the top edge of the nail
- Let the lines drip downward toward the tip, varying where they end
- Some drips can reach the very tip, others can stop mid-nail
- Create anywhere from 3-5 drips per nail depending on density preference
- Keep drips in varying widths for organic appearance
- Seal with clear matte top coat
Pro tip: Plan your drip placement before you start—lightly sketch them with a pencil on a white piece of paper to visualize where they’ll look best.
15. Forest Green with Black Gothic Pattern
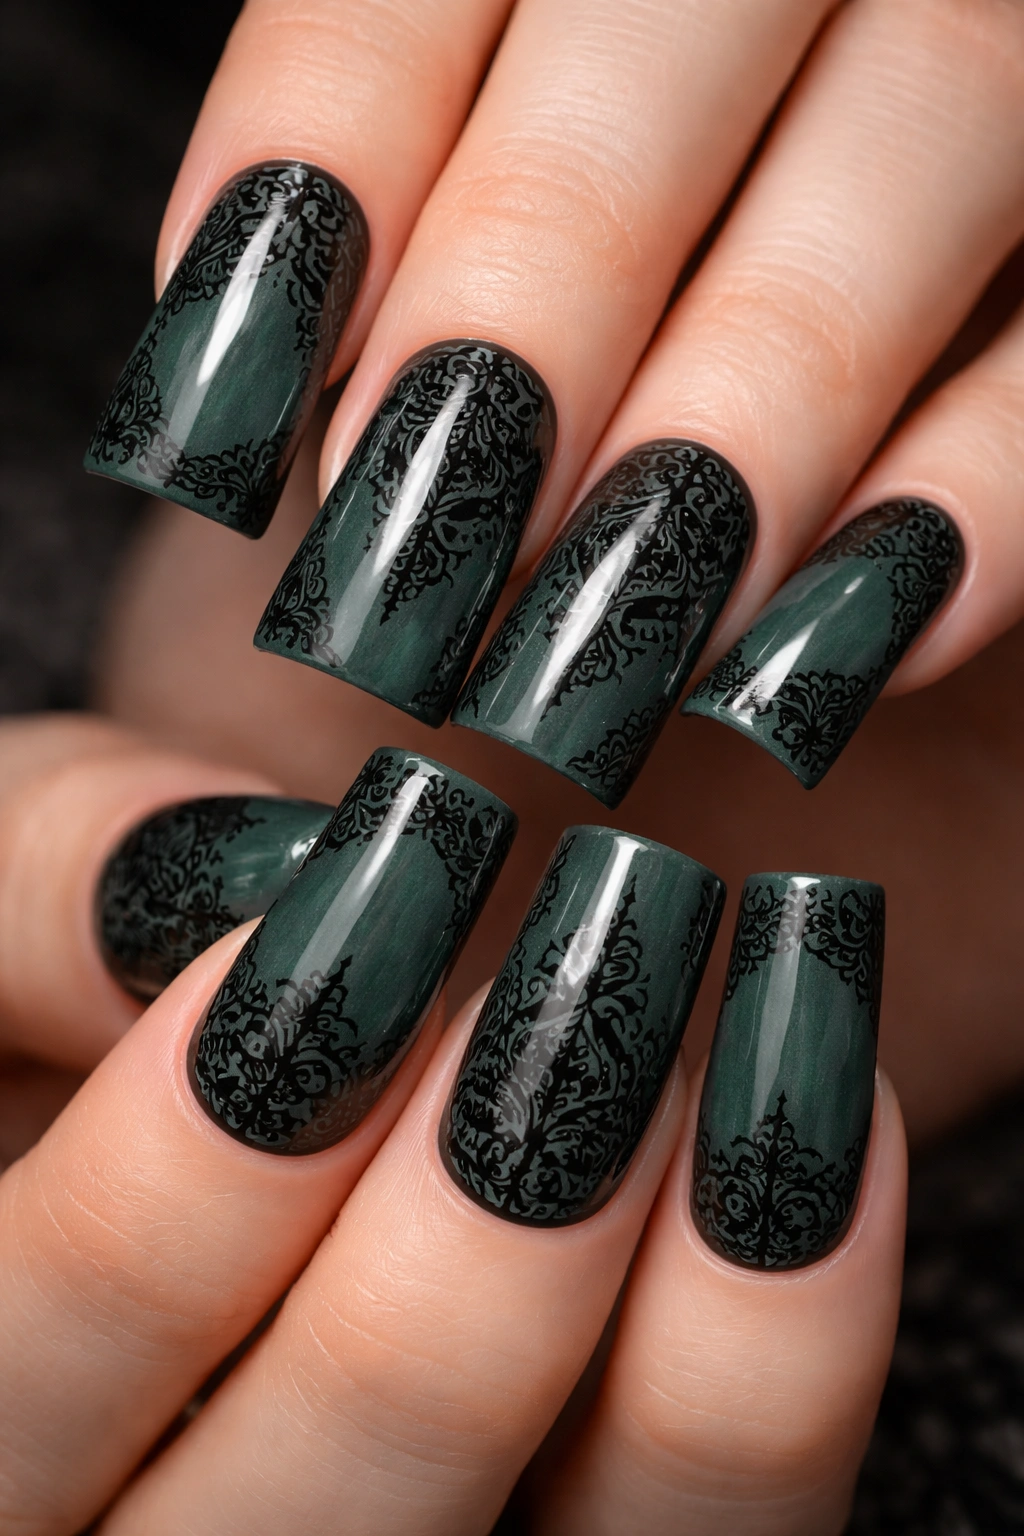
Gothic patterns—think intricate line work, ornamental details, and Victorian-inspired designs—add artistic depth to forest green nails. Black fine-line details transform a simple colored base into a sophisticated art piece.
Gothic Elements in Grunge
While gothic and grunge are distinct aesthetics, they share dark moods and romantic intensity. Gothic patterns add complexity and visual interest while maintaining the overall dark, edgy vibe grunge demands. Forest green provides the perfect backdrop for intricate black details.
Hand-Painting Gothic Details
- Paint base coat of forest green
- Using a very fine striping brush and black polish, carefully paint ornamental patterns—think filigree, decorative corners, delicate line work, or small Gothic symbols
- Work on one nail at a time to maintain precision
- Focus details on specific areas (corners, half the nail, tips) or scattered across the entire surface
- Build details gradually—it’s easier to add more than to fix mistakes
- Seal with glossy top coat to make details shine
Worth knowing: Gothic hand-painting requires patience and a steady hand—practice basic line work before attempting intricate details.
16. Charcoal Ombre to Black with Glitter Gradient
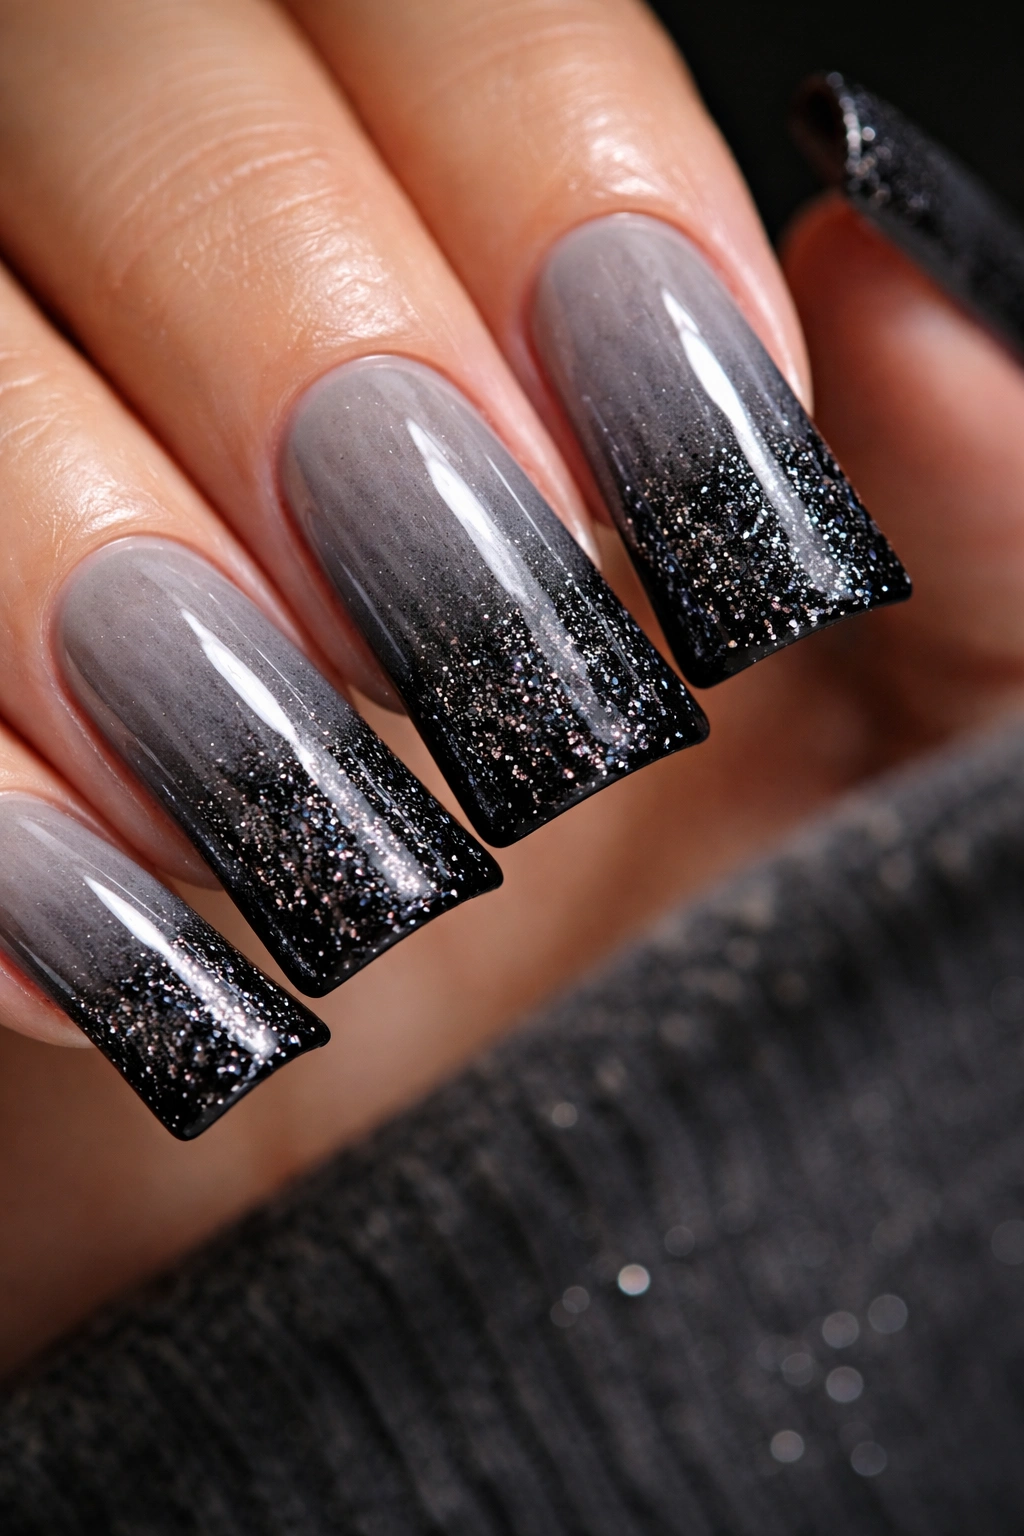
Ombre creates movement from light to dark while glitter adds texture and sparkle. Starting with charcoal and fading to black with increasing glitter intensity creates visual depth and dimension.
Glitter as Textural Element
Glitter typically feels fun and celebratory, but applied in a specific way over dark tones, it becomes edgy and sophisticated. By layering glitter densely at the tips and sparsely near the cuticle, you create a gradient that feels intentional and artistic rather than random.
Ombre with Glitter Technique
- Paint base coat of charcoal gray
- Using a makeup sponge, dab black polish onto the tips of the nails, blending upward to create gradient
- Apply a thin layer of glitter-infused polish or loose glitter mixed with clear polish at the very tips
- Continue layering glitter slightly more densely as you move toward the tip and edge
- The glitter concentration should increase with the darkness—more glitter on the black sections, minimal on the charcoal
- Seal with glossy top coat
Insider note: Loose glitter adheres better to slightly tacky polish, so apply your top coat while the polish is still just barely wet.
17. Matte Black with Silver Fine Line Details
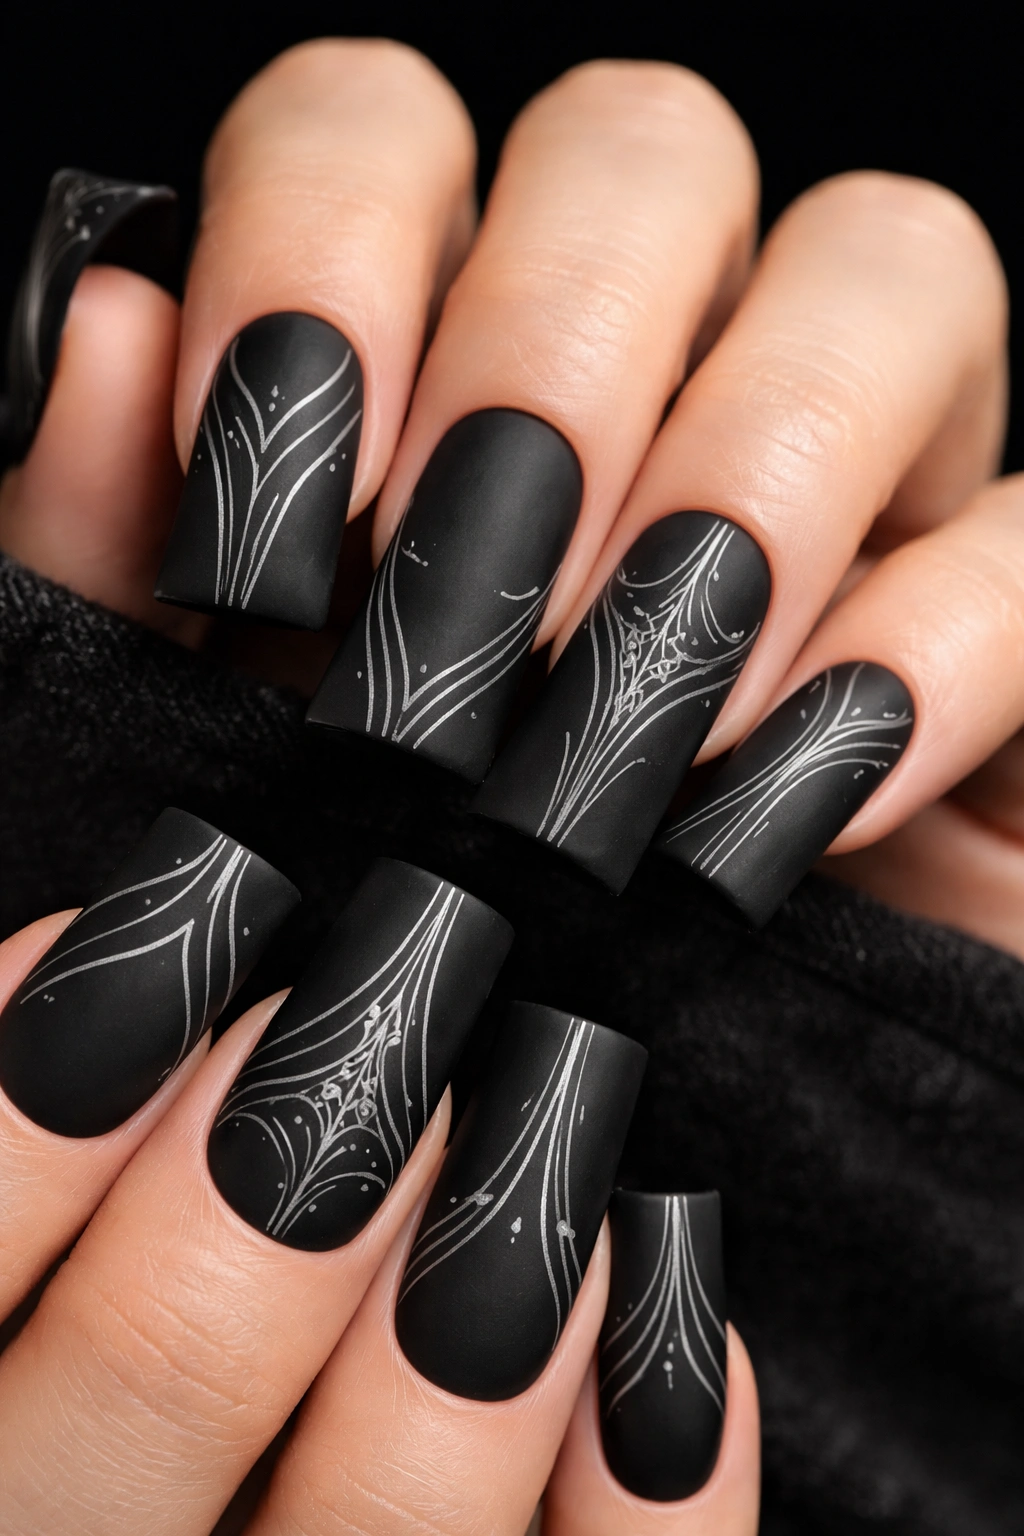
Fine line details in silver create artistic complexity on matte black. Thin, precise lines feel sophisticated and intentional, adding visual interest without competing with the base color.
Silver Lines on Matte Black
Silver metallic lines stand out starkly against matte black, creating high contrast and visual impact. Fine lines feel more elegant than thick brushstrokes while maintaining grunge’s edgy aesthetic. This design works for any occasion from casual to professional.
Application Method
- Paint nails with matte black polish
- Using a very fine striping brush and silver metallic polish, carefully paint delicate line work—try parallel lines, geometric patterns, abstract designs, or decorative details
- Precision matters here, so work slowly and deliberately
- Create varied patterns on each nail or maintain consistency across all ten fingers depending on aesthetic preference
- Seal with clear matte top coat to maintain the matte finish while protecting the silver details
Pro tip: A matte top coat over metallic details creates interesting visual texture—the metallic seems to sit slightly on top of the matte surface rather than fully embedded in it.
18. Deep Purple with Distressed Gold Foil
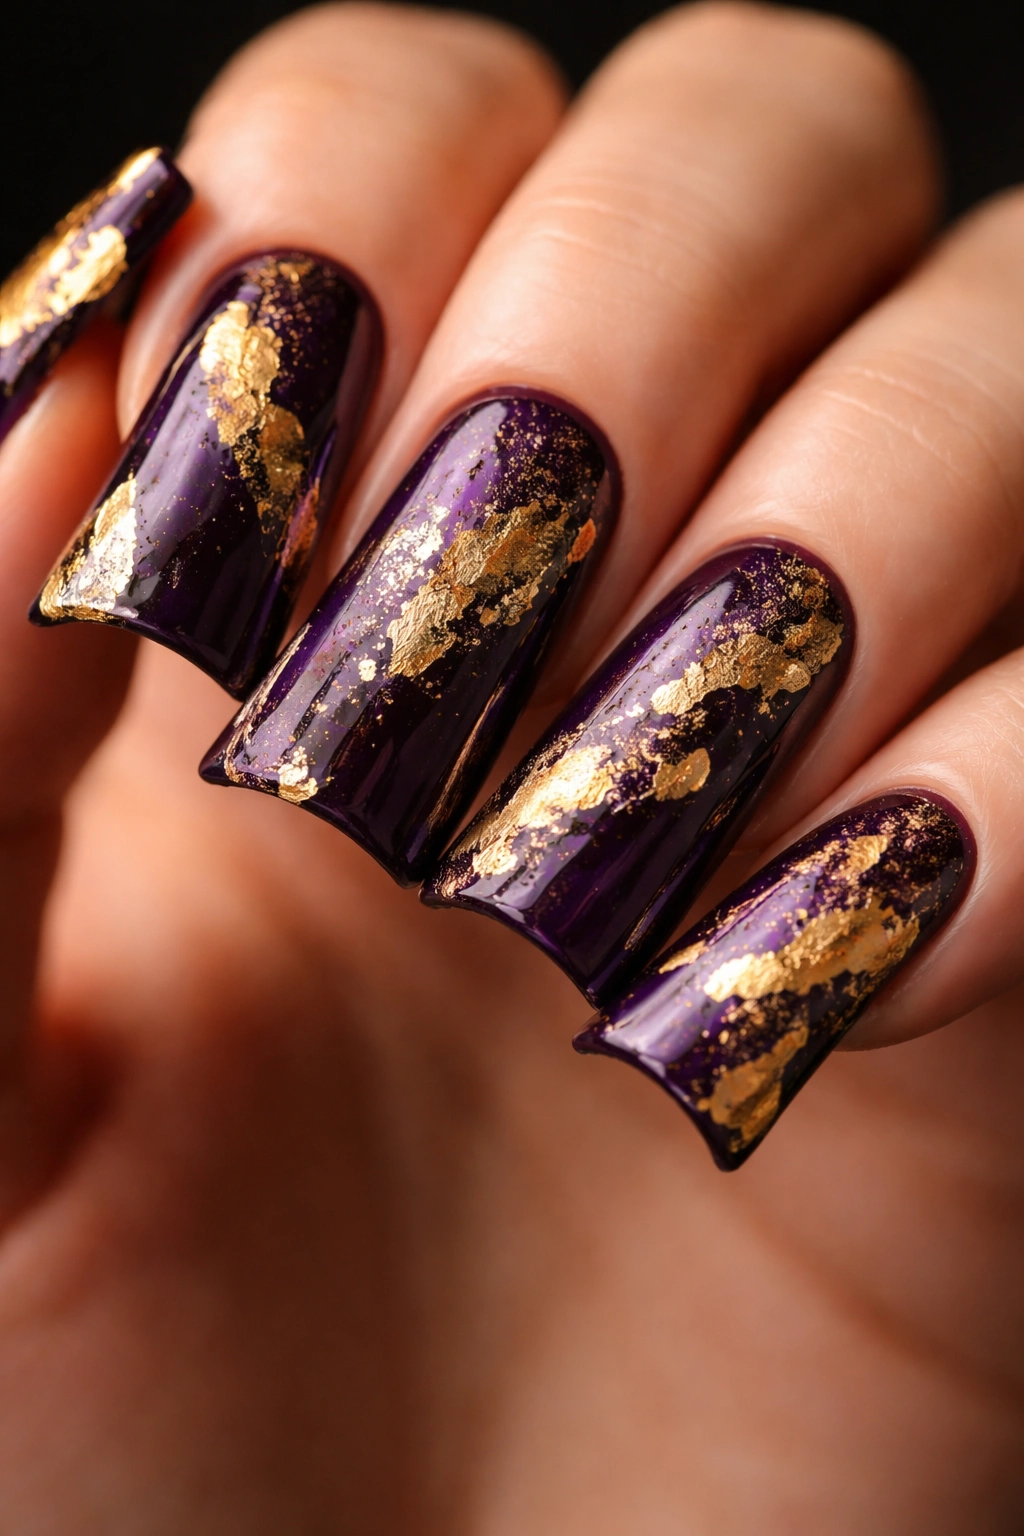
Deep purple brings richness and sophistication while distressed gold foil adds irregular, artistic texture. The combination feels luxe and edgy simultaneously.
Purple as Underrated Grunge
Dark purple doesn’t get as much attention as black or gray in grunge styling, but it perfectly fits the aesthetic—moody, mysterious, and slightly romantic. When paired with distressed gold, it reads as intentional and fashion-forward rather than just another dark nail.
Distressed Foil Application
- Paint nails with deep purple base (two coats)
- Cut or tear gold foil into irregular, organic shapes
- Apply adhesive foil pieces randomly across the nail surface
- Some pieces should partially cover areas, others completely, creating an intentionally distressed, layered appearance
- Instead of pressing them flat, let some edges curl or rise slightly for added dimension
- Seal with glossy top coat
Worth knowing: Distressed foil works best when you resist trying to make it look neat—embrace the chaos and irregular coverage.
19. Charcoal with Black Tar Drip Effect
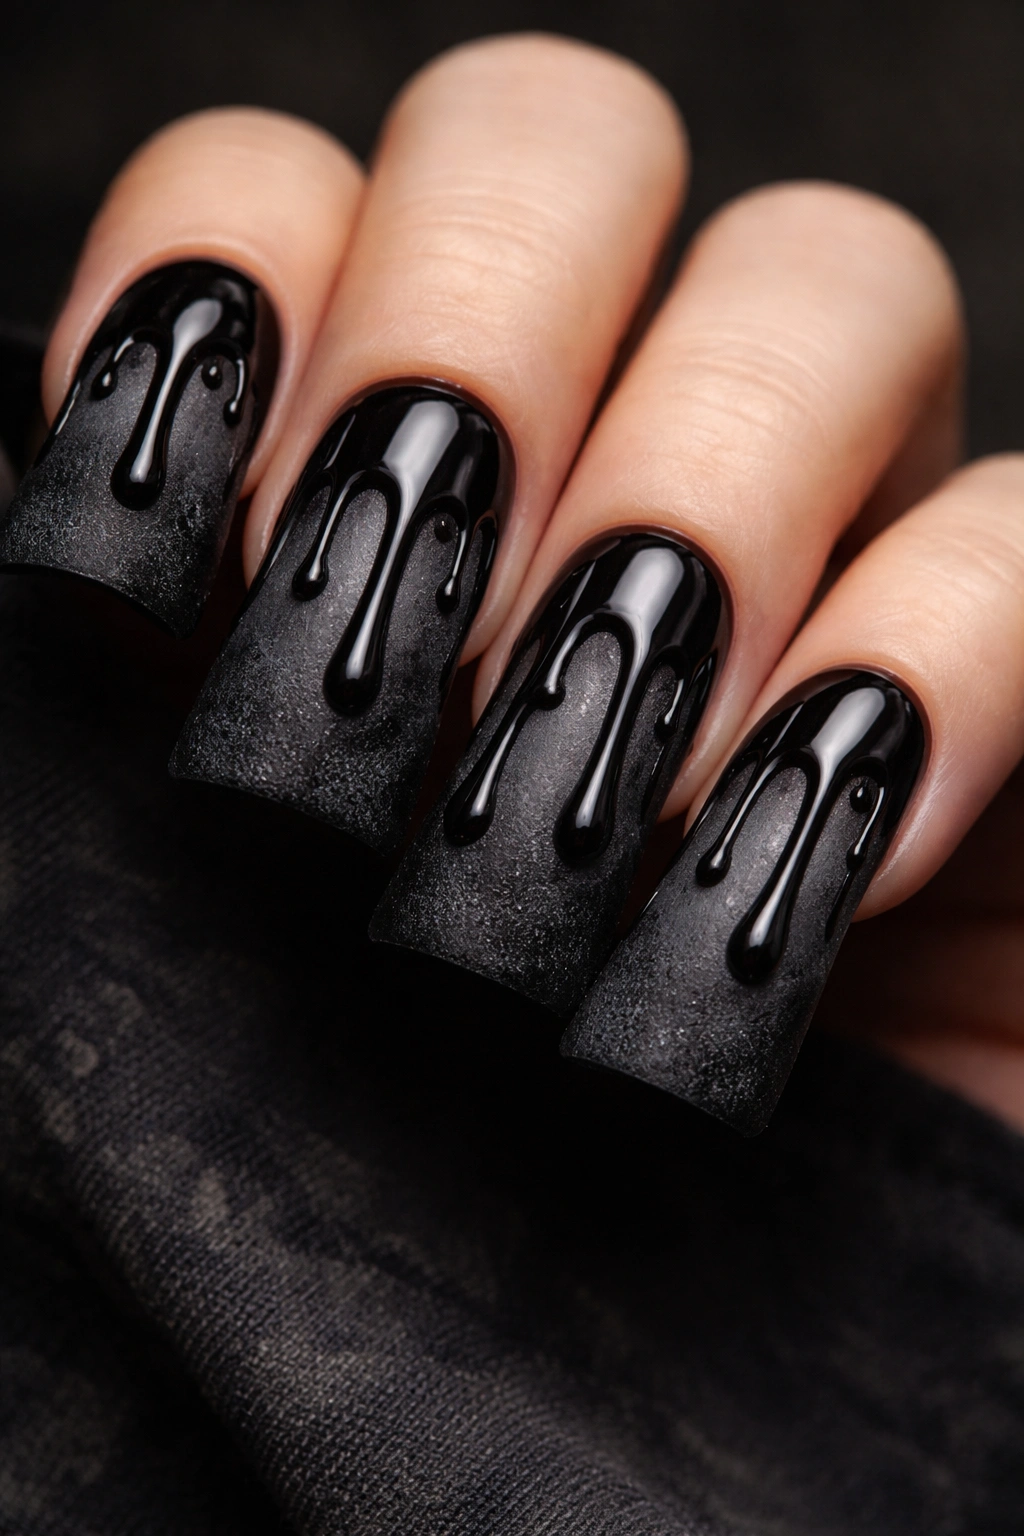
A tar drip effect (created by allowing thicker black polish to flow downward) creates the illusion of liquid movement and decay. It’s messy in the best way possible.
Tar as Metaphor
Tar suggests industrial decay, something viscous and heavy, and environmental damage—all elements grunge aesthetics reference. Unlike water-based drips, tar appears thicker, slower, and more sinister. This design feels deliberately edgy and slightly darkly humorous.
Creating the Tar Drip
- Paint base coat of charcoal gray
- Apply one coat of regular black polish across most of the nail, leaving the top portion bare
- Load a striping brush very heavily with thick black polish (you might need to use a gel polish or extra-thick formula)
- Starting at the very top edge, paint thick lines downward allowing the polish to naturally flow and drip
- The polish should appear to run and spread unevenly for authentic tar effect
- Allow to dry completely (this may take longer than usual polish due to thickness)
- Seal with matte top coat for authentically weathered appearance
Insider note: This design works best if your top edge is completely bare (nail color or nude) so the black drips appear to come from outside the nail.
20. Black with White Broken Mirror or Shattered Glass Effect

A shattered glass effect mimics fractured surfaces and breakage—deeply grunge conceptually. White cracks over black create the illusion of shattered glass or broken mirror.
Broken Glass as Grunge Symbolism
Broken surfaces, shattering, and fragmentation are core grunge visual metaphors. A shattered glass design feels edgy, rebellious, and conceptually interesting. Unlike most nail art, this design tells a story.
Creating Shattered Effect
- Paint base coat of black polish
- Using white polish and a thin striping brush, create an irregular pattern of intersecting lines across the nail—think of a spiderweb or fractured glass pattern
- Lines don’t need to be perfectly straight; jagged, organic lines look more authentic
- Vary line lengths and spacing so the pattern feels random and natural
- Fill in some sections of the shattered pattern with white, leaving others as just outlines depending on your preference
- Seal with matte top coat for maximum impact
Pro tip: Study actual broken glass or shattered mirror photos for reference before attempting this design—understanding how fractures actually spread will make your pattern look more convincing.
Final Thoughts
Grunge duck nails celebrate the intersection of bold shape and moody aesthetics, giving you endless room for creative expression. These twenty designs represent different approaches to grunge styling—some lean into pure darkness with charcoal and black, while others introduce unexpected colors like forest green or deep purple. Some emphasize texture through distressing and splatter, while others focus on precise geometric or ornamental details.
The beauty of grunge duck nails is that there’s no wrong approach. Whether you prefer the simplicity of matte black with negative space or the complexity of gothic patterns and foil accents, your nails can reflect whatever mood you’re channeling. The duck nail shape itself makes every design feel intentional and elevated, transforming simple polish applications into statement-making art.
Start with whichever design speaks to you most—maybe you’ll begin with charcoal smoke and black tips because it’s relatively forgiving, or perhaps you’re confident enough to jump straight into detailed hand-painted gothic patterns. Mix and match elements from multiple designs to create something entirely your own. The grunge aesthetic thrives on individuality and imperfection, so don’t stress about executing these designs flawlessly. Sometimes the best grunge nails are the ones that look beautifully, intentionally imperfect.
