

Short nails don’t mean you have to skip out on adorable nail art designs. In fact, duck-themed nails on a shorter canvas often look even more charming and proportional than on longer nails — the designs feel intentional rather than stretched thin across excess nail space. Duck nails have become increasingly popular as a cute, whimsical nail trend that appeals to anyone who loves minimalist animal designs, playful nail art, or just wants something that makes them smile every time they look down at their hands. The beauty of duck nails for short nails is that you don’t need complicated techniques or professional-level steady hands to pull them off. Most of these designs rely on simple shapes, bold colors, and a bit of strategic placement rather than intricate detail work. Whether you’re a beginner looking to dip your toes into nail art or someone who just wants a fun seasonal look, duck nails on short nails are accessible, charming, and surprisingly versatile. Let’s explore fourteen different approaches to this delightful trend that will work beautifully on your shorter length.
1. Simple Yellow Duck Faces
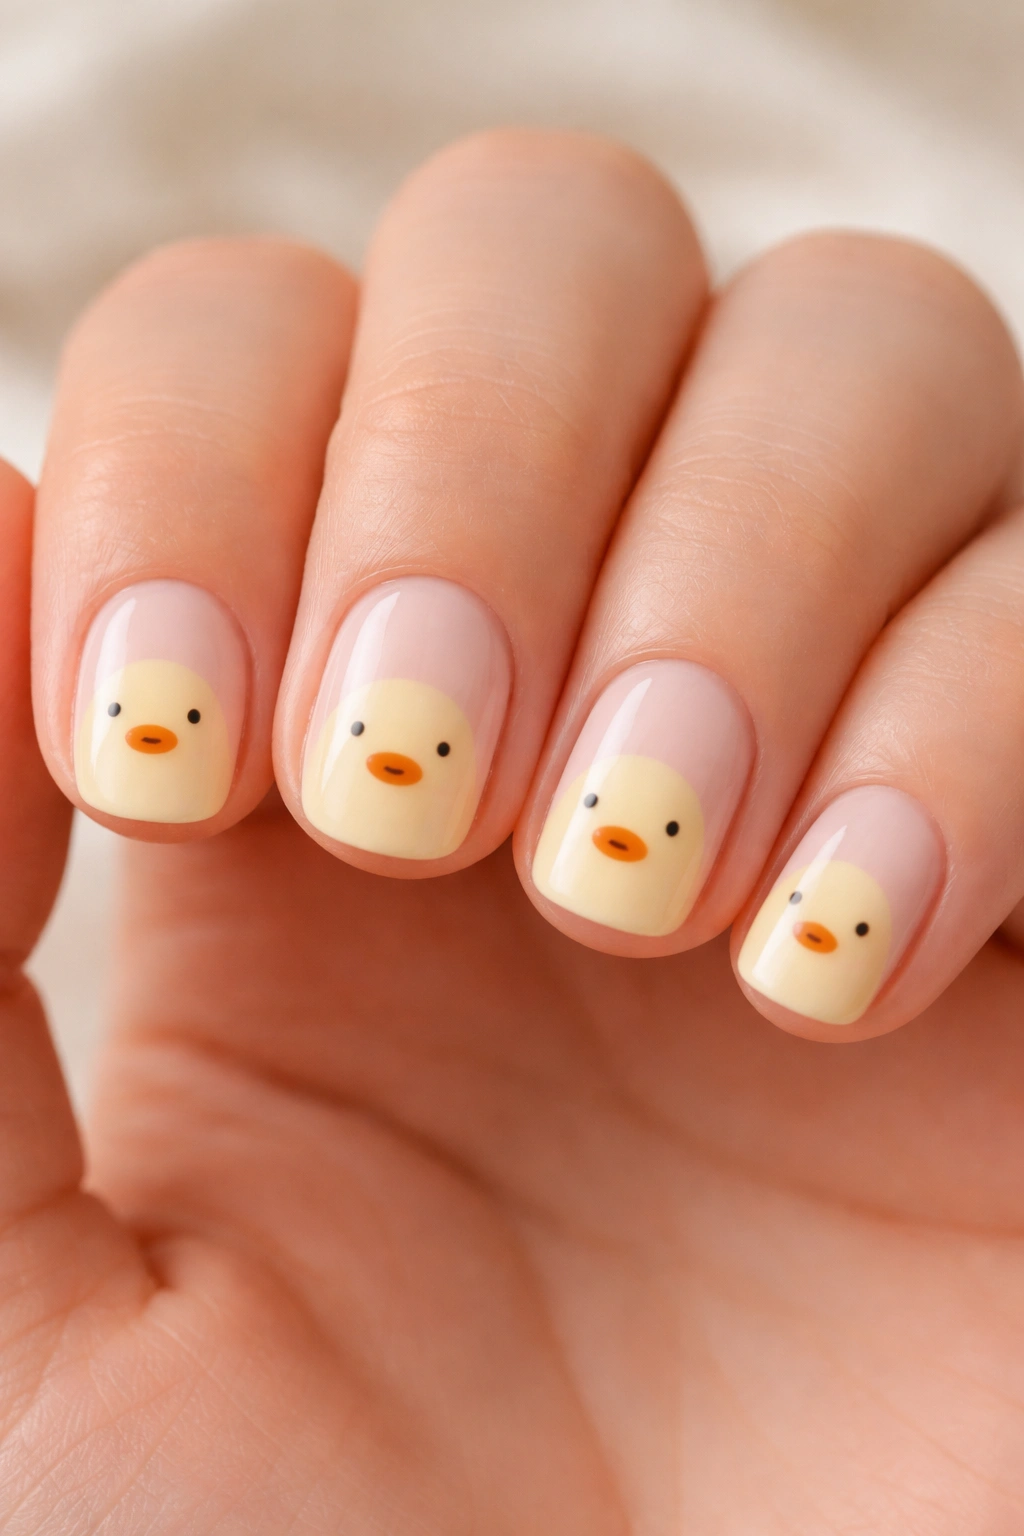
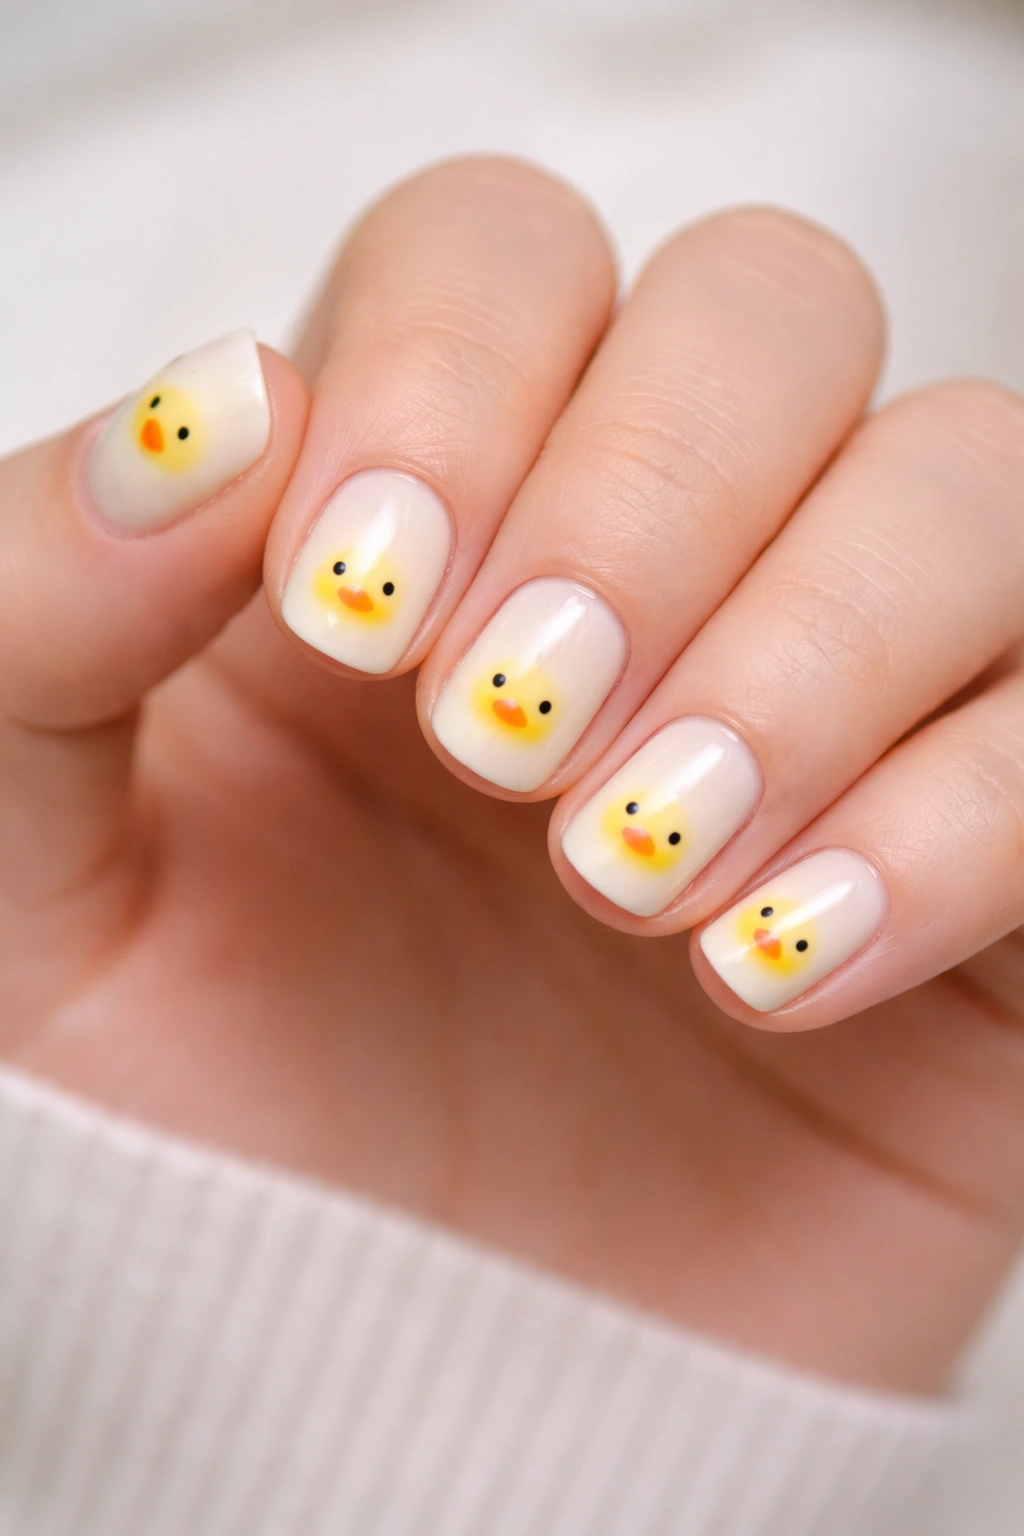
This is the most straightforward duck nail design and the perfect starting point if you’ve never attempted animal nail art before. Paint your nails a clean white or pale cream base, then use a thin brush or even a toothpick to create a small yellow circle on each nail — this is your duck’s head. Add two tiny black dots for eyes and a small orange triangle or oval for the bill. The elegance of this design comes from its absolute simplicity.
Why It Works So Well on Short Nails
When your canvas is smaller, a minimalist approach becomes not a limitation but an advantage. The duck faces remain perfectly visible and charming without needing to stretch across an oversized space. The design feels balanced and intentional on short nails rather than cramped. Kids and adults both love this design because it reads immediately as “that’s a duck” without requiring any imagination or closer inspection.
Pro Tips for Execution
- Use white or pale yellow as your base — these colors make the design pop without competing with it
- A white base with a yellow duck stands out more than a yellow base with a white duck
- Let your base coat dry completely before adding the yellow circles; this prevents the colors from muddying together
- If your brush feels too thick, dip a toothpick or dotting tool into yellow polish — the slightly imperfect circles actually add character
- Seal everything with a glossy topcoat for protection and a finished, professional look
2. Minimalist Quacking Ducks
Instead of a full duck face, create an open-bill duck design where the bill is open in a quacking position. This design uses the same base color but adds more personality through the open-mouth expression. Paint a tiny yellow circle for the head, then extend two small lines downward from where the bill would be — these form the open bill. Add small black eyes that are slightly wider apart than on the smiling duck design, giving the duck a more expressive, animated look.
What Makes This Different
The open-bill approach adds character and movement to the design. It suggests action and personality — this duck isn’t just sitting there; it’s actively quacking. The slight extra detail in the bill positioning makes this design feel more dynamic than the basic duck faces, while still remaining super simple to execute.
Key Details to Get Right
- Ensure the bill is proportional to the head — it should extend roughly one-quarter to one-third the length of the duck’s head
- The eyes should be small and placed above where the bill begins
- A pale yellow or golden yellow works better than a bright neon yellow for this design, as it reads more clearly as a duck
- This design benefits from being centered on the nail with a bit of white space around it
- Add a small curved line at the bottom of the bill (where it meets the head) to suggest the duck’s lower bill — just one simple curve
3. Pastel Rainbow Ducks
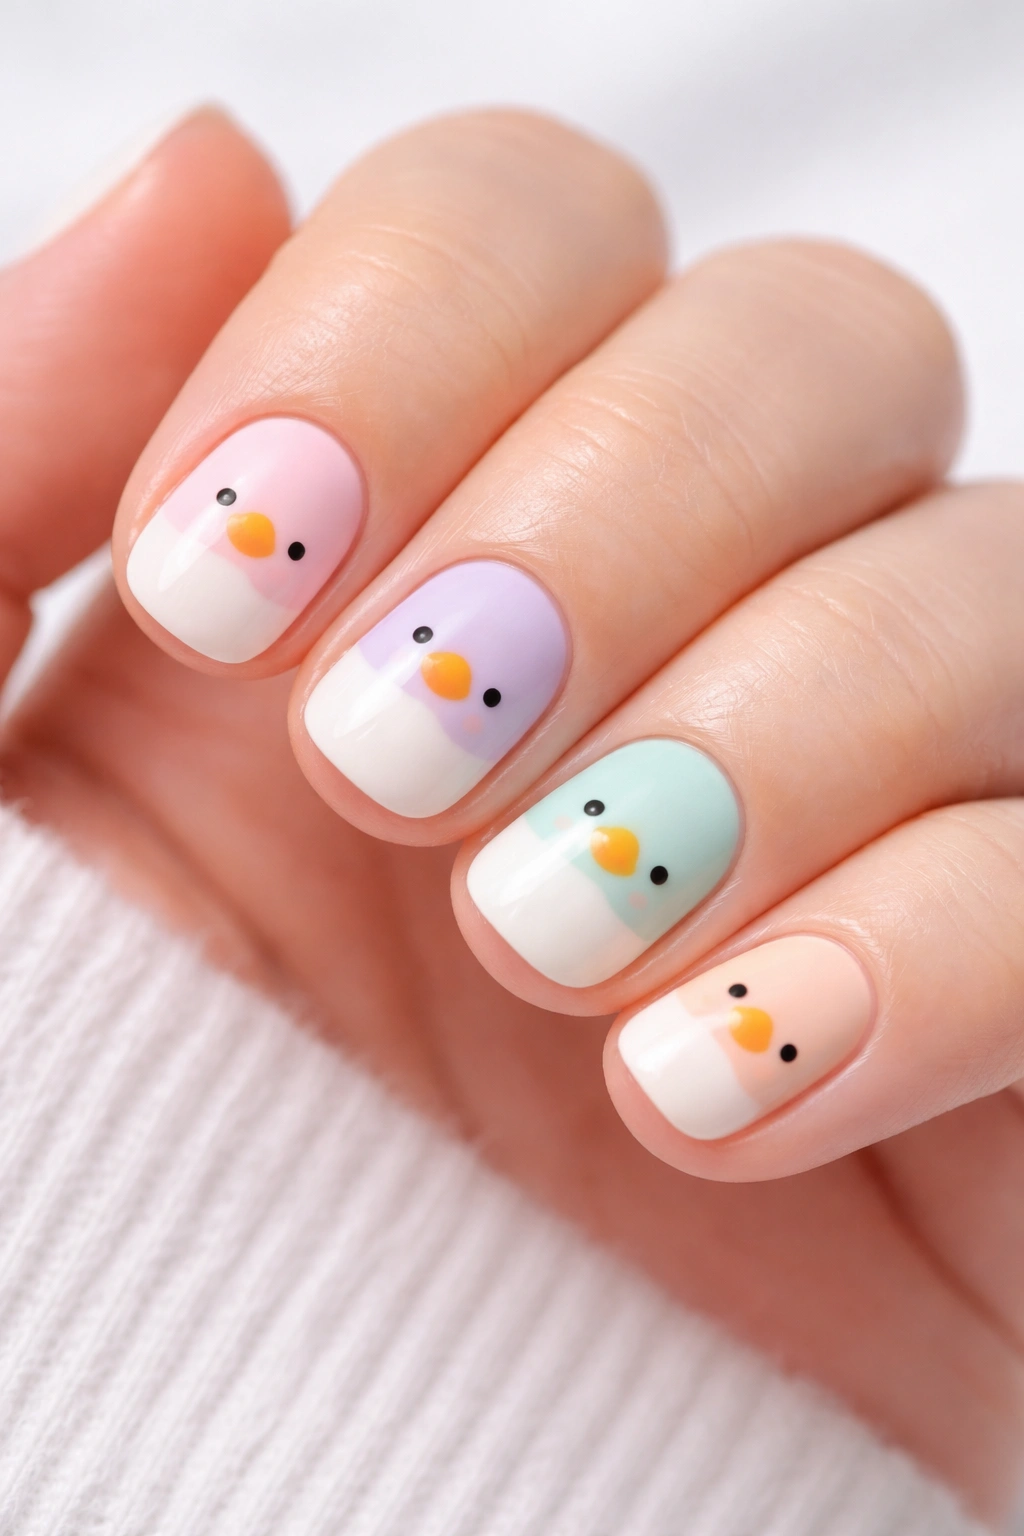
Take the simple duck design and multiply it across your nails, using a different pastel color for each duck. Your thumb might have a soft pink duck, your index finger a pale lavender duck, your middle finger a mint green duck, your ring finger a pale yellow duck, and your pinky a soft peach duck. All on a white base, with the same simple expression repeated across your hand.
Why Pastels Instead of Bright Colors
Pastel shades feel softer, more sophisticated, and less babyish than bright, saturated colors — even though the design itself is playful. Pastels also blend beautifully together if you choose them thoughtfully, so when you look at all five fingers together, the overall effect feels intentional and curated rather than random. Pastels have become the go-to color palette for cute nail art because they photograph beautifully and feel current without being trendy.
Color Combinations That Work Beautifully
- Pale pink, lavender, mint, soft yellow, and peach — a full pastel rainbow that’s soft and harmonious
- Pale blue, pale pink, pale green, pale yellow, and pale coral — another gentle rainbow option
- Two of each color in alternating pattern — easier to match if you don’t have five different polish shades
- Ombre pastels where each nail is slightly more saturated than the last, creating a gradient effect
- Using a white or off-white base on all nails keeps the focus on the duck colors themselves
4. Rubber Duck Bath Scene

Create a scene rather than just a standalone duck. Paint a white or pale blue base on one or two nails, then add a simple yellow rubber duck in the center. Around the duck, add tiny details: small curved lines to suggest water (think of gentle waves or ripples), maybe a tiny bubble or two, or even a suggestion of a bathtub edge in one corner. This transforms the single duck into a full narrative.
Building a Story on a Tiny Canvas
Short nails actually shine with this approach because the entire scene fits into the space without feeling cluttered. The white or pale blue background immediately communicates “water,” the duck is the obvious focal point, and the ripples and bubbles fill negative space meaningfully. This design works particularly well as an accent nail where one or two fingers feature the full scene while the others stay solid.
Scene Details That Add Life
- Use a darker blue or teal for water ripples against a lighter blue base
- Add 2-3 small white dots above the duck to suggest bubbles floating upward
- Include a simple line at the bottom of the nail to suggest the bathtub floor
- A tiny curved line on the duck’s head can suggest a bath cap or just texture
- Keep bubbles and ripples small — they’re supporting players, not the main event
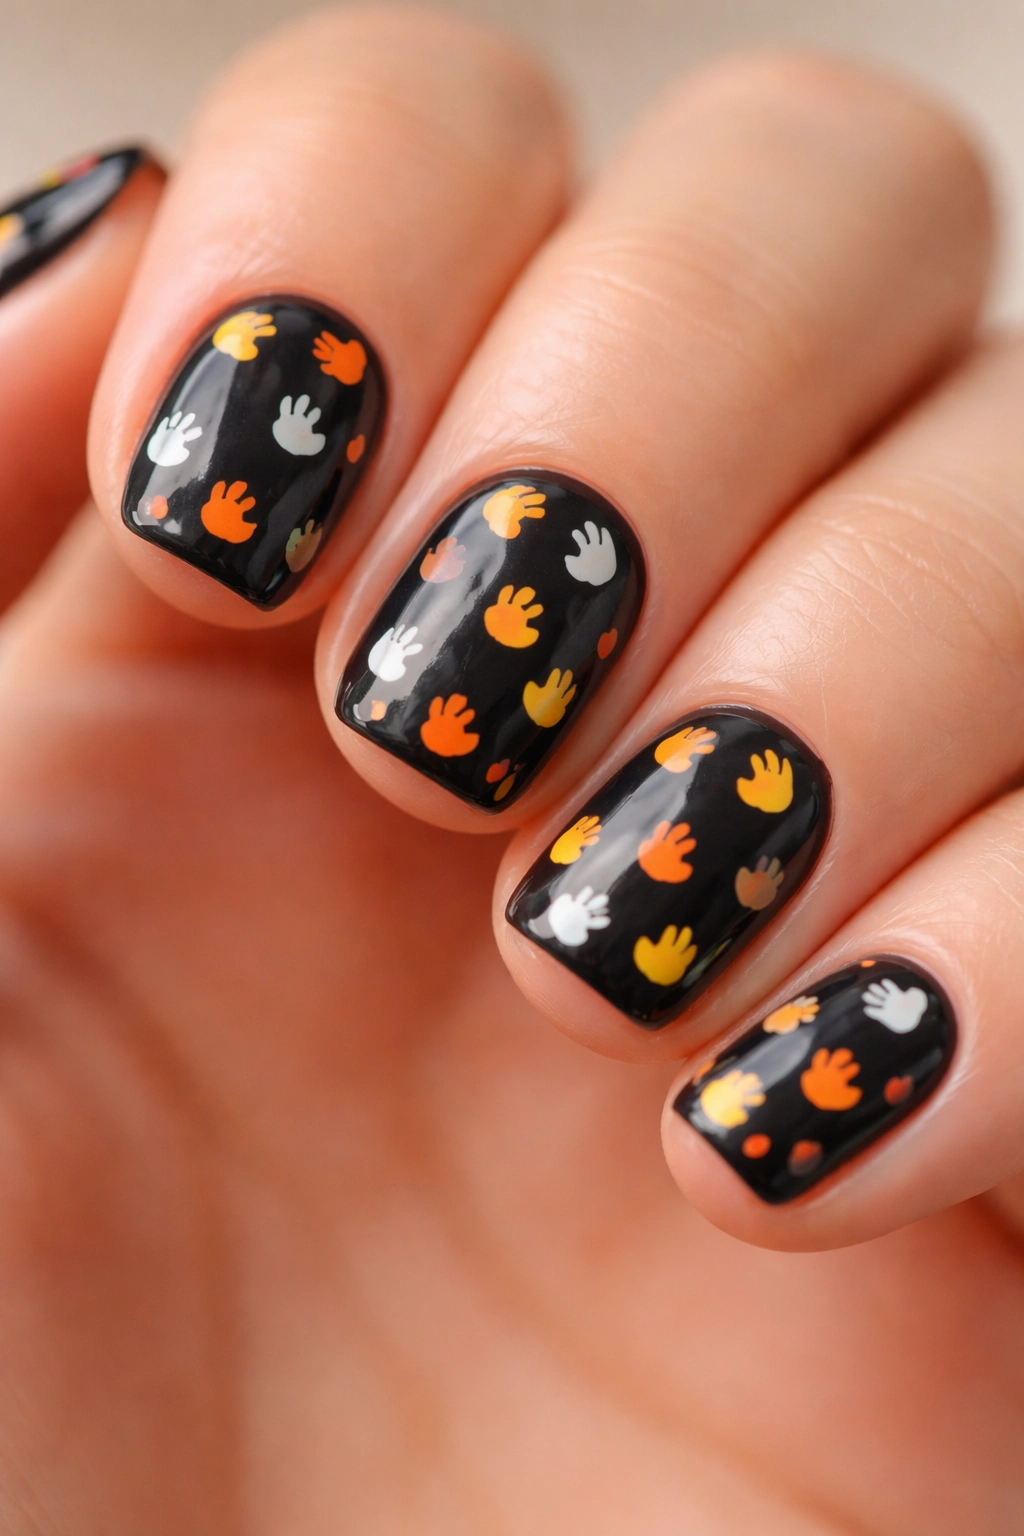
5. Duck Silhouettes with Glitter
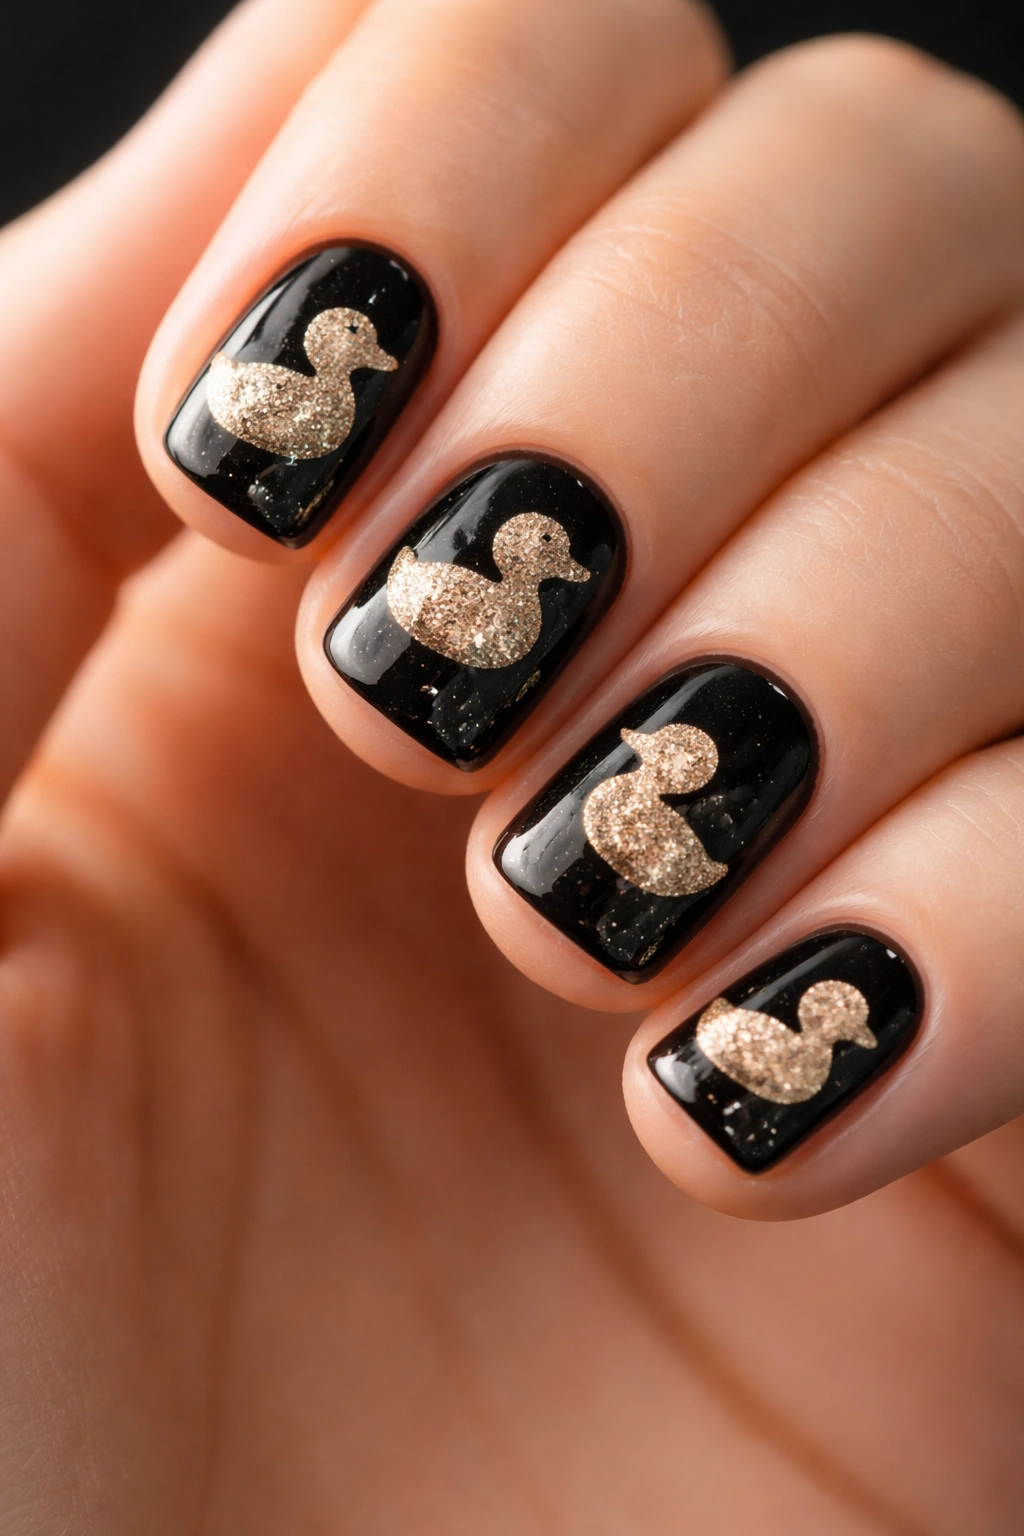
Paint your entire nail a solid color — black, dark blue, navy, or deep teal work wonderfully — then create a duck silhouette using glitter polish, a metallic shade, or even white polish. The contrast between the dark base and the shimmering or bright silhouette creates a striking effect that reads as sophisticated rather than just cute.
Why Silhouettes Work
A silhouette removes the need for tiny facial features. You’re not trying to paint eyes or a bill; you’re simply filling in the shape of a duck in profile, which is much easier and often more visually striking. The silhouette approach also allows you to experiment with interesting textures — glitter, metallic, chrome, or holographic effects — that would be harder to apply to smaller details.
Texture Options That Shine
- Gold glitter against a black or navy base feels elegant and festive
- Silver glitter on dark blue feels cool and modern
- Holographic or chrome silhouettes catch light beautifully and add dimension
- White polish for a clean, high-contrast look that’s graphic and bold
- Copper or rose gold metallics for a warm, sophisticated approach
6. Daisy & Duck Garden Nails
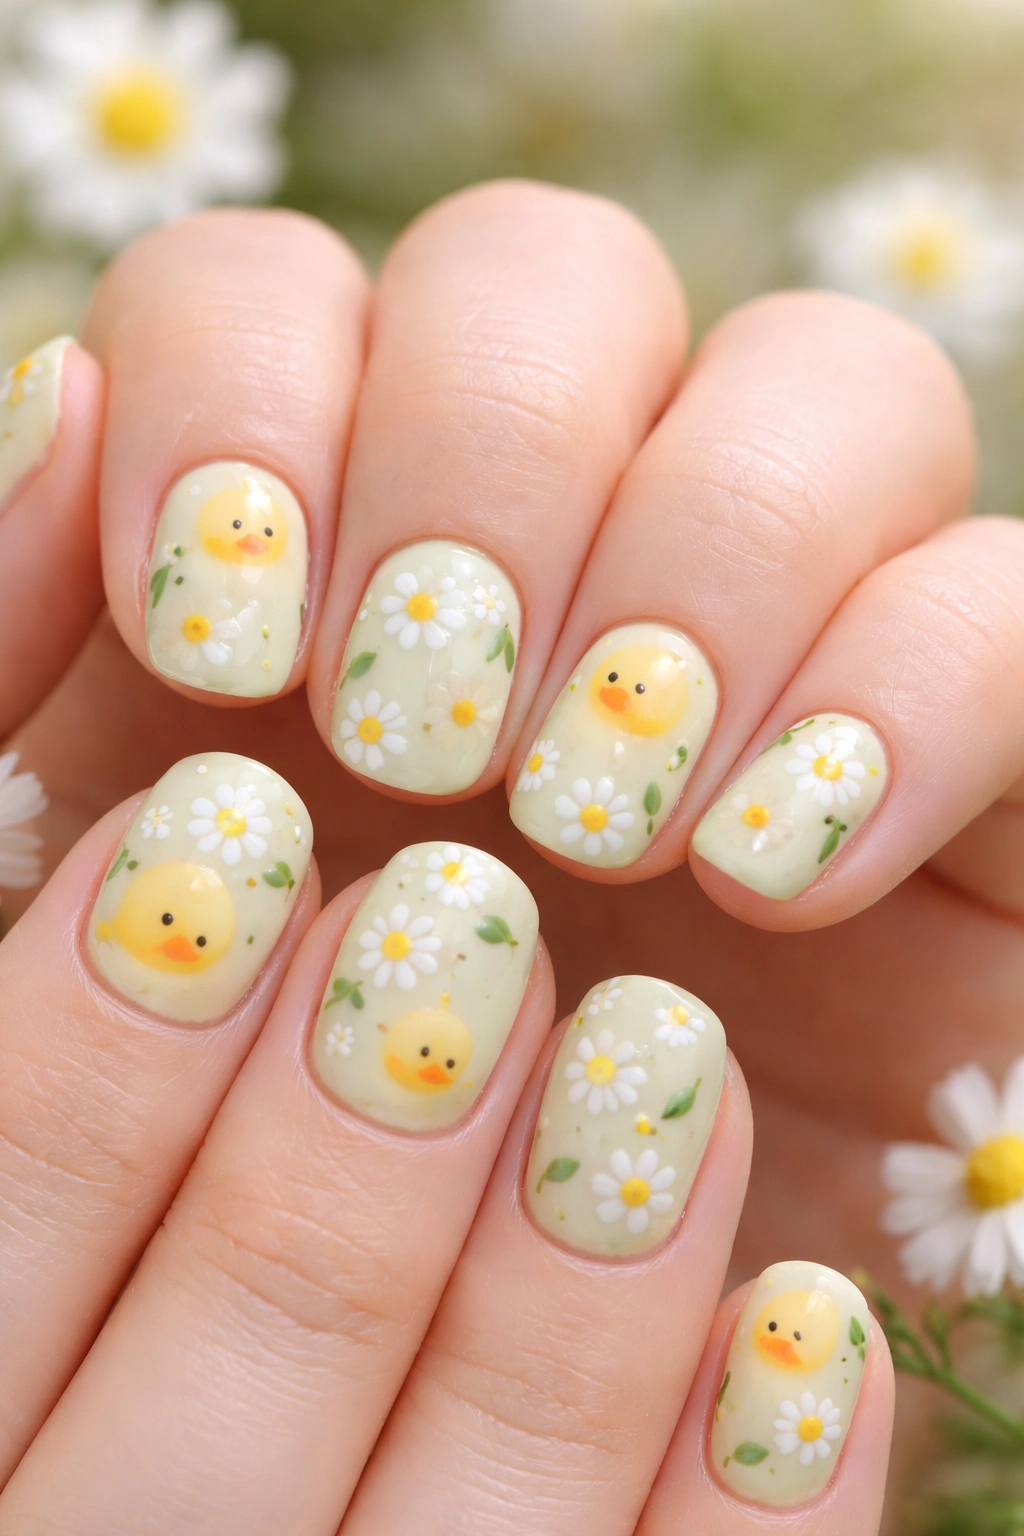
Combine two simple designs: tiny yellow ducks and tiny white daisies scattered across your nails. Paint a pale yellow or pale green base, then fill the nail with a pattern of small yellow duck heads and white flower daisies. This design feels springtime and cheerful without being overly complicated.
Creating Pattern Without Chaos
On short nails, spacing matters more than the number of elements. Place your ducks and daisies with intention — maybe two ducks and three daisies per nail, or space them diagonally rather than randomly covering the surface. The pattern should feel curated and balanced, not like you just dotted randomly until you ran out of polish.
Design Spacing Strategy
- Leave white space between elements — this makes the pattern feel intentional rather than cluttered
- Arrange ducks and daisies in a loose diagonal line that draws the eye across the nail
- Alternate duck and flower, duck and flower, for a predictable rhythm
- Use a pale cream, pale yellow, or pale green base to unify the entire design
- Add a tiny green leaf or two near the daisies for context — these take no extra effort but feel thoughtful
7. Duck Footprint Pattern
Instead of a duck, paint the tiny three-toed footprints that ducks leave behind. These are simple to execute: three small dots or lines radiating from a point, repeated across the nail. Paint them in orange, yellow, or even white (against a darker base) to create a scattered footprint pattern that suggests movement and playfulness.
Why This Works as a Design
Footprints suggest action and narrative without requiring you to paint an entire duck. They’re abstract enough to feel modern and graphic, yet specific enough that anyone recognizes them as duck tracks. This design works particularly well if you want something cute without being overly literal about the duck imagery.
Footprint Placement Ideas
- Scatter footprints diagonally across the nail as if a duck has walked across it
- Create a path of footprints leading from one corner to the opposite corner
- Use alternating colors — orange footprints on some nails, yellow on others
- Add small dots between footprints to suggest water or pebbles
- Keep footprints roughly the same size for a consistent, intentional appearance
8. Watercolor Duck Portraits
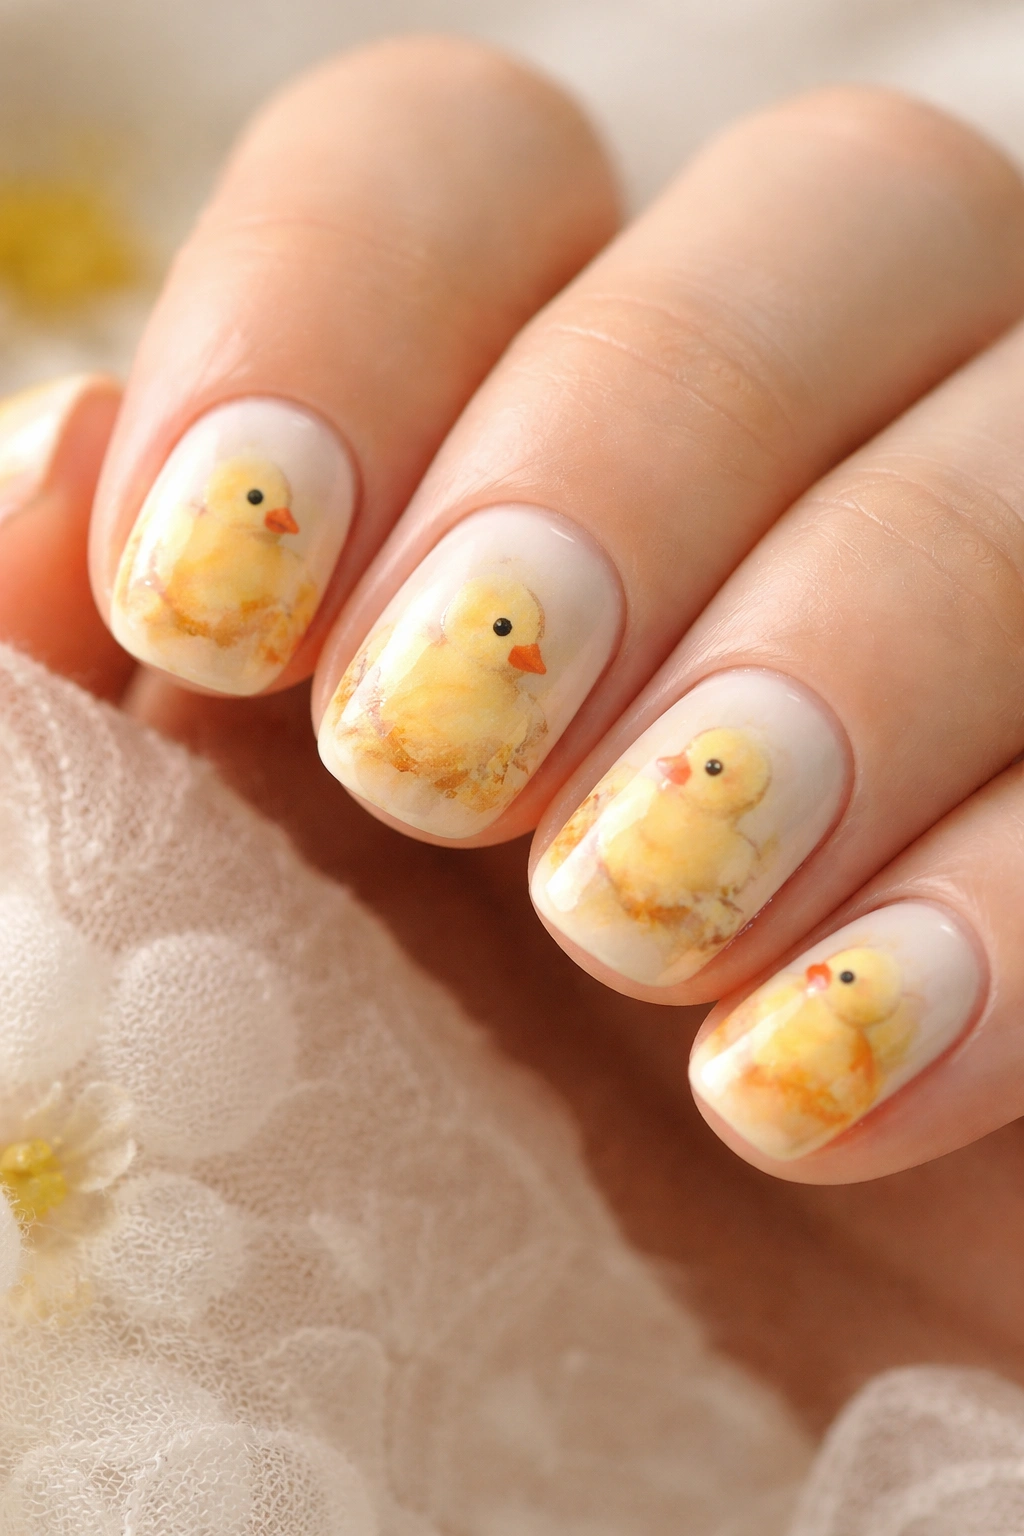
Use watercolor nail polish (or create a watercolor effect by diluting regular polish slightly) to paint soft, impressionistic duck portraits. These don’t need to be realistic; the beauty is in the soft, blended colors creating a duck shape. A pale yellow blends into a slightly darker golden yellow with hints of orange, creating a warm, artistic portrait that reads as a duck without being photorealistic.
The Charm of Impressionistic Nail Art
Watercolor effects are forgiving because slight imperfections add to the artistic aesthetic rather than detracting from it. You’re not aiming for precision; you’re creating mood and impression. This style feels elevated and intentional, and it’s perfect for short nails because the limited space keeps the design focused and prevents overworking the polish.
Achieving Watercolor Effects
- Use thin coats of polish that blend rather than opaque coverage
- Let colors touch and slightly merge where they meet
- Add darker accents (orange, brown) around the edges to define the shape
- Keep the center lighter to suggest dimension and form
- Seal with a glossy topcoat to set the watercolor and protect it
9. Cartoon Duck Eyes Only
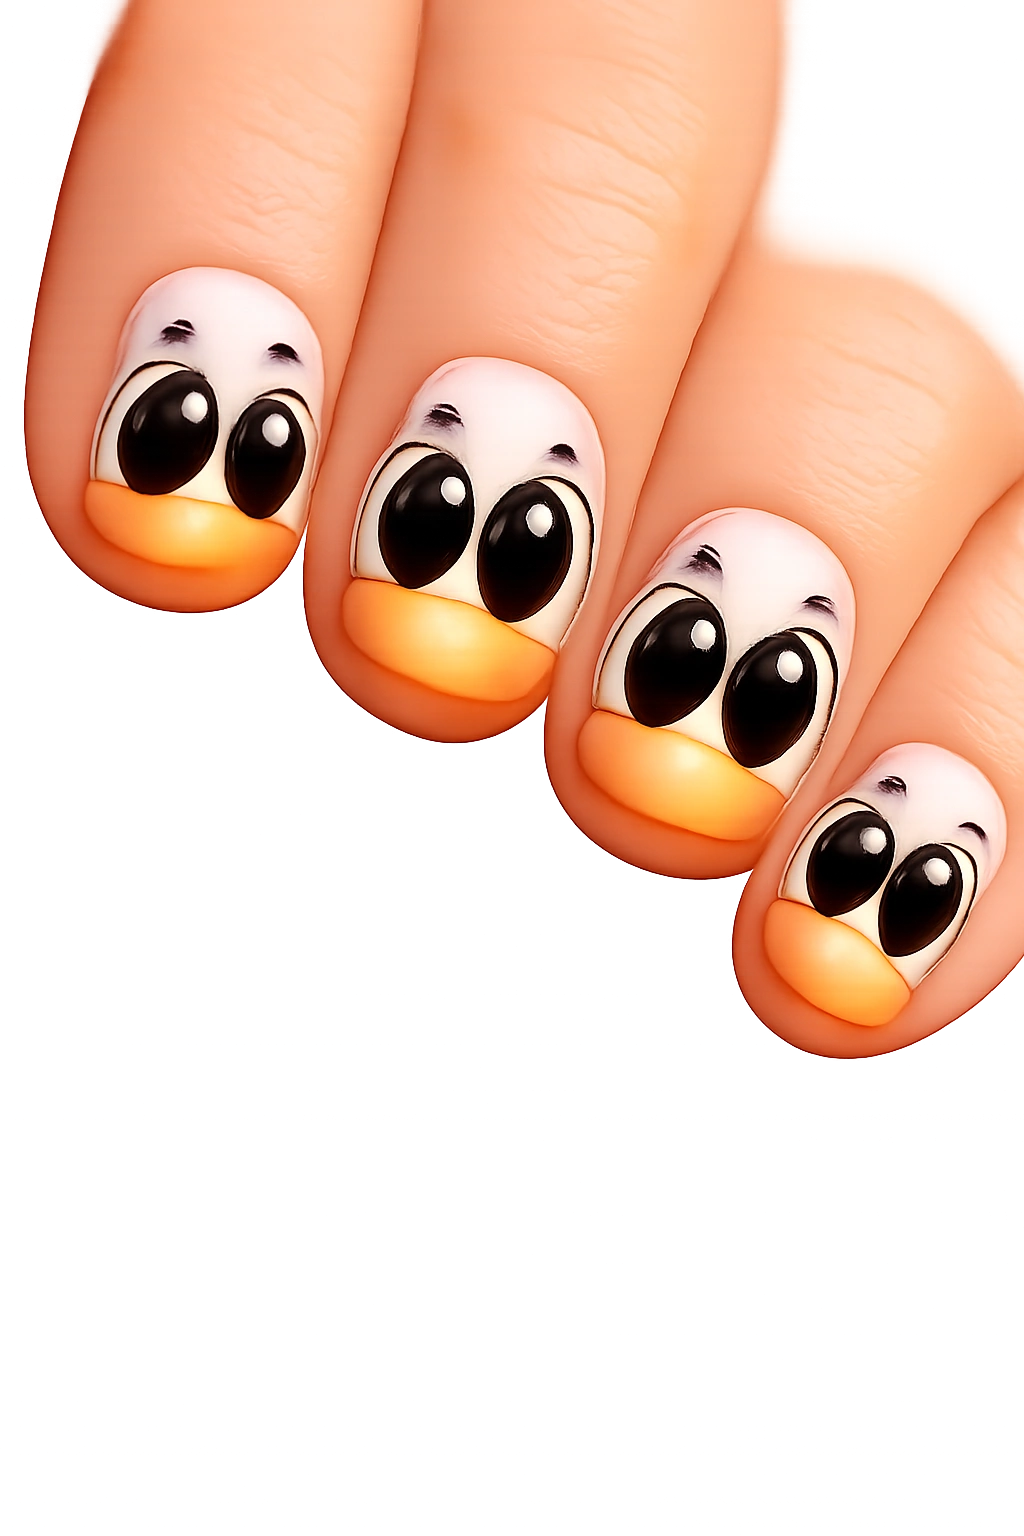
Skip the entire duck body and just paint oversized, expressive cartoon eyes on your nails. Think big, rounded eyes with large black pupils and white highlights. Add tiny eyebrows above to suggest expression — raised eyebrows for surprise, angled eyebrows for attitude. The charm comes from the expression communicated through the eyes alone.
Personality Through Expression
This design is surprisingly effective at conveying character. Different eyebrow angles on different nails create different moods — one nail looks surprised, another looks skeptical, another looks happy. This design appeals to people who love character design and enjoys having nails that feel like tiny cartoons.
Eye Design Variations
- Large circles with black pupils and white highlights — the classic approach
- Bigger eyes on the thumb and ring finger (the nails you see most) for maximum impact
- Vary eyebrow angles between nails to create different expressions
- Use a white, pale pink, or pale yellow base so the eyes pop
- Add a tiny curved line below the eyes to suggest a smile or bill
10. Duck with Bow Tie
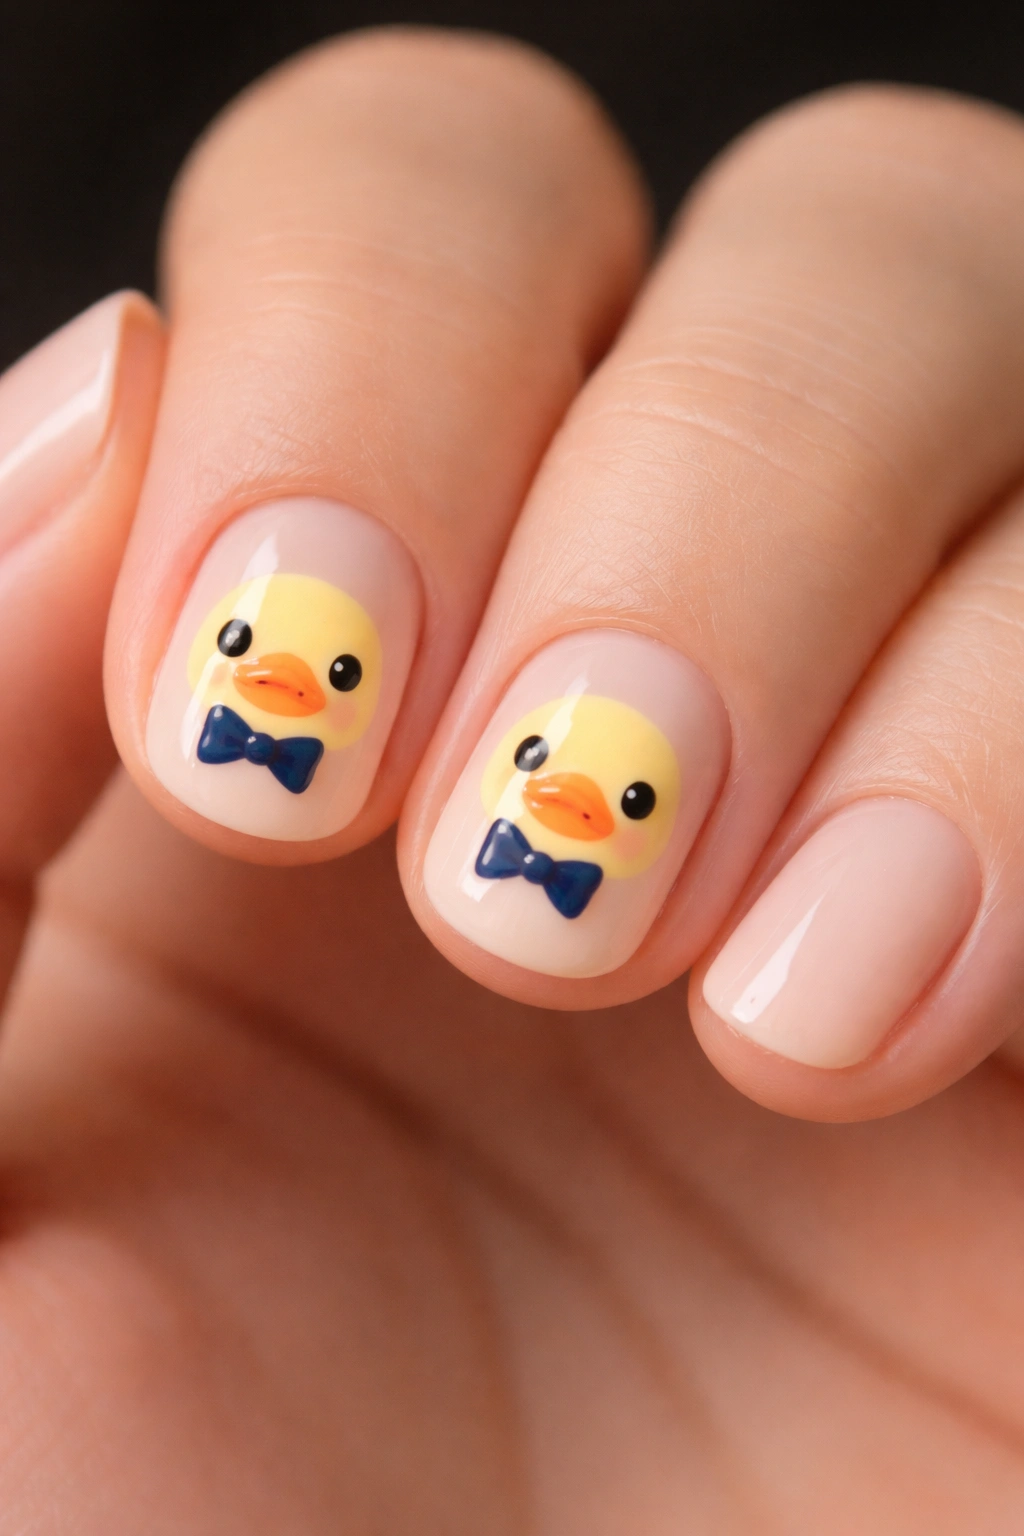
Elevate the simple duck face design by adding a tiny bow tie beneath the bill. This small addition transforms the duck from generic to stylish and whimsical. Use contrasting colors — if your duck is yellow, try a navy, pink, or red bow tie. This detail suggests personality and sophistication while remaining incredibly simple to execute.
Small Details That Change Everything
A bow tie is just two tiny loops on either side of a small center knot. It adds maybe thirty seconds to your nail design but completely shifts the vibe from “cute duck” to “debonair duck with style.” This is the power of thoughtful accessory details in nail art — they require minimal skill but maximum impact.
Bow Tie Color Pairings
- Yellow duck with navy bow tie — classic and sophisticated
- Yellow duck with hot pink bow tie — playful and bold
- Yellow duck with red bow tie — vintage and cheerful
- Yellow duck with gold glitter bow tie — festive and fancy
- White duck with any color bow tie stands out more than yellow duck options
11. Duckling & Mother Duck
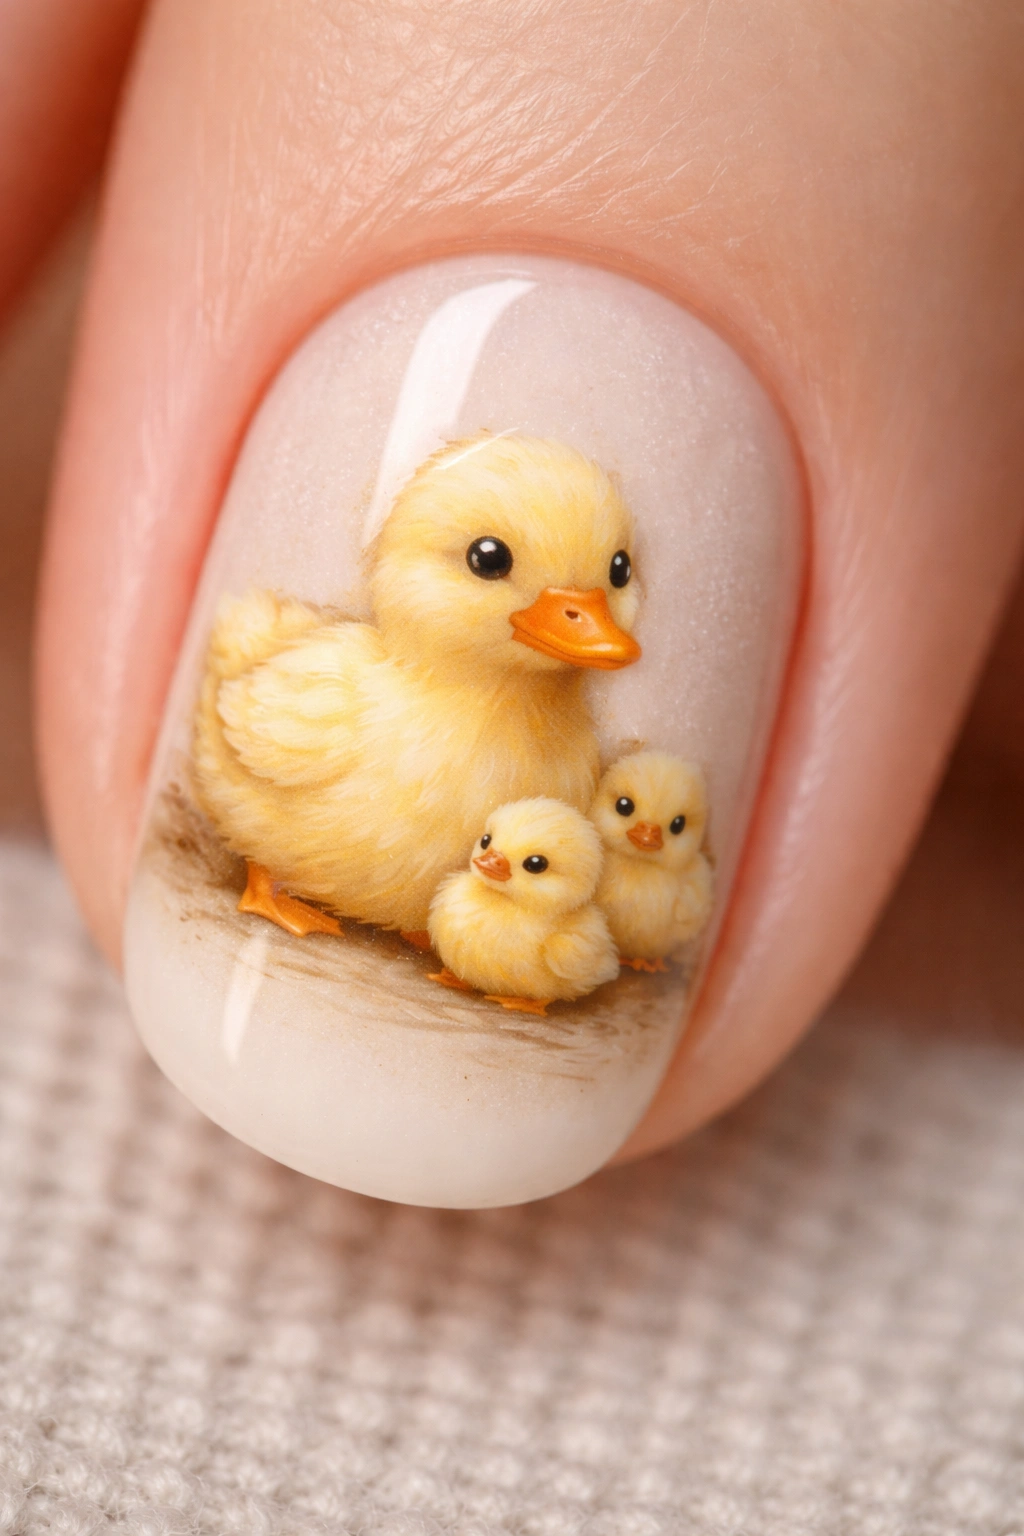
Create a size contrast by painting one larger duck and one or two smaller ducklings next to it on the same nail. The mother duck can be fully detailed while the ducklings are simplified versions — maybe just dots with bills. This tells a sweet story and gives you more to work with design-wise while still keeping everything small and proportionate.
Narrative Design on Short Nails
Telling a tiny story with multiple elements works beautifully on short nails when you maintain size contrast and clear focal points. The mother duck is the obvious star; the ducklings are supporting characters. This prevents the design from feeling crowded or cluttered.
Size and Placement Strategy
- Make the mother duck about twice the size of the ducklings
- Position the mother duck slightly larger or off to one side
- Add 2-3 tiny ducklings clustered together
- Use the same yellow for all ducks but add more detail to the mother’s face
- Leave some white space around the group so they feel intentional, not squeezed
12. Duck Ombre Gradient
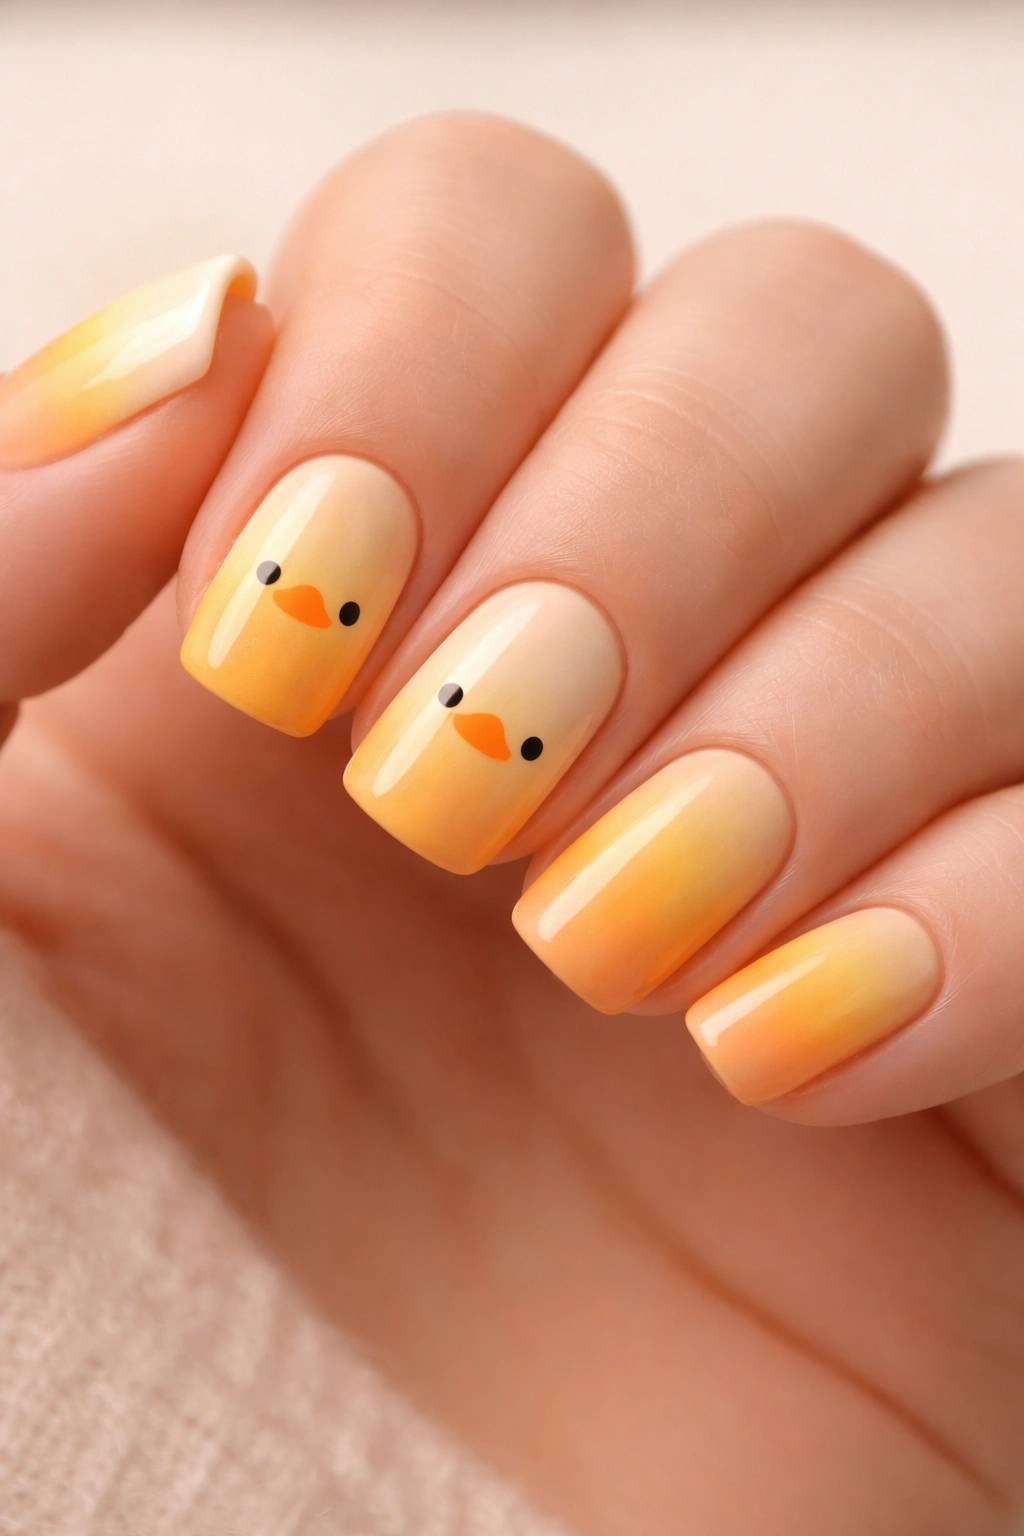
Create an ombre effect where nails transition from pale yellow to deeper golden yellow to soft orange. Each nail gets progressively darker, creating a gradient effect that’s elegant and modern. Add a simple duck face to one or two nails in this gradient to tie the design together.
Gradient Sophistication
An ombre base feels elevated and modern, transforming a cute duck design into something that reads as intentional and curated. The gradient does the heavy lifting aesthetically, so your duck design can remain simple and still feel polished.
Gradient Application Tips
- Use five different shades from pale yellow to deep golden
- Apply each shade to one full nail rather than trying to blend within a single nail
- Add a duck face to the thumb and middle finger in the gradient
- Keep the duck the same pale yellow regardless of the nail shade so it reads clearly
- This works best with matte or satin topcoat rather than ultra-glossy
13. Splatter Paint Ducks
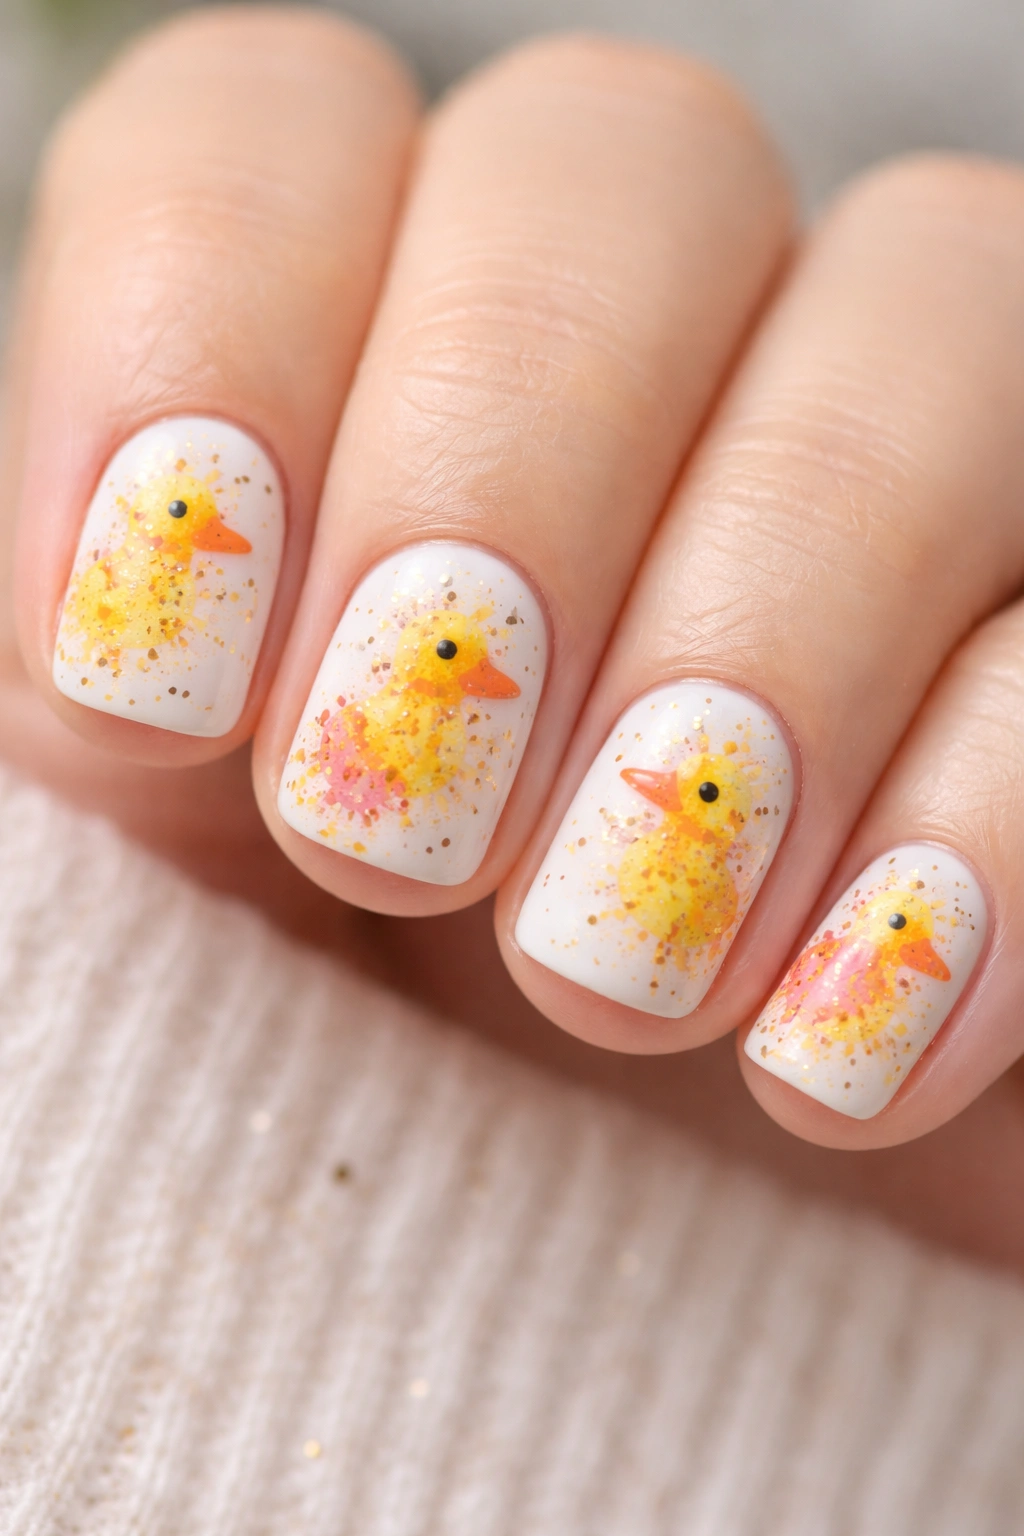
Use the splatter technique to create a playful, abstract duck design. Paint a white or pale blue base, then flick a brush loaded with yellow, orange, or pink polish to create organic splatters across the nail. The splatters should loosely suggest a duck’s head and body shape — this isn’t precise, but rather impressionistic and fun.
When Imperfection Is the Point
Splatter designs are liberating because there’s no “wrong” way to do them. Each nail will be slightly different, and that variation is the design’s greatest strength. This approach feels artistic and modern rather than cartoonish.
Splatter Technique Breakdown
- Use a thin brush or flick technique — load the brush and flick it toward the nail
- Create multiple splatter directions so it feels organic and intentional
- Concentrate splatters slightly more in the center area where the duck’s head would be
- Add a few darker splatter accents in orange or brown for depth
- Keep some white space visible so the design doesn’t become a muddy blob
14. French Tips with Duck Tips
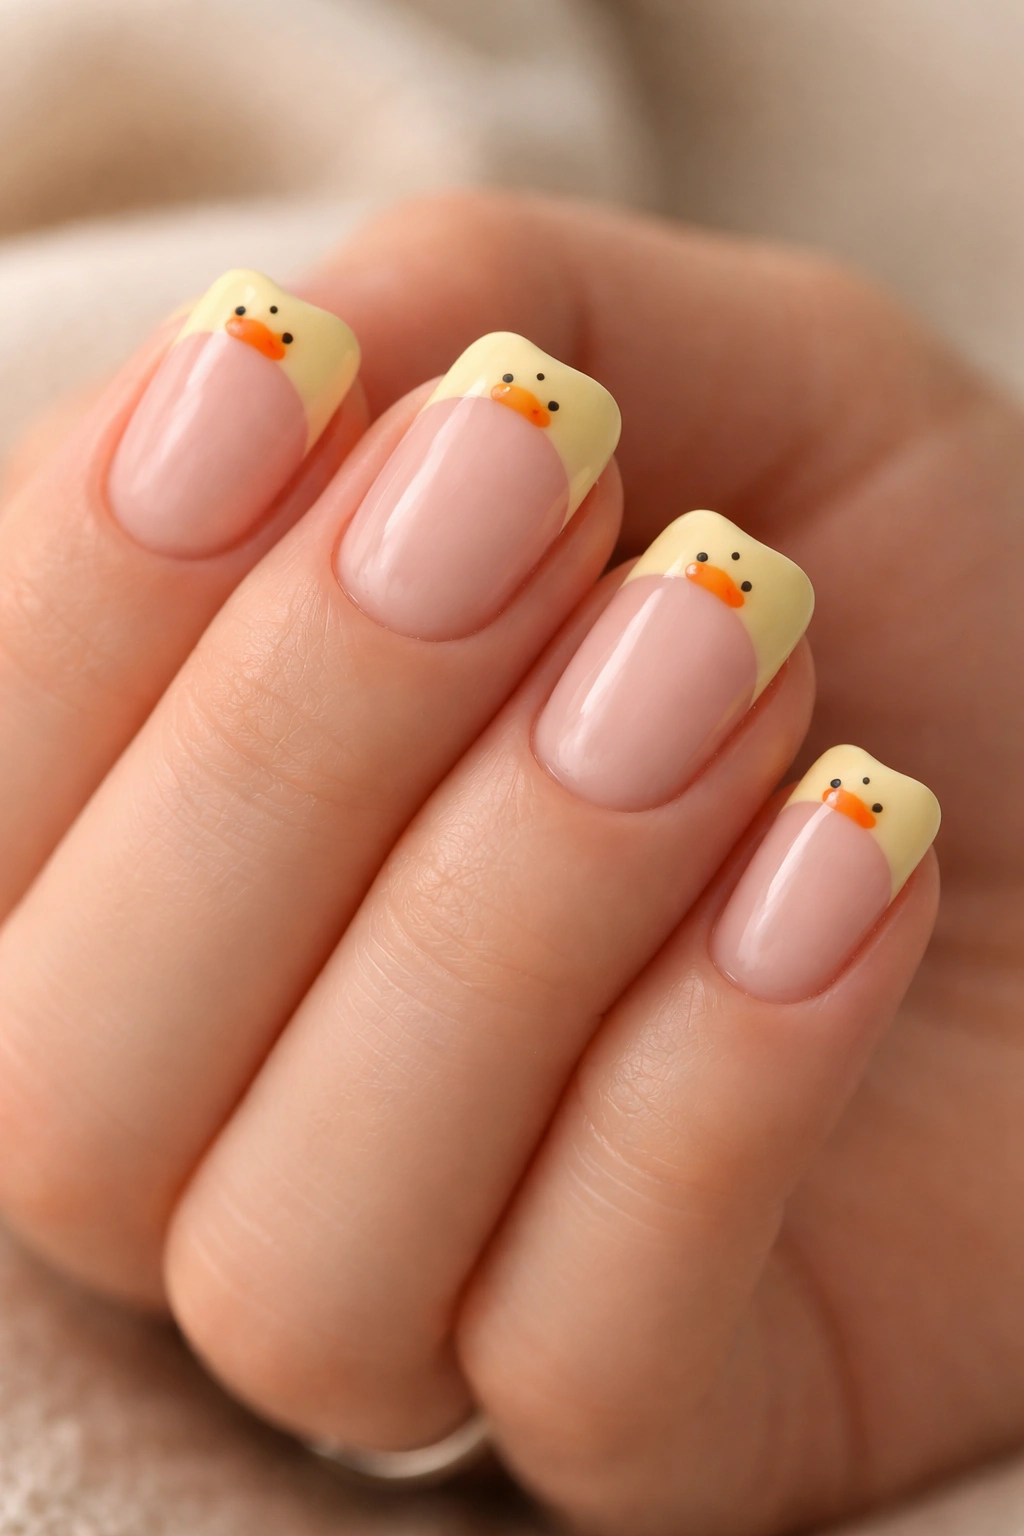
A modern twist on the classic French manicure: instead of a white tip, use pale yellow or gold for your tips. Then add the tiniest duck silhouette or just a small duck bill at the edge of the color line. This design feels sophisticated and subtle — the duck becomes an accent rather than the main event.
When Subtle Is Sophisticated
Not everyone wants bold, obvious nail art. This design appeals to people who want something cute that reads more as “interesting French manicure” than “duck nails.” The simplicity and subtlety actually increase the visual impact because the design surprises people who look closely.
French Tip Variation Options
- Pale yellow tips with a tiny duck silhouette at the color line
- Gold tips with a small duck bill just suggesting the bird
- Soft pink tips with an orange duck accent for a warmer palette
- White tips with a yellow duck detail for maximum contrast
- Add a tiny gold line along the color separation for extra sophistication
Final Thoughts
Duck nails on short nails prove that canvas size never determines design impact — it determines design approach. The constraints of shorter nails actually force you to focus on simplicity, clarity, and intention, which are the very things that make nail art feel polished and professional. You don’t need advanced techniques, professional supplies, or years of practice to create adorable duck nails that make you smile. Start with whichever design resonates most, even if it’s just the simple duck faces, and let yourself experiment. The beautiful part about nail art is that it grows out in a few weeks, which means every manicure is low-stakes practice. Try different color combinations, swap in your favorite hues, and don’t worry about achieving perfection. The charm of duck nails comes from their genuine sweetness and playfulness, not from flawless execution. Your short nails are the perfect canvas for bringing any of these designs to life.
