

Duck nails have become one of the most striking and playful nail trends, and when you combine them with length, the impact multiplies. The curved, upturned tip that gives duck nails their distinctive name creates a bold statement that’s equal parts elegant and whimsical—especially when you’re working with extended lengths that showcase the full drama of the shape. Long curved duck nails offer a larger canvas for creative design work, allowing you to experiment with gradients, detailed art, gemstone placement, and color combinations that shorter nails simply can’t accommodate as effectively.
What makes duck nails so appealing is their unique silhouette. Unlike stiletto or coffin nails that come to sharp points, duck nails curve upward at the free edge, resembling the bill of a duck (hence the name). This shape flatters virtually every hand shape and skin tone, and the curve adds movement and elegance to your fingertips. When you extend this shape to longer lengths, you’re not just creating a nail—you’re making an accessory that catches light, shows off detail, and genuinely turns heads.
The best part? Long curved duck nails work for so many different aesthetics. Whether you’re drawn to minimalist chic, maximalist glam, artistic expression, or something delicately romantic, there’s a duck nail design that matches your style perfectly. These 11 styles showcase the incredible range of possibilities, from soft pastels to bold jewel tones, from intricate nail art to elegant simplicity.
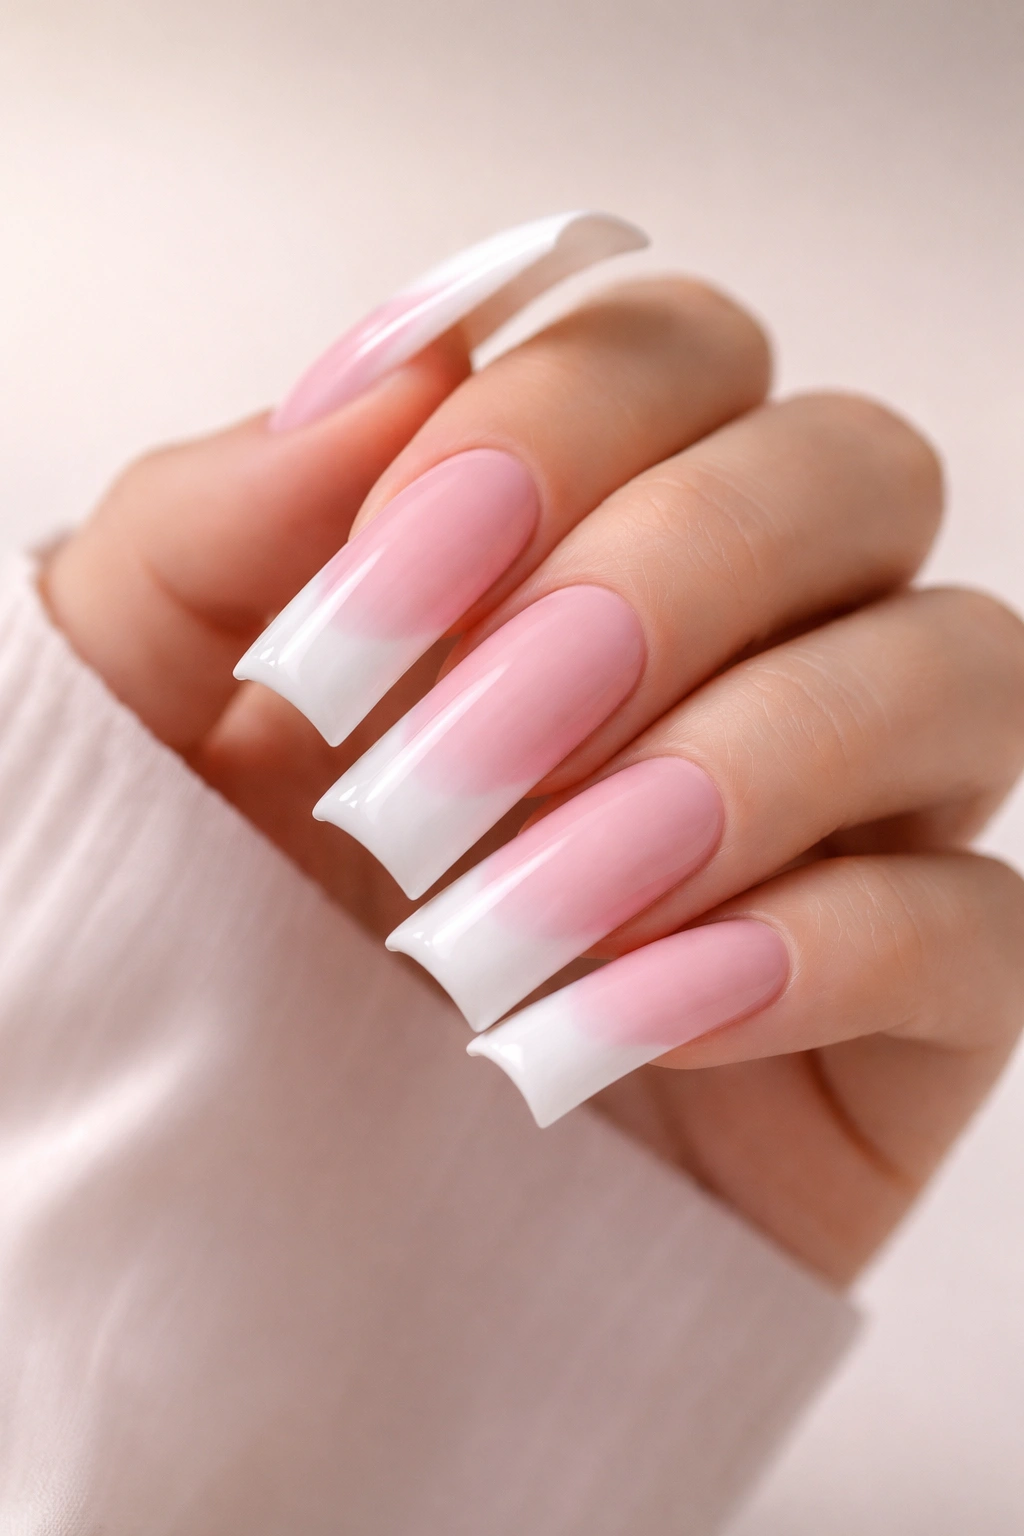
1. Soft Pink Ombré With White Tips
A timeless favorite that feels both modern and romantic, the soft pink ombré with white tips style combines a gentle gradient from blush pink at the base to crisp white at the curved duck tip. This design works beautifully on long nails because the length allows the color transition to flow naturally without feeling cramped. The ombré effect creates depth and dimension, making your nails appear fuller and more sculptural, while the white tip adds the classic element that keeps the look feeling polished rather than overly trendy.
Why This Design Stands Out
The beauty of an ombré duck nail lies in how it plays with proportion and balance. The soft pink provides a flattering, universally wearable base that coordinates with nearly every skin tone, while the white tip creates crisp definition that the duck shape naturally emphasizes. Because the curve of the nail means the white actually sits beneath the free edge in a subtle way, the tip appears to glow rather than simply sitting on top of your nail. This creates an almost ethereal quality that photographs beautifully and catches light in person.
How to Achieve This Look
- Use a pink nail polish in a rosy, medium-toned shade (avoid anything too cool or too warm until you test it on your own skin)
- Apply a white polish to the curved tip, fading it slightly into the pink using a sponge technique
- Seal with a glossy top coat to enhance the ombré blend and create shine
- Request this design during your appointment if you’re not confident with the ombré blending at home—a professional can execute the gradient much more smoothly
- This design lasts 3-4 weeks on grown-out natural nails, or indefinitely if you’re using a gel or acrylic base
Pro tip: Ask your nail technician to make the ombré transition longer and more gradual than it appears on shorter nails—the extra length means you have room to show off a beautiful gradient rather than having it compressed into the final quarter-inch.
2. Chrome Gold Mirror With Gloss Finish
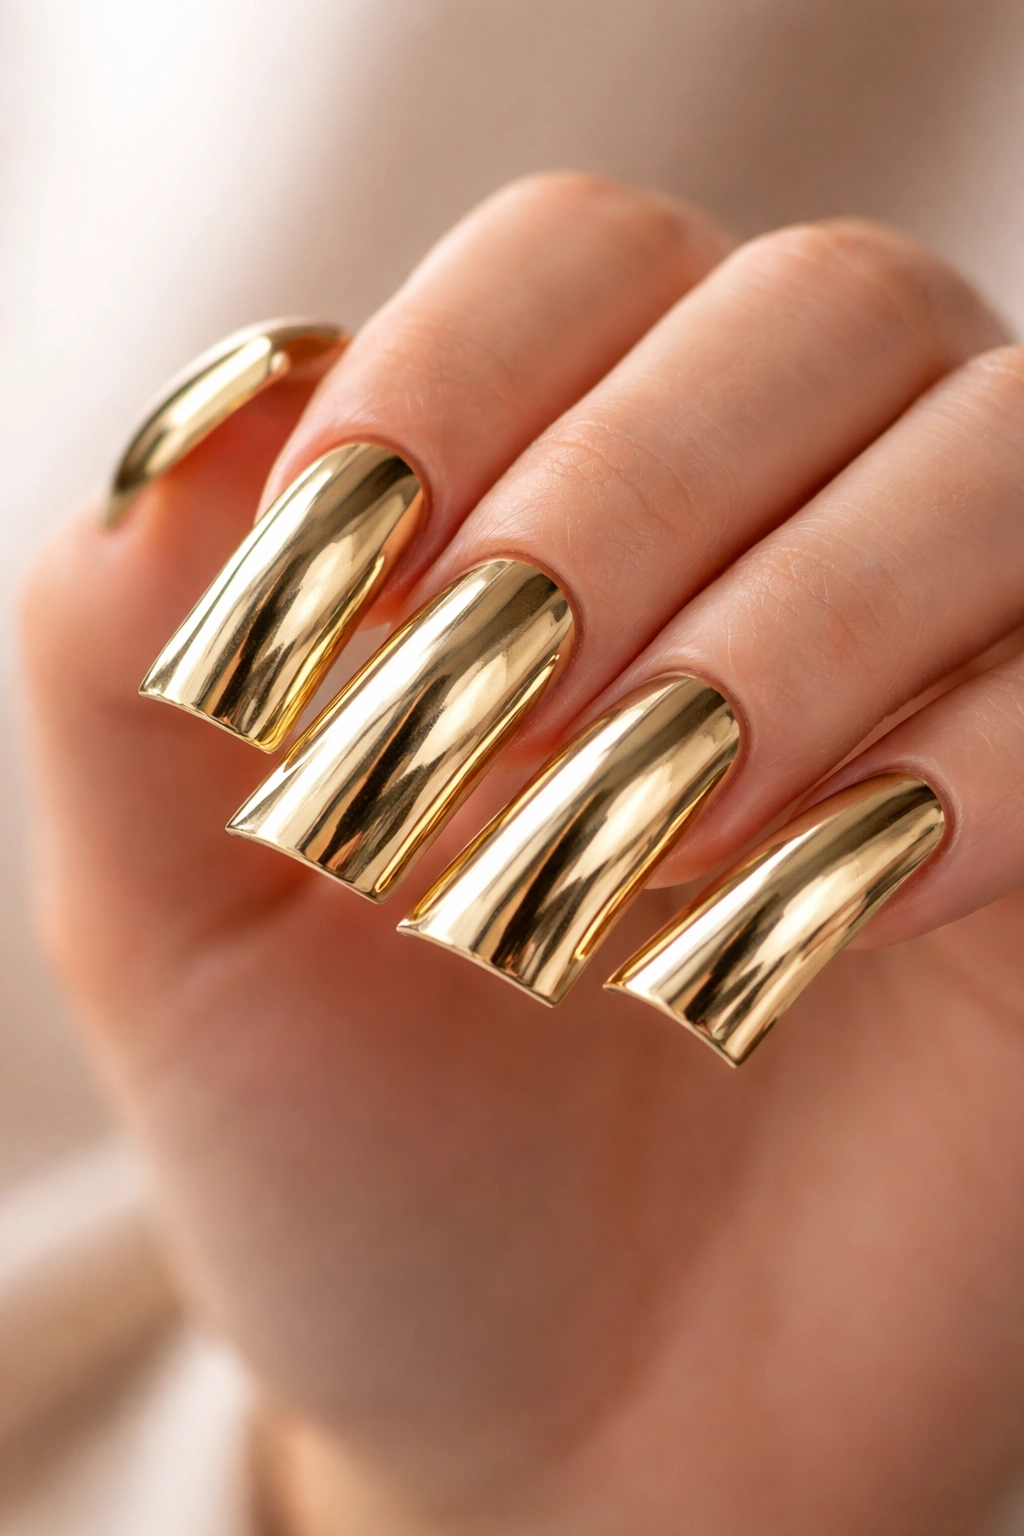
For anyone who loves high-impact glamour, chrome gold mirror nails on long curved duck shapes deliver instant luxury. The reflective chrome finish creates a mirror-like surface that catches light and literally shines from every angle, while the warm gold tone feels expensive and refined without being costume-y. Long duck nails showcase the chrome effect beautifully because the curved tip catches light from multiple angles, creating a dynamic shimmer that shorter nails simply can’t replicate.
What Makes This So Striking
Chrome polish has a specialized formula that creates a metallic mirror effect that’s far more reflective than regular shimmer or metallic polish. When applied to curved duck nails, the chrome actually curves with your nail, meaning light bounces differently across the rounded surface—creating areas of intense shine and subtly shadowed valleys that give the design three-dimensional depth. The gold tone sits somewhere between warm champagne and bright butter, which means it coordinates beautifully with both cool and warm skin undertones.
Application and Longevity Tips
- Chrome polish requires a very smooth, perfectly prepped nail surface—any bumps or texture will show
- It typically lasts 2-3 weeks in gel formula, or about 1 week in regular polish
- Top coat is essential—chrome without a seal will oxidize and lose its mirror effect within days
- If you’re doing this at home, use a lint-free pad to apply the chrome powder for the smoothest, most reflective finish
- Avoid water and excessive handling for the first 24 hours after application—chrome is prone to smudging during the cure period
Worth knowing: Chrome gold looks absolutely stunning in natural daylight and under warm indoor lighting. If you spend most of your time under fluorescent lights, it may appear slightly different—consider how your typical environment will showcase this finish before committing.
3. Matte Black With Tiny Rhinestone Accents
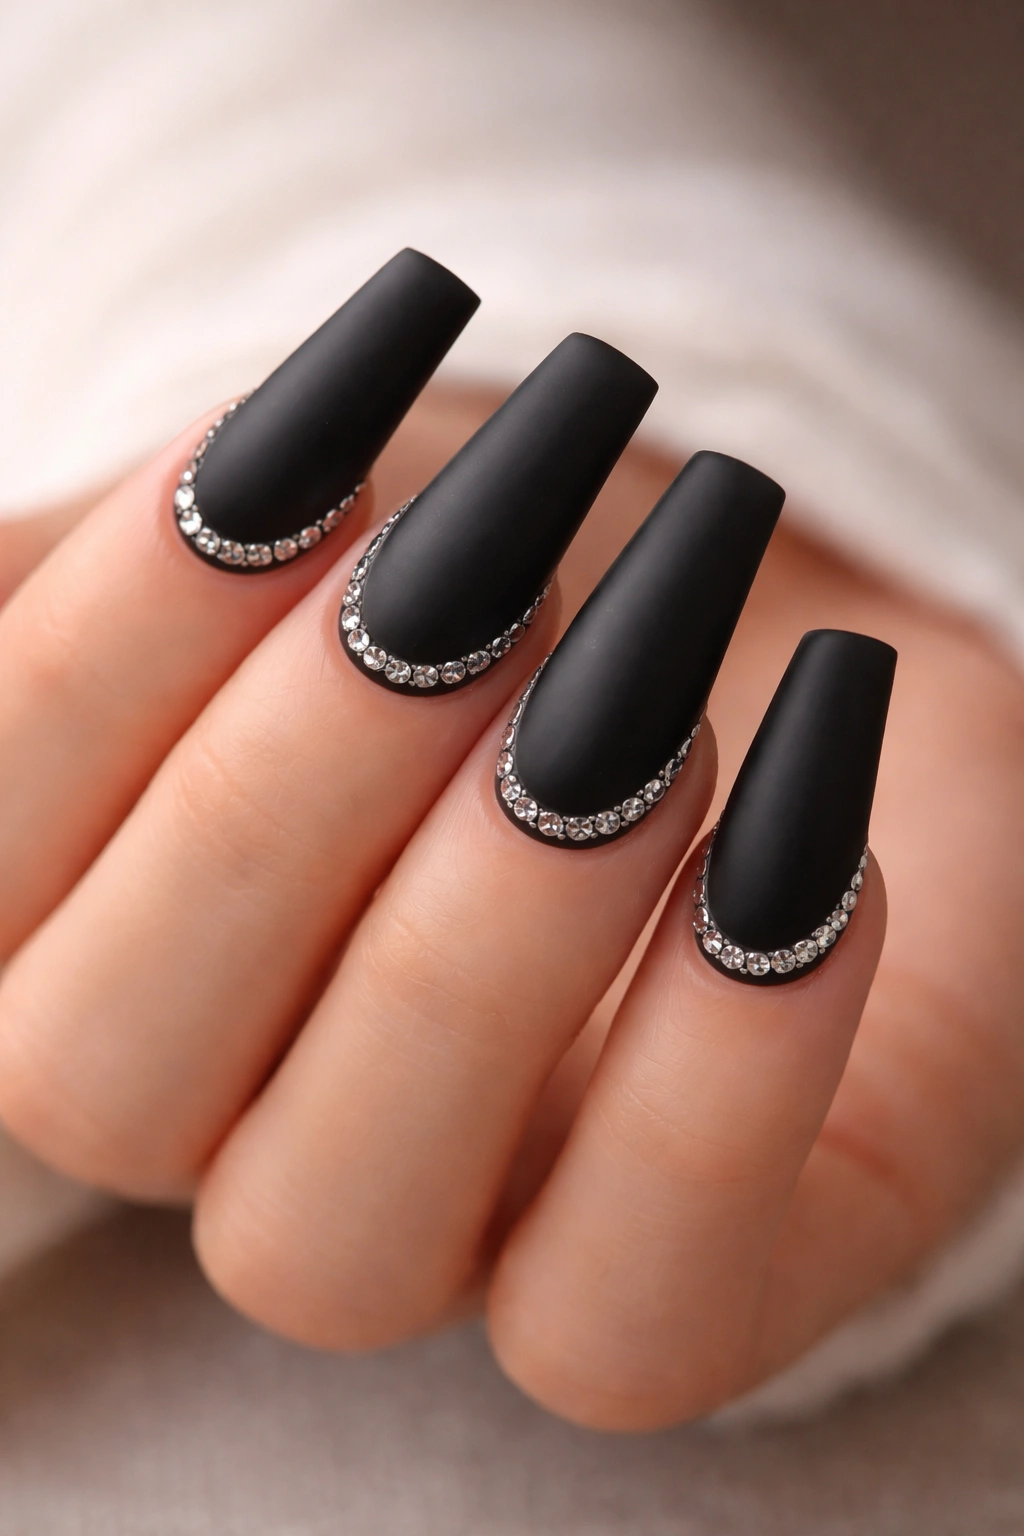
The contrast between deep matte black and sparkling rhinestones creates visual impact that feels simultaneously edgy and elegant. Long curved duck nails provide the perfect stage for strategic rhinestone placement—a few stones clustered near the white tip, or scattered in a constellation pattern across the black surface. The matte finish on the black makes the rhinestones pop without competing light or creating too much shine, while the duck curve naturally frames the gems as if they’re meant to be there.
The Design Philosophy Behind This Look
Matte black is the ultimate neutral that works with absolutely everything and won’t fade or look dated. Because the base is so minimal, you have complete creative control over where and how you place the rhinestones. Some people prefer a few large stones clustered at the tip for a bold statement, while others scatter smaller stones to create a glittery, more playful effect. The curved duck shape actually benefits from rhinestone placement because the curve creates natural zones where gems can catch light differently—creating visual interest without overwhelming the design.
How to Get Professional Results
- Use a gel base with a matte topcoat formula—this creates better adhesion for rhinestones than regular polish
- Place rhinestones while the gel is still slightly sticky but not wet (ask your technician about proper timing)
- Use a rhinestone applicator (a small tool with a sticky tip) rather than your fingers for precision placement
- Seal rhinestones with a clear gel top coat to ensure they stay put for the entire wear time
- This design typically lasts 4-6 weeks with a gel base, depending on how much your hands endure
Insider note: Budget-friendly rhinestones and luxury ones photograph identically in most settings—save your money on the stones and invest in the quality of your nail shape and base instead. A perfectly curved, smooth matte black nail with basic rhinestones beats an imperfectly executed luxury design every time.
4. Peachy-Nude Gradient to Shimmer Gold
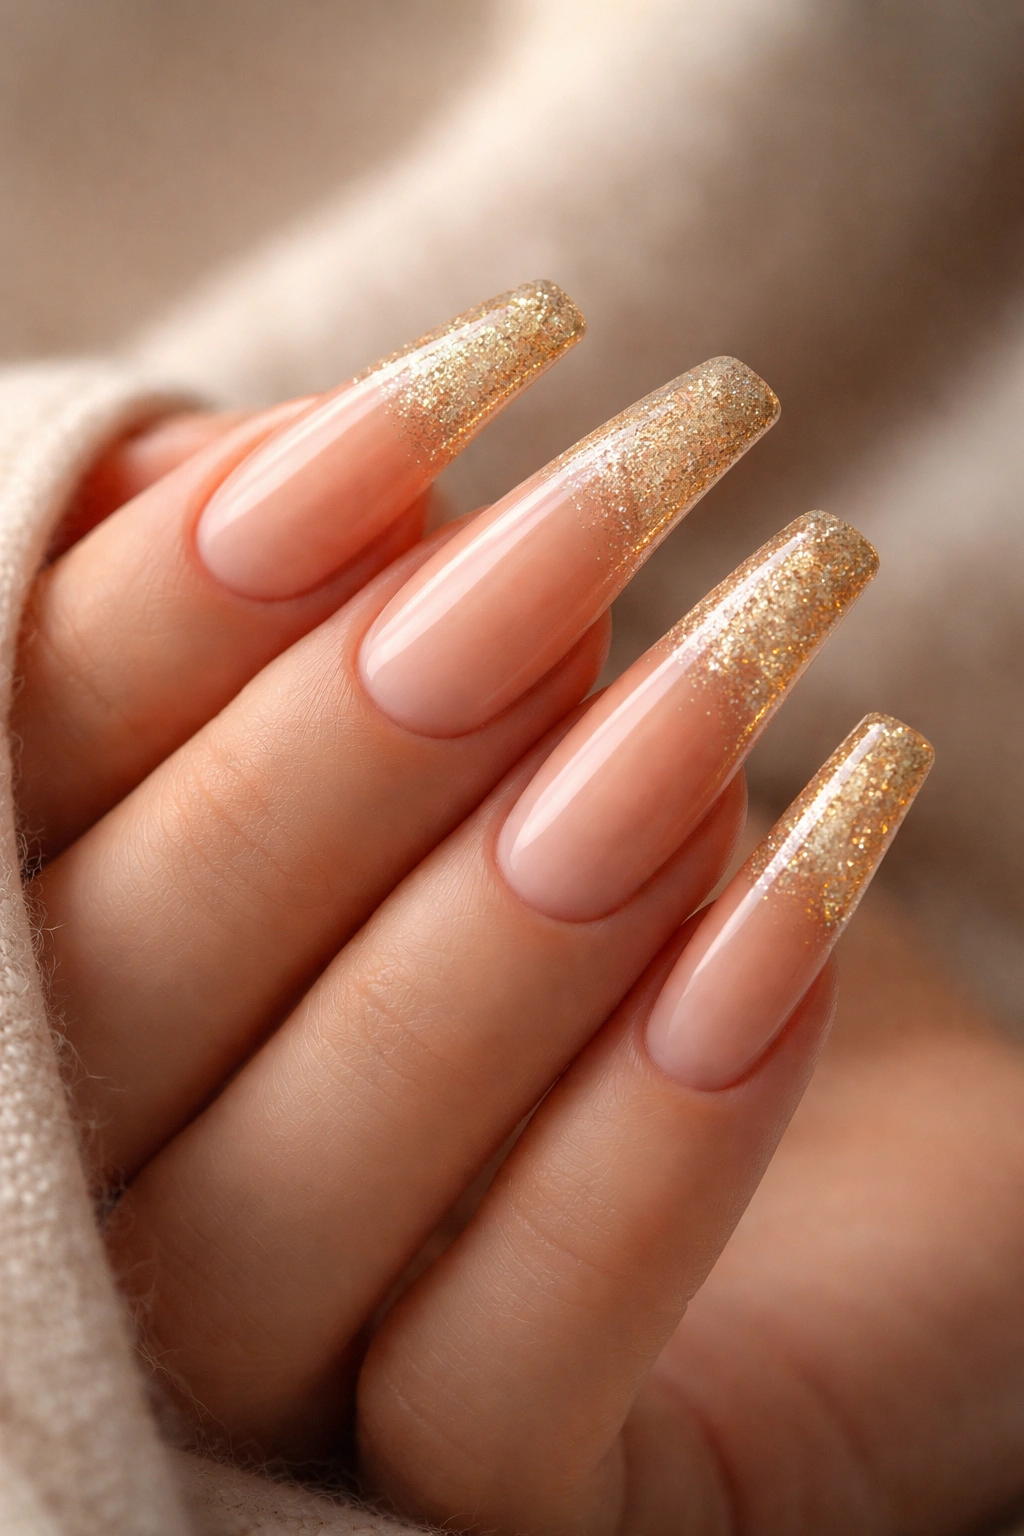
This warm, sunset-inspired design flows from a creamy peachy-nude base to a shimmering gold gradient, creating an effect that’s both wearable and special. The peachy-nude tone sits somewhere between neutral and tinted, which means it flatters virtually every skin tone while still feeling intentional and designed. As the color shifts toward gold, the shimmer increases, creating a gradient that’s understated at the base and catches light beautifully at the curved duck tip.
Why This Color Story Works
The peachy-nude-to-gold progression evokes natural light and warmth. It’s the kind of design that looks good in any lighting (natural daylight, warm indoor light, even cool fluorescent light), which means you won’t get to the office and discover your nails look completely different than they did at home. The shimmer isn’t so intense that it’s party-only—it’s refined enough for professional settings while still feeling elevated and intentional. Long curved duck nails show off this gradient beautifully because you have enough surface area to see the full color progression without it feeling cramped or muddled.
Technique and Wear Time
- Use a nude-pink base as your starting color
- Layer peachy shimmers over the entire nail, concentrating the density toward the tips
- Add a gold shimmer polish or chrome powder to the very end, fading it slightly into the peach
- Seal with a shiny top coat to blend the colors and create luminosity
- Expect this design to last 3-4 weeks if you use a gel base, or about 1-2 weeks in regular polish
- The shimmer may settle or shift slightly over time, which adds to the organic, natural feel
Pro tip: If you’re trying this at home, apply the peachy-nude base first and let it dry completely, then layer your shimmers—this prevents the colors from muddying together and keeps the gradient clean and intentional.
5. Deep Burgundy With Negative Space Design
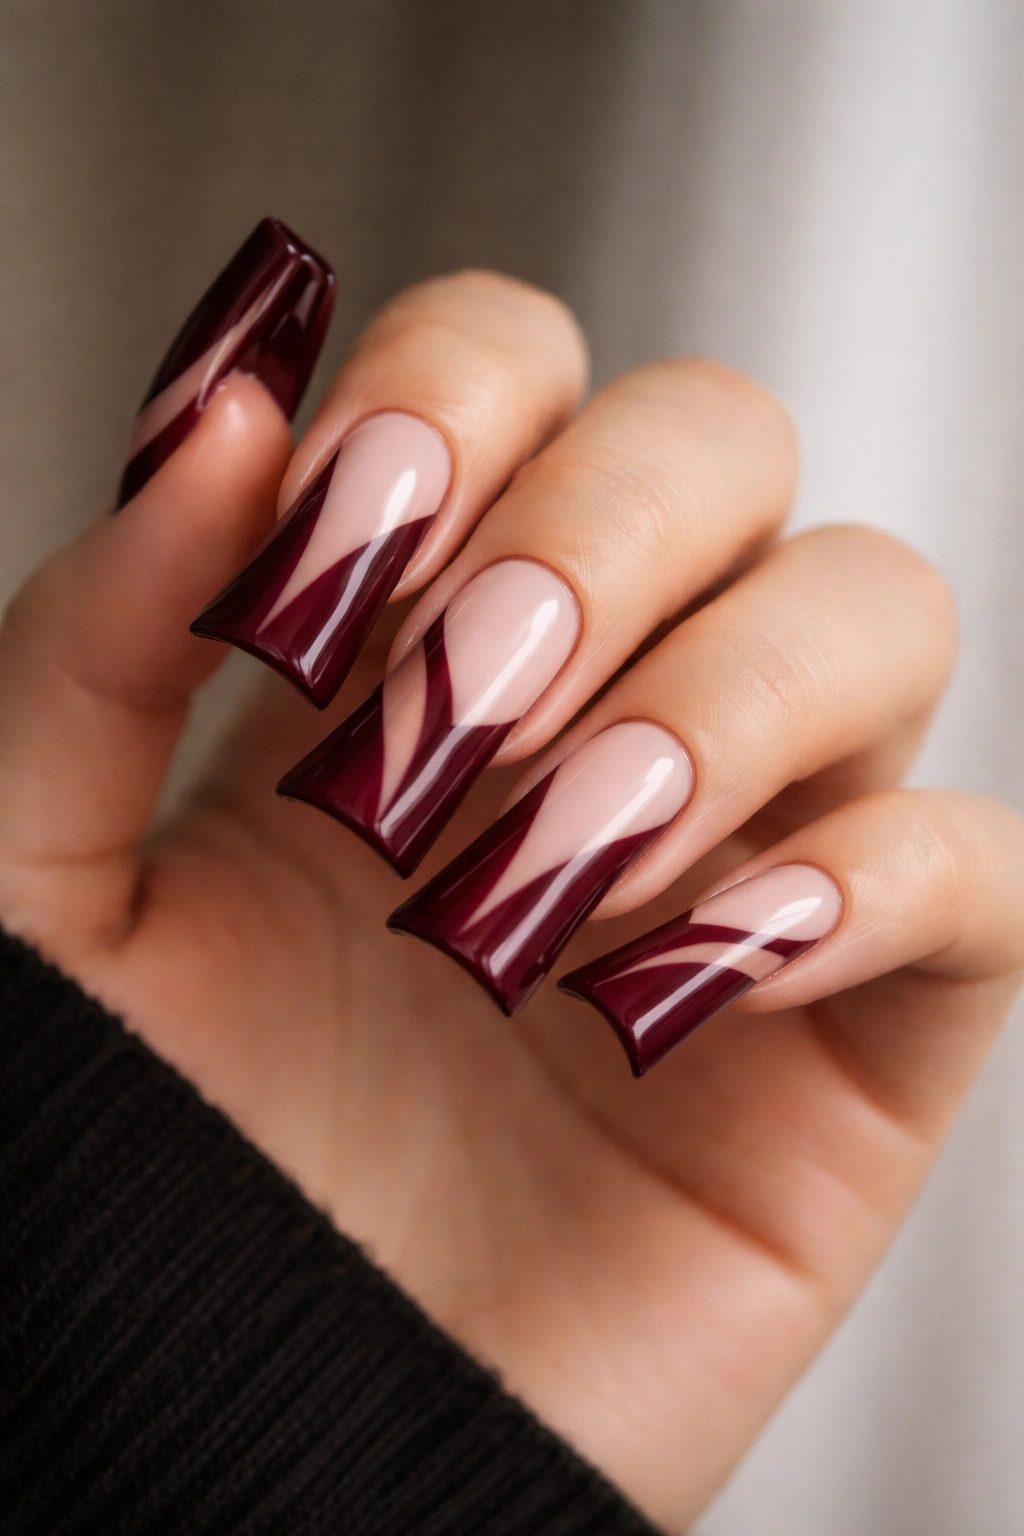
Negative space designs—where you intentionally leave portions of your nail bare or a different color—look incredibly sophisticated on long curved duck nails. A deep burgundy wine color paired with strategic negative space (perhaps leaving a clean white strip or geometric pattern visible) creates a design that feels modern, artistic, and intentional. The burgundy shade is rich enough to feel luxurious without being overly formal, while the negative space adds visual interest and keeps the design from feeling heavy on longer nails.
The Art of Negative Space on Duck Nails
Negative space works particularly well on duck nails because the curved shape creates natural visual zones. You might create a vertical stripe of negative space down the center of the nail, a geometric triangle, or a curved pattern that follows the shape of the duck tip itself. The key is that negative space should feel intentional—carefully planned and precisely executed—rather than accidental. When done well, negative space makes a design feel editorial and high-fashion, like something you’d see in a nail art magazine rather than just a solid color.
Creating This Design
- Start with a clean, perfectly shaped and curved duck nail base
- Apply the deep burgundy polish as your main color (2-3 coats for opacity)
- Use tape, stencils, or hand-paint your negative space pattern—this is where precision matters
- If you’re painting by hand, use a thin nail art brush and steady your hand against something stable
- Seal everything with a top coat, and make sure the negative space is truly clean—any smudges or bubbles will stand out
- This design lasts 3-4 weeks with gel, or about 2 weeks with regular polish
Worth knowing: Negative space designs show every tiny imperfection. Make sure your nail shape is truly smooth and even before committing to this design—any uneven edges or bumps will look magnified by the negative space.
6. Translucent Milky White With Pearl Finish
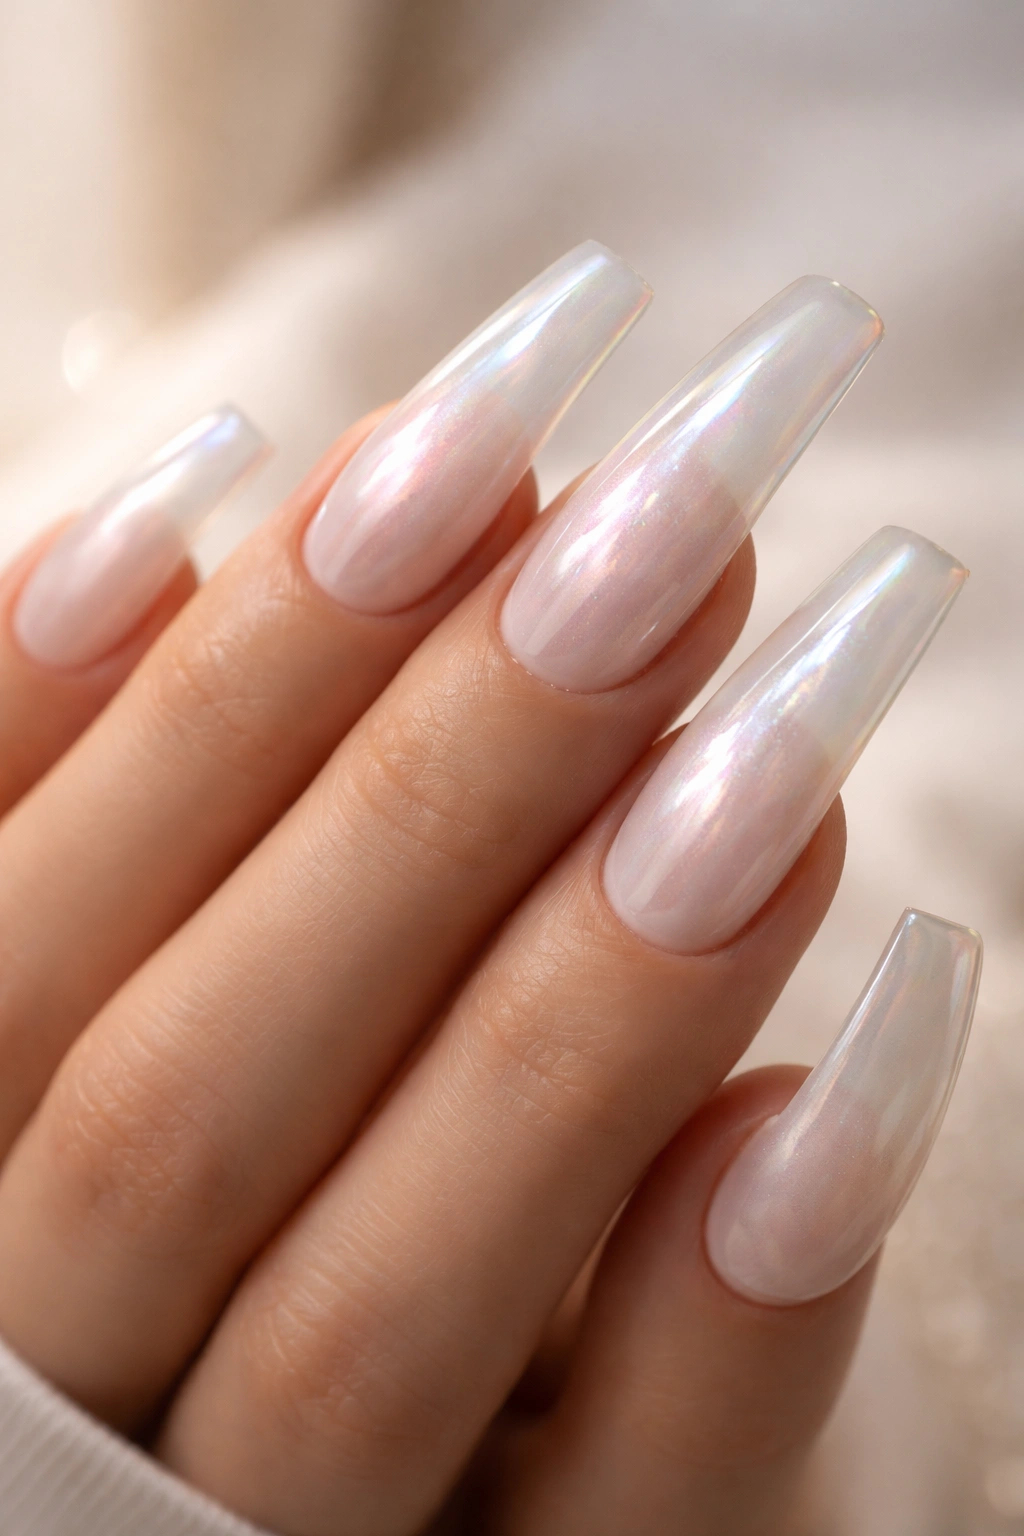
For those who love delicate, understated elegance, a translucent milky white with pearl finish creates a soft, luminous look that feels refined and timeless. This isn’t a stark white—it’s softer, with a barely-there tint that makes it feel alive rather than blank. The pearl finish adds subtle iridescence that catches light differently depending on the angle, creating dimension without relying on heavy color or bold patterns. On long curved duck nails, this design feels ethereal and romantic, like something a fairy tale character would wear.
The Appeal of Milky Translucence
Milky translucent polishes are becoming increasingly popular because they offer a middle ground between completely natural nails and bold color. They feel like an enhanced version of your natural nail—as if your nails are simply glowing rather than covered in color. The translucent quality means light can actually pass through the polish, creating depth. Combined with a pearl finish that adds subtle iridescence, you get a nail that looks different under different lighting conditions—almost like it has an inner light source.
Achieving the Perfect Translucent Pearl
- Choose a milky white polish that leans slightly warm or cool, depending on your skin tone (test on your nail before fully committing)
- Pearl finishes work best with 1-2 thin coats rather than thick coats—too much product will make them look opaque instead of translucent
- Use a gel formula if possible, as it’s easier to build translucent layers without creating a flat, plastic appearance
- Consider layering a subtle pink or champagne shimmer underneath the milky white for added warmth and depth
- This design requires beautiful nail care because the translucence shows any staining or yellowing—avoid staining activities or wear gloves
- Expect 4-6 weeks wear time with gel, or 2-3 weeks with regular polish
Pro tip: Pair this design with subtle nail art—perhaps a thin gold line or a few tiny gems—to add sophistication without overwhelming the delicate translucence.
7. Sunset Ombré: Orange, Pink, and Purple
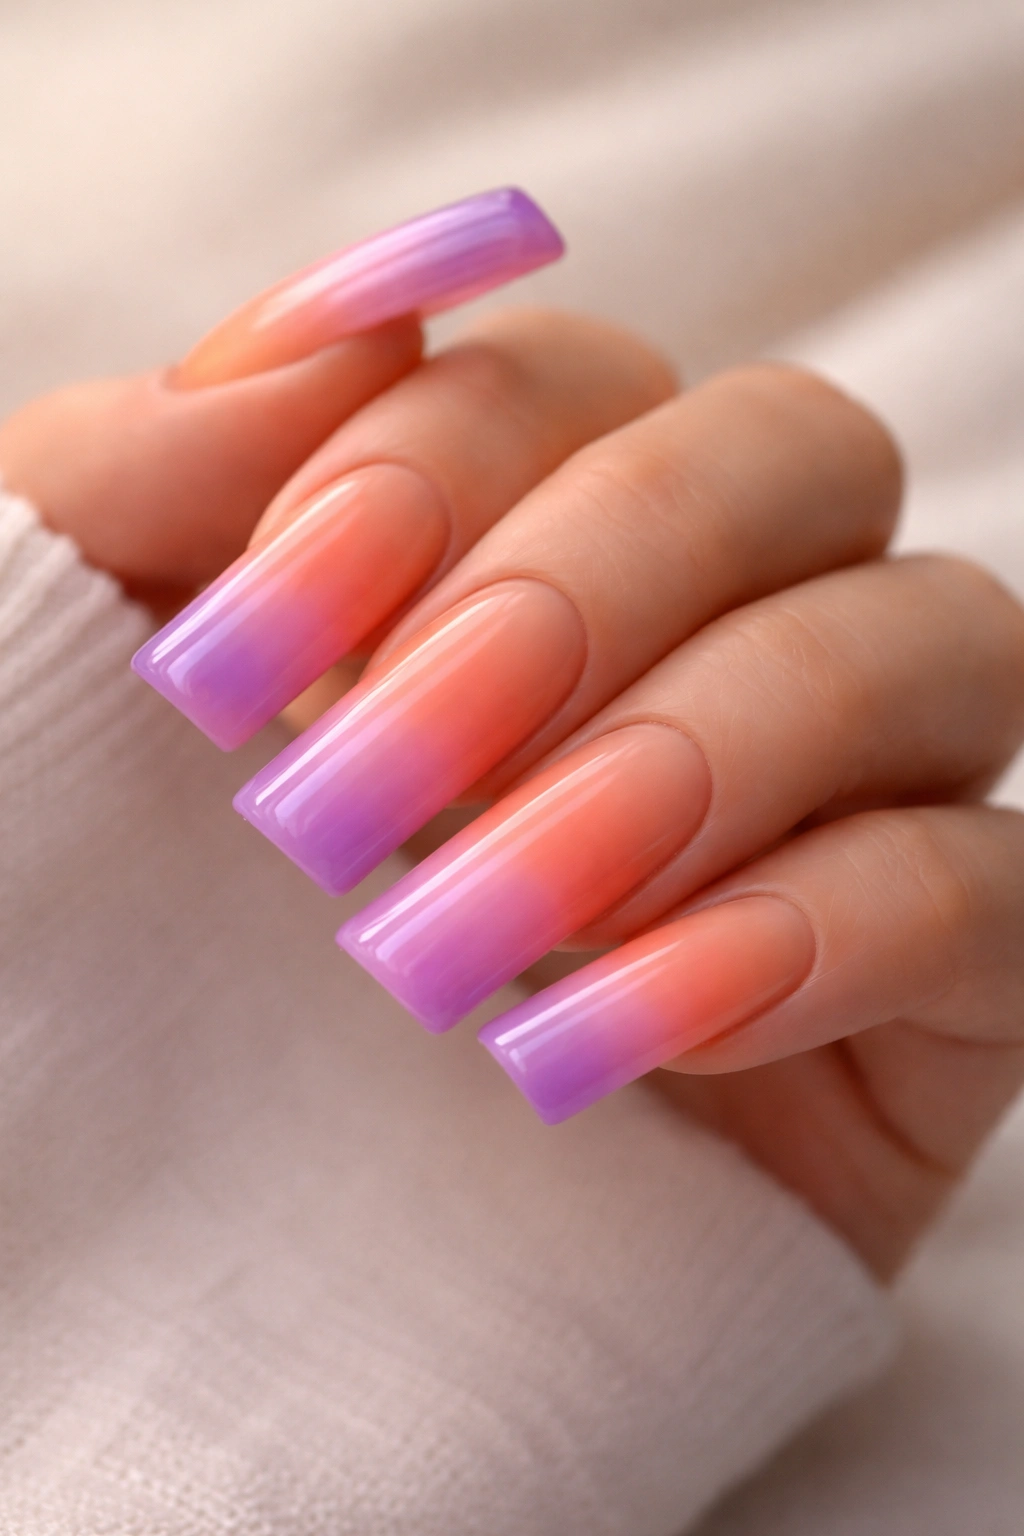
An artistic approach to the ombré trend, the sunset ombré combines warm oranges, soft pinks, and cool purples in a gradient that evokes actual sunsets. On long curved duck nails, this design has enough surface area to show a beautiful color transition without feeling chaotic. The warmth of the orange grounding at the base, the sweetness of pink in the middle, and the cool sophistication of purple at the tip create a harmonious progression that’s visually exciting but not overwhelming.
Creating Sunset Magic
Sunset ombré requires a bit more finesse than single-color ombré because you’re blending multiple colors and managing the transitions between warm and cool tones. The key is to keep the transitions soft and blended—you want to see where one color shifts into another, but there shouldn’t be harsh lines or obvious demarcation. Using a sponge applicator and working methodically from one color to the next creates the best results. The curved duck shape actually helps this design because the curve naturally guides your eye along the color progression.
Application Tips for Multiple-Color Ombré
- Prepare each polish color on a makeup sponge before you start (don’t try to apply and blend all at once)
- Use a sea sponge rather than a dense beauty sponge—the texture creates softer blending
- Start with the warmest color (orange) at the base and work toward cool colors at the tip
- Overlap each color slightly and blend the edges with a clean sponge to avoid stripes
- Cure or dry between major color blocks if you’re using gel
- Seal with a clear top coat to smooth out any sponge texture and create shine
- Plan for 2-3 applications to build opacity without looking muddy
Insider note: Sunset ombré photographs beautifully in natural light, especially during golden hour. If you love sharing nail photos on social media, this design is worth the extra effort it takes to execute.
8. Nude Base With 3D Rhinestone Gradient
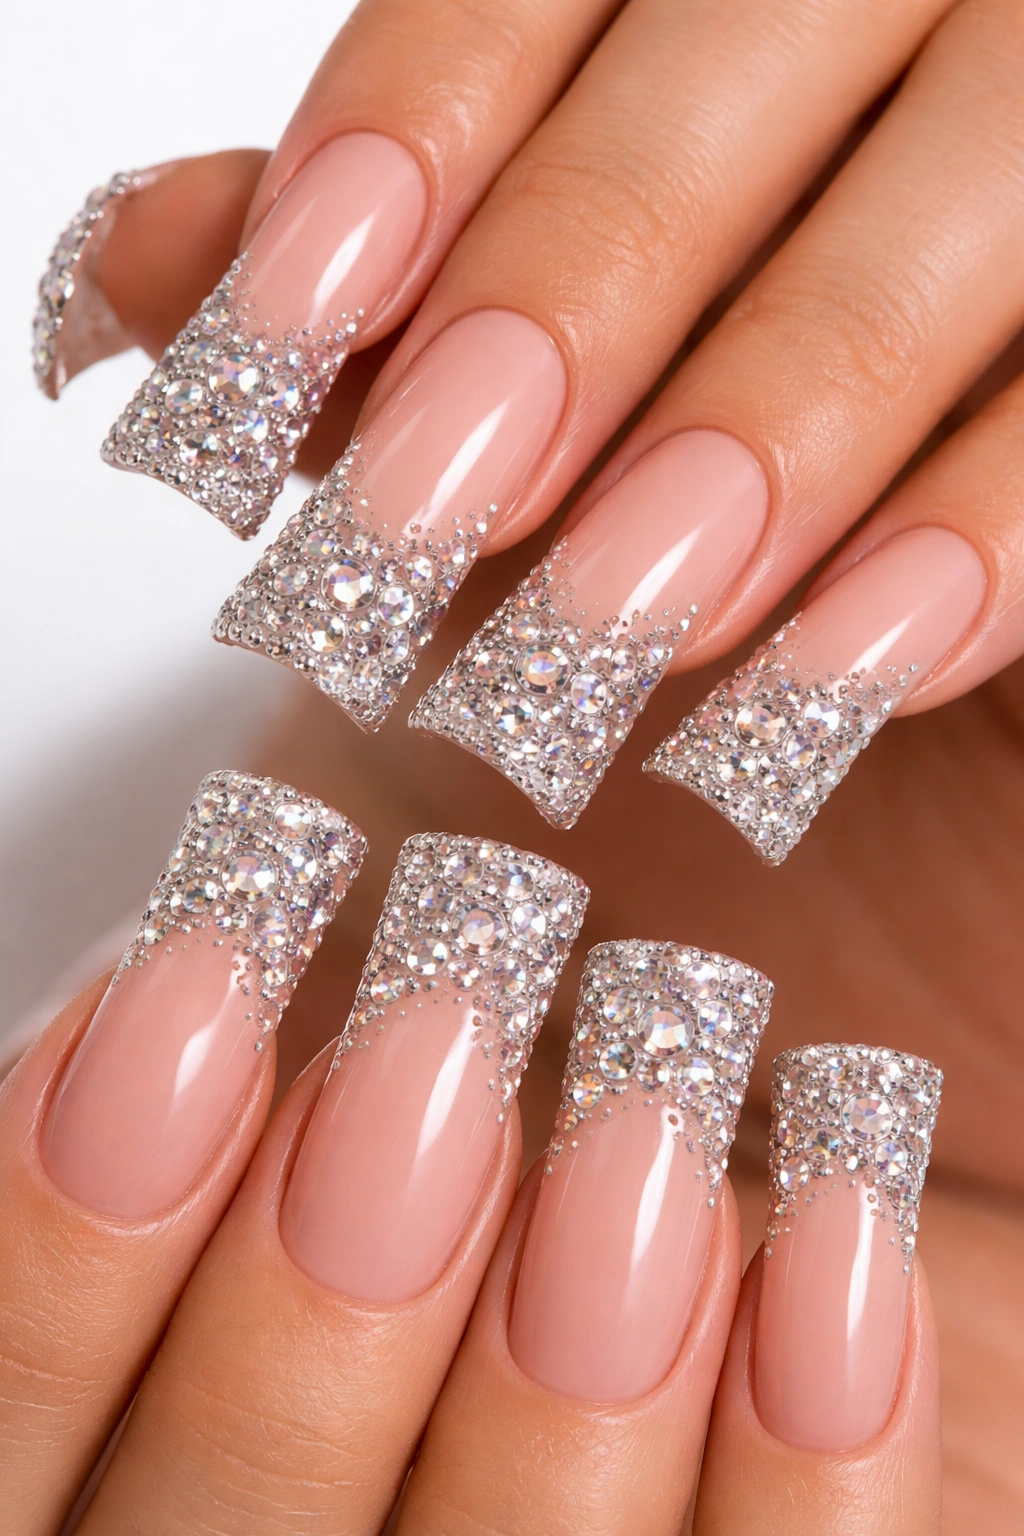
Elevating the rhinestone concept, a 3D rhinestone gradient starts sparse at the base and builds in density toward the curved duck tip, creating a visual effect that’s simultaneously glamorous and architectural. Using a neutral nude base ensures the rhinestones remain the undisputed focal point. This design is perfect for special occasions—weddings, parties, fancy dinners—where you want your nails to genuinely dazzle without requiring any additional jewelry or accessories.
The 3D Effect Explained
A true 3D rhinestone gradient isn’t just placing more stones at the tip—it’s using varying sizes and sometimes heights of rhinestones to create genuine dimension. Larger stones might sit at the tip with smaller stones scattered toward the base, or you might use layered rhinestones to create peaks and valleys. The nude base allows light to bounce off every stone without competing reflection, which makes the entire design sparkle dynamically. The curved duck shape frames the gradient beautifully because the upturned tip naturally becomes the focal point for the densest concentration of gems.
Building the Gradient
- Start with a smooth, perfectly applied nude gel base (this is your foundation—it must be flawless)
- Map out your rhinestone placement mentally before you start applying
- Use tweezers or a rhinestone applicator to place larger stones at the tip
- Fill in the gaps with progressively smaller stones as you move toward the base
- Secure each stone thoroughly before moving to the next one
- Consider mixing clear rhinestones with champagne or rose gold for visual depth and complexity
- Seal everything with a thick, protective top coat
- This design typically lasts 4-6 weeks, though the top coat may need refreshing at the 3-week mark if you’re rough on your hands
Worth knowing: The more ornate your rhinestone design, the less appropriate it becomes for activities involving water or heavy hand use (cooking, washing dishes, gym). Choose your wear time strategically based on your lifestyle.
9. Sage Green With Minimalist Line Art

Soft sage green serves as a calming, sophisticated base for minimal line art that feels artistic without being loud. Using thin black lines to create simple geometric shapes, abstract patterns, or nature-inspired designs (like single-line leaf drawings) keeps the overall aesthetic refined. On long curved duck nails, this design has room for slightly more complex line art than shorter nails could accommodate, while still maintaining the “less is more” philosophy that makes minimalism so appealing.
Why Sage Green Feels Fresh
Sage is one of those rare colors that feels both trendy and timeless. It’s warm enough to feel cozy and approachable, cool enough to feel sophisticated, and neutral enough to coordinate with virtually any outfit or skin tone. The muted quality of the green means it recedes slightly, allowing your line art to take center stage as the design’s focal point. This is a design that reads as “I have excellent taste” rather than “I’m trying too hard”—which is exactly the right impression for minimalist nail art.
Creating Precise Line Art
- Apply sage green as your base (2 coats for opacity)
- Use a very thin nail art brush (000 or smaller) and black gel or polish for your line work
- Sketch your design lightly in pencil first if you’re hand-painting (you can erase mistakes)
- Work slowly and deliberately—line art has nowhere to hide
- Consider using nail art tape or stencils if hand-drawing feels risky
- Seal with a matte or glossy top coat depending on your preference (matte can look more editorial, glossy looks more finished)
- This design lasts 3-4 weeks with gel, 1-2 weeks with regular polish
Pro tip: If your hand-drawing skills aren’t confident, ask your nail technician if they can recreate a design you provide—bring a reference image or sketch of exactly what you want.
10. Gradient Glitter Ombré: Clear to Holographic Sparkle
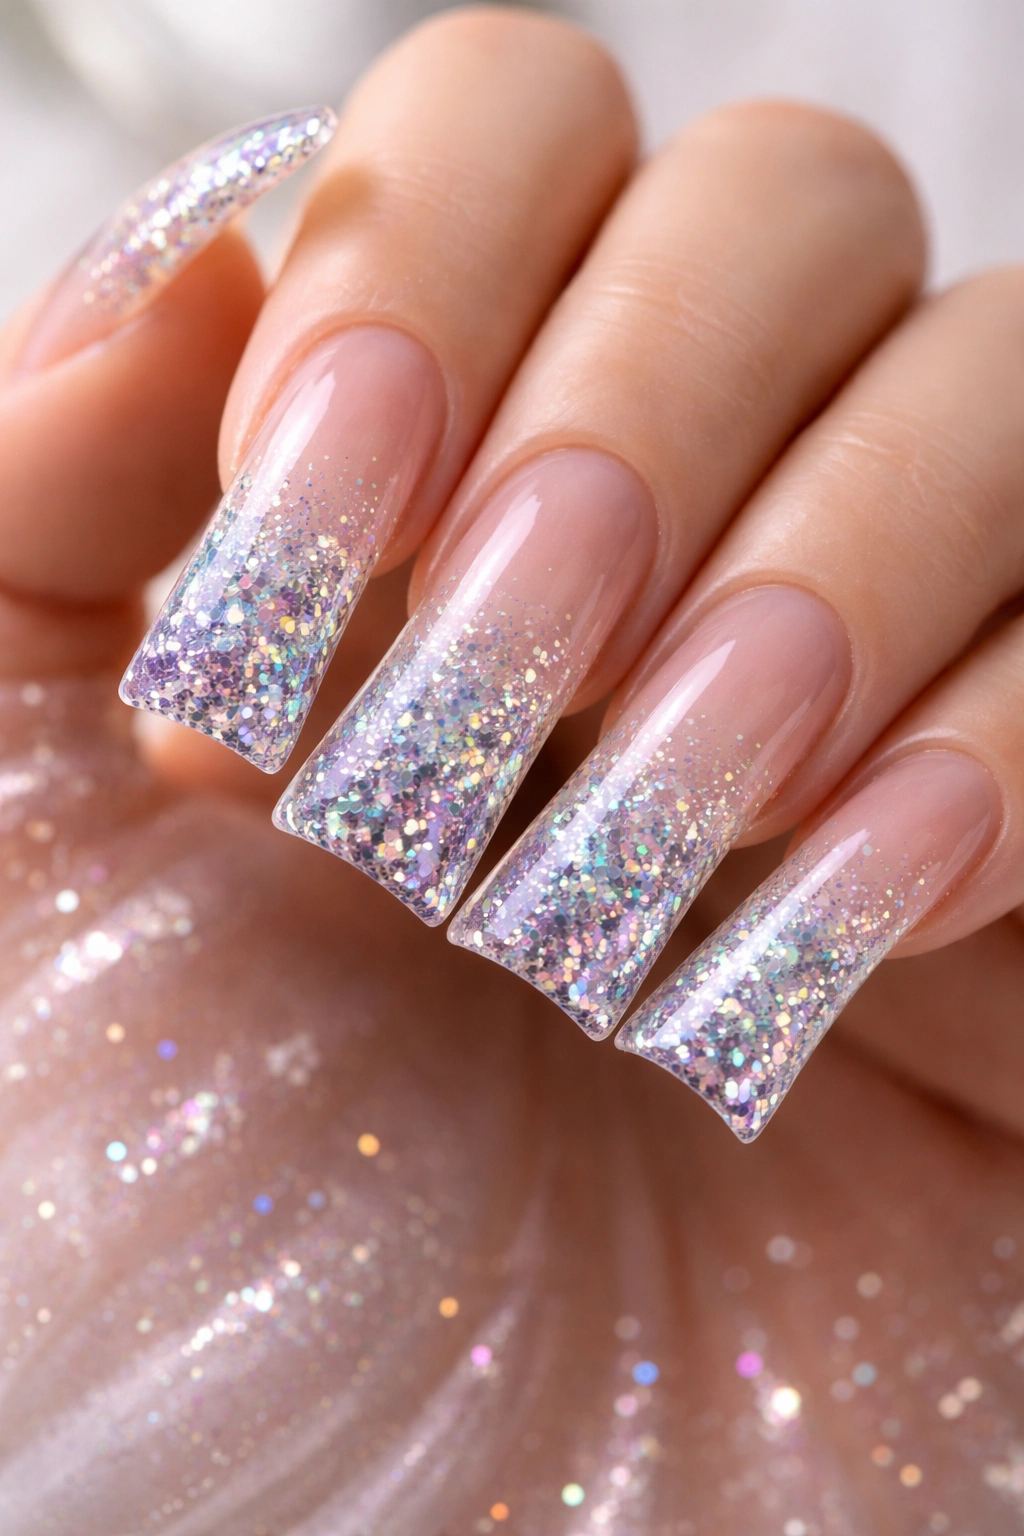
Building from a translucent clear base to a full holographic glitter explosion at the curved tip, this gradient creates a design that feels party-ready while still maintaining elegance. The gradual build from clear to sparkle is key—you’re not simply adding glitter to the entire nail, but rather creating a progression where the glitter becomes denser and more intense as you move toward the tip. On long curved duck nails, this gradient has beautiful scale and visual impact.
The Science of Glitter Gradients
Holographic glitter catches light in multiple wavelengths, creating rainbow sparkle that literally changes color depending on the angle and light source. A gradient that builds from nothing to full holographic at the tip creates contrast—the clear base gives your eyes a place to rest while the tip delivers the drama. This balance is what keeps the design feeling intentional rather than overdone. The curved duck shape naturally concentrates the glitter at the most visible point, which is exactly where you want maximum sparkle.
Layering for the Perfect Gradient
- Begin with a translucent clear gel base (1-2 coats)
- In the middle section of your nail, apply a thin layer of polish with embedded glitter—something with smaller particles that feels more refined
- Move toward the tip with progressively more intense glitter (larger particles, denser concentration)
- Use a clear gel to “lock in” each layer before moving to the next stage
- The very tip should be nearly solid glitter for maximum impact
- Seal the entire design with a thick, protective top coat
- This design typically lasts 4-6 weeks, though the tips may show glitter wear before the rest of the nail does
Insider note: Holographic glitter works best under natural daylight and warm indoor lighting—under fluorescent lights, it may appear more subtle. Consider your typical environment before choosing this design.
11. Soft White With Delicate Gold Line Design
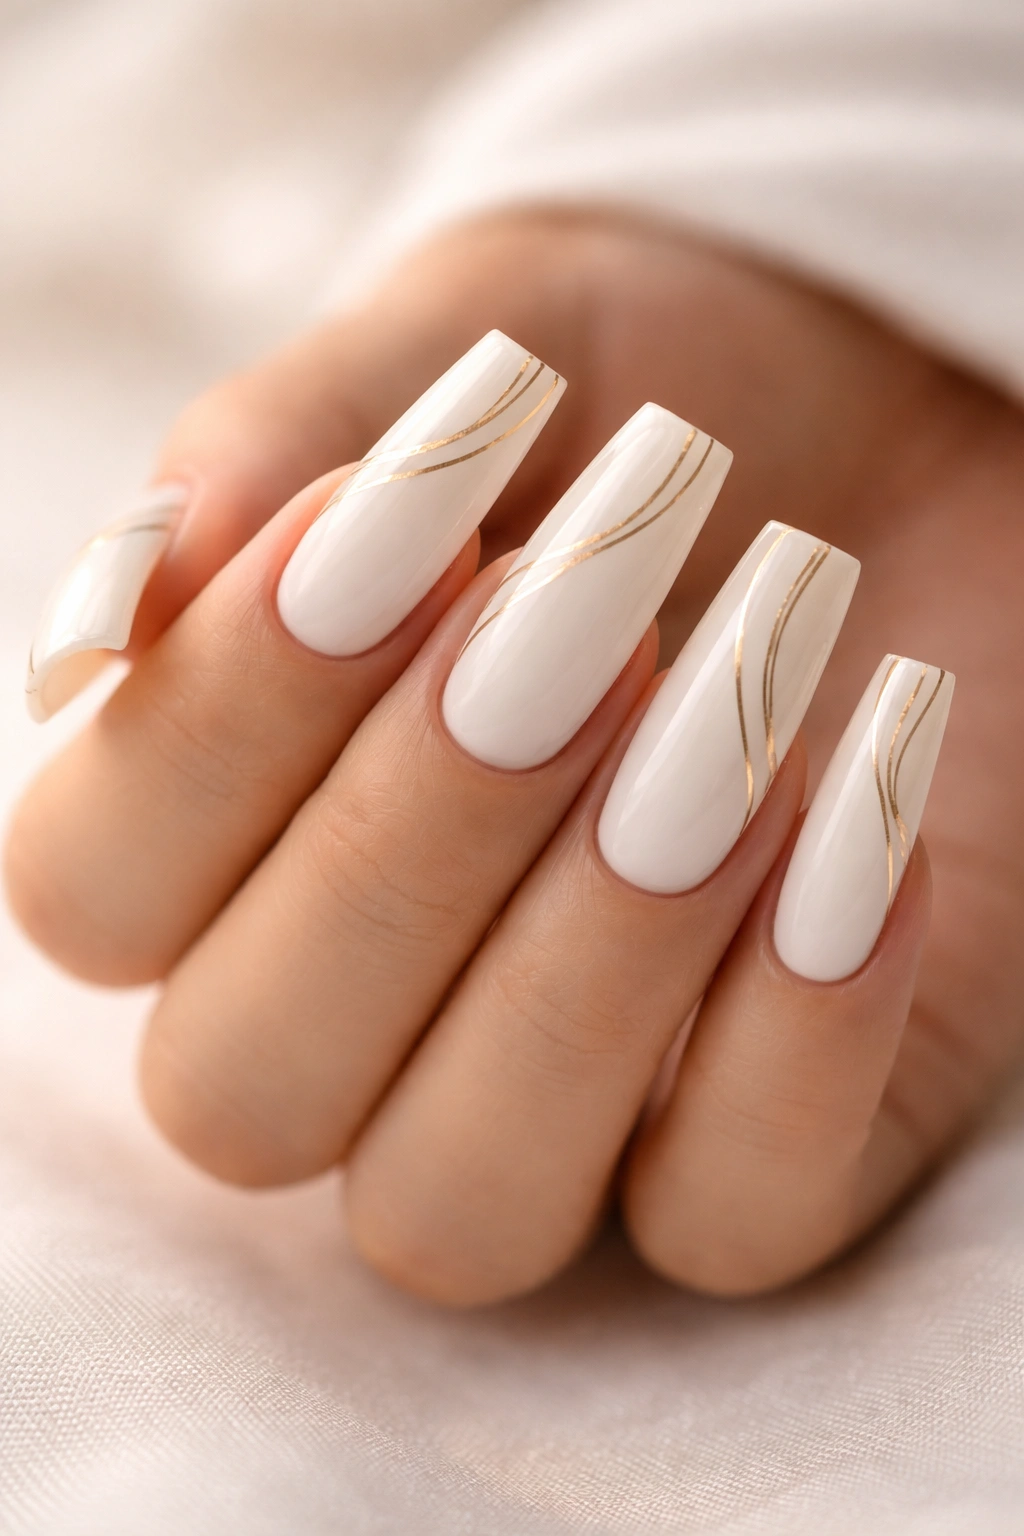
Finishing with an elegant classic, soft white paired with delicate gold lines creates a design that’s timeless, sophisticated, and effortlessly chic. Using thin gold lines to create geometry (like a minimalist art deco pattern), organic shapes (like marble veining), or simple nail art (like tiny constellations), you build visual interest without overwhelming the design. On long curved duck nails, this design feels almost like jewelry—it enhances and elevates without trying to be the loudest thing in the room.
The Enduring Appeal of White and Gold
White and gold together represent luxury and refinement—it’s a combination you see in high-end jewelry, fine art, and palace architecture. On nails, this pairing is quietly powerful. The white provides a clean, fresh canvas, while the gold adds warmth and sophistication. This design works beautifully for both everyday wear and special occasions, which makes it incredibly versatile. Unlike bolder designs that feel situational, white and gold nails feel appropriate everywhere.
Executing the Gold Line Work
- Start with a bright white base (2-3 coats for opacity)
- Use a thin brush and gold gel or polish for your line work (thin lines are more elegant than thick ones)
- Consider using metallic gold markers or paint pens for more controlled application if hand-painting feels challenging
- Decide on your pattern before starting—whether you’re going geometric, organic, or decorative
- Work deliberately and carefully—gold on white shows every wobble
- Seal with a glossy top coat to make the gold lines really pop and protect them from wear
- This design lasts 3-4 weeks with gel, or about 2 weeks with regular polish
Pro tip: Mix your white and gold with textures—perhaps a glossy white base with a matte top coat only on certain areas, creating subtle contrast that adds sophistication. Or pair glossy white with glitter gold lines for extra refinement.
Final Thoughts
Long curved duck nails offer an incredible amount of creative potential, and these eleven styles represent just the beginning of what’s possible. Whether you’re drawn to soft, romantic designs like the translucent milky white or bold, glamorous statements like the 3D rhinestone gradient, there’s a duck nail style that matches your personality and aesthetic. The length of the nail—that extended canvas—allows for more detailed work, more nuanced color gradients, and more visual impact than shorter nails can achieve.
The beauty of curved duck nails is their versatility. They work for nearly every occasion, every season, every style, and every skin tone. You can keep them minimalist and clean, or layer on complexity and sparkle. You can change your design every few weeks to match your mood, or find a signature look that becomes your trademark. The shape itself is becoming increasingly popular because it’s genuinely flattering, and when you add length to that flattering shape, you create something truly striking.
If you’re considering long curved duck nails, don’t overthink the design choice. Pick a style that genuinely excites you—something you’ll be happy to look at for the next three to six weeks—and commit to it. The confidence of wearing nails you love shows, and that’s when nail art really becomes a form of self-expression rather than just decoration.
