

When you first see duck nails in real life, there’s no denying the impact. That elegant, elongated curve that sweeps upward and outward has become one of the most coveted nail shapes across social media, fashion weeks, and red carpets. It’s audacious yet refined, and it gives off an effortless confidence that keeps people coming back for this particular nail style. The beauty of duck nails lies not just in the shape itself, but in the endless design possibilities that the generous surface area provides.
The challenge, though, is knowing which designs actually look good on duck nails rather than simply appearing gimmicky or overwhelming. Not every nail art translates well to this particular shape—some designs need the right color palette, the right proportions, or the right level of detail to truly shine. Finding designs that complement the duck nail’s natural drama while staying wearable and elegant is what separates showstopping manicures from ones that miss the mark.
What makes a duck nail design truly successful is how it plays with proportion, uses the nail’s distinct shape as part of the aesthetic, and maintains that balance between bold and refined. Whether you’re drawn to minimalist elegance, intricate artistry, or striking color combinations, there’s a duck nail design out there that speaks to your personal style. The designs that follow have been chosen because they work with the duck nail shape rather than against it, maximizing what makes this nail form so special while keeping the overall look polished and intentional.
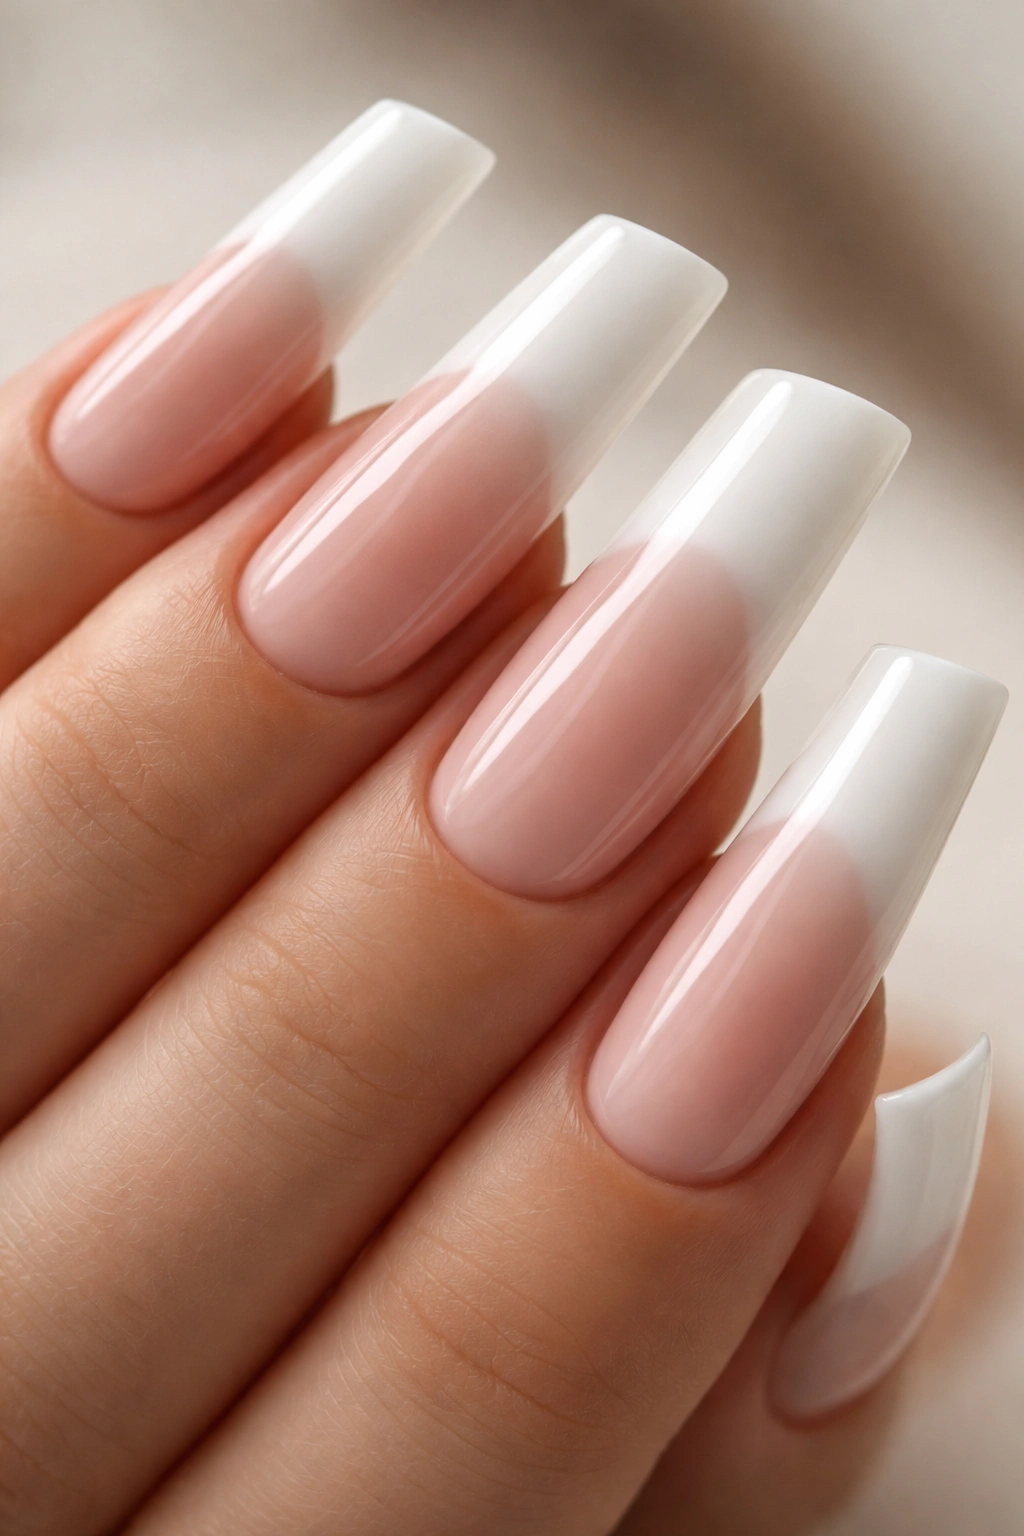
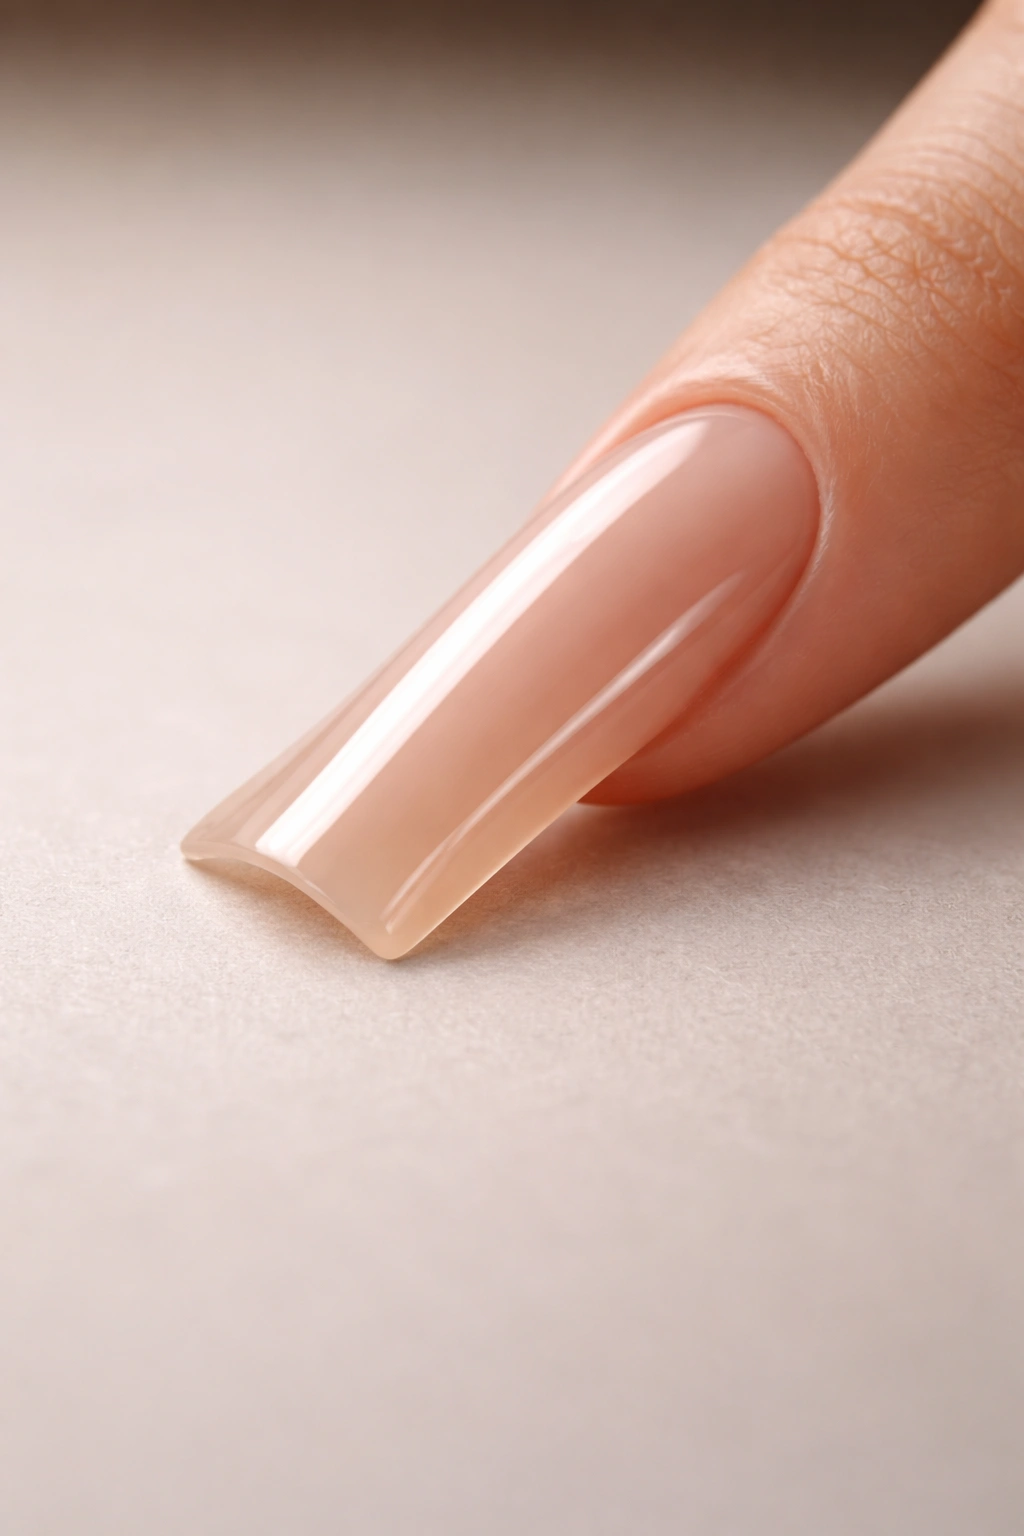
1. Soft Peachy Nude With Milky Tips

This design takes the understated elegance route by combining a warm, creamy nude base with translucent milky-white tips that fade naturally into the peachy tone. The result feels both sophisticated and incredibly wearable for everyday life while still showcasing the beautiful duck nail shape. The soft, gradient-like transition from nude to white creates visual interest without requiring elaborate nail art skills, making it accessible for anyone wanting to enhance their manicure.
Why This Works for Duck Nails
The elongated shape of duck nails is perfectly suited for subtle color transitions and ombre effects. With this particular design, the gradient draws the eye along the length of the nail, emphasizing the elegant curve and creating an illusion of even greater length. The soft color palette won’t overpower the nail’s architectural shape—instead, it complements and enhances it while maintaining a refined, professional appearance.
How to Achieve This Look
- Start with a neutral peachy-nude base coat applied evenly across the entire nail
- Use a milky-white gel or regular polish on the tips, blending it with a dry brush into the nude base for a seamless gradient
- Seal with a glossy top coat to enhance the translucent, creamy quality
- Keep the design simple and resist the urge to add additional embellishments—the beauty is in the subtle sophistication
Pro tip: Warming your base shade with peachy undertones (rather than going too pink or too beige) creates a more flattering, universally wearable result that complements most skin tones beautifully.
2. Black and Gold Geometric Art
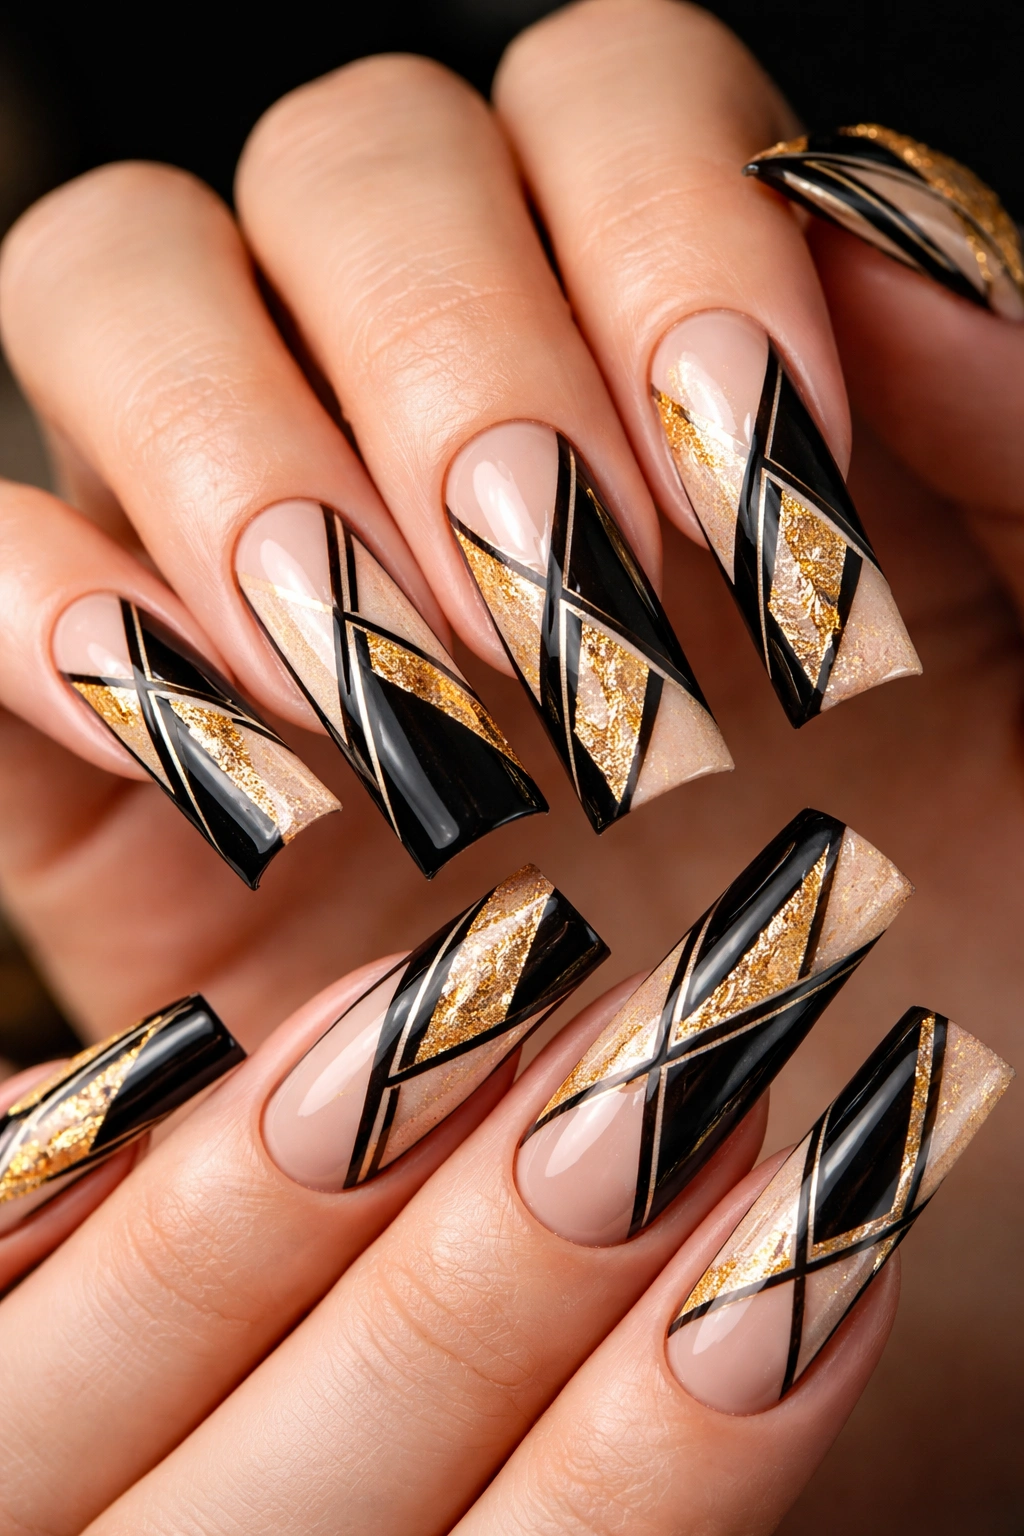
Bold geometric patterns in black and gold deliver immediate visual impact on the expansive duck nail canvas. This design combines crisp black lines creating angular shapes—think triangles, stripes, or abstract modern art—against a clean white or nude base, accented with delicate gold foil or metallic paint for luxury touches. The geometry forces the eye to follow the lines across the nail, playing perfectly with the duck’s extended length.
Why This Works for Duck Nails
Duck nails provide enough real estate that geometric patterns don’t feel cramped or cluttered. The elongated surface becomes a showcase for intricate linework and symmetrical designs that would look too busy on shorter nails. The contrast between black, gold, and a neutral base also creates sharp definition that highlights the nail’s unique curve and length.
How to Achieve This Look
- Apply a clean white, nude, or soft grey base as your foundation
- Use a thin, detail brush or nail art pen to create precise geometric patterns—start with simple designs like stripes or triangles before attempting complex arrangements
- Add gold accents using gold foil, metallic gel pen, or gold leaf pressed into wet top coat
- Seal with a glossy or matte top coat depending on your preference for how the gold should appear
Design variation: Swap the gold for silver or copper metallic for a slightly different energy, or add geometric patterns to only one accent nail while keeping the others solid.
3. Pastel Gradient Rainbow
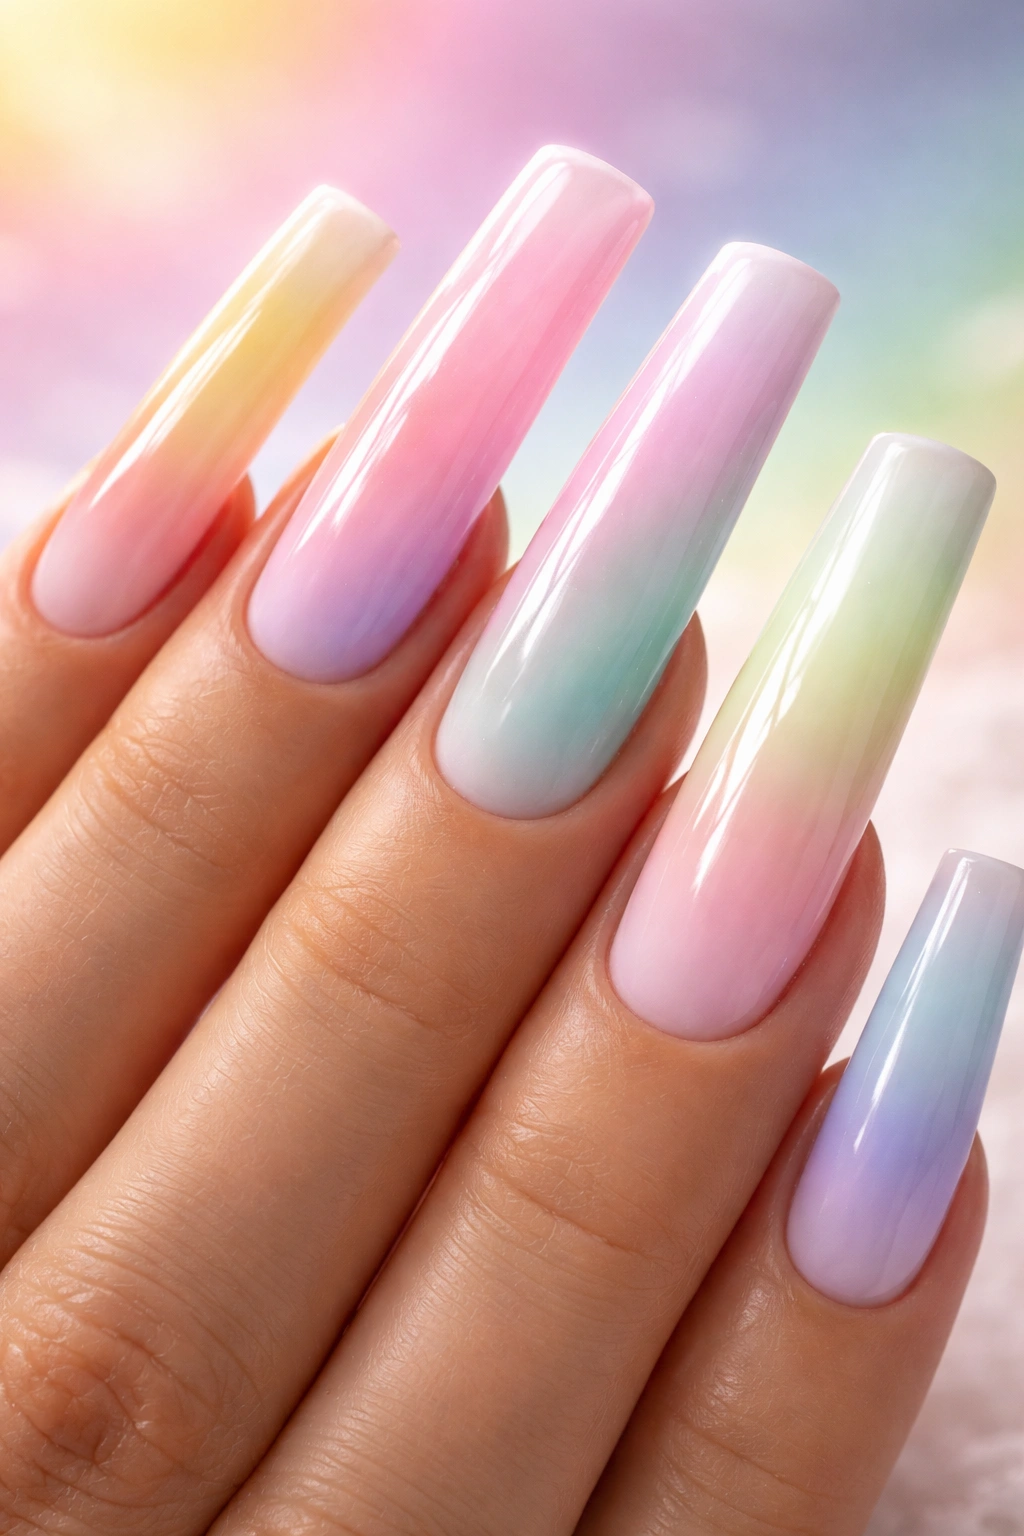
A rainbow gradient in soft, buttery pastel shades creates an enchanting, youthful energy that still feels sophisticated on duck nails. Each nail can feature a different pastel color—think soft yellow, pale pink, lavender, mint green, and peachy-cream—with each color bleeding subtly into the next for a dreamy, watercolor effect. This design celebrates color without being juvenile, leaning instead into the dreamy aesthetic.
Why This Works for Duck Nails
The duck nail’s generous length allows multiple colors to transition beautifully without competing for space. A pastel rainbow would appear too busy or chaotic on short nails, but on duck nails, it has room to breathe and create genuine visual flow. The soft color palette keeps the overall look elegant, while the gradients showcase the full length of each nail.
How to Achieve This Look
- Begin with a white or translucent nude base on all nails
- Apply soft pastel gel polishes in rainbow order (yellow → pink → lavender → green → cream), using a sponge or dry brush to blend them together where they meet
- Create an ombré effect by starting light at the base and intensifying slightly toward the tip, or go for a horizontal gradient that spans the full nail width
- Seal with a glossy top coat that enhances the blended, dreamy quality
- Keep the design on the surface only—don’t attempt to create 3D embellishments that would compete with the gradient’s soft aesthetic
Best for: Expressing a whimsical, artistic side while maintaining sophistication and wearability.
4. Marble Effect In Grey and Black
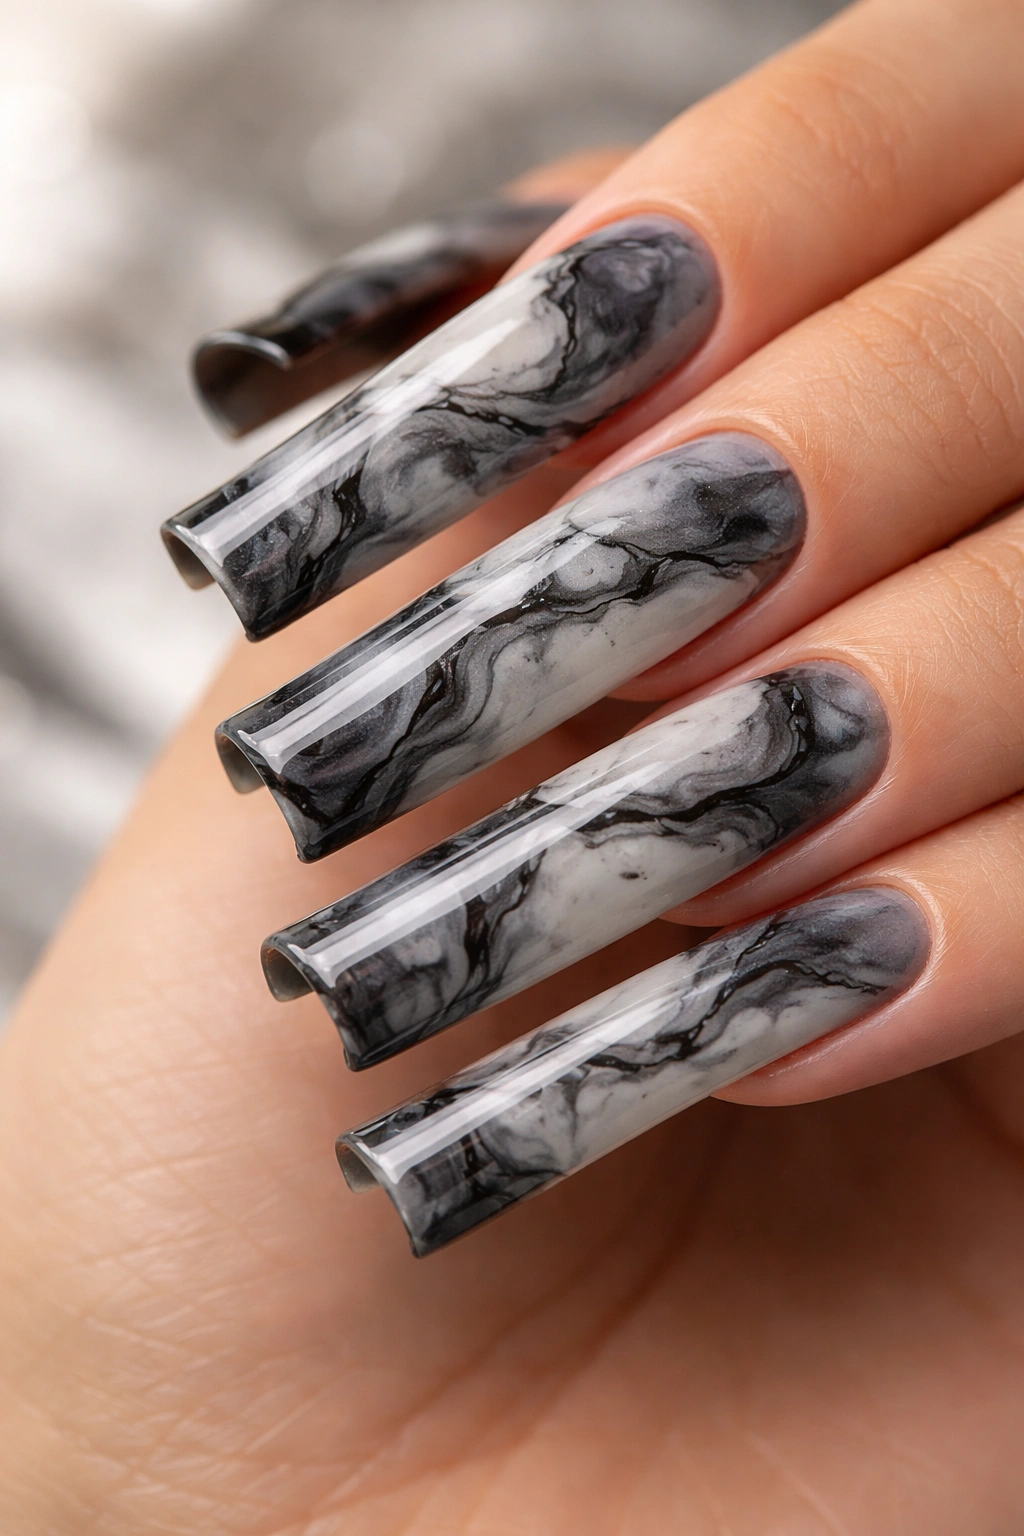
Marble-effect nails using grey, black, and white create a luxurious, natural-stone aesthetic that feels upscale and modern. The veining and swirls that characterize marble naturally follow the contours of the duck nail, creating an organic design that looks intentional and gallery-worthy. This design works because it mimics real texture, giving duck nails a substantial, elegant appearance.
Why This Works for Duck Nails
Marble effects benefit enormously from length and surface area. The veining patterns have space to develop naturally without appearing cramped or artificial. The duck nail shape’s architectural quality complements the structured, sophisticated feeling that marble brings to a manicure.
How to Achieve This Look
- Apply a white or light grey base coat and allow it to fully dry
- Drop black, dark grey, and lighter grey gel polish onto the nail in random areas
- Use a wet brush, nail art pen, or toothpick to drag, swirl, and blend the colors into abstract veining patterns
- Work quickly before the gel sets, creating organic-looking cracks and flows
- Use a clean brush with top coat to seal and set the pattern, which also unifies the design
- Apply final glossy top coat for a smooth, polished marble appearance
Variation: Experiment with other color combinations—white and champagne gold marble, black and navy marble, or blush pink and white marble—each conveying a different mood.
5. Deep Burgundy With Diamond Accents
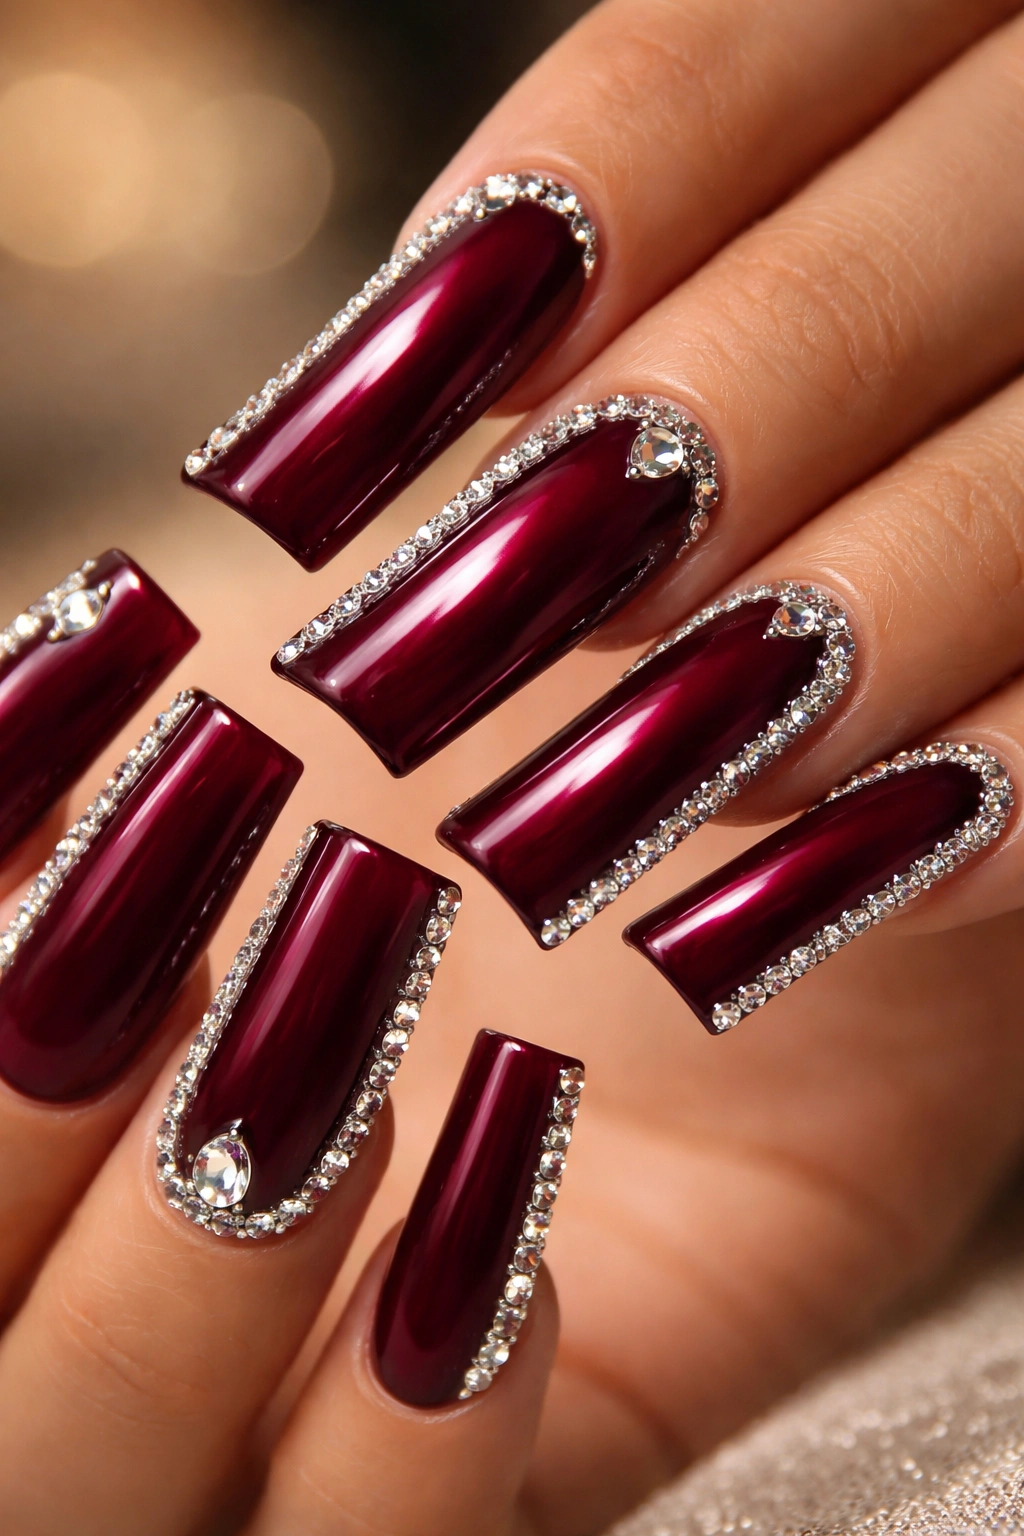
A rich, deep burgundy base provides the perfect backdrop for strategically placed diamond or rhinestone accents along the nail’s edge or scattered down the center. The warm, sophisticated tone feels luxurious without being over-the-top, while the sparkly accents catch light beautifully without overshadowing the nail’s shape. This design whispers elegance rather than shouting for attention.
Why This Works for Duck Nails
Burgundy is one of the most flattering colors for elongated nails, as it deepens the visual impact without making nails appear gaunt. The duck nail shape gives diamond accents room to be appreciated without clustering too densely. The elongation means rhinestones spaced along the edge or center create a cohesive, linear design rather than a scattered appearance.
How to Achieve This Look
- Apply 2-3 coats of rich burgundy gel or regular polish for full opacity
- While the final coat is still wet (or use a nail glue for rhinestones), place diamond or rhinestone accents in your chosen pattern—many prefer a line down the center or crystals placed where the nail curves most dramatically
- Allow the base to fully cure or dry
- Apply top coat carefully around the rhinestones to avoid disturbing them, or use a thick gel top coat that holds everything in place
- Choose high-quality rhinestones or genuine crystals; they catch light far better than cheap imitations
Styling note: This design pairs beautifully with warm, earthy outfits and elevates eveningwear dramatically.
6. Classic French Ombre With Soft Curve
A refined take on the French manicure reimagined for duck nails: a soft, blurred gradient from a pale pink or nude base to a barely-there white or cream tip that curves gracefully along the duck nail’s distinctive shape. Rather than the harsh, defined line of a traditional French manicure, this version embraces softness and the nail’s natural contours, creating something both classic and contemporary.
Why This Works for Duck Nails
The duck nail’s upward curve is its defining feature, and a soft French ombre follows that curve naturally, almost as if the design was made specifically for this shape. The subtle gradient emphasizes elegance and is universally flattering, making it a design that works for virtually any occasion or personal style.
How to Achieve This Look
- Start with a pale pink or warm nude base applied evenly across all nails
- Use a sponge or dry brush with white or cream polish to create a gradient at the tips, blending backward toward the center
- The key is keeping the transition blurred and undefined rather than creating a sharp line
- Build up color gradually—it’s easier to add more than to remove polish once you’ve applied too much
- Seal with a glossy top coat for a refined, salon-quality finish
- Buff the sponge-applied areas gently if they appear too textured
Why it’s timeless: This design doesn’t rely on trends or specific colors—you can swap the base shade to match your undertones and the overall effect remains sophisticated.
7. Emerald Green With Gold Foil Accents
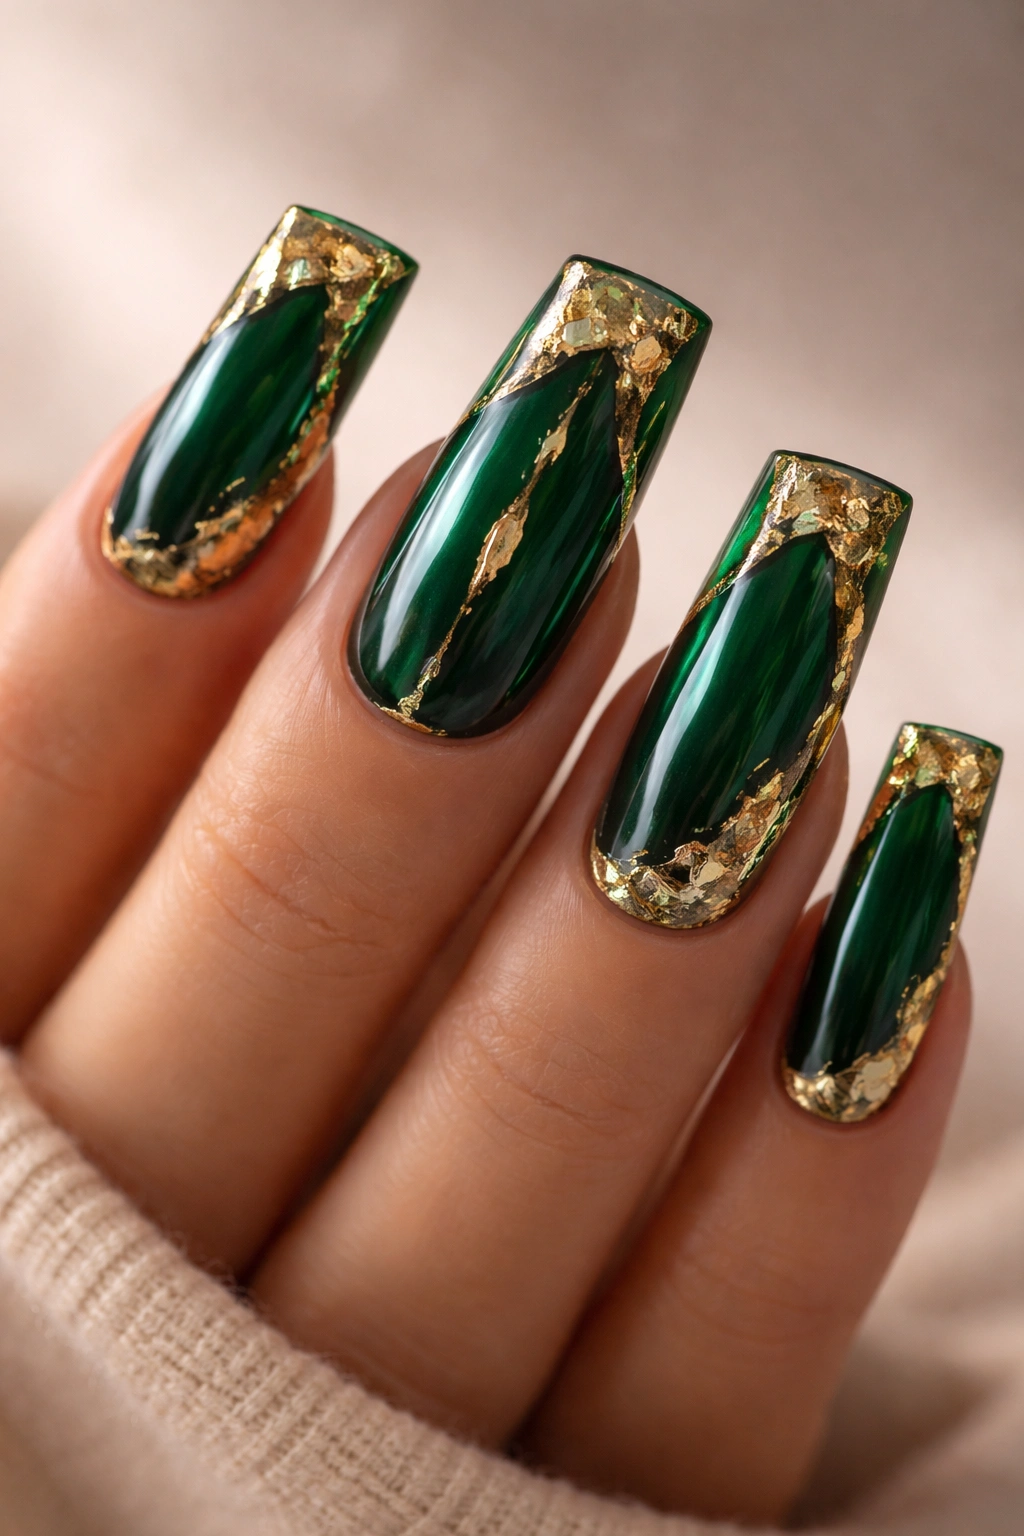
A jewel-tone emerald green base combined with strategic gold foil accents creates a design that’s simultaneously bold and luxurious. The deep green brings richness and drama, while the gold foil adds just enough sparkle to catch light without overwhelming the nail. This combination feels inherently upscale and pairs beautifully with the duck nail’s elegant shape.
Why This Works for Duck Nails
Jewel tones require a sufficient surface area to look intentional and rich rather than heavy or dark. The duck nail provides exactly that. The length also allows gold foil to be placed thoughtfully—perhaps framing the curve of the nail or creating an accent down the center—without appearing cluttered.
How to Achieve This Look
- Apply 2-3 coats of deep emerald green gel or regular polish for full, opaque coverage
- While the final coat is still tacky (or using nail glue), apply gold foil in your chosen design—common placements include along the tip’s edge, creating a frame around the curve, or scattered asymmetrically down one side
- Press the foil gently but firmly to ensure adhesion
- Use a top coat to seal everything and create a smooth, finished surface
- The foil should catch light and add dimension without being the focal point
Pairing suggestion: This design elevates eveningwear and pairs beautifully with gold jewelry and accessories.
8. Soft Pink Ombre to Clear
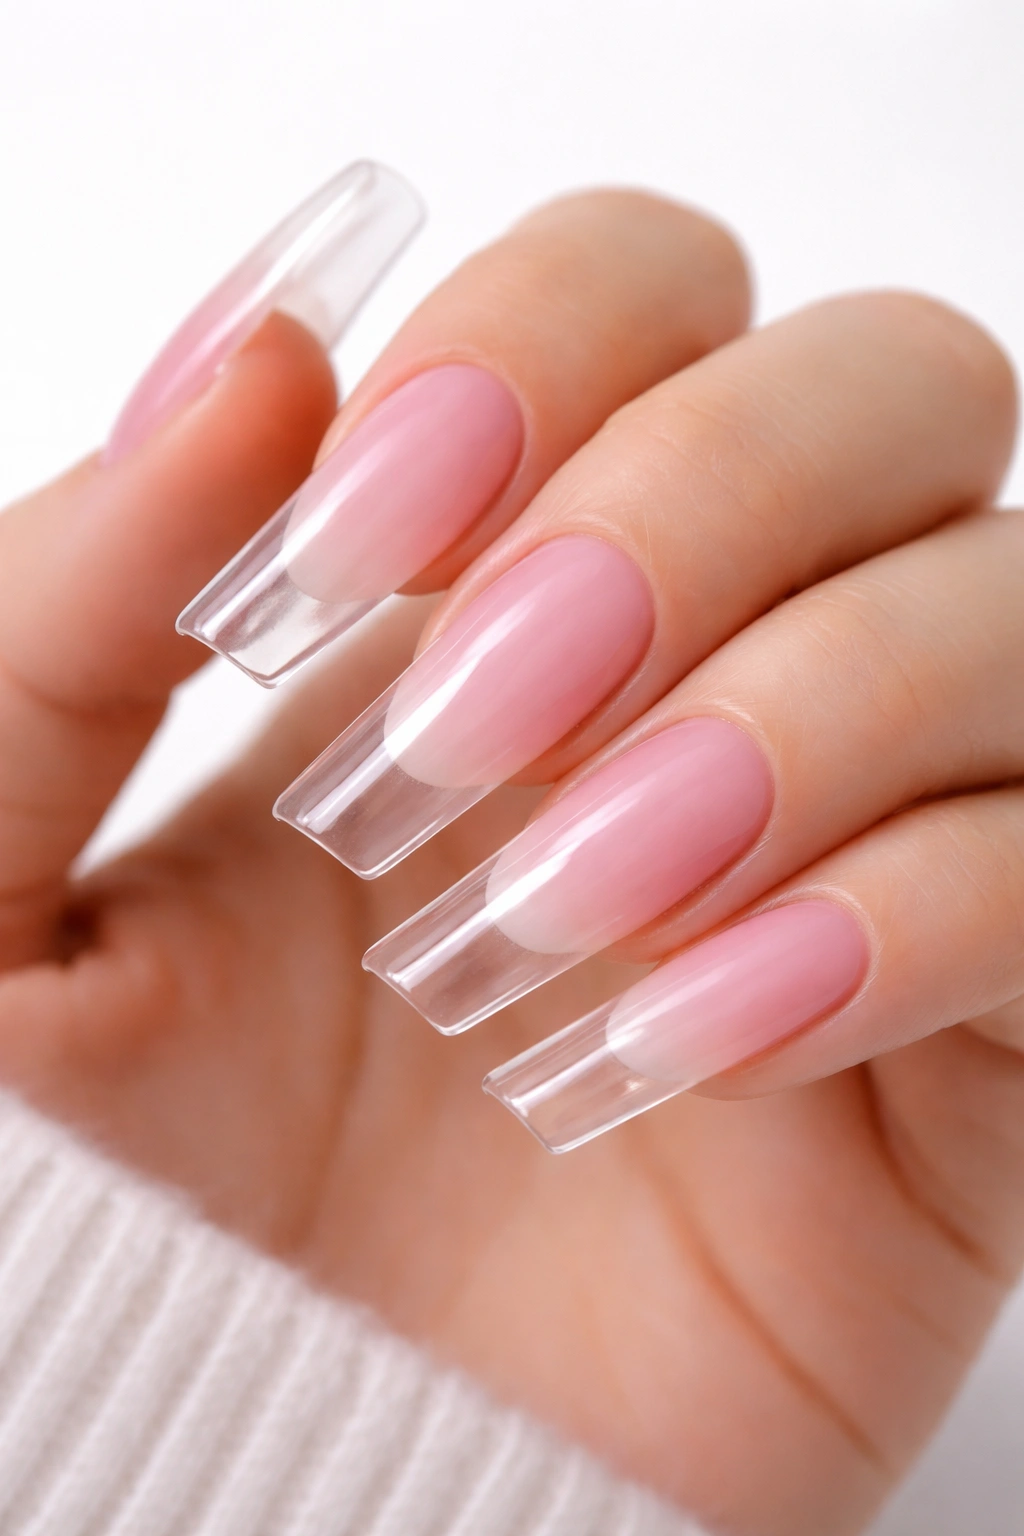
A gradient that transitions from a soft, warm pink base to completely clear at the tips creates an ethereal, glass-like effect that feels modern and refined. The transparency at the tips showcases the nail bed itself, creating visual interest through contrast rather than color addition. This design is surprisingly flattering because it maintains the length and shape while feeling weightless.
Why This Works for Duck Nails
The duck nail’s curve becomes part of the design with this effect—as the color fades to clear, the nail’s architectural shape becomes more apparent. The transparency also makes the nail appear slightly longer because your eye can see the nail extending beneath it. This is a design that lets the nail’s shape do the heavy lifting.
How to Achieve This Look
- Apply a soft pink gel base coat to the entire nail
- Use a sponge or dry brush with a lighter pink, then white, then translucent/clear gel, blending each layer so there’s no harsh line
- Work backward from the tip gradually, creating a soft ombré
- The key is using increasingly clear polishes rather than jumping straight from pink to nothing
- Seal with a glossy top coat for smooth, polished appearance
- The final result should look as though the color is naturally fading away
Lighting matters: This design photographs beautifully in natural light and looks striking under any lighting condition.
9. Midnight Blue With Silver Stars
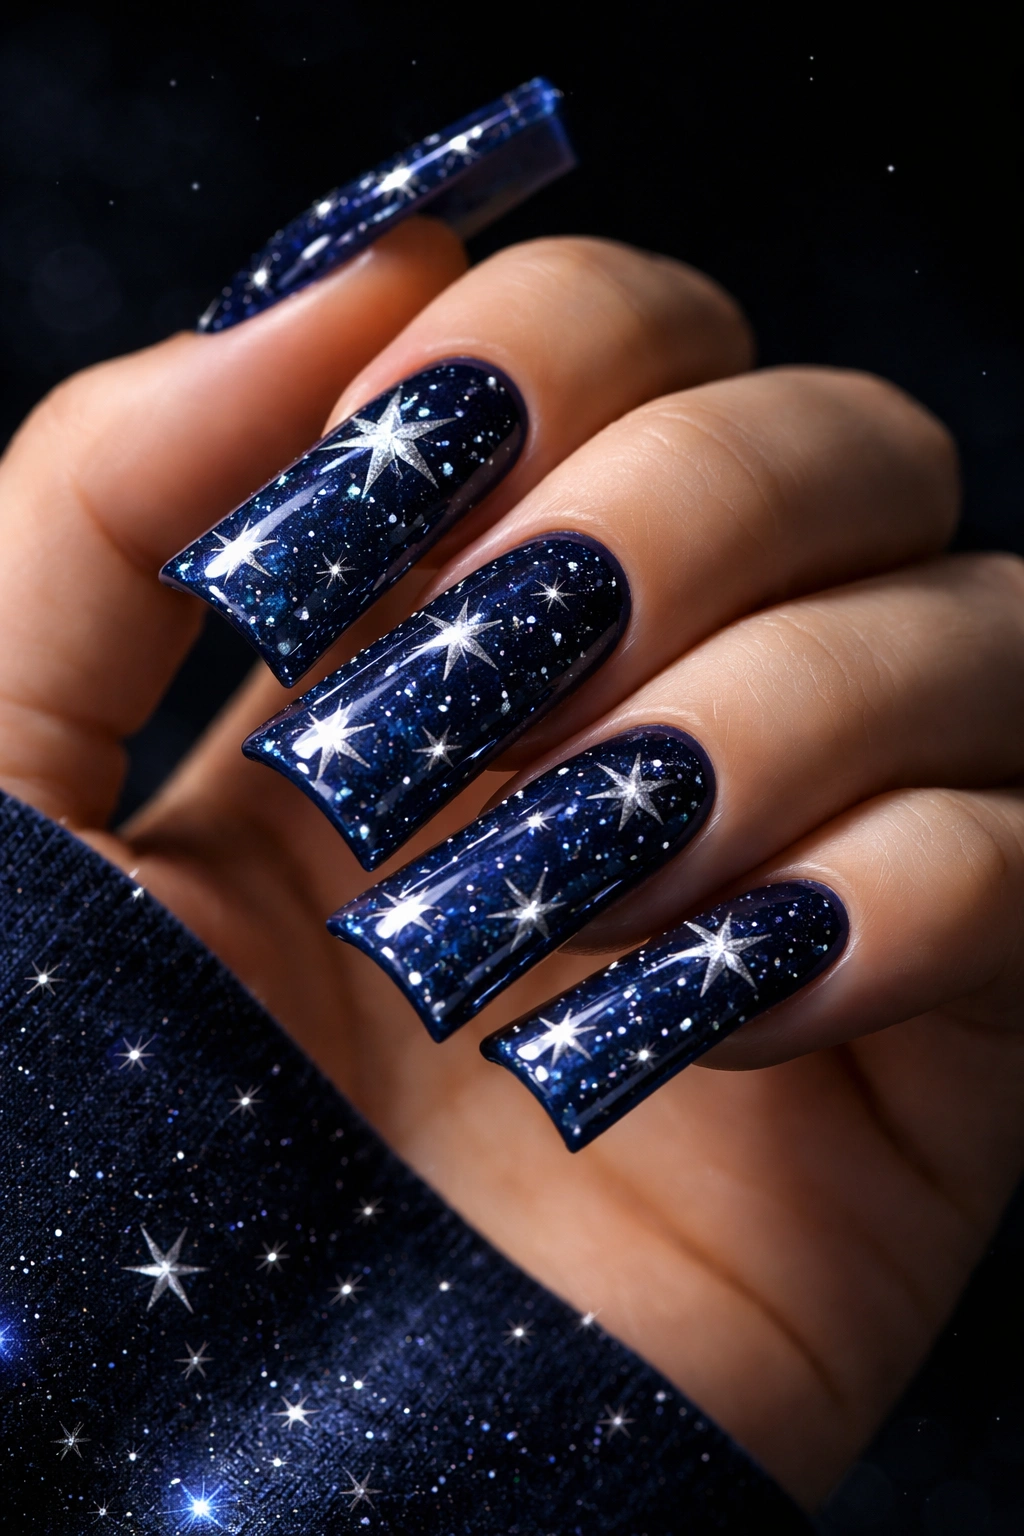
A deep, dark midnight blue base dotted with delicate silver star accents creates a celestial, dreamlike aesthetic that’s whimsical without being childish. Stars scattered across the nail’s surface create movement and visual interest, while the dark base keeps the overall look sophisticated. This design celebrates imagination while maintaining elegance.
Why This Works for Duck Nails
Stars scattered across the generous surface area of duck nails create an intentional, artistic design rather than appearing random. The length allows the stars to be spaced gracefully without clustering. The contrast between the dark base and silver accents creates definition that highlights the nail’s distinctive shape.
How to Achieve This Look
- Apply 2-3 coats of deep midnight blue polish for full opacity
- Once the base is completely dry, use a thin nail art brush and silver gel pen or metallic polish to paint small stars across the nail
- Stars can be simple four-pointed designs, realistic with multiple points, or scattered asterisk-style depending on your skill level and preferred aesthetic
- Vary the size slightly—mixing large and small stars creates more visual depth and interest
- Seal with a glossy top coat
- Keep the star designs relatively small and well-spaced so they don’t overwhelm the design
Variation: Add tiny dots of silver or rhinestones between stars for added sparkle and dimension.
10. Classic Red With Matte Finish
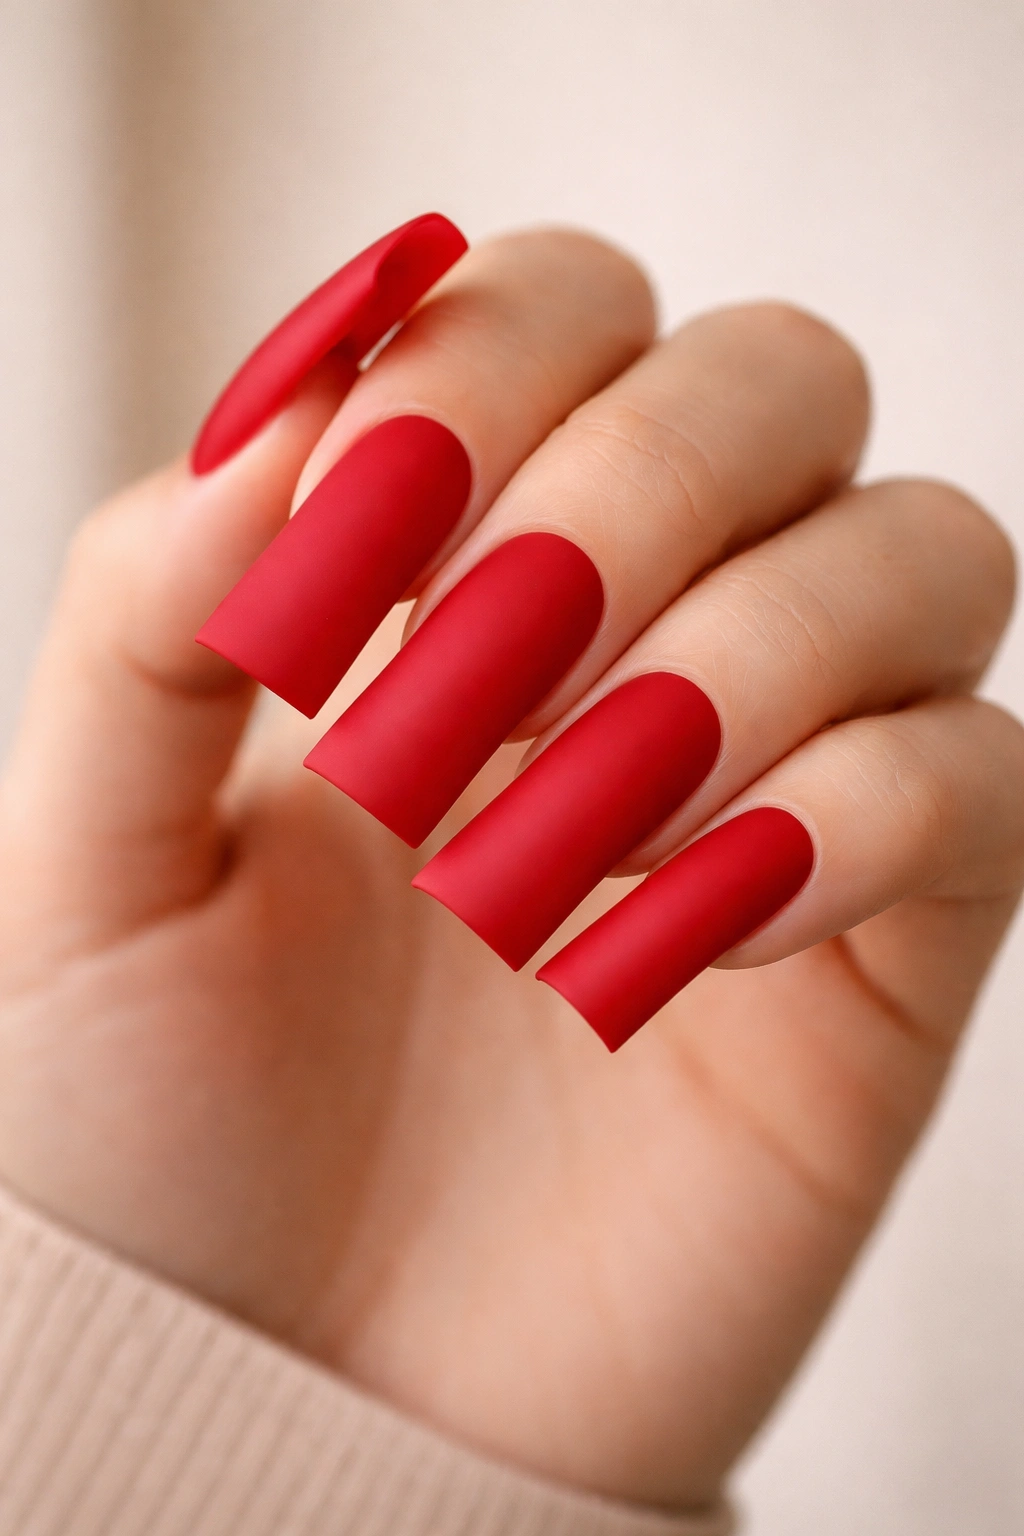
A bold, confident red in a matte finish creates a design that’s simultaneously timeless and modern. The matte texture softens the boldness of the red slightly, preventing it from feeling overly dramatic while still making a clear statement. The duck nail’s length gives the red genuine presence without appearing aggressive or costume-like.
Why This Works for Duck Nails
Red requires confidence and a good surface on which to display it. The duck nail provides exactly that—enough length to show the color boldly, but with an elegant shape that prevents the look from being too heavy-handed. The matte finish adds sophistication that a glossy red might lack.
How to Achieve This Look
- Choose a true red (not orange-leaning or blue-leaning) that complements your skin tone
- Apply 2-3 coats of red gel or regular polish for full, even opacity
- Instead of a glossy top coat, use a matte top coat to create a velvety, sophisticated finish
- Ensure the base is completely smooth and even—imperfections show more clearly on matte finishes
- Keep the nails clean and free of dust before applying matte top coat, as texture is more visible with this finish
Styling suggestion: This timeless design works for any occasion, from professional settings to evening events. It pairs beautifully with gold or silver jewelry.
11. Soft Peachy-Pink With Nude Ombre
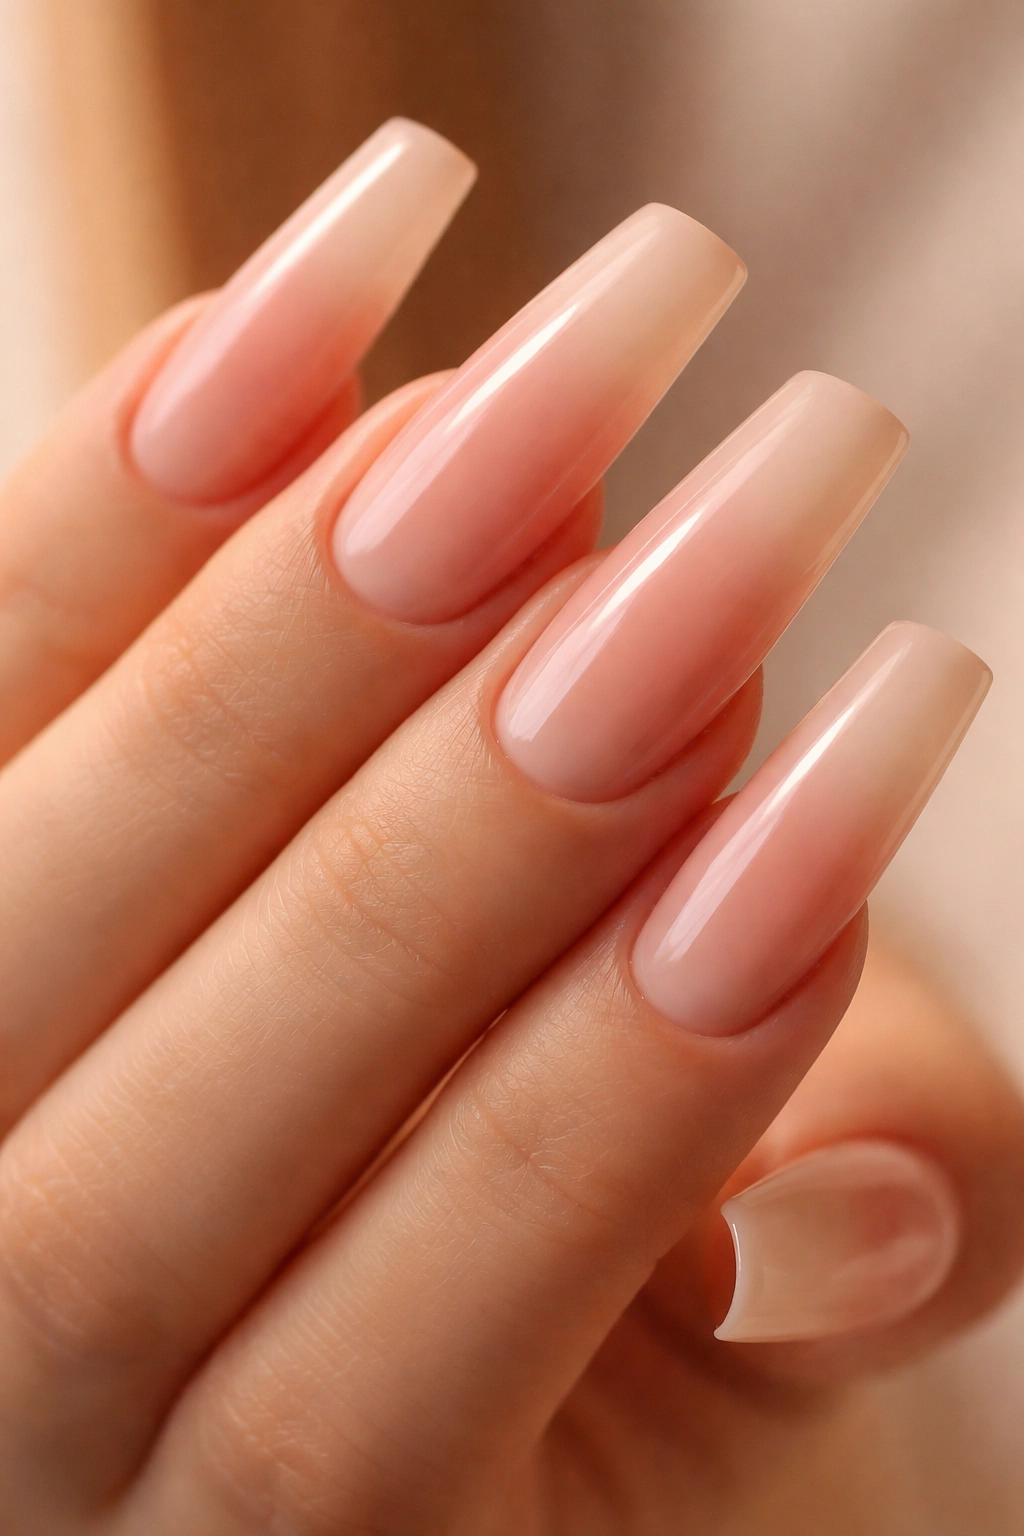
A peachy-pink base that gradually transitions to a warmer, deeper nude at the tips creates a sophisticated ombre that feels both warm and refined. The color progression is subtle enough to appear understated from a distance but reveals interesting dimension upon closer inspection. This design celebrates warmth and flatters most skin tones.
Why This Works for Duck Nails
Warm-toned ombres work beautifully on duck nails because the color transition has space to develop gradually and naturally. The duck nail’s length allows the eye to follow the subtle shift in tone, making the color progression feel intentional and artistic rather than accidental.
How to Achieve This Look
- Apply a soft peachy-pink gel base coat to all nails
- Use a sponge or dry brush with a slightly deeper, more nude-toned pink to blend onto the tips
- Gradually build up the color intensity toward the tips, creating a smooth gradient rather than a distinct line
- Work in thin layers so you can adjust the depth gradually
- The transition should feel natural, almost as though the color is deepening naturally toward the tip
- Seal with a glossy top coat
Best for: Creating a manicure that’s effortlessly elegant and works with virtually any outfit or occasion.
12. White Base With Delicate Floral Line Art
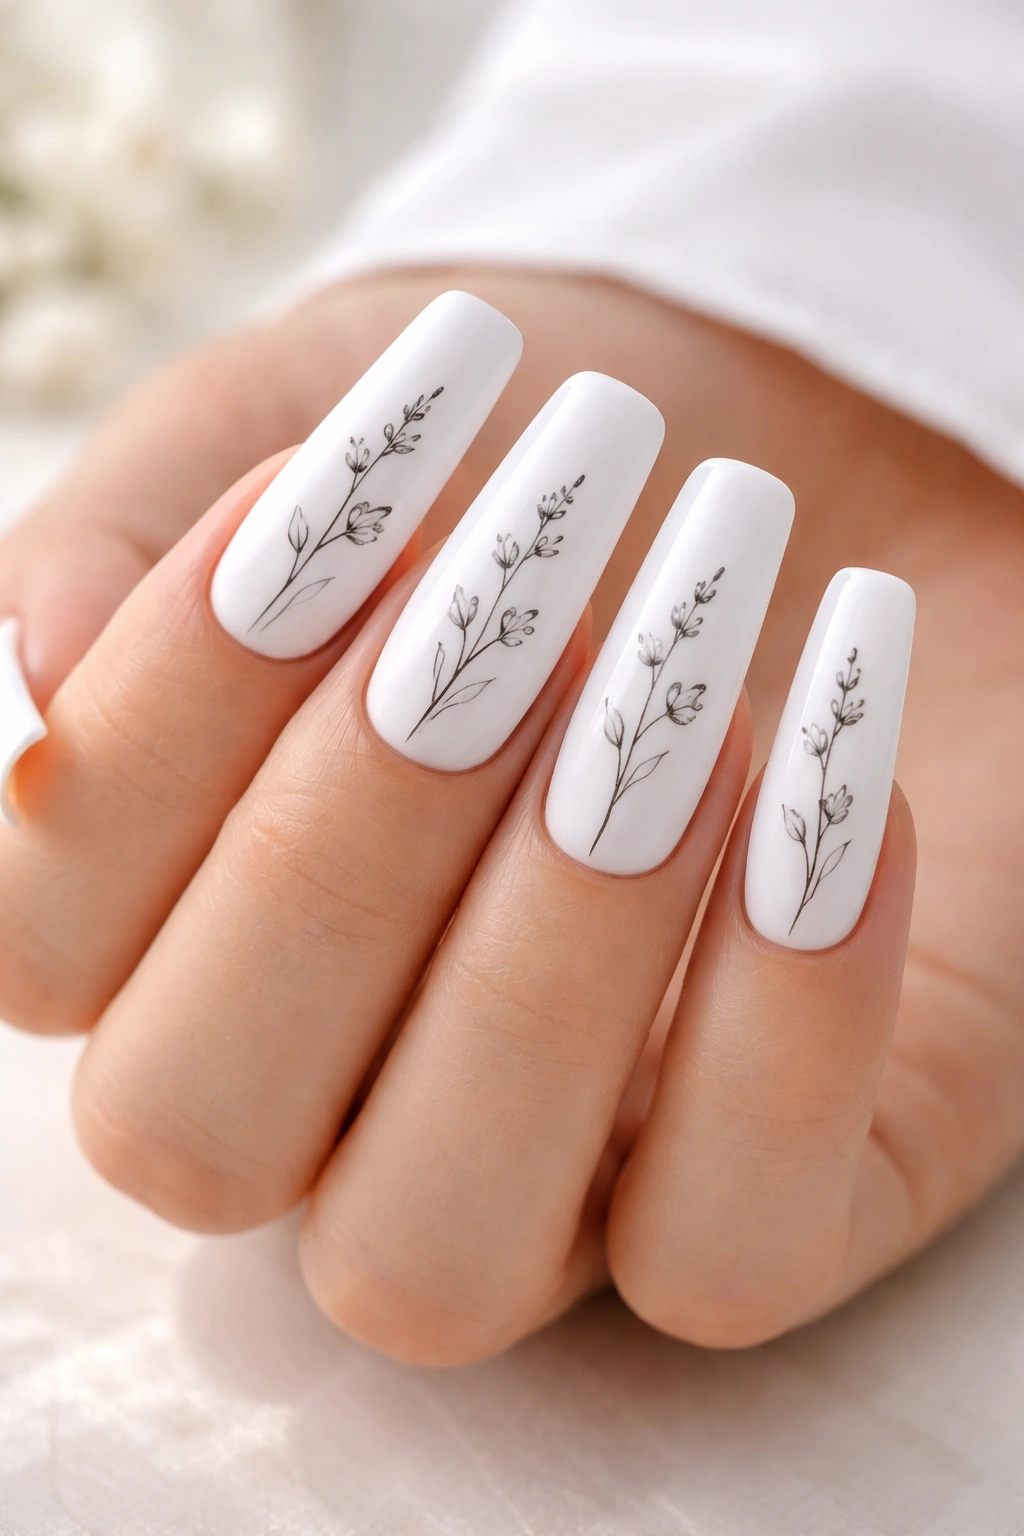
A pristine white base with delicate, minimalist floral line art drawn down one side or the center of the nail creates botanical elegance. The flowers are rendered in thin, single-line style using black, gold, or a complementary color, creating an artistic look that’s not overwrought. This design proves that you don’t need colors or embellishments to create visual impact.
Why This Works for Duck Nails
The duck nail’s length is ideal for showcasing line art designs that would appear cramped on shorter nails. A single delicate flower or vine can flow down the elongated surface, creating a design that feels intentional and curated. The white base keeps the overall look clean and modern while the art adds personality.
How to Achieve This Look
- Apply 2-3 coats of bright white gel or regular polish for a clean, opaque base
- Allow the base to fully cure or dry completely
- Using a thin nail art brush or pen, carefully draw delicate floral designs—think minimalist stems, simple petals, or one-line leaf sketches
- Keep the line work thin and refined; thick lines will overwhelm the design
- Consider the nail’s curve when placing your design, allowing it to follow the natural shape rather than fighting against it
- Seal with a glossy or matte top coat depending on desired finish
Skill level: This design requires some nail art ability, but the minimalist style is forgiving—imperfections add to the hand-drawn aesthetic.
13. Glossy Nude With Holographic Shimmer
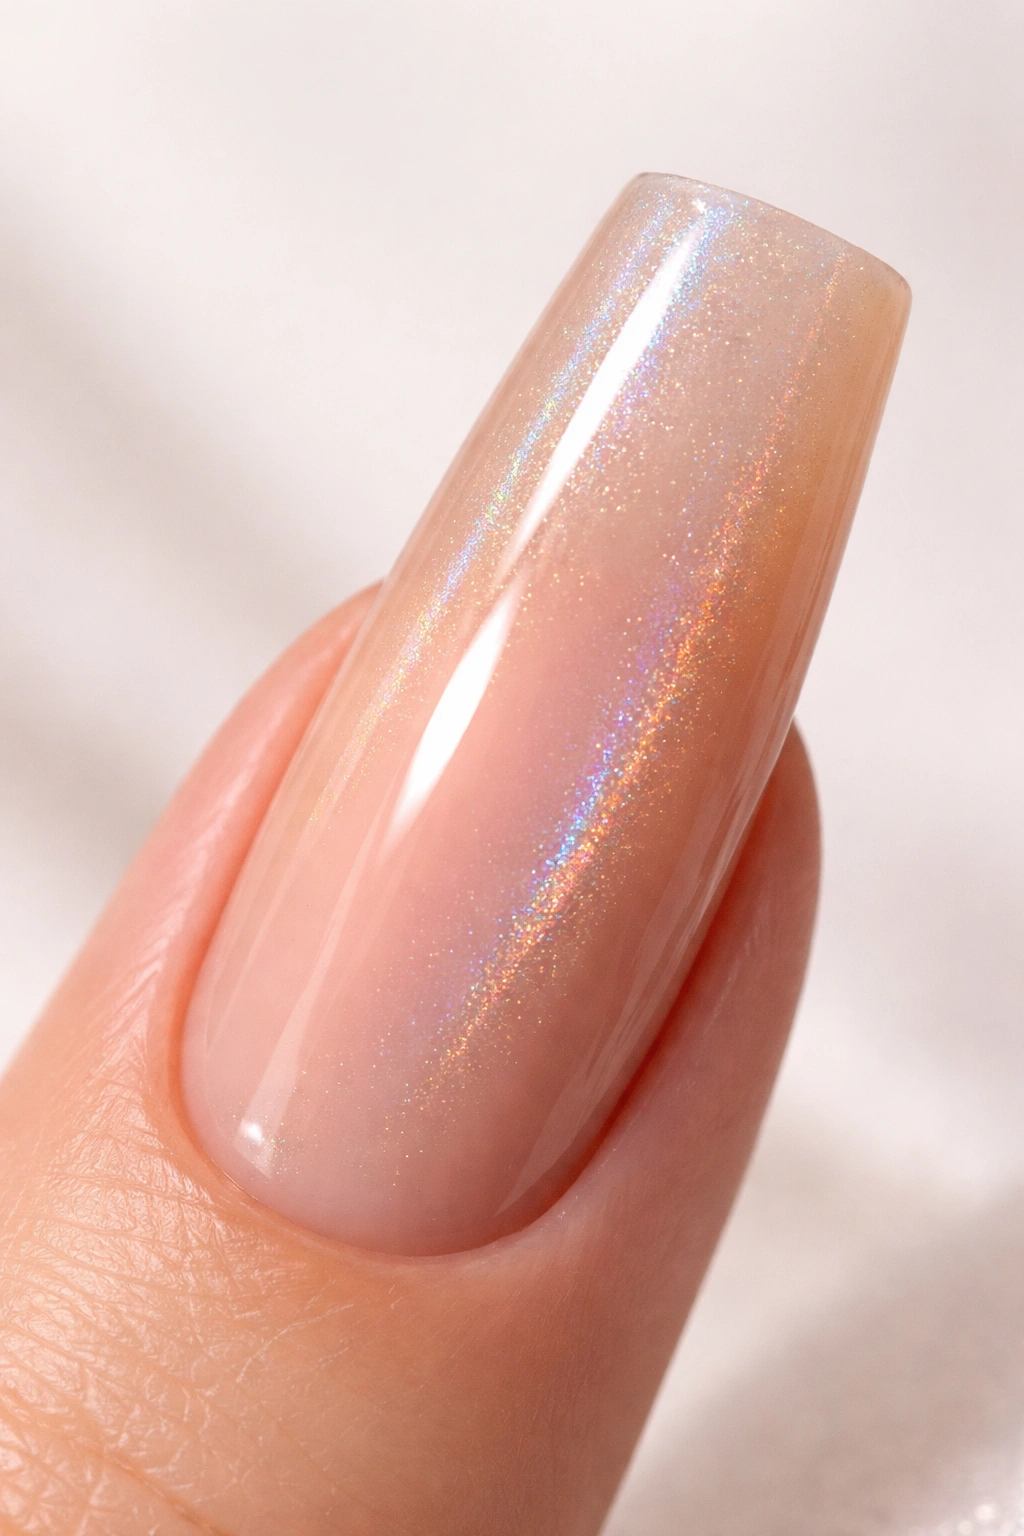
A warm, flattering nude base combined with subtle holographic shimmer throughout creates a design that’s sophisticated with just enough sparkle to feel special. The holographic shimmer catches different colors under different lighting conditions, creating visual interest and movement without being glittery or over-the-top.
Why This Works for Duck Nails
Holographic shimmer works particularly well on elongated nails because it creates movement and depth across the larger surface area. The shimmer becomes more apparent and more striking the longer the nail is, making duck nails the ideal shape to showcase this effect.
How to Achieve This Look
- Select a warm nude shade that complements your skin tone
- Apply 1-2 coats of the nude base
- While the final coat is wet, sprinkle holographic pigment powder across the nail or apply holographic gel/polish directly
- The holographic material will be distributed across the entire nail surface
- Set with a clear top coat to seal the shimmer and create a smooth finish
- The effect will be subtle in regular light and more apparent in bright or direct light
Why it’s versatile: This design works beautifully for both everyday wear and special occasions, maintaining elegance while adding just enough sparkle to feel intentional.
14. Deep Plum With Rose Gold Details

A rich, deep plum base combined with delicate rose gold details creates a design that’s luxurious and slightly more adventurous than standard neutrals. The plum is deep enough to feel sophisticated while remaining approachable, and the rose gold accents add warmth and sparkle without overwhelming the design.
Why This Works for Duck Nails
Jewel tones like plum require enough surface area to look intentional and rich, which the duck nail provides perfectly. The depth of the plum color is flattered by the nail’s length, creating a more impactful, luxurious appearance.
How to Achieve This Look
- Apply 2-3 coats of rich plum gel or regular polish for full opacity
- While the final coat is still tacky (or using nail glue), apply rose gold foil, rhinestones, or paint rose gold accents in your chosen design
- Placement options include a frame around the tip, scattered asymmetrically, or creating a geometric pattern
- The goal is strategic placement rather than covering the entire nail
- Seal with a glossy top coat for a refined, finished appearance
Occasion-appropriate: This design bridges everyday elegance and special-occasion glamour beautifully.
15. Clear With Embedded Pressed Flowers
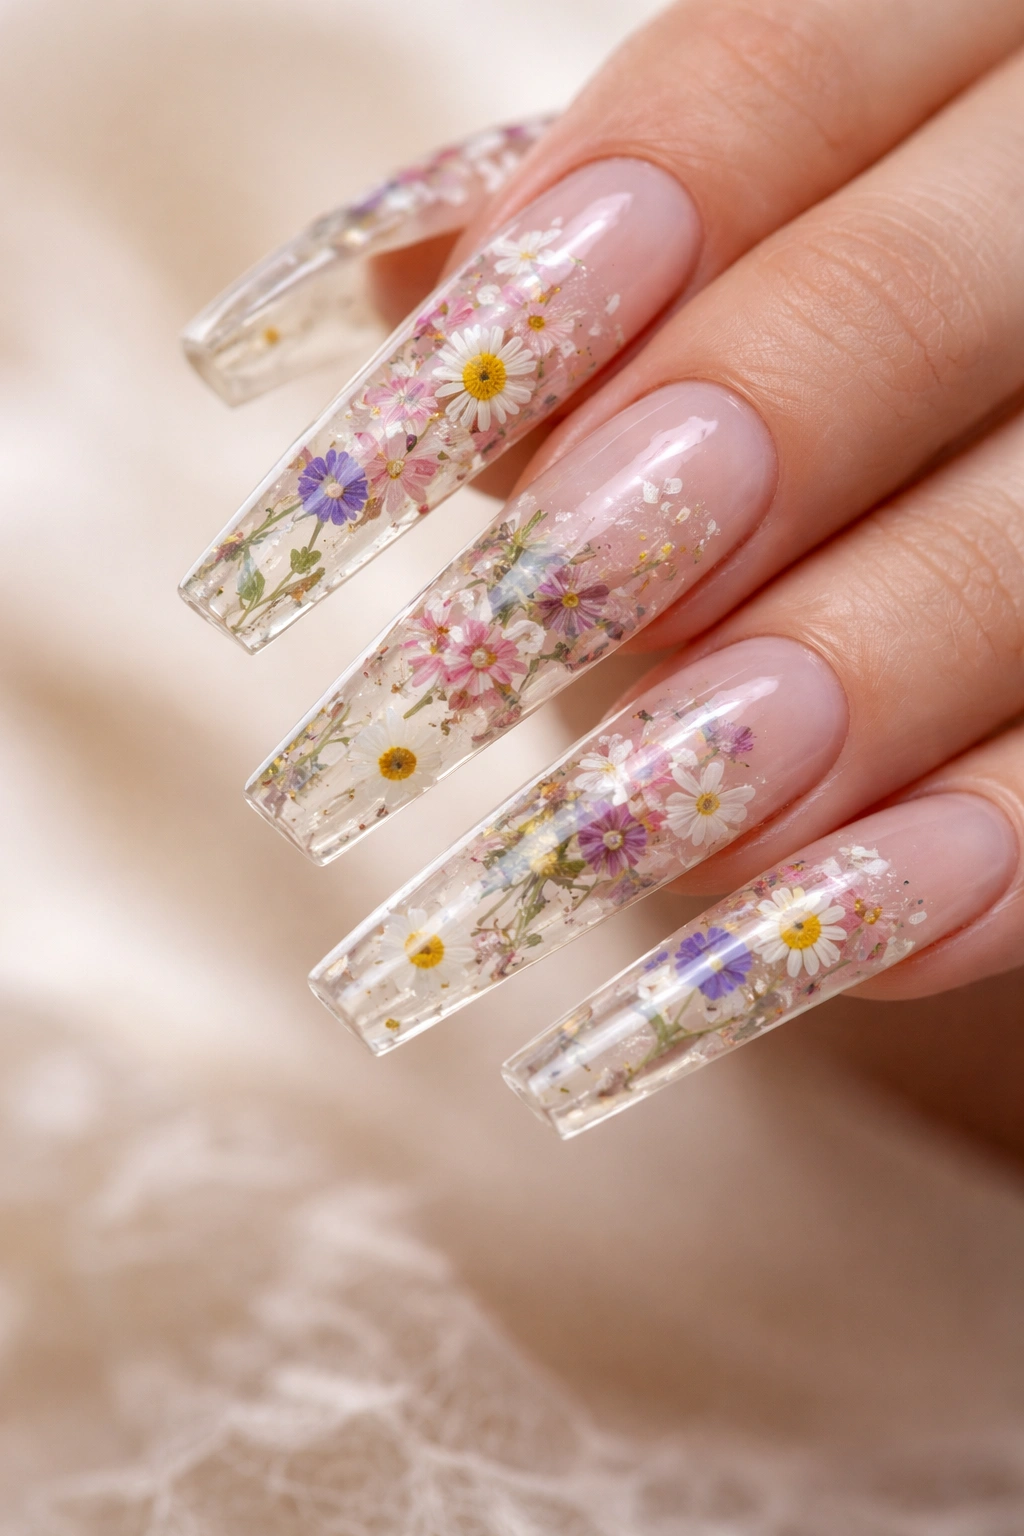
A clear or transparent milky base with genuine or artistic pressed flowers embedded throughout creates a unique, nature-inspired design that’s romantic and artistic. Actual dried flowers or botanical illustrations can be sealed within the gel, creating a design that feels curated and special.
Why This Works for Duck Nails
The transparency of the design allows the duck nail’s shape and the nail bed itself to remain visible, which creates visual interest and prevents the design from appearing too busy. The length of the nail provides room for flowers to be arranged intentionally without clustering.
How to Achieve This Look
- Start with a clear gel base coat or a translucent milky nude
- Carefully place tiny dried flowers or hand-painted floral elements onto the nail while the base is still slightly tacky
- You can source real pressed flowers or create the design using thin watercolor details
- Once positioned, seal with clear gel top coat to encase the flowers and create a smooth surface
- The final result should have a glass-like, encased appearance
Durability note: Ensure flowers are fully sealed to prevent moisture from entering, which would cause discoloration or mold.
16. Soft Grey With Minimalist Chrome
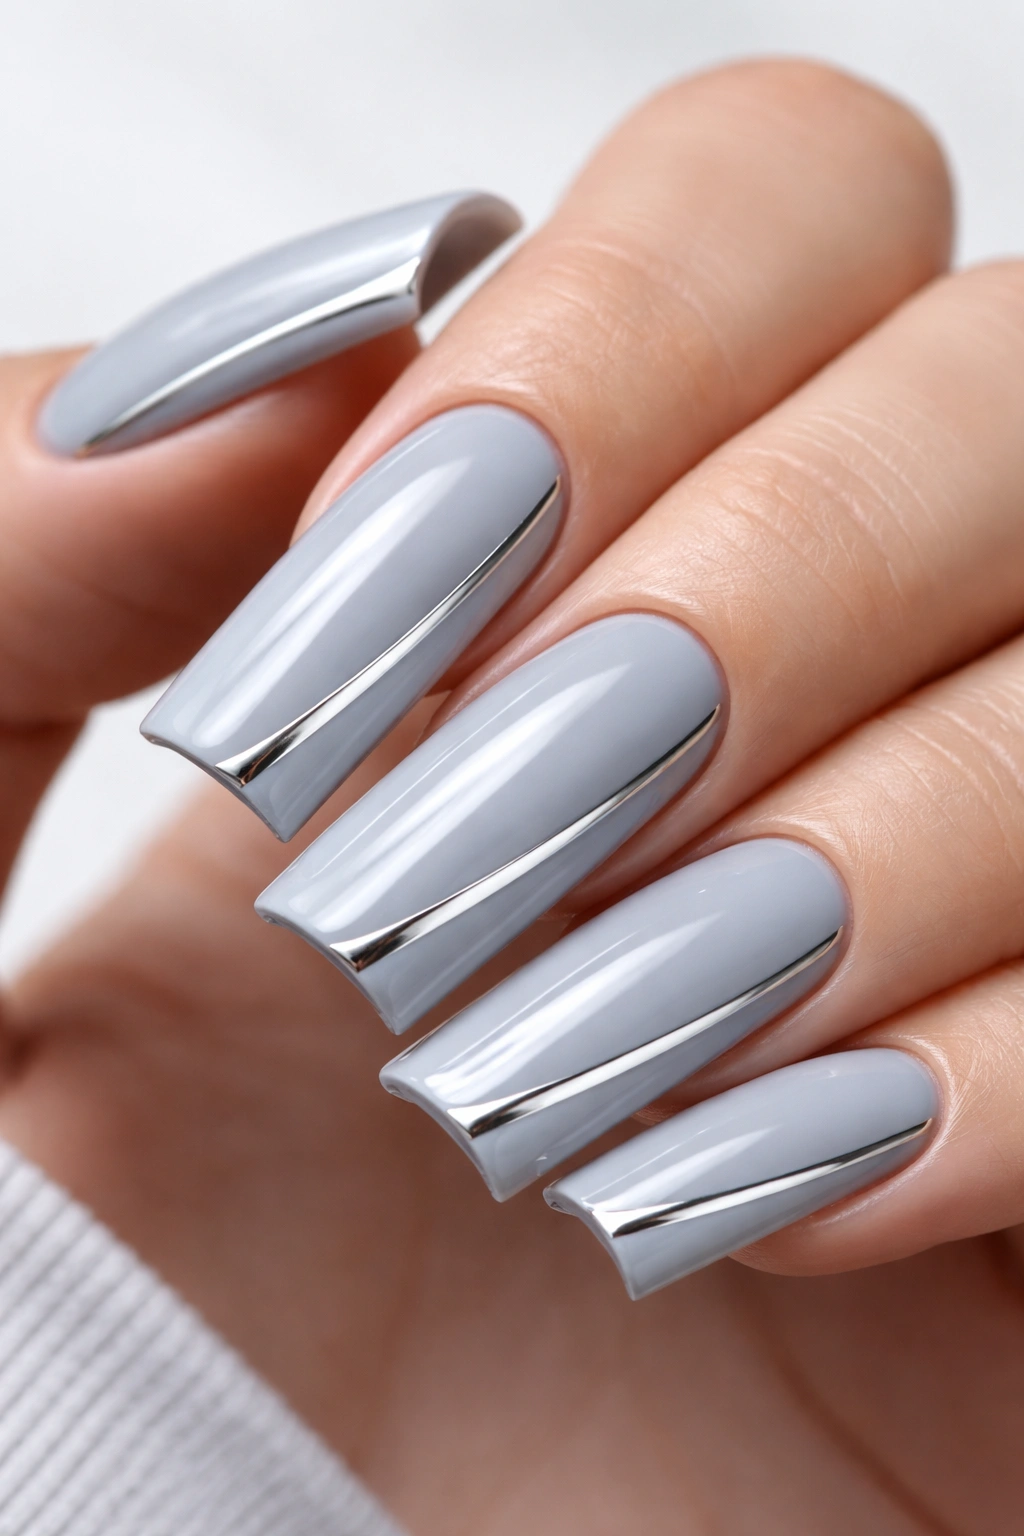
A sophisticated soft grey base paired with minimalist chrome accents creates a design that’s modern, understated, and undeniably elegant. The chrome—whether in a thin stripe down the center or a geometric accent—adds just enough shine to elevate the look without overwhelming it.
Why This Works for Duck Nails
Grey is one of the most versatile colors for elongated nails, as it never appears overwhelming and works beautifully with virtually any outfit. The duck nail’s length allows chrome accents to be placed strategically—perhaps following the nail’s curve or creating a clean geometric line—creating visual flow that guides the eye along the nail.
How to Achieve This Look
- Apply 2-3 coats of soft, cool-toned grey gel or regular polish
- Once the base is fully cured, use a thin brush to apply chrome gel or use chrome powder with a gel base
- Chrome should be applied strategically—perhaps down the center, along the tip, or creating a frame
- The key is keeping the chrome placement minimal and precise
- Seal with a glossy top coat to achieve a smooth, polished appearance
- Chrome reflects light intensely, so even minimal application will have noticeable impact
Best for: Professional settings, minimalist aesthetic enthusiasts, and anyone seeking sophisticated understated elegance.
17. Cream Base With Caramel Swirl
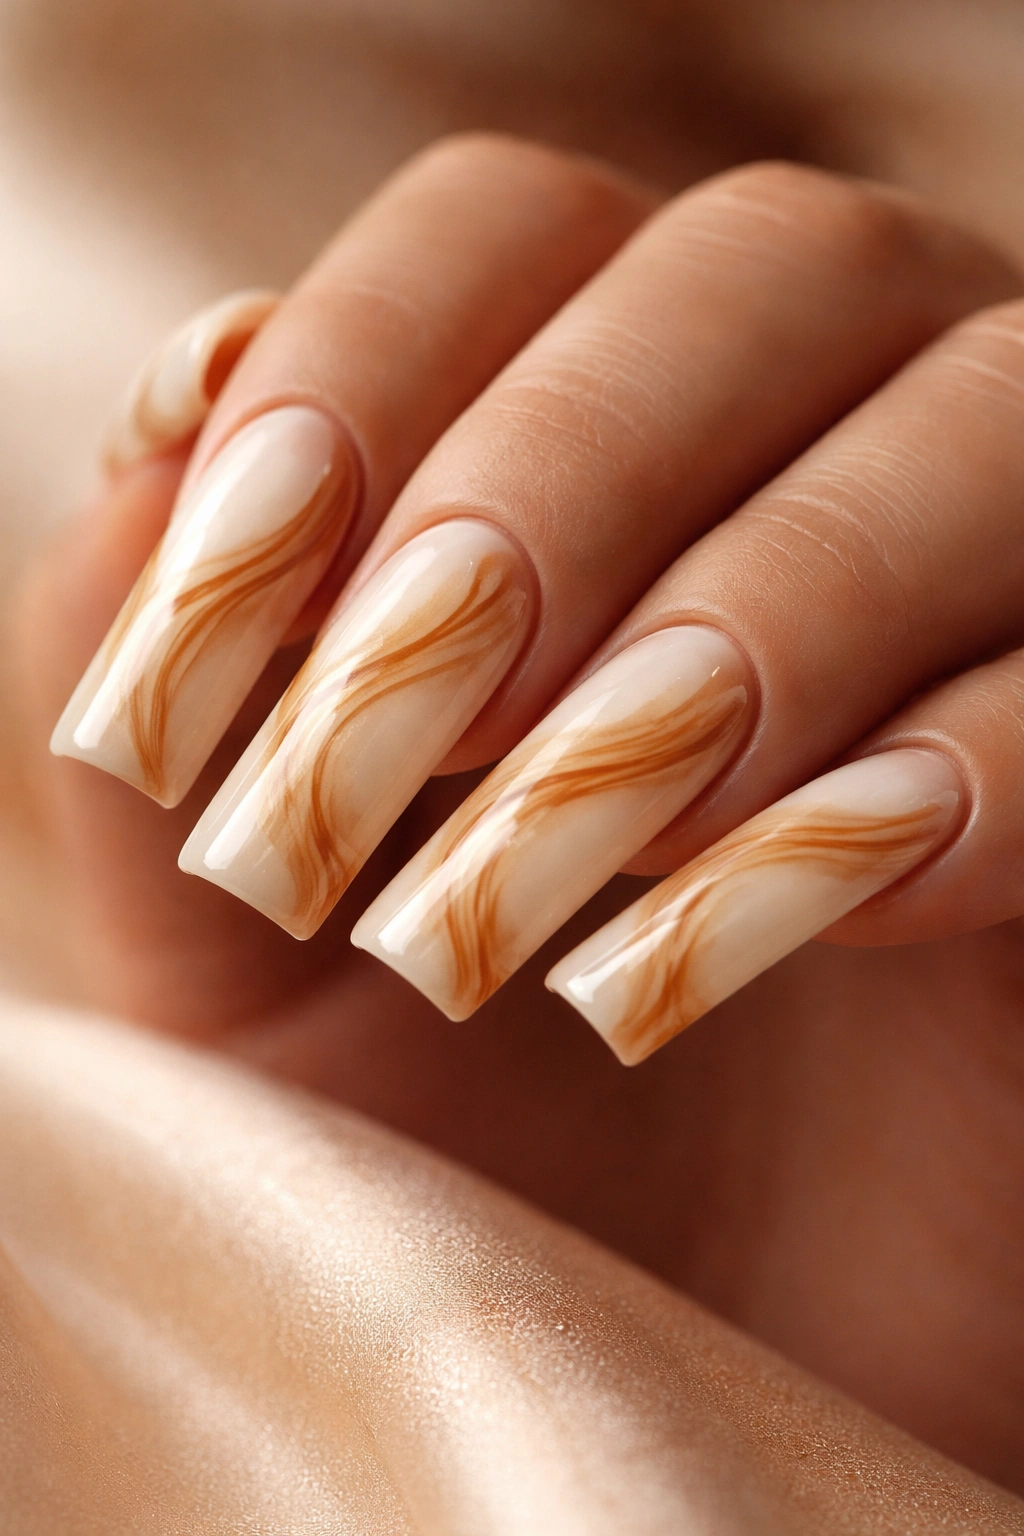
A creamy, soft base combined with caramel-toned swirls creates a warm, organic design reminiscent of marble or natural stone patterns. The swirls flow across the nail naturally, and because they’re warm-toned against a warm base, the effect is cohesive and sophisticated rather than stark or contrasting.
Why This Works for Duck Nails
Warm-toned swirls benefit enormously from the space that duck nails provide. The longer surface allows the swirls to develop and flow naturally without appearing cramped or chaotic. The design has a luxurious, organic quality that complements the nail’s elegant shape.
How to Achieve This Look
- Apply a creamy, pale base coat to all nails
- Once the base is dry, use a thin brush with caramel, honey, or warm brown tones to create organic swirl patterns
- Let the swirls flow naturally—think of them as abstract rather than attempting to create specific patterns
- Vary the line width slightly to create more natural movement
- Blend the swirls gently with a clean brush to ensure they integrate with the base
- Seal with a glossy top coat for a finished appearance
Variation: Use a sponge to blend the swirls more seamlessly for a softer, more unified effect, or keep the brush marks more pronounced for an artistic hand-painted appearance.
18. Ballet Blush With Art Deco Details
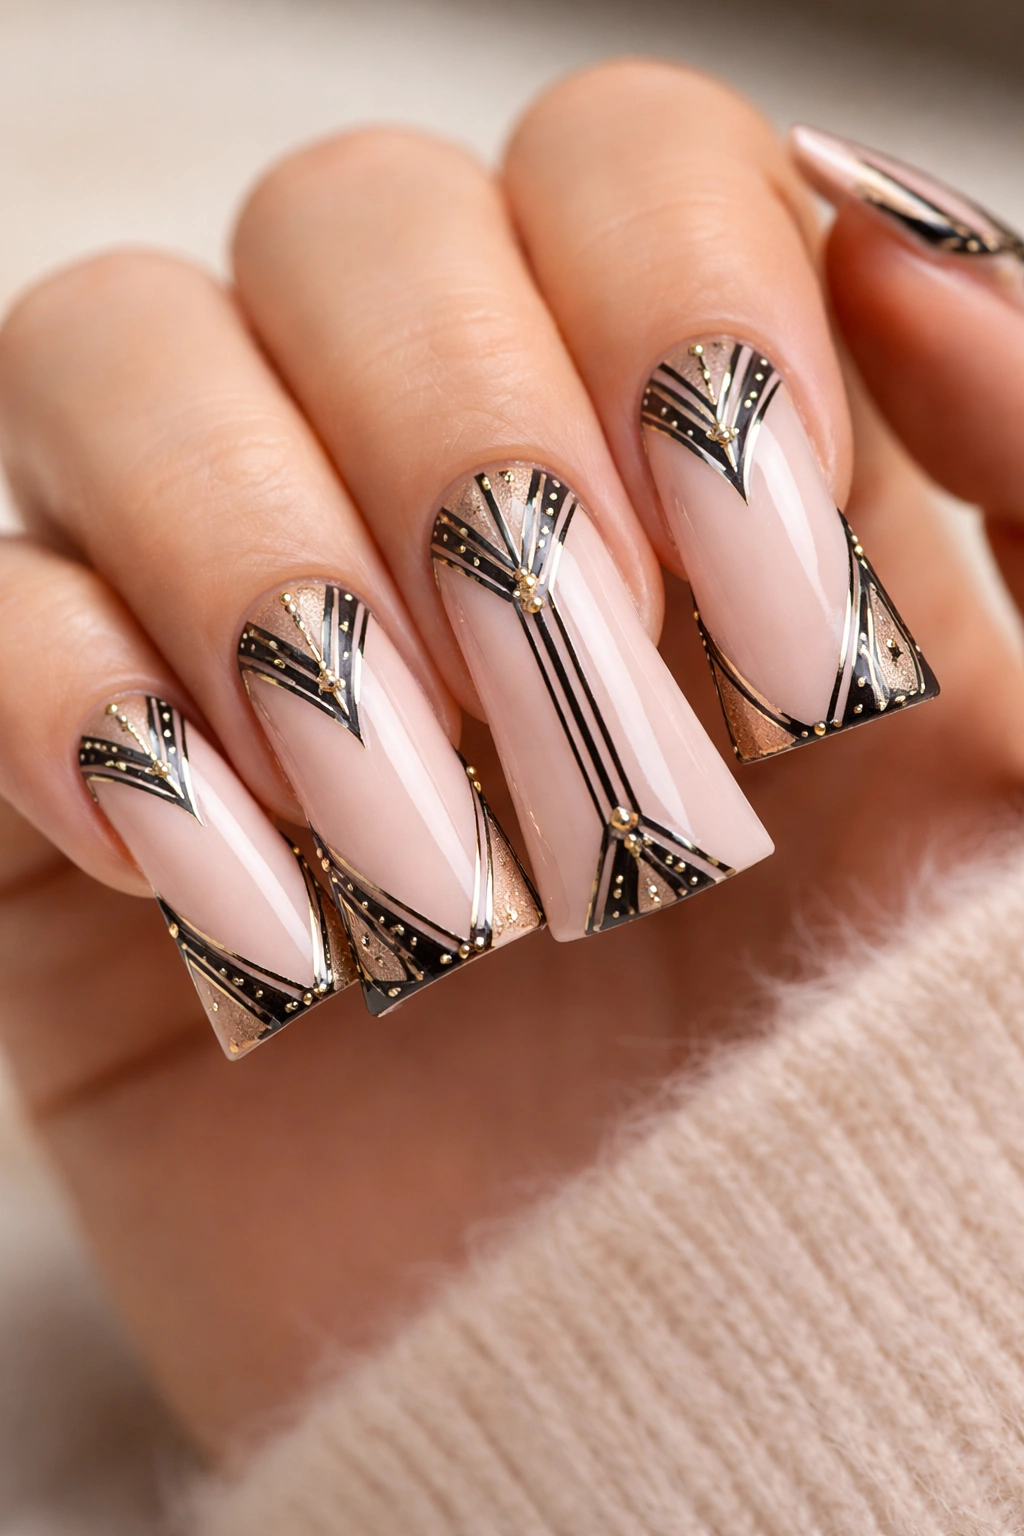
A soft, feminine ballet blush base combined with geometric Art Deco details in black or gold creates a design that’s vintage-inspired yet completely modern. The blush provides a soft, romantic foundation, while the crisp geometric patterns add structure and contemporary edge.
Why This Works for Duck Nails
The contrast between the soft color and geometric patterns is striking on duck nails. The nail’s elegant shape allows these contrasting elements to coexist beautifully. The length provides room for Art Deco patterns to be rendered with detail and precision without appearing cramped.
How to Achieve This Look
- Apply 2-3 coats of soft ballet blush or pale pink base
- Once the base is fully cured, use a fine nail art brush or pen with black or gold polish to create Art Deco geometric patterns—think triangles, chevrons, sunburst designs, or linear patterns
- Keep patterns symmetrical and precise
- Placement options include along the tips, creating a frame, or scattered asymmetrically depending on your preference
- Seal with a glossy top coat for a polished, gallery-like finish
Design inspiration: Look to vintage Art Deco architecture and jewelry for authentic pattern inspiration.
19. Mint Green With Negative Space Circles
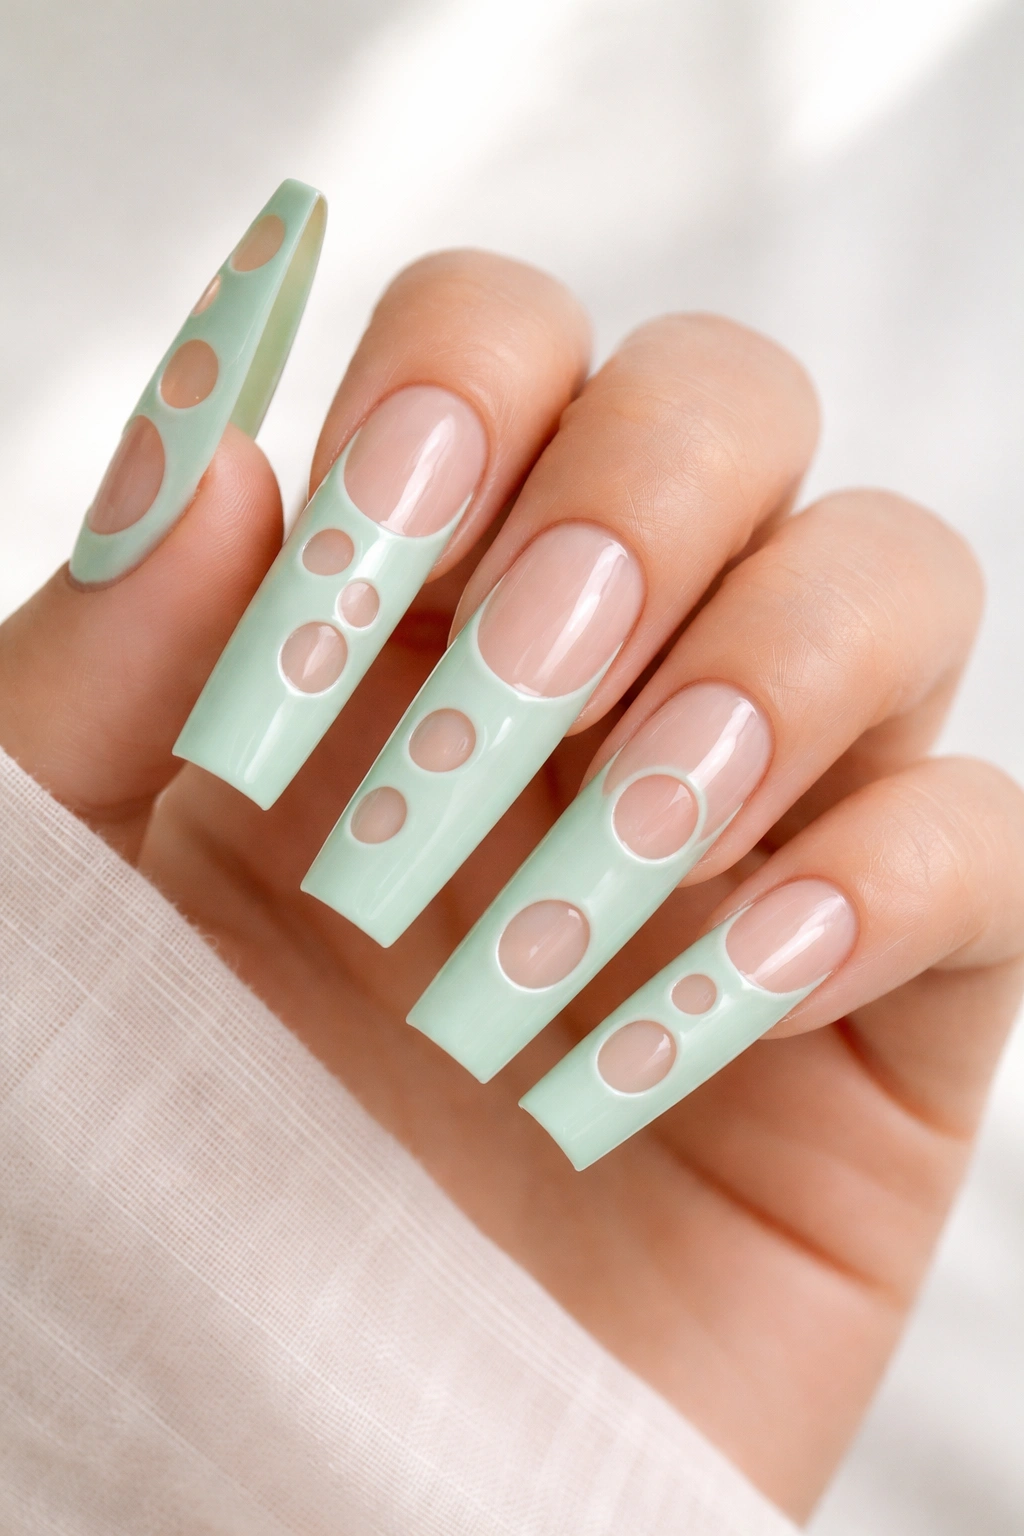
A fresh mint green base with strategic negative space (where the base nail is left bare or shows through) creating circular designs offers a modern, artistic approach. The circles might be uniform or varied in size, arranged in patterns or scattered asymmetrically, creating visual interest through what’s not there as much as what is.
Why This Works for Duck Nails
Negative space designs work beautifully on duck nails because the elongated surface allows patterns to develop across the full length without appearing too busy. The mint green provides a soft, fresh foundation that the negative space designs can play against dramatically.
How to Achieve This Look
- Apply 2-3 coats of fresh, cool-toned mint green base
- Once fully cured, use thin stencils, tape, or freehand your circle designs
- Carefully remove the polish from the marked areas using a thin brush and acetone, or apply gel polish to the areas around where you want the circles to appear, leaving mint showing through
- Circles can be any size—mixing various sizes creates more visual depth
- Clean any rough edges carefully
- Seal with a clear top coat
- The negative space creates visual breathing room that prevents the design from feeling heavy
Variation: Use white base under the mint, so the negative space shows white rather than the actual nail bed, creating higher contrast and bolder definition.
20. Champagne Gold With Diamond French Tips
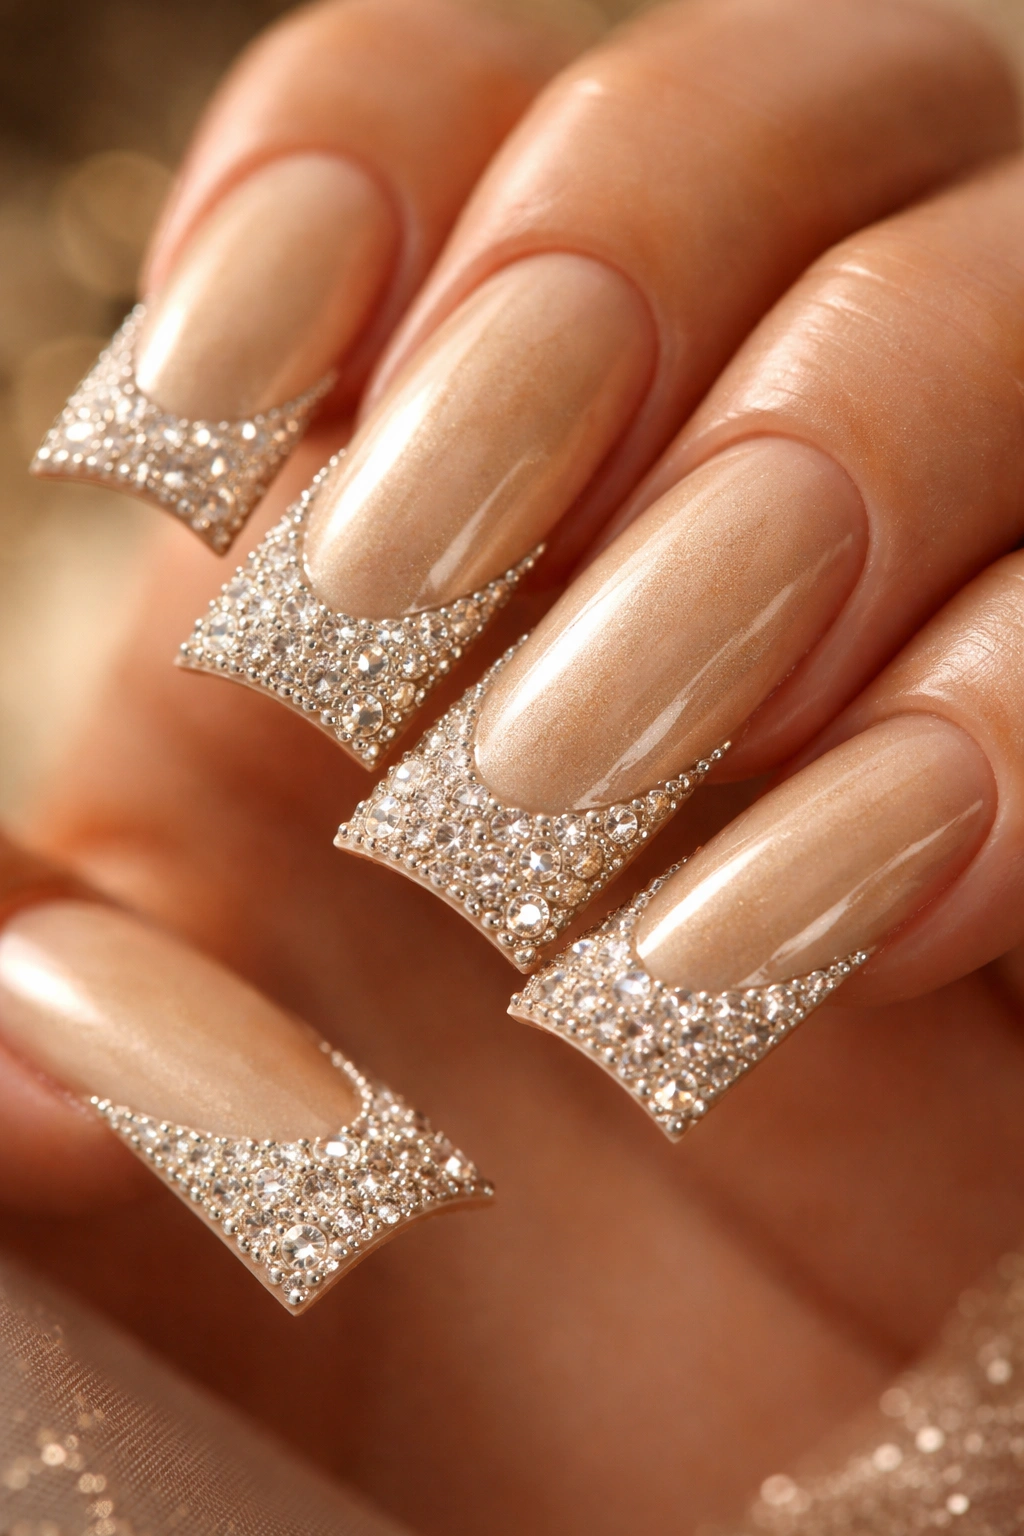
A warm, luxurious champagne gold base combined with delicate diamond-encrusted French tips creates a design that’s inherently celebratory and refined. The champagne gold provides richness and warmth, while the diamond tips add just enough sparkle to catch light and appear special without being costume-like.
Why This Works for Duck Nails
Champagne gold is one of the most flattering colors for elongated nails, as it adds warmth and luxury. The duck nail’s distinctive tip provides a perfect focal point for diamond accents—the natural curve and architecture of the tip is already striking, and diamonds simply enhance that existing beauty.
How to Achieve This Look
- Apply 2-3 coats of rich champagne gold gel or regular polish
- While the final coat is still tacky (or using nail glue), carefully place small diamonds or rhinestones along the tip edge, following the natural curve of the nail
- The diamonds should be spaced close enough to create definition but far enough apart to prevent excessive clustering
- Consider placing slightly larger stones at the center of the tip and smaller ones on either side for a cohesive look
- Seal with a glossy top coat, applying carefully around the stones to avoid displacing them
- High-quality rhinestones make an enormous difference in how luxurious this design appears
Pairing suggestion: This design is perfect for celebrations, date nights, and any occasion when you want your nails to feel elevated and special.
Final Thoughts
Duck nails have become a legitimate design canvas that demands respect and intention. The shape itself is architectural and elegant, which means whatever design you choose will be magnified and put on display. The beauty of the options above is their versatility—whether you’re drawn to minimalist restraint or bold statement-making, there’s a duck nail design that speaks to your aesthetic.
The most successful duck nail designs share a common thread: they work with the nail’s distinctive shape rather than fighting against it. They take advantage of the generous surface area without overwhelming it, and they maintain a sense of balance and intention that transforms the nails from simply long into genuinely elegant.
Your choice in duck nail design communicates something about how you see yourself—whether that’s classic and refined, artistic and creative, bold and confident, or soft and romantic. The shape gives you permission to express all of those things simultaneously. Take your time choosing a design that genuinely speaks to you, and don’t feel pressure to match what’s trending if it doesn’t align with your personal aesthetic. The most beautiful manicures are the ones where the wearer feels completely comfortable and authentically themselves, and duck nails provide the perfect foundation for exactly that.
