

Duck nails might seem like a niche trend, but they’re actually one of the most fun and approachable nail art ideas for kids. Whether your child loves rubber duckies, enjoys watching ducks at the pond, or just thinks feathered friends are adorable, duck nail designs offer endless creative possibilities that don’t require professional-level skills. The beauty of duck nails for kids is that they can range from super simple (a few painted dots and lines) to more detailed artistic scenes, making them flexible for different ages and nail art experience levels.
What makes duck nail designs especially great for kids is that they’re inherently playful and forgiving. Ducks are naturally cute and expressive, which means even if the proportions aren’t perfect or the colors aren’t exactly matching, the final result still looks intentional and charming. Kids love the whimsy of it, and parents appreciate that this is a fun creative activity that can be done at home with basic nail supplies. The designs work beautifully on both short, practical nails and longer nails, so there’s no need to worry about nail length being a limiting factor.
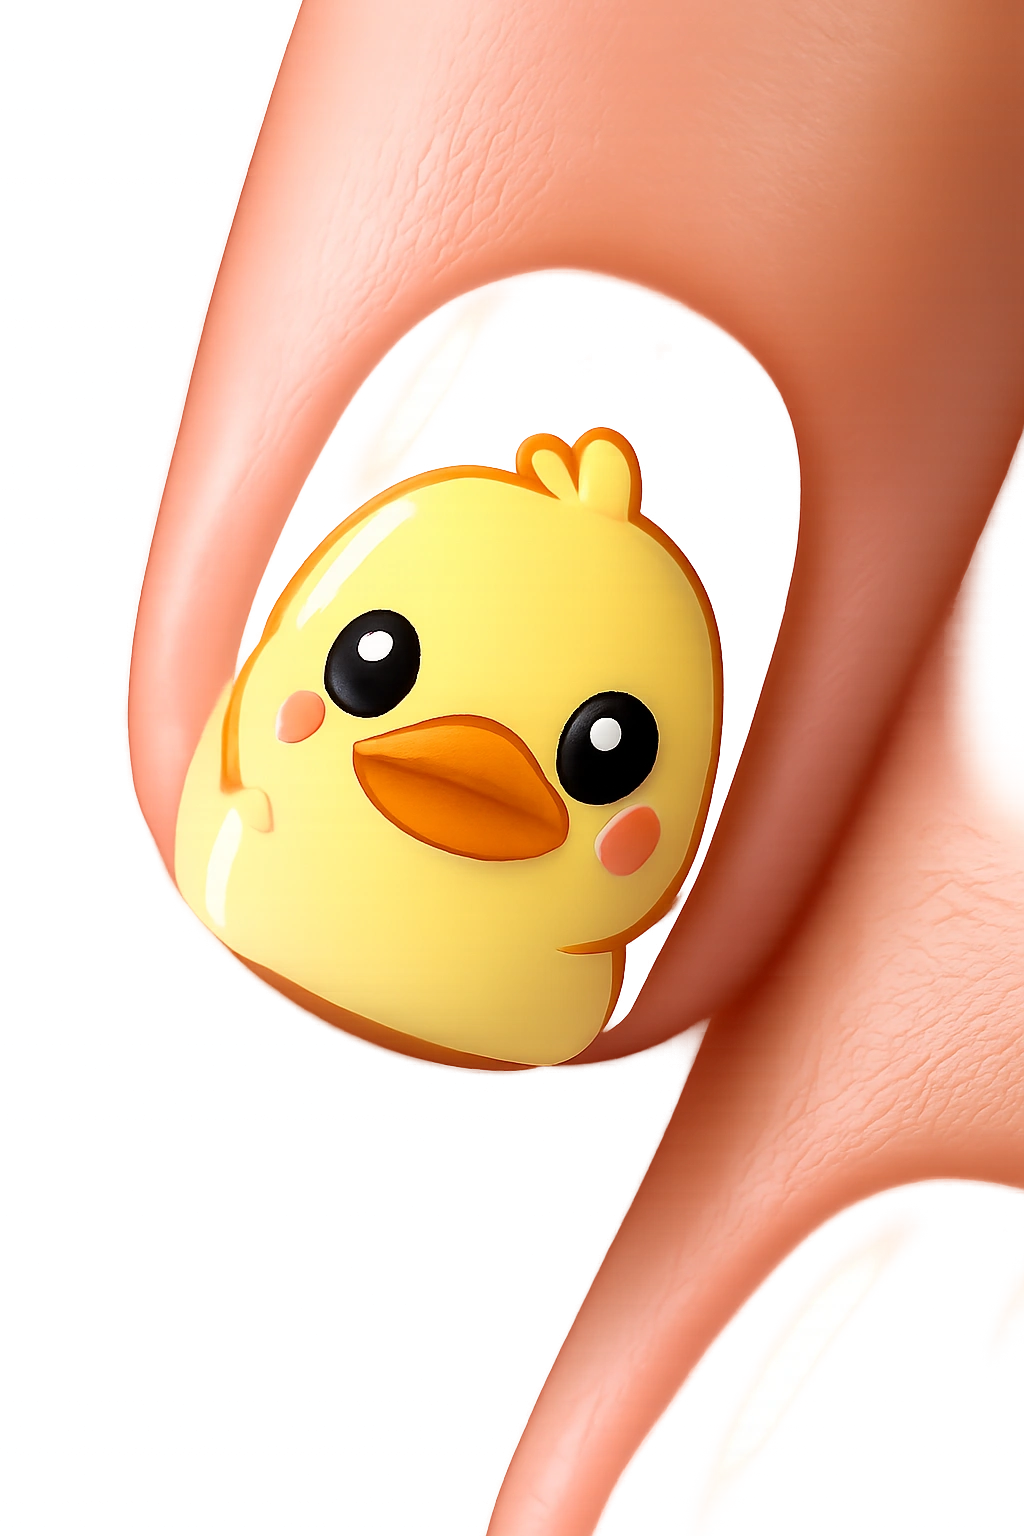
1. Classic Yellow Duck Heads
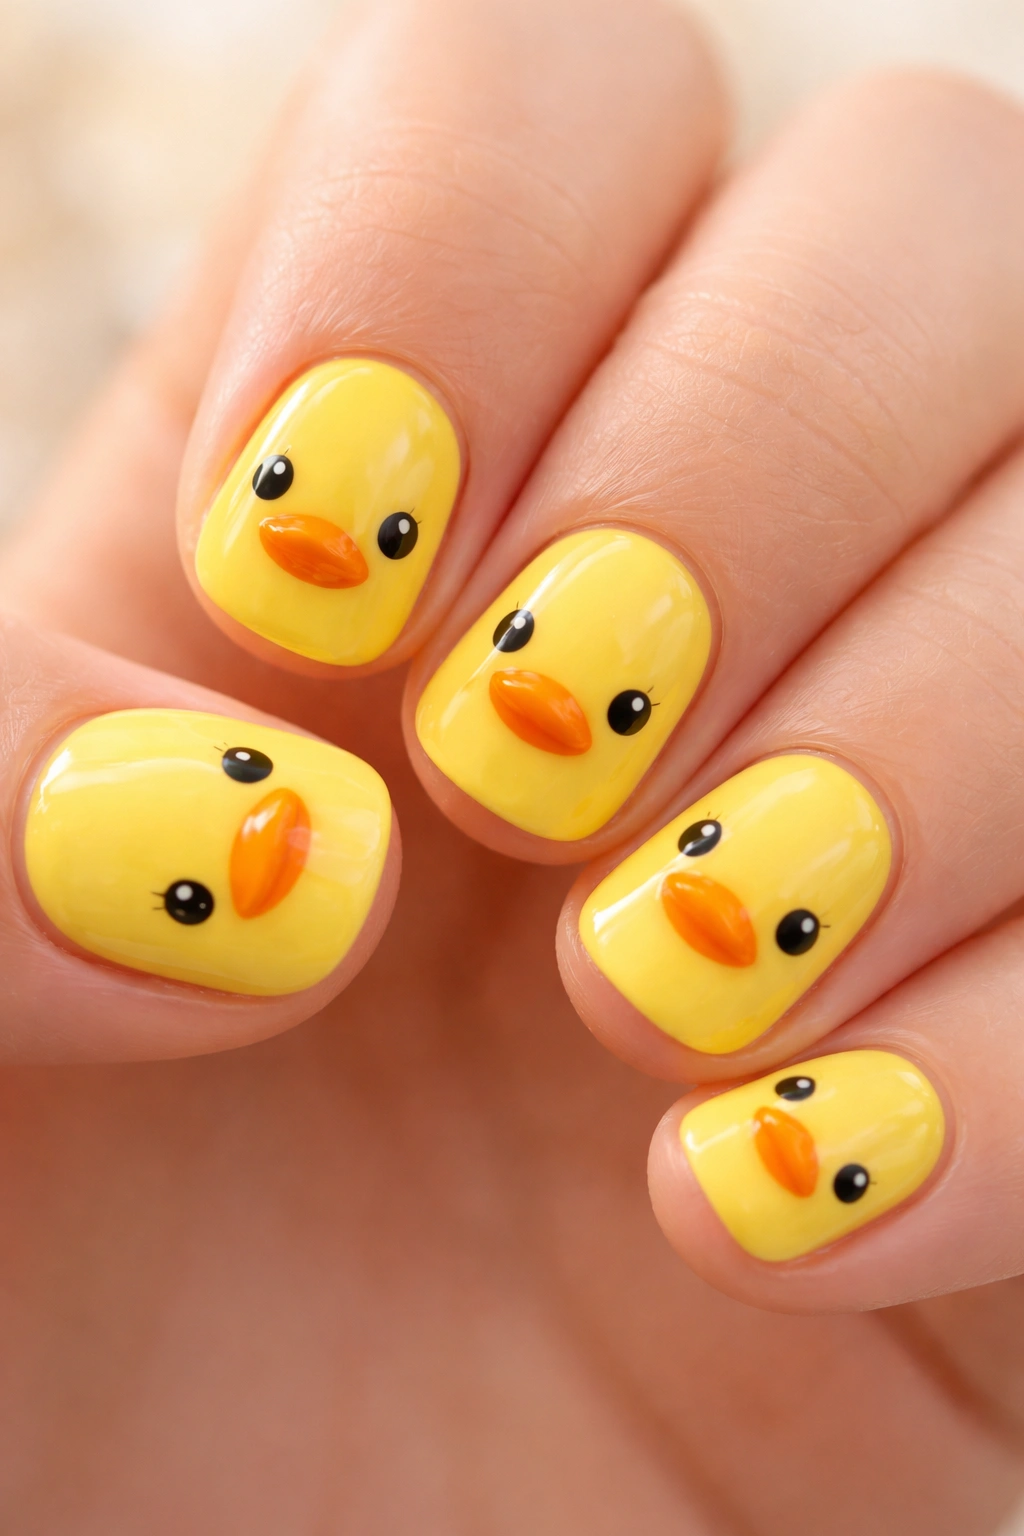
Bright yellow duck heads are the quintessential duck nail design—simple enough for young kids to help paint, yet striking enough to look polished and complete. You’re painting a small yellow oval or circle on each nail, then adding an orange beak, two tiny black eyes, and a little curved line for the duck’s smiling expression. The warmth of the yellow against most skin tones makes this design universally flattering, and it works beautifully on kids of any age.
Why Kids Love This Design
Young children especially gravitate toward this one because it’s recognizable instantly. The cheerful yellow feels celebratory without being over-the-top, and the duck’s expression can be customized to look happy, curious, or sleepy depending on how you angle the eyes and mouth. It’s the kind of design that sparks conversations—other kids will immediately ask what the nails are supposed to be, which gives your child the chance to proudly explain their cute duck design.
How to Create It
- Use a small dotting tool or the end of a bobby pin to place two tiny black dots for the eyes
- Paint a small orange triangle or teardrop shape pointing outward for the beak
- Add a gentle curved line or tiny smile below the beak with black or dark brown polish
- Seal everything with a glossy topcoat so the design stays bright and cheerful
Pro tip: If the yellow polish feels thin on the first coat, apply a second coat before moving to the details. Yellow can be tricky to get fully opaque, but two coats will ensure the ducks pop against the nail base.
2. Rubber Ducky Bath Time Theme
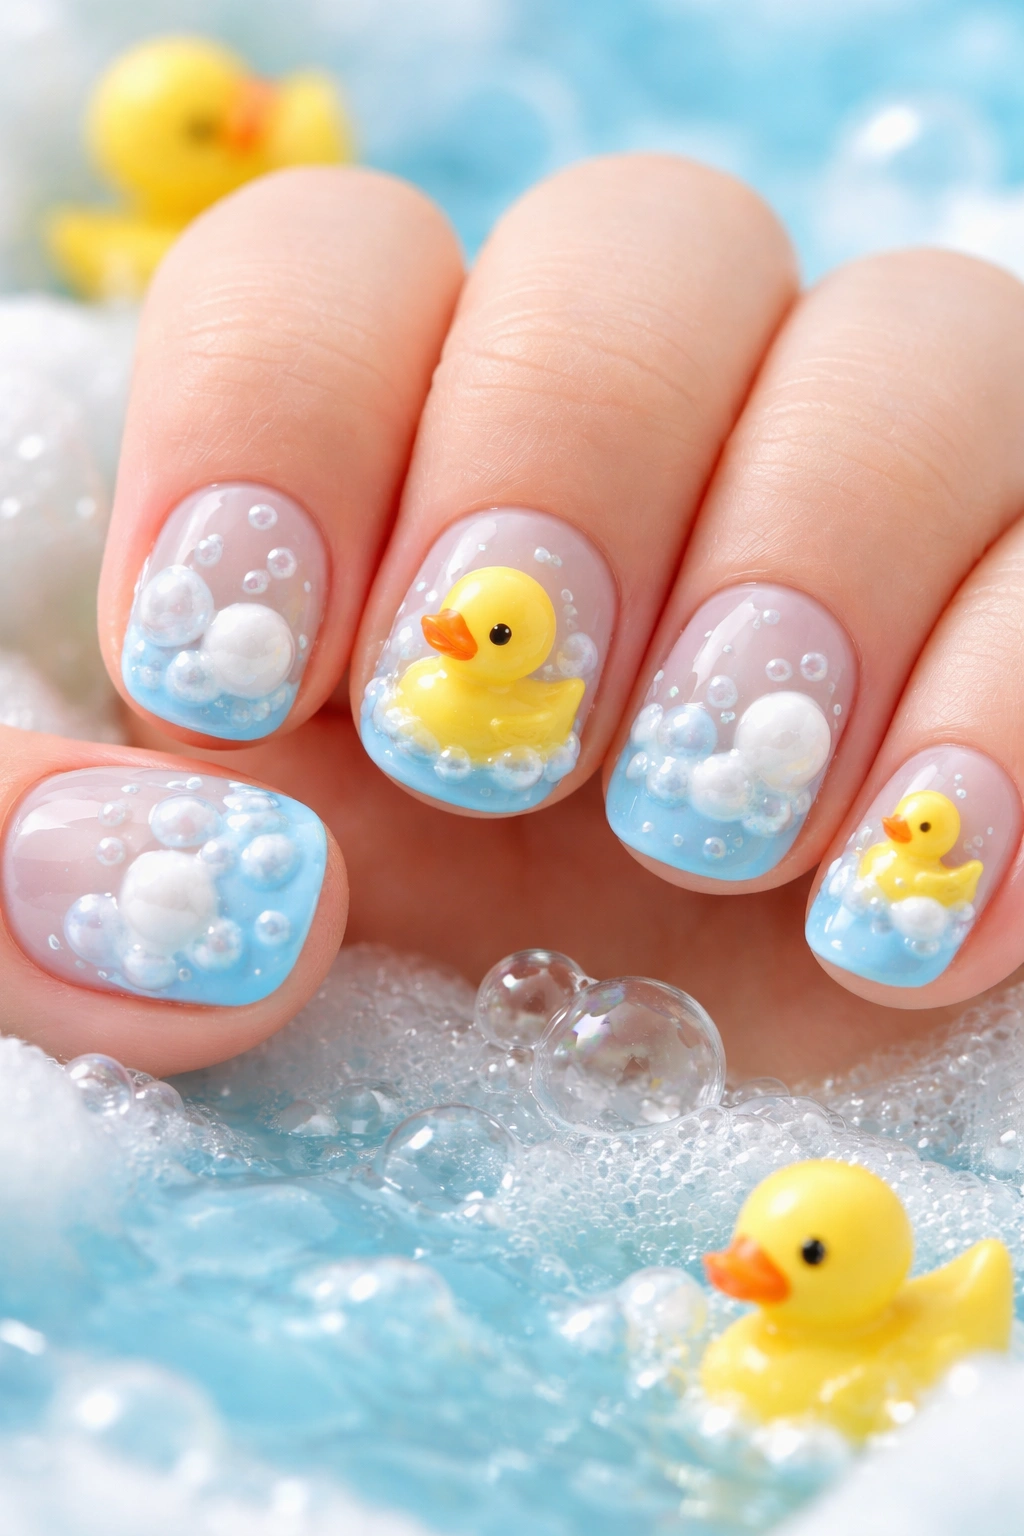
Transform nails into a miniature bathroom scene complete with rubber duckies, bubbles, and bath time vibes. This design works beautifully on kids who love bath time or are working on getting comfortable with the water. You can paint each nail as a different moment of the bath scene—one nail shows the duck floating, another shows bubbles rising, and so on. Using soft blues, whites, and pops of bright yellow creates the perfect playful bath aesthetic.
What Makes This Design Special
Rubber ducky bath time nails tap into pure childhood nostalgia and joy. There’s something inherently comforting about bath-themed nail art, especially for younger kids. The design gives you room to include little story-telling details—maybe a rubber ducky wearing sunglasses, or a duck surrounded by colorful bubbles. This isn’t just nail art; it’s a tiny narrative your child gets to wear on their fingertips.
Design Elements to Include
- Soft light blue background to represent bathwater
- Bright yellow duck bodies (round or oval shapes work great)
- White circles of varying sizes for bubbles
- Optional: tiny details like duck eyes, a shower head on one nail, or a washcloth
- Pale pink or white highlights on bubbles to make them look dimensional
Worth knowing: This design actually photographs really well because the blues and whites have nice contrast. If your child likes taking pictures of their nails to show friends or post on family chat, this one looks especially cute in photos.
3. Duck Family Scene
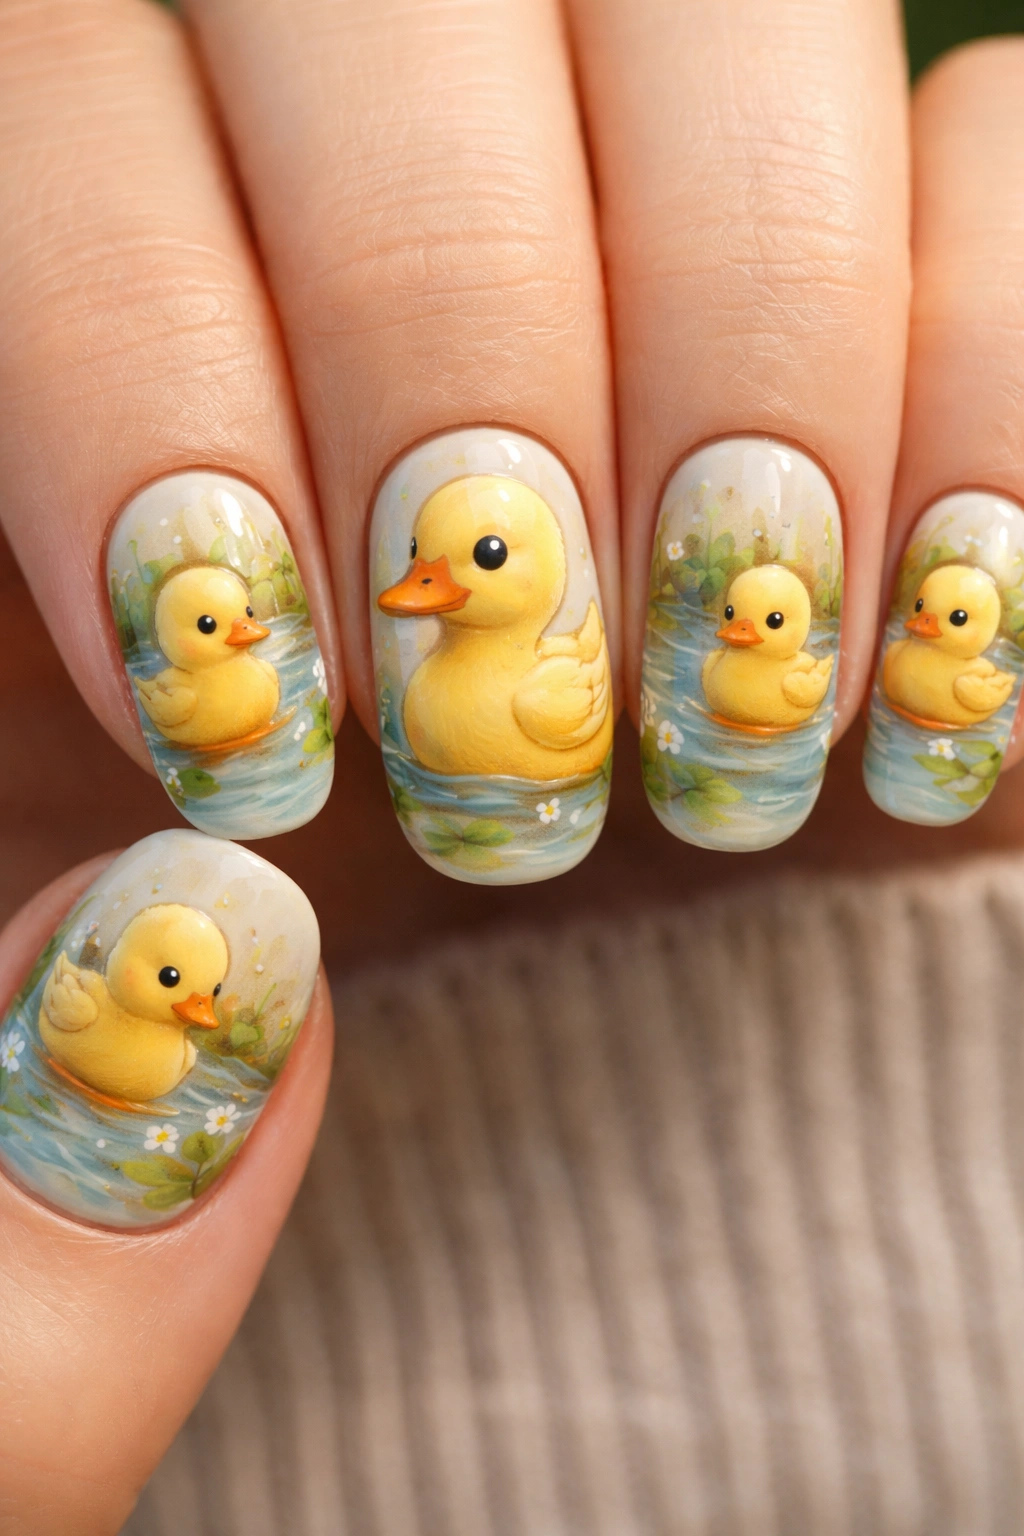
Create a heartwarming scene featuring a mama duck with her ducklings. You can spread the family across multiple nails—perhaps the mama duck on the middle finger and babies on the nails on either side. This design teaches kids about family while creating something genuinely sweet. Mama duck can be slightly larger with a more detailed face, while the babies can be tinier and simpler, all rendered in the same warm yellows and oranges.
Why This Design Resonates with Kids
Family-themed nail art has special meaning for children. They see themselves as part of a family unit, and seeing that reflected in their nail design makes it feel personal and meaningful. The mama duck protecting her ducklings also creates a gentle narrative about care and belonging that kids intuitively respond to. It’s the kind of design that makes a child smile every time they look at their hands.
Creating the Family Dynamic
- Paint mama duck slightly larger with more detail—eyes, a fuller body, maybe a longer neck
- Paint babies on other nails as simpler, rounder shapes clustered near the mama
- Use the same yellow and orange palette to unify the family
- Add tiny green lily pads or blue water beneath them to create a complete pond scene
- Optional: paint grass or cattails along the nail edges to ground the scene
Insider note: Kids often want to name each duck in their family scene. Encouraging this creative element makes the design even more meaningful and gives your child something fun to talk about when people notice and compliment their nails.
4. Golden Duck Silhouettes
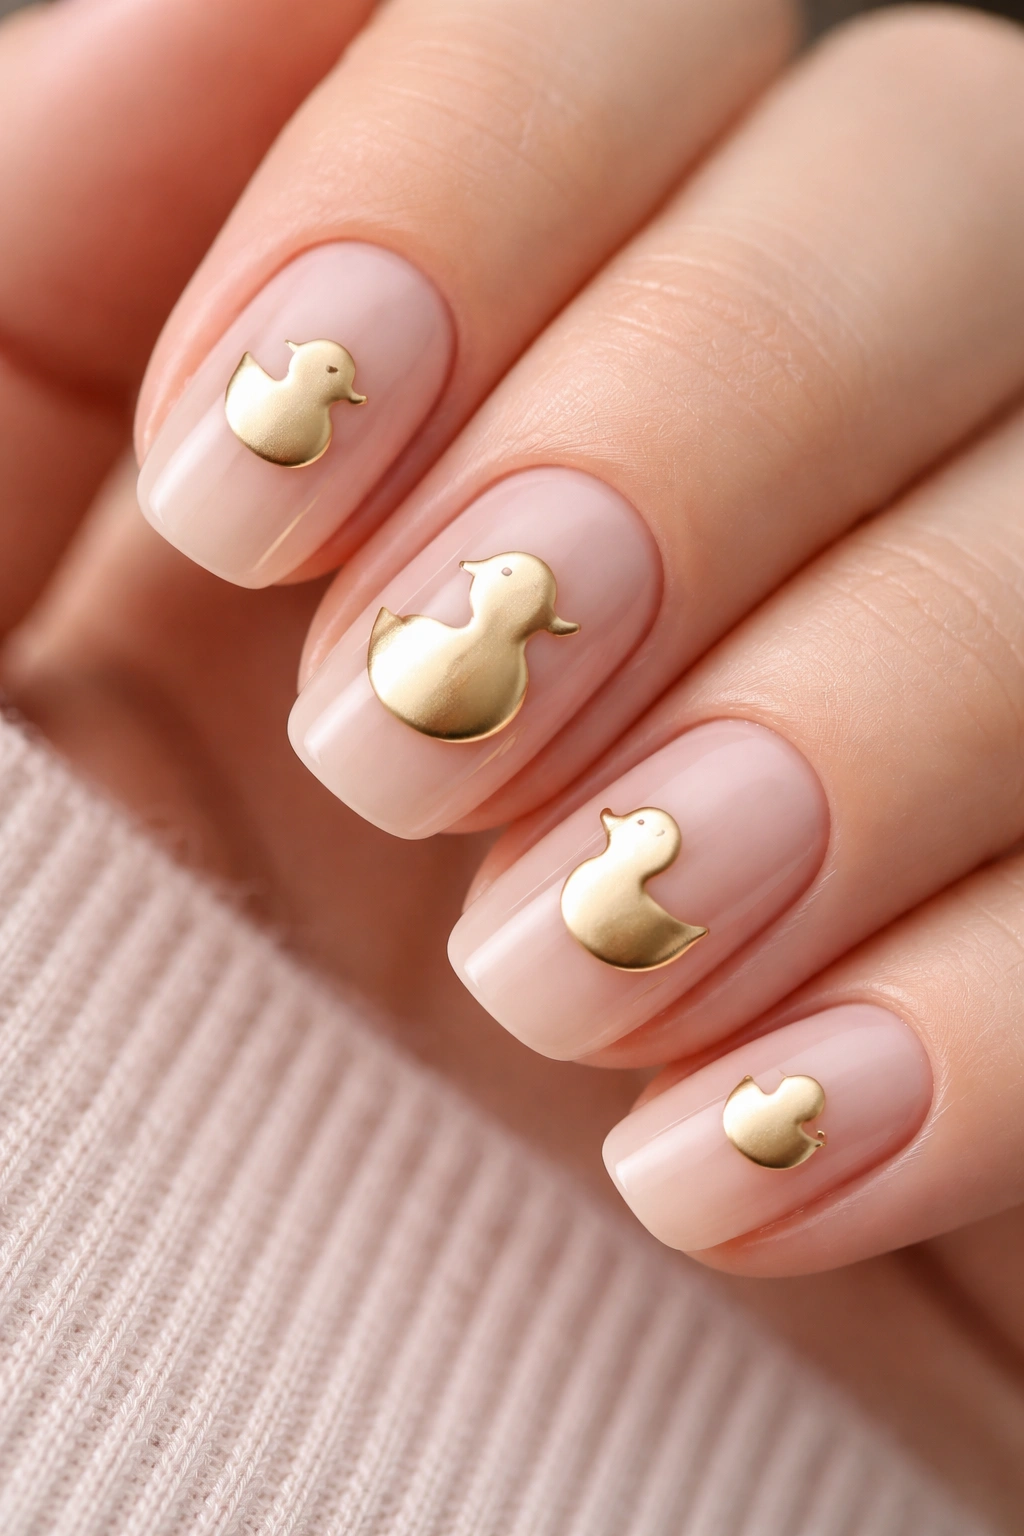
For a more sophisticated take on duck nails, try elegant silhouettes in metallic gold or rose gold polish. Silhouettes are inherently flattering and work on both light and dark base colors. The duck profile—neck extended, beak pointed forward, body rounded—creates a beautiful recognizable shape even when reduced to a single color. This design appeals to slightly older kids or those who prefer a more minimalist aesthetic.
The Appeal of Silhouettes
Silhouettes are powerful because they’re iconic. Even a simple outline of a duck is instantly recognizable, which means your child’s nail art will be immediately understood without needing detailed facial features or shading. The metallic quality of gold or rose gold polish adds elegance and makes the design feel special and grown-up. It’s a bridge between simple kid nail art and more fashion-forward designs.
Execution Tips
- Apply a neutral or white base coat so the gold silhouette stands out clearly
- Use a thin brush or nail art brush to paint the duck profile carefully
- Keep the outline relatively thick so it reads clearly even from a distance
- Consider painting ducks facing different directions across the nails for visual interest
- Finish with a shiny topcoat to make the metallic finish glow
Pro tip: If metallic polish feels slippery and hard to control, try using a gel-based gold polish instead. It tends to have better pigmentation and easier application while still delivering that gorgeous shimmery effect.
5. Cute Duck Face Expressions
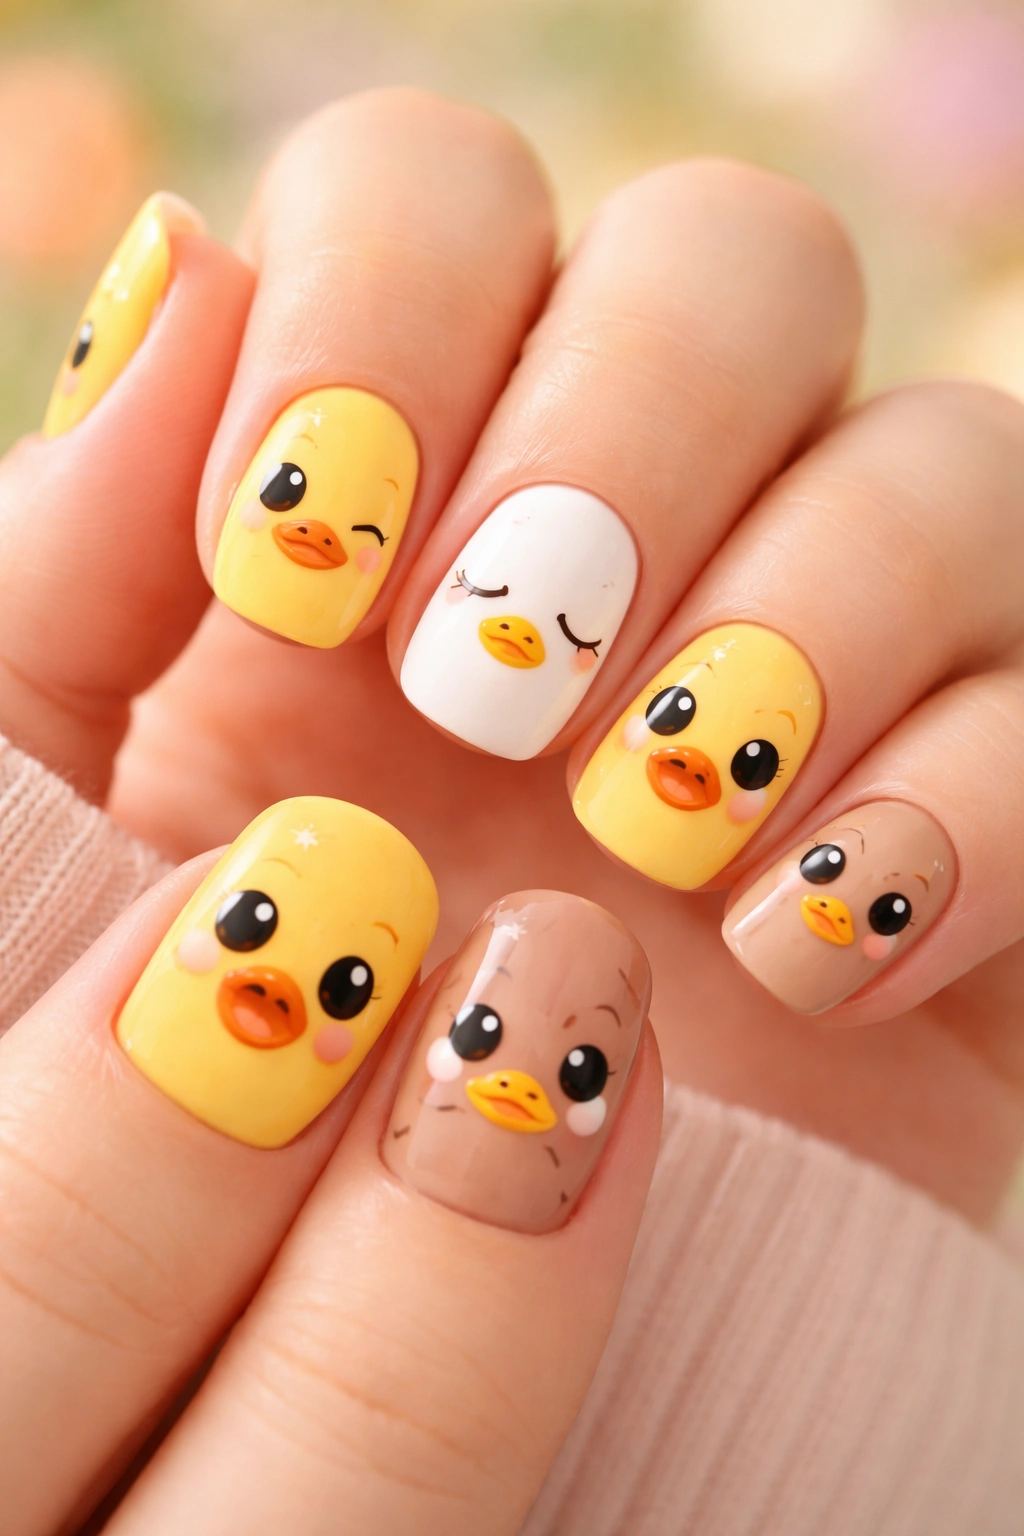
Focus entirely on duck faces and give each nail a different personality. One duck might look surprised with wide eyes, another might wink, a third could look sleepy with half-closed eyes. Using various yellow shades, or even painting some ducks in different colors (white duck, brown duck), keeps the design from feeling repetitive. The key is varying the expressions enough that each nail tells a tiny character story.
Building Character Through Expression
Kids are naturally expressive, and they love designs that reflect different emotions and personalities. When each nail shows a duck with a distinct expression, it becomes a tool for creative storytelling. A child might point to the sleepy duck on their pinky and tell you that duck is ready for a nap, or they might say the surprised duck on their thumb just saw something funny. This transforms nail art into an interactive creative play tool.
Expression Ideas to Try
- Wide, happy eyes with an open-mouthed smile for the cheerful duck
- One eye closed in a wink for the playful duck
- Half-closed eyes with a gentle smile for the sleepy duck
- Shocked expression with round eyes and an O-shaped mouth for the surprised duck
- Slightly crooked eyes and smile for the goofy duck
Worth knowing: This design works particularly well for kids who are developing their emotional intelligence. Painting different expressions helps them recognize and discuss feelings in a fun, low-pressure way.
6. Duck Pond Blue and Green
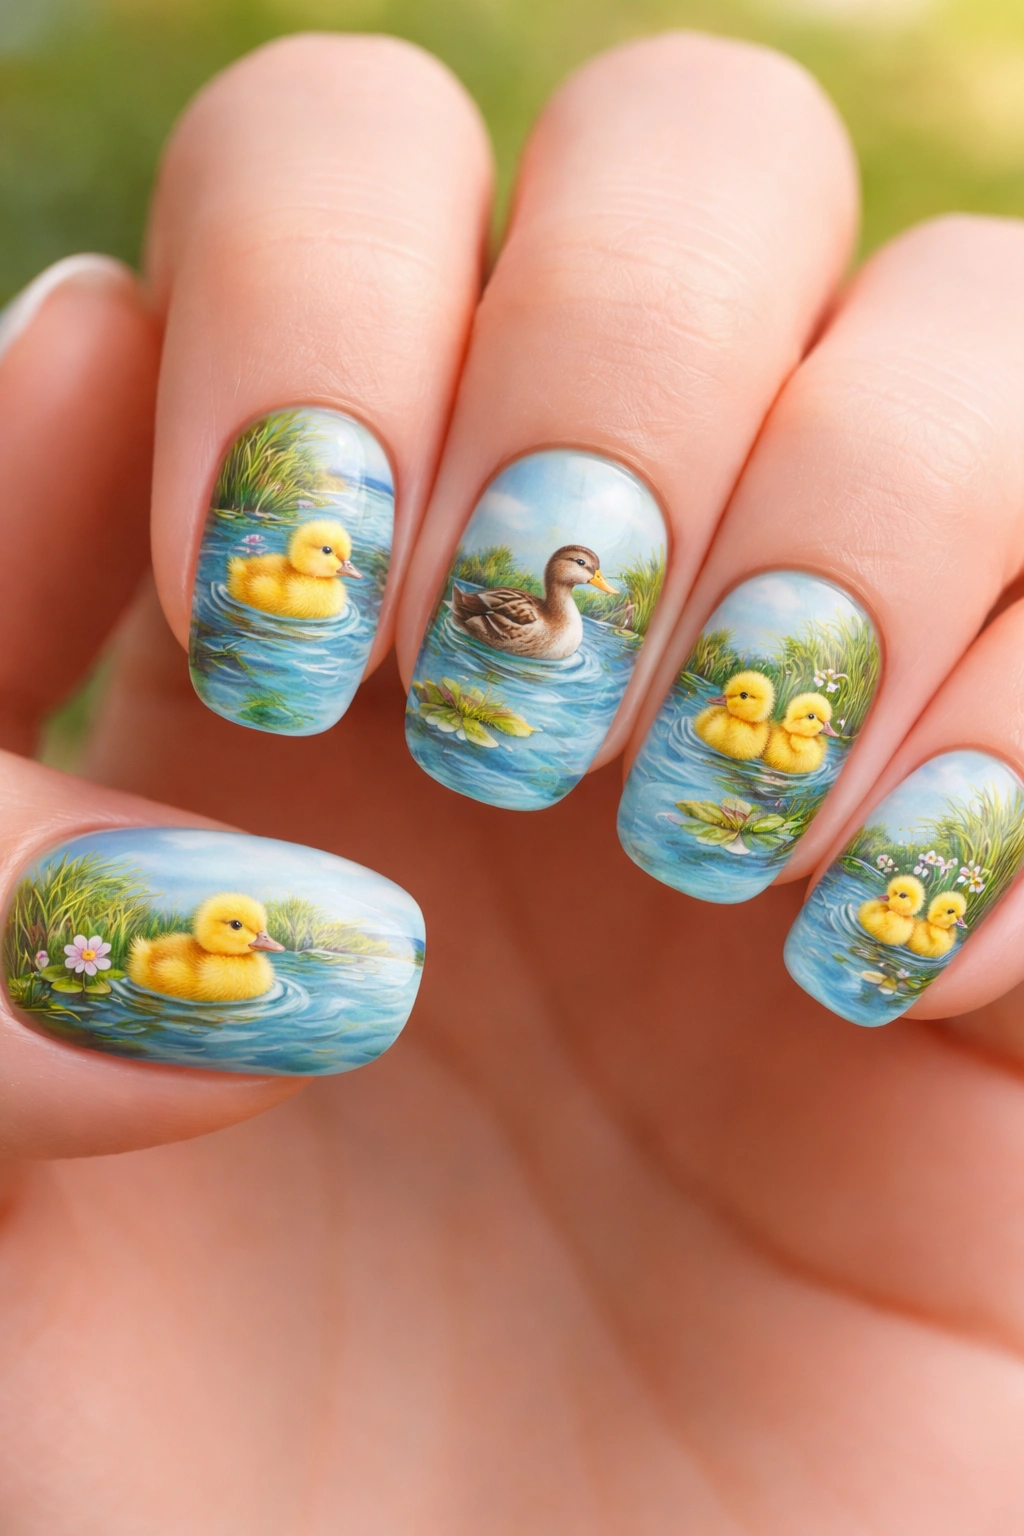
Create a landscape design across all nails that tells the story of a pond ecosystem. Use graduated shades of blue and green to suggest water and grass. Paint ducks floating in the blue sections, maybe add a lily pad or two, and include some cattails or water plants. This design teaches kids about nature and natural habitats while looking genuinely artistic. It’s perfect for kids who love being outdoors or have recently visited a pond or lake.
Designing a Complete Ecosystem
This design moves beyond single-nail graphics into true landscape nail art. Each nail becomes a section of the larger pond scene, so nails work together to tell a cohesive story. The pinky might show shallow grassy water, the ring finger shows the middle of the pond, the middle finger is the deepest blue water, and so on. This creates visual flow and tells a more complete narrative than individual duck designs.
Layering the Scene
- Start with light blue at the top of each nail, transitioning to deeper blue toward the tip
- Add green along the sides to represent grass or reeds
- Paint ducks in various positions—one swimming, one diving, one on a lily pad
- Include details like cattails, water lily flowers, or dragonflies
- Use white or light polish for ripples in the water to add movement
Pro tip: Practice the color gradient on a piece of paper first. Blending blue and green smoothly on a small nail takes practice, but the effort pays off when the design looks like an actual pond scene.
7. Rainbow Duck Wings
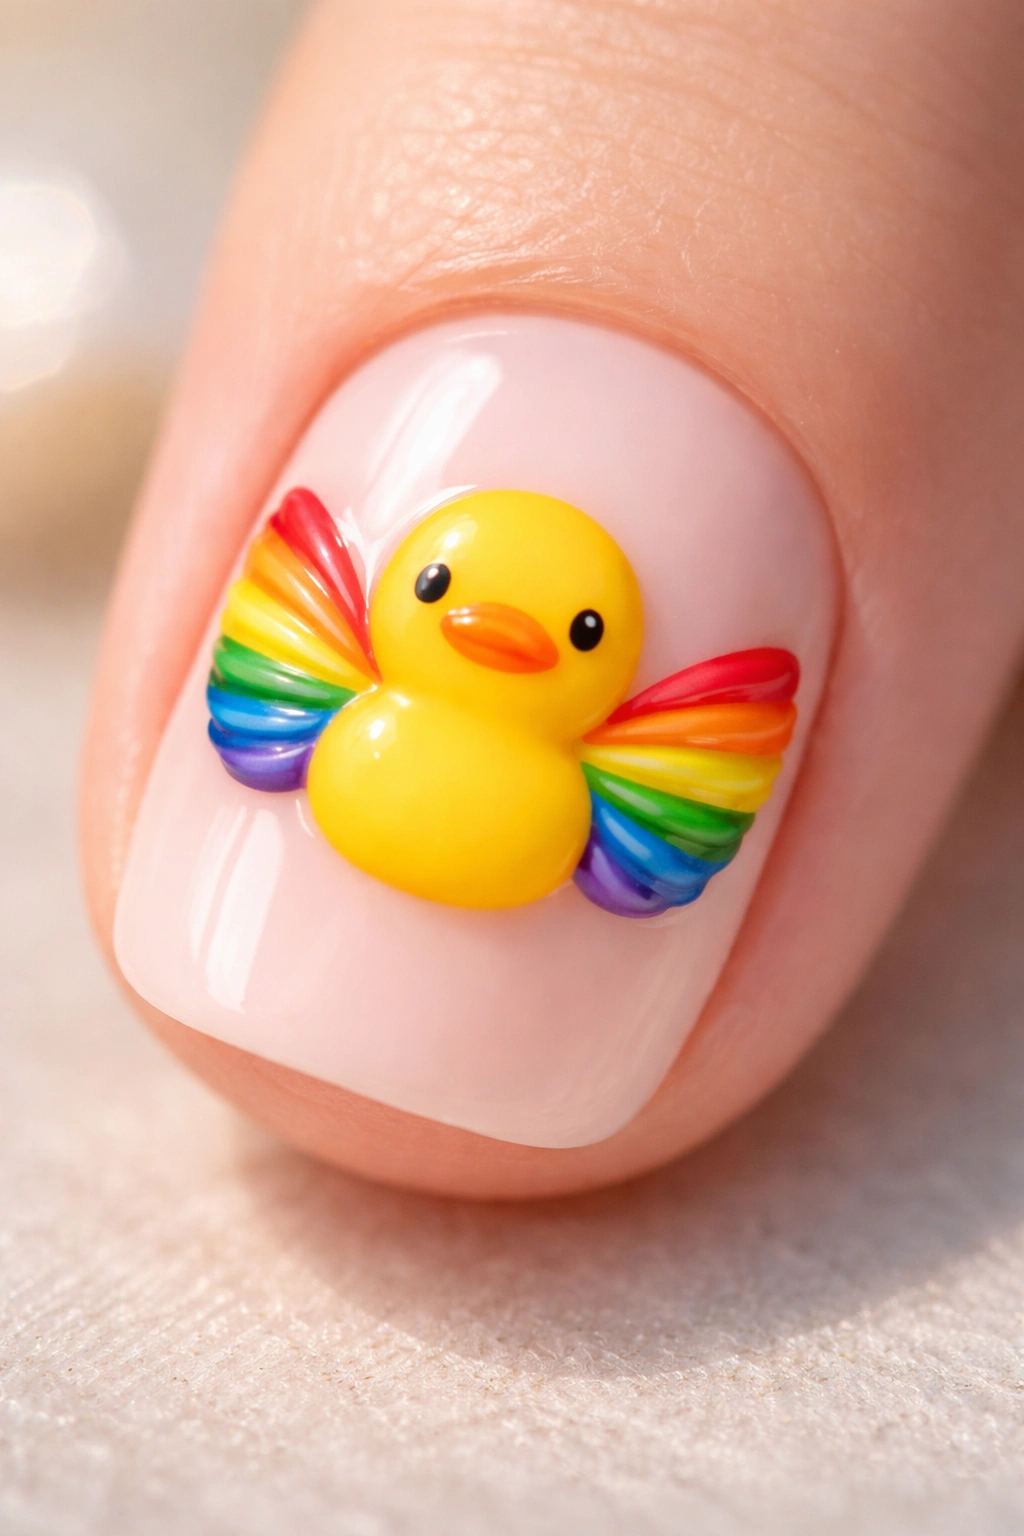
Transform a duck design by giving it colorful rainbow-striped wings. The duck’s body stays classic yellow, but the wings feature all the colors of the rainbow in neat stripes. This design combines the familiarity and charm of a simple duck with an unexpected burst of color and energy. It appeals to kids who love rainbows and want their nail art to be vibrant and playful.
Why Rainbow Details Add Magic
Rainbow elements make any design feel celebratory and special. Kids associate rainbows with happiness, magical thinking, and positive emotions. By giving a simple duck rainbow wings, you’re elevating it from cute to fantastical. It becomes a creature that’s part reality, part imagination—exactly the kind of thing that captures kids’ attention and makes them want to show their nails to everyone.
Painting the Rainbow Wings
- Paint the duck body in classic yellow with a small orange beak
- On each side of the body, paint a curved wing shape
- Divide each wing into stripes using red, orange, yellow, green, blue, and purple
- Make the stripes roughly equal width for a neat appearance
- Add a tiny black eye to complete the face
Worth knowing: This is an excellent design for helping kids learn the colors of the rainbow in order. As you paint each stripe, you can name the color, turning nail art into a learning moment.
8. Fuzzy Duck Texture Nails
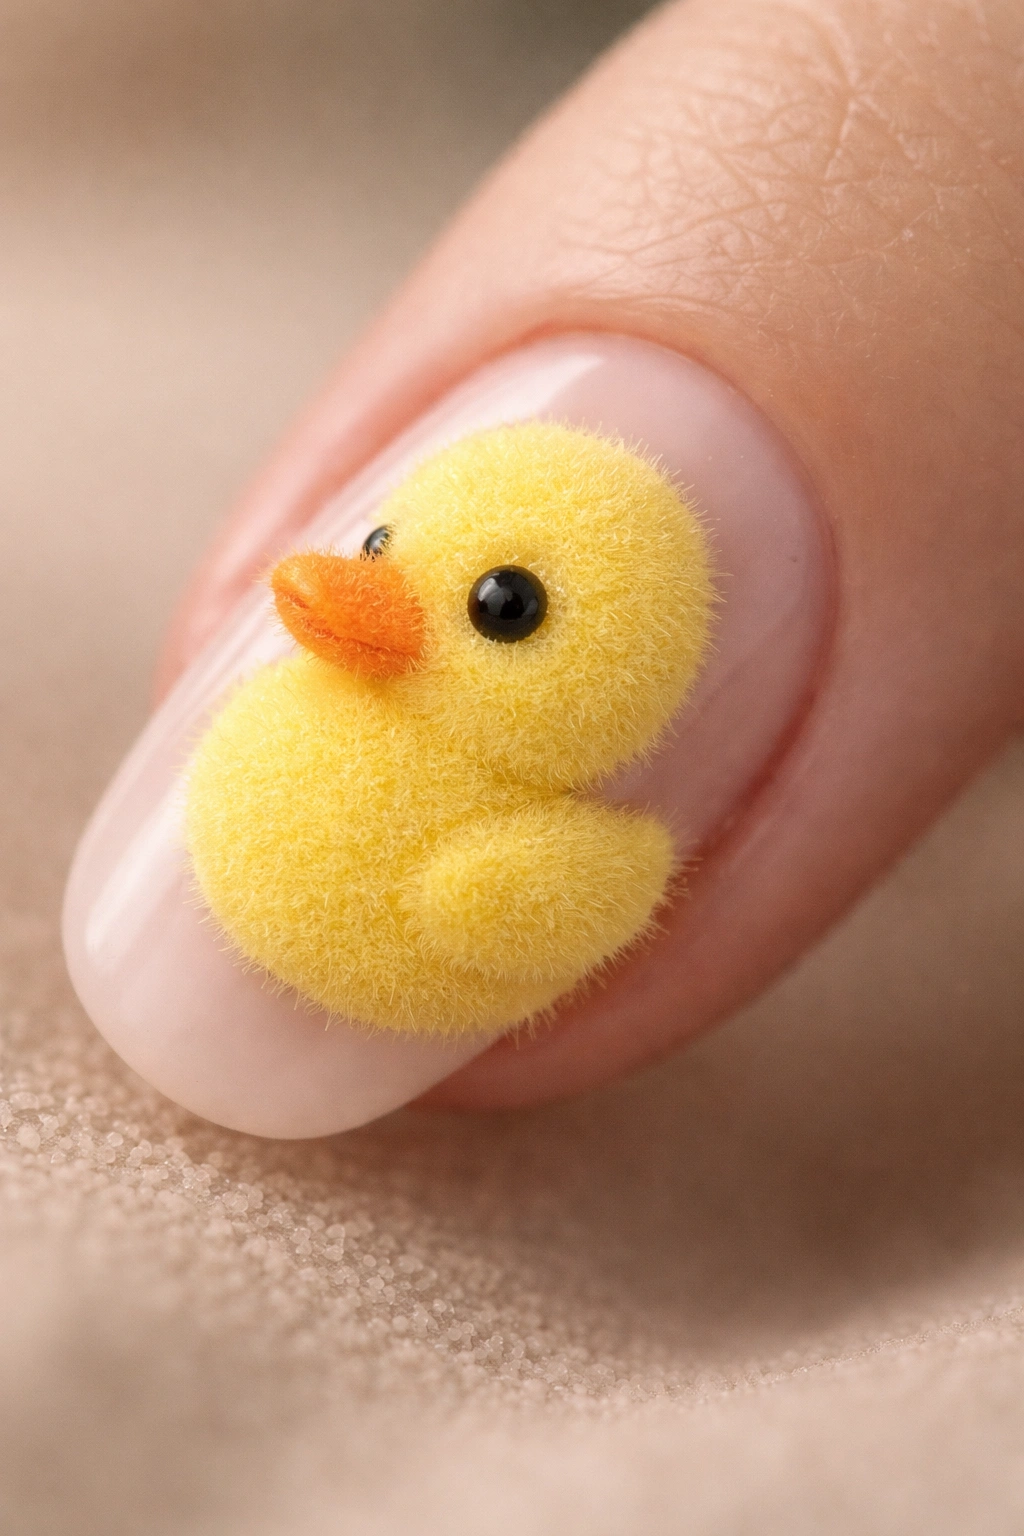
Create a tactile sensation by using textured polish or adding faux fur details to duck designs. You might use a fuzzy or glitter polish for the duck’s body, giving it an almost three-dimensional appearance. Some kids love the sensory component of being able to feel different textures on their nails. This design works especially well for younger kids or those with sensory sensitivities who find comfort in texture play.
Adding Dimension Through Texture
Textured nails operate on a different level of sensory engagement than flat designs. Kids touch their nails frequently throughout the day, so having something interesting and pleasant to feel makes nail art more interactive and engaging. Fuzzy polish feels cozy and cuddly, which perfectly suits the soft, approachable nature of duck designs. It adds a playful tactile element that regular polish can’t match.
Texture Technique Options
- Use a fuzzy or flocking nail polish designed specifically for creating velvet texture
- Alternatively, add tiny dots of glitter or microbeads to the duck’s body while the base polish is still wet
- Try a matte topcoat on the duck body contrasted with glossy polish on the beak and eyes
- Mix metallic accents with the fuzzy texture for visual contrast
- Finish with a clear topcoat to seal everything in place
Pro tip: Fuzzy nail polish can be tricky to apply evenly. Paint in thin layers and allow each layer to dry slightly before adding more. Patience with texture polish pays off in a design that looks intentionally plush rather than accidentally clumpy.
9. Duck and Lily Pad
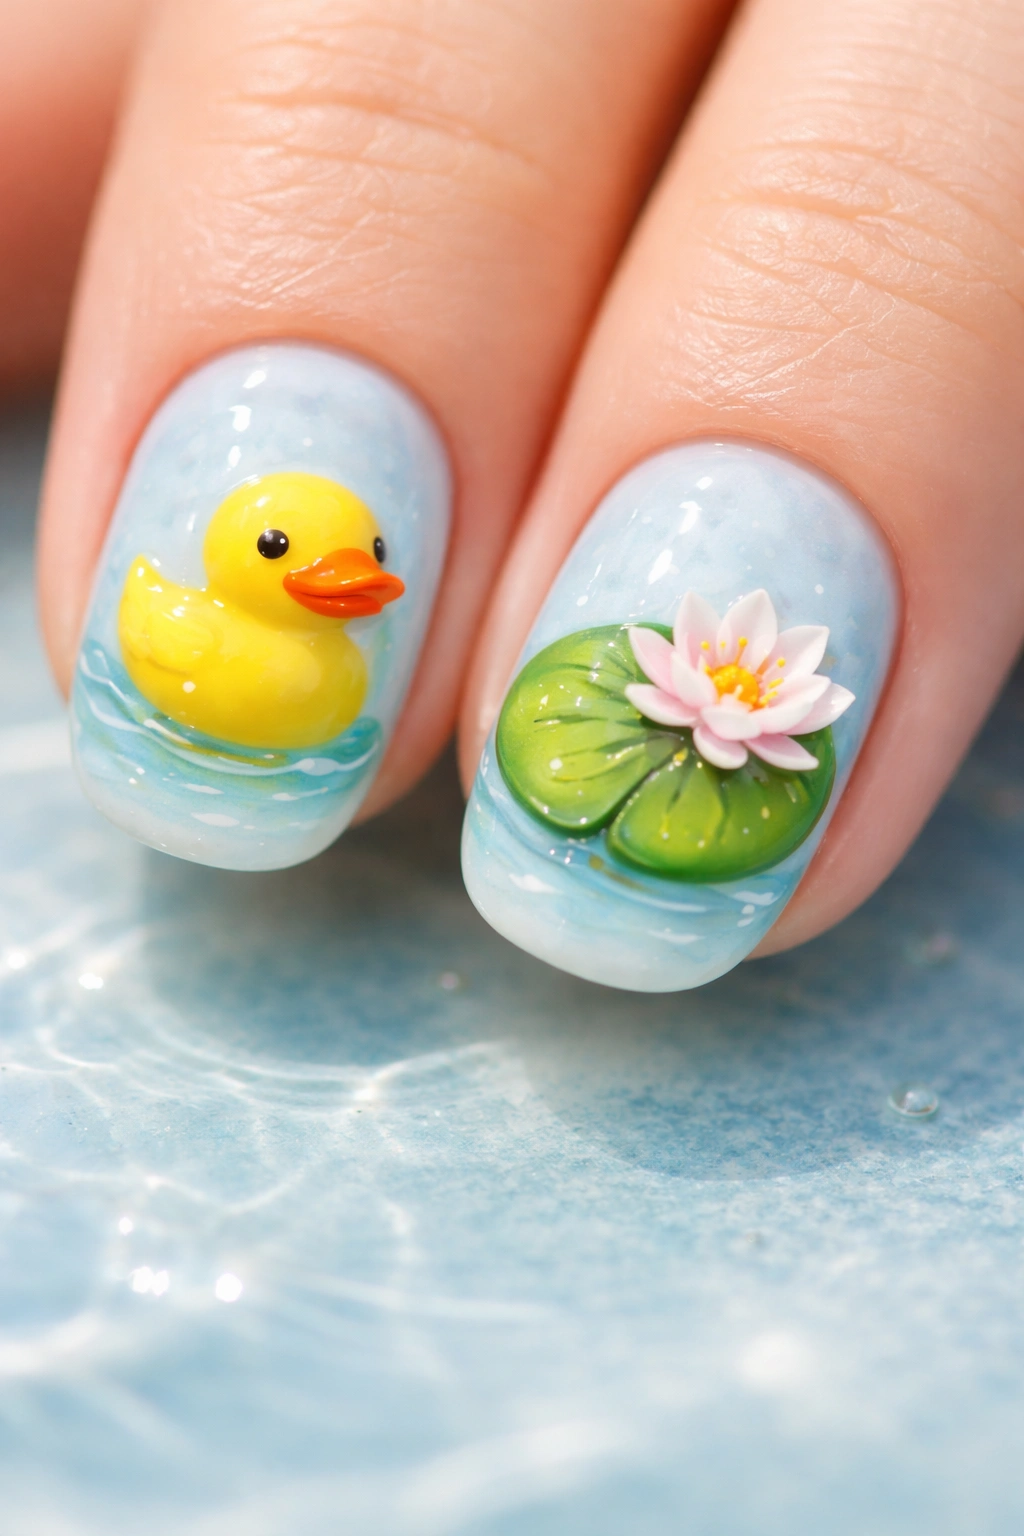
Paint a serene scene featuring a duck perched on or near a lily pad. The lily pad becomes the focal point—a circular green shape with sometimes a pink or white water lily flower—while the duck sits proudly beside it or floats nearby. This design works beautifully on a soft blue water background and creates a lovely peaceful vibe. It’s perfect for kids who enjoy nature art or are learning about pond ecosystems in school.
Creating Balance in the Composition
This design teaches basic composition principles—how to arrange elements on a small space for maximum visual impact. The lily pad acts as an anchor point, and the duck’s position relative to it creates balance. Kids naturally start to understand visual balance and arrangement through nail art projects like this. They begin to notice whether a design looks “right” or unbalanced, developing an intuitive eye for good composition.
Building the Scene
- Paint soft blue across the entire nail for water
- Create a green circle or oval for the lily pad
- Add a delicate pink or white flower in the center of the lily pad
- Paint a small yellow duck near the lily pad, as if admiring the flower
- Add tiny details like ripples in the water or a dragonfly hovering nearby
- Use white polish to add shine and dimension to the water
Worth knowing: This design scales beautifully across multiple nails or stays stunning as a single accent nail. Some kids prefer having the full scene on just one or two nails, while others want the lily pad theme repeated across all five.
10. Cartoon Duck Characters
Draw inspiration from beloved cartoon ducks and create recognizable character designs on nails. Whether it’s a classic Disney-inspired duck or a more modern cartoon character, nail-sized cartoon ducks are surprisingly achievable. You can simplify cartoon designs to their essential elements—the distinctive eyes, the characteristic beak shape, any signature accessories—and create something that captures the character’s personality in miniature.
Bringing Beloved Characters to Life
Kids have deep emotional connections to cartoon characters they love. Creating those characters on their nails makes the connection between their favorite entertainment and their personal style. It’s empowering for kids to see a beloved character rendered in their own customized way. This design also works beautifully as a way to celebrate a specific show or movie your child is currently enjoying.
Simplifying Character Details
- Focus on the most distinctive features that make the character recognizable
- Large expressive eyes are usually key to capturing cartoon personality
- Keep the color palette true to the original character
- Simplify complex details into basic shapes (triangles for beaks, circles for eyes)
- Add any signature accessories or markings in a simplified form
Pro tip: If you’re not confident drawing freehand, search for simple cartoon duck coloring pages and use those as references. Tracing the basic outline onto a nail (using a light pencil or washable pencil) gives you a guide to follow with polish.
11. Splatter Paint Ducks
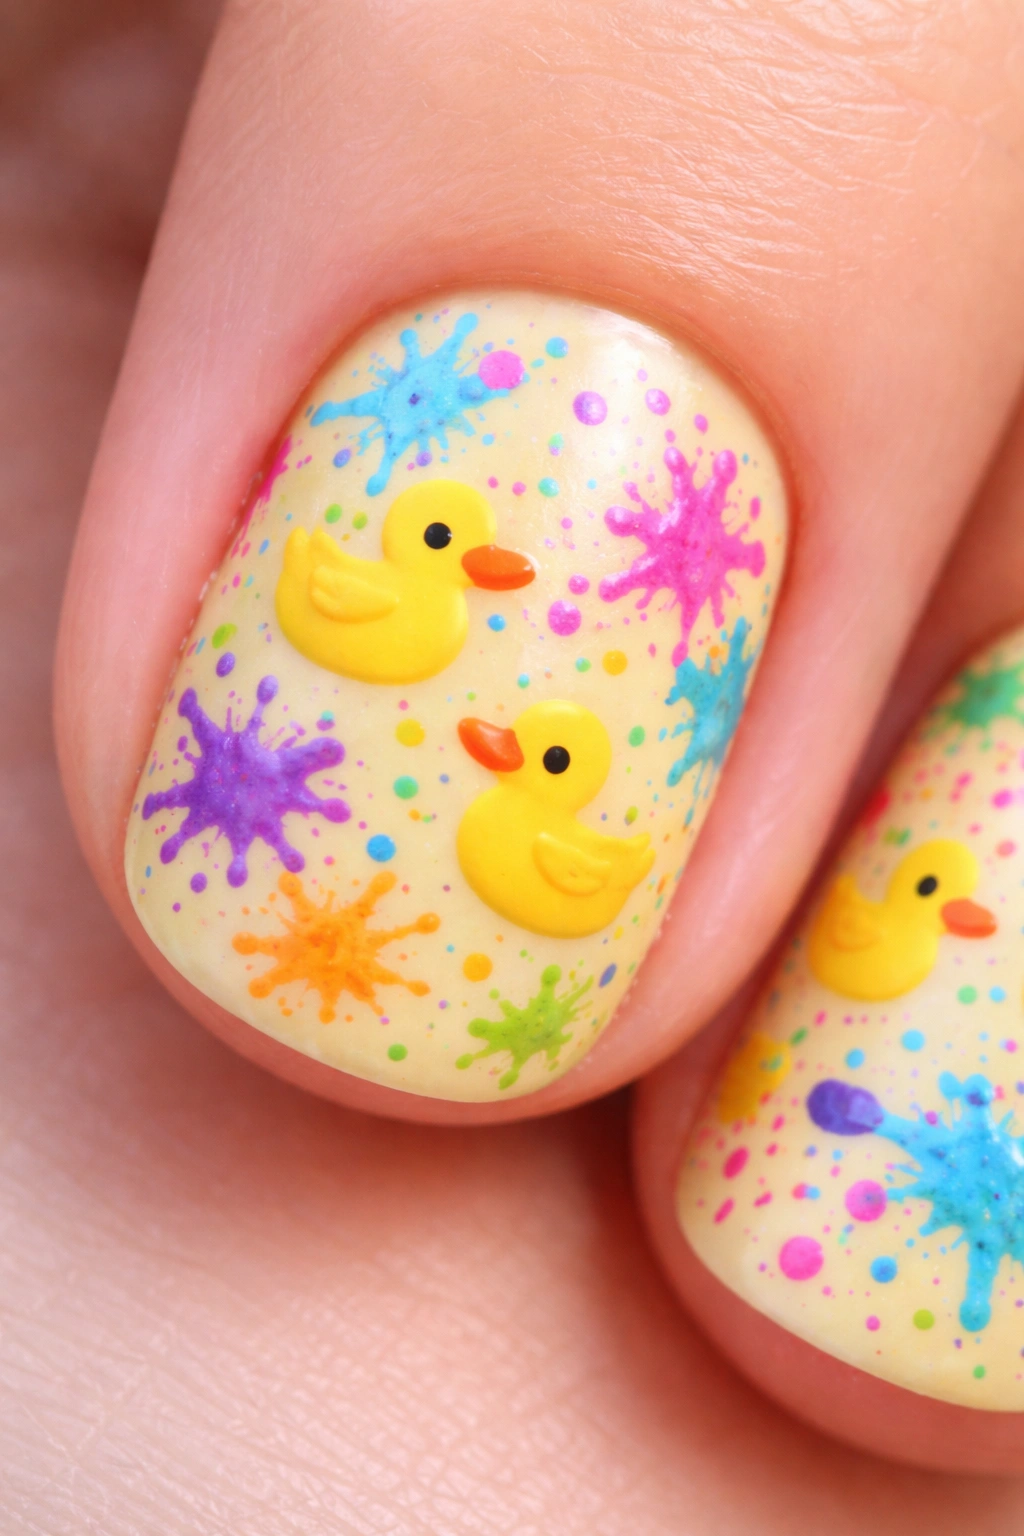
Create an artistic, energetic design using splatter technique. Paint a base color, then splatter contrasting colors across the nail to create a paint-splashed effect. Add simple duck shapes either before or after the splattering for an abstract yet recognizable design. This approach appeals to kids who prefer more artistic, less structured designs and love the creative freedom of splatter art.
Embracing Artistic Chaos
Splatter techniques are liberating for kids because they’re intentionally imperfect. There’s no need to worry about precision or neat lines; the whole point is the energetic, spontaneous effect. This style celebrates creativity over perfection, which is an important message for kids. They learn that art doesn’t have to be flawlessly executed to be beautiful and meaningful. Splatter duck nails teach that intentional “messiness” can be more visually interesting than perfection.
Splatter Technique Steps
- Paint a solid base color (pale yellow works beautifully)
- Load a thin brush with a contrasting color (bright blue, orange, or purple)
- Flick the brush toward the nail to create splatter patterns
- Alternatively, tap the brush against another object to create splatter drops
- Paint simple duck silhouettes over the splatter effect
- Seal with topcoat to prevent the splatter from wearing off
Worth knowing: Splatter technique requires some practice to control. Test on a scrap of paper or practice nail first. Thinner polish spatters more dramatically, while thicker polish creates larger drops. Experiment to find the effect your child prefers.
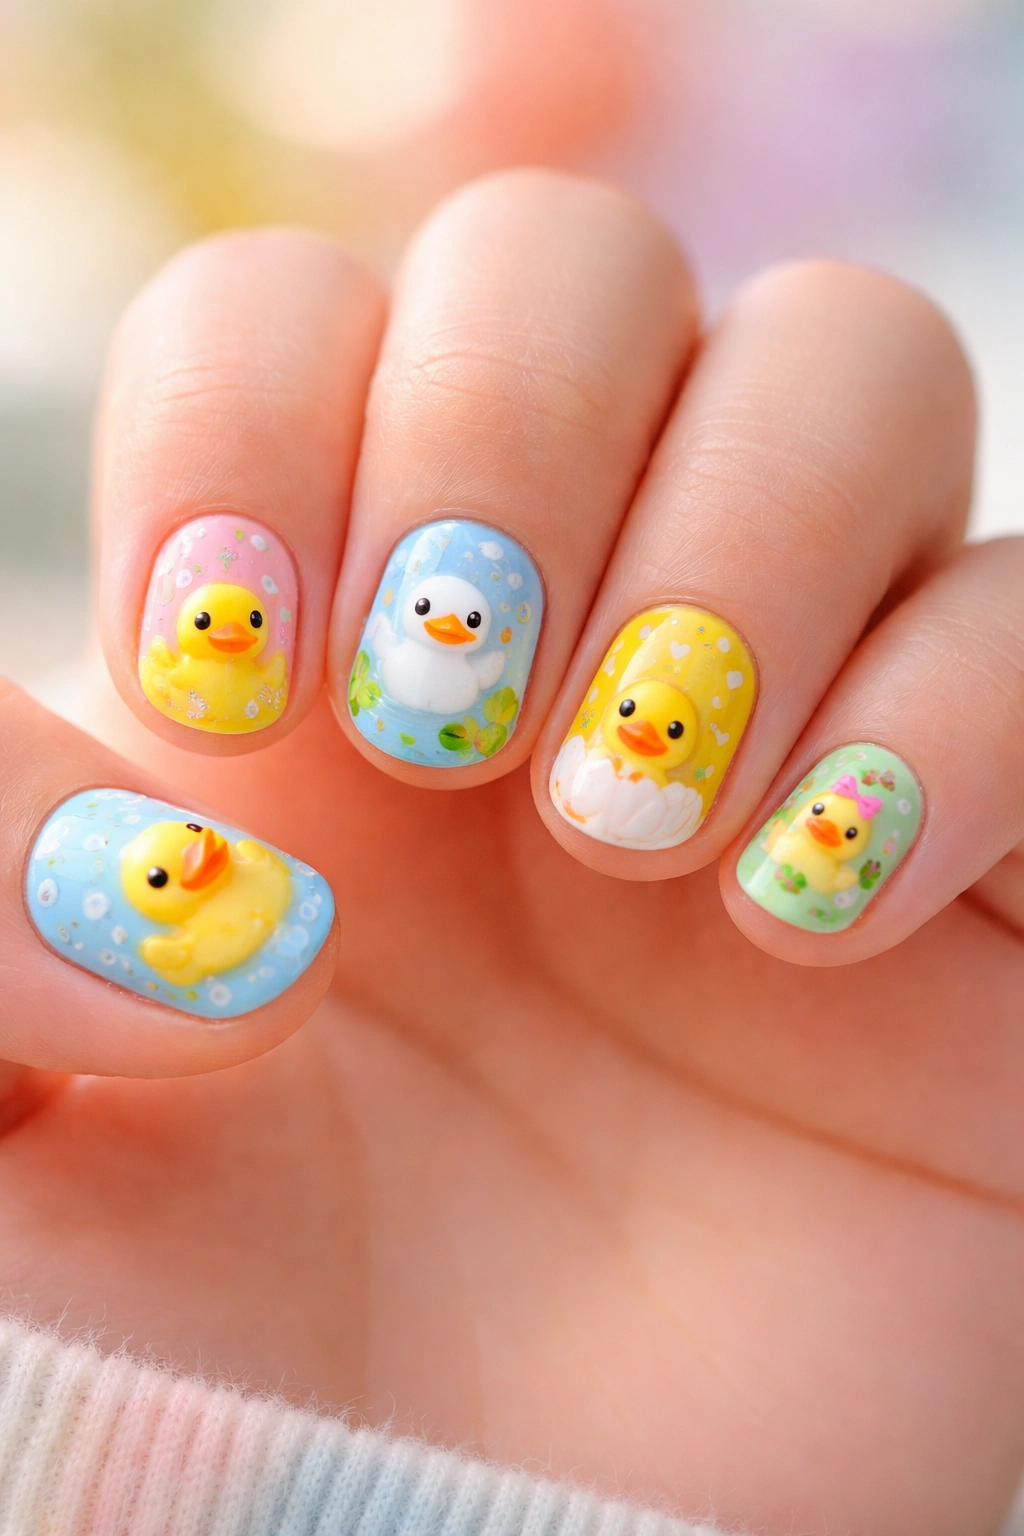
12. Pastel Duck Flowers
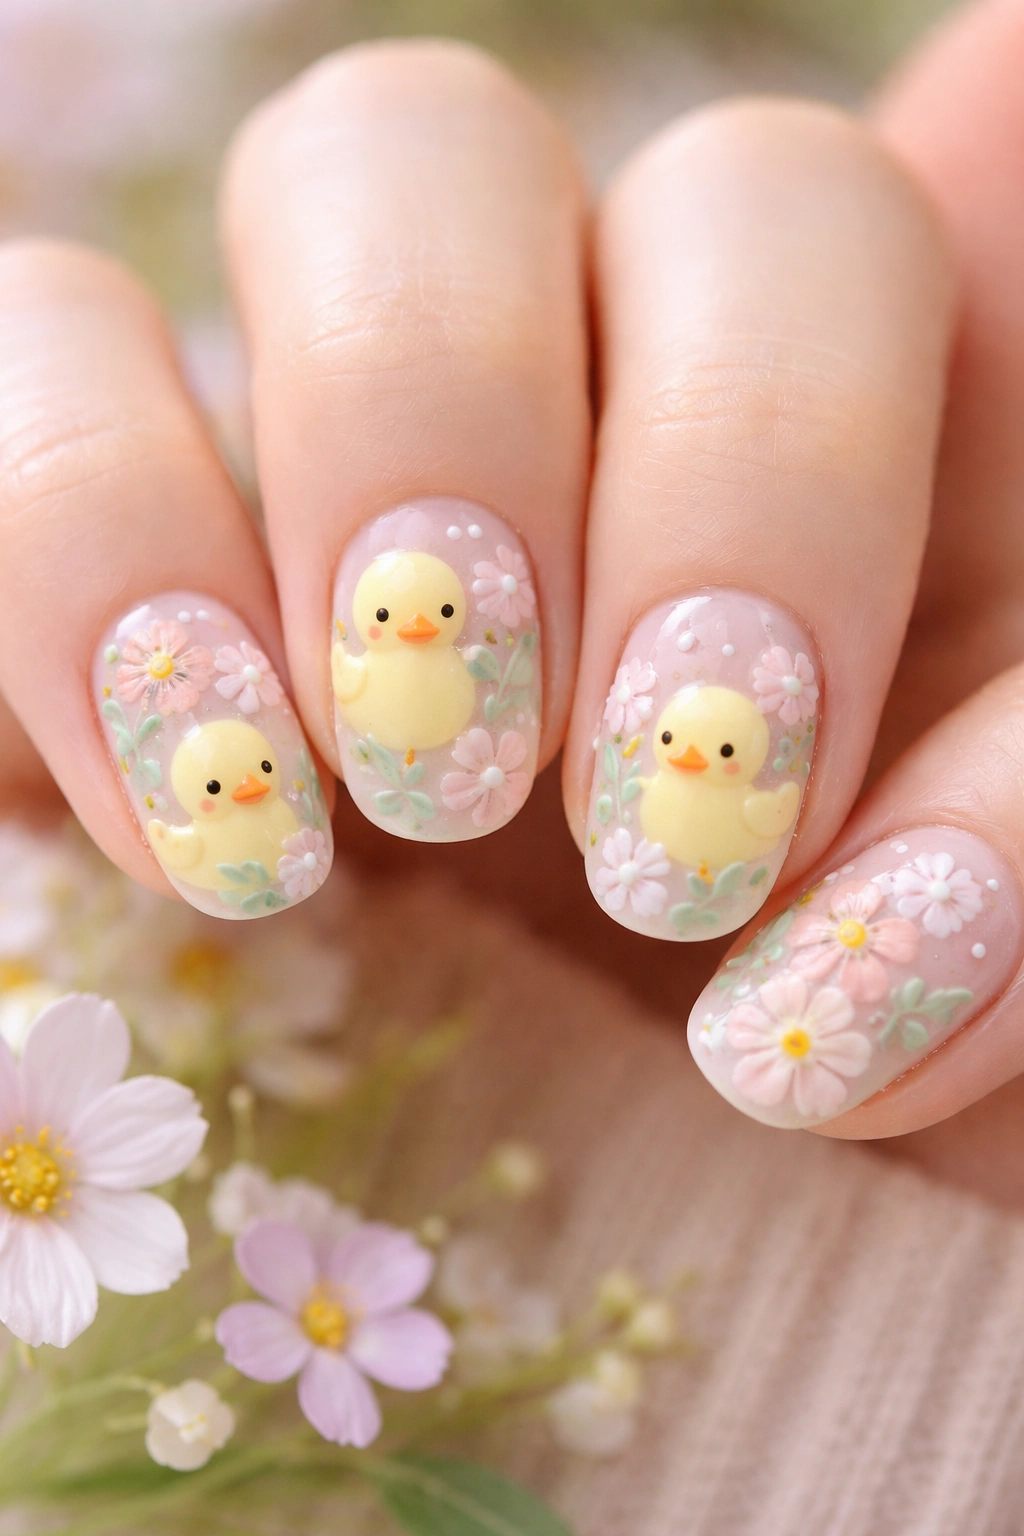
Combine duck designs with delicate floral elements using soft pastel colors. Paint small ducks alongside tiny flowers in pale pink, lavender, mint, and cream tones. This design appeals to kids who love gentle, dreamy aesthetics. The pastels feel soft and approachable, and the flower-duck combination creates a whimsical garden scene. It’s perfect for kids who prefer subtle, artistic designs over bold statements.
Creating a Dreamy Aesthetic
Pastel designs have a calming, almost meditative quality. Kids who prefer quieter, more thoughtful self-expression gravitate toward pastels. This design also works beautifully for kids during transitional seasons—spring moving into summer, or fall into winter—when the natural world is full of soft colors and gentle growth. Pastel duck-and-flowers nails capture that same peaceful energy.
Color and Design Combinations
- Pale yellow ducks paired with pale pink flowers
- Soft blue ducks with lavender blossoms
- Cream or white ducks surrounded by mint green leaves
- Soft orange ducks with pale peach flowers
- Add tiny green stems and leaves to ground the flowers
- Use white polish to add delicate highlights and make pastels glow
Pro tip: Pastel polish can be sheer and require multiple coats. Don’t fight it—embrace the translucent quality and layer thin coats until you reach the desired opacity. The delicate result is worth the extra effort.
13. Duck Footprints Pattern
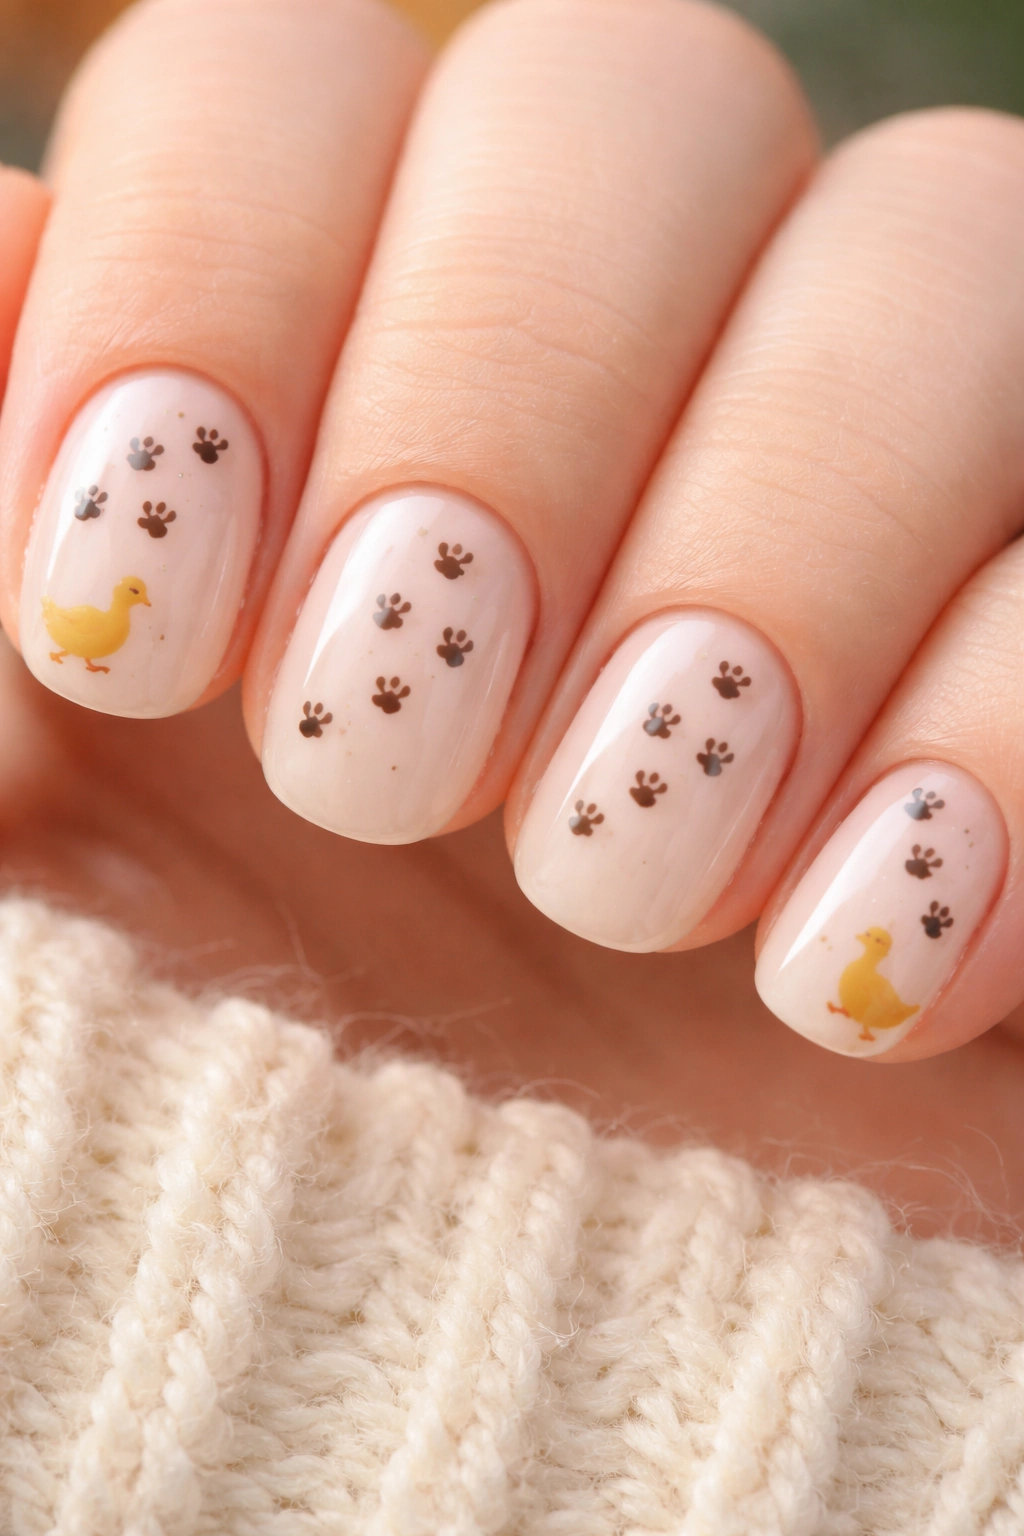
Create a playful pattern of tiny duck footprints trailing across the nails. Paint alternating toes (the characteristic three-toed duck print) and add tiny ducks at the beginning or end of the trail, as if the ducks have literally walked across your child’s nails. This design is simple enough for young kids to attempt, yet charming and clever enough for older kids to appreciate.
The Charm of Whimsical Details
Duck footprints immediately evoke the image of a duck waddling along a shore or pond edge. Kids find this imagery hilarious and endearing. The repeated footprint pattern is visually interesting without being overly complex, and the inclusion of actual ducks adds narrative—the footprints aren’t just abstract, they tell the story of where the ducks have been. This combines pattern design with storytelling.
Creating the Footprint Pattern
- Use a dotting tool or thin brush to paint three short lines radiating from a central point (the duck’s foot)
- Space footprints evenly across the nail in a trail formation
- Paint alternating feet pointing slightly different directions for a natural walking effect
- Add tiny duck silhouettes at the start or end of each trail
- Use colors like green (muddy ground), blue (water), and yellow (ducks)
Worth knowing: This design is forgiving of imprecision. Slightly wonky footprints actually add to the charm and authenticity of the design. They look less like perfect manufactured prints and more like real duck tracks.
14. Galaxy Ducks

Float ducks through a cosmic space scene using navy, purple, and deep blue backgrounds with stars, planets, and galaxies. This design appeals to kids who love space and astronomy. The ducks can be rendered in their typical yellow, creating a striking contrast against the dark cosmic background, or painted in metallic or glow-in-the-dark polish for extra magic. It’s the kind of design that celebrates a child’s interests while being visually stunning.
Merging Passions Through Nail Art
Galaxy ducks work beautifully for kids who love multiple things—ducks AND space. This design validates the idea that you don’t have to choose between your interests; you can merge them creatively. It’s also a design that works across changing interests; kids who go through space phases will love this, and if their interests shift, the duck element keeps it relatable. This design grows with your child’s developing tastes.
Creating the Cosmic Scene
- Paint a dark base using navy, deep purple, or black polish
- Add nebula effects by blending purples, pinks, and blues while the base is still wet
- Splatter tiny white or silver dots across the nail for stars
- Paint small circles in various colors for planets
- Add yellow ducks floating through the cosmic scene
- Optional: use glow-in-the-dark polish for ducks or stars for nighttime magic
Pro tip: Glow-in-the-dark polish works best when applied thickly. Don’t worry about opacity on the nail itself—the magic happens in the dark when it glows. Your child will love discovering the hidden detail when the lights go out.
15. Duck Reading Glasses
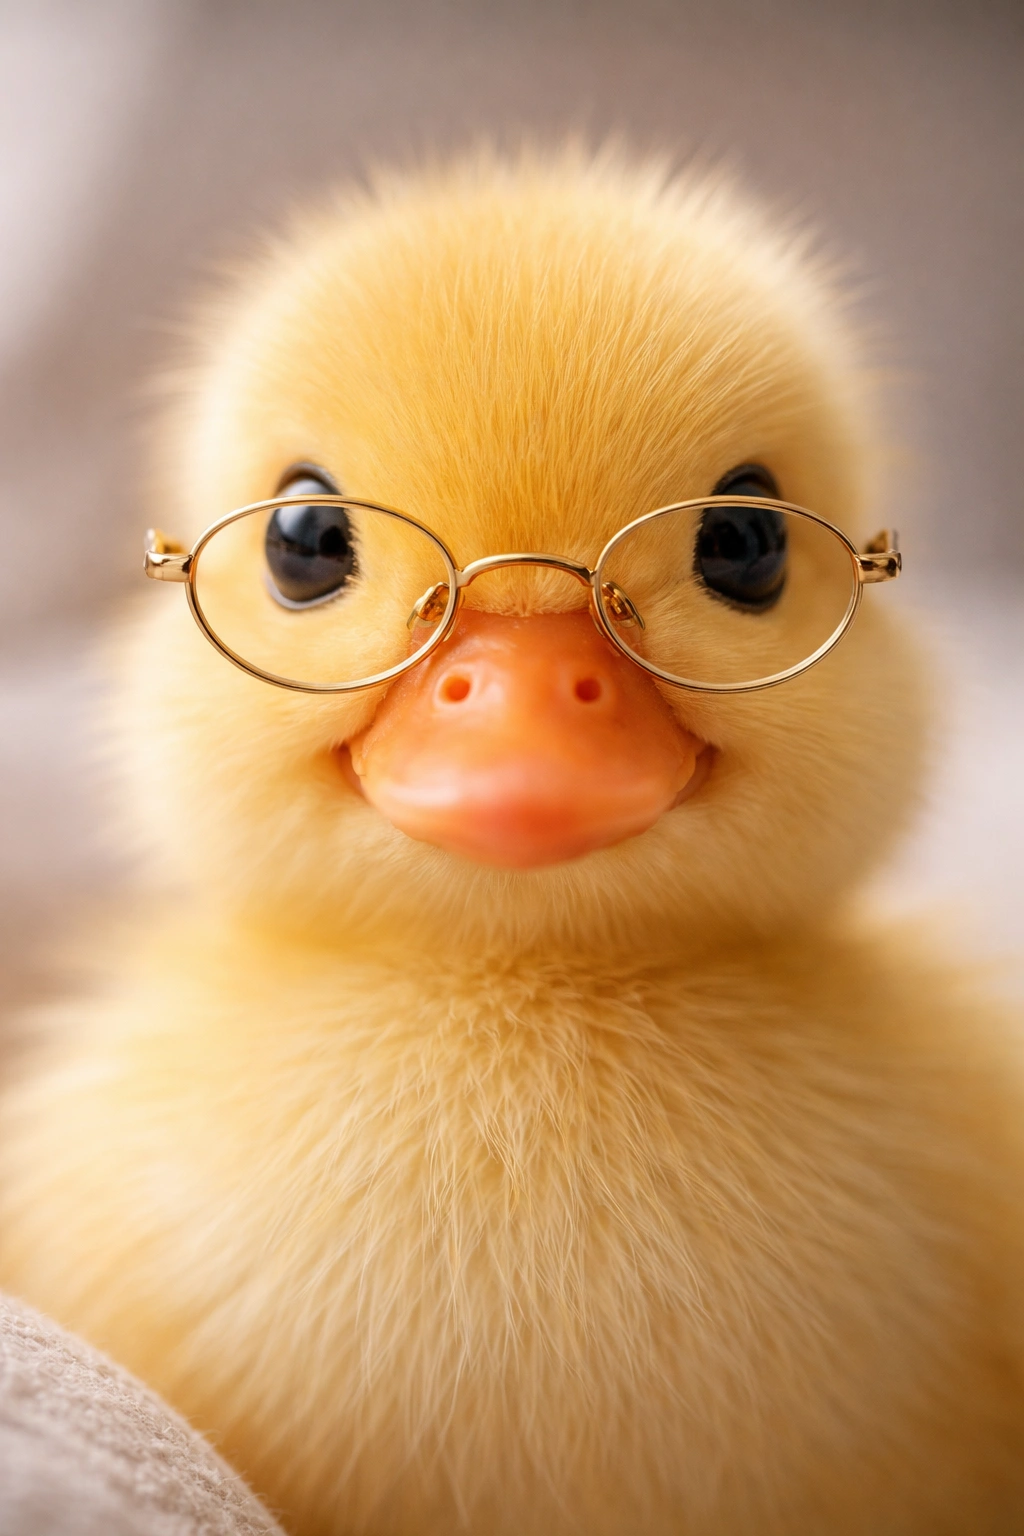
Paint adorable ducks wearing tiny reading glasses or sunglasses. The duck’s face remains the focal point, but now you’re adding oversized frames that give the duck personality and a dash of humor. This design appeals to kids who love funny, whimsical elements and appreciate the comedy of anthropomorphized animals. Depending on the glasses style, ducks can look scholarly, cool, or charmingly nerdy.
Building Personality Through Accessories
Adding glasses to duck faces is a tiny detail that completely transforms the vibe. Suddenly the duck isn’t just cute—it’s got attitude, humor, and personality. Kids love this kind of design because it makes them smile. There’s something inherently funny about an animal wearing human accessories. This design also celebrates different styles; reading glasses, sunglasses, cat-eye frames, or colorful fun glasses all change the duck’s personality.
Painting Glasses on Duck Faces
- Paint the basic duck face in yellow with orange beak and black eyes
- Add glasses frames around or over the eyes
- Reading glasses can be thin-framed and serious-looking
- Sunglasses should be larger, darker, and give the duck a cool vibe
- Use black, gold, or colored frame polish to make the glasses pop
- Add tiny white highlights on the lenses to suggest reflection
Worth knowing: Small details like glasses really bring a design to life. Taking time to make the frames look intentional and well-executed elevates the entire design from cute to genuinely clever.
16. Minimalist Line Ducks
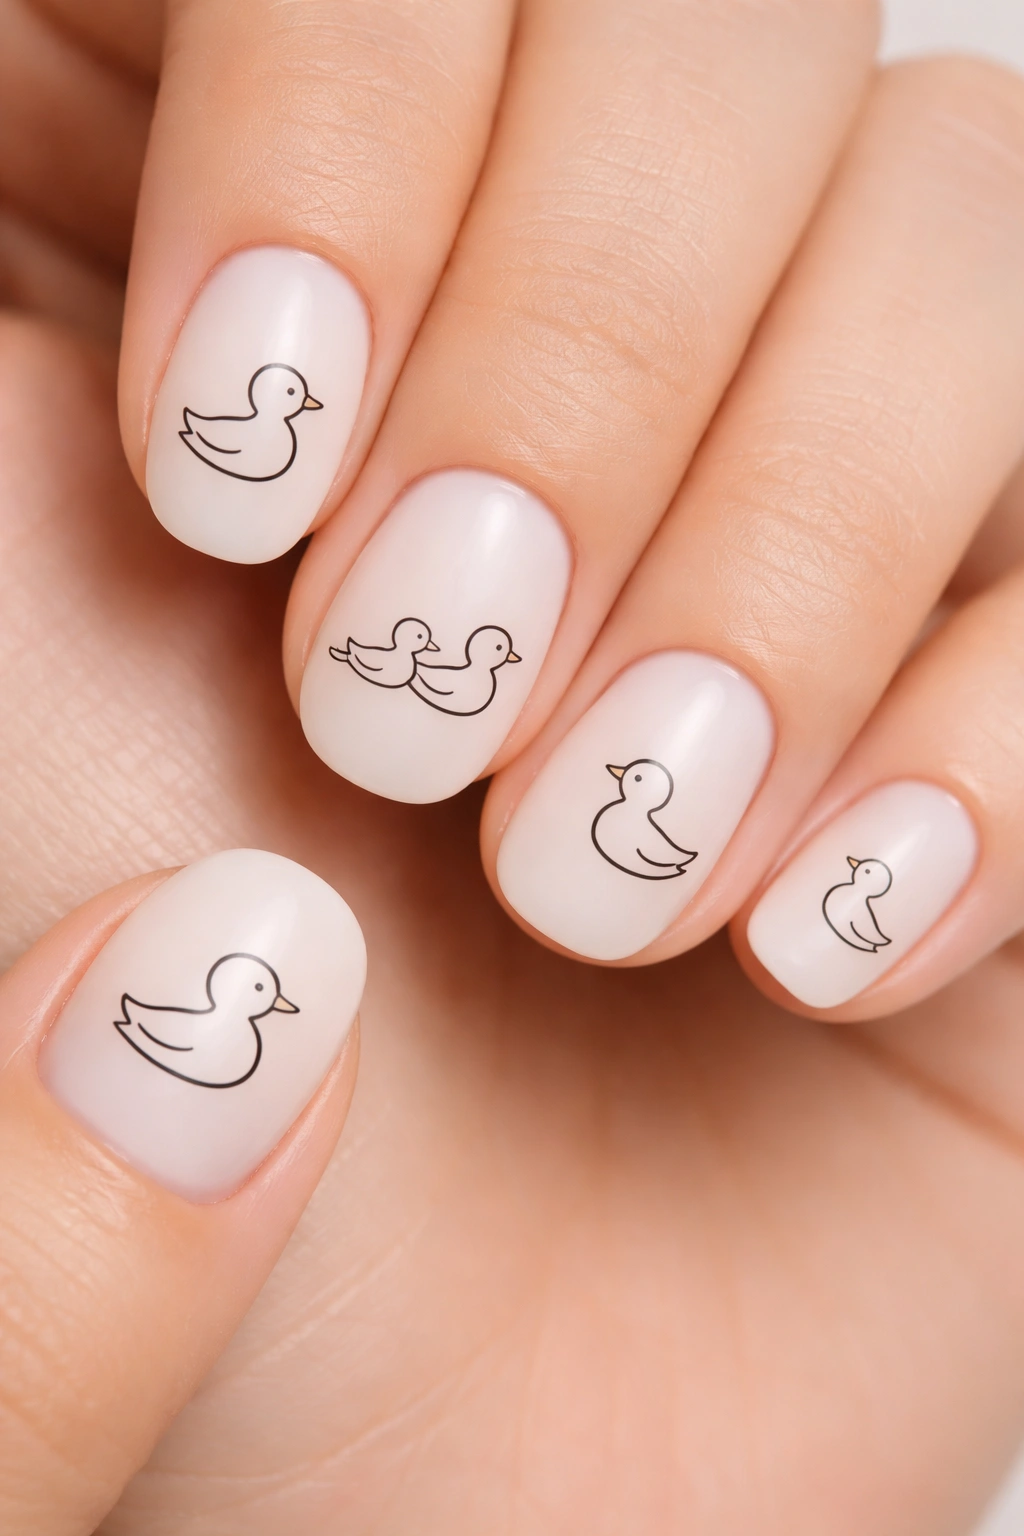
Use thin black or dark-colored lines to create simple, elegant duck outlines against pale or white nail backgrounds. This design emphasizes simplicity and clean lines. It appeals to kids with a more sophisticated aesthetic or those who prefer less-is-more styling. The minimalist approach proves that you don’t need color and complexity to create stunning nail art. Sometimes the most striking designs are the simplest ones.
The Power of Restraint
Minimalist designs teach kids that simplicity can be more powerful than complexity. There’s a confidence in choosing to paint just a few essential lines and trusting that they’re enough. Minimalist duck nails prove that good design doesn’t require overwhelming detail. Kids who gravitate toward this style are often thoughtful and prefer quality over quantity—good traits to nurture through design choices that reflect that philosophy.
Execution of Line Art
- Use a thin brush or technical pen with nail polish
- Draw duck profiles using continuous or broken lines
- Include essential details: head, neck, body, beak
- Keep lines clean and deliberate rather than sketchy
- Space multiple ducks across the nail in a balanced composition
- Consider white nail bases for contrast, or pale backgrounds for subtlety
Pro tip: Practice the duck outline on paper first. You want the lines to feel confident and intentional. Shaky lines don’t read as minimalist; they read as uncertain. A few confident strokes will always look better than multiple uncertain ones.
17. Holographic Duck Sparkles
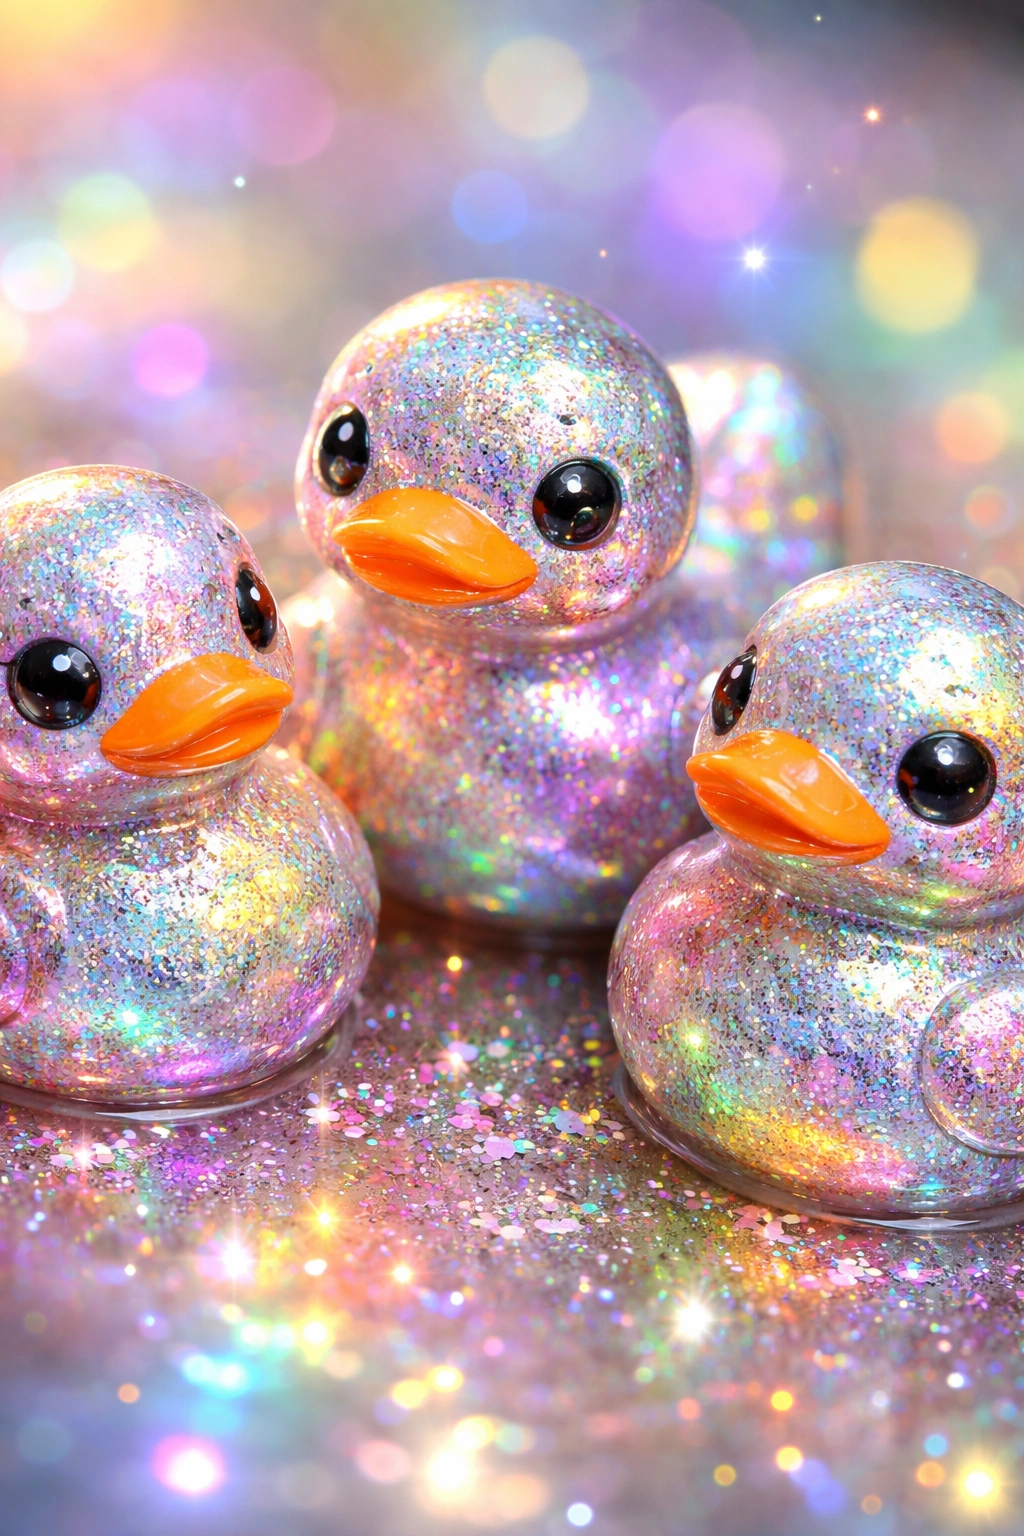
Use holographic or multichromatic polish to create ducks that shift and sparkle with different colors depending on the angle. The duck design itself remains simple, but the magical quality of holographic polish transforms it into something extraordinary. Kids are absolutely mesmerized by the shifting colors and the way holographic nails catch light. This design is pure magic through nail polish chemistry.
The Wow Factor of Holographic Polish
Holographic polish feels like having tiny prisms on your fingertips. The way colors shift and change in different light is genuinely magical, especially for kids. They’ll spend time moving their hands back and forth just to watch the colors change. This design combines the charm of duck nail art with the pure sensory delight of holographic effects. It’s the kind of nail art that makes kids feel special and a little bit magical themselves.
Using Holographic Polish Effectively
- Apply holographic polish smoothly in thin, even coats (usually requires 2-3 coats)
- Paint simple duck shapes in classic colors, then apply holographic topcoat over them
- Alternatively, use holographic polish as the base and paint darker duck details over it
- The holographic effect works better in bright, natural light than artificial light
- Seal with a glossy topcoat to enhance the sparkle and shift effect
Worth knowing: Holographic polish can sometimes look dull indoors and only shows its true colors in bright light. If your child will be wearing these nails mostly indoors, test the design in natural light first to make sure the effect is visible enough to be worthwhile.
18. Tie-Dye Duck Doodles
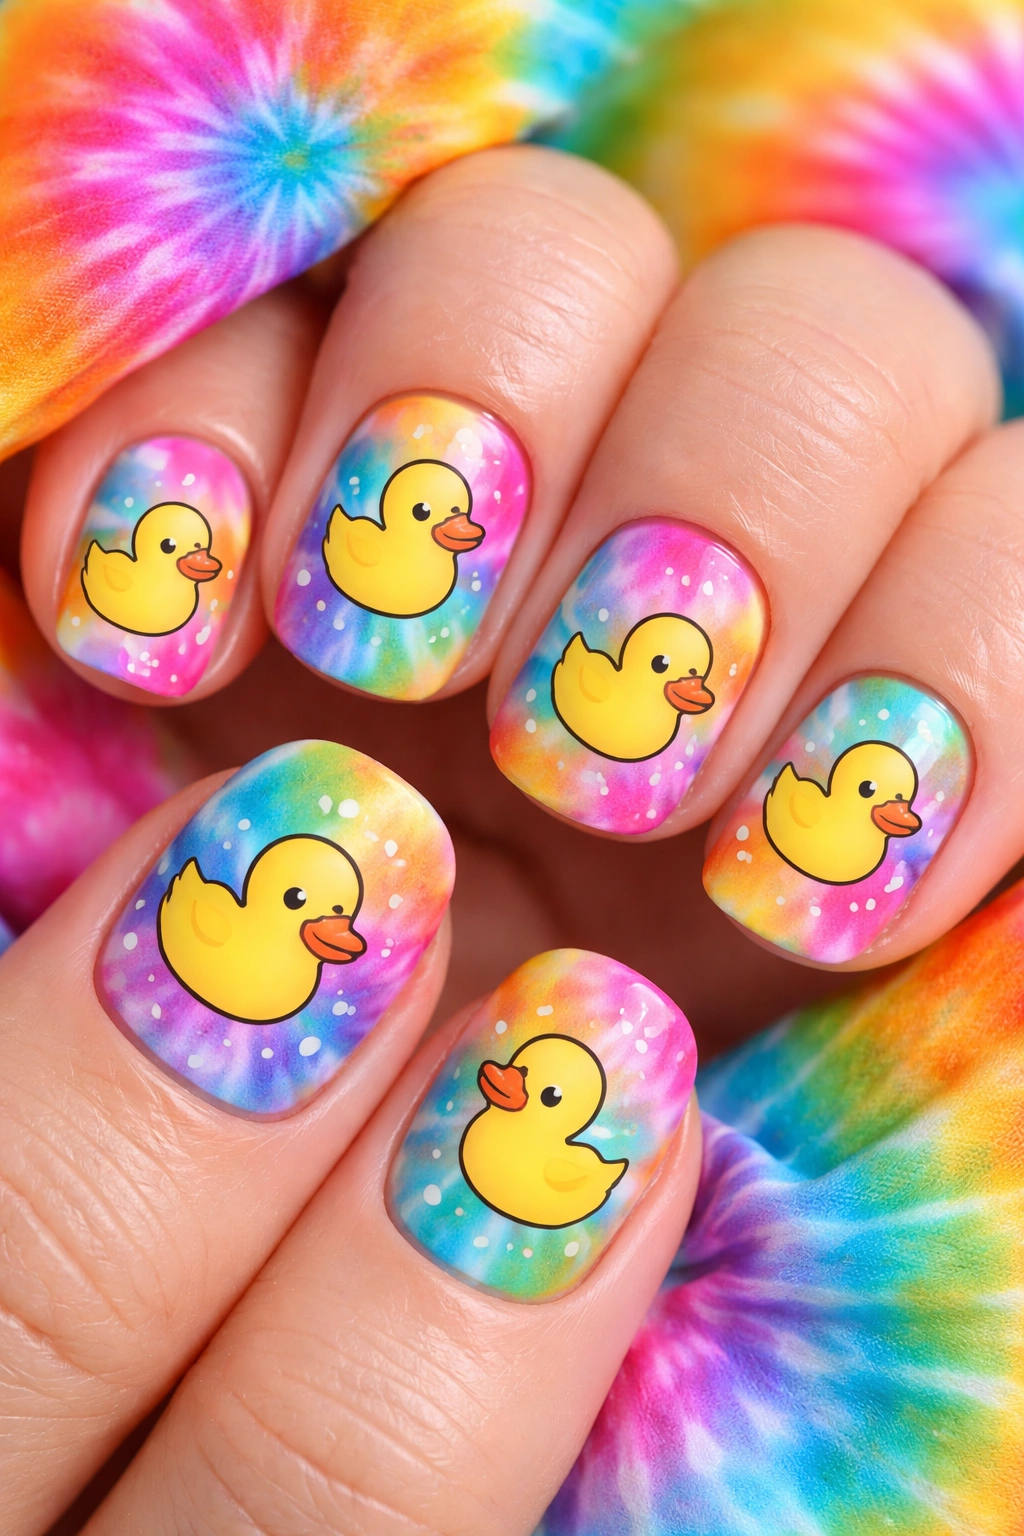
Create a tie-dye background effect using multiple colors and then add duck doodles on top. The tie-dye base provides a vibrant, groovy backdrop, while simple duck sketches add recognizable imagery. This design combines the peace-and-love aesthetic of tie-dye with the cuteness of ducks. It appeals to kids who love bold color combinations and enjoy the slightly chaotic beauty of tie-dye patterns.
Mixing Aesthetics and Styles
Tie-dye duck doodles prove that different design styles can coexist beautifully. The free-flowing, organic nature of tie-dye paired with the structured simplicity of duck doodles creates visual interest. Kids learn through this design that rules don’t have to be rigid. You can blend a 1970s aesthetic with cute animal imagery and create something uniquely beautiful and entirely new. It’s about creative freedom and personal expression.
Creating the Tie-Dye Effect
- Paint a light base color (white or pale yellow works well)
- Apply several bright colors (pink, green, blue, purple) in pools across the nail while the base is still wet
- Blend the colors together where they meet using a damp brush or sponge
- Allow the tie-dye effect to dry completely
- Add simple duck doodles using black or dark polish over the tie-dye background
- Seal with topcoat to set the design
Pro tip: Tie-dye effects work best when you don’t overblend. Let the colors sit near each other and only gently blend where they meet. Too much blending creates mud instead of the vibrant tie-dye look you’re aiming for.
Final Thoughts
Duck nail designs offer something special for kids—they’re playful without being babyish, creative without being intimidating, and flexible enough to match any child’s personality or current interests. Whether your child gravitates toward bold, colorful designs or prefers subtle, minimalist styles, there’s a duck nail idea that speaks to them.
The most important thing to remember is that these designs are meant to be fun. The process of choosing a design, gathering supplies, and creating nail art together builds confidence and creative thinking. Kids learn that they can transform something ordinary into something special through imagination and effort. When mistakes happen—and they will—they learn that imperfection doesn’t ruin the result. A slightly wonky duck or a color that bled a little still tells a story and still brings joy.
Encourage your child to experiment with the designs, mix and match elements from different ideas, and create their own unique duck variations. The most meaningful nail art is often the kind your child designed themselves. Duck nails aren’t just about having cute fingertips; they’re about celebrating creativity, individuality, and the simple joy of self-expression through wearable art.
