

If you’ve scrolled through nail inspiration lately, you’ve probably seen those dramatically curved, elongated nails that look like they’re almost defying gravity—those are duck nails, and they’ve become a phenomenon. The shape is bold, unapologetic, and honestly addictive once you commit to it. But here’s what makes duck nails even more interesting: they’re the perfect canvas for color combinations that hit different, and nothing quite matches the contrast and sophistication of black paired with pink.
Black and pink is one of those color combos that works at literally every vibe—edgy and moody, cute and playful, or sleek and minimal depending on how you style it. When you combine that with the sculptural drama of duck nails, you’ve got something that commands attention and photographs like a dream. The thing about this pairing is that it works because of the stark visual contrast. Black grounds the design and adds depth, while pink (whether it’s hot fuchsia, soft rose, or anywhere in between) brings brightness and personality. Together, they create balance instead of feeling chaotic.
The best part? There’s an enormous range of ways to interpret this color combo on duck nails. You can go high-fashion minimalist with clean lines and geometric shapes, full-on maximalist with detailed nail art and embellishments, or anything in between. Whether you’re naturally drawn to nails as a form of self-expression or you’re just looking for something fresh and different, black and pink duck nails offer endless creative possibilities. Each design approach below brings its own flavor and skill level, so whether you’re a nail art novice or someone who’s been perfecting the craft for years, there’s something here that’ll speak to you.
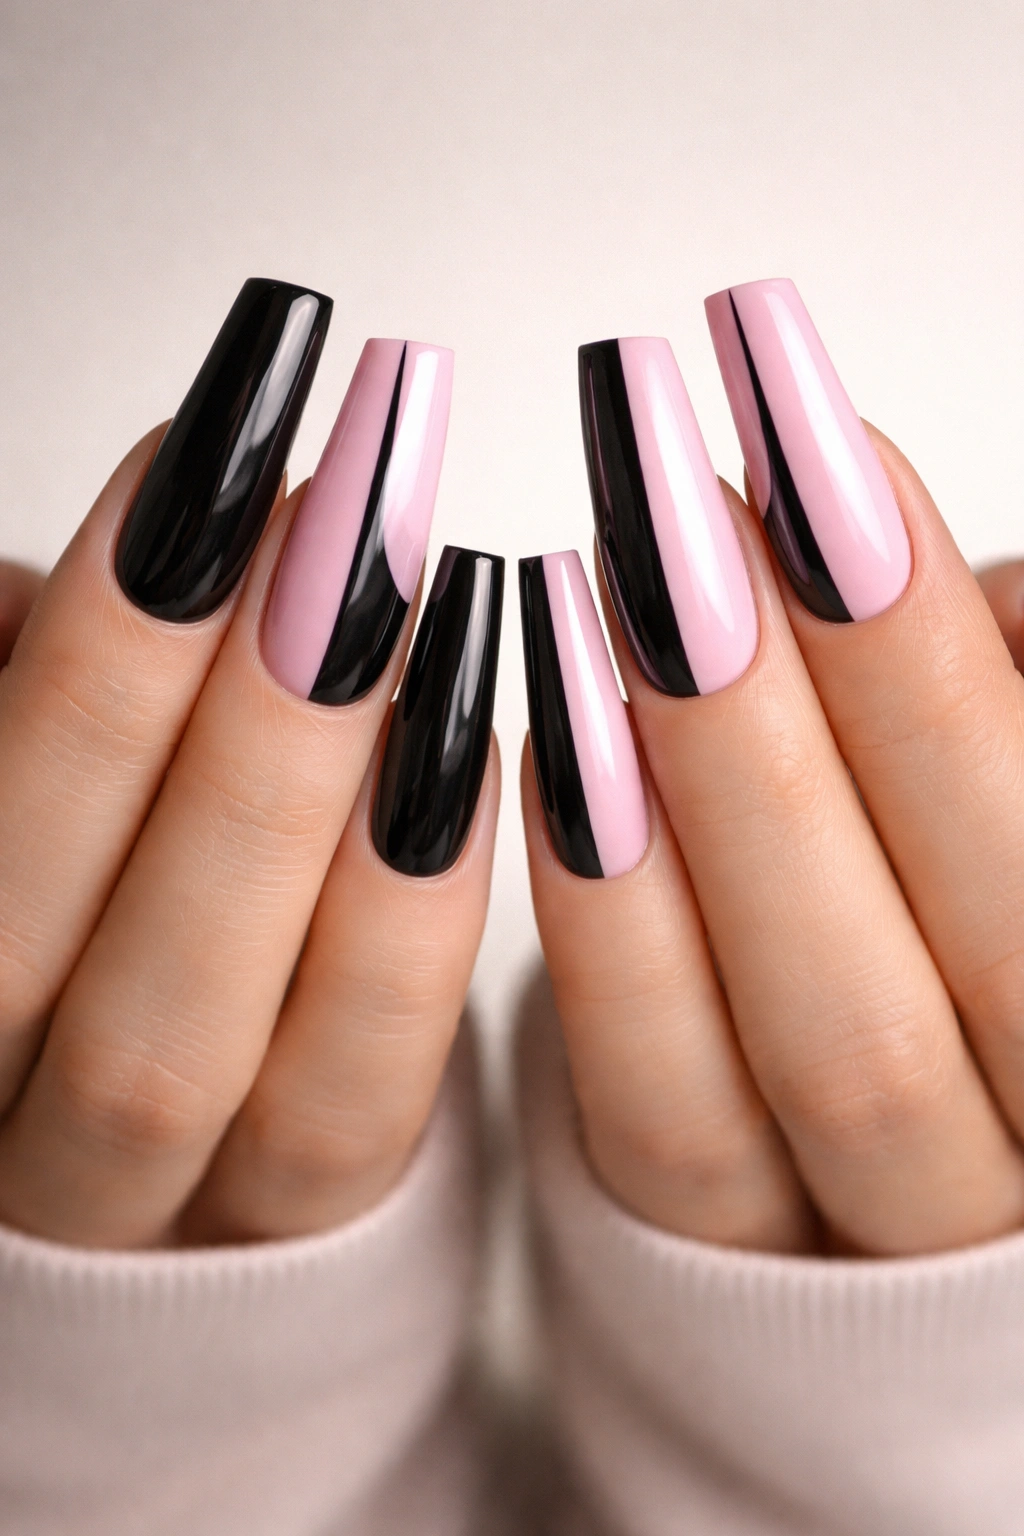
1. Classic Two-Tone Split Design
The simplest approach to black and pink duck nails is also one of the most striking—a clean vertical split down the middle where one half is solid black and the other is solid pink. This design works beautifully because of its symmetry and clarity; there’s no confusion about where one color ends and the other begins, which actually makes it feel more intentional and high-fashion rather than accidental.
Why This Design Works Best
The beauty of a true 50/50 split is that it lets the duck nail shape do the talking. You’re not competing with intricate details or layered colors—you’re showcasing the curve and length of the nail itself, which is really the point of this trend. The geometric simplicity also means this design stays crisp and clean-looking even as your nails grow out slightly between appointments. It reads as intentional and editorial rather than trying too hard.
Application Tips for Perfect Results
- Use painter’s tape down the center of each nail for a razor-sharp line
- Apply pink first since it’s typically more opaque than black
- Seal both colors with a glossy top coat for maximum shine and visual pop
- If you prefer a softer transition, skip the tape and freehand a slightly blurred edge for a gradient effect instead
Pro tip: This design looks incredible with a matte top coat on the black side and glossy on the pink side for a mixed-finish effect that adds unexpected dimension.
2. Ombré Gradient Blend
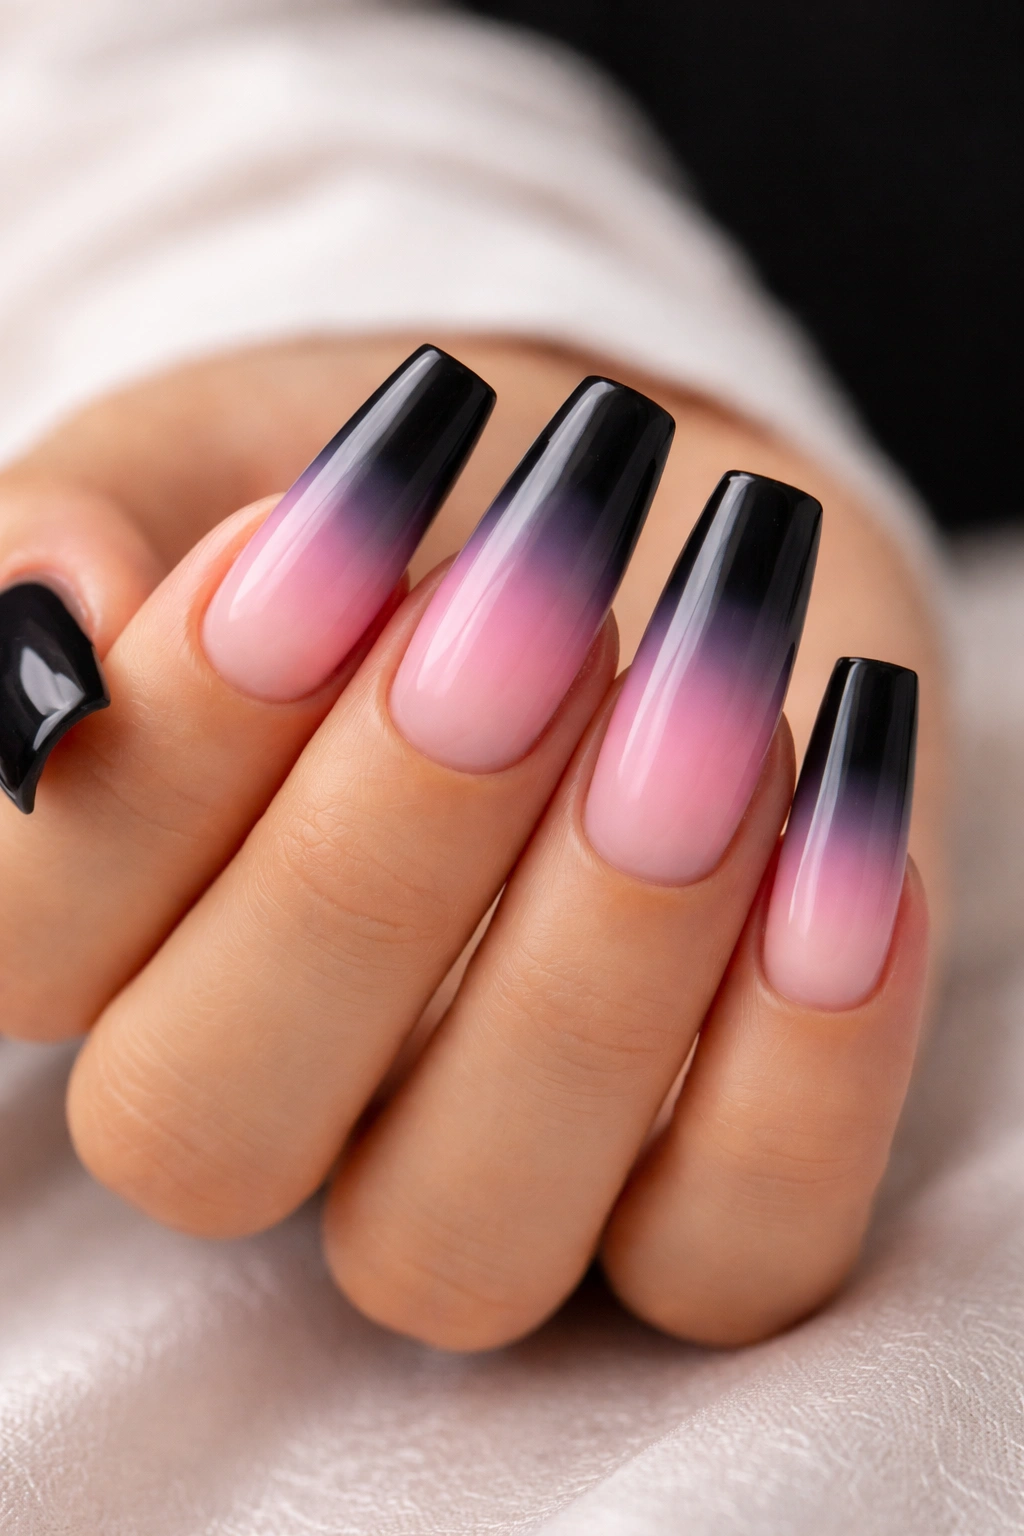
Ombré creates a dreamy, seamless transition from black to pink (or vice versa) using a sponging technique. Instead of a hard line between the colors, you’re building layers where the black gradually softens into pink, creating an almost watercolor effect on the nail surface. This approach takes a little more technical skill but the result is absolutely worth it.
The Gradient Technique Breakdown
To achieve this, you’ll need a makeup sponge and patience. Start with a base coat, then apply your colors to the sponge in sections—black on one end, pink on the other—and dab that sponge onto the nail repeatedly, building the gradient piece by piece. The key is using a light hand and not pressing too hard, which would create obvious sponge marks instead of a smooth blend. You’re essentially stippling color onto the nail rather than dragging the sponge across it.
Color Combinations That Look Best
- Black fading to hot pink for maximum drama and contrast
- Black transitioning to pale rose for a softer, more romantic vibe
- Deep black melting into dusty mauve-pink for an understated elegance
Worth knowing: Layer a glossy top coat thickly over ombré designs—it helps blur any remaining texture from the sponging process and creates that coveted glass-like finish.
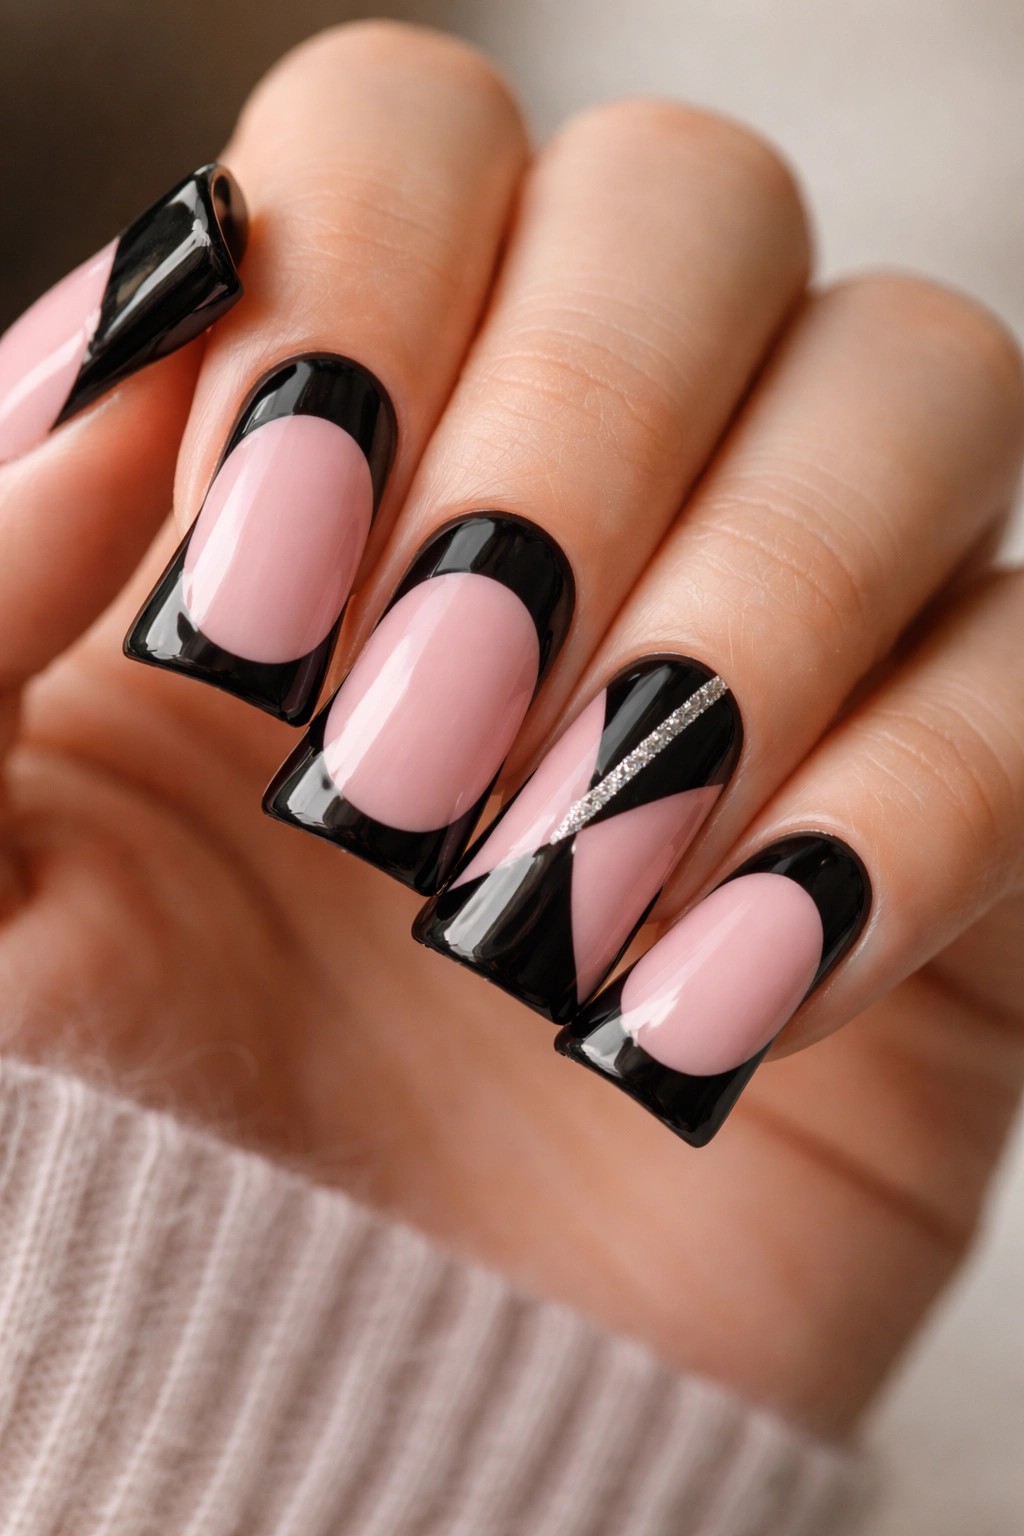
3. Geometric Black and Pink Patterns
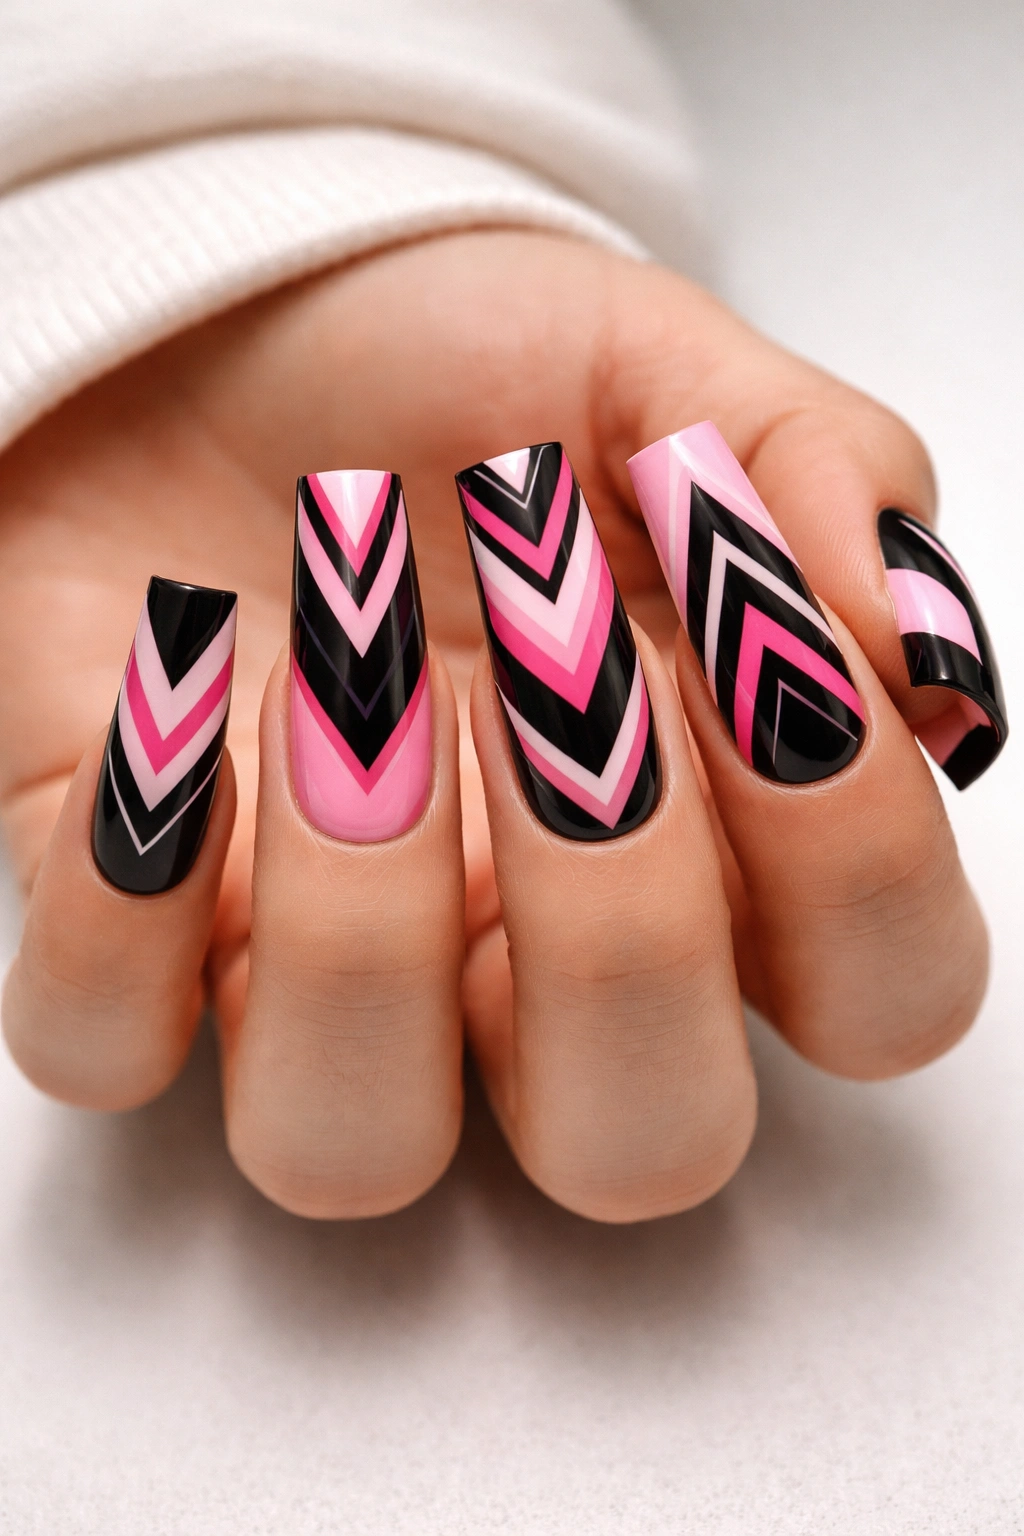
Geometric designs on duck nails create an architectural quality that feels very modern and intentional. Think stripes, chevrons, triangles, or abstract angular shapes in alternating black and pink. The length of duck nails actually works in your favor here because each geometric section has more surface area to work with, making the design bolder and easier to execute.
Design Patterns Worth Trying
Chevron patterns create movement and visual flow along the length of the nail. Vertical stripes are cleanest and easiest to execute using painter’s tape. Triangular sections that alternate colors create a dynamic, almost artistic look. You can also experiment with half-geometric designs where the top portion is patterned and the bottom is solid, or vice versa.
Tools and Techniques for Crisp Lines
- Thin striping brushes for hand-painted details
- Nail art tape for creating clean, straight divisions
- A dotting tool for creating geometric sections if you prefer stippling to brushwork
- Steady your hand by resting your pinky side on the table as you work
Insider note: Seal geometric designs with a matte top coat rather than glossy—it makes the pattern read more clearly without light bouncing across a shiny surface.
4. Negative Space Marble Effect
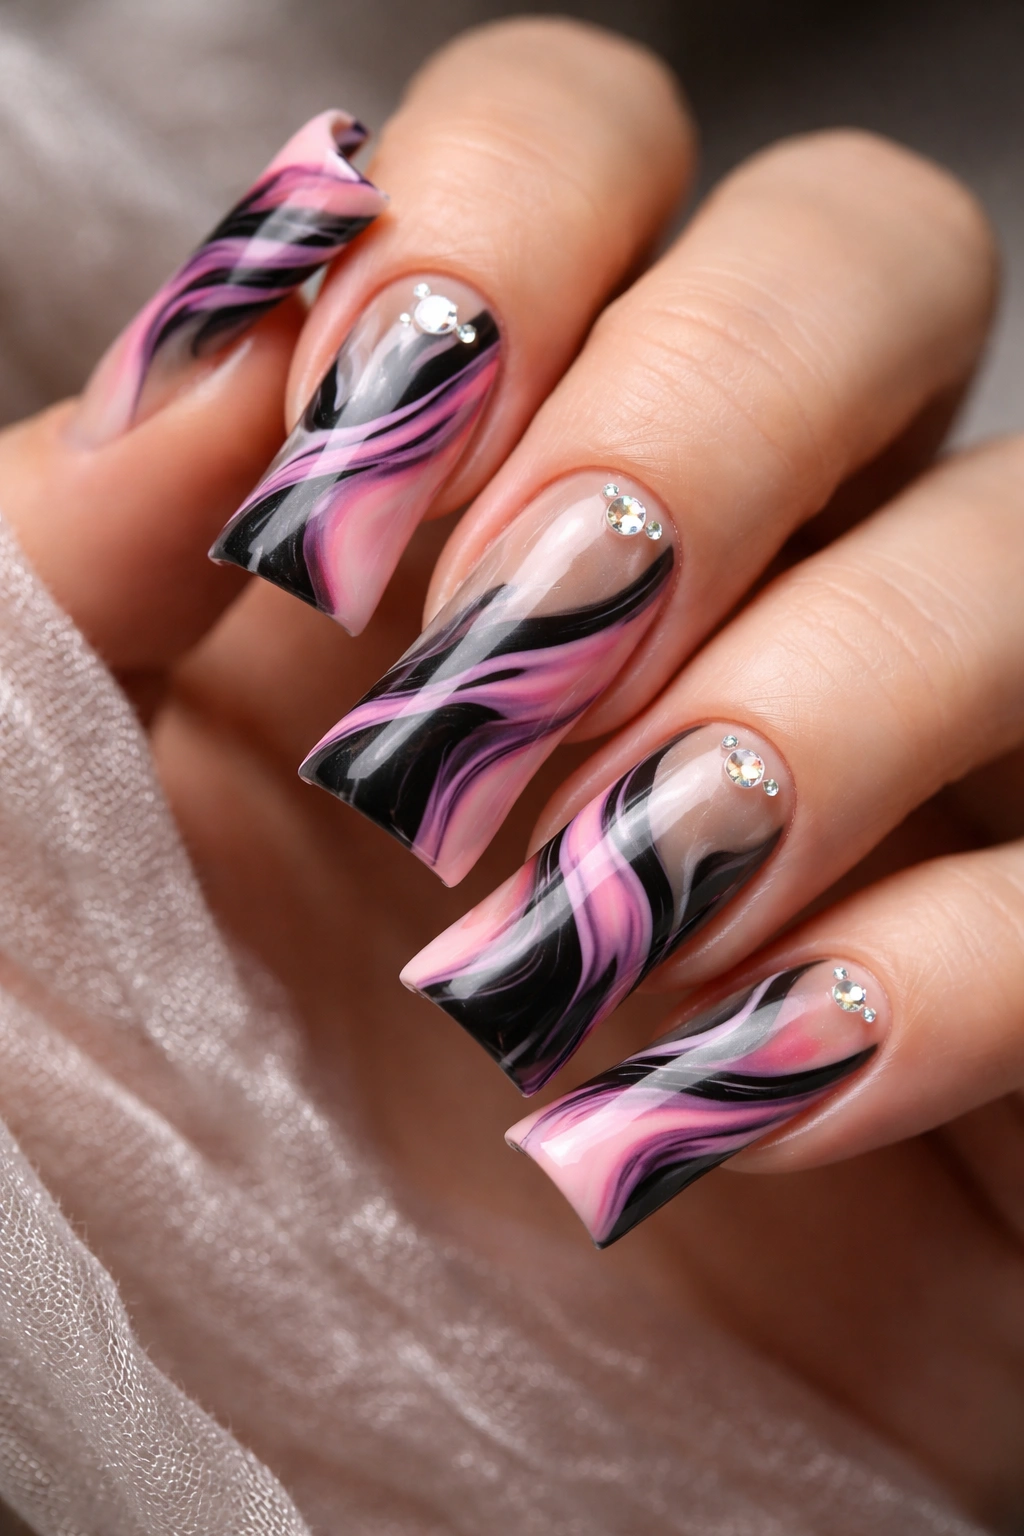
Negative space designs work beautifully on duck nails because the length gives you plenty of room to play with white (or natural nail) showing through. A marble effect using black, pink, and negative space creates an organic, high-fashion feel that looks like something straight out of a luxury nail salon. The marble pattern mimics natural stone, which brings sophistication to the design.
Creating the Marble Look
Mix black and pink in a shallow dish with a tiny amount of water to create a marbling solution. You can either water down the actual polish slightly or drop pre-thinned polish into water. Use a thin brush or toothpick to create swirling patterns in the mixture, then dip your nail into it at an angle. The polish clings to the nail surface in organic, unpredictable patterns—every nail ends up slightly different, which is exactly why this technique works.
Variations on the Marble Technique
- Create abstract swirls that cover 70% of the nail, leaving negative space at the tips
- Mix three colors (black, pink, and white) for a more complex marbled appearance
- Apply marble to just the nail bed, leaving the duck curve at the tip solid colored
Real talk: If water-marbling feels intimidating, you can fake the effect with a thin brush and irregular swirled brushstrokes in black and pink over a white base.
5. French Tip with a Twist
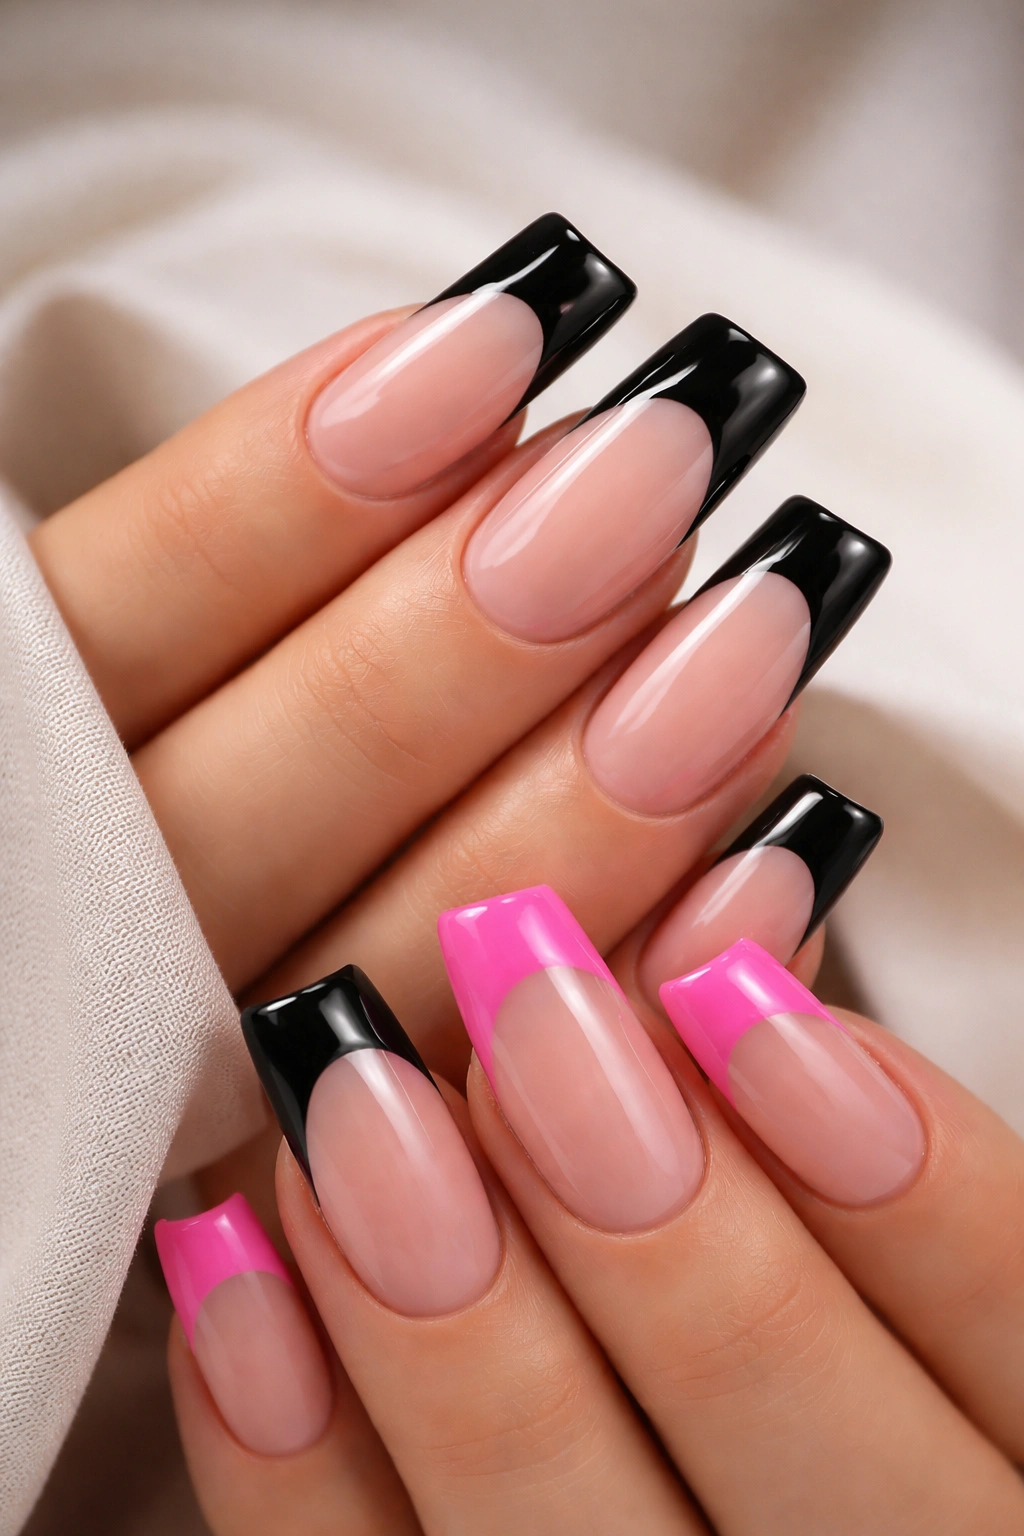
The duck nail French tip is one of the most elegant interpretations of this trend. Instead of the traditional white tip, you’re using pink or black for the tip line, creating a contemporary take on a classic. A black French tip on a pink base (or pink on black) creates refined, editorial-looking nails that work beautifully for both casual and fancy occasions.
Why French Tips Suit Duck Nails Perfectly
The elongated shape of duck nails makes the French tip line extra visible and impactful. The curved, extended tip portion becomes a canvas for your chosen contrast color, drawing the eye to the nail’s most dramatic feature. Because French tips are inherently clean and minimal, you’re using the color contrast to make a statement without needing additional nail art.
Execution Details That Matter
- Use a guide or freehand the curved line with a thin detail brush
- Keep the line thickness between 1-2mm for a modern feel (thicker looks more traditional)
- Ensure the tip line follows the natural curve of your duck nail for the most flattering proportions
- Apply with high precision—French tips look sloppy if the line wavers
Pro tip: A thin line of metallic gold or silver between the French tip and the main color adds glamour without overwhelming the design.
6. Splatter or Drip Design
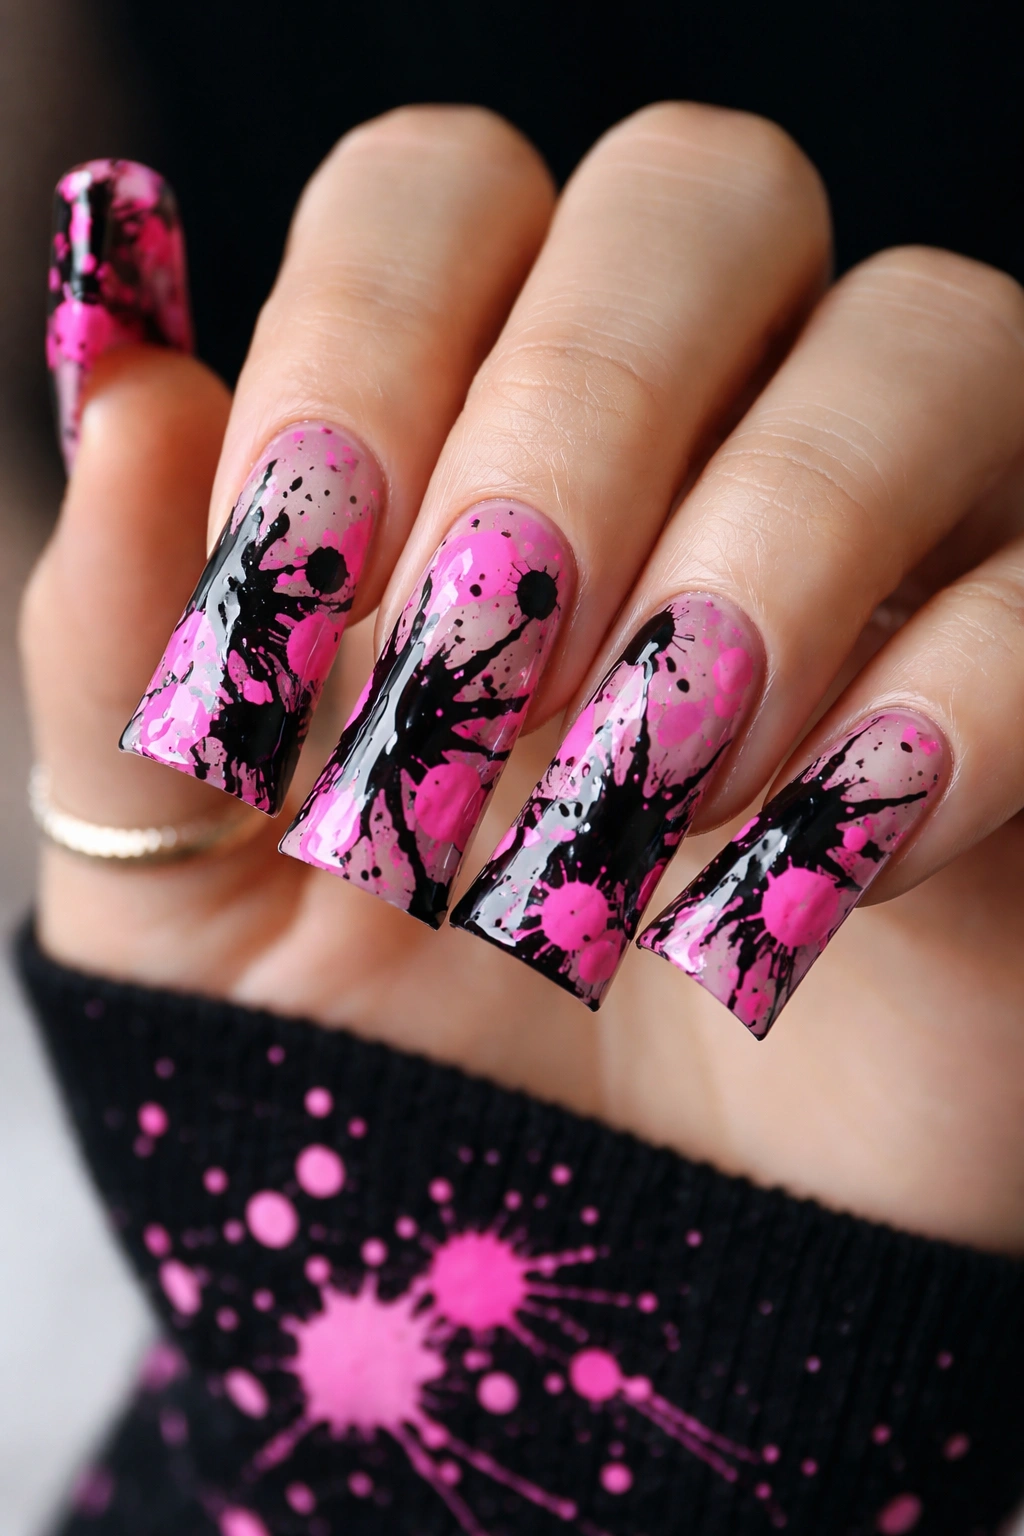
Splatter nails create an edgy, artistic vibe that feels playful and energetic. You can either splatter one color over the other (black splatters over pink, for instance) or create a balanced splatter effect where both colors are scattered across the nail in seemingly random patterns. This is a design that embraces imperfection and celebrates the artistic process.
Splatter Technique Methods
The flick technique involves loading a thin brush with polish and flicking it across the nail to create small splatters. The straw blow technique requires you to drop small amounts of polish onto the nail and blow through a straw to scatter the color outward in organic patterns. The toothbrush method involves loading a toothbrush with polish and dragging your finger across the bristles to create fine splatter lines. Each method creates a slightly different texture and feel.
Color Layering for Splatter Designs
- Start with a solid base (pink), then add black splatters for contrast
- Create a dual-splatter effect where both colors are scattered equally
- Build layers of splatters starting light and adding density as you go
- Use different splatter sizes—some fine, some chunky—for visual interest
Worth knowing: Let each color dry partially between applications so splatters don’t blend together into mud. You want distinct splatter marks, not a murky mix.
7. Minimalist Line Art
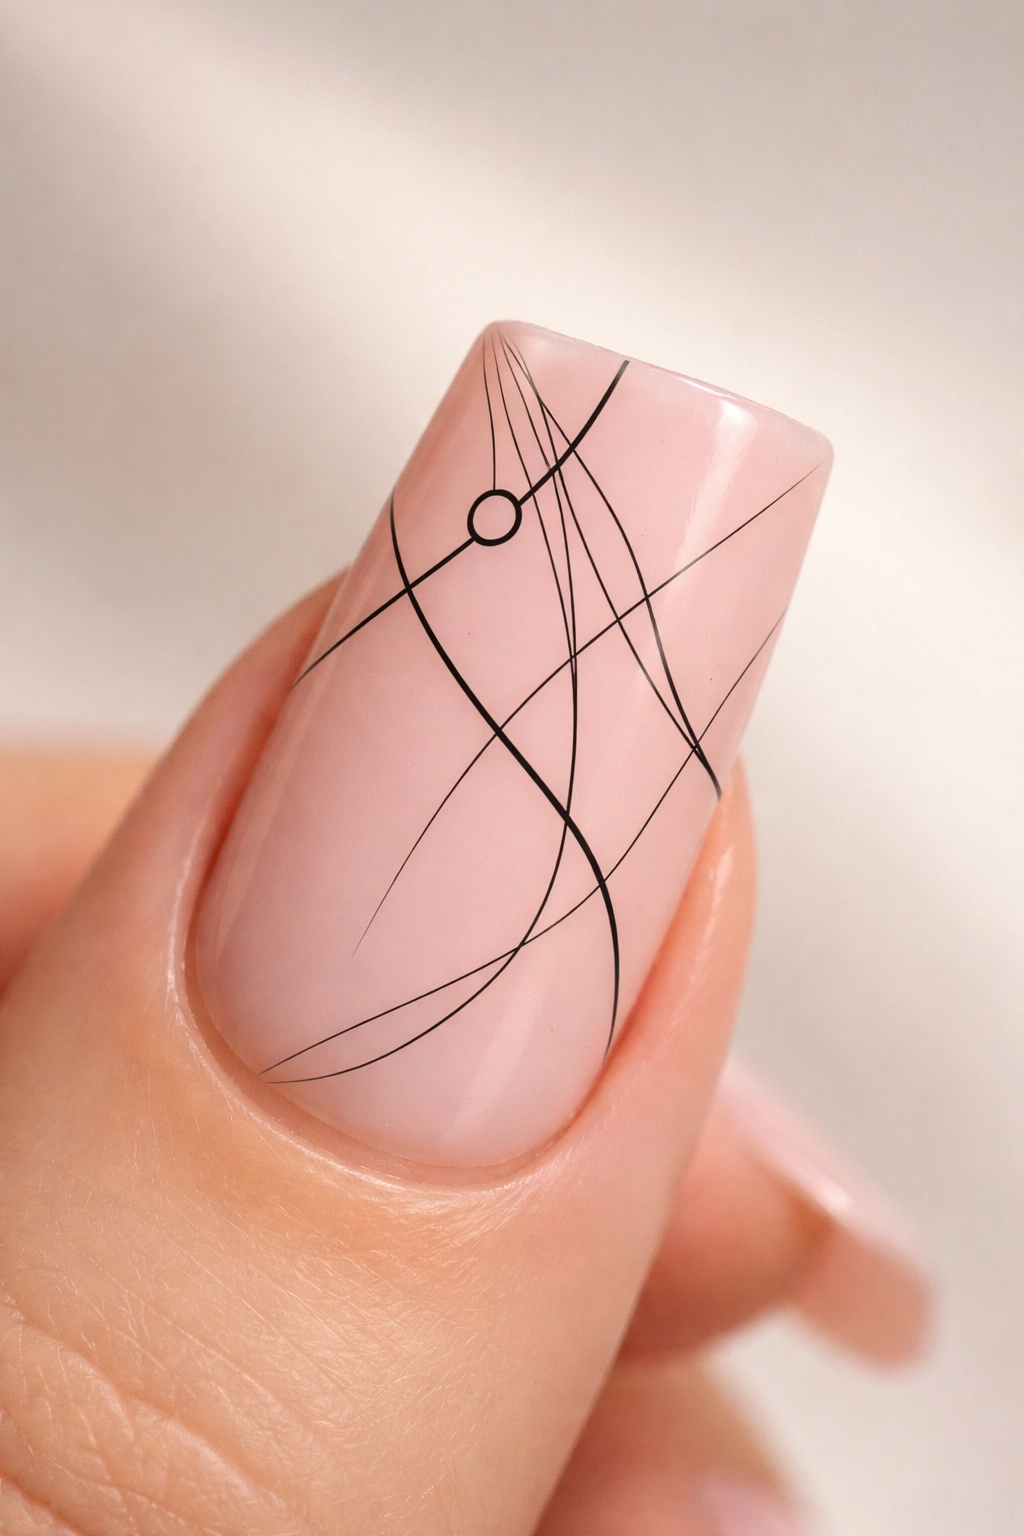
Line art designs use thin, precise brushstrokes in black or pink to create simple illustrations, patterns, or abstract lines on the opposite colored base. A thin black line creating geometric patterns on a pink base (or fine pink lines on black) feels elegant and intentional. This approach appeals to people who love art and detail but prefer designs that aren’t overly complicated or visually loud.
Line Art Design Ideas
- Simple abstract lines that weave across the nail surface
- Geometric patterns like triangles, hexagons, or interlocking shapes
- Nature-inspired designs like thin branch lines or grass-like strokes
- Minimalist faces or abstract expressions with just a few strategic lines
Getting Precision Line Work
Invest in a quality thin detail brush (size 0 or smaller). Stabilize your hand by bracing your pinky side against the table. Work under good lighting so you can see exactly what you’re doing. Start with simple designs before attempting complex patterns. If your hand shakes, apply the base color first and let it dry completely, then practice the line design on a piece of paper to build confidence before committing to nail.
Insider note: If you accidentally mess up a line, wipe it away immediately with a damp brush before the polish sets, then try again.
8. Glitter Accent Design
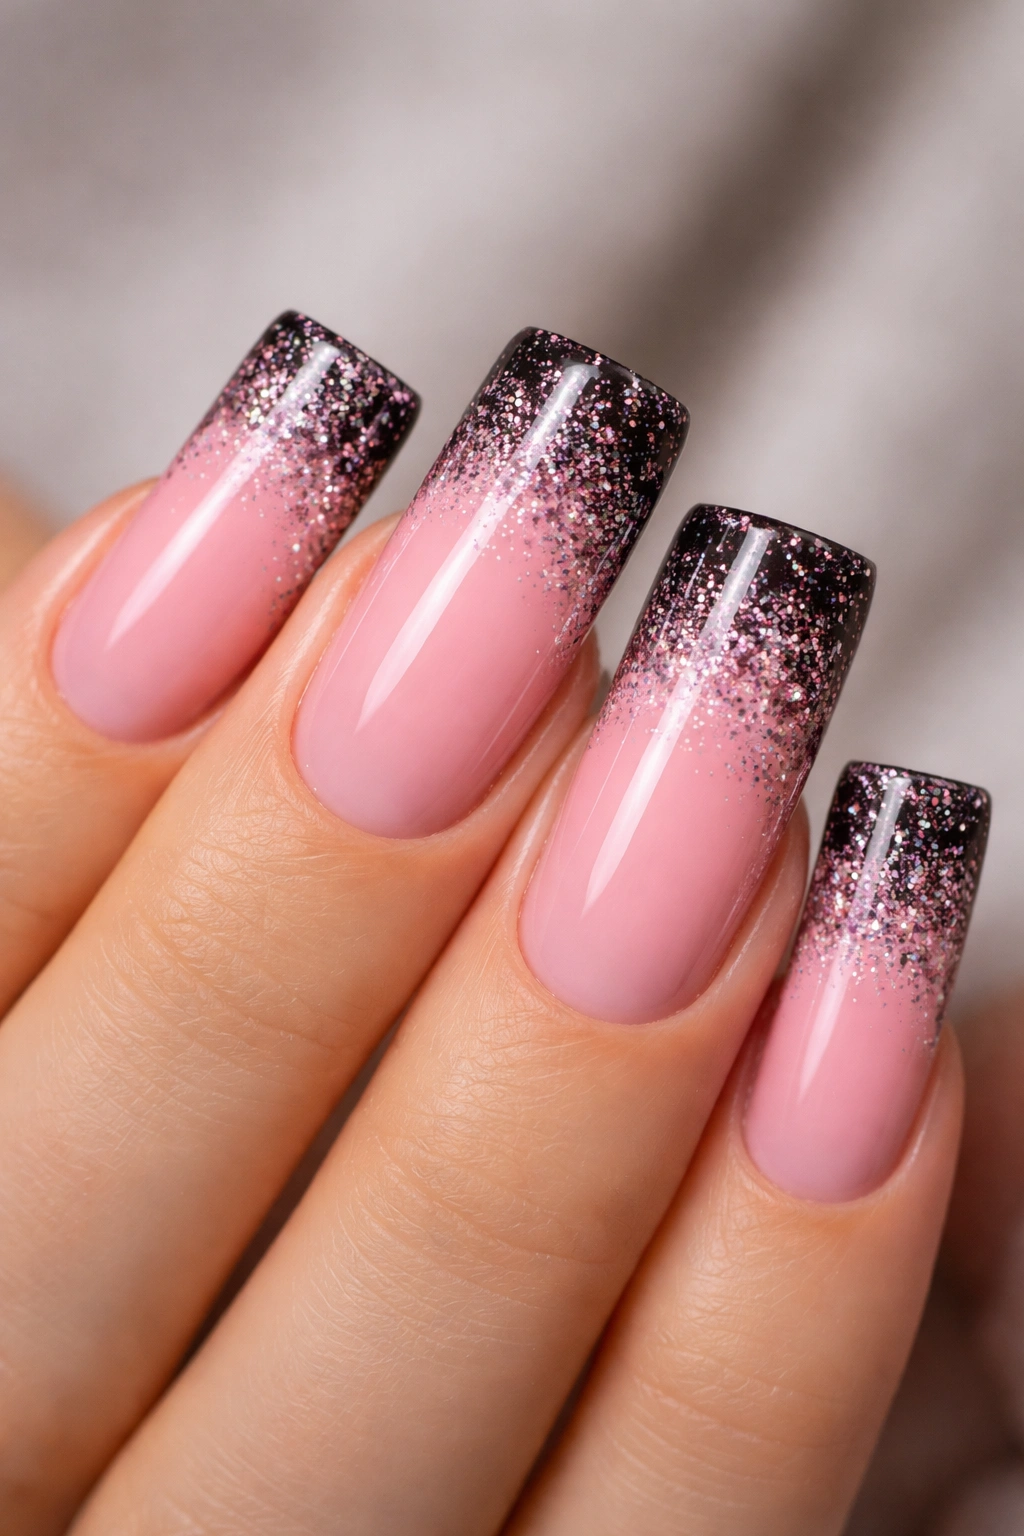
Glitter brings dimension and sparkle to black and pink duck nails without overwhelming the design. A clear or semi-transparent layer of fine glitter over one color, or concentrated glitter just on the tips, creates a design that catches light beautifully. This works especially well if you want a design that’s pretty but not overly bold, or if you’re adding extra glam for a specific occasion.
Glitter Application Strategies
Apply a base coat first, then your main color. While that’s still slightly wet, sprinkle fine glitter over the color (or use a glitter polish). You can cover the entire nail or concentrate glitter in specific areas like the outer edges or the very tip. Once it’s dry, seal everything under a glossy top coat that will lock the glitter in place and create a smooth surface.
Glitter Combinations That Work
- Black glitter over pink base for a subtle sparkle effect
- Pink metallic glitter over black for shine that pops
- Clear glitter with pink shimmer over a black base for understated glamour
- Chunky glitter mixed with fine glitter for textural variety
Pro tip: Let your polish dry 50% of the way before adding glitter, not completely dry. Fully dried polish won’t grip the glitter as effectively.
9. Yin and Yang Pattern
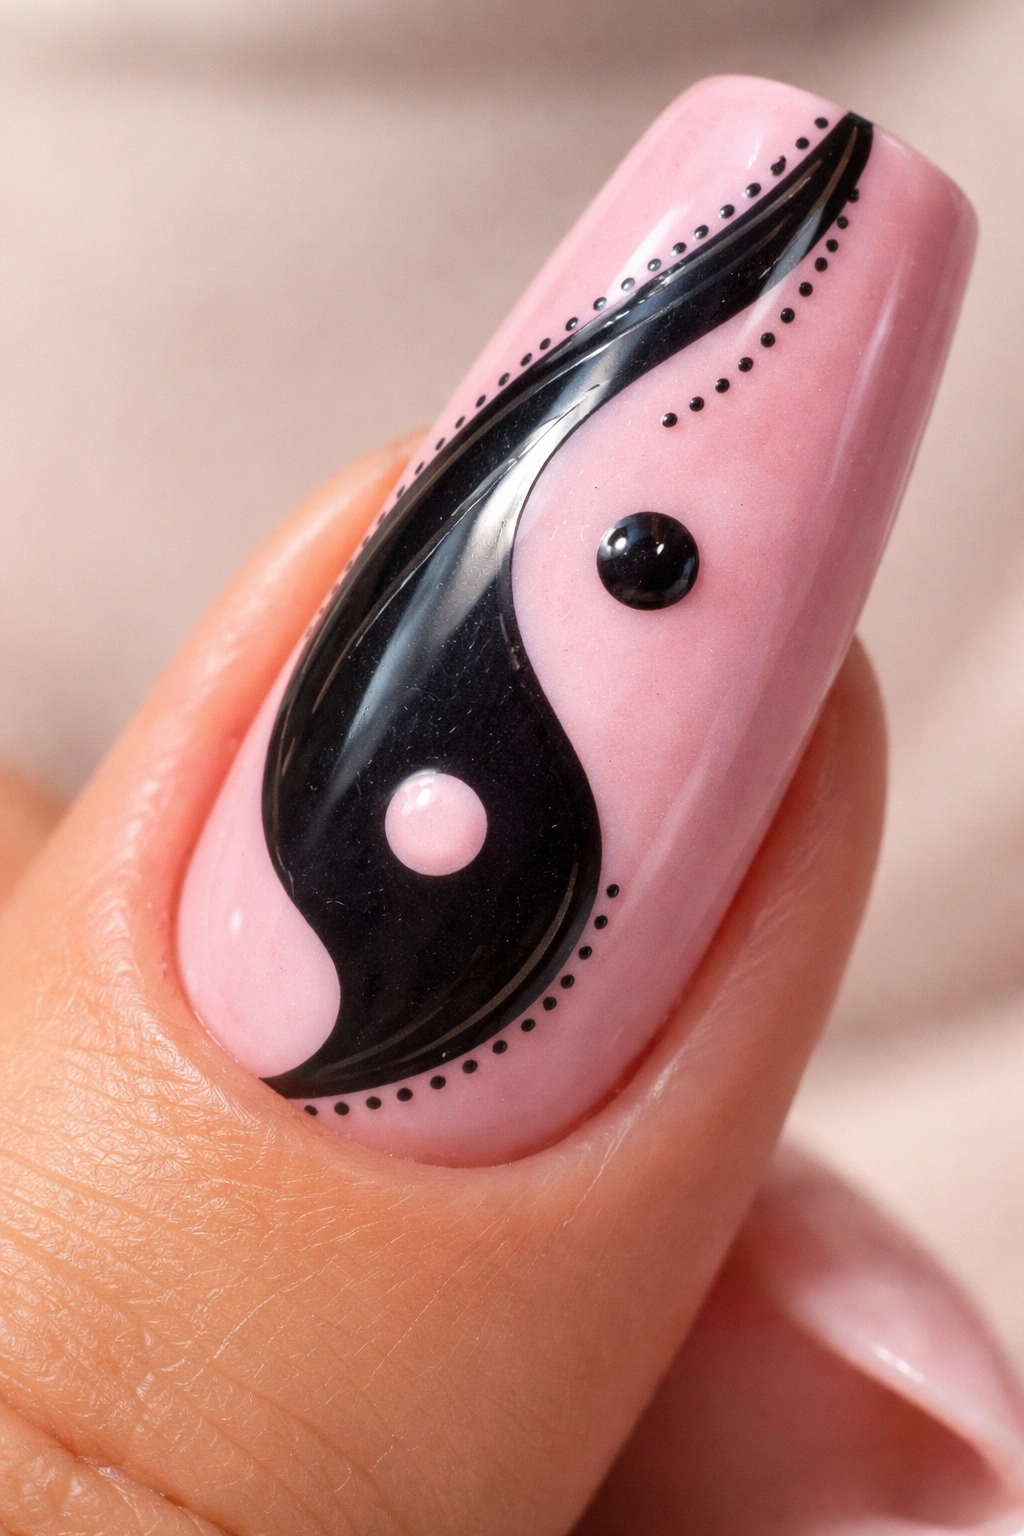
The yin-yang symbol is a perfect design for duck nails because the circular pattern naturally elongates along the nail shape, creating a sophisticated and balanced look. You’re working with black and pink to create the two opposing forces, which inherently makes sense with this particular color combo. The symbol carries meaning beyond just aesthetics—balance, duality, harmony—which gives the design extra resonance.
Executing the Yin-Yang Design
Start with a light base color (pink works beautifully). Use a thin brush or dotting tool to outline the yin-yang symbol in black, then fill it in carefully. The traditional symbol has a black teardrop on the pink side and a pink teardrop on the black side, with tiny dots in each. Because duck nails are curved, you might need to adjust the design slightly so it fits the nail shape naturally—elongating it rather than keeping it perfectly round.
Size and Placement Options
- Create one large yin-yang symbol spanning multiple nails as a continuous design
- Place a small yin-yang in the center of each nail
- Create a yin-yang design on the nail tip with pink and black solid colors below it
- Make the symbol vertical rather than horizontal to follow the elongated nail shape
Worth knowing: The yin-yang works best when you’re precise with your line work—sloppy execution makes this design look less intentional.
10. Leopard or Animal Print
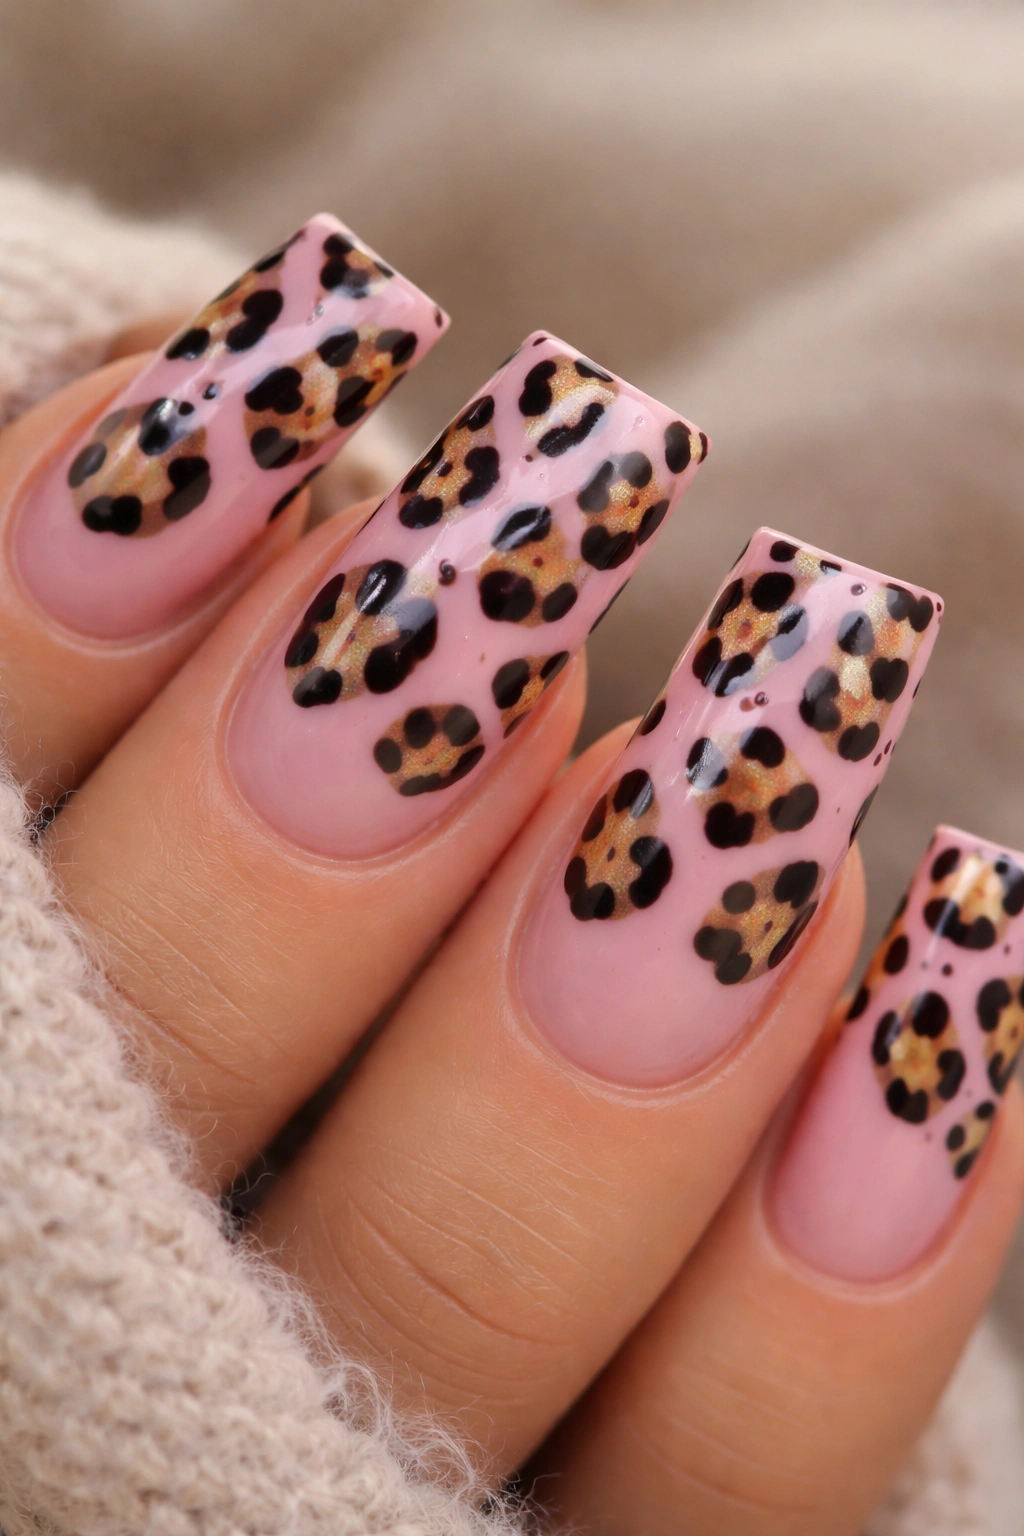
Animal print, especially in the black and pink color combination, feels bold and fashion-forward. Leopard spots, zebra stripes, or abstract animal prints create a design that’s energetic and slightly wild. Duck nails give you enough surface area to create recognizable animal patterns that read clearly rather than looking muddled or unclear.
Creating Believable Animal Prints
For leopard, use a thin brush or dotting tool to create irregular circles or teardrop shapes in black on a pink base. Don’t make them perfectly uniform—real leopard spots have variation in size and shape. Add fine black details or outlines around some spots for dimension. For zebra, create curved stripes that follow the natural contour of the duck nail rather than forcing perfectly straight lines.
Color Options for Animal Print
- Classic: black spots or stripes on pink base
- Reversed: pink spots on black base (less traditional but striking)
- Gradient approach: start with pink and fade to black while incorporating animal print
- Mix both colors in the animal print itself—some black spots, some pink spots, on a neutral base
Pro tip: Study real animal print photos before you design. Real patterns have asymmetry and variation that makes them look authentic and interesting.
11. Reverse French with Accent Nail
A reverse French tip flips the traditional design—instead of a colored tip on a neutral base, you’re creating a thick band of solid color around the base of the nail with the nail tip left pink or black. Pair this with one or two accent nails in a contrasting color or pattern, and you’ve got a cohesive look that’s still visually interesting.
Reverse French Base Nail Design
A thick black band or base (about 1/4 to 1/3 of the nail) on pink duck nails creates a dramatic frame. The base band essentially “grounds” the longer nail, making it feel less floating and more architecturally intentional. On accent nails, you might add details like geometric patterns, glitter, or a different color altogether.
Accent Nail Options
- One accent nail with a full geometric pattern in black and pink
- Alternating accent nails (every other nail) with a completely different design
- Feature a detailed pattern on your ring finger or thumb only
- Create a gradient or ombré effect only on the accent nails
Real talk: Reverse French actually makes duck nails feel more wearable for everyday life if you work in a more conservative environment—the framing effect makes the elongated shape feel less dramatic.
12. Holographic or Chrome Effect
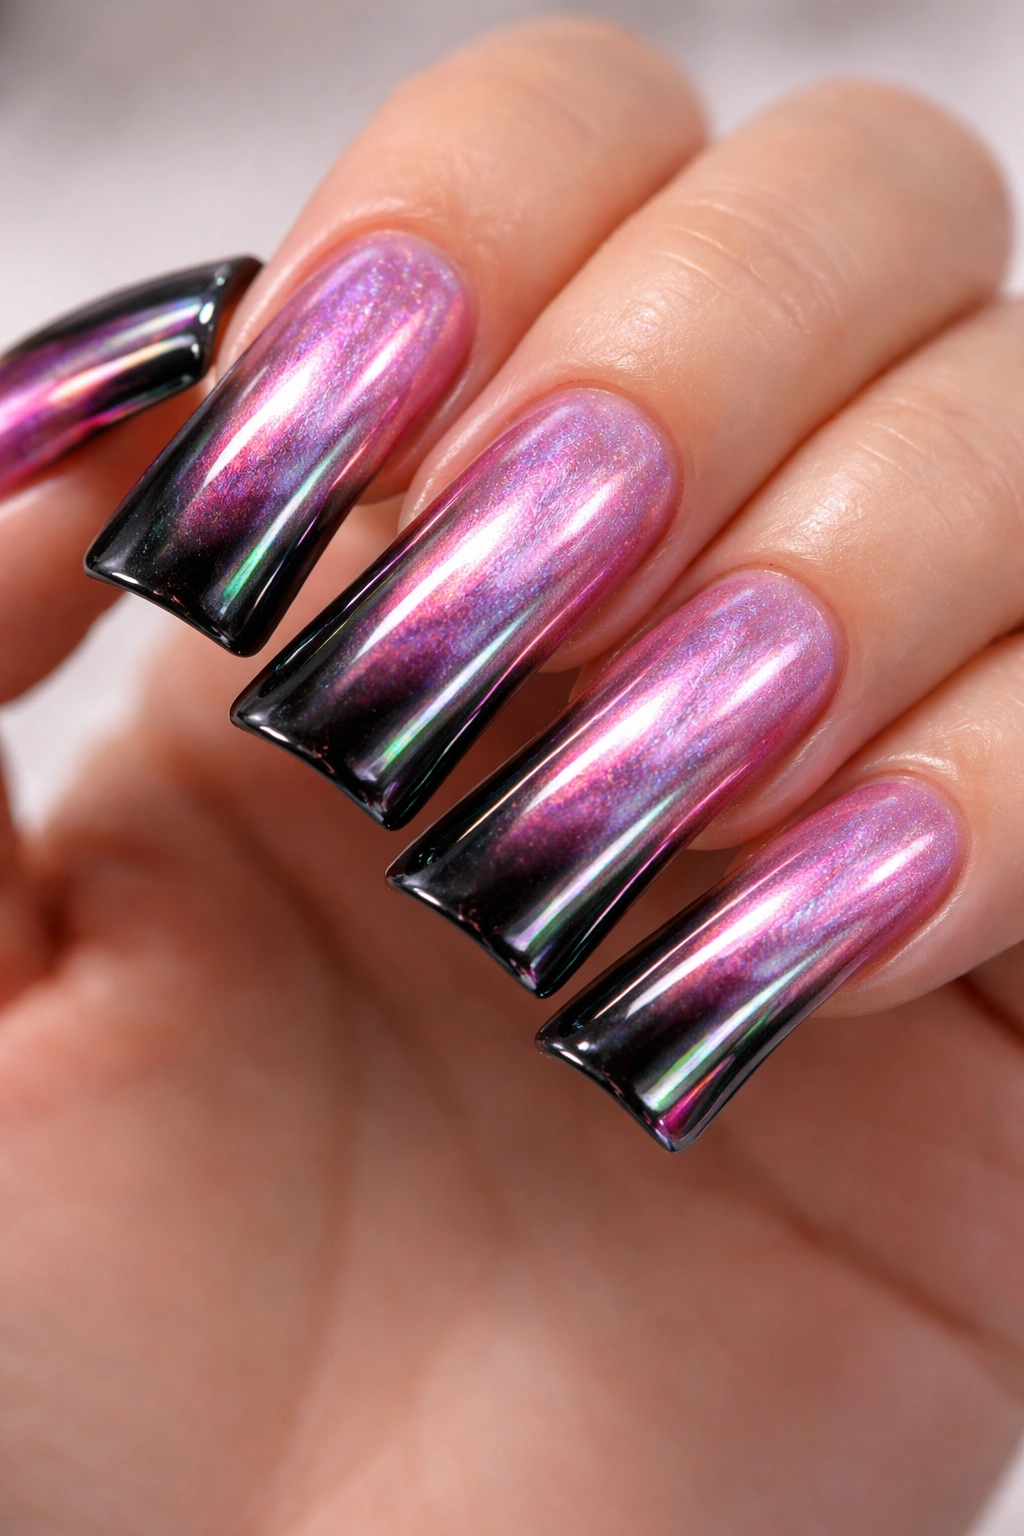
Holographic and chrome finishes create an ultra-modern, futuristic aesthetic that works beautifully in black and pink. These special finishes catch light and shift color depending on the angle, creating depth and dimension that regular polish can’t achieve. When combined with the sculptural duck nail shape, you get something that feels genuinely cutting-edge and high-tech.
Applying Holographic and Chrome Effects
Holographic polishes are typically used straight from the bottle—apply them as you would any regular polish, building opacity with two coats. Chrome finishes often require a base color plus a chrome powder applied with a velvet pad or sponge. Some modern chrome products come as polish that you apply directly. Black chrome creates an almost mirror-like effect that’s absolutely striking. Pink chrome shifts between shades depending on lighting.
Combining Holographic Effects
- Holographic black base with pink chrome details or tips
- Alternate between holographic pink and solid black sections
- Create a holographic full-nail finish on some nails and solid color on others
- Apply holographic effects only to the tip portion of the duck nail
Insider note: These finishes look most impressive in natural light or bright environments—indoors they might look more muted.
13. Striped Design with Varied Widths
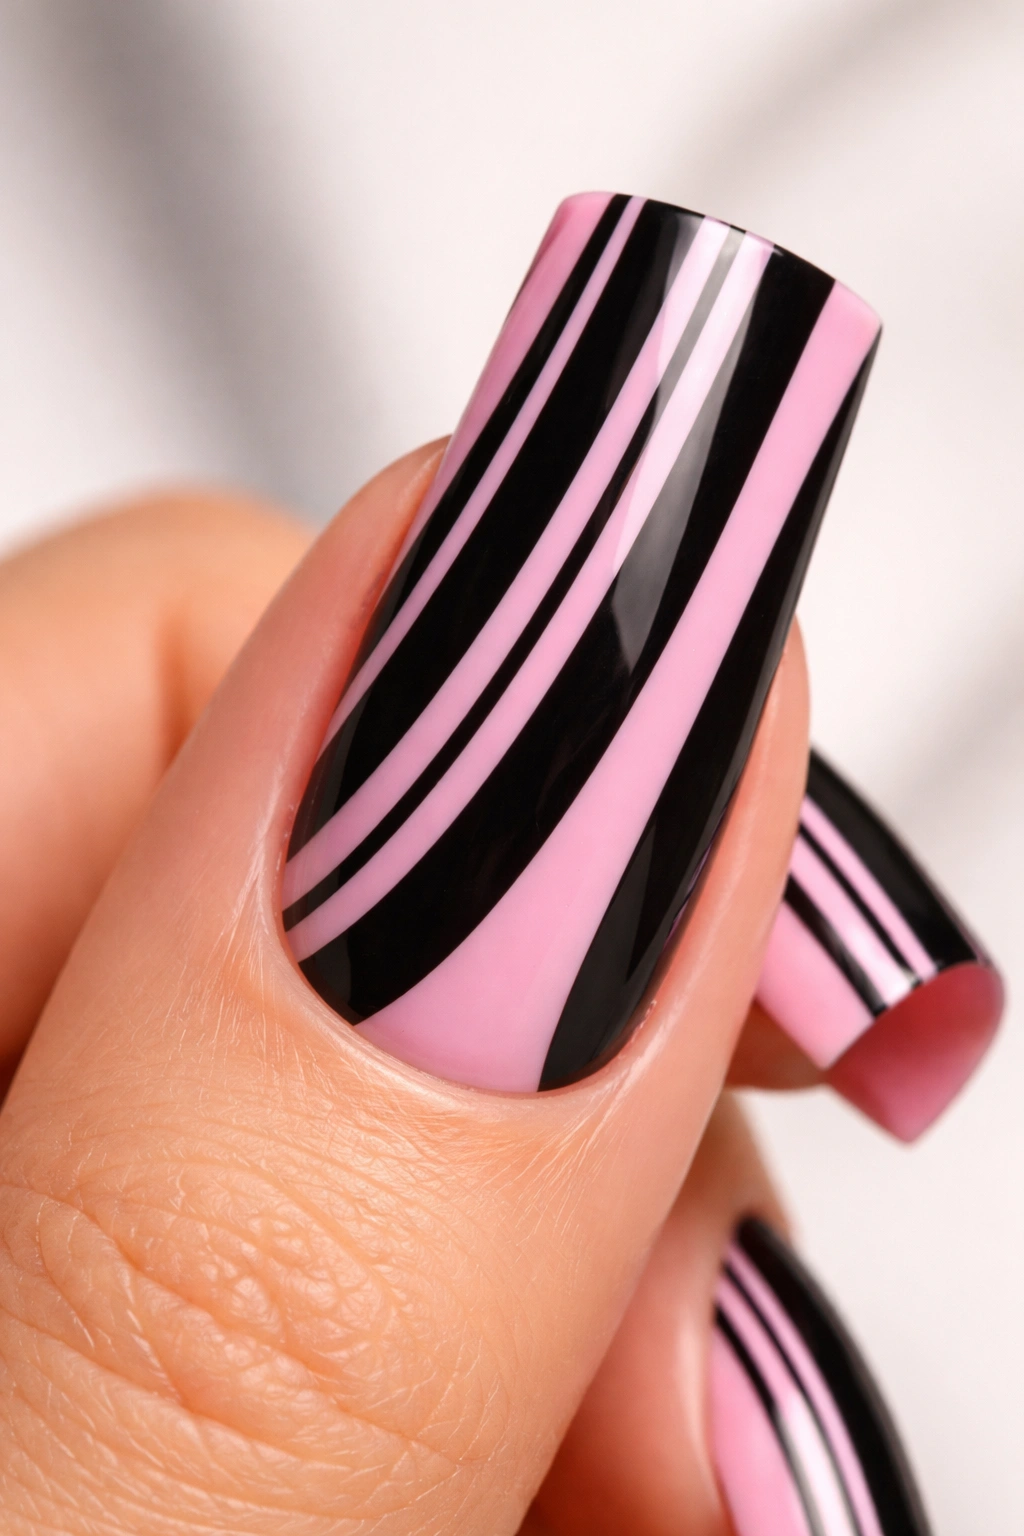
Stripes are a classic nail design, but the key to making them interesting is varying the width and spacing. Thin stripes alternating with thick stripes, or multiple thin stripes grouped together, create visual rhythm and interest. On duck nails, the length of the canvas means your striped pattern has plenty of room to develop and show detail.
Stripe Width Combinations
- Thin pink stripe, thick black stripe, thin pink stripe pattern
- Grouped thin stripes (like three thin black lines together) separated by pink sections
- Graduated stripes that get progressively thinner or thicker
- Random spacing where stripes feel deliberately scattered rather than perfectly measured
Tools and Techniques for Precise Stripes
- Striping tape for perfectly straight divisions
- A thin brush for hand-painted stripes with slightly softer edges
- A striping brush specifically designed for nail art lines
- Rulers or guides taped on if you’re a beginner
Pro tip: Stripes that run vertically (from base to tip) elongate the nail visually, while horizontal stripes can make nails appear wider and shorter—keep this in mind when planning your design.
14. Checkerboard or Gingham Pattern
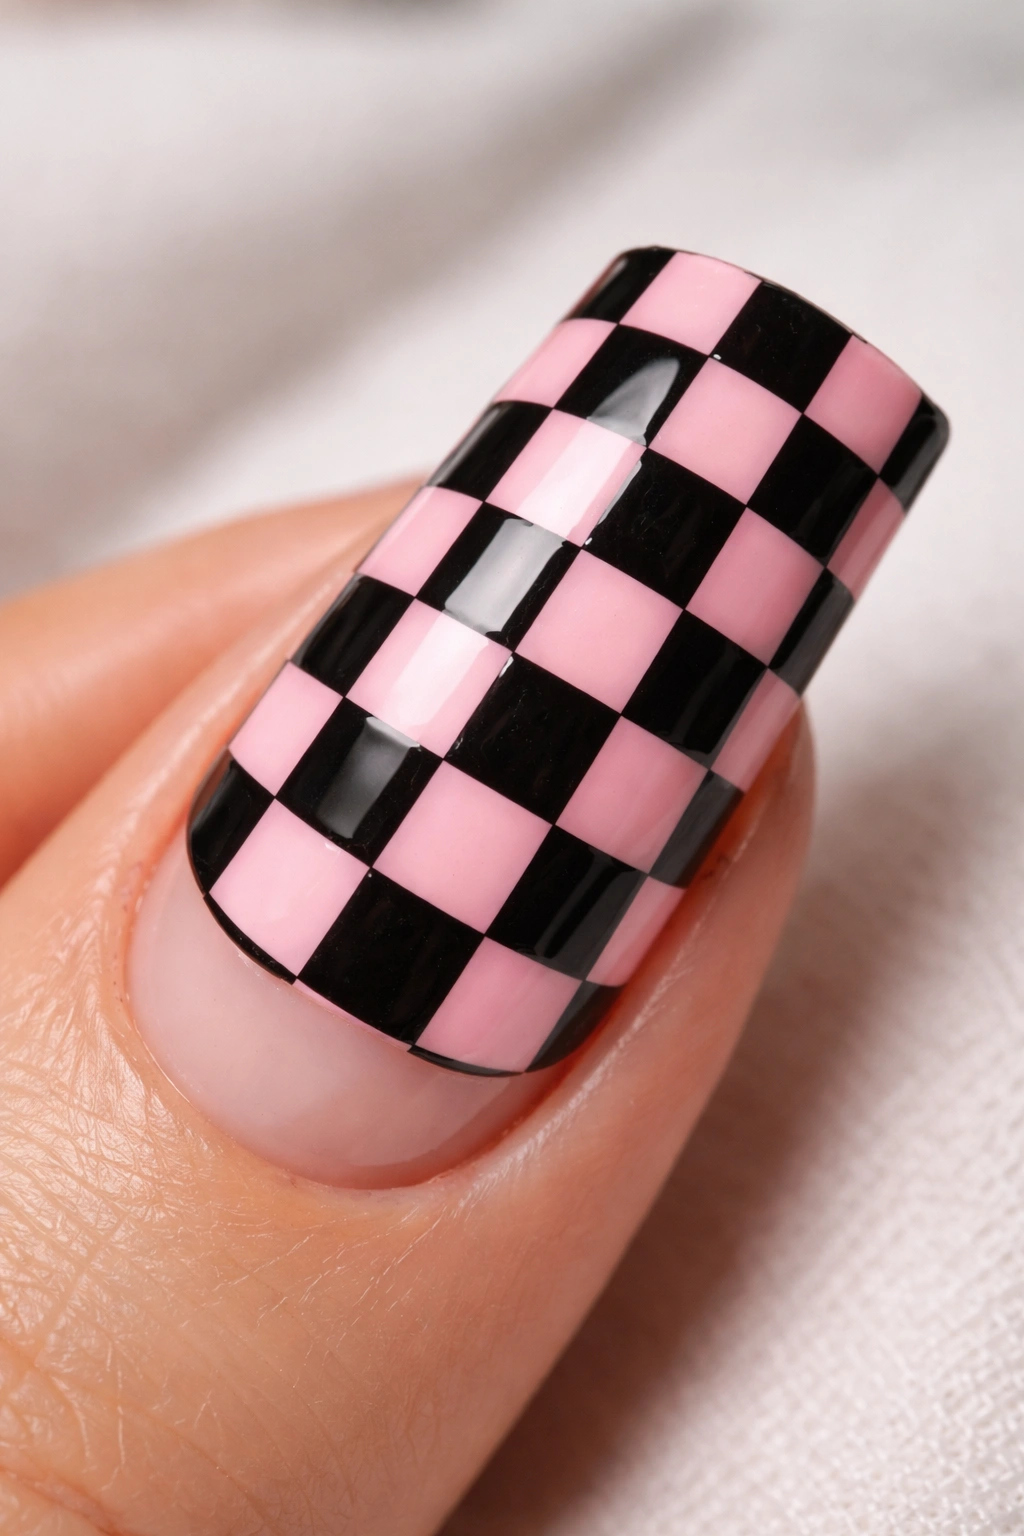
Checkerboard and gingham patterns create a structured, almost playful look that feels modern and intentional. Black and pink checkerboards are cheerful and bold without being chaotic. The key to executing these patterns successfully is precision with your divisions—whether you’re using tape or painting them freehand.
Creating Perfect Checkerboard Patterns
Start by planning your grid—if your nail is roughly 1.5 inches long, you might do 4-5 rows of squares. Using painter’s tape, create a grid pattern on your nail by taping off alternating squares. Paint one color, let it dry, remove the tape, and use tape again to paint the opposite color in the remaining squares. Alternatively, use a small square sticker or create a grid freehand with a thin brush.
Pattern Variations
- Traditional checkerboard with equal-sized squares in black and pink
- Gingham pattern (smaller checks) for a more delicate feel
- Checkerboard only on the tips, solid color on the nail bed
- Checkerboard that covers one half of the nail, solid color on the other
Worth knowing: Smaller checkerboards look more refined and modern; larger, chunkier squares feel more casual and playful.
15. Gradient with Contrasting Tip
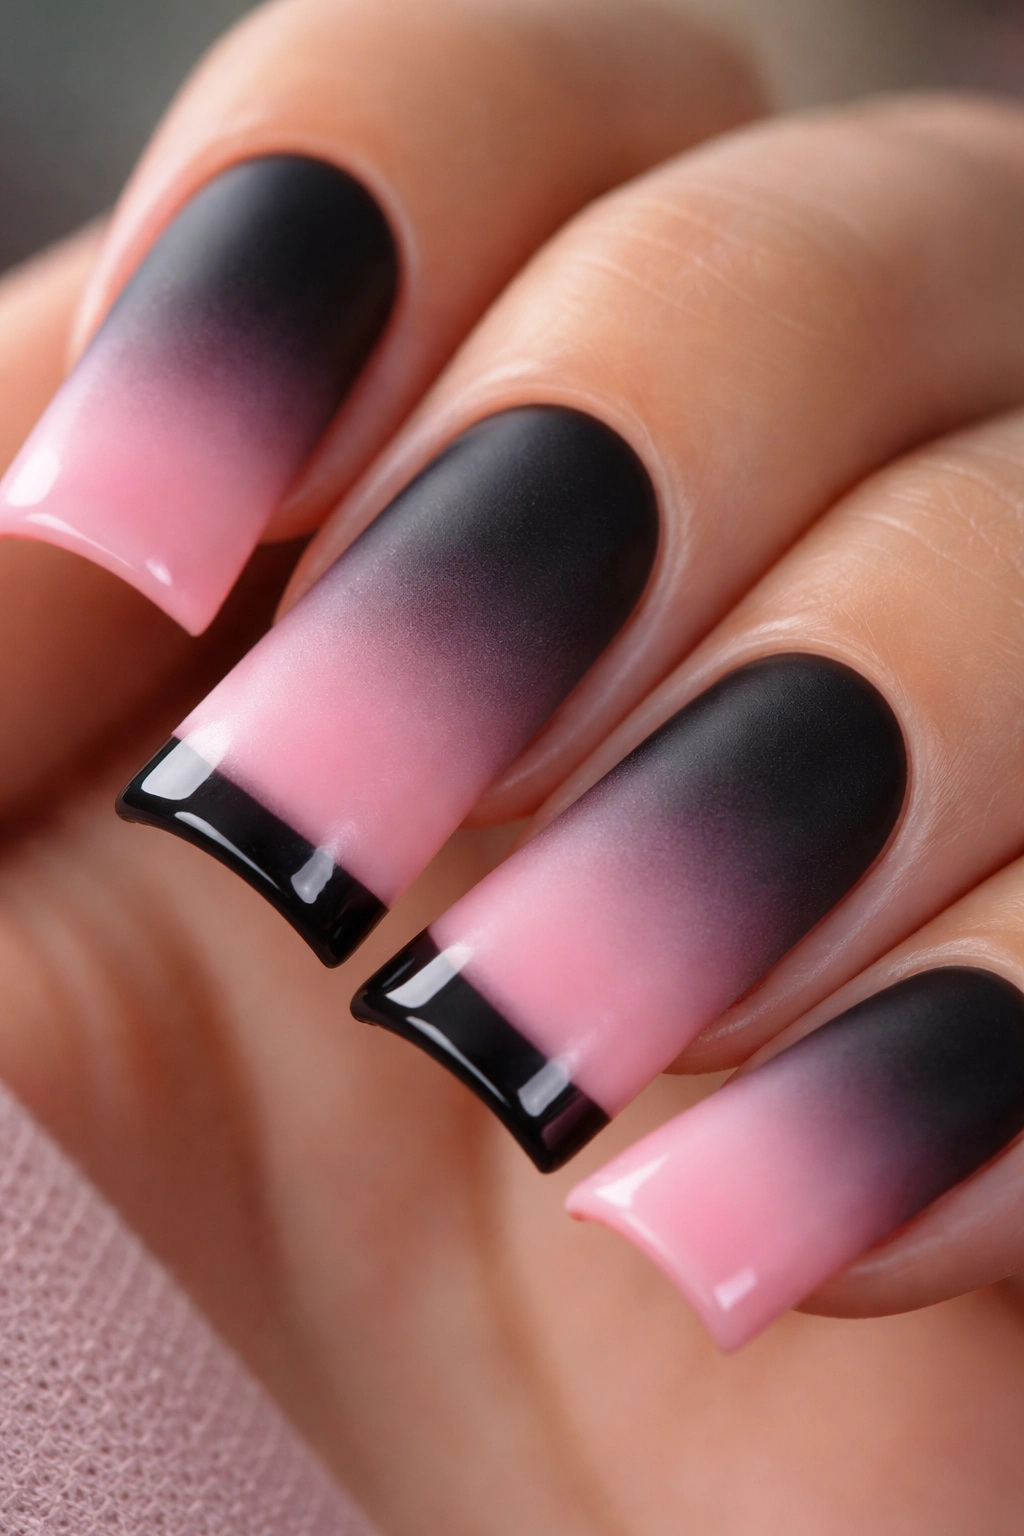
Combine the softness of a gradient with the boldness of a contrasting solid tip. Start with a smooth ombré from black to pink, then cap it with a solid opposite color tip (all black on the pink end, or all pink on the black end). This hybrid design balances the romantic flow of gradient with the edginess of a strong color statement.
Execution for Gradient with Contrasting Tip
Create your ombré from base to about 75% of the nail length using the sponging technique described earlier. Once that’s completely dry, apply painter’s tape at the 75% mark and paint the remaining tip portion in your contrasting color. The line between the gradient and the solid tip should be slightly softer than a hard edge—you want enough contrast to see the design clearly, but not so harsh that it looks like two separate nails.
Design Balance Considerations
- Ensure the gradient colors are similar enough that they read as connected to the tip
- The tip should be just thick enough to be visually distinct (about 2-3mm at minimum)
- Use matte finish on the gradient and glossy on the tip for mixed-finish interest
- Consider adding a thin metallic line to separate the gradient from the tip, like a frame
Pro tip: If your ombré-to-tip transition looks too harsh, apply a slightly thicker top coat to soften the line visually.
16. Metallic Accents and Foil Details
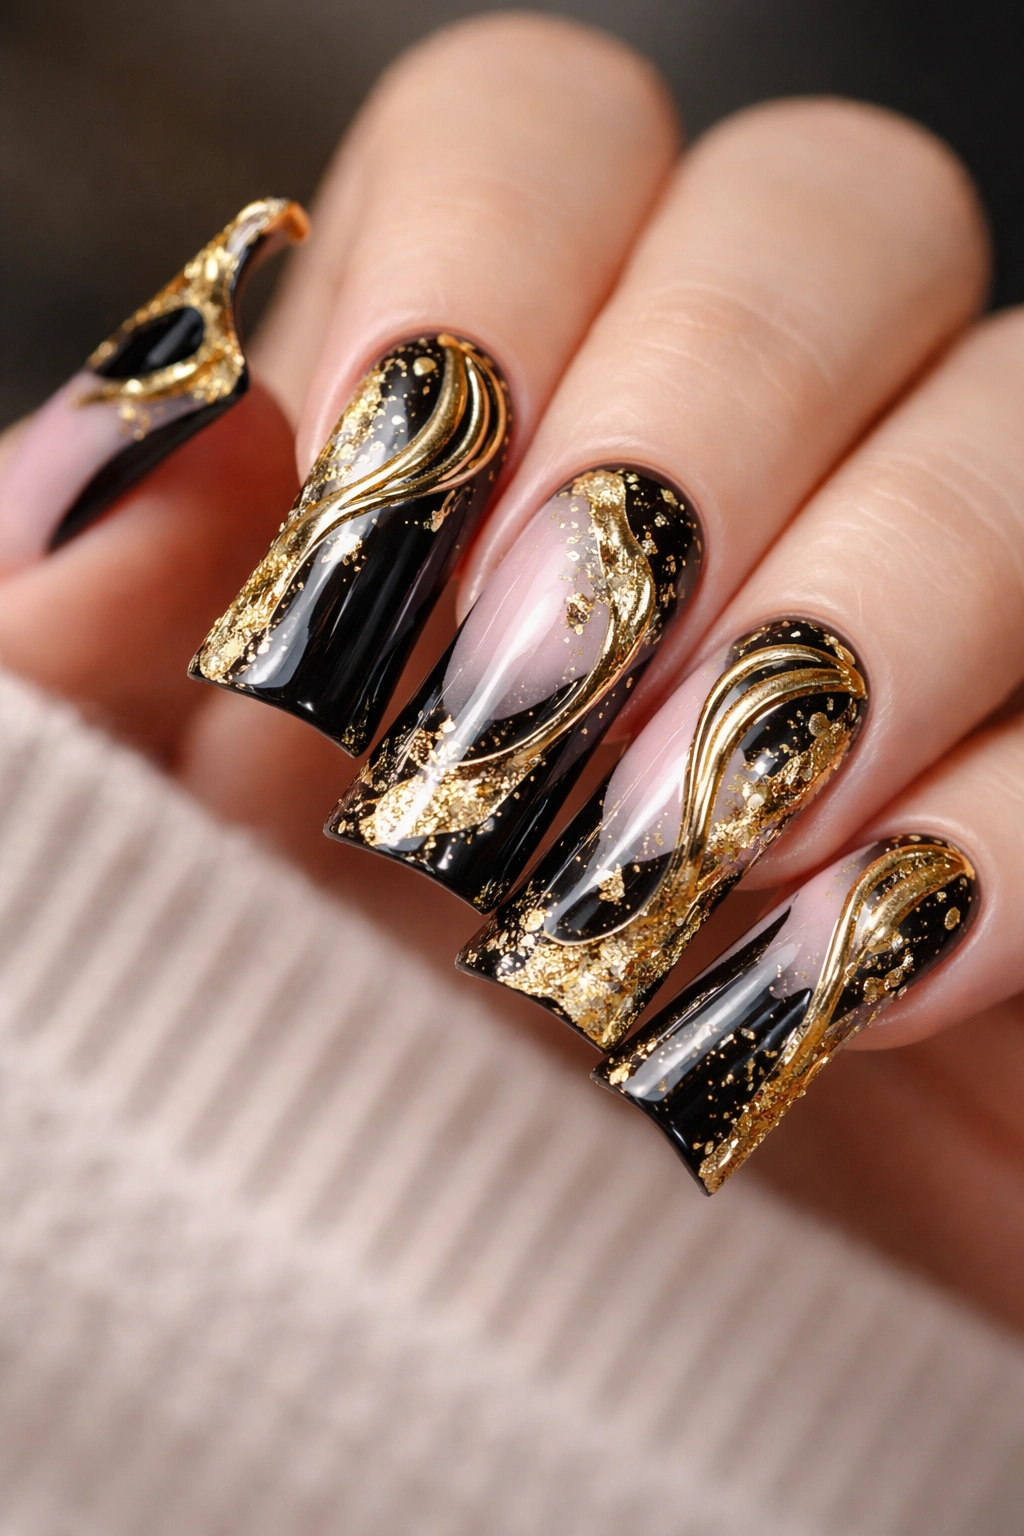
Metallic details—gold, silver, or rose gold foils, paint markers, or metallic accent stripes—add luxury and dimension to black and pink duck nails. You might add a thin gold outline around geometric shapes, apply foil to specific sections, or create metallic gradient lines that run through your design. These accents read as high-end and intentional without requiring complex nail art skills.
Applying Metallic Foils
Metallic foil requires a special adhesive layer or foil polish. Apply the base color, then while it’s still wet or with a dedicated foil glue applied on top, press metallic foil onto the nail and rub firmly. Peel away the foil backing, and the metallic layer should stick to the adhesive. It creates a crisp, mirror-like metallic effect that’s impossible to achieve with regular polish.
Metallic Accent Ideas
- Gold foil outlines around geometric shapes
- Rose gold foil tips on a black and pink gradient base
- Silver stripes running vertically through a pink base with black accents
- Metallic “confetti” scattered across the nail in random patterns
Real talk: Metallic foil can be tricky if you’re not experienced—if you apply regular metallic polish instead of actual foil, you’ll get a metallic sheen that looks good but isn’t quite the same premium effect.
17. Negative Space Geometric with Dots
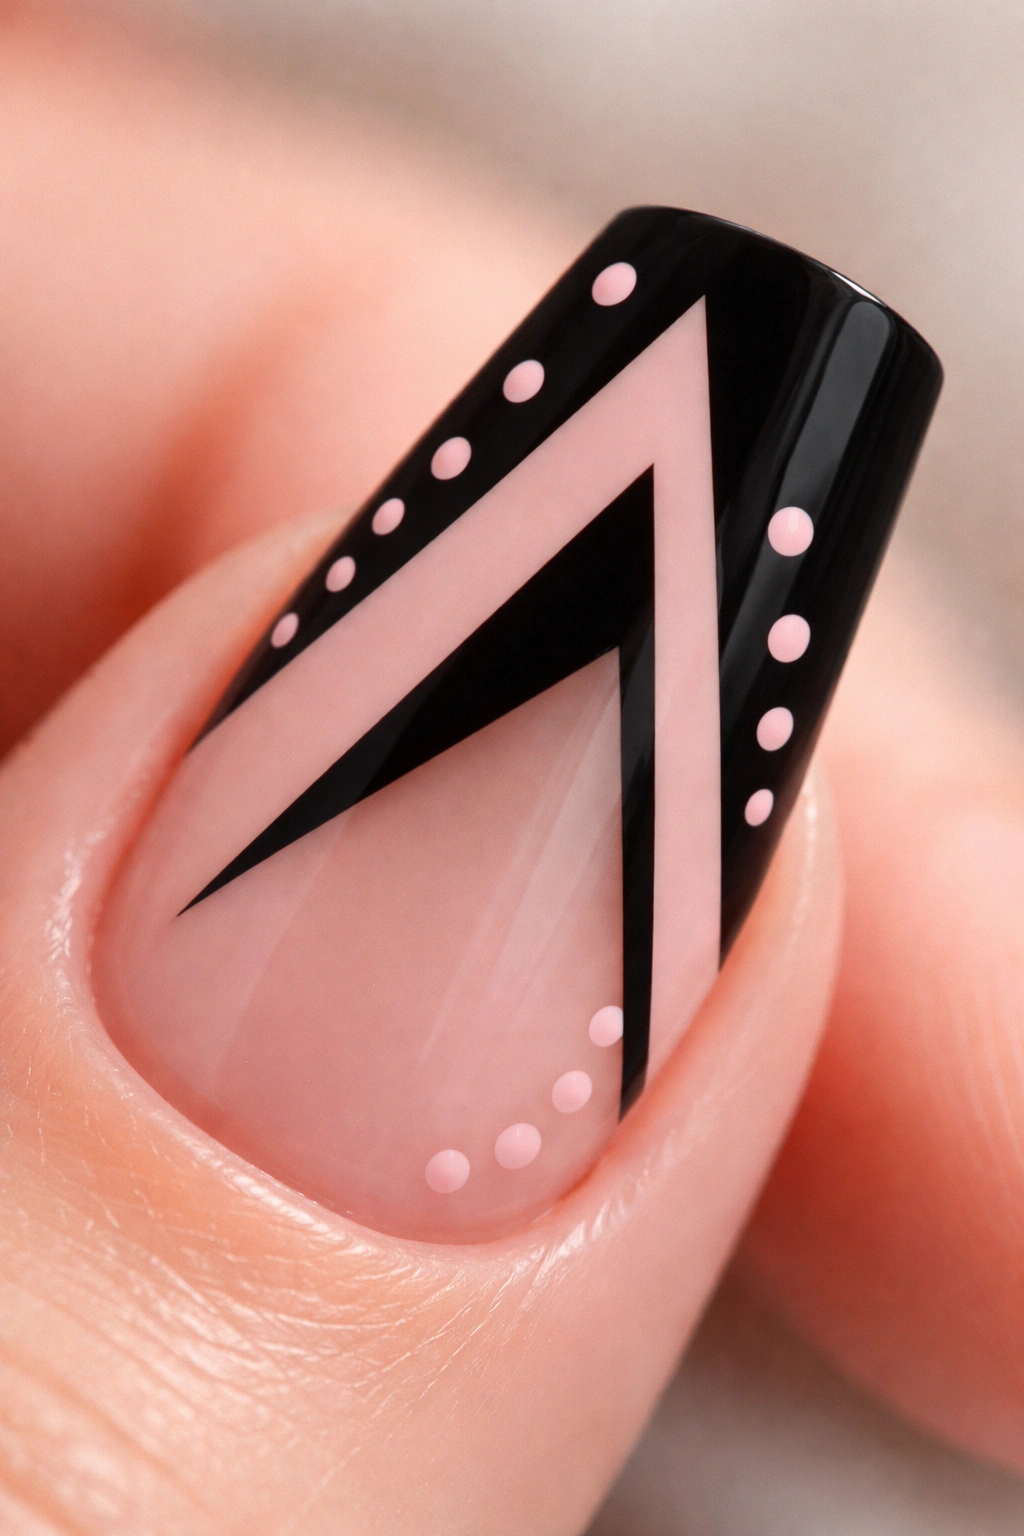
Combine negative space with both black and pink details, plus small dots as accent elements. The negative space (visible nail) acts as a third “color,” creating contrast alongside the black and pink. Dots provide visual interest and can guide the eye around the design. This approach feels contemporary and graphic, like something that would appear in a high-fashion magazine.
Building Negative Space with Dots
Create a geometric shape (triangle, hexagon, circle) on your nail using black on the pink base, but leave the interior negative (unpainted nail showing). Add small dots in pink around the geometric shape, creating a frame or accent pattern. Alternatively, paint geometric sections of the nail in black and pink, then add small dots in the opposite color within each section for balance.
Geometric Shapes That Work Best
- Triangles create sharp, modern energy
- Hexagons feel technical and architectural
- Circles and half-circles feel softer and more organic
- Angular abstract shapes feel artistic and experimental
Insider note: The key to making this design feel intentional rather than accidental is consistency—maintain even spacing between dots and keep geometric shapes proportional.
18. Color-Blocking with Abstract Shapes
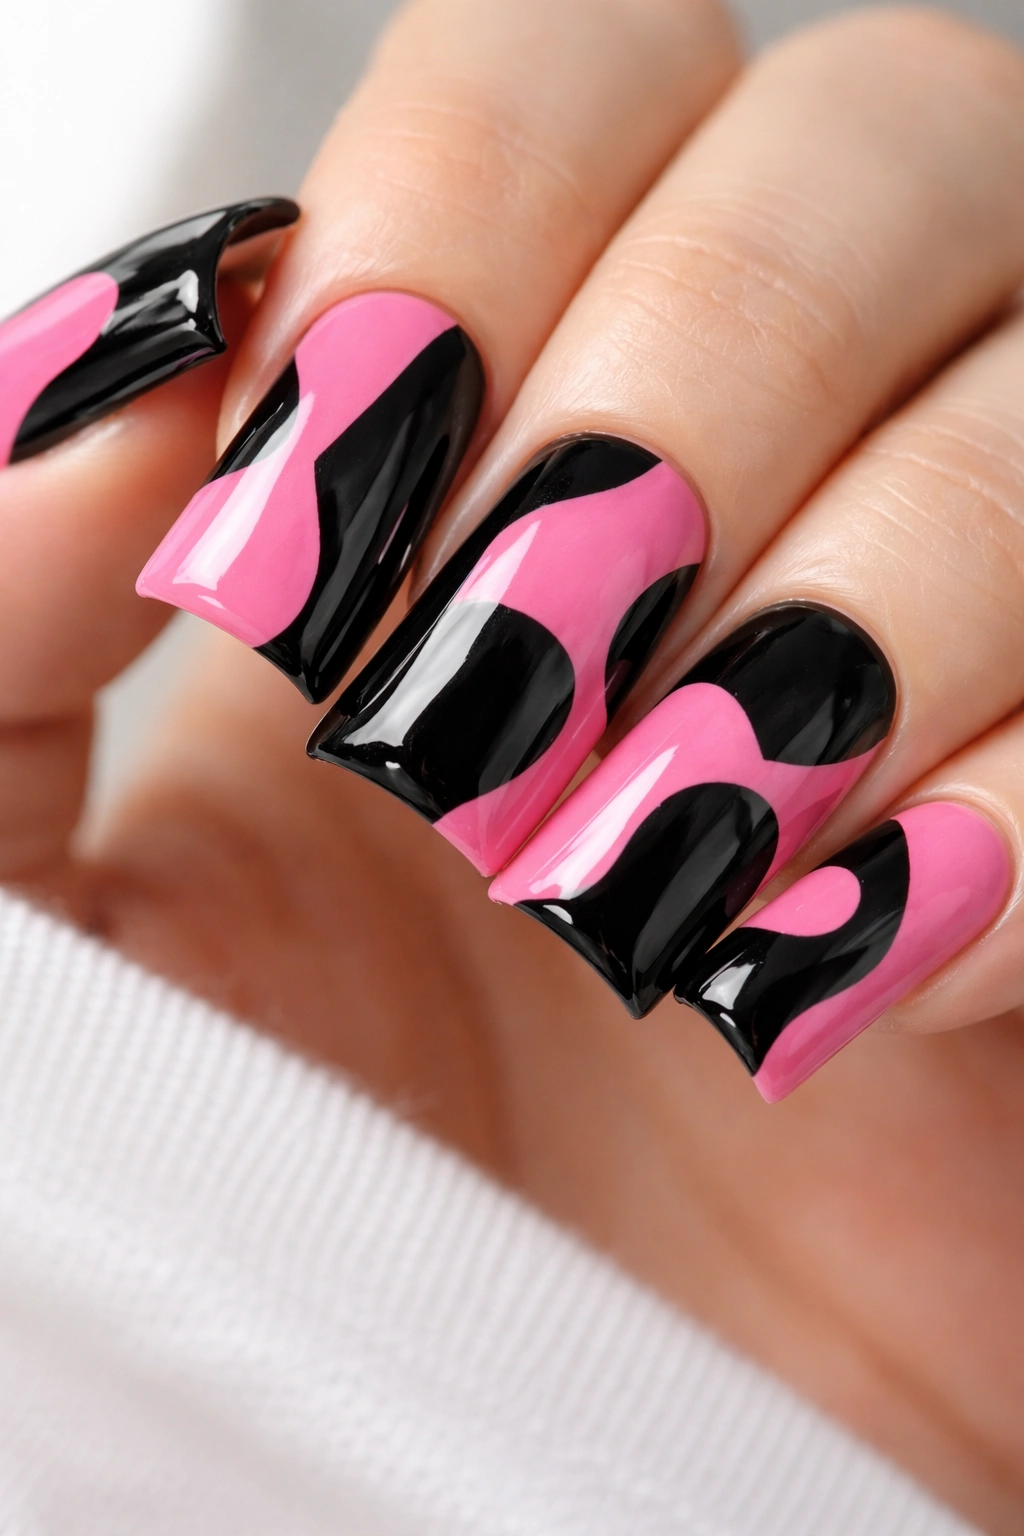
Color-blocking uses solid blocks of black and pink in abstract shapes that don’t follow traditional patterns. Rather than stripes or geometric sections, you’re creating organic, irregular sections of color that feel modern and artistic. Think of it as creating an abstract painting on your nail—some shapes might be sharp-edged, others soft and flowing.
Creating Abstract Color Blocks
You don’t need a plan before you start. Apply your base color (let’s say pink), then use a thin brush or even a small sponge to create irregular sections of the contrasting color (black). The shapes don’t need to make sense or follow a pattern—the beauty is in the seemingly random arrangement that actually looks very intentional. Step back occasionally to assess the balance of colors and ensure one color isn’t dominating too much.
Composition Principles That Work
- Balance dark and light areas so neither color overwhelms the nail
- Create a focal point (an area where more detail or different-sized shapes cluster together)
- Vary the size of color blocks rather than making them all the same size
- Allow some shapes to flow across multiple nails for a connected, cohesive look
Worth knowing: Abstract color-blocking actually forgives imperfection—uneven edges and irregular shapes are the whole point. This design is permission to stop worrying about precision and just create.
Final Thoughts
Black and pink duck nails offer genuinely endless creative possibilities, whether you’re drawn to minimalist elegance or bold, graphic statements. The beauty of this color combination is its versatility—the same colors read completely differently depending on how you arrange them, what finishes you use, and what details you add. What works for your personality, style, and comfort level is what matters most.
The technical side of these designs ranges from beginner-friendly (solid colors, simple splits, basic stripes) to more advanced (ombré, detailed nail art, foil work), so you can absolutely start with what feels achievable and build your skills from there. Many nail technicians actually started by doing simpler versions of complex designs—they practiced, experimented, and gradually elevated their technique.
The duck nail shape itself is having a moment, and pairing it with thoughtful color and design choices makes you part of that creative conversation. Whether you’re getting these done at a salon or attempting them at home, investing in quality polishes and decent brushes genuinely makes the difference between a design that looks rushed and one that looks intentional and polished. Take your time, reference design photos while you work, and remember that even nail artists mess up sometimes—that’s why top coats and creative problem-solving exist. Most importantly, pick a design that makes you genuinely excited to look at your nails.
