

Pink and green nail combinations have a sophisticated, unexpected charm that works equally well for bold statements and understated elegance. The key to making these two colors work together lies in understanding which shades complement each other—soft pastels create a dreamy effect, while neon and jewel tones make an unapologetic statement. Duck nails, with their distinctive curved, elongated shape, provide the perfect canvas for showing off these color pairings because the wider surface area gives you room to experiment with gradients, patterns, and artistic details that might get lost on shorter nail beds.
What makes pink and green such a compelling combination is that it feels fresh without being predictable, and it works for nearly every season and occasion. Whether you’re drawn to the calming energy of blush and sage or the bold confidence of hot pink and lime, there’s a pink and green duck nail design that matches your style. The following designs showcase the range of possibilities with these two colors, from minimalist two-tone approaches to intricate nail art that demands attention.
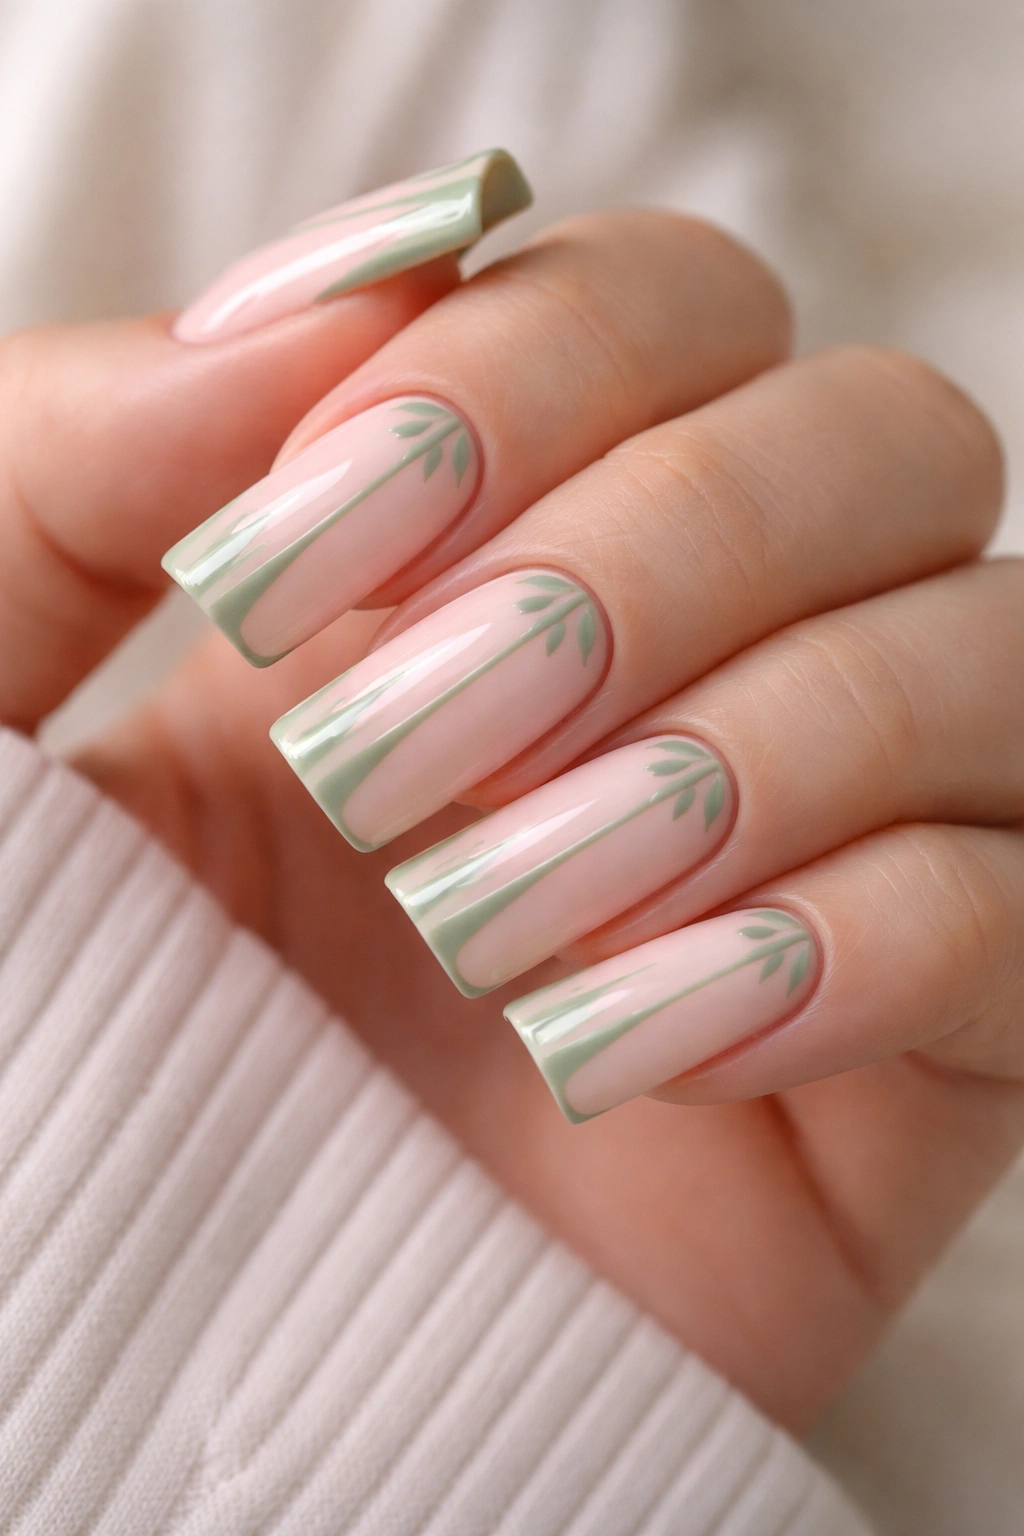
1. Soft Blush Pink with Sage Green Accents
This design pairs a delicate blush pink base with muted sage green details that create a calming, sophisticated look perfect for everyday wear. The soft pink covers the entire nail, while sage green accents appear as thin vertical stripes, small geometric shapes near the cuticle, or minimalist leaf designs along the nail edges.
Why This Color Pairing Works
Blush and sage are complementary neutrals that feel mature and intentional without screaming for attention. The warmth of blush pink against the cool undertones of sage green creates visual balance, and both colors are forgiving—they work with virtually every skin tone and don’t clash with any outfit.
How to Create This Look
- Use a creamy blush pink as your base (apply two coats for full coverage and a flawless finish)
- Once the base is completely dry, use a thin liner brush or nail art pen to add sage green accents
- Consider simple vertical stripes spaced about 2-3mm apart, or go for scattered dots arranged in a minimalist pattern
- Seal everything with a glossy top coat to make the colors pop and protect your design
Pro tip: If hand-painting feels intimidating, use sage green nail tape to create perfectly straight stripes—it’s nearly foolproof and looks professionally done.
2. Mint Green Base with Hot Pink Swirls
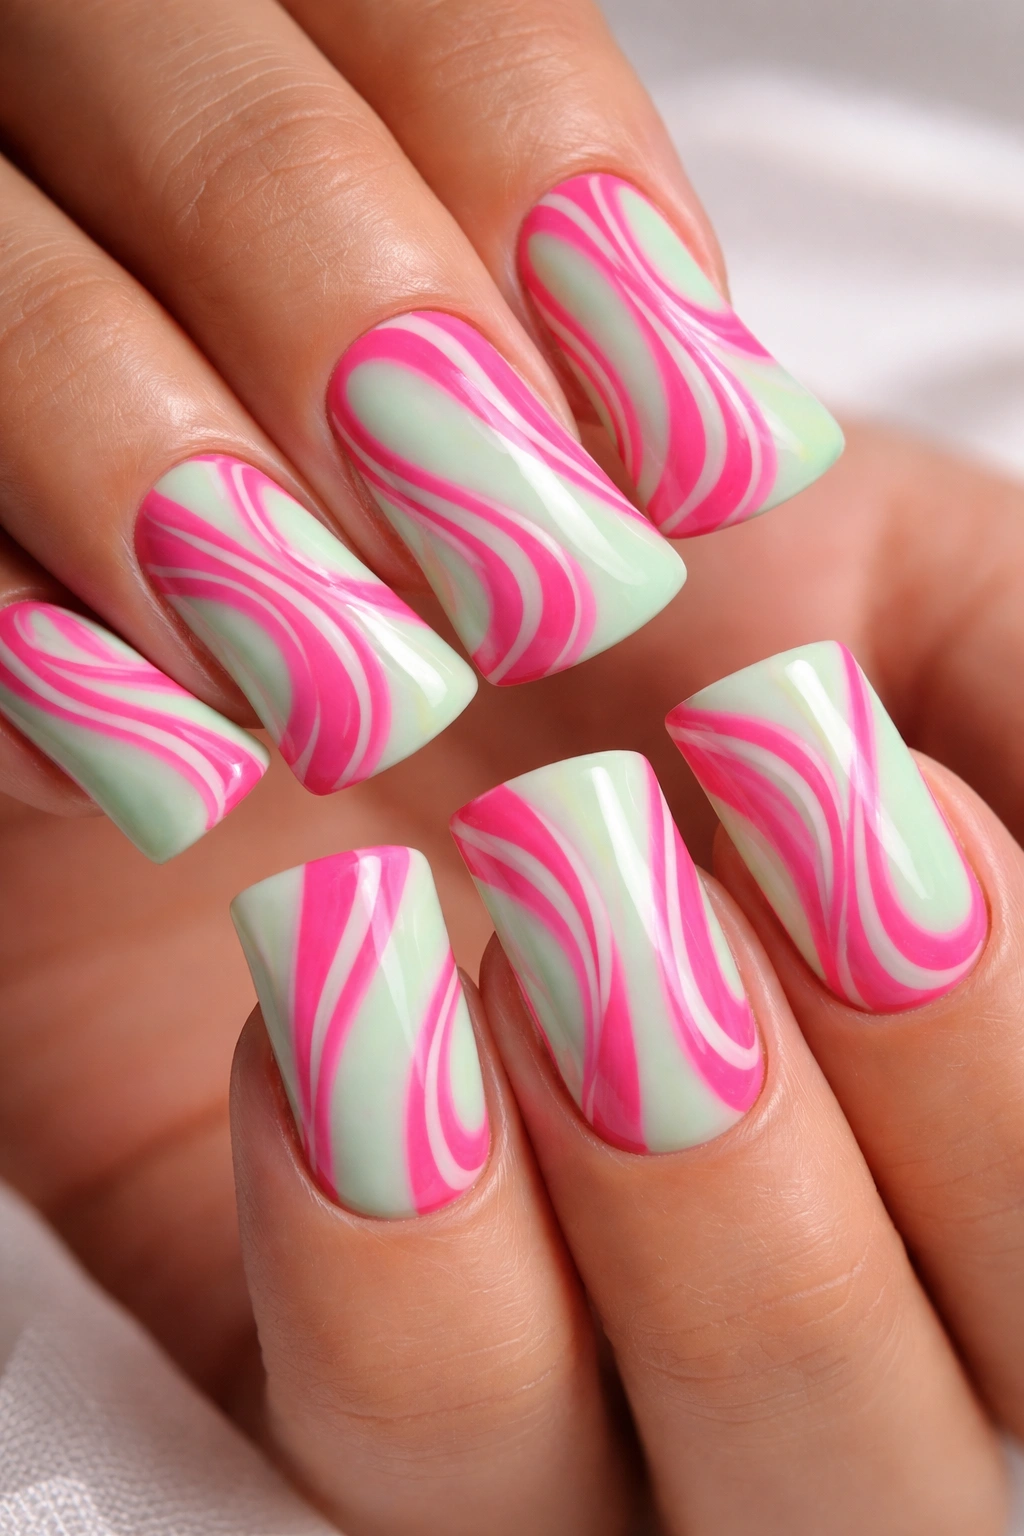
A refreshing mint green base becomes the stage for bold hot pink swirls that dance across the nail surface, creating movement and visual interest. This design has energy and playfulness while maintaining a balanced color ratio between the cool mint and the warm, vibrant pink.
The Technique Behind This Design
Hot pink swirls work best when applied over a completely dry mint base using a thin brush or dotting tool. The trick is creating organic, flowing patterns rather than rigid lines—think marbling effect where the colors blend slightly at the edges but maintain their distinct personalities.
Application Steps for Perfect Swirls
- Paint two coats of mint green and let cure completely (at least 2-3 minutes)
- Load a thin brush with hot pink gel or polish
- Starting near the cuticle, create curved strokes that flow toward the tip, varying the direction so swirls cross over each other
- Some swirls should thin out to barely-there wisps; others can be bold and prominent
- The asymmetrical placement looks more artistic than placing identical swirls on each nail
Worth knowing: If you’re using gel polish, you can create softer swirl edges by slightly blending the hot pink into the wet mint base before curing—the result feels more integrated than a sharp color separation.
3. Pastel Pink Ombre to Pistachio Green
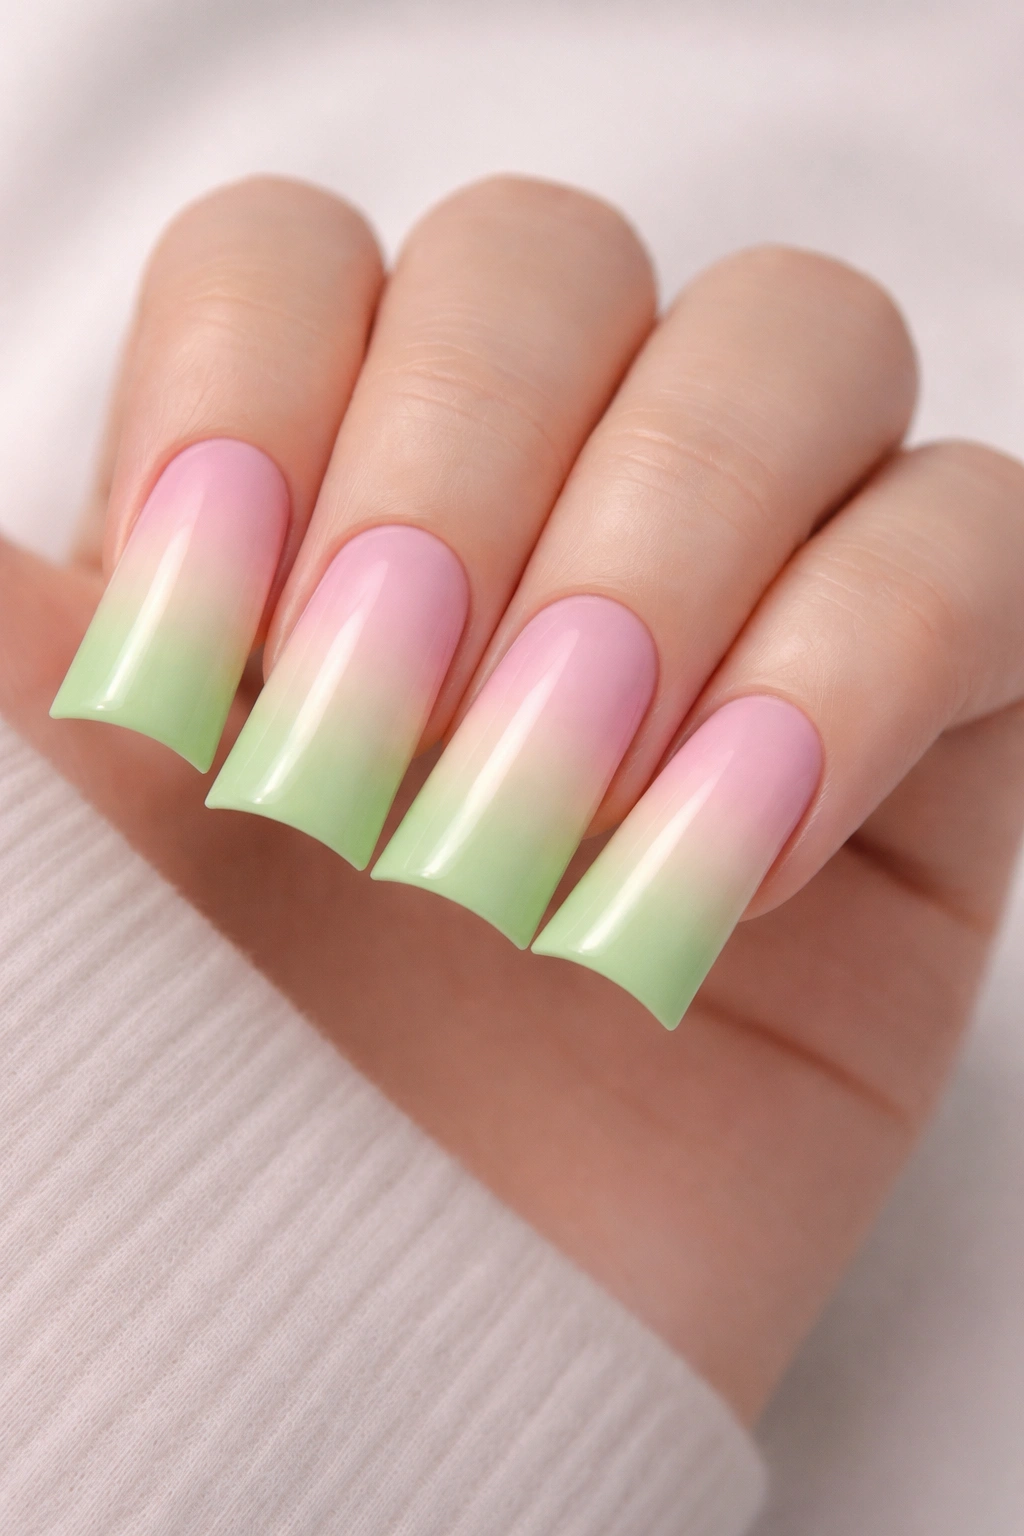
An ombre gradient flowing from soft pastel pink at the cuticle through pale blush tones, ending in subtle pistachio green at the tip creates a dreamy, dimensional effect. This design feels sophisticated and modern, showcasing your ability to blend colors seamlessly across the duck nail shape.
Mastering the Ombre Technique
True ombre requires three to four transitional shades bridging your start and end colors. You’ll need pastel pink, a slightly deeper rose, blush, pale green, and finally pistachio green. Each shade should be just slightly darker or lighter than the one adjacent to it, creating an almost imperceptible transition.
Step-by-Step Ombre Application
- Paint a base coat of the palest pink shade across the entire nail
- Using a makeup sponge, dab the next shade (deeper rose) across the middle section of the nail
- Apply the third shade (blush) slightly lower, overlapping slightly with the rose
- Continue the progression, moving toward green tones (pale green, then pistachio)
- Seal with a sheer or glossy top coat to blend everything together—the top coat helps soften harsh lines
- Buff the dried result gently if any color lines appear too sharp
Real talk: This design takes practice—your first attempt might show more distinct stripes than smooth gradients, and that’s completely normal. Each nail you do gets easier as you develop a feel for how much pressure to use with the sponge.
4. Neon Pink and Lime Green Geometric Patterns
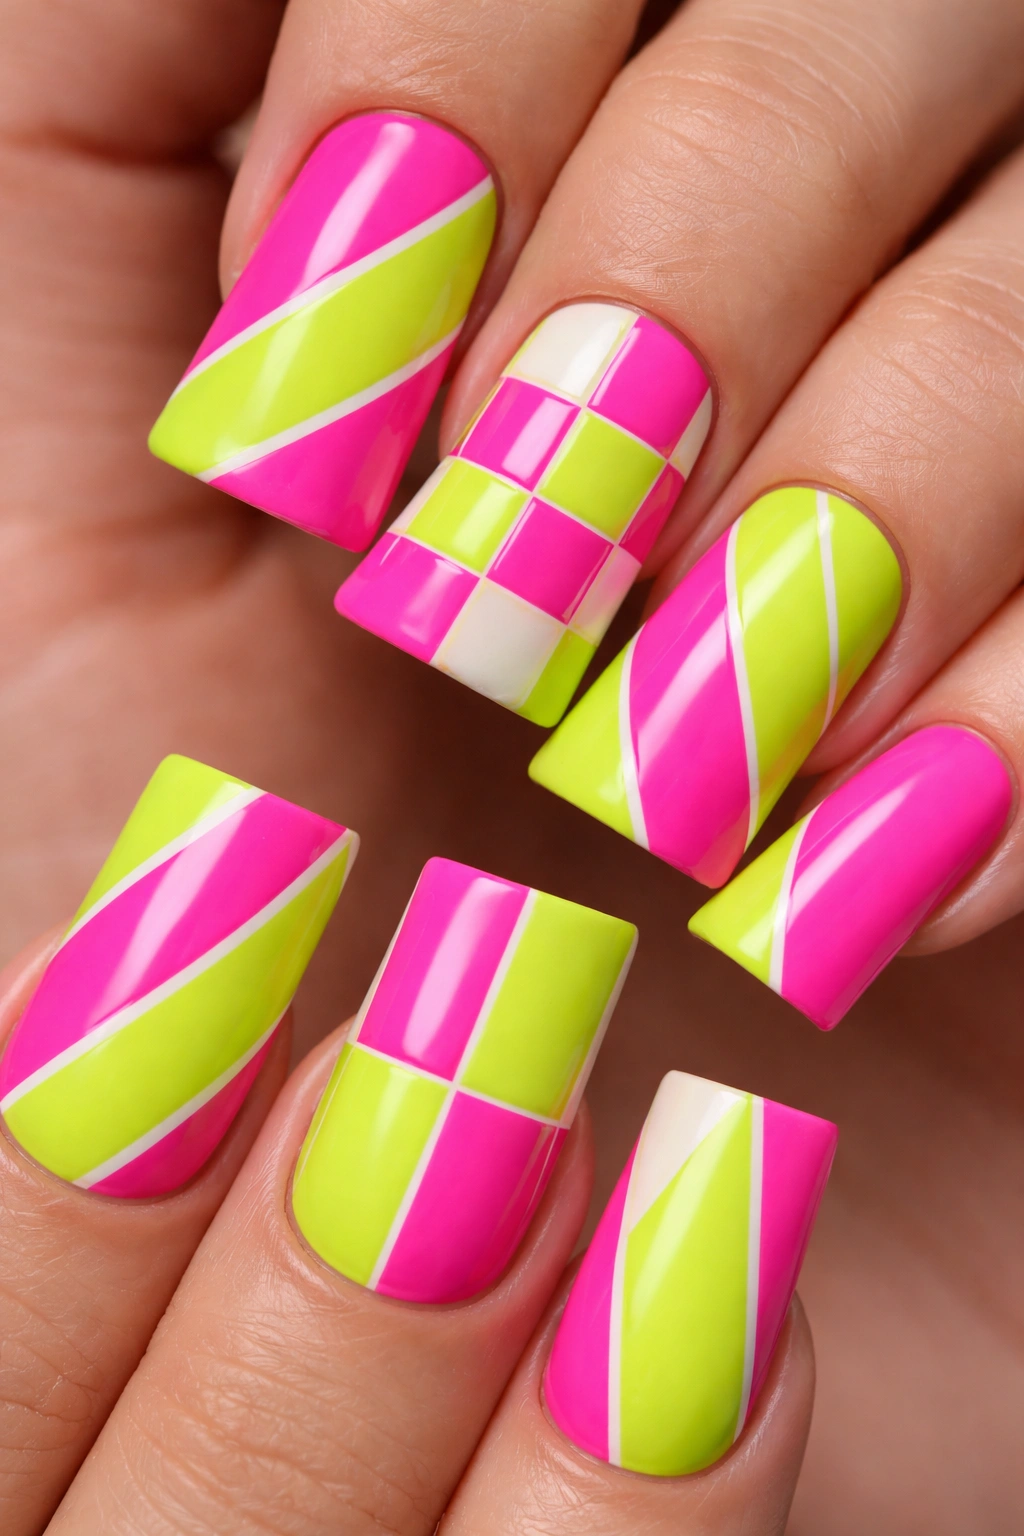
Bold geometric shapes in neon pink and lime green create a design that absolutely commands attention and works best when you want your nails to be a statement piece. Think triangles, hexagons, or diagonal stripes in contrasting neon shades that create a high-contrast, nearly pop-art aesthetic.
Design Layout Strategy
Divide each duck nail into sections using geometric shapes. A diagonal stripe pattern is the easiest approach: start with neon pink, paint thick diagonal stripes from upper-left to lower-right, leaving negative space for the lime green to show through. Alternatively, create a checkerboard pattern where alternating squares are neon pink and lime green, or use a half-and-half split where the nail is divided vertically down the center.
Creating Clean Geometric Edges
- Use nail striping tape or thin painter’s tape to create perfectly straight lines and sharp color boundaries
- Apply your first color (say, neon pink), let it dry completely, then place tape on top covering the areas you want to stay pink
- Paint the second color (lime green) over the taped areas
- Remove the tape immediately while the polish is still slightly tacky—if it dries completely, the tape can pull up the new layer
- If edges look slightly rough, clean them up with a thin brush dipped in acetone
Insider note: Neon polishes often have thinner consistency, so you might need three thin coats instead of two thick ones to achieve full opacity and that electric glow.
5. Dusty Rose with Dark Forest Green Drip
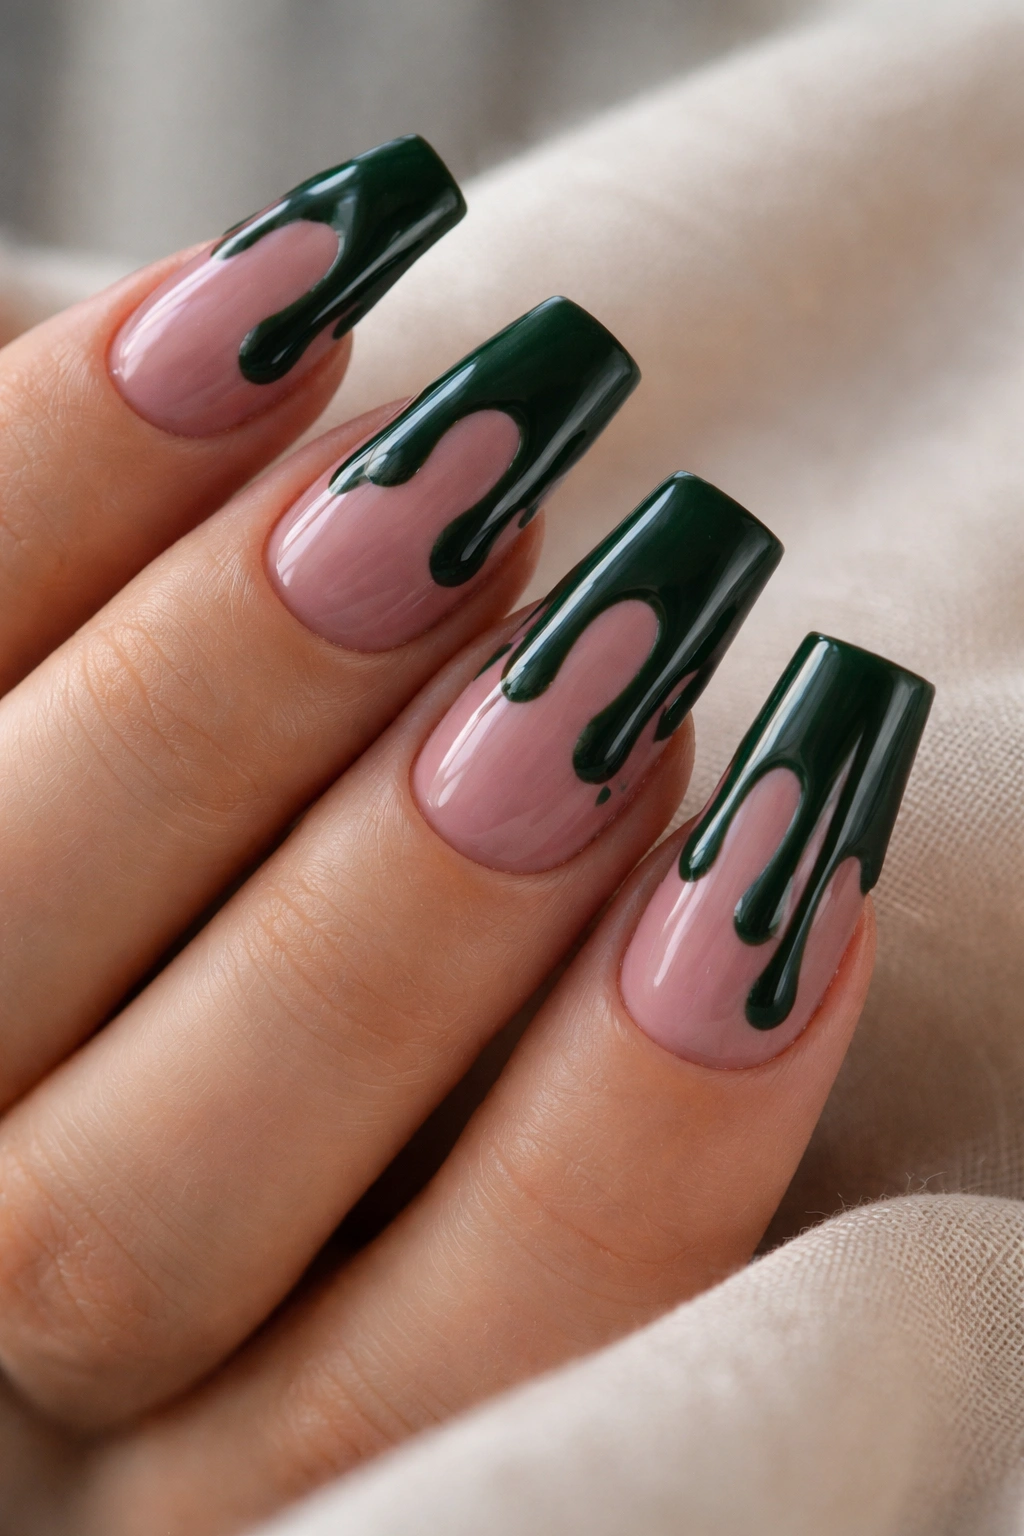
A dusty rose base is elevated by a dark forest green “drip” effect cascading down from the cuticle toward the tip, as if green paint is melting down the nail. This design feels artistic and modern, with the darker green creating drama against the soft, muted rose.
Understanding the Drip Effect
The drip isn’t random—it’s a series of elongated droplet shapes that start thick at the cuticle and taper toward the tip. You want them to look intentional and somewhat symmetrical across the nail, even though they’re organic shapes. Some drips should be more prominent; others can be thinner and more subtle.
Executing the Drip Design
- Apply two coats of dusty rose as your base and let it cure completely
- Using a thin, pointed brush, load it with dark forest green
- Position the brush at the cuticle and drag downward in a slightly curved motion, lifting the brush gradually to create a tapered effect
- Create 3-5 drips per nail spaced evenly, varying their width and length for visual interest
- Some drips can reach nearly to the tip; others should stop about halfway down
- Once dry, seal with a shiny top coat to make the colors luminous
What to watch for: If your green is too thick, it can appear muddy rather than dramatic. Two thin coats of green over the drip areas works better than one heavy application—it maintains color clarity while creating depth.
6. Baby Pink and Seafoam Green Marble
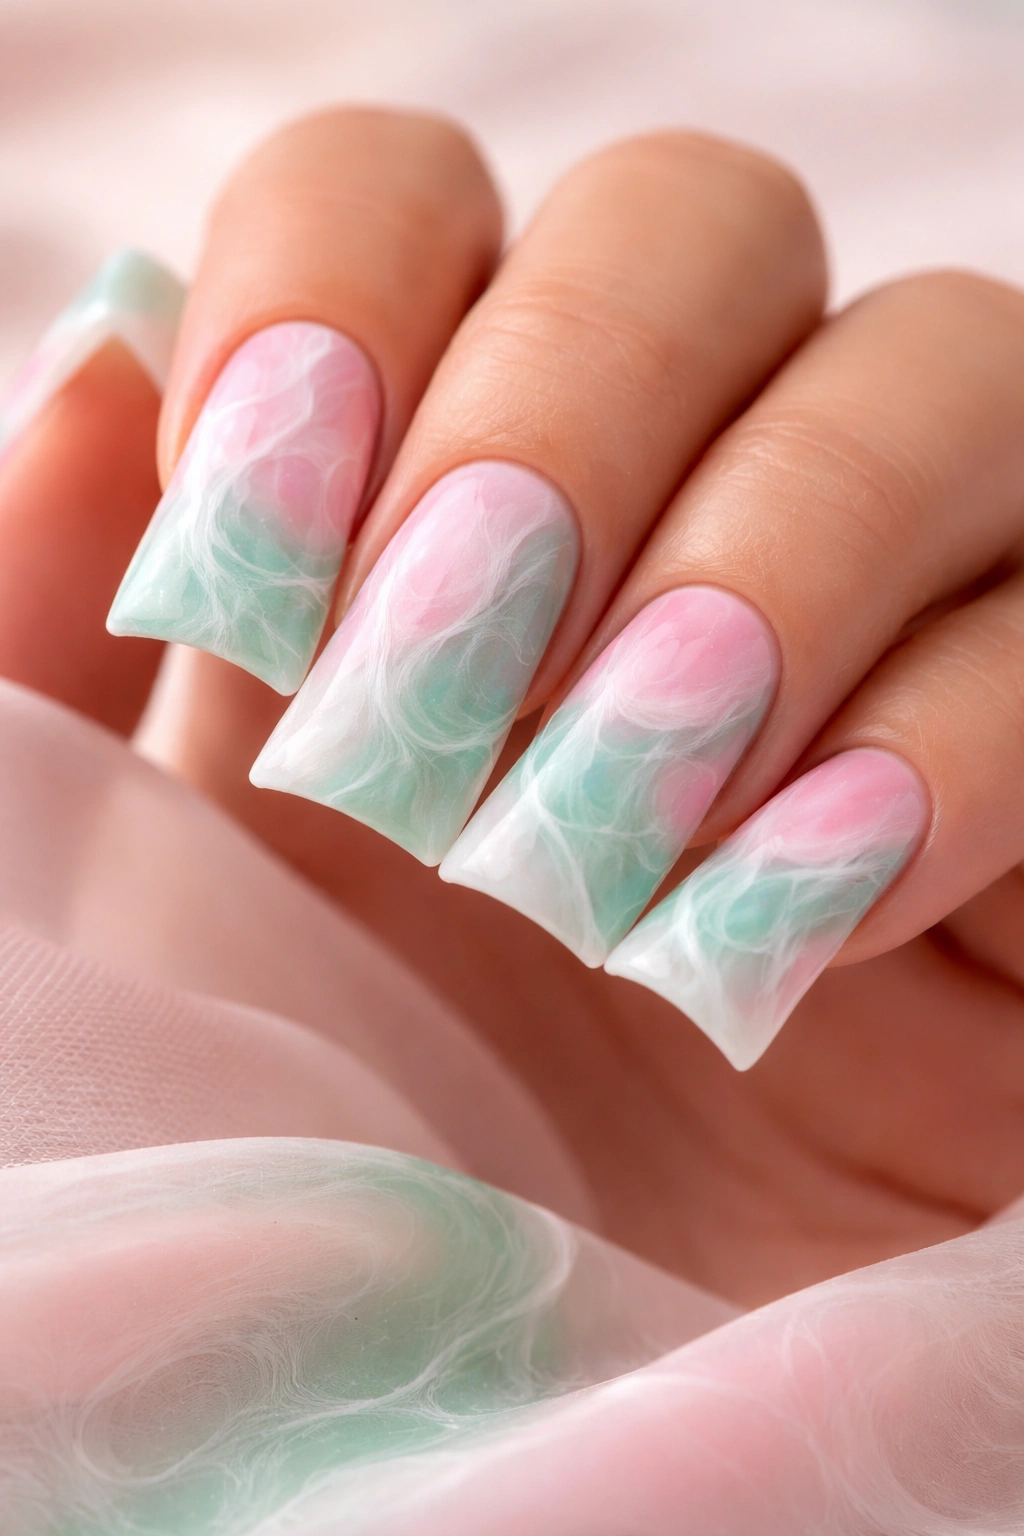
A delicate marble effect combining baby pink and seafoam green creates an ethereal, fluid design that feels sophisticated and uniquely artistic. The marbling technique creates organic, irregular patterns where the two colors twist and swirl together without a clear boundary between them.
The Water Marble Technique on Duck Nails
Traditional water marbling requires a bowl of room-temperature water, two polishes of the right consistency, and a steady hand. Drop alternating colors into the water, drag a toothpick through to create swirled patterns, then dip your nail at a slight angle to pick up the design. However, this method can be tricky on longer duck nails.
Dry Marbling: A More Accessible Approach
- Paint the entire nail with baby pink as your base
- While the pink is still very slightly tacky (not fully dry), drop small amounts of seafoam green directly onto the nail
- Use a toothpick, thin brush handle, or dotting tool to swirl and drag the green through the pink, creating organic patterns
- Don’t overwork it—the more you manipulate it, the more the colors muddy together
- Let it dry completely, then seal with glossy top coat
- The result should feel balanced, with roughly equal amounts of pink and green visible
Pro tip: If the marble effect doesn’t turn out perfectly, add a thin layer of translucent glitter or holographic dust over the top—it catches the light and distracts from any imperfect marbling while adding shimmer.
7. Hot Pink Duck Nails with Green Tips
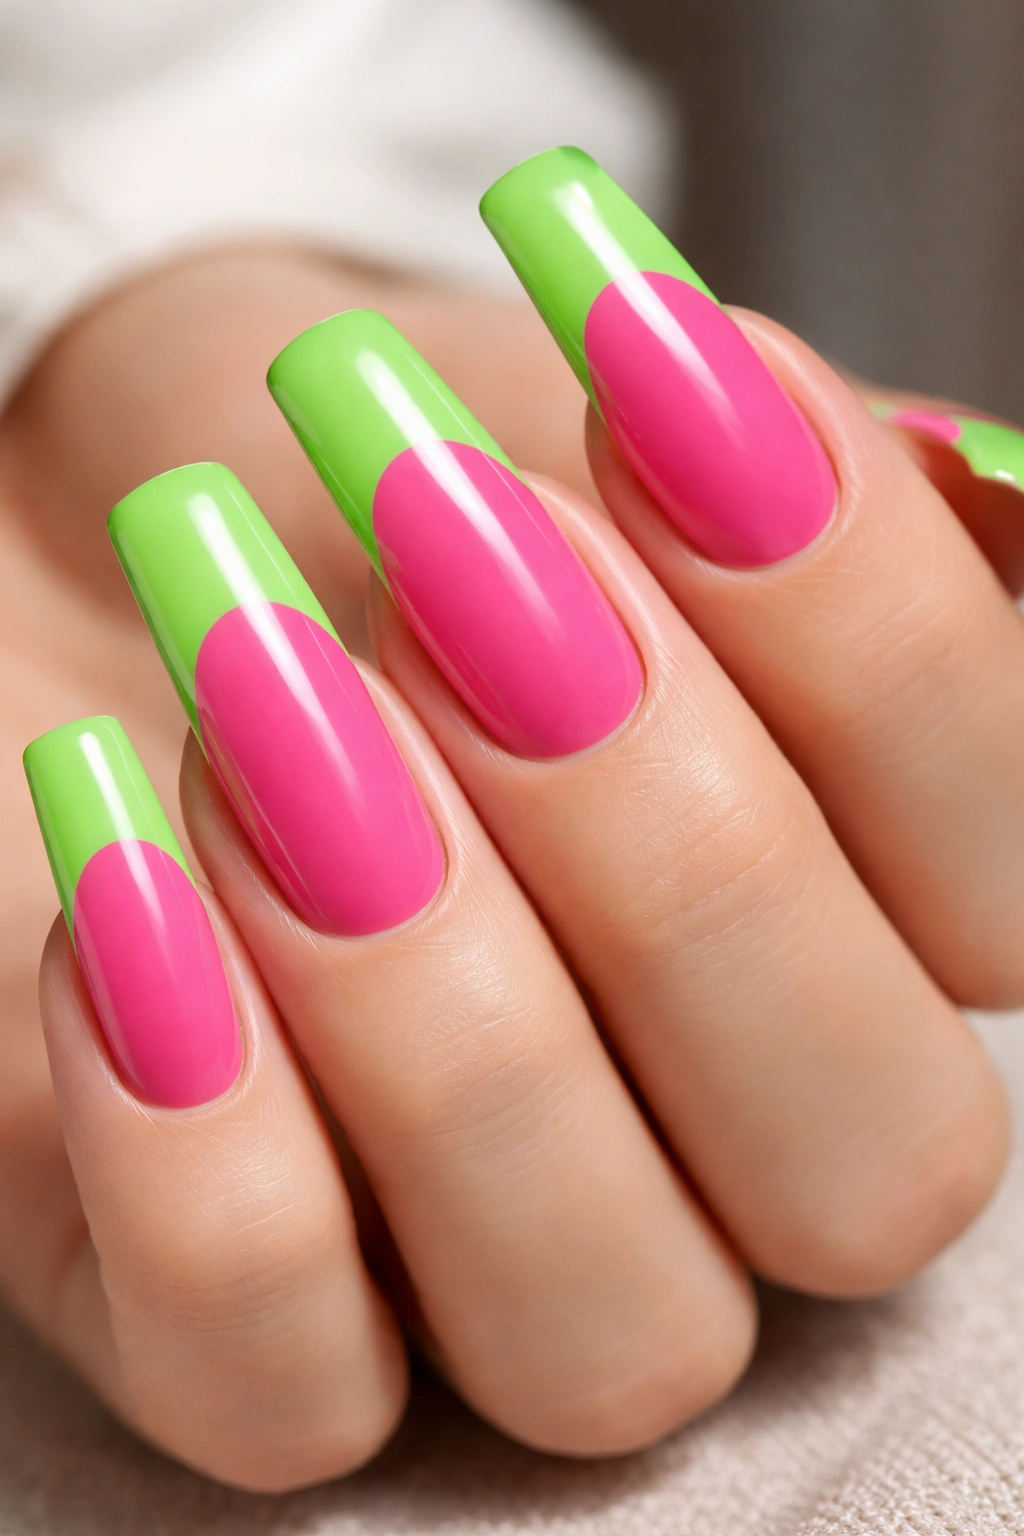
This classic French tip variation replaces the traditional white with vibrant green, creating a striking contrast against the hot pink nail body. The duck nail’s extended tip makes this design particularly impactful because the green tip is proportionally larger and more prominent than it would be on shorter nails.
Adapting the French Manicure for Duck Nails
A standard French tip occupies about one-quarter of the nail length; on duck nails, this translates to a substantially larger green section. You want the green to start about 2-3mm away from the free edge and flow smoothly to cover the entire tip. The transition line should be gently curved rather than a harsh, straight edge.
Creating a Clean Green Tip
- Paint the entire nail with hot pink as your base (two coats for full coverage)
- Once the pink is completely dry, use a curved striping brush or a thin, angled brush
- Position the brush about 1-2mm below where you want the green to start
- Use a gentle sweeping motion to create the curved line that defines the beginning of the green tip
- Fill in above that line with two coats of green, making sure the color extends all the way to the free edge
- The transition line can be perfectly clean, or you can slightly feather it for a softer blend
Fair warning: Creating a perfectly symmetrical curved tip across all ten nails takes patience. Your first nail always looks better than your tenth, so practice on your non-dominant hand first if you’re doing this for the first time.
8. Peach Pink and Olive Green Abstract Art
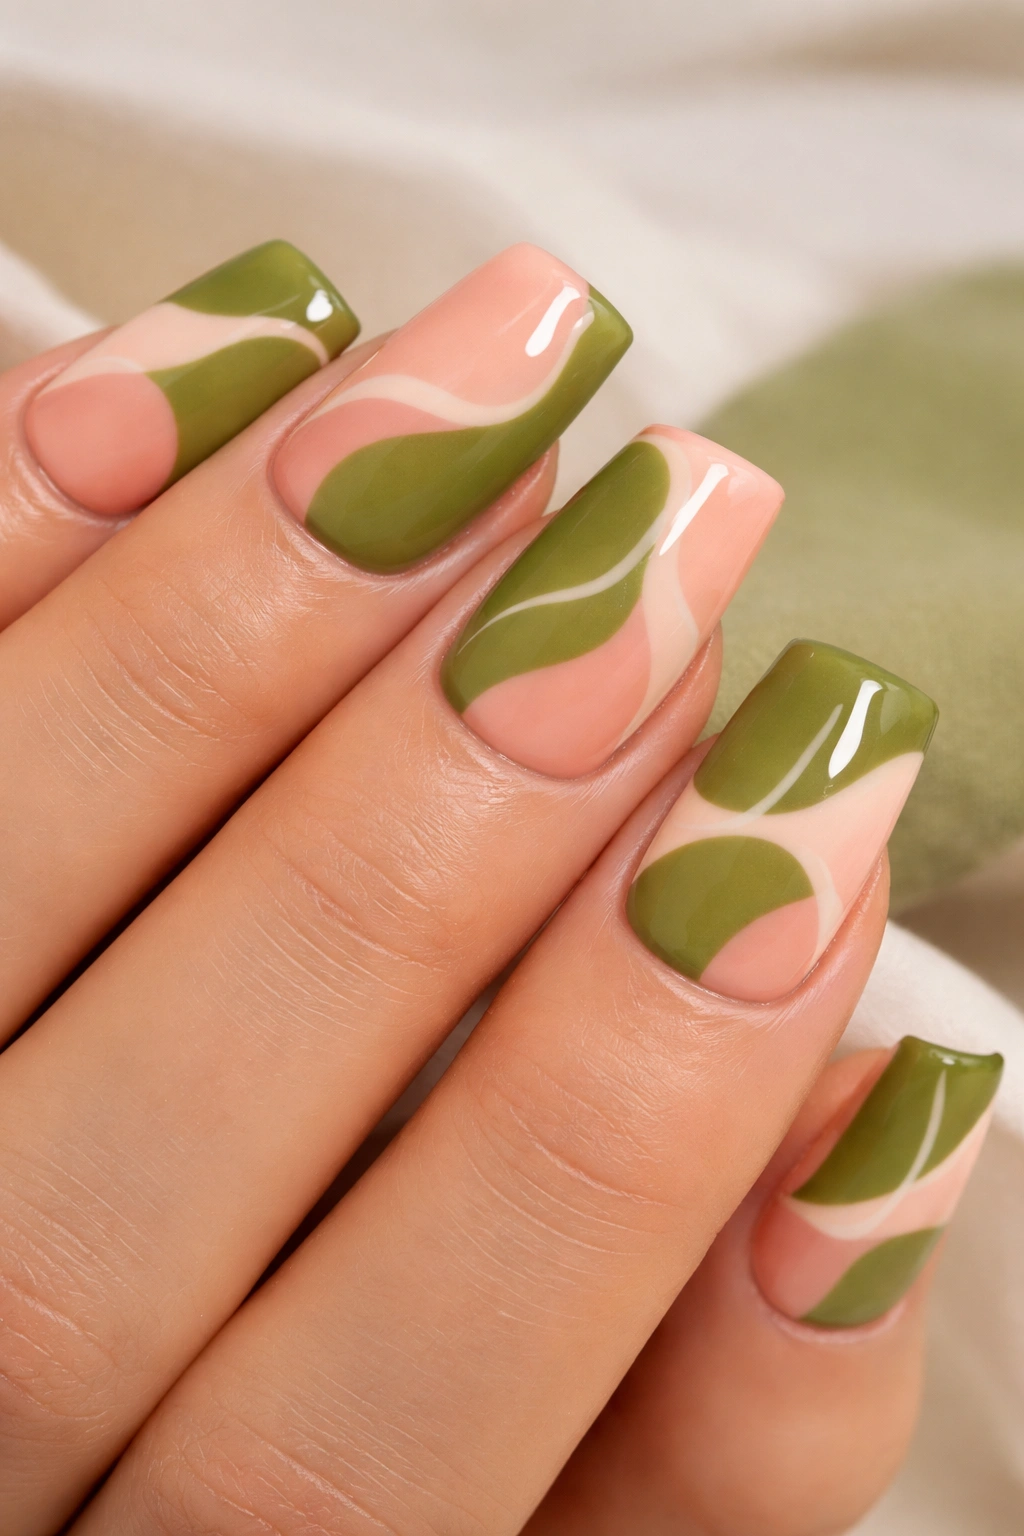
Geometric and organic shapes in peach pink and olive green come together in an abstract composition that feels artistic and intentional. This design doesn’t follow a strict pattern—instead, it uses both colors in roughly equal amounts, with shapes that interact and overlap in interesting ways.
Developing Your Abstract Composition
Sketch your composition lightly in your mind before painting. You might start with one large geometric shape (a rectangle, circle, or triangle), then add organic curved lines, smaller shapes, and negative space. The goal is visual balance and movement—your eye should travel across the nail in a natural path.
Executing Abstract Nail Art
- Apply a neutral or slightly translucent base coat (or work directly on the nail surface with a light base)
- Using peach pink, paint your first set of shapes—let them dry completely
- Switch to olive green and add complementary shapes that interact with the pink areas
- Add thin lines, dots, or smaller accents in either color to tie everything together
- Consider adding one metallic accent color (gold or rose gold) to elevate the design and add dimension
- Seal with a glossy or matte top coat depending on the mood you want
Here’s something most people miss: Abstract art works better when you commit fully to your design rather than second-guessing every stroke. The slight imperfections are what make it feel hand-done and artistic, not mass-produced.
9. Magenta Pink with Kelly Green Floral Design
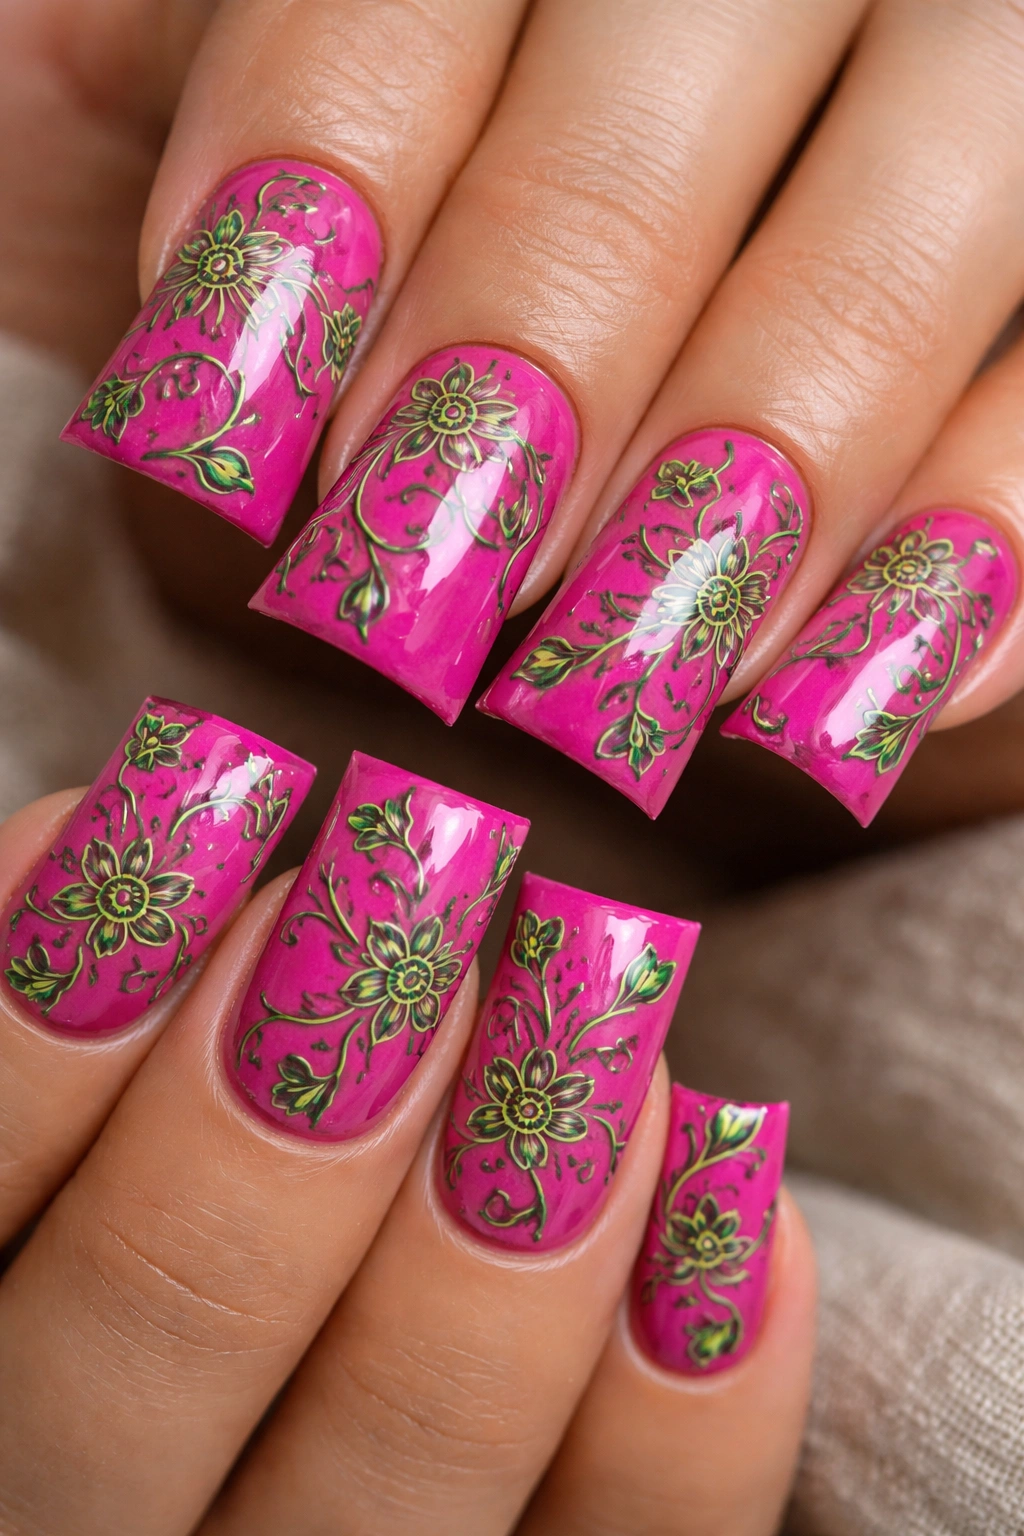
A vibrant magenta pink base becomes the backdrop for detailed kelly green floral designs—think small flowers, delicate leaves, or botanical elements scattered across the nail. This design showcases precision and artistry while maintaining a bold color scheme that commands attention.
Selecting Floral Elements for Nail Art
Simple five-petal flowers, leaf clusters, and vine-like stems are most manageable for nail art. Avoid overly detailed designs with tiny elements that disappear at arm’s length. Your flowers should be recognizable even from a distance, with enough negative space between elements so the design doesn’t feel cluttered.
Painting Floral Details
- Apply two coats of magenta pink as your base and let it cure completely
- Using a very thin brush, outline your flowers and leaves lightly in kelly green
- Fill in the outlines with two thin coats rather than one heavy coat—this gives you better control and prevents polish from pooling
- Add tiny details like flower centers (a small dot in a contrasting color) or vein lines in leaves
- Space your flowers asymmetrically for a more natural, organic feel
- Seal with a shiny top coat that makes the colors glow
Worth knowing: If your brush control isn’t yet precise, use a dotting tool to create flower centers and small details first, then hand-paint larger leaf and petal shapes around them. You can also use thin striping tape to create leaf shapes if freehand feels too challenging.
10. Coral Pink and Jade Green Watercolor Effect
A soft, diffused watercolor effect combines coral pink and jade green in a dreamy, artistic design where colors fade and blend into each other. This look feels romantic and whimsical, perfect for those who appreciate subtle artistry over bold statements.
Creating the Watercolor Effect
The watercolor technique relies on translucent polish, thin brush strokes, and strategic layering. You’re essentially building soft color washes rather than opaque coverage, allowing the underlying nail to show through slightly.
Building Your Watercolor Design
- Start with a clear or pale pink base to allow colors to appear translucent
- Using a thinner brush or even a dry brush technique, apply thin strokes of coral pink to the upper portion of the nail
- While the pink is still wet, apply thin strokes of jade green in the lower portion, allowing them to blend slightly in the middle
- Add a second layer of each color in different areas to build depth and variation
- Some areas should show nail color underneath, creating that watercolor translucency
- Once completely dry, add fine details: thin lines, dots, or minimal florals in either color
- Seal with a glossy top coat
Real talk: Watercolor nails are forgiving because slight color bleeding and soft transitions are exactly what you want. It’s hard to mess up when imperfection is the aesthetic goal.
11. Rose Pink with Emerald Green Metallic Accents
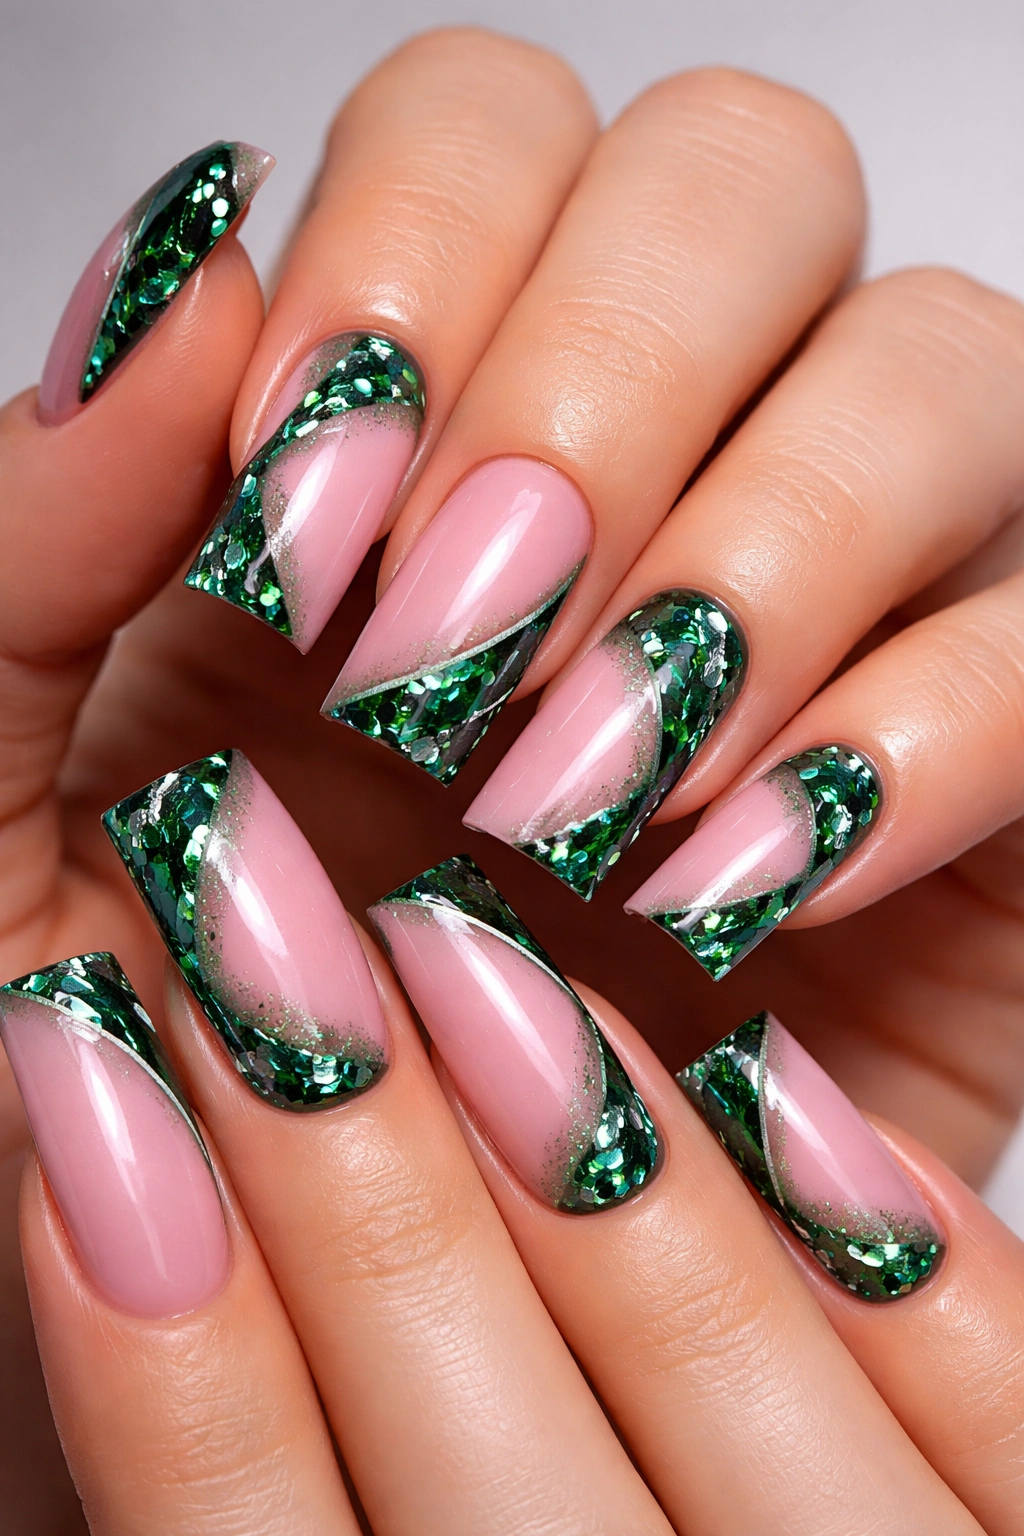
A rose pink base is elevated by luxe emerald green metallic elements—think thin metallic stripes, geometric shapes in chrome green, or a scattered confetti effect with emerald flakes. This design feels high-end and elegant, combining a romantic pink with sophisticated jewel-tone green.
Working with Metallic Polish
Metallic polishes have different consistency and application requirements than standard polish. They’re often thinner and need thinner coats to prevent pooling and uneven finish. The payoff is luminosity and depth that standard polish can’t achieve.
Incorporating Metallic Details
- Apply two coats of rose pink as your base (a warm, deeper pink works better with emerald metallics than pale blush tones)
- Once fully cured, add metallic emerald accents—thin vertical or diagonal stripes work beautifully
- Alternatively, create a confetti effect: drop small amounts of metallic emerald polish onto the nail and let them dry in organic puddles
- Use emerald metallic as a gradient accent, concentrating it heavily at the cuticle or tips and fading toward the center
- If using chrome or high-shine emerald polish, apply it exactly as the manufacturer recommends—often fewer coats are needed for full opacity
- Seal with a top coat designed for metallic polish (check the label to ensure compatibility)
Insider note: The contrast between a creamy matte-finish rose pink and a shiny, reflective emerald metallic is what makes this design feel elevated. The shine of the green against the softness of the pink creates visual interest and dimension that keeps eyes moving across your nails.
Final Thoughts
Pink and green duck nail designs work because they’re bold enough to feel intentional while remaining sophisticated enough for any occasion. The beauty of these color combinations is their versatility—whether you lean toward pastels or neons, minimal designs or complex artwork, there’s a pink and green combination that feels authentically you.
The key to success with these designs is understanding your preferred color intensity (soft and subtle versus bright and bold), choosing complementary shades that work with your skin tone, and taking time with application techniques. Starting with simpler designs like solid two-tone nails or basic French tips builds your confidence and skills, making more complex techniques like marbling or floral art feel achievable when you’re ready.
Remember that duck nails are forgiving because their size accommodates detail without feeling cramped. You have room to experiment, make mistakes, and create something uniquely personal. Each design gets easier with repetition, and the most important element isn’t perfection—it’s choosing colors and designs that make you feel confident and beautiful.
