

If you’re drawn to nails that shimmer with sophistication and catch every light in the room, silver duck nails might be exactly what you’re looking for. The duck nail shape—with its squared-off tip and flattering width—pairs beautifully with metallic finishes, creating a look that’s simultaneously elegant and bold. Silver is the perfect canvas for experimenting with shine, texture, dimension, and design while maintaining an air of refined, luxe style that works for everything from daily wear to special occasions.
The duck nail shape has taken the nail world by storm because it’s genuinely flattering on most hand shapes and nail beds. The slightly curved sides taper inward toward a wider, squared-off tip that creates visual length without the fragility of sharp stiletto nails. When you layer silver—whether glossy chrome, soft shimmer, or matte metallic—the result is a manicure that feels both modern and polished. The following eighteen ideas showcase different ways to interpret silver duck nails, from minimalist single-color statements to intricate multi-dimensional designs.
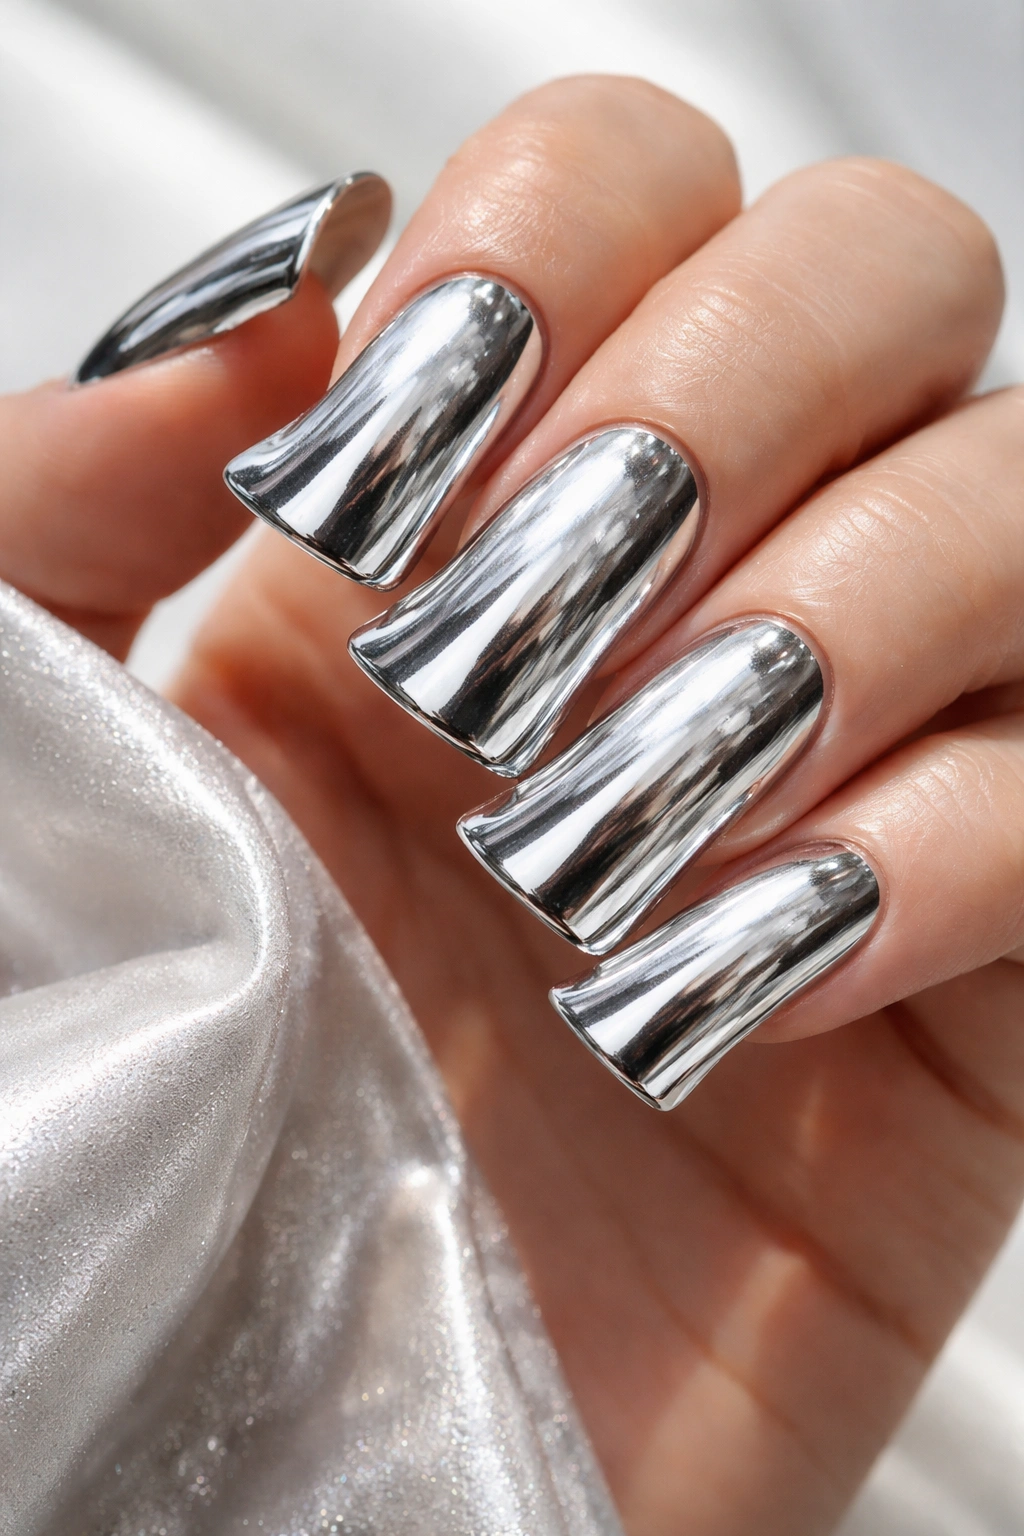
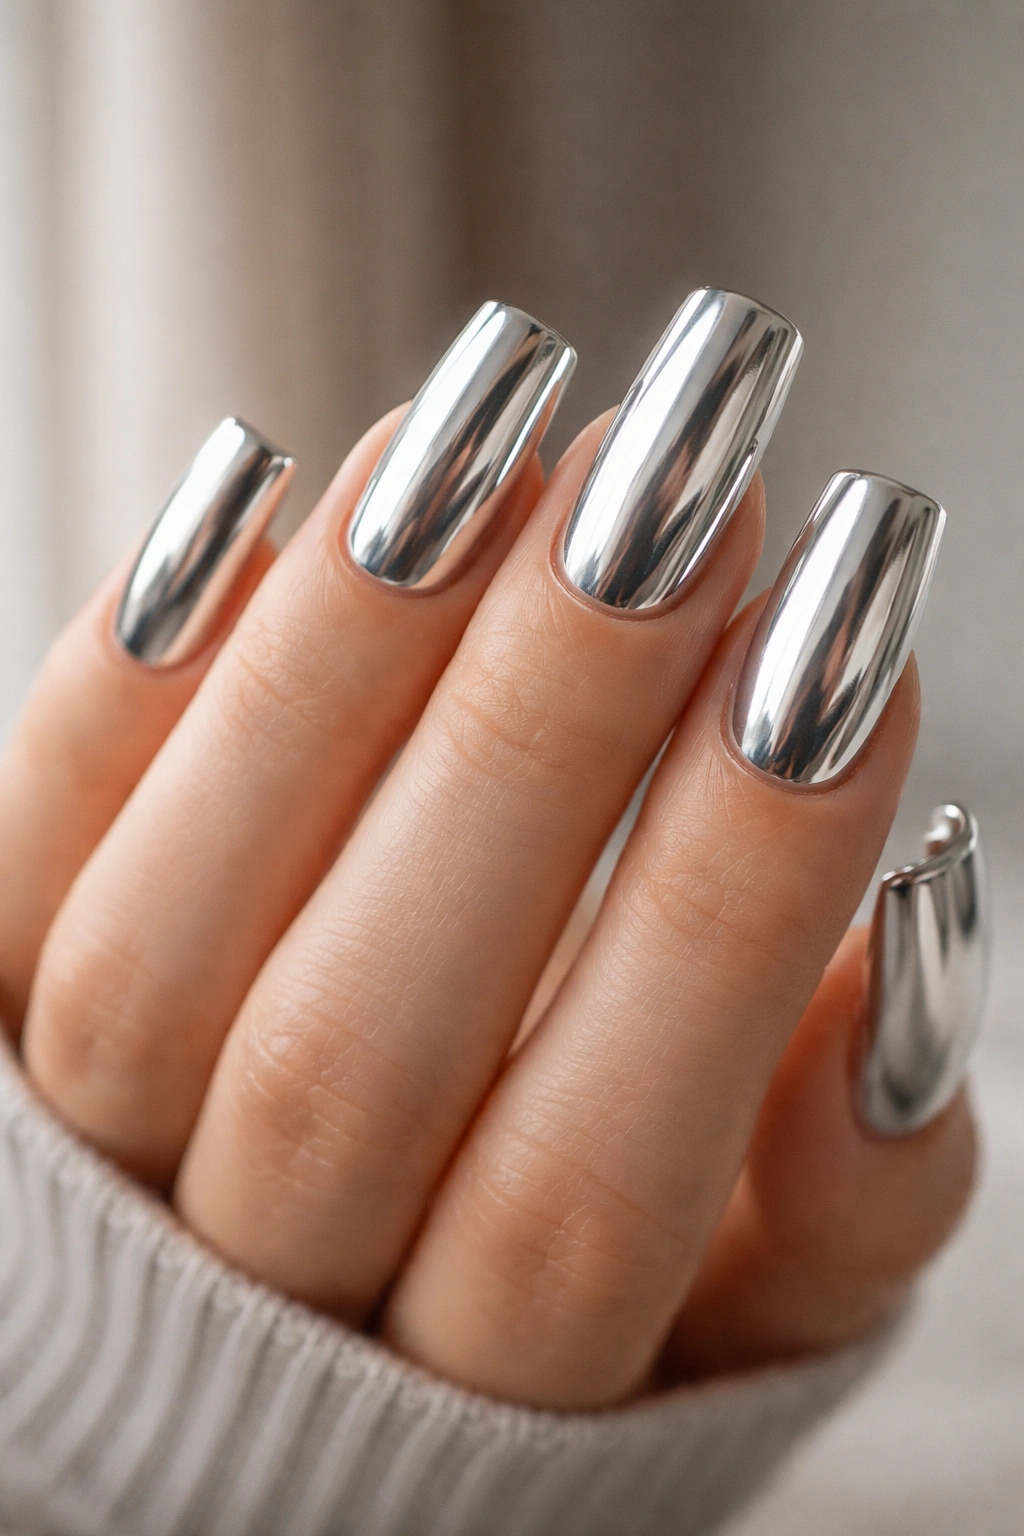
1. Pure Metallic Chrome Silver Base
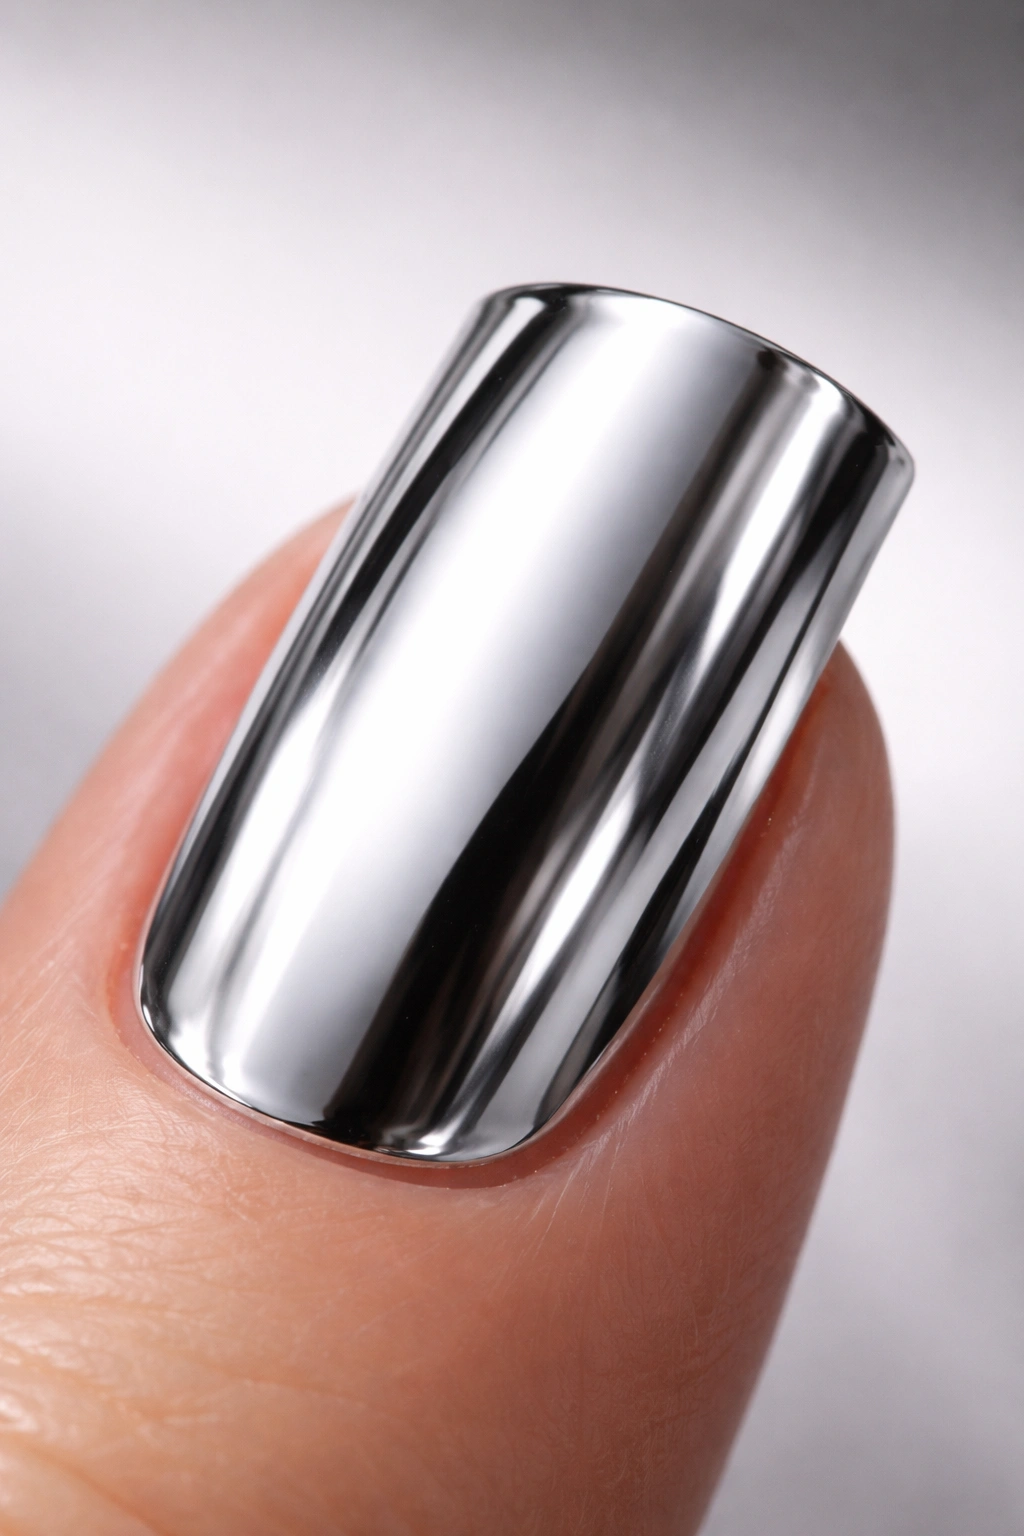
A solid chrome silver base is the foundation for understanding true metallic luxury on duck nails. This isn’t just any silver polish—it’s a high-shine, mirror-like finish that reflects light with an almost liquid quality. Chrome silver creates an instant impression of polish and sophistication without requiring additional embellishment, making it perfect for professional settings or anyone who loves understated elegance.
Why This Design Works So Well
Chrome silver’s reflective quality makes your nails appear longer and more sculpted than they actually are. The finish itself is quite difficult to achieve with regular polish—it typically requires a specialized chrome powder applied over a sticky base and sealed with a top coat. The mirror-like surface catches light from every angle, so your nails draw attention without looking overly decorated. This versatility means chrome silver works equally well with casual weekend wear and formal evening outfits.
Application and Maintenance Tips
- Use a gel or hybrid base coat specifically designed for chrome application to ensure the powder adheres evenly
- Apply chrome powder in thin, overlapping layers rather than one thick coat—this prevents streaking and uneven shine
- Seal immediately with a quality gel top coat to protect the finish and prevent tarnishing
- Plan for gel removal, as chrome powder can be stubborn to remove with regular soaking; a professional removal service is often worth it
- Touch up the chrome coat every two weeks if you notice any dull patches appearing on the surface
Pro tip: For maximum shine, use a lint-free wipe with a tiny amount of gel-specific oil to gently buff the chrome surface after application—this removes any dust particles that can dull the mirror effect.
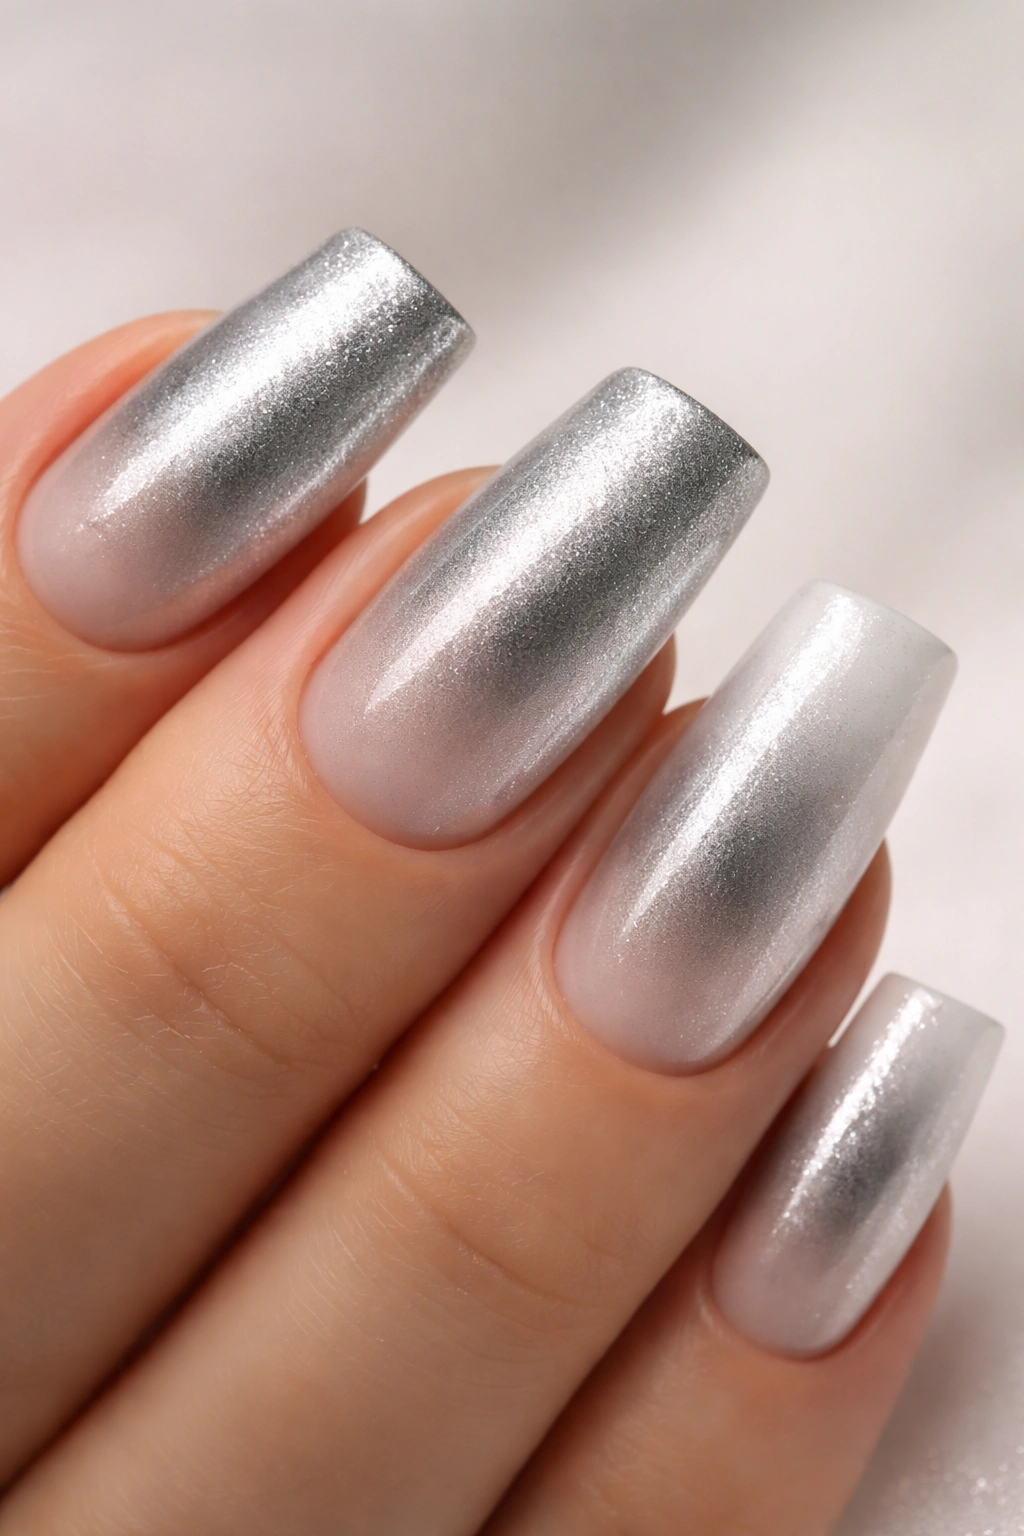
2. Silver Ombre Gradient Fade
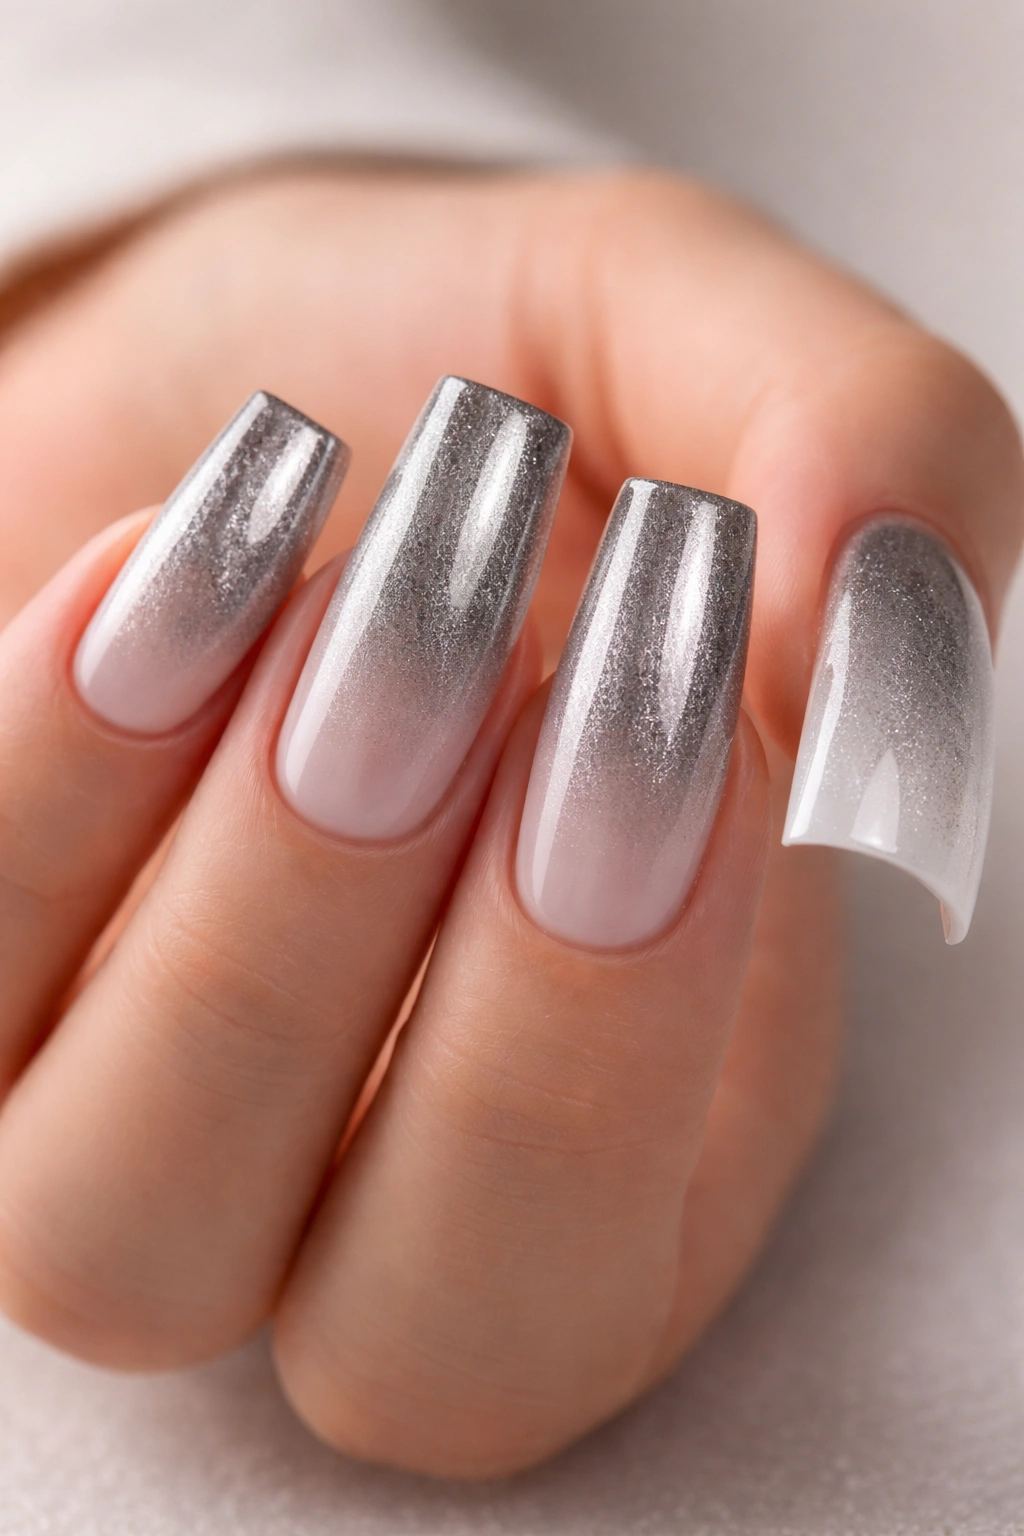
An ombre gradient on duck nails creates a stunning visual effect where silver transitions from a concentrated metallic tone at the base to either white, nude, or transparent at the tip. This gradient technique adds depth and dimension while maintaining the understated elegance that makes silver so appealing. The soft transition draws the eye along the length of the nail, enhancing the already-lengthening effect of the duck shape.
How the Gradient Creates Visual Impact
The ombre effect works on duck nails because the wider tip provides ample space for the color transition to shine without looking cramped. Whether you’re fading from deep silver to pale silver, silver to white, or silver to nude, the gradient adds a sophisticated complexity that solid color simply can’t match. This technique is particularly stunning on longer duck nails, where the gradient has space to really unfold. The visual effect is flattering to most skin tones and coordinates beautifully with both warm and cool seasonal palettes.
Creating a Smooth Ombre Transition
- Use a makeup sponge or specialized ombre sponge to dab and blend two or three polish shades together on the nail surface
- Apply the darker shade first (concentrated silver), then gently sponge the lighter shade (white or nude) over the tip area
- Build the transition gradually with multiple light layers rather than one heavy application—this prevents a harsh line and creates a more professional blend
- Seal with a clear top coat to smooth out any texture from the sponging process
- Practice on practice nails first; the sponge-and-dab technique takes a few tries to master
Worth knowing: Gel polish blends more smoothly than traditional polish for ombre work because you control the curing process and can add layers without the base drying unevenly.
3. Silver with Bold Geometric Line Art
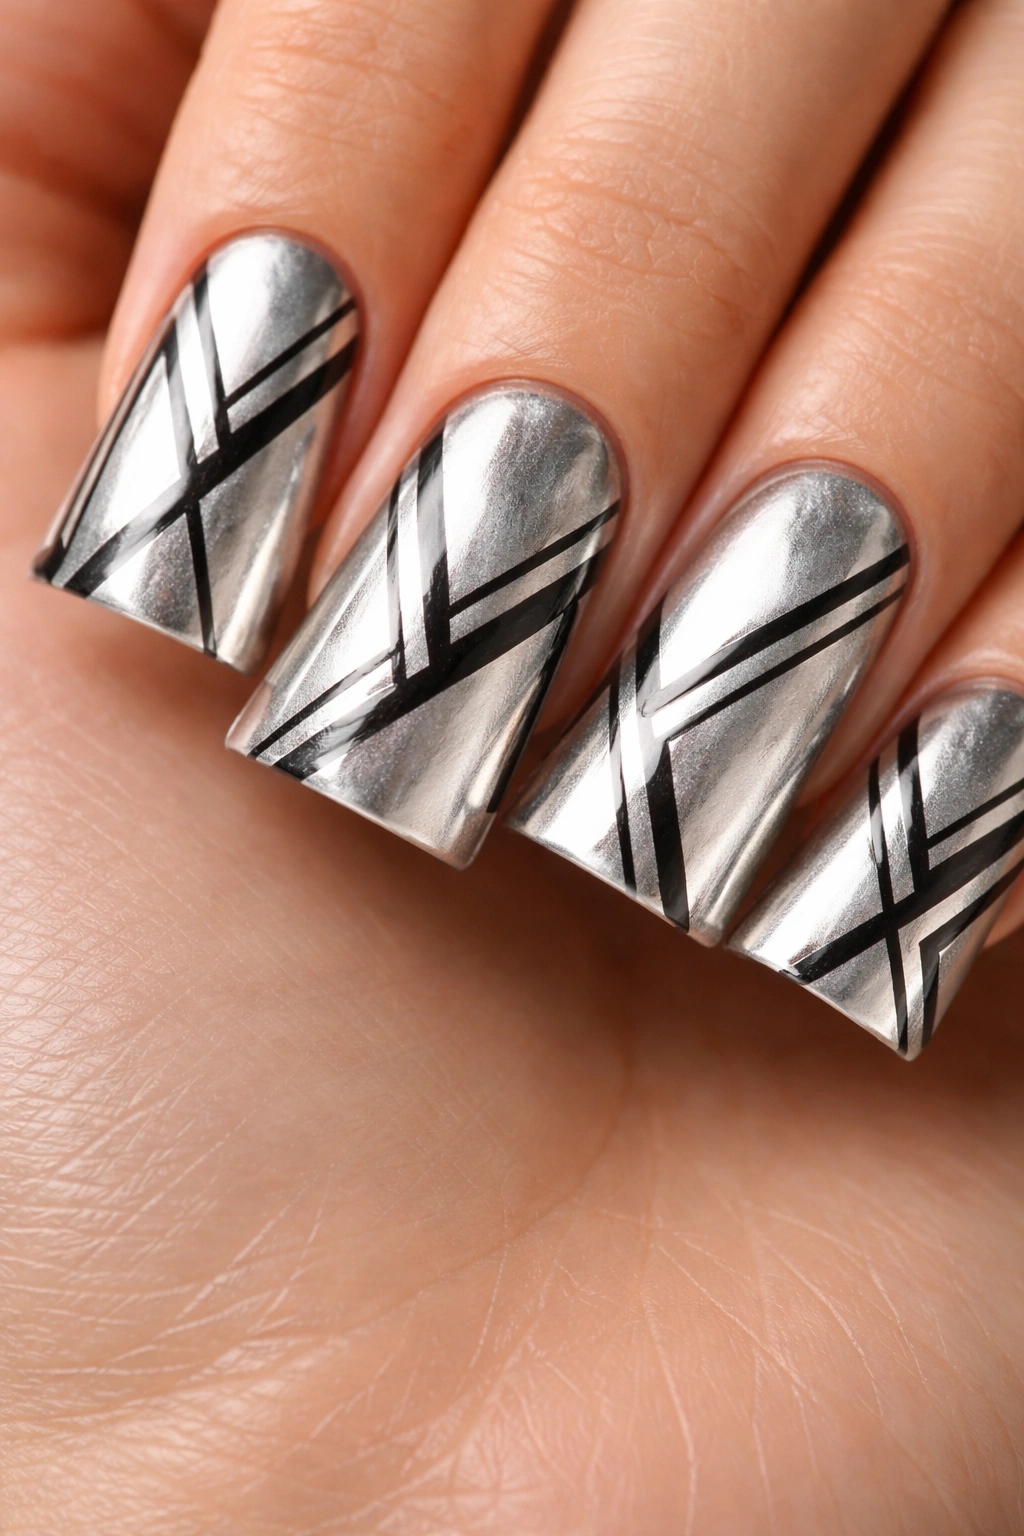
Geometric designs on duck nails let you play with negative space, clean lines, and contrasting colors while keeping the overall look modern and intentional. Silver provides the perfect metallic backdrop for black, white, or even neon geometric patterns—stripes, triangles, squares, or abstract line work all pop against a shimmering silver base. The duck nail shape’s size and structure make it an ideal canvas for geometric designs that might feel cramped on smaller nail shapes.
Why Geometric Patterns Feel So Contemporary
Geometric designs tap into a minimalist aesthetic that feels fresh and deliberate rather than busy or ornate. On duck nails, geometric patterns work because they align naturally with the nail’s structured shape—the squared-off tip and defined sides echo geometric forms. Whether you’re drawing simple black lines across the nail or creating intricate patterns with multiple colors, geometric nail art reads as sophisticated and intentional. The contrast between shiny silver and matte or contrasting colors creates visual interest without looking chaotic.
Execution Tips for Clean Geometric Lines
- Use a thin nail art brush or a striping brush to draw precise lines; gel polish holds its shape better than traditional polish for detailed work
- Apply patterns on top of a fully cured silver gel base to avoid the design sinking into uncured polish
- Consider using nail guides or striping tape to create perfectly parallel lines if freehand feels too uncertain
- Bold geometric designs work best when you keep color contrast high—pale silver with black lines, or silver with white—rather than trying to blend similar shades
- Seal everything under a clear gel top coat to protect the design and keep lines crisp
Insider note: If perfect freehand lines stress you out, create a stencil using thin nail tape or sticky vinyl—cut your geometric pattern, stick it to the cured silver base, and fill in the exposed nail area with contrasting color, then peel away the tape for perfectly clean edges.
4. Silver and White Marble Effect

A marble effect combines soft silver with white in swirled, organic patterns that mimic real marble stone—no two nails look exactly alike, which is part of the appeal. This design bridges the gap between minimalist elegance and artistic expression; it’s decorative without being overly complex. On duck nails, the marble effect creates an almost architectural look that feels both luxurious and grounded.
The Appeal of Organic Marble Patterns
Marble designs work beautifully on duck nails because the larger surface area allows the organic swirls and veining to develop fully without looking cramped. The combination of metallic silver and classic white creates a timeless palette that coordinates with virtually any outfit. Each nail ends up unique, giving you a custom, artistic manicure rather than a pattern-matched design. The marble effect reads as effortlessly elegant and upscale, the kind of look you’d expect to see on a luxury resort or in a high-end salon.
Creating Authentic-Looking Marble
- Start with a white or pale pink base coat as your foundation color
- While the base is still wet or tacky, drop silver polish onto the nail and use a thin brush or toothpick to drag and swirl the colors together
- Create irregular veining by dragging thin lines of silver or black through the white and silver areas—these “cracks” mimic real marble’s natural texture
- Allow each layer to dry or cure between swirling motions to prevent the design from becoming muddy
- Apply a glossy top coat that enhances the marble’s natural elegance and creates depth
Pro tip: Use a dry brush or a fine striping brush dipped lightly in black gel polish to add delicate black veining over the marble pattern—this detail mimics high-quality marble stone and elevates the entire design from pretty to professional.
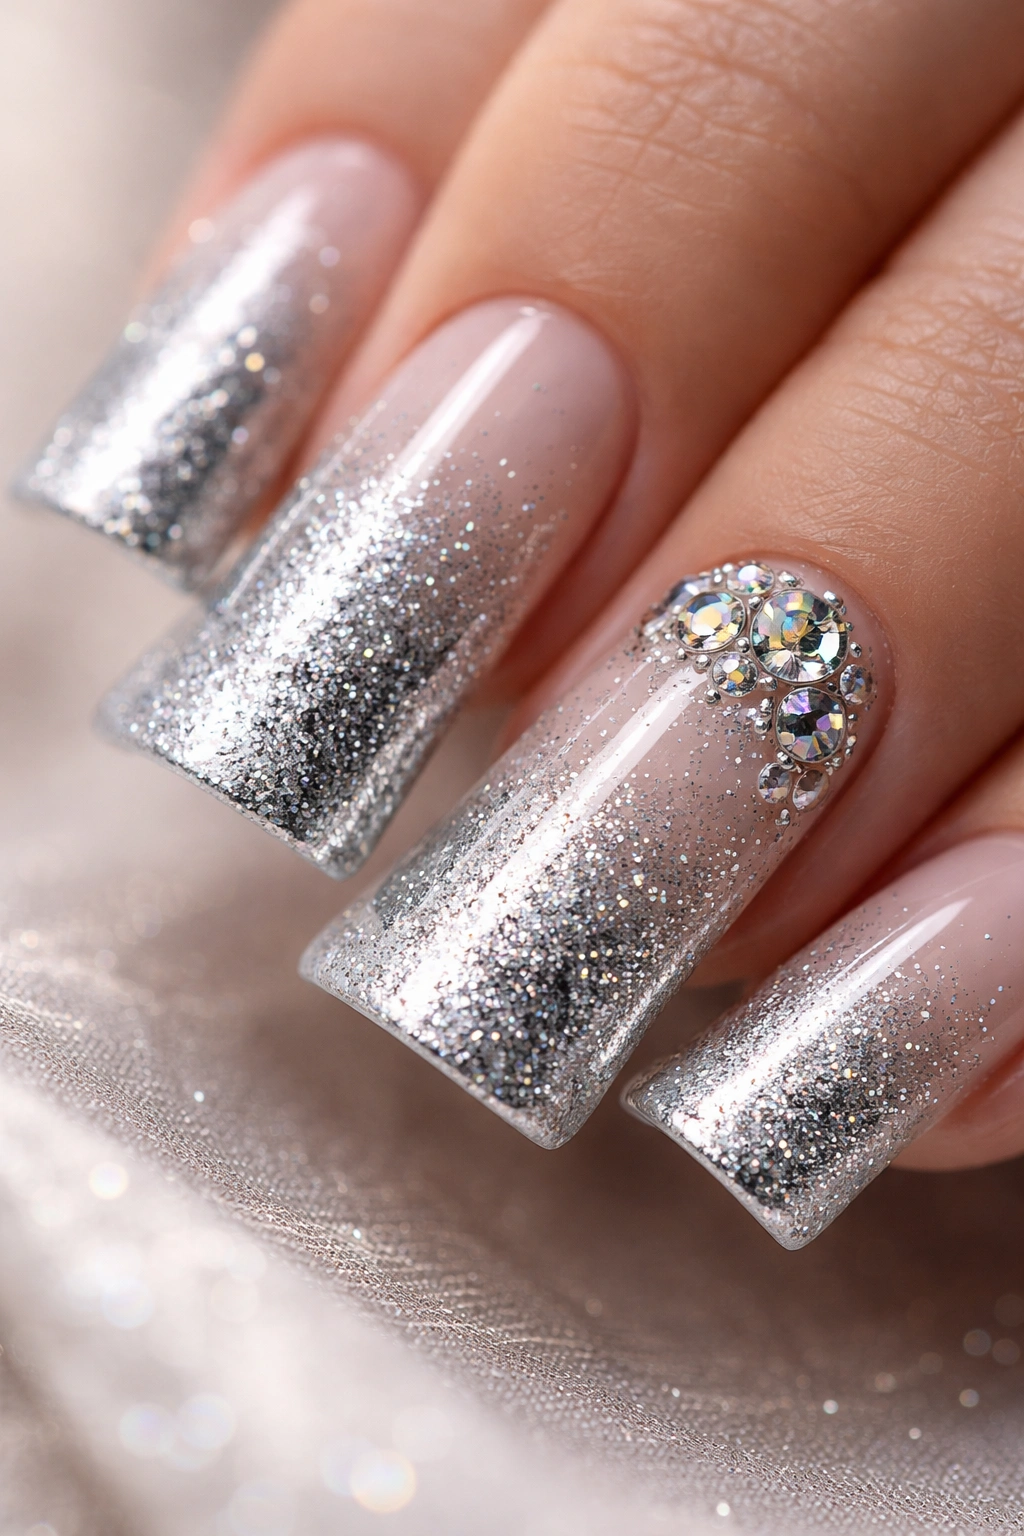
5. Silver Duck Nails with Rhinestone Accents
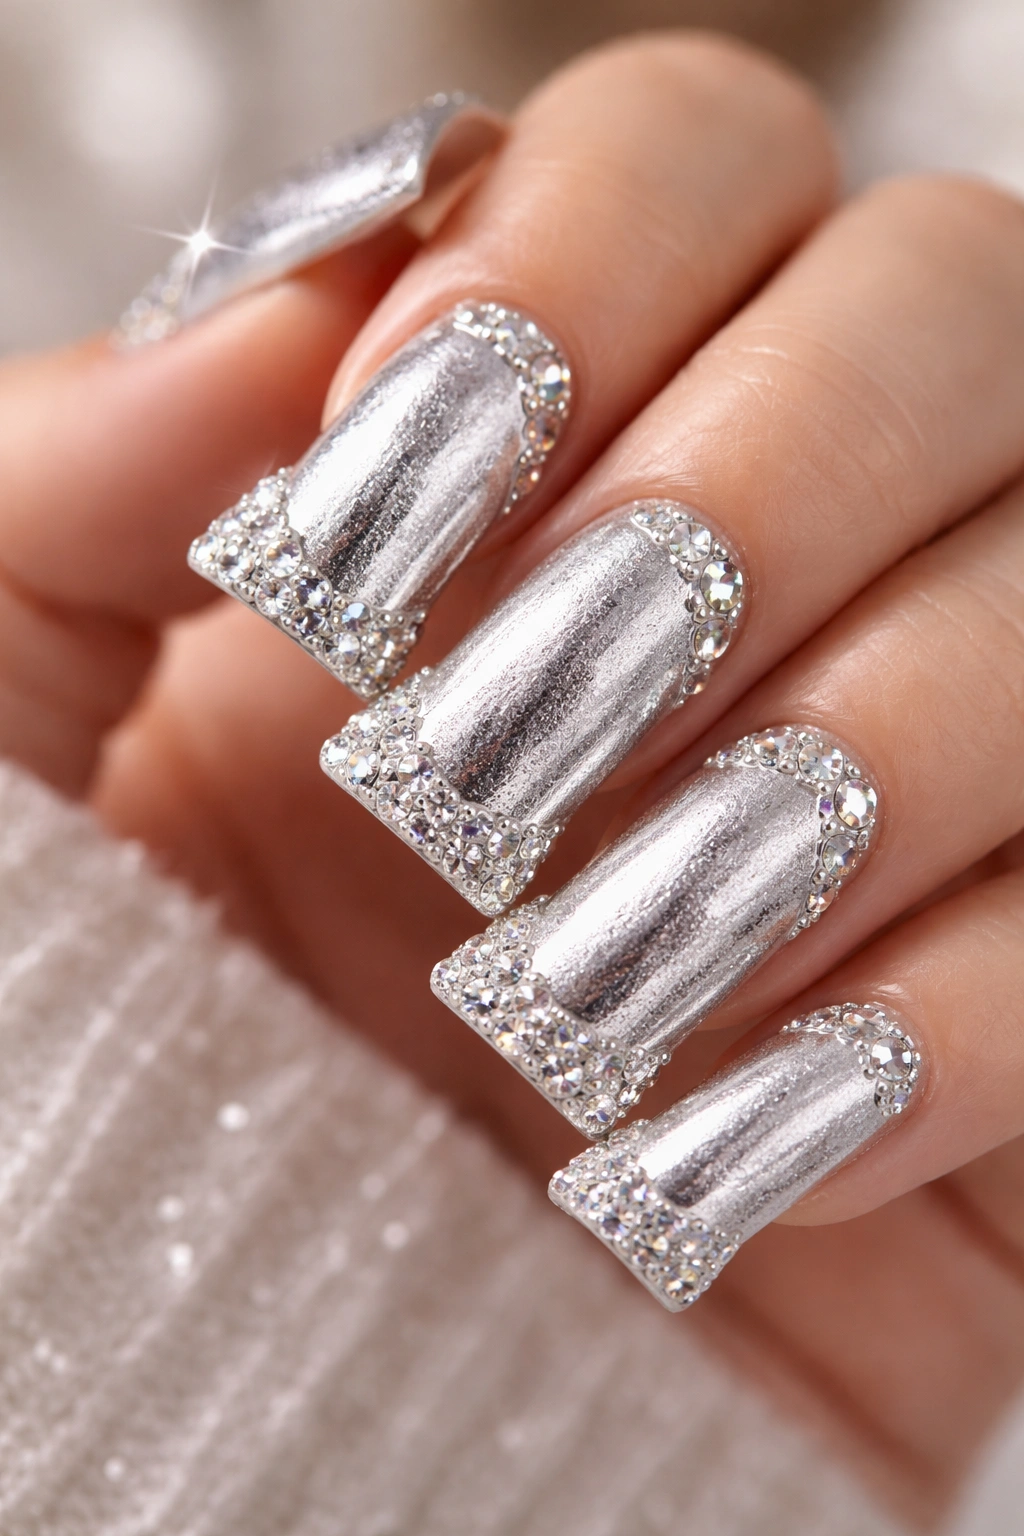
Silver polish becomes the base for a sparkle moment when you add rhinestones or diamond accents strategically across the nail. Rhinestones catch light independently of the silver base, creating layered dimension and a decidedly luxe aesthetic. On duck nails, rhinestones can be placed along the tip, scattered across the surface, or clustered in a focal pattern that feels intentional rather than random.
How Rhinestones Add Luxury and Dimension
Rhinestones create a formal, celebratory vibe that’s perfect for special occasions—weddings, parties, date nights, or anywhere you want your nails to make a statement. The combination of shiny silver polish and bright rhinestones creates multiple reflection points that catch light from different angles. Duck nails provide plenty of surface area for rhinestone designs without the nails feeling so densely decorated that they become uncomfortable to wear. The key is intentional placement—too many rhinestones can feel overwhelming, while a thoughtfully placed selection feels curated and elegant.
Application and Durability Strategies
- Apply rhinestones to a slightly tacky gel base so they have something to grip without sinking into wet polish
- Use a rhinestone picker (a specialized tool with a sticky tip) or the tip of a damp brush to place stones individually—avoid trying to press them in with your fingers
- Start with larger rhinestones as anchors, then add smaller stones around them for visual balance
- Seal rhinestones under a thick gel top coat, or apply a dedicated rhinestone-sealing top coat to secure them permanently
- Check rhinestones regularly; even well-sealed stones can loosen around week three if the nail edge experiences bumps or pressure
Worth knowing: Higher-quality rhinestones (like Swarovski crystals) stay brilliantly clear and shiny throughout the entire manicure, while cheaper alternatives can look dull or cloudy after a few days of wear.
6. Glittery Silver with Matte Contrast Finish
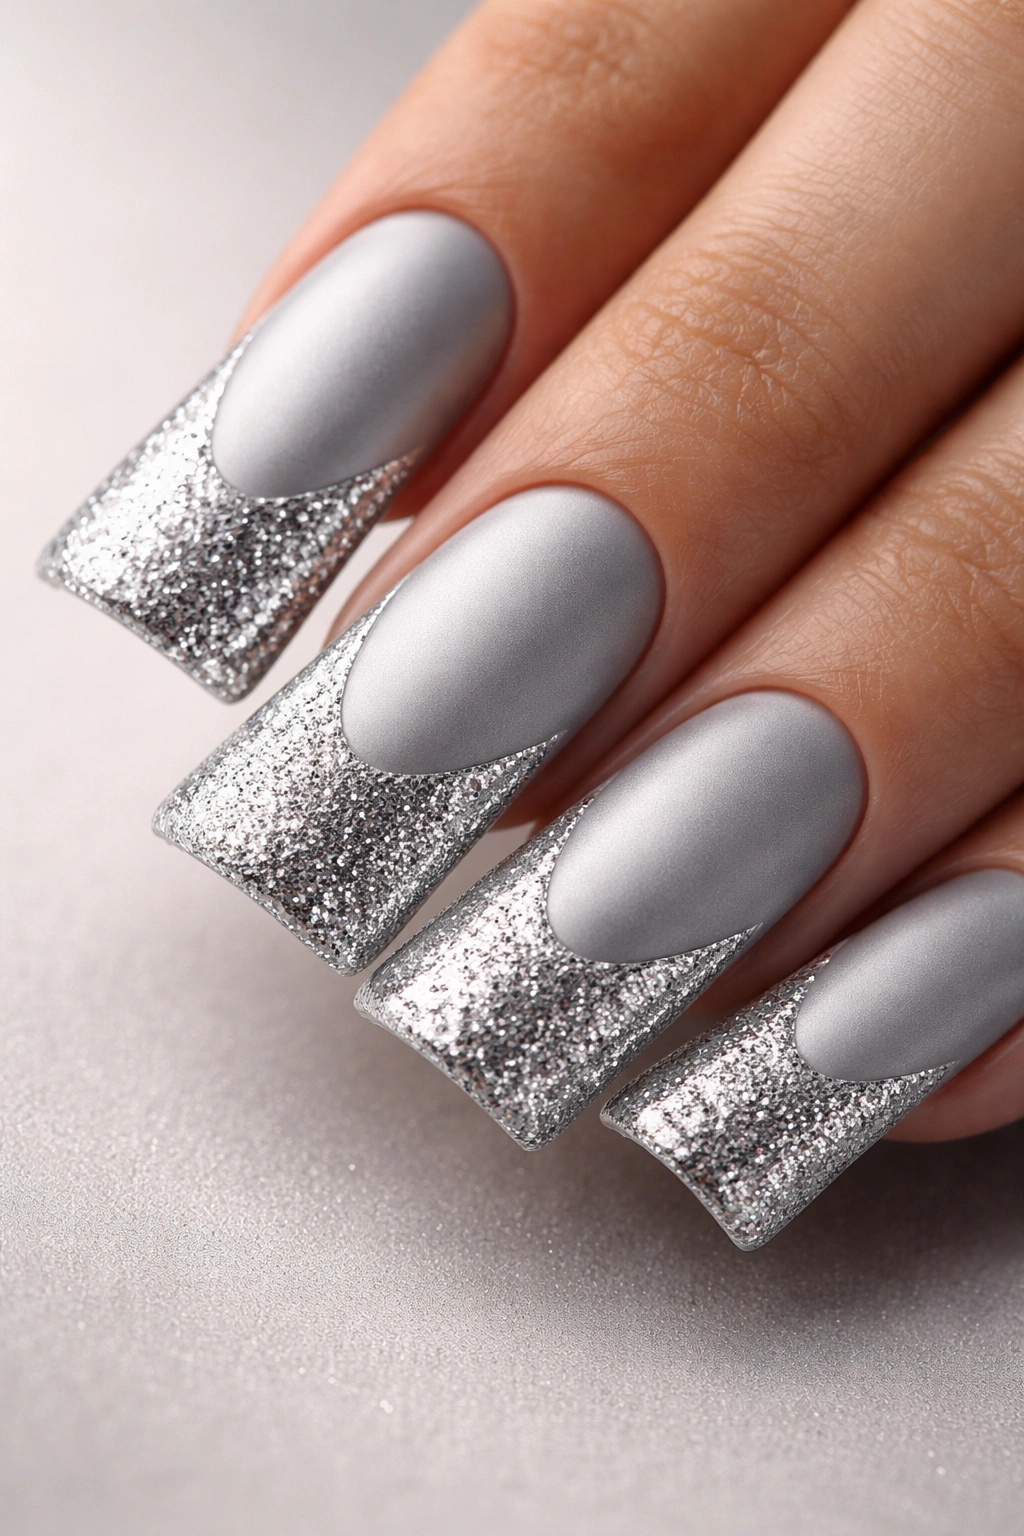
Combining a glittery silver with matte silver or matte nude creates textural contrast that’s visually striking and deeply satisfying. One approach: a glittery silver base on the tip and matte silver on the bed of the nail. Another: alternate glitter and matte sections with a geometric pattern. The contrast between shiny and matte surfaces adds dimension that reads as intentional and sophisticated.
Why Texture Contrast Elevates a Simple Color Palette
When you use the same or similar colors in different finishes, the design feels cohesive while still offering visual interest. The glitter catches light and sparkles, while the matte surface provides a visual rest point that prevents the overall look from feeling one-note. On duck nails, this textural play is especially effective because the size allows both finishes to be visible and appreciated. The combination feels modern and editorial—the kind of nail design you’d see in a professional beauty magazine.
Achieving Flawless Matte and Glitter Combinations
- Apply glitter polish as your first layer; seal it with a clear coat before moving to the matte application
- Apply matte polish over a clear base coat on the matte sections; matte finishes are more forgiving than glitter but need a clean application
- Keep a clear gel top coat handy to apply between glitter and matte sections so they don’t bleed into each other
- Use painter’s tape or striping tape to create a clean edge between glitter and matte zones if freehand feels imprecise
- Cure each layer separately if using gel products—don’t try to cure glitter and matte together, as they may not cure evenly
Pro tip: For a more subtle matte-and-glitter combo, apply matte silver as your base, then add glitter only to the nail tips and seal them separately—this creates a sophisticated gradient from matte to sparkly without sharp lines.
7. Silver to Nude Blended Transition
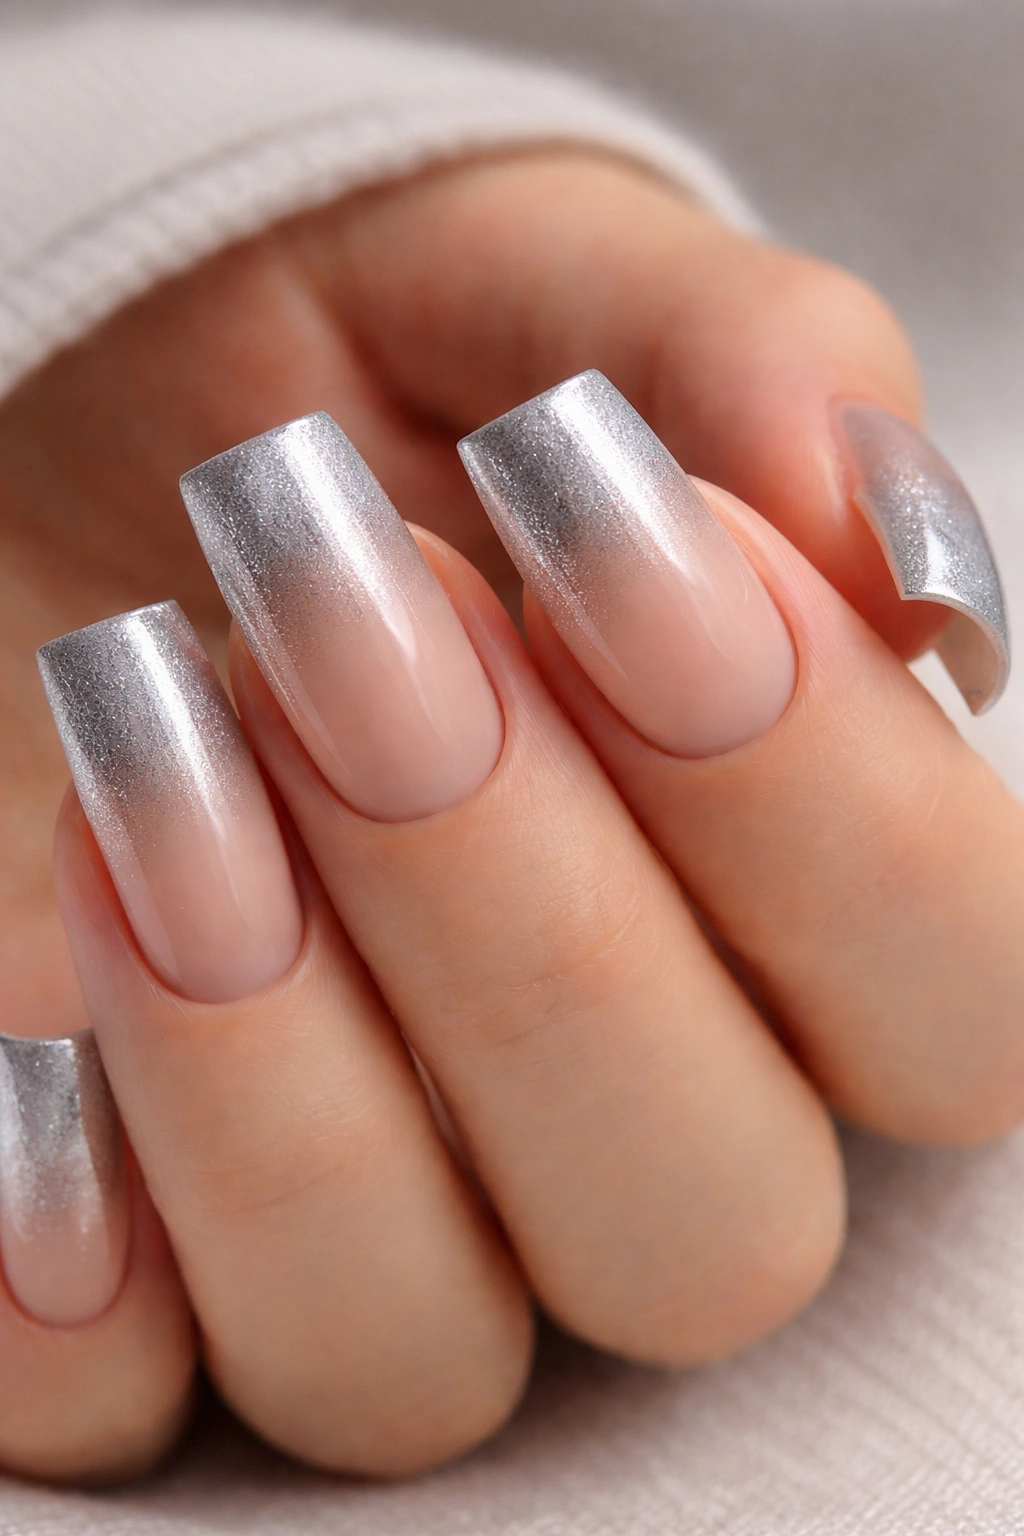
A soft blend from silver metallic to peachy, warm, or cool nude creates a subtle, wearable aesthetic that works for virtually every occasion. This design is less dramatic than a bold ombre but offers more visual interest than a single solid color. The silver-to-nude transition flatters most skin tones because it borrows the universality of nude while adding the sophistication of silver shine.
The Versatility of Silver-to-Nude Gradients
Silver-to-nude nails read as polished and intentional without demanding attention or limiting outfit choices. This is the manicure you can wear to work, to a date, to casual brunch, or to a formal event—it transitions across contexts seamlessly. The nude end of the gradient tones down the intensity of the silver, creating a balanced look that feels effortless. On duck nails, the gradient has space to unfold naturally, making the transition feel organic rather than abrupt.
Blending Silver and Nude Seamlessly
- Start with a nude base coat on the entire nail—use a shade that complements your skin tone (warm nude for warm undertones, cool pink-nude for cool undertones)
- Apply silver polish to the base or lower portion of the nail and gently blend the edge upward using a damp makeup sponge
- Build the blend gradually with light touches rather than heavy coverage; multiple light layers create a smoother gradient than one heavy application
- Use a clear gel top coat to smooth any texture created by the blending process and create a unified, glass-like finish
- Allow each layer to set or cure fully before adding the next—this prevents the colors from muddying together
Worth knowing: The most flattering silver-to-nude blends happen when you choose a nude that’s one or two shades lighter or darker than your natural nail bed—this creates subtle dimension rather than a stark contrast.
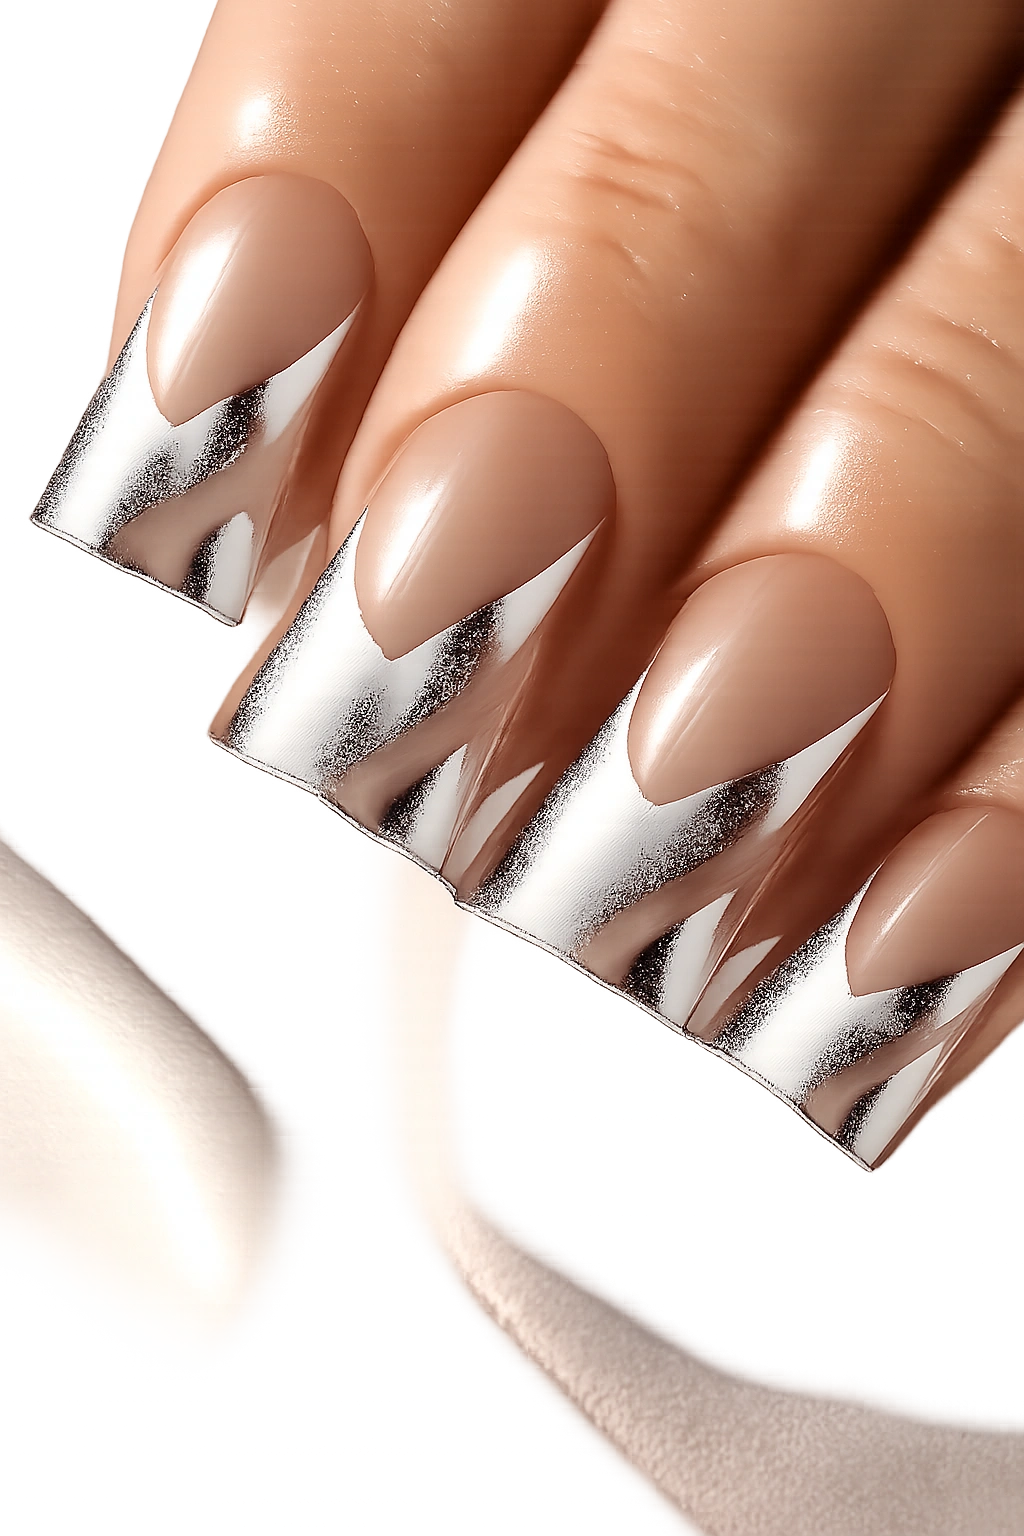
8. Silver with Black French Tips
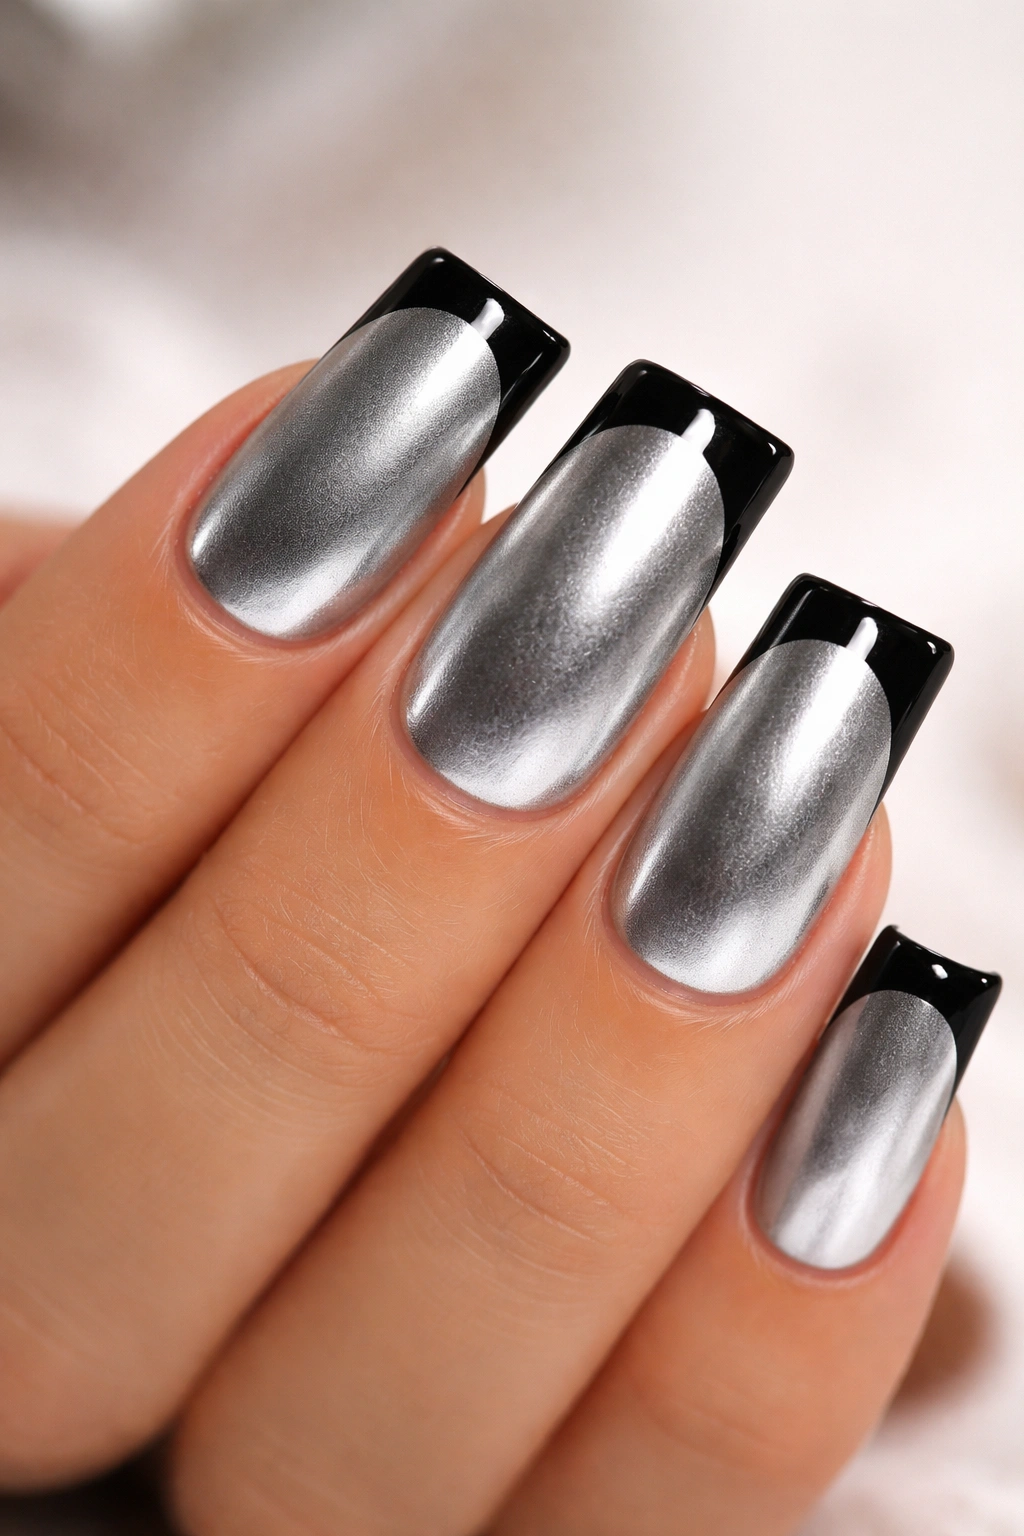
A classic French tip reimagined with silver as the base and black on the tip puts a contemporary spin on a timeless design. The high contrast between shiny silver and deep black creates instant visual impact while remaining wearable and elegant. On duck nails, the black tip frames the squared-off edge beautifully, creating a design that feels both modern and refined.
Why Black and Silver Never Go Out of Style
Black and silver is a color combination that reads as sophisticated, dramatic, and intentional—it’s the manicure equivalent of black and silver jewelry or a monochrome evening outfit. The contrast is clean and graphic without feeling juvenile or trendy. On duck nails specifically, a black French tip emphasizes the nail shape itself, drawing attention to the elegant proportions. This design works year-round and coordinates with virtually every color palette and style aesthetic.
Executing the Perfect Black French Tip
- Apply a shiny silver gel or polish as your base color; cure or allow it to dry fully
- Use a thin brush or striping brush to draw a clean black line along the tip edge; alternatively, use striping tape as a guide for a perfectly straight edge
- Fill in the tip area above the line with black polish or gel; keep the line clean and even all the way across
- The tip should be wide enough to be visible—approximately one-eighth to one-quarter of the nail length works well on duck nails
- Seal with a clear gel top coat to protect the design and keep the black from chipping
Pro tip: If drawing a perfectly straight French tip line feels shaky, apply a thin striping tape along where your line should be, apply black polish over it (slightly overlapping the tape), and peel the tape away immediately—the result is a crisp, clean edge every single time.
9. Silver with Holographic Shift Effect
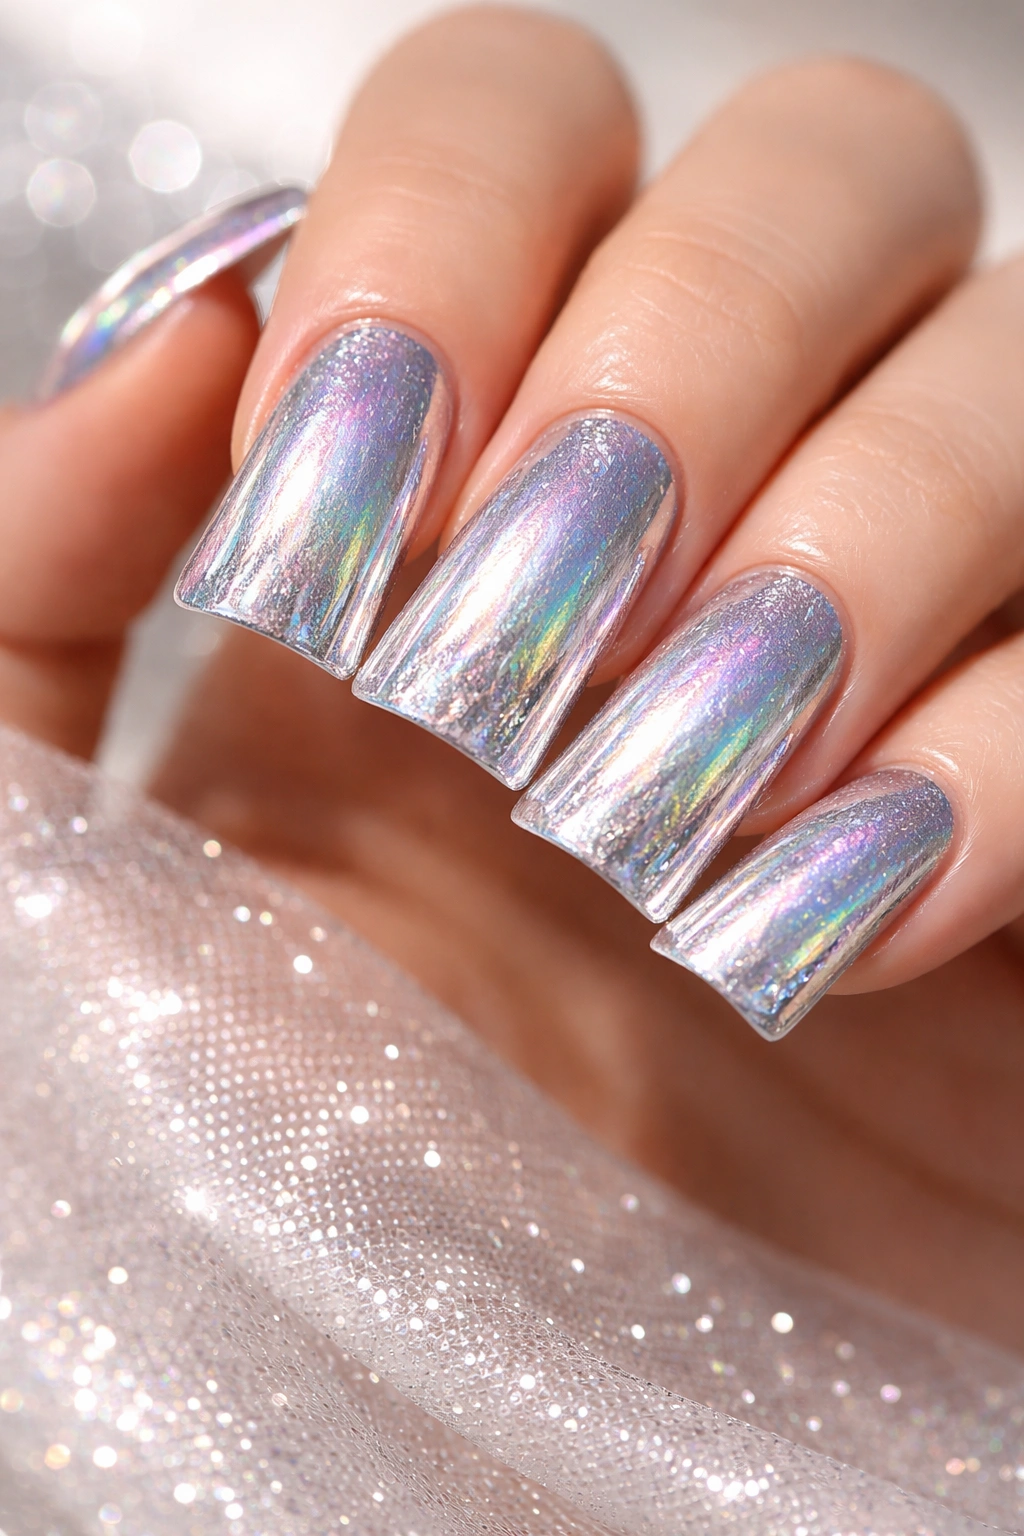
Holographic nail polish creates an iridescent effect that shifts between different colors as light and angles change—combine it with silver for a nail design that’s never the same twice. Holographic effects on duck nails are especially stunning because the larger surface area means the color shifts are more visible and dramatic. This design sits at the intersection of luxe and playful; it’s eye-catching without being costume-like.
The Mesmerizing Quality of Holographic Polish
Holographic polish creates movement and dimension that catches the eye repeatedly—people will keep noticing your nails because the color literally changes depending on the angle and light. When applied to duck nails, the holographic effect becomes a conversation starter; it’s the kind of manicure that photographs beautifully in different lighting. The effect is contemporary and slightly futuristic, appealing to anyone who loves modern nail art. Silver holographic is particularly striking because the underlying metallic quality interacts with the holographic pigments to create even more depth.
Application for Maximum Holographic Impact
- Start with a smooth silver or white base that the holographic polish can sit on without sinking or blending
- Apply holographic polish in thin, even layers; thick application can dull the effect or create a cloudy appearance
- Cure each layer separately to ensure the holographic effect stays clear and vibrant
- Apply multiple thin coats rather than one or two thick coats—this allows the full spectrum of the holographic effect to show through
- Seal with a clear top coat, but avoid thick top coat applications that can cloud the holographic shift
- Cure thoroughly; holographic polish can be trickier to cure than regular gel because of its specialized pigment
Worth knowing: Different holographic polishes shift between different color spectrums—some lean toward blue-purple-pink shifts, others toward rainbow shifts across the entire spectrum—choose the one that appeals to your personal aesthetic.
10. Silver with Mirror Powder Effect
Mirror powder creates a surface that looks literally metallic and reflective, like you’ve painted your nails with real silver or chrome. Unlike regular chrome, mirror powder can be applied in layers and combinations to create depth, ombre effects, and textural variety. On duck nails, mirror powder creates a dimensional, almost three-dimensional quality that’s absolutely show-stopping.
What Sets Mirror Powder Apart From Chrome
Mirror powder typically requires a tacky base coat, careful application with a brush or applicator, and immediate sealing—but the result is a finish that looks painted-on and permanent rather than powdered. The reflected surface creates an almost liquid appearance; nails look less like they’re wearing polish and more like they’ve been dipped in liquid metal. On duck nails, this effect is particularly striking because the larger surface area allows the mirror finish to really shine. The dimensional quality makes nails appear longer and more sculpted.
Professional Mirror Powder Application
- Apply a gel base coat and cure it—the tackiness is essential for mirror powder adhesion
- Use a specialized mirror powder applicator brush or a clean, slightly damp brush to apply powder in smooth strokes
- Work in sections and avoid pressing too hard; mirror powder applies with gentle pressure rather than heavy rubbing
- Seal immediately with a thick gel top coat to lock the powder in place and create a smooth, sealed surface
- Buff gently if needed to create an even, seamless finish
- Plan for this to be a professional application; mirror powder is tricky to apply at home without experience
Pro tip: Layer different shades of mirror powder on the same nail to create depth—a lighter silver on the tip and a darker chrome on the base, for example, creates a subtle ombre effect that’s incredibly sophisticated.
11. Silver and Rose Gold Combination
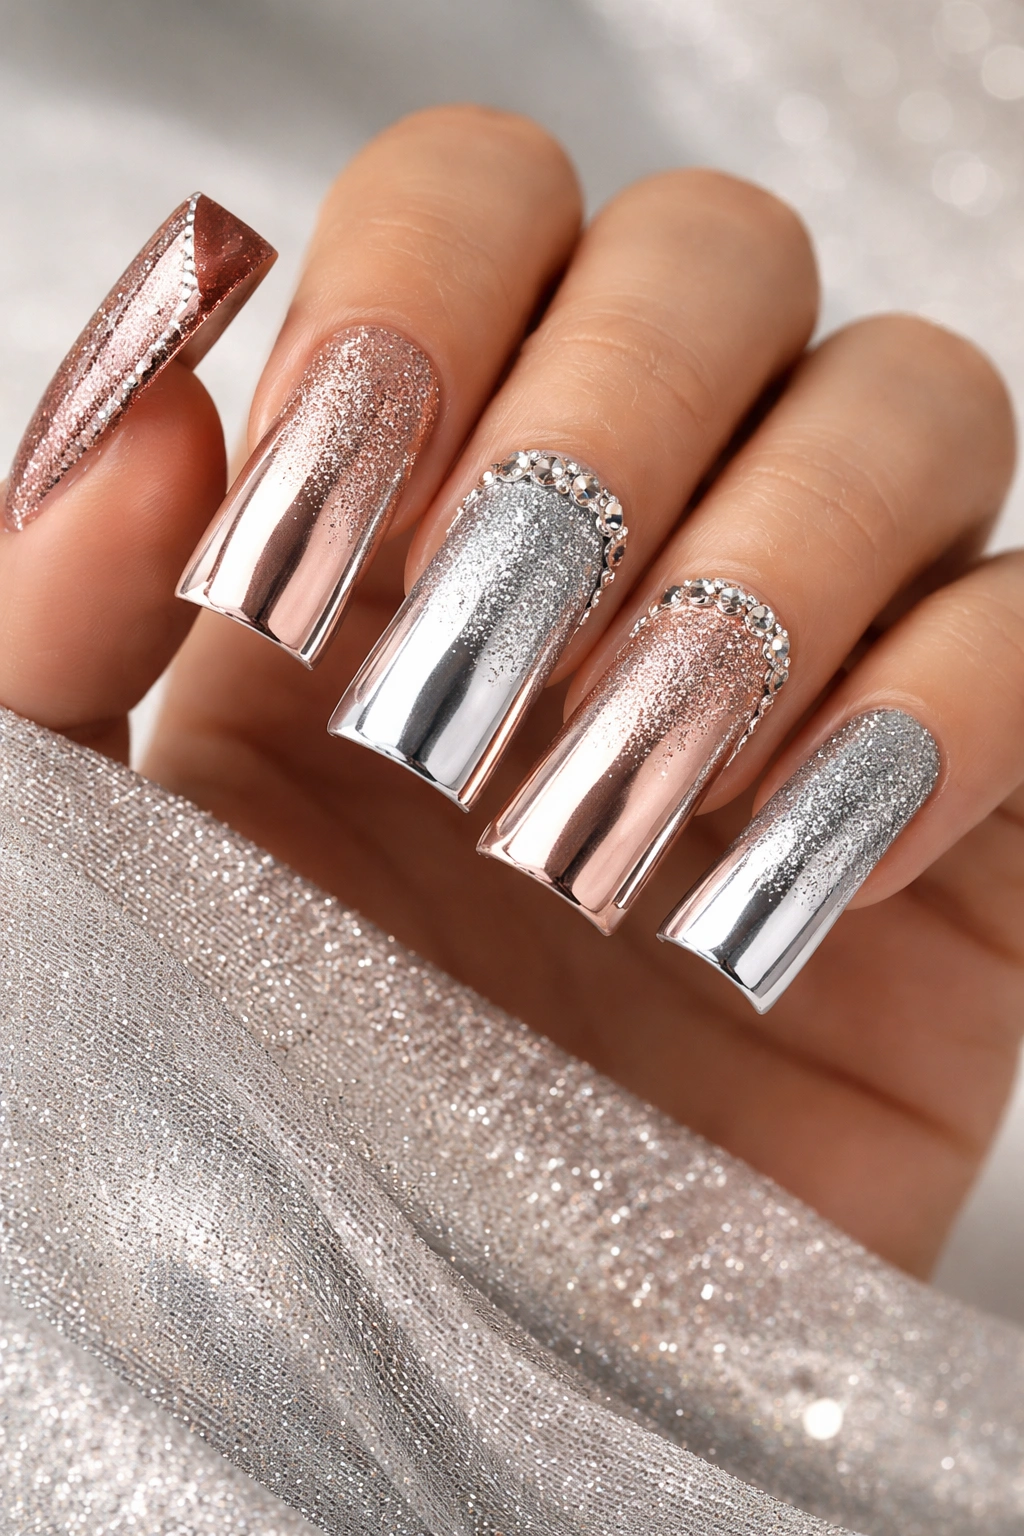
Mixing silver with rose gold creates a warm, romantic manicure that appeals to anyone drawn to metallics but wanting something beyond pure silver. The two metals can be applied in sections (silver on some nails, rose gold on others), layered (rose gold base with silver accents), or blended into an ombre. On duck nails, the combination reads as intentional and high-fashion.
Why Silver and Rose Gold Work Together
Silver is cool and modern, while rose gold is warm and romantic—together they balance each other into something that feels simultaneously luxe and wearable. The combination coordinates beautifully with both warm and cool skin tones because you’re covering the full spectrum of metallics. On duck nails, this dual-metal approach creates visual variety without the design feeling scattered or unfocused. The effect is editorial and intentional, the kind of manicure that draws compliments.
Combining Silver and Rose Gold Effectively
- Apply silver as a base or on half the nails, and rose gold as accents or on alternating nails—the key is balance
- Create an ombre by blending silver and rose gold using a makeup sponge, transitioning from one metal to the other across the nail length
- Use geometric patterns or sectioning to divide silver and rose gold clearly—alternating stripes, a split down the middle, or tip and base separation
- Choose metallics in similar finish levels (both glossy or both matte) so they appear intentionally paired rather than mismatched
- Seal with a clear top coat to unify the look and add dimension
Worth knowing: Rose gold in a warm-toned setting (warm lighting, warmer skin tone) will read as more peachy and prominent, while in cool lighting it will feel more subtle—keep this in mind when choosing your finish and accent placement.
12. Silver with Delicate Nail Art Designs
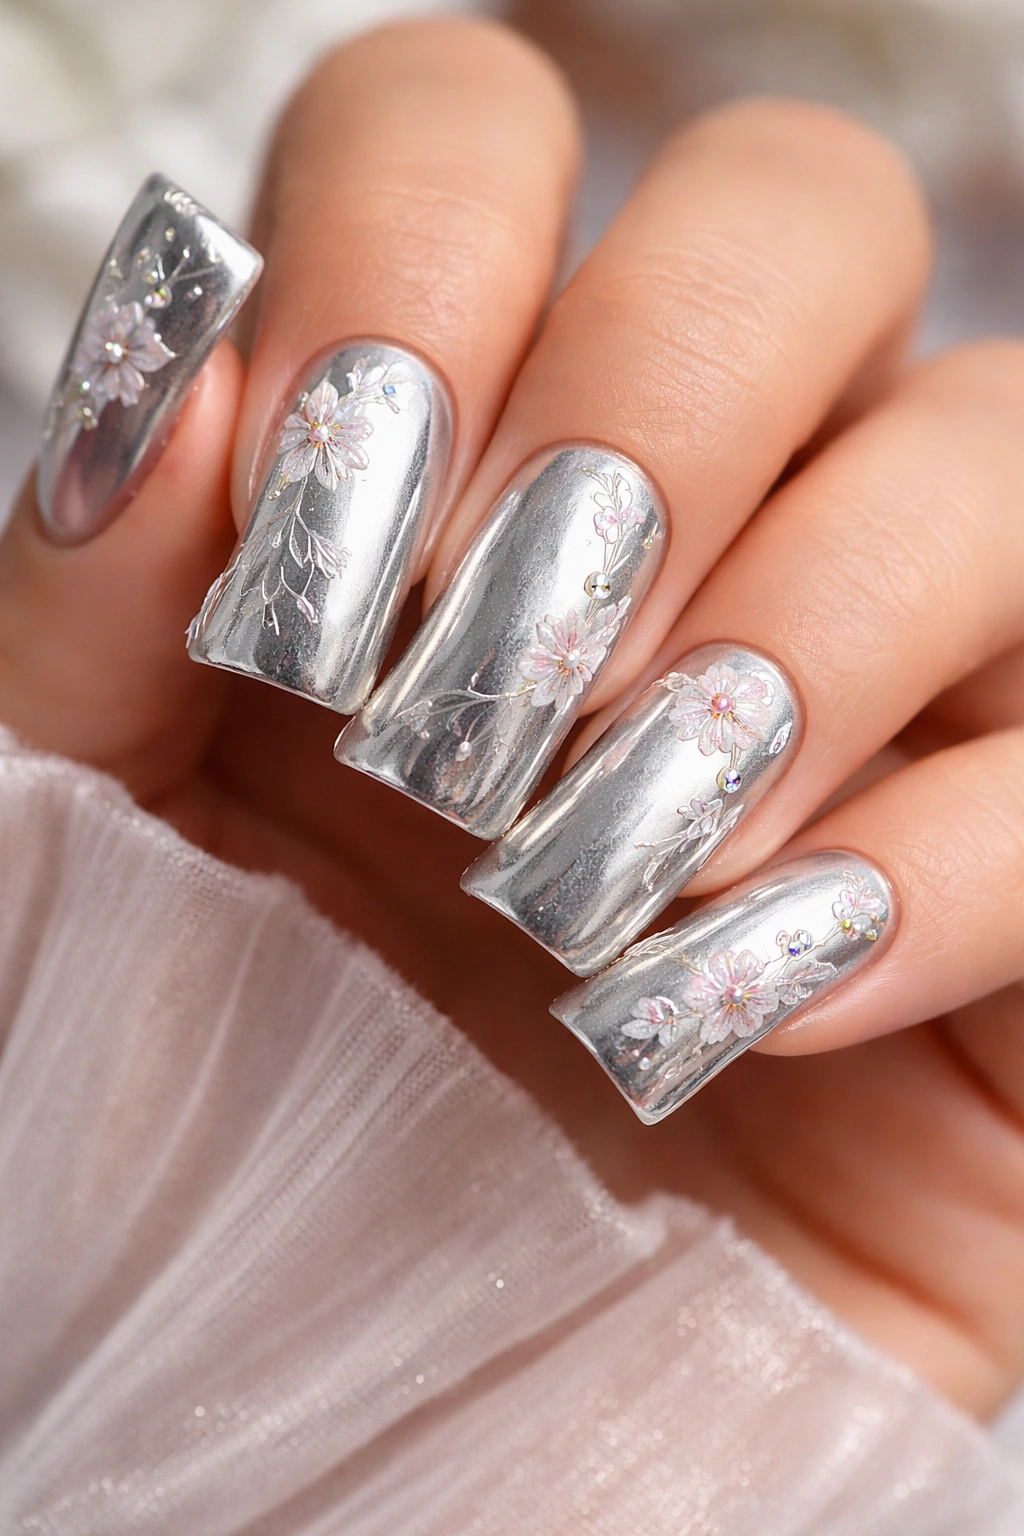
Silver serves as a sophisticated base for nail art—delicate florals, fine lines, miniature scenes, or detailed patterns applied on top of the metallic finish. The contrast between the sparkly silver base and detailed artwork in contrasting colors creates depth and visual interest that reads as truly custom. On duck nails, there’s enough space to display intricate designs without them looking cramped.
Creating Art That Shines on Silver
Nail art on silver is most striking when you use high-contrast colors (black, white, deep jewel tones) that pop against the metallic base. Fine-line work, detailed florals, and geometric patterns all read clearly when applied over silver. The metallic base doesn’t distract from the artwork; instead, it frames it and makes it feel more intentional. On duck nails, delicate designs can span the entire nail or be concentrated on specific sections—both approaches work beautifully.
Tools and Techniques for Detailed Artwork
- Use a thin striping brush or specialized nail art brush for detailed work; cheap brushes shed bristles that ruin fine designs
- Apply artwork to a fully cured silver gel base to avoid the design sinking into wet polish
- Use gel polish for nail art; traditional polish is too thin and unforgiving for detailed work
- Build detailed designs in multiple thin layers rather than trying to capture everything in one thick application
- Cure between layers to prevent designs from shifting or blurring together
- Seal artwork under a gel top coat to protect it from chipping
Insider note: The most professional-looking nail art happens when you zoom in on your work (use your phone camera or a magnifying tool) rather than relying on what looks good from arm’s length—details that look perfect from far away often have imperfections up close that you’ll want to correct.
13. Pastel Silver with Fine Glitter Mix
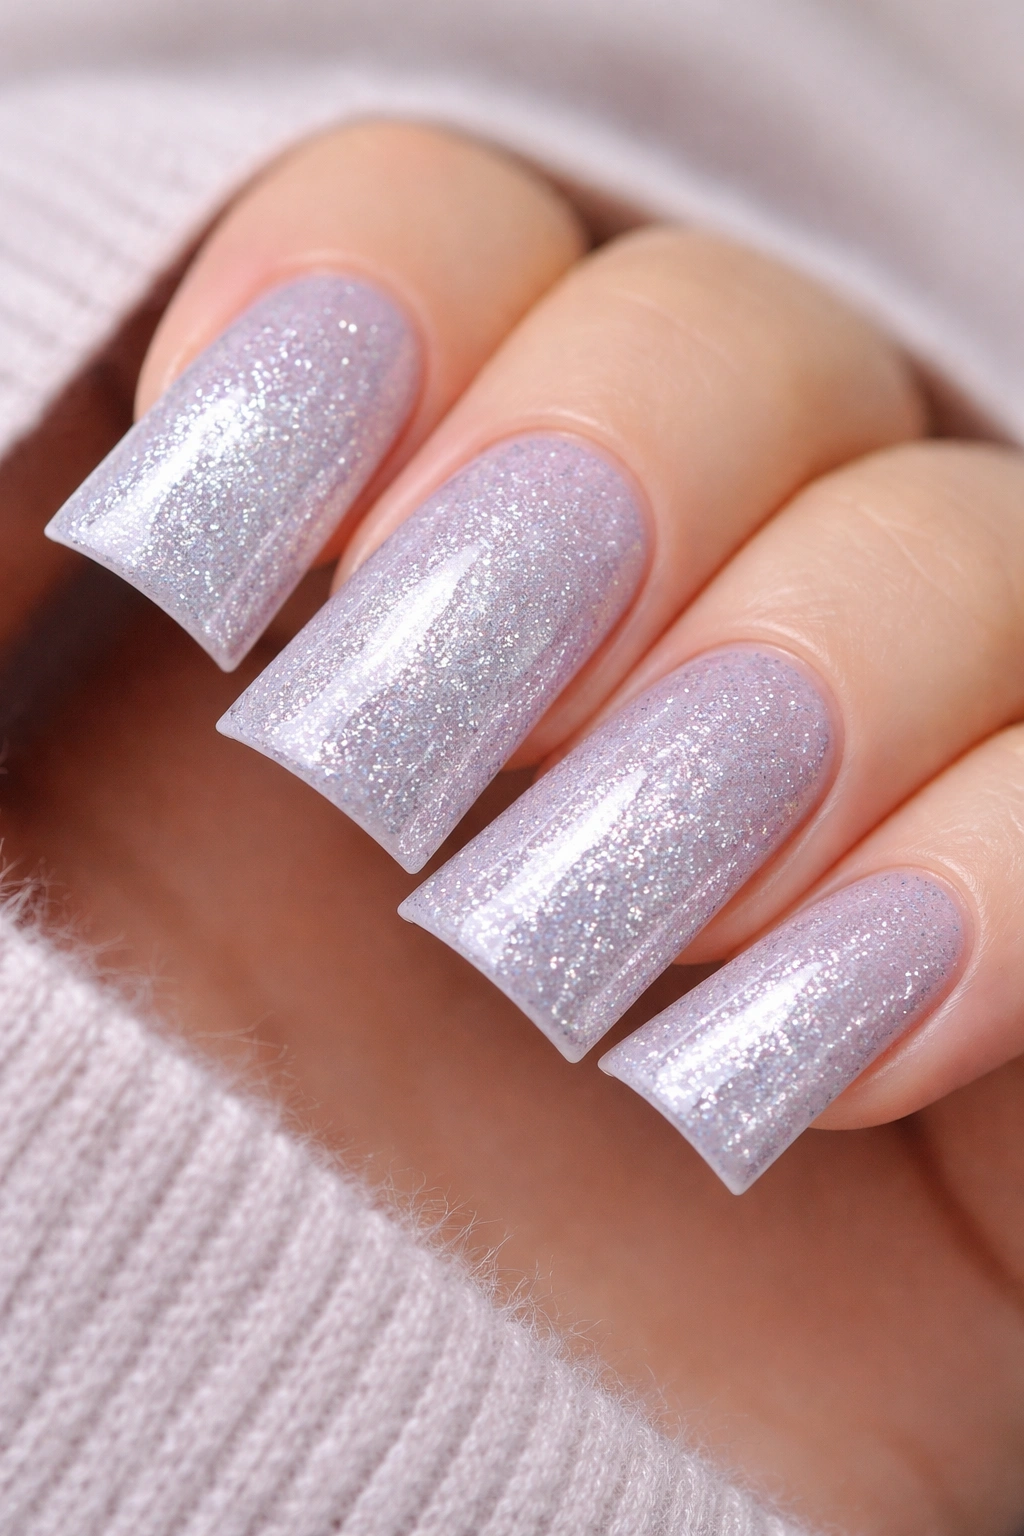
Combining soft pastel shades with silver and adding fine glitter creates a whimsical, feminine aesthetic that’s more playful than pure metallic silver. Think pale lavender or soft pink mixed with silver and delicate sparkle—the result is romantic and sophisticated simultaneously. On duck nails, this approach works beautifully for anyone wanting a manicure that’s pretty and eye-catching without being overtly dramatic.
The Appeal of Pastel-Silver Hybrids
Pastels feel soft and approachable, while silver brings modern sophistication—the combination is unexpectedly wearable. Adding fine glitter (as opposed to chunky glitter) keeps the design feeling refined and intentional. On duck nails, pastel-silver-glitter creates a manicure that photographs beautifully and works for a wide range of occasions from casual to semi-formal. The lightness of the pastels means the overall look feels fresh and contemporary rather than trendy or dated.
Creating Cohesive Pastel-Silver-Glitter Designs
- Start with a pale pastel base—lavender, soft pink, pale mint, or powder blue all work beautifully
- Layer fine glitter (not chunky) into the wet polish before it dries, or apply it as a separate glitter polish over the pastel base
- Add silver accents as tips, stripes, or scattered elements across the pastel base
- The silver acts as a grounding element that keeps the pastels from feeling too baby-ish or juvenile
- Use a thick, glossy top coat to merge all elements into one unified, dimensional finish
- Cure thoroughly; layered designs take slightly longer to cure than single-color manicures
Pro tip: For maximum glitter impact without the manicure looking too sparkly, apply glitter only to the bottom half or tips of the nails, leaving the upper portion of the nail as solid pastel or silver—this creates visual interest while maintaining sophistication.
14. Matte Silver Metallic Finish
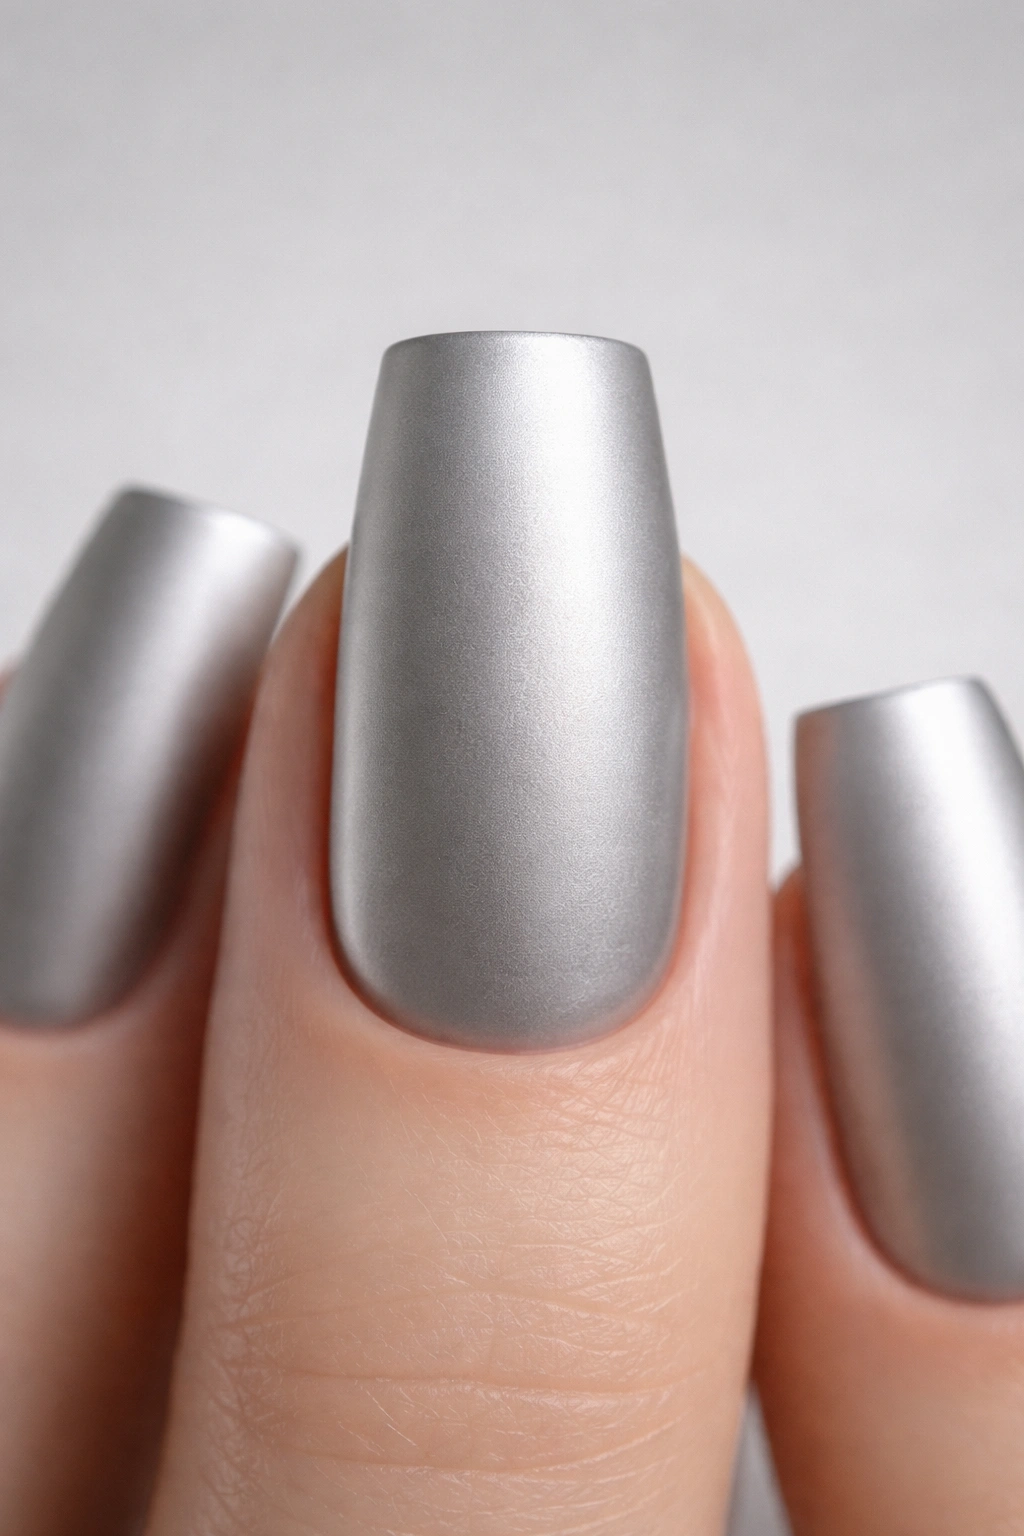
A matte metallic silver finish is the understated alternative to high-shine chrome or glittery silver—it’s modern, sophisticated, and perfectly appropriate for professional settings. Matte silver appears as a soft, non-reflective metallic finish that feels luxe without being bold. On duck nails, the matte finish emphasizes the nail shape itself rather than the shine, creating an elegant, minimalist look.
The Sophistication of Matte Metallic
Matte finishes are having a major moment in nail design because they feel contemporary and intentional—they read as a deliberate choice rather than a default or a second-best to glossy. Matte silver specifically appeals to minimalist aesthetics; it’s the metallic equivalent of a neutral but with more visual presence. The non-reflective surface creates a calming, elegant vibe. On duck nails, matte silver is particularly striking because the nail shape remains the focus rather than shine competition.
Achieving a Perfect Matte Silver Finish
- Use a dedicated matte metallic polish, not a glossy silver with matte top coat (which can look dull rather than intentionally matte)
- Apply matte silver in thin, even layers to avoid streaking or uneven coverage
- Cure fully if using gel; matte gel can sometimes appear patchy if not cured completely
- Do NOT apply a glossy top coat over matte silver—this defeats the purpose and will create an uneven, conflicting finish
- Use a matte top coat if additional protection is needed, or leave the matte surface as-is for a truly minimal aesthetic
- Matte surfaces show fingerprints and dust more readily than glossy, so plan for occasional touch-ups
Worth knowing: Matte silver pairs beautifully with other matte finishes (matte black tips, matte nude accents) or contrasts sharply with glossy elements—either approach works depending on your overall aesthetic.
15. Silver with Negative Space Design
Negative space designs leave portions of the nail bare (showing the natural nail or skin beneath) while covering other portions with silver polish or patterns. This approach creates graphic, modern designs that feel artistic and intentional. On duck nails, negative space can be used to create geometric patterns, asymmetrical designs, or structured looks that feel very contemporary.
How Negative Space Creates Visual Impact
Negative space is striking because it plays with the viewer’s eye—absence becomes as important as presence. A silver manicure with negative space elements feels modern and editorial rather than simply decorated. The negative space provides visual rest within the design, preventing the manicure from feeling busy. On duck nails, negative space designs are particularly effective because the nail shape can be part of the design—the squared-off edge, for example, can frame negative space beautifully.
Creating Confident Negative Space Designs
- Plan your design before applying polish; sketch it out or use a design reference to ensure you’re happy with the overall composition
- Apply silver polish only to the areas you want covered, using painter’s tape as a guide for clean edges
- Keep edges clean and intentional—negative space only works if the boundaries are clearly defined
- The negative space itself can show natural nail, skin, or even a different base color—all approaches work depending on your design
- Seal the manicure with a top coat to protect it; bare areas don’t need top coat, but polished areas do
- Remove painter’s tape immediately after application to prevent polish from drying under the tape edges
Pro tip: Asymmetrical negative space designs are more forgiving than geometric ones—if lines aren’t perfectly precise, an asymmetrical approach reads as intentional rather than sloppy.
16. Silver with Gradient to White
A gradient that transitions from deep silver at the base to pure white at the tip creates a soft, almost ethereal aesthetic. This design is less dramatic than a strong ombre but offers more visual interest than a solid color. The silver-to-white gradient works particularly well on duck nails because the transition has space to develop gradually and beautifully.
The Ethereal Quality of Silver-to-White
Silver-to-white gradients evoke elegance and refinement without demanding attention or looking overly decorated. The transition feels natural and soft, almost like watercolor paint merging. This approach works year-round and coordinates with virtually every color palette and aesthetic. On duck nails, the gradient emphasizes the length and shape of the nail beautifully, creating an elongating visual effect.
Blending Silver and White Without Harsh Lines
- Start with a white base coat on the entire nail
- Apply silver polish to the base half and blend upward using a makeup sponge dampened with clear gel or polish
- Make multiple light passes with the sponge rather than trying to blend in one or two heavy swipes
- Allow each layer to dry or cure before adding the next—this prevents muddy, murky blending
- Use a clear glossy top coat to smooth the finish and create a unified, seamless appearance
- Consider applying the gradient under bright light so you can see exactly how the colors are blending
Worth knowing: The softest, most beautiful gradients happen when you choose silver and white shades that are close in undertone (both cool or both warm) rather than mixing opposing undertones.
17. Silver with Pearl Accents
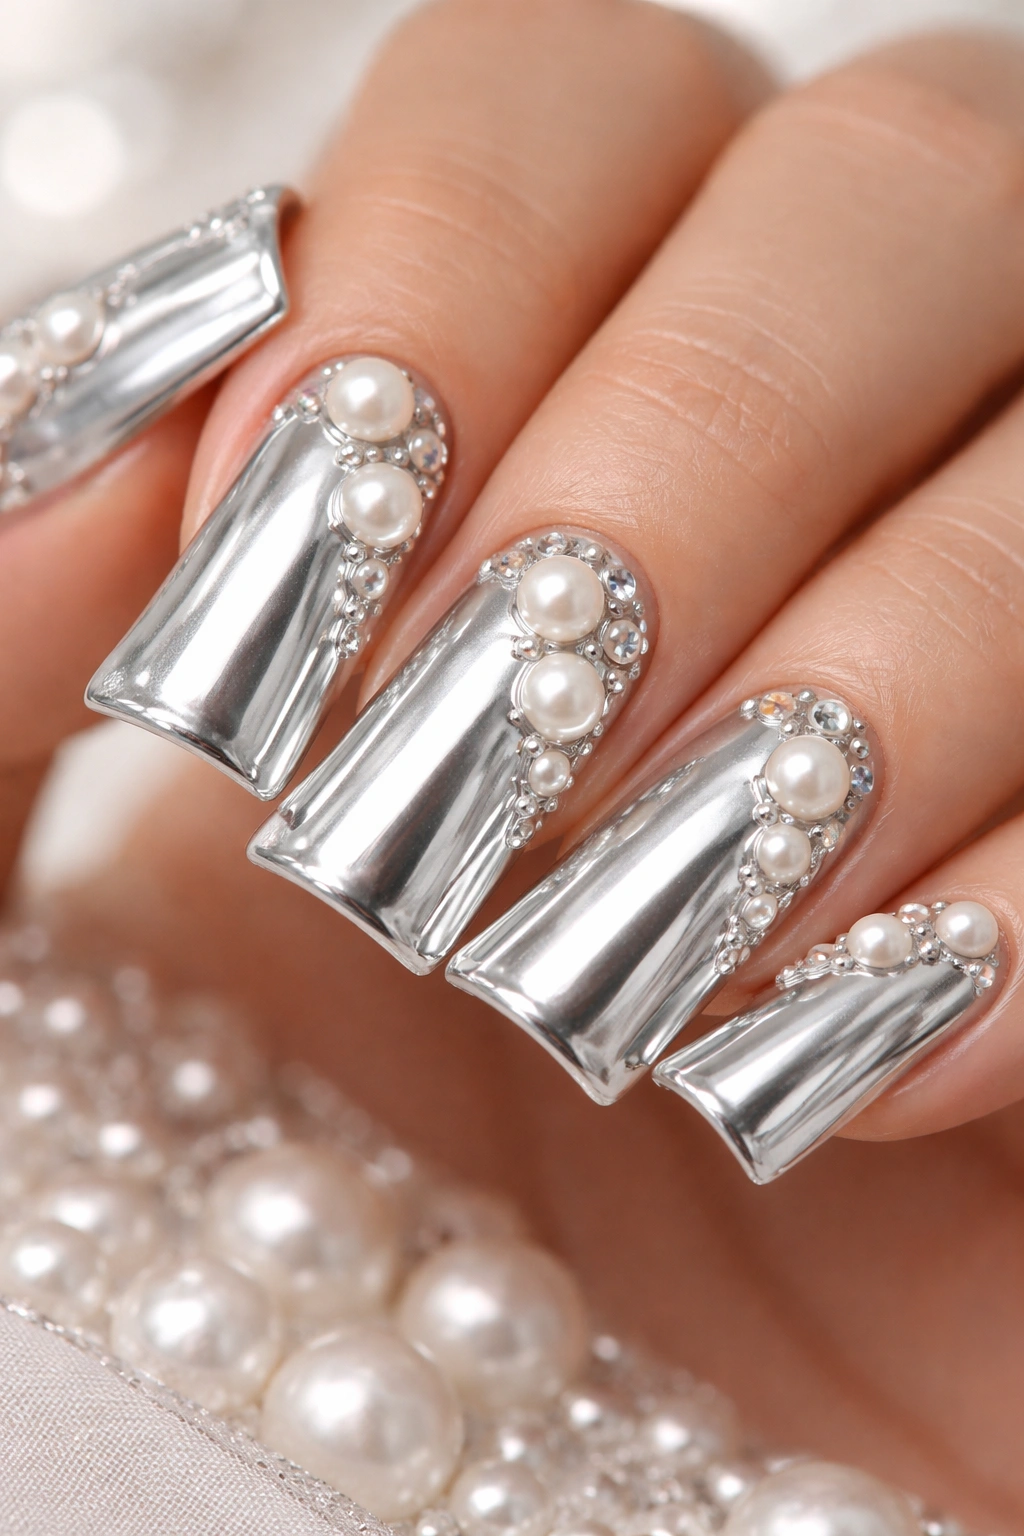
Pearl accents (whether actual pearl powder, pearl-finish polish, or pearl-like embellishments) add a luxe, organic quality to silver duck nails. Pearls can be applied as a full layer, scattered as accent elements, or concentrated in specific design areas. The combination of metallic silver and pearl creates a sophisticated, jewelry-like aesthetic.
Why Pearls Elevate Silver to Luxury
Pearls carry inherent associations with luxury and timelessness—adding pearl accents to silver elevates the entire manicure to a special-occasion feeling. Pearl finish (a soft, lustrous, slightly iridescent finish) pairs beautifully with silver because both have reflective qualities without being overly shiny or glittery. On duck nails, pearl accents create a manicure that feels like wearable jewelry—elegant and refined. The combination is particularly striking on longer duck nails where the pearl effect has space to develop.
Applying Pearl Accents and Finishes
- Pearl powder can be applied over a tacky base coat and sealed under gel, similar to chrome or mirror powder application
- Pearl-finish polish applies like regular polish but with a subtle iridescent quality rather than a flat metallic finish
- Layer pearl accents over silver by applying pearl to specific nail sections (tips, half-moons, accent nails) or scattered across the surface
- Combine matte silver with glossy pearl, or vice versa, to create textural contrast that highlights both finishes
- Seal pearl accents under a gel top coat to protect them and create a unified, professional appearance
- Pearl finishes can be subtle or statement-making depending on the concentration and application
Pro tip: For a subtle pearl-and-silver combination, apply silver polish to the entire nail, then apply a sheer pearl top coat over the entire manicure—the result is a unified, sophisticated finish that catches light with both metallic and pearlescent quality.
18. Silver Ombre with Shimmer and Dimension
A multi-layered approach combining silver ombre with shimmer, sparkle, or dimensional elements creates the ultimate luxe statement. This isn’t a simple single-color manicure—it’s a composition of multiple finishes and effects working together. On duck nails, the size and proportion allow all elements to be visible and appreciated without the design feeling chaotic.
Creating Layered Luxury and Dimension
When you combine silver ombre with shimmer and dimensional elements, the result is a manicure that catches light from multiple angles and appears different in different settings. This approach works best when the elements are cohesive—choosing complementary shades and finishes rather than random sparkly bits scattered across the nail. On duck nails, the composition has space to breathe; each element is visible without the design looking overcrowded.
Building a Dimensional Silver Manicure
- Start with a strong silver ombre base (silver to white, silver to nude, or silver to pearl)
- Layer shimmer over the ombre once it’s fully cured—this can be fine glitter, shimmer dust, or a shimmer topcoat applied strategically
- Add dimensional accents with rhinestones, pearl details, or metallic stripes applied to specific areas (tips, accent nails, scattered focal points)
- Use multiple gel layers and cure between each application to ensure proper adhesion and to prevent elements from shifting or blurring
- Seal everything under a thick, durable gel top coat that protects all elements while maintaining clarity and shine
- Step back periodically and assess the overall composition; the goal is coordinated luxury rather than every possible sparkly thing at once
Insider note: The most impressive dimensional manicures happen when you choose a clear direction—either a gradient with scattered sparkle, or distinct sections with different finishes, rather than trying to incorporate every technique simultaneously into one unified design.
Final Thoughts
Silver duck nails offer genuinely versatile canvas for expressing your personal style while maintaining polish and sophistication. Whether you’re drawn to understated metallic minimalism, eye-catching sparkle and dimension, or intricate detailed artwork, silver works as both a statement color and a neutral base. The duck nail shape itself is flattering and contemporary, and when paired with silver in any of these eighteen approaches, the result is a manicure that feels intentional, curated, and absolutely you.
The beauty of silver is that it works across every season, coordinates with virtually every outfit, and remains elegant whether you’re at work, on a casual weekend, or dressing up for a special occasion. Experiment with the finishes and designs that appeal to you most—whether it’s a single, simple chrome silver base or a complex multi-layered dimensional design. The best manicure is always the one that makes you feel confident and beautiful when you look down at your hands.
