

Duck nails have become a signature statement in nail art, and for good reason. This bold, geometric nail shape features squared-off sides that taper slightly, creating that signature flat base with sharper edges that look distinctly different from traditional acrylics. When you add the timeless combination of pink and white, you’re tapping into a palette that’s simultaneously elegant, playful, and endlessly versatile. Pink and white duck nails work whether you’re heading to the office, a wedding, or just want to elevate your everyday look with something a little more interesting than standard manicures.
The beauty of duck nails lies in how the shape itself becomes a canvas for creativity. The width of the nail bed gives nail artists plenty of real estate to work with, meaning you can create intricate designs, bold color blocking, and detailed embellishments without feeling cramped. When you combine this with pink and white—two colors that complement each other beautifully across nearly every skin tone—the possibilities feel genuinely endless. Whether you’re drawn to soft pastels, vibrant hot pinks, or everything in between, there’s a pink and white duck nail design that’ll match your aesthetic perfectly.
What makes this nail shape so appealing right now is that it’s distinctly modern while still feeling sophisticated. Unlike some trend-driven nail shapes that feel dated within a season or two, duck nails have that staying power because they’re both flattering and functional. Your nails actually stay strong longer with the duck shape because the distribution of stress is better than with more extreme coffin or stiletto shapes. That means your design isn’t just beautiful—it’s actually practical too.
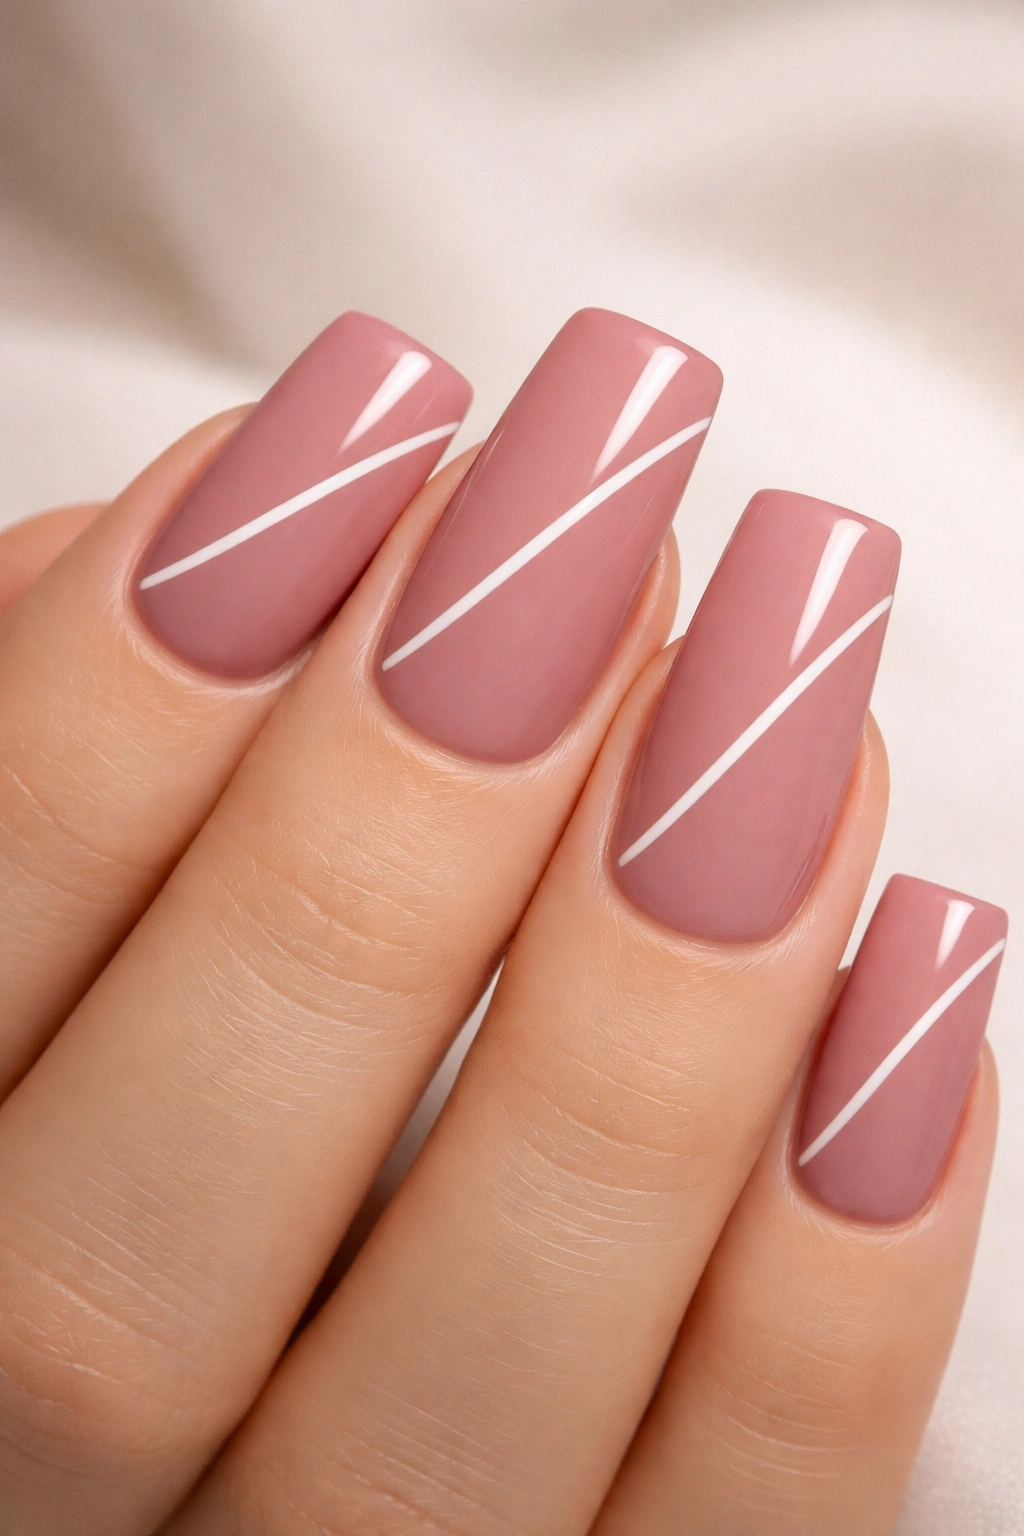
1. Soft Pink Base With White Accent Stripe
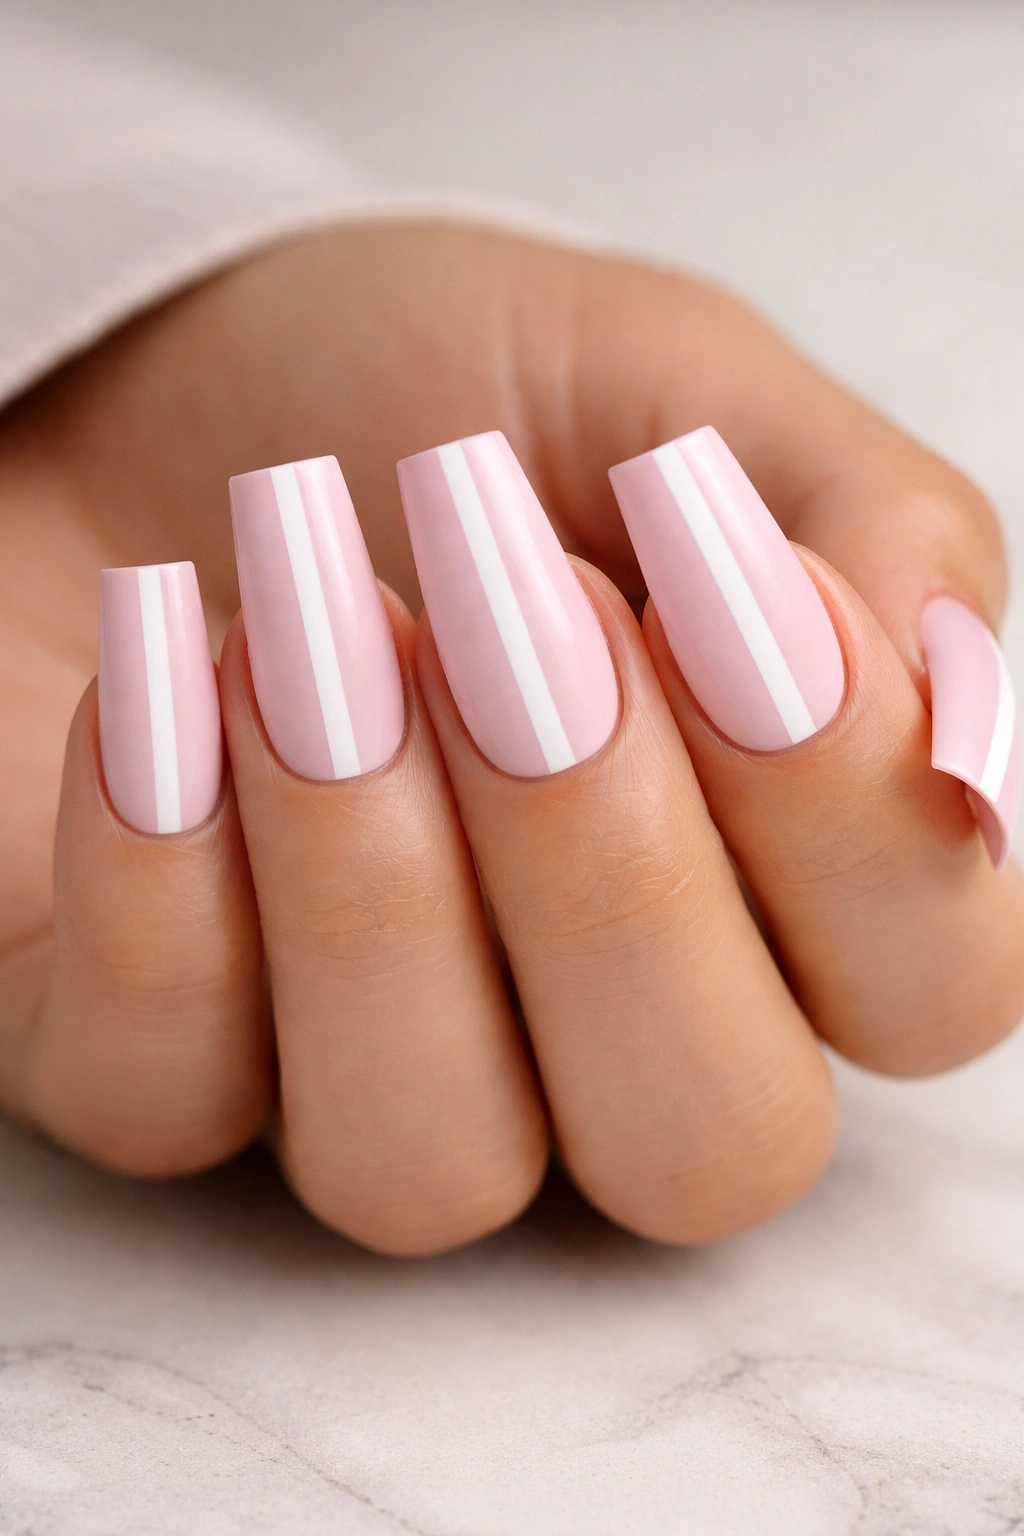
This minimalist design works beautifully for anyone who loves understated elegance. Paint the entire nail in a soft, pale pink shade—something in that sweet spot between ballet slipper and bubblegum, but on the lighter end. Once that base dries completely, use a thin striping brush or even a straight-edge technique to apply a clean white line down the center of each nail from cuticle to tip. The key here is precision; you want that line to feel intentional and perfectly centered.
Why This Design Stands Out
The simplicity of this look is deceptive. It creates a lengthening effect that makes your fingers appear more slender and elegant, which is partly why it’s been a favorite among people who want to look polished without going overboard. The white stripe against the pink creates contrast without competing visually, so your nail design actually enhances your overall appearance rather than demanding attention. It’s the kind of manicure that makes people ask if you got a professional manicure, even if you did it yourself at home.
How to Get It Right
- Use two thin coats of your pale pink base color to ensure even coverage without looking chalky
- Allow complete drying between coats—rushing this step will show
- Create a template by applying painter’s tape vertically down the center of each nail if you’re worried about the line being straight
- A white gel polish or glossy top coat will make the stripe pop without looking flat
- Keep your top coat consistent across the whole nail for a seamless finish
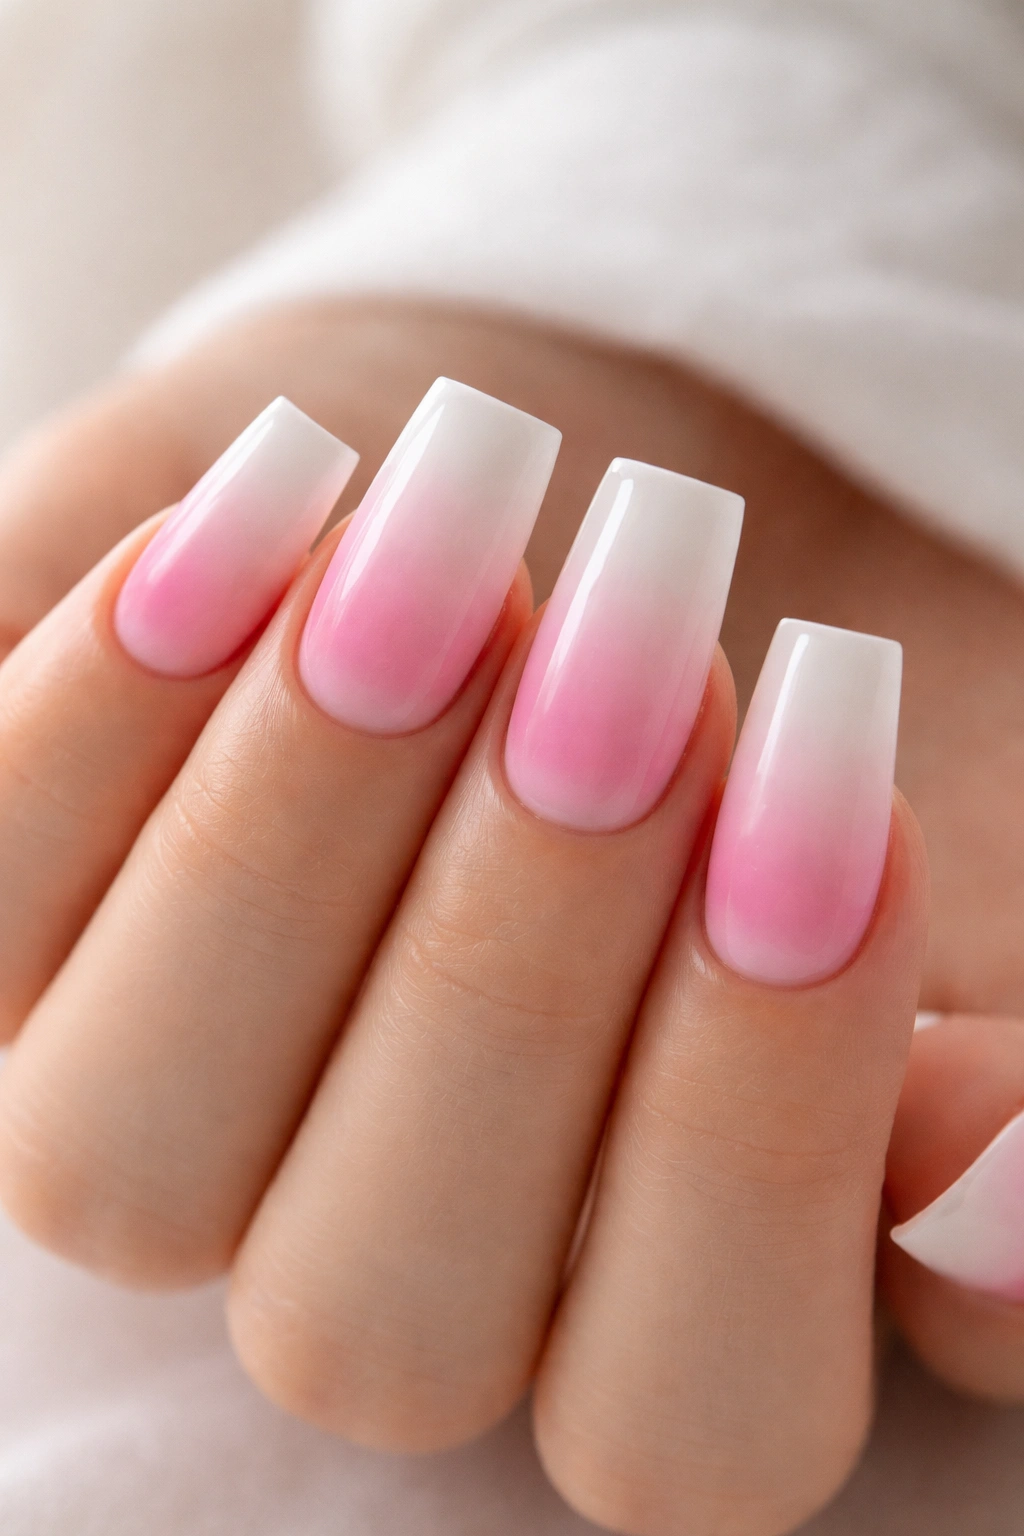
2. Ombré Pink to White Gradient
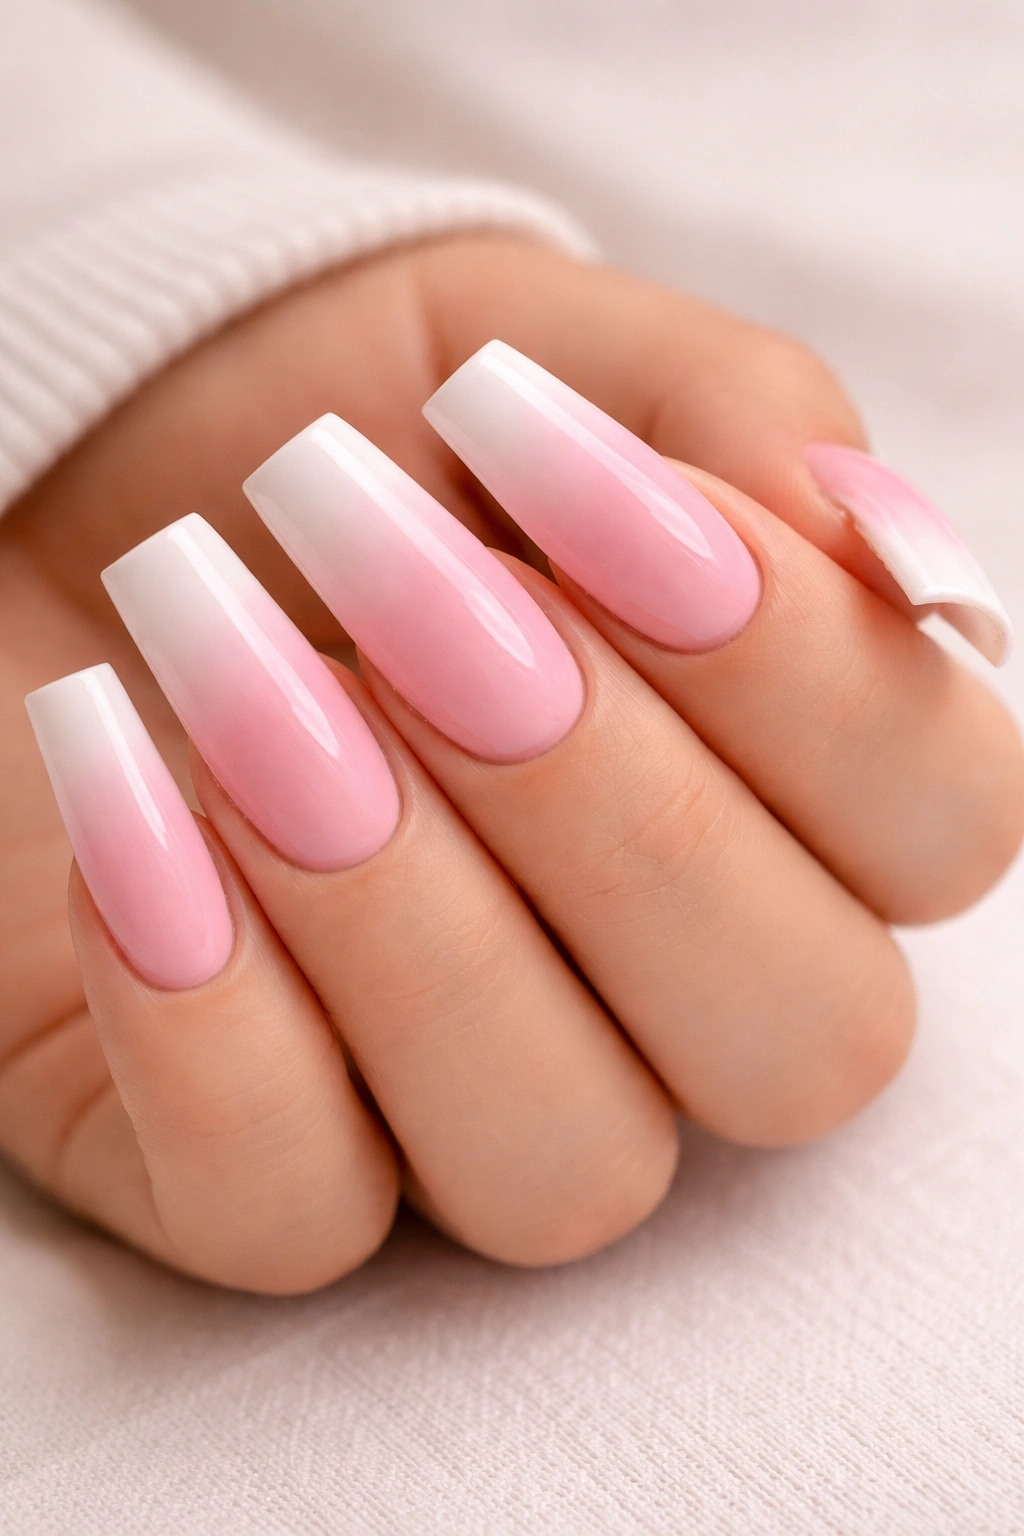
This gradient design is all about that smooth color transition from pink to white across the surface of the nail. Start with white at the tip and gradually blend it into your chosen pink shade as you move toward the cuticle. The magic here is in the blending—you’re essentially creating a soft, gradual shift rather than a distinct line between colors.
The Technique Behind Smooth Gradients
Ombré nails require either a sponge technique or a gradient tool, and honestly, the sponge method is more forgiving for beginners. You’ll apply your pink and white polish to a cosmetic sponge in overlapping sections, then dab it onto the nail. The beauty of this technique is that the sponge naturally creates that soft, feathered transition that makes gradients look professional. Some nail artists add a tiny drop of clear gel between applications to help the colors blend, but that’s optional.
Step-by-Step Gradient Application
- Paint a white base coat on the tip half of the nail and a pink base coat on the bottom half
- Cut a cosmetic sponge into a small rectangle (about the size of your nail)
- Apply white polish to one side of the sponge and pink to the other, allowing them to touch slightly in the middle
- Gently dab the sponge onto your nail, rolling slightly to blend the colors
- Seal with a glossy top coat to smooth out any texture from the sponge
- One coat of top coat usually isn’t enough—two thin coats create a more professional appearance
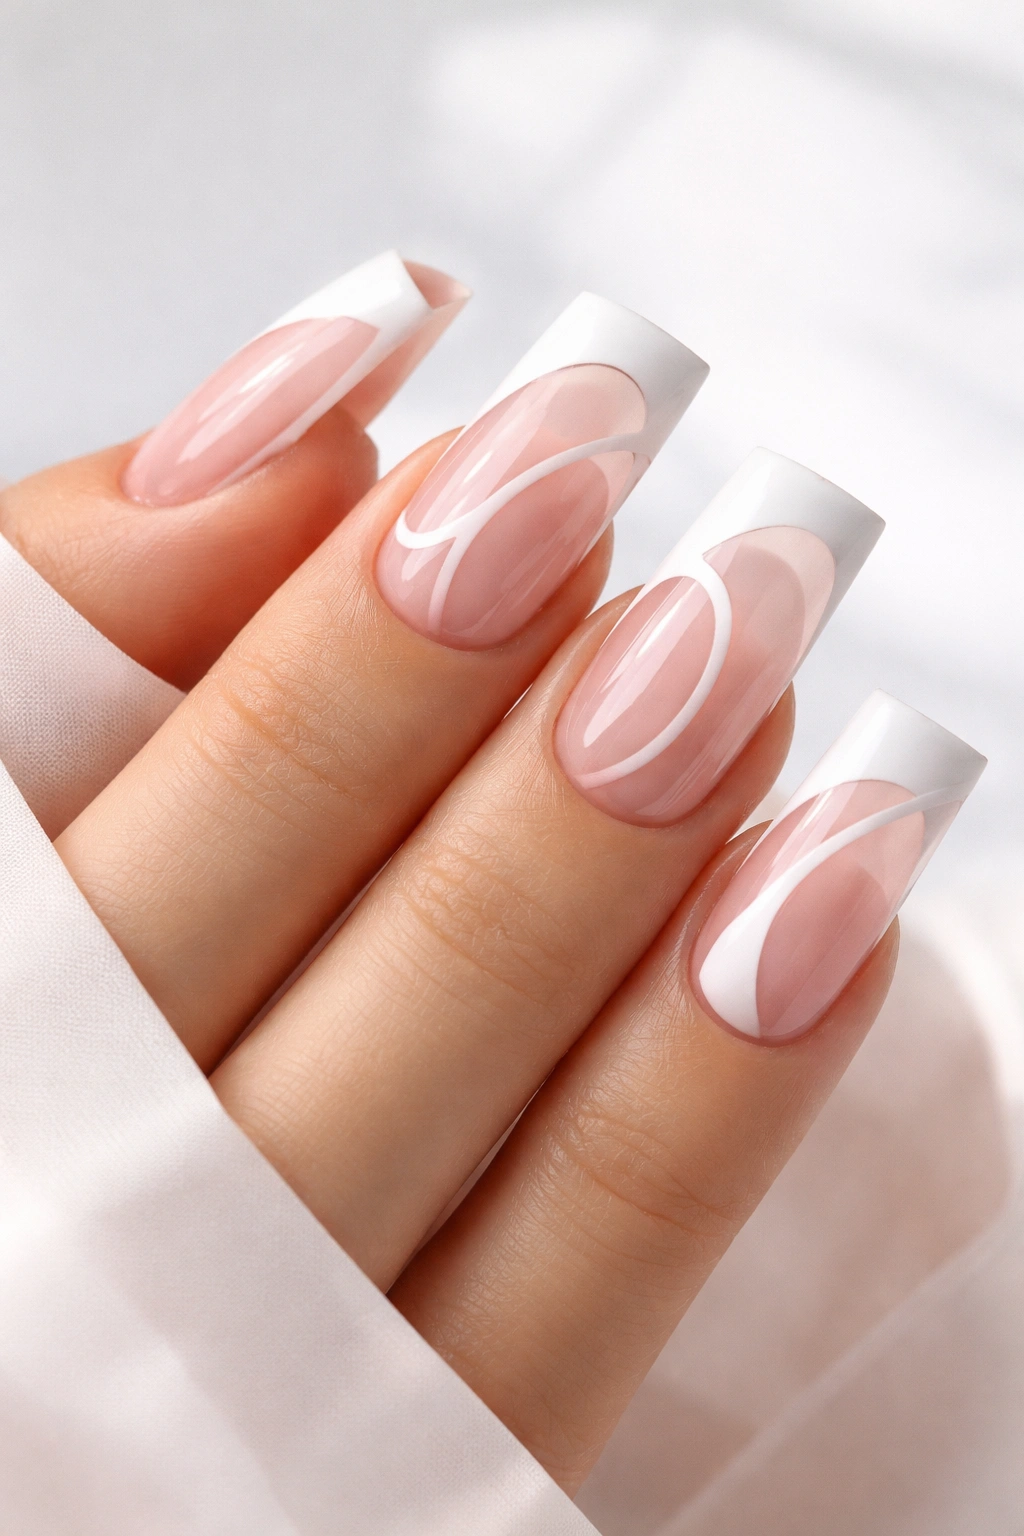
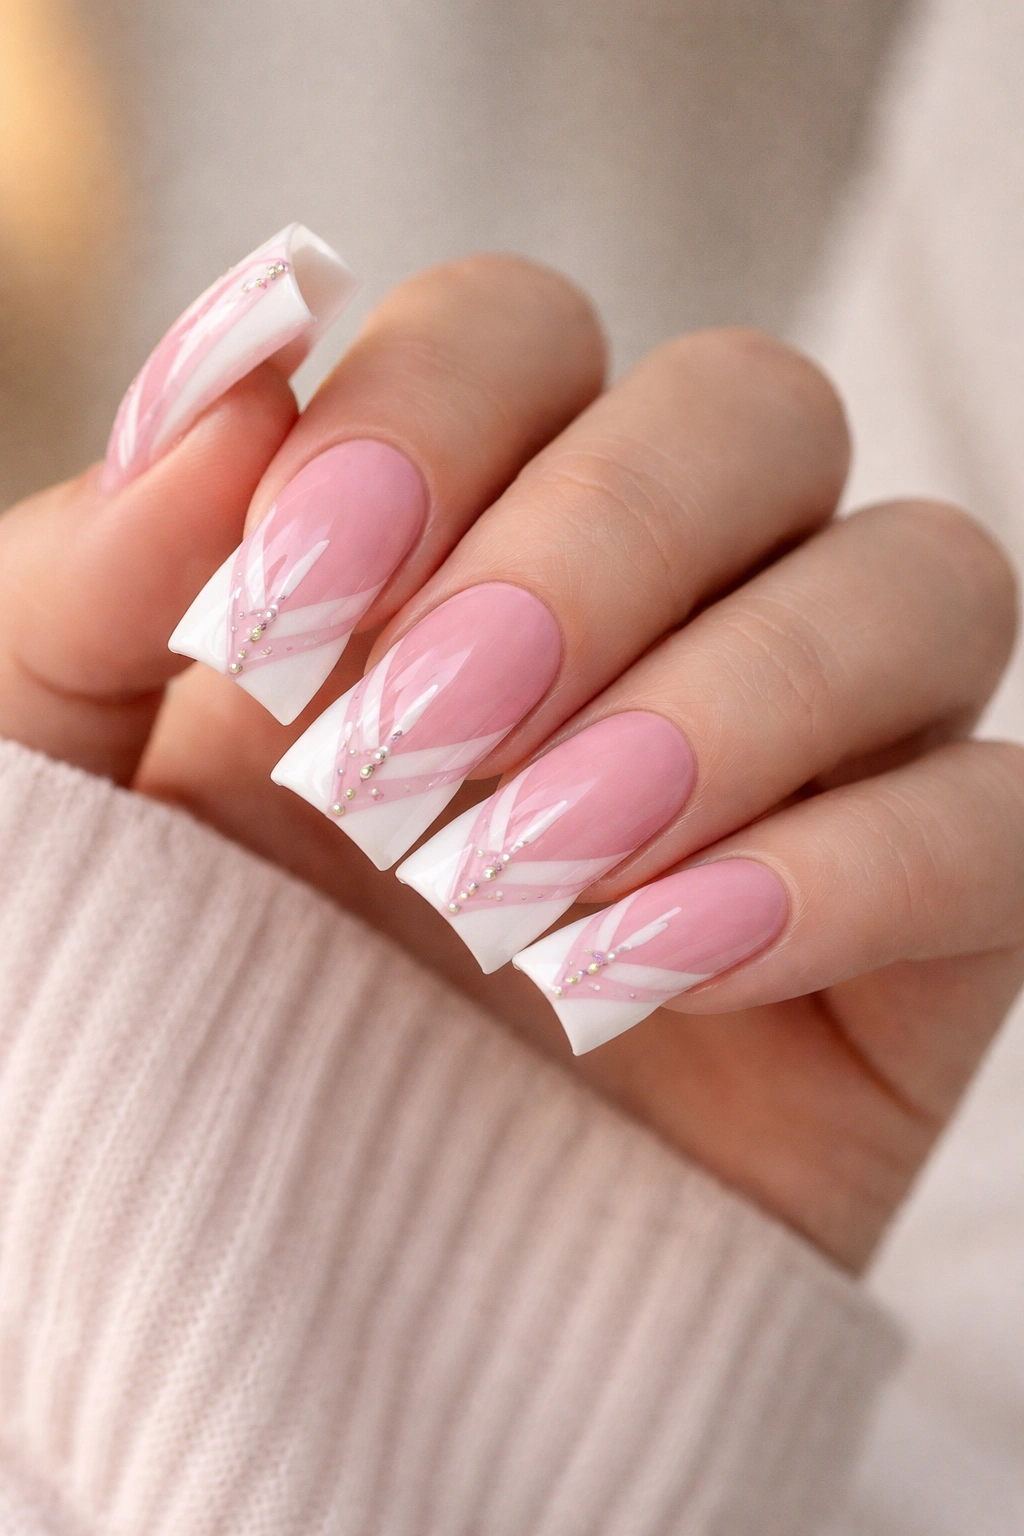
3. French Tip With Pink Accent Line
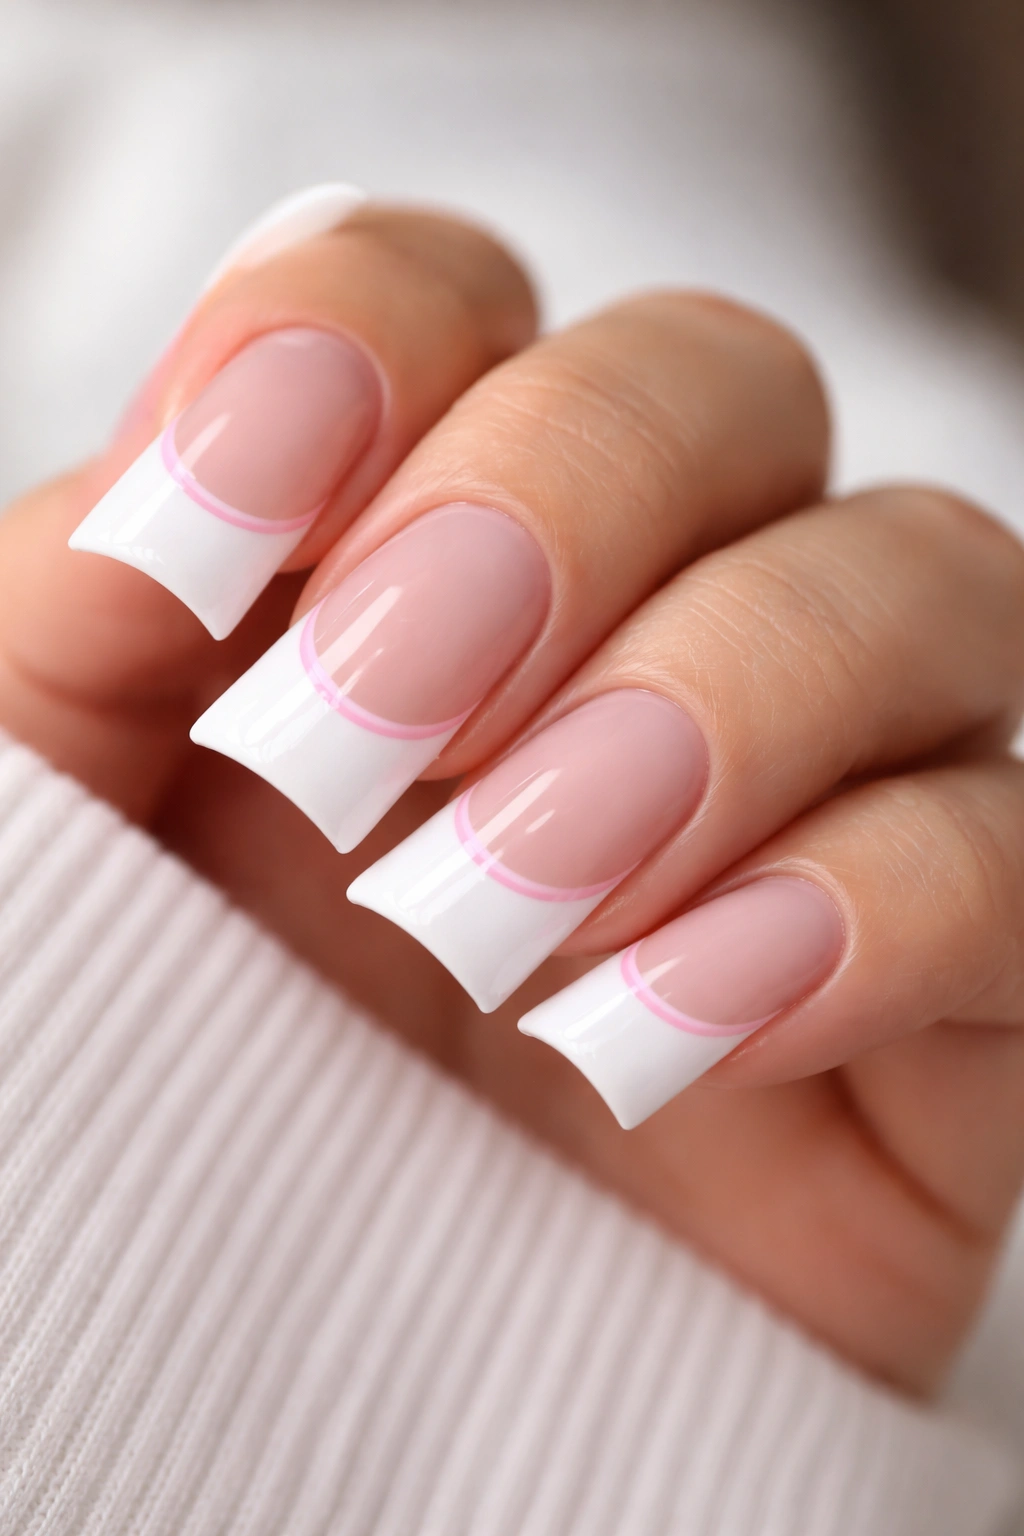
This elevated version of the classic French manicure adds a thin pink line just above the white tip, creating a subtle three-dimensional effect. The white tip stays traditional and clean, but that pink accent line transforms it into something fresher and more modern. It’s proof that you don’t need to reinvent the wheel to create something that feels new and interesting.
Why This Modern Take on a Classic Works
The additional pink line breaks up what could feel like a standard French manicure, giving it personality while maintaining the timeless elegance that makes French tips perpetually wearable. This design works across every context—professional settings, casual outings, formal events. No one can say it’s too much, but it’s definitely more interesting than a standard French tip. The pink line also draws the eye to the shape of your nail, which means the design inherently complements the duck nail shape itself.
Application Tips for Clean Lines
- Use a high-quality striping brush or a thin gel brush for the pink accent line
- Position the line about 1-2mm above where the white tip begins for best visual balance
- Seal the entire nail with a clear top coat after both colors set completely
- If the pink line isn’t perfectly straight, don’t panic—a small imperfection actually looks handmade and intentional rather than corporate
- Practice on a few nails first before committing to all ten
4. White Base With Pink Geometric Shapes
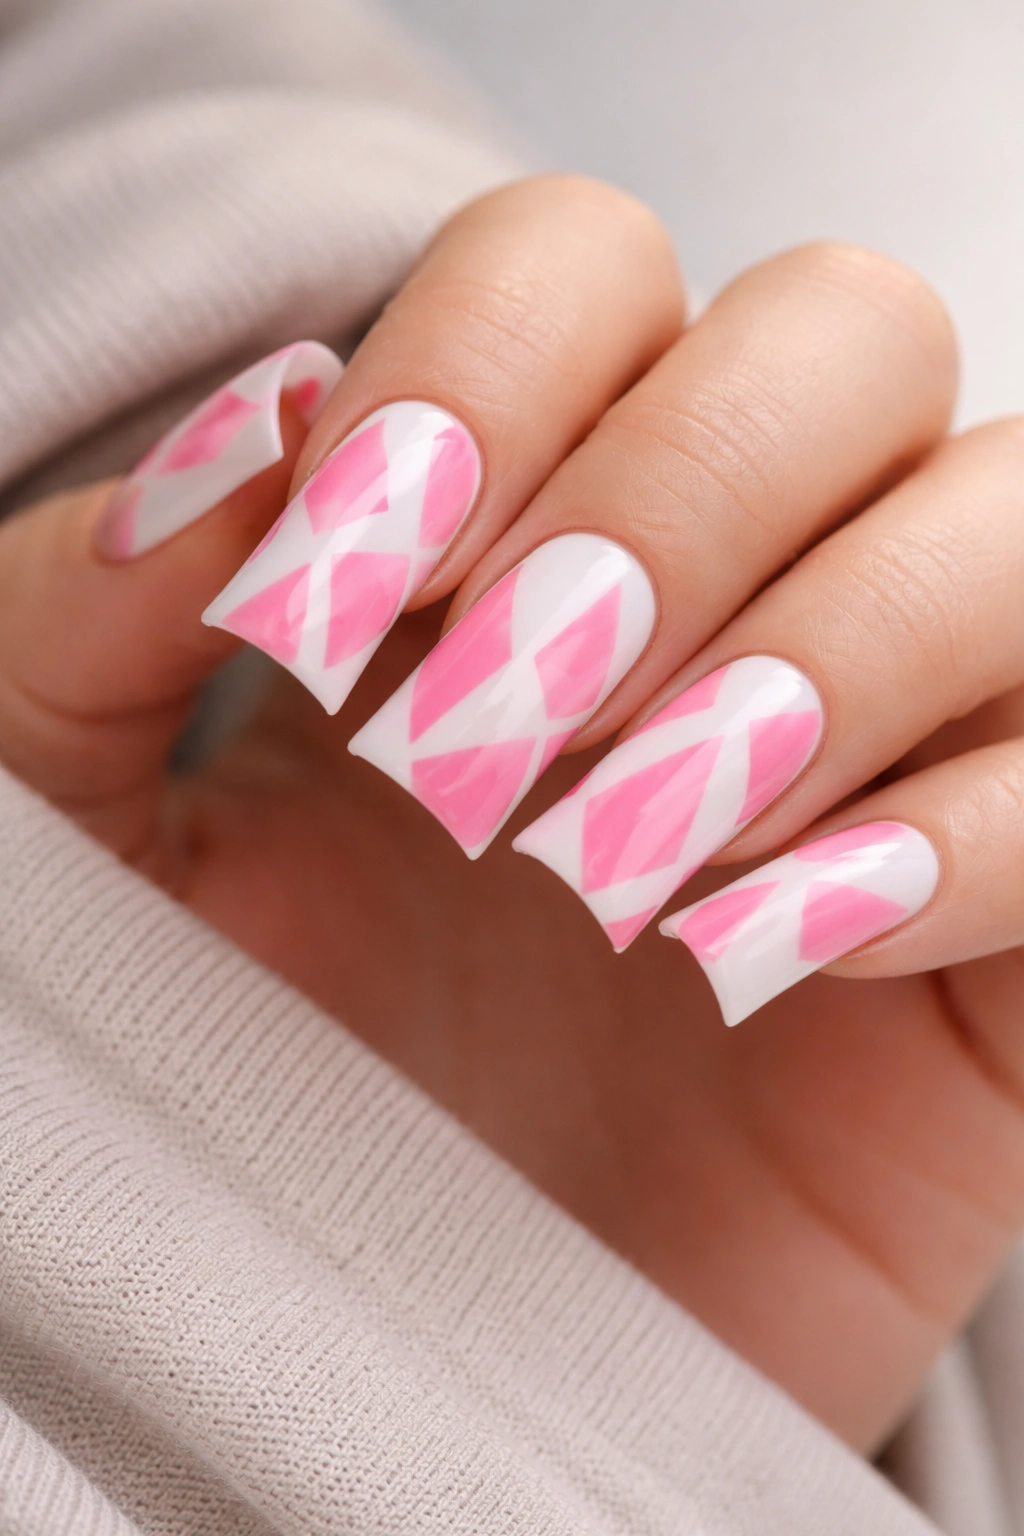
Geometric designs give duck nails room to shine because you’ve got the surface area to actually create interesting shapes without the design feeling cramped. Try painting your entire nail white as the base, then use a thin brush to add pink geometric shapes—triangles, diamonds, squares, or abstract lines. The key is spacing them thoughtfully so they feel intentional rather than random.
Design Placement Strategies
The larger surface area of duck nails means you can actually create complex geometric layouts that would be impossible on shorter nails. You could create a geometric pattern that starts at the cuticle and progresses toward the tip, or create a focal point design on just a few nails while keeping others simple. Many people create matching designs on their thumb and ring finger while keeping their other nails simpler, which creates visual interest without overwhelming.
Geometric Shape Ideas
- Pink triangles arranged in a repeating pattern moving toward the tip
- Pink and white diamond shapes creating a checkerboard effect
- Abstract pink lines creating asymmetrical designs
- Pink geometric half-moons at the cuticle line
- Pink chevron patterns pointing downward or upward
- Small pink squares arranged in a grid pattern across the white base
- Pink lines creating geometric sections that divide the nail into interesting zones
5. Marble Pink and White Swirl
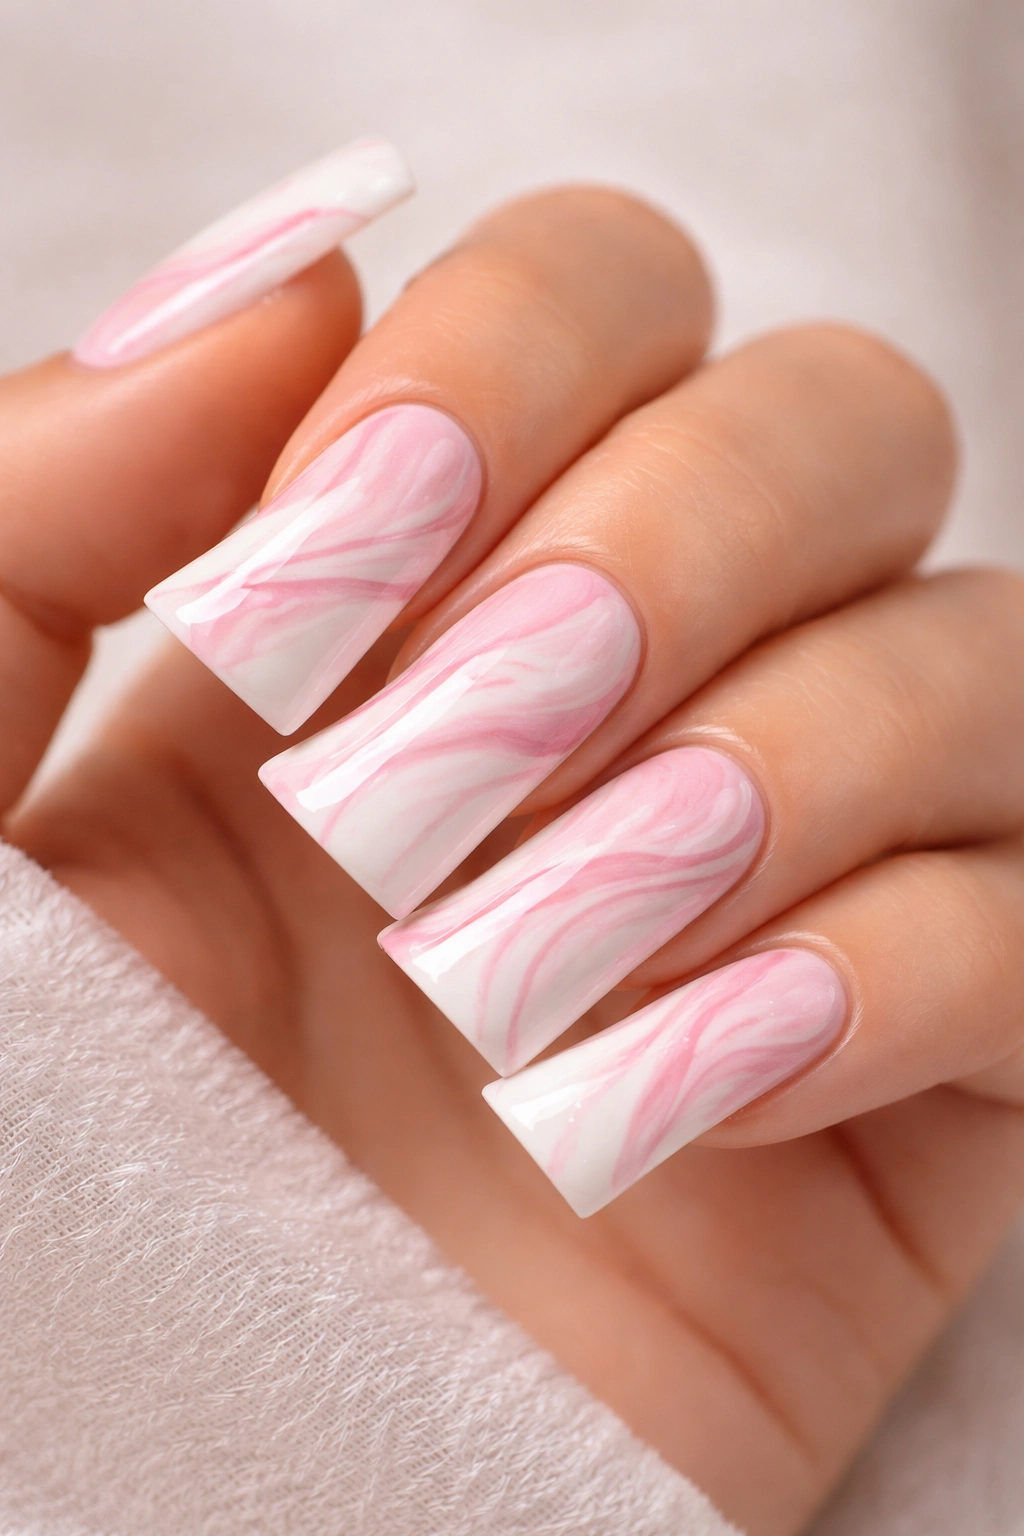
Marble designs capture that high-end aesthetic that makes people think you spent a fortune at a professional salon. Create this by applying white base coat, then using a thin brush to swirl pink polish across the surface in organic, flowing patterns. The key is not overthinking it—the most beautiful marble nails have an intentional chaos to them, not perfectly controlled patterns.
Creating Authentic Marble Patterns
Start with clean, thin lines of pink polish applied in flowing, curved motions across the white base. Use a toothpick or the handle of a brush to gently drag through the pink lines, creating that signature veined marble look. The slight imperfections actually make marble look more authentic. Each nail should be slightly different, which is exactly what makes real marble beautiful. Seal everything with a thick glossy top coat—the shine is what makes marble designs really pop.
Pro Tips for Marble Success
- Apply pink lines while the white base is still slightly tacky—not wet, but not completely dry
- Work quickly before the white base sets completely, or the pink will sit on top rather than blending
- Use dark pink for more dramatic marble, pale pink for subtle, sophisticated marble
- A glossy top coat is non-negotiable—matte or satin finishes will make marble look flat and lose the effect
- If a nail doesn’t turn out how you wanted, the whole thing can be repainted without affecting the others
6. Pink Confetti Sprinkle Design
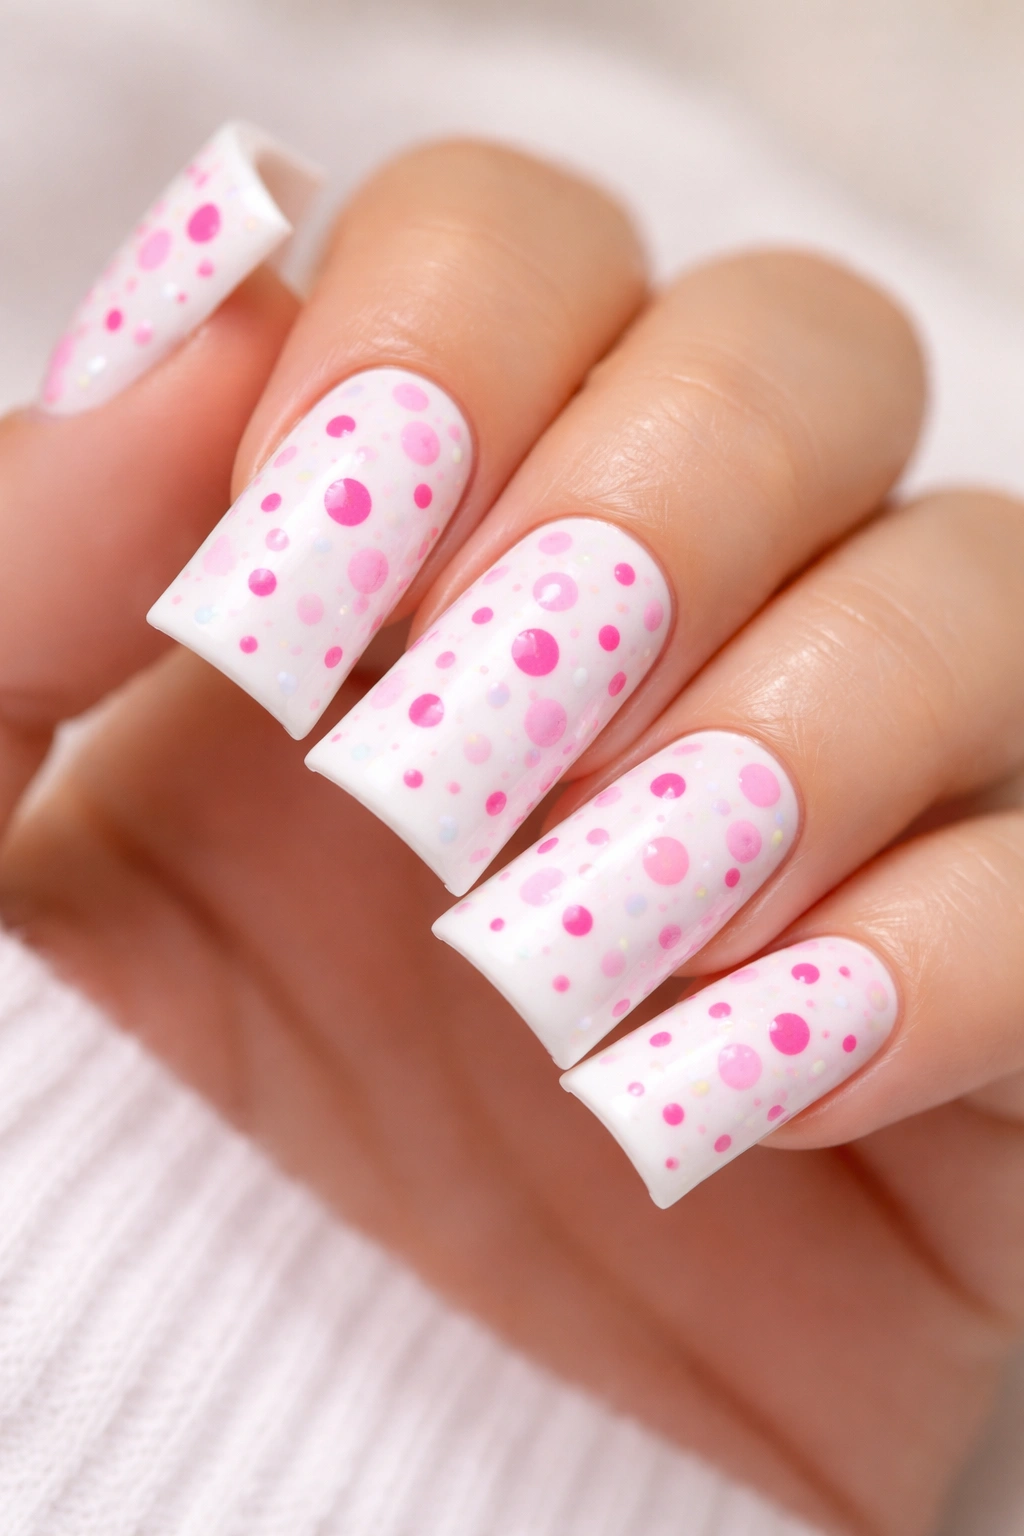
Confetti designs are pure joy on nails, and they work especially well on duck nails because you have the space to sprinkle actual variety. Paint your nail white as the base, then use a dotting tool to add small pink dots, or finely chop up pink glitter and sprinkle it across the surface before the top coat sets. You’re basically creating the nail equivalent of a celebration captured in color.
Achieving the Perfect Confetti Effect
The beauty of confetti nails is that there’s no “wrong” way to do them—more is usually better. Use different shades of pink if you can, adding hot pink, dusty pink, and pale pink dots across the white surface. If you’re using actual glitter, make sure it’s cosmetic-grade and safe for use near eyes and skin. Apply it while your top coat is still wet, then seal with another layer of top coat to keep everything in place.
Confetti Application Methods
- Use a dotting tool dipped in pink polish to create uniform circles of varying sizes
- Apply fine pink glitter directly to wet top coat and seal with another layer
- Use a makeup sponge with pink polish dabbed on it and press gently onto white nails for a mottled effect
- Combine multiple shades of pink for dimensional confetti
- Add just a few specks for sophisticated confetti or go full coverage for playful energy
7. Dip-Dye Pink to White Effect

Dip-dye nails mimic that trend of dyeing just the tips of your hair, but applied to nails. The magic here is that the color transition looks deliberate and gradient-like without needing advanced blending techniques. Paint the bottom third or half of your nail pink, allowing the color to fade naturally into white at the tips. The transition doesn’t need to be perfectly blended—a slight ombré effect is actually more interesting.
The Appeal of Dip-Dye Design
This design works because it visually shortens the appearance of duck nails slightly while still showcasing the shape. The color concentration at the base draws the eye there first, creating balance. It’s a design that looks intentional and high-effort even when it’s relatively simple to execute. The dip-dye effect is especially striking when you use a bold pink, because the color is concentrated where it has the most visual impact.
Execution Tips
- Apply pink polish to the bottom portion of the nail, feathering the edge with a slightly dry brush for natural blending
- The transition doesn’t need to be sharp—soft and gradual actually looks more modern
- Use a full-opacity white for the tip to create clear contrast
- This design works better with gel polish because you can control the blending more easily
- The look is enhanced by a thick, glossy top coat that catches light and emphasizes the dimension
8. White Base With Pink Nail Art Stickers
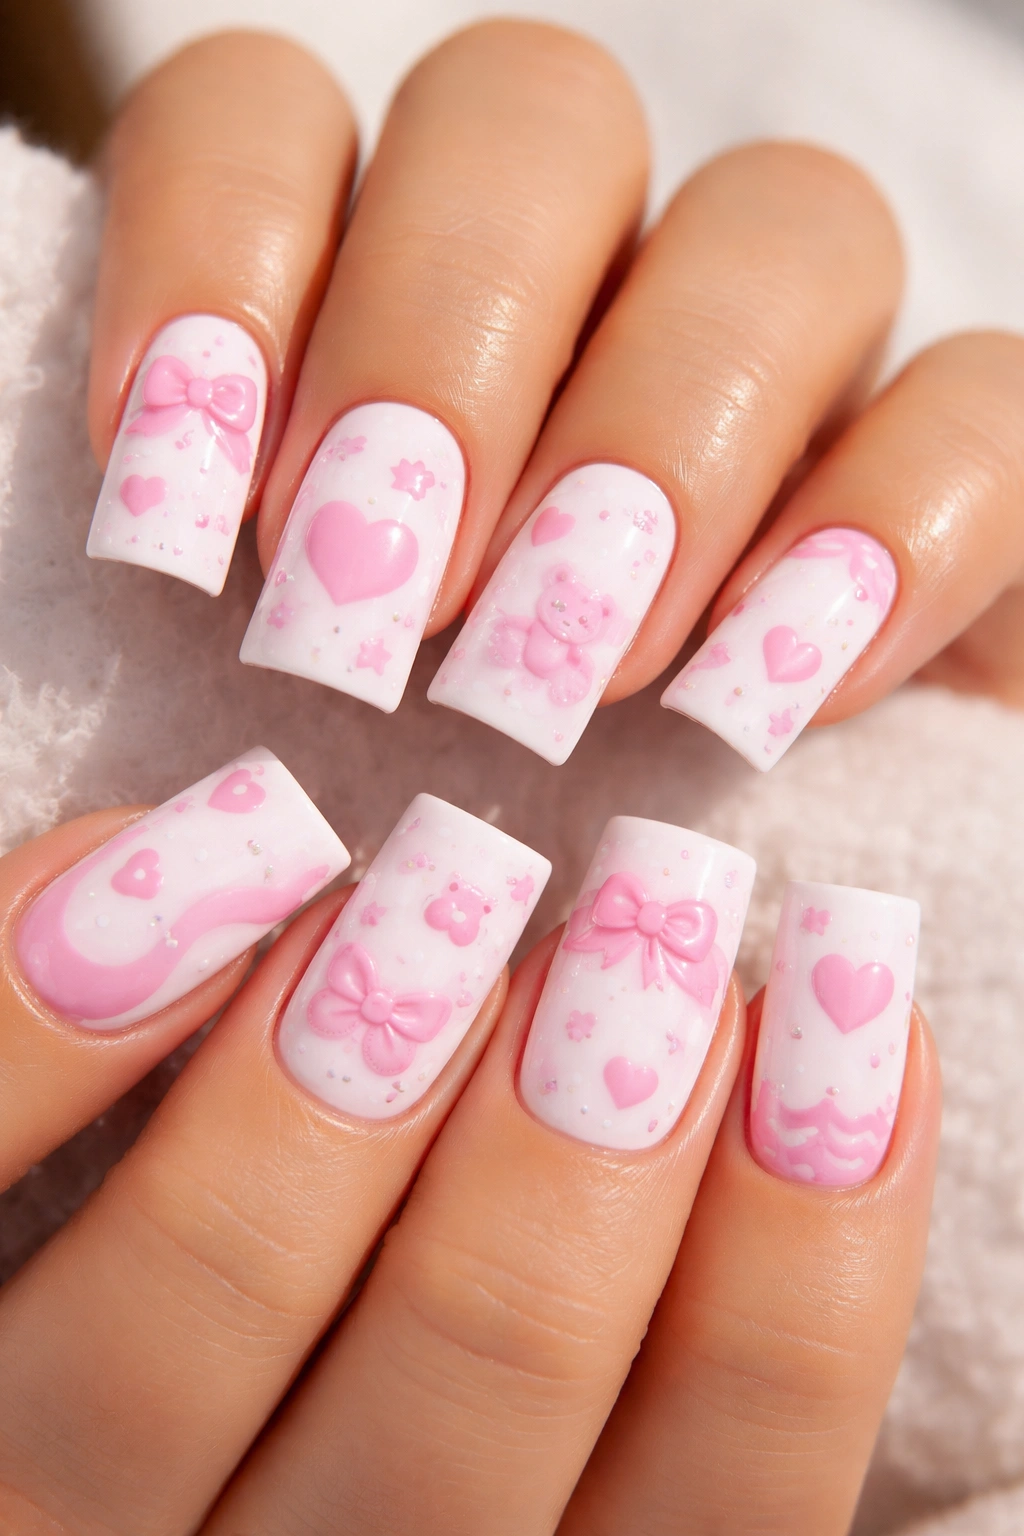
If you love the look of intricate designs but aren’t comfortable creating them freehand, nail art stickers or decals are a game-changer. Apply a white base coat, then place your chosen pink nail art sticker on top and seal with clear polish. Modern nail stickers have come incredibly far—there are options ranging from delicate florals to geometric patterns to abstract designs.
Choosing Stickers That Match Your Style
Look for stickers specifically designed for duck-shaped nails, or choose designs with smaller focal points that won’t look weird on the wider nail bed. Pink stickers on white nails create beautiful contrast, and you can layer stickers (place a smaller one over a larger one) to create more complex designs. The key is choosing stickers that feel cohesive—don’t mix too many different styles on the same manicure.
Sticker Application for Professional Results
- Start with a smooth, clean white base and allow it to dry completely
- Use a cuticle pusher or flat tool to position the sticker exactly where you want it before pressing down fully
- Press firmly from the center outward to avoid air bubbles
- Seal with a thick top coat to secure the sticker and add shine
- Layer stickers on alternating nails for visual interest without overdoing it
- Stickers positioned toward the tip create lengthening, while stickers at the cuticle feel more modern and fashion-forward
9. Color-Blocked Pink and White Sections
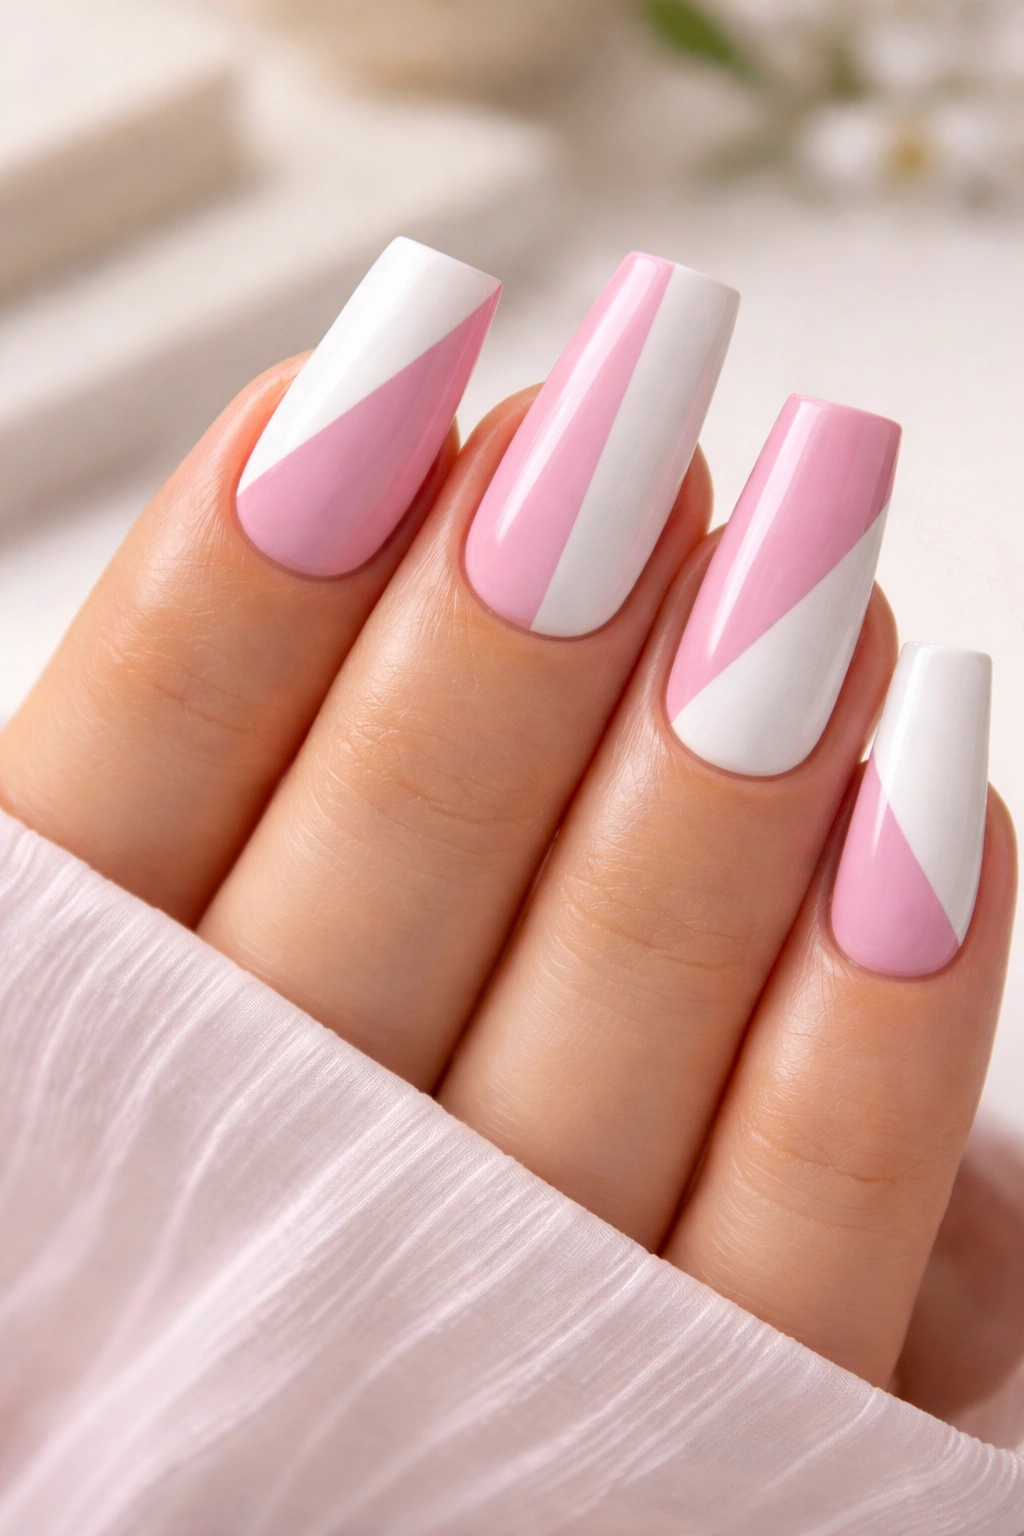
Color blocking means dividing your nail into distinct color sections with clean lines between them. Try splitting each nail vertically down the middle with one half pink and one half white. Or create diagonal color blocks. Or block the nail into thirds with alternating colors. The geometry of duck nails actually makes color blocking look particularly striking because the shape is already geometric.
Creating Perfectly Straight Color Blocks
The trick to clean color blocks is using painter’s tape or a nail striping tape to create perfectly straight lines. Apply the tape, paint your first color, remove the tape before that color completely dries (so you don’t pull up your base coat), apply tape for the next section, and paint your second color. This method ensures clean lines without guesswork. Some artists prefer using a thin striping brush freehand, which creates more organic lines that actually look intentional.
Color Block Layout Ideas
- Vertical split down the center (one half pink, one half white)
- Diagonal split from top left to bottom right
- Horizontal blocks with pink at the base and white at the tip
- Off-center vertical block with a 60/40 split
- Thin white stripe down the center with pink on either side
- Small pink triangle or shape at one corner against a white base
- Triple horizontal blocks in alternating colors creating stripe effect
10. Soft Pink Base With White Lace Overlay
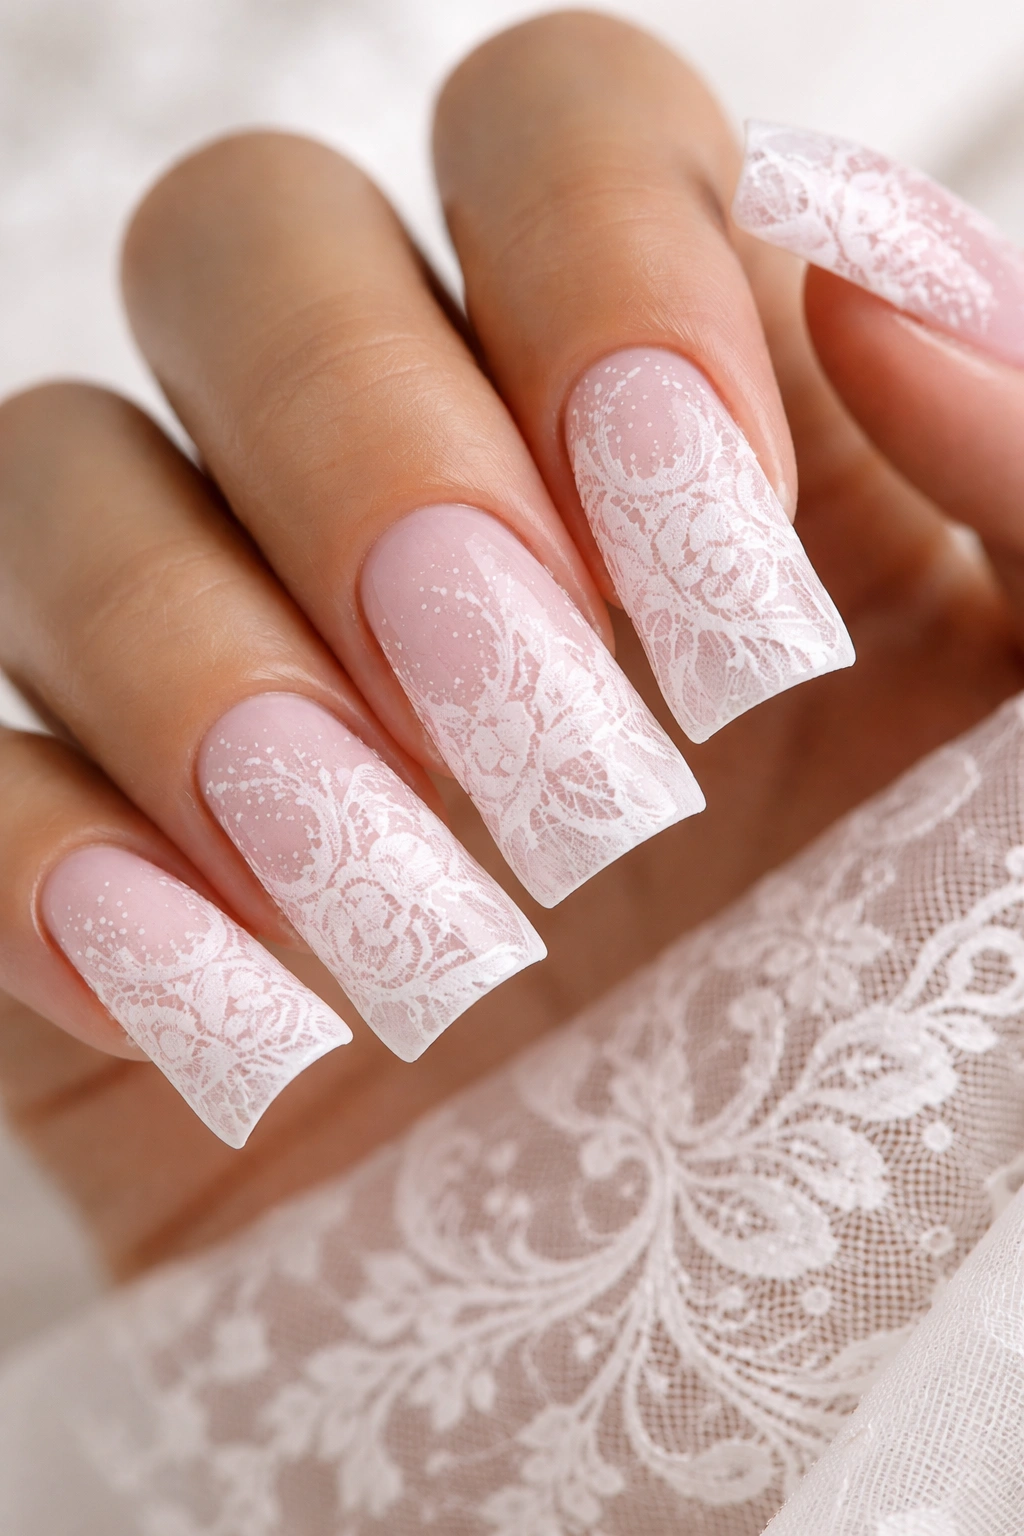
Lace designs are delicate and feminine, and they look absolutely stunning on duck nails. Paint your nails in soft pink, then use a thin brush to create white lace-like patterns across the surface. Think intricate florals, delicate geometric lace patterns, or Victorian-inspired line work. The pink base should show through, creating a layered, intricate look.
Creating Convincing Lace Patterns
Lace doesn’t need to be perfect—actually, the most beautiful lace designs have slight irregularities that make them feel organic. Start with simple curved lines, then add smaller details within those curves. If you’re not confident drawing freehand, search for lace designs online and print them out to trace with a makeup pencil first. Once you have your pattern sketched, paint over it with white polish using a very thin brush.
Lace Design Approaches
- Delicate curved lines creating floral motifs
- Geometric lace with repeating diamond or square patterns
- Victorian-inspired ornate lace covering the entire nail
- Simple scallop or fan-like lace patterns at the tip
- Minimalist lace with just a few strategic lines
- Full-coverage lace netting effect
- Lace concentrated at the tip fading toward the cuticle
11. Pink Gradient Tips With White Base
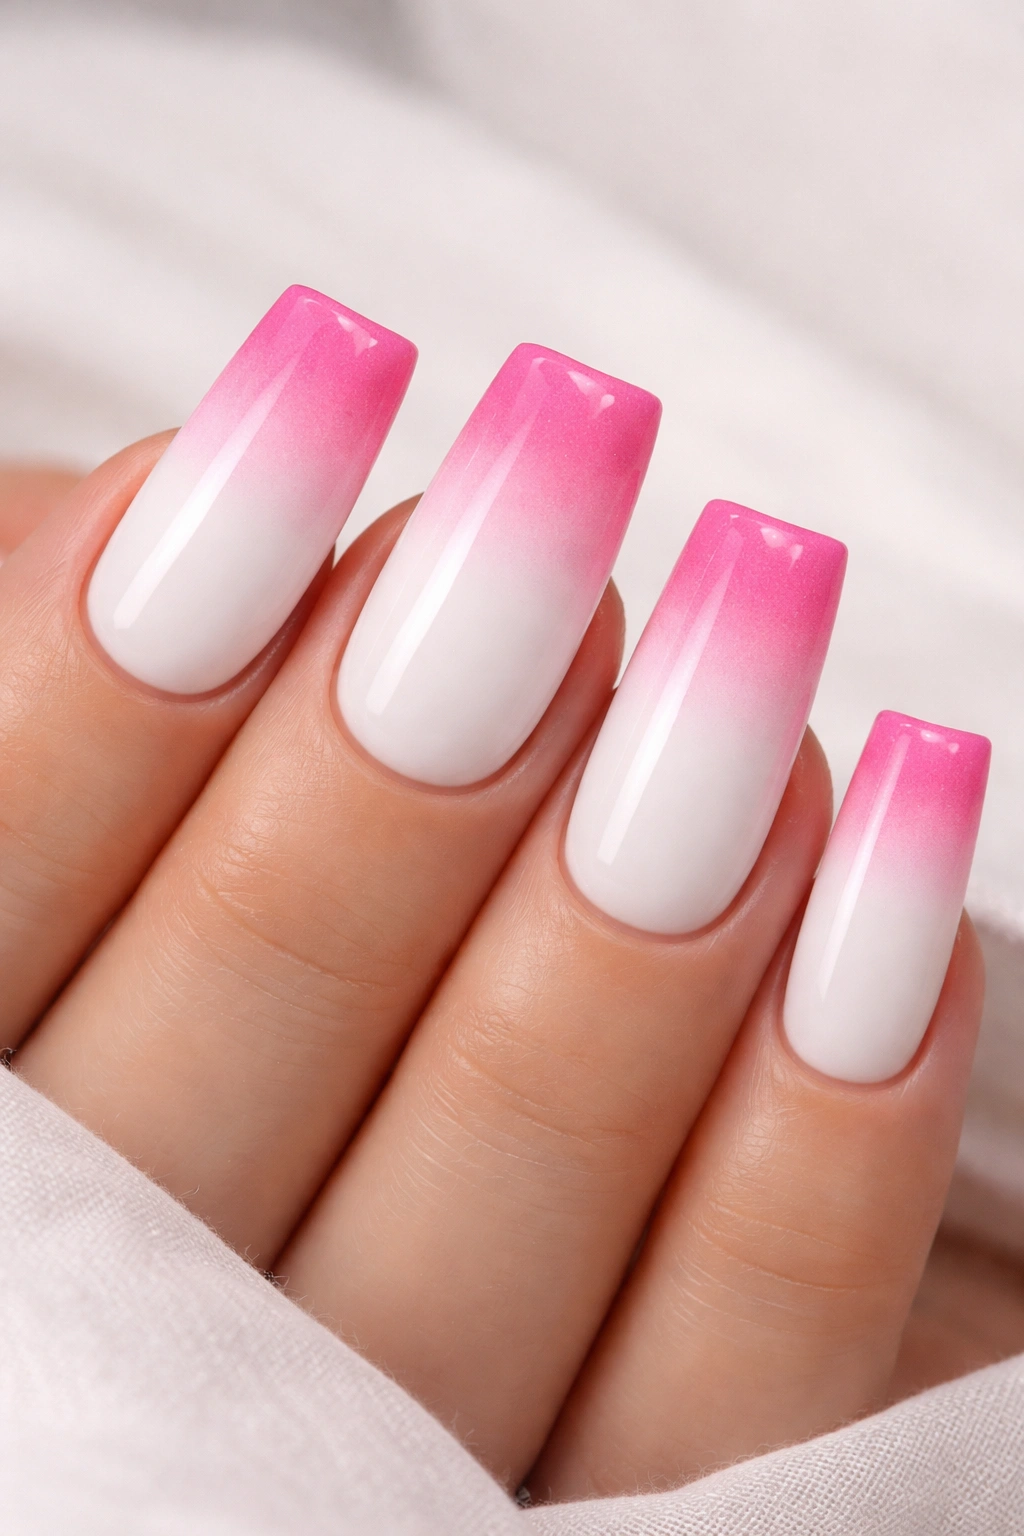
This design reverses the typical gradient direction by having the white at the base and the pink intensifying as you move toward the tip. Start with a white base, then use the sponge gradient technique to add progressively more pink as you move down the nail. The result is that the color “pops” at the very edge, drawing attention to the tip of your duck nails.
Why Tip-Heavy Gradients Feel Modern
Concentrating color at the tip is very on-trend right now because it creates emphasis and draws the eye downward, which is exactly what you want with a statement nail shape like duck nails. The white base keeps everything feeling clean and professional, while the pink at the tip adds personality. This design is versatile enough for professional settings but interesting enough to feel intentional and thought-out.
Gradient Tip Application
- Paint entire nail white and allow to dry completely
- Create your pink gradient at the tip using the sponge technique or a gradient brush
- The transition should be most intense right at the very tip, fading toward the base
- Use a darker pink at the tip and a lighter pink in the middle for more dimension
- Seal with a glossy top coat that’s applied generously—you want that shine to amplify the gradient effect
- This design looks especially striking under natural sunlight
12. White With Pink Negative Space Design
Negative space designs use the absence of color as part of the design itself. Paint your nail white, then use a very thin brush and steady hand to create abstract shapes by “drawing” with clear areas where you’re not painting anything. Alternatively, create geometric outlines in pink that leave strategic white spaces visible inside them. It’s a bit of visual trickery that looks far more complex than it actually is.
Executing Negative Space Designs
The key is planning your design before you start. Lightly sketch with a makeup pencil where your pink outlines will go, then paint over them with a thin brush. The white showing through those outlined areas is what makes the design interesting. You’re essentially using the white as your actual design element rather than just a background. This approach is perfect for people who like minimalist, modern aesthetics.
Negative Space Ideas
- Pink outline creating a large geometric shape with white negative space inside
- Thin pink lines creating abstract patterns with strategic white gaps
- Pink outline of a shape (circle, diamond, heart) that you leave unfilled
- Multiple overlapping pink outlines creating a web-like or lattice effect
- Small pink geometric shapes spaced across the nail with white showing between them
- Pink lines creating sections that frame areas of solid white
- Asymmetrical abstract design with intentional white areas visible throughout
13. Baby Pink With White Floral Accents
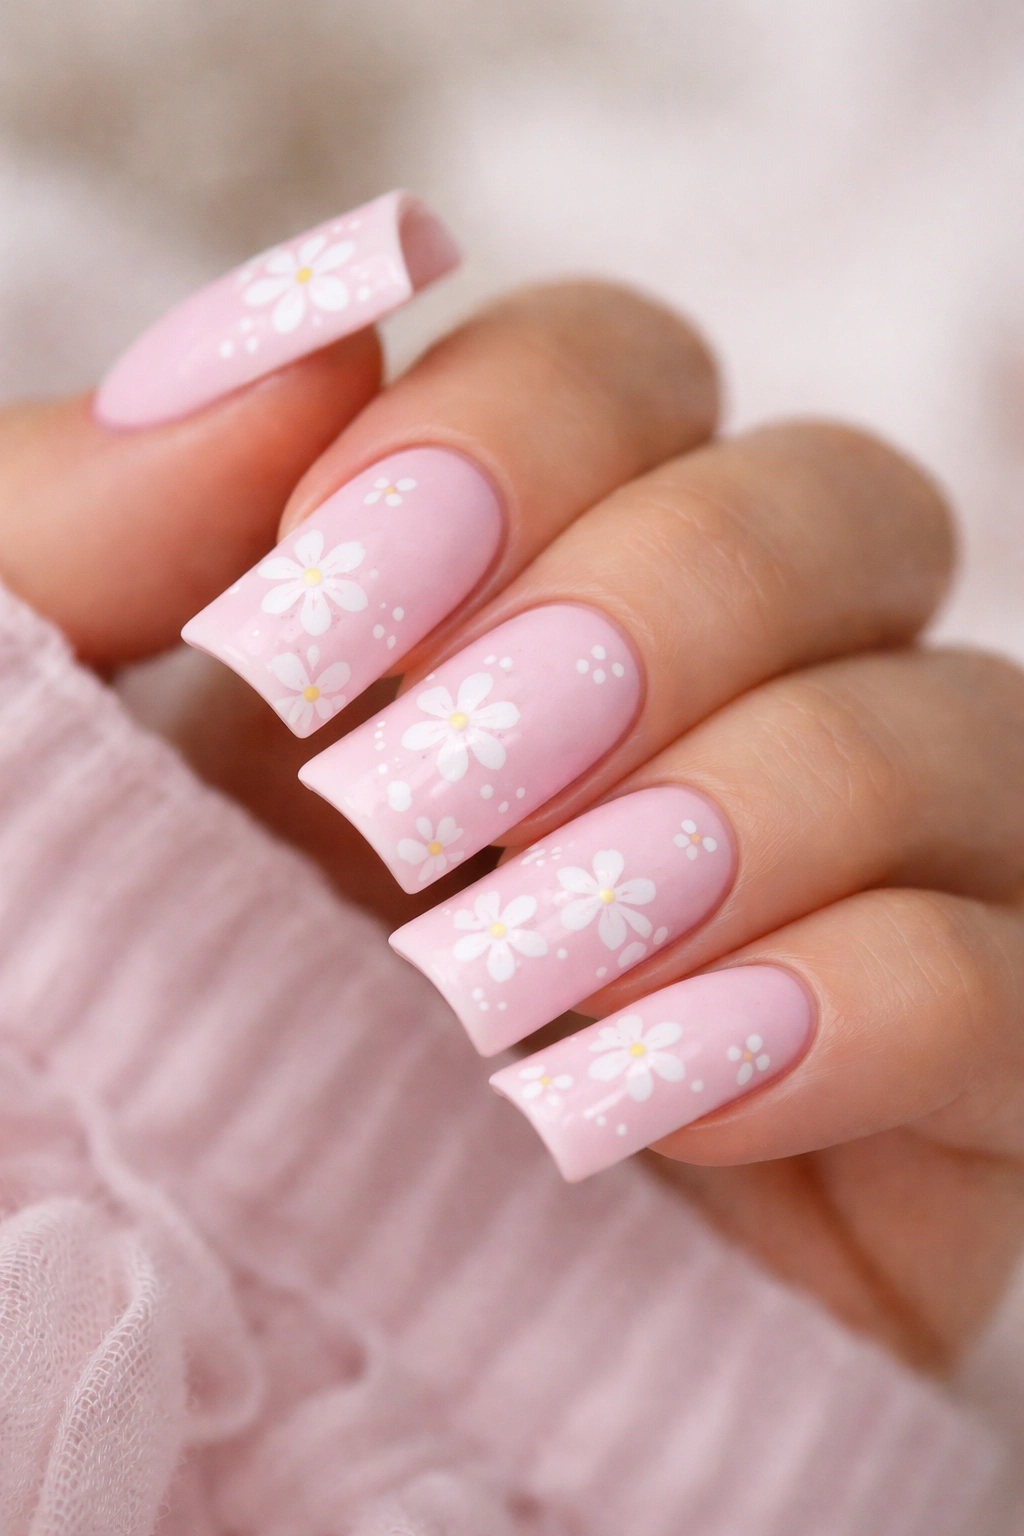
Florals are inherently romantic, and when you create white flower designs on a pale baby pink base, you get something that feels both elegant and approachable. Paint your nail in baby pink (that soft, pale shade), then use a thin brush to create small white flowers. These don’t need to be botanically accurate—simple circular shapes with small petals work beautifully.
Creating Simple Floral Designs
Start with small circles as the center of each flower, then add simple petal shapes around that center. If you’re not comfortable creating flowers freehand, use a dotting tool to create simple dots that you connect with curved lines to form petals. The organic nature of hand-drawn flowers means slight imperfections actually look charming rather than like mistakes. Vary the flower sizes and positions across the nail for a natural, scattered bouquet effect.
Floral Design Placement
- Small flowers concentrated at the tip with empty space at the base
- Scattered flowers across the entire surface like pressed flowers
- One larger statement flower at the center with smaller flowers around it
- Flowers arranged in a line down the center of the nail
- Flowers framed by white leaf details for added dimension
- Ombré of baby pink to white with flowers in the gradient area
- Simple daisy-style flowers requiring just dots and connecting lines
14. Bold Hot Pink With White Stripe Pattern
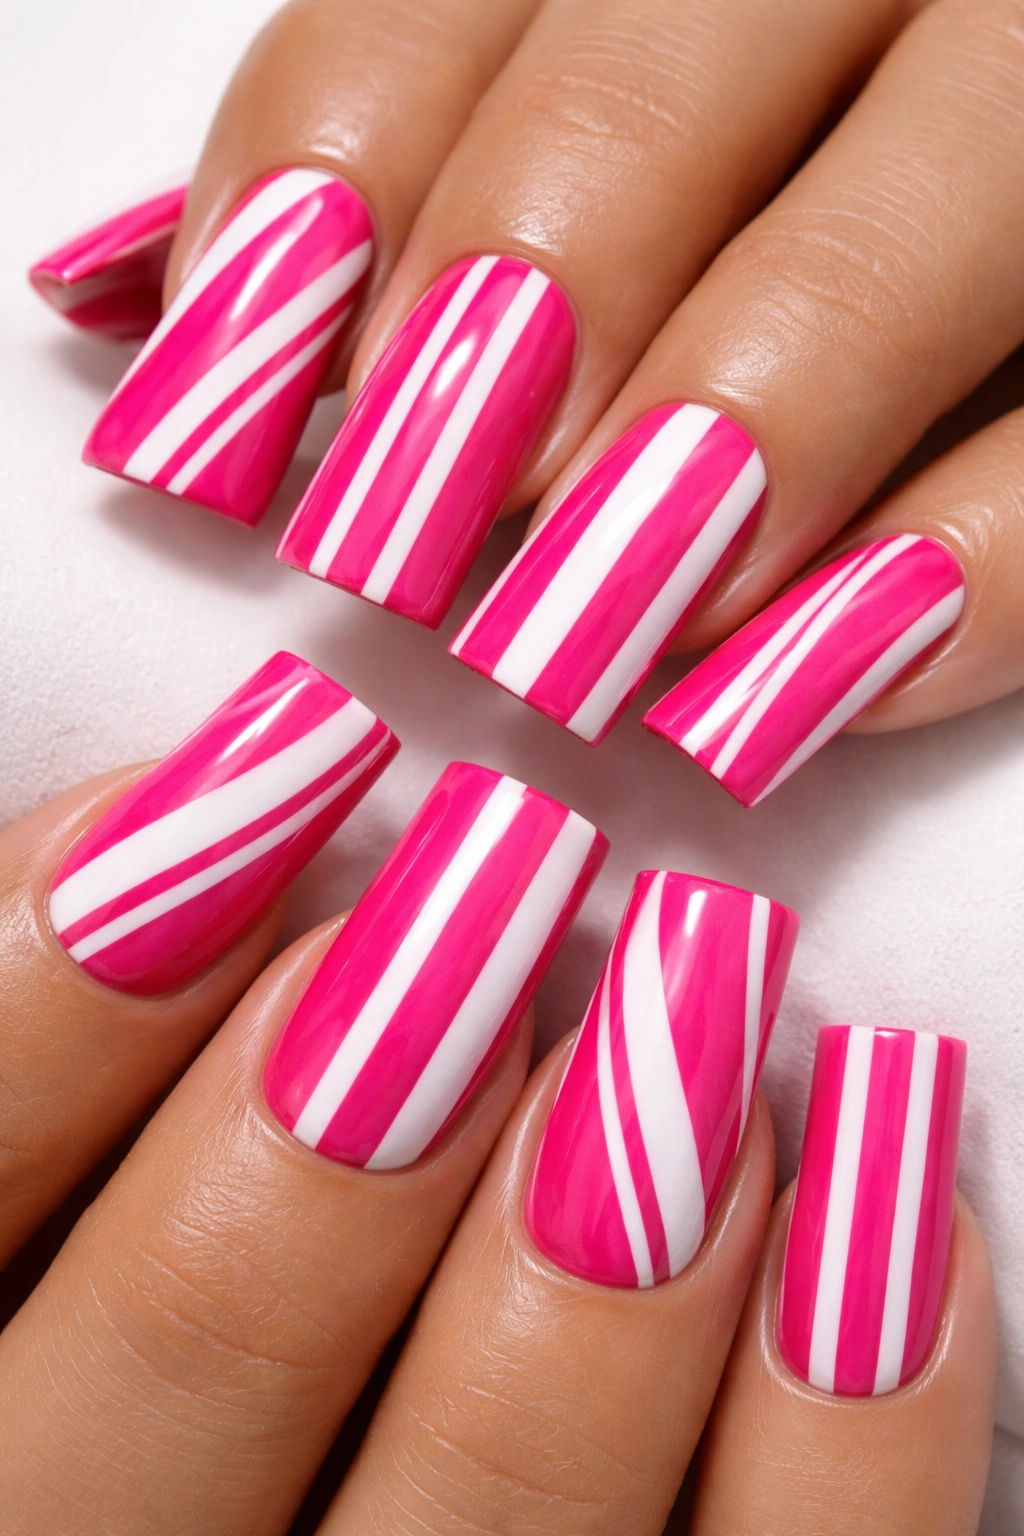
If soft and subtle isn’t your style, go bold with hot pink as your main color and use white stripes to create a pattern. Paint your entire nail in vibrant hot pink, then use a thin brush or striping tape to add white lines. Vertical stripes are classic, but you could also do diagonal stripes, horizontal stripes, or a combination. The contrast between hot pink and white is striking and impossible to ignore.
Making Bold Colors Work Professionally
Hot pink might feel like it’s too much for professional settings, but strategic use of pattern can actually make it feel intentional and designed rather than chaotic. If you’re nervous about the boldness, start with just a few nails in hot pink and white pattern while keeping others more neutral. The duck nail shape actually helps make bold colors feel intentional because the shape itself is a statement.
Stripe Pattern Variations
- Thin white vertical stripes across hot pink base
- Thick and thin white stripes alternating
- Diagonal white stripes creating a chevron-like effect
- Horizontal stripes creating a banded look
- Scattered thin white lines that don’t follow a pattern
- White stripes creating geometric sections within the hot pink
- Gradient from hot pink to lighter pink with white stripes over the whole thing
15. Blush Pink Base With White Pearl Accents
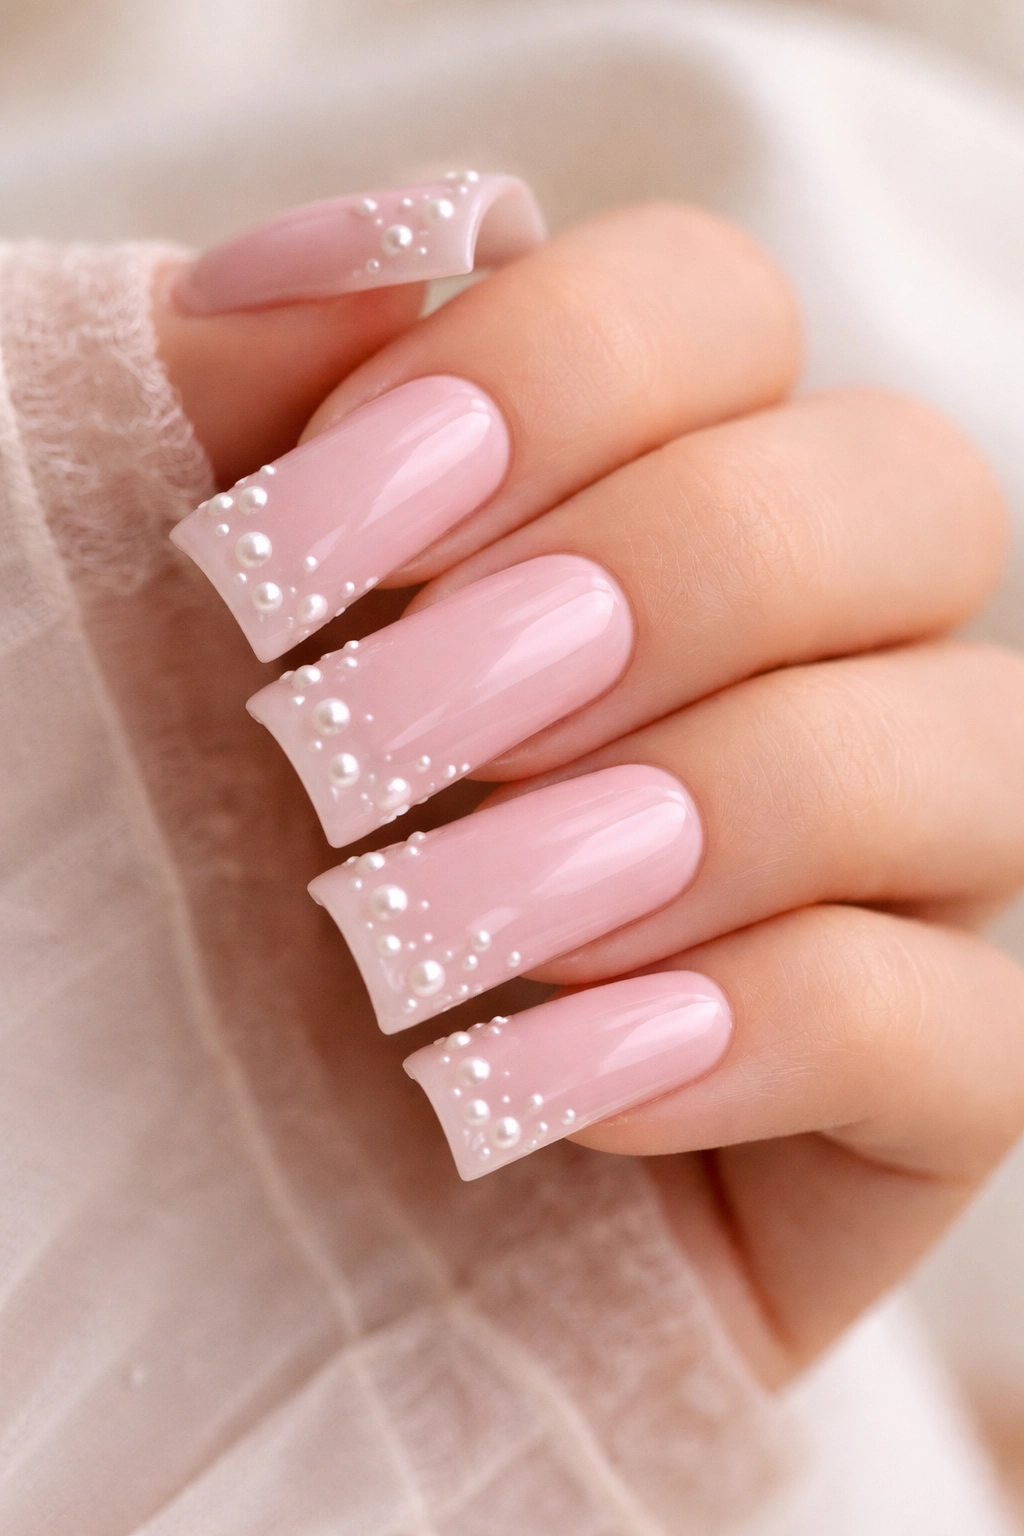
Pearl accents add luxury and shimmer without being over-the-top. Paint your nail in blush pink (a medium-toned pink with warmth), then apply small dots of white pearl polish in strategic locations. Pearls add dimension and catch light beautifully, making your nails sparkle subtly. This design feels elevated and expensive-looking despite being relatively simple to execute.
Using Pearl Polish for Maximum Effect
Pearl polishes have a slightly different finish than regular polish—they’re slightly translucent with shimmer. Apply pearl polish dots while your base is completely dry. The pearls will sit on top of your base color, creating dimension. You can cluster pearls together for emphasis or space them out for a minimalist feel. The number of pearls determines how glitzy the overall look feels—less is more refined, more is more playful.
Pearl Accent Placements
- Small pearls arranged in a line down the center of the nail
- Pearls concentrated at the tip in a triangular formation
- Scattered pearls across the entire surface irregularly
- Pearls framing the edge of the nail creating a border effect
- One cluster of 5-7 pearls at the center as a focal point
- Pearls arranged in a simple geometric pattern
- Alternating pearls with small pink dots for rhythmic pattern
16. White Base With Pink Ombré Cuticle
This design positions the color concentration at the cuticle end, creating a completely reversed gradient from most designs. Paint your entire nail white, then apply pink polish at the cuticle area and blend it outward using the sponge technique, fading it to nothing as you reach the tip. The result feels fresh and different from standard gradient nails.
Strategic Color Placement
Concentrating color at the cuticle is interesting because it draws the eye upward and creates balance. On duck nails, which are already a statement shape, this design feels modern and unexpected. The white tips feel clean and fresh while the pink base adds personality. This approach works especially well with dusty pink or rose gold tones, which feel sophisticated when concentrated at the cuticle.
Cuticle Ombré Execution
- Apply pink to the cuticle area (roughly the bottom third of the nail)
- Blend the pink outward using a sponge or blending brush
- The pink should fade almost completely by the time it reaches the tip
- Allow multiple layers if needed to achieve your desired intensity
- Seal with a glossy top coat for a professional finish
- This look is enhanced by keeping the tips very white and clean
- The design makes your fingers appear longer because color is pulled toward the base
17. Pink With White Geometric Grid
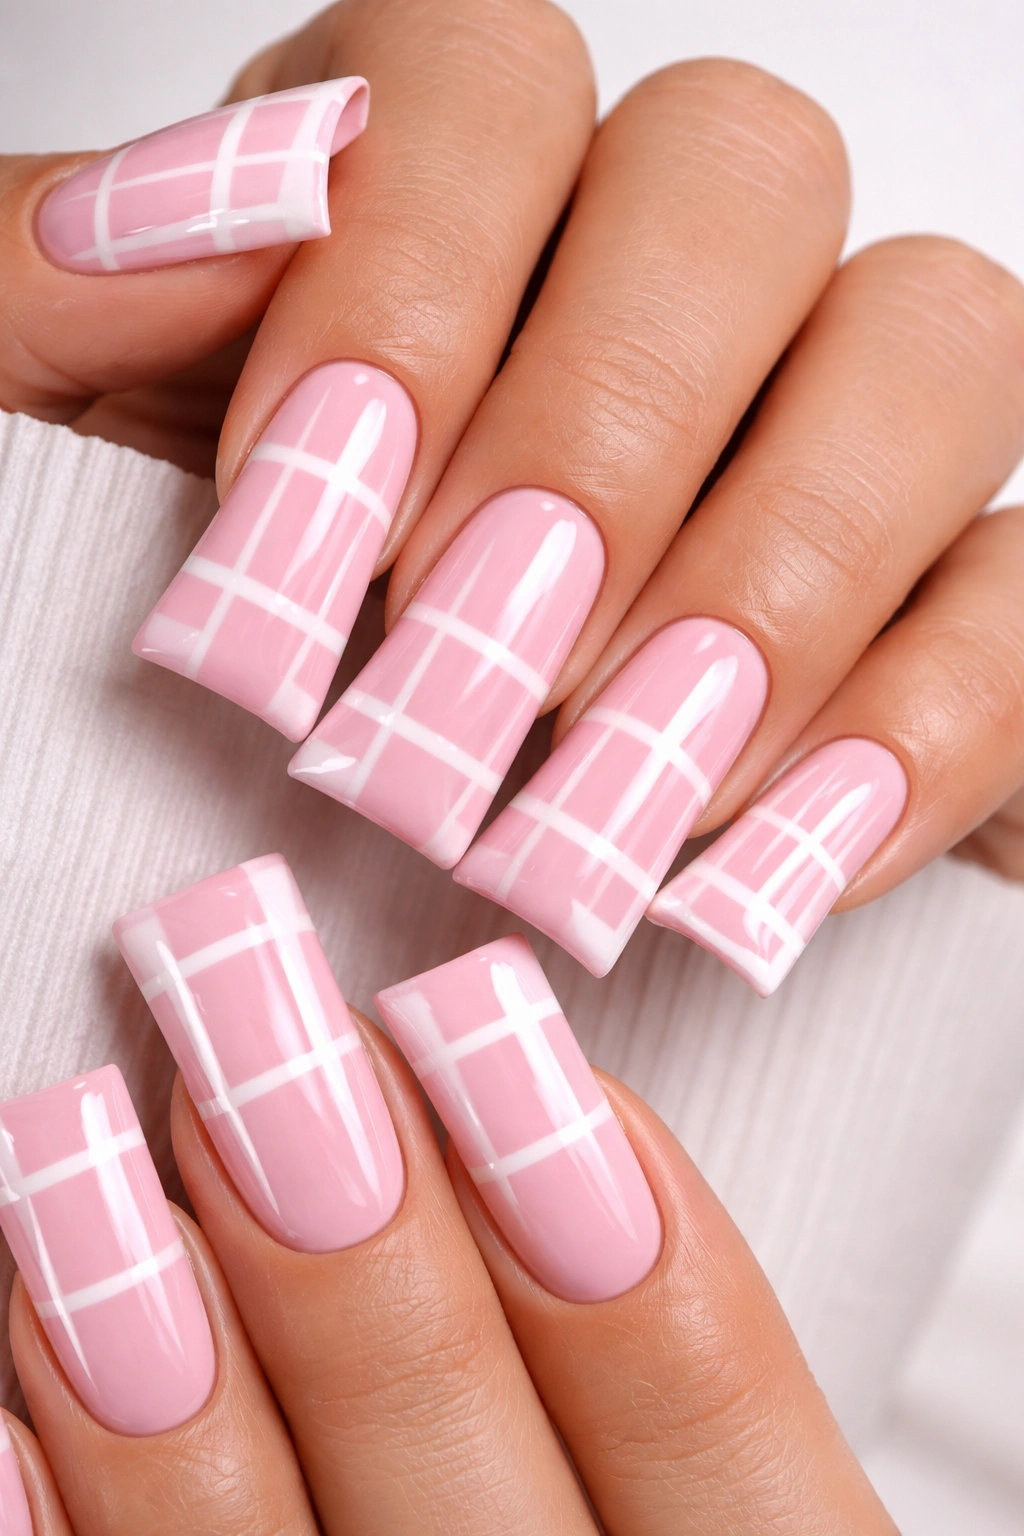
Grids are architectural and modern, making them perfect for anyone who loves geometric designs. Paint your nail pink, then use a thin brush or striping tool to create white lines in a grid pattern. The spacing can be even for a formal grid or irregular for a more organic feel. Grids are surprisingly forgiving because slight imperfections read as intentional rather than mistakes.
Creating Grid Patterns Efficiently
You can use painter’s tape to create your grid lines, ensuring they’re perfectly straight. Apply tape in one direction, paint between the lines, remove tape, apply tape in the perpendicular direction, and paint again. Or use a thin brush and steady hand to paint the lines freehand. The beauty of grids on duck nails is that you have enough surface area that the pattern actually reads clearly and looks intentional.
Grid Pattern Ideas
- Small even grid creating a checkerboard-like pattern
- Large grid with thick white lines creating bold sections
- Irregular grid with varying space between lines
- Gradient grid where lines are closer together at the tip and farther apart at the base
- Grid concentrated in just one area of the nail with solid color elsewhere
- Offset grid creating a more dynamic pattern than a straight grid
- Minimalist grid with just 3-4 lines creating simple divisions
18. Dusty Rose With White Minimalist Design
This final design is perfect for anyone who wants sophistication without complexity. Paint your nail in dusty rose (that perfect warm, slightly muted pink that works with every skin tone), then create one simple white element: perhaps a thin line, a small geometric shape, or a tiny dot. The beauty of minimalist design is that less really is more.
Choosing the Right Minimal Element
Minimalist design works because it lets your nail shape and color be the stars while adding just enough visual interest to feel intentional. A single thin white line down the center, a small white dot at the cuticle, or a thin white stripe along the edge are all excellent minimal additions. The key is restraint—you’re adding emphasis, not creating a pattern.
Simple Minimalist Additions
- Single thin white vertical line down the center
- Tiny white dot at the cuticle or at the tip
- Thin white frame around the entire edge of the nail
- Small white dash or line off to one side
- Tiny geometric shape (triangle, square, or circle) in white
- Minimal white constellation of three small dots
- White line framing just the tip area, leaving most of the nail solid dusty rose
Final Thoughts
Pink and white duck nails offer something for every aesthetic, whether you’re drawn to minimalist elegance, bold geometric patterns, romantic florals, or playful designs. The duck nail shape gives you the surface area and structure to actually execute these designs with confidence—you’re not working in a cramped space where everything gets lost. The fact that pink and white work beautifully together across virtually every skin tone means you can tailor the exact shades to what flatters you personally, whether that’s soft pastels or vibrant jewel tones.
What makes these designs work is that they’re not trend-dependent. You’ll see these combinations and styles year after year because they’re fundamentally flattering and versatile. A pink and white manicure works whether you’re heading to the office, a wedding, a casual brunch, or anywhere in between. The design options mean you can keep your manicures feeling fresh and interesting while staying within a color palette that you know works for you.
The best pink and white duck nail design is ultimately the one that makes you feel confident. Start with designs that feel achievable to you—whether that’s professional salon work or DIY attempts with the help of tools and techniques. Nail art is genuinely forgiving because you can always paint over a nail that didn’t turn out, and every design you create teaches you something for the next one. Your nails are a small canvas that’s entirely within your control, which is pretty empowering. Enjoy experimenting with these ideas and make them your own.
