

White duck nails have become one of the most coveted nail trends among beauty enthusiasts looking for a fresh, elegant aesthetic. The beauty of duck nails—those wide, curved tips that extend from the nail bed like a duck’s foot—lies in their bold silhouette, and white is the perfect color to showcase this statement-making shape. Whether you’re drawn to minimalist designs, intricate patterns, or glamorous embellishments, white duck nails offer incredible versatility while maintaining a sophisticated, modern edge.
Duck nails are perfect for anyone with longer nail beds who wants to experiment with nail art that feels both trendy and timeless. The extended curved sides provide a generous canvas for creative designs, and the pure simplicity of white keeps every look refined and wearable across casual and formal settings alike. The key to pulling off white duck nails is understanding that it’s not about the base color alone—it’s about layering details, textures, and finishes to create depth and visual interest on that pristine white foundation.
What makes white duck nails particularly appealing is their ability to feel chic whether you go completely bare or load them up with embellishments. The contrast between the bold nail shape and a clean white palette creates an almost architectural quality that photographs beautifully and catches the light from every angle. Let’s explore twelve distinct ways to style white duck nails so you can find the perfect iteration that matches your personal aesthetic.
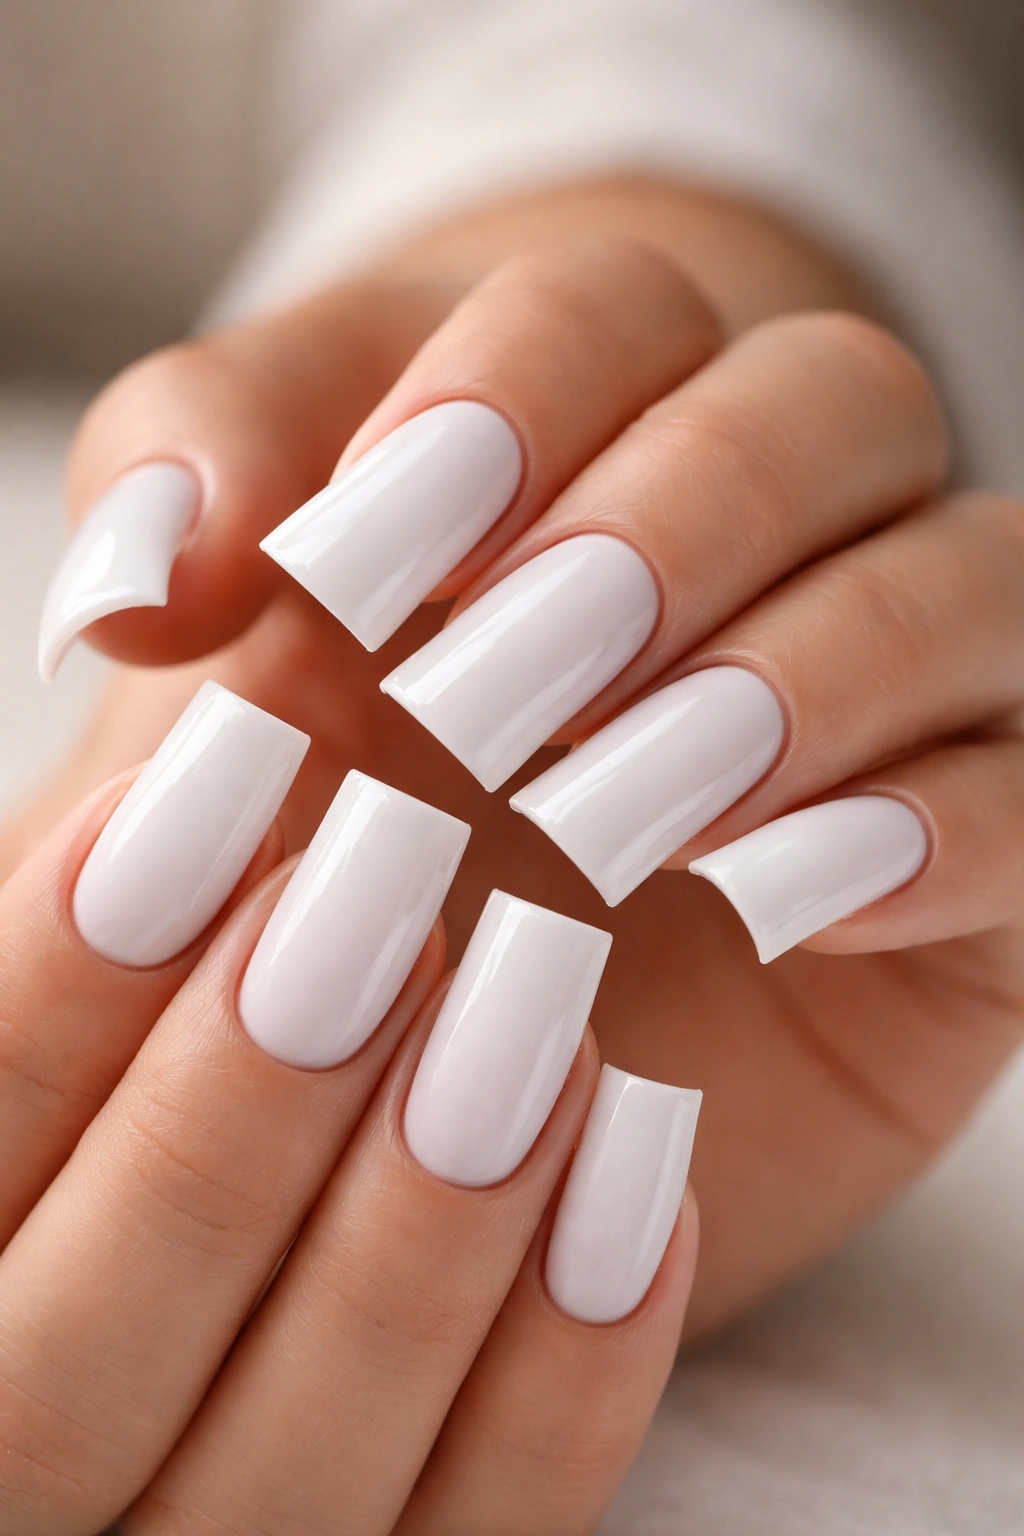
1. Classic Glossy White Duck Nails
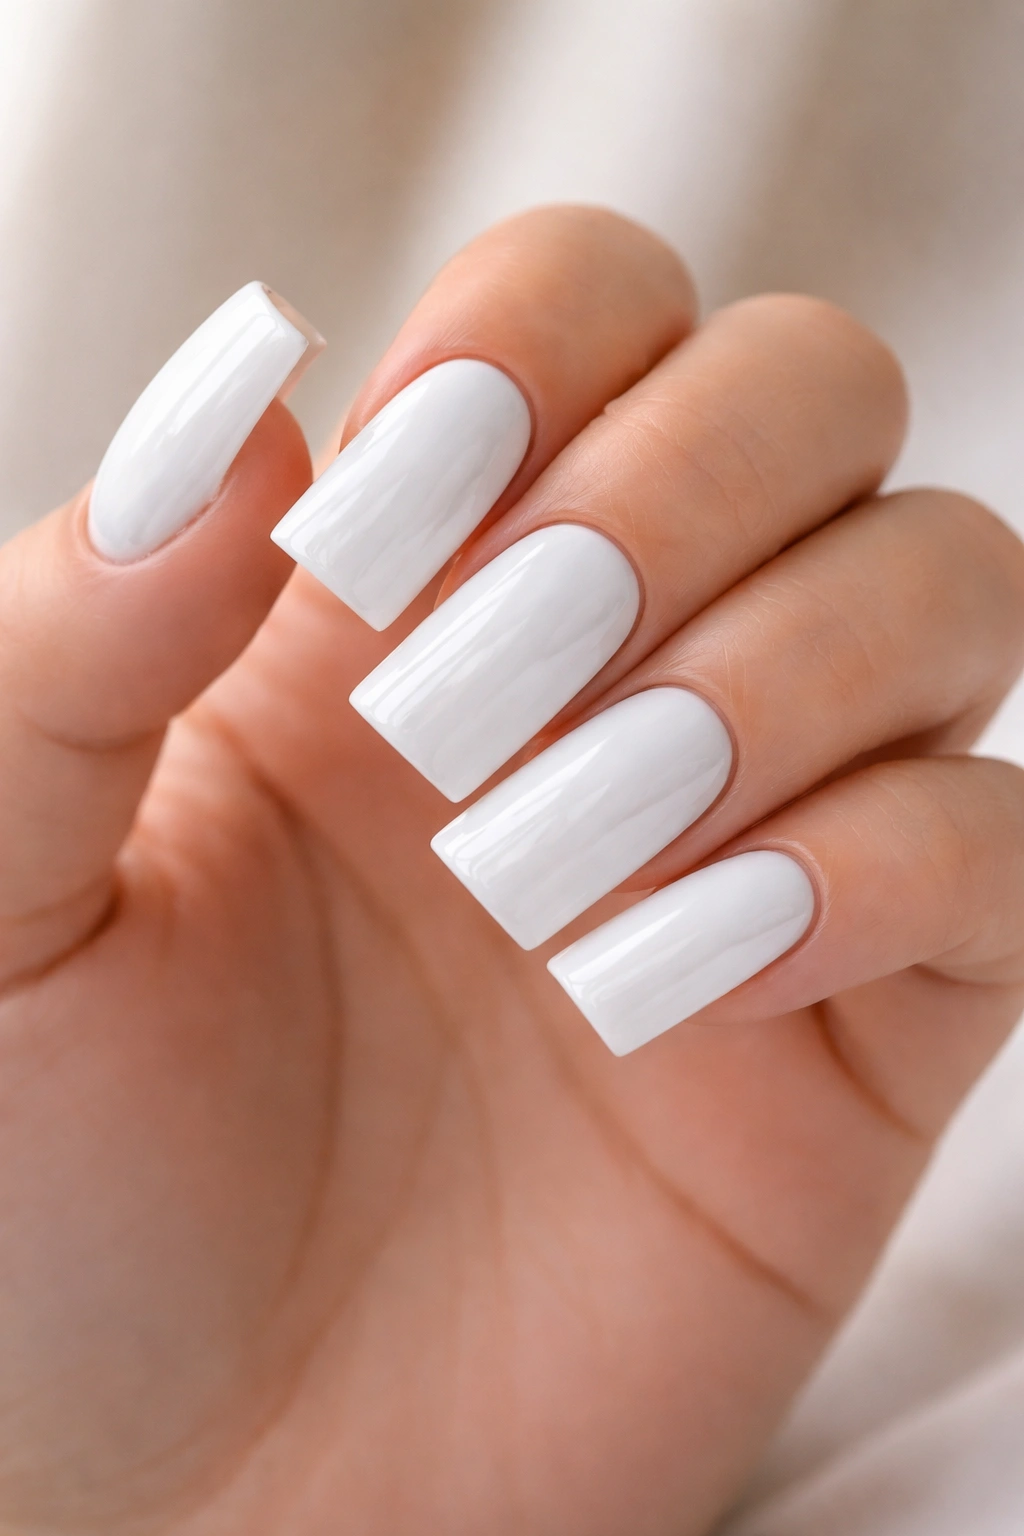
There’s something timeless about opting for a perfectly manicured glossy white that needs nothing else. A high-shine, pure white polish applied in thin, even coats creates an almost porcelain-like effect that makes the nail shape itself the star of the show. This is the foundation look—simple, elegant, and undeniably chic—that works for any occasion.
Why This Look Never Goes Out of Style
Glossy white duck nails represent pure elegance without apology. The shine reflects light beautifully and creates an elongating effect that makes your fingers appear more slender and graceful. There’s a reason this remains the go-to choice for brides, corporate professionals, and anyone who values understated sophistication. The high-gloss finish adds a polished quality that reads as intentional and well-maintained, even though it takes minimal effort to achieve once you have the shape down.
Tips for Flawless Glossy White
- Use a quality base coat to prevent staining and create a smooth foundation for your white polish
- Apply white polish in two thin coats rather than one thick coat for an even, opaque finish without streaking
- Invest in a good top coat—a premium gloss sealer makes all the difference in longevity and shine intensity
- Keep your nails hydrated with cuticle oil, as white polish can emphasize dryness or imperfections on the nail surface
- Schedule touch-ups every 7-10 days since glossy white shows wear, chips, and regrowth more visibly than other finishes
2. Glazed Donut White Duck Nails
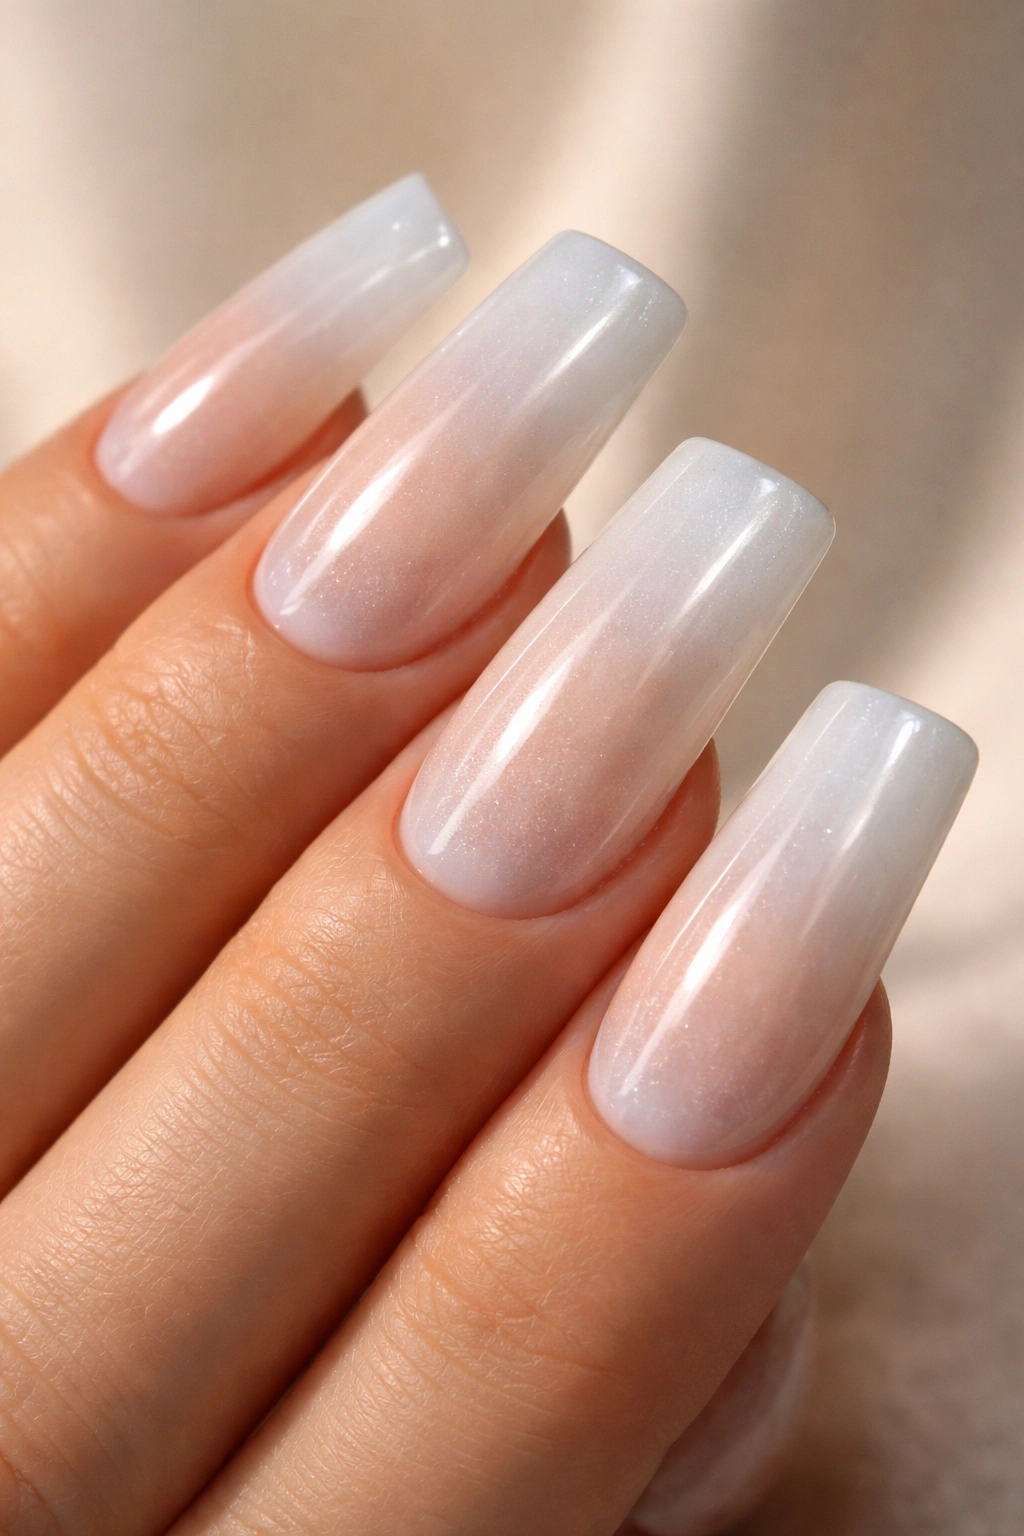
Inspired by the viral glazed donut nail trend, this style features a milky white translucent base with a darker white or cream ombré effect concentrated around the cuticle and free edge, creating depth and dimension. The effect mimics the glossy, buttery appearance of an actual glazed donut—hence the name—and it’s undeniably gorgeous on the duck nail shape.
How the Glazed Effect Creates Visual Interest
The glazed donut technique works beautifully on duck nails because the wider surface area gives you more room to build the gradient without it feeling cramped. The translucency of the milky base allows light to pass through while the deeper tones at the edges create a soft, three-dimensional quality. This design feels sophisticated rather than overly trendy, even though it’s recent—the glazed effect reads as modern but not faddish, which makes it a smart choice if you’re embracing trends intentionally.
How to Create the Glazed Look at Home
- Start with a thin base coat, then apply one coat of a milky white or pale pink gel or polish
- Use a nude, cream, or slightly deeper white shade with a blending brush to create a gradient from the cuticle line down
- Concentrate the deeper shade at the cuticle and edges, then blur it inward with a clean blending brush or sponge
- Seal with a glossy or semi-matte top coat depending on your preferred finish
- If you use gel polish, cure between each layer according to your lamp’s specifications
3. Ombre White Duck Nails
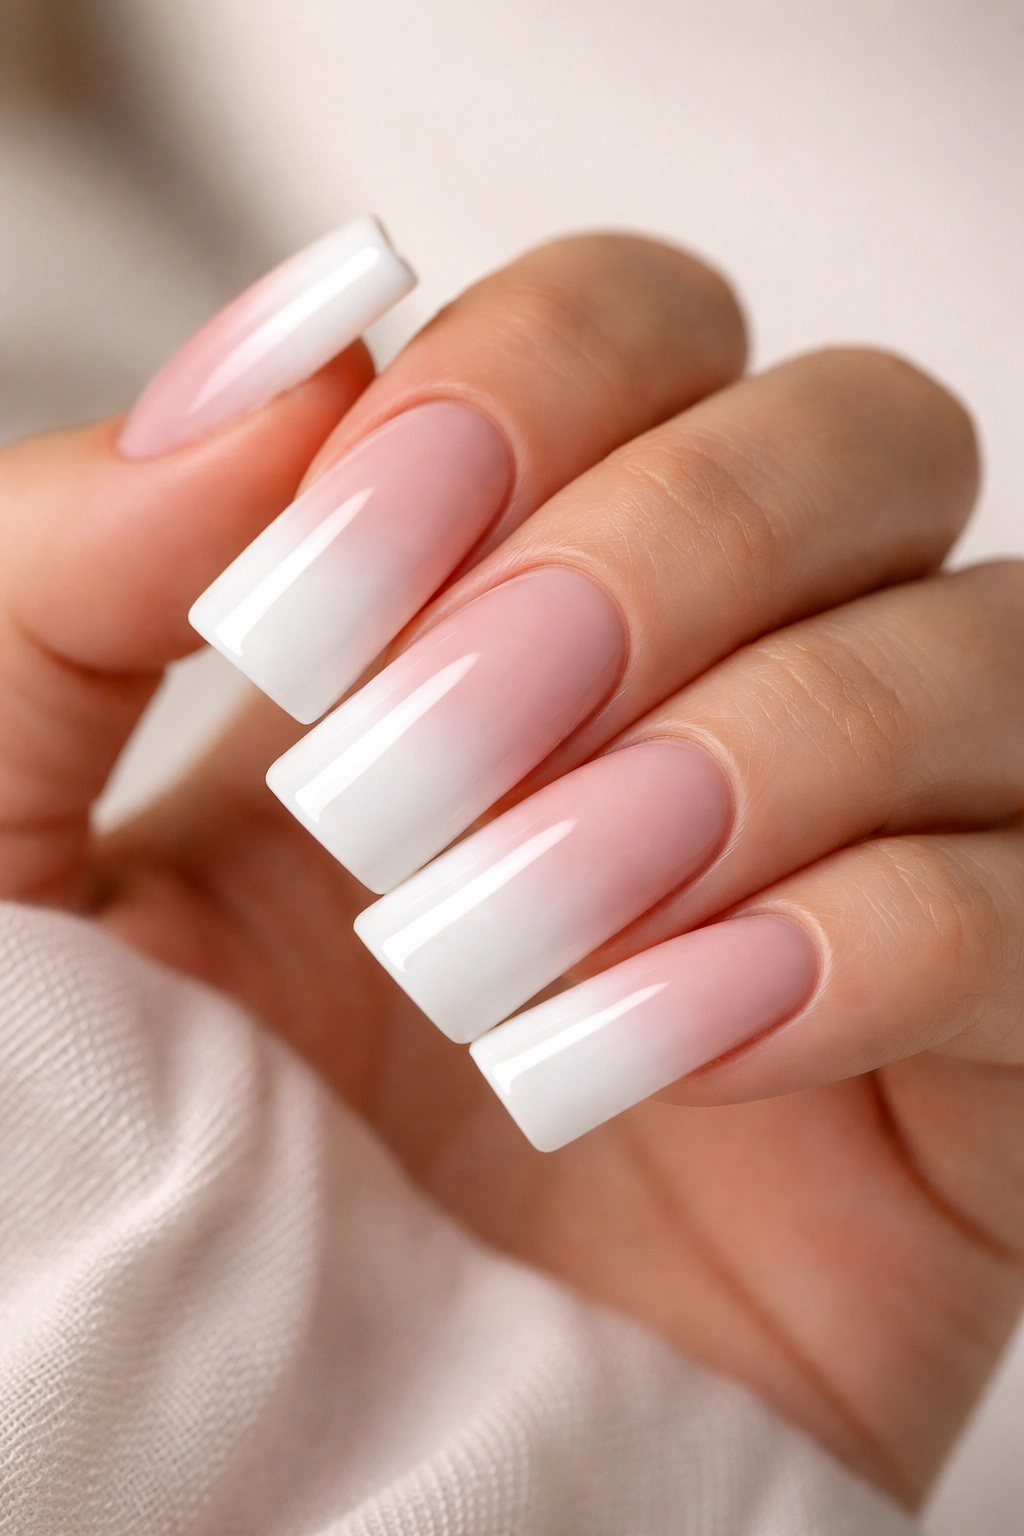
An ombre transition from white to another color—soft pink, pale yellow, or even a neutral beige—creates movement and visual flow across the nail. This gradient style takes advantage of the duck nail’s generous surface area to showcase a beautiful color transition that looks professional and artistic simultaneously.
The Power of a Subtle Color Gradient
Ombre white duck nails feel more modern and playful than a solid color while maintaining the sophistication that white brings to any design. The gradient draws the eye across the entire nail surface, making the extended shape feel intentional and deliberate rather than simply long. A white-to-nude ombre, for instance, creates a lengthening illusion while feeling incredibly wearable for work, dates, or everyday life. The beauty of an ombre is that it hides minor imperfections far better than a solid color would, making it a smart practical choice even as it delivers visual appeal.
Ombre Techniques That Work on Duck Nails
- Apply a white base coat as your foundation across the entire nail
- Using a makeup sponge or specialized gradient brush, dab your second color (pale pink, soft yellow, warm beige) onto the edge or tip area
- Gently dab and bounce the sponge to create a blended transition zone between the two colors
- Repeat layering and blending until the gradient feels smooth and intentional, not muddy
- Seal with a top coat and use cuticle oil on your fingertips to help blend the edges if needed
4. French Tip White Duck Nails
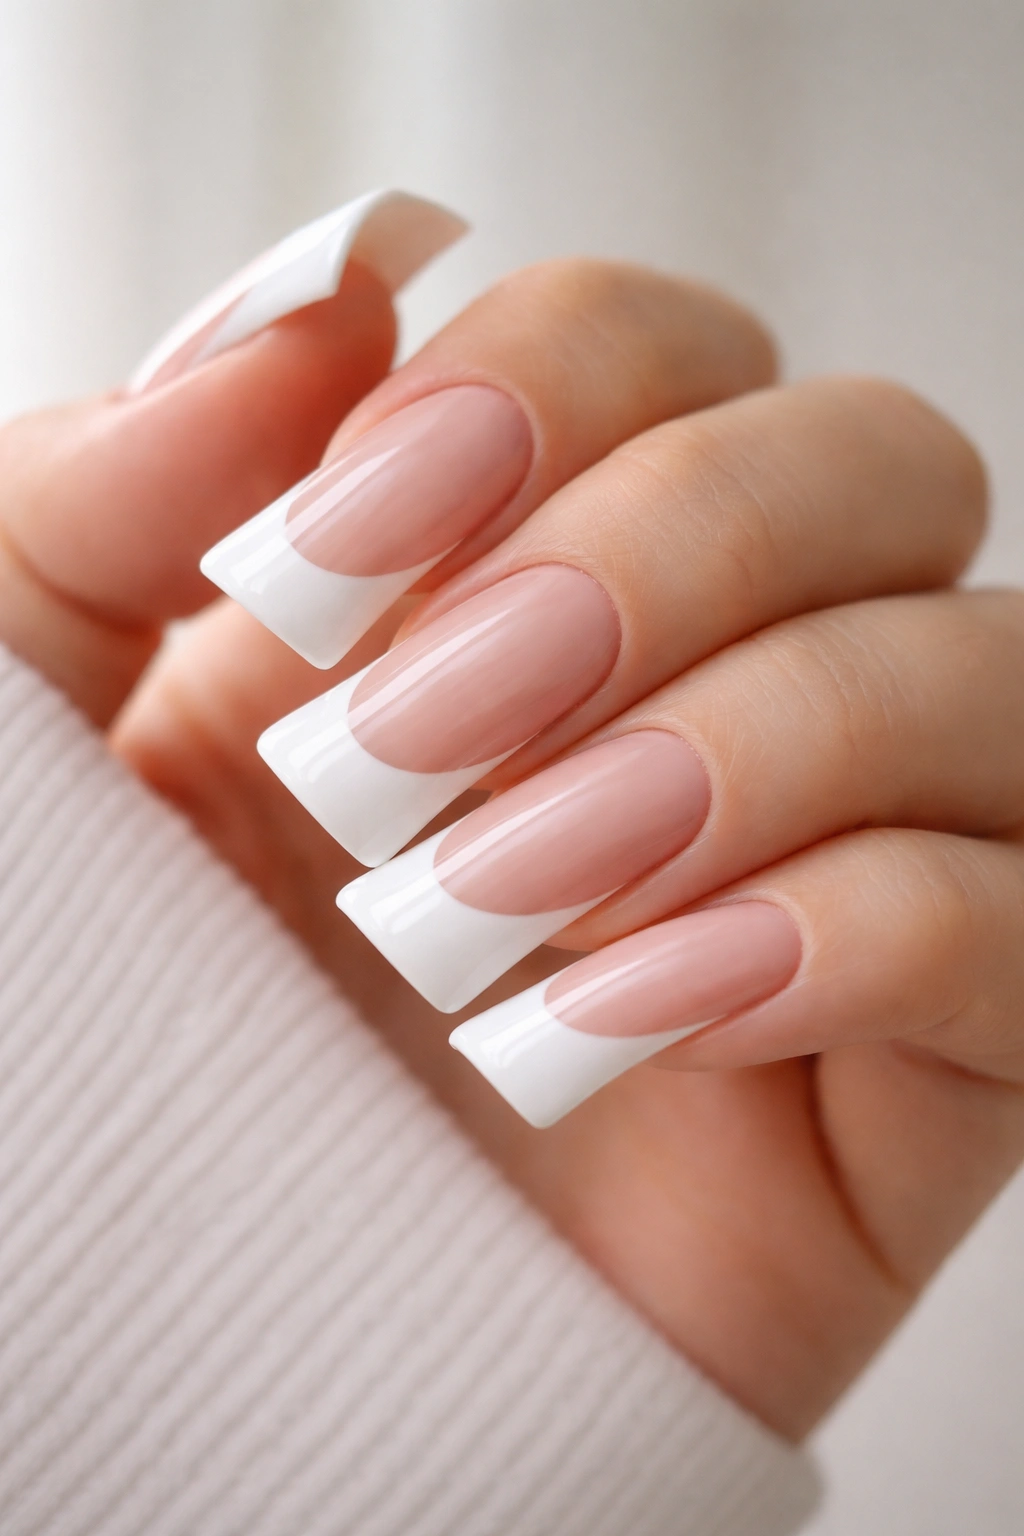
A classic French manicure adapted for duck nails uses a white tip with a nude, pink, or ivory base. The elegant contrast between the pale base and crisp white tips feels timelessly sophisticated while showcasing the unique shape of duck nails in a way that traditional square nails can’t quite achieve.
Why French Manicures Suit Duck Nails Particularly Well
The French manicure’s defining feature—that clean horizontal line separating base from tip—is beautifully emphasized on the curved edges of a duck nail. Where the white tip follows the natural curve of the nail shape, it creates an almost architectural effect that feels very current. The French manicure also has an inherent sophistication that appeals to people who want a stylish look but aren’t ready for bold or colored designs. On duck nails, this classic style feels fresh and unexpected rather than dated.
Creating a Picture-Perfect French Tip on Duck Nails
- Apply a sheer nude, pink, or ivory base coat across the entire nail in two thin coats
- Using a thin nail art brush or a specialized French tip liner, draw a thin white line along the edge of the duck curve
- Follow the natural nail line, maintaining consistent thickness throughout—this requires a steady hand or a nail guide sticker
- Make the line clean and precise by allowing it to dry fully before applying top coat
- For wobbly hands, nail guide stickers designed for duck nails can help you achieve perfectly straight tips every time
5. Sparkly White Duck Nails with Glitter
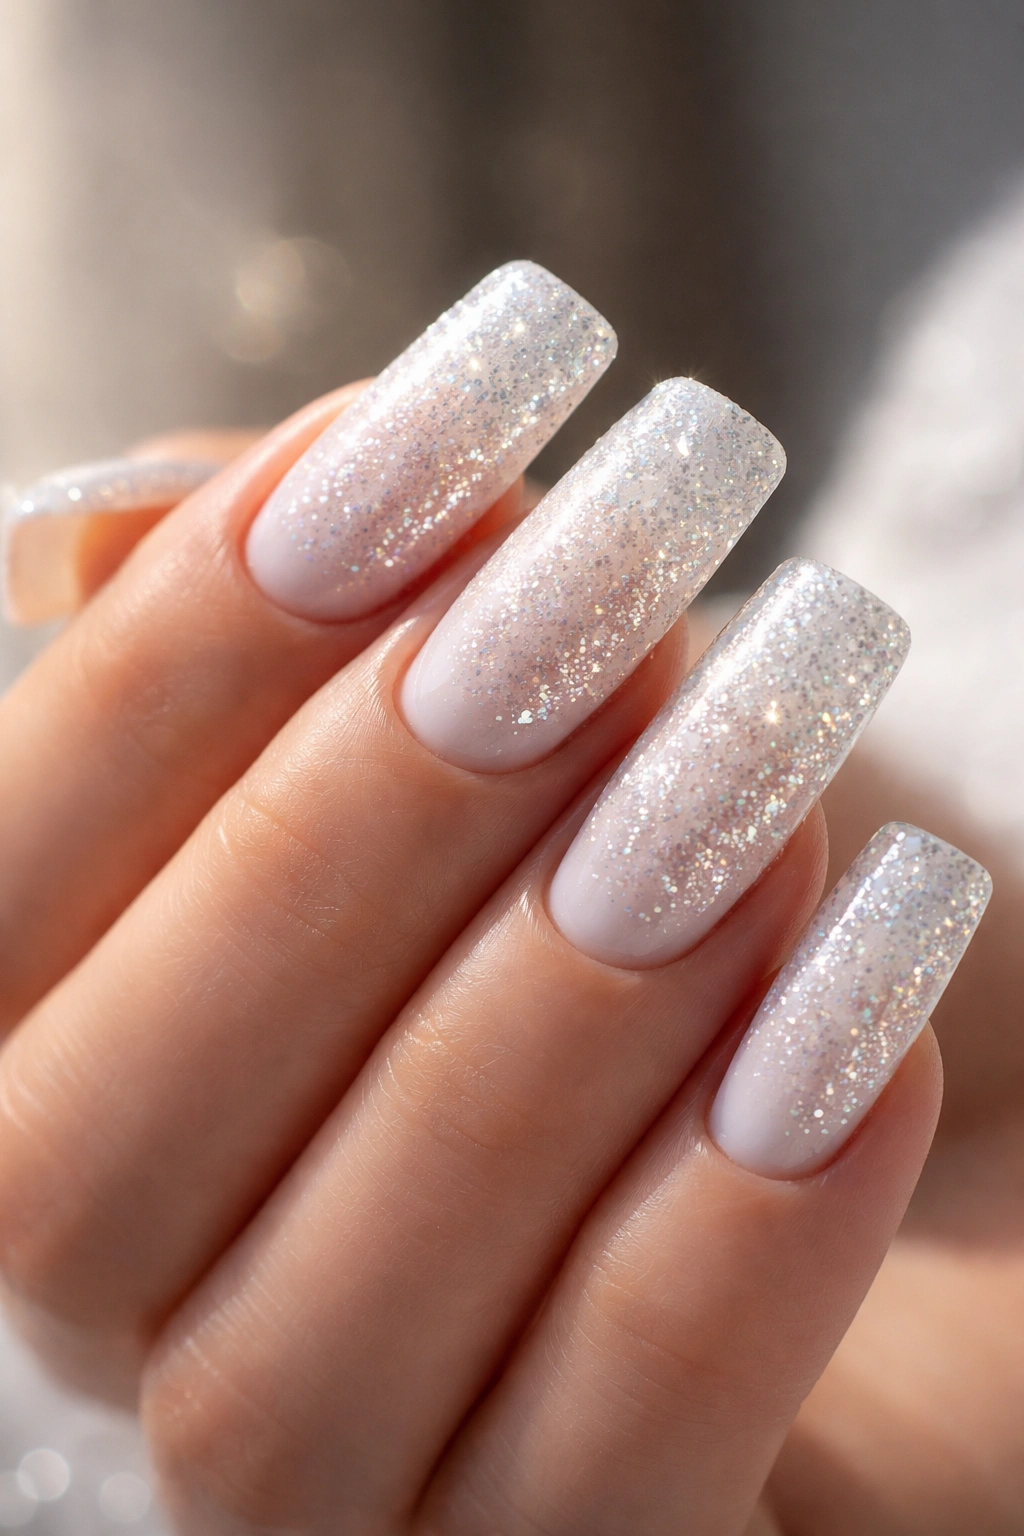
White duck nails become instantly glamorous with the addition of glitter—whether it’s a full coverage sparkle, a concentrated glitter gradient, or delicate accent lines. Glitter catches light and draws attention to your nails in the most eye-catching way, making this ideal for special occasions or anyone who loves a little dazzle.
Choosing Glitter Finishes That Work at Every Event
Chunky holographic glitter reads as bold and fun, perfect for parties or creative expressions. Fine cosmetic glitter or diamond dust creates a more refined, sophisticated sparkle suitable for professional settings or formal events. Alternatively, restricting glitter to just the tips or edges keeps the look polished rather than overwhelming. The white base prevents glitter from looking garish—instead, the neutral background allows the sparkle itself to be the statement rather than fighting for attention with a competing base color.
Glitter Application Methods for Longevity
- Use a sticky base coat (or the tacky layer of a gel base) to help glitter particles adhere securely
- Apply glitter to wet polish before it dries, using a flat brush to pat it on rather than dragging
- For concentrated glitter tips, apply white polish to the tip area only, then add glitter while wet
- Seal with at least two coats of top coat to lock glitter in place and prevent shedding
- Press down gently on each nail with a flat tool after sealing to ensure all particles are well-embedded
- Remove with acetone rather than regular polish remover, as glitter requires a bit more solvent strength
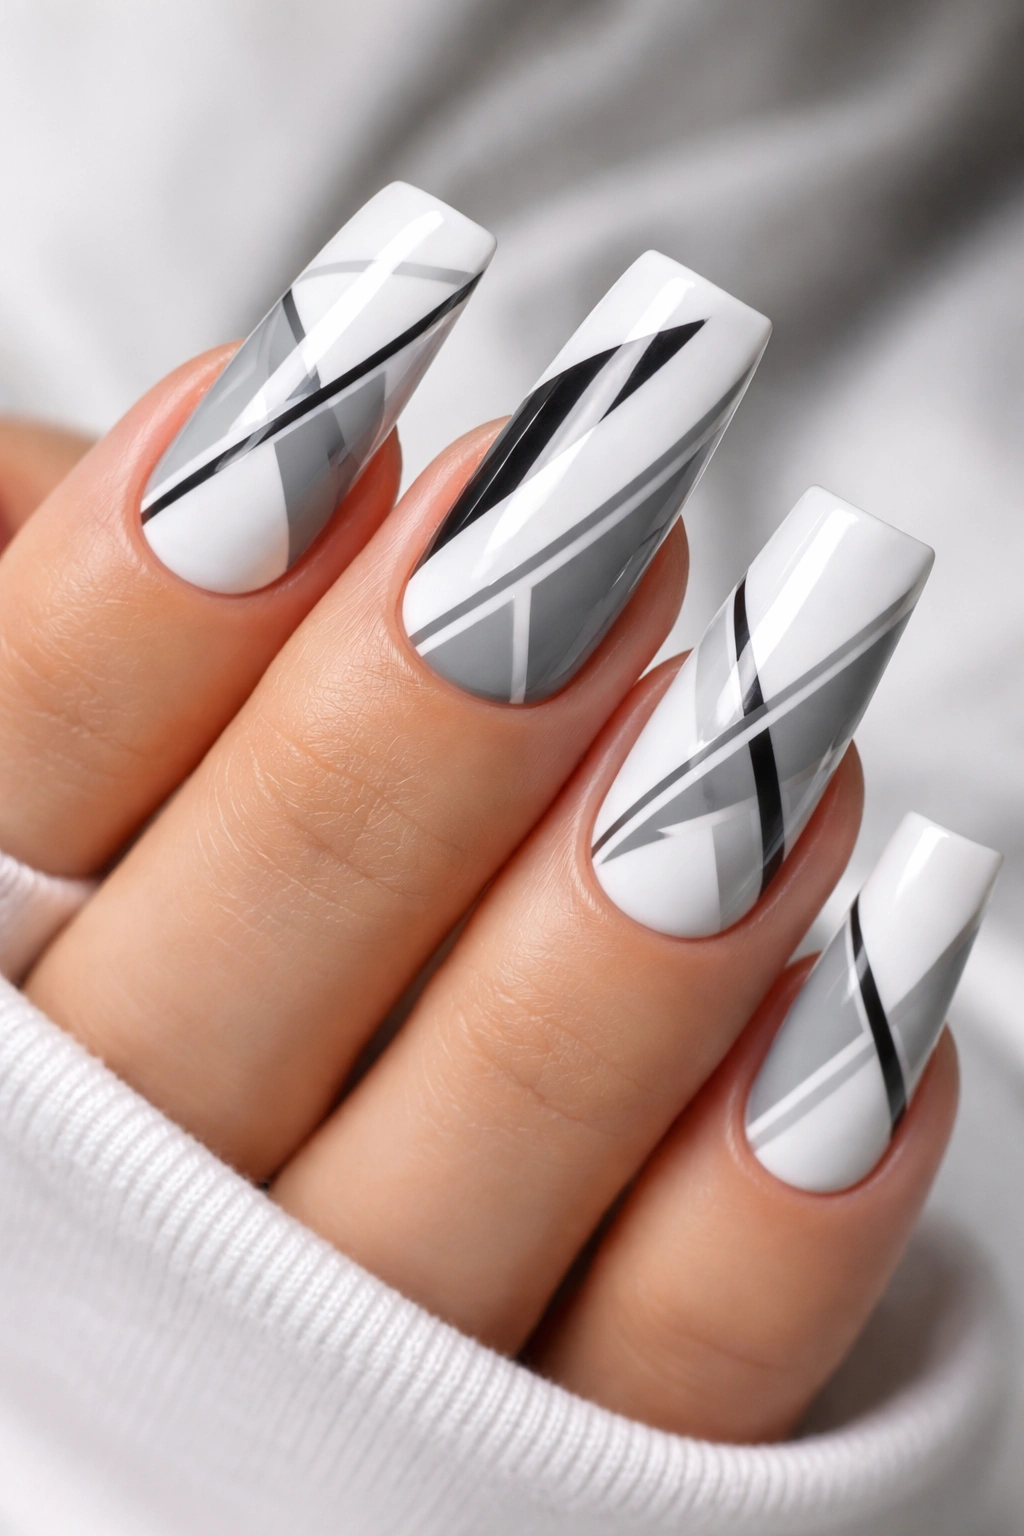
6. Minimalist Line Art White Duck Nails
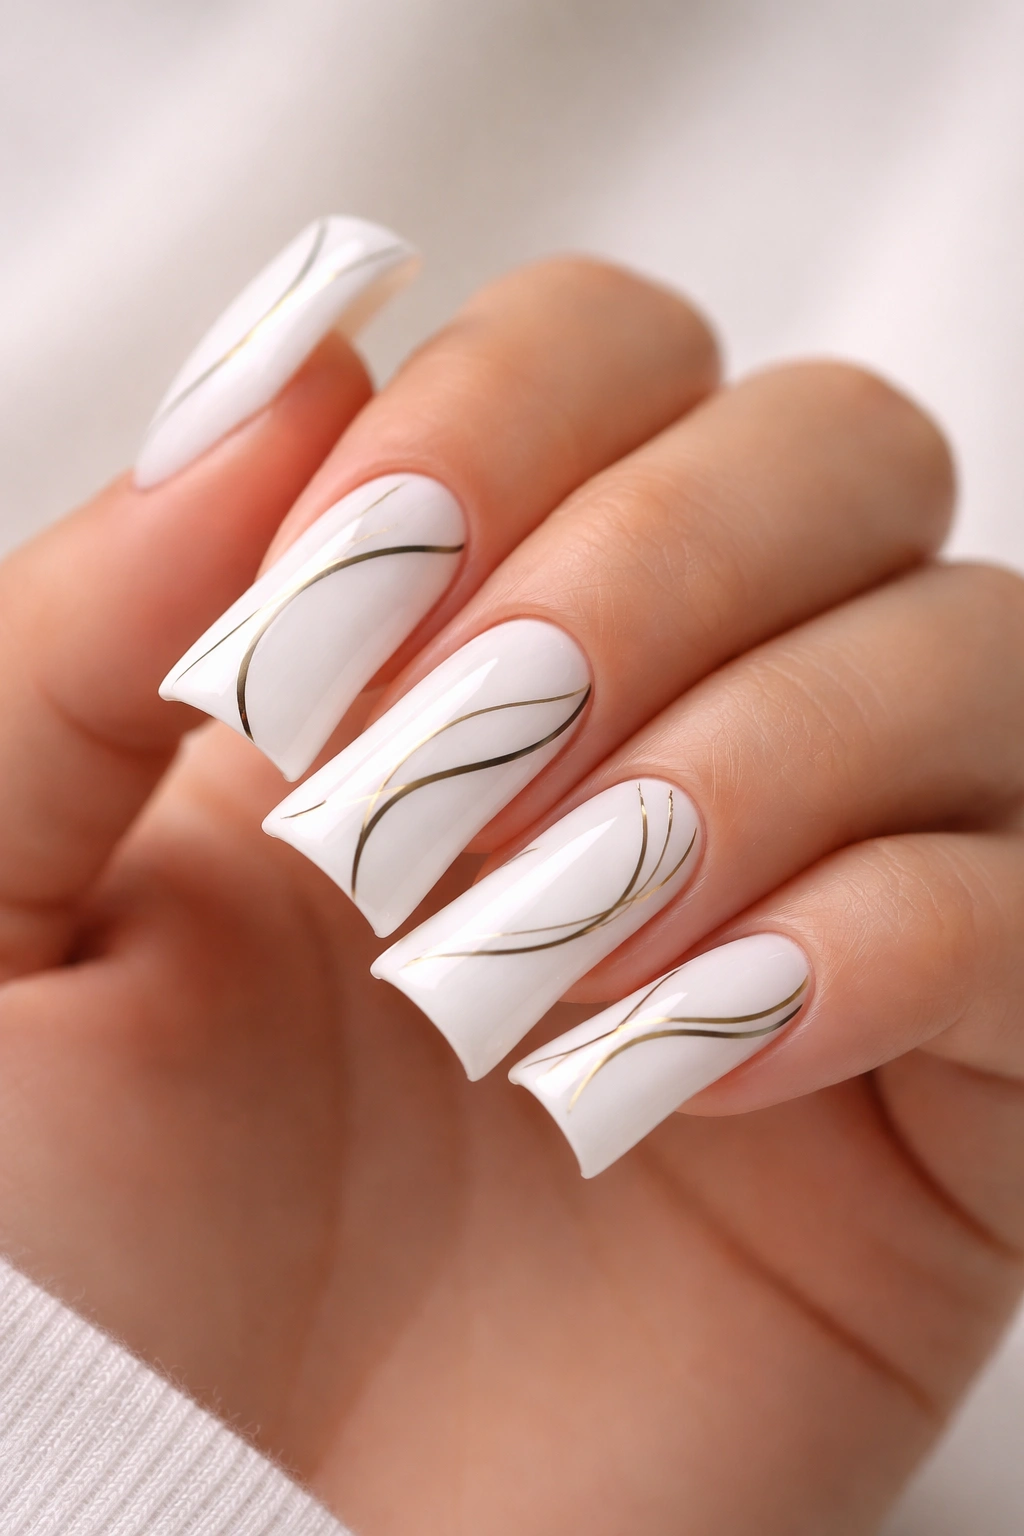
Clean, thin lines in black, navy, or gold create a sophisticated, gallery-like aesthetic on white duck nails. Minimalist line art might be a simple geometric shape, a single curved line, or an abstract design—the key is restraint and precision. This style appeals to minimalists and art enthusiasts alike, offering visual interest without overwhelming the white canvas.
The Appeal of Negative Space in Nail Design
Minimalist line art respects the beauty of white space, allowing the white duck nail to remain the primary visual focus while the lines add thoughtful detail. This approach feels very current—it aligns with modern design principles that value simplicity and intentionality over maximalism. A single thin line down the center of the nail, a subtle arch near the cuticle, or geometric shapes scattered across the nail all read as intentional art rather than decoration. The restraint actually makes these designs feel more expensive and designer-created than complex multicolored artwork.
Tools and Techniques for Precise Line Work
- Use a thin nail art brush (the finest sizes available) for controlled, steady lines
- A steady hand is essential, or alternatively, consider investing in nail art pens that feel more like drawing implements than brushes
- Create guidelines lightly with a pencil or nail marker first if you’re not confident
- Apply your line color in one smooth motion rather than multiple strokes when possible
- Allow each line to dry fully before applying top coat to prevent smudging
- Practice on a practice wheel or paper before attempting intricate designs on your actual nails
7. Marble White Duck Nails
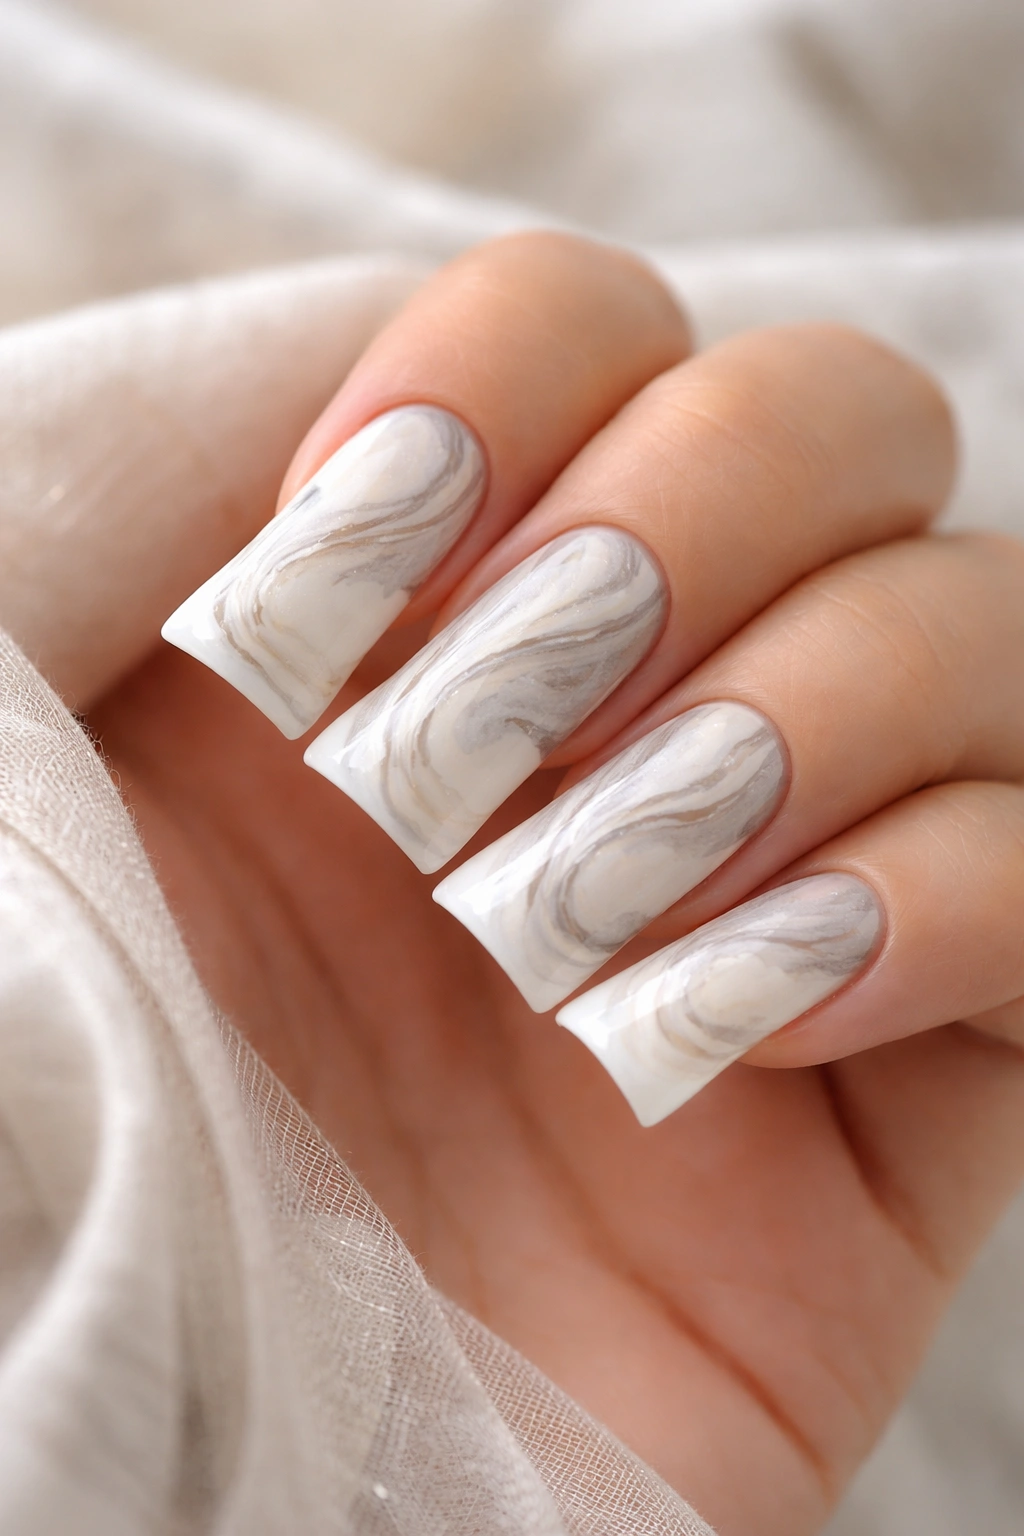
Swirled marble patterns in white, cream, gray, and nude create an elegant, organic aesthetic that never feels repetitive since each nail is naturally unique. The marble effect mimics natural stone and adds luxurious visual texture while staying within a sophisticated neutral color palette.
Creating the Illusion of Natural Stone
Marble patterns work beautifully on white duck nails because the shape provides enough surface area to showcase the pattern without it feeling cramped or overly busy. The curved edges of duck nails actually enhance the organic, flowing quality of marble—the pattern seems to move and shift as you tilt your hand. Unlike bold colored marbles, white and neutral marble reads as refined and understated despite being visually complex. This style suits anyone who wants visual interest without drawing excessive attention.
Marble Techniques for Realistic Results
- Apply a white base coat and allow it to dry completely
- Using thin nail art brushes or thin striping tools, paint thin, irregular lines in gray, cream, or nude across the nail surface
- Connect some lines and let others stand alone, creating an organic, random-looking pattern
- Blend some line edges slightly with a clean, damp brush to soften transitions and increase the stone-like effect
- Alternatively, use marble stickers or water decals designed for duck nails for a faster, more uniform result
- Seal with a glossy top coat that mimics the polished sheen of actual marble stone
8. Soft Gradient White Duck Nails
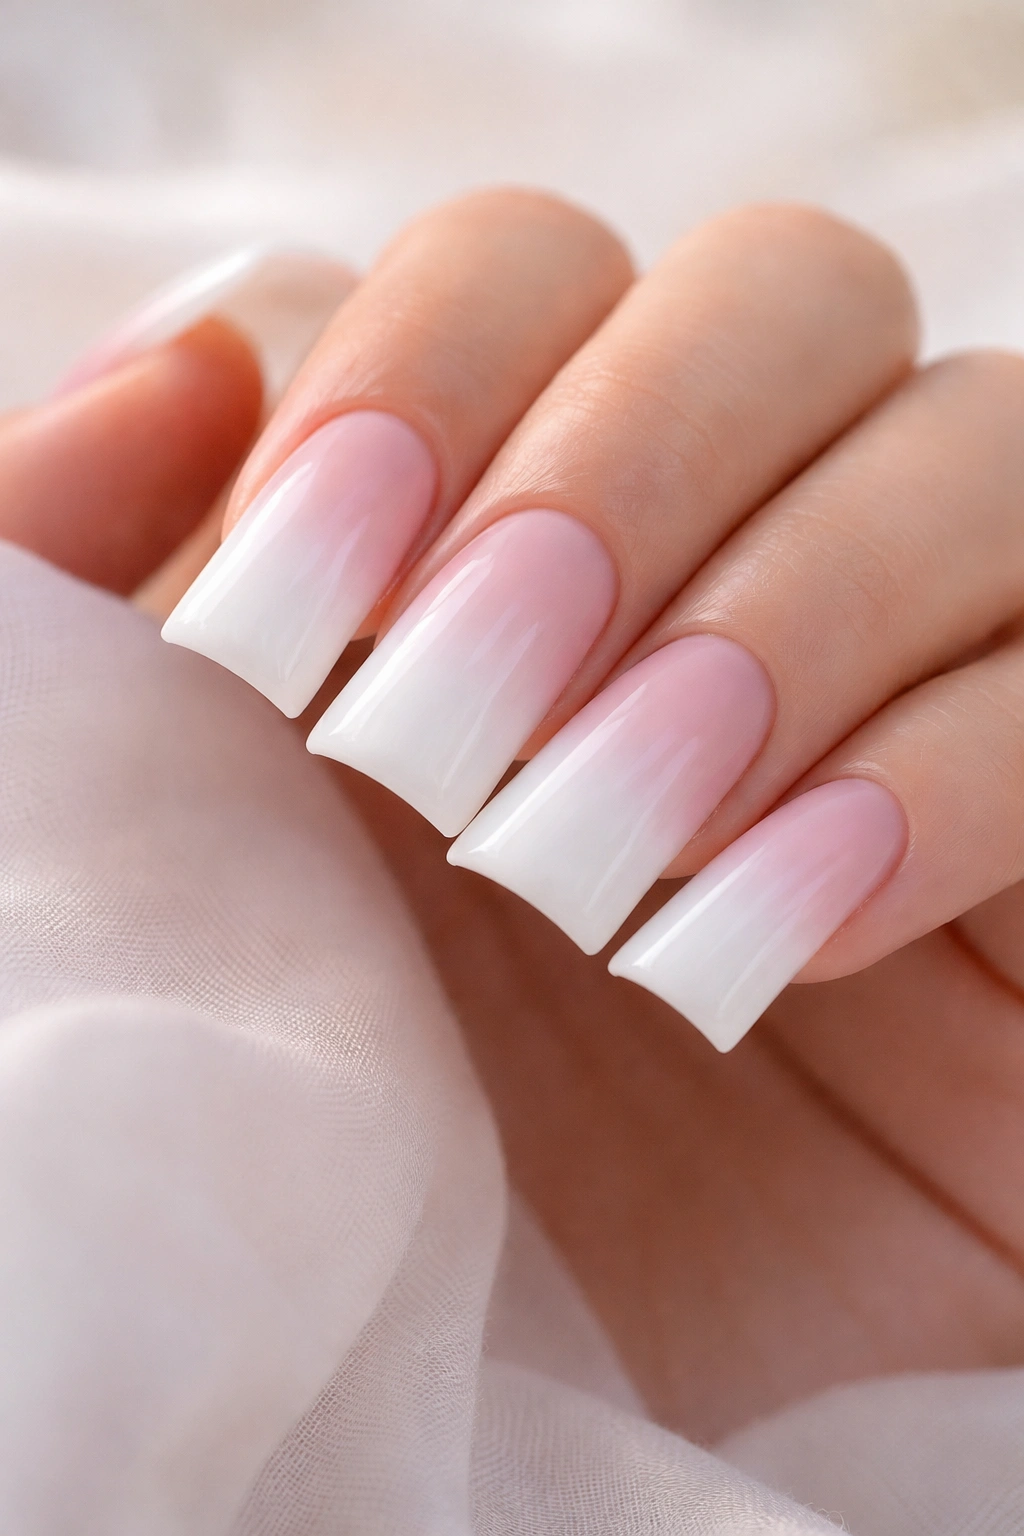
A gentle gradient from white to a complementary pale color—soft pink, lavender, peach, or pale yellow—creates a dreamy, soft aesthetic. Unlike the more dramatic ombre, a soft gradient maintains white as the dominant color while introducing subtle warmth or coolness to the design.
Why Soft Gradients Feel Both Modern and Calming
A soft gradient feels soothing rather than striking, making it perfect for everyday wear that still looks intentional and designed. The gentle color shift creates movement across the nail without demanding attention, which appeals to people who want to look polished without making a bold statement. The duck nail shape provides plenty of space for a gradient to be visible and impactful without feeling cramped. Soft gradients photograph beautifully and tend to look more sophisticated in person than flat colors do.
Building a Smooth, Professional-Looking Gradient
- Start with a white base coat as your anchor color across the entire nail
- Apply your second color (pale pink, lavender, peach) to the edge or tip area using a small brush
- Use a makeup sponge or blending brush to create a transition zone, gently blending the two colors together
- Build the gradient gradually through multiple light layers rather than trying to create it in one application
- The transition should feel soft and imperceptible rather than having a visible line where the colors change
- Seal with a quality top coat that won’t disturb the blended areas
9. Geometric White Duck Nails
Bold geometric shapes—triangles, hexagons, stripes, or color blocks—create a modern, artistic aesthetic on white duck nails. Geometric designs appeal to people who love contemporary art and design, and the clean lines feel very current without being trendy in a way that ages quickly.
The Power of Structured Design on a Bold Nail Shape
Geometric designs on duck nails create an almost architectural quality that feels intentional and polished. The regular shapes and clean lines complement the defined curves of the duck nail shape, creating a cohesive visual effect. Whether you choose monochromatic geometric designs (white and gray or white and black) or incorporate soft colors, geometric patterns read as modern and design-forward. This style works particularly well for people in creative fields or anyone who wants to showcase artistic taste through their nail art.
Executing Geometric Patterns with Precision
- Use nail guide stickers or tape to create perfectly straight lines and defined shapes
- A thin nail art brush or striping tool helps maintain control of lines
- Start with your base white coat, then apply geometric shapes or patterns over it
- Plan your design beforehand by sketching on paper, as geometric designs require intentionality to avoid looking random
- Use a ruler or straight edge as a guide if you don’t have specialized nail art tools
- Seal designs with a glossy top coat to enhance the sleek, modern appearance
10. Floral White Duck Nails
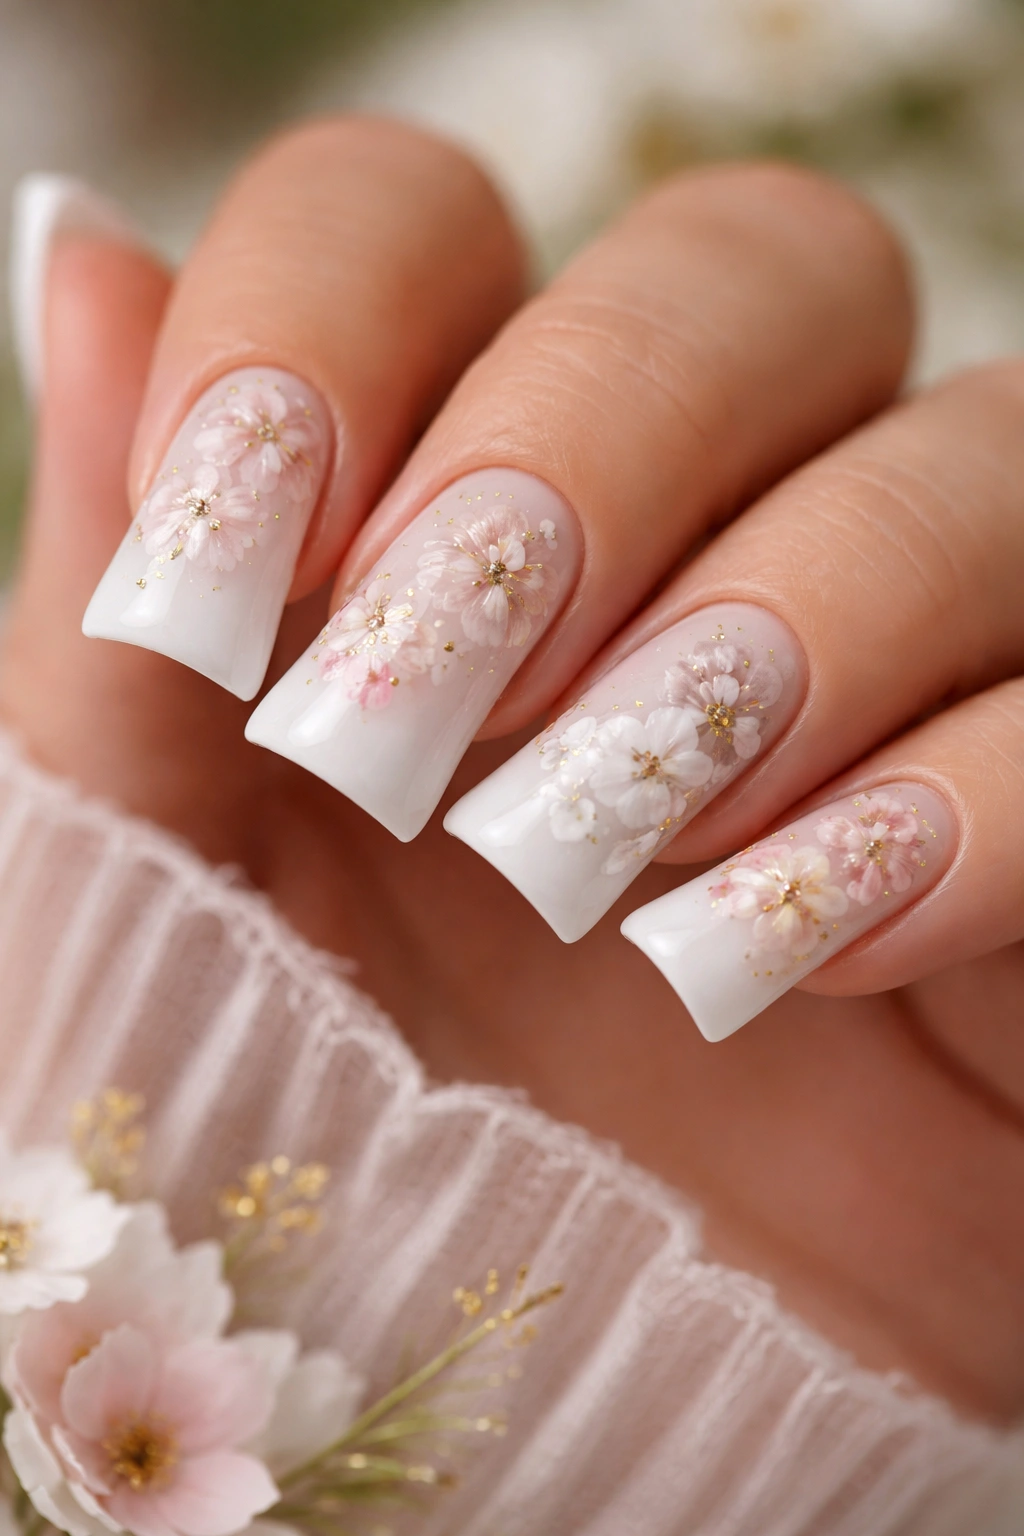
Delicate flowers painted on white duck nails create a romantic, feminine aesthetic without feeling overly cutesy. Florals can be as simple as tiny scattered blooms or as elaborate as full bouquets, and the white background allows flower colors to pop beautifully.
Bringing Botanical Beauty to Your Fingertips
Floral designs on white duck nails feel elegant and artistic rather than juvenile when executed with intention and appropriate color choices. Soft pastels, jewel tones, or even monochromatic florals in gray or gold create sophistication. The extended duck nail shape provides enough space to create recognizable flower shapes without them feeling cramped. Florals suit people who love nature-inspired aesthetics or anyone drawn to romantic, artistic nail designs.
Painting Flowers That Look Professional
- Start with a white base and allow it to dry fully
- Using a thin brush, paint petal shapes in your chosen flower colors
- Build flowers by layering petals slightly over each other rather than trying to create them in one stroke
- Add delicate stems and leaves using a thinner brush or striping tool in a contrasting green shade
- Simple five-petal shapes are more forgiving than complex roses for amateur nail artists
- Seal with a glossy top coat that protects the detailed artwork
11. Chrome White Duck Nails
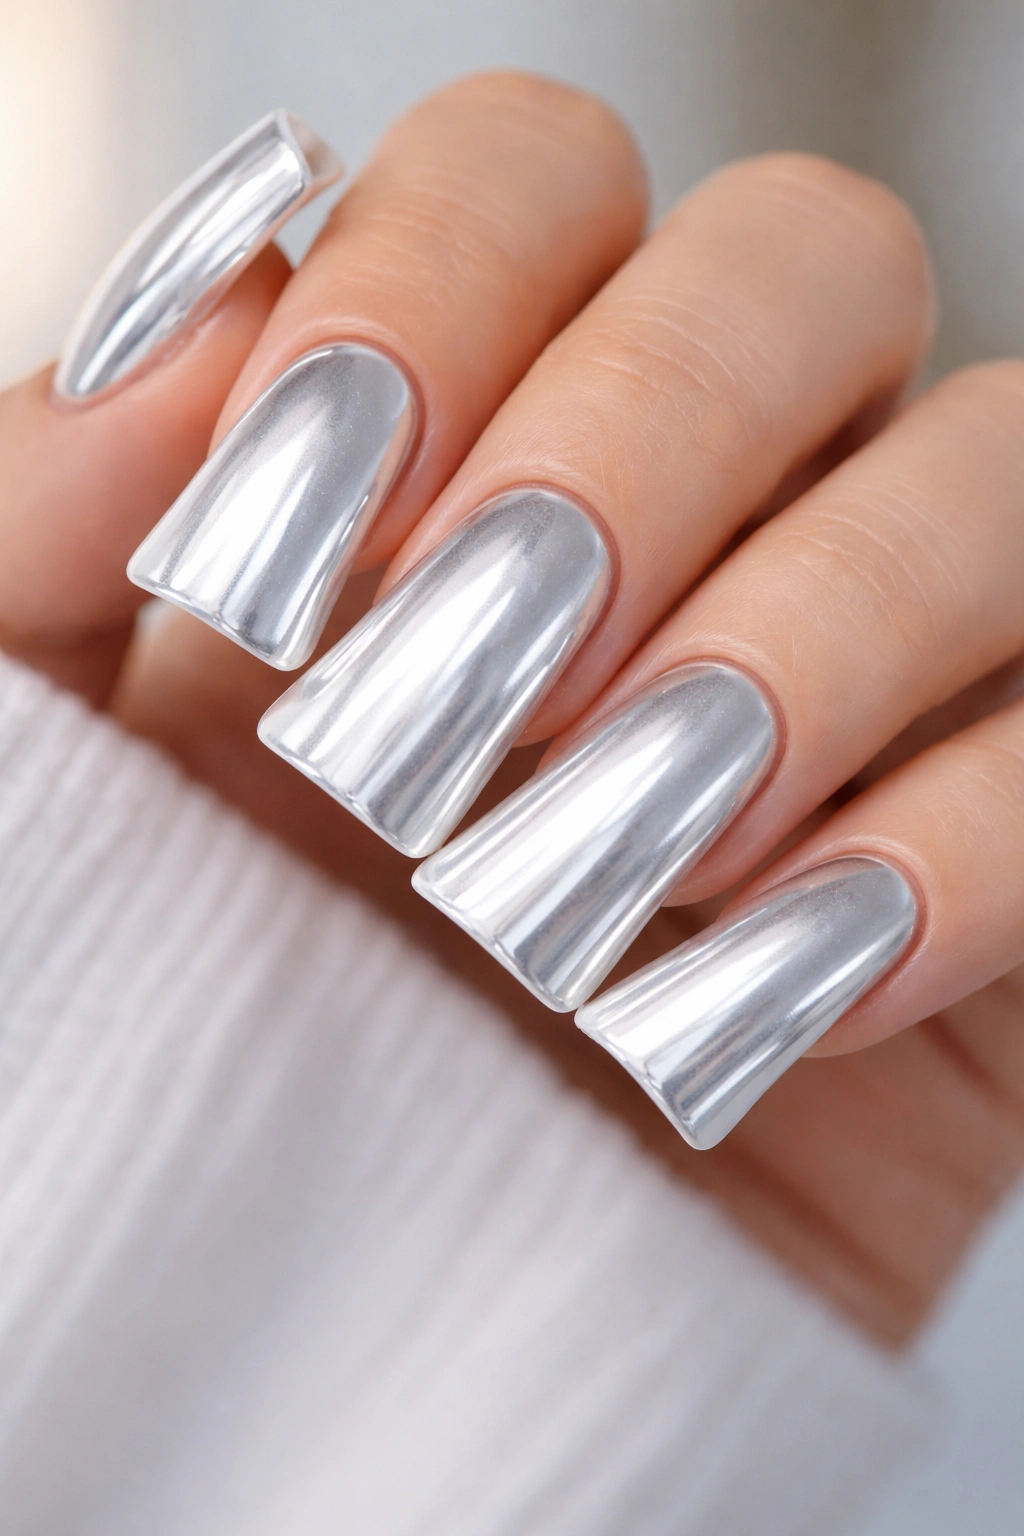
A shimmery chrome or mirror effect applied over white creates an otherworldly, futuristic aesthetic that’s absolutely striking. Chrome techniques can be subtle and refined or bold and maximalist depending on the chrome product used and how much you apply.
The Modern Luxury of Chrome Finishes
Chrome finishes feel expensive and fashion-forward, making them perfect for anyone who loves current nail trends and wants to make a statement. The reflective quality of chrome products creates a multidimensional effect that makes your nails look almost metallic. When applied over white, chrome creates a stunning silver or holographic effect that photographs beautifully and catches light from every angle. This style is particularly stunning for special occasions, photo shoots, or anyone confident enough to rock a futuristic aesthetic.
Chrome Application for Maximum Impact
- Apply a white base coat and seal it with a sticky top coat
- Rub the chrome powder onto the wet top coat using a velvet applicator pad, following the product’s specific instructions
- Chrome powders vary in technique, so carefully read and follow the manufacturer’s guidelines for your specific product
- Once the chrome coating is complete, seal with a thick top coat to prevent the chrome from rubbing off
- Chrome finishes require extra care during washing—avoid harsh scrubbing directly on your nails
- Reapply chrome powder as needed if it begins to rub away with regular use
12. Matte White Duck Nails
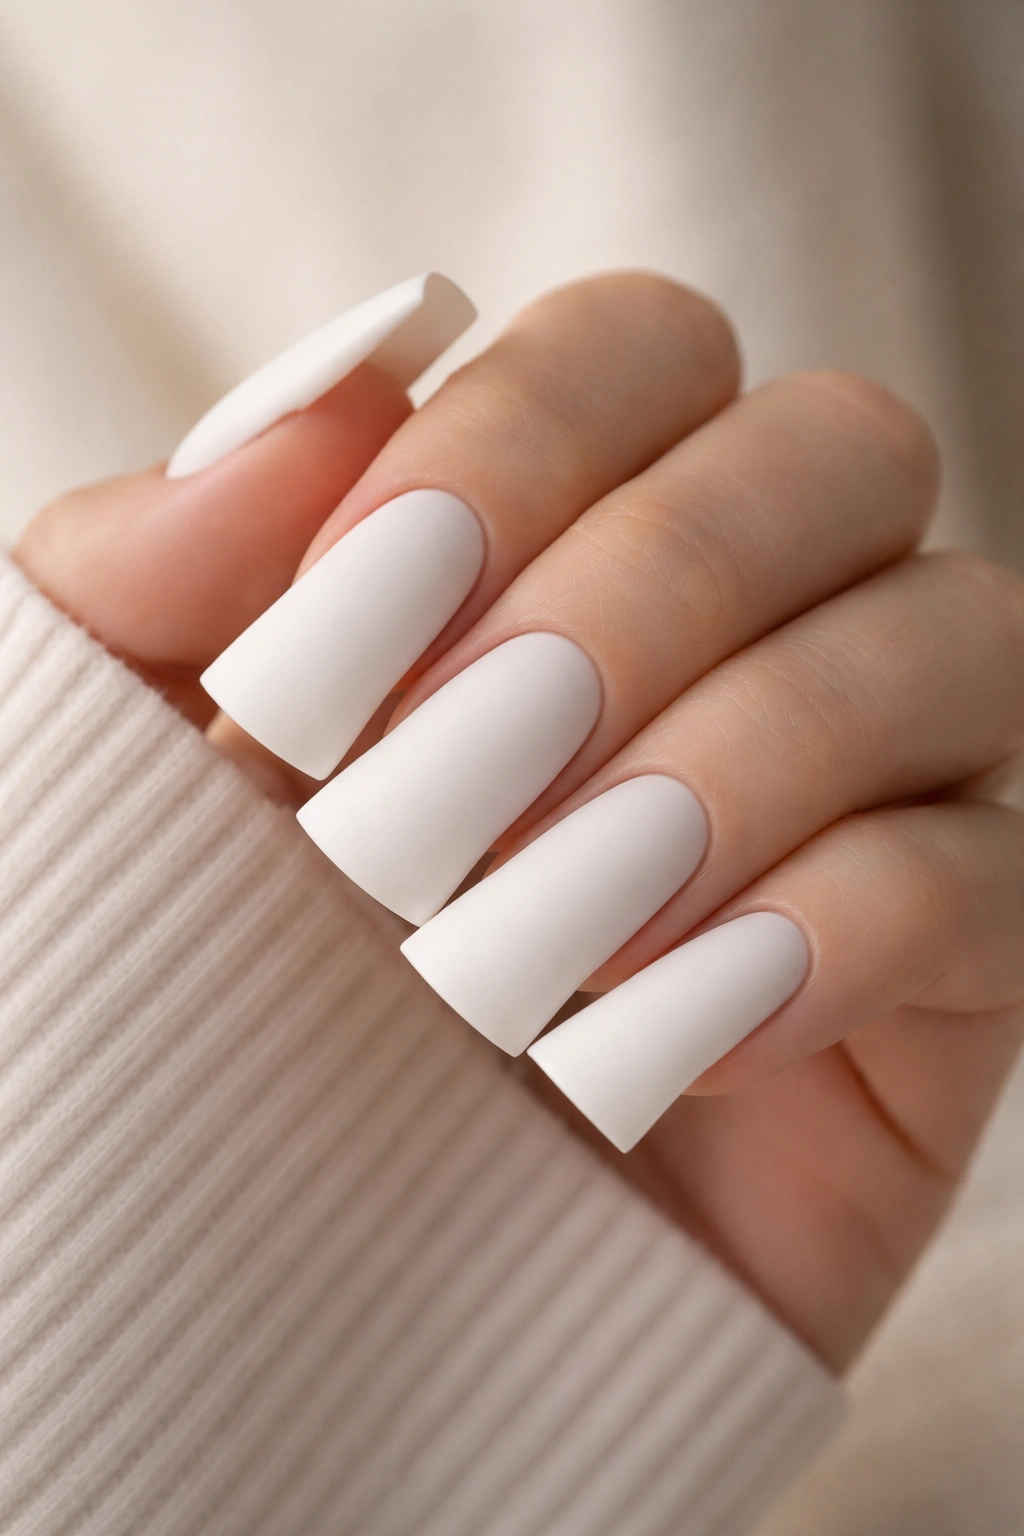
Switching from gloss to matte creates an entirely different aesthetic—matte white feels understated, modern, and almost creamy in texture. A matte finish softens the boldness of the duck nail shape while maintaining visual interest through the finish contrast with more typical glossy nails.
Why Matte Finishes Feel So Sophisticated
Matte finishes have become increasingly popular in high-fashion nail design because they feel intentional and editorial. Matte white in particular reads as cool, calm, and collected—it feels very now without being trendy in a way that will look dated quickly. The soft, powdery appearance of a matte finish creates a sophisticated, understated luxury that appeals to people with refined taste. Unlike glossy nails that demand shine and perfection, matte nails feel forgiving and wearable for daily life.
Creating a Perfect Matte Finish
- Apply white polish in two thin coats as your base, ensuring even coverage
- Use a matte top coat rather than a glossy one to transform the finish
- Matte top coats vary in how quickly they dry, so check the product instructions
- Allow the matte coat to dry fully without touching or bumping your nails
- If you prefer a semi-matte look rather than full matte, apply one coat of matte top coat followed by a sheer glossy coat for hybrid finish
- Maintain matte nails with cuticle oil to prevent the finish from looking chalky or dry
Final Thoughts
White duck nails represent the perfect intersection of statement-making shape and timeless color, offering endless possibilities for self-expression without ever veering into territory that feels inappropriate or overly bold. Whether you choose glossy simplicity, intricate artwork, sparkly embellishment, or any of the styles in between, white duck nails deliver sophistication and style.
The beauty of white as your base is that it adapts to any aesthetic—minimalist to maximalist, casual to formal, playful to professional. You can experiment with different finishes and details until you find exactly what makes you feel confident and beautiful. Duck nails require commitment since maintaining the shape means regular fills or consistent growth, but that investment pays off with nails that feel intentional, polished, and undeniably chic every single time you look at your hands.
Start with whichever style calls to you most strongly, then build your nail art repertoire from there. The skills you develop—brush control, blending technique, design composition—will serve you across all twelve styles and beyond. Your white duck nails are a canvas waiting for your creativity.
