

Duck nails are having a major moment, and for good reason. These bold, sculptural nails with their signature curved, elongated shape make any nail design feel instantly elevated and eye-catching. What makes them so perfect for color experimentation is their generous curved surface area — unlike traditional nail shapes, duck nails give you plenty of real estate to play with vibrant gradients, multi-color patterns, and intricate art. Whether you’re drawn to soft pastels or bold, saturated hues, there’s a colorful duck nail design that’ll speak to your style. The shape itself is forgiving too; because of its upward curve, color combinations that might look chaotic on a straight nail somehow come together beautifully on a duck.
The beauty of colorful duck nails is that you don’t need advanced nail art skills to achieve stunning results. Many of these designs rely on gradient techniques, sponging, or simple two-tone blocking that any enthusiast can master at home. You’ll want a good base coat, quality gel or polish depending on your preference, a cosmetic sponge for blending, and a steady hand (or at least patience). The curved surface is actually your friend here — it naturally catches light and makes colors appear more dimensional than they would on a flat nail. Ready to transform your duck nails into a colorful statement? Here are fifteen stunning ideas to inspire your next manicure.
1. Sunset Gradient Duck Nails
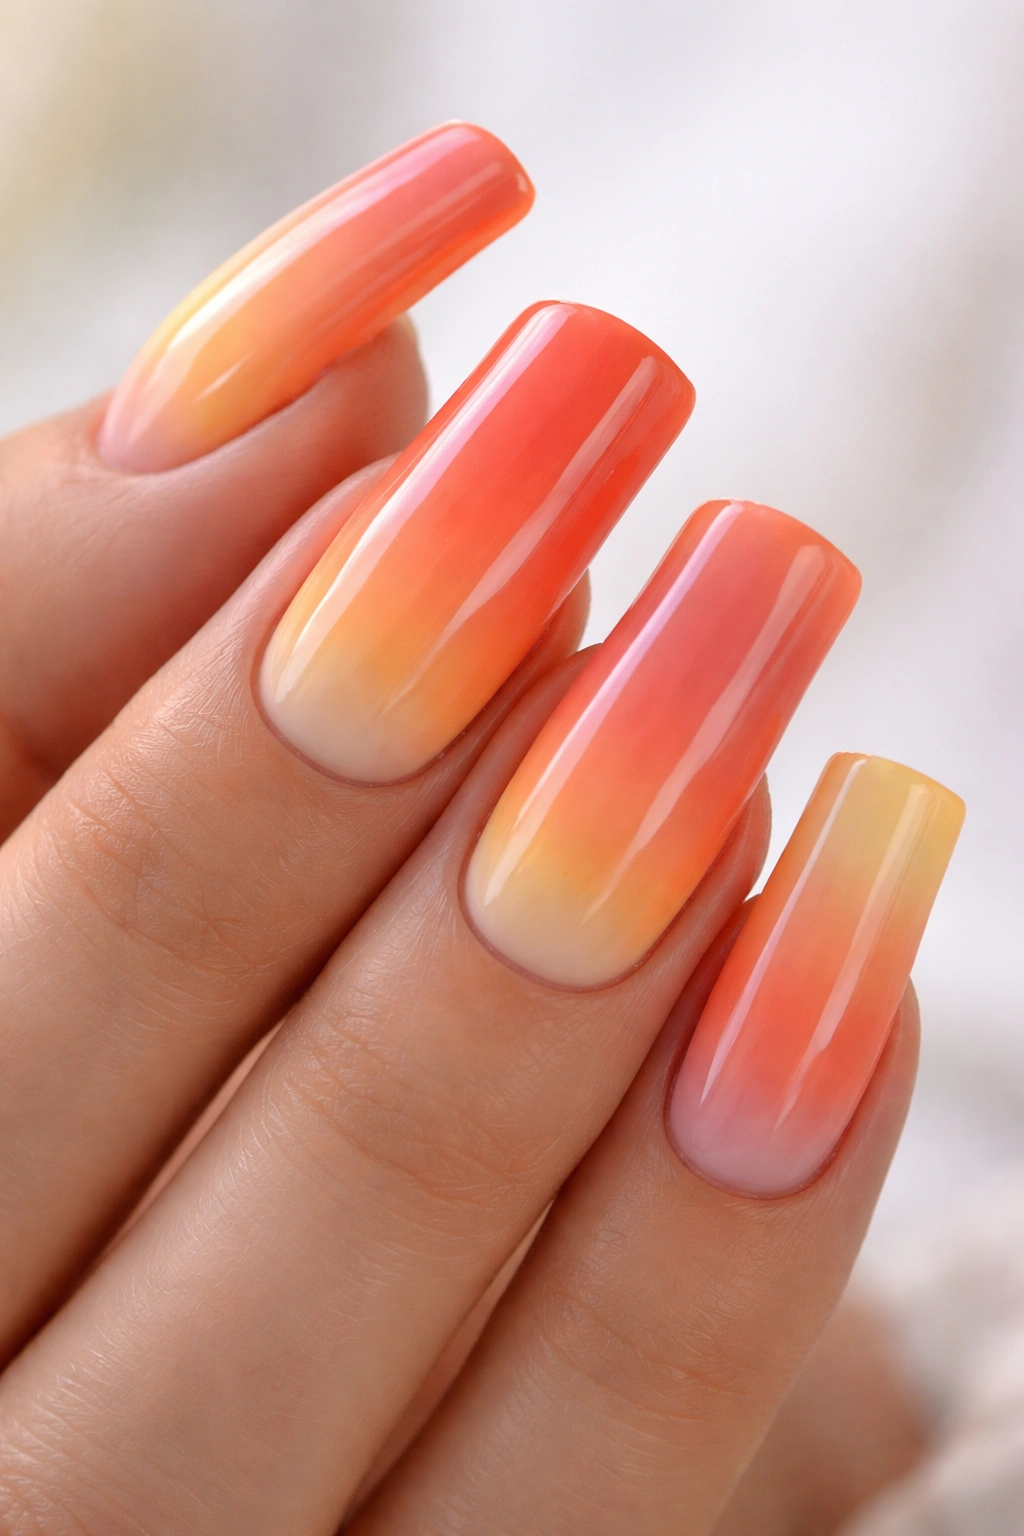
A sunset-inspired gradient is pure summer energy captured on your nails. This design layers warm, glowing tones from orange at the base through coral, peachy-pink, and finishing with soft yellow at the tip. The beauty of this gradient on duck nails is that the upward curve creates a natural light-to-dark progression that mimics an actual sunset on the horizon. The combination of these warm tones feels sophisticated yet playful, making it perfect for everything from brunch outings to evening events.
How to Create This Gradient Effect
The key to a seamless sunset gradient is using a cosmetic sponge to blend your colors. Paint thin layers of each shade onto a makeup sponge in order — orange, coral, peach, and yellow — then gently dab the sponge onto your nail in a rolling motion from base to tip. The sponge technique creates soft, blended transitions that look airbrushed. You’ll want to work with one nail at a time and reload your sponge with color after every 2-3 applications.
Pro Tips for This Design
- Use cream or opaque polish shades rather than sheer ones — they blend more smoothly and create better color gradation
- Apply a glossy top coat to seal everything and enhance the gradient’s dimensional quality
- If you mess up the blending, a thin line of nude or skin-tone polish along the side edge cleans up the look instantly
- Practice the sponging motion on paper first to get a feel for the pressure and motion before applying to nails
2. Rainbow Ombre Duck Nails
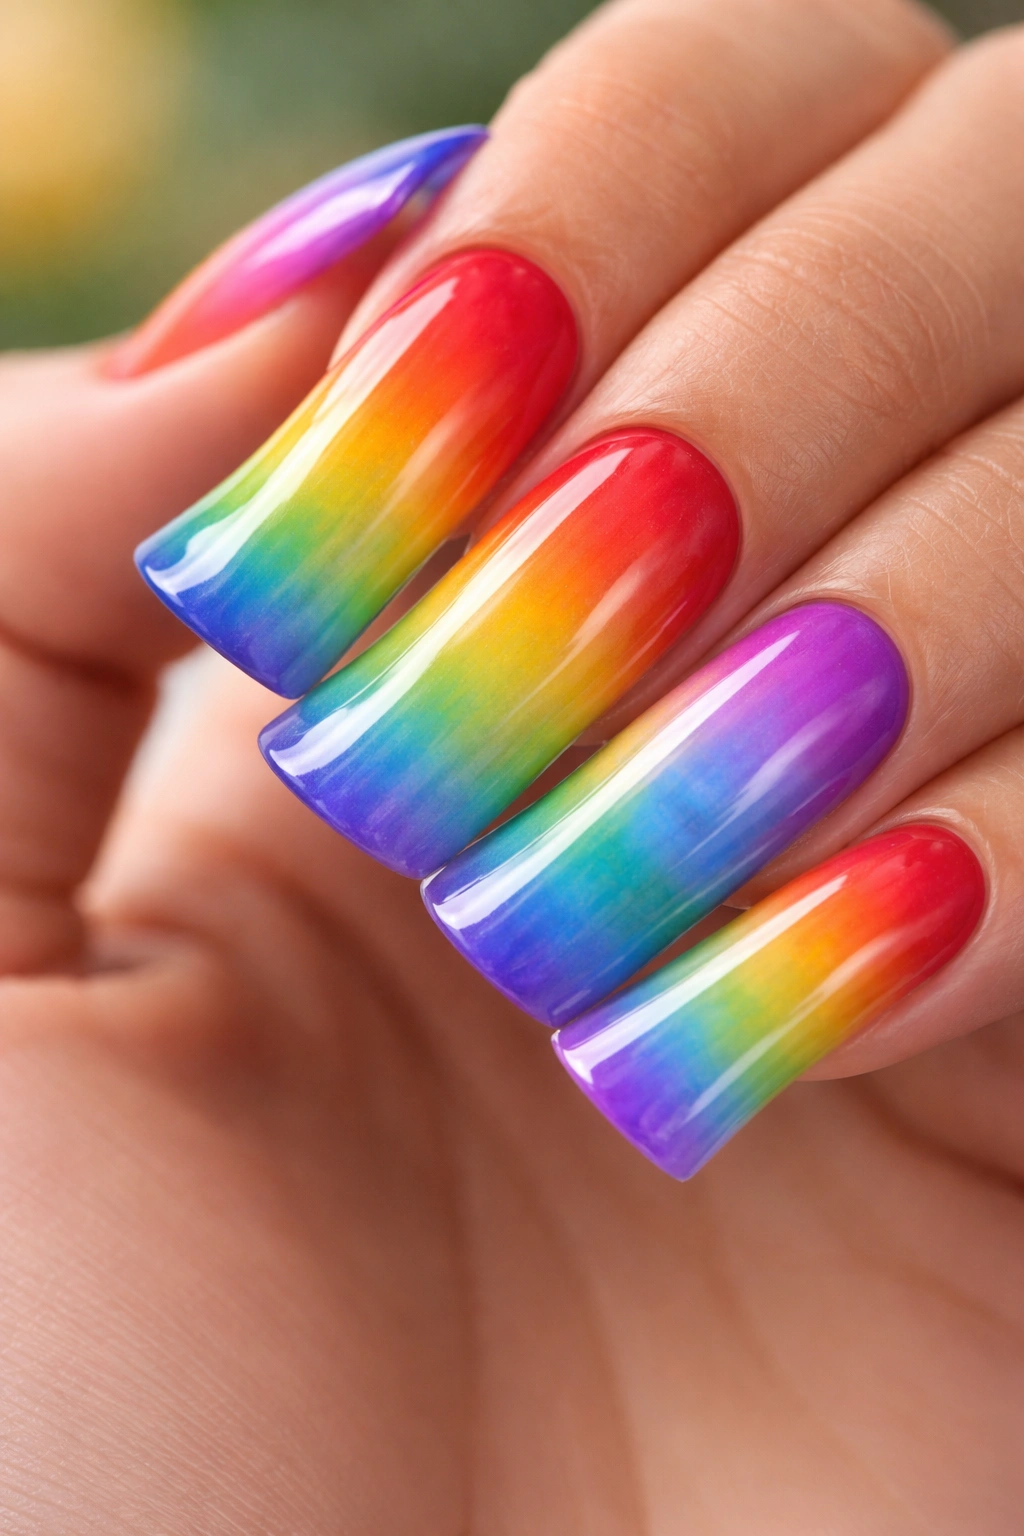
Take the spectrum and condense it into a stunning vertical gradient that flows from deep reds at the base through orange, yellow, green, blue, and purple at the tips. On duck nails, this creates an almost holographic effect where different colors are visible depending on the light and angle. This design is bold and unapologetically fun — it’s a statement that you’re here to celebrate color in its fullest expression. The curved surface of duck nails allows each color band to be visible and distinct even though they’re blended together.
Why This Design Stands Out
Rainbow gradients work especially well on duck nails because the shape’s natural curve means you get multiple color reveals as the nail curves upward. When you look at your hand from different angles, you’ll see different dominant colors — from the side you might see more blue and green, straight-on you see the middle spectrum, and from above you catch more red and orange. This multi-dimensional color story is what makes the design feel luxe rather than childish.
Execution Essentials
- Start with a white or very pale base coat to make all your spectrum colors pop with maximum saturation
- Use a thin sponge or makeup applicator — a full-size makeup sponge is too large; cut it into smaller pieces for better control
- Work quickly before polish dries, as blending becomes harder once the colors begin to set
- Use semi-transparent versions of each color if you want a softer, more blended rainbow, or fully opaque shades for bold, distinct color bands
- Seal with a glossy or gel top coat that matches your polish type for maximum longevity
Pro tip: If one section of your gradient looks muddier than the rest, a thin line of nude or clear polish between the colors can create intentional separation that actually looks more intentional than a fully blended gradient.
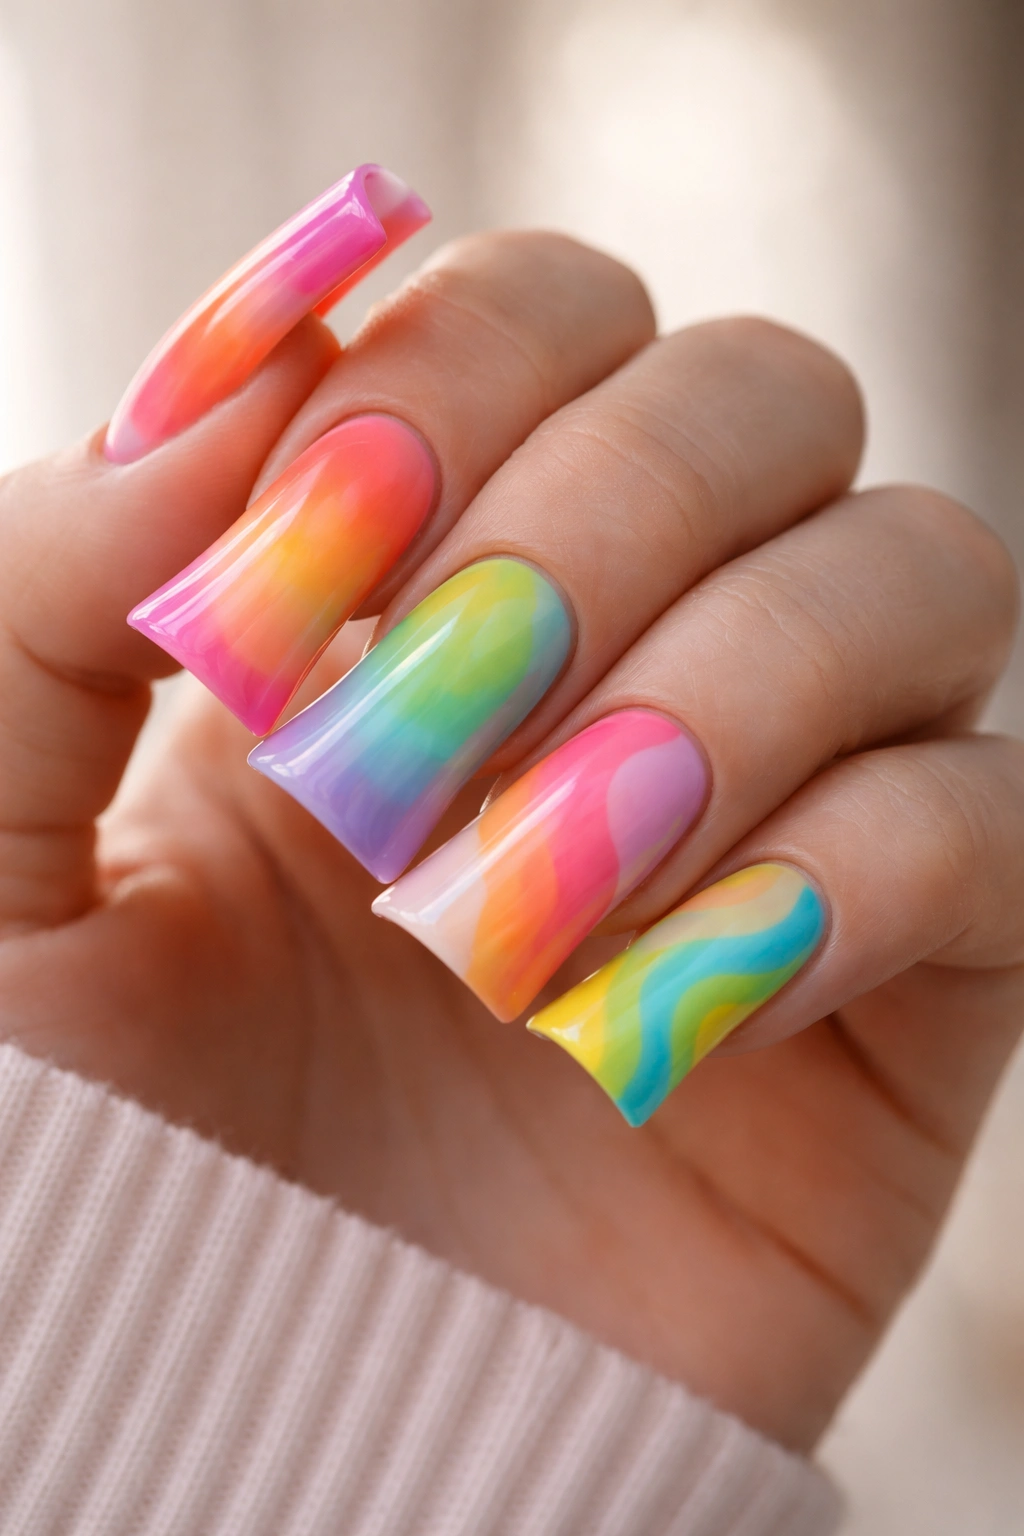
3. Tie-Dye Duck Nails
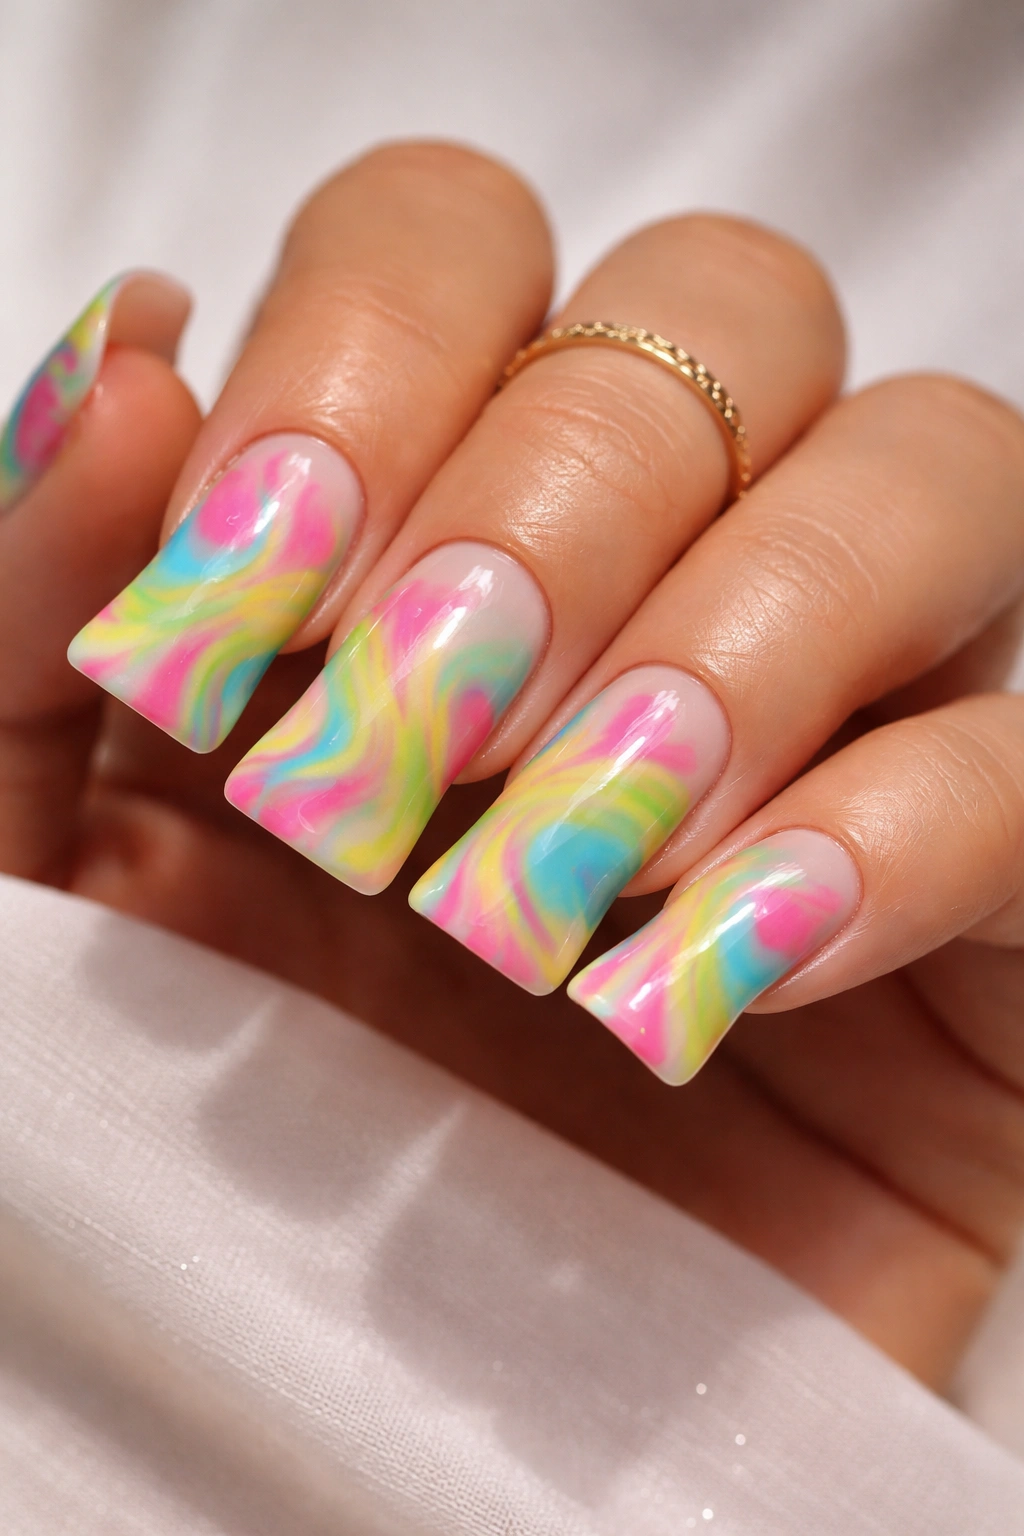
Bring that laid-back bohemian energy to your fingertips with a tie-dye inspired pattern. This design combines multiple bright colors — typically fuchsia, lime green, turquoise, and sunny yellow — in a swirled, organic pattern that feels both chaotic and somehow perfectly balanced. The beauty of tie-dye on duck nails is that the design doesn’t need to be perfectly symmetrical; in fact, the more organic and random the swirls, the more authentic it looks. Each nail becomes a tiny canvas for color exploration.
Creating the Perfect Tie-Dye Effect
Paint a very pale base color or leave nails nearly white, then use a thin dotting tool or toothpick to draw squiggly lines in your chosen colors. The randomness is intentional — think more “swirled together” than “perfectly placed.” You can also use a dry brush to drag colors across the nail in organic sweeps. The key is layering translucent and opaque shades so some areas of color show through while others are rich and saturated.
Tie-Dye Quick Facts
- Use a mix of both neon and pastel shades for a more interesting, dimension-rich version than using just neons or just pastels
- A matte top coat gives tie-dye a more artistic, fabric-like quality than a high gloss
- The pattern looks more intentional when you keep colors somewhat contained to different “zones” of the nail rather than completely random placement
- If you want this design to last, seal it with at least two coats of clear top coat — the multiple colors mean more potential for chipping
- Use long, swooping motions rather than tiny details; duck nails are large but the curve means extreme detail can get lost
4. Neon Bright Duck Nails
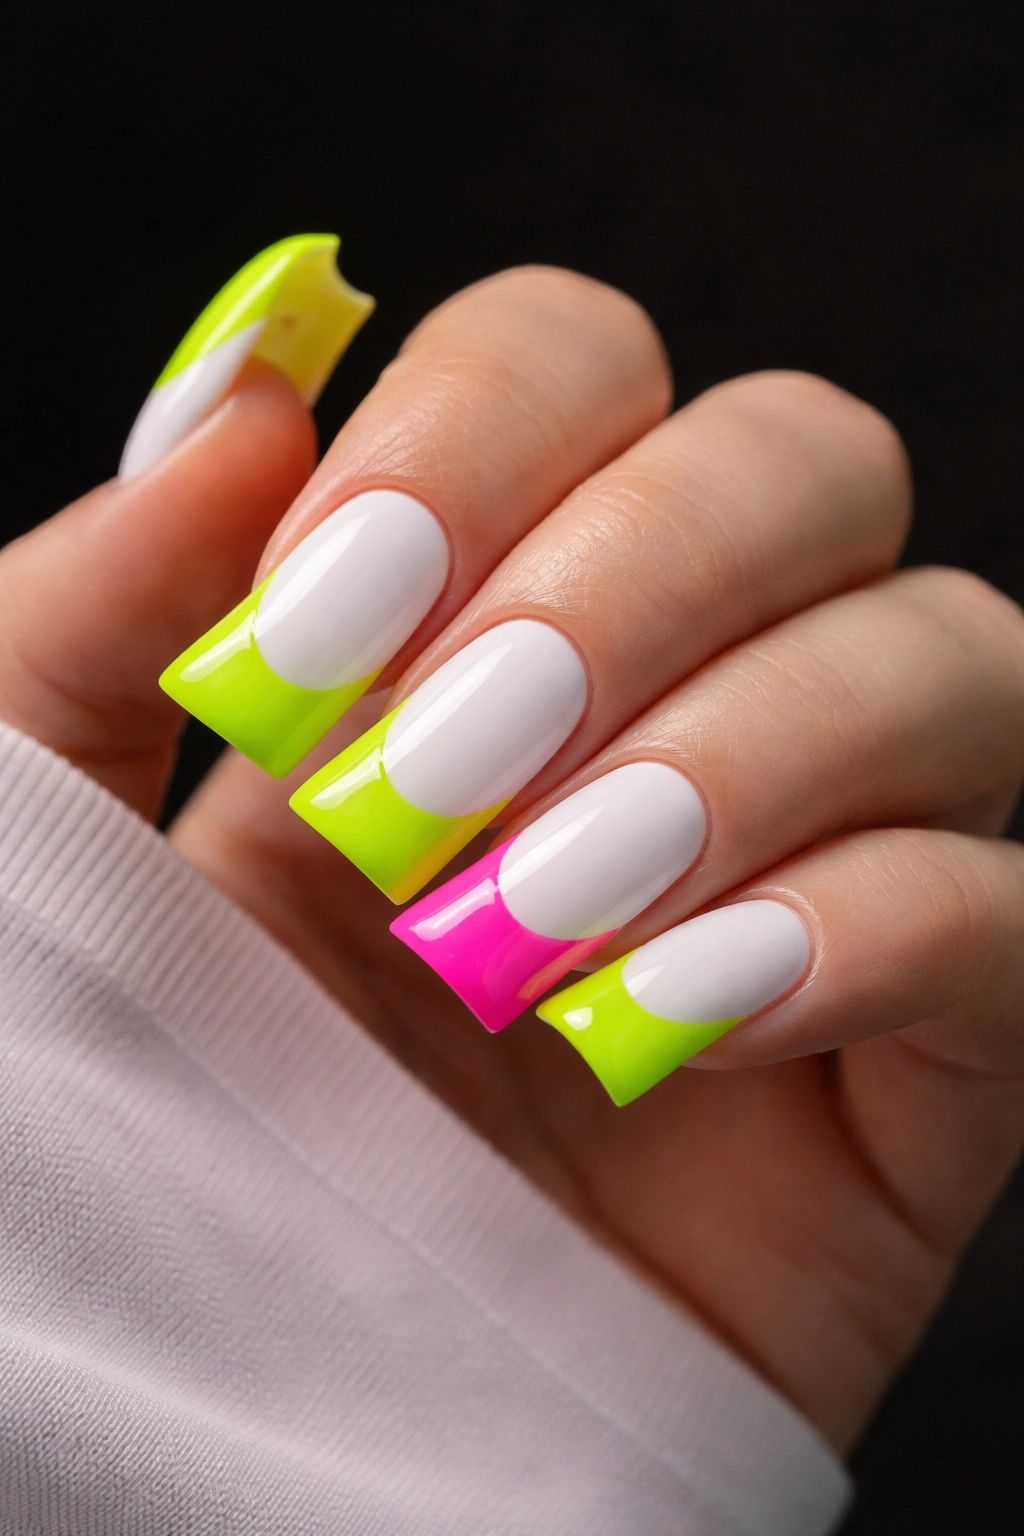
Go full maximalist with neon duck nails that practically glow under any light. Choose one or two neon shades — electric lime, hot pink, blazing orange, or electric blue — and commit to the intensity. Neon polish is unforgiving in its brightness, which is exactly why it works so well on duck nails. The larger surface area means the color reads as bold and intentional rather than accidental. A single-color neon nail in this shape makes an unmistakable statement.
What Makes Neon Work on Duck Nails
Neon polish has a totally different finish and application than regular colors. It’s typically more opaque, which means it covers in one coat but can sometimes look streaky. Apply neon polish in thin, even strokes rather than trying to get full coverage in one swipe. The curved surface of duck nails actually helps with this — as you apply polish, the curve naturally guides the brush and creates even coverage. A neon nail is a commitment to boldness, and duck nails give you the shape to pull it off confidently.
Getting Neon Right
- Neon polish requires a bright white base coat to achieve maximum glow and vibrancy
- Apply thin layers rather than one thick layer — neons are opaque and thick application can look muddy
- Use a matte top coat with neon for an edgy, modern look, or a gloss top coat for maximum shine and reflection
- Neon nails photograph incredibly well under natural light and especially under UV or LED lights
- Pair neon nails with neutral clothing so the nails remain the focal point rather than competing with your outfit
- Neons can be slightly harder on the nail with multiple applications, so give your nails a break between neon-heavy designs
Worth knowing: Neon polish can stain lighter base coats slightly if left on for several weeks. Using a quality base coat acts as a barrier and prevents discoloration of the nail itself.
5. Pastel Ombre Duck Nails
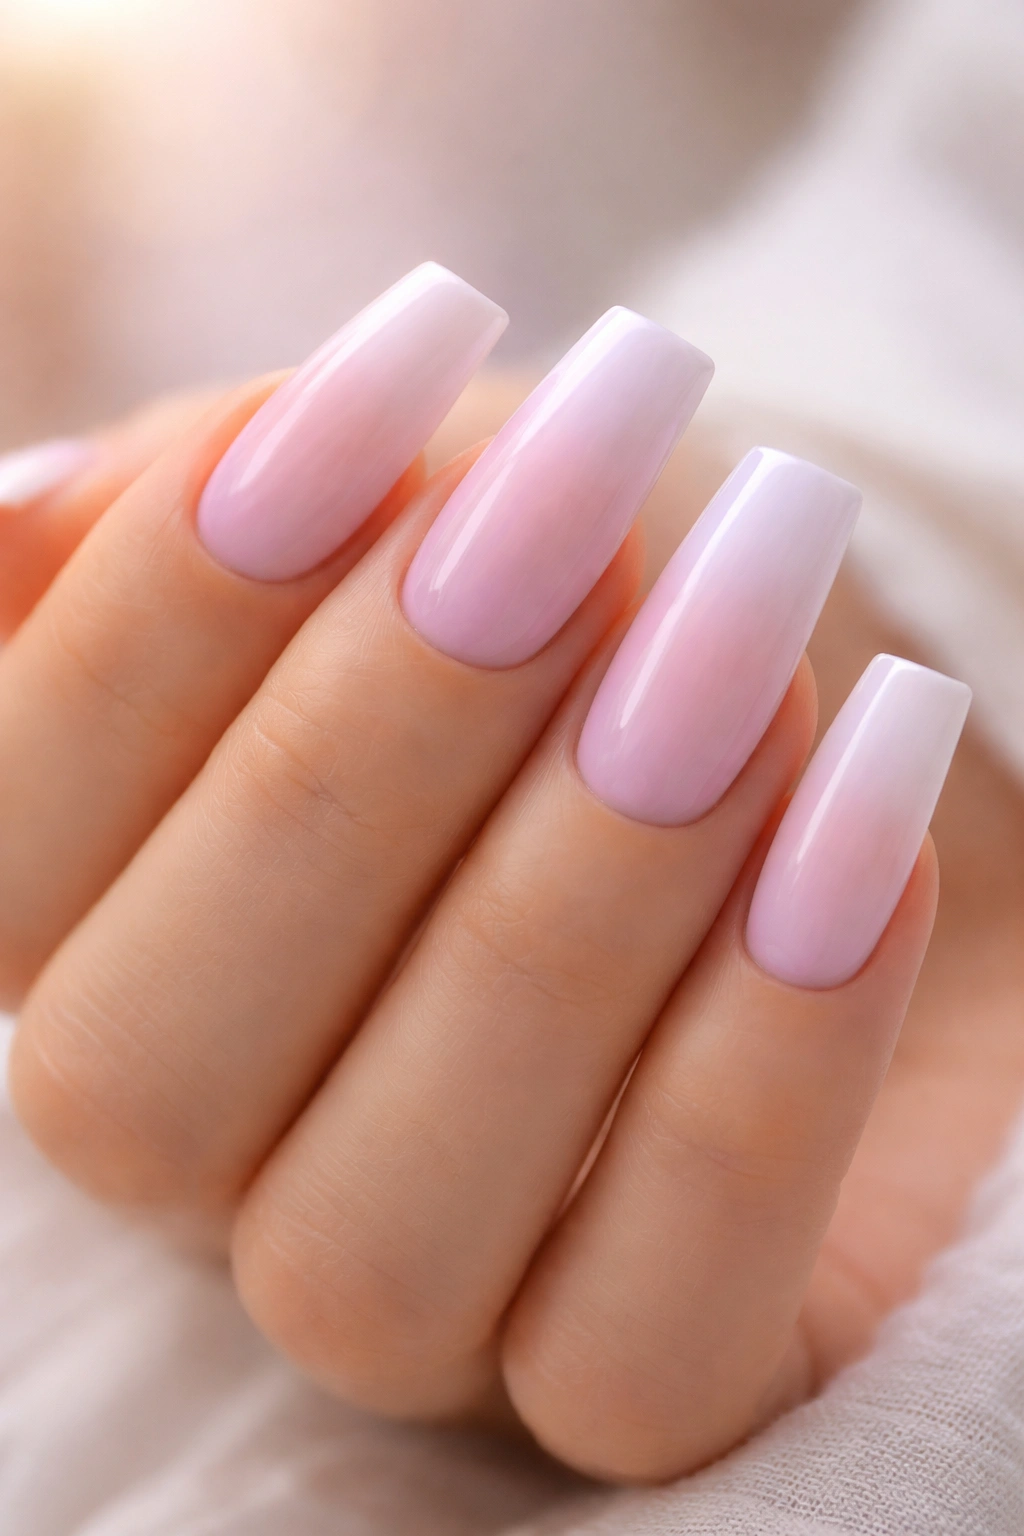
Create a dreamy, soft gradient using pastel versions of a single color family. A pale pink ombre transitioning to a barely-there blush, or a soft lavender fading to white, creates a gentle, romantic aesthetic that feels sophisticated rather than childish. Pastels are often underestimated, but on duck nails they create a subtle, refined look that still celebrates color. The curved shape means the ombre is visible from every angle, and the pale hues catch light beautifully.
The Art of Pastel Gradation
Pastel ombres require a slightly different technique than bold color gradients because the shades are so close in tone. Start with your lightest shade on the upper third of the nail, then use a sponge with the middle shade to blend it into the bottom two-thirds, then finish with your deepest pastel shade on the bottom third. Because pastels are closer in value, the blending is actually easier and more forgiving than with high-contrast colors. The transitions appear naturally subtle because they’re supposed to be.
Pastel Ombre Details
- Pastel polish often has less pigment density than regular or neon shades, so apply a white base coat to ensure the colors show their intended hue rather than appearing washed out
- Thin, multiple layers of pastel often look better than one thick layer
- Pastels pair beautifully with minimalist designs — keep them simple so the color gradient remains the star
- A sheer or milky top coat adds dimension without adding shine that might overwhelm the delicate colors
- This design works especially well in spring and summer when pastels feel seasonally appropriate
6. Glitter Gradient Duck Nails
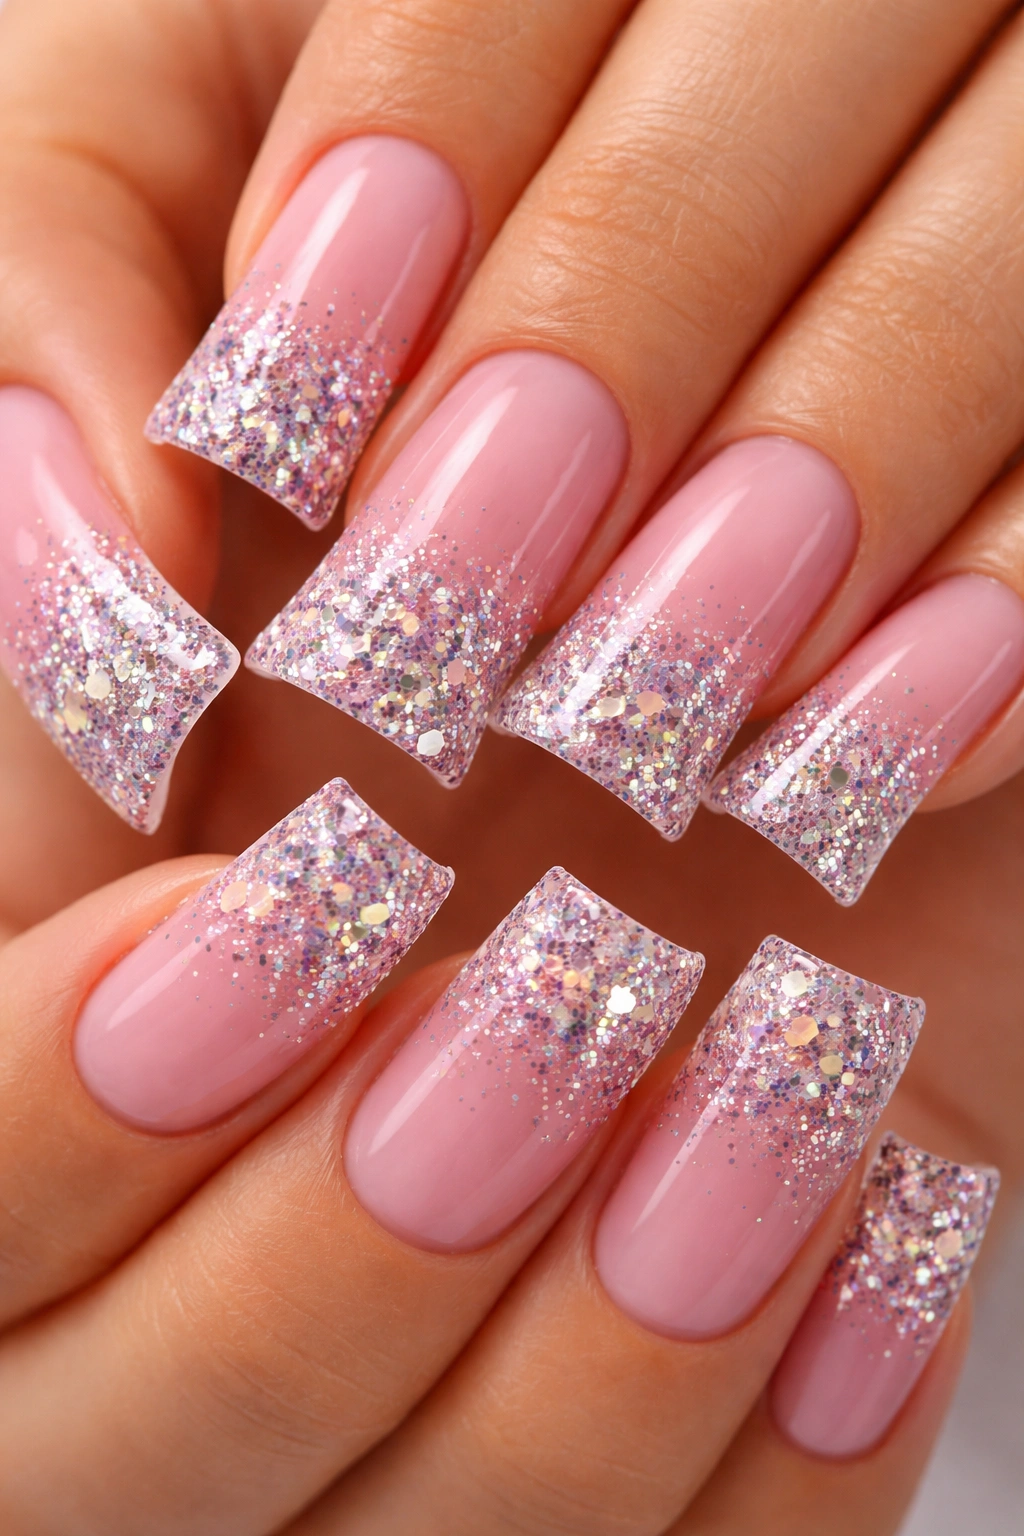
Combine the shimmer of glitter with the dimension of a color gradient for maximum sparkle appeal. Start with a solid or ombre base color — perhaps a soft pink or coral — then layer in chunky glitter particles that increase in density from the cuticle to the tip. The result is a nail that goes from subtle and elegant at the base to full-on glamorous at the tips. On duck nails, this creates a beautiful visual progression that catches light dramatically.
Building Your Glitter Gradient
Use a glitter-infused gel or polish, or apply clear gel and hand-place glitter particles into it before it sets. The hand-placement method gives you more control over density — you can layer just a few particles near the base and significantly more toward the tip. This creates the gradient effect. Allow each layer to set slightly before adding the next so the glitter adheres properly and doesn’t shift around. Seal everything with a thick layer of clear gel or polish to lock the glitter in place.
Glitter Gradient Success Tips
- Chunky glitter reads better on nails than fine micro-glitter, which can look dusty or sparse
- A base color with sheen or shimmer coordinates better with glitter than a completely matte base
- Avoid placing glitter right at the cuticle line if you’re doing a gradient — leave the base relatively bare so the gradient progression is visible
- When removing glitter nails, soak them rather than picking at them to avoid damaging the nail bed
- Combine glitter gradients with simple solid colors on alternating nails for a less intense but still sparkly look
7. Color-Blocking Duck Nails
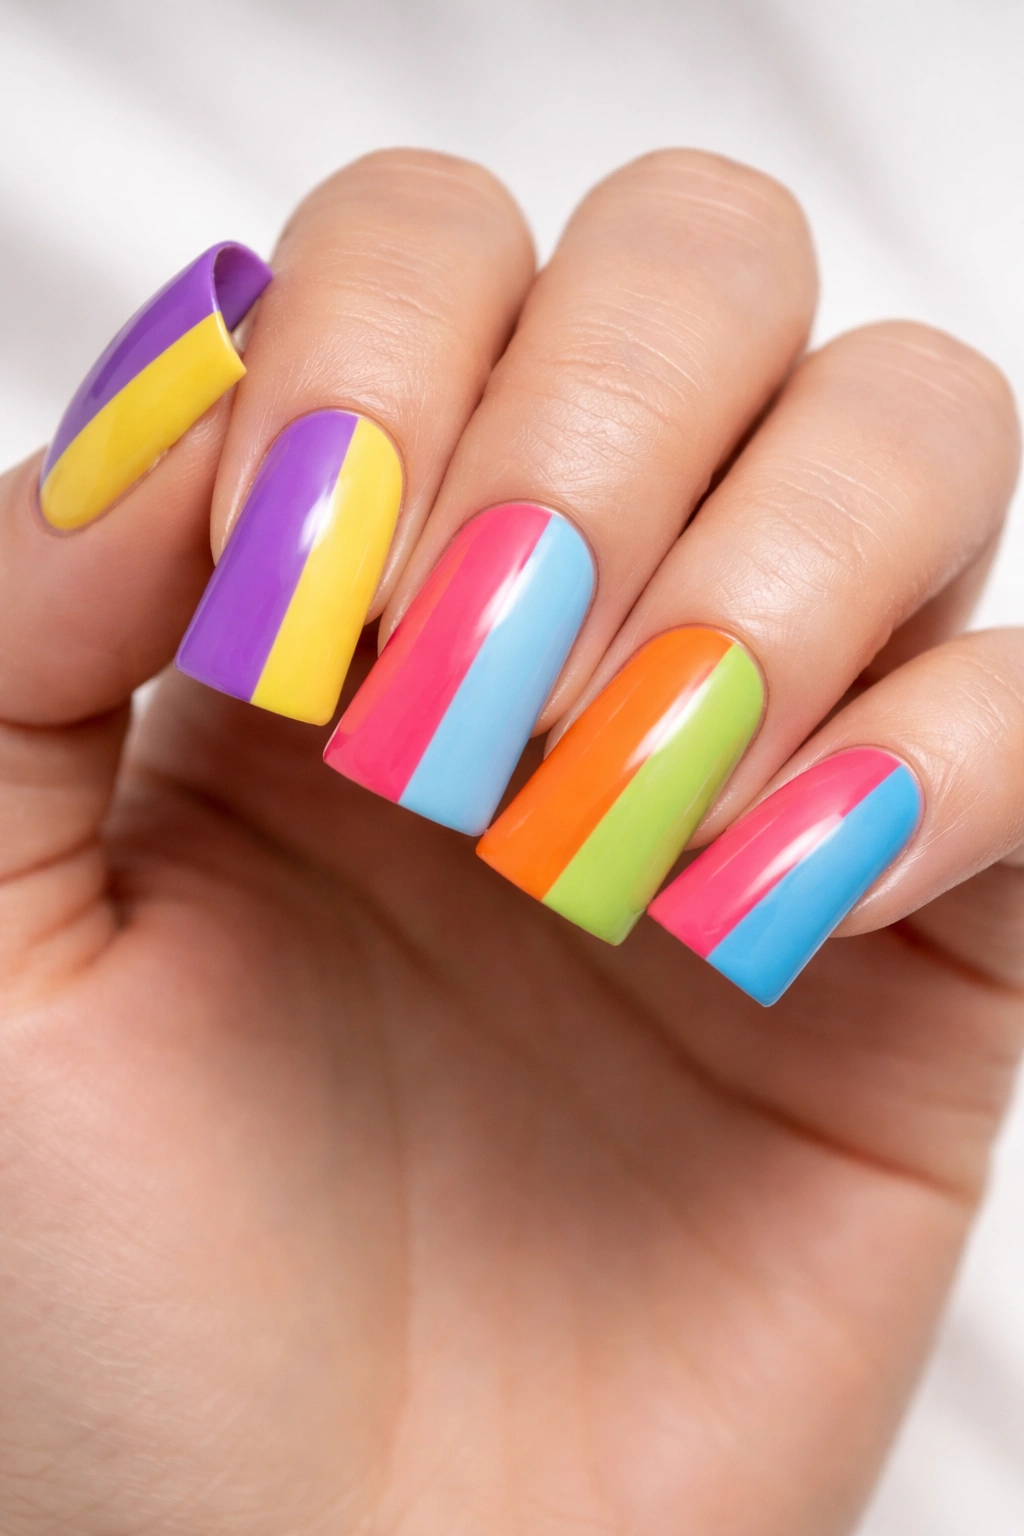
Take bold geometric approach and divide each duck nail into distinct color sections — perhaps a top half in coral and a bottom half in teal, or a left side in purple and right side in yellow. The straight lines and contrasting colors create a modern, almost architectural aesthetic that looks intentional and editorial. Color-blocking is surprisingly forgiving because the transitions are meant to be sharp, not blended.
Executing Clean Color Blocks
Use painter’s tape applied carefully along where you want your color division to be. Apply your first color, allow it to dry completely, then apply tape on top of it along the division line (not on bare nail). Apply your second color, and remove the tape while the polish is still slightly tacky. This creates a crisp, clean line without bleeding. For duck nails specifically, a vertical division works beautifully because it follows the natural curve of the nail shape.
Color-Blocking Ideas
- Complementary color pairs (purple and yellow, orange and blue) create high visual impact
- Analogous color pairs (colors next to each other on the color wheel) create harmony and are slightly more wearable for everyday settings
- Matte finishes on color-blocked nails enhance the geometric, modern feeling
- You can color-block each nail differently for variety, or keep them all consistent for a graphic, coordinated look
- Add a metallic gold or silver line between the color blocks to enhance the intentional, designed feel
Pro tip: If your tape doesn’t create a perfectly clean line, use a thin brush and corrector pen or liquid chalk to clean up the edge after polish dries. This takes seconds and makes the design look professional.
8. Metallic Shimmer Duck Nails
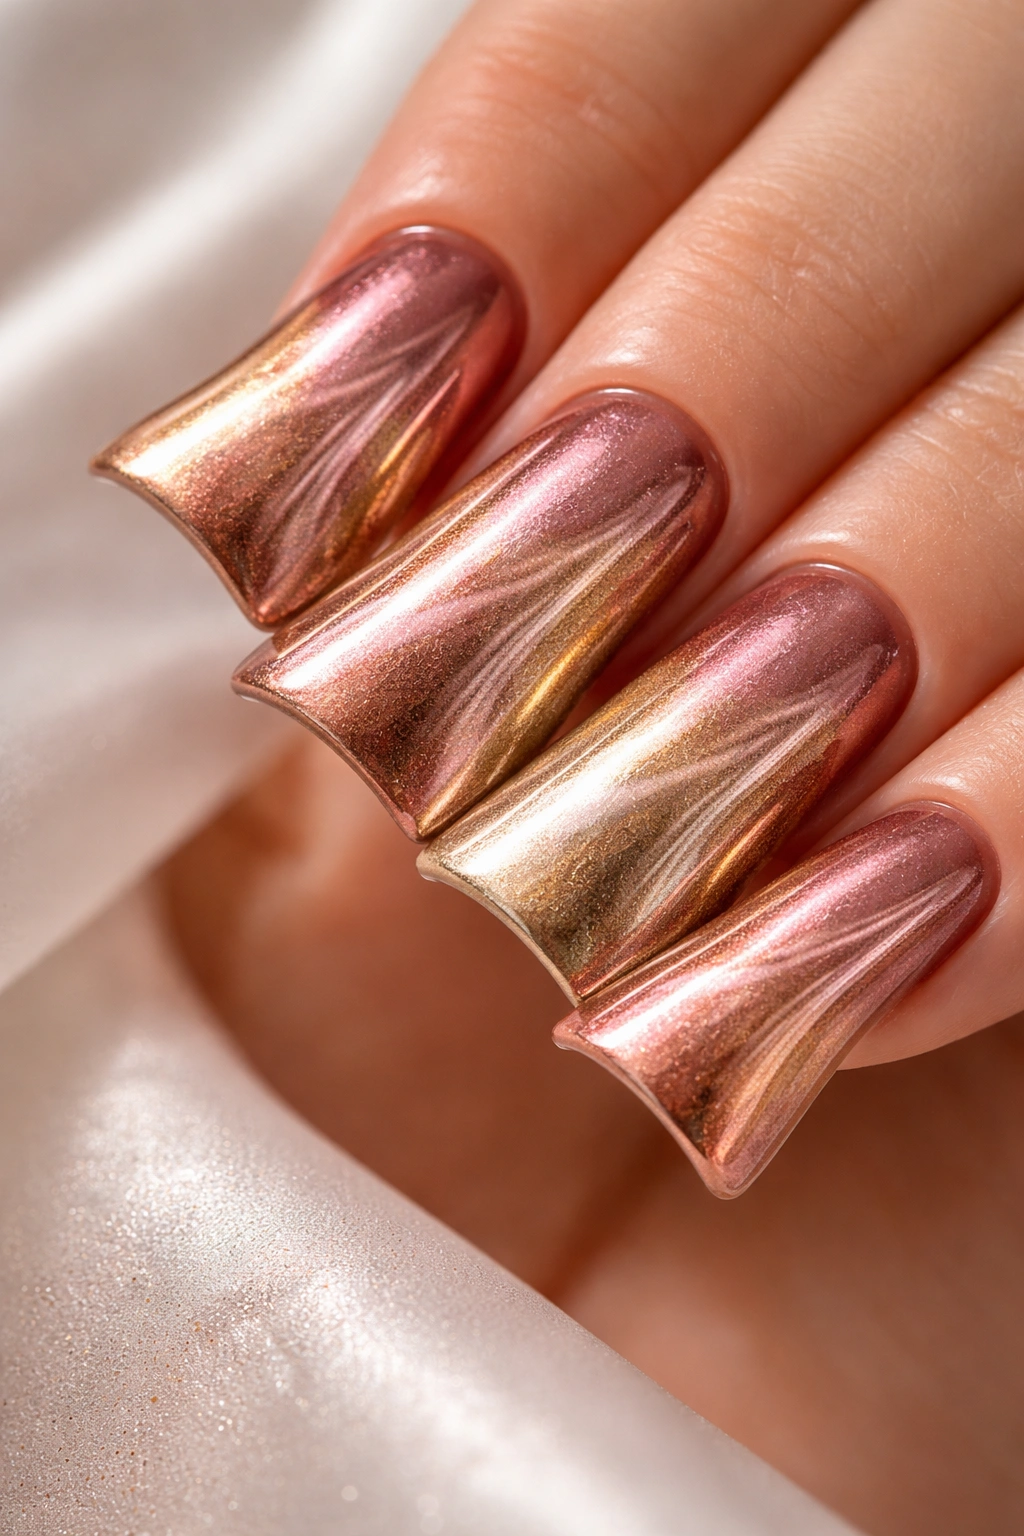
Go luxe with a mix of metallic shades that catch light differently depending on the angle and lighting. Combine rose gold, champagne gold, and copper in an ombre or swirl formation, or layer different metallic finishes for an almost liquid-metal effect. Metallics are inherently glamorous, and duck nails amplify that luxury feel. The curved surface becomes almost like a prism, reflecting different metallic tones as you move your hand.
Creating Metallic Dimension
Metallic polishes range from subtle and sophisticated to bold and reflective. Layer lighter metallics over darker ones, or use a matte metallic base with shiny metallic accents. The combination of finishes — matte alongside glossy, subtle alongside bold — creates visual depth that reads as expensive and intentional. Apply metallics in thin layers because they can sometimes appear patchy if applied too thickly, and the shimmer is actually enhanced by seeing a bit of the base color through it.
Metallic Selection Guide
- Rose gold and champagne work beautifully together for a warm, romantic metallic combination
- Copper and bronze create an earthy, autumn-feeling palette
- Silver and holographic metallics feel modern and almost futuristic
- Gold metallics pair well with warm skin tones, while silver metallics complement cooler undertones
- A matte metallic top coat can tone down overly shiny metallics for a more wearable, everyday look
- Layer metallic flakes or foil into gel for maximum reflectivity and dimension
9. Watercolor Duck Nails
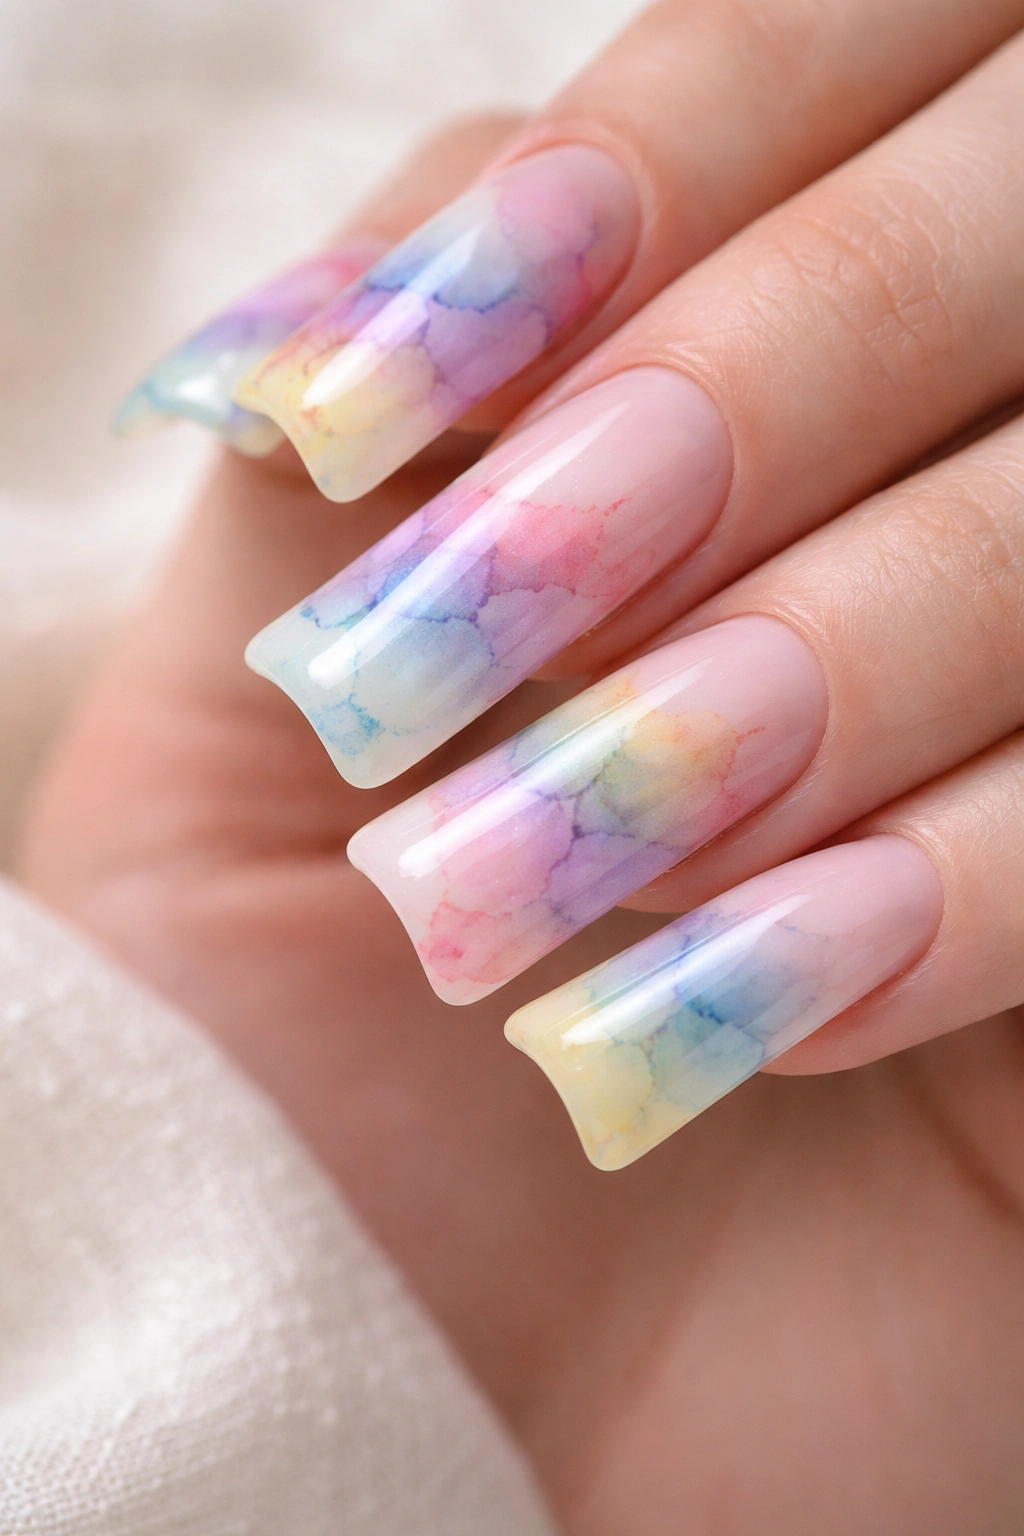
Create a painterly, artistic look that mimics actual watercolor painting on your nails. Apply loose washes of color using watered-down polish or gel, allowing colors to blend and bleed into each other organically. The result feels intentionally artistic rather than nail-art precise. This design celebrates the medium itself — you’re not trying to paint a realistic image, but rather creating color compositions that feel beautiful precisely because they’re soft, organic, and slightly unpredictable.
Achieving the Watercolor Effect
Use actual watercolor paint with a clear base coat underneath, or thin your nail polish with a gel base to create a more translucent consistency. Apply colors in loose strokes and dabs, allowing them to mingle and blend where they meet. Watercolor is forgiving because the entire aesthetic depends on soft edges and unexpected color interactions. Duck nails are perfect for this because the larger surface area gives you room for multiple color interactions without the design feeling cluttered.
Watercolor Design Considerations
- A white or very pale base coat allows watercolor washes to show their true colors rather than appearing muted
- Work quickly before the medium dries so colors have time to blend
- Limit your palette to 3-4 colors maximum — too many colors in watercolor can look muddy rather than artistic
- Seal watercolor designs with a glossy gel top coat for protection and to prevent color bleeding
- This design pairs beautifully with minimalist jewelry and clothing that doesn’t compete with the artistic nails
10. Candy Swirl Duck Nails
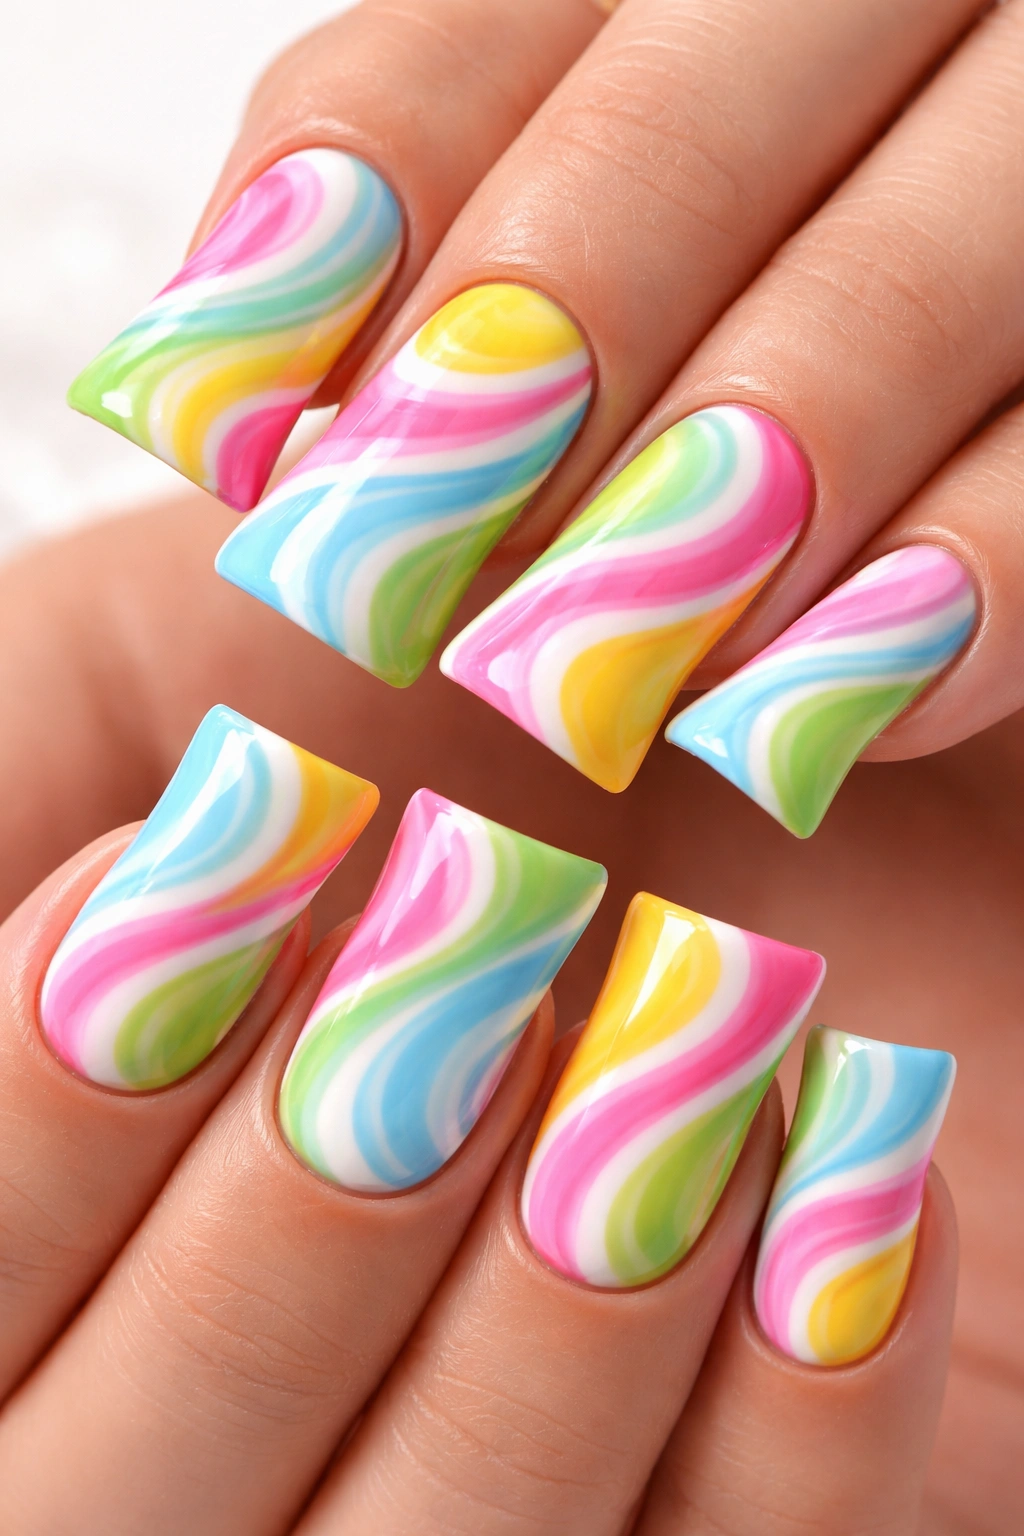
Embrace maximum sweetness with a candy-inspired color palette featuring hot pink, mint green, sunny yellow, and sky blue swirled together in a chaotic, fun pattern. This design is pure joy — it celebrates color without overthinking composition or balance. Think cotton candy, hard candies, and every colorful confection that made you happy as a kid. The result is nostalgic, playful, and utterly charming.
Creating Candy Swirl Patterns
Apply alternating dots of your chosen colors across the nail, then use a thin brush or dotting tool to drag through the colors in gentle swirls, creating an organic mixing pattern. You’re not aiming for perfect blending; the slightly chaotic nature is what makes it read as “candy swirl” rather than “muddy mess.” Each nail can be slightly different, which actually enhances the candy-store randomness of the design.
Candy Swirl Color Combinations
- Hot pink, mint, yellow, and sky blue is the classic combination
- Try all pastels (baby pink, lavender, pale yellow, pale blue) for a softer, more sophisticated version
- Neon versions (hot pink, electric lime, electric blue, neon orange) create a maximalist, bold statement
- Pair candy swirls with a nude or pale pink base so the colors read as intentional and not overwhelming
- A matte finish can make candy swirls look more artistic, while a glossy finish amplifies the playful, sweet vibe
Worth knowing: Candy swirl designs photograph beautifully and tend to get compliments from people who might normally not notice nails. There’s something about the color happiness that reads as intentional artistry rather than random.
11. Chrome Duck Nails
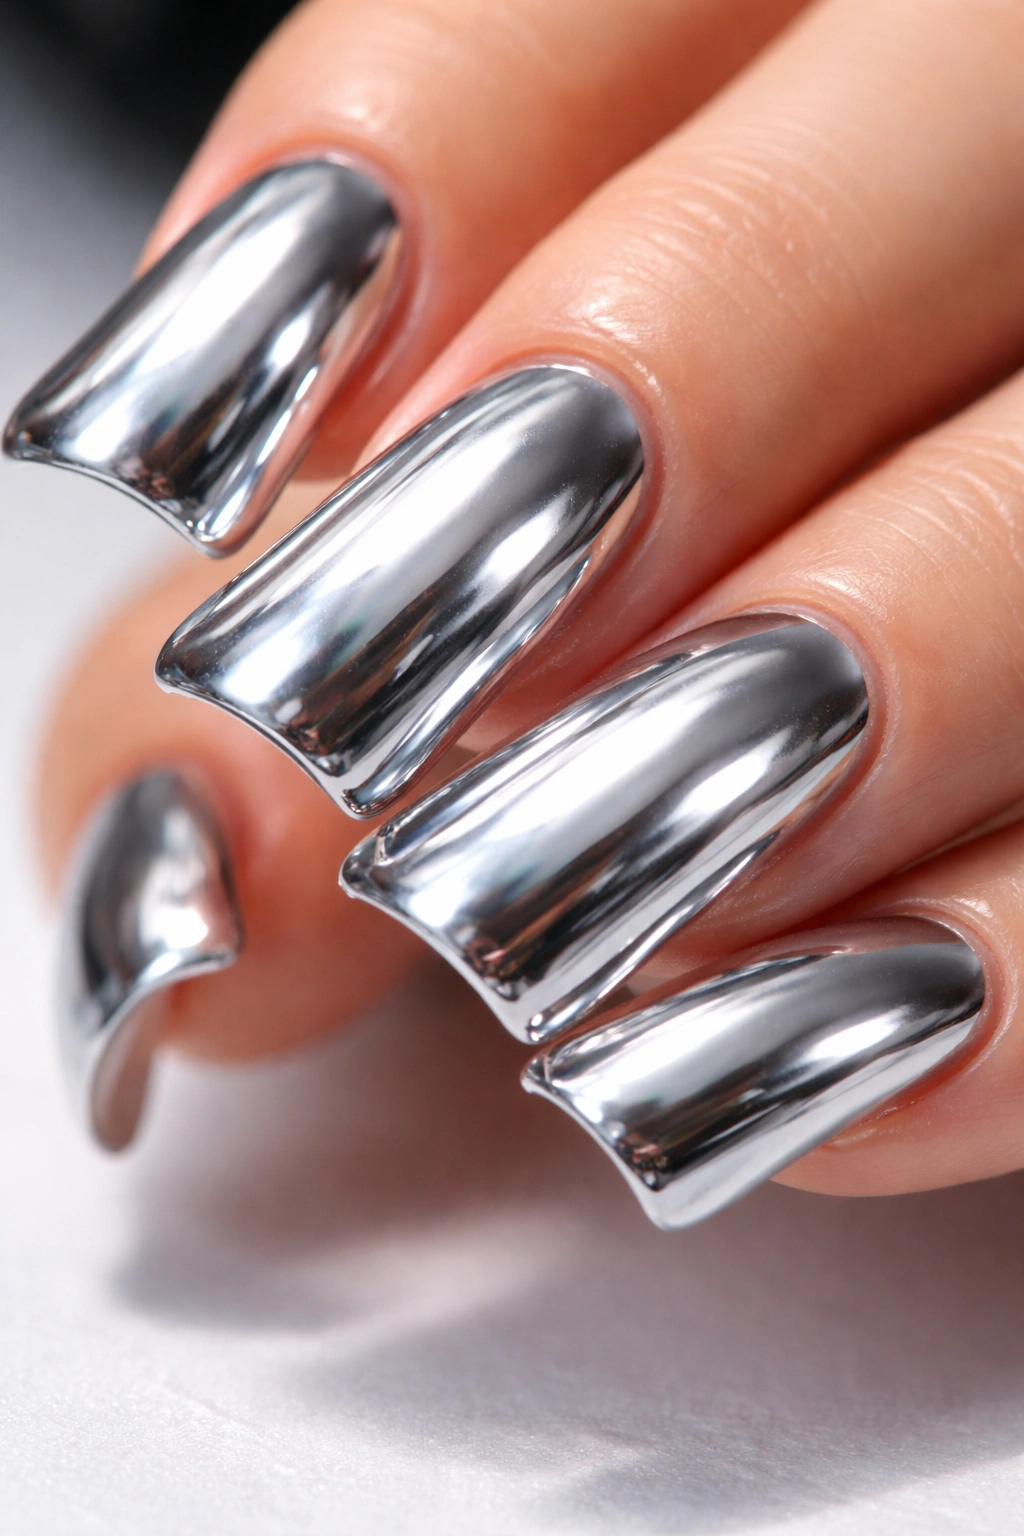
Create an almost futuristic, mirror-like finish using chrome or holographic powder applied to a sticky gel base. The effect is utterly transformative — your nails look almost liquid, reflecting your surroundings like a polished mirror. Chrome is particularly stunning on duck nails because the curved surface catches and reflects light from multiple angles simultaneously, creating an almost three-dimensional effect. This is the closest you can get to wearing actual metal on your nails.
Applying Chrome Powder Successfully
Chrome powder application requires a light touch and the right technique. Apply a sticky base coat, then use a soft brush or applicator pad to press the chrome powder into the surface with gentle, circular motions. Work in small sections so you maintain control. Once the powder is fully applied and adhered, seal it with a thick layer of clear gel top coat. The seal is critical — chrome powder isn’t sealed properly can rub off quickly.
Chrome Finish Options
- Silver chrome has a cool, modern, almost robotic quality
- Rose gold chrome feels warmer and more luxe
- Rainbow holographic creates a prism effect with multiple colors reflecting simultaneously
- Combine chrome on some nails with solid colors on others for a balanced, wearable look
- Chrome works beautifully with minimalist nail shapes, but on statement duck nails it’s absolutely show-stopping
12. Holographic Duck Nails
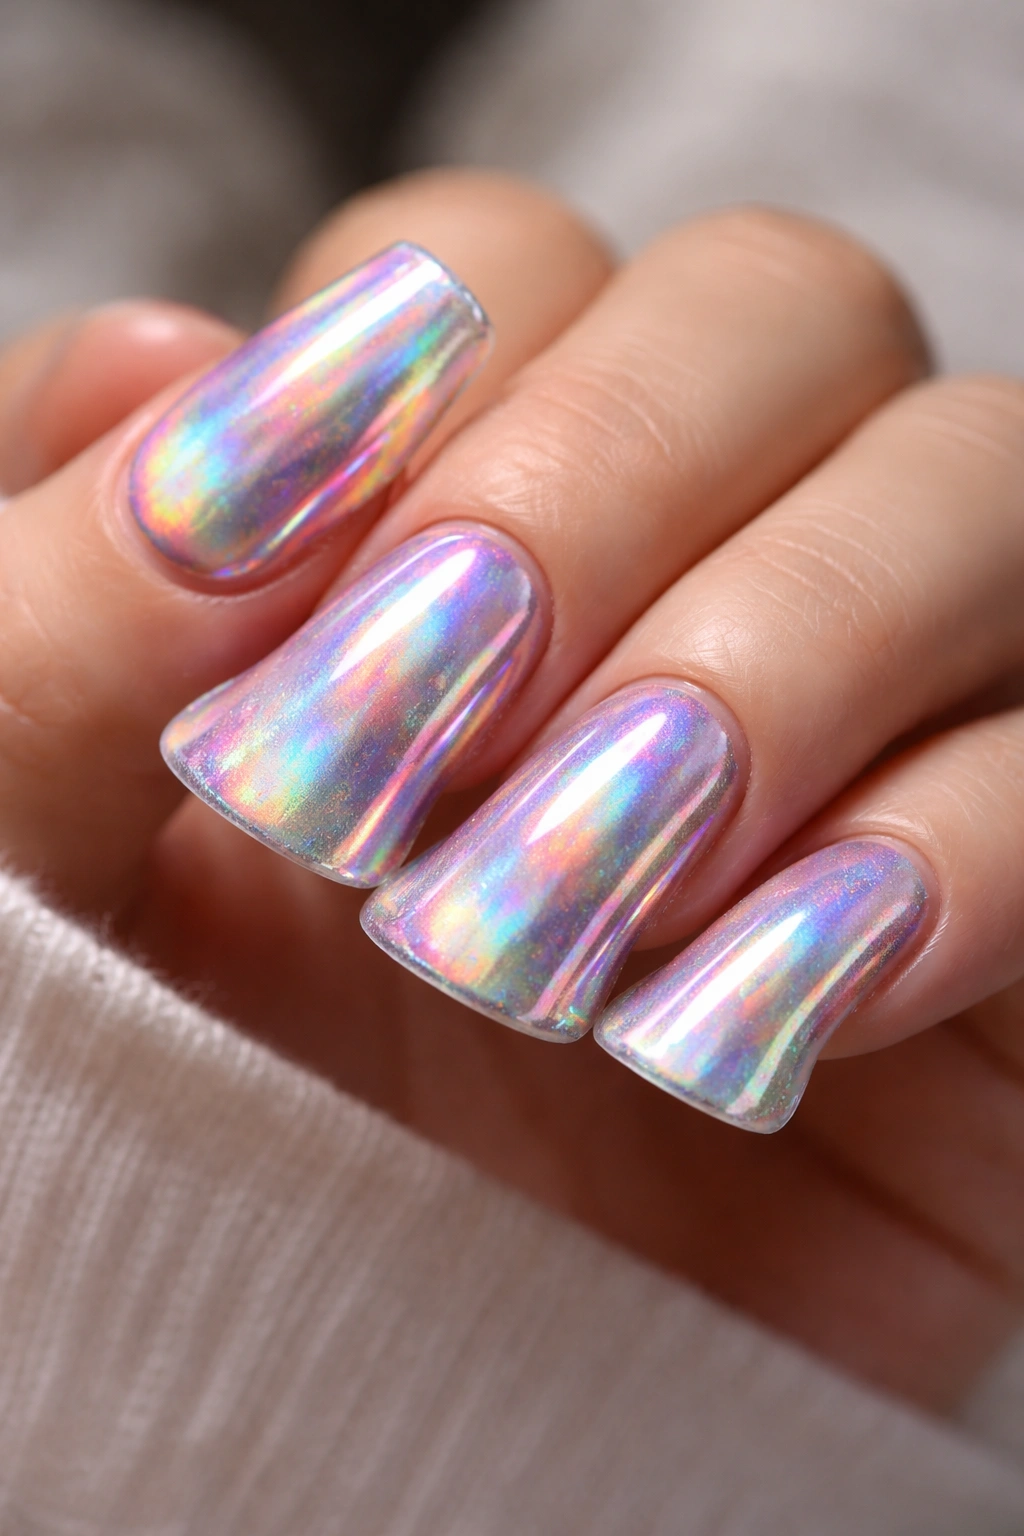
Use holographic polish or powder to create a nail that shimmers with rainbow iridescence. Holographic nails display the entire spectrum of color depending on light and angle — under natural light they might appear blue-green, under LED lights they flash with pink and purple, and at different angles they reveal yellow, orange, and red. This makes every movement of your hand reveal new colors, keeping the design visually interesting and dynamic.
Applying Holographic Effects
True holographic polish and powder are specialized products that create the prismatic effect. Apply holographic polish in thin layers — holographic products have less pigment density than regular polish, and thin layers build color better than thick ones. For maximum effect, use a white or pale base coat. If using holographic powder, apply it the same way you would chrome powder — to a sticky gel base with gentle, pressing motions, then seal thoroughly.
Holographic Design Ideas
- A full holographic manicure is bold but absolutely stunning
- Holographic on some nails and solid colors on others creates balance while still making a statement
- Pair holographic nails with neutral clothing to let the nails be the star
- Holographic nails photograph dramatically under different lighting, so take pictures in multiple light sources to appreciate the full effect
- This finish works beautifully on short or long duck nails — the shape doesn’t matter as much as the finish quality
13. Jewel-Tone Duck Nails
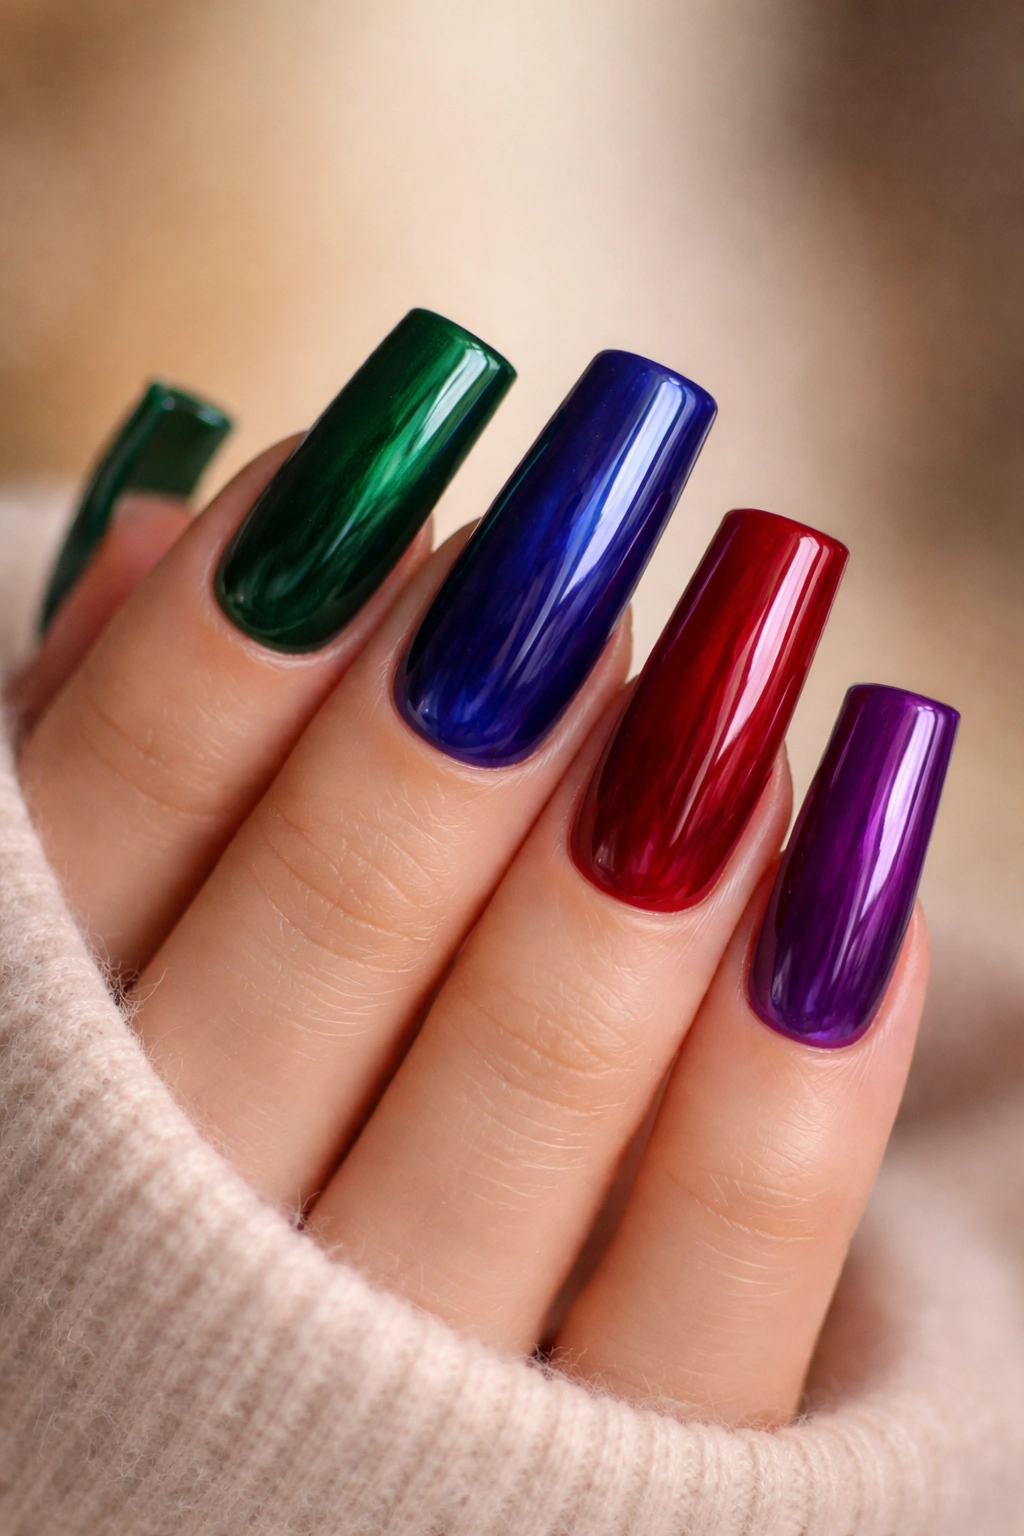
Celebrate rich, saturated colors inspired by precious stones: deep emerald green, sapphire blue, ruby red, and amethyst purple. Jewel tones are inherently luxurious and sophisticated. Each shade has enough depth and saturation to stand alone, but they also coordinate beautifully together. You can create a gradient moving through different jewel tones, or alternate jewel-tone colors across your nails for a coordinated but varied manicure.
Working with Jewel-Tone Polish
Jewel tones are naturally rich and opaque, so they typically cover in one coat — though two thin coats always look better than one thick coat. These colors pair beautifully with both glossy and matte finishes. A glossy finish emphasizes the jewel-like shine and luxury feel, while a matte finish creates a more velvety, sophisticated aesthetic. Jewel tones photograph beautifully and complement a wide range of skin tones when chosen thoughtfully.
Jewel-Tone Combinations
- Emerald and sapphire create a cool, regal palette
- Ruby and amethyst combine warm and cool for elegant contrast
- A single jewel tone on all nails creates cohesive luxury
- Alternating different jewel tones across nails (one emerald, one sapphire, one ruby, one amethyst) creates a colorful but coordinated look
- Layer jewel tones with gold accents (gold leaf, gold striping tape) for maximum luxury
- Jewel tones pair beautifully with minimalist designs or solid manicures where the color itself is the statement
14. Sunset to Midnight Duck Nails
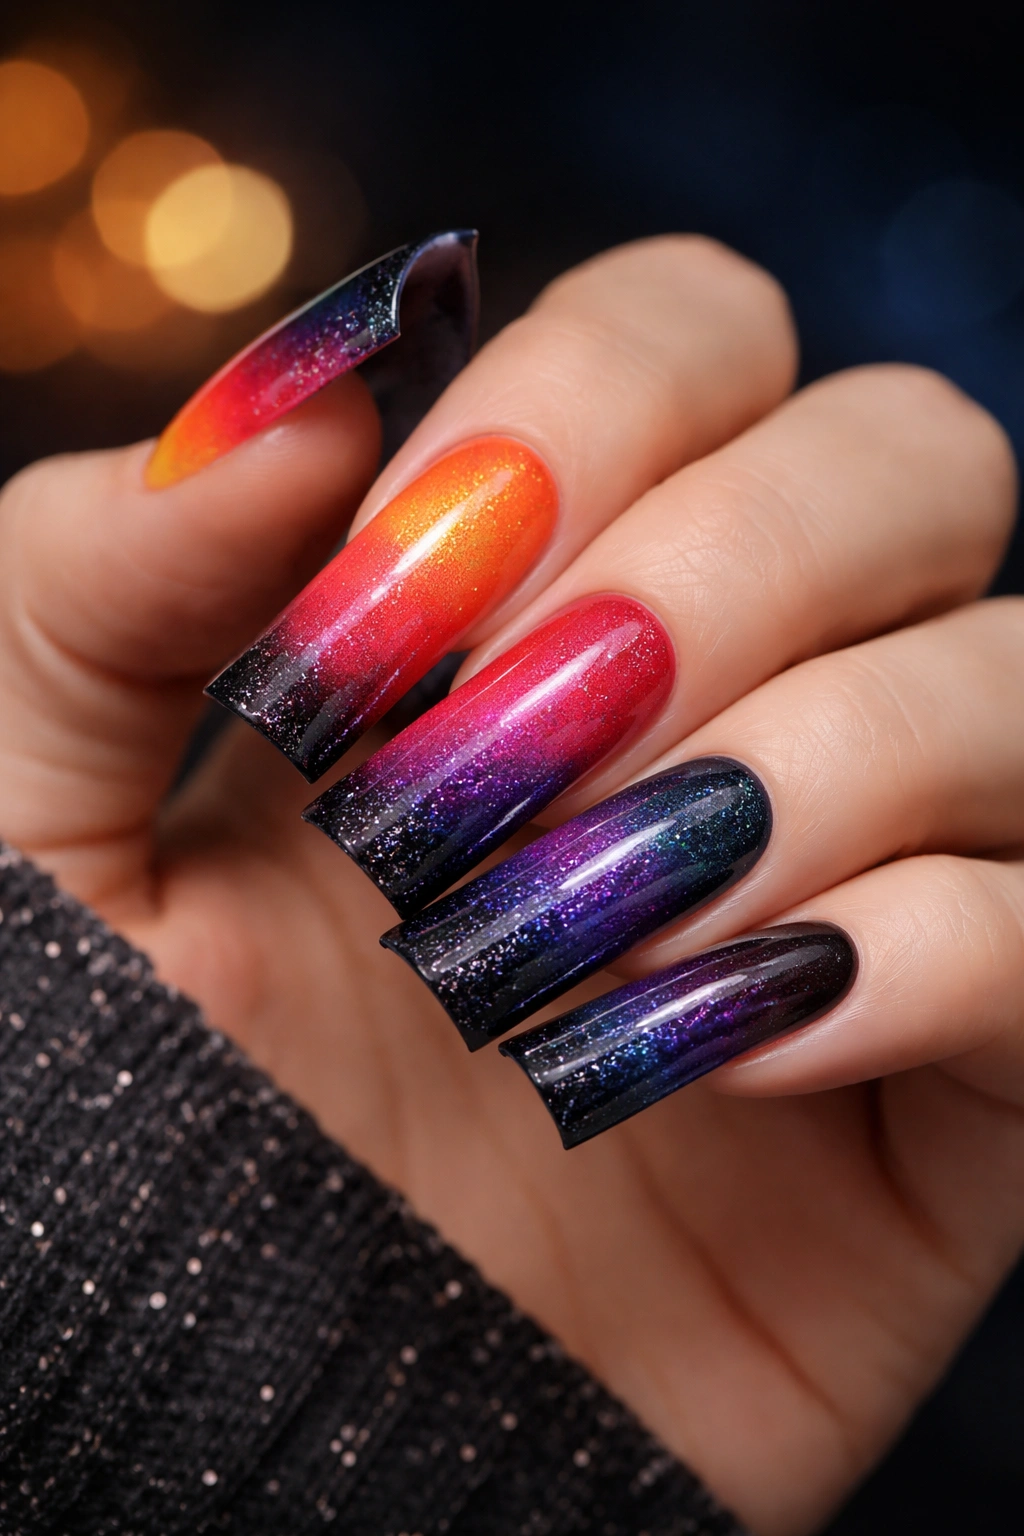
Create a dramatic color transition that moves from warm sunset hues at the cuticle (coral, orange, gold) through a warm-to-cool transition (peachy red, deep red) to cool midnight shades at the tip (deep purple, midnight blue, charcoal). This gradient tells a visual story of a day transitioning to night, making it both beautiful and narratively interesting. On duck nails, this progression is especially striking because you can view different parts of the gradient from different angles.
Creating the Sunset-to-Midnight Effect
Use the sponge gradient technique, starting with your warmest shades on one end of a makeup sponge and your coolest shades on the other end. Dab the sponge gently across the nail, allowing the colors to blend in the middle. The transition from warm to cool happens gradually, creating a sophisticated gradient that reads as planned and artistic. This design requires a bit more blending skill than simple single-color gradients, but it’s entirely achievable with practice.
Key Color Transitions
- Coral to coral-pink to deep rose to burgundy to plum to midnight blue creates a smooth, natural progression
- Gold to orange to rust to deep red to wine to charcoal gives a slightly more dramatic, autumnal feel
- Peach to coral-red to deep red to plum creates a more compact color story focused on warm-to-cool
- A glossy top coat enhances the dimension and makes the gradient appear more polished
- This gradient looks particularly stunning in evening lighting and formal settings
15. Multi-Color Matte Duck Nails
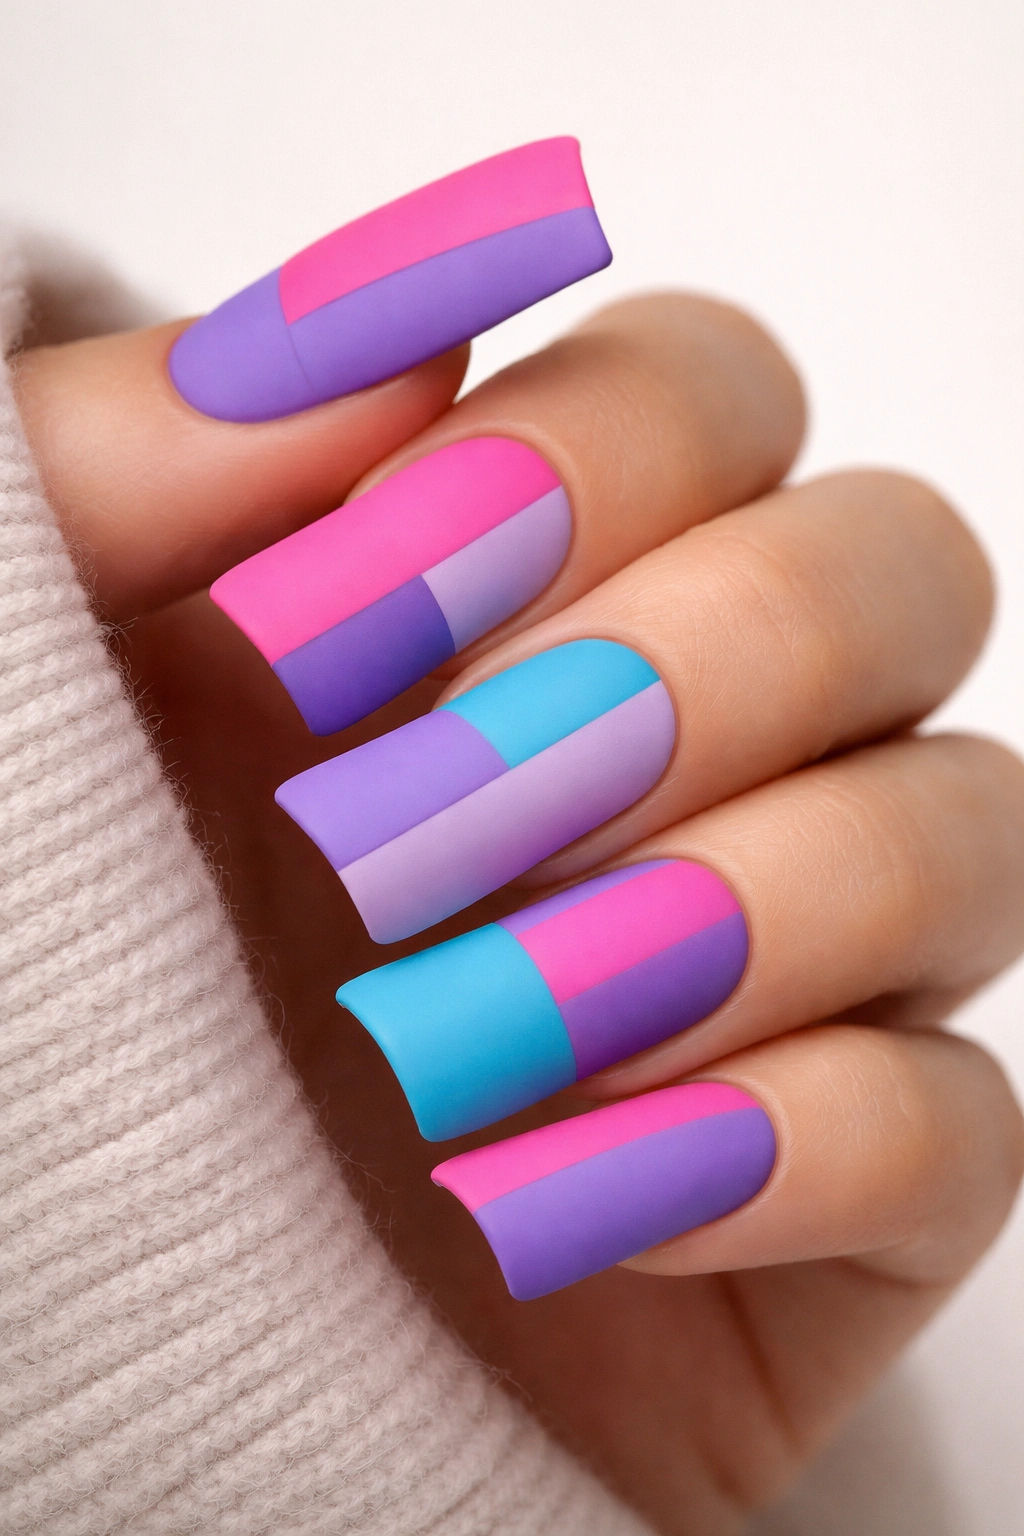
Apply multiple bright colors across each nail in blocks, stripes, or sections, then finish with a matte top coat for an artistic, modern aesthetic. Matte finishes are transformative — they make colors read as more serious and artistic rather than playful. Combining multiple bright colors with a matte finish creates an intentional, editorial look that feels contemporary and sophisticated rather than chaotic.
Creating Multi-Color Matte Designs
You can divide nails into geometric sections with painter’s tape and solid colors, or create stripes, blocks, or organic color divisions. The key is committing to the matte finish — don’t second-guess yourself by switching to glossy. Apply a quality matte top coat (or use a matte base coat with matte polish), and the entire aesthetic shifts to feel intentional and design-forward.
Multi-Color Matte Ideas
- Vertical stripes in three colors (perhaps pink, purple, and blue) create a rainbow effect that feels contemporary
- Color-blocking three distinct sections creates an almost graphic, poster-like aesthetic
- Each nail can be a different color, or you can repeat colors across nails for cohesion
- Matte finishes show fingerprints more than glossy ones, so keep a matte top coat handy for quick touch-ups
- Pair multi-color matte nails with monochromatic clothing so the nails remain the focal point
- This design works beautifully with a minimalist aesthetic or a bold, maximalist personal style
Pro tip: If you’ve applied a matte top coat and want to switch back to glossy for just one or two nails, simply apply a regular glossy top coat over the matte. The glossy will override the matte finish on those specific nails for a mixed-texture manicure.
Final Thoughts
Colorful duck nails are an invitation to play with color in a way that feels intentional, artistic, and thoroughly modern. The duck nail shape’s generous curved surface is actually a gift for color lovers — it gives you the real estate to experiment with gradients, multiple color combinations, and bold finishes that might feel overwhelming on smaller nail shapes. Whether you’re drawn to soft pastels, jewel tones, or neon brights, there’s a colorful duck nail design that lets you express exactly what you’re feeling.
The technical skills required for most of these designs are completely learnable. Gradient techniques improve with practice, color-blocking becomes intuitive once you’ve applied painter’s tape a few times, and chrome or holographic finishes are forgiving once you understand the application method. Start with designs that appeal to you most, and don’t worry about achieving perfection on your first attempt. The beauty of colorful nails is that minor imperfections often read as intentional artistry rather than mistakes.
Remember that your nails are a canvas for self-expression. Choose colors that make you genuinely happy when you look at your hands, designs that feel authentic to your personality, and finishes that suit how you want to feel. A confident person wearing neon bright duck nails looks entirely different from someone wearing the same design reluctantly. Your enthusiasm for your nail design is visible, and that’s what makes any color choice shine.
