

Baby blue duck nails have become one of the most charming and whimsical nail designs trending across social media and nail salons. There’s something genuinely satisfying about combining the soft, calming qualities of baby blue with the playful character of duck imagery — it’s cute without being over-the-top, sophisticated enough for everyday wear, and instantly recognizable as a design choice that shows personality and thoughtfulness.
The beauty of baby blue duck nails lies in their versatility. Whether you’re drawn to minimalist interpretations or fully detailed hand-painted designs, there’s a version of this manicure that fits your skill level, aesthetic, and lifestyle. Baby blue as a base color is forgiving — it works on every skin tone, photographs beautifully in both natural and artificial light, and has that sweet spot of being distinctive without demanding to be the loudest thing in the room.
What makes duck nails particularly fun is that they’re inherently lighthearted. Unlike some nail art designs that require a certain mood or occasion, duck nails just make people smile. They’re the kind of design you wear when you want to feel a little more playful, a little more creative, and a little more you. The duck motif brings an element of humor and charm that elevates even a simple design from basic to memorable.
If you’ve been considering trying baby blue duck nails but weren’t sure which direction to go, you’ve come to the right place. Below are ten distinct approaches to this design — from ultra-minimal to intricately detailed, from glossy to matte finishes — so you can find the exact version that calls to you.
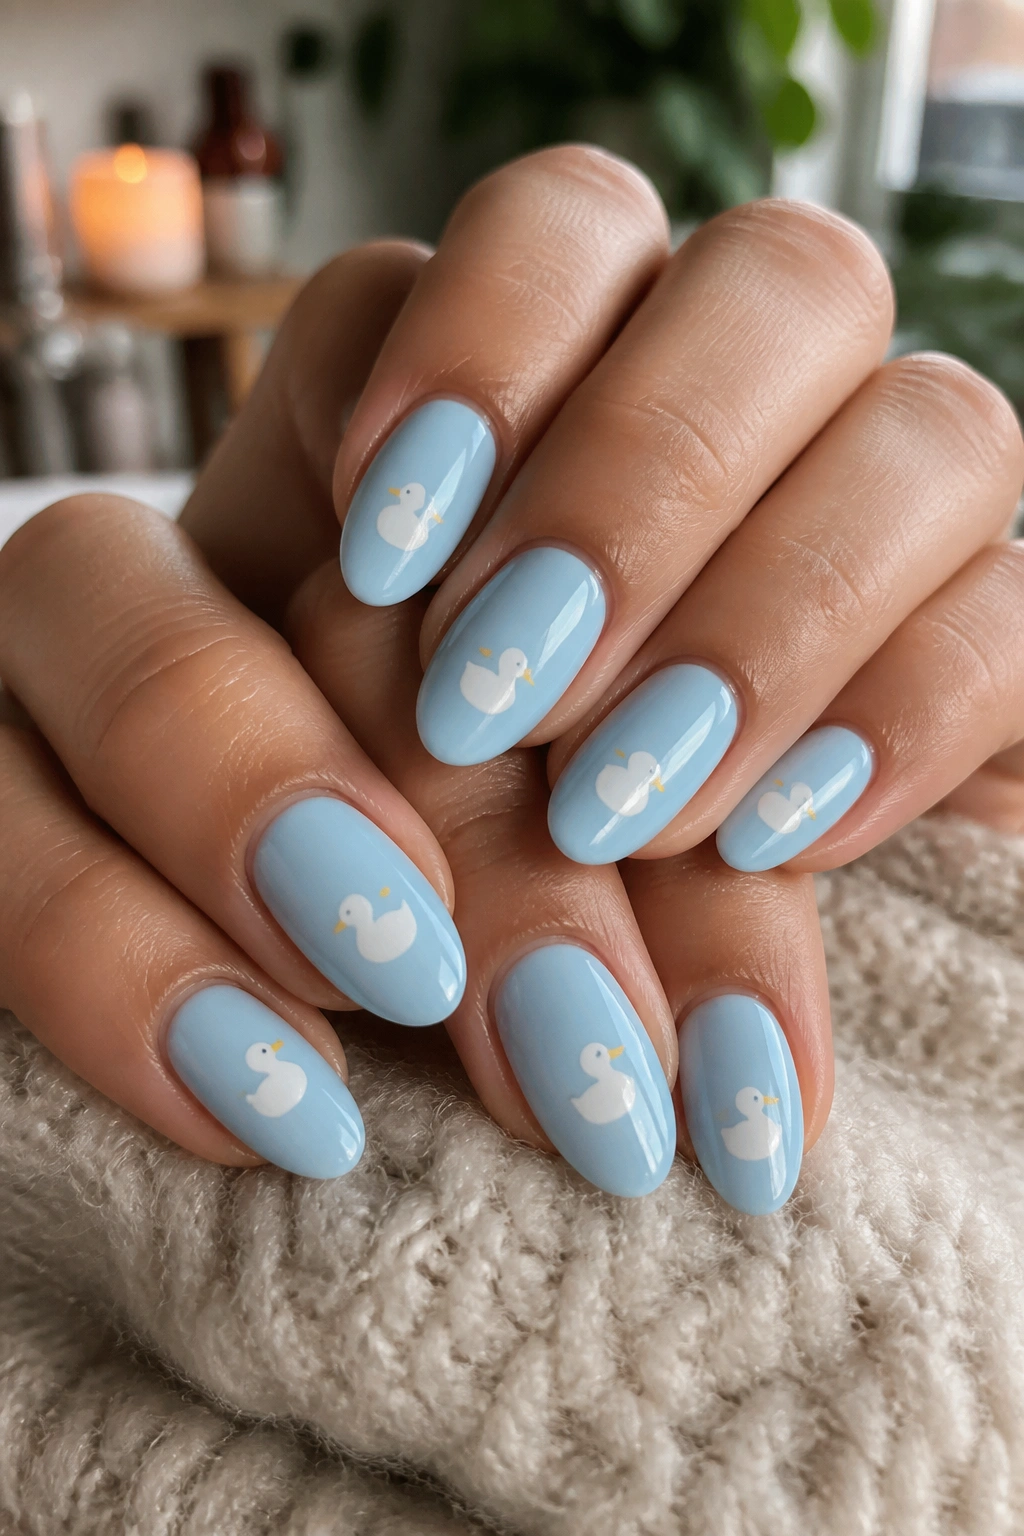
1. Soft Baby Blue with Delicate White Ducks
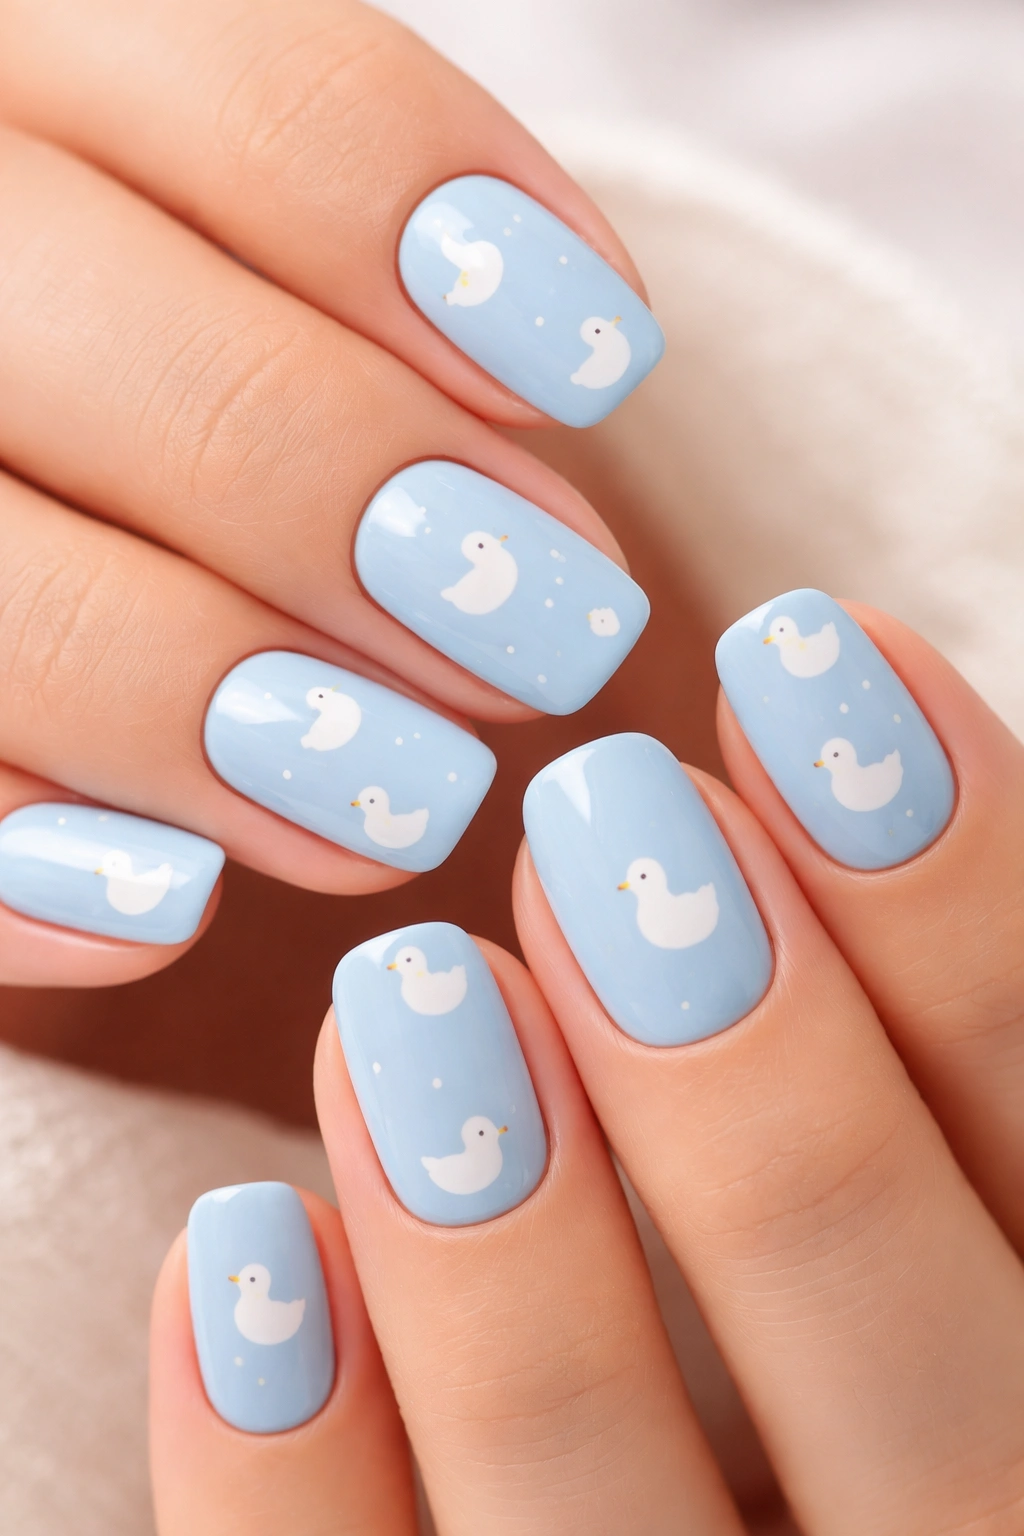
This is the foundation of duck nail art — a clean, soft baby blue base with simple white duck silhouettes scattered across your nails. The ducks are typically painted as tiny, minimalist line drawings or solid shapes with just a few curved strokes to suggest their form.
Why This Design Works So Well
The simplicity here is actually its superpower. When you’re not fighting with complexity, every element has to earn its place, which means the design feels intentional and refined rather than sparse. The contrast between the soft blue and crisp white creates visual interest without overwhelming the nail, and the minimalist duck forms have an almost Scandinavian aesthetic that feels both timeless and contemporary.
How to Execute It at Home
Start with two thin coats of your baby blue polish, allowing each coat to dry completely. Using a thin detail brush or a nail art pen with white polish, sketch light pencil marks first to map out where your ducks will go — this gives you a chance to adjust placement before committing. Each duck needs just three elements: a small rounded body, a curved neck, and a tiny dot for the eye. Keep the lines confident and deliberate; hesitant brushwork reads as uncertain rather than artistic.
Pro Tips for Success
White polish can be streaky, so thin it slightly with a clear base or topcoat to ensure smooth, even application. Let each duck dry before moving to the next nail — this prevents smudging and keeps edges crisp. If you make a mistake, a fine-tipped nail art corrector pen filled with your base blue color can fix small imperfections instantly.
Best for: Beginners, minimalist aesthetic lovers, everyday wear, professional settings
2. Pastel Duck Design with Minimalist Details
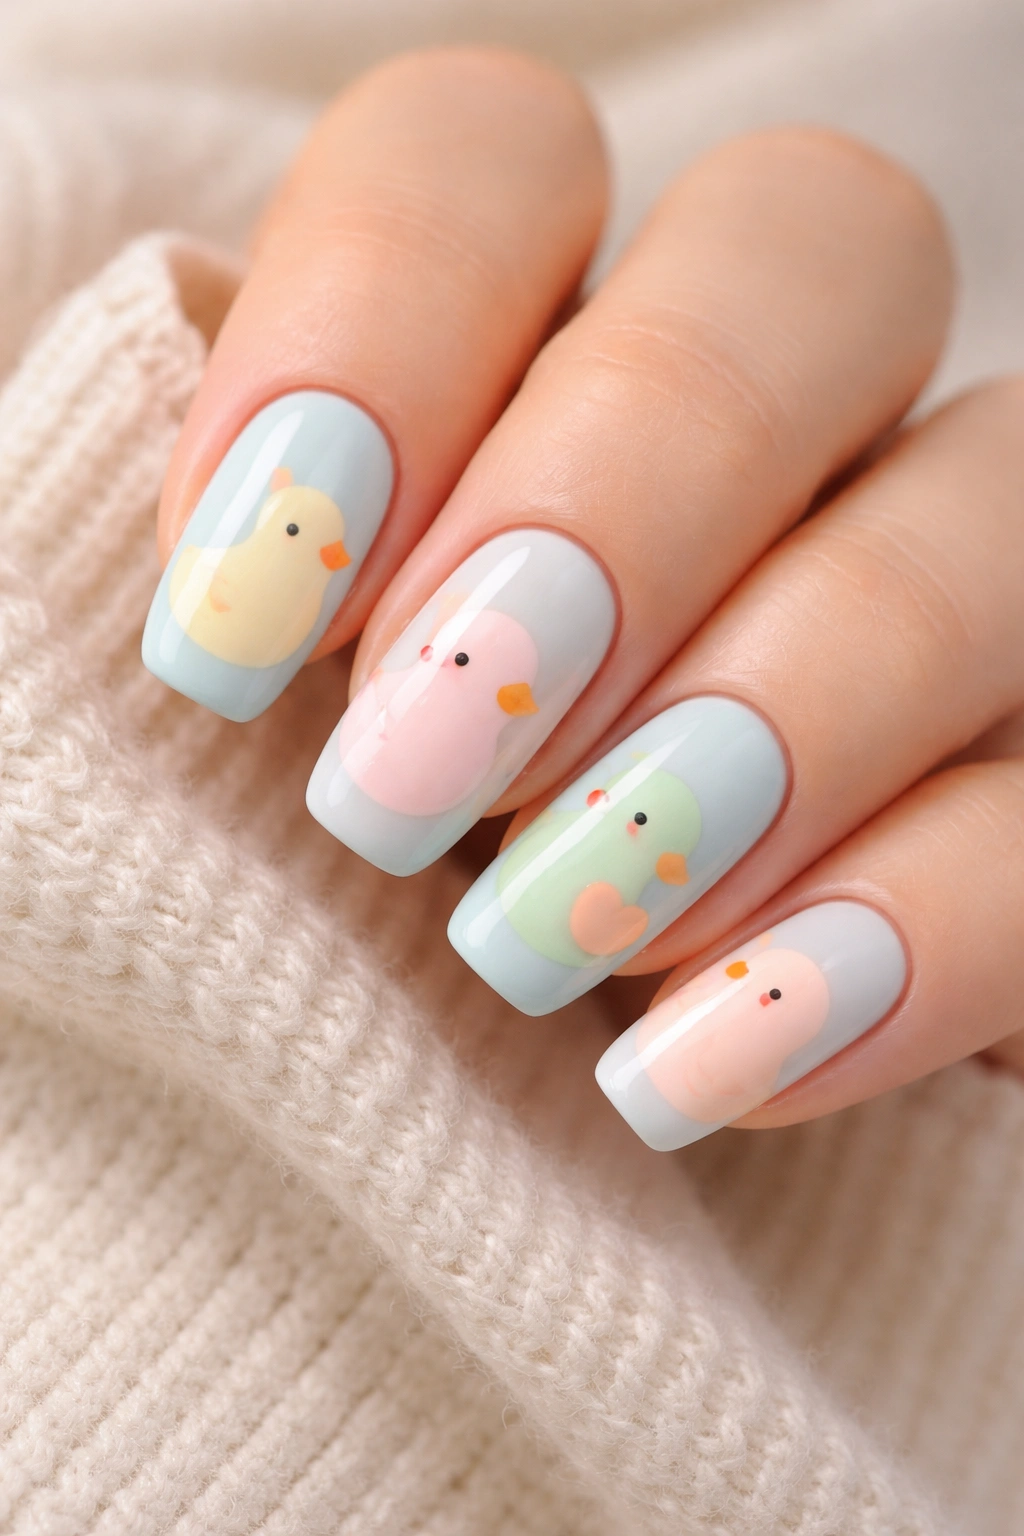
Rather than using pure white ducks, this design incorporates other pastel colors — think pale pink, mint green, soft peach, or cream — to create a playful, coordinated color palette while keeping the duck forms simple and graphic.
The Color Story Behind This Approach
Baby blue anchors the design beautifully as the dominant color, but the introduction of complementary pastels adds depth and personality. The pastels work because they share the same soft, desaturated quality as the base blue, so even though multiple colors are present, the overall effect feels cohesive rather than chaotic. This design particularly shines if you’re someone who loves subtle color play and wants your nails to whisper rather than shout.
Building the Design
After applying your baby blue base, select two to three coordinating pastel shades. Paint each duck in a different color, or create a pattern where certain fingers get certain colors — for example, all ducks on your left hand in blush pink, all on your right hand in mint green. The duck forms themselves stay minimal: simple outlines or solid shapes with minimal detail. The colors do the visual work; the forms just provide the structure.
Customization Options
You can assign each pastel color to represent different “ducks” in a little scene, creating a narrative element. Or arrange colors by finger, alternating between pastels in a rhythm that feels balanced. Some people add a tiny dot or dash of each pastel color on the thumb as a color reference point that ties the design together.
Best for: Color-lovers, people who want something a touch more playful, those with a developed nail art skill level
3. Baby Blue Base with Hand-Painted Duck Portraits
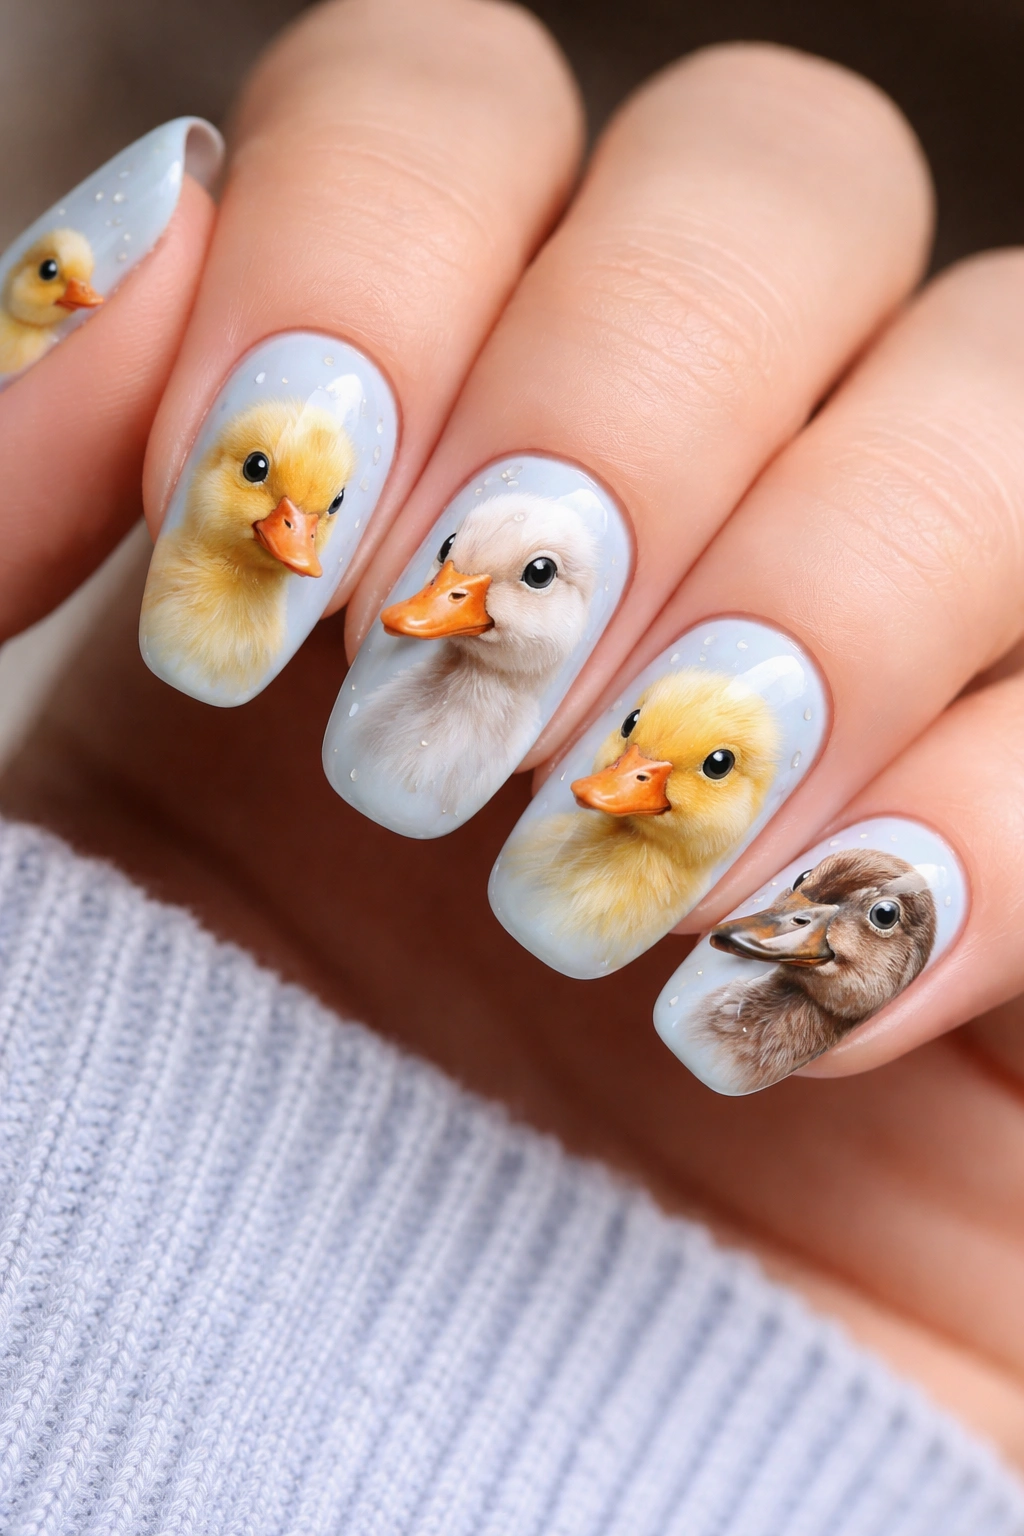
This is where duck nails become genuinely artistic. Instead of abstract or minimalist representations, hand-painted duck portraits include realistic facial features, feather details, and individual personality. Each duck looks like an actual duck rather than a symbol.
The Artistic Challenge and Reward
Creating detailed duck portraits takes patience and practice, but the result is undeniably striking. You’re painting recognizable faces with distinct expressions — some ducks might look curious, others serene, others slightly amused. The level of detail means each nail becomes a tiny artwork that rewards close inspection.
Technical Execution for Portrait Details
You’ll need a very fine detail brush (size 000 or smaller) and steady hands. Start with the eye — a tiny black dot with a microscopic white dot inside for shine. The duck’s profile is key: a rounded head, a slightly tapered bill, a suggestion of cheeks or feathering. Add subtle shading around the head to suggest dimension. Feather textures can be indicated with very fine lines or small comma-shaped strokes that follow the direction feathers would naturally grow.
Layering and Protection
After completing your portraits, seal everything with a glossy topcoat to protect the fine details and give them a subtle shine. Some artists use a matte topcoat instead for a more painterly, fine-art feeling.
Best for: Experienced nail artists, people who want wearable art, special occasions, photo-worthy nails
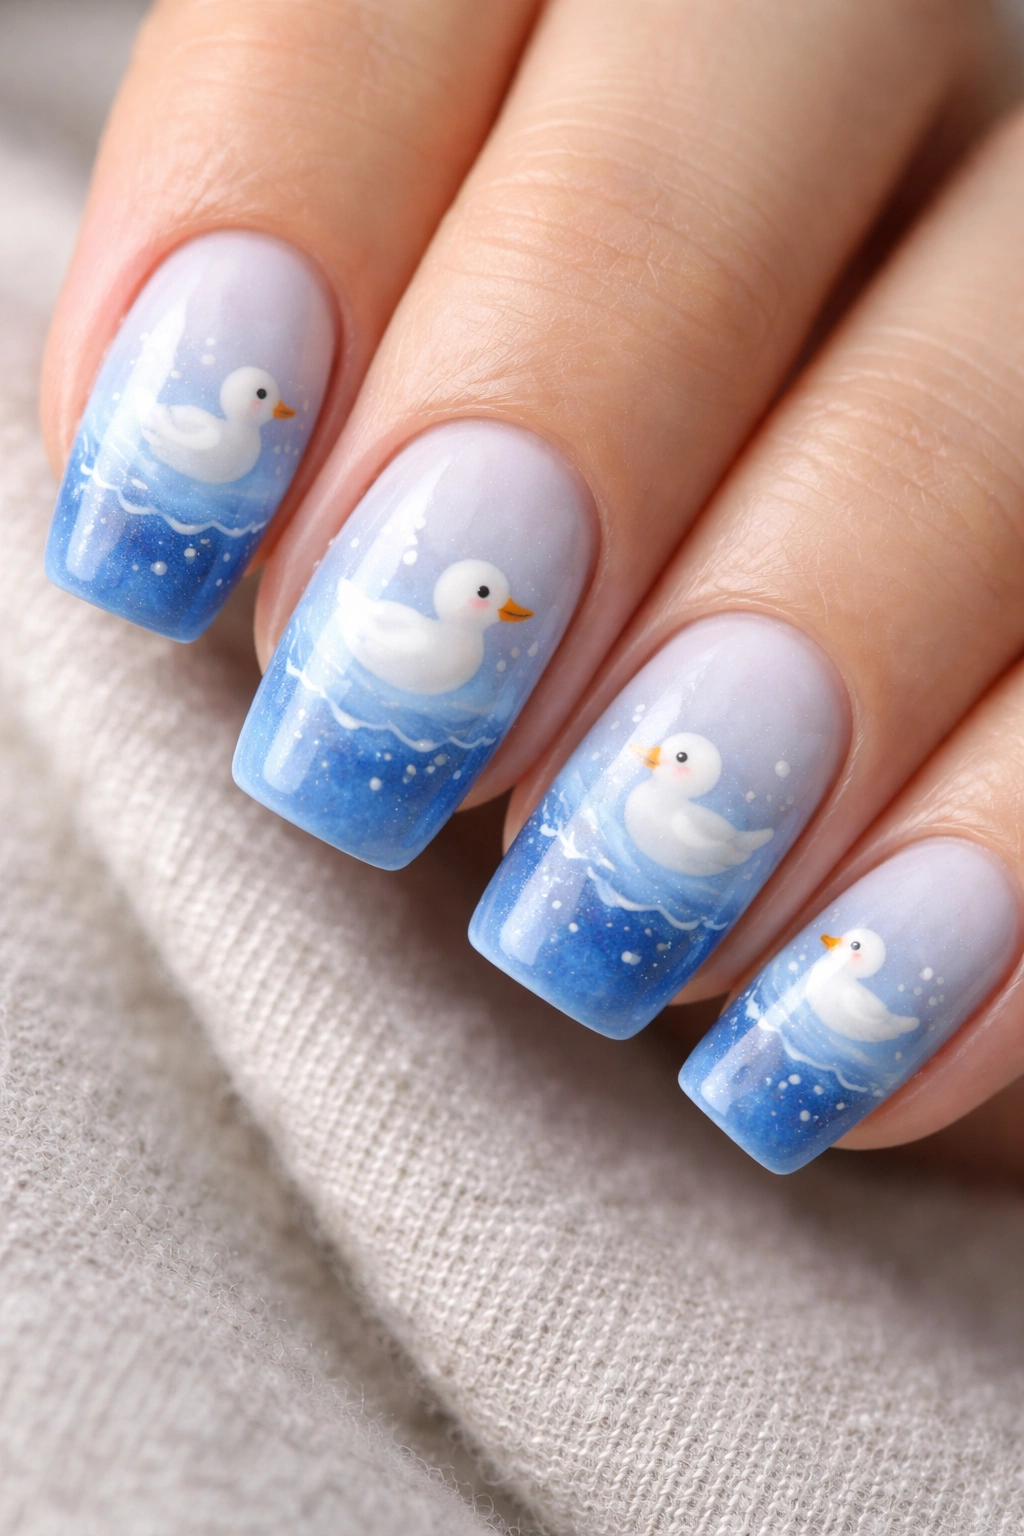
4. Gradient Baby Blue to White Duck Nails
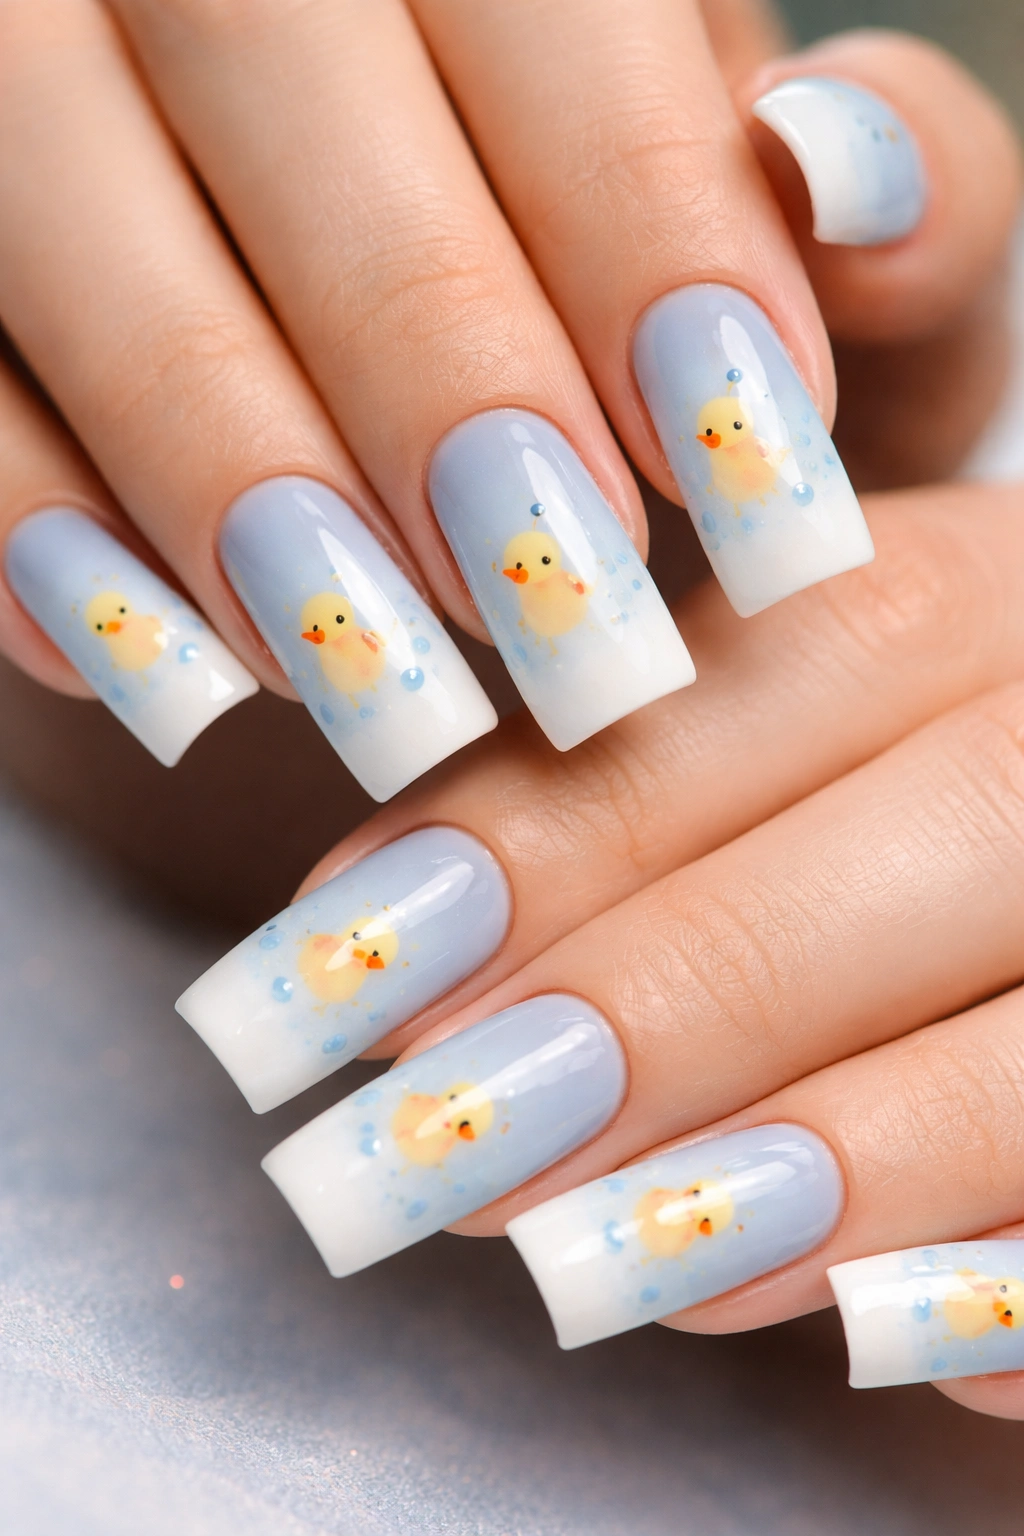
A gradient (or ombre) background creates visual sophistication and makes even simple duck designs feel more elevated. The color gradually transitions from deeper baby blue at the base to soft white or near-white at the tip, with ducks painted on top of this blended background.
Why Gradients Transform a Design
Gradients create movement and dimension across the nail surface. The eye travels from the darker blue to the lighter white, which naturally guides attention and makes the nail feel less flat. When you layer simple duck designs over a gradient background, the ducks pop forward while the gradient recedes slightly, creating an illusion of depth.
Creating a Smooth Gradient
Use a makeup sponge or a dedicated gradient tool. Apply both your baby blue and white polish separately onto a makeup sponge in adjacent sections, then press the sponge firmly onto each nail and gently bounce it to blend the colors where they meet. You want soft transitions, not distinct stripes. Practice this technique on a few test nails first — the motion and pressure matter more than you’d think.
Where to Place the Ducks
Paint your gradient first, seal it with topcoat, then add ducks once completely dry. Placing ducks in the gradient’s “middle zone” (where blue and white are blending) creates beautiful color interaction — a white duck positioned in a mid-blue area of the gradient will have subtle depth.
Best for: People who want elegance with their whimsy, those comfortable with gradient technique, date night or special event nails
5. Baby Blue Duck with Floral Accents
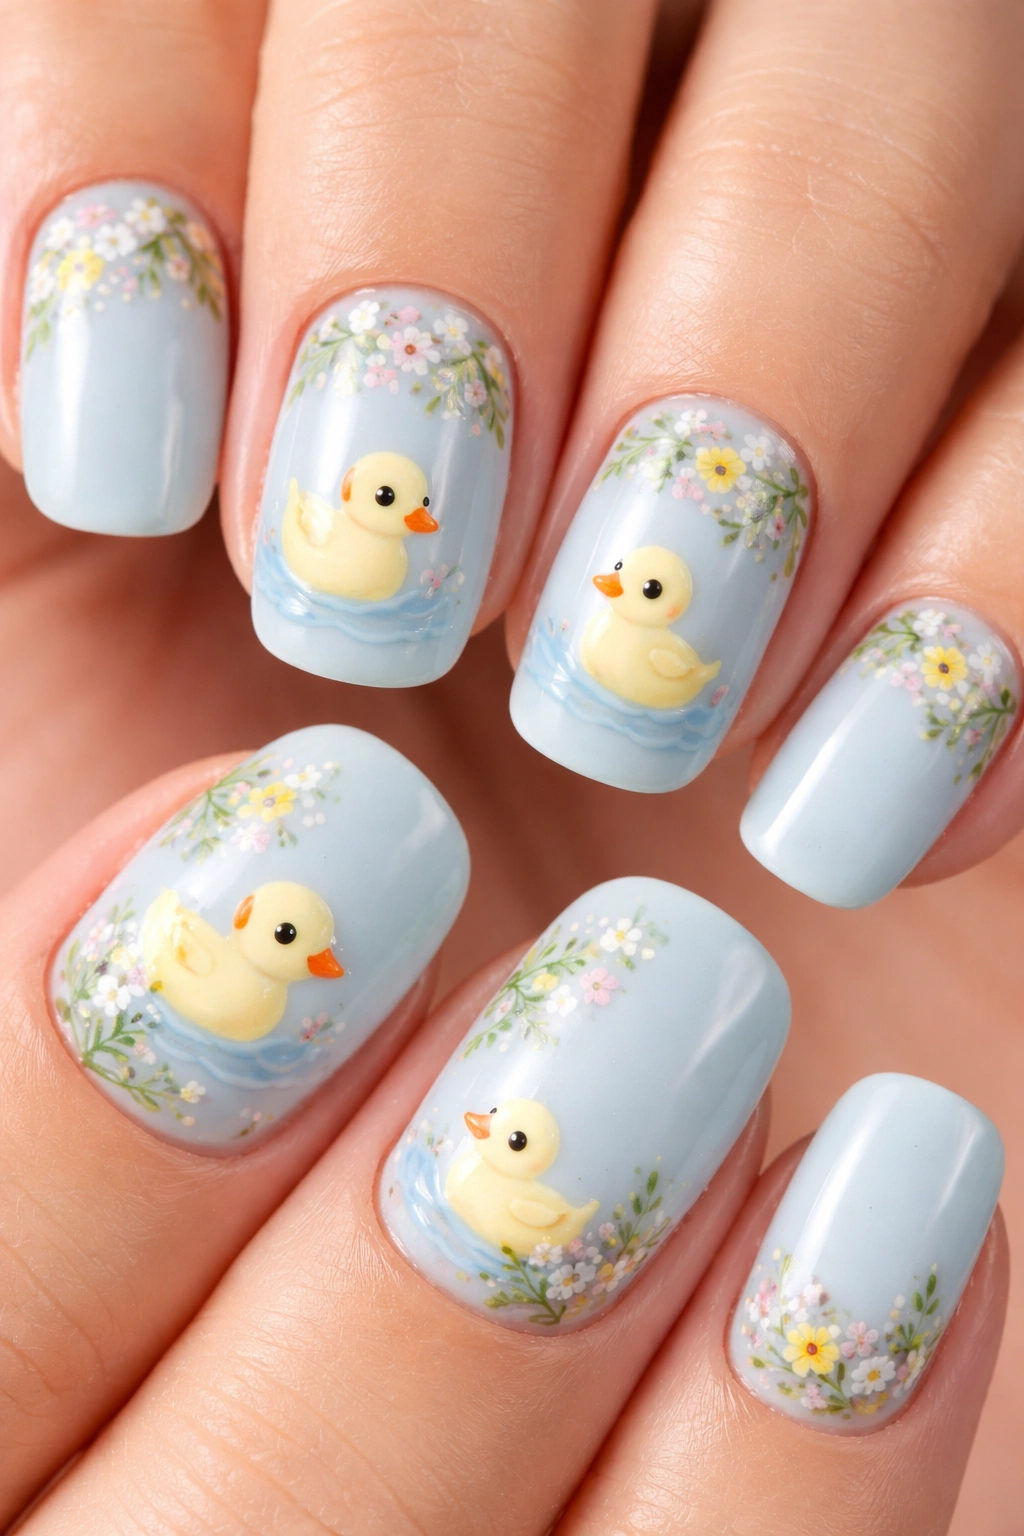
Combine duck designs with tiny florals — think small flowers, leaves, or botanical elements — to create a garden-inspired aesthetic. The ducks and flowers share the nail space in a deliberately composed scene.
The Composition Approach
Rather than filling the entire nail with pattern, create pockets of content. Maybe a duck occupies the lower third of the nail while flowers cluster near the cuticle. Or alternate — one nail is duck-focused, the next is flower-focused, and when you look at all ten nails together, they tell a cohesive story. This approach feels less busy than covering every millimeter with design.
Floral Styles That Pair Well
Delicate wildflower sketches work beautifully with minimalist ducks. Watercolor-style flowers (where you blur the edges slightly with a damp brush) create an impressionistic feel. Tiny detailed botanical line-work pairs well with hand-painted duck portraits. The key is ensuring the floral elements share the same visual weight and complexity level as the ducks — if ducks are simple and flowers are detailed, or vice versa, the design feels unbalanced.
Color Coordination
Consider whether florals will be monochromatic (all white, all one pastel) or multicolor. White flowers on baby blue read cleanly. Pastel-colored flowers add another layer of sweetness and work especially well if you’ve already committed to a pastel color palette elsewhere.
Best for: Nature lovers, people who want a softer, more romantic aesthetic, spring and summer occasions
6. Chrome Baby Blue Duck Nail Art
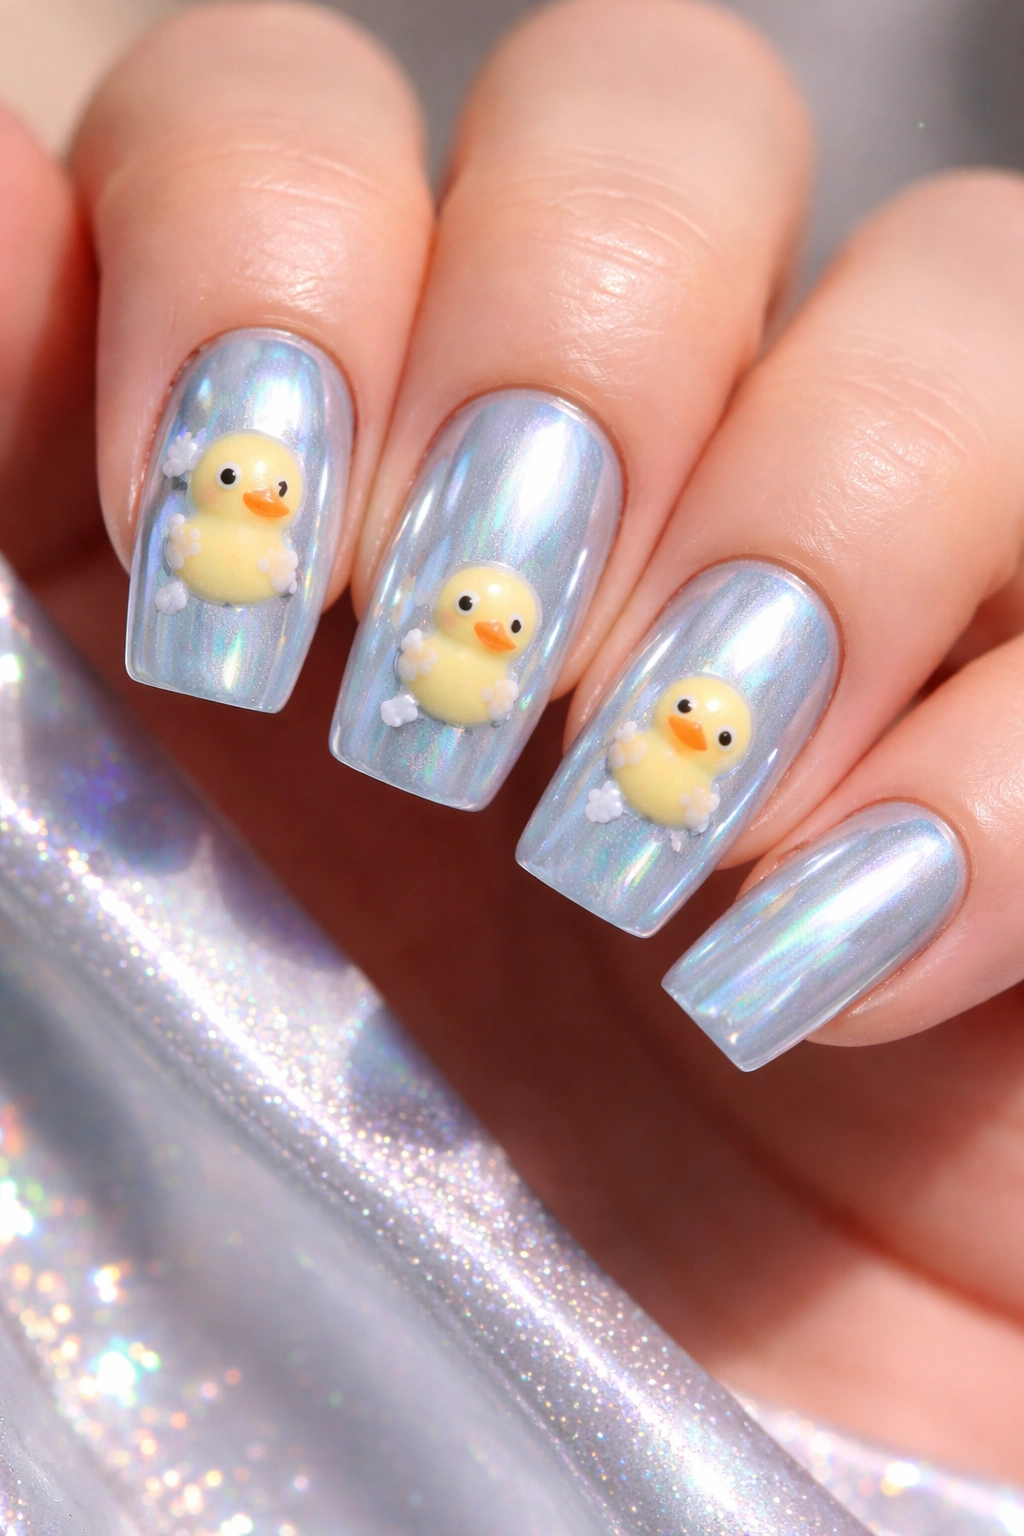
Chrome and holographic finishes have revolutionized nail art, and pairing them with duck designs creates something genuinely eye-catching. The ducks are painted traditionally while the base incorporates shimmery, reflective chrome elements.
Two Approaches to Chrome Ducks
Option 1: Paint your baby blue base normally, then create a chrome duck silhouette using chrome powder pressed into a clear or translucent topcoat layer. The duck becomes a shimmering, reflective shape against the matte blue background. This creates maximum visual contrast and makes the duck design nearly impossible to miss.
Option 2: Create a gradient base with baby blue transitioning into chrome or holographic powder, then paint simple ducks on top. The metallic base makes even minimalist ducks feel glamorous.
Applying Chrome Powder Properly
Chrome powder requires a tacky base — typically a gel base coat or a glossy regular polish layer. After applying your base layer and letting it become slightly sticky (don’t fully cure if using gel), use a velvet applicator to press the chrome powder onto the nail in the duck’s shape. You need firm, even pressure and multiple passes to build the reflective quality. Seal with a clear topcoat.
The Visual Impact
Chrome ducks catch light from every angle, shifting colors and intensity as you move your hands. This dynamic quality is part of the charm — your nails are never the same twice depending on the lighting.
Best for: Statement-makers, people who love modern, futuristic aesthetics, those comfortable with gel manicures
7. Baby Blue Duck with Glitter Details
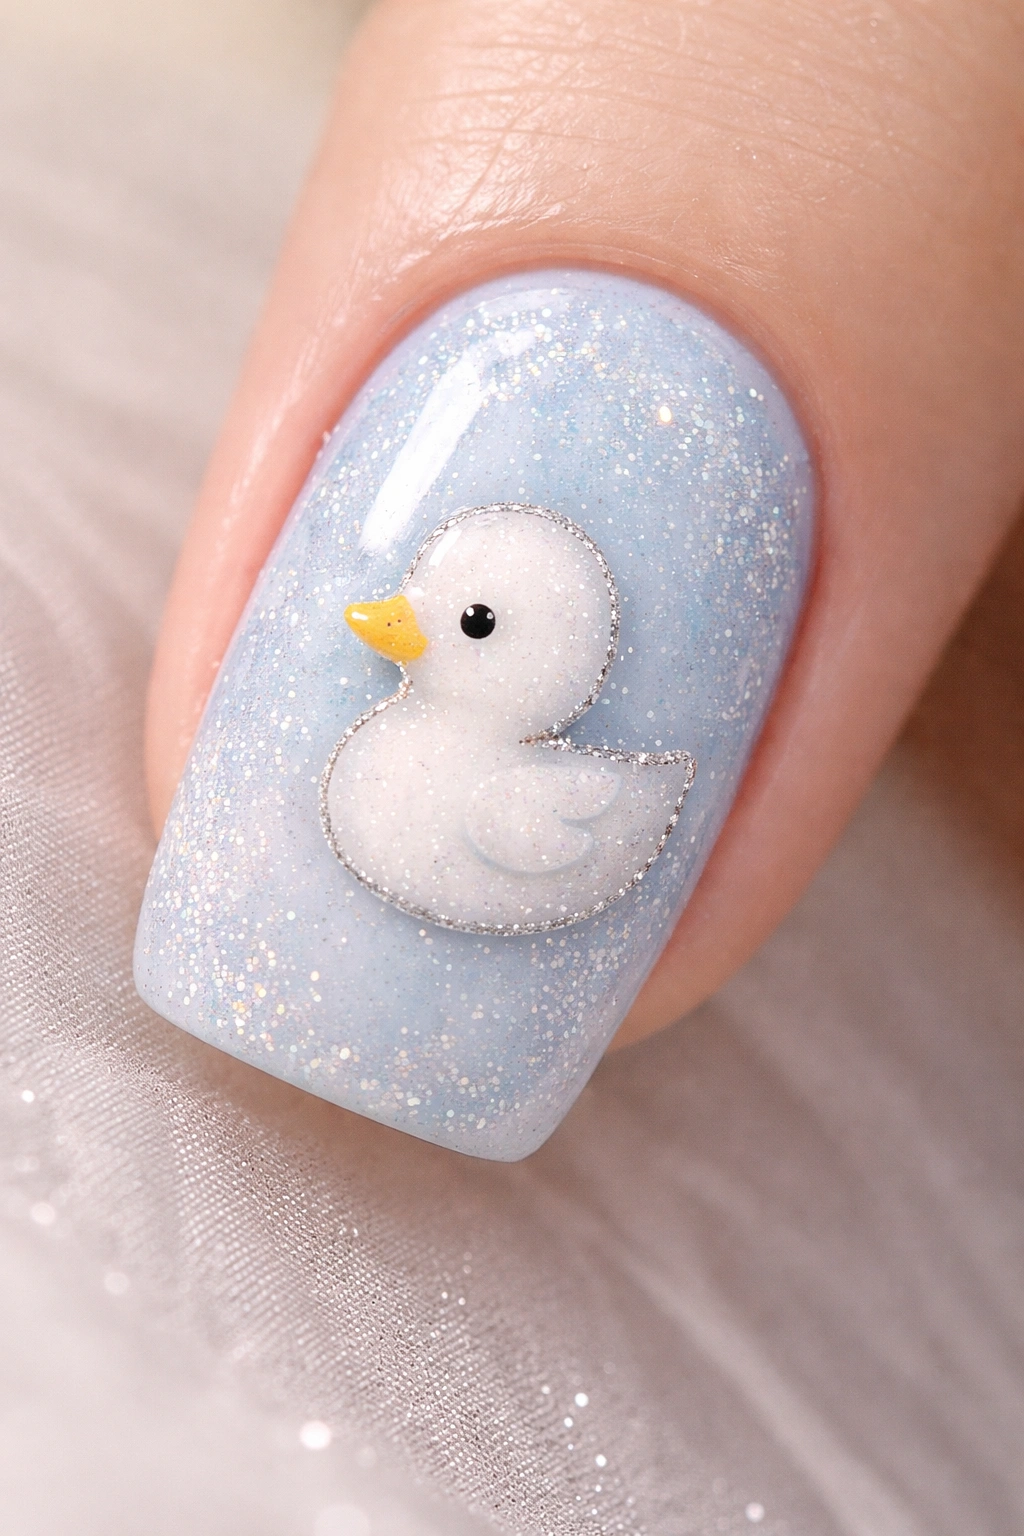
Add sparkle by incorporating glitter into duck designs — whether glitter-filled polish for the entire base, glitter accents around duck outlines, or glitter elements within the ducks themselves.
Glitter Application Methods
Full glitter base: Mix fine or medium glitter into a clear base coat and apply over your baby blue. This creates a sparkly foundation. Paint ducks on top using regular polish or white gel. The glitter peeks through and around the ducks, creating a festive, celebratory feel.
Glitter accents: Paint ducks in white or pastel, then outline them with a thin line of clear glitter topcoat or add tiny glitter dots around them. This keeps the design clean while adding just enough shine to feel special.
Ombré glitter: Apply baby blue at the base, then gradually add more glitter density toward the tips, creating an ombré effect from solid blue to heavily glittered. Paint ducks on top once dry.
Choosing Your Glitter
Fine glitter creates a refined, sophisticated shimmer. Medium or chunky glitter reads as more playful and celebratory. Holographic glitter shifts colors. Matching the glitter finish to the overall vibe of your design — whether you’re going delicate or bold — ensures the glitter enhances rather than overwhelms.
Best for: Celebrations and special occasions, people who love sparkle, those wanting their ducks to feel festive
8. Ombre Baby Blue Duck Design
An ombre design differs from a gradient in its steeper color transition and often uses multiple tones within the blue family — from pale icy blue to deeper periwinkle or navy. Ducks are layered over this multi-tonal background.
Creating Depth with Blue Tones
Select three to four shades of blue: a pale, almost-white blue; a mid-tone baby blue; a deeper periwinkle or soft blue-purple; and potentially a touch of navy or indigo. Apply these in horizontal bands across the nail, then use a sponge to blend the transitions until they’re soft and seamless. The result is a nail that feels dimensional and moody.
Where the Ducks Live in the Ombre
Paint ducks (typically in white or a contrasting pastel) across the ombre background, allowing them to float through multiple color zones. A single duck might have its head in the pale blue zone and its tail in the deeper blue, which creates the illusion that the duck is moving through the nail’s landscape. This is genuinely clever design.
Execution Tips
Blend your ombre thoroughly before sealing — any visible stripes will undermine the effect. Wait for the ombre base to fully cure before painting ducks. The smooth, blended base should feel complete and polished on its own before you add the duck details on top.
Best for: Sophisticated tastes, people who want visual drama, those who appreciate color nuance and depth
9. Baby Blue Duck with Geometric Patterns
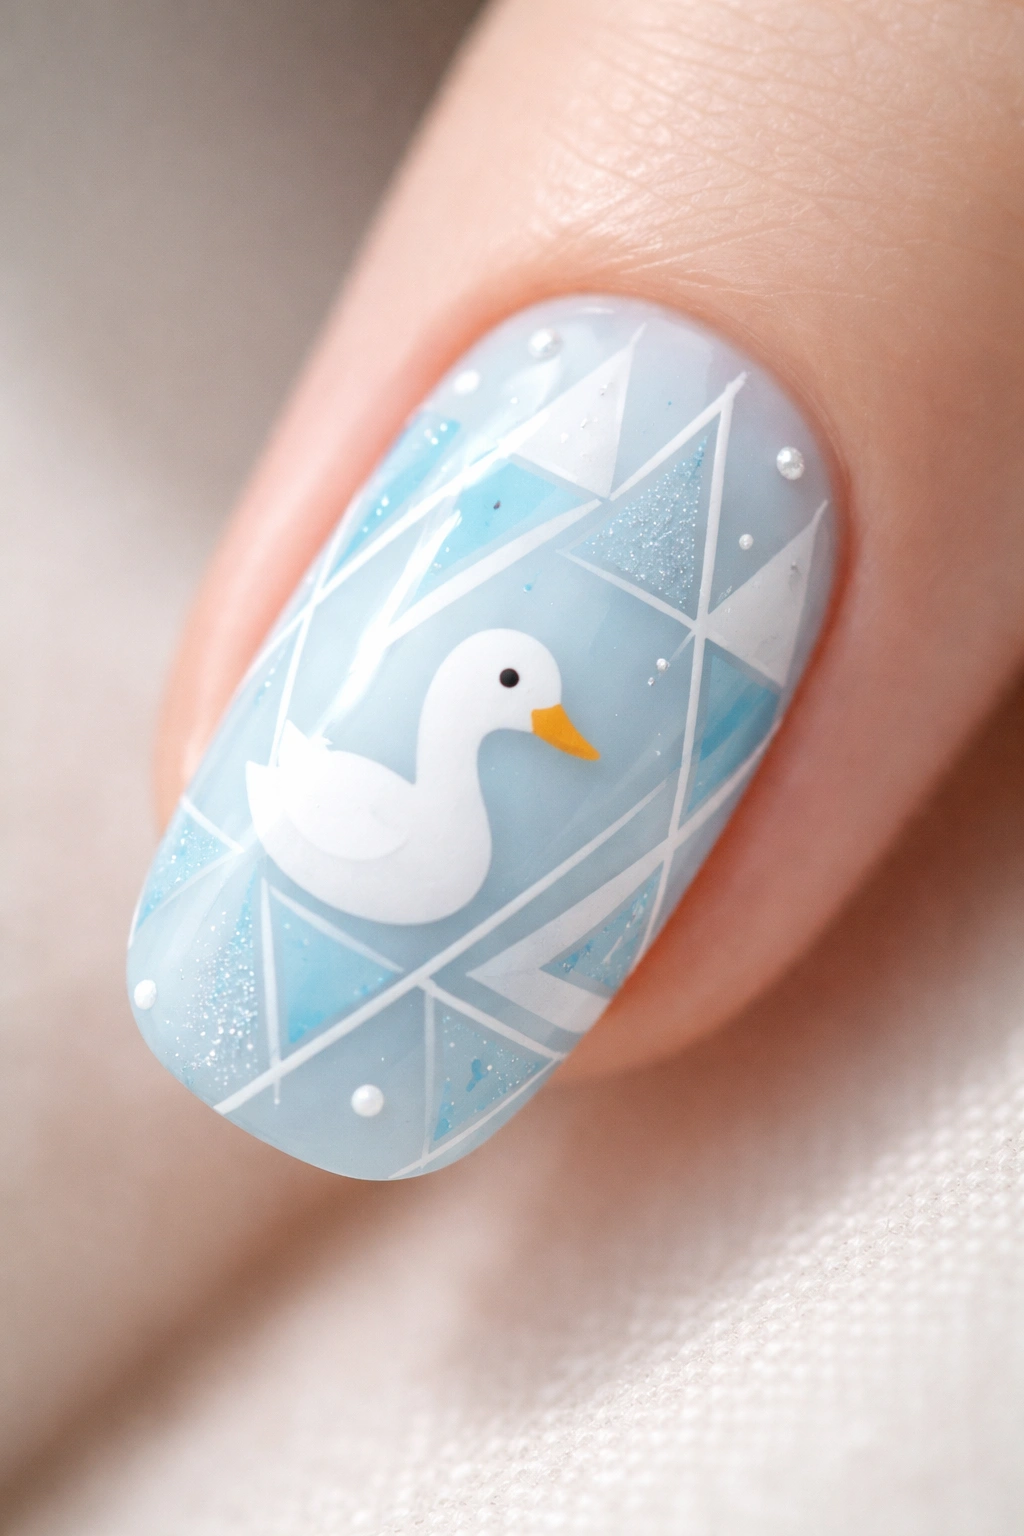
Combine duck imagery with geometric elements — triangles, lines, dots, or abstract shapes — to create a modern, almost architectural aesthetic. The geometry provides structure while the ducks add organic softness.
Balance Geometric and Organic Elements
The tension between structured geometry and the curves of duck forms is what makes this design visually interesting. You might create a geometric frame (lines, triangles, or borders) that the duck sits within, or use geometric elements as background pattern while ducks float on top. The key is intentional composition — nothing should feel accidental.
Geometric Pattern Ideas
Linear designs: Thin parallel lines across the nail create movement; position ducks so lines intersect with them interestingly.
Triangular or hexagonal divisions: Divide the nail into geometric sections; place a duck in some sections and leave others patterned or solid.
Dot matrix: A scattered pattern of tiny dots creates texture and visual interest without competing with duck details.
Abstract shapes: Paint semi-transparent geometric shapes (triangles, circles) in a lighter shade of blue or white; let them overlap with the ducks to create layering.
Color Considerations
Keeping geometric elements in the same color family (white or very light blue on baby blue, or light pastels) prevents the design from feeling too busy. The subtlety of the geometric pattern allows the ducks to remain the design’s focal point.
Best for: Modern, design-forward aesthetics, people who love contemporary art, minimalist sophistication
10. Matte Baby Blue Duck Nails with Dimensional Details
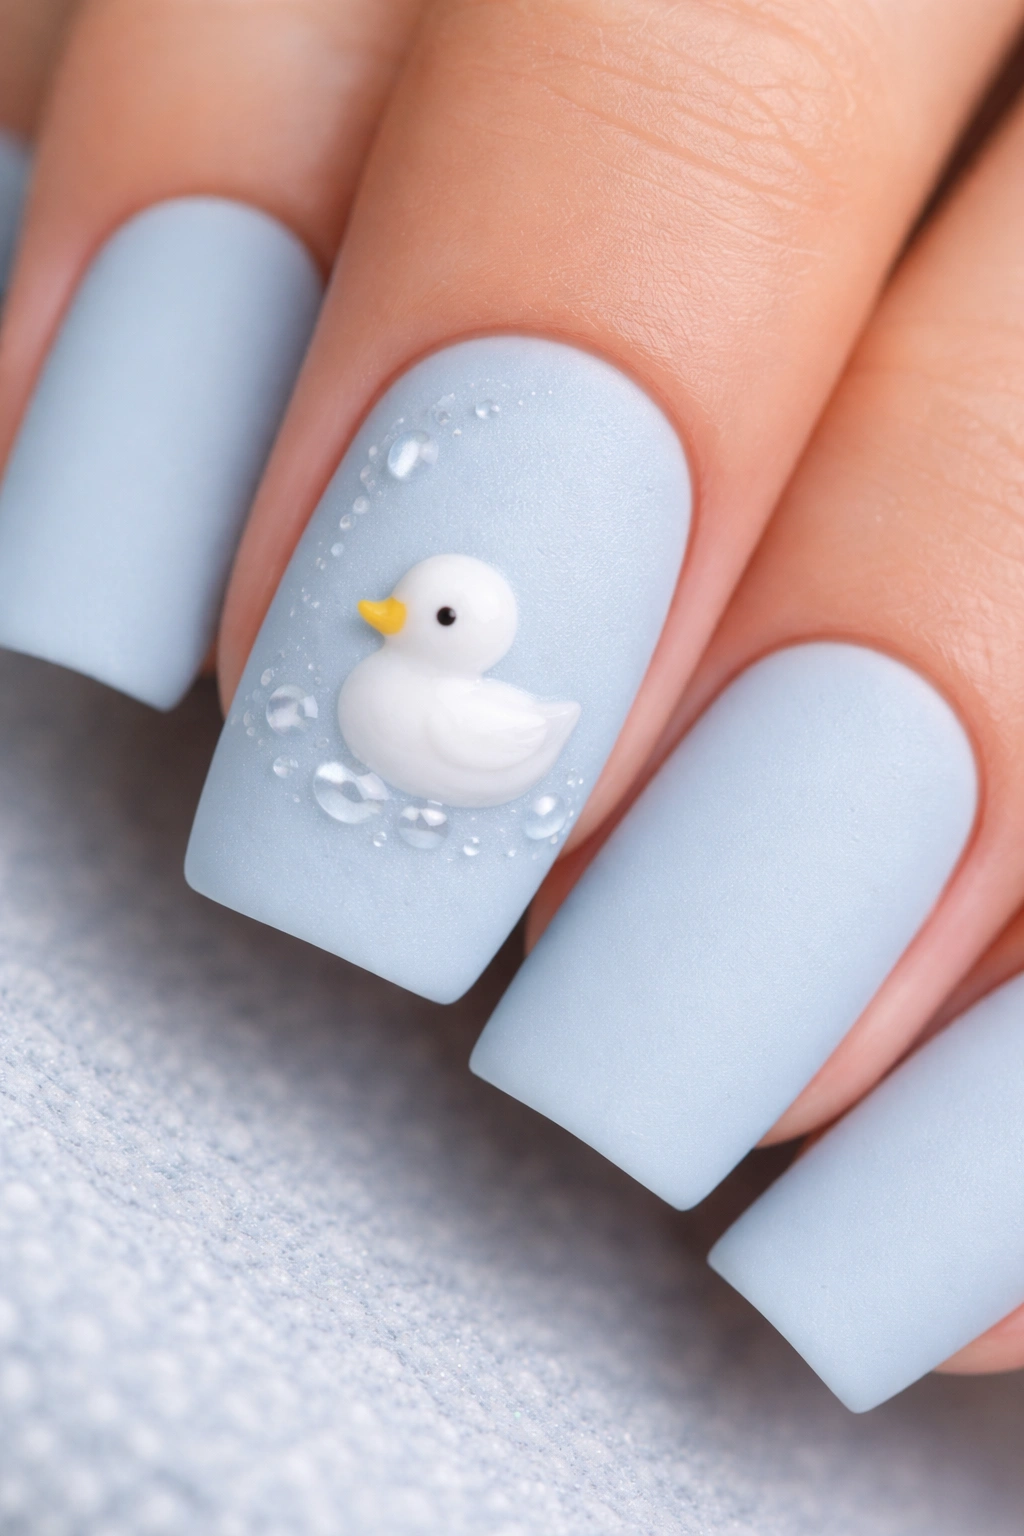
Most duck nails feature glossy finishes, which is why matte duck nails stand out. A matte topcoat changes the entire feel of the design, giving it a velvety, almost powder-soft appearance. Dimensional details — raised elements or contrasting finishes — add tactile interest to matte bases.
The Matte Advantage
Matte finishes make colors appear slightly deeper and more saturated. Baby blue in matte form looks richer, almost like soft velvet. Matte nails feel more modern and slightly edgy compared to traditional glossy manicures. The finish lends an artistic, almost fine-art quality to nail designs.
Adding Dimension to Matte
Create contrast by adding glossy elements to matte bases. Paint matte baby blue as your base, then paint ducks in a glossy white or glossy pastel. The ducks will appear to float above the matte surface due to the finish difference. Alternatively, create glossy accents — tiny flowers, dots, or borders — that pop forward against the matte background.
Textural Elements
Some nail artists add subtle texture to matte duck nails using a matte topcoat with added elements: a tiny amount of glitter pressed in before it fully dries, or velvet powder (which creates an actual velvet texture) applied to specific areas. These textural touches elevate the design from simple to genuinely innovative.
Maintaining Matte Nails
Matte finishes show oil and fingerprints more readily than glossy finishes, so you’ll want to refresh the matte topcoat every few days or switch to a long-lasting gel matte option if you want longevity.
Best for: Art lovers, people who want unconventional aesthetics, those seeking understated sophistication, anyone tired of glossy nails
Final Thoughts
Baby blue duck nails work because they’re inherently joyful without being juvenile. Whether you choose the simplicity of white ducks on solid blue, the drama of hand-painted portraits, the sparkle of chrome or glitter, or the modern edge of geometric elements, you’re choosing a design that’s distinctly yours.
The real secret to nailing duck nail art (pun absolutely intended) is understanding that the design should feel intentional. Every element — the shade of blue, the duck style, any additional details — should exist because you consciously chose it, not because you felt obligated to add complexity. Some of the most stunning duck manicures are remarkably simple.
Start with whichever approach resonates with you, whether that’s minimal and meditative or detailed and artistic. If you’re new to nail art, those soft white ducks on baby blue are a perfect entry point. If you’re experienced and want something that challenges you, hand-painted duck portraits or chrome designs will keep you engaged. The beauty of this trend is that it scales perfectly from beginner-friendly to seriously advanced, meeting you wherever you are in your nail art journey.
Your duck nails should make you happy every time you look at your hands. That’s the only rule that really matters.
