

Black duck nails have become a statement-making favorite among people who love bold, dramatic nail designs that still feel sophisticated enough for professional settings. The elongated, curved shape of duck nails—sometimes called the Margot Robbie nail—pairs perfectly with deep, rich black finishes that create an instantly elegant silhouette. What makes black such a versatile choice for this particular nail shape is how it works as both a minimalist canvas and a dramatic backdrop for embellishments. Whether you’re after understated elegance, eye-catching glamour, or something in between, black duck nails offer endless creative possibilities.
The beauty of this nail style lies in its adaptability. Black doesn’t have to mean simple or boring—it can be glossy or matte, plain or adorned, minimalist or maximal. You can dress it up for special occasions or wear it as everyday chic. The duck nail shape itself elongates the fingertips and creates a graceful line, and black amplifies that effect by creating clean visual boundaries. If you’ve been wanting to try this look but weren’t sure where to start, or if you’re already a fan looking for fresh inspiration, here are eleven stunning black duck nail ideas that range from classic to creative.
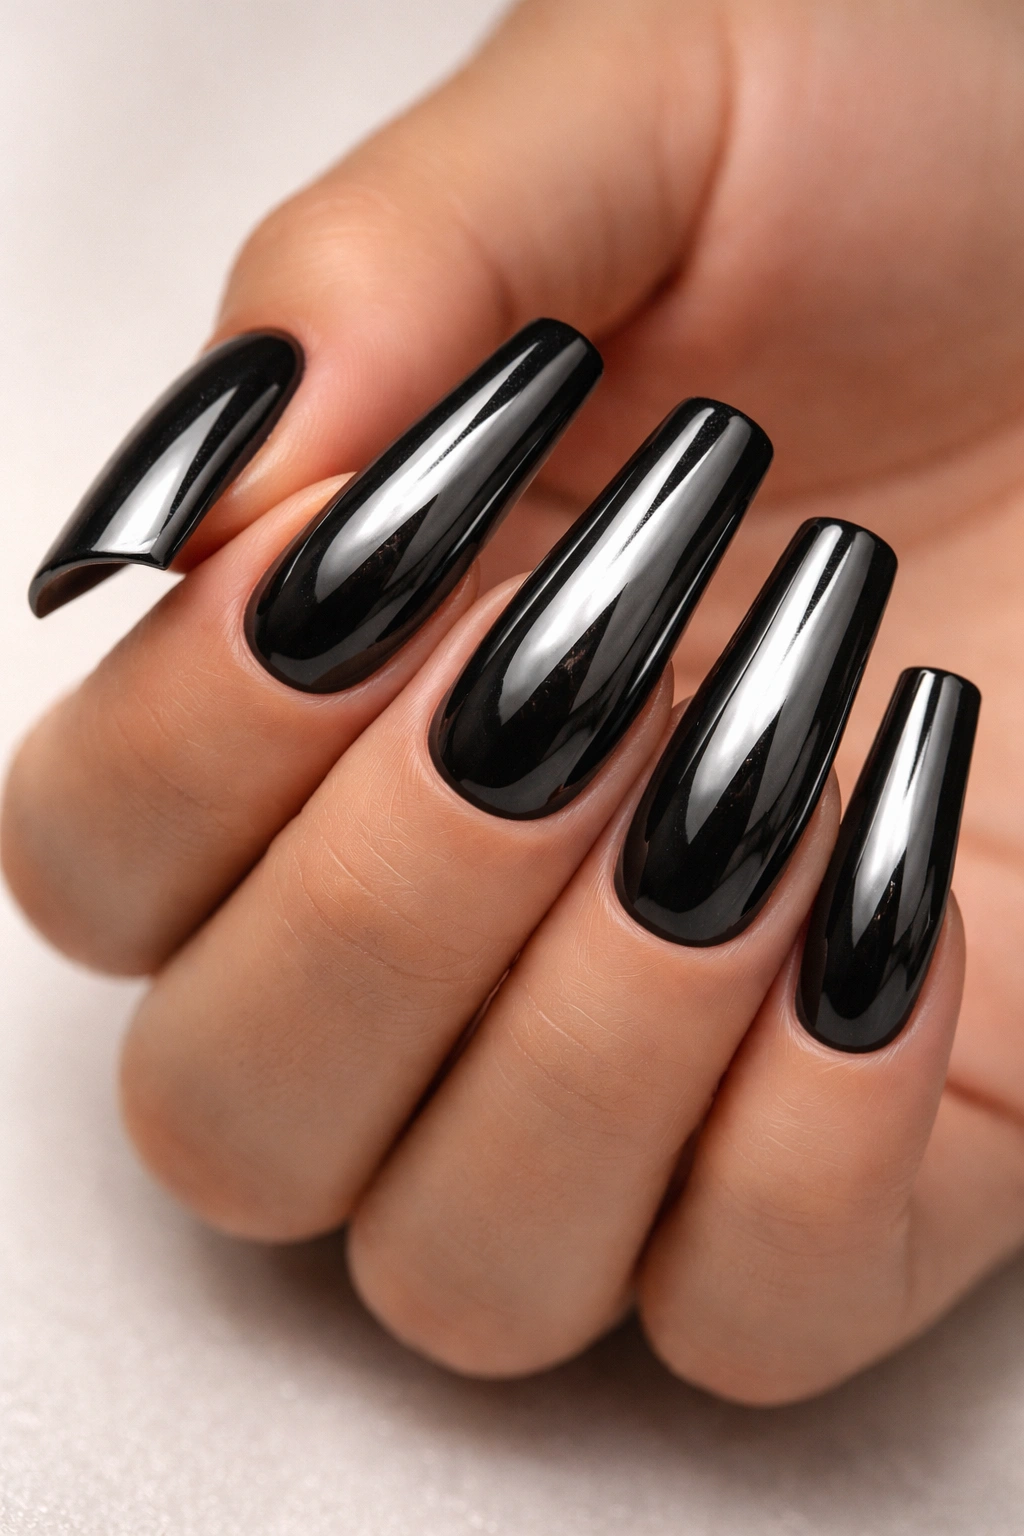
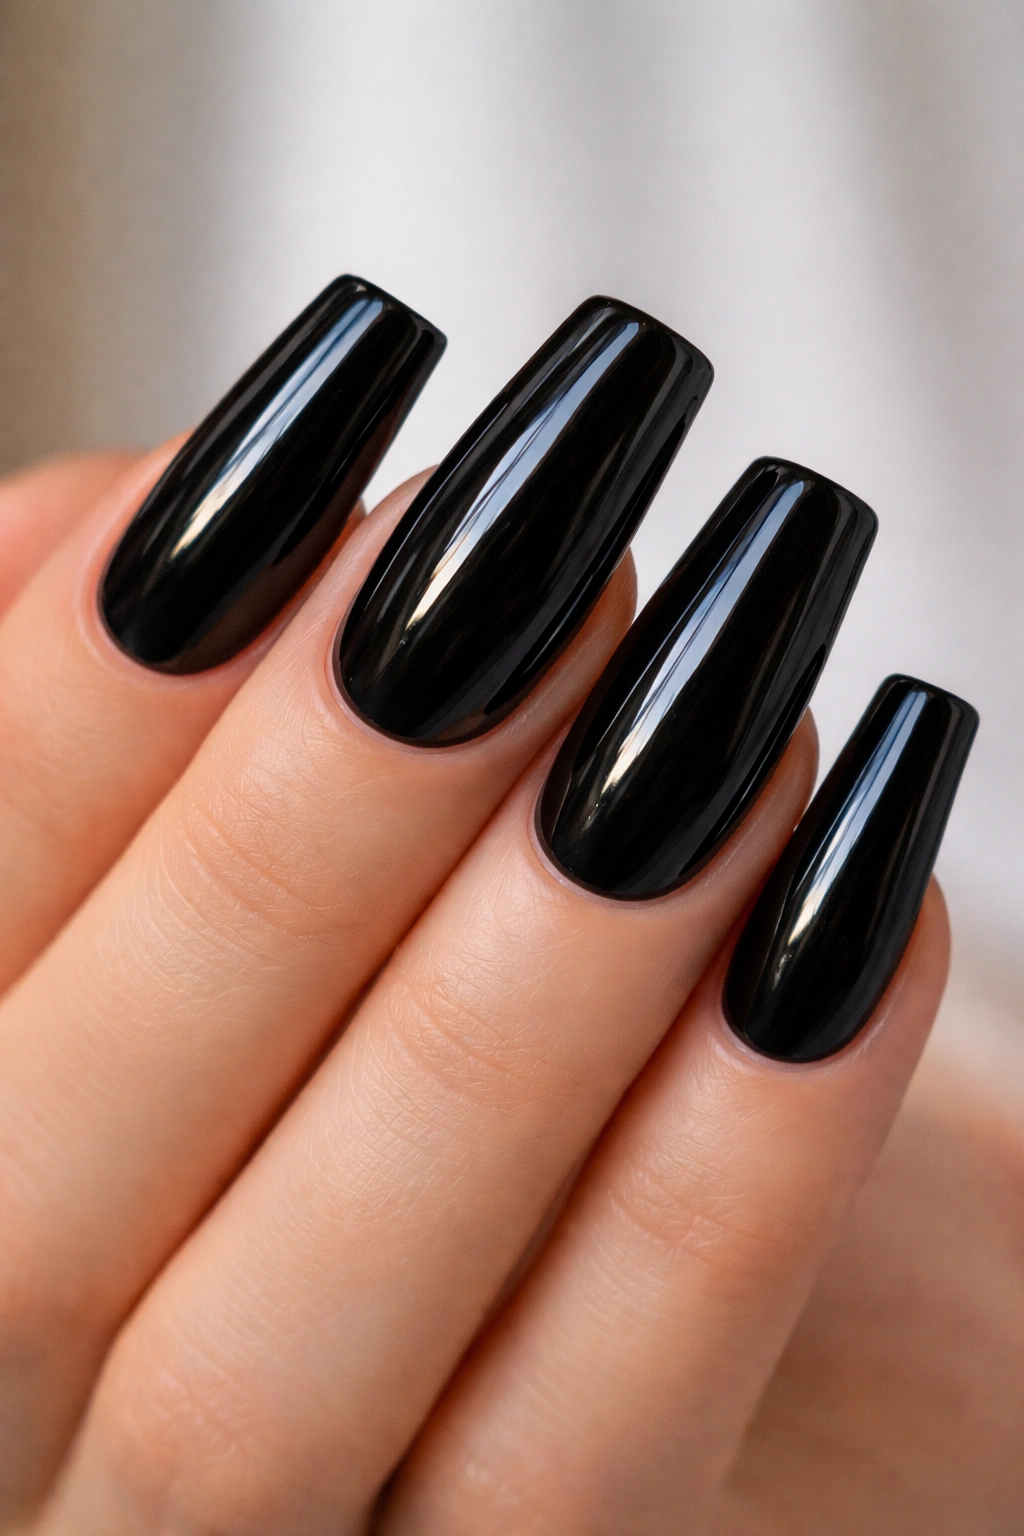
1. Classic Glossy Black Duck Nails
There’s a reason the simple glossy black duck nail never goes out of style—it’s effortlessly chic and works with absolutely everything. A high-shine, glossy black finish on duck-shaped nails creates an illusion of length and elegance that feels both polished and modern. The reflective surface catches the light beautifully, giving your nails subtle dimension even without added embellishments.
Why This Design Works
The glossy finish on black creates an almost mirror-like effect that draws attention to the nail shape itself. Without any pattern or texture to distract, the focus stays on the graceful curved silhouette of the duck nail form. This works exceptionally well because the elongated shape paired with black’s visual weight creates a lengthening effect that flatters most hand shapes and proportions.
Application Tips for Perfect Results
- Use a creamy black gel or regular polish that has excellent pigmentation—cheap black polish often has a grayish or dull appearance, which defeats the purpose of a glossy finish
- Apply thin, even coats rather than one thick coat. Two coats of a quality black polish will deliver better coverage and shine than a single heavy-handed application
- Invest in a good top coat that delivers genuine glossy shine—this is what makes the difference between a basic manicure and one that looks professionally done
- If you’re using regular polish, seal it with a quality shiny top coat every two days to maintain the pristine glossy appearance
Pro tip: File your duck nails into a smooth, even curve before applying polish. Any bumps or irregularities in the nail shape become much more visible with a glossy black finish, so take time with the shaping.
2. Matte Black Duck Nails with Gold Accents
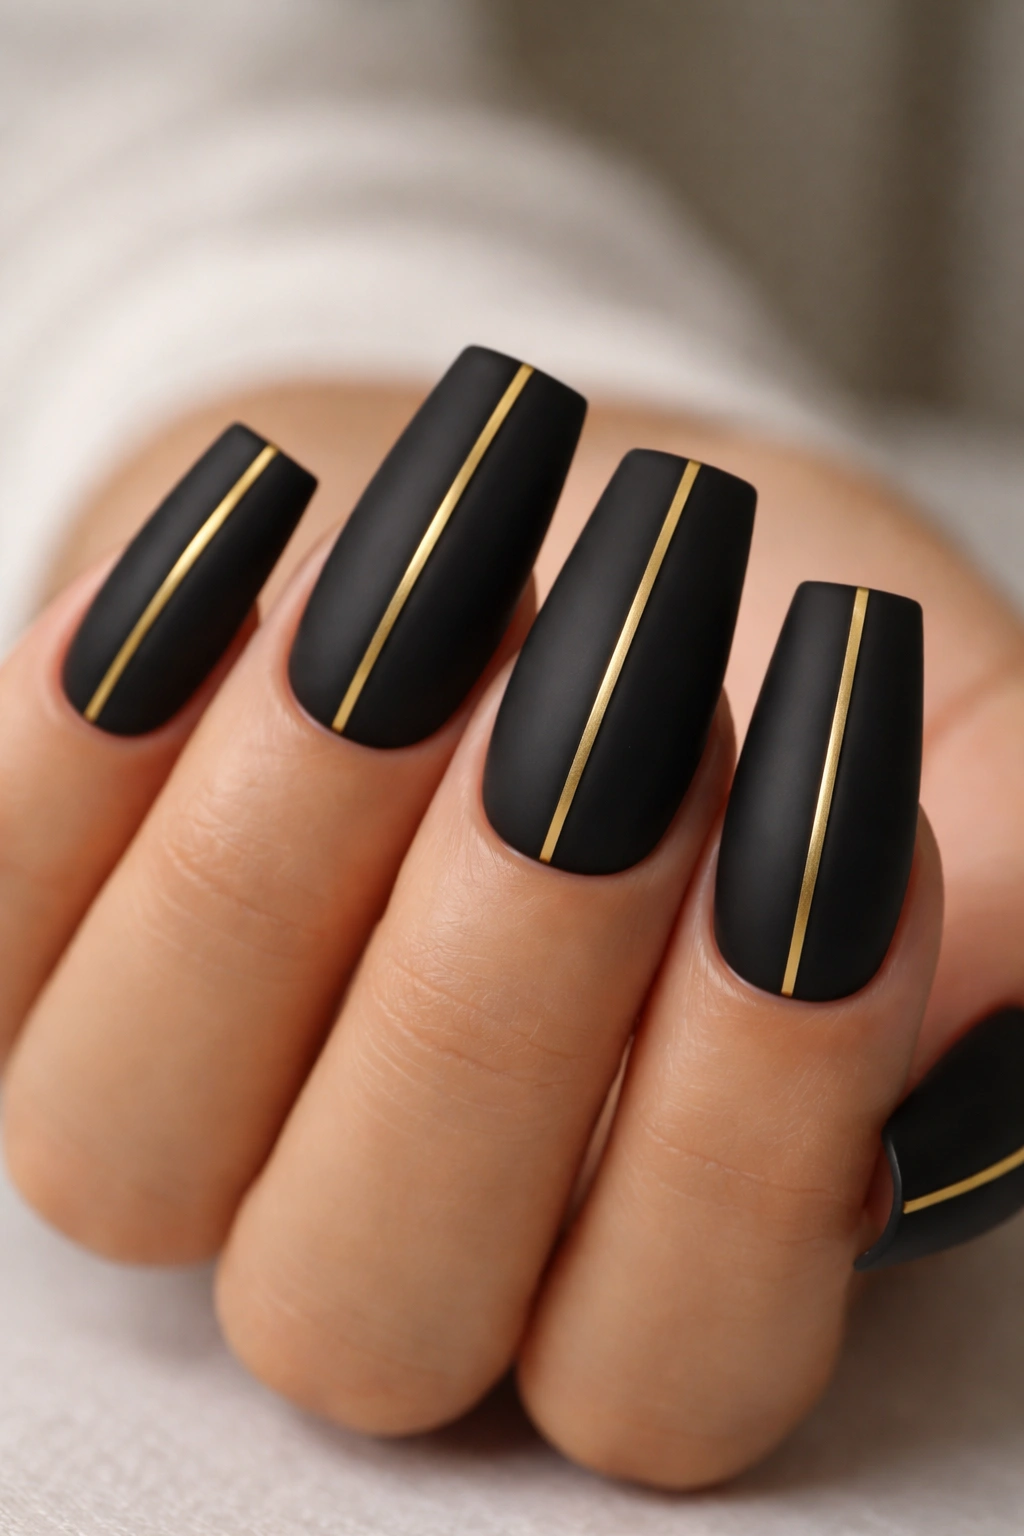
The contrast between velvety matte black and warm metallic gold creates an instantly luxurious look that feels expensive and intentional. Matte black is more understated than glossy, allowing gold accents to become the focal point of the design without overwhelming the overall effect. This combination walks the perfect line between dramatic and sophisticated.
Why Matte Transforms the Look
Matte black absorbs light rather than reflecting it, which makes the finish feel deeper and more complex. When you layer gold accents on top of this matte base, the gold practically glows in comparison. The contrast between the two finishes creates visual interest without requiring complicated nail art skills. This is what makes matte-and-metallic combinations so effective—they look intricate but are surprisingly simple to execute.
Gold Accent Placement Ideas
- A thin gold stripe down the center of each nail, following the curve of the duck shape
- A gold geometric outline around the edge of each nail, creating a frame effect
- Gold dots scattered across the matte black surface in a constellation pattern
- A solid gold accent nail among the matte black nails for a pop of brightness
- A gold ombre that fades from concentrated at the tip to barely-there at the cuticle
Worth knowing: Metallic gold nail polish or metallic gel provides richer color than gold nail art pens. If you’re hand-painting gold lines, use a thin nail art brush and steady your hand against the edge of your palm for controlled, even lines.
3. Black Duck Nails with White Geometric Lines
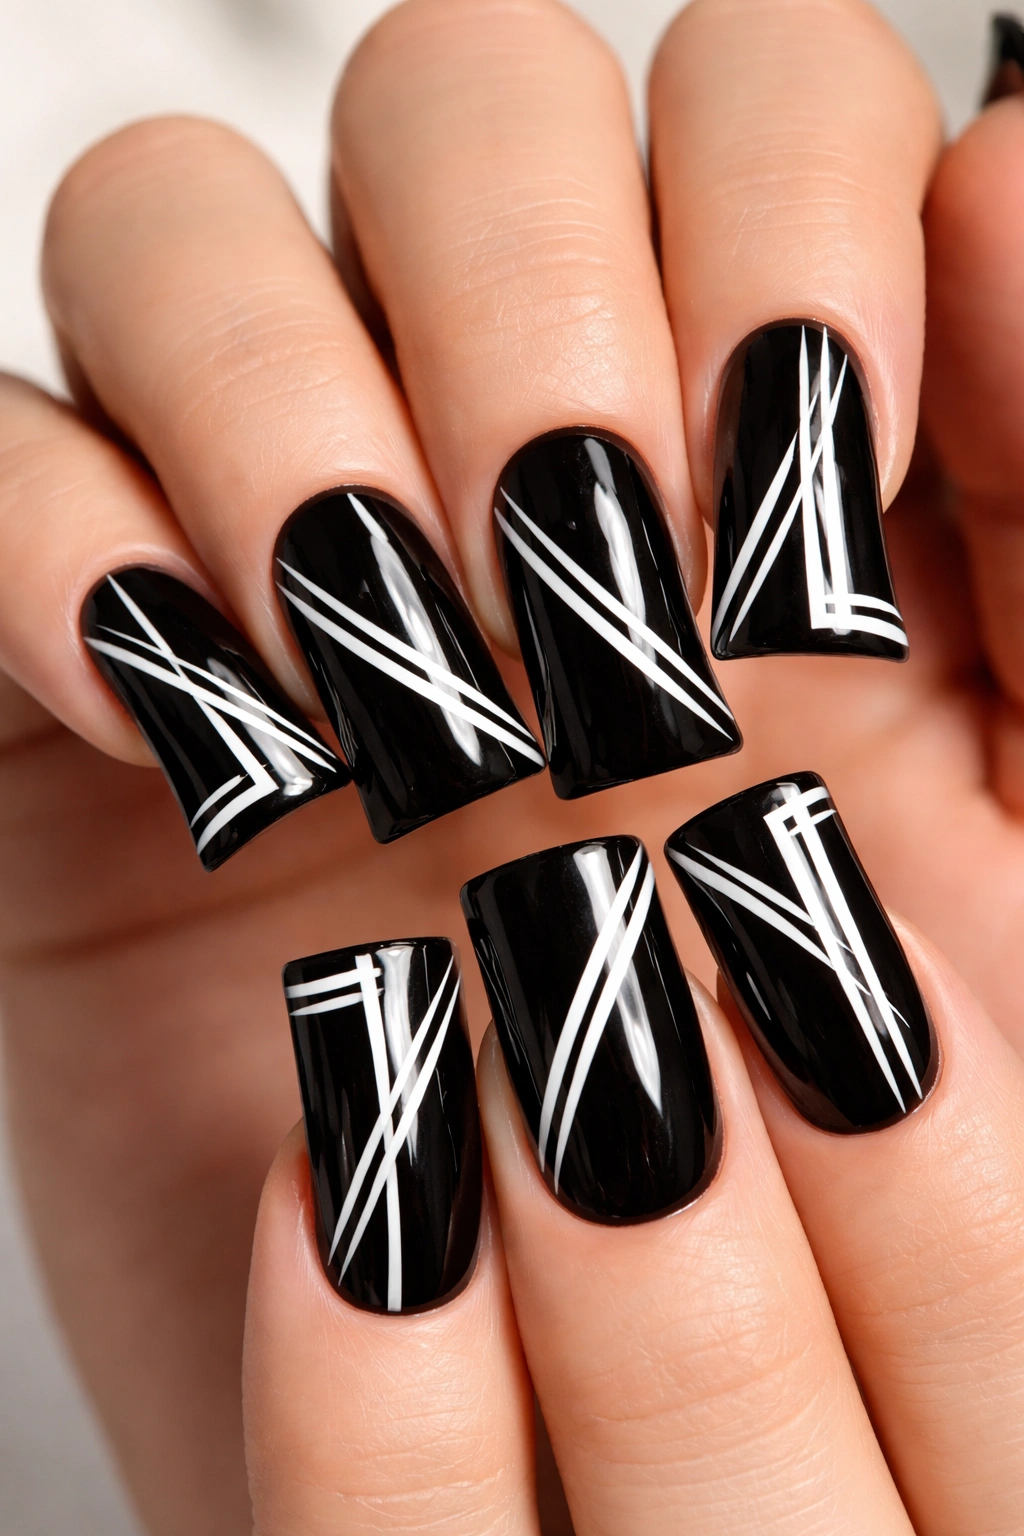
Geometric patterns bring a modern, artistic edge to black duck nails, and white lines create high contrast that makes the design impossible to ignore. Whether you’re working with simple stripes, bold triangles, or intricate angular patterns, white-on-black geometry always reads as contemporary and intentional. The clean lines complement the smooth curves of the duck nail shape beautifully.
Design Patterns Worth Trying
- Vertical white stripes spaced evenly across each black nail
- A single bold white diagonal line across each nail from inner corner to outer edge
- Triangular or diamond shapes created with white lines, positioned at the tips
- A combination of white lines and negative space (bare nail) creating a graphic effect
- A white outline around the entire edge of the duck nail, creating a frame
Execution Tips for Crisp Lines
- Use a fine-tipped nail art brush or a striping brush designed specifically for nail work. Regular brushes are too thick and will create wobbly, imprecise lines
- Paint slowly and steadily. Rushing will result in shaky lines and uneven edges
- White polish can be transparent, so use an opaque white or apply multiple thin coats rather than one thick coat
- If hand-painting feels intimidating, nail striping tape is a game-changer. Apply the tape in your desired pattern, paint white polish over the entire nail, and remove the tape to reveal clean white lines
Quick fact: Matte black and white lines create sharper contrast than glossy black and white. If you want your geometric design to really pop, use a matte black base rather than glossy.
4. Black Duck Nails with Rhinestone Embellishments
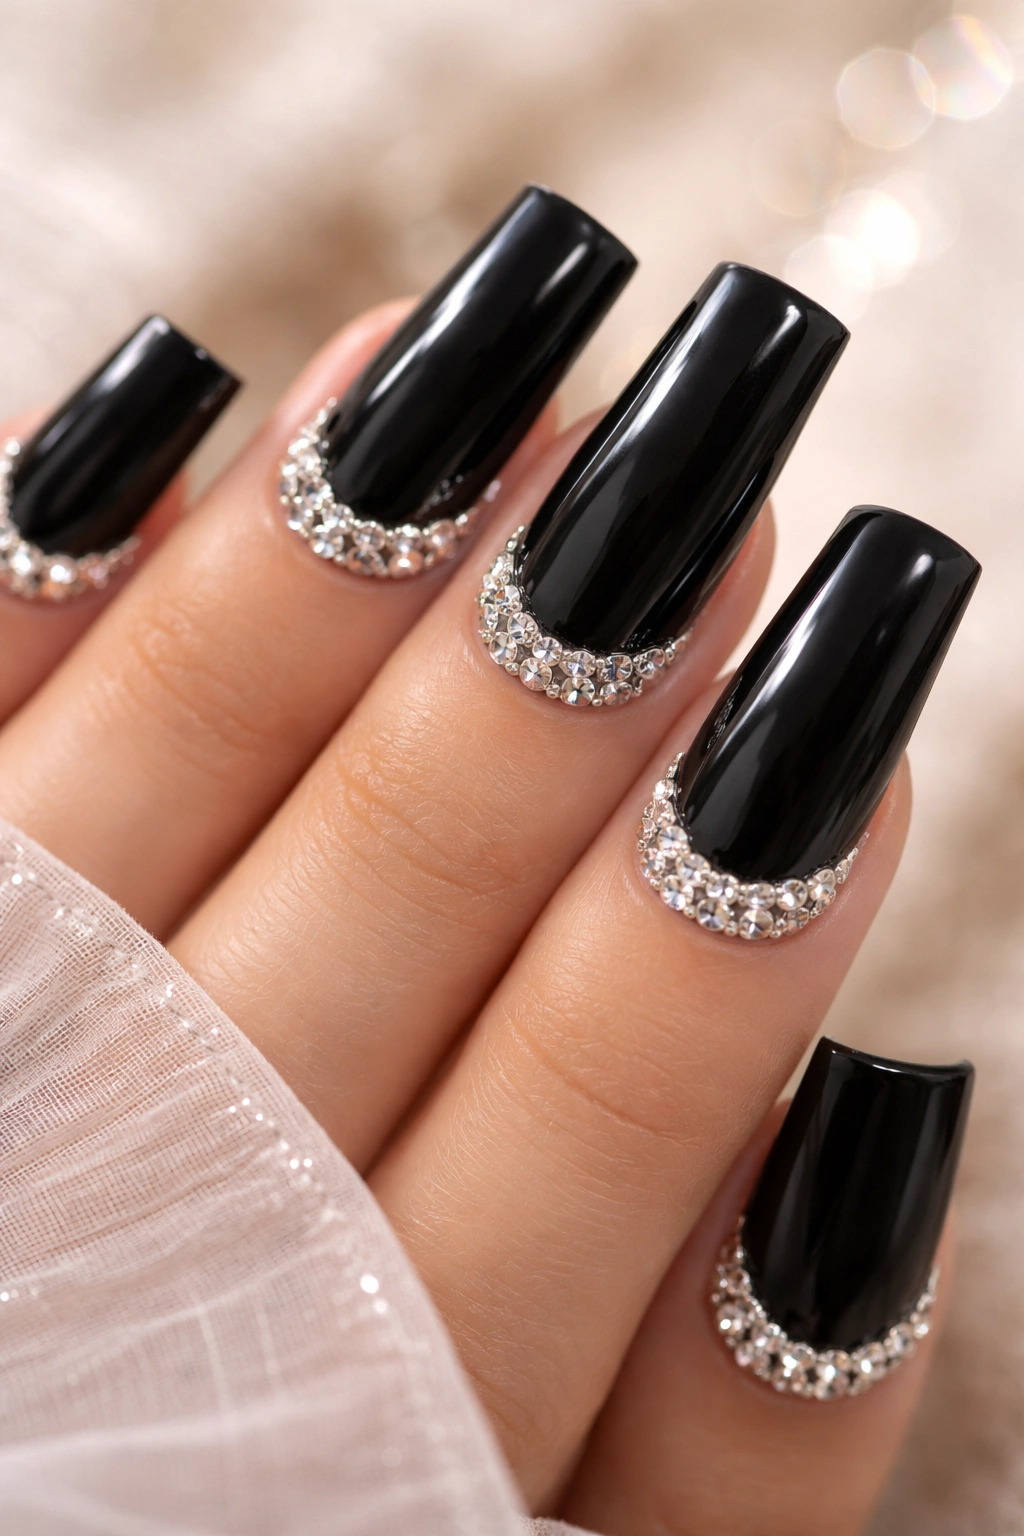
Rhinestones instantly elevate black duck nails from everyday to occasion-ready, adding sparkle and luxury without overwhelming the base color. Whether you’re embedding tiny stones across the entire nail or creating a strategic cluster at the tip, rhinestones catch light and create movement that’s impossible to ignore. This is the go-to design when you want your nails to feel truly special.
Where to Place Rhinestones
- A dense cluster covering the bottom half or tip of each nail, creating a gradient from bare at the cuticle to fully bejeweled at the free edge
- A vertical line of rhinestones running down the center of each nail, following the natural curve of the duck shape
- Random scattered rhinestones across all five nails, like stars scattered across a night sky
- A concentrated cluster on just one or two accent nails for subtle sparkle
- A border of stones around the edge of each nail, creating a decorative frame
Rhinestone Application Best Practices
- Use nail glue or gel specifically formulated for applying rhinestones, not regular top coat—these are stickier and will hold stones longer
- Apply stones to tacky uncured gel or wet top coat for best adhesion
- Press each stone gently but firmly straight down—wiggling or adjusting after placement can dislodge the adhesive
- Allow at least 24 hours for the glue to fully cure before getting your hands wet or doing activities that might snag the stones
- Seal rhinestones with a layer of clear top coat to protect them and extend their longevity
Pro tip: Not all rhinestones are created equal. Swarovski crystals are significantly more sparkly and durable than cheap flat-backed rhinestones, and the difference is noticeable. If you’re investing time in application, invest in better stones.
5. Black Duck Nails with a Red Accent Nail
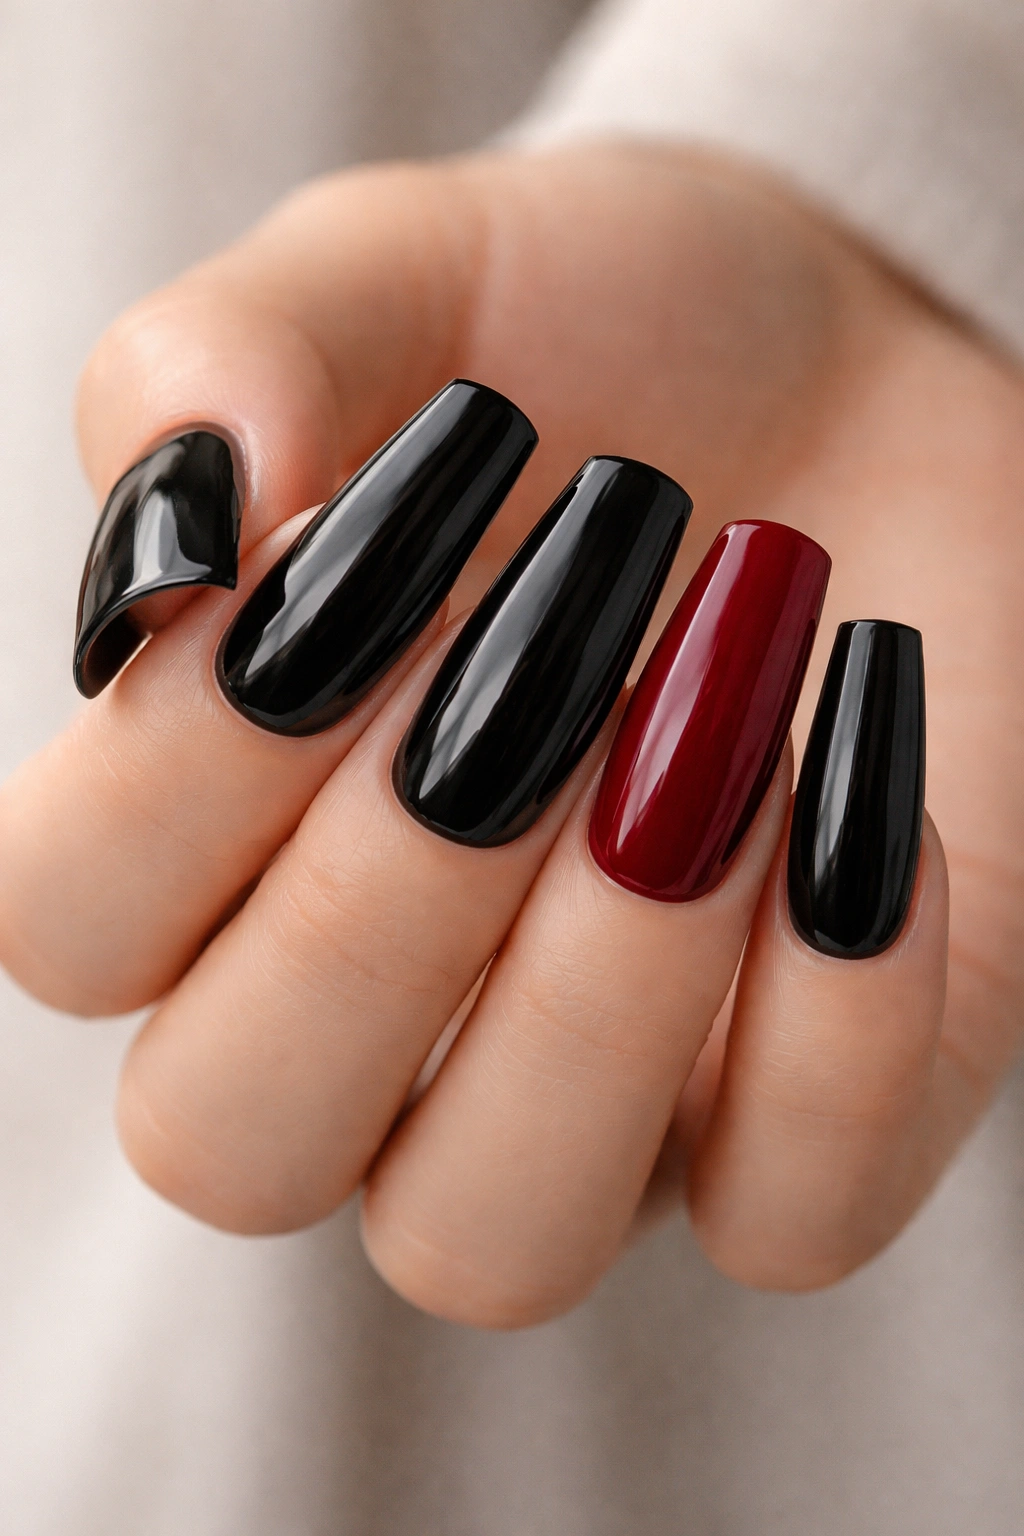
Sometimes the most impactful design choice is one of restraint. An all-black duck nail set with a single red accent nail creates bold contrast while maintaining an overall sophisticated appearance. The red draws the eye and adds personality without sacrificing the elegant simplicity of the design. This approach works especially well on the ring finger or middle finger, where a statement nail truly stands out.
Red Shade Considerations
- A deep burgundy or oxblood red on black creates a moody, autumn-inspired look
- A bright cherry red against black feels bolder and more modern, with a retro edge
- A metallic red or red with gold flakes adds extra dimension and catches light beautifully
- A matte red accent against glossy black nails (or vice versa) adds textural interest
Why One Accent Nail Works So Effectively
The human eye is drawn to contrast and change. When you have ten nails of black and then suddenly one nail of red, that red nail becomes the focal point whether you intend it to or not. This is actually an advantage—it means you don’t need an elaborate design on that accent nail. The color alone is statement enough. You could paint it solid red, add a simple gold line, or keep it completely plain, and the effect will still be striking.
Quick fact: Nail stylists call a single contrasting nail a “statement nail” or “accent nail,” and it’s one of the easiest ways to make a manicure feel deliberately designed rather than accidental.
6. Black Duck Nails with Marble Effect
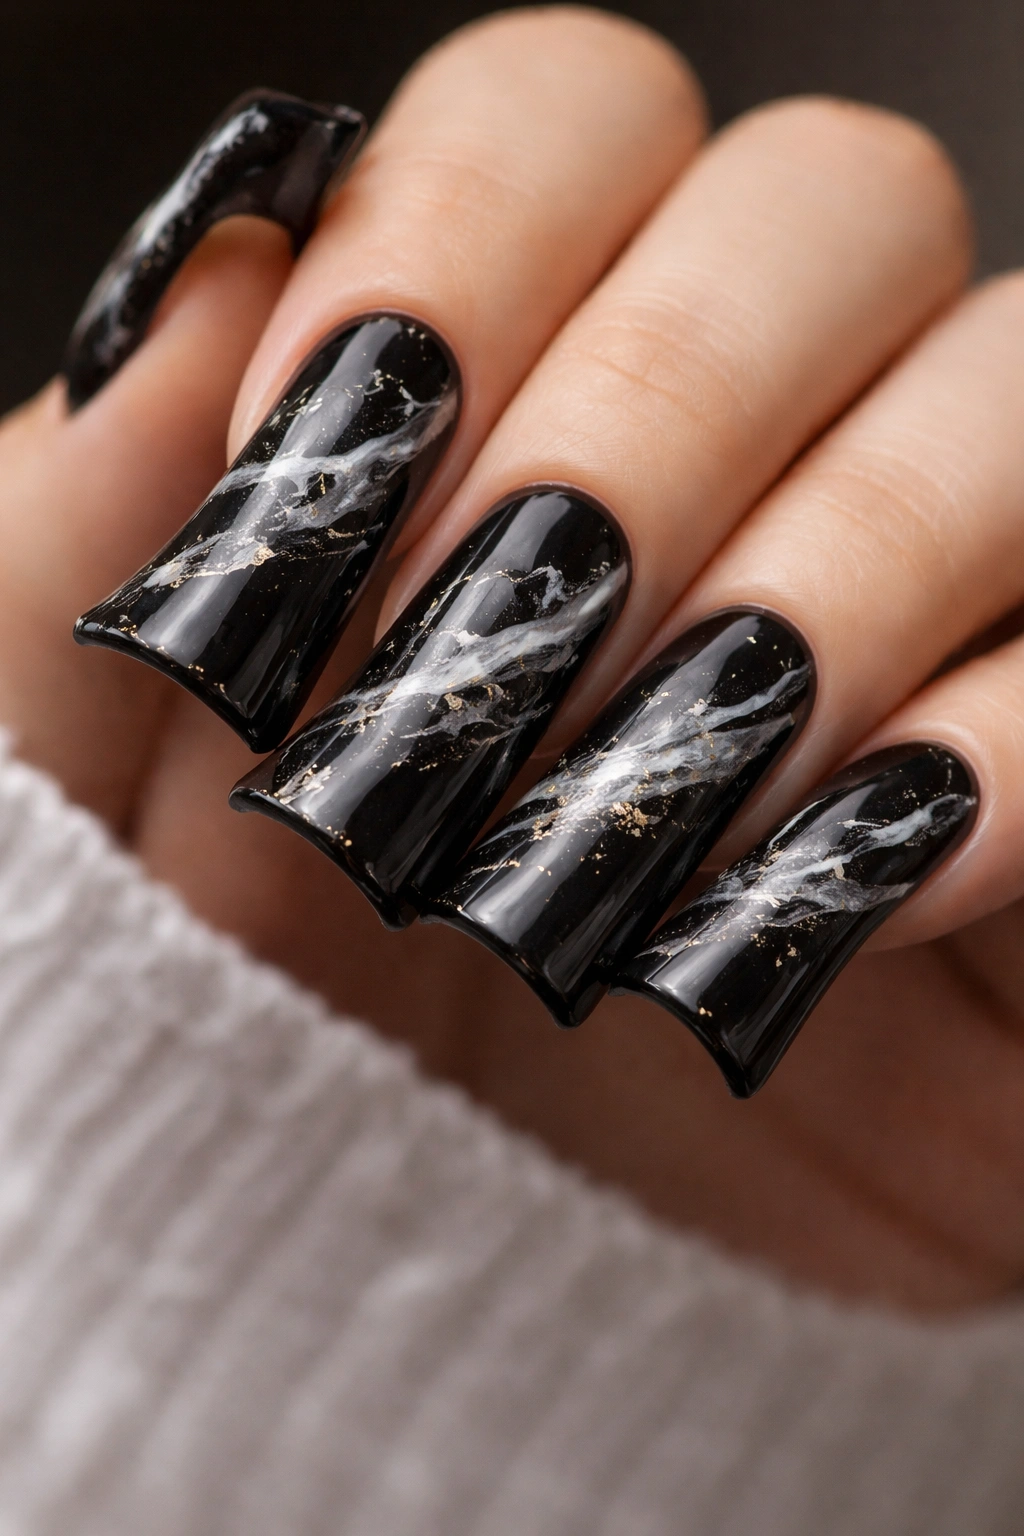
Marble effects add texture and organic movement to black duck nails, transforming them from solid to sophisticated with just a bit of nail art technique. The swirled veining of marble—whether in white, gray, or metallic tones—creates a natural, artistic look that feels elevated and intentional. This design works especially well on duck nails because the elongated shape provides plenty of canvas for the marble pattern to show.
Creating a Marble Effect
The classic method involves dropping small amounts of contrasting polish into water, swirling to create a pattern, then dipping the nail into the water to pick up the design. This technique requires some practice but absolutely works. Alternatively, you can use a marble effect top coat or nail polish specifically formulated to create marble finishes with just one or two applications.
Marble Color Combinations on Black
- Black base with white and gray marble veining for a classic, elegant look
- Black with white marble and subtle gold specks for a more luxurious feel
- Black with iridescent or holographic marble for a futuristic twist
- Black with metallic silver marble for cool-toned sophistication
Foolproof Alternative Approach
If the water marbling technique feels too uncertain, use nail art tools to hand-paint veining onto your black base. A thin brush and white or gray polish can create convincing marble-like patterns. It won’t be identical to water marbling, but it will still look intentional and artistic. The beauty of marble is that natural marble itself is unpredictable, so there’s no “wrong” way to create it.
Worth knowing: Marble effects show best on a matte or satin finish rather than glossy, because the flat texture allows the veining pattern to stand out without competing with shine.
7. Black Duck Nails with Chrome or Mirror Finish
Chrome and mirror finishes represent the cutting edge of nail design technology, creating a reflective, futuristic effect that’s difficult to achieve any other way. A chrome or mirror finish on black duck nails creates an almost liquid, metallic appearance that’s utterly captivating. This is the look that makes people stop and ask what product you used.
Understanding Chrome vs. Mirror Finishes
Chrome finish typically uses chrome powder (a finely milled metallic powder) applied to wet gel polish, creating a reflective metallic surface. Mirror finish is similar but creates an even more reflective, almost mirror-like effect. Both require gel polish and careful application technique. Regular polish cannot create these finishes.
Application Process Overview
- Apply a layer of colored gel polish (in this case, black) and cure according to product instructions
- While the gel is still slightly tacky (or on a fresh layer of tacky gel), apply chrome or mirror powder using a soft brush, working it gently into the surface
- Brush away excess powder and seal with a gel top coat, being careful not to disturb the powder with aggressive brushing
- Cure in an LED lamp according to product timing
Design Variations with Chrome
- A full chrome finish across all ten nails for a completely futuristic look
- Chrome applied only to the tips of the nails, creating a gradient from black to chrome
- A single chrome nail among black duck nails for a modern accent
- Chrome combined with matte areas, creating contrast between finishes
Pro tip: Chrome powder shows best on darker polish colors, and black is ideal. The contrast between the dark base and the reflective chrome creates stunning visual depth.
8. Black Duck Nails with Holographic Sparkle
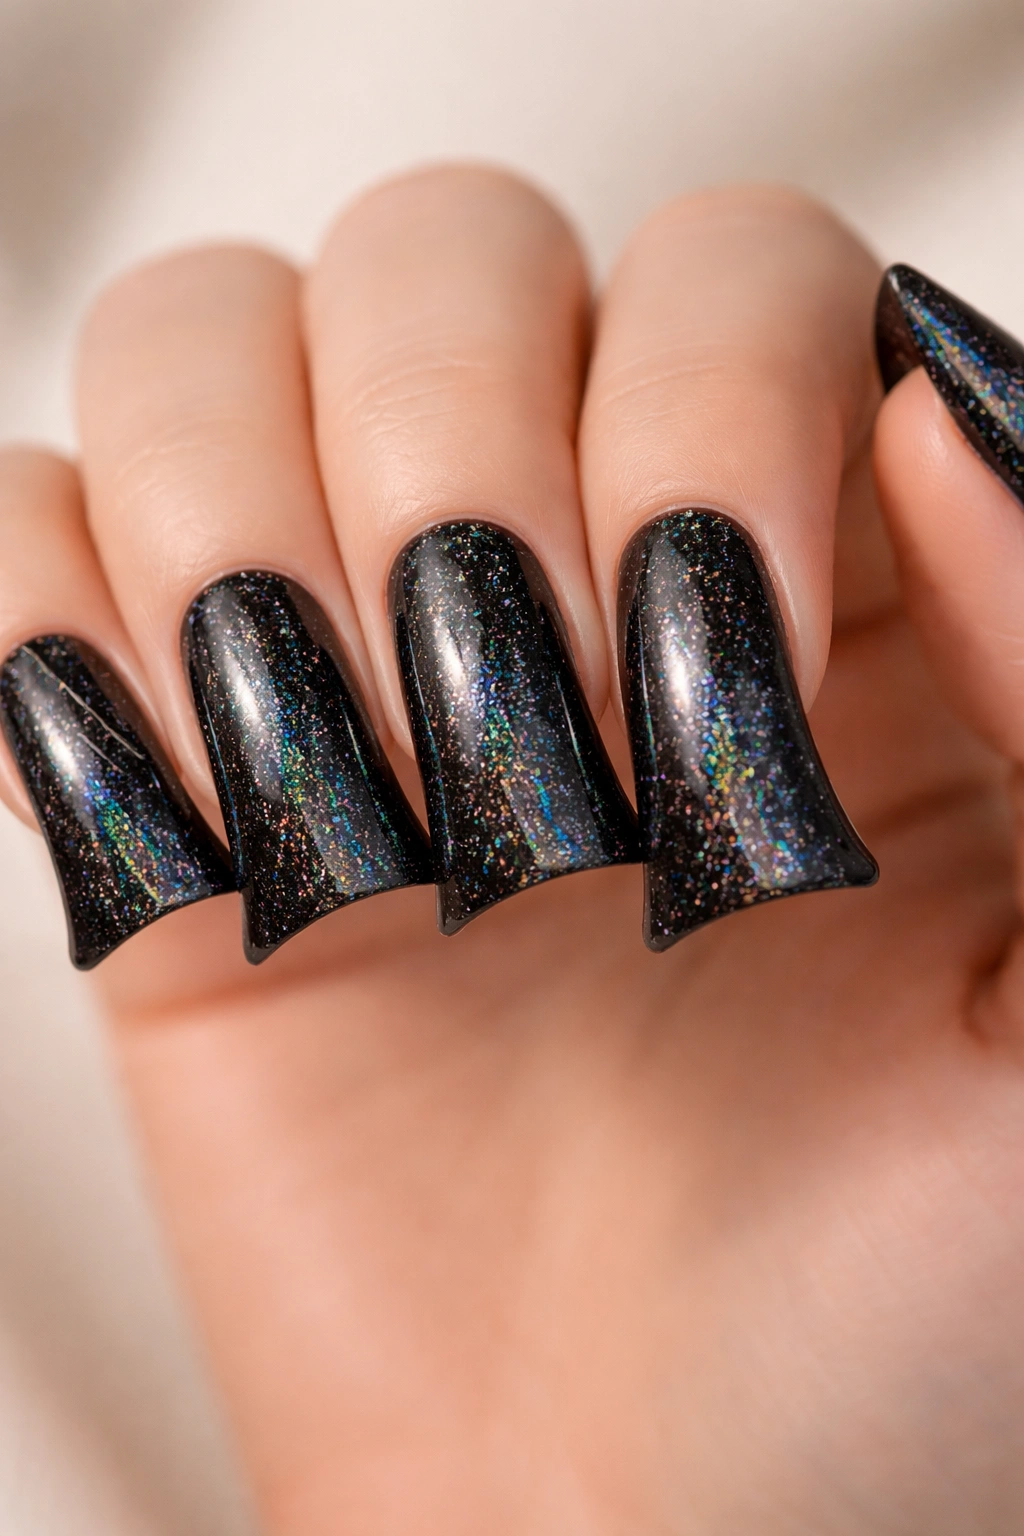
Holographic polish adds rainbow sparkle and movement to black duck nails without looking cartoonish or overly flashy. The fine glitter particles catch light and create color-changing effects that draw attention and create visual excitement. This is the design choice when you want something glamorous that also has genuine movement and depth.
Holographic Polish Types
- Holographic top coats applied over black base color—allows you to control the amount of sparkle
- Pre-made holographic black polish (some brands create black with holographic glitter built in)
- Holographic flakes or glitter suspended in a clear gel, applied over black polish for a custom effect
Why Holographic Reads as High-End
Holographic effects catch light in multiple directions simultaneously, creating a quality that solid glitter simply cannot match. When you move your hands, holographic nails seem to shimmer and shift in ways that feel expensive and intentional. This is why holographic finishes have become so popular in professional nail salons—they deliver visual impact with relatively simple application.
Styling Holographic Black Duck Nails
- Pair holographic nails with minimal jewelry to let your nails be the statement
- Holographic works for both everyday and special occasion, depending on the intensity of the sparkle
- Black base with holographic sparkle reads as edgy and fashion-forward rather than feminine or delicate
- These nails photograph beautifully, making them perfect if you love sharing photos of your manicure
Quick fact: Holographic effects show up best in natural light and LED light. In dim lighting, the sparkle is less apparent, so these nails truly shine in daytime or well-lit environments.
9. Black Duck Nails with Negative Space Design
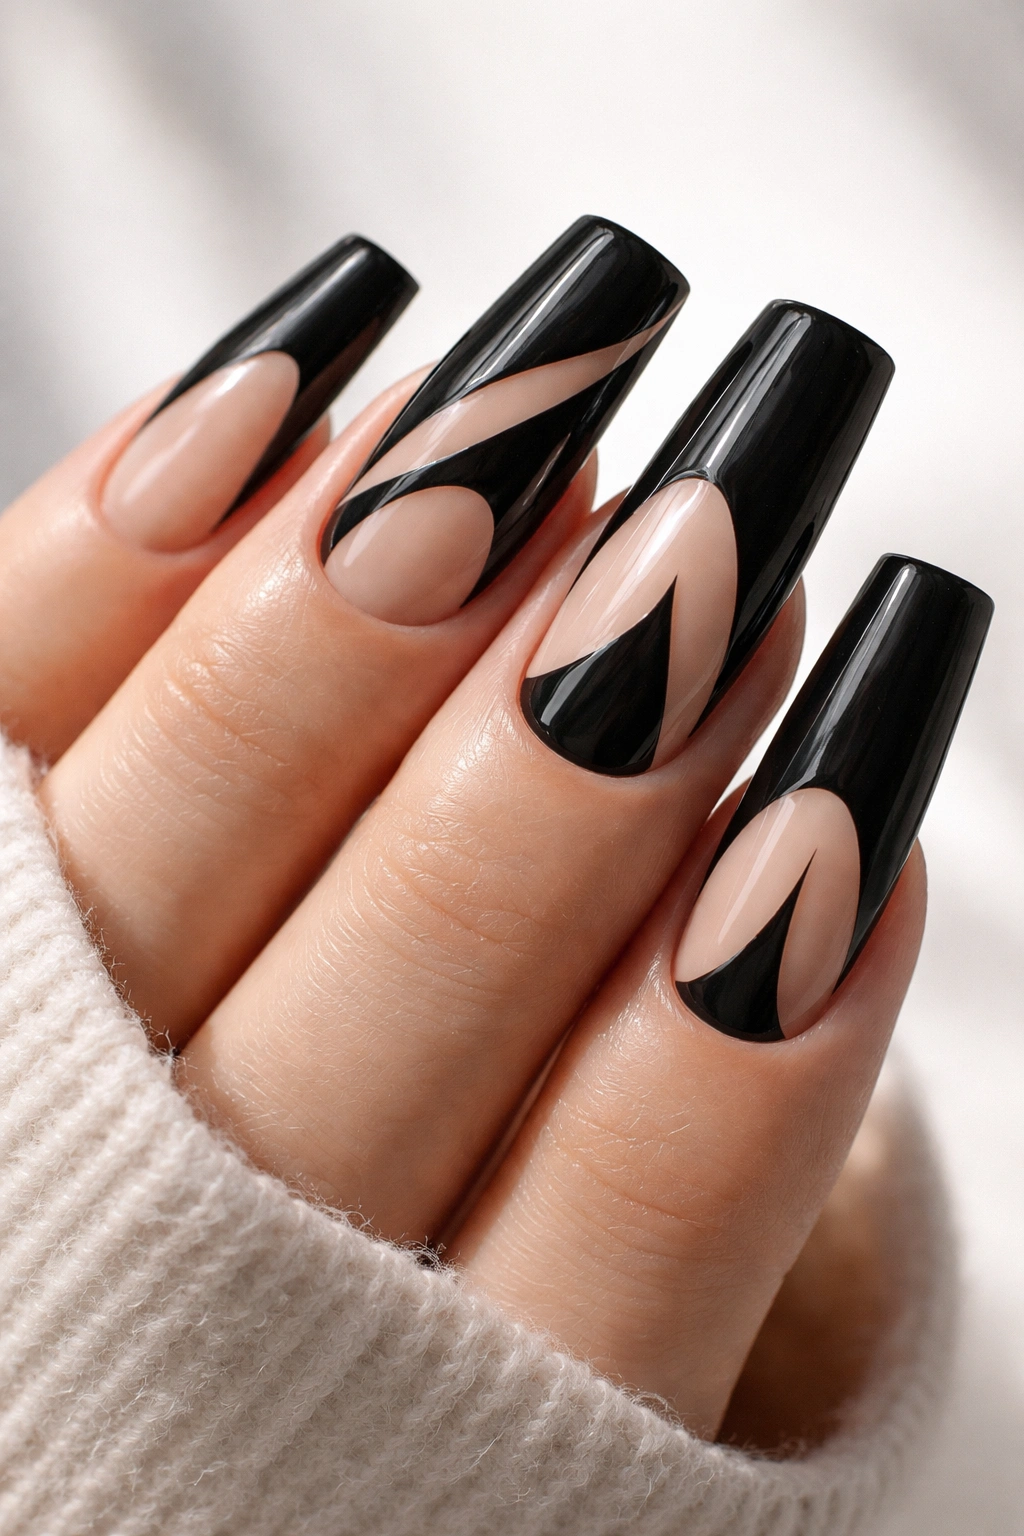
Negative space designs use bare nail (unpainted areas) as part of the artistic composition, creating a modern, minimalist effect that feels intentional and fashion-forward. On black duck nails, negative space creates visual breathing room while highlighting the shape of the nail itself. This approach works beautifully because it’s minimalist but never looks unfinished.
Negative Space Design Ideas
- Geometric shapes (triangles, stripes, or bands) of bare nail cutting through the black
- A sheer, nude base with black applied only to the tips and edges, creating an inverted French manicure effect
- Negative space at the cuticle area, leaving a strip of bare nail before transitioning to black at the tip
- Scattered geometric cutouts throughout the design, like a pattern of squares or diamonds in bare nail surrounded by black
- A solid black outline around the edge of the nail with bare nail in the center
The Appeal of Negative Space
Negative space makes designs feel intentional and editorial—like something from a high-fashion magazine rather than a traditional manicure. It also allows you to show off healthy, well-groomed nail beds, which adds to the sophisticated appearance. The contrast between the painted areas and bare nail creates visual interest without requiring complicated nail art.
Execution Tips
- Keep the lines of your negative space clean and precise. Blurry or uneven edges will make the design look accidental rather than intentional
- Consider using tape or stickers to create clean lines if hand-painting feels too difficult
- Matte black pairs beautifully with negative space designs, creating sharper contrast against the bare nail
Pro tip: File and buff your nails perfectly smooth when doing negative space designs—any imperfections in the nail bed become visible in the exposed areas.
10. Black Duck Nails with Metallic French Tips
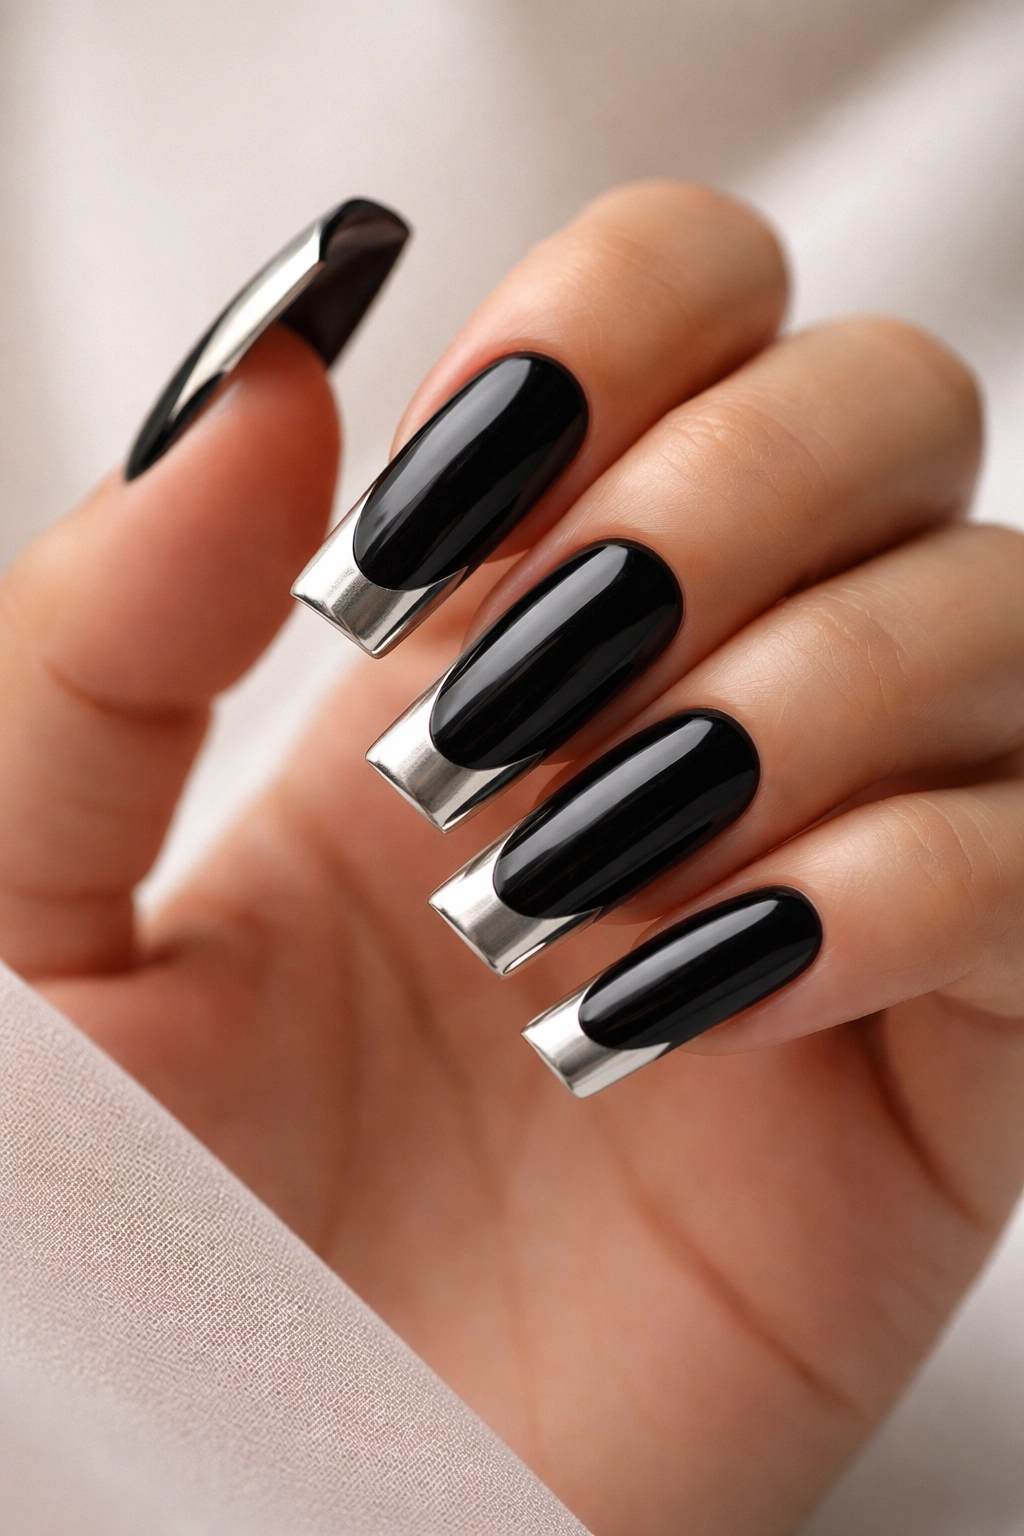
A metallic French tip on black duck nails modernizes the classic manicure, combining the elegance of French tips with the drama of a metallic accent. The metallic tip draws focus to the length and shape of the nail, which is exactly what duck nails are designed to showcase. This design delivers sophistication with just enough visual interest to feel intentional.
Metallic Color Options
- Gold French tips on black create warmth and luxury—this is the most classic combination
- Silver French tips on black offer cool-toned elegance and modern sophistication
- Chrome French tips provide a reflective, almost futuristic take on the classic manicure
- Rose gold tips offer a softer, more romantic metallic option
- Holographic tips combine the metallic trend with spectrum sparkle
How Wide Should the French Tip Be
Traditional French tips are narrow—usually about 1-2 millimeters of white space. For a metallic version, you can go slightly wider (2-4 millimeters) without losing the refined appearance. The wider you go, the more dramatic and statement-making the nail becomes. On duck nails, even a narrow French tip is visible and elegant due to the length.
Application Methods
- Using a French tip guide or nail sticker to create a clean, even line before painting metallic polish
- Hand-painting the tip with a small brush and steady hand (this requires practice but gives you total control)
- Using a thin stripe of tape to create a clean edge, painting metallic polish over it, then removing the tape
- Applying a metallic top coat only to the tip area of an already-cured black base
Worth knowing: Metallic tips look most impressive when the line between black and metallic is absolutely clean and sharp. Even a slightly wobbly line will be noticeable, so take your time with application.
11. Black Duck Nails with Ombre Gradient Effect
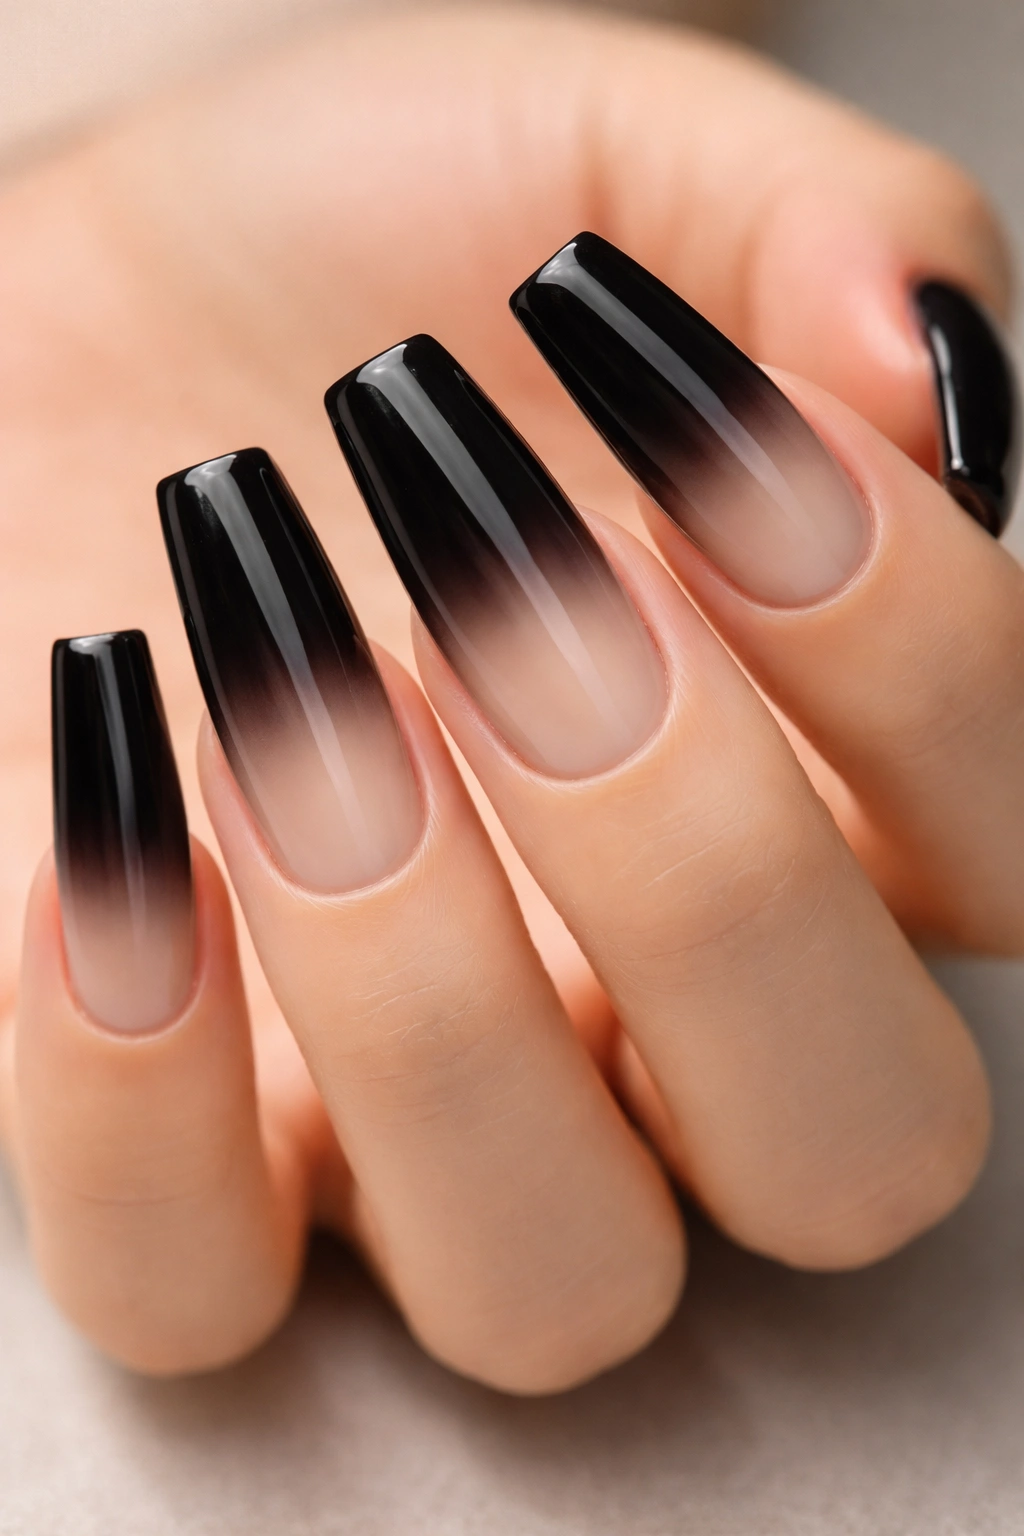
An ombre gradient on black duck nails creates a sophisticated color transition that adds depth and movement to the design without relying on patterns or embellishments. Whether you’re fading from black to sheer nude, black to metallic, or black to another color entirely, an ombre effect delivers visual interest and elegance. This design type works especially well on duck nails because the gradient can follow the natural flow and shape of the nail.
Ombre Gradient Direction Options
- Tip-to-cuticle gradient, where the black fades gradually to nude or sheer as you move toward the base—this creates an ethereal, elegant effect
- Cuticle-to-tip gradient starting with pure black at the base and fading to sheer or a complementary color at the tip
- Side-to-side gradient, transitioning from black on one side to another shade on the other side, creating a dynamic divided effect
- Concentrated gradient where the color transition happens primarily at the tip, with most of the nail staying black
Colors to Pair with Black in an Ombre
- Black fading to nude or sheer pink for a classic, wearable look that’s office-appropriate
- Black fading to silver or chrome for a futuristic, high-glam effect
- Black fading to burgundy or deep red for a moody, autumn-inspired aesthetic
- Black fading to white for high contrast and modern elegance
- Black fading to rose gold for warmth and romantic sophistication
Creating an Ombre Effect
The most common method uses a makeup sponge and two or more shades of nail polish. Apply one color to the sponge, then dab the other color beside it on the sponge. The colors blend slightly where they meet on the sponge, creating a gradient effect. When you sponge this onto the nail, you get a transitional blend. This technique requires a bit of practice, but it’s the most effective way to create an even, professional-looking ombre.
Quick fact: Ombre effects look more sophisticated when the colors are carefully chosen to complement each other. Black and nude is elegant. Black and white is modern. Black and burgundy is moody. Black and metallic is glamorous. The color you choose to pair with black sets the entire mood of the design.
Final Thoughts
Black duck nails offer endless creative possibilities, whether you prefer understated elegance or full-on glamour. The key to pulling off any of these designs is understanding that the duck nail shape itself is the statement—the black color and any additional embellishments simply enhance what’s already beautiful about the silhouette. You don’t need complicated nail art skills or expensive products to achieve any of these looks; what matters most is clean application, quality base products, and taking your time with execution.
The versatility of black as a base color means you can wear these designs anywhere—to the office, to a night out, to everyday life—and they’ll always feel appropriate and intentional. Start with whichever design speaks to you most, practice your application technique, and don’t be afraid to customize these ideas to match your personal style. Whether you’re getting your nails done at a salon or doing them yourself at home, these eleven ideas provide plenty of inspiration for your next black duck nail look.
