

Duck nails have become one of the most playful and on-trend nail shapes, and they’re surprisingly perfect for celebrating birthdays. If you’re wondering whether short nails can pull off the duck nail aesthetic, the answer is a resounding yes—in fact, short duck nails often look more sophisticated and wearable than their longer counterparts. The key is choosing designs that maximize the unique curved, flippered shape while keeping the birthday spirit front and center.
Short nails provide the ideal canvas for birthday-themed duck nails because they’re less likely to overwhelm your fingertips, they’re more practical for daily life, and they actually showcase intricate nail art without looking cartoonish. Whether you’re celebrating with vibrant colors, fun patterns, or subtle sparkle, duck nails can deliver serious personality in a compact package. The beauty of this particular nail shape is that it draws attention to the nail bed itself, making it perfect for bold designs and celebratory themes.
This guide walks you through ten stunning birthday duck nail ideas specifically designed to work beautifully on short nails. Each design balances the fun, flirty nature of duck nails with birthday aesthetics—think confetti, glitter, cake-inspired colors, and celebratory elements. You’ll get exact details on color combinations, application techniques, and styling tips that make each design shine. Whether you’re prepping for your own birthday or creating nail art for a celebration, these ideas prove that short duck nails are absolutely here for the party.
1. Pastel Confetti Celebration
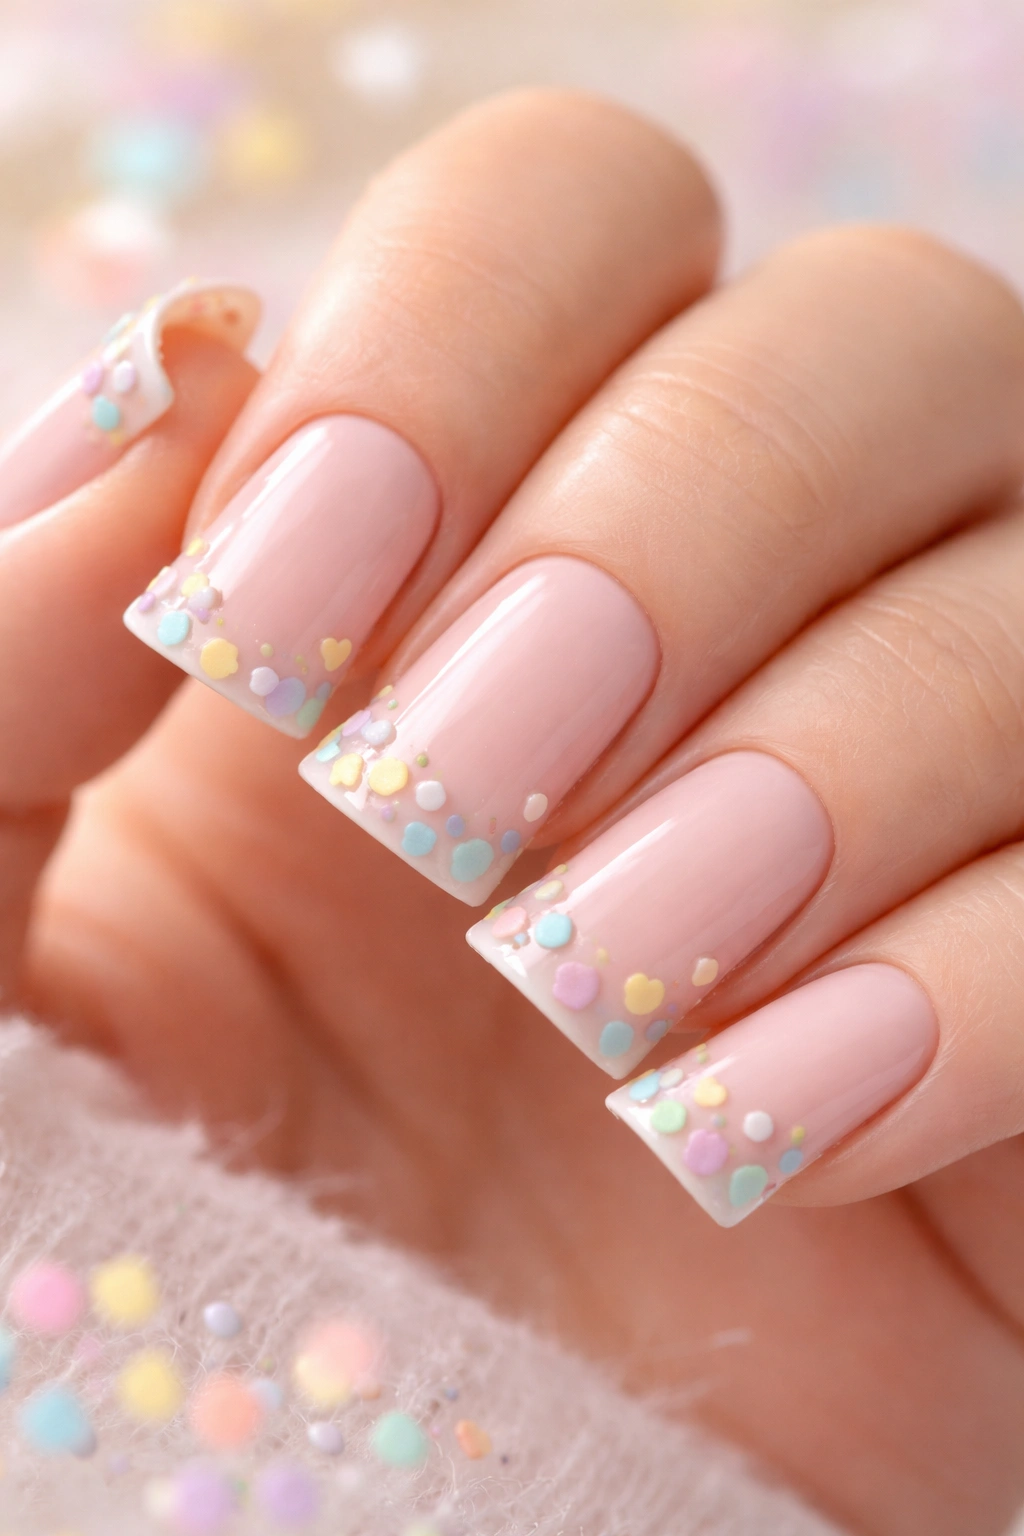
Pastel confetti designs capture that celebratory feeling without being overwhelming on short nails. Start with a soft base color—blush pink, mint green, or powder blue work beautifully—and layer tiny confetti pieces in complementary pastels across the nail. The duck shape allows the confetti to sit naturally along the curved edges, creating a frame effect that enhances the celebratory vibe.
How to Apply This Design Flawlessly
Begin with two coats of your chosen pastel base, making sure the color is opaque and smooth. Once dry, use a thin detail brush or a dotting tool to add small confetti shapes in contrasting pastels. You can create tiny rectangles, circles, and triangles in soft yellow, lavender, peach, and cream. The key to making this work on short nails is keeping the confetti pieces small and distributed evenly rather than clustered in one area. Seal everything with a glossy top coat to make the confetti sparkle subtly.
Design Elements That Make This Work
- Soft base color creates a sophisticated backdrop for the confetti
- Pastel confetti pieces in 3-4 complementary shades prevent visual chaos
- Duck shape naturally frames the design along the edges
- Works for both casual daytime and evening celebrations
- Easy to customize with your favorite pastel palette
- Confetti placement along the curve mimics the natural shape of a duck nail
Pro tip: Use a toothpick dipped in polish to place tiny confetti pieces if you don’t have a steady hand with a brush—it gives you more control and creates perfectly sized dots and shapes.
2. Golden Birthday Glitter Ombre
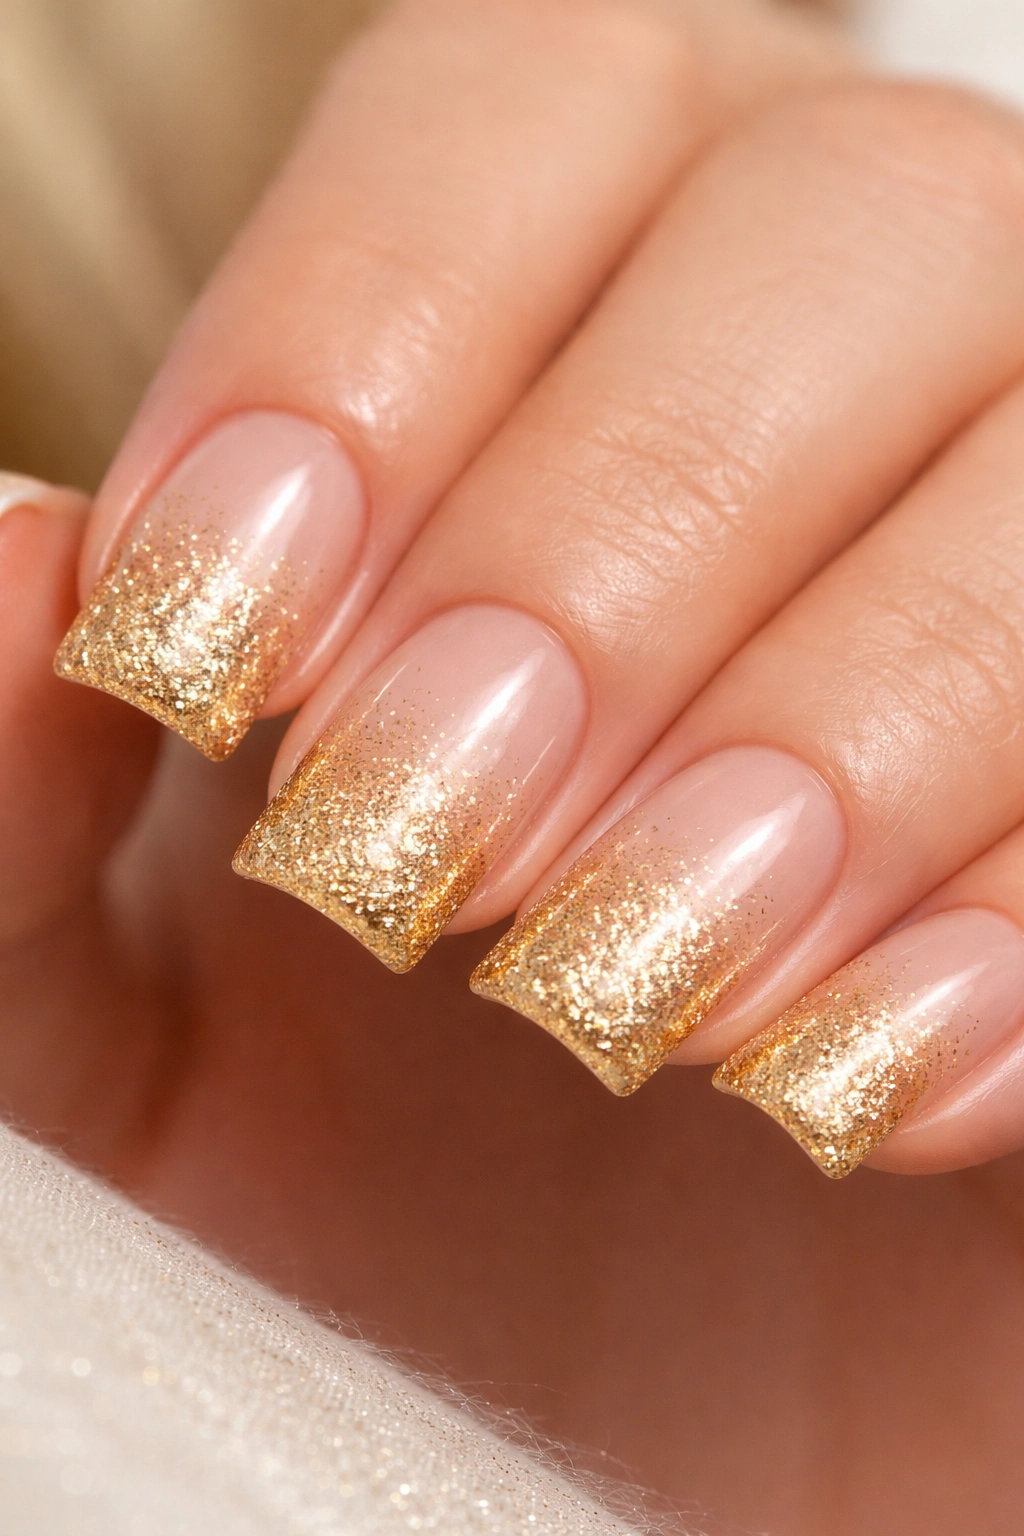
Ombre designs on duck nails create a sophisticated gradient that catches light beautifully. A golden glitter ombre—starting from champagne or soft gold at the cuticle and deepening to rich gold with glitter concentration toward the tip—creates an elegant birthday look that works for short nails because the color transition happens gradually without overwhelming the nail.
Why This Works Beautifully on Short Nails
The ombre effect creates the illusion of length on short duck nails because your eye follows the gradient from base to tip. Golden tones are inherently celebratory and luxurious without being costume-like. On short nails, a smooth ombre transition is actually easier to achieve than on longer nails because there’s less surface area to cover. The duck shape’s curves actually help blend the gradient naturally.
Application and Color Breakdown
- Base color: Champagne or pale gold (opaque, 2 coats)
- Middle zone: Light gold with minimal glitter (blend with sponge)
- Tip zone: Deep gold with heavy glitter concentration (use a glitter topper)
- Transition: Use a makeup sponge to blend between zones for seamless color flow
- Top coat: Matte or glossy depending on your preference (glossy shows glitter better)
Worth knowing: Apply your base color slightly higher than normal on the nail to give yourself more room for the ombre gradient. On short nails, every millimeter counts.
3. Cake Slice Pink and White
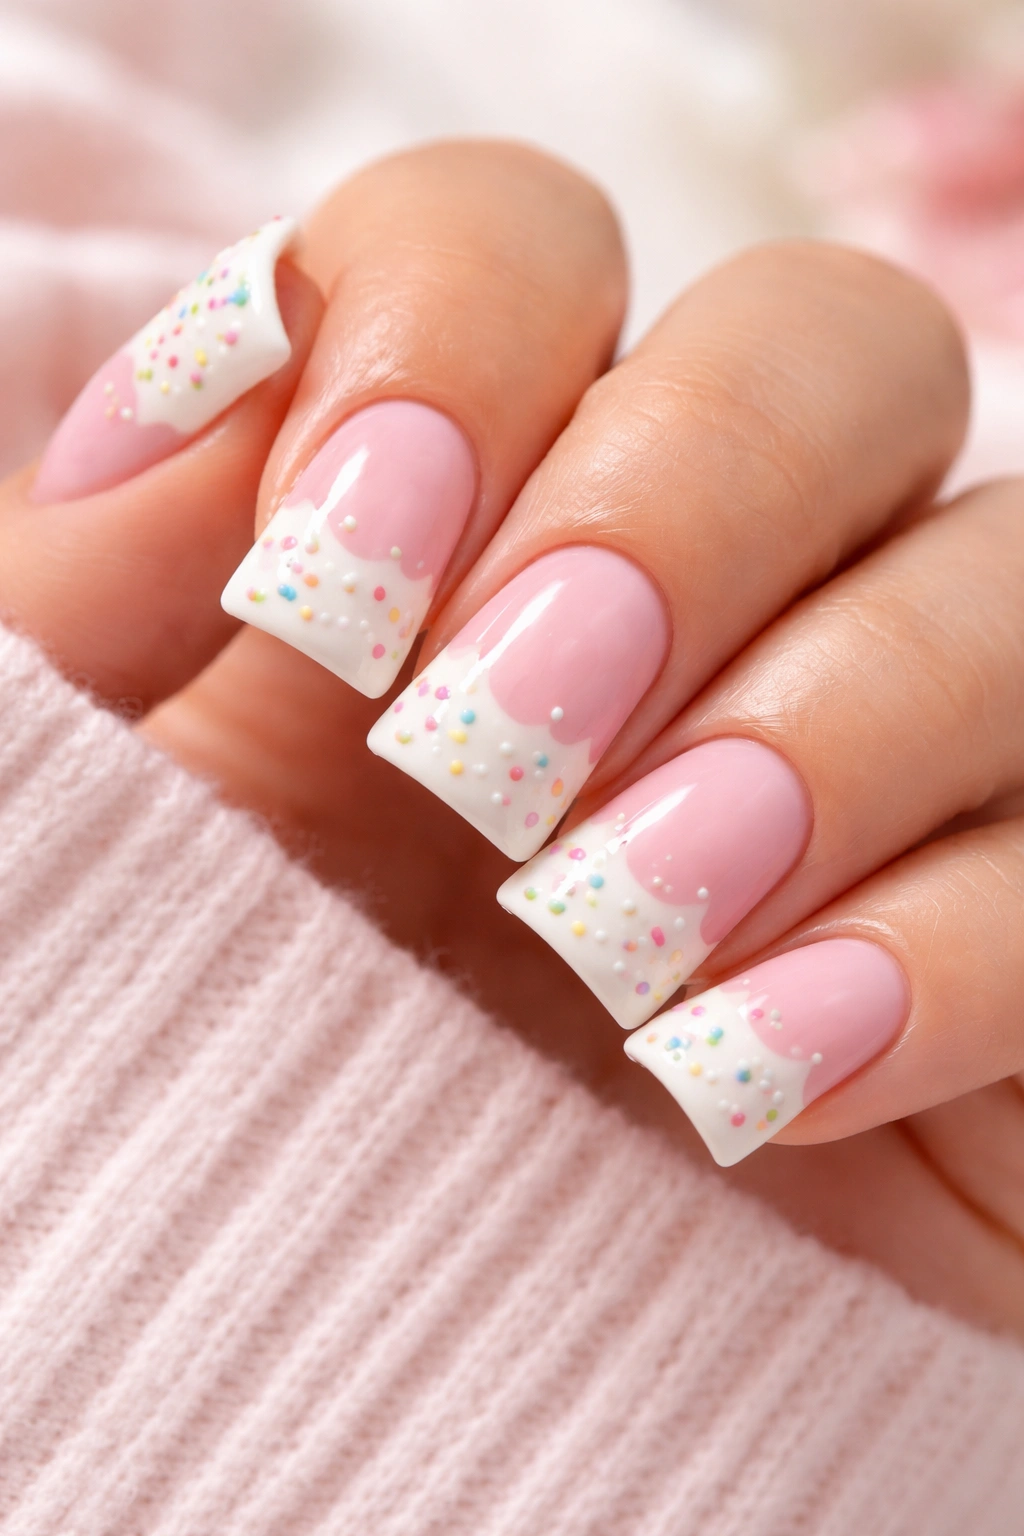
Inspired by birthday cake aesthetics, this design features a two-tone look with soft pink as the main color and white accents that mimic cake frosting. The duck nail’s shape naturally lends itself to this design because the curved tip can showcase the white “frosting” while the pink body represents the cake itself. Add tiny sprinkle details in rainbow colors for extra birthday flair.
Design Strategy for Short Nails
Divide each nail into two zones using a thin striping brush: the larger curved section in soft pink (like vanilla cake) and a thinner accent at the tip in white (like buttercream frosting). The division should follow the natural curve of the duck nail rather than fighting it. Once the base colors set, layer tiny rainbow sprinkles—thin lines in yellow, blue, pink, and green—across the white section and scattered onto the pink.
Specific Steps for Perfect Execution
- Apply soft pink base color (2 coats, smooth finish)
- Use a thin striping brush to paint a white frosting line across the upper third
- Blend the white slightly into the pink using a clean, damp brush for a frosting effect
- Add ultra-thin rainbow sprinkle lines using a detail brush
- Seal with gloss for that cake-frosting shine
- Optional: add a tiny pearl or rhinestone at the base for a candle effect
Pro tip: If you’re worried about the white and pink blending too much, let the pink dry completely before painting the white frosting layer—crisp lines look more intentional and bakery-inspired.
4. Rainbow Gradient Burst
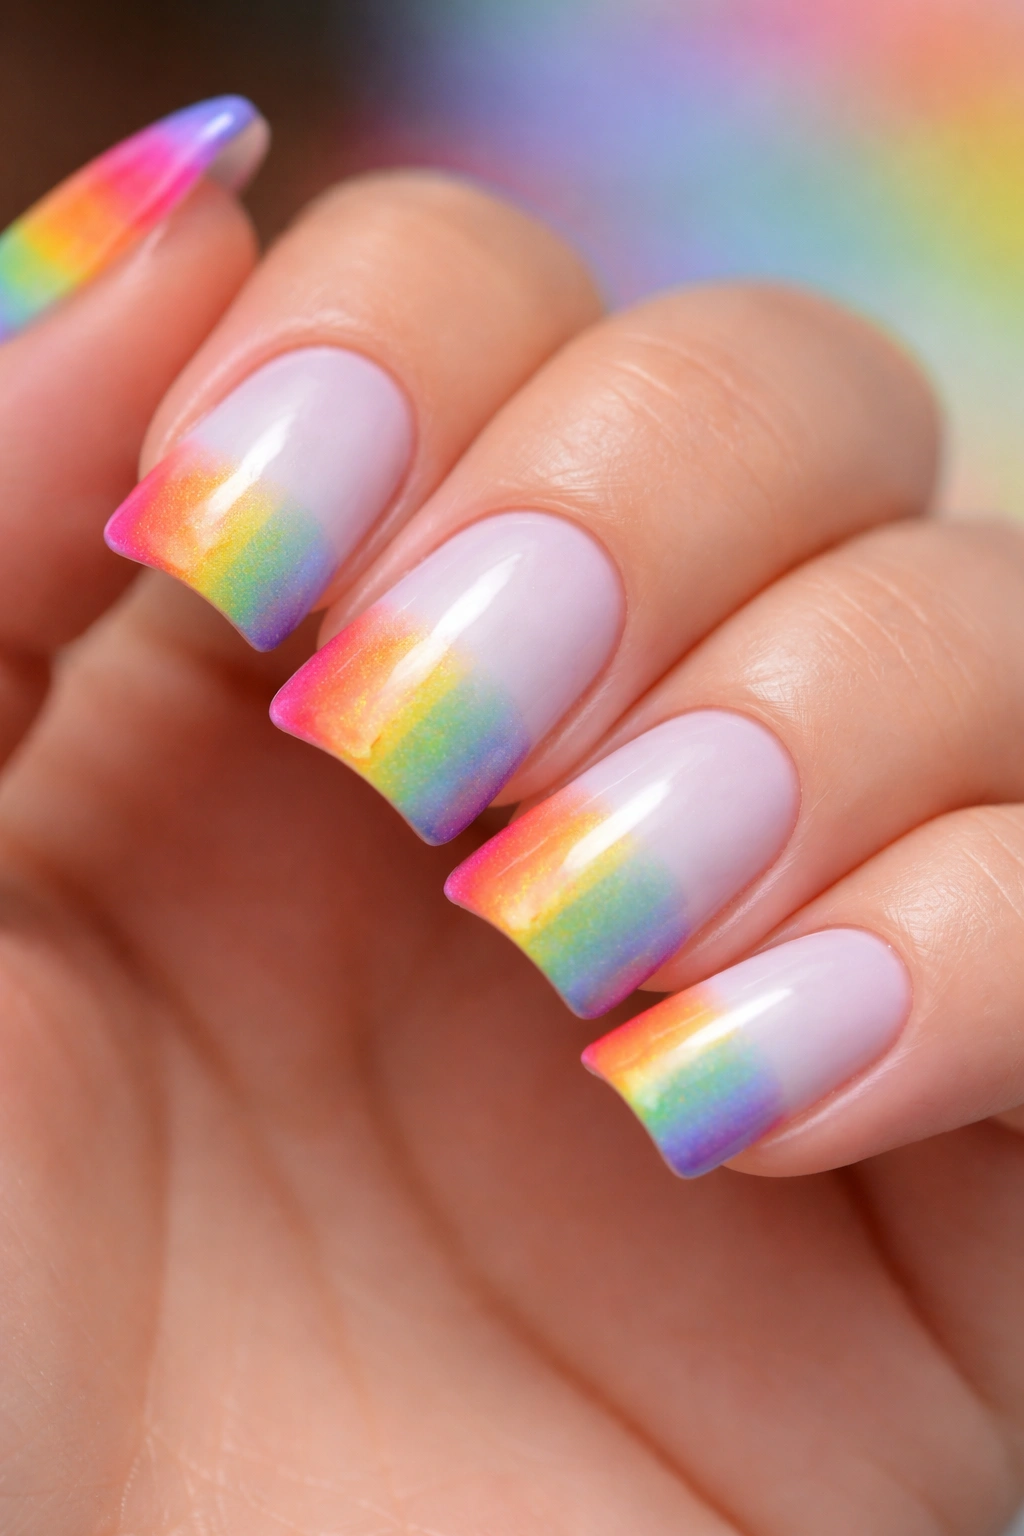
A rainbow gradient that concentrates its most vibrant colors at the duck nail tip creates a celebratory explosion of color. The duck shape naturally focuses attention toward the curved tip, making it the perfect vessel for showing off all the rainbow colors. On short nails, the concentrated color burst feels celebratory without looking chaotic.
Why Short Duck Nails Excel With This Design
The transition from soft colors at the base to fully saturated rainbow at the tip feels intentional rather than accidental. The duck shape’s curve guides the gradient in a way that longer nail shapes can’t achieve—it’s like the color is naturally flowing to the edge. This design celebrates the unique architecture of duck nails rather than fighting against it.
Gradient Breakdown and Application
- Base: White or very pale lavender
- Gradient zones (from cuticle to tip): Soft pink → coral → yellow → green → blue → purple
- Method: Use a makeup sponge to dab and blend colors together on the nail
- Precision: Keep the gradient tight and controlled so colors don’t muddy together
- Finish: Glossy top coat to make each color read clearly and shine
Worth knowing: Let each color zone dry slightly before adding the next one if you’re concerned about colors blending together too much. This gives you more control over where each hue sits.
5. Champagne Sparkle with Birthday Numbers
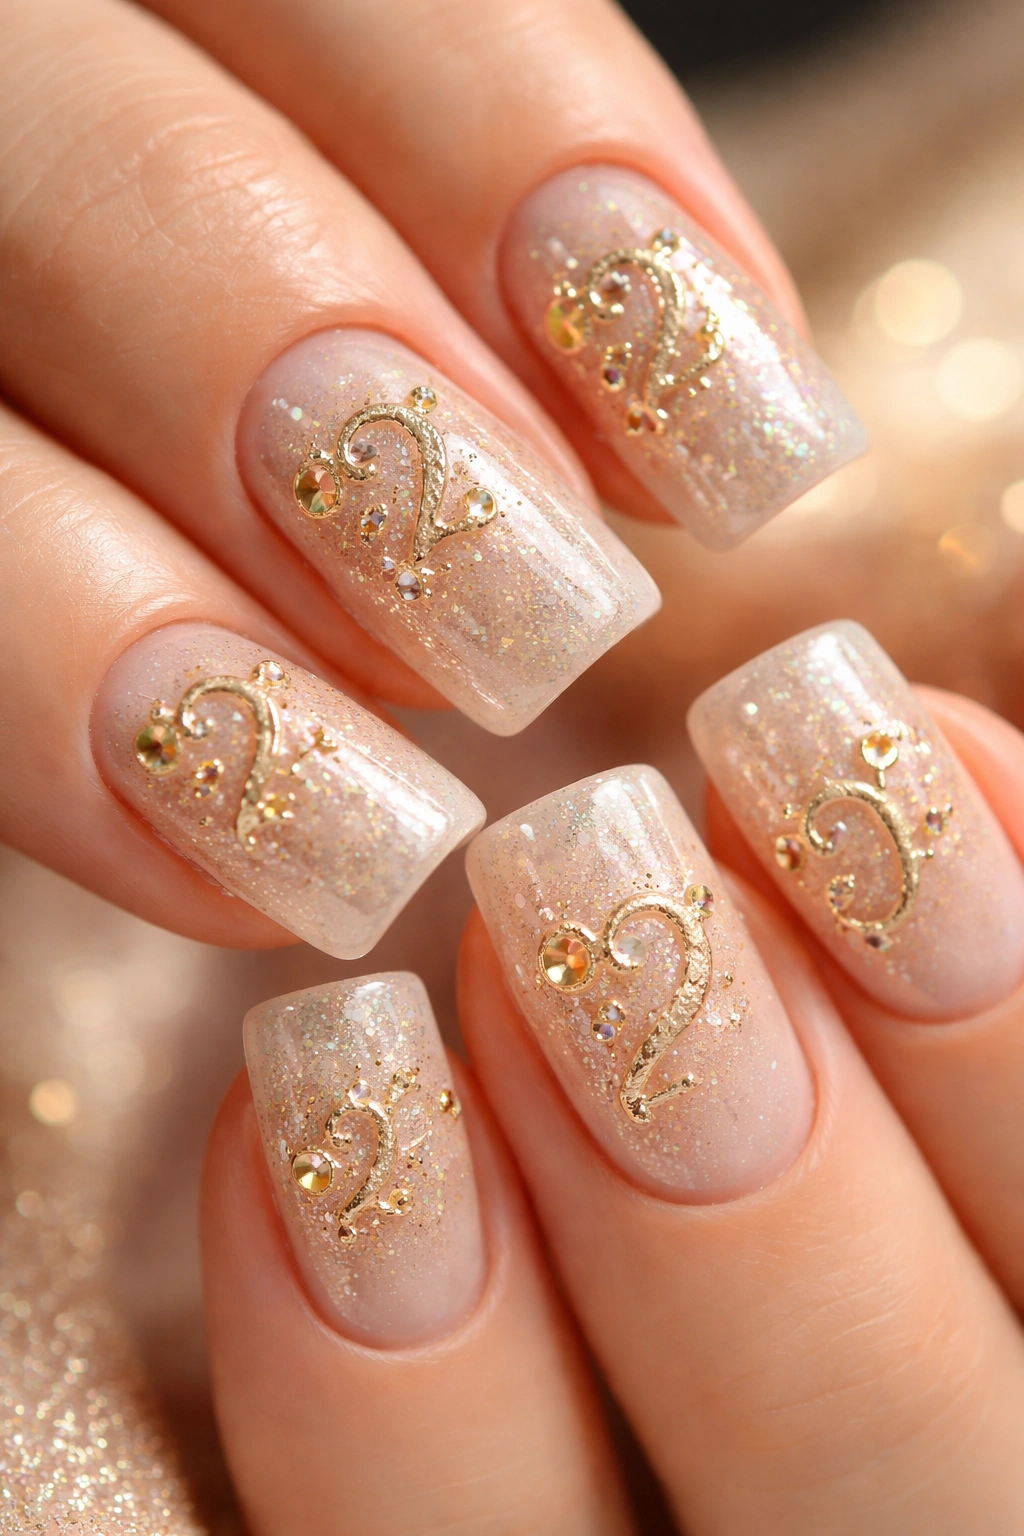
This elegant design features a neutral champagne base with a subtle shimmer, topped with delicate gold numerals representing the birthday year or age. The beauty of this design on short duck nails is that it’s sophisticated enough for any celebration—from a quiet intimate dinner to a larger party—while still being distinctly celebratory.
How to Create This Elegant Look
Start with a champagne or nude-pink base that has fine shimmer running through it (or apply a shimmery topcoat over a neutral base). Once completely dry, use a very thin striping brush and gold metallic polish to paint elegant, thin numerals on one nail. The duck shape means you have a naturally curved surface to work with—the numerals can follow the curve or sit straight depending on your aesthetic preference.
Design Details to Perfect
- Base: Champagne with micro-shimmer (ensures sophistication)
- Numerals: Thin, elegant, gold metallic (use a 0-size or 00-size brush)
- Nail to feature: Usually just one accent nail, or two if you want to space them
- Finishing touch: Tiny gold flecks scattered around the numerals for extra sparkle
- Top coat: Glossy to enhance the shimmer and make gold read clearly
Pro tip: Practice the numerals on a piece of paper first, or use a nail art stamp if you’re not confident with freehand. The numerals should be visible but delicate—not thick or heavy-handed.
6. Butterfly Birthday Parade
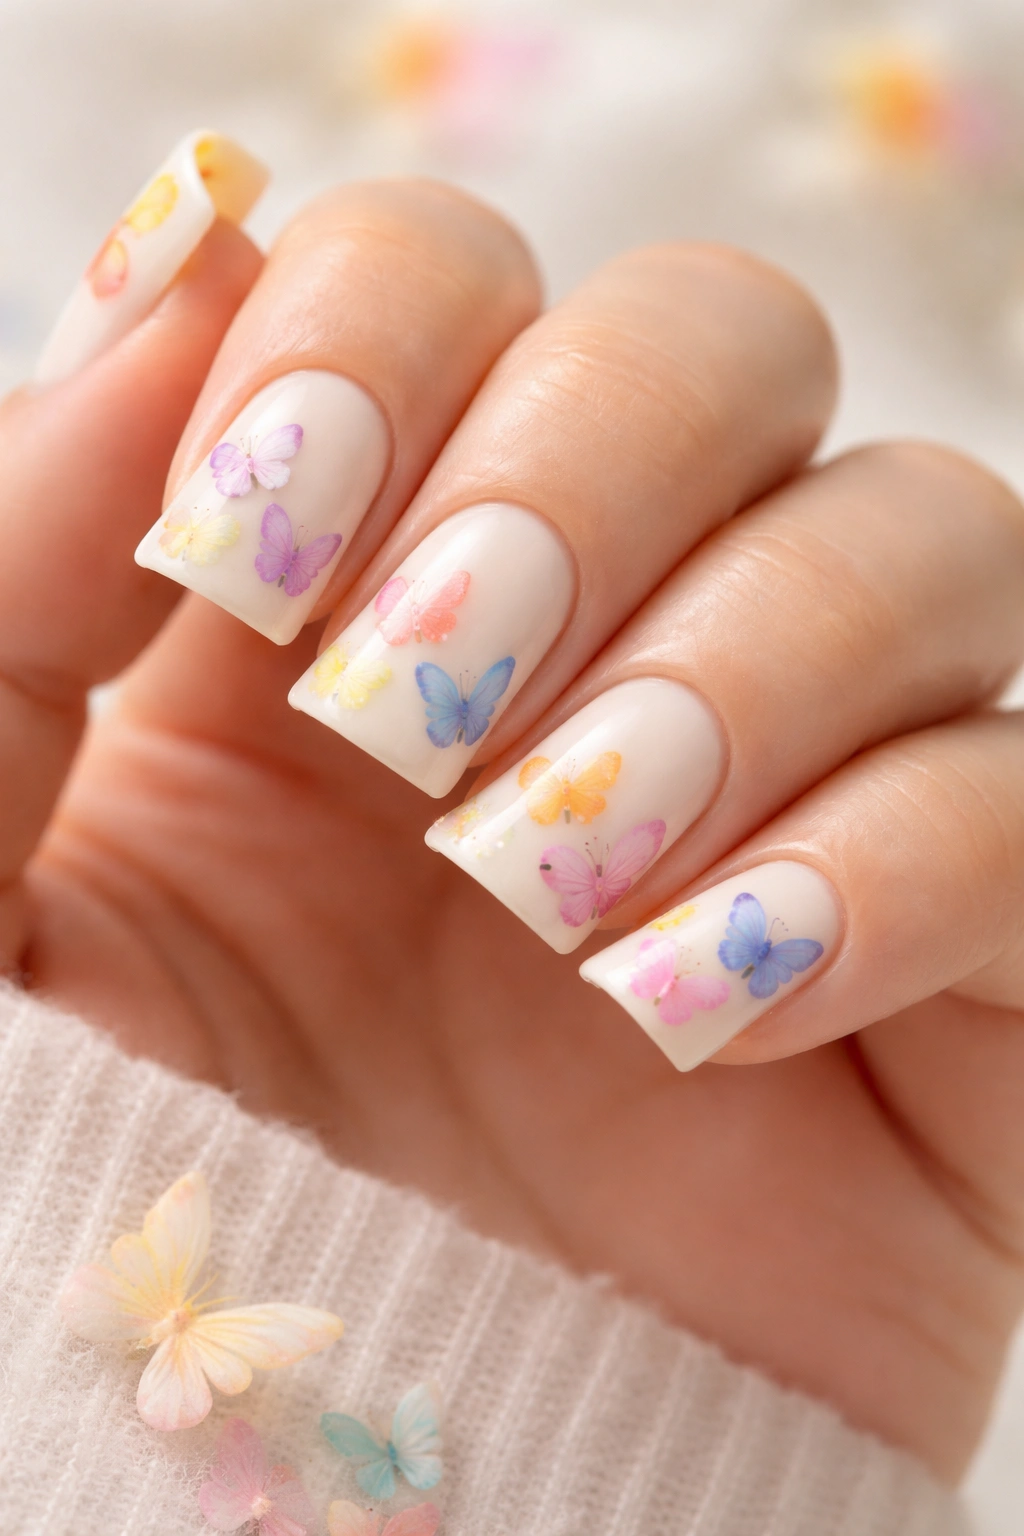
Short duck nails are ideal for a butterfly-themed birthday design because the nails’ curved shape mirrors butterfly wing shapes. This design features a pale base color (soft yellow, cream, or pale pink) with colorful butterfly silhouettes scattered across the nail. The butterflies can be simple geometric shapes or more detailed designs depending on your comfort level.
Why Butterflies Work on Short Duck Nails
Butterflies have a natural curved symmetry that complements the duck nail shape—the wings can follow the curve of the nail, making the design feel intentional rather than random. On short nails, multiple small butterflies feel celebratory without overwhelming the nail bed. The butterfly theme also feels playful and birthday-appropriate without being babyish.
Butterfly Design Application
- Base: Pale cream or soft yellow (2 coats)
- Butterfly colors: Use 3-4 contrasting shades—coral, turquoise, lavender, and gold work beautifully together
- Butterfly shapes: Create simple butterfly silhouettes using a thin brush, or use nail art stamps for consistency
- Placement: Scatter 3-5 butterflies across each nail at varying sizes and angles
- Details: Add tiny antenna lines in gold or dark metallic polish
- Finish: Glossy topcoat to make colors pop
Worth knowing: Butterflies don’t need to be perfectly symmetrical to look intentional. Slightly imperfect butterflies often look more organic and artistic than perfect ones.
7. Birthday Cake Design with Sprinkles
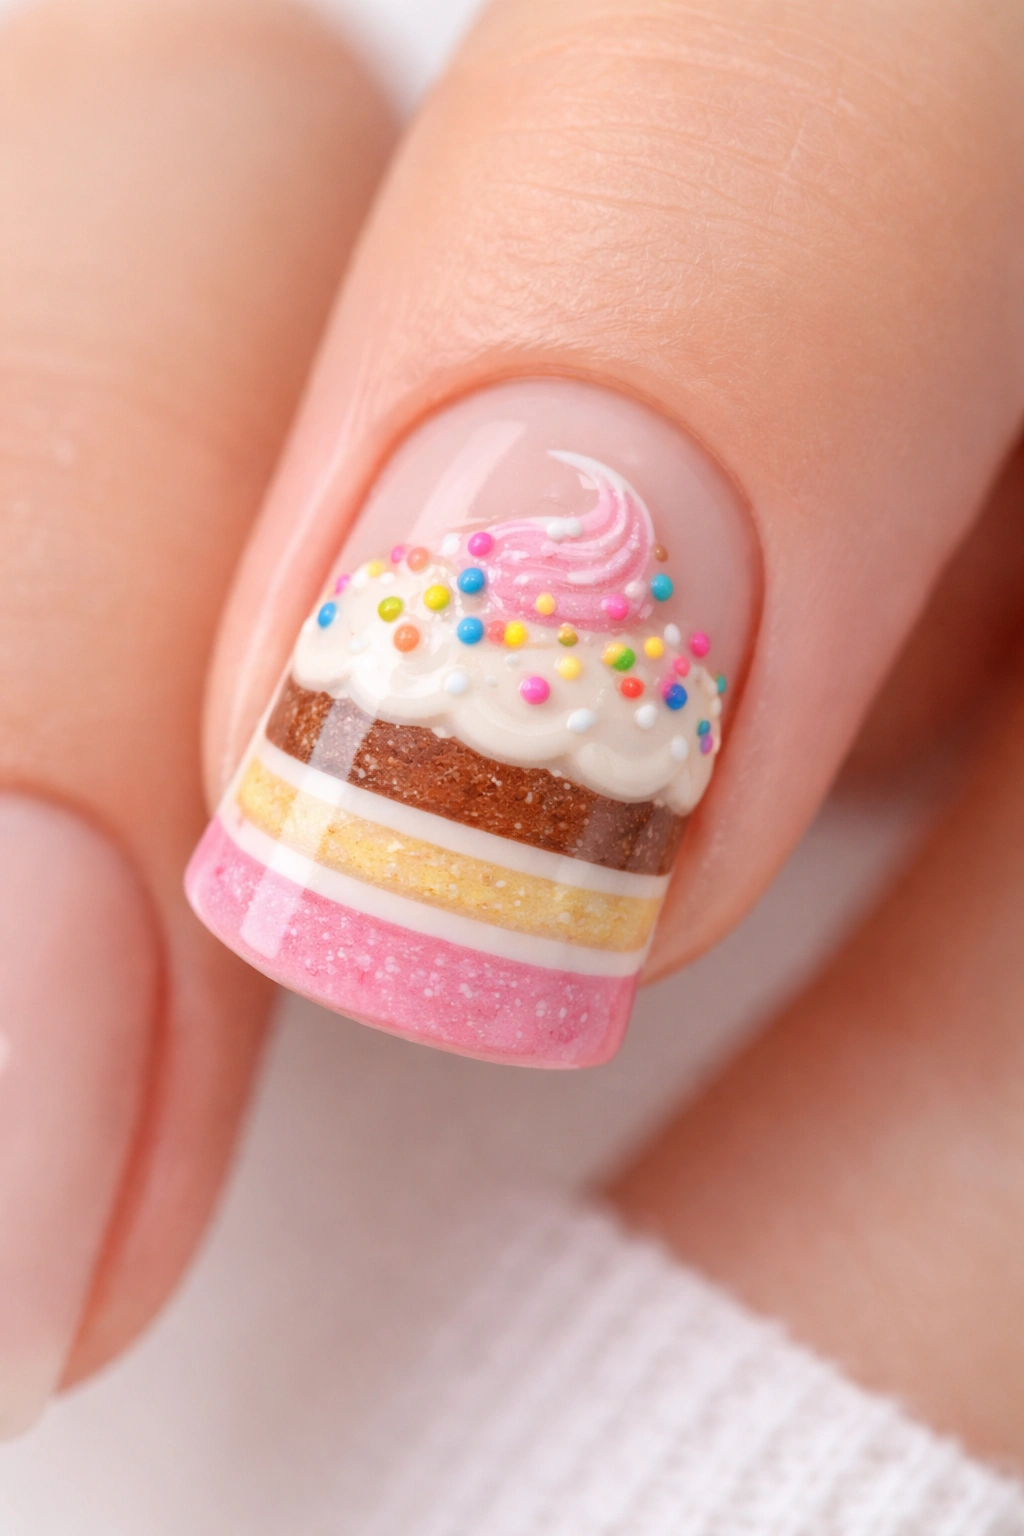
Take the cake theme further with an actual multi-layer cake illustration on the nail. The duck shape’s curved tip becomes the frosting swirl, while the body of the nail represents the cake layers. This design works surprisingly well on short nails because you’re not trying to fit a full cake into a tiny space—instead, you’re creating a stylized, simplified cake that feels birthday-specific.
Technique for Creating a Mini Birthday Cake
Start with a nude or cream base. Paint horizontal bands in contrasting colors to represent cake layers—try vanilla, chocolate, and strawberry pink. Use white or coordinating frosting colors to create frosted edges between layers. The curved duck tip becomes the perfect spot for a frosting swirl rendered in white or pastel pink. Top with tiny sprinkles in rainbow colors scattered across the frosting area.
Step-by-Step Cake Construction
- Base layer: Cream or nude (represents the plate)
- Cake layers: Paint 2-3 horizontal bands in contrasting cake colors using a striping brush
- Frosting lines: White or coordinating color between each layer
- Swirl at tip: Create a curved frosting swirl that follows the duck nail’s natural curve
- Sprinkles: Tiny rainbow lines scattered across the frosting area
- Optional candle: A thin orange line with a yellow flame at the very tip
Pro tip: Use thin, even horizontal lines for the cake layers—they’ll look more like actual cake layers than chunky stripes. A very thin brush is your friend here.
8. Pearl and Gold Luxury
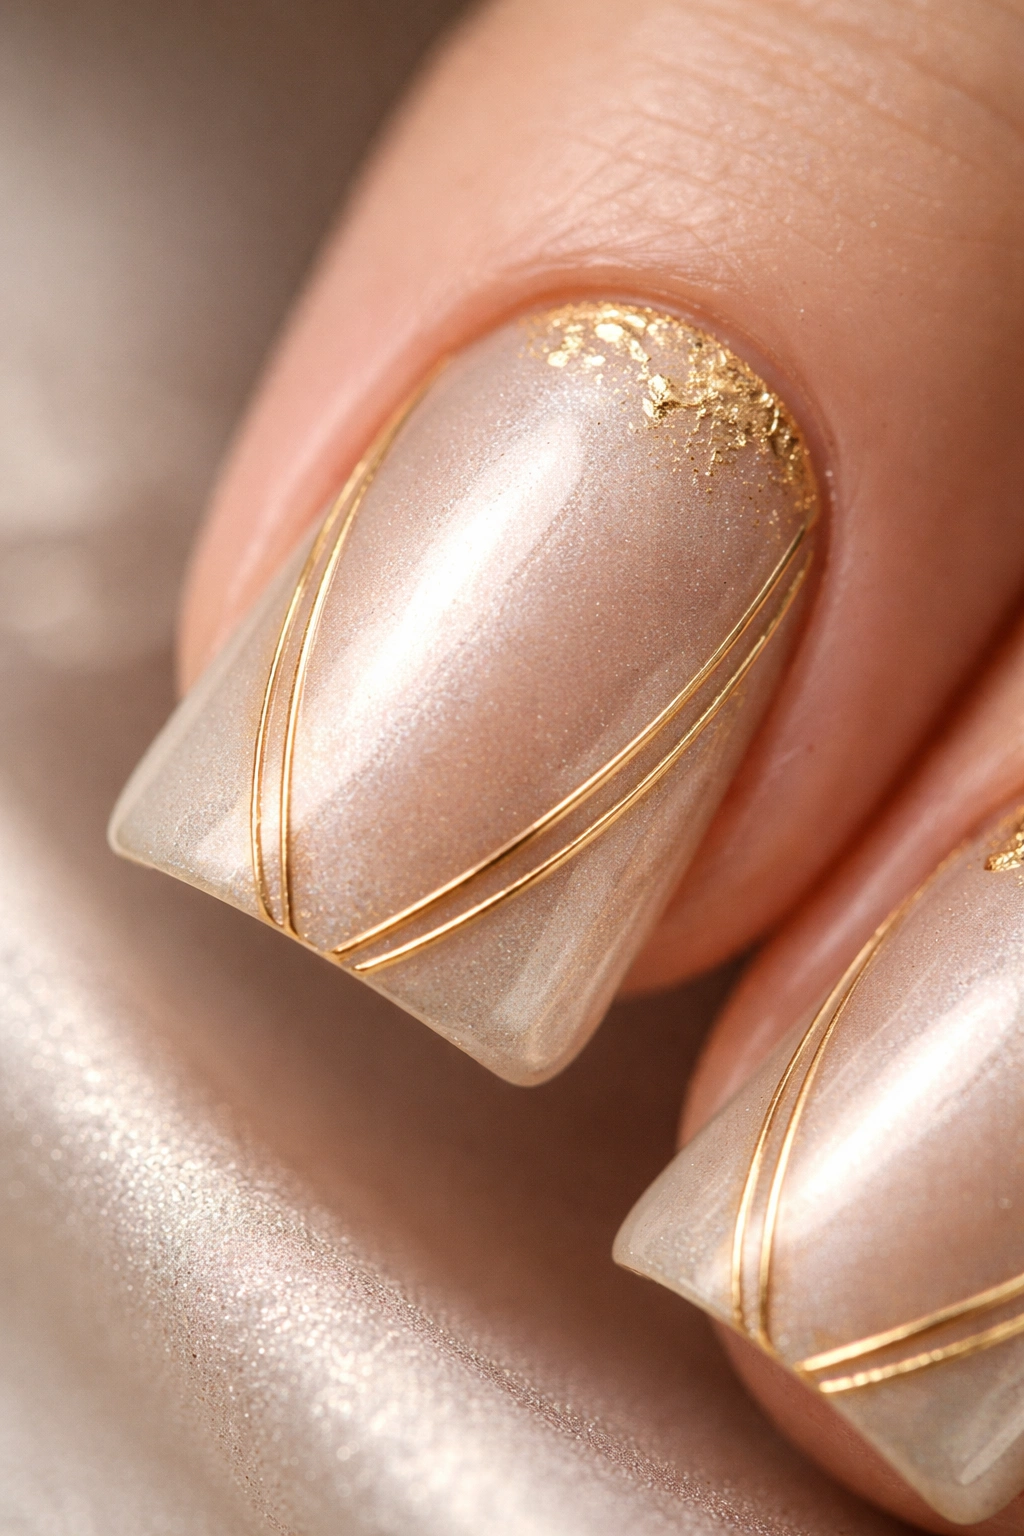
This sophisticated design pairs lustrous pearls with warm gold accents for a birthday look that skews elegant. The duck nail’s shape showcases pearl finishes beautifully because the curved surface catches light differently than flat nails. Short nails work especially well with this design because the luxury feel doesn’t require length to be impressive.
Why Pearls Shine on Short Duck Nails
Pearl finishes have an inherent sophistication that makes short nails feel intentional and chic rather than limited. The duck shape’s curves actually emphasize the pearl’s light-catching properties. This design bridges the gap between casual and formal—perfect for a birthday celebration that’s upscale but not costume-like.
Pearl and Gold Application
- Base: Warm champagne or soft gold metallic
- Pearl layer: Apply a pearl or shimmer topcoat that has visible pearl particles
- Gold accents: Use thin gold striping polish to create delicate geometric lines or swirls
- Accent placement: Gold lines can frame the nail edges or create a subtle geometric pattern
- Optional embellishment: 1-2 tiny gold foil flakes or pearls placed at the cuticle or tip
- Finish: Glossy topcoat to enhance both the pearl and gold shimmer
Worth knowing: Pearl finishes photograph beautifully and catch light in person—this design looks more luxurious in person than it might appear in a photo.
9. Confetti Bomb Holographic
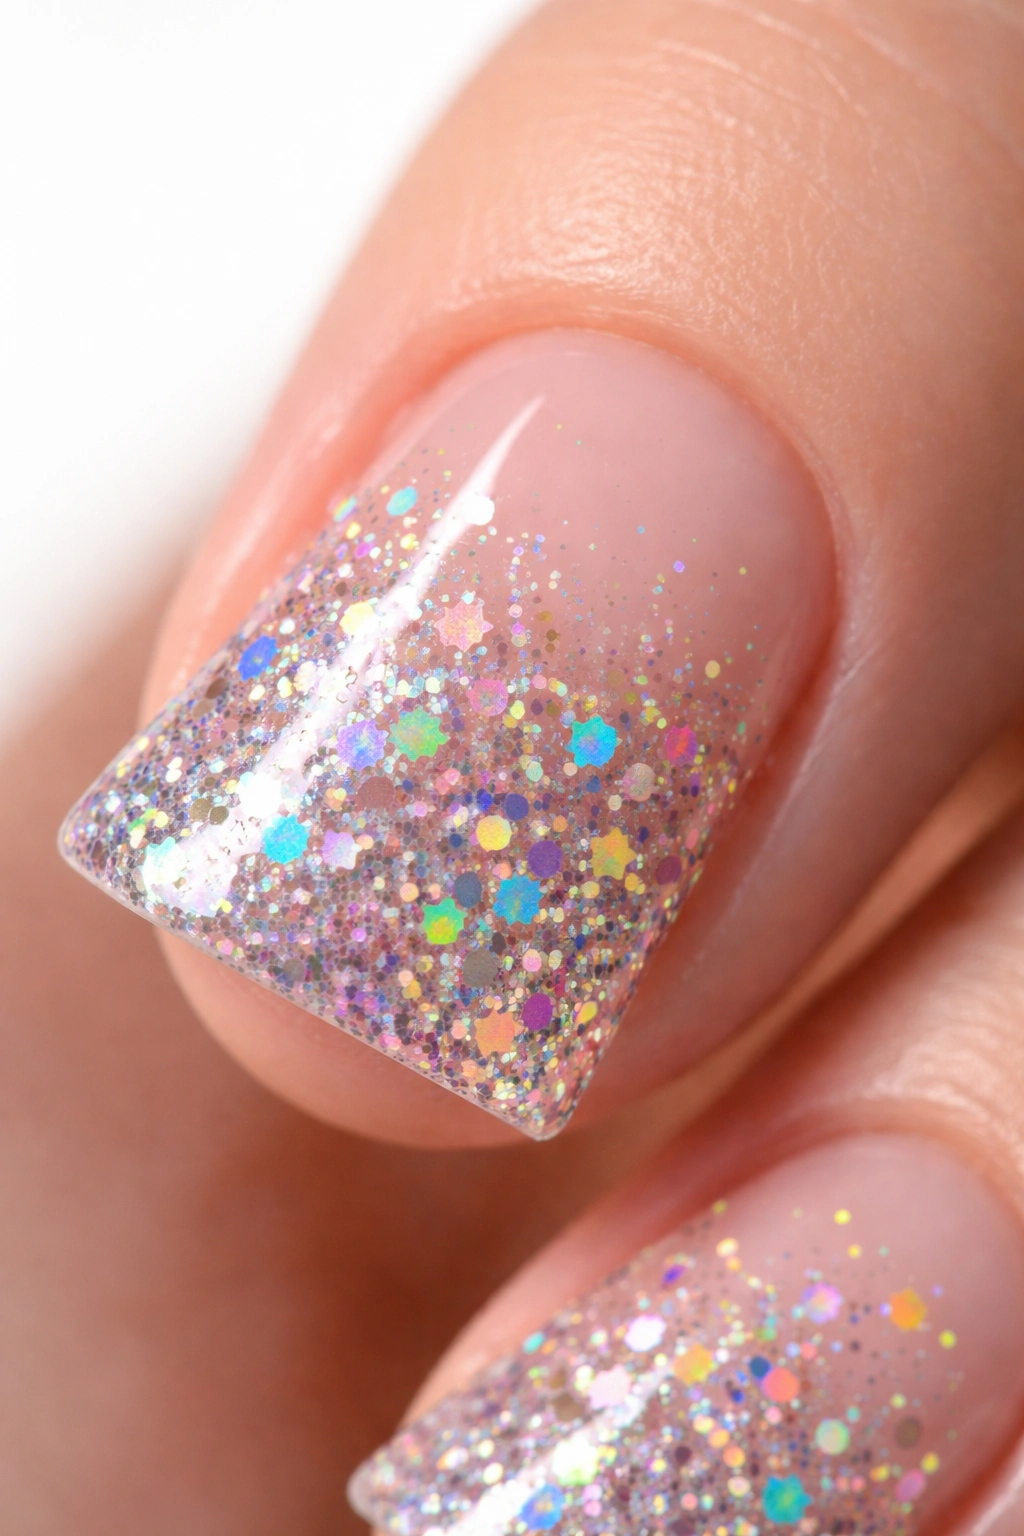
This playful design uses holographic elements to create a “confetti explosion” effect. Holographic flakes and glitter catch light in multiple colors, creating the illusion of confetti frozen mid-air. On short duck nails, the holographic elements create depth and dimension that make the nails appear more dimensional than they actually are.
Creating the Confetti Bomb Effect
Start with a neutral or coordinating colored base—white, blush, or cream work beautifully as backgrounds for holographic elements. Once dry, layer holographic glitter, flakes, or a holographic topcoat across the nail, concentrating heavier amounts toward the duck tip. The concentration creates the sense of movement and celebration without requiring a large surface area.
Holographic Application Details
- Base color: White, cream, or blush (opaque, 2 coats)
- Holographic layer 1: Fine holographic dust or glitter mixed into a clear topcoat
- Holographic layer 2: Larger holographic flakes applied with a small brush or toothpick
- Concentration: Denser holographic coverage toward the tip, lighter at the cuticle
- Variation: Mix holographic colors—rainbow, gold, or silver shift depending on your preference
- Finish: Matte topcoat to reduce shine and make holographic elements pop more, or glossy to enhance overall shine
Pro tip: Layer your holographic elements gradually rather than applying everything at once—this prevents clumping and creates a more natural, dispersed confetti effect.
10. Ombre Glitter Fade to Nude

End with a timeless design that works for literally any birthday celebration: a subtle ombre from rich glitter at the tip to a clean, nude base at the cuticle. This design is sophisticated enough for professional settings while still feeling celebratory. On short nails, the ombre creates the illusion of length while the glitter brings the festive energy.
Why This Design Is Universally Flattering
The nude-to-glitter ombre suits every skin tone and works with any outfit. It’s celebratory without being loud, sophisticated without being boring. The duck nail shape actually makes this gradient look more intentional because the concentration of glitter naturally follows the nail’s curve. This design proves that short duck nails can be elegant and celebratory simultaneously.
Ombre Glitter Application Method
- Base: Nude or soft pink that matches your skin tone (2 coats)
- Middle zone: Nude base with 20% fine glitter coverage
- Tip zone: Nude base with 75-100% glitter coverage (concentrated at the very tip)
- Blending method: Use a makeup sponge to dab and blend the glitter concentration gradually
- Glitter type: Mix fine glitter with slightly larger sparkle for depth
- Finish: Glossy topcoat to make the glitter read as intentional rather than chunky
Worth knowing: This design ages beautifully—even as the glitter chips slightly over time, the nude base keeps the nail looking intentional and put-together.
Final Thoughts

Short duck nails offer remarkable versatility for birthday celebrations, proving that nail length doesn’t determine whether you can rock a trendy shape. The designs above showcase how the duck nail’s unique curved tip actually enhances birthday-themed art rather than limiting it. Each design works because it respects the shape’s architecture instead of fighting against it, making the celebration feel intentional and thoughtfully executed.
The most important factor in making any of these designs work is starting with a clean, well-prepared nail surface and using quality products that won’t chip or fade throughout your celebration. Whether you choose the understated elegance of champagne sparkle or the playful energy of a confetti bomb, your short duck nails will absolutely deliver the birthday statement you’re going for. The shape itself is already a conversation starter—pair it with any of these designs, and you’ve got a nail look that’s as memorable as the celebration itself.
