

If you’ve scrolled through nail inspiration lately, you’ve probably noticed curved duck nails everywhere—and for good reason. These nails take the bold, statement-making duck nail shape and add an elegant curved dimension that feels simultaneously edgy and refined. The curved silhouette creates an almost sculpted appearance that photographs beautifully and demands attention in the best way. Unlike the sharper, more angular duck nail designs, curved versions soften the overall look while maintaining that trendy, confident vibe that makes people instantly ask about your manicure.
The beauty of curved duck nails lies in their versatility. Whether you’re drawn to minimalist nail art, bold color blocking, luxe metallics, or intricate hand-painted designs, the curved duck shape provides a stunning canvas that elevates any aesthetic. The natural curve of the nail bed gets amplified through expert shaping and polish placement, creating depth and dimension that flat manicures simply can’t match. What makes these nails so special is that they work for virtually every skin tone, hand shape, and personal style—you just need to find the right design to match your vibe.
This curved duck nail trend shows no signs of slowing down, and honestly, once you experience the confidence boost of wearing a beautifully shaped curved duck manicure, you’ll understand why so many people are obsessed. The shape flatters your hands in a way that makes even everyday activities—typing, scrolling, grabbing your coffee—feel a little more luxe. Whether you’re planning your next salon appointment or gathering inspiration for a nail artist conversation, these eighteen curved duck nail ideas will show you exactly what’s possible with this elegant shape.
1. Soft Nude Elegance With Pearl Accents
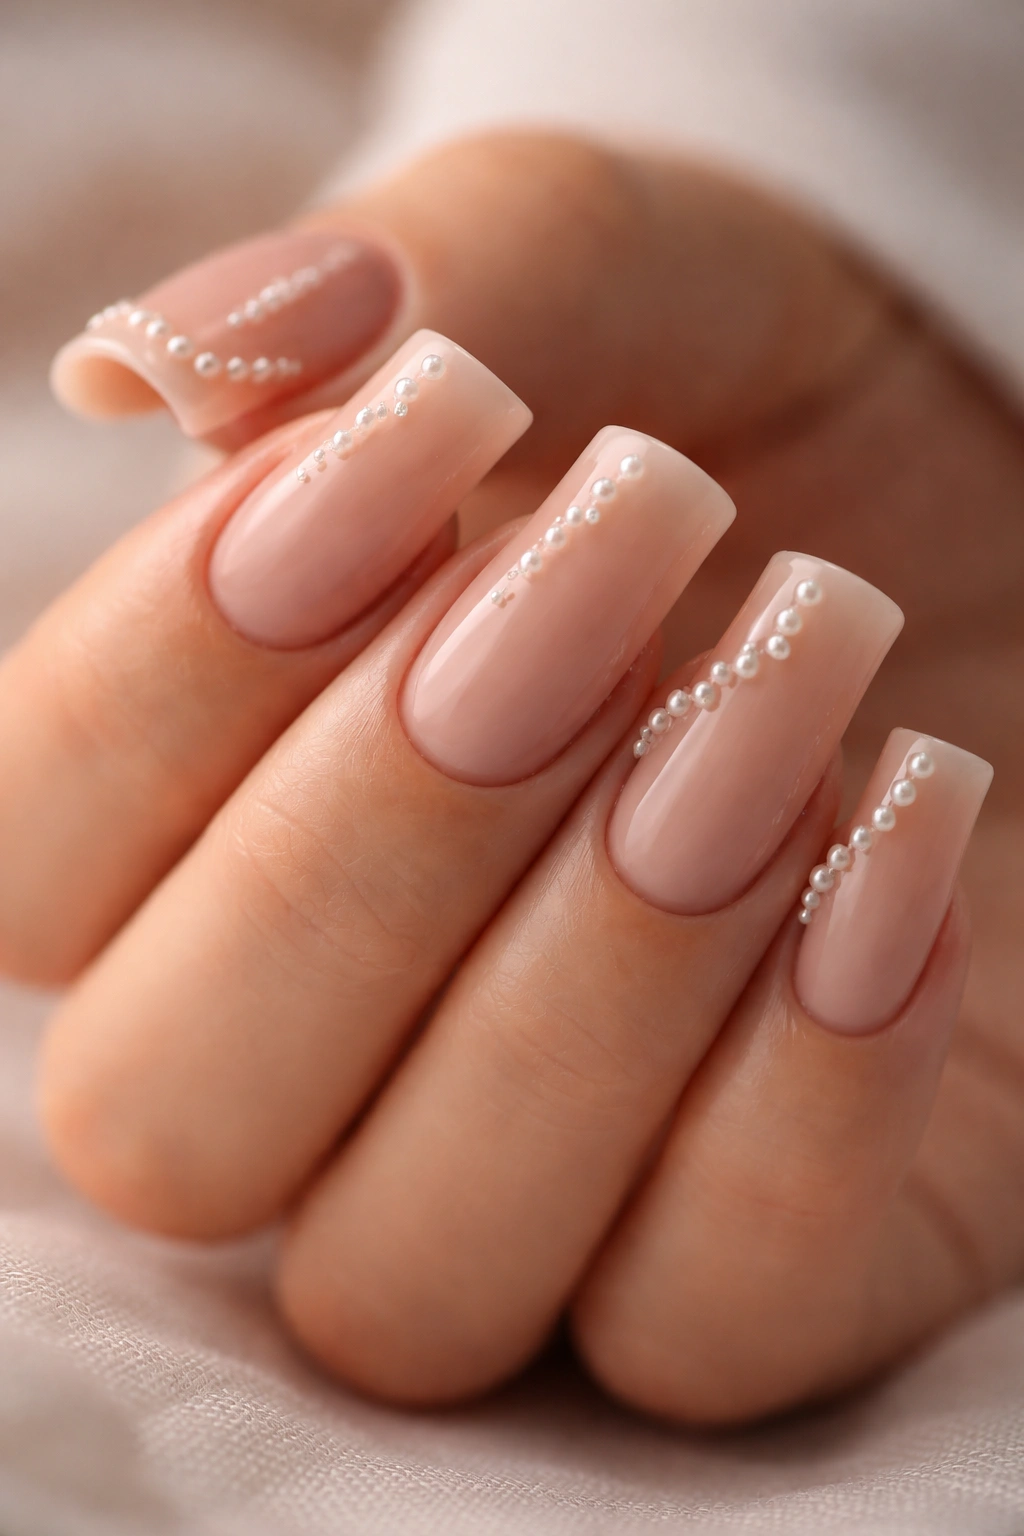
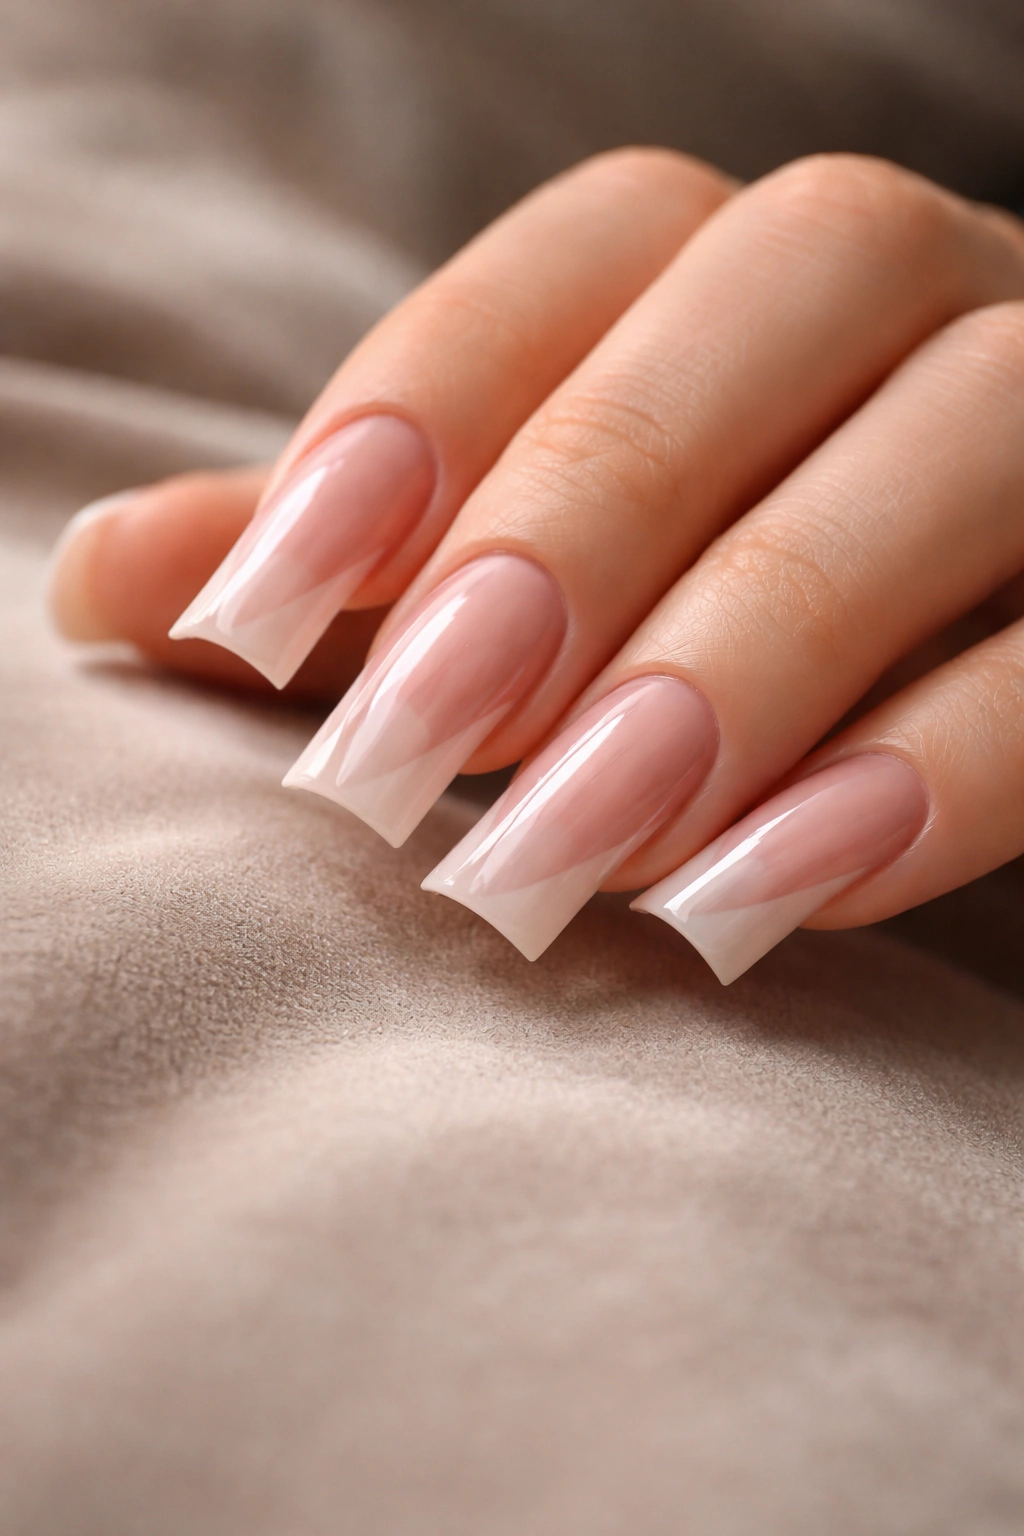
This timeless approach to curved duck nails strips away the drama and focuses on sophisticated understated beauty. A soft, warm nude base creates an elongated, flattering appearance that makes your fingertips look naturally graceful and refined. The nude shade works beautifully on every skin tone when you choose the right undertone—peachy nudes for warmer complexions, cooler beiges for cooler undertones, and rich taupes for deeper skin tones.
Why This Design Commands Quiet Confidence
Nude curved duck nails are the manicure equivalent of a perfectly tailored blazer—effortlessly polished and undeniably chic. The simplicity of the base color allows the curved duck shape itself to be the hero, letting the nail architecture do all the talking. Pearl accents add just enough visual interest and dimension to keep the design from feeling flat or boring, catching light as you move your hands throughout the day.
Accent Placement Ideas and Material Choices
- Tiny pearl dots scattered across the tips, mimicking the curved contour of the nail edge
- One single pearl placed at the apex of the curve for a subtle focal point that doesn’t overwhelm
- Pearl gradient fading from multiple pearls at the tip to none at the base, creating depth and movement
- Mixed pearl sizes—some larger, some smaller—for organic, collected beauty rather than rigid perfection
- Iridescent pearls that shift colors in different lighting for secret magic only you’ll notice
Pro tip: Ask your nail artist to use a pearl-finish top coat base rather than gluing individual pearls—it’s more durable and creates a seamless, professional appearance that lasts through your entire grow-out period.
2. Bold Emerald Green With Gold Leaf Details
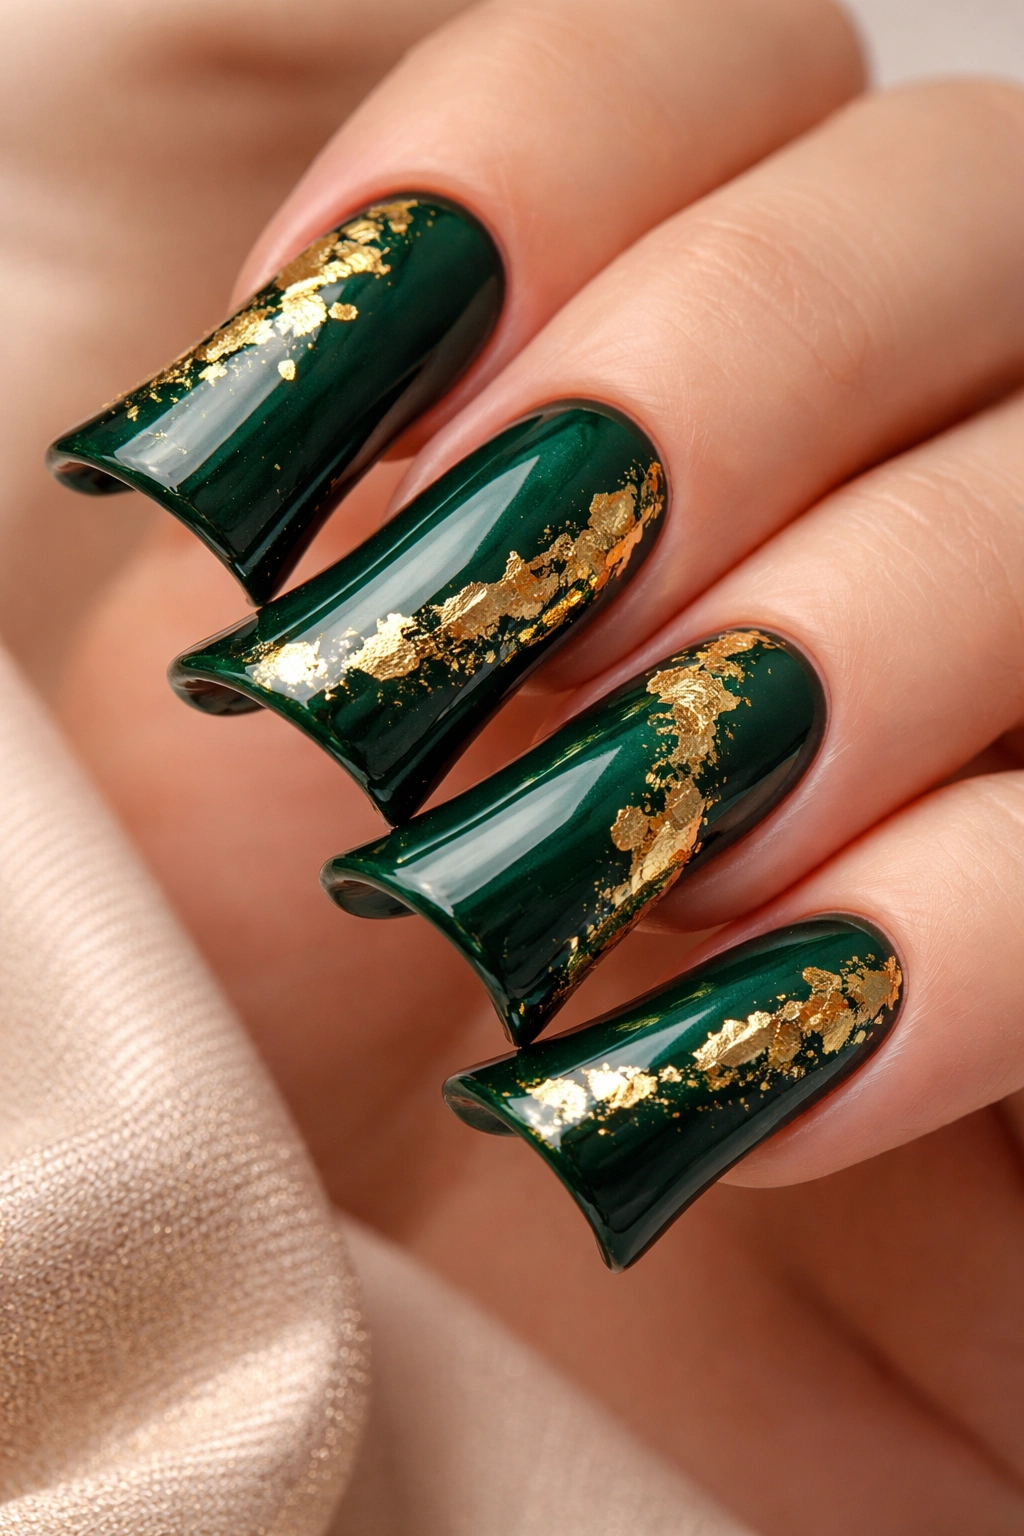
Emerald is the crown jewel of nail colors, and curved duck nails provide the perfect stage for this jewel-tone drama. A deep, rich emerald green base makes a statement that’s sophisticated rather than screaming—there’s something about this particular green that reads as luxury and intentionality. Gold leaf scattered across the surface catches light and adds texture, creating a manicure that feels handcrafted and precious.
Why Emerald and Gold Create Maximum Impact
Emerald green sits in that rare sweet spot where it’s bold enough to feel special but not so bright that it looks costume-y. Paired with curved duck nails, the color automatically looks more premium—the shape elevates the polish, and the polish elevates the shape. Gold leaf adds dimension without requiring intricate hand-painted design work, making this a design that looks more complicated than it actually is.
Design Variations and Application Methods
- Organic scattered gold leaf across the entire nail surface in random, unplanned-looking placement
- Gold leaf concentrated only on the curved tip portion, leaving the base solid emerald
- Delicate gold veining that follows the natural curve of the nail, almost like the nail is cracked open to reveal gold inside
- Mix larger gold leaf pieces with finer gold foil dust for a textured, dimensional surface
- Alternate between emerald and a deep forest green on different nails for subtle variation
Insider note: Seal your gold leaf under a thick layer of glossy top coat to prevent the leaf from catching on fabric or peeling away. A quality gel top coat makes this design last the full three weeks without compromising the gold’s shine.
3. Blush Pink Ombre With Soft Glitter Fade
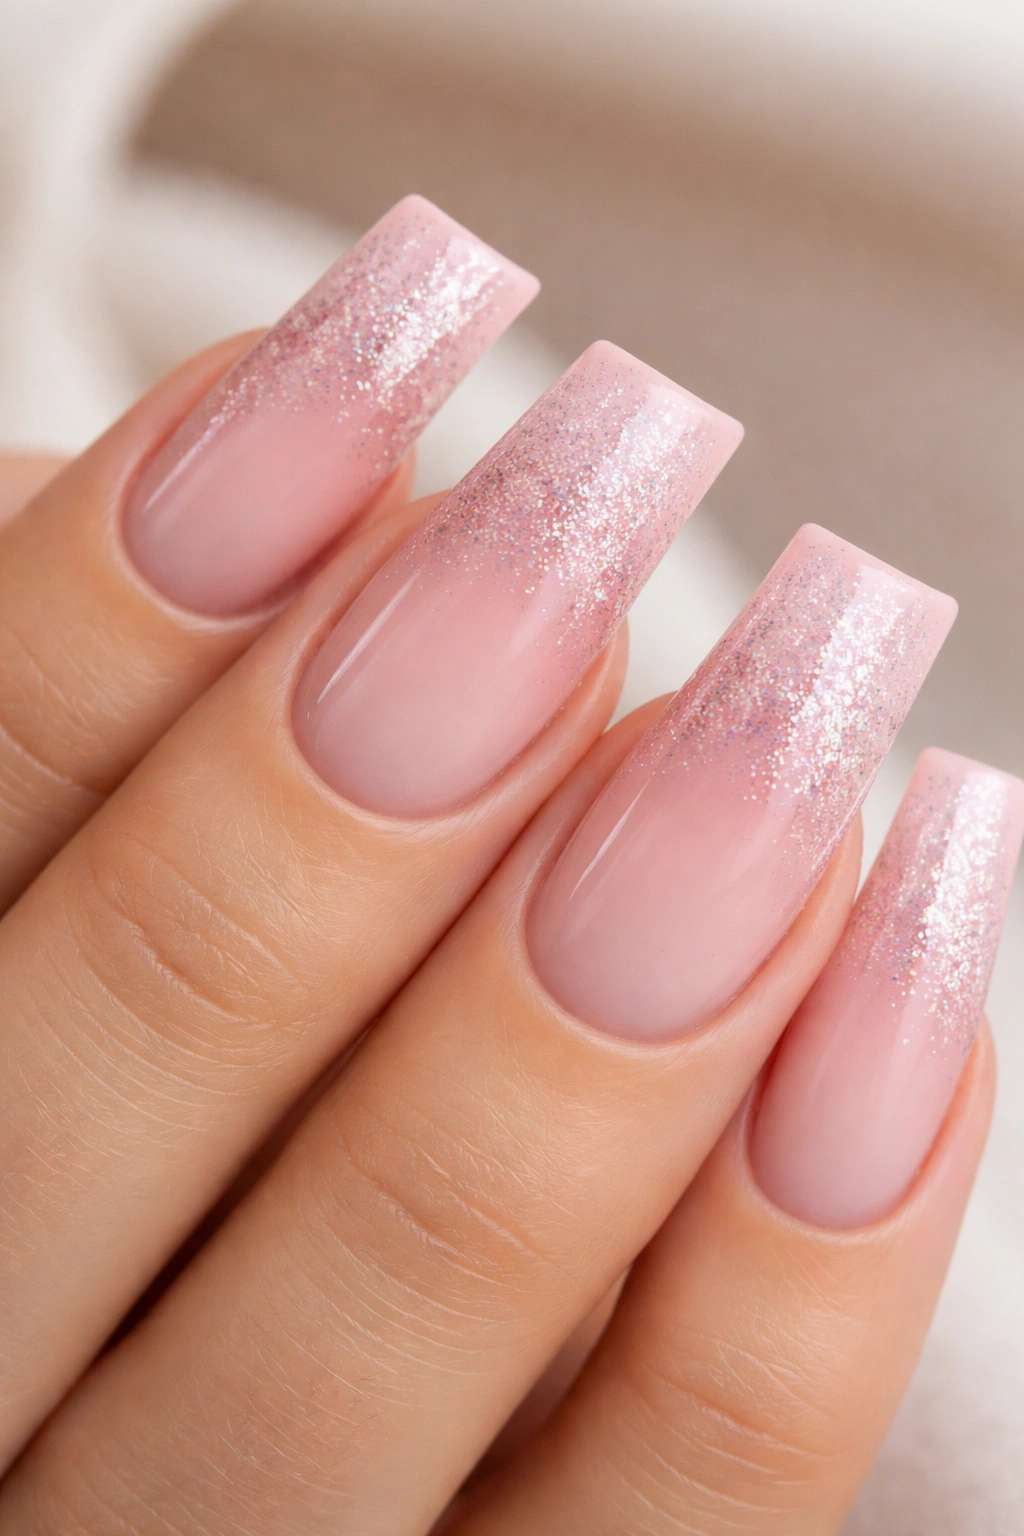
This design is the essence of gentle glamour—a soft blush pink that deepens toward the tips with an incorporated glitter fade that’s visible but never harsh. The gradient moves from creamy pale pink at the base through a mid-tone blush, finally settling into deeper rose at the curved tips with fine iridescent glitter seamlessly blended throughout. This is the manicure that makes people say “I want nails like that but nothing too crazy”—it’s the goldilocks of nail design.
Why This Works for Every Occasion and Season
Blush pink is universally flattering, calming to look at, and feels appropriate everywhere from board meetings to weekend coffee runs. The ombre gradient creates visual interest and depth without requiring complicated nail art skills, and the glitter fade catches just enough light to feel celebratory without being costume jewelry. Curved duck nails amplify the elegance of this gradient—the curve naturally guides the eye along the color transition, making it feel intentional and perfectly executed.
Achieving This Look and Material Selection
- Use a sponging technique with three distinct polish shades (light pink, mid blush, deep rose) to blend the gradient
- Mix fine cosmetic-grade glitter into top coat rather than applying glitter as a separate step for seamless integration
- Apply glitter more heavily toward the tips and fade it out toward the cuticle for that coveted gradient effect
- Seal everything under a thick, glossy top coat to blend any visible gradations and protect the glitter
- Refresh just the tips every two weeks as they grow out—the base pink becomes the new mid-tone
Worth knowing: This design actually improves with a week or two of growth as the original base color becomes more visible, creating a multi-dimensional effect that evolves over time.
4. Jet Black With Holographic Pigment Dust
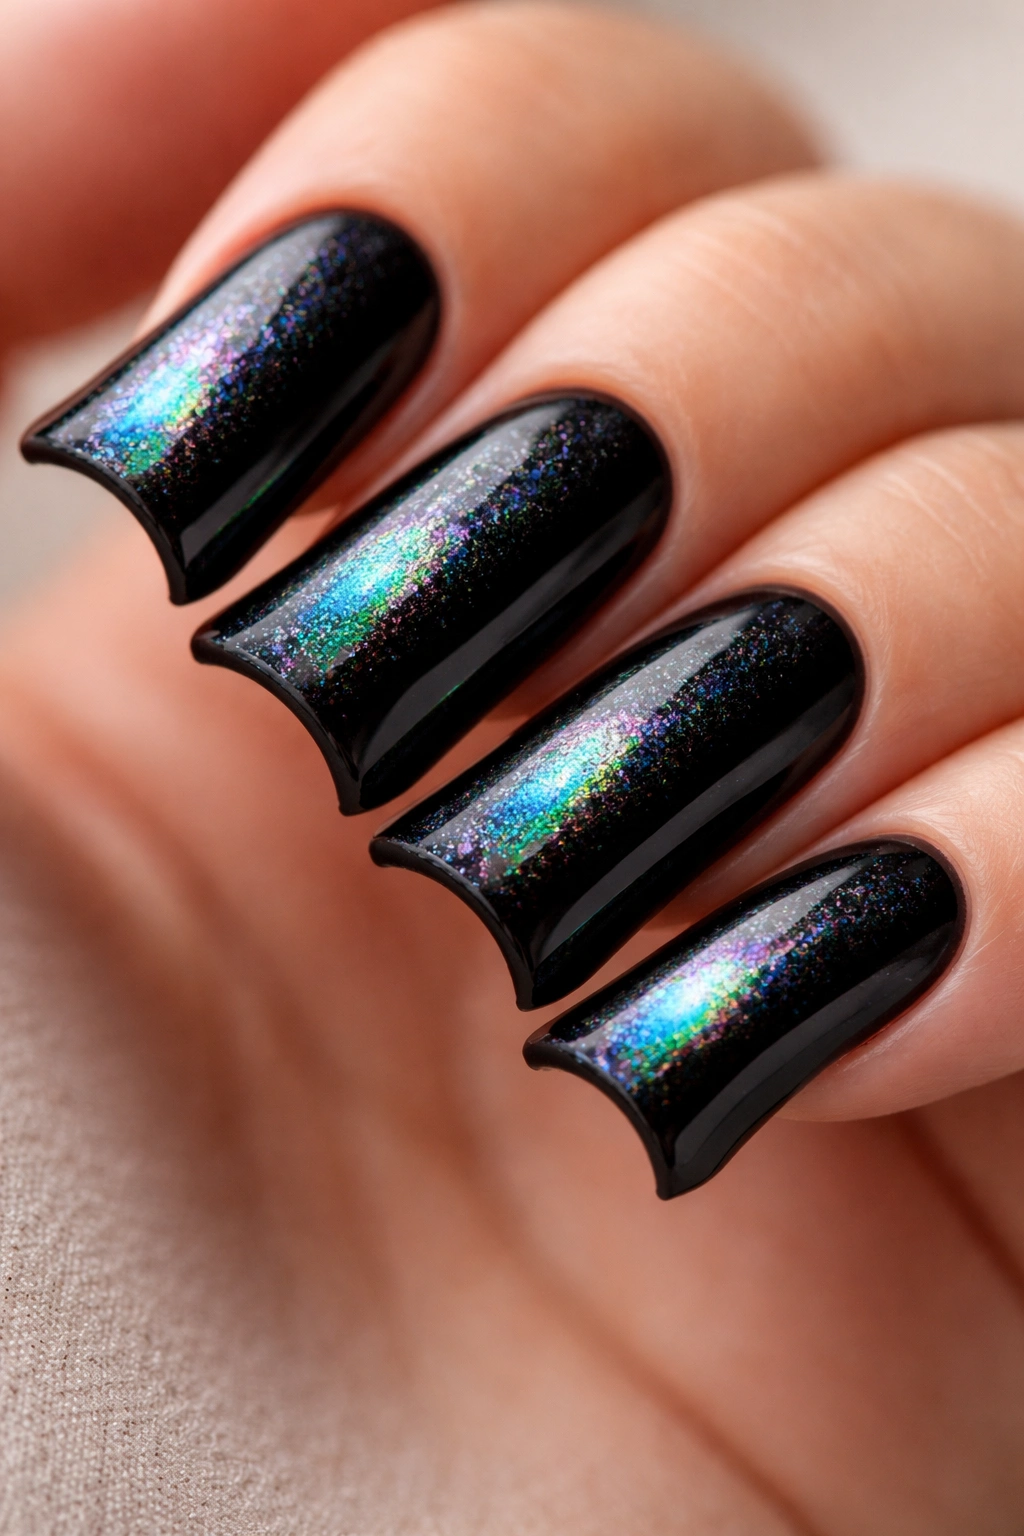
When you want curved duck nails that absolutely command attention, go black—but make it mystical with holographic pigment dust that shifts between colors depending on the light and angle. A solid jet black base becomes the foundation for subtle magic: holographic powder pressed into the wet top coat creates iridescent shifts of purple, blue, and green that reveal themselves only when light hits your nails at certain angles. This is sophisticated because the black keeps it grounded, but the hidden holographic shimmer is pure personality.
The Psychology Behind Black With Hidden Shimmer
Black curved duck nails read as powerful, intentional, and a little mysterious—they’re the nail equivalent of a leather jacket. But adding holographic pigment prevents the look from feeling harsh or severe; instead, it becomes playful and artistic. The holographic element is a secret message to anyone who gets close enough to see it: you’re more interesting than you first appear.
Application Techniques for Maximum Shine
- Apply black gel polish as your base, then press holographic pigment powder into the wet top coat before curing
- Use a matte top coat first, then layer holographic pigment, then seal with a glossy top coat for depth
- Concentrate the holographic powder more heavily on one side of each nail for an asymmetrical, artistic look
- Apply holographic pigment to only the curved tip portion, leaving the base solid black for contrast
- Buff the surface lightly after curing to activate the holographic shift—more light reflection equals more color play
Pro tip: Different holographic pigments shift into different color spectrums. Cool-toned holographics shift blue and purple; warm-toned ones shift pink and gold. Choose based on your personal color preference and what compliments your skin tone.
5. Creamy White With Minimalist Line Work
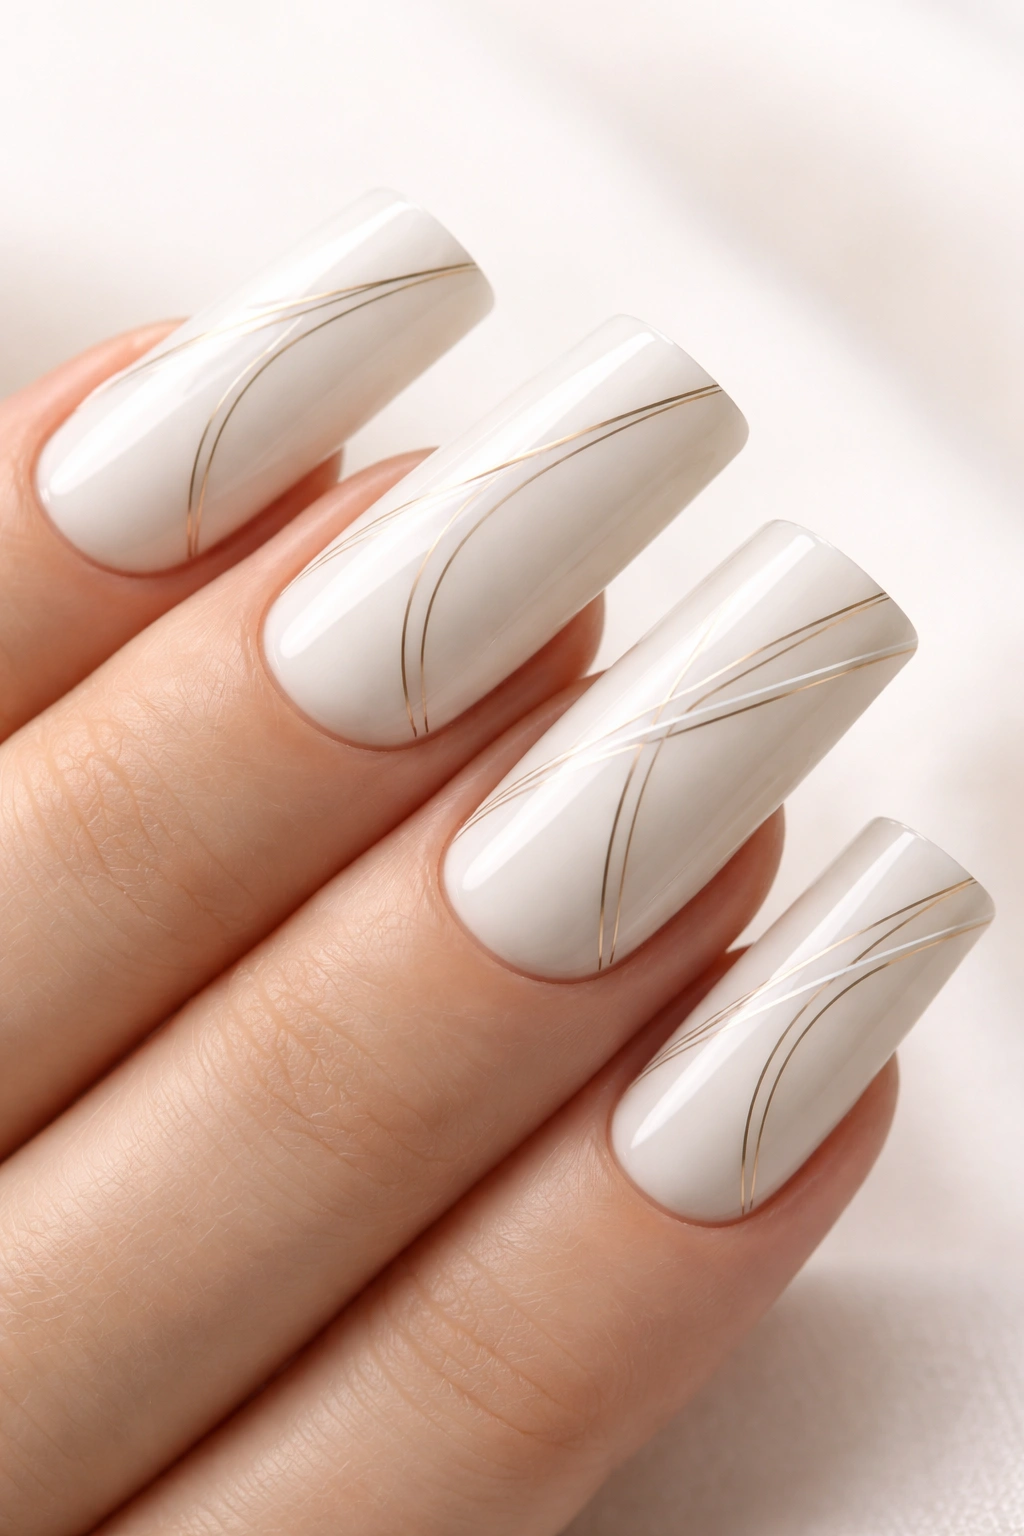
Curved duck nails in creamy white serve as the perfect blank canvas for minimalist line work that feels artistic without being overwhelming. Fine, precise black or deep gray lines create geometric shapes—thin stripes, scattered dots, small triangles, or delicate negative space designs that guide the eye along the curve of the nail. This design celebrates the beauty of empty space and intentional simplicity, making it feel modern and editorial rather than trendy.
Why Minimalism Works Better on Curved Nails
The curved shape itself already provides visual interest, so minimalist design complements rather than competes with the nail architecture. A single fine line that follows the curve of your nail, or a tiny geometric shape placed intentionally, becomes art rather than decoration. Creamy white keeps the look clean and fresh, allowing your design elements to stand out without creating a busy, overwhelming appearance.
Line Work Ideas and Execution Methods
- Thin horizontal lines that follow the nail’s curve, spaced evenly for rhythm and movement
- A single vertical or diagonal line running from cuticle to tip, emphasizing the nail’s elongation
- Minimalist shapes like small circles, lines, or squares scattered across the base in balanced placement
- Negative space designs where certain areas are left white and outlined with thin lines to create shape
- Hand-drawn organic squiggles that look intentionally imperfect, adding personality and artistry
Worth knowing: Thin line work is technically challenging and requires a skilled nail artist with a steady hand. Budget accordingly and don’t hesitate to ask your artist for examples of their line work before committing.
6. Deep Plum With Chrome Mirror Accents
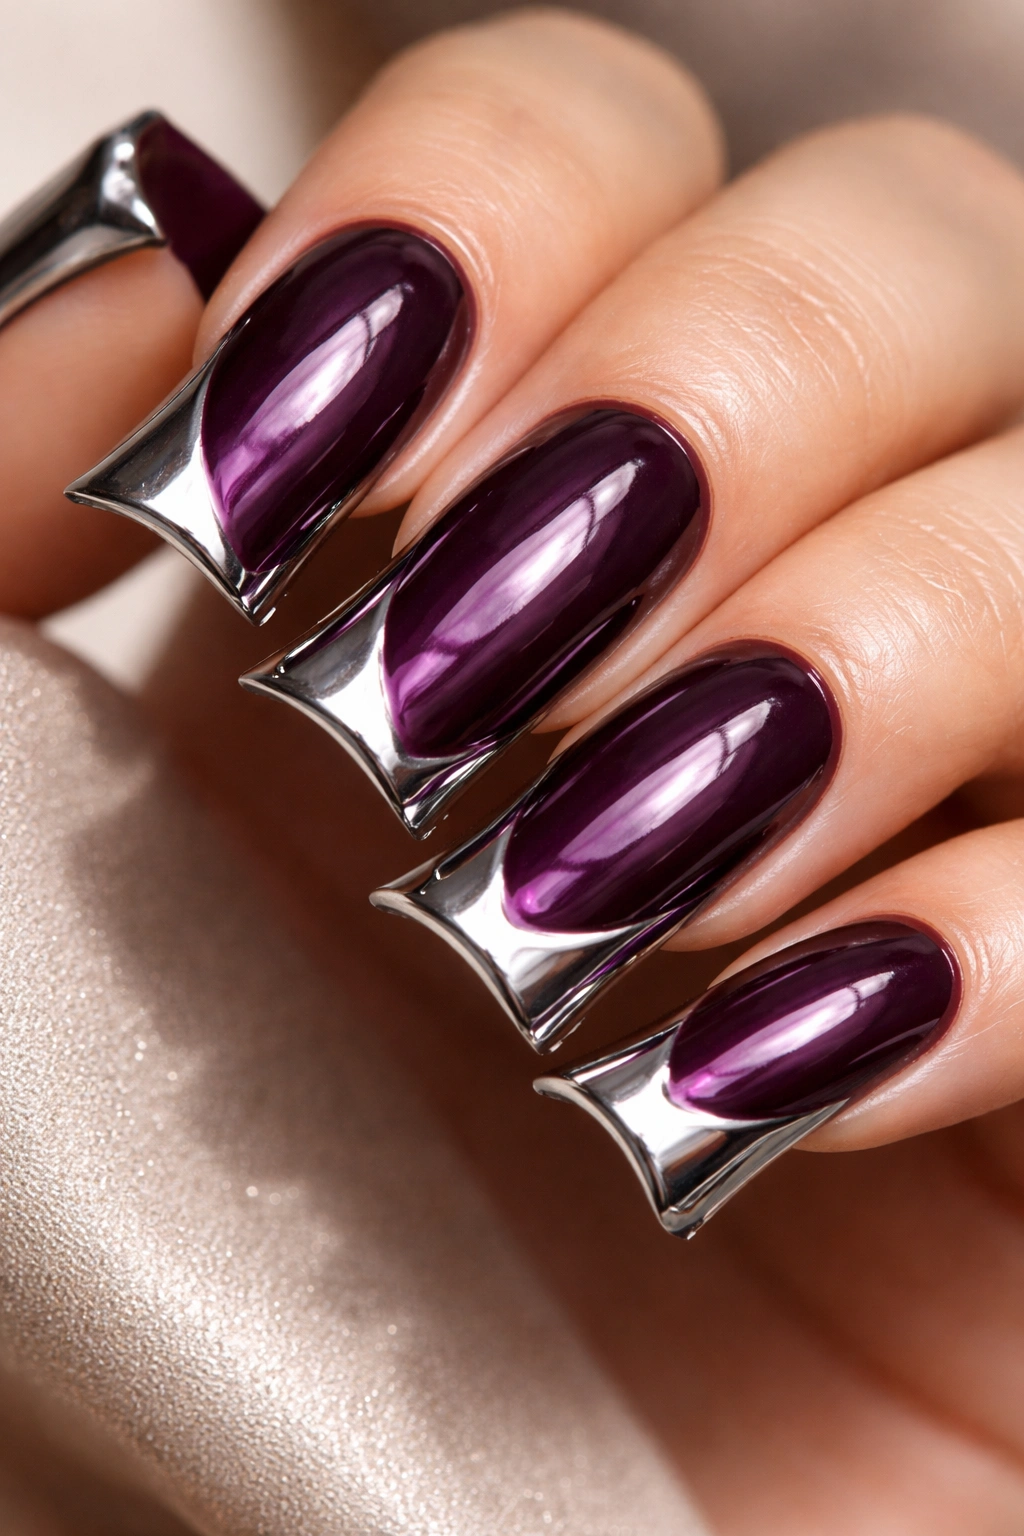
Deep plum curved duck nails deliver richness and sophistication, while chrome mirror accents along the curved edges catch light like captured reflection. The plum base—deep enough to feel luxe but not so dark it disappears—pairs with strategically placed chrome mirror effects that seem to glow. This design walks the line between maximalist and minimalist perfectly: the color makes a statement, but the chrome accents are the punctuation mark that makes people stop and stare.
Why Plum Is Underrated for Curved Duck Nails
Plum is mysterious and elegant without being as obvious as black or as predictable as nude. It photographs beautifully, coordinates with virtually every skin tone, and feels equally appropriate for a business dinner or weekend adventure. Adding chrome mirror accents elevates plum from a simple solid color into something that feels high-fashion and intentional, like you had the exact vision for this manicure and executed it perfectly.
Chrome Placement Strategies and Finishes
- Chrome mirror concentrated solely on the curved edge of the nail, creating a glowing outline of your nail shape
- Chrome dust pressed into a gradient that fades from fully mirrored tips to pure plum at the base
- Random geometric shapes—triangles, rectangles, or abstract forms—topped with chrome for a mixed-media effect
- Chrome placed in the center of each nail while plum remains on the edges for a completely unique look
- Holographic chrome (which shifts colors) instead of standard silver chrome for added complexity
Insider note: Chrome powder requires a special sticky base coat and won’t adhere properly to regular polish. Always ask your nail artist to use the correct chrome-specific base, or your mirror finish will chip or peel within days.
7. Pastel Ombré Rainbow Across All Ten Nails
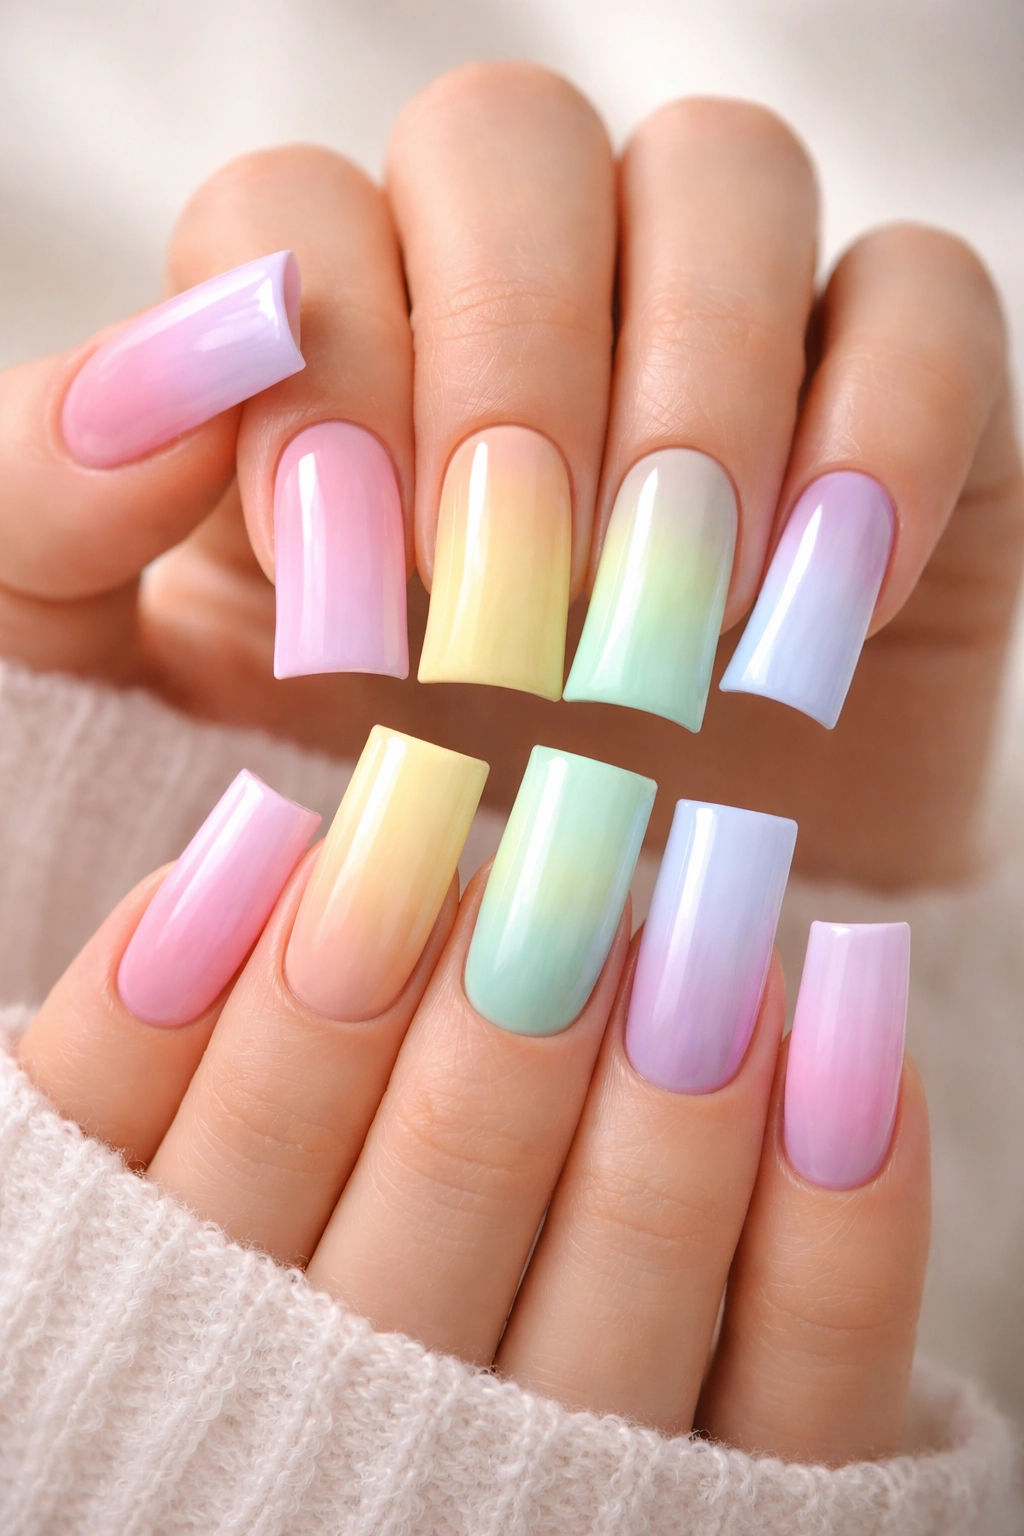
This design takes curved duck nails in a celebratory direction—each nail features a different pastel color gradient that flows from one nail to the next, creating a rainbow effect across your entire hand. Pale pink on your thumb blends to pale peach on your index, moving through pale yellow, pale green, pale blue, and pale purple as you progress. The soft pastel palette keeps it elegant rather than juvenile, while the curved duck shape ensures each color change looks polished and intentional rather than chaotic.
The Art of Flow and Color Progression
A true rainbow ombré across multiple nails requires careful color selection to ensure each shade transitions smoothly and feels like one unified design rather than ten random colored nails. The curved duck shape becomes essential here—the curve naturally guides the eye along each individual gradient, then leads seamlessly to the next nail’s gradient, creating flow. This design works because every element serves the whole: the shape, the colors, the gradients, and the progression all work together to create something more beautiful than any single element alone.
Color Selection and Blending Techniques
- Select ten pastel shades that sit directly next to each other on the color wheel, ensuring smooth transitions
- Use a sponging method to blend each color gradient on individual nails, creating soft transitions between shades
- Apply colors with slightly more intensity at the tips and fade them lighter toward the base for dimension
- Coordinate one color per nail but blend it with its neighbor color at the edges to create connection
- Use a pale, glossy top coat that enhances the gradient without adding additional shimmer or texture
Pro tip: Take a photo in natural sunlight before leaving the salon—pastels can look different under salon lighting. This gives you a true reference for how your nails actually look in daylight.
8. Burnt Orange With Negative Space Geometric Shapes
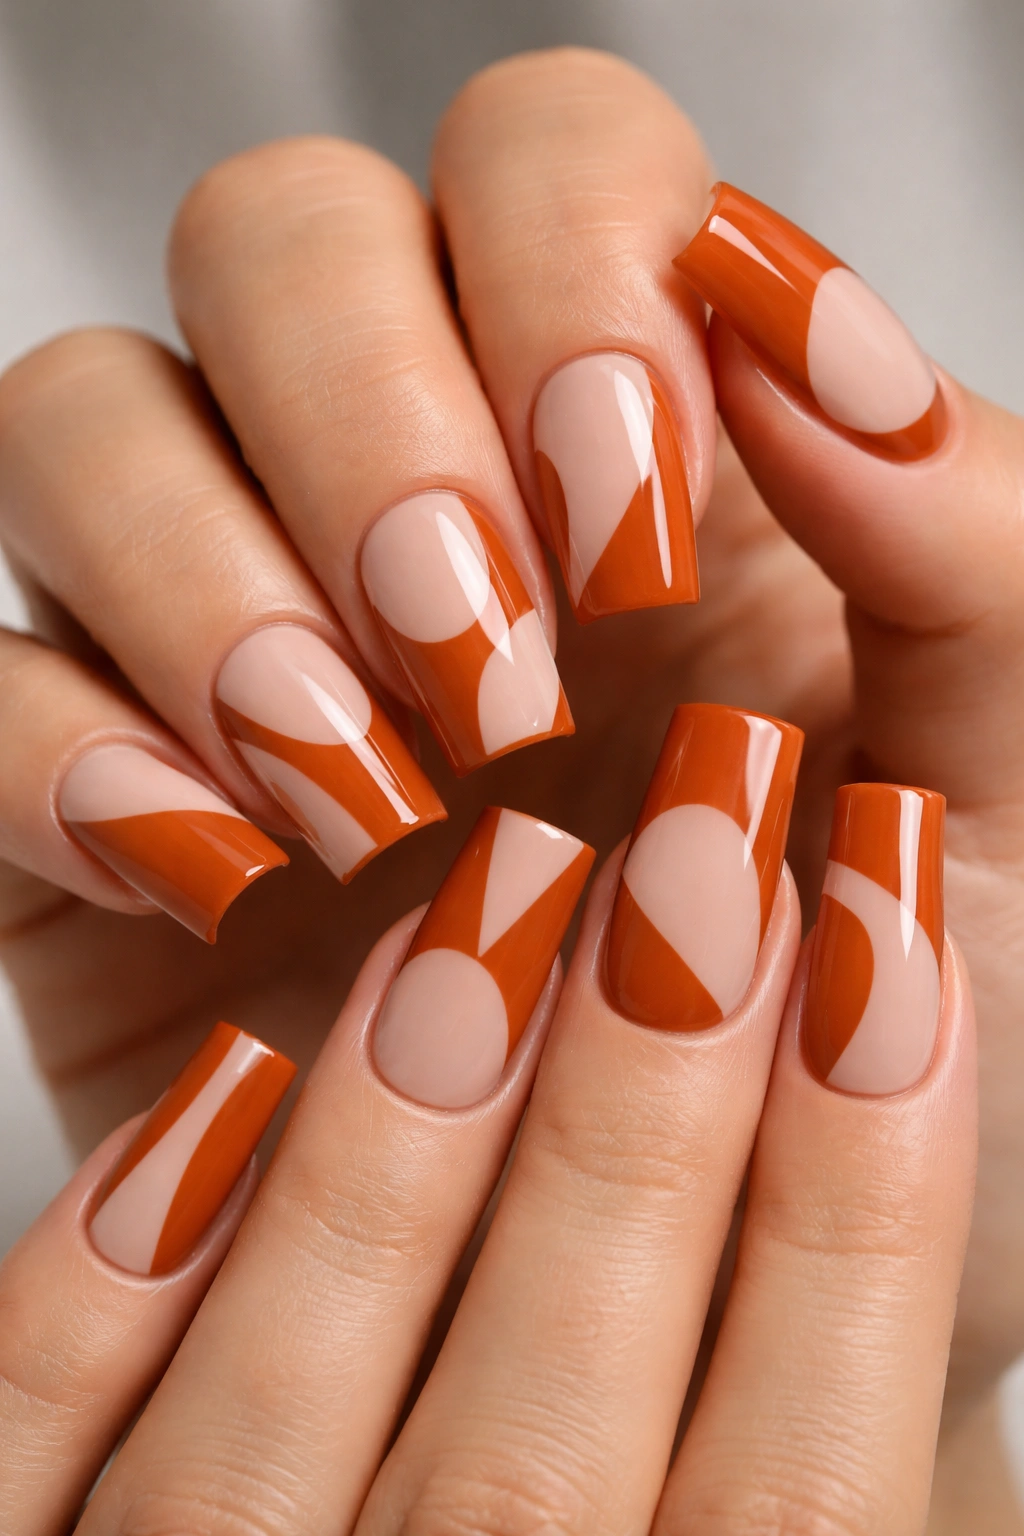
Curved duck nails in a warm, earthy burnt orange create a bold statement that feels sophisticated when paired with negative space geometric design. Rather than adding additional color or details, negative space designs let your natural nail (or a nude base) show through specific geometric shapes—diamonds, triangles, or abstract cutouts that reveal the contrast beneath. This approach keeps the design clean and architectural while the burnt orange base provides warmth and personality.
Why Burnt Orange Commands Autumn Aesthetic
Burnt orange feels warm, sophisticated, and less predictable than other warm autumn tones. It’s bold without being aggressive, making it perfect for someone who wants their manicure to be noticed but still appropriate for professional settings. Curved duck nails in this color feel editorial and intentional—like you consulted a color mood board before arriving at the salon. Negative space design elevates it further by adding artistic dimension.
Negative Space Design Ideas and Execution
- Diamond shapes positioned down the center of each nail, creating a geometric runway effect
- Triangular cutouts along the curved edge, almost like a ruffled or scalloped border created with empty space
- Abstract curved shapes that follow the natural contour of the nail, creating organic negative space
- Geometric lines creating a modern lattice pattern with alternating areas of burnt orange and open space
- Corner cutouts that create a frame effect, drawing attention to the center of the nail
Worth knowing: Negative space designs require precise application. Your nail artist will apply burned orange polish and then use specialized techniques (or stencils) to create the cutouts. The more complex the geometric pattern, the longer the appointment will take.
9. Shimmering Rose Gold With Delicate Lace Details

Rose gold curved duck nails are inherently romantic and reflective, and adding delicate lace details elevates the entire aesthetic into something that feels handcrafted and precious. A shimmering rose gold base provides warm, luminous backdrop for hand-painted or stamped lace designs that feel intricate without being overwhelming. The combination of metallic shimmer and delicate lace creates luxury: it’s the perfect manicure for someone who loves feminine details but won’t tolerate anything saccharine or overly sweet.
The Appeal of Metallic Shimmer Combined With Delicate Detail
Rose gold has an inherent warmth that flatters virtually every skin tone, and the shimmer catches light in a way that makes your hands feel luminous and intentional. Pairing this with delicate lace details prevents the shimmer from feeling costume-y or party-wear—instead, it reads as refined and elegant. The lace detail adds craft and artistry, transforming a simple metallic manicure into something gallery-worthy.
Lace Detail Application and Design Styles
- Hand-painted fine lace motifs that appear to wrap around the curved tip of each nail
- Stamped delicate lace patterns that cover portions of the nail in repeated, precise detail
- Lace designs concentrated on the outer edges of the nails while the center remains shimmering rose gold
- Mixed detail: large lace elements on some nails, tiny scattered details on others, for collected beauty
- Negative space lace where the rose gold appears to create the lace pattern against a nude or white background
Pro tip: If hand-painted lace feels too delicate for your lifestyle, ask your artist about lace stamping—it provides the appearance of intricate hand-painted detail with greater durability.
10. Deep Navy Blue With Constellation Design
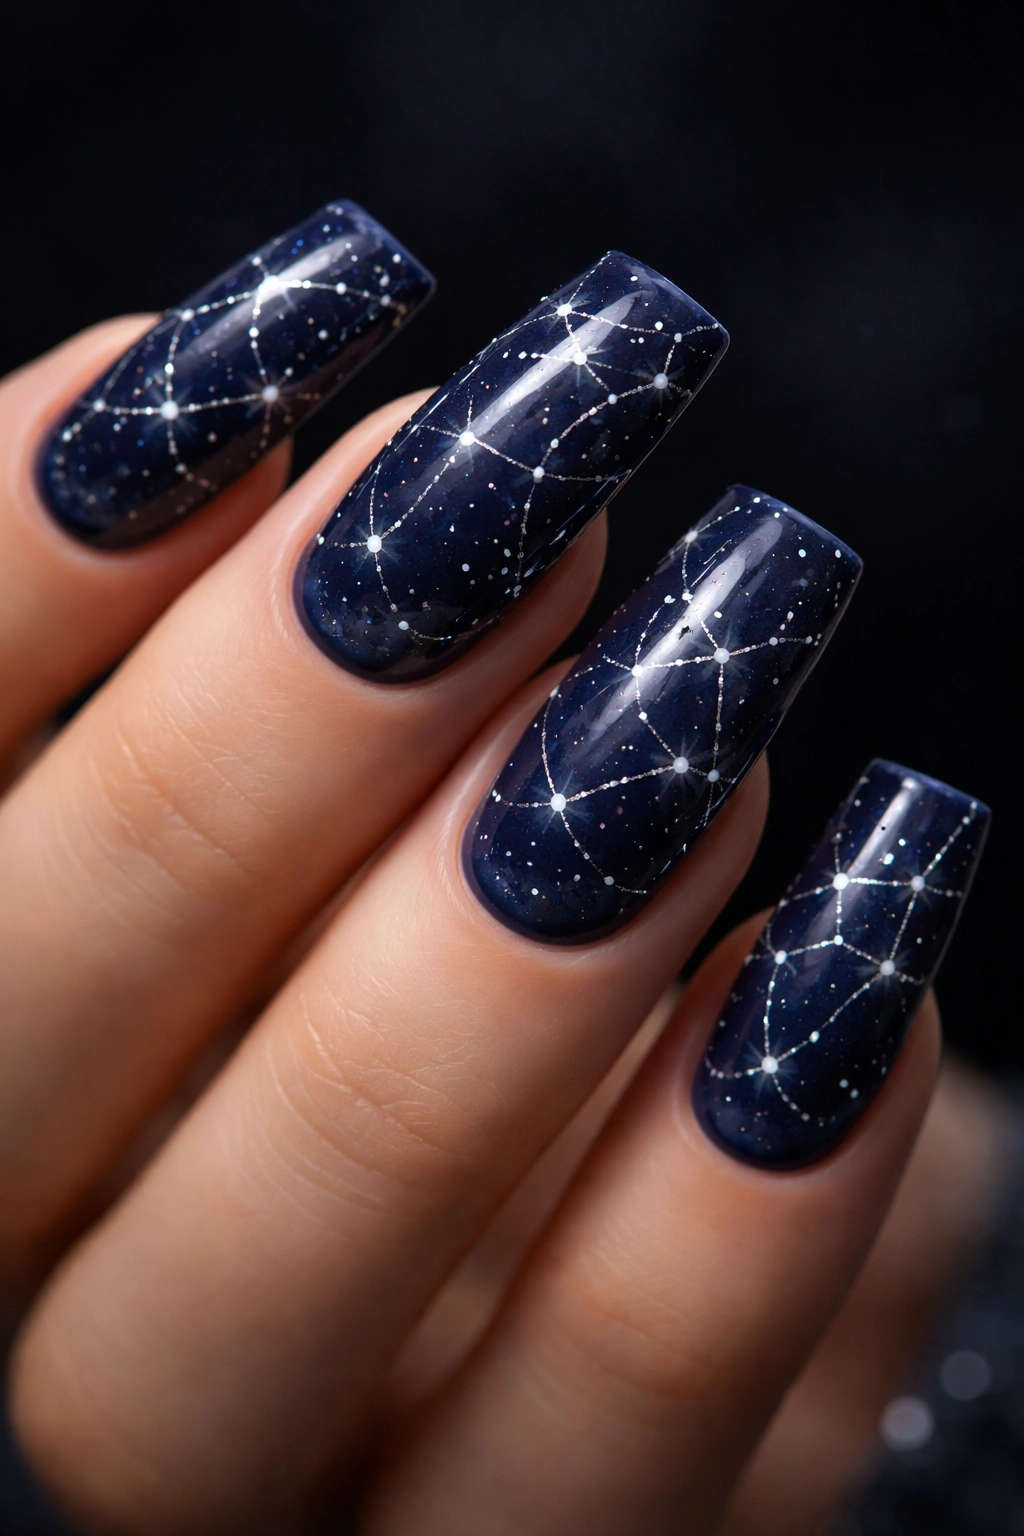
Navy curved duck nails provide a deep, sophisticated base for a celestial design that feels magical and personal. Tiny white dots representing constellations scattered across the navy create a night-sky theme that’s both whimsical and elegant. You can opt for accurate constellation mapping or create your own personal star pattern—either way, the design tells a story. Navy is deep enough that even small white details stand out clearly, while remaining professional enough for any setting.
Why Celestial Themes Resonate on Curved Nails
There’s something about curved nails that naturally evokes the cosmos—perhaps it’s the way the curve mimics celestial arcs, or maybe it’s simply that the shape feels graceful enough to deserve something equally ethereal. A constellation design on curved duck nails feels like wearing a piece of the night sky on your fingertips, but in a way that’s grounded and intentional rather than mystical or costume-like.
Constellation and Celestial Design Options
- Accurate constellation maps on specific nails, with tiny white lines connecting the dots to form recognizable patterns
- Scattered stars of varying sizes across all nails, with larger stars concentrated toward the tips
- Moon phases incorporated with constellation designs for a full celestial theme across both hands
- Glow-in-the-dark elements mixed with standard white paint for hidden magic visible only in darkness
- Tiny white dots with occasional touches of metallic silver or gold for subtle glimmer among the stars
Worth knowing: Glow-in-the-dark nail polish requires specific application techniques and may not last as long as standard gel polish. Discuss longevity expectations with your nail artist before committing.
11. Blush Nude With 3D Rhinestone Accent Nail
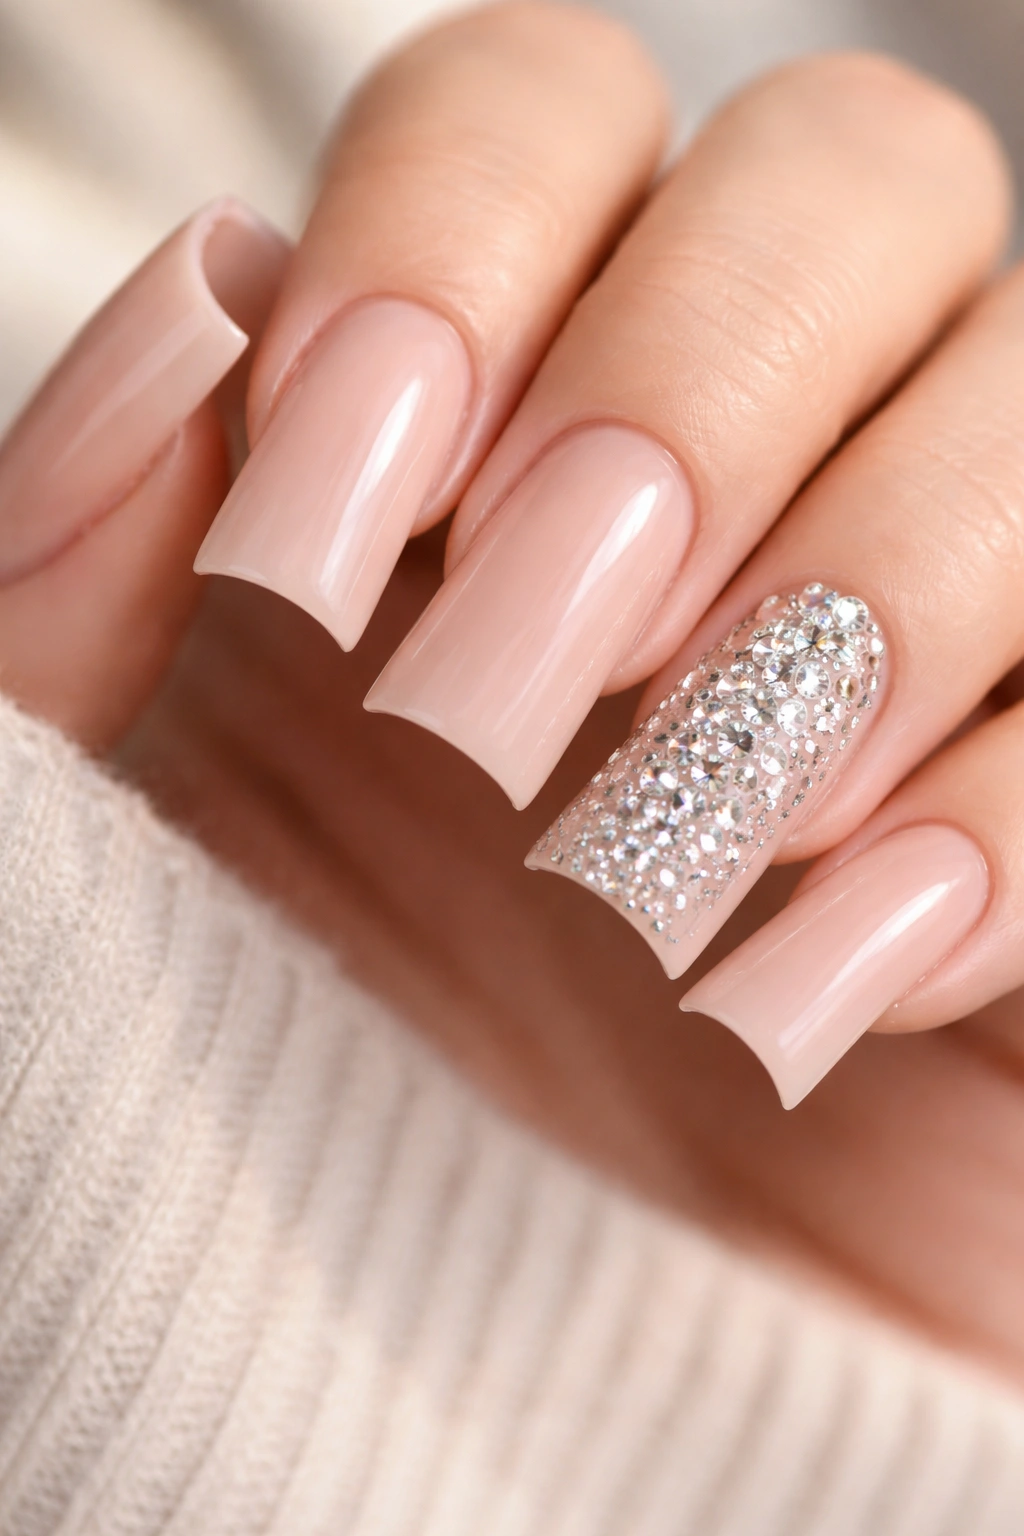
Sometimes the most impactful curved duck nail design is understated perfection with one statement accent. A warm blush nude across nine nails provides the foundation, while the ring finger (or accent finger of choice) becomes a rhinestone showcase. A gradient of rhinestones increasing in size and density from the base toward the curved tip creates a waterfall effect that’s glamorous but not over-the-top. The blush nude keeps the overall look wearable, while the 3D accent says you’re ready for anything.
The Power of Strategic Accenting on Curved Nails
One rhinestone accent nail prevents your manicure from feeling like too much while providing undeniable glamour. The curved shape of the nail becomes a natural highway for rhinestone placement—larger stones at the tip, medium stones in the middle, tiny ones at the base creates a size gradient that feels intentional and beautiful. Surrounding this statement nail with nine perfect blush nude nails makes the rhinestones feel even more luxe.
3D Rhinestone Application and Layout Options
- Large faceted rhinestones graded in size, starting with tiny gems near the cuticle and increasing toward the tip
- Rhinestones arranged in a curved line that follows the natural curve of the nail shape
- Mixed rhinestone sizes and shapes—some faceted, some round, some flat—for dimensional sparkle
- Ombré rhinestone effect using clear stones at the base graduating to colored rhinestones (rose gold, champagne) toward the tip
- Rhinestones concentrated only on the curved edge of the accent nail while the center remains solid blush
Pro tip: High-quality rhinestones are worth the investment—cheaper stones dull quickly and fall off. Ask your nail artist specifically what grade and quality of rhinestones they use.
12. Milky White With Ethereal Abstract Watercolor
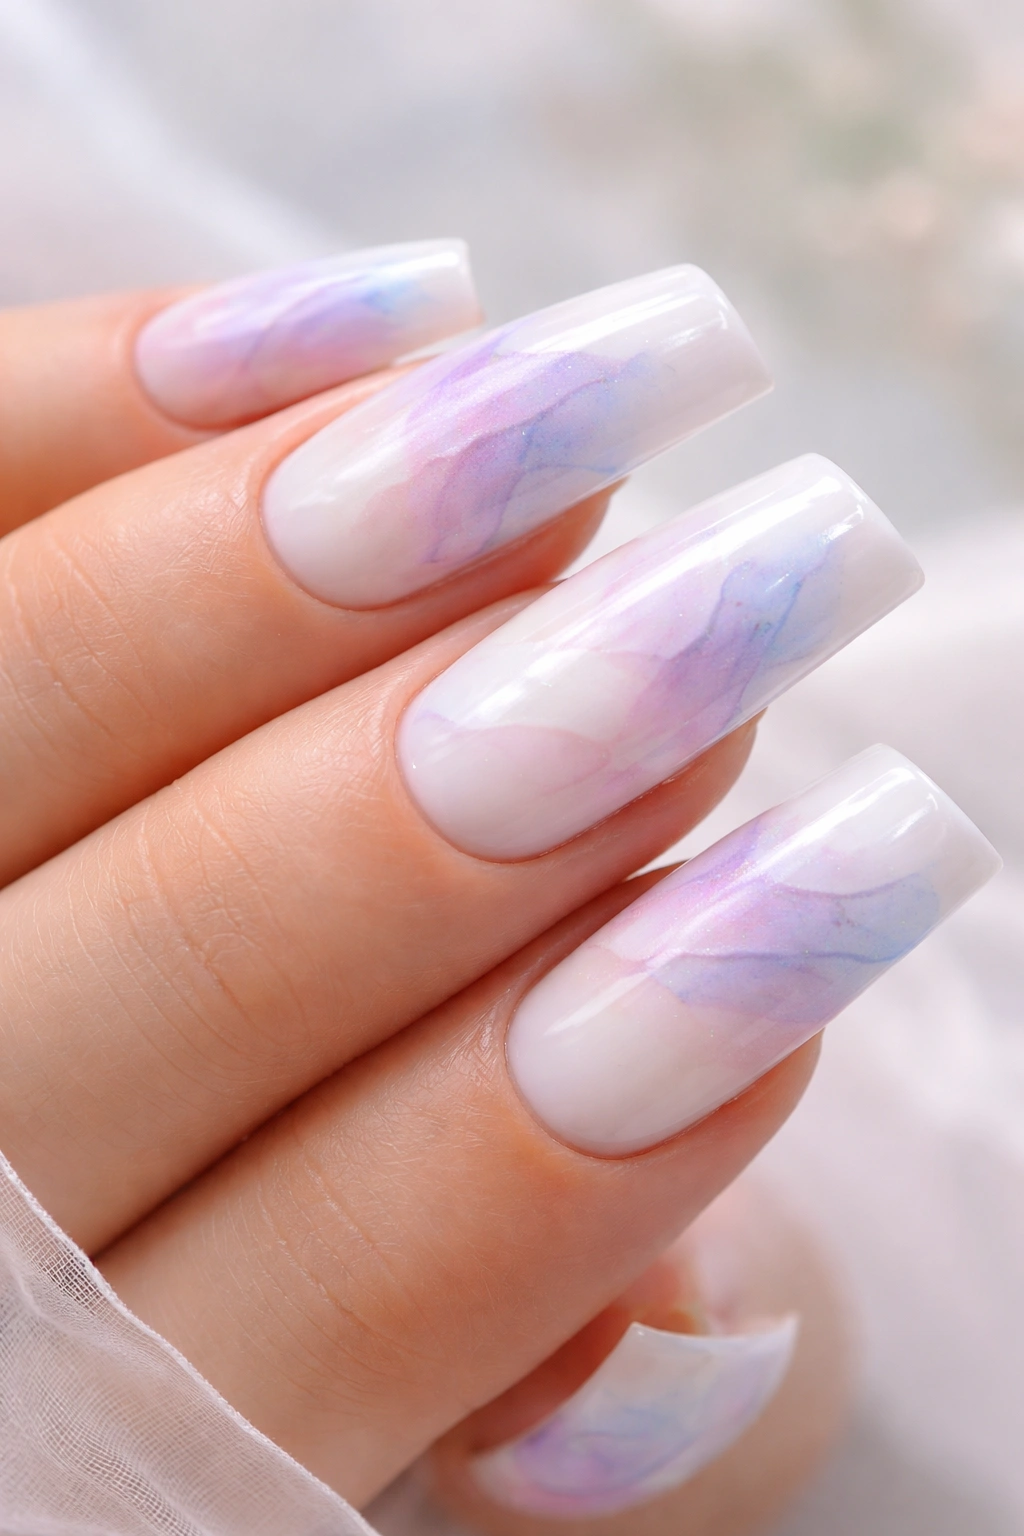
Curved duck nails in a creamy milky white create an almost porcelain appearance, perfect for showcasing ethereal abstract watercolor designs that feel like cloud formations or weathered brushstrokes. Soft washes of pale pink, lavender, and blue bleed into the white, creating organic patterns that never look the same twice. This design feels artistic and intentional without requiring photorealism or technical perfection—the beauty lives in the abstraction and the way the colors fade and blend.
Why Watercolor Looks Better on Curved Nails
The curved shape naturally complements the organic flow of watercolor design. Where a flat nail might make watercolor feel accidental or unpolished, curved duck nails make it feel artistic and intentional. The color transitions inherently follow the nail’s architecture, creating designs that feel like they were created specifically for the curved shape rather than adapted to fit it.
Watercolor Application Techniques and Color Palettes
- Soft pastel washes (blush pink, lavender, sky blue) that drift across milky white without harsh edges
- Color concentrated toward the tips with fading intensity toward the base for an ombré effect
- Abstract strokes that create the impression of movement or wind without representing anything specific
- Multiple colors on different nails while maintaining the same milky white base for cohesive unity
- Matte top coat instead of glossy to enhance the watercolor painting aesthetic
Worth knowing: Gel watercolor effects require a skilled hand and careful layering. Some artists prefer using traditional nail polish for watercolor effects as it’s more forgiving. Ask your artist about their preferred method.
13. Forest Green With Gold Filigree Accents
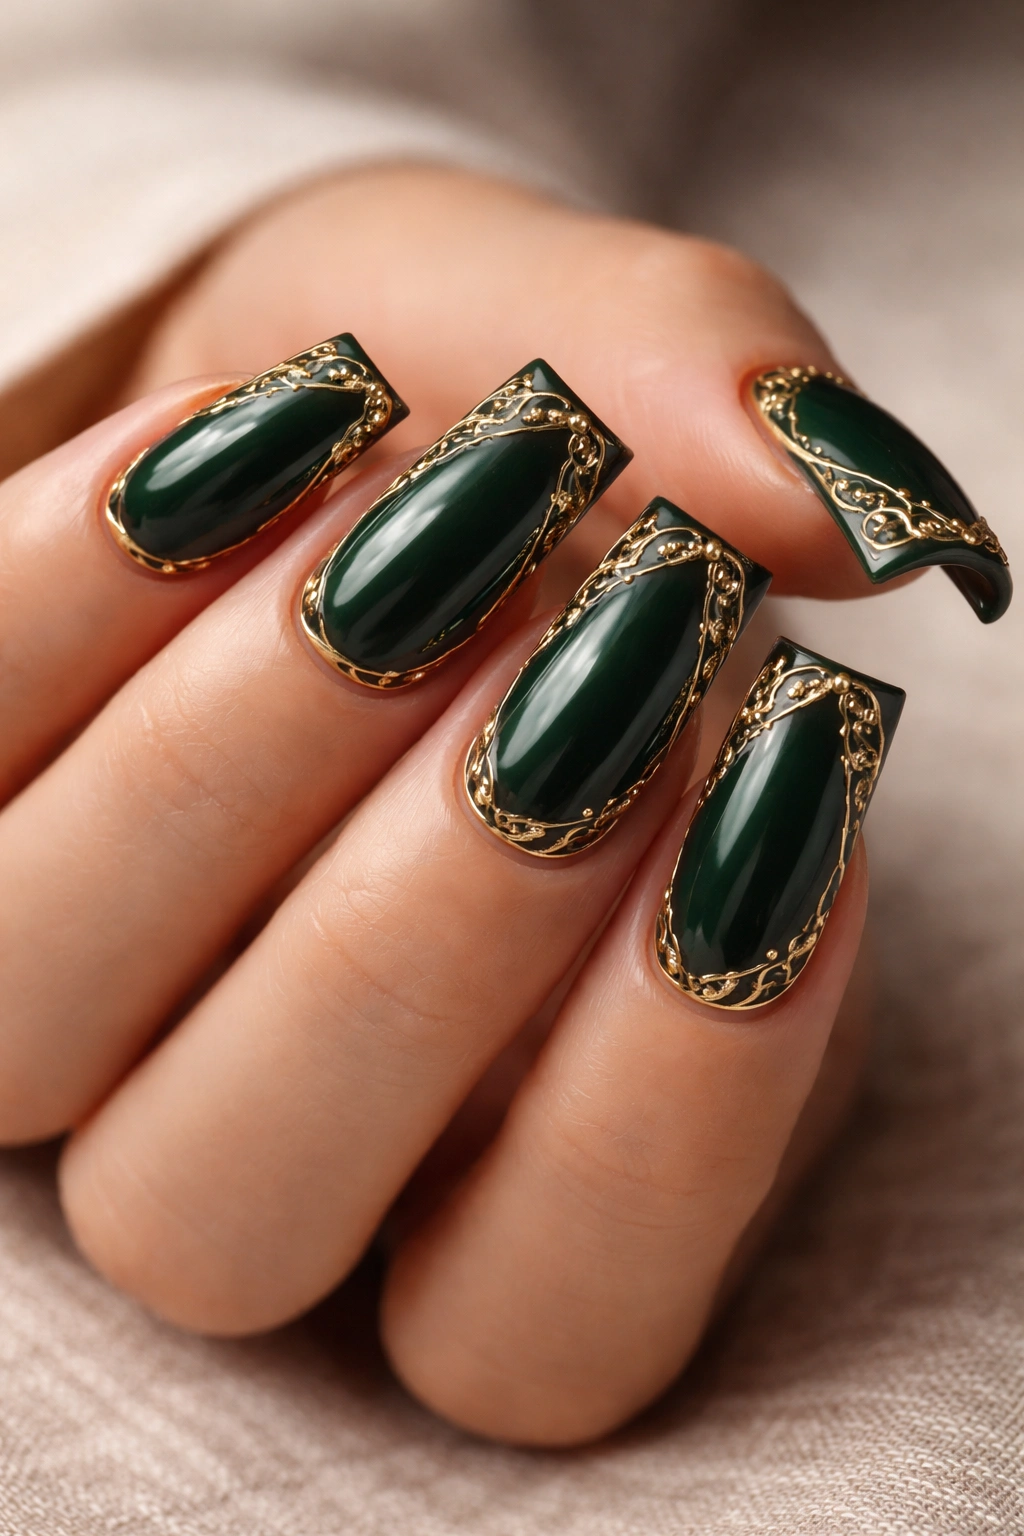
Deep forest green curved duck nails deliver jewelry-box luxury, while delicate gold filigree accents create an almost Victorian elegance. Fine gold lines and flourishes follow the curves and contours of each nail, creating ornate but refined detail that feels handcrafted. The forest green provides a jewel-tone backdrop that makes the gold shimmer appear richer and more intentional, while the filigree detail prevents the solid color from feeling flat or one-dimensional.
The Heritage of Filigree and Modern Application
Filigree—delicate ornamental metalwork—feels timeless and precious. Applied to curved duck nails, it creates an effect that’s both classic and contemporary: classic in technique and reference, contemporary in application. This combination makes the manicure feel sophisticated and intentional rather than costume or dated. Forest green amplifies the luxury feeling, making it perfect for someone who loves sophisticated detail.
Filigree Design and Application Methods
- Hand-painted delicate gold lines that follow the natural curve of each nail, creating symmetrical flourishes
- Filigree concentrated around the curved edges of the nail, creating an ornamental frame
- Corner filigree elements on each nail that flow into adjacent nails when hands are together, creating a unified design
- Stamped filigree designs for consistency and precision if hand-painting feels too delicate
- Mixed techniques: hand-painted elements on some nails and stamped details on others for varied interest
Pro tip: Ask your nail artist if they use actual metallic gold polish or if they can apply metallic foil for enhanced longevity. Foil-applied gold holds up better than paint alone.
14. Peachy Nude With Glazed Donut Finish

Curved duck nails with a glazed donut finish feel incredibly modern and tactile—the manicure practically begs you to admire the way it catches light. A peachy nude base is topped with a thick, glossy coat that creates a 3D appearance almost like the nail is covered in glaze. The finish catches light differently than standard glossy polish, creating an almost wet-looking surface that photographs beautifully and feels luxurious to the touch. This design proves that sometimes simplicity with the right finish is more impactful than complex detail.
The Glazed Donut Trend and Why It Works
Glazed donut nails became a phenomenon because they’re simple but undeniably photogenic. The thick glossy finish creates visual depth and dimension without requiring additional color, design work, or embellishment. On curved duck nails, this finish is even more effective—the curve naturally catches and reflects light, amplifying the glazed effect. It’s the kind of manicure that looks like you invested significant time and money even though it’s straightforward and achievable.
Achieving the Perfect Glaze Effect
- Multiple layers of thick glossy top coat, building gradually for dimension rather than applying one heavy coat
- A sticky base coat under the top coat to prevent sliding and ensure the gloss adheres properly
- Gel polish rather than regular polish for maximum shine and longevity—the glaze effect is especially effective with gel
- Light-reflecting polymers mixed into the top coat layer for enhanced shimmer and dimension
- Careful application around the curved edges to ensure the glaze pools slightly and catches light maximally
Worth knowing: The glazed donut effect requires maintenance—touching up the glossy top coat every week keeps the finish looking fresh and prevents it from becoming dull or cloudy.
15. Soft Lavender With Pressed Flower Details
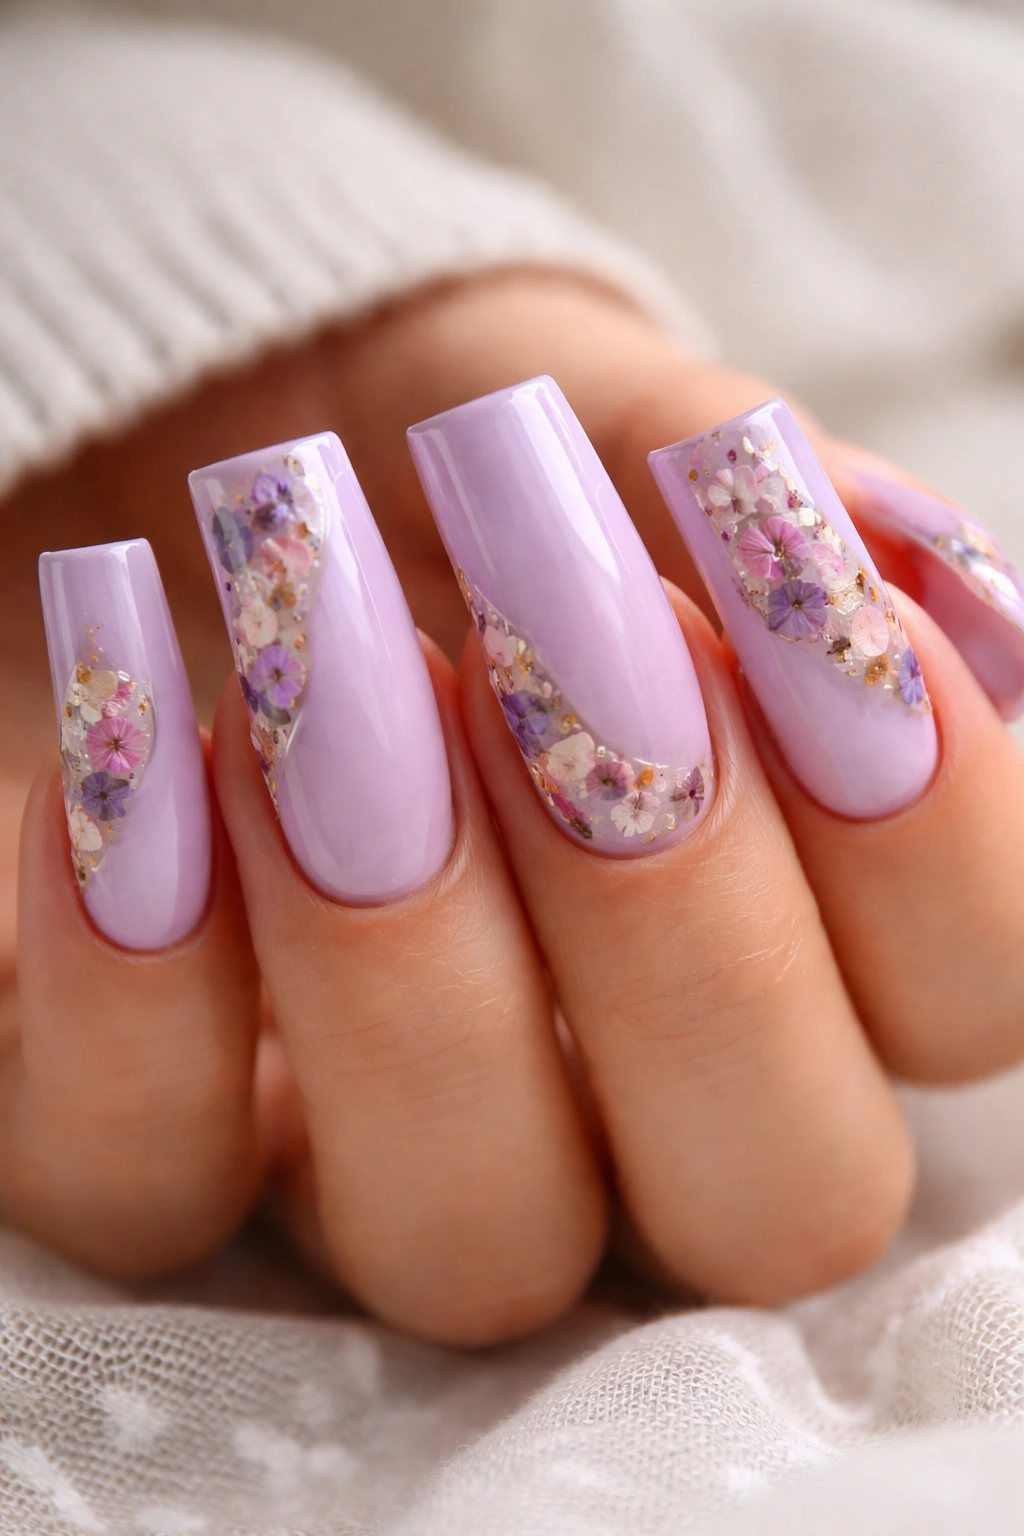
Curved duck nails in soft lavender create a romantic, garden-inspired aesthetic enhanced by actual pressed flowers or flower-inspired designs. Real tiny flowers (or high-quality floral nail stickers that look real) are sealed under clear gel, creating texture and dimension that feels organic and precious. The soft lavender base allows the floral details to become focal points rather than blending into a busy background. This design appeals to anyone who loves nature, botanicals, and romantic details without wanting to look costume-y.
The Appeal of Botanical Details on Curved Nails
Pressed flower manicures feel handmade and special in a way that perfectly suits curved duck nails. There’s something about the shape that makes botanical details feel intentional—almost like the flowers are specifically arranged along the curve to enhance the nail’s architecture. Soft lavender complements flower tones beautifully, whether you’re using pale pink baby’s breath, tiny white daisies, or delicate purple pansies.
Botanical Design Options and Sourcing
- Real pressed flowers sealed under gel for an authentic, botanical feel (source from specialized nail supply shops)
- Hand-painted tiny floral designs that represent pressed flowers without requiring actual botanicals
- Floral nail stickers (high-quality ones from reputable suppliers) sealed under gel for durability and realism
- Flowers concentrated at the curved tips with bare lavender base for minimalist botanical vibes
- Mixed flowers across all nails: each nail features a different flower type for collected beauty
Pro tip: If using actual pressed flowers, ensure they’re sourced from suppliers that specialize in nail-safe botanicals. Flowers from other sources may contain moisture or materials that break down under gel or cause discoloration.
16. Butter Yellow With Minimalist Smiley Face Details
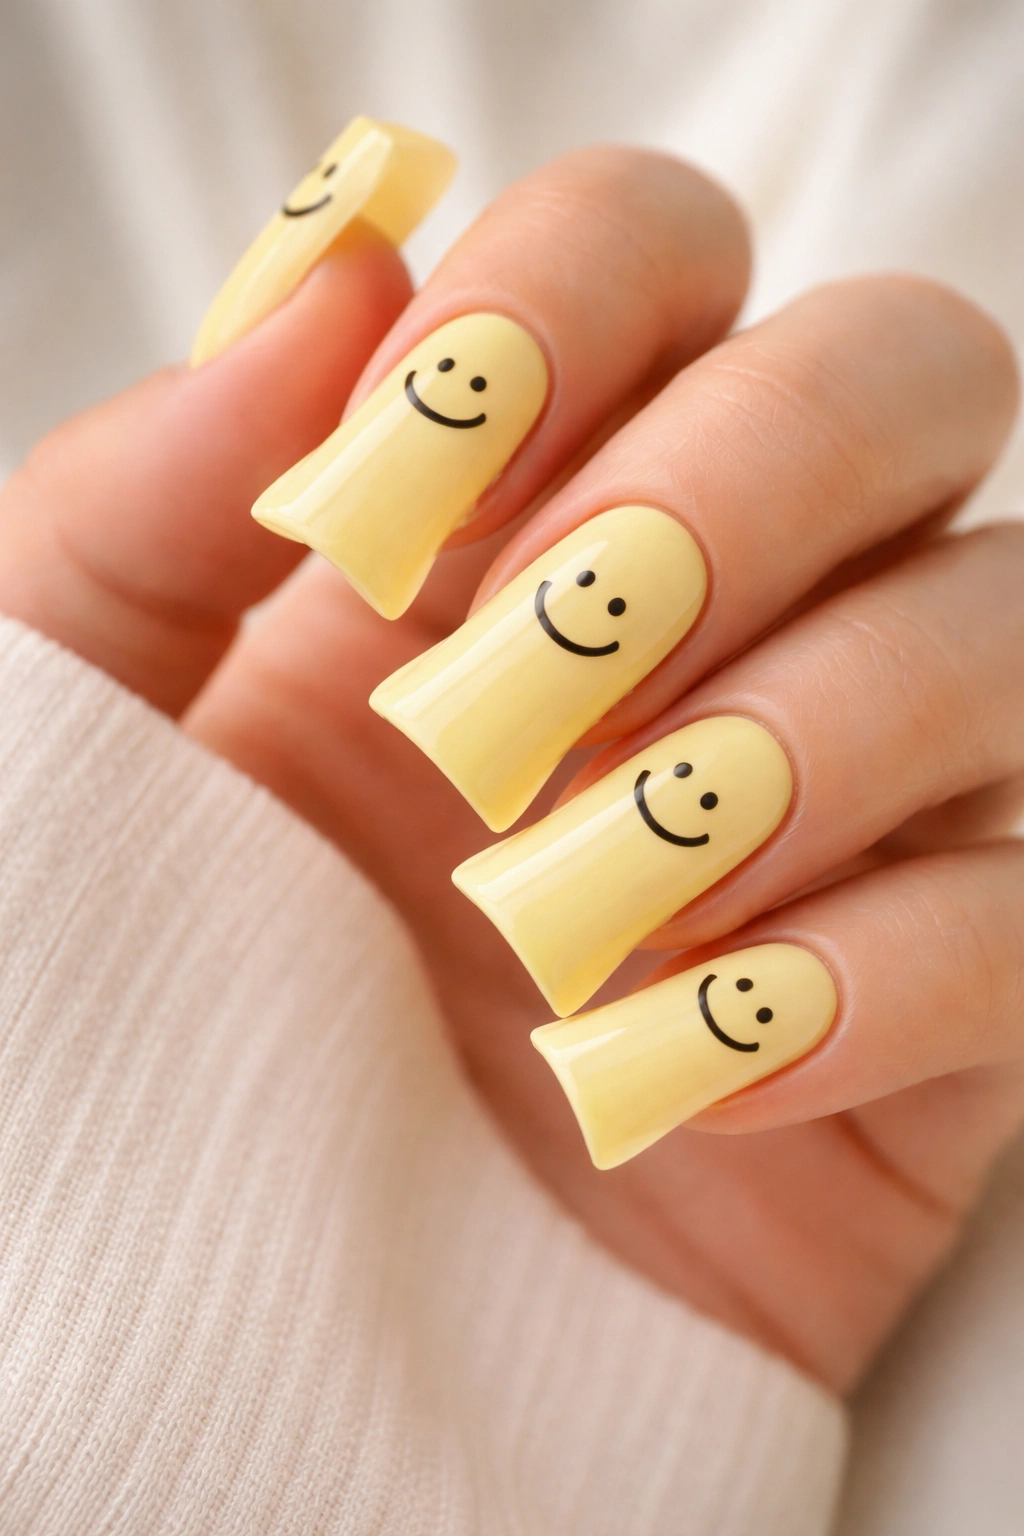
Don’t overlook the pure joy of curved duck nails in butter yellow with tiny smiley face details—this design is playful, confident, and impossible to feel sad looking at. A warm, creamy butter yellow covers all nails, while tiny black smiley faces are hand-painted or stamped on each nail. The placement can be scattered and random or strategically positioned; either way, the design radiates happiness without feeling childish. This is the manicure equivalent of a good mood—bright, confident, and unapologetic about its optimism.
Why Playful Details Elevate Rather Than Diminish
Curved duck nails give enough sophistication that playful details read as confident rather than frivolous. Someone wearing a bold curved duck nail in butter yellow with smileys is making a clear statement: I’m secure enough to wear joy on my fingertips. There’s something genuinely powerful about refusing to be taken too seriously, and this manicure celebrates exactly that.
Smiley Face Placement and Style Variations
- Tiny, minimal smiley faces scattered across all nails for random moments of joy
- One strategically placed smiley on the curved tip of each nail, positioned for impact
- Varying smiley sizes on different nails—some tiny, some larger—for visual interest
- Smiley faces in different colors (red, black, gold) rather than all the same for variation
- Asymmetrical placement where some nails have multiple smileys and others have none
Worth knowing: Hand-painted tiny faces require a skilled artist. If you’re unsure about your artist’s detailed design capabilities, ask to see examples of similar small, precise work before booking.
17. Rose Quartz Pink With Sparkle Gradient Fade
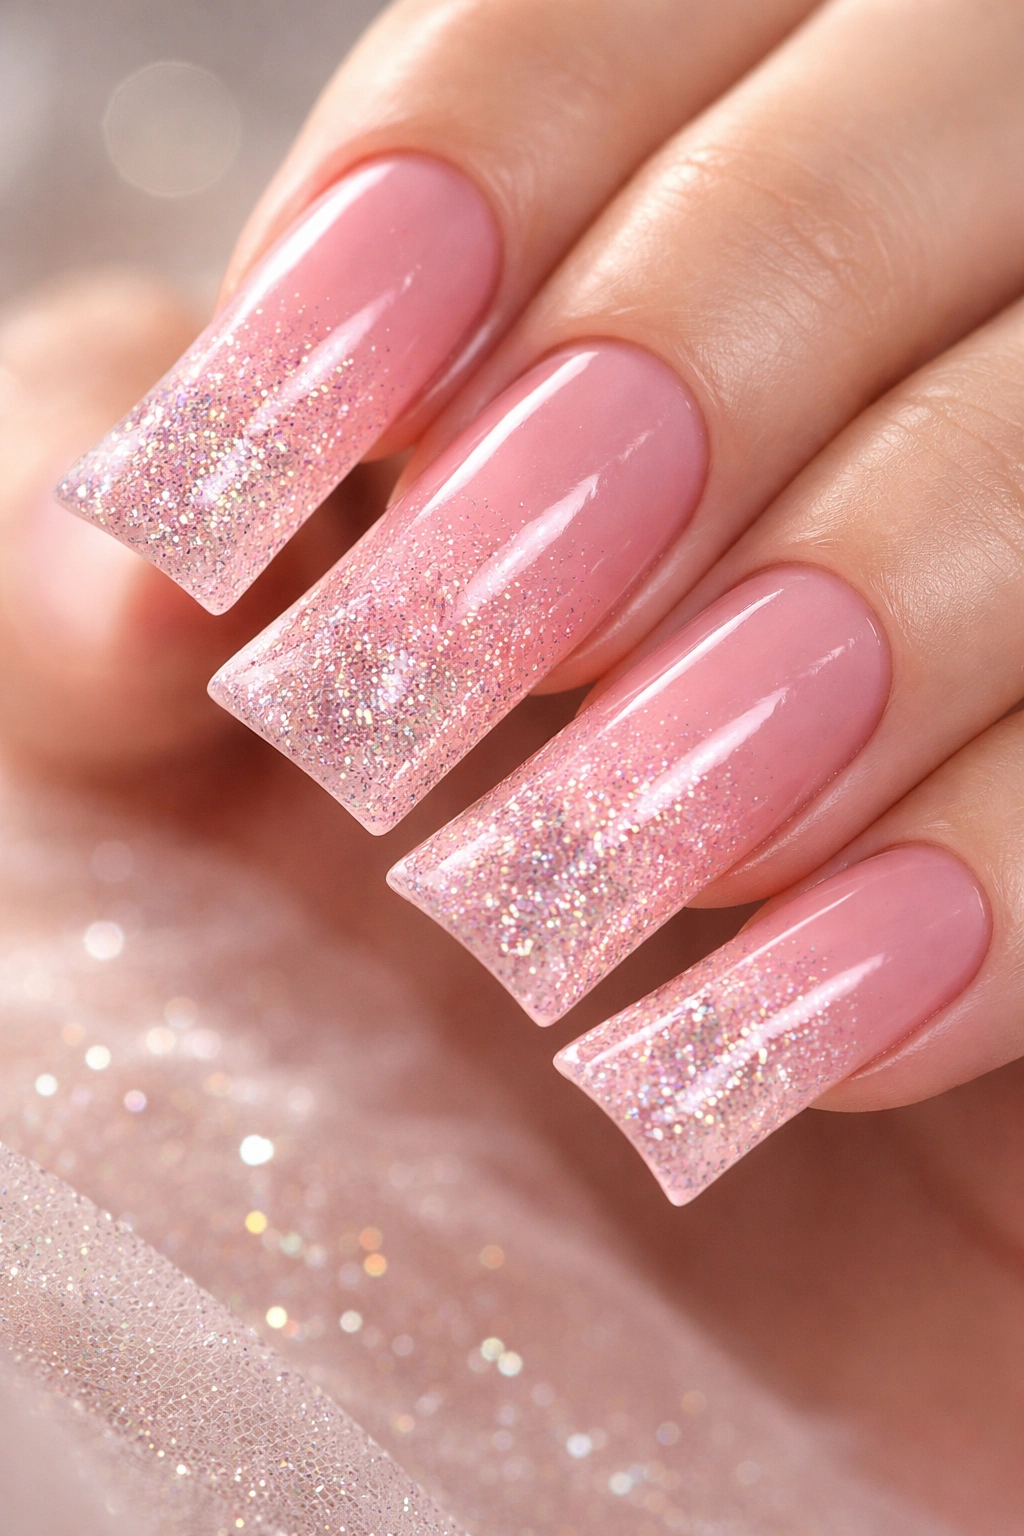
Curved duck nails in rose quartz pink create an inherently soft, romantic aesthetic that becomes absolutely magical with a sparkle gradient fade. The base is a solid rose quartz pink at the cuticle that gradually incorporates more and more fine glitter or sparkle as you move toward the tips, creating a fade from solid color to full sparkle. This design is the most romantic, Valentine’s Day dream version of curved duck nails—soft enough for everyday wear but glamorous enough for special occasions.
Why Gradient Sparkle Enhances Curved Nail Shape
A sparkle gradient naturally guides the eye along the length of the nail, emphasizing the elegant curve and elongation that makes duck nails so flattering. Solid sparkle can feel overwhelming, but a gradient that begins at the base in pure color allows the curved shape to feel sophisticated while the increasing shimmer toward the tips provides glamorous detail. It’s a design that works beautifully for both minimalist and maximalist aesthetics.
Sparkle Gradient Application and Material Options
- Fine cosmetic glitter blended into gel top coat with more concentration toward the tips
- Iridescent sparkle that shifts colors in different lighting for hidden dimension
- Gradient beginning at the cuticle with pure rose quartz and reaching maximum sparkle at the very tip
- Mixed sparkle: fine glitter in the middle gradient, larger confetti glitter at the very tips for textured dimension
- Matte rose quartz base graduating to glossy sparkle for contrast between texture and shine
Pro tip: The most seamless gradient sparkles are created by using a sticky base coat and blending the glitter concentration gradually across multiple layers rather than trying to create the effect in one application.
18. Charcoal Gray With Iridescent Foil Edge
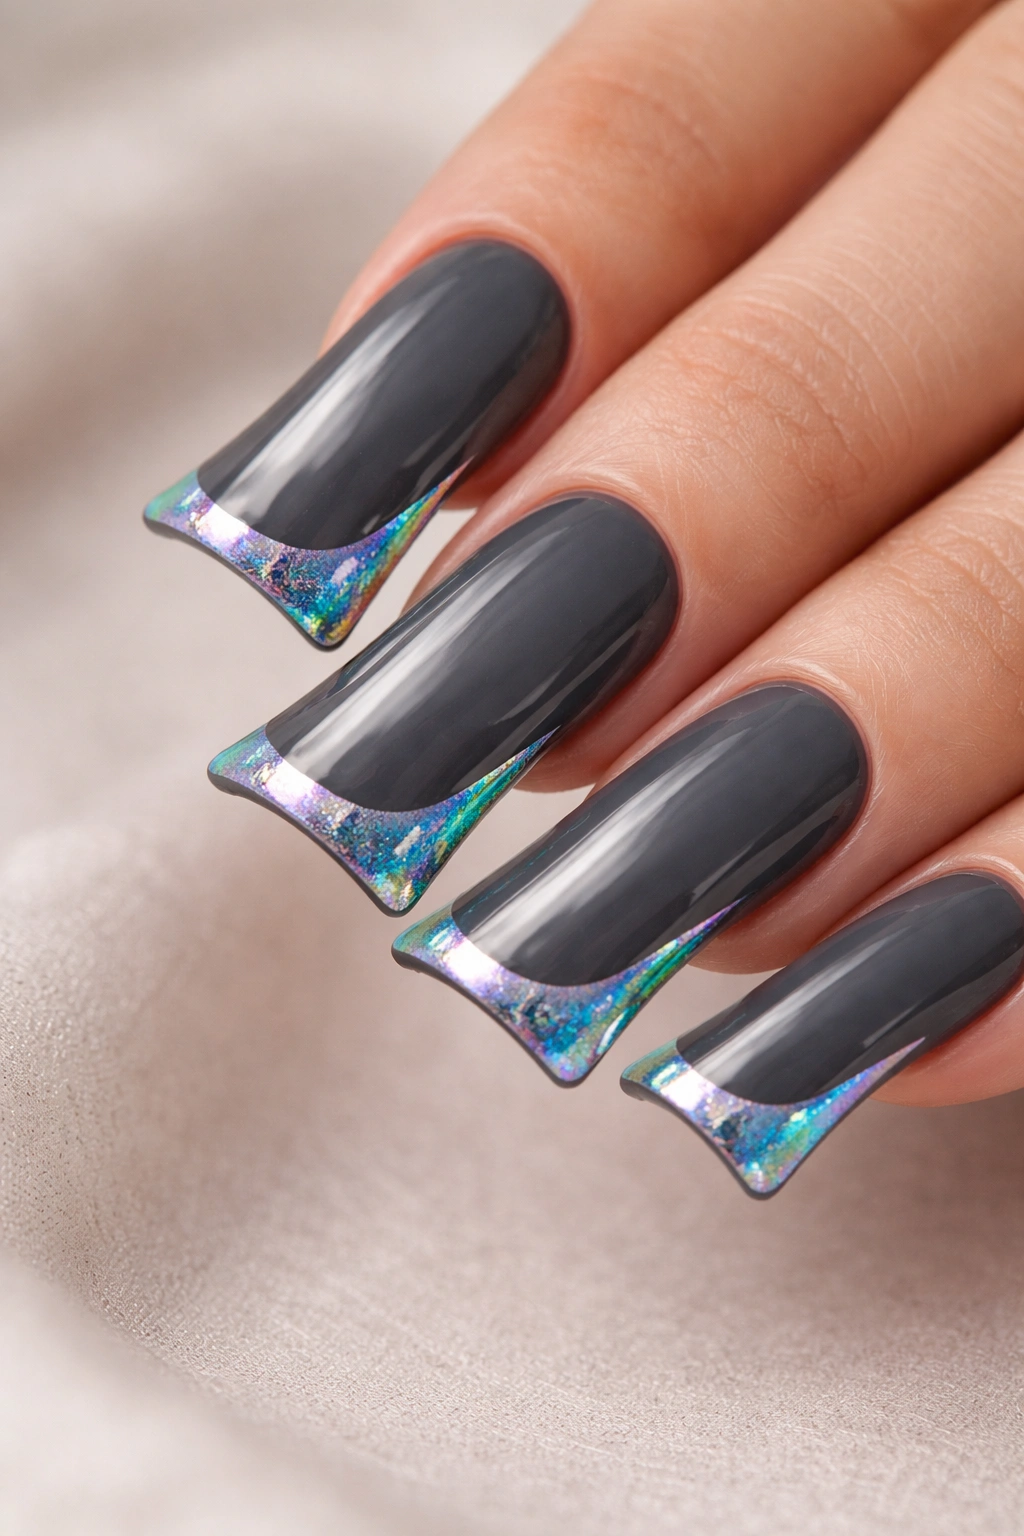
This final curved duck nail design proves that the most sophisticated aesthetic comes from restraint and intentionality. A sleek charcoal gray base covers all nails, while iridescent foil applied exclusively to the curved edge creates a glowing outline that shifts between colors depending on light and angle. The charcoal gray keeps the overall look professional and wearable, while the iridescent edge adds unexpected dimension and artistry. This is the manicure for someone who prefers quality and subtlety over obvious statement-making.
The Sophistication of Restrained Design
Charcoal gray is professional, versatile, and deeply flattering—it’s a color that works in any setting and coordinates with any outfit. Adding iridescent foil to the edge elevates the design from simple to carefully considered without making it feel like you’re trying too hard. This design has the confident restraint of someone who knows exactly what they like and doesn’t need to overexplain it.
Iridescent Foil Placement and Effect Options
- Foil applied exclusively to the curved edge outline, creating a glowing frame for each nail
- Foil covering the entire tip area below the curve, creating a mirrored curved cap
- Foil concentrated on one side of each nail for an asymmetrical, artistic approach
- Holographic foil instead of standard iridescent for maximum color-shifting effect
- Mixed application: solid iridescent foil on some nails, foil patterns on others
Pro tip: Iridescent foil requires a special adhesive base and correct application technique. Use a nail artist experienced with foil work—improper application results in foil that peels immediately.
Final Thoughts
Curved duck nails provide an elegant foundation for virtually any aesthetic you can imagine—from the softest, most romantic pastels to bold, statement-making jewel tones and everything in between. The shape itself does significant work, creating an inherently flattering silhouette that photographs beautifully and feels luxe from the moment you have them applied. Whether you’re drawn to minimalist simplicity, intricate artistic detail, sparkly glamour, or playful personality, there’s a curved duck nail design that speaks to exactly who you are.
The key to choosing the right design is thinking about how you actually live your life and what makes you feel confident. A manicure is something you’ll look at dozens of times a day, so it should make you happy every single time. Whether you’re inspired by something here or combining elements from multiple designs to create your own version, your nail artist can help you bring your vision to life. Curved duck nails elevate everything they touch—now it’s just about finding the perfect design to match your style.
