

Duck nails—those chic, flared tips that fan outward like a duck’s bill—have taken the nail world by storm. The distinctive shape creates an undeniably eye-catching silhouette that transforms even the smallest hands into a statement-making fashion moment. But here’s what most people don’t realize: short nails actually work beautifully with the duck nail trend, and arguably with more elegance than their longer counterparts. When you keep the length modest (think quarter-inch to half-inch past your fingertip), the dramatic flare of the shape becomes refined rather than over-the-top, striking that perfect balance between bold and sophisticated.
The misconception is that duck nails require serious length to look good. In reality, short duck nails offer a distinct advantage—they’re less likely to break or snag during daily life, which means your manicure actually lasts. They photograph wonderfully. They feel modern and intentional without reading as costume-like. Most importantly, they work for nearly every hand shape, every age group, and every lifestyle, which is why short duck nails have become the go-to choice for people who want the trend without the maintenance headache.
The key to pulling off short duck nails with genuine class lies in your color selection, nail art approach, and the overall polish of your design. A classy duck nail doesn’t shout—it whispers with confidence. It works with your skin tone, complements your personal style, and feels like an elevated choice rather than a gimmick. What follows are ten specific, tested designs that deliver exactly that: undeniable style paired with practical elegance, all designed to flatter short nails and turn heads for all the right reasons.
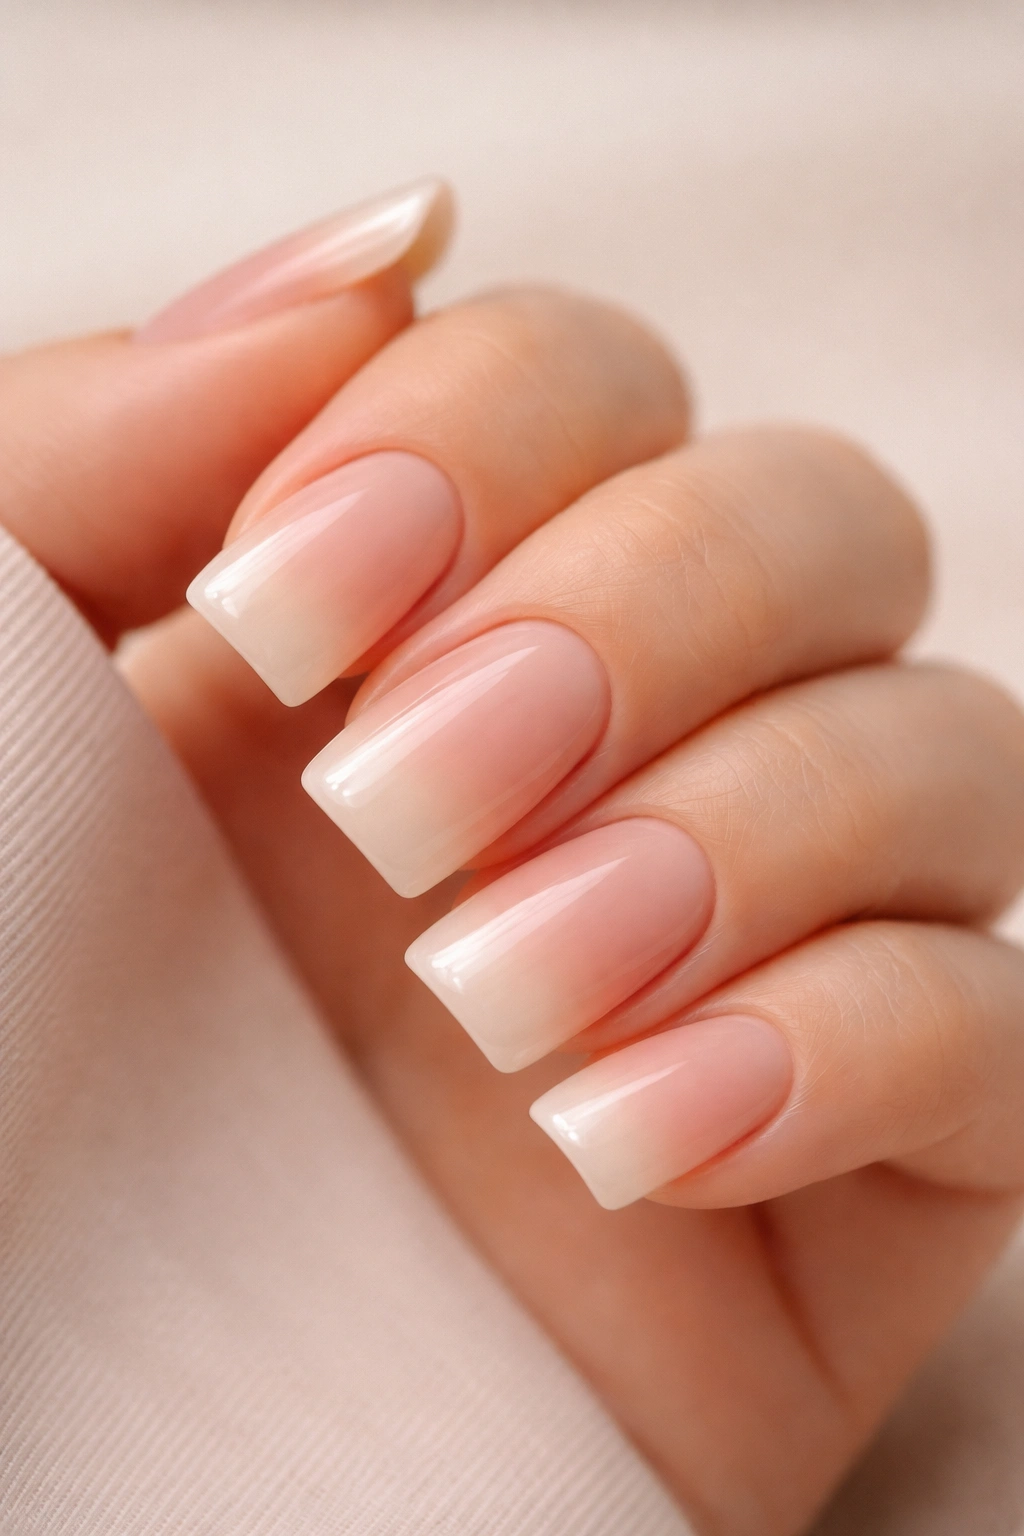
1. Soft Nude with Subtle Ombre Fade
Soft nude duck nails represent the ultimate expression of quiet luxury. This design uses a creamy, barely-there nude—one that sits just slightly darker than your natural skin tone—across the entire nail surface. The magic happens with the delicate ombre gradient that fades from a soft peachy-pink at the base to an almost translucent nude at the tips, creating depth without drama.
Why This Works for Short Nails
This color combination refuses to overwhelm short nail beds. The lack of bold contrast actually elongates the visual space of your nail, making the modest length feel intentional and chic rather than limited. The soft gradient mimics how light naturally plays across your fingertips, which reads as sophisticated and refined. You’re not fighting against your nail length—you’re working with it to create something genuinely elegant.
How to Achieve the Look
- Start with a smooth base coat and a coat of your soft nude polish
- Apply the peachy-pink shade to the lower third of the nail using a makeup sponge or ombre sponge
- Dab the nude shade over the middle and tip areas with a clean, slightly damp sponge
- Blend by sponging gently back and forth until there’s no harsh line—the transition should take at least three passes
- Seal with a glossy top coat for a dewy finish that catches light beautifully
Pro tip: Choose a nude shade that exactly matches your undertone—warm if you have golden skin, cool if you have rosy or deeper skin. When the ombre fades to nearly nude at the tip, you’re creating length illusion, which is the real power of this design on shorter nails.
2. Classic White Tips with Refined Gold Accent Line
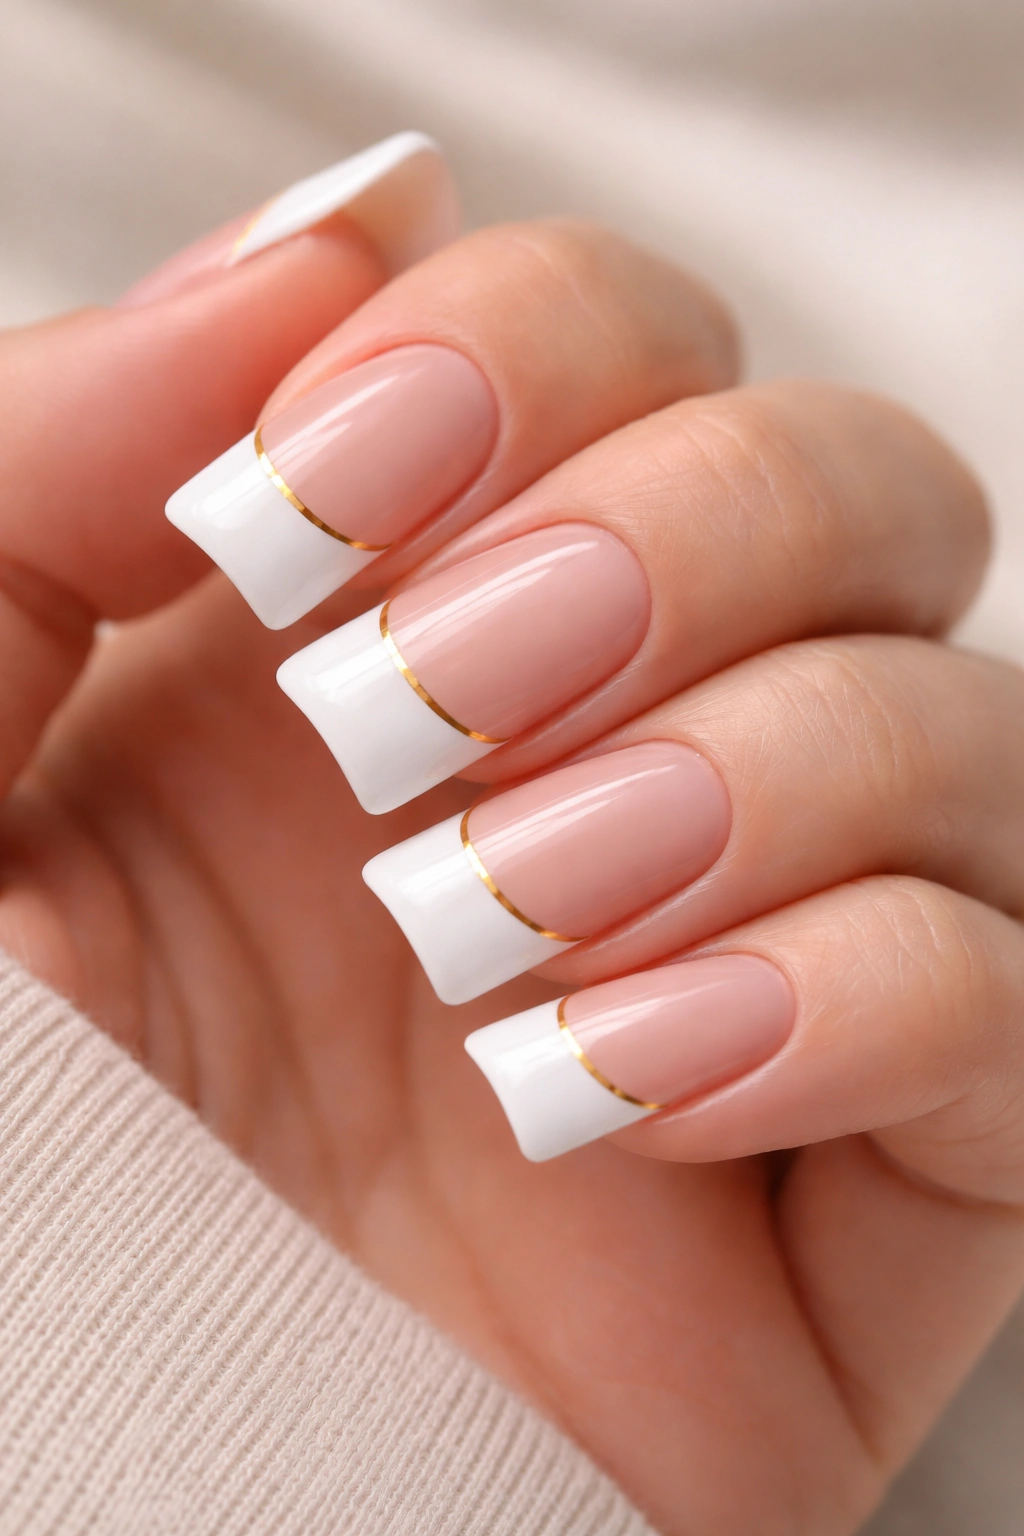
The French ombre duck nail elevates the iconic French manicure into something modern and undeniably chic. On short nails, this design feels like wearing a tailored jacket—structured, professional, and effortlessly put-together. The base is typically a soft neutral or true nude, while the flared tip stays crisp white. The magic happens with a hairline-thin gold stripe running horizontally across where the white meets the nude, adding just enough glamour without tipping into costume territory.
The Sophistication Factor
What makes this design classy rather than basic is the restraint. There’s no rhinestone overload, no thick glitter stripes, no complicated nail art. Instead, it’s all about clean lines and color balance. The white tips on short nails read as intentional and polished rather than try-hard, and the gold accent line communicates that you know the difference between trendy and timeless.
Execution Details
- Paint your base in a soft beige or warm nude and let dry completely
- Apply a bright white polish to the flared tip area, staying within the natural white zone (don’t overextend the white or it overwhelms short nails)
- Use a very fine striping brush or thin nail art brush to apply a single-line gold accent where the white and nude meet
- The gold line should be approximately the width of a single strand of embroidery thread—any thicker and it dominates
- Finish with a glossy top coat
Worth knowing: This design absolutely requires steady hands or the assistance of someone with nail art experience. The stripe needs to be clean, not shaky, or the whole effect falls apart. If you’re not confident in your precision, ask your nail artist specifically for a “refined gold accent line” rather than a thick stripe.
3. Deep Burgundy with Matte Finish and Subtle Shine
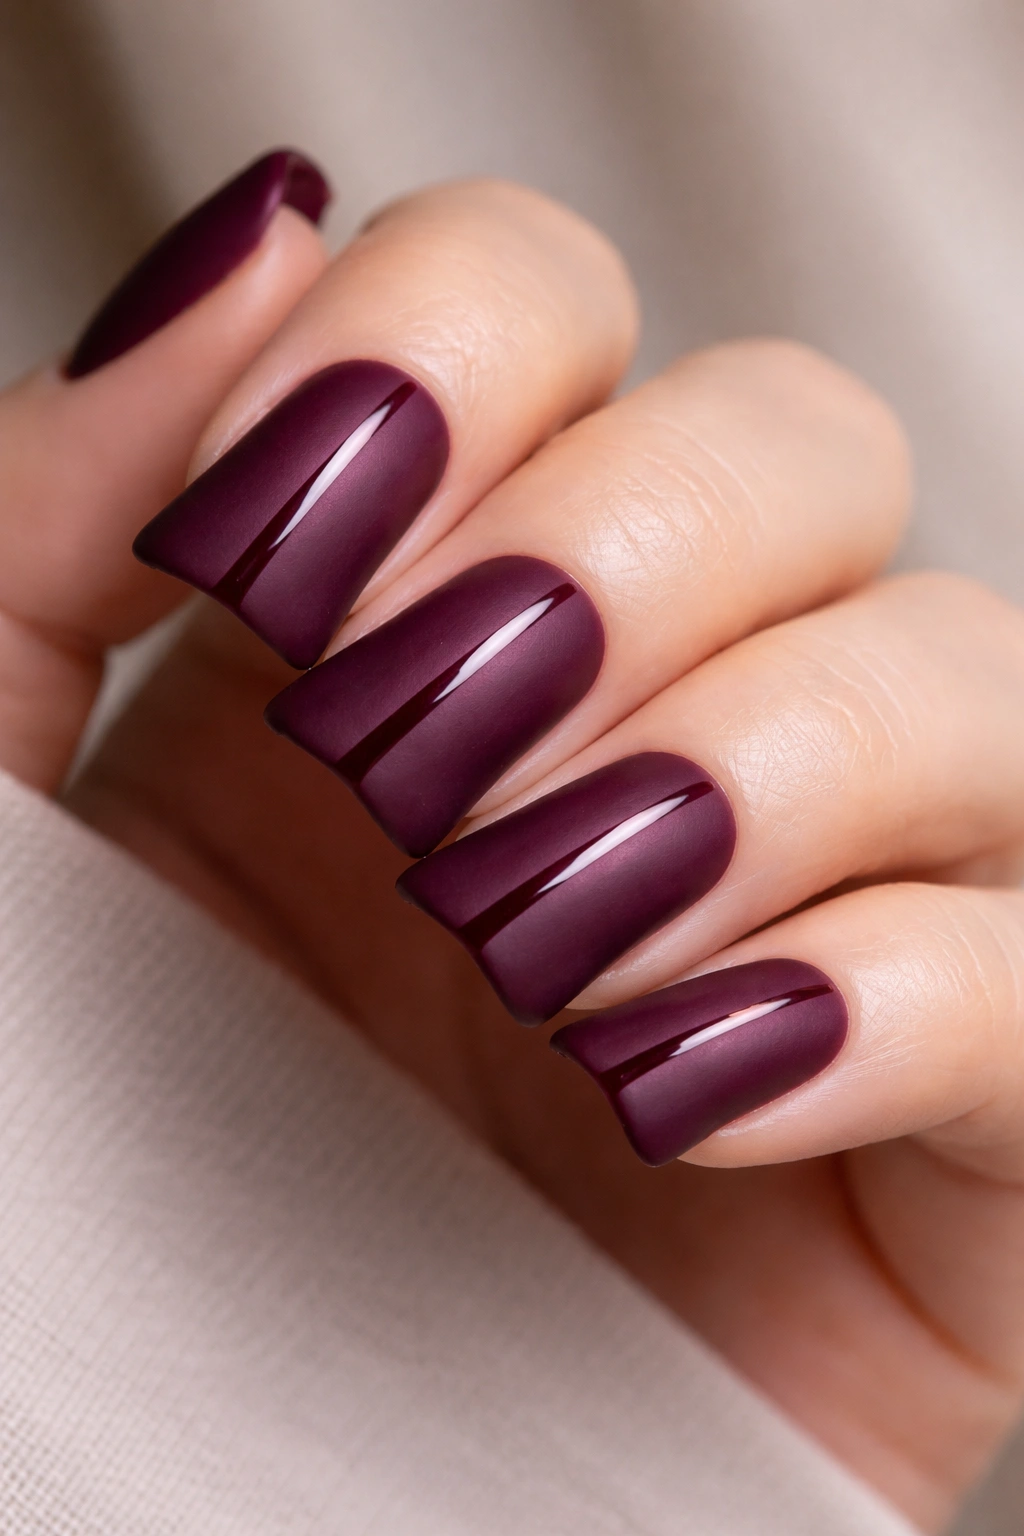
Deep burgundy duck nails bring an air of understated elegance that reads as mature and intentional. This color sits somewhere between a classic wine shade and a sophisticated oxblood, making it flattering across nearly every skin tone. The matte finish paired with strategic glossy elements (like a thin shiny stripe or the very tip of the nail) creates visual texture without looking chaotic.
Why Burgundy Works on Short Nails
Darker shades on shorter nails don’t create the “claw” effect that people often worry about. Instead, they make your nails look sophisticated and intentional. Burgundy specifically skews elegant rather than edgy, making it perfect for work settings, formal events, or anyone who wants a bold color that still reads as professional. The depth of the shade also makes the nail shape itself more apparent—the flare becomes a design feature rather than something you have to squint to see.
Creating the Matte-Meets-Glossy Effect
- Apply two thin coats of your chosen burgundy shade and allow to dry
- Apply a matte top coat across the entire nail
- Once the matte is completely dry, use a thin brush to paint a single glossy stripe down the center of the nail from base to tip (like a subtle shine accent)
- Alternatively, leave just the very tip glossy while keeping the rest matte—this highlights the flared shape
- Seal with a matte top coat if you used the stripe variation, or leave as-is if you only polished the tip
Pro tip: When you’re asking your nail technician for this look, bring a photo showing the exact shade of burgundy you want. This color varies wildly—some burgundies lean brown, others lean purple. Showing a visual reference prevents the common disappointment of getting home and finding the color isn’t quite right.
4. Cream Base with Hand-Painted Minimalist Line Art
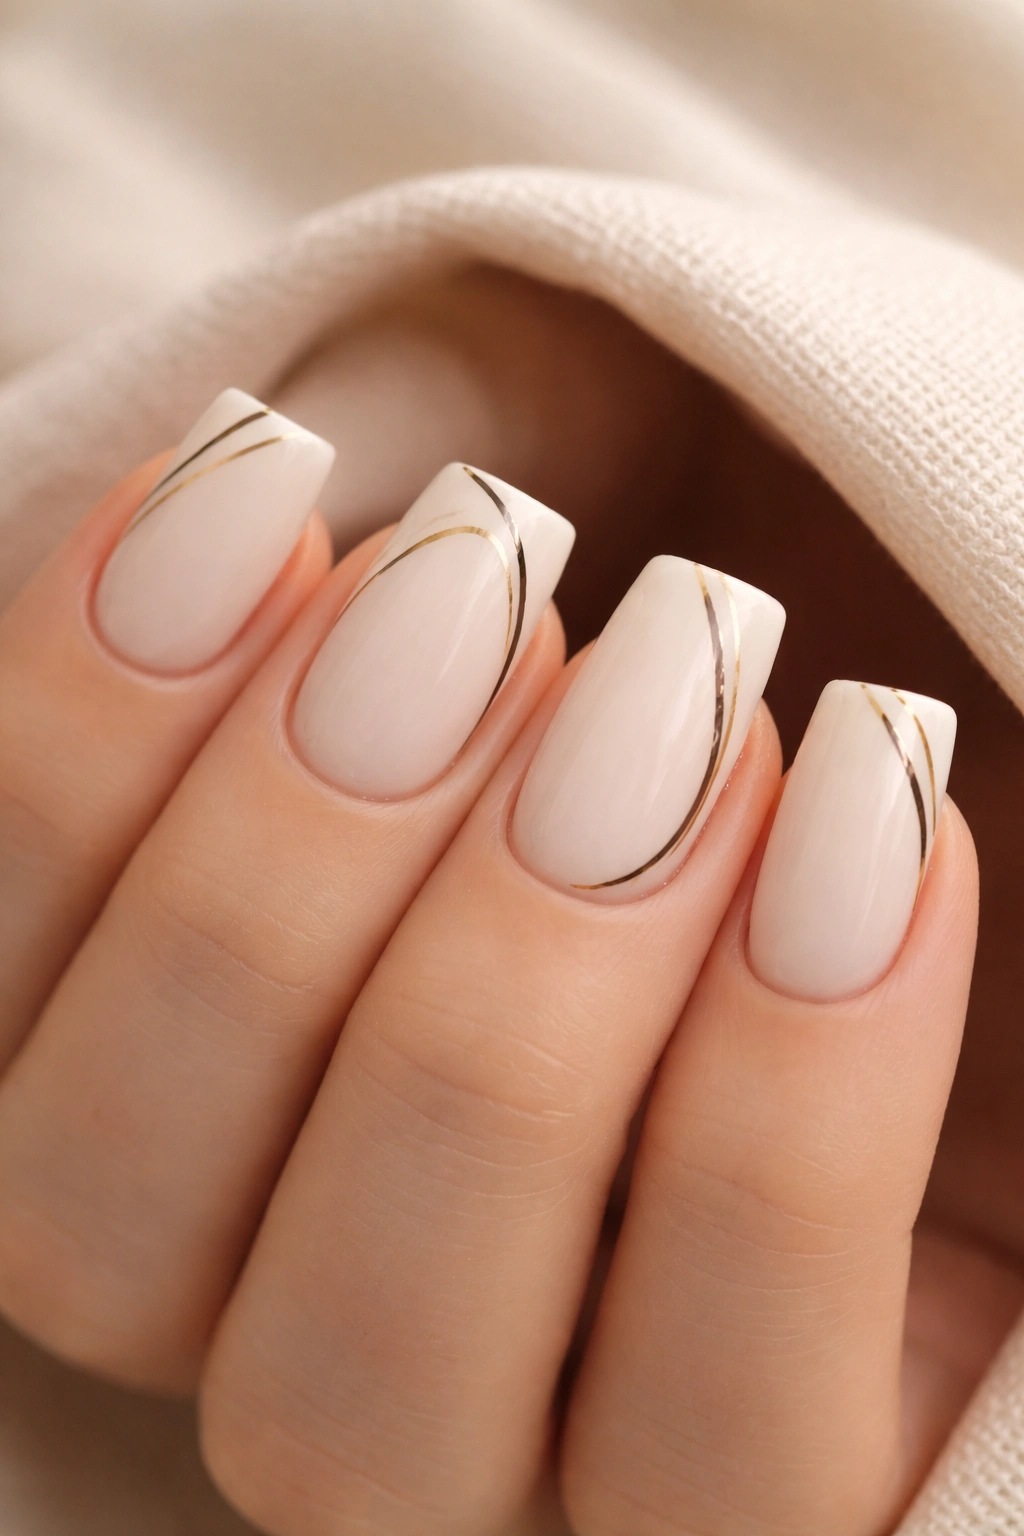
Minimalist nail art on duck nails reads as intentional artistry rather than over-decoration, especially when you keep the design incredibly simple. Think a single curved line, a tiny geometric shape, or a delicate leaf—rendered in black, gold, or a contrasting neutral shade against a clean cream base. The open negative space keeps short nails from feeling crowded, while the artistic touch prevents the design from reading as too basic.
The Art of Restraint
This design succeeds entirely because of what you don’t do. There’s no glitter, no rhinestones, no complex imagery. Instead, you’re leveraging the clean duck nail shape itself as part of the design. A single curved line that follows the flare of your nail, for example, becomes a perfect pairing—the line draws the eye to the shape, and the shape complements the line. Together, they create something that feels intentionally designed rather than randomly decorated.
Technical Execution
- Apply a smooth, opaque cream or off-white base coat
- Choose your minimalist design—a curved line from the inner corner to the tip, a tiny geometric shape centered on the nail, or a delicate flourish
- Use a fine art brush or nail pen to execute the design in your chosen accent color
- Keep the line weight consistent and the design intentionally incomplete—let it suggest rather than spell out
- Seal with glossy top coat
Insider note: The most visually striking minimalist designs are often the ones that seem unfinished. If your design covers less than 20% of the nail surface and leaves plenty of negative space, it reads as intentional and artistic. If it fills more than that, it starts to feel like a placeholder for something more elaborate.
5. Soft Blush Pink with Pearl Finish
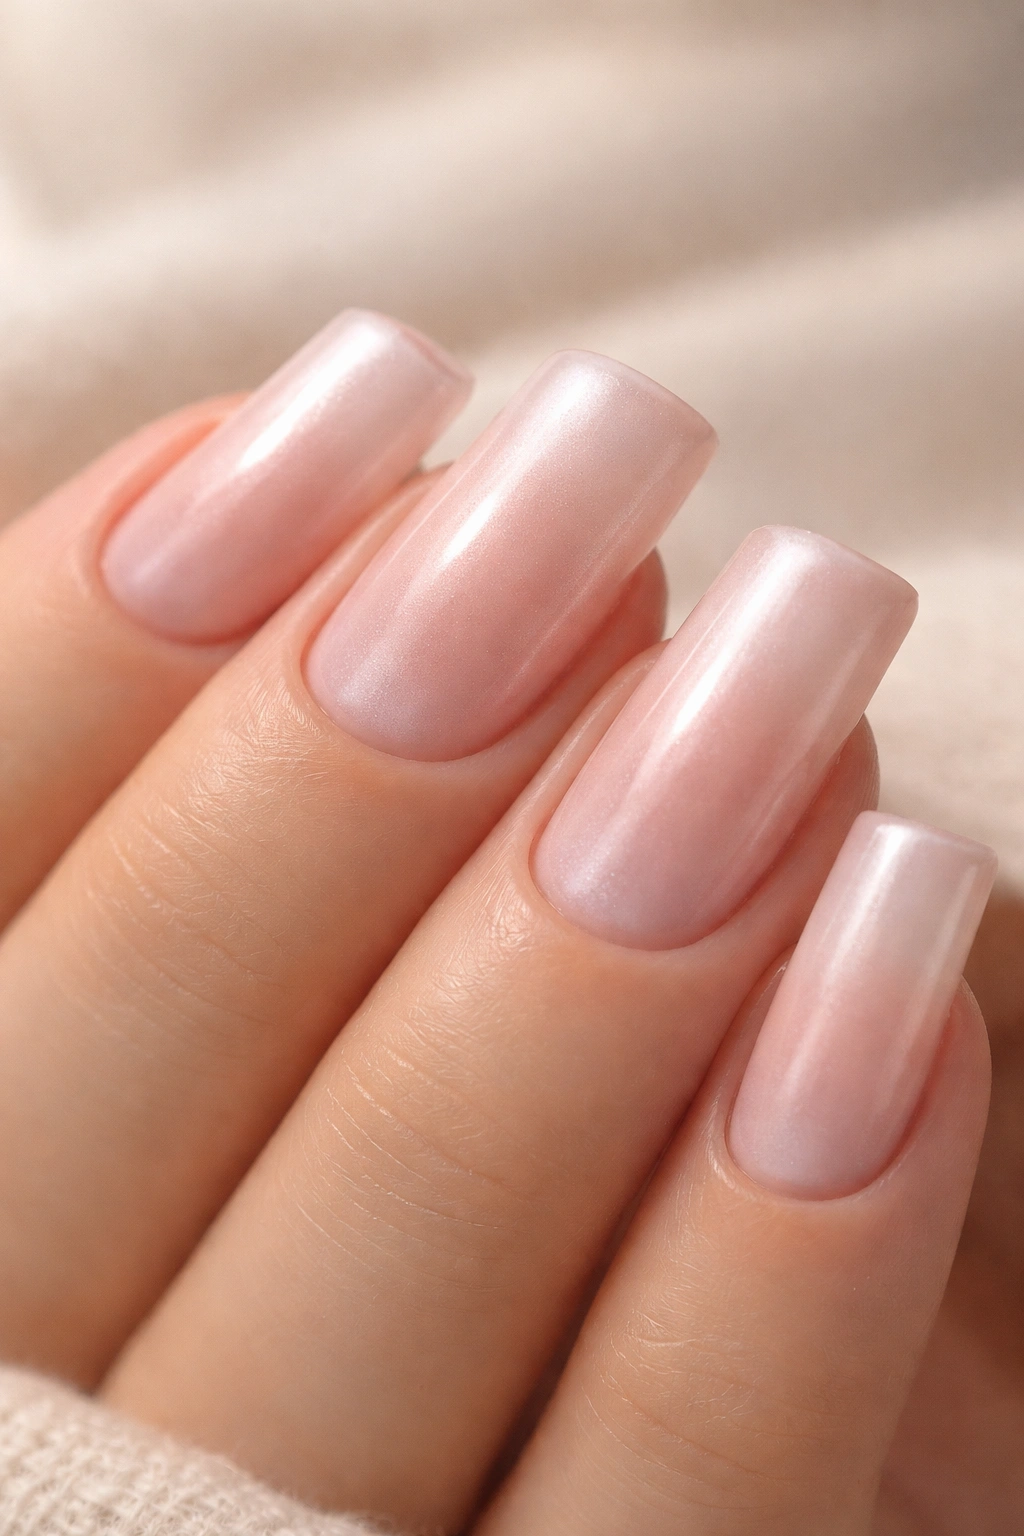
Soft blush pink duck nails deliver femininity without the saccharine quality of hot pink or baby pink. This shade—a muted rose-mauve tone—sits perfectly between sweet and sophisticated. The pearl or shimmer finish catches light subtly, creating dimension that makes even short nails feel luxurious. This is the color choice for people who want understated elegance with just a hint of sparkle.
Perfect for Every Occasion
Soft blush with pearl finish works equally well at a boardroom meeting or an evening event. The color doesn’t scream “fun and youthful”—instead, it whispers “polished and put-together.” On short nails, this shade combination feels intentional. You’re not trying to create length where there isn’t any. You’re choosing a color specifically because it’s beautiful and suits your hand, which is exactly how classy nail choices are made.
Application for Optimal Pearl Effect
- Start with a base coat (this helps the color adhere smoothly)
- Apply two thin, even coats of your soft blush shade
- Make sure each coat is completely dry before applying the next—rushed application causes streaking
- Apply a pearl or shimmer top coat designed specifically for nail use (not a loose glitter topcoat, but one with fine pearl particles suspended throughout)
- The pearl effect should catch light as you move your hand but remain subtle at rest
Worth knowing: Pearl finishes work best in person rather than in photos—the subtle shimmer often doesn’t photograph well, which can make people uncertain about the shade in pictures. If you’re choosing this design for a special event and want photos, you might consider a slightly more visible sparkle level.
6. Charcoal Gray with Metallic Gold Details
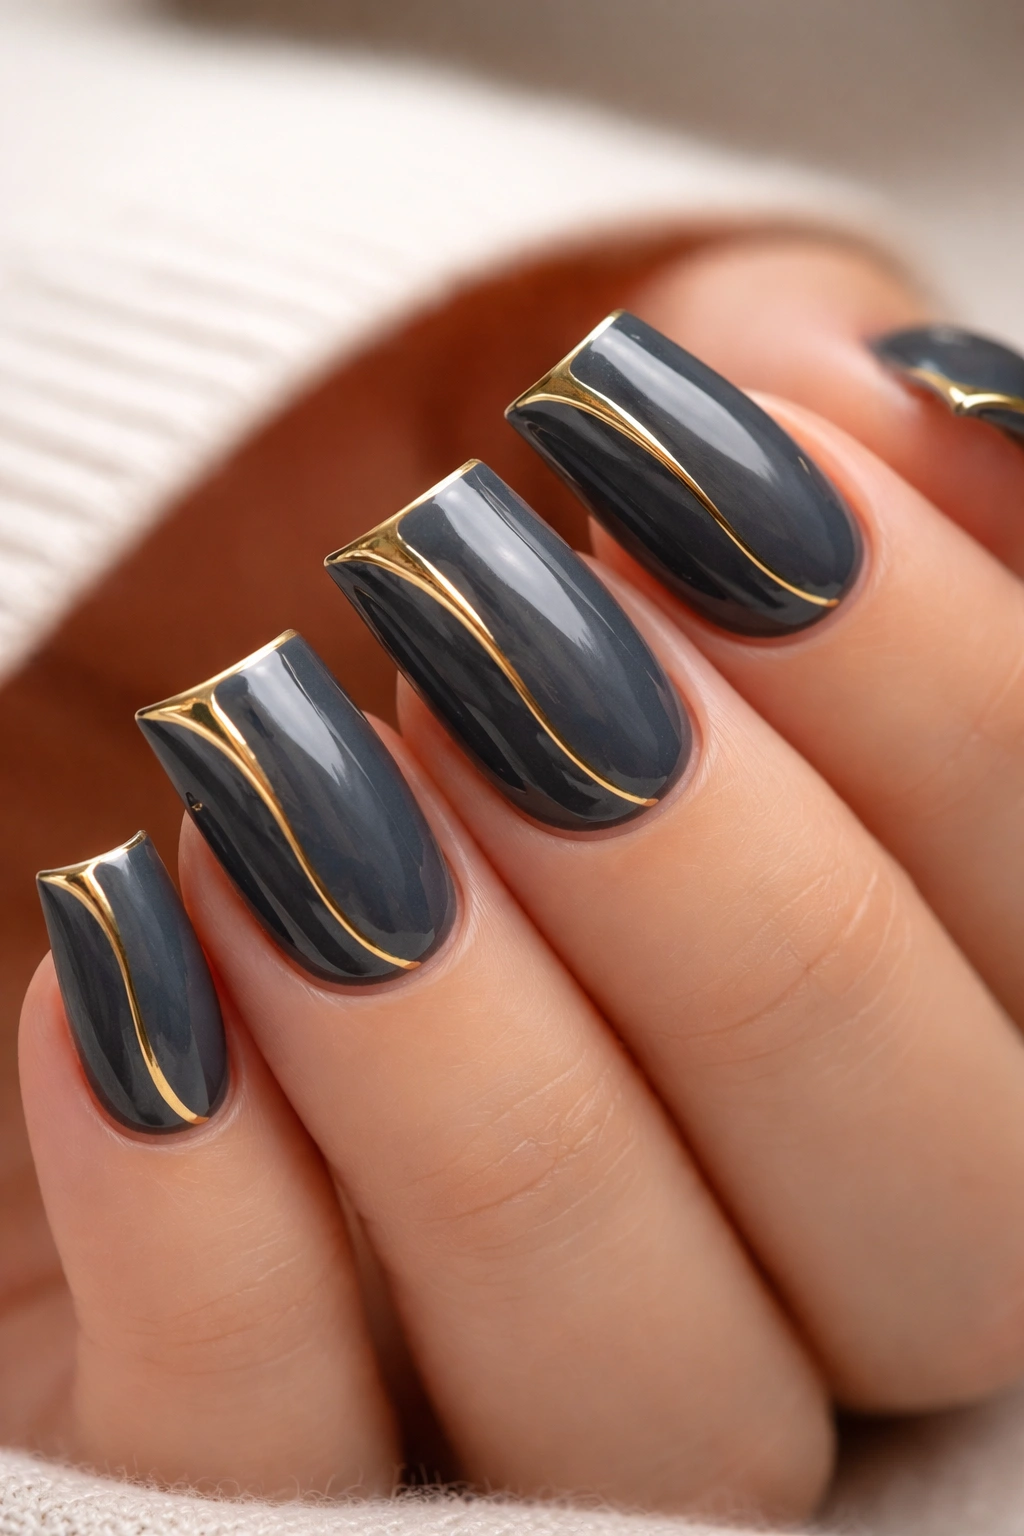
Charcoal gray brings unexpected sophistication to short nails. This isn’t a trendy gray, but rather a timeless, almost-neutral shade that reads as elegant rather than moody. Pair it with metallic gold accents—perhaps a thin stripe running down the center or along the edge of the flare—and you’ve created a design that feels haute couture rather than experimental.
Why This Combination Works
Gray and gold is an objectively classy pairing, used in interior design and fashion for good reason. On short nails, the dark base makes the shape visually prominent without feeling overdone. The gold accent adds just enough glamour to prevent the design from reading as dull. The overall effect is sophisticated, professional, and effortlessly put-together—the holy trinity of classy nail design.
Creating the Effect
- Apply two coats of a quality charcoal gray (not black, which reads as harsh; choose gray with depth and a hint of blue undertone)
- Once completely dry, use a thin striping brush and gold metallic polish to create your accent detail
- A single vertical line down the center of each nail is simplest and most effective
- Alternatively, trace a thin gold line along the natural edge where the nail flares outward (this highlights the duck shape beautifully)
- Finish with a shiny top coat that makes the gold appear to float above the gray
Pro tip: This design is best executed at a professional salon if precision is important to you. The thin gold line against dark gray has nowhere to hide—any wobble or inconsistency is immediately visible. If you’re attempting it at home, practice on a practice wheel or paper first.
7. Dusty Mauve with Subtle Glitter Fade at Tips
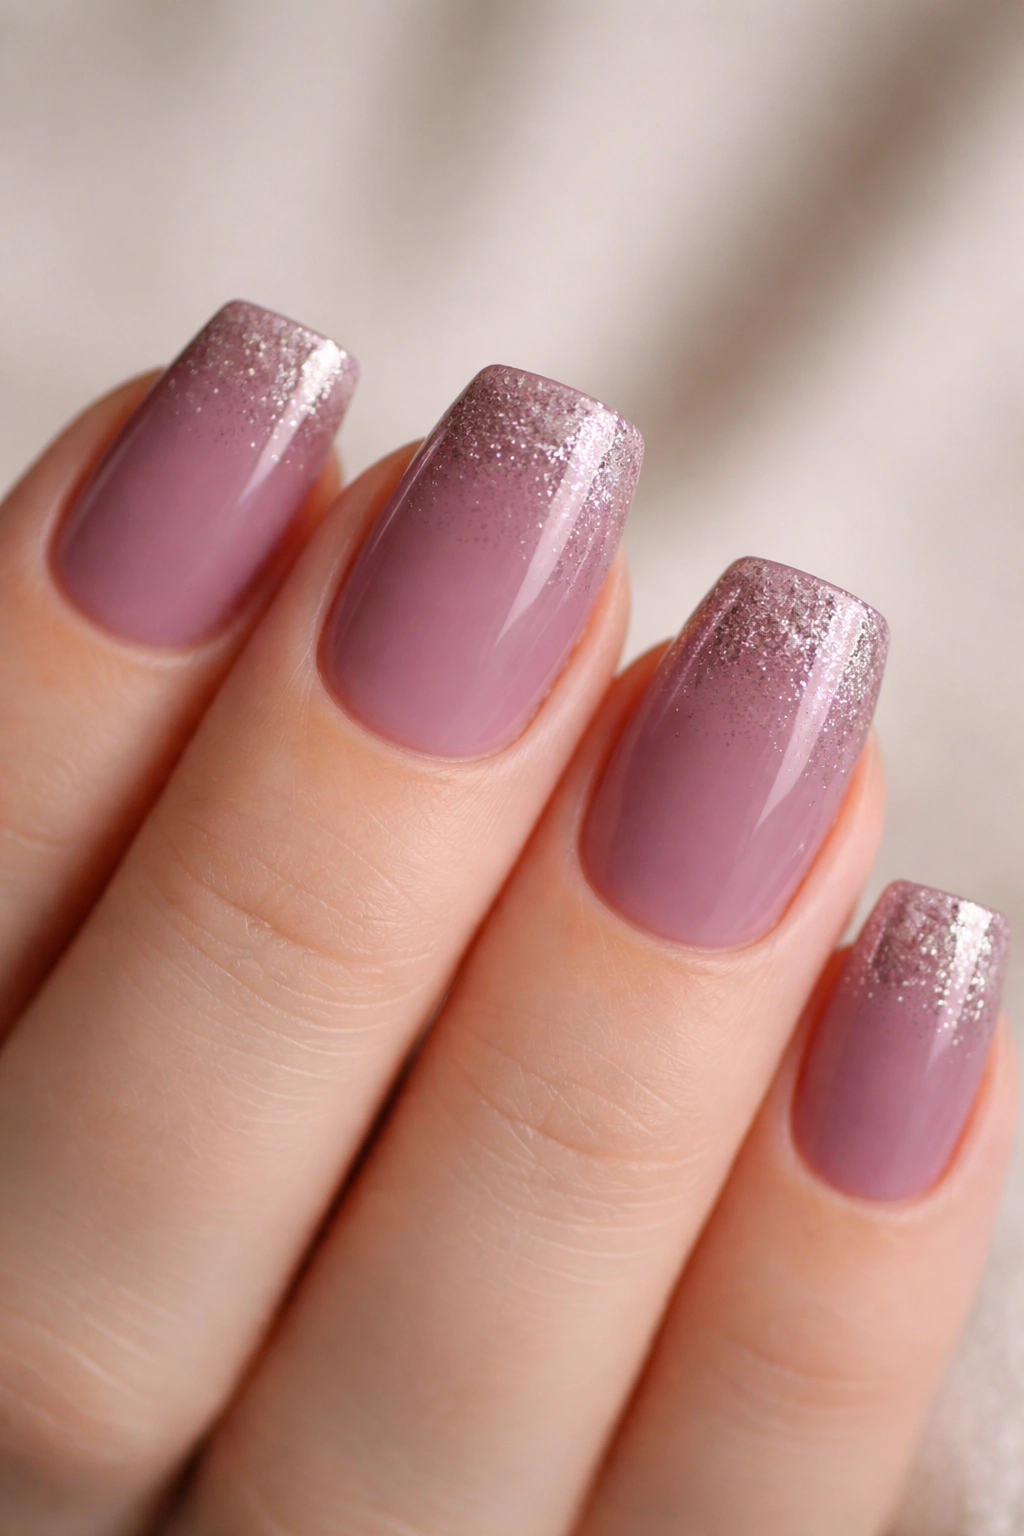
Dusty mauve (a muted purple-gray blend) occupies a magical color space where it looks good on almost everyone. When paired with a subtle glitter fade at the tips—starting clear at the base and gradually intensifying toward the tip—it creates depth and movement without overwhelming short nails.
The Psychology of Mauve
Mauve reads as thoughtful and artistic without trying too hard. It suggests someone with refined taste but not rigid rules. On short nails, this color combination feels intentionally curated rather than whatever was available. The glitter fade (not full-coverage glitter, but a progressive increase) prevents the design from feeling flat while maintaining the sophistication that comes with restraint.
Achieving the Gradient Glitter Effect
- Paint two coats of your dusty mauve base and let dry completely
- Using a makeup sponge, apply a small amount of clear gel or top coat mixed with fine glitter to just the very tip of the nail
- Dab and press (don’t swipe) to create texture
- On your next application, extend the glitter mixture slightly higher, blending it back toward the base with a damp sponge
- Repeat until you have a gradual transition from no glitter at the base to concentrated glitter at the tip
- Seal with glossy top coat
Worth knowing: This technique requires patience and a light touch. You’re building the glitter effect gradually, not applying it all at once. Rushing this step results in an uneven, blotchy appearance rather than the polished gradient you’re aiming for.
8. True Red with Glossy High-Shine Finish
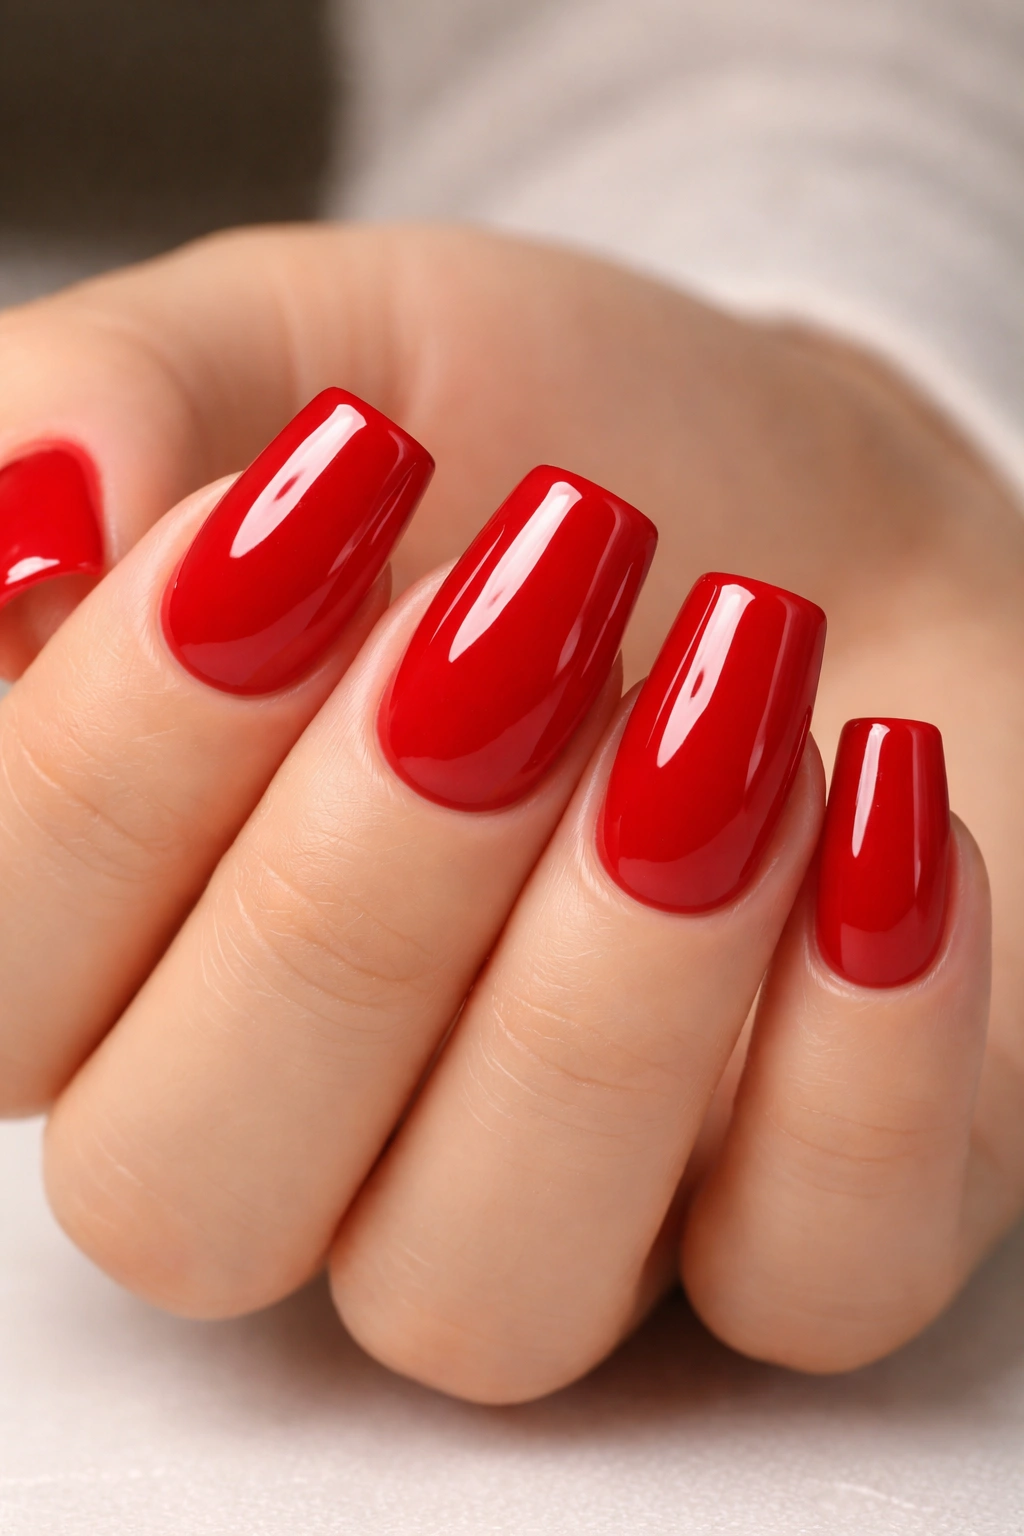
True red duck nails on short nails is a bolder choice, but when executed with restraint and a pristine glossy finish, it reads as confident and classically elegant rather than costume-like. The key is choosing a true, slightly cool-toned red (not orange-red, not burgundy-red, but the red of a fire engine or a classic lipstick) and maintaining an impeccable, mirror-like finish.
The Confidence Factor
True red nails are the domain of people who know their own power. On short nails, this color choice communicates that you’re not trying to create length or drama—you’re simply choosing a color because it’s beautiful and makes you feel good. That confidence is actually what makes it classy. You’re not compensating for anything. You’re just wearing red.
Perfecting the Glossy Finish
- Choose a red shade that has depth—not a flat or neon red, but one with dimension
- Apply a base coat, then two thin coats of your red polish
- The key to true red looking classy is perfection in the application—any streaking, unevenness, or nail line showing through reads as sloppy rather than bold
- Apply a glossy top coat and let it cure fully (if using gel) or dry completely (if using regular polish)
- The finish should be so reflective that you can see light bouncing off your nails
Pro tip: True red looks best when your nail shape is perfectly maintained. Get a manicure every two weeks if you’re wearing red—chips and growth look worse on dark or jewel-tone nails than on lighter shades.
9. Soft Ivory with Delicate Botanical Detailing
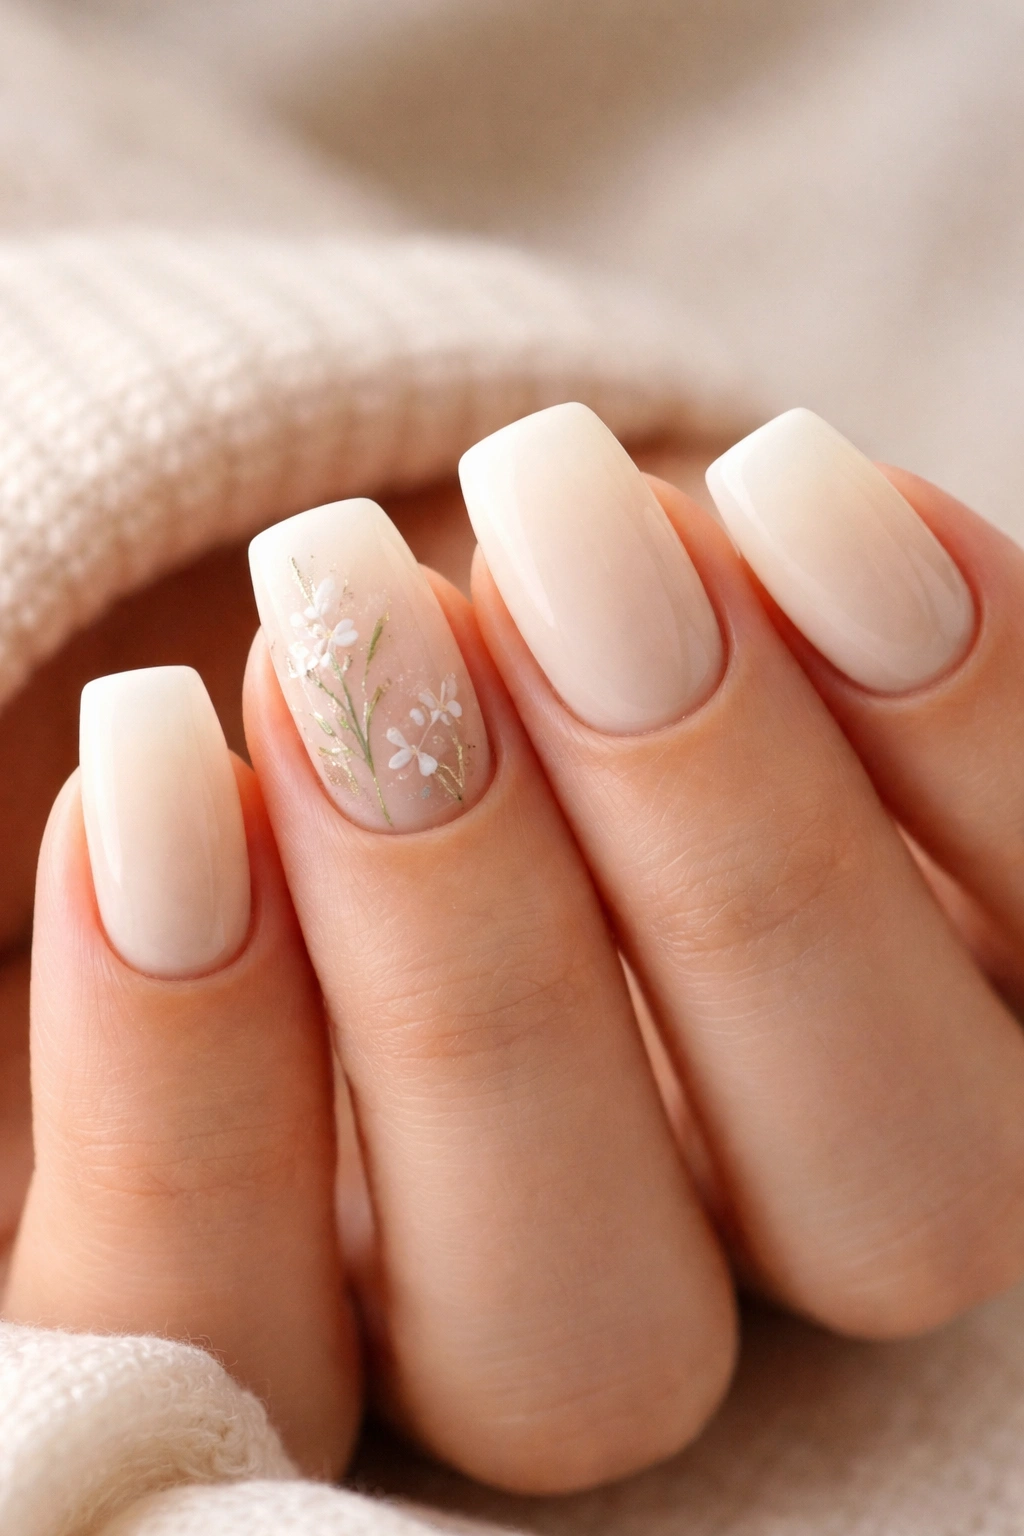
Soft ivory duck nails offer a blank canvas for subtle artistic expression. Pair this creamy, warm neutral with delicate botanical details—perhaps a tiny leaf on one nail, a small flower on another, or a trailing vine across the flare—and you’ve created something that feels handcrafted and thoughtful without being overwhelming.
The Artistic Angle
Botanical nail art reads as sophisticated when it’s executed with restraint. You’re not filling every millimeter with design. Instead, you’re using negative space intentionally, allowing the ivory base to breathe. This approach makes short nails feel elegant rather than cramped, and it transforms your manicure into a conversation starter that suggests artistic sensibility rather than trend-following.
Executing Botanical Details
- Start with a smooth ivory base—two coats for full opacity
- Use a very fine brush or specialized nail art pen to create your botanical details
- A single small leaf or flower on each nail is more elegant than multiple designs
- Consider limiting the botanical detailing to just 2-3 nails (perhaps your ring and middle fingers) rather than all ten—this creates a sophisticated accent rather than an allover pattern
- Keep line weight consistent and delicate—think watercolor rather than marker
- Seal with matte or glossy top coat depending on your preference
Worth knowing: The quality of your botanical designs depends entirely on the quality of your brush and your steady hand. Invest in a proper nail art brush (not a regular paintbrush) and practice the design on paper before attempting it on nails.
10. Rich Emerald with Subtle Flecks of Gold
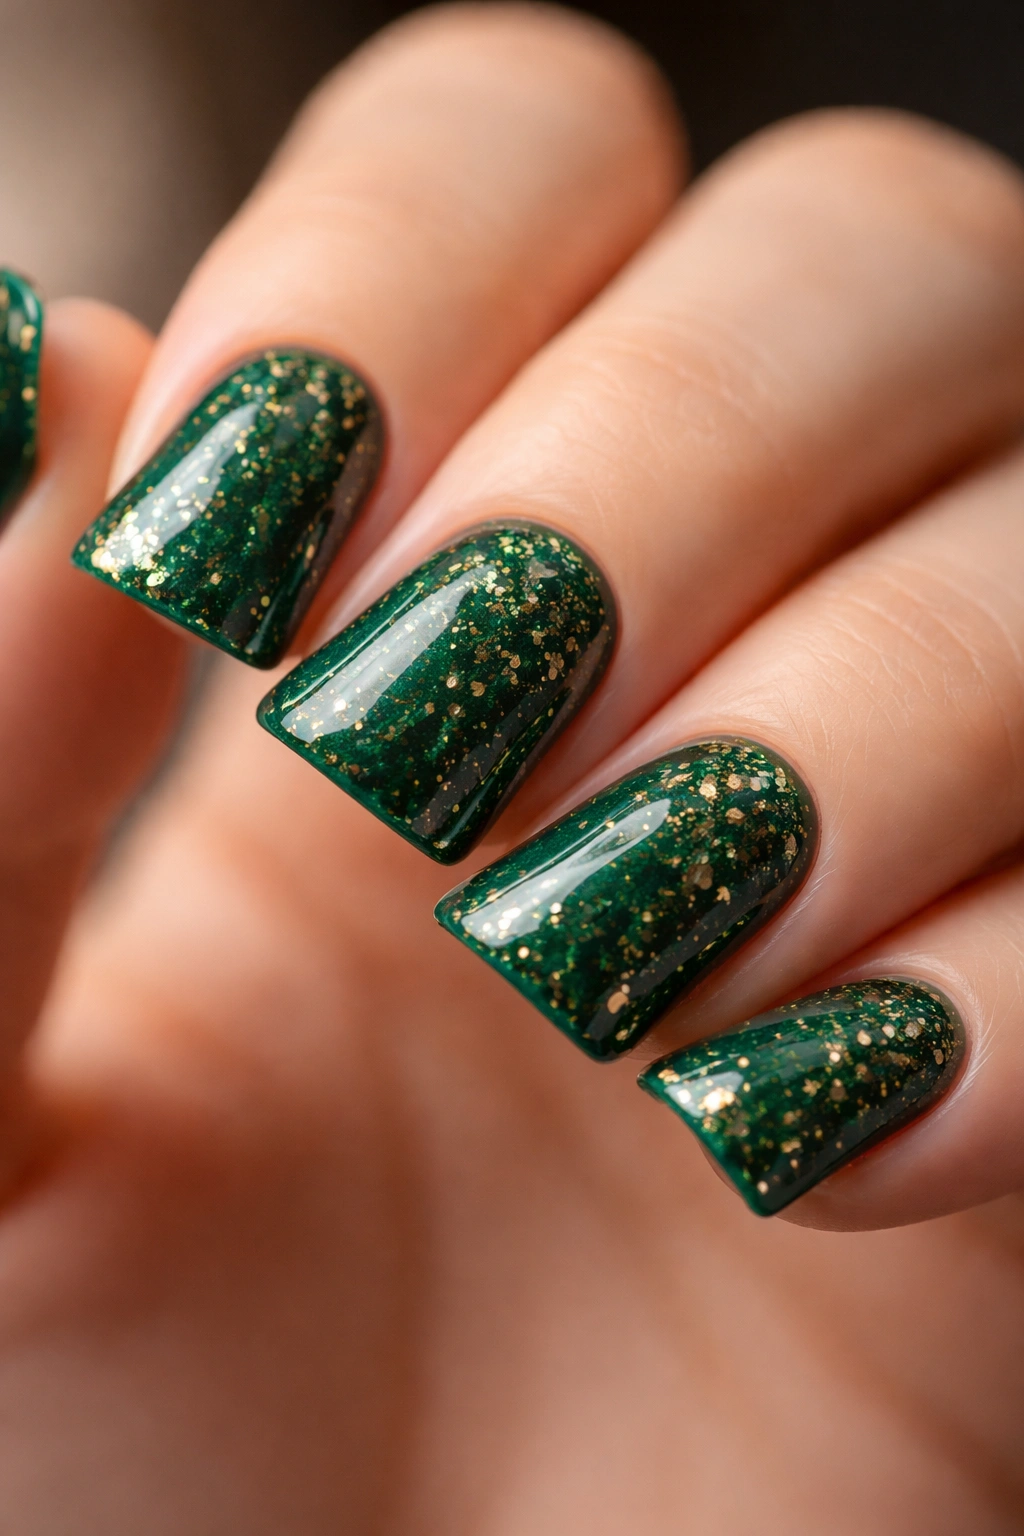
Rich emerald green—a jewel tone that sits deeper and more sophisticated than standard green—brings unmistakable elegance to short duck nails. When you incorporate subtle flecks of gold scattered throughout the polish (not concentrated, but distributed gently), you create luxury without loudness.
The Jewel-Tone Power
Emerald is objectively a classy color. It suggests wealth, sophistication, and intentionality. On short nails, emerald reads as a confident choice rather than an attempt to hide nail length. The depth of the color makes the duck nail shape visually prominent, and the scattered gold flecks catch light without creating a glitter-nail effect.
Creating the Flecked Effect
- Apply a base coat, then two coats of your emerald shade
- While the second coat is still slightly tacky (if using regular polish) or cured (if using gel), use a dotting tool or very fine brush to apply individual flecks of gold leaf or gold metallic polish
- Space the flecks randomly but not densely—you should see plenty of emerald between each fleck
- Alternatively, use a polish that contains actual gold leaf particles suspended throughout (several brands now offer this premixed)
- Seal with glossy top coat
Pro tip: Emerald shades vary wildly depending on the brand. Some look more blue-green, others more yellow-green. Before committing, look at your chosen shade in natural light, artificial light, and daylight—you want one that looks consistently beautiful and rich across all lighting conditions.
Final Thoughts
Short duck nails prove that length isn’t a requirement for impact. What actually matters is the thoughtfulness of your design choice, the precision of your execution, and the confidence with which you wear your nails. Every design here works because it respects the short length rather than fighting against it, creating something genuinely elegant rather than compensatory.
The real secret to classy short duck nails is simplicity that reads as intentional. Whether you’re drawn to neutral tones with subtle shimmer or bold jewel colors with minimalist accents, the most sophisticated choice is the one that feels true to you. Your nails are a daily accessory that everyone sees, so they deserve to make you feel good every single time you look at them.
Start with whichever design resonates most strongly, and commit to maintaining it properly. A perfectly executed simple design beats an ambitious design that’s been chipped and grown out by day three. That’s when short duck nails truly shine—when they’re maintained with care and chosen with intention. That combination is what actually reads as classy.
