

There’s something undeniably striking about a perfectly manicured stiletto nail. The sharp, elongated shape commands attention, and when you pair it with glam design elements, you’ve got nails that don’t just look good—they make a statement. Whether you’re heading to an event, feeling bold on a regular Tuesday, or simply craving that extra dose of confidence, stiletto nails offer an iconic canvas for creative nail artistry. The key to pulling off stiletto nails with serious glamour isn’t just about the length—it’s about knowing which designs actually elevate the look from fun to genuinely jaw-dropping.
This guide walks you through ten stunning stiletto nail ideas that range from sophisticated and subtle to bold and show-stopping. Each design showcases a different technique and aesthetic, so whether you’re drawn to shimmer, metallics, negative space, or intricate art, you’ll find inspiration here. Better yet, these aren’t designs that only look good fresh from the salon—many are totally achievable at home if you’re willing to invest a little time and practice. Let’s dive into the designs that will make your stiletto nails impossible to ignore.
1. Ombré Gradient Glamour
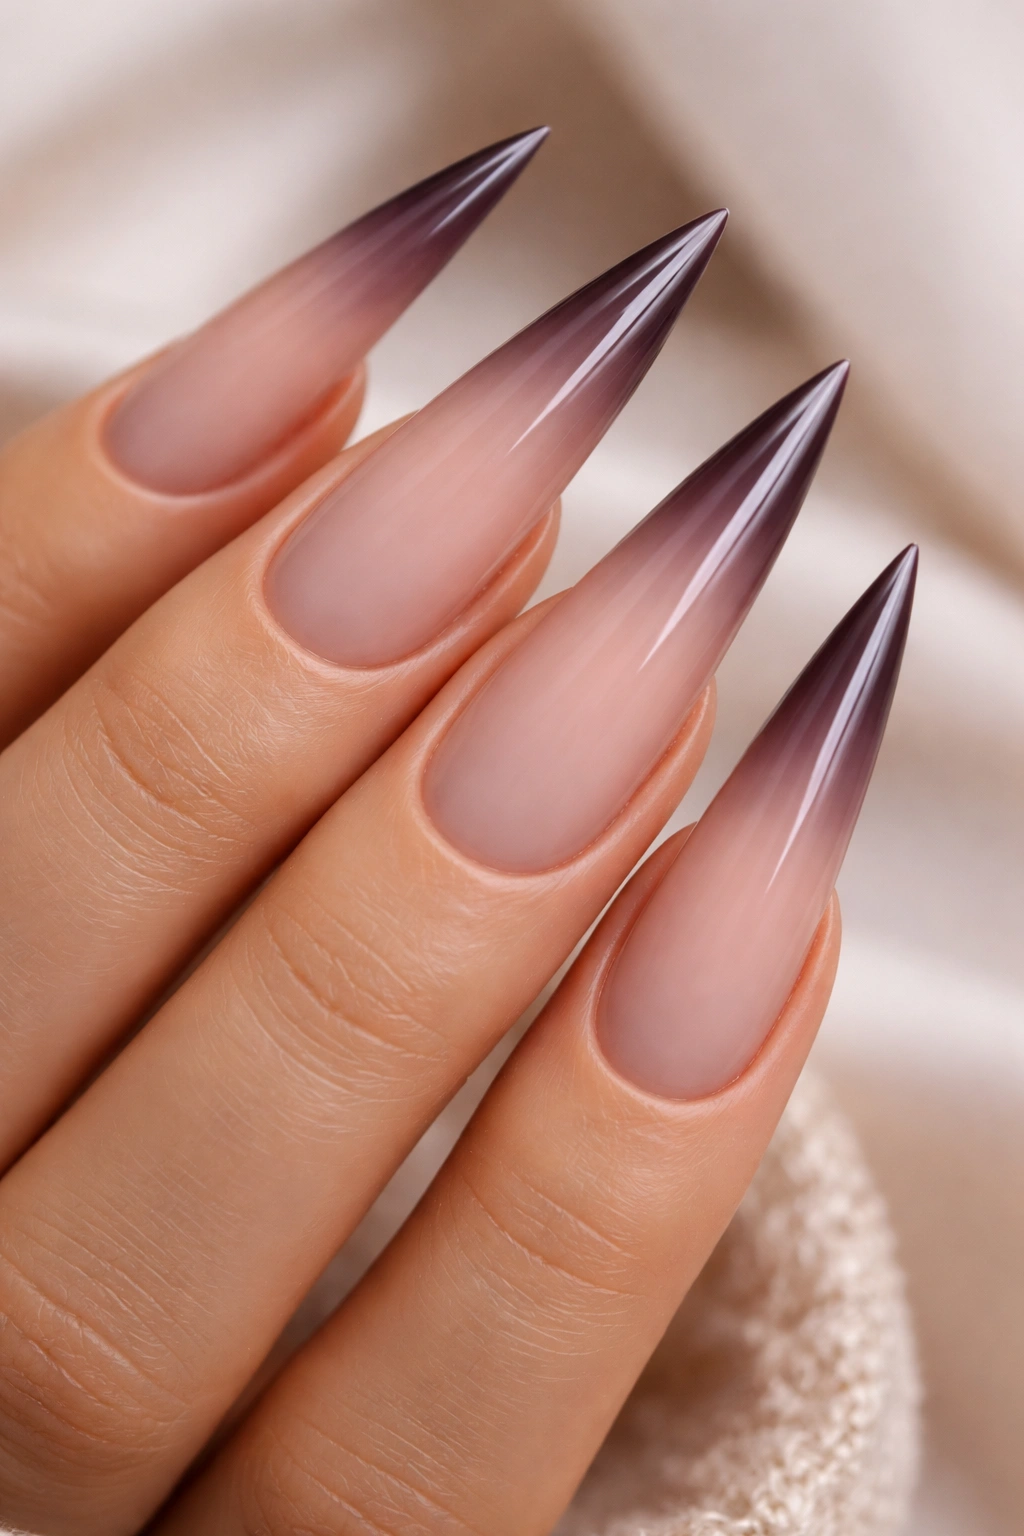
An ombré gradient is the definition of sophistication on stiletto nails. This design creates a smooth color transition from one shade to another, typically moving from a light tone at the base to a deeper, richer color at the tips. On the elongated canvas of a stiletto nail, an ombré effect feels incredibly luxe and draws the eye downward in the most flattering way.
How to Achieve the Look
The magic of a flawless ombré happens on a makeup sponge. Start by painting your base color directly onto your nail—something light and neutral works beautifully here, like a soft pink, nude, or pale champagne. Next, paint your deeper accent color onto a small piece of a makeup sponge, leaving about a quarter-inch of the sponge unpainted. Lightly dab the sponge onto the tip of your nail, then gently bounce it up and down along the edge where the two colors meet. The sponge’s texture creates that beautiful, blended gradient. Do this 3-4 times with fresh sponge sections, allowing each layer to soften and blend the transition.
Pro Styling Tips
- Use colors within the same family for a subtle, refined ombré—think dusty rose to deep burgundy or champagne to rose gold
- Add a glossy top coat over the ombré to give it dimensional depth and extra shine
- Pair an ombré gradient with a delicate gold or silver nail charm on the ring finger for added drama without overwhelming the design
- The longer your stiletto nail, the more space you have for the gradient to transition smoothly—the effect looks even more impressive
2. Diamond-Studded Elegance
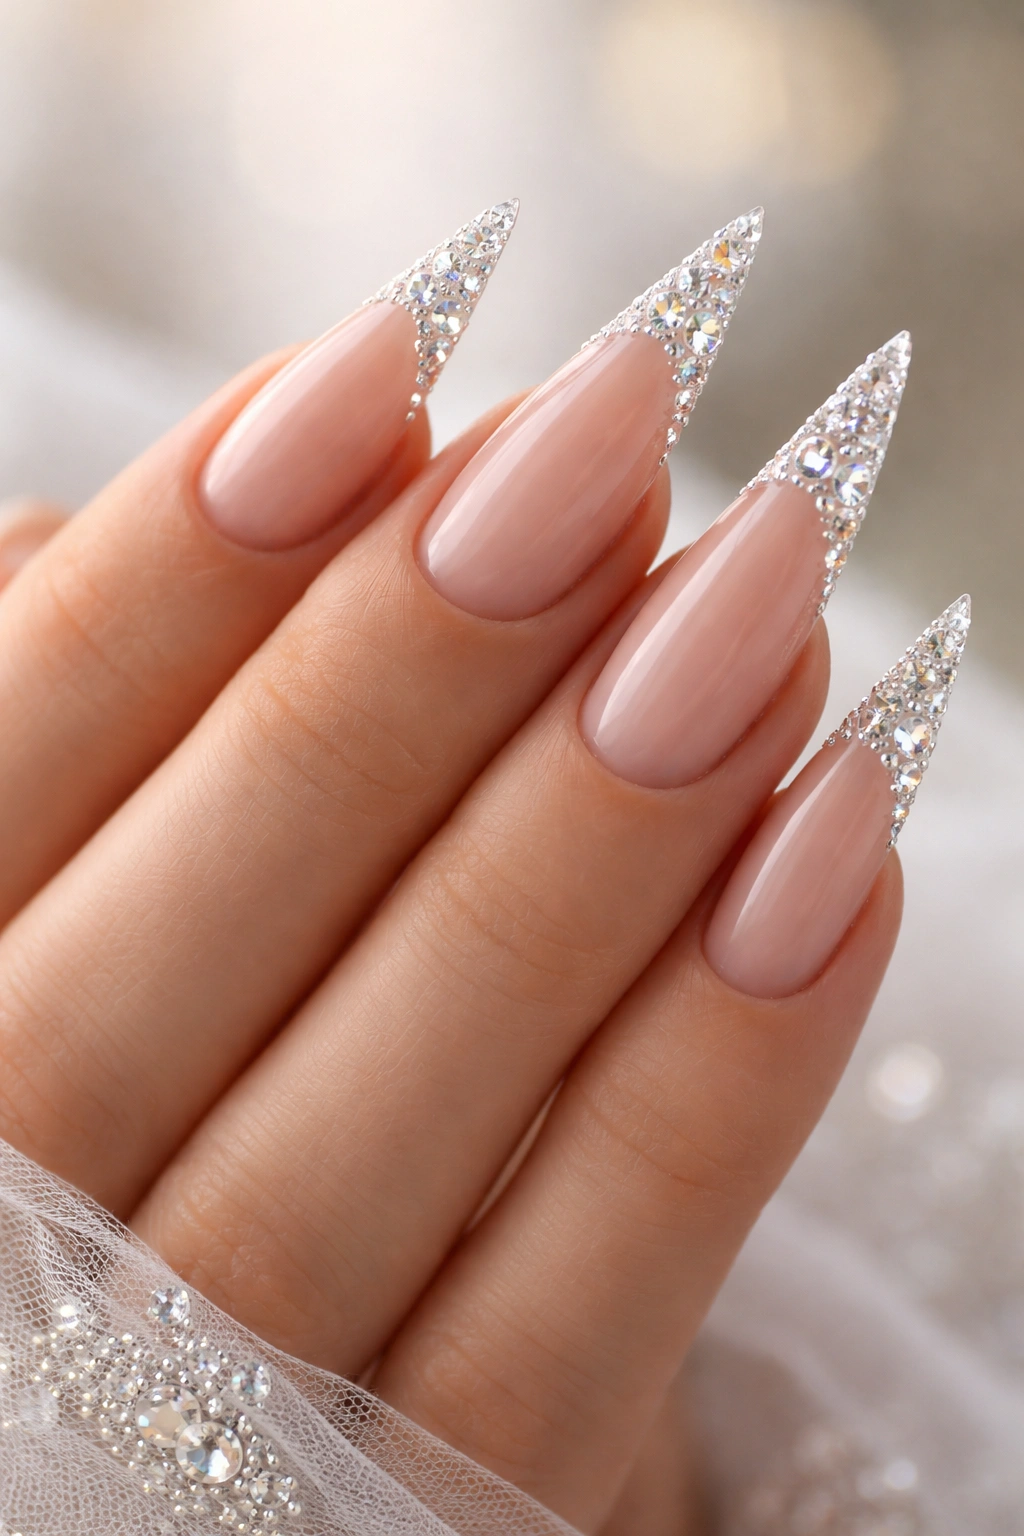
There’s classic glamour, and then there’s diamond-studded elegance. Embellishing your stiletto nails with crystal rhinestones, glass diamonds, or premium nail gems instantly elevates any base color into red-carpet territory. The sharp geometry of the stiletto shape pairs beautifully with the angular sparkle of diamonds, creating a cohesive, intentional-looking design.
Design Placement Strategies
The most impactful placements are along the tips—create a gradient of stone sizes, starting with smaller stones at the very point and increasing in size as you move toward the nail bed. Alternatively, create a dramatic vertical line of diamonds down the center of each nail for a very modern, architectural look. A scattered, asymmetrical approach works too: place diamonds randomly across the nail in a way that feels organic, perhaps concentrating more stones on the accent nail and fewer on the others.
Application and Durability
Apply diamonds using a strong, clear UV gel or a dedicated nail glue formulated for gems. Press each stone firmly onto the nail, holding it in place for a few seconds until the adhesive sets. Once you’ve placed all your stones, seal the entire nail with a high-shine top coat to lock everything in place and create a smooth, durable surface. This method keeps stones secure and protected, and the sealed surface is much easier to clean and maintain throughout the day.
Color Pairing Ideas
- Deep burgundy or wine base with clear or AB (aurora borealis) diamonds for an ultra-luxe look
- Matte black base with white or silver diamonds for modern, architectural contrast
- Nude or cream base with rose gold or champagne diamonds for understated elegance
3. Chrome Mirror Effect
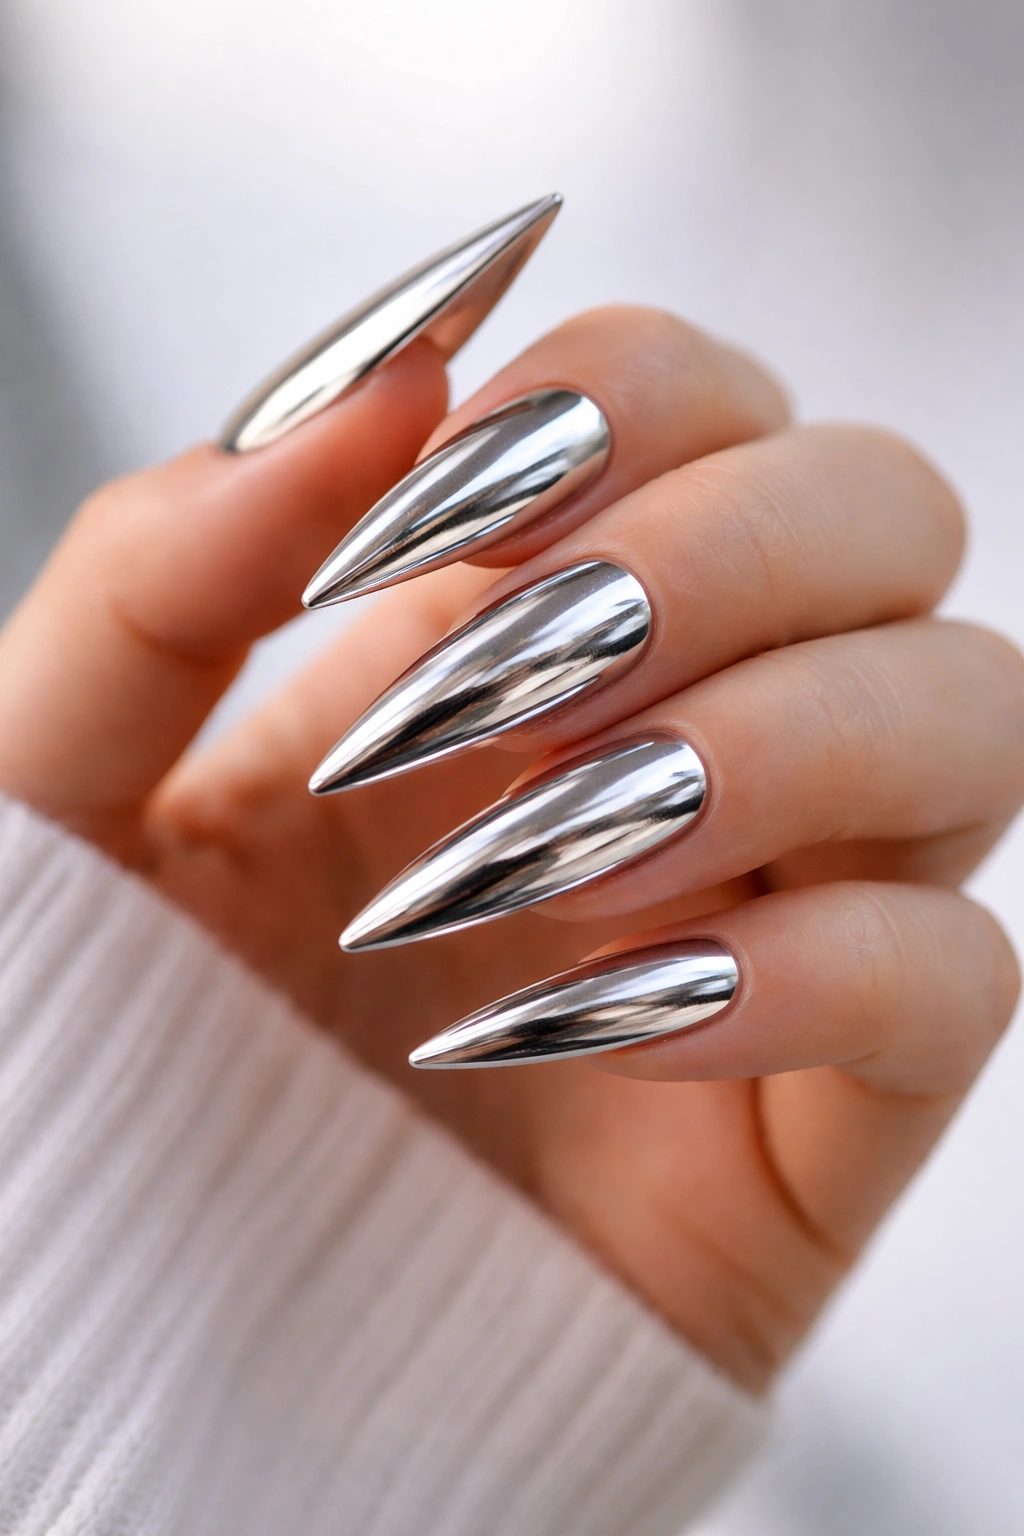
Chrome nails are having a major moment, and stiletto nails are the perfect shape to showcase this futuristic, reflective finish. A chrome effect creates an almost liquid-metal appearance, with a mirror-like surface that catches and reflects light from every angle. The effect is undeniably dramatic and contemporary while still feeling genuinely glamorous.
Creating the Chrome Finish
Chrome powders are the secret weapon here. After applying a base coat and your chosen color nail polish (chrome works beautifully over jewel tones, neutrals, and even pastels), apply a generous amount of chrome powder using a small applicator tool or even your fingertip—the powder creates that metallized finish. Work the powder into the wet polish using gentle, directional strokes. Once you’ve applied the powder to all five nails, seal everything with a shiny top coat to lock the effect in place and create that glass-smooth, mirror-like surface. The top coat also prevents the powder from rubbing off during daily use.
Variations on the Chrome Effect
- Gradient chrome: Apply different chrome colors—starting with rose gold at the base transitioning to silver at the tips—for a two-tone metallic effect
- Half-chrome: Paint chrome on just the tips of your nails while leaving the base in solid color for a subtler take
- Duochrome chrome: Use two contrasting colors (like copper and emerald) so the color shifts depending on how light hits your nails
4. Velvet Matte Finish
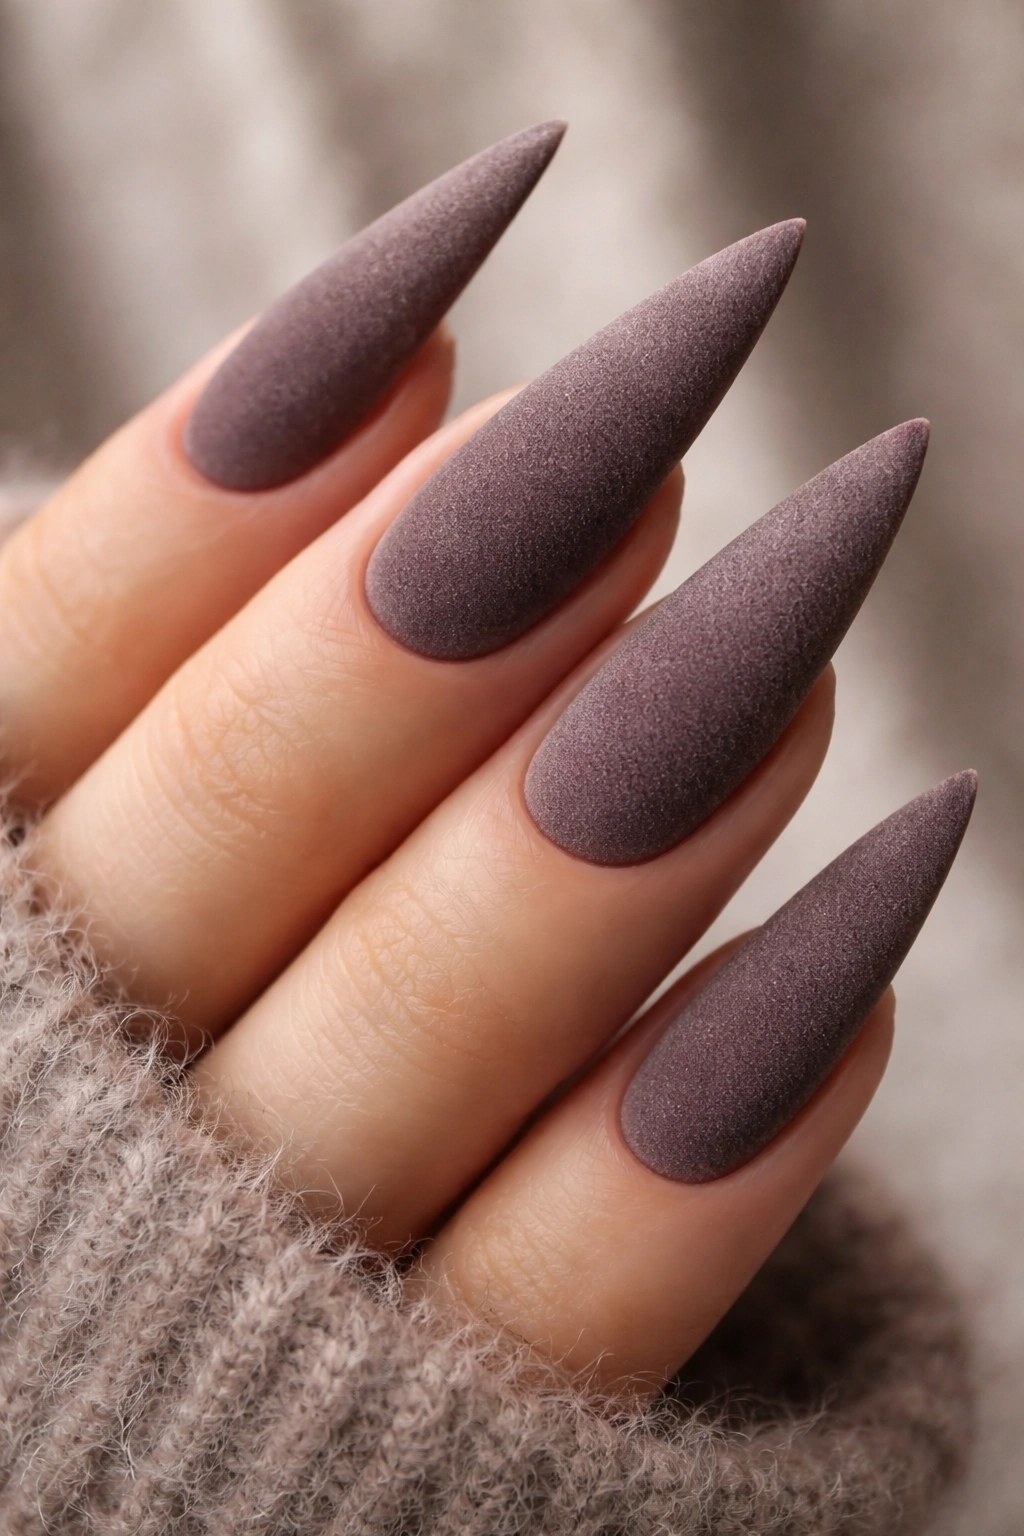
While glossy nails have their place, a soft, velvety matte finish feels surprisingly luxurious and modern on stiletto nails. The velvet texture creates visual depth and sophistication—it’s the nail equivalent of a cashmere sweater. This finish also photographs beautifully and feels incredibly satisfying to touch.
Achieving True Velvet Texture
Start with your base color applied in full coverage. Before it completely dries, use a soft makeup brush or sponge to apply velvet powder or flocking to the wet polish. The adhesive properties of the still-wet polish cause the tiny fibers to stick permanently to your nail. Once dry, the result is a soft, tactile matte finish with subtle texture. Seal with a matte top coat to lock everything in place and protect the delicate texture from everyday wear and tear.
Color Combinations That Look Incredible in Matte
- Deep forest green velvet with gold accents or a shimmery green accent nail
- Soft taupe velvet on most nails with a silky rose gold velvet on the ring finger
- Warm chocolate brown velvet with delicate gold nail art
- Dusty mauve or lavender velvet for a refined, trendy look
Maintenance and Care
Matte finishes require a little extra attention because they don’t have the protective glossy layer. Avoid intense scrubbing when washing dishes, and use a nail brush gently if needed to keep the surface clean. The velvet texture can shed tiny fibers over time, which is normal—just brush them away gently with a soft brush.
5. Black Cat Eye Design
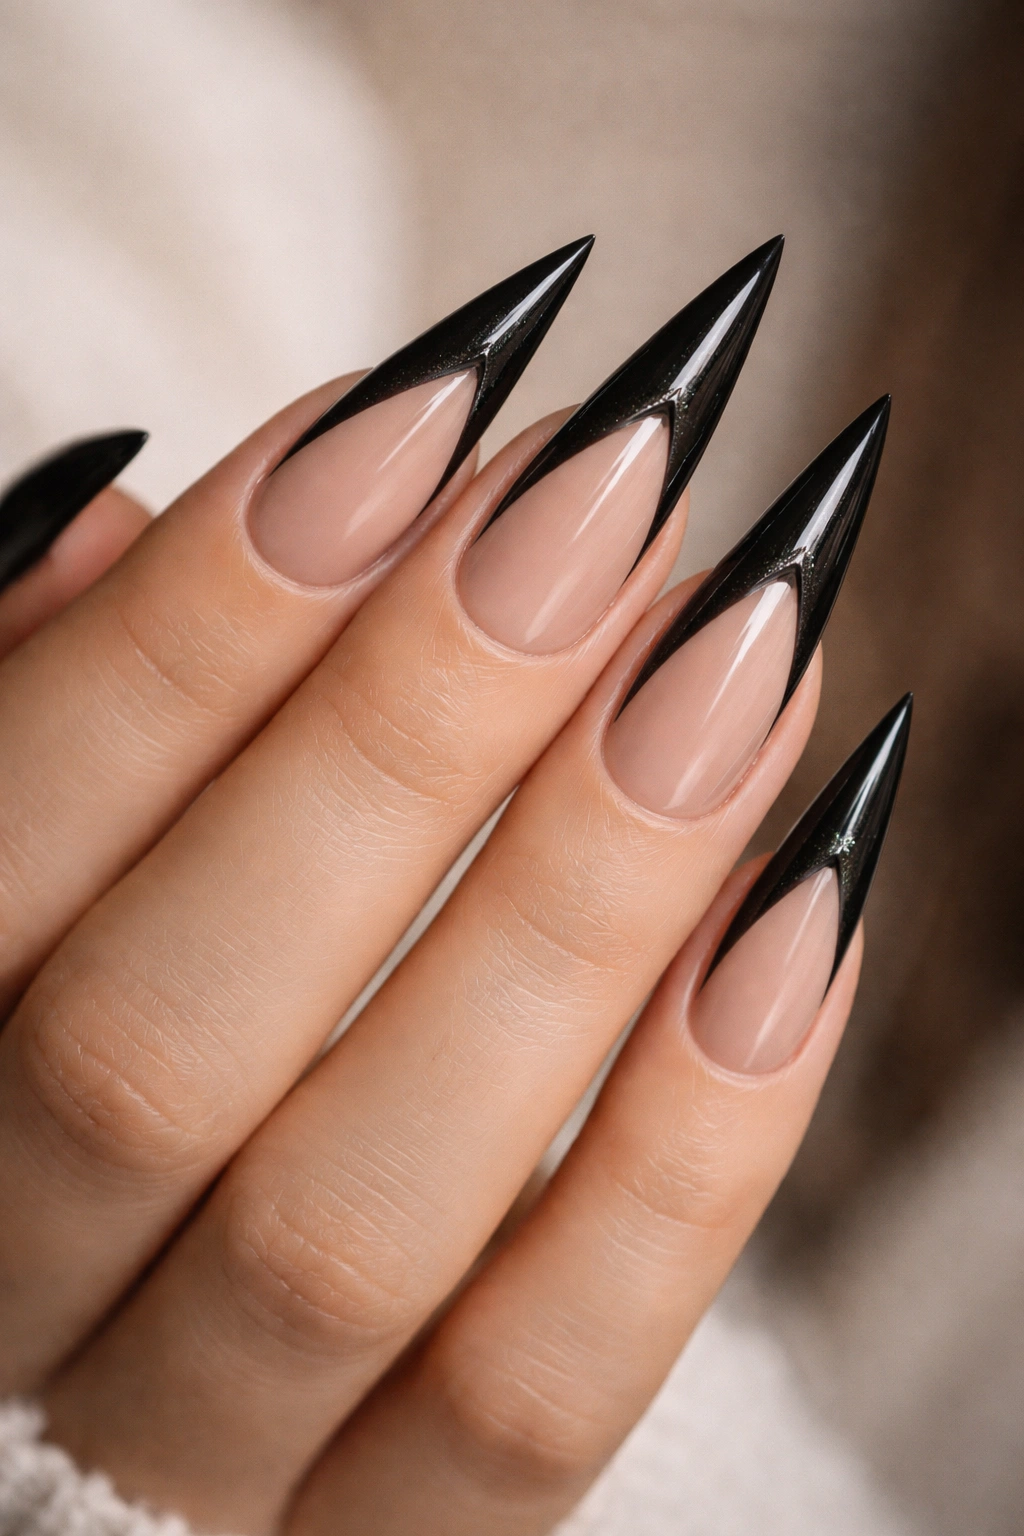
The cat eye design on stiletto nails is pure sophistication with an edgy twist. This design mimics the cat eye makeup look, creating an elongated, winged effect using black polish or gel. On a stiletto nail, the natural point at the tip of the nail becomes the ideal place for the cat eye “flick” to extend, making this design feel like it was made for this nail shape.
Step-by-Step Application
Begin with a nude, cream, or light pink base color as your background. Once the base is completely dry, use a thin nail art brush or eyeliner-style nail pen to create the cat eye. Start at the inner corner of your nail and draw a thin line toward the center and slightly upward. From the center, extend the line toward the outer edge of the nail tip, creating that signature cat eye flick. The point of your stiletto nail is the perfect canvas for this extended flick. Fill in the winged area with black polish to create a clean, solid shape.
Design Variations
- Minimalist cat eye: Create just the thin flick without filling in a larger shape for an ultra-modern look
- Colorful cat eye: Use jewel tones like emerald, sapphire, or plum instead of classic black for a more fashion-forward approach
- Double cat eye: Create the cat eye on both the top and bottom edges of your nail for a more dramatic, balanced design
Skill Level and Practice
This design requires a steady hand and some practice, but it’s entirely achievable at home with the right tools. Invest in a quality thin nail art brush or a gel eyeliner pen designed specifically for nails—these tools give you the precision you need. Practice on nail wheels first to get the motion and pressure down before moving to your actual nails.
6. Glitter Galaxy Nails
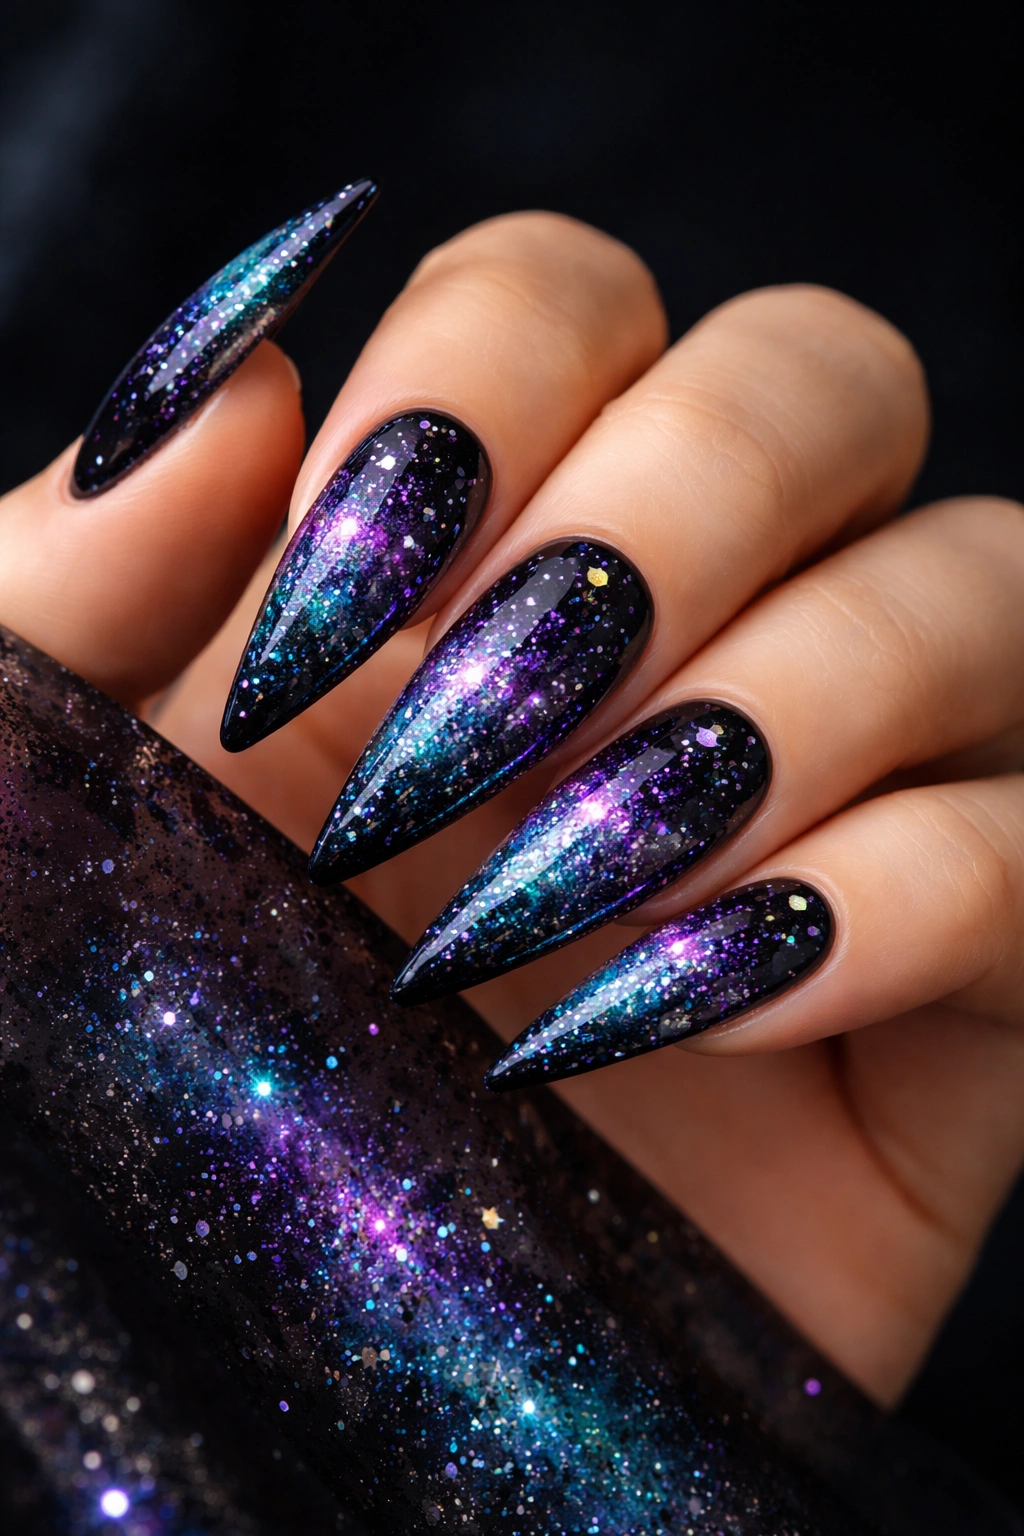
A glitter galaxy design transforms your stiletto nails into a cosmic masterpiece. This design combines a dark base (typically black, navy, or deep purple) with scattered stars, sparkles, and gradient glitter effects that evoke the feeling of looking up at a star-filled night sky. The effect is deeply romantic and undeniably glamorous.
Creating the Galaxy Effect
Start with a dark base color on all nails, ideally in black or very dark navy. Once dry, use a makeup sponge to apply a gradient of deep purple, blue, or teal over the black base, working from one corner of the nail toward the opposite direction to create an uneven, space-like quality. While this is still wet or tacky, use a fine glitter (small pieces that capture light beautifully) and sprinkle it randomly across the nail. Use a nail art brush to apply white or silver dots and small dots to represent stars. Add a glossy top coat once everything is dry to seal all the glitter and create a domed, jewel-like surface.
Color Palette Options
- Black base with purple and teal gradients, white and silver glitter, and pearl accents
- Deep navy base with rich blue and emerald transitions, gold and copper glitter stars
- Black base with magenta and pink gradients, holographic and iridescent glitter for an extra-cosmic vibe
Durability Considerations
Loose glitter can shed over time, so using a clear gel top coat specifically formulated for art nails works better than regular polish top coat. The gel seals everything in place and provides a more durable finish. Alternatively, use a thick, sticky top coat applied generously to encase the glitter and stars.
7. Marble Luxe Pattern
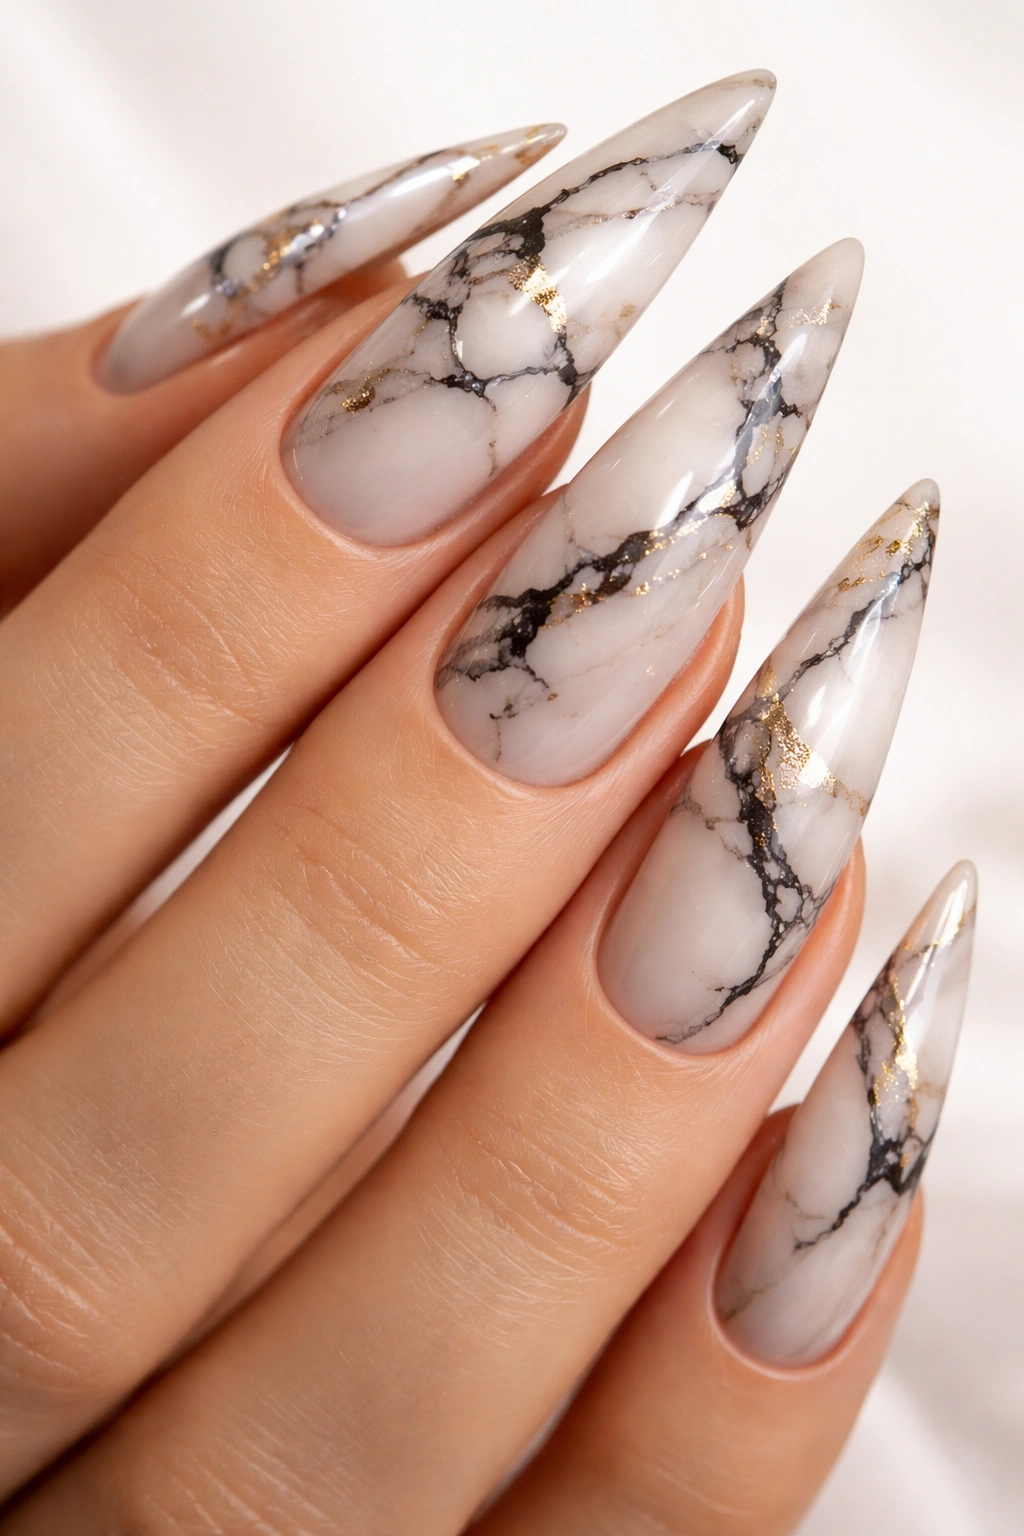
Marble designs have become synonymous with luxury manicures, and there’s a good reason—the organic, veined pattern naturally looks expensive and sophisticated. When executed on stiletto nails, marble creates an elegant, artistic statement that works for both casual and formal occasions. The sharp geometry of the stiletto shape contrasts beautifully with the flowing, organic lines of marble.
Technique for Flawless Marble
Begin with a clean, dry base coat. Choose your background color (white, cream, nude, or even a soft pastel) and apply it to all nails. Once completely dry, use a thin nail art brush and dark accent colors (typically black, gray, navy, or a contrasting color) to hand-paint the vein-like patterns. Look at actual marble photos for reference—the veins are rarely perfectly straight; they meander, branch, and create organic-looking patterns. Apply several thin lines across the nail in various directions, allowing some to fade at the edges by tapering the brush pressure. Finish with a glossy top coat for that polished, luxe appearance.
Marble Color Combinations
- White or cream base with black veining and a touch of gold foil—the most classic luxury marble look
- Soft pink or rose base with gray and rose gold veining
- Pale gray or cool white base with deep navy and platinum veining
- Champagne or warm beige base with chocolate brown and copper veining
Alternative Methods
If hand-painting feels intimidating, you can use a water marble technique—though this is trickier on stiletto nails because of their pointed shape. Alternatively, many brands now offer marble-pattern nail wraps or nail polish with built-in marble effects, which removes the skill barrier entirely.
8. Gold Foil Accents
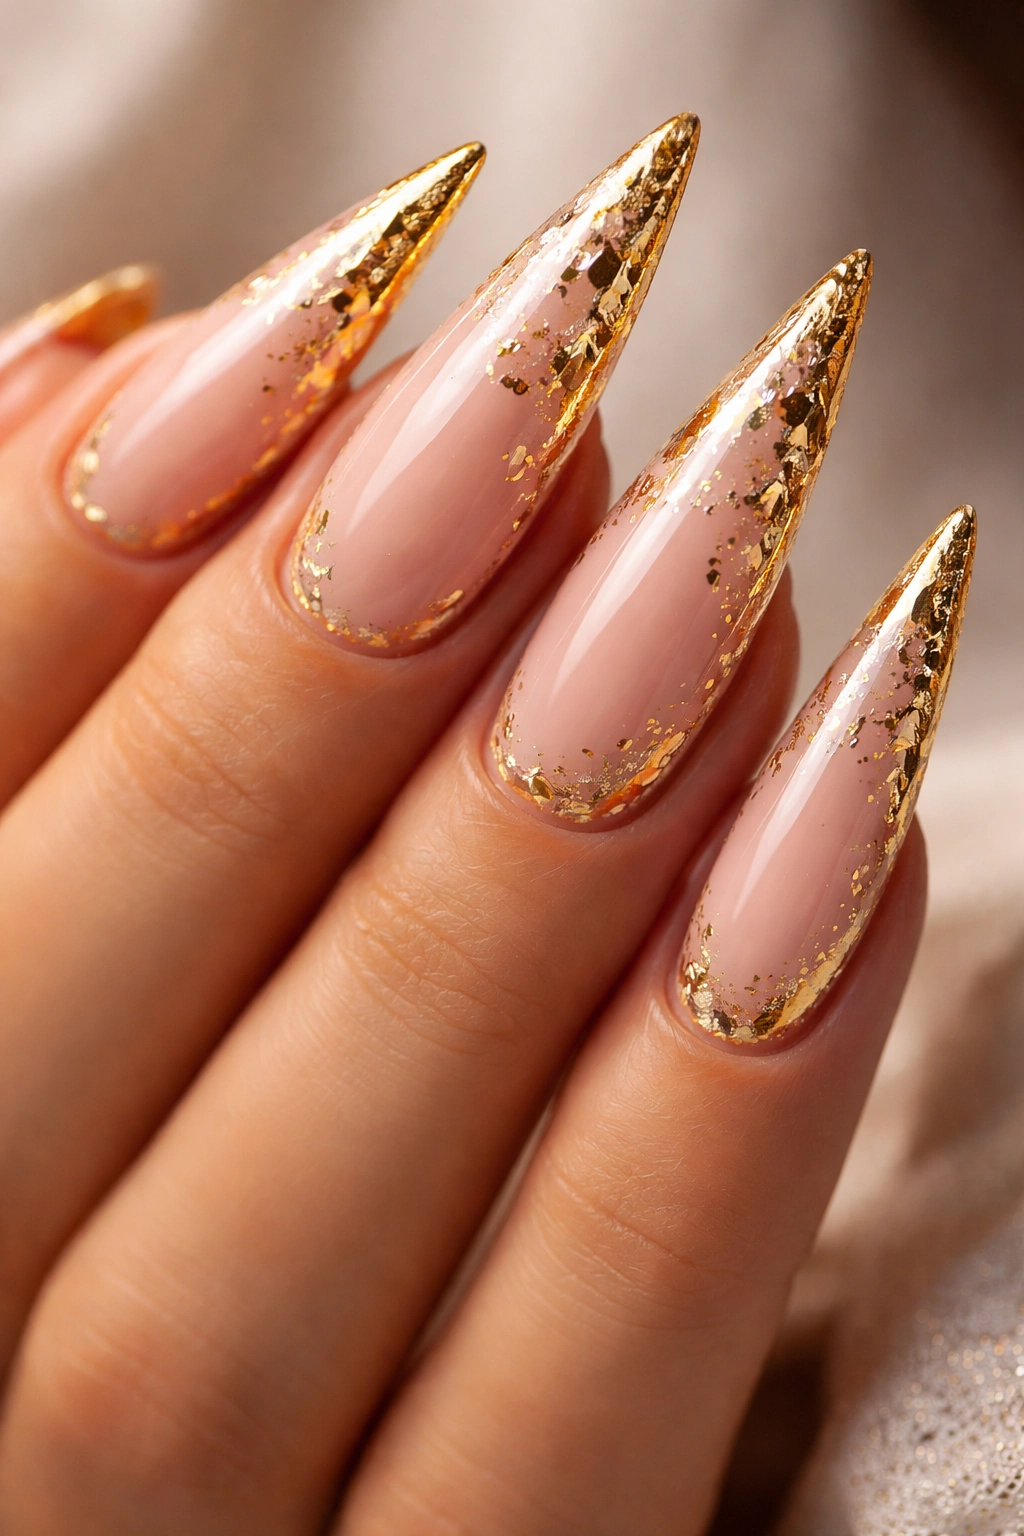
Gold foil brings an immediate sense of luxury and warmth to any nail design. On stiletto nails, gold foil works beautifully as an accent—perhaps along the edges, scattered across the surface, or concentrated on accent nails. The way foil catches and reflects light is unique and creates a dimensional, high-fashion appearance.
Applying Gold Foil Successfully
Gold foil requires a specific adhesive to stick properly—regular polish won’t hold it. Use a clear UV gel or a dedicated foil adhesive, and apply it thinly to the area where you want the foil to adhere. Press your gold foil (the kind made for nails, not craft foil) directly onto the adhesive, pressing firmly with a nail art brush or your finger. Hold it in place for several seconds until it’s fully adhered, then peel away the backing paper. Seal with a top coat to lock the foil in place and protect it from peeling or lifting.
Gold Foil Design Ideas
- Edging foil: Apply gold foil along the edge of the tip, creating a gilded frame for your stiletto point
- Ombre foil: Use foil powder mixed with gel for a softer, more blended gold accent
- Geometric foil: Create clean triangles, lines, or abstract shapes using foil for a modern, artistic look
- Scattered foil: Apply small pieces of foil randomly across a solid base color for an organic, luxe appearance
9. Peacock Feather Motif
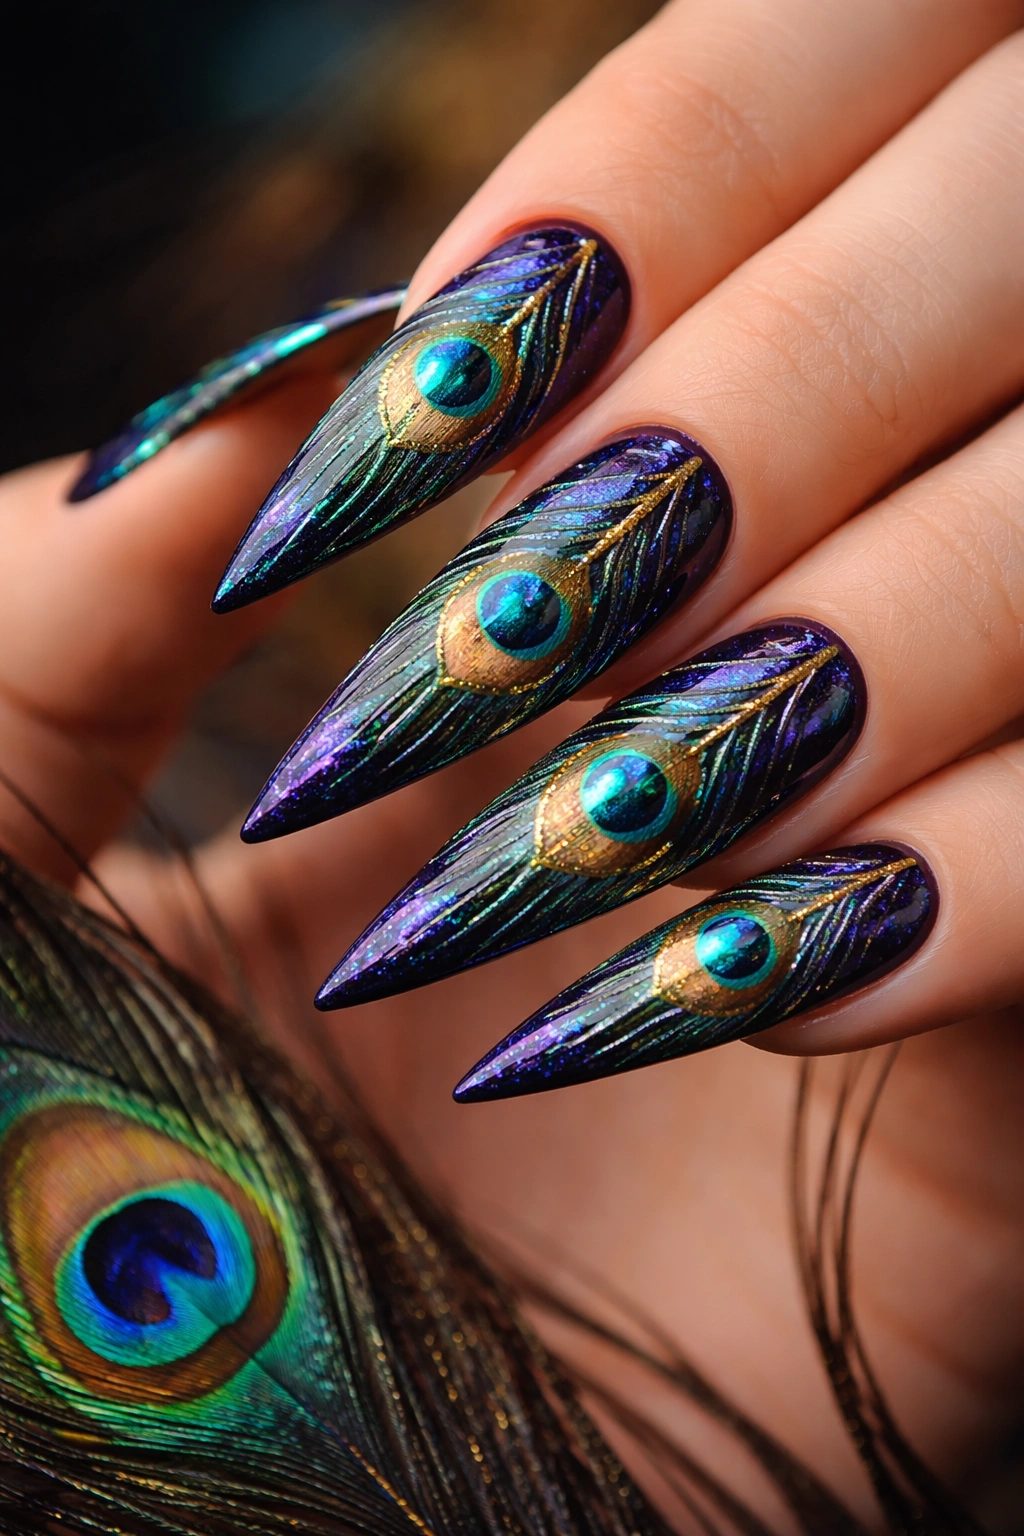
A peacock feather design on stiletto nails is pure artistry and drama. The natural shape and colors of peacock feathers—iridescent blues, greens, purples, and golds—translate beautifully onto the elongated canvas of a stiletto nail. This design is conversation-starting and works especially well for special events or when you want to feel extra confident.
Painting the Peacock Feather
Start with a solid base color, ideally in a deep jewel tone like teal, navy, or emerald. Using a thin nail art brush and multiple colors, paint the signature peacock feather shape: begin with a curved “eye” shape at the tip of your nail, then extend feather-like strokes upward. Use iridescent blues, greens, purples, and golds to create depth and dimension. Layer the colors slightly, allowing them to blend where they meet. Add fine white or silver lines to create the delicate feather details and structure. The pointed tip of your stiletto nail becomes the perfect focal point for the feather’s eye.
Skill Level and Alternatives
This design requires some painting ability, but it’s not impossible for beginners—start with a simple feather outline and fill it in with color. If hand-painting feels like too much, look for nail art stickers or decals featuring peacock feathers; these give a similar effect with less effort.
Color Palettes Beyond Traditional Peacock
- Navy and gold feather for a more understated, elegant approach
- Teal and copper for a warm take on the peacock motif
- Purple and silver for a romantic, mystical vibe
10. Holographic Iridescence
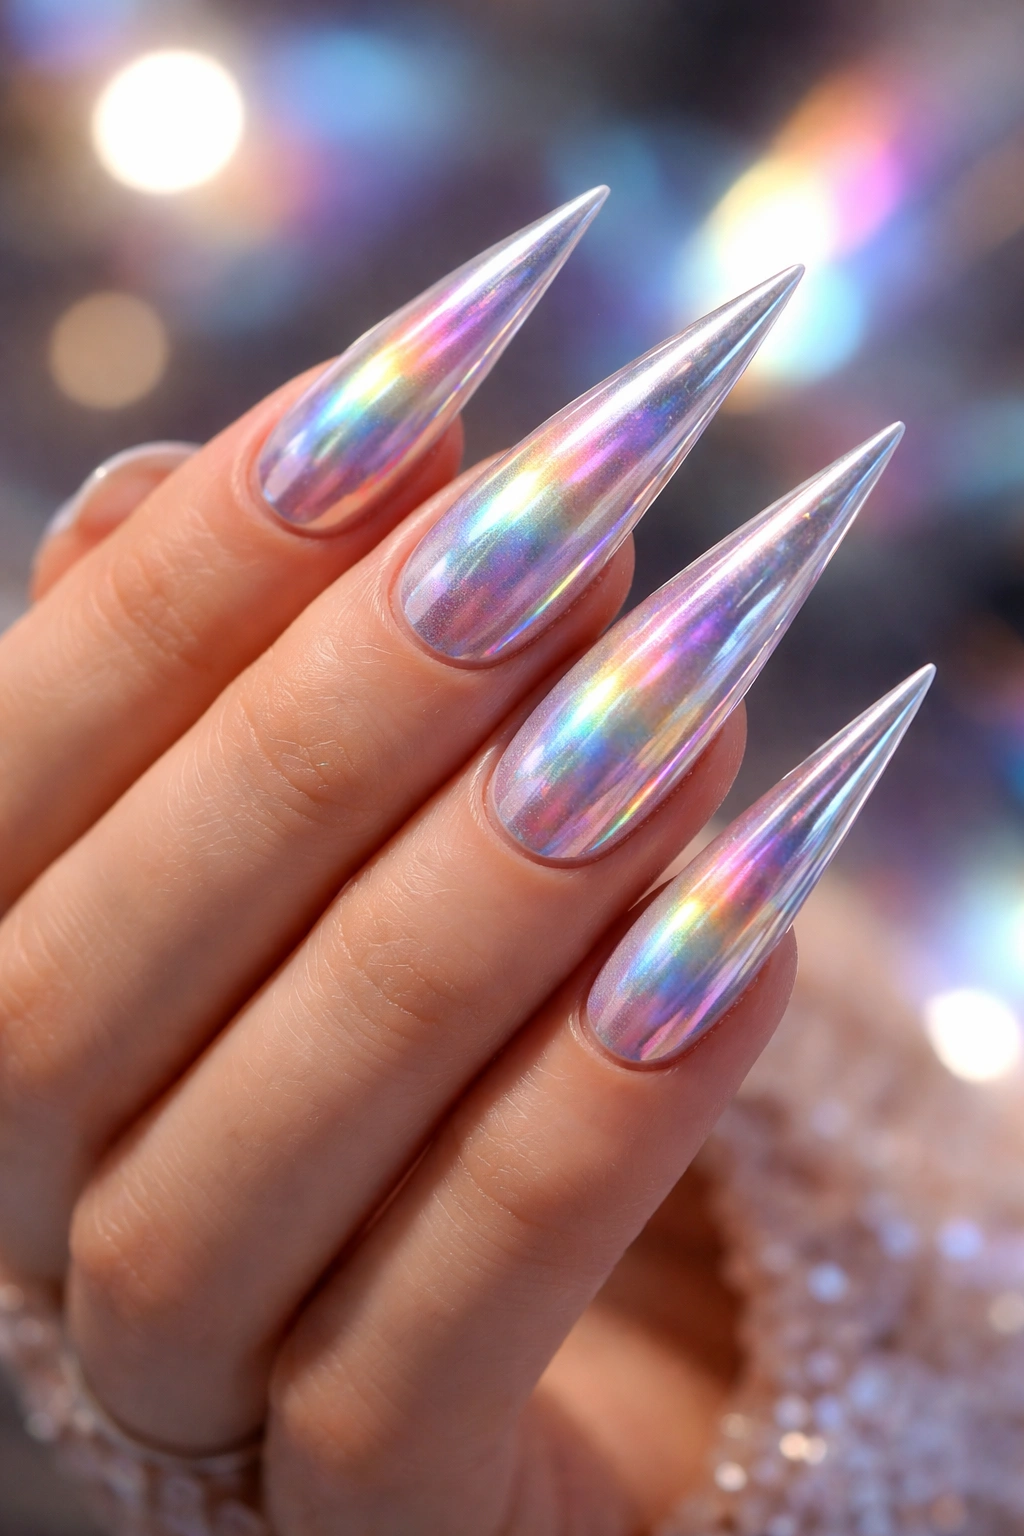
A holographic finish is the ultimate way to make your stiletto nails feel magical and modern. Holographic nails shift color depending on the angle and lighting, creating a rainbow effect that’s mesmerizing and undeniably eye-catching. This is the design you choose when you want your nails to be the focal point of your entire look.
Achieving the Holographic Effect
Use a holographic nail polish formulated to create the color-shifting effect, or layer a holographic powder over a clear or light base. The key is applying enough product to capture and reflect light across the full spectrum without creating a thick, heavy application. Some holographic polishes work better than others, so invest in a reputable brand known for true holographic effects rather than generic glitter. Once applied and dried, seal with a glossy top coat that won’t dull the effect.
Styling Holographic Nails
- Keep the rest of your look relatively minimal so the nails can be the statement piece
- Pair holographic stiletto nails with neutral clothing to let the nails shine
- Consider adding just one or two accent nails in holographic if you prefer a more subtle approach
- Holographic effects photograph beautifully, so these nails are perfect for someone who loves taking photos
Longevity and Maintenance
Holographic effects can fade with repeated hand washing and sun exposure over time, which is normal. The color shift may become less dramatic after a few weeks, but the nails remain beautiful. When you’re ready for a fresh manicure, simply remove and reapply for that renewed holographic glow.
Final Thoughts

Each of these ten stiletto nail designs offers a different expression of glamour, whether you’re drawn to the sophisticated simplicity of an ombré gradient, the show-stopping sparkle of diamond studs, or the artistic complexity of a peacock feather. The beauty of stiletto nails is their versatility—the shape flatters any design you choose to place on it, and the length provides a generous canvas for creative expression.
The best design for you depends on your personal style, comfort level with nail art, and the occasion you’re dressing for. If you’re new to stiletto nails, start with a design that feels achievable—an ombré, velvet matte finish, or simple gold foil placement require minimal technical skill but deliver maximum impact. As your confidence grows, move toward more intricate designs like cat eyes, marble patterns, or hand-painted details.
Remember that these designs don’t have to be permanent. If you’re trying stiletto nails for the first time, many salons can create nail extensions that last two to four weeks, giving you time to see if you love the length and shape before committing long-term. Alternatively, press-on stiletto nails with pre-designed artwork offer an affordable, temporary way to experiment with different looks.
Whatever design you choose, wear your glamorous stiletto nails with confidence. There’s something undeniably powerful about beautifully manicured, well-designed nails—they catch the light, they make a statement, and they remind you that sometimes the smallest details make the biggest impact.
