

Chrome duck nails have taken over the beauty world, and yes — you can absolutely rock this glamorous trend even if you’re rocking short nails. The beauty of chrome is that it works beautifully on any nail length, and when paired with the chic duck nail shape (where the tip extends with a subtle curve), short nails become an elegant canvas for high-shine, futuristic designs. Short chrome duck nails strike that perfect balance between practical and fancy, letting you keep your nails manageable while still turning heads with a sophisticated, eye-catching finish.
The key to making chrome duck nails work on shorter lengths is choosing designs that maximize the visual impact without overwhelming the smaller surface area. Solid metallics, two-tone splits, and gradient finishes tend to shine brightest on short nails, while minimal embellishments let the reflective chrome take center stage. Whether you’re drawn to cool silvers, warm golds, or those mesmerizing holographic effects, there’s a chrome duck nail design that’ll work perfectly with your hand shape and lifestyle.
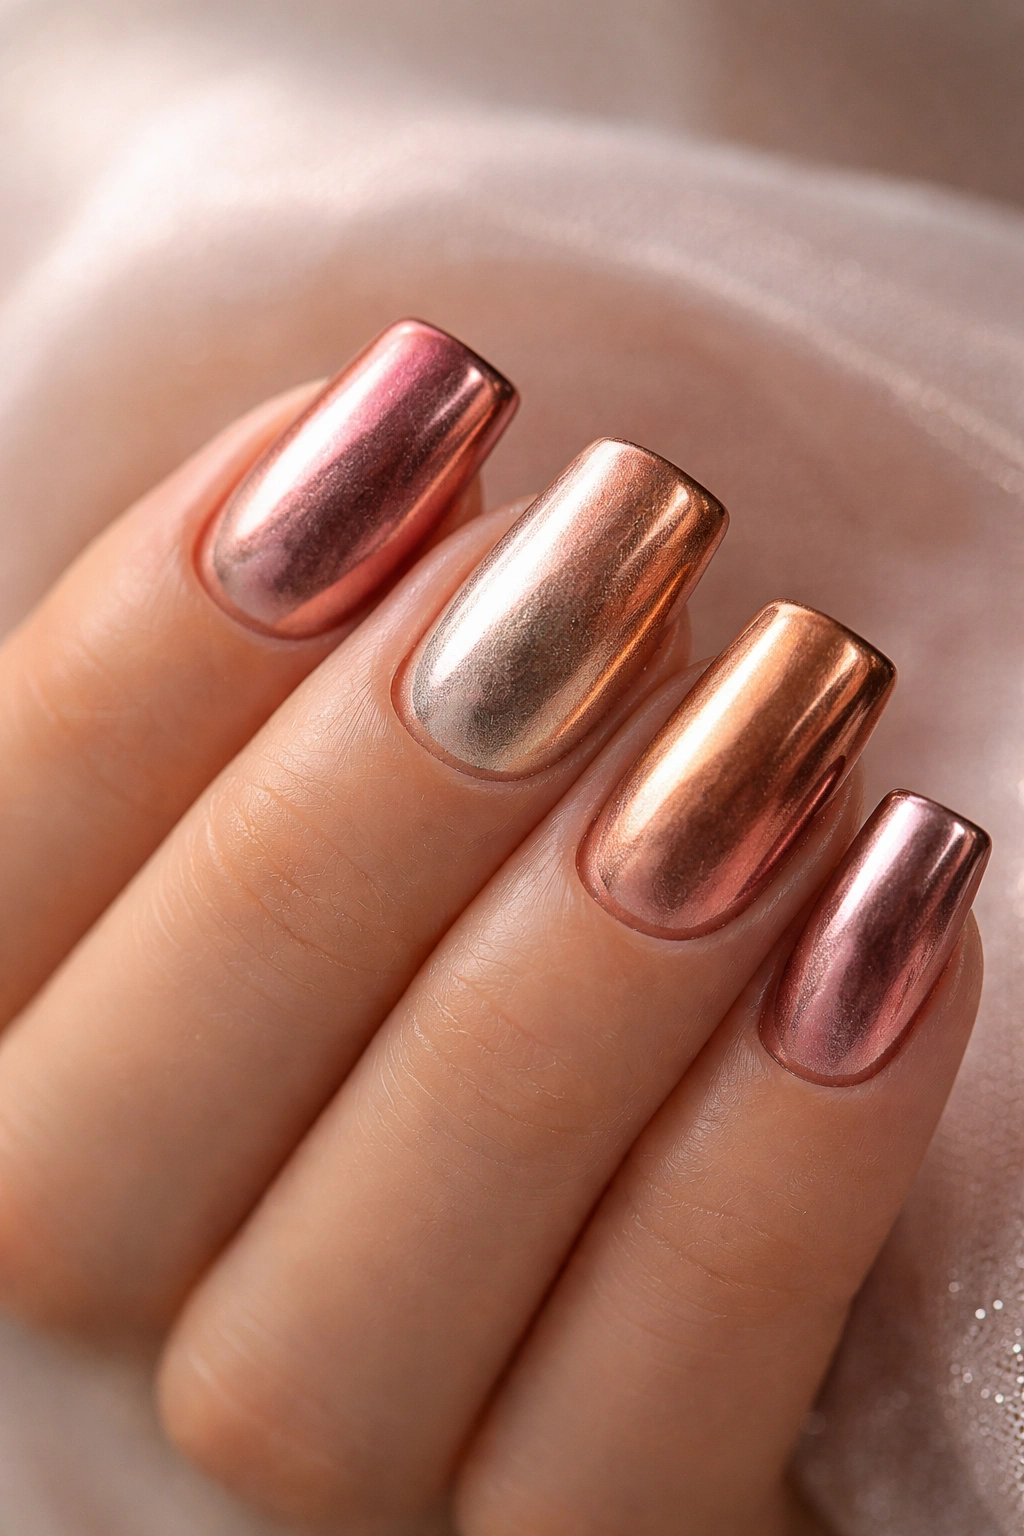
1. Rose Gold Chrome With Glossy Tips
Rose gold chrome on short nails has this warm, luxurious quality that photographs beautifully in any lighting. The soft metallurgic sheen bridges the gap between cool chrome and warm rose tones, making it universally flattering.
Why It’s a Smart Choice for Short Nails
Rose gold chrome looks fresher and less industrial than pure silver, which means it works better on shorter nail beds. The warmth in the formula complements a wider range of skin tones, and on short nails, that universally flattering quality becomes even more valuable since there’s less space to work with.
How to Nail This Design
- Apply a smooth, even base of rose gold chrome polish across all nails for a polished foundation
- Use a high-shine top coat to maximize the reflective quality without adding thickness
- Keep cuticles clean and the duck nail extension subtle to avoid looking cramped
- Pair with nude or metallic eyeshadow to echo the reflective finish on your nails
Pro tip: Rose gold chrome shows fingerprints less than pure silver chrome, making this a practical choice if you’re a frequent phone user or need your nails to stay pristine between touch-ups.
2. Holographic Chrome Duck Design
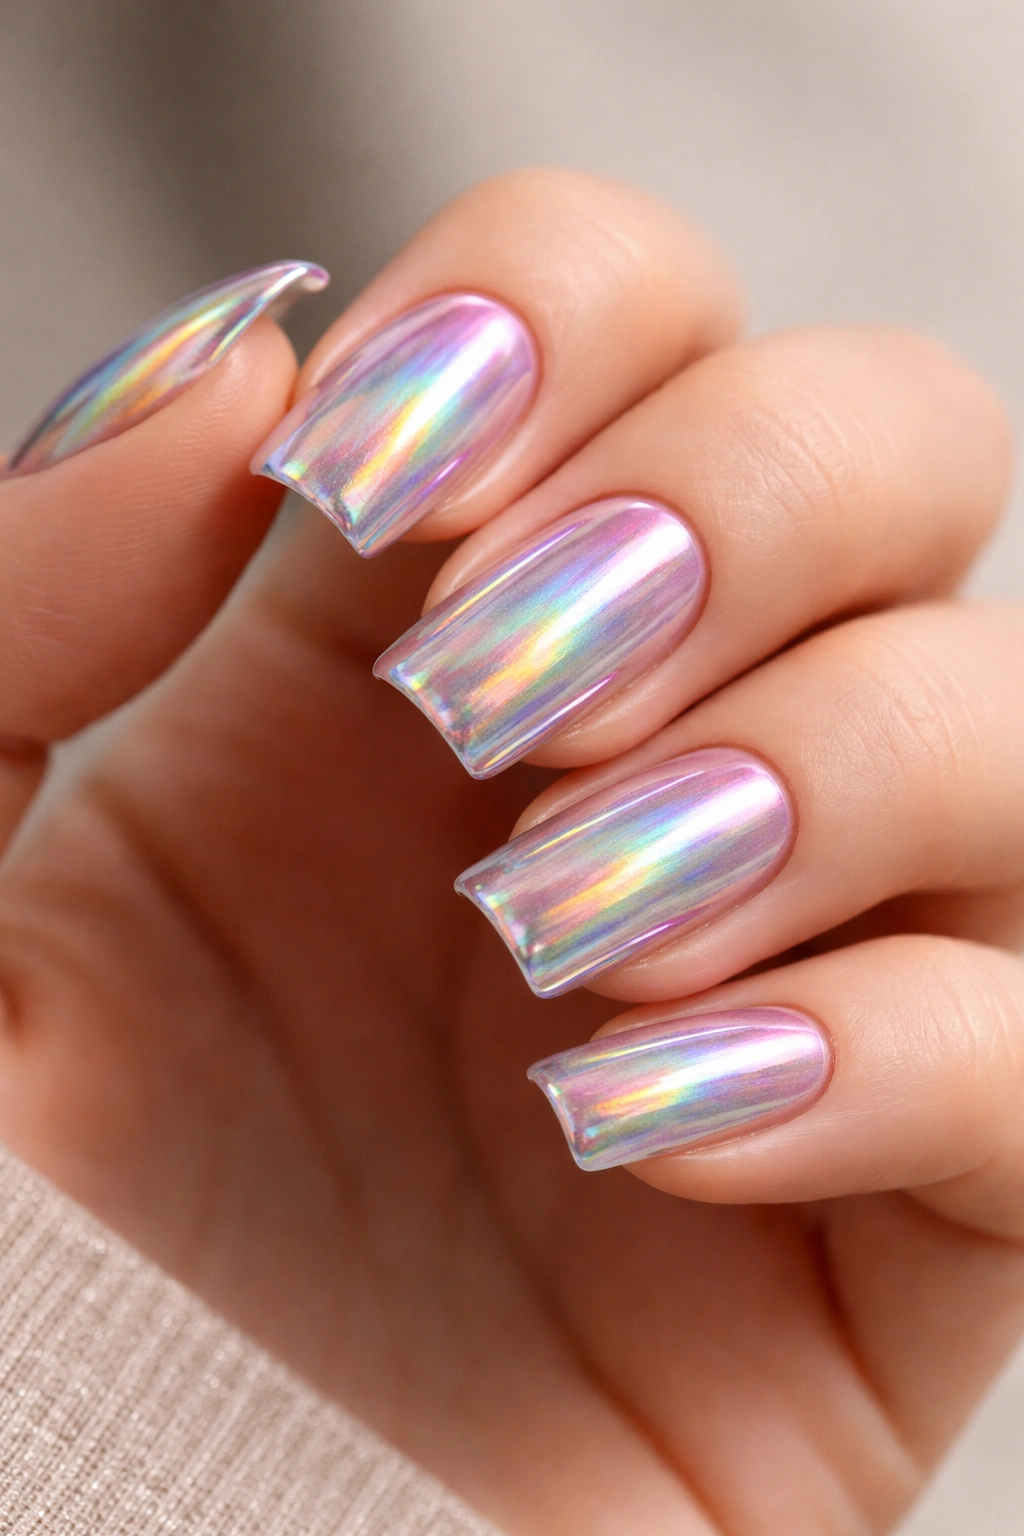
Holographic chrome creates those mesmerizing rainbow reflections that shift through the entire color spectrum as your hand moves. It’s bold, eye-catching, and surprisingly wearable even on short nail beds.
What Makes This Design Pop
Holographic finishes work through micro-prism technology in the polish formula, meaning the effect is built into the color itself rather than relying on size or embellishment. On short nails, this concentrated rainbow effect actually looks more striking because it’s more densely concentrated in a smaller space.
Application and Styling Tips
- Look for holographic polishes specifically formulated for short nail lengths (they tend to have finer particles)
- Apply 2-3 thin coats rather than one thick coat to get the full prismatic effect without bubbling
- The holographic shine is enough visual interest on its own, so skip additional designs or rhinestones
- Wear with minimalist jewelry to let your nails be the statement piece
Worth knowing: Holographic chrome polishes require a good base coat and primer, since the effect depends on complete, even coverage. Any thin spots will disrupt the rainbow effect.
3. Mirror Chrome in Nude Base
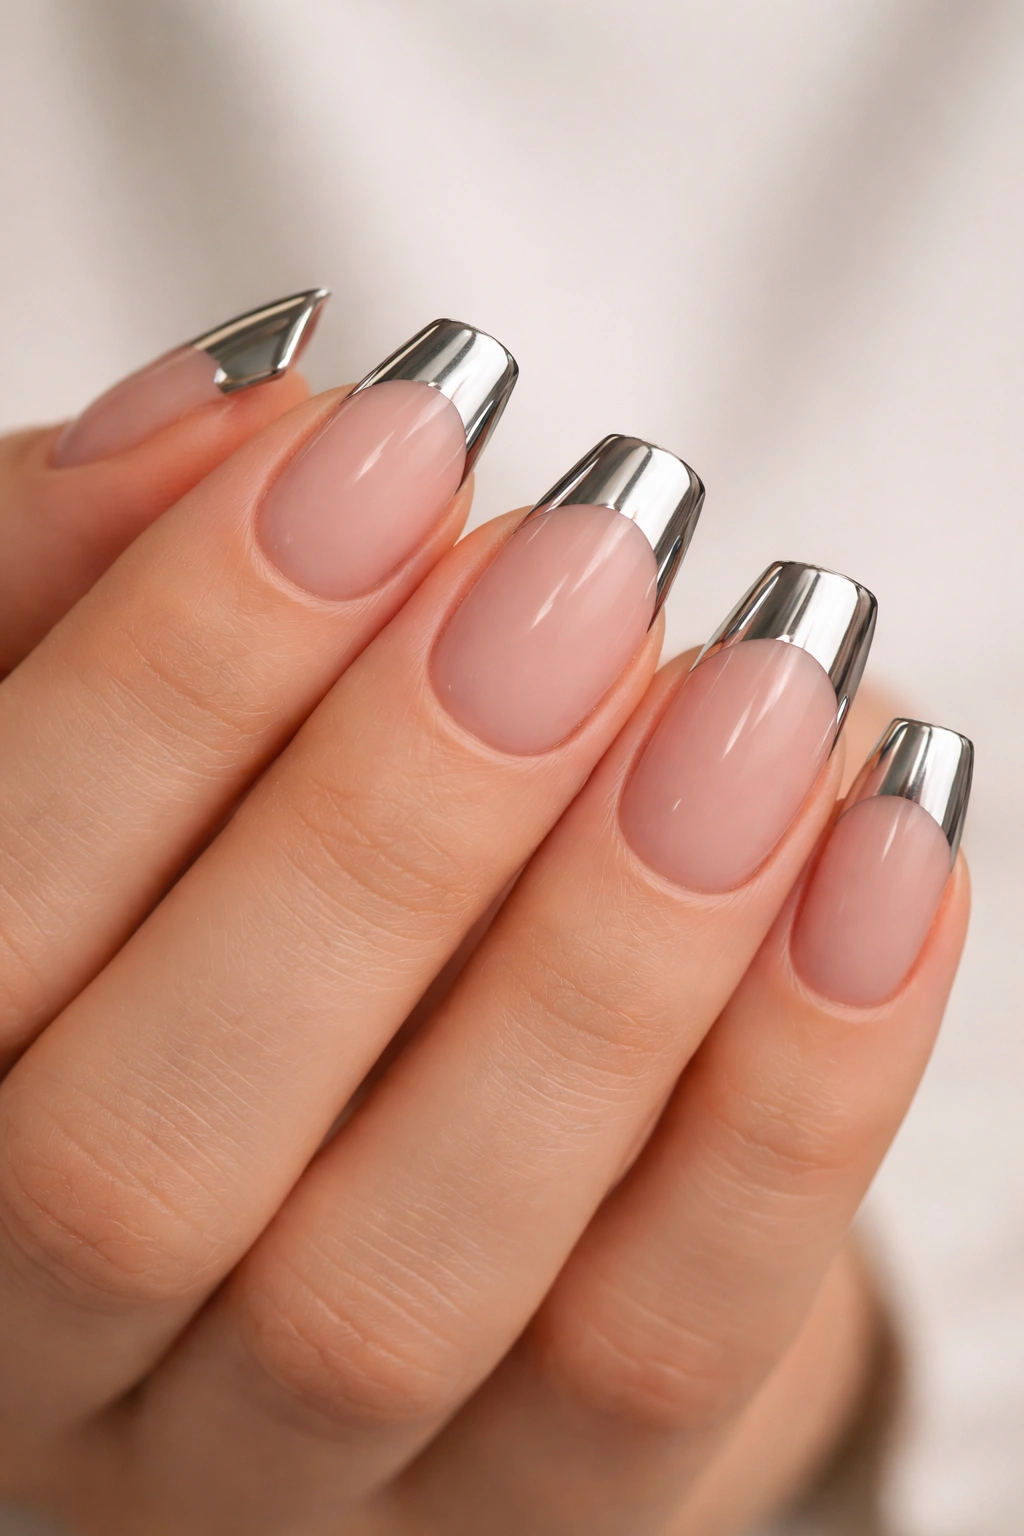
Pairing mirror chrome with a nude or skin-tone base creates an elegant, high-fashion aesthetic that reads as refined rather than trendy. This design elongates short nails visually while maintaining that coveted duck nail curve.
Why This Combination Works on Short Nails
The nude base provides visual anchoring while the mirror chrome tip creates the illusion of length. It’s a trick used by professional manicurists — the color blocking tricks the eye into perceiving more elongation than actually exists.
Creating the Look
- Paint the lower 2/3 of the nail with a nude shade that matches your skin tone or is one shade lighter
- Apply chrome polish to just the tip, creating a clean line where the two shades meet
- Use a thin brush or nail striping tool to get a precise demarcation line
- Seal with a matte top coat over the nude section to create contrast with the glossy chrome
Insider note: The most convincing version of this design has a slightly blurred blend line rather than a harsh edge — use a clean, dry brush to softly feather the line where the colors meet.
4. Two-Tone Chrome Split
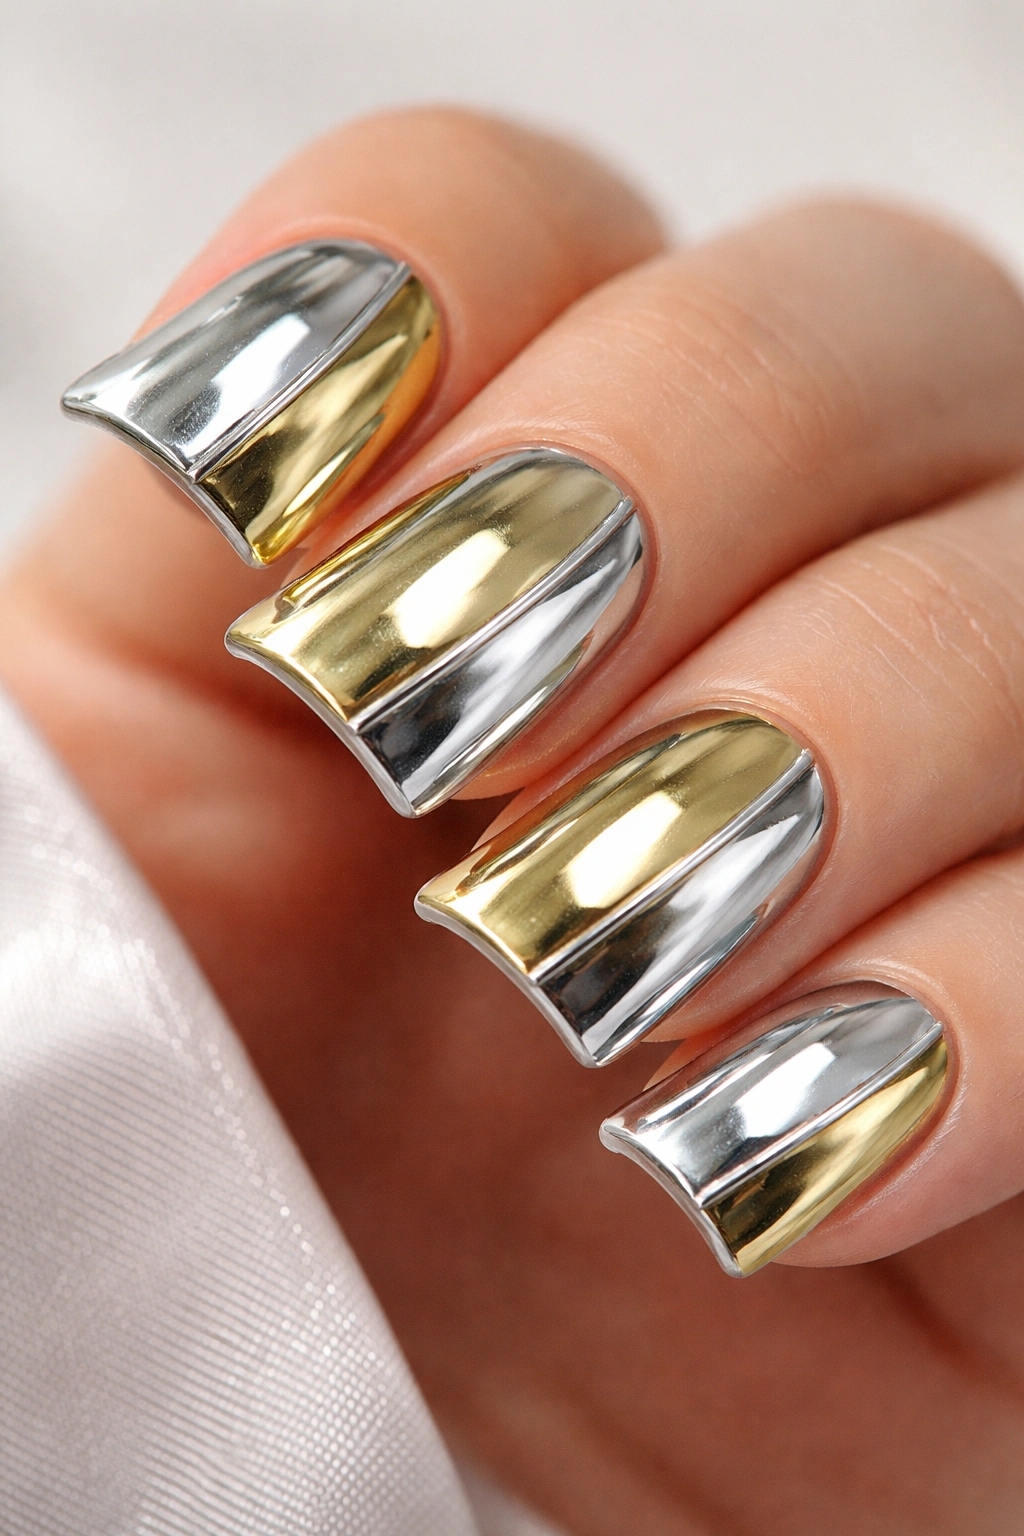
A vertical or diagonal split between two metallic chrome colors creates modern, geometric visual interest without requiring advanced nail art skills. This works especially well on short nails where you want maximum impact with minimum fuss.
The Color Combinations That Work Best
- Silver chrome paired with copper chrome creates warm-cool contrast
- Rose gold chrome with champagne chrome gives sophisticated continuity
- Gold chrome with bronze chrome provides depth through tonal variation
- Holographic chrome split with solid rose gold chrome balances wildness with wearability
How to Execute This Design
- Decide whether you want a vertical split (down the middle) or diagonal (corner to corner)
- Apply painter’s tape along your split line and smooth it down firmly so no polish bleeds underneath
- Paint one chrome color on one side, remove tape, apply the opposite chrome color on the other side
- Seal with a glossy top coat to unite both sides under a uniform shine
- For a more blended look, use a dry brush to soften the line between colors
Quick tip: Vertical splits are easiest for beginners since the tape application is straightforward. Diagonal splits look more dynamic but require steadier hands when positioning the tape.
5. Chrome With Marble Accents
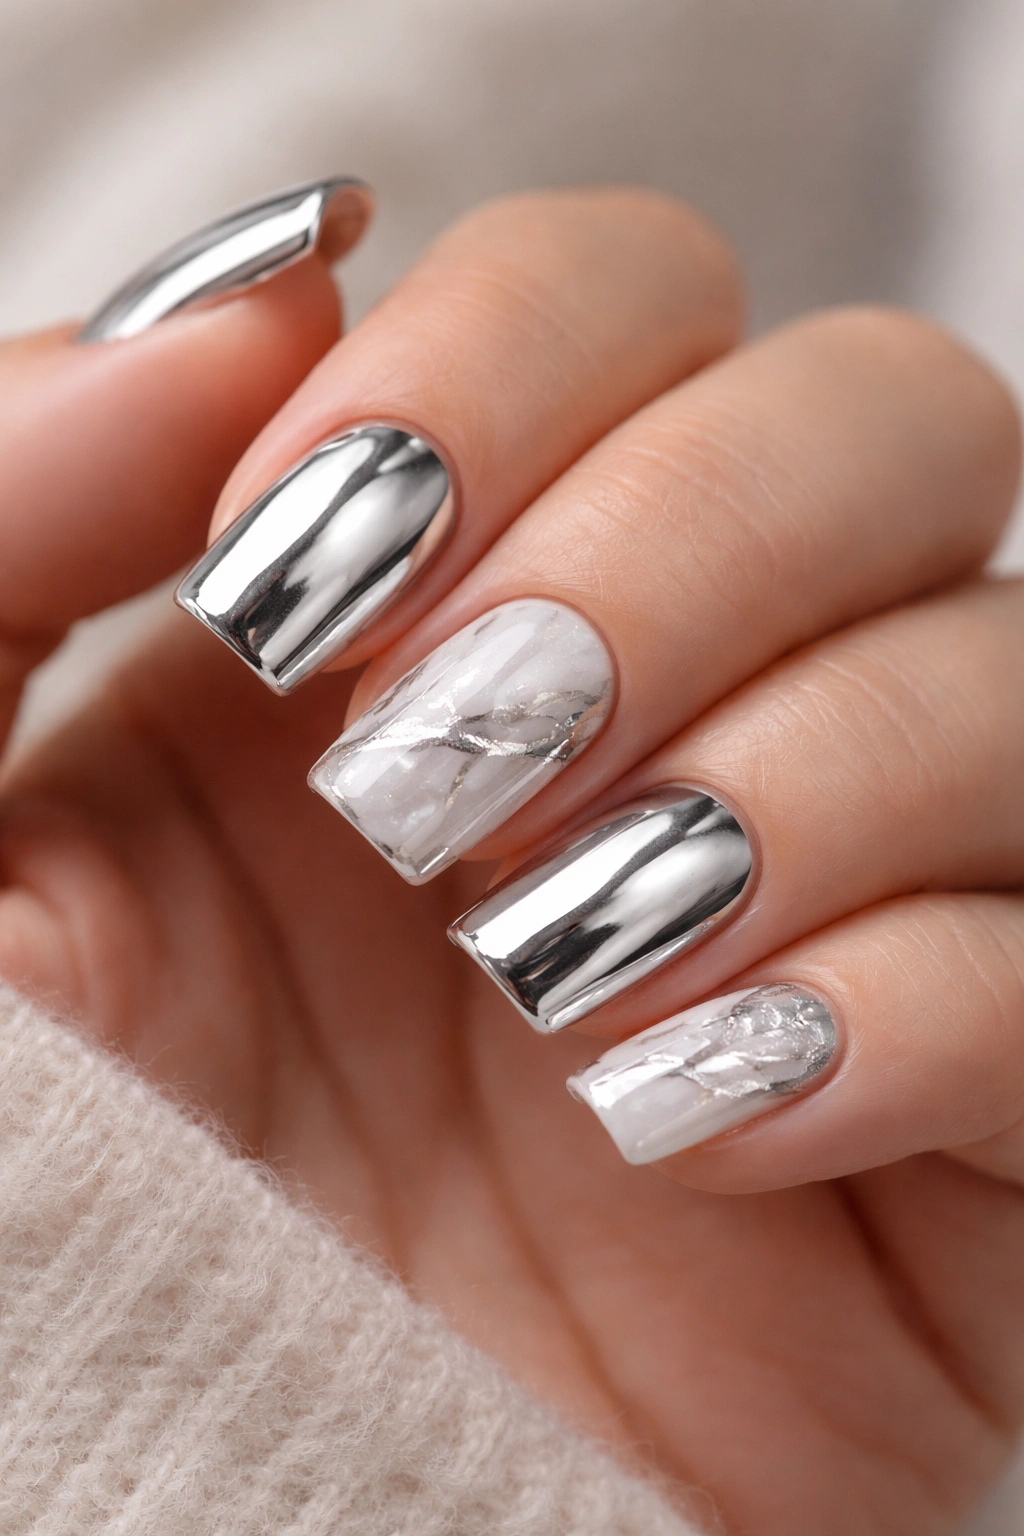
Combining glossy chrome with subtle marble veining marries the futuristic feel of chrome with the organic elegance of natural stone. This hybrid design is sophisticated enough for professional settings while remaining visually exciting.
Why Marble Softens Chrome
Marble accents add a grounding, natural element that prevents all-chrome nails from feeling too icy or cold. On short nails, this balance prevents the design from looking harsh or overly minimal.
Creating the Marble Effect
- Start with a soft gray or white base coat across all nails
- Apply a thin coat of chrome polish over the entire nail
- Using a thin brush or dotting tool, paint fine, irregular black or gray lines that mimic marble veining
- Focus the veining on just a few nails rather than all ten to keep visual balance
- Top with a high-shine sealer to let the chrome catch light while the marble lines remain matte and grounded
What to watch for: If your marble lines are too thick or too geometric, they’ll look like cracks rather than veining. Embrace irregular, organic line work for authenticity.
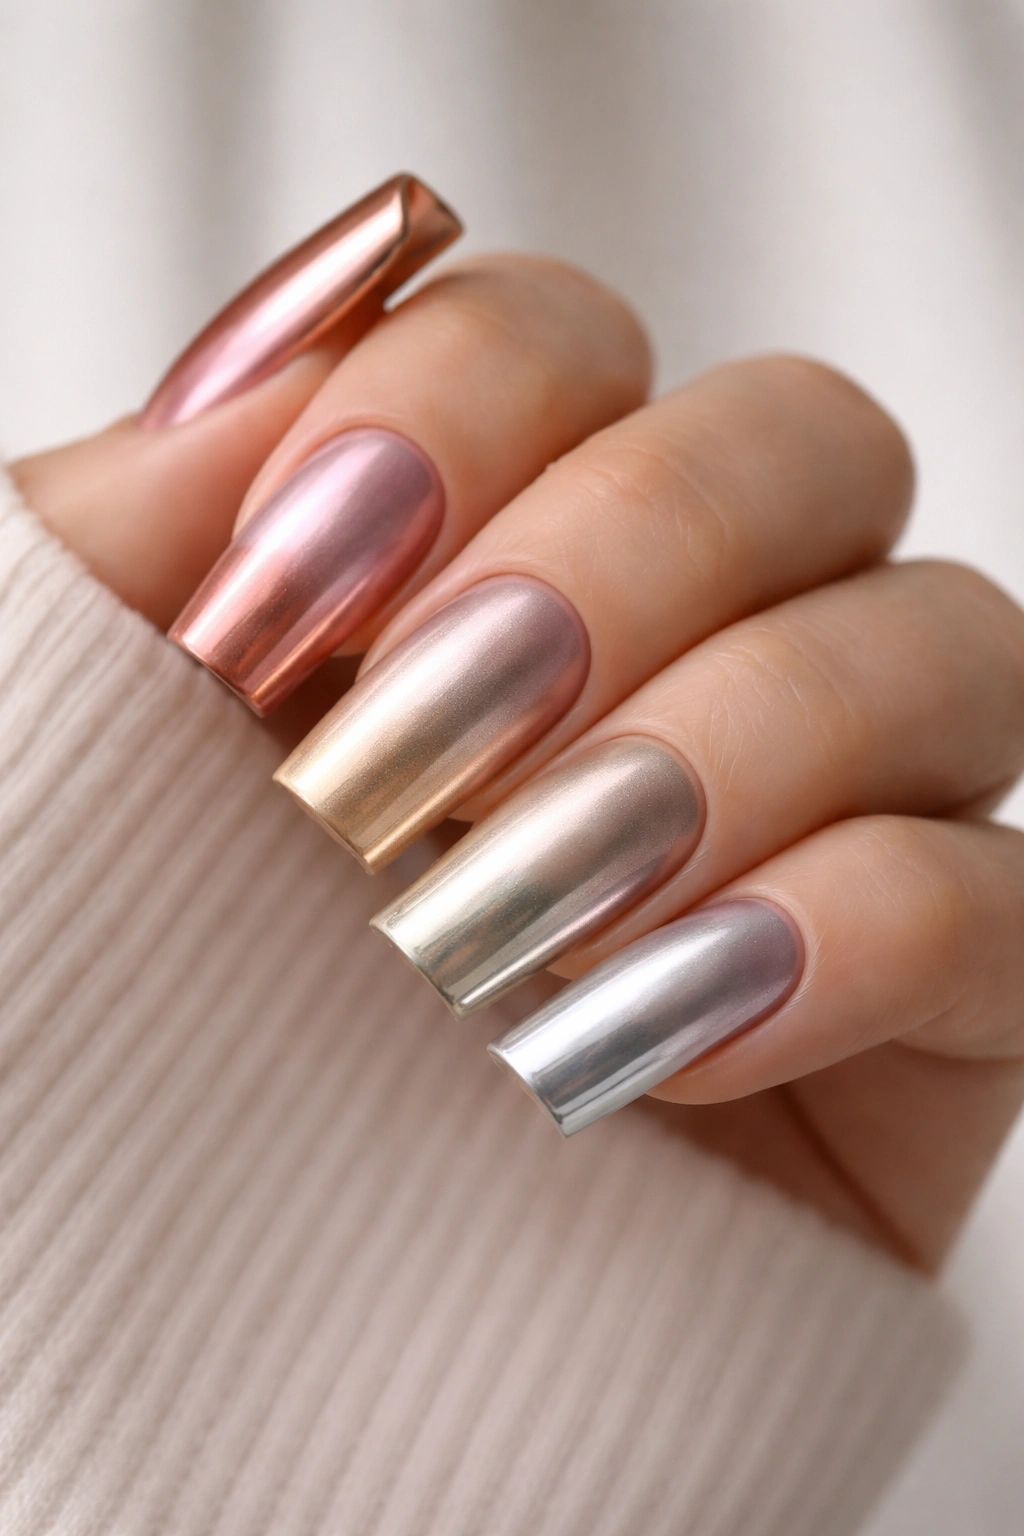
6. Metallic Rainbow Gradient
A gradient that flows through metallic shades — from rose gold to champagne to copper to bronze — creates a multi-dimensional effect that’s more interesting than a flat single-tone chrome.
How Gradient Works on Short Nails
Gradients work beautifully on short nails because the color progression reads clearly in a compact space. Rather than getting lost across a long nail bed, the transition becomes visually concentrated and punchy.
Application Method
- Use a makeup sponge or nail sponge for blending rather than hand-painting (this gives smoother transitions)
- Paint thin horizontal stripes of each metallic shade across the sponge
- Dab the sponge repeatedly onto your nails at different angles to create a blended, non-linear gradient
- Build the effect gradually with 2-3 applications until the color transition looks seamless
- Use a glossy top coat to amplify the reflective quality of all the metallic shades
Pro technique: Holding your hand at different angles while the gradient is drying helps blend the colors more naturally than letting it dry flat.
7. Brushed Chrome Finish
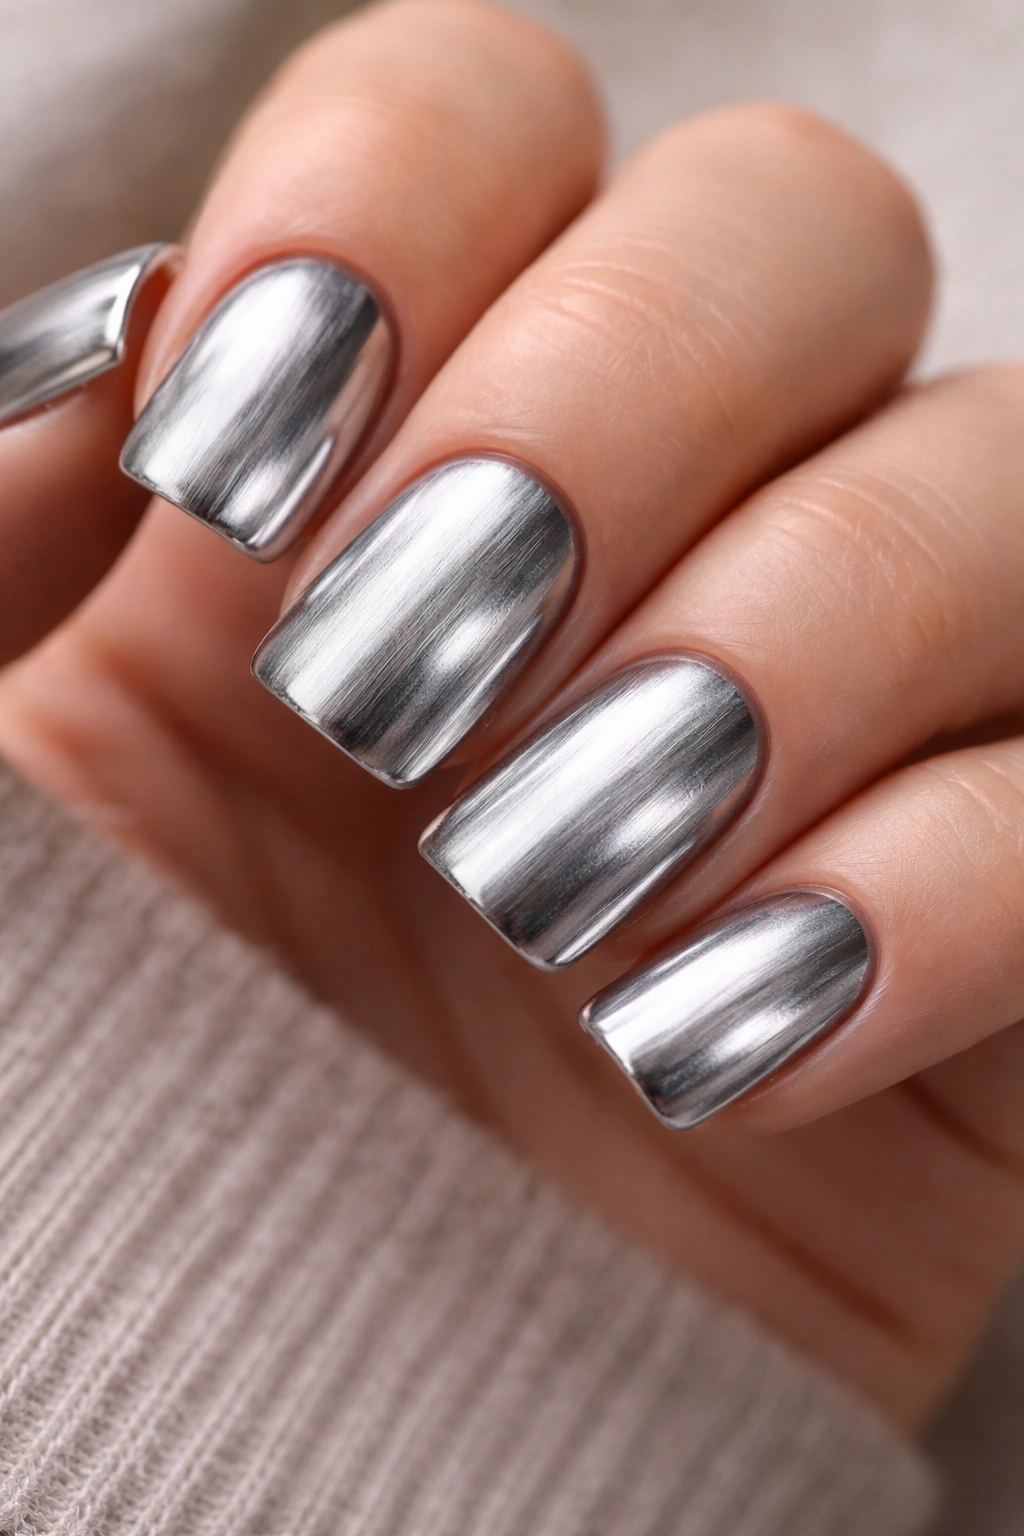
A brushed or matte chrome texture (rather than mirror-high-gloss) reads as modern and intentional. This design category includes directional brush strokes and textured finishes that catch light differently than smooth chrome.
Why Brushed Chrome Suits Short Nails
Brushed chrome is less reflective than mirror chrome, which means it doesn’t create visual clutter on smaller nail surfaces. The texture adds depth and interest that makes short nails read as more substantial.
Creating Brushed Effect
- Apply a chrome base coat and let it dry completely
- Use a fine-bristled matte top coat and apply it in one direction across the entire nail (all horizontal, all vertical, or all diagonal)
- The brush strokes in the matte coat will create fine lines across the chrome beneath
- For more dramatic brushing, use a gel formula that you can work with before curing
- Alternatively, use a specialized brushed chrome polish that has a pre-matte texture built into the formula
Key detail: The brushed effect works best when all nails follow the same brush direction — this creates a cohesive look rather than appearing accidental.
8. Chrome Ombre Transition
An ombre is a gradient that transitions from one color to another, and when applied to chrome finishes, creates sophisticated color progression from one nail to the next across your entire hand.
How to Plan Your Ombre
- Choose a start color (like copper chrome) and an end color (like silver chrome or holographic)
- Assign each nail a position in the gradient progression
- The thumb and pinky finger usually anchor the darkest and lightest ends, with middle fingers being the peak of transition
- Apply progressively adjusted chrome shades to each nail moving across your hand
Application Steps
- Paint the pinky finger with your starting chrome shade
- Paint the next nail with a 50/50 blend of shades one and two
- Continue assigning blended shades to each nail moving inward
- Paint the accent nail (usually middle finger) with your ending chrome shade
- Repeat the reverse progression on the other hand so your two middle fingers mirror each other
Reality check: True chrome ombre is more labor-intensive because it requires mixing custom shade ratios. An easier alternative: use commercially available chrome polishes in related shades and simply apply them progressively across your nails.
9. Negative Space Chrome
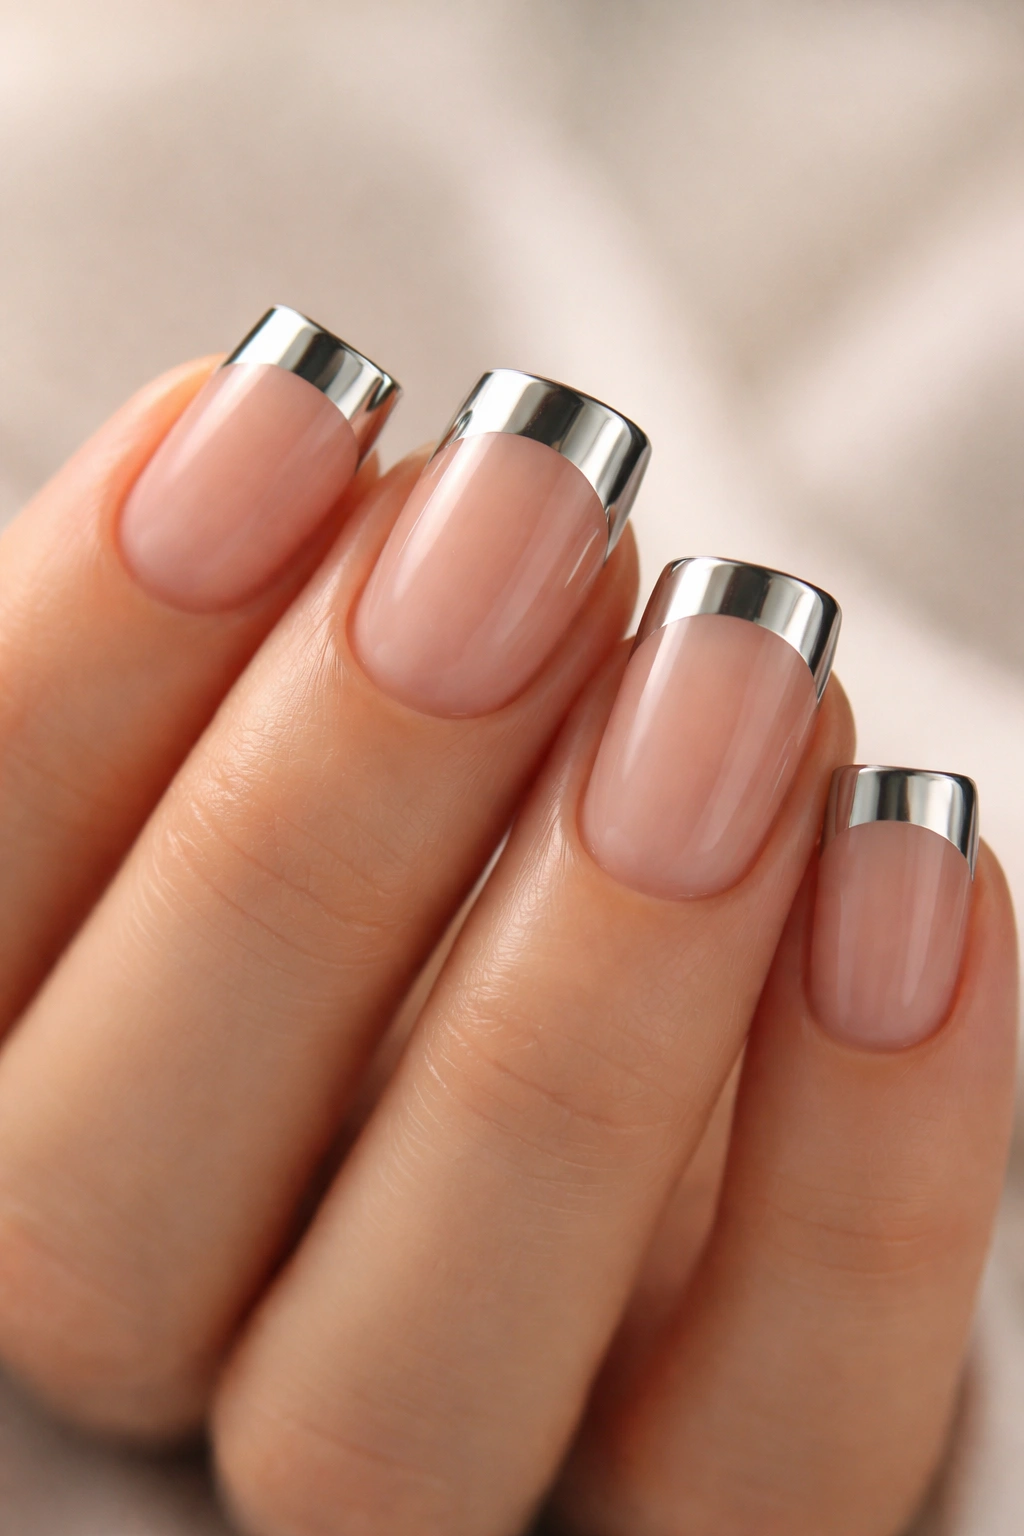
Negative space nails leave areas of your actual nail bed (or a contrasting base color) visible, creating a contemporary design where the chrome becomes an accent rather than the full coverage.
Why Negative Space Works on Short Nails
Negative space prevents short nails from feeling overly decorated. By intentionally leaving blank areas, you create breathing room that makes the design feel sophisticated rather than cramped.
Design Approaches for Negative Space
- Paint chrome only in a thin strip across the tip (leaving a gap between the chrome and your cuticle)
- Create a chrome frame around the edge of the nail, leaving the center bare or filled with a contrasting shade
- Paint chrome in a diagonal slice across one corner, leaving the rest of your natural nail or base color visible
- Use chrome to create geometric shapes (stripes, triangles, or half-moons) with intentional gaps
Design tip: The most striking negative space designs use chrome only on roughly 40-60% of the nail — enough to read as intentional rather than accidental.
10. Chrome With Rhinestone Details
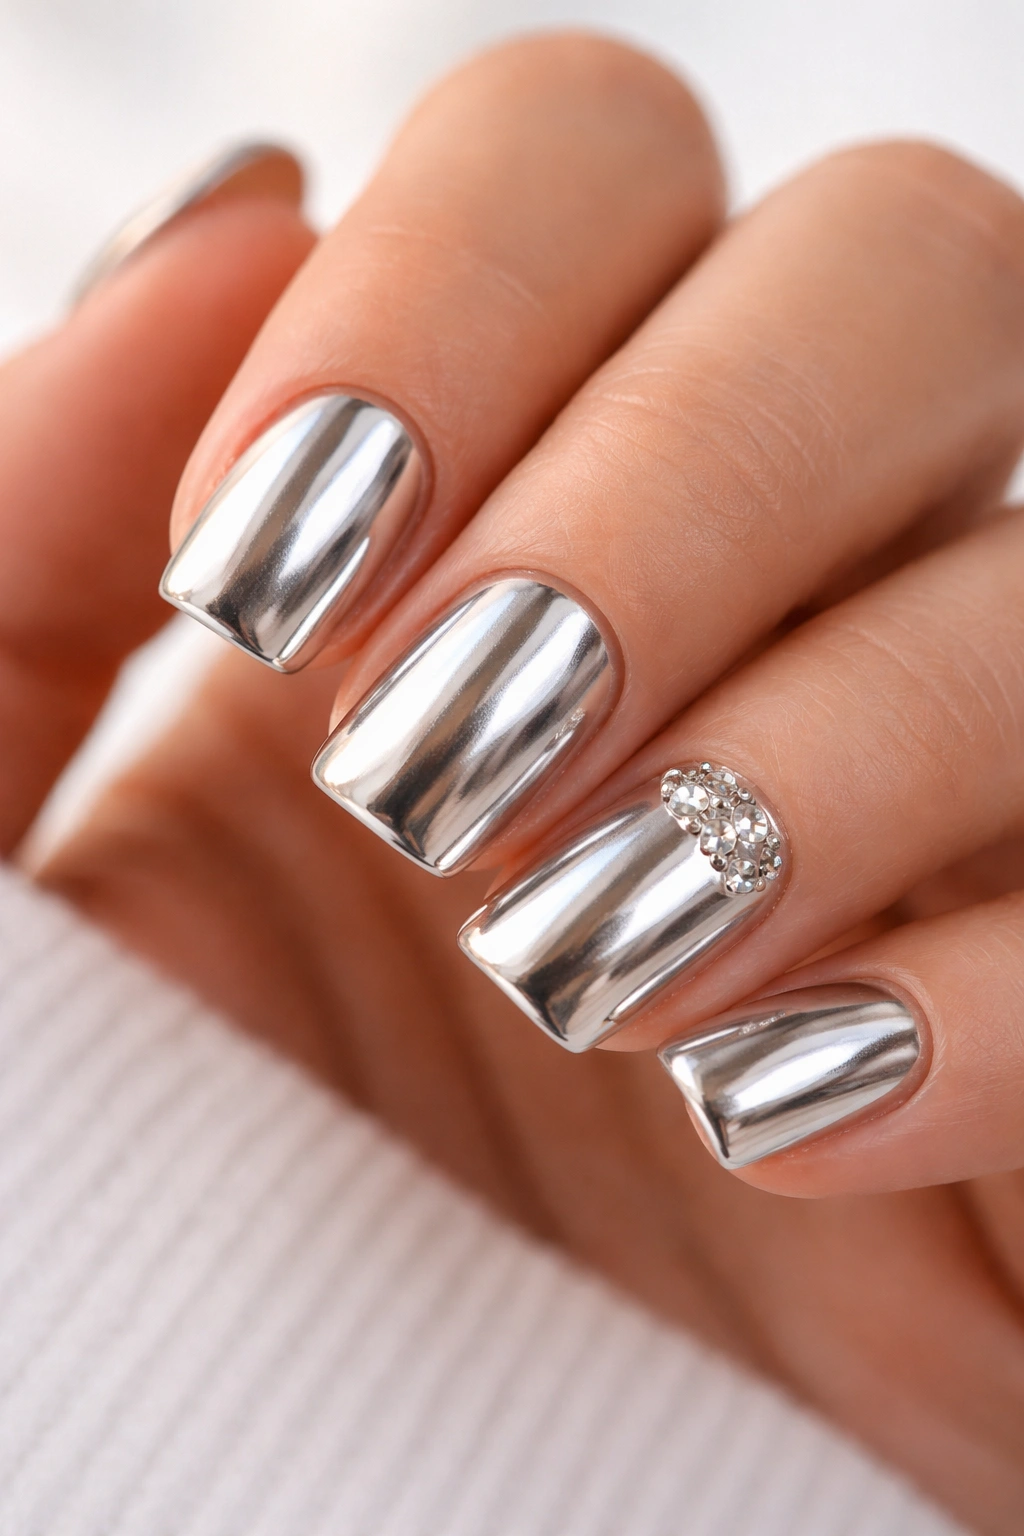
Adding a few carefully placed rhinestones to chrome nails elevates the design into evening-wear territory. The contrast between reflective chrome and the sparkle of stones creates layered glamour.
How to Add Stones Without Overdoing It
On short nails, less is more with embellishment. A general rule: place stones on 3-4 nails max, and use 1-3 stones per nail rather than clustering them.
Rhinestone Placement Ideas
- Place one larger stone at the center of each accent nail
- Create a tiny cluster of 2-3 small stones in the corner of the nail
- Line the cuticle area of one or two nails with a delicate row of micro-stones
- Place a stone at the 12 o’clock position of the chrome to echo the duck nail’s upward curve
Application technique: Apply rhinestones while your top coat is still slightly tacky (about 60 seconds after application). Press firmly but gently, making sure each stone sits flush with the nail surface. Seal with another thin layer of clear top coat to secure everything.
11. Matte Chrome Effect
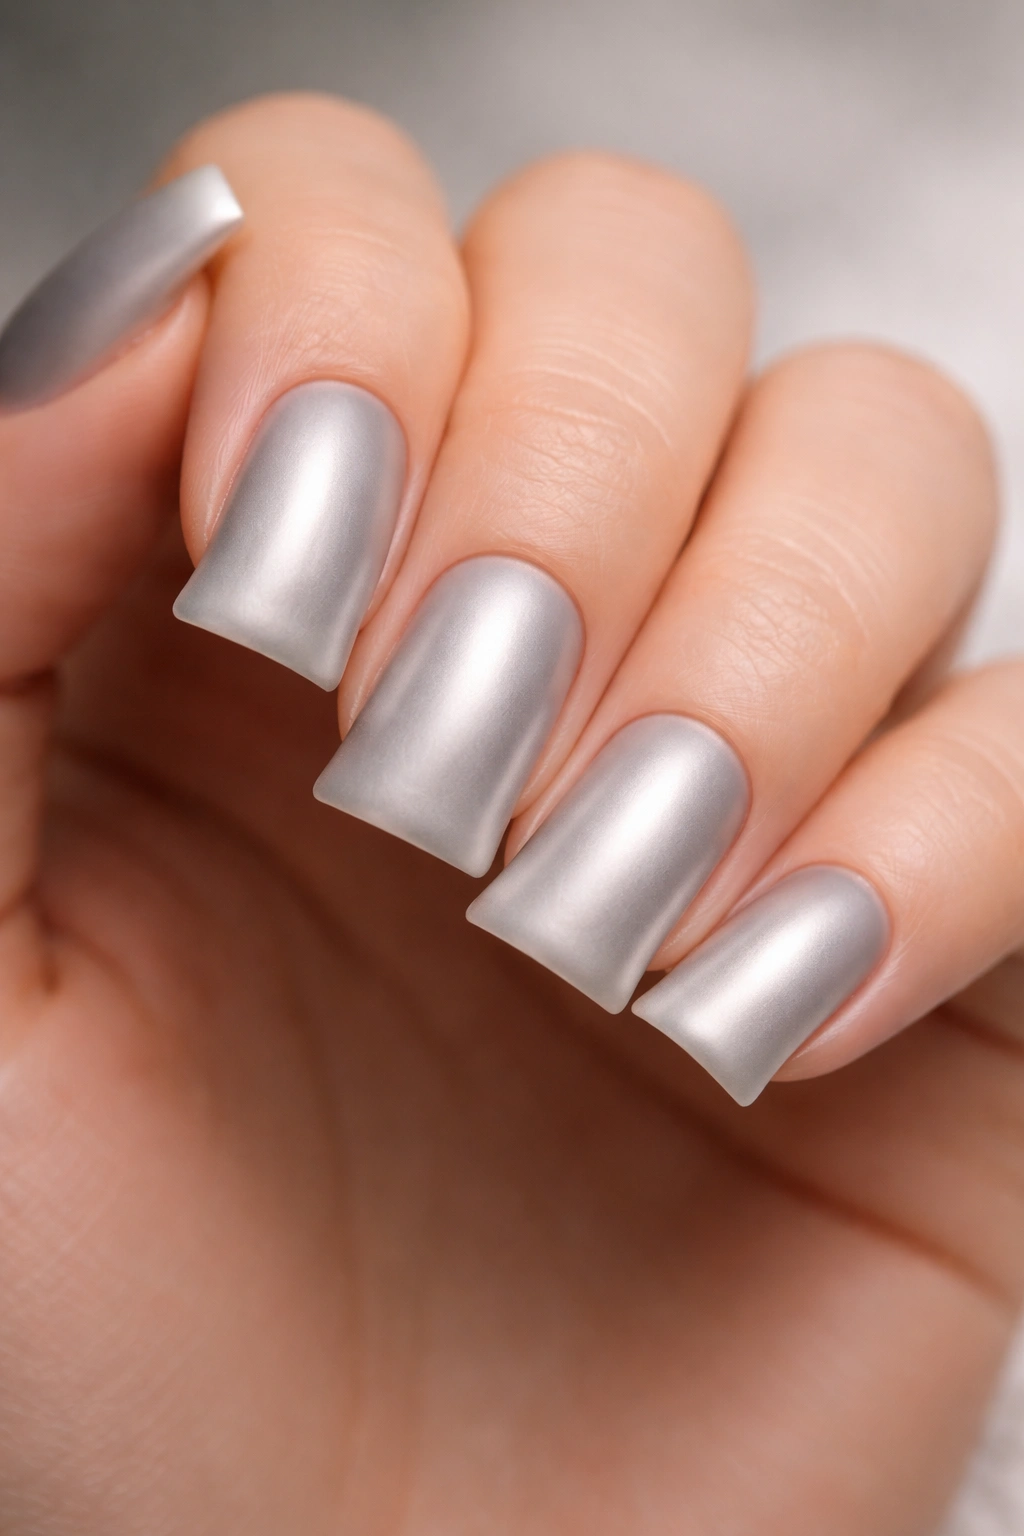
A matte chrome finish swaps the traditional glossy reflectivity for a softer, powdery sheen that reads as more understated and modern than mirror chrome.
The Appeal of Matte Chrome
Matte chrome looks less high-gloss and doesn’t reflect light as dramatically, making it feel more contemporary than traditional chrome. On short nails, this subtlety prevents the design from feeling overly statement-making.
Creating Matte Chrome
- Apply your chrome polish as normal in 2-3 thin coats
- Once fully dry, apply a matte top coat instead of a glossy sealer
- Make sure the matte coat is thick enough to fully dull the reflectivity
- Test on one nail first — some chrome polishes are formulated with top coats already built in
What to expect: Matte chrome has a velvety, sophisticated quality that photographs differently than glossy chrome. It can look less sparkly in person but more refined and intentional.
12. Chrome Tortoiseshell Pattern
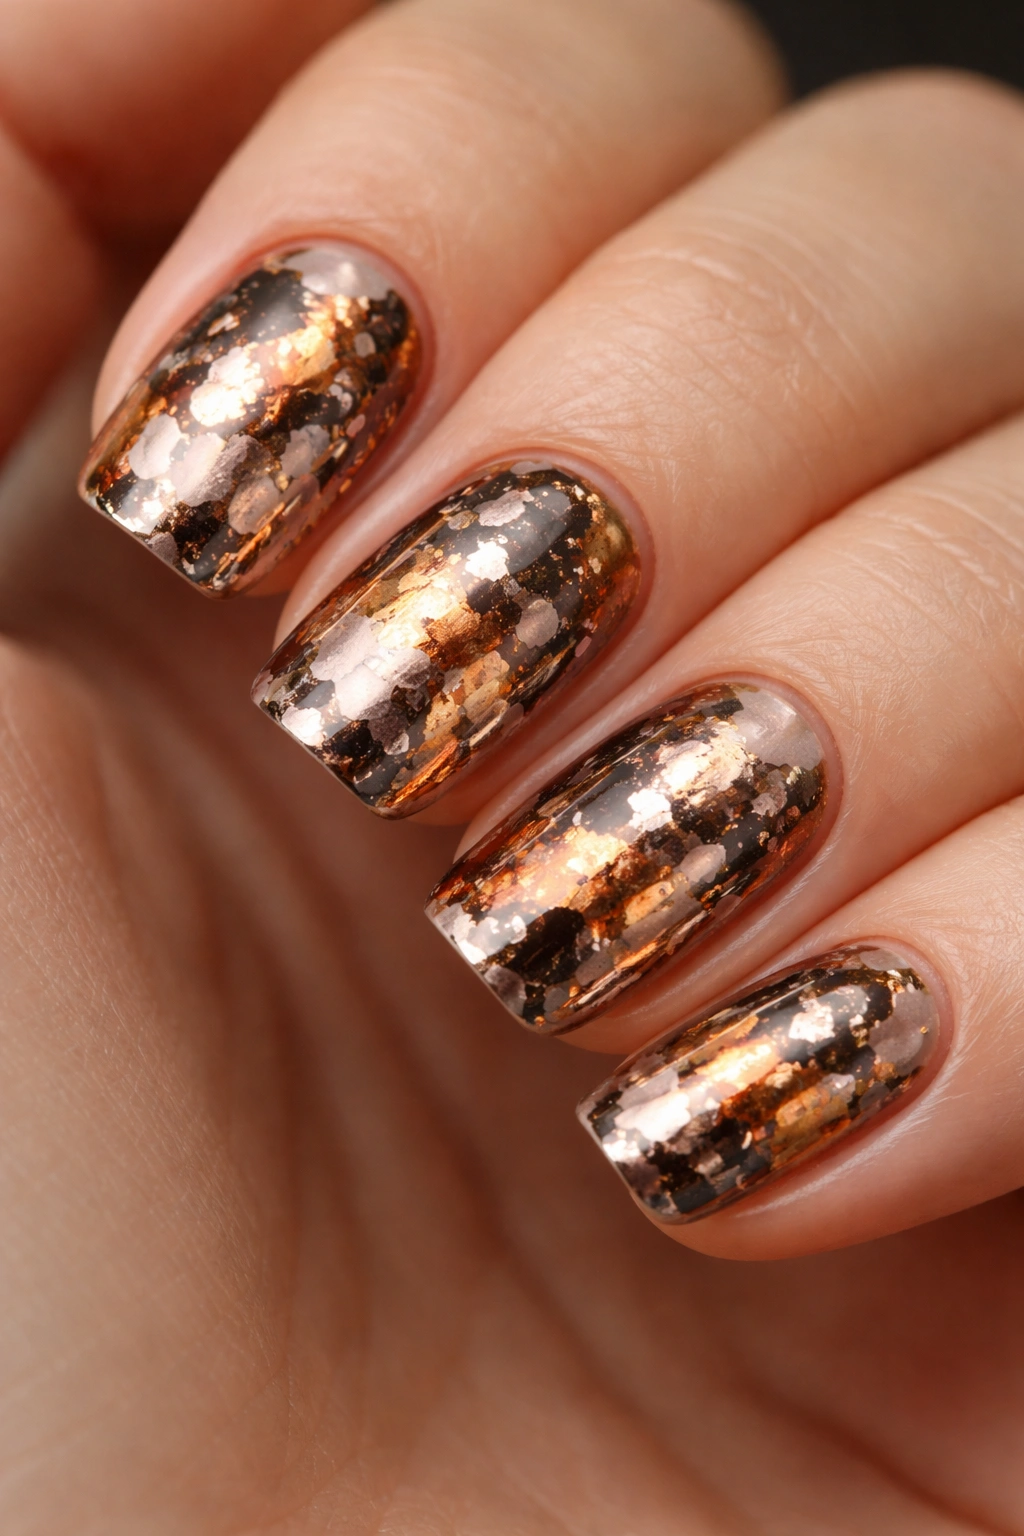
Tortoiseshell combines brown, gold, and black tones in an organic, mottled pattern. When executed with chrome metallics, it becomes a rich, textured design that feels luxe and artistic.
How Chrome Upgrades Traditional Tortoiseshell
Standard tortoiseshell relies on opaque colors. Swap those for chrome metallics — bronze chrome, rose gold chrome, and gunmetal chrome — and suddenly the organic pattern has reflective depth and dimension.
Creating the Pattern
- Start with a nude or cream base coat
- Using a makeup sponge, apply bronze chrome in irregular patches across the nail
- Layer rose gold chrome over some sections and edges
- Add gunmetal or dark chrome in the remaining areas, creating organic boundaries between shades
- Dab and blend with a sponge rather than painting distinct lines
- Seal with glossy top coat to unify the multi-colored, multi-textured look
Technique note: This design benefits from gentle layering — apply chrome shades in thin layers and build gradually rather than trying to get perfect coverage in one pass.
13. Oil Slick Chrome Look
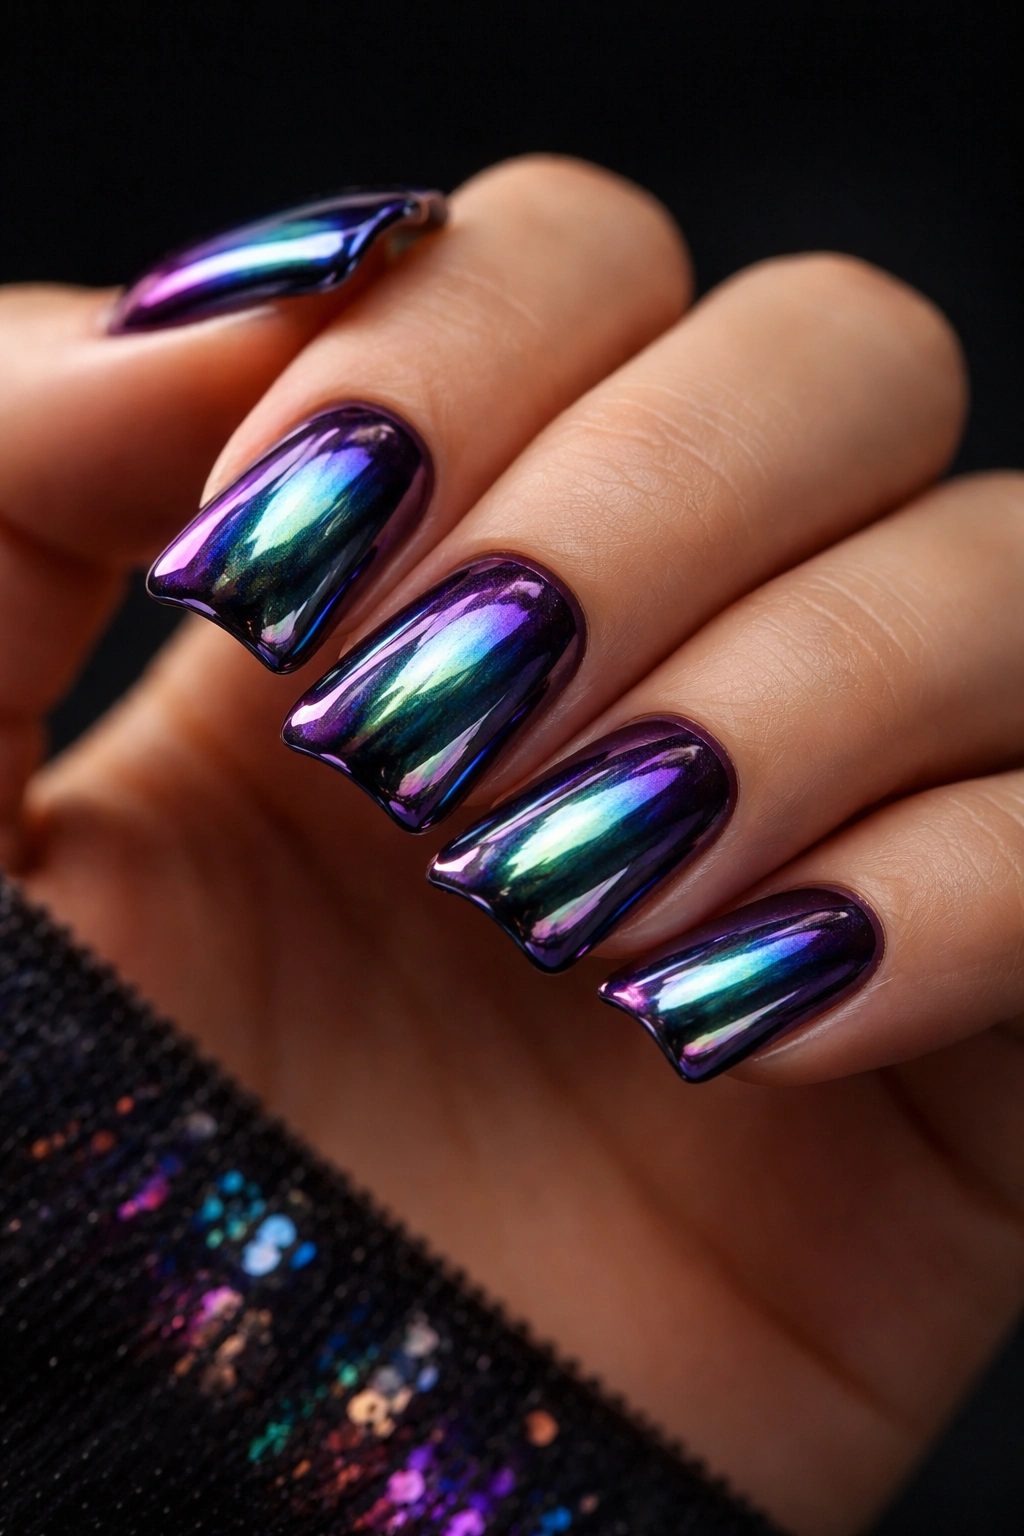
An oil slick effect mimics the iridescent colors that appear in oil on water — shifting purples, teals, greens, and magentas. Combined with chrome’s reflectivity, this creates a mesmerizing, almost alien aesthetic.
What Makes Oil Slick Chrome Special
Oil slick uses the chrome’s natural reflectivity but focuses on that shifting color quality rather than a single metallic tone. The effect feels futuristic and unexpected.
Creating the Oil Slick Effect
- Start with a dark base (black, deep purple, or gunmetal)
- Layer a specialized oil slick polish formulated to show multiple color shifts
- Alternatively, use holographic or chameleon polishes that naturally create rainbow reflection effects
- Apply in thin coats and cure under UV light if using gel polish
- The effect depends on light and viewing angle — rotate your hand to see the full color range
Reality check: True oil slick effect requires specialized polishes formulated with those specific micro-particles. Regular chrome polish won’t create the same shifting color effect.
14. Chrome With Geometric Lines
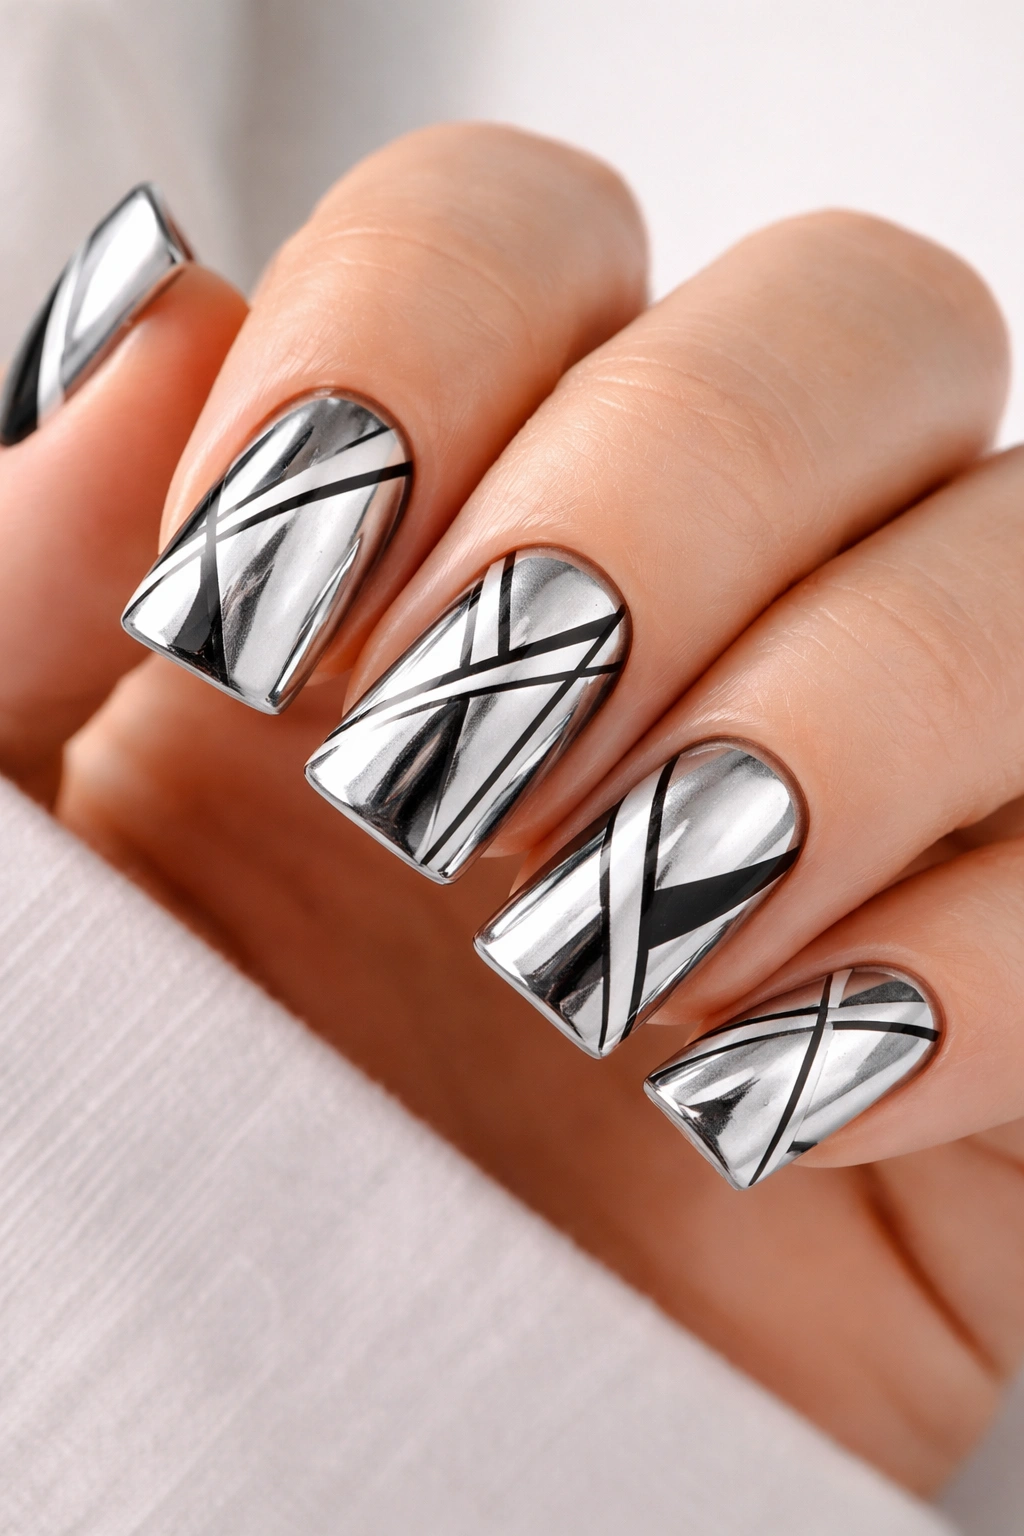
Crisp geometric line work — stripes, triangles, or angular designs — paired with chrome creates an architectural, almost futuristic aesthetic that feels graphic and intentional.
Why Geometry Complements Chrome
Chrome is inherently reflective and metallic, making it feel tech-forward. Geometric designs reinforce that modern aesthetic while providing visual structure.
Geometric Design Options
- Thin white or black stripes across a chrome base
- Triangular negative space sections with chrome filling the gaps
- Asymmetrical angular lines cutting diagonally across nails
- Concentric geometric shapes (squares within squares) in varying chrome shades
- Half-and-half designs where chrome covers exactly 50% and contrasting color fills the other half
Drawing tip: Use a thin brush or striping tool for precise lines. For perfectly straight stripes, apply painter’s tape along the line you want and remove it immediately after the chrome coat dries.
15. Duochrome Duck Nails
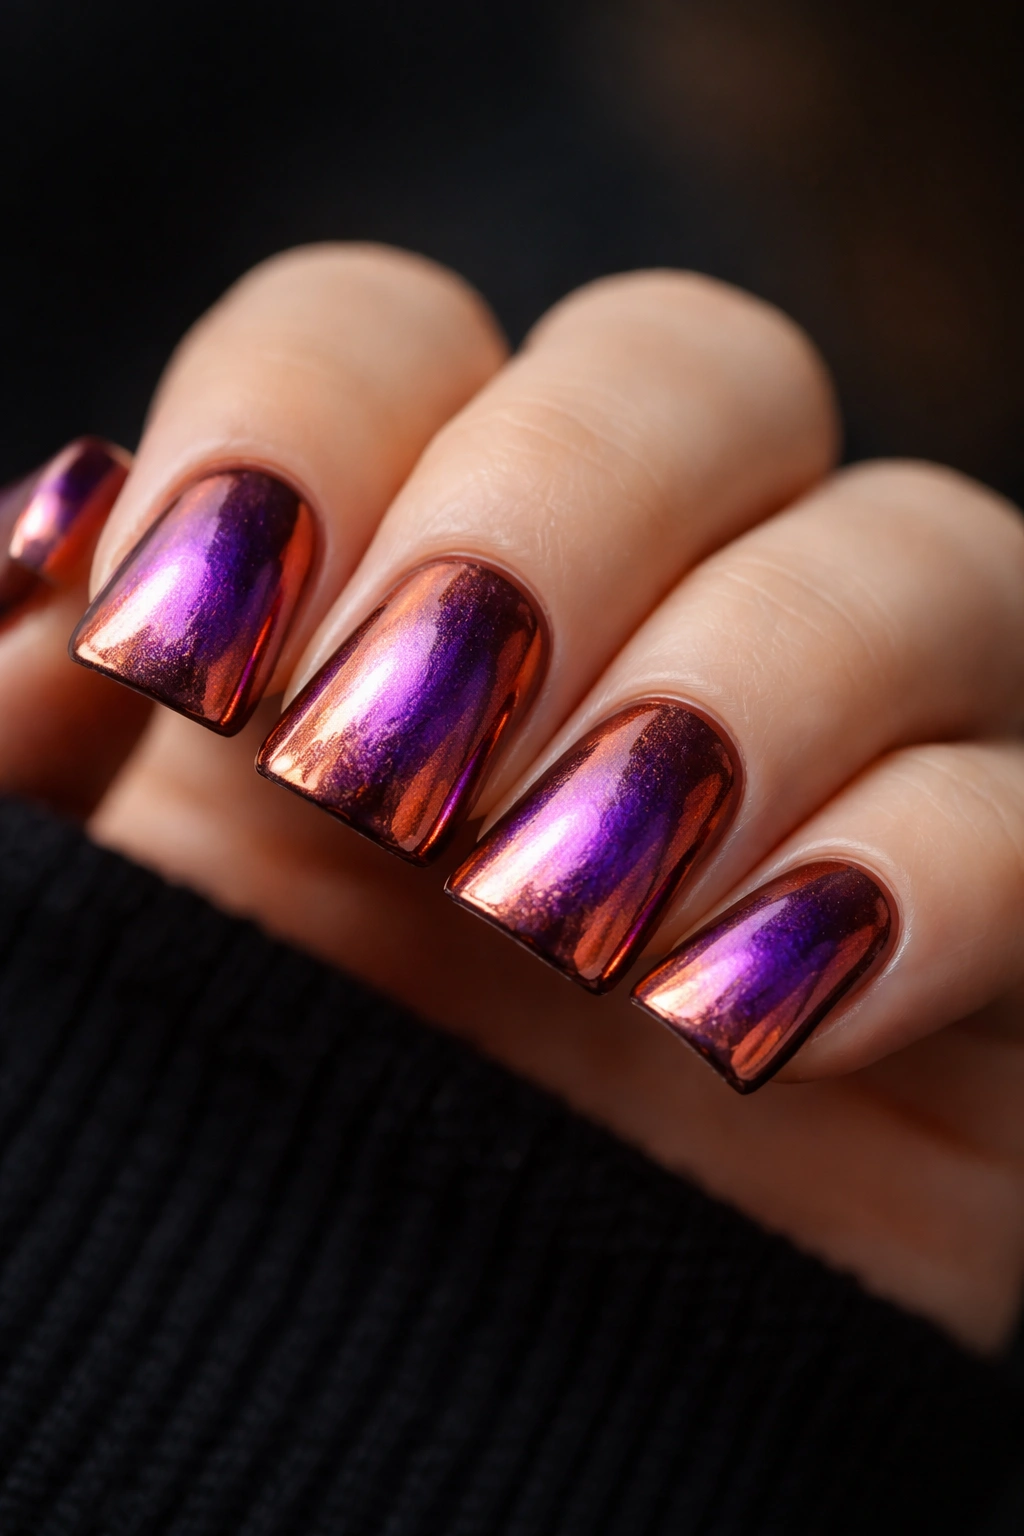
Duochrome polishes shift between two distinct colors depending on the angle and light — different from holographic, which shows a full spectrum. A duochrome might shift from deep purple to copper, or teal to gold.
The Visual Magic of Duochrome
Duochrome creates movement and interest as your hand moves and light hits the polish at different angles. This constant-shifting quality keeps the design feeling fresh and prevents it from looking flat or static.
Using Duochrome on Short Nails
- Apply duochrome as a full coverage on all nails for maximum impact
- Or use duochrome on 2-3 accent nails paired with solid chrome on others for a more subtle approach
- Duochrome typically requires 2-3 coats for the full color-shift effect to show
- Apply a glossy top coat to keep the effect looking bright and reflective
Shopping note: Duochrome polishes are sometimes labeled as “shifter” or “chameleon” polishes. Check swatches carefully to make sure the color shift you’re seeing matches what you want.
16. Metallic Pink Chrome
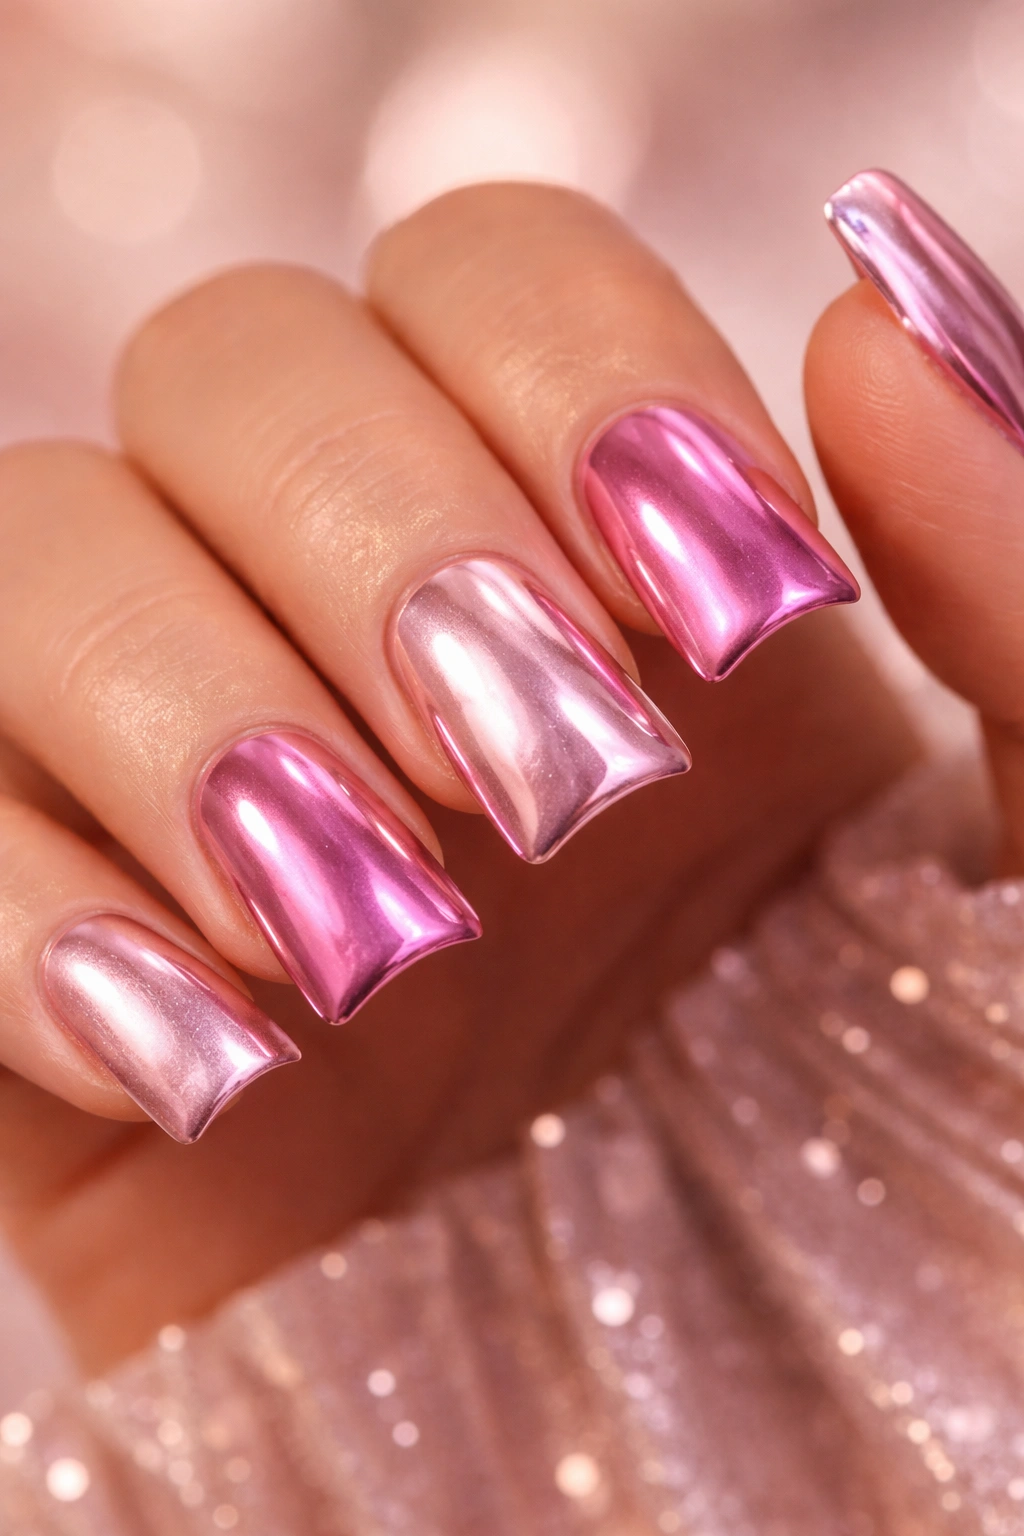
A pink-toned chrome — whether it’s rose gold, pink champagne, or fuchsia chrome — brings a feminine, warm energy while maintaining that sophisticated metallic shine.
Why Pink Chrome Works on Short Nails
Pink metallics feel less harsh than cool silvers and less trendy than trendy nail colors. It’s a flattering, universally wearable shade that elevates short nails into elegant territory.
Shade Variations
- Rose gold chrome: warm, versatile, flattering on most skin tones
- Pink champagne chrome: lighter, more delicate, gives an ethereal quality
- Hot pink chrome: bold and unapologetic, makes a statement
- Dusty rose chrome: muted and sophisticated, pairs well with cool-toned outfits
Application Tips
- Pink chrome shows dust and smudges more readily than darker shades — apply a good top coat and avoid touching your nails until it’s fully set
- Pink chrome pairs beautifully with soft, warm makeup tones
- Keep the rest of your styling simple so your nails remain the focal point
Styling note: Pink chrome works year-round but feels especially fresh and warm during warmer months when you’re wearing lighter clothing.
17. Chrome With Glitter Accent
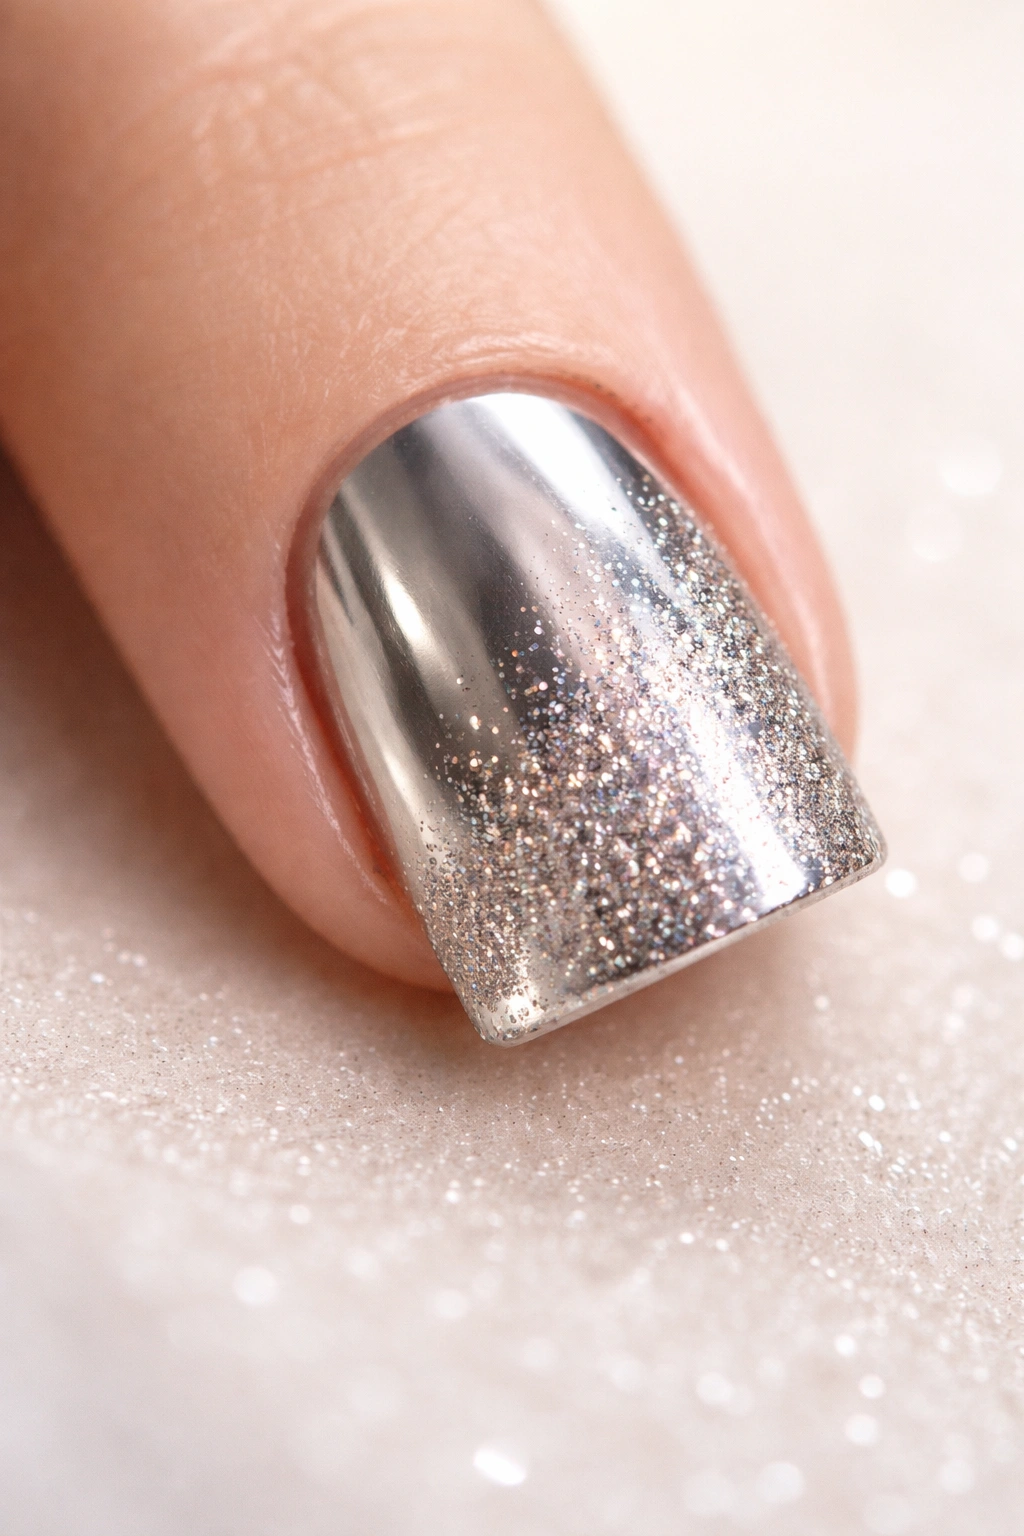
A single accent nail featuring chrome paired with fine glitter creates a layered, festive design that feels special without being overly complicated.
Why One Glitter Nail Works Best on Short Nails
On short nails, a full set of glittery nails can feel overwhelming. Limiting glitter to one or two accent nails keeps the design feeling balanced and intentional.
Glitter-Chrome Combinations
- Holographic chrome base with ultra-fine iridescent glitter scattered across the top
- Rose gold chrome with rose-gold-toned glitter concentrated at the tips
- Mirror chrome with confetti glitter in mixed metallics for a celebratory look
- Matte chrome with sparkly glitter as the contrasting shine element
Application Method
- Apply your chrome base and seal with a glossy top coat
- While the top coat is still slightly tacky, sprinkle glitter across your accent nail (or nails)
- You can either scatter glitter randomly or concentrate it in a specific area
- Seal with another layer of glossy top coat to lock the glitter in place and smooth any rough edges
Pro tip: Using a glitter-specific adhesive rather than relying on regular top coat helps ensure the glitter doesn’t gradually shed throughout the day.
18. Solid Chrome Redirect
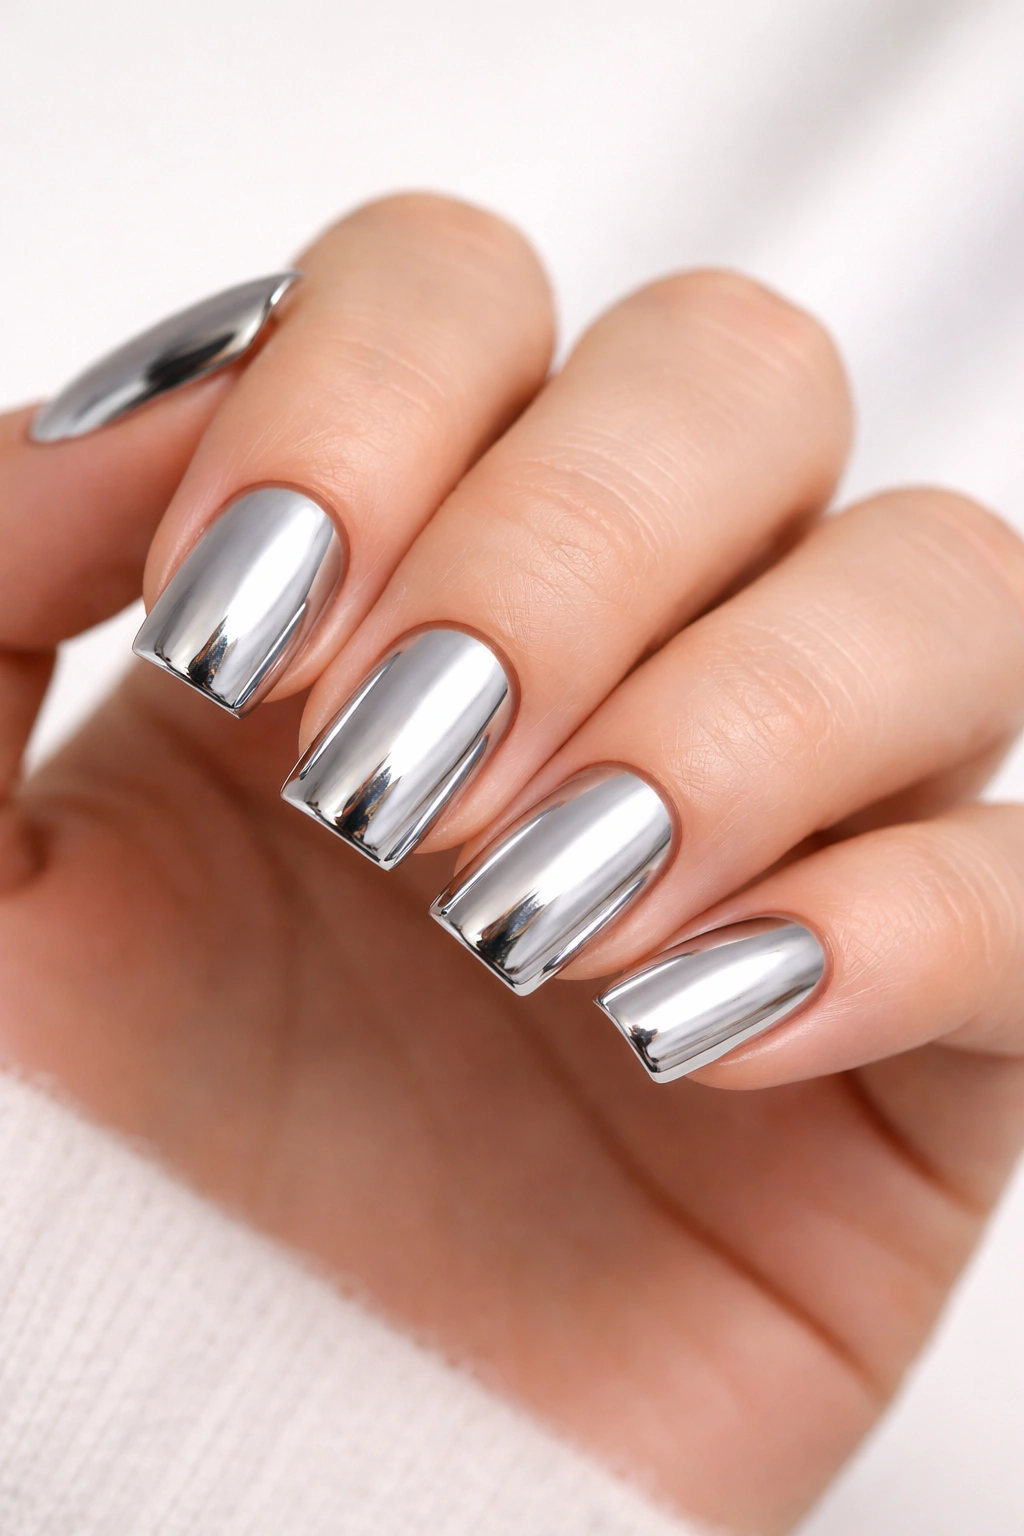
Sometimes the most striking design is the simplest: a perfectly executed solid chrome finish with flawless application and a high-shine seal. This is the “less is more” approach that lets the chrome itself do all the talking.
Why Solid Chrome Is Underrated
In a world of increasingly complex nail art, a clean, perfect solid chrome can actually feel more elevated than complicated designs. It reads as intentional, sophisticated, and effortlessly chic.
Perfecting the Solid Chrome Application
- Start with a smooth base coat to provide an even surface
- Apply thin, even coats of chrome (usually 2-3 thin coats rather than one thick coat)
- Each coat should cover completely without leaving streaks or thin patches
- Cure properly if using gel, or let regular polish dry completely between coats
- Seal with a high-quality glossy top coat for maximum reflectivity
Why Application Matters
On short nails, every flaw is visible. Uneven chrome coverage, streaks, or a dull top coat become immediately apparent. Taking time to apply thin, even coats makes the difference between “okay” and “salon-quality.”
Quality detail: Invest in a good quality chrome polish — cheaper formulas tend to have larger pigment particles that create a less reflective finish. Premium chrome polishes have finer particles that create a true mirror effect.
19. Chrome Mixed Metals

Combining multiple metallic tones across different nails creates a cohesive yet dynamic design. Think rose gold on some nails, copper on others, and champagne on your accent nails.
Creating Cohesion With Multiple Metallics
When using multiple metallic shades, choose ones that share a color family. Cool-toned silvers and golds clash, but rose gold, champagne, and copper feel intentional and coordinated.
Design Layout Options
- Alternate chrome shades across your nails in a repeating pattern (rose gold, copper, rose gold, copper, etc.)
- Assign your dominant shade to most nails and use accent shades on just two or three nails
- Create a gradient progression moving from the darkest metallic (bronze) to the lightest (champagne)
- Paint opposite hands with reversed shade orders for visual balance
Color Pairing That Works
- Rose gold + champagne + nude = warm, wearable, universally flattering
- Silver + gunmetal + chrome = cool, sophisticated, tech-forward
- Gold + bronze + copper = warm, luxe, earthy
- Holographic + rose gold + matte chrome = trendy, artistic, eye-catching
Composition tip: If you’re using three or more different chrome shades, balance them visually — don’t put all three accent shades on just one hand, distribute them across both hands for symmetry.
20. Chrome With Nude Overlay
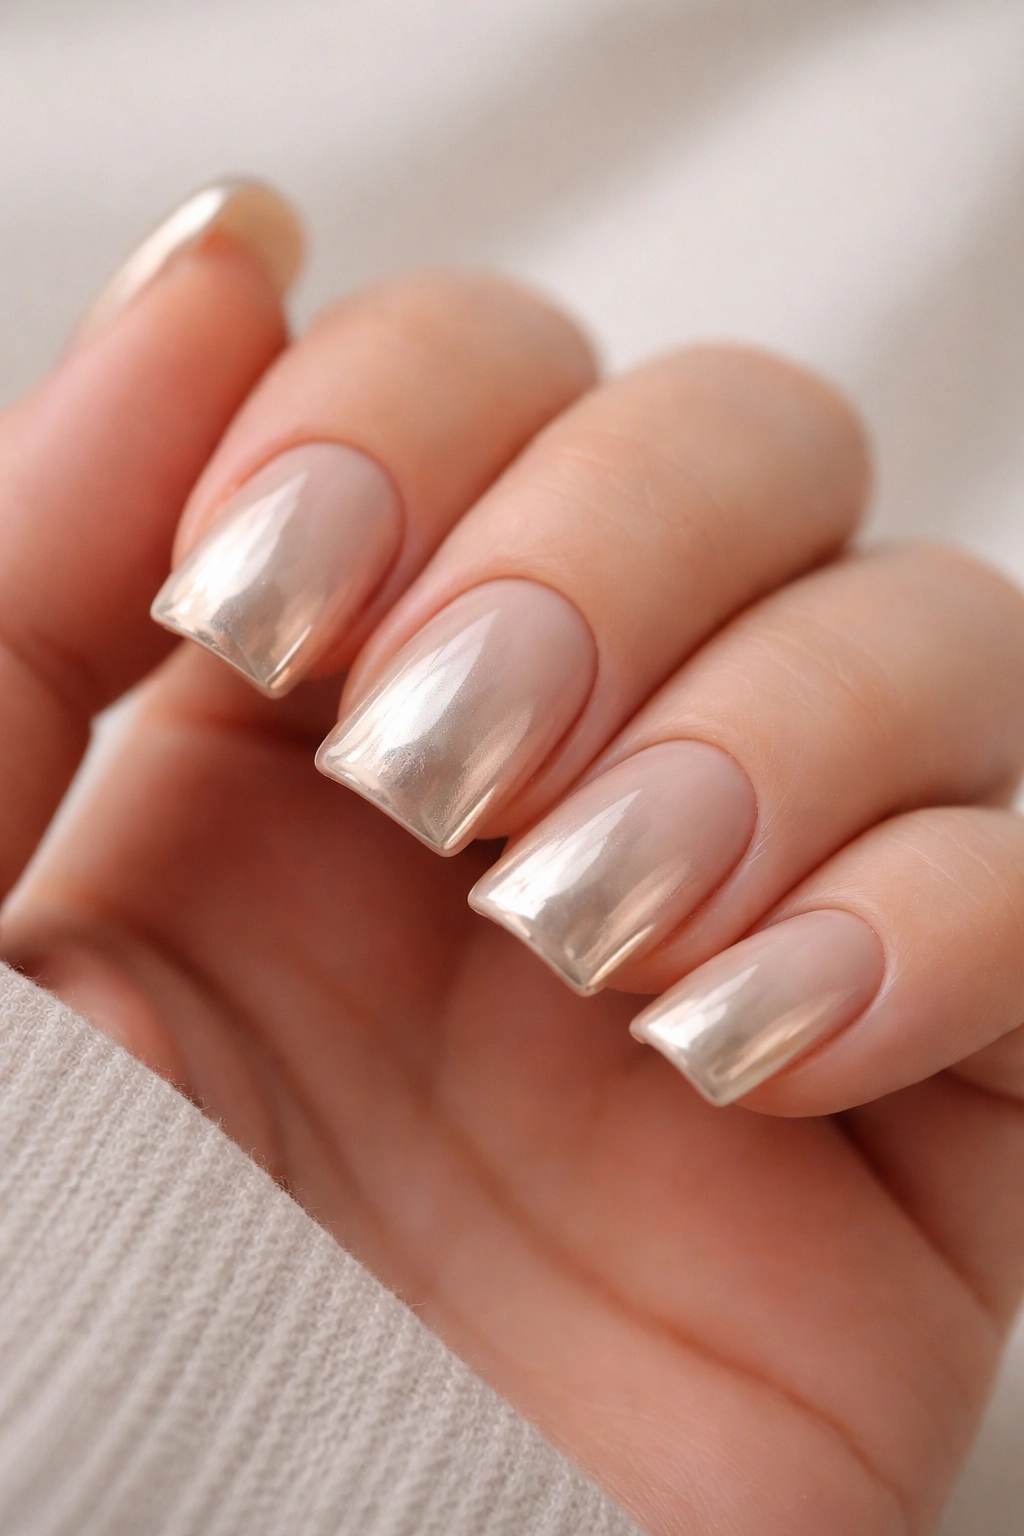
Painting a thin layer of semi-transparent nude polish over chrome creates a softened, less intense chrome effect while maintaining that metallic shine underneath.
Why Overlay Changes the Game
A nude overlay mutes chrome’s intensity, making it more wearable for professional settings or anyone who finds pure chrome too bold. The effect becomes understated-luxury rather than statement-making.
Executing the Overlay
- Apply 2-3 coats of chrome as your base and seal with a top coat
- Once completely dry, paint a very thin layer of semi-transparent nude or beige polish over the chrome
- The nude should be sheer enough that you can still see the chrome shine underneath
- Seal with a top coat — this should be thin so it doesn’t muddy the finish
Adjusting the Effect
- Use a lighter nude for more chrome visibility, a darker nude for more muting
- A pinkish nude overlay on rose gold chrome creates an almost “champagne” effect
- A gray nude overlay on silver chrome creates a subtle, sophisticated tone
- Beige overlay on any chrome creates a warm, skin-tone-friendly effect
Application caution: The key to this design is using a truly sheer nude rather than an opaque one. Opaque shades will completely cover the chrome and defeat the purpose. Look for nude polishes labeled as “sheer” or “translucent.”
Final Thoughts

Chrome duck nails on short nails prove that you don’t need length to make a major statement. Whether you’re drawn to the mirror-bright intensity of solid chrome, the artistic complexity of multi-toned designs, or the understated elegance of matte finishes, there’s a chrome aesthetic that matches your vibe and lifestyle.
The real beauty of these designs is that they work specifically because they’re scaled to short nails. The concentrated reflectivity, the visual impact of geometric precision, and the sophisticated simplicity of solid chrome all read differently (and often more favorably) on a shorter canvas. A design that might feel overwhelming on long nails becomes refined and intentional on short ones.
The key to nailing any of these designs: invest in quality chrome polish and take your time with application. Chrome demands smooth, even coverage and a good top coat to truly shine. Start with what appeals to you most, but don’t be afraid to experiment — your short nails are the perfect laboratory for testing bold new looks without the commitment of growing them out first.
