

Duck nails have transformed modern nail art with their distinctive wide, squared silhouette that mimics the shape of a duck’s bill. The bold, architectural shape gives you an enormous canvas for creative designs, and when you combine that expansive surface with the sophisticated contrast of black and silver, you unlock some genuinely striking nail art possibilities. Black and silver is a classically elegant pairing that works for everything from understated professional settings to bold evening looks — the key is choosing the right design approach.
The beauty of duck nails with black and silver is that these colors work together in endless ways. You can go for stark geometric contrast, soft gradient blends, intricate metallic detailing, or moody chrome finishes. Some of the most successful designs leverage the sheer surface area of duck nails to showcase complex nail art that would look cramped on shorter, rounder nails. Whether you’re drawing inspiration from minimalist aesthetics or maximalist glam, there’s a black and silver duck nail design that matches your style and skill level.
What makes this particular color combination special is how versatile it actually is. Unlike trendy color combos that feel dated after a season, black and silver reads as timeless. It’s refined enough for a luxury aesthetic, edgy enough for a rockstar vibe, and sophisticated enough for a boardroom. The trick is finding the specific design that speaks to you and your lifestyle.
1. Metallic Ombre Fade From Black to Silver
This design creates a smooth gradient transition from deep black at the cuticle to shimmering silver at the tip, giving your duck nails a dimensional, multidimensional depth that catches light beautifully. The ombre effect leverages the extra length and width of duck nails to showcase the full spectrum of the transition, making the gradient feel more dramatic and professional than it would on shorter nails.
How to Achieve This Look
Start with a clean base coat and apply your black polish to the entire nail. While the black is still slightly tacky (after about 30 seconds), use a makeup sponge to dab on silver metallic polish, overlapping onto the black and blending the two colors together. The sponge stippling technique creates a natural, feathered transition rather than a harsh line. Seal everything with a gel topcoat if you’re using gel polish, or a regular glossy topcoat for longevity. The key to a successful ombre is patience — don’t rush the blending step.
What Makes This Design Stand Out
- Requires minimal tools (just a makeup sponge and two polishes) but creates a high-impact result
- Works beautifully with both matte and glossy finishes — try a glossy black fading to matte silver for even more visual contrast
- The metallic silver catches light constantly, creating movement and dimension even when your hands are still
- Ombre designs are universally flattering regardless of skin tone or personal style
- Takes about 10-15 minutes to create once you get the technique down
Pro tip: If your first ombre attempt looks patchy, don’t start over. Wait for it to dry completely, then use a thin brush dipped in a light gray to manually blend any harsh lines and create the appearance of a smoother transition.
2. Black Base With Geometric Silver Stripes
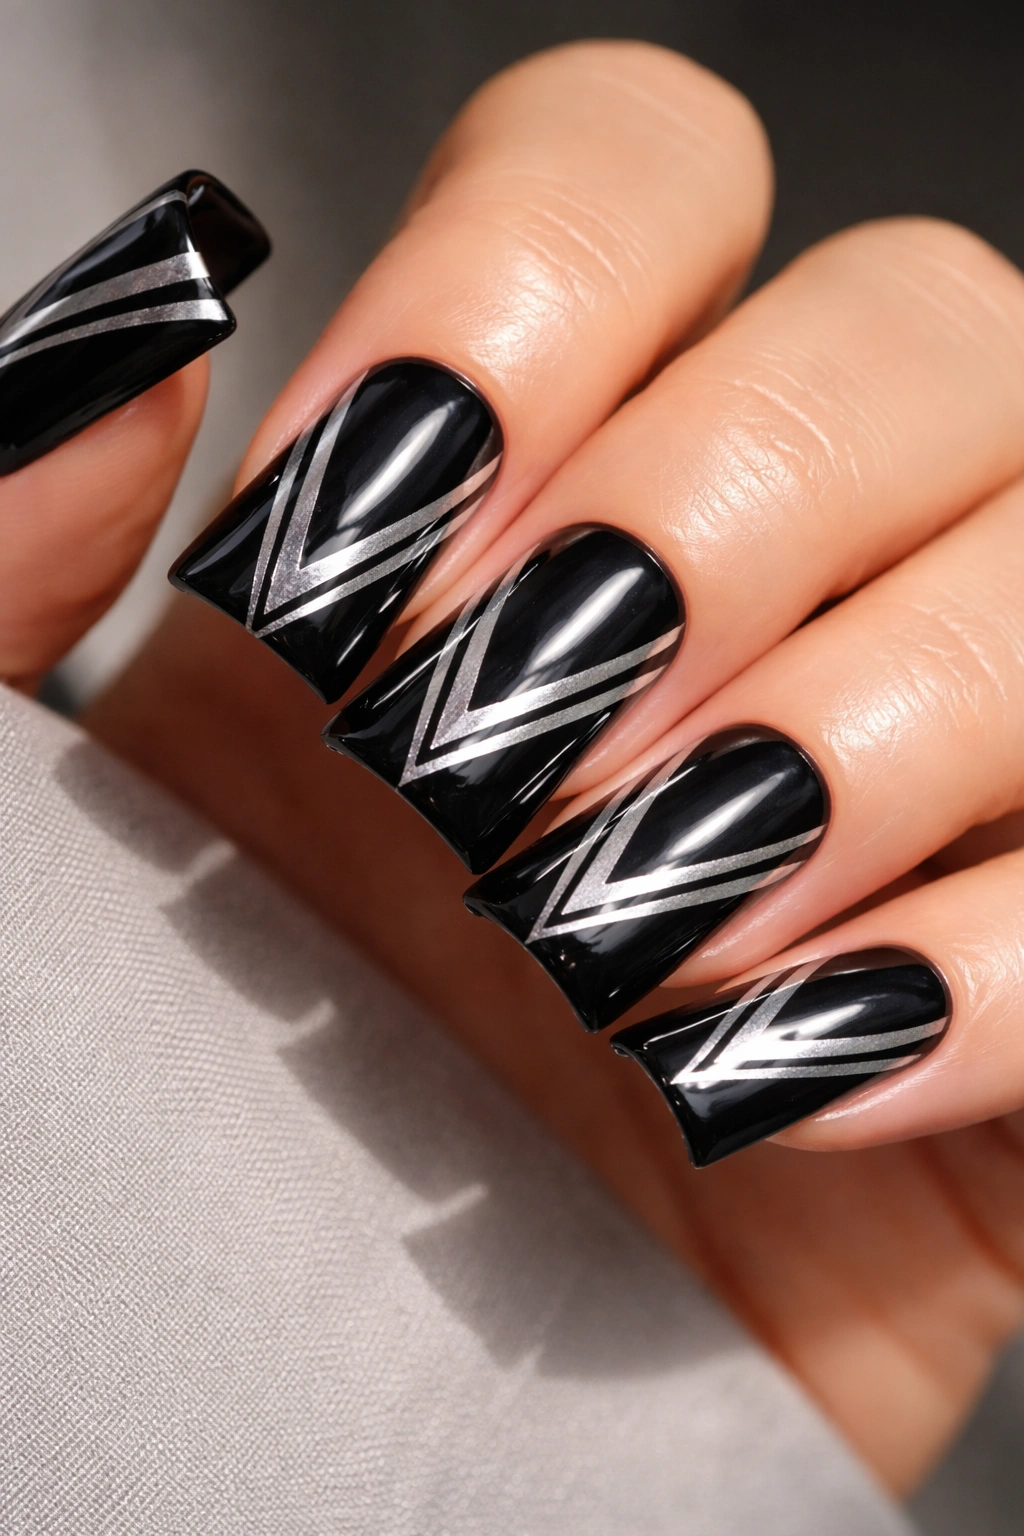
Bold diagonal or horizontal silver stripes slashed across a solid black base create an instantly modern, graphic look that feels almost architectural. Duck nails provide the perfect wide surface to showcase geometric patterns without them feeling cramped or overly complicated — the stripes have room to breathe and create clean, intentional negative space.
Design Technique and Application
Apply two coats of glossy black polish as your base layer and let it cure fully (or dry for 2-3 minutes with regular polish). Using a thin nail art brush or a striping brush, paint silver metallic lines across your nail in your chosen pattern. For perfectly straight lines, use a striping tape — place the tape where you want your line to be, apply the silver polish over the edge of the tape, let it set for 30 seconds, then peel the tape away. This method creates crisp, professional-looking lines every single time. Finish with a topcoat to seal and protect your design.
The Styling Advantage
- Geometric designs feel intentional and sophisticated, not accidental
- The ratio of black to silver can be customized — go for 3-4 thin stripes for a subtle look, or wider, bolder stripes for maximum impact
- Pairs seamlessly with both casual and formal outfits, making this a genuinely versatile design
- Minimalist and clean without being boring — the geometric element adds visual interest without overwhelming
- Easy to recreate at home once you nail the technique (the tape method especially removes the guesswork)
Insider note: If striping tape isn’t available, painter’s tape from a hardware store works just as well and costs a fraction of the price.
3. Black Marble Swirls With Silver Veins
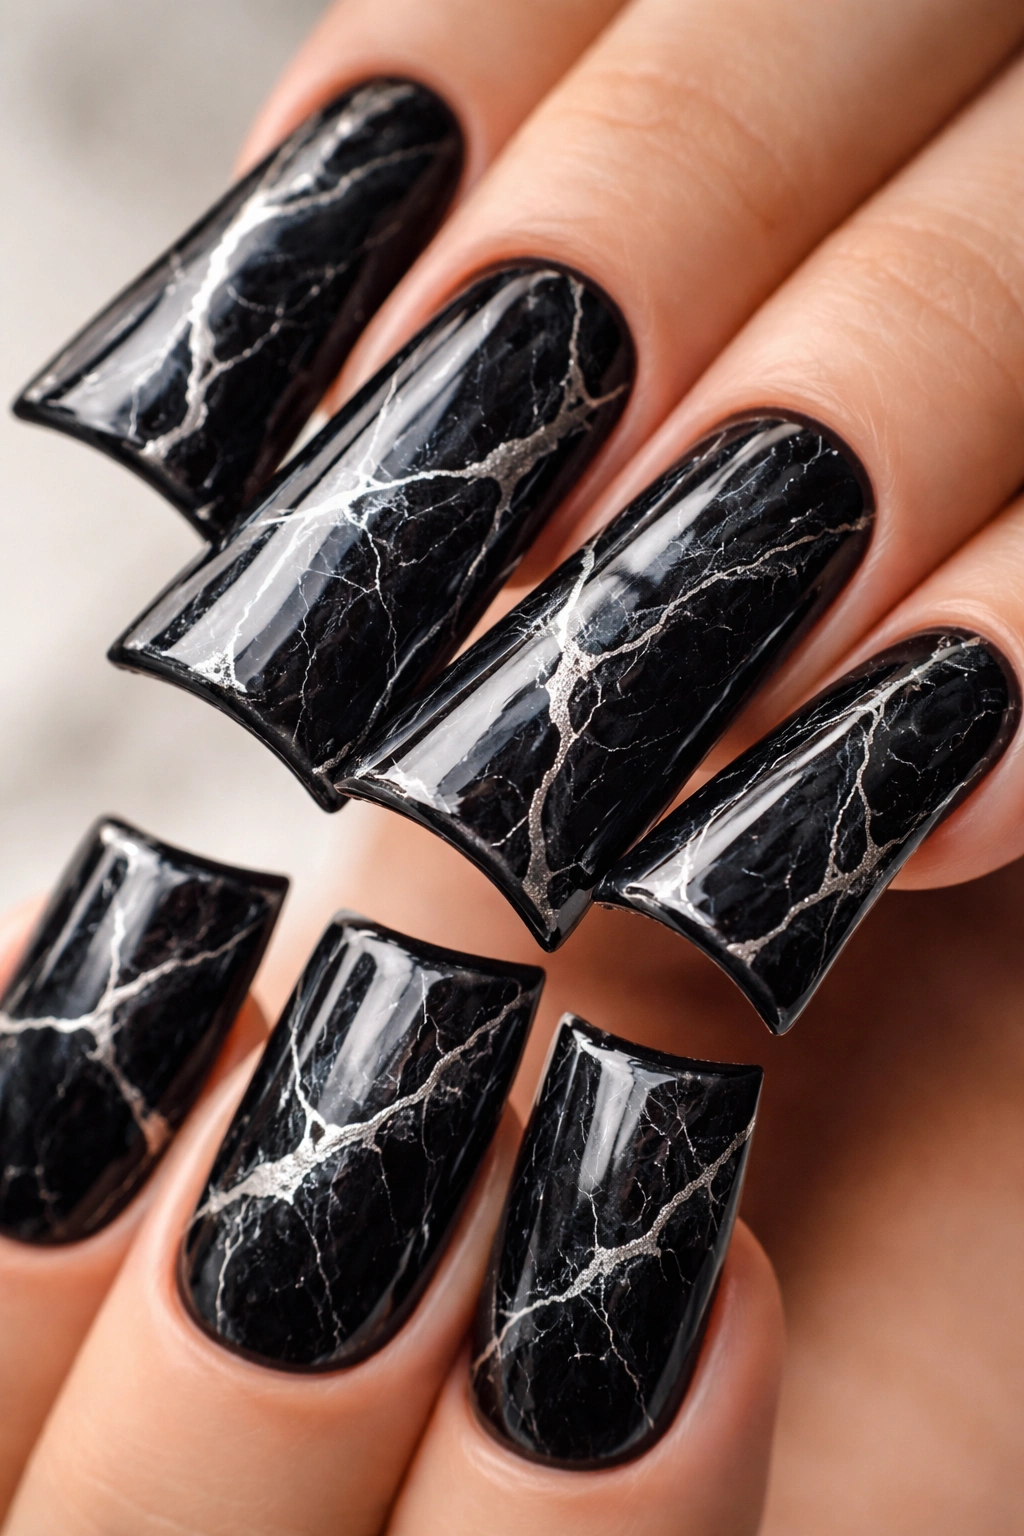
Marble is a perennially elegant design that looks expensive and sophisticated without requiring advanced nail art skills. Black marble with delicate silver veins creates a natural stone aesthetic that feels luxurious and works with nearly every aesthetic — gothic, modern minimalist, glamorous, professional, or bohemian.
Creating Marble Effect Nails
Start with a white or cream base coat to make the veining more visible. Using a thin striping brush or a detail brush, create irregular, organic lines across your nail using black polish — think of actual marble and how its veins run in seemingly random but beautiful patterns. While the black is still wet, use a very thin brush dipped in silver to create thinner secondary lines that weave between and around the black. The trick is to let the colors blend slightly where they touch, creating a natural, watercolor-like effect rather than harsh lines. Don’t overthink the pattern — real marble is organic and imperfect, so your design should be too. Seal with topcoat.
Why Marble Designs Work on Duck Nails
- The large surface area allows for more detailed veining than you could fit on shorter nails
- Marble feels elevated and gallery-worthy, giving your nails a luxury appearance
- Each nail can have a slightly unique vein pattern, making the set feel individually designed
- Black and white marble with silver accents reads as both classic and contemporary
- Marble designs are forgiving — slight imperfections actually add to the natural stone aesthetic
Worth knowing: If you’re nervous about the freehand aspect, practice your vein pattern on a piece of white paper first. This takes the pressure off and helps you develop a feel for the brushwork without wasting polish.
4. Chrome Silver With Black Accent Nail
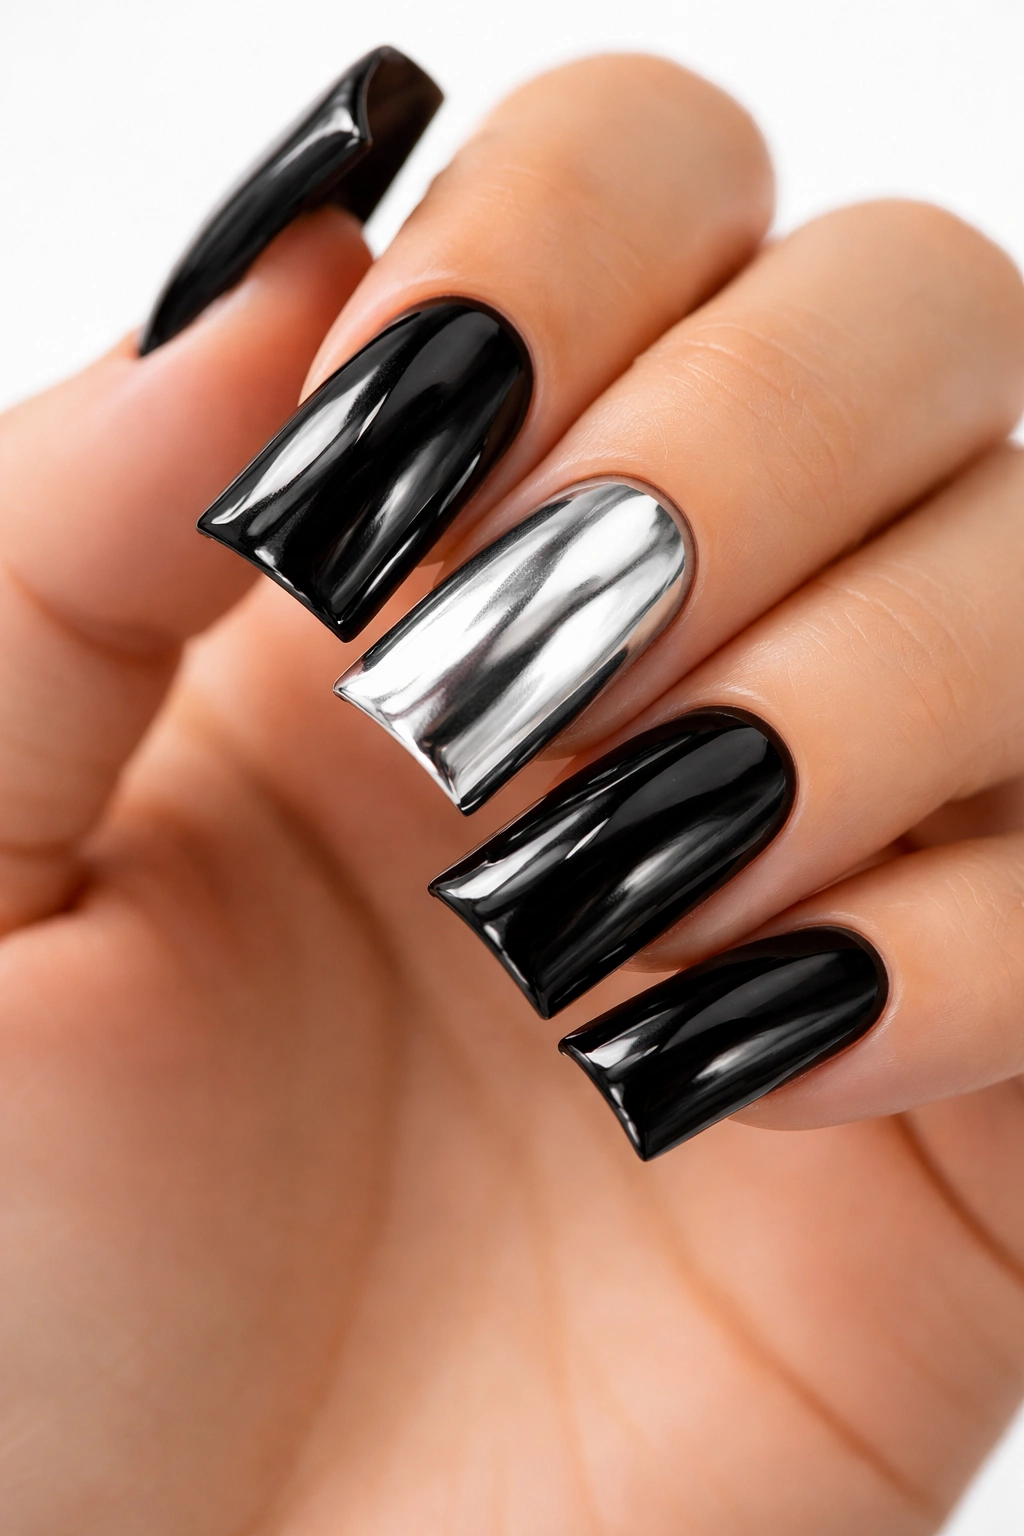
A statement accent nail draws attention through contrast — one nail features a bold design (in this case, lustrous chrome silver) while the surrounding nails are a solid complementary color (sleek black). This creates visual hierarchy and makes each hand feel intentionally curated rather than uniformly decorated.
Chrome Polish Application Tips
Chrome and mirror polishes require specific application techniques to achieve that coveted reflective finish. Paint two thin coats of the chrome polish onto your accent nail, ensuring complete coverage with no streaks or thin patches. The chrome powder won’t stick properly to thin layers. After the final coat is fully cured, use a soft buffing pad to gently polish the surface — this activates the mirror effect and brings out the full reflectivity. For your remaining nails, apply two coats of glossy black polish. The high-shine contrast between the mirror chrome and matte-looking black is what makes this design work.
Balance and Visual Impact
- One chrome accent nail prevents the look from feeling overwhelming while still showcasing the eye-catching finish
- The chrome catches light constantly, making it impossible to miss even in low lighting
- Black surrounding nails provide the perfect neutral frame for the statement accent
- Works beautifully as a ring finger accent or a pinky statement — the placement changes the overall vibe
- Chrome finishes feel luxurious and high-end, elevating the entire manicure
Design hack: If you’re worried about chrome polish application, many nail salons now carry gel chrome polishes that are easier to apply than traditional powders. The results are just as stunning and the application is more forgiving.
5. Negative Space Design With Black and Silver
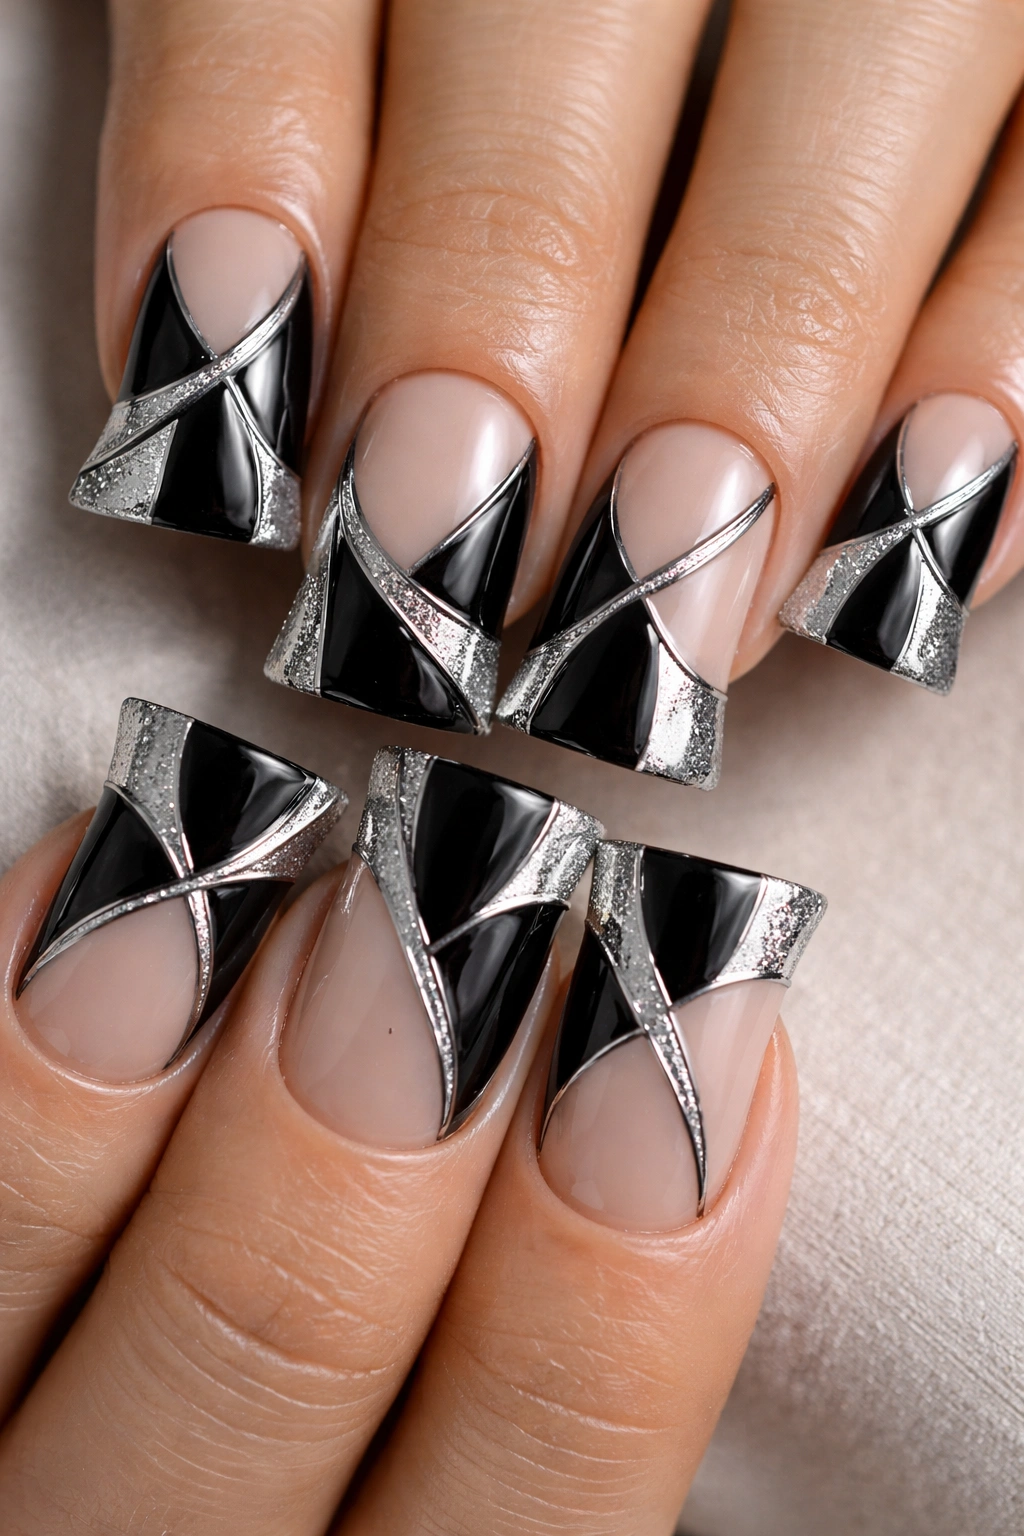
Negative space designs intentionally expose sections of your natural nail or base coat to create an outline or shape. Combining black polish, silver metallic accents, and exposed negative space creates a modern, artistic aesthetic that feels intentionally designed rather than decorative. This is where duck nails truly shine — the extra surface area allows for more complex negative space patterns without them looking cluttered.
Creating Negative Space Patterns
Start with a cream or light pink base that mimics your natural nail tone, or use a clear base if you want to show your actual nail bed. Using thin nail art tape or a stencil, create a geometric pattern or shape (think triangles, diagonal lines, semi-circles, or abstract shapes) by masking off sections of the nail. Paint black polish over the exposed areas, let it dry, then paint silver metallic details on top of the black before removing the tape. The combination of the three — base color, black sections, and silver details — creates depth and dimension that single-color designs can’t achieve.
Why This Design Feels Elevated
- Negative space designs feel intentional and artistic rather than simply decorative
- The interplay between three colors (base, black, silver) creates sophisticated visual complexity
- Modern and minimalist aesthetic without feeling boring or incomplete
- Shows off your natural nail (or your base color) in a flattering way
- Incredibly versatile — the specific negative space pattern can be customized to match any personal style
Pro insight: The most successful negative space designs use odd-shaped or angular patterns rather than perfectly symmetrical ones. Asymmetry feels more contemporary and interesting than symmetry.
6. Silver Glitter Gradient on Black
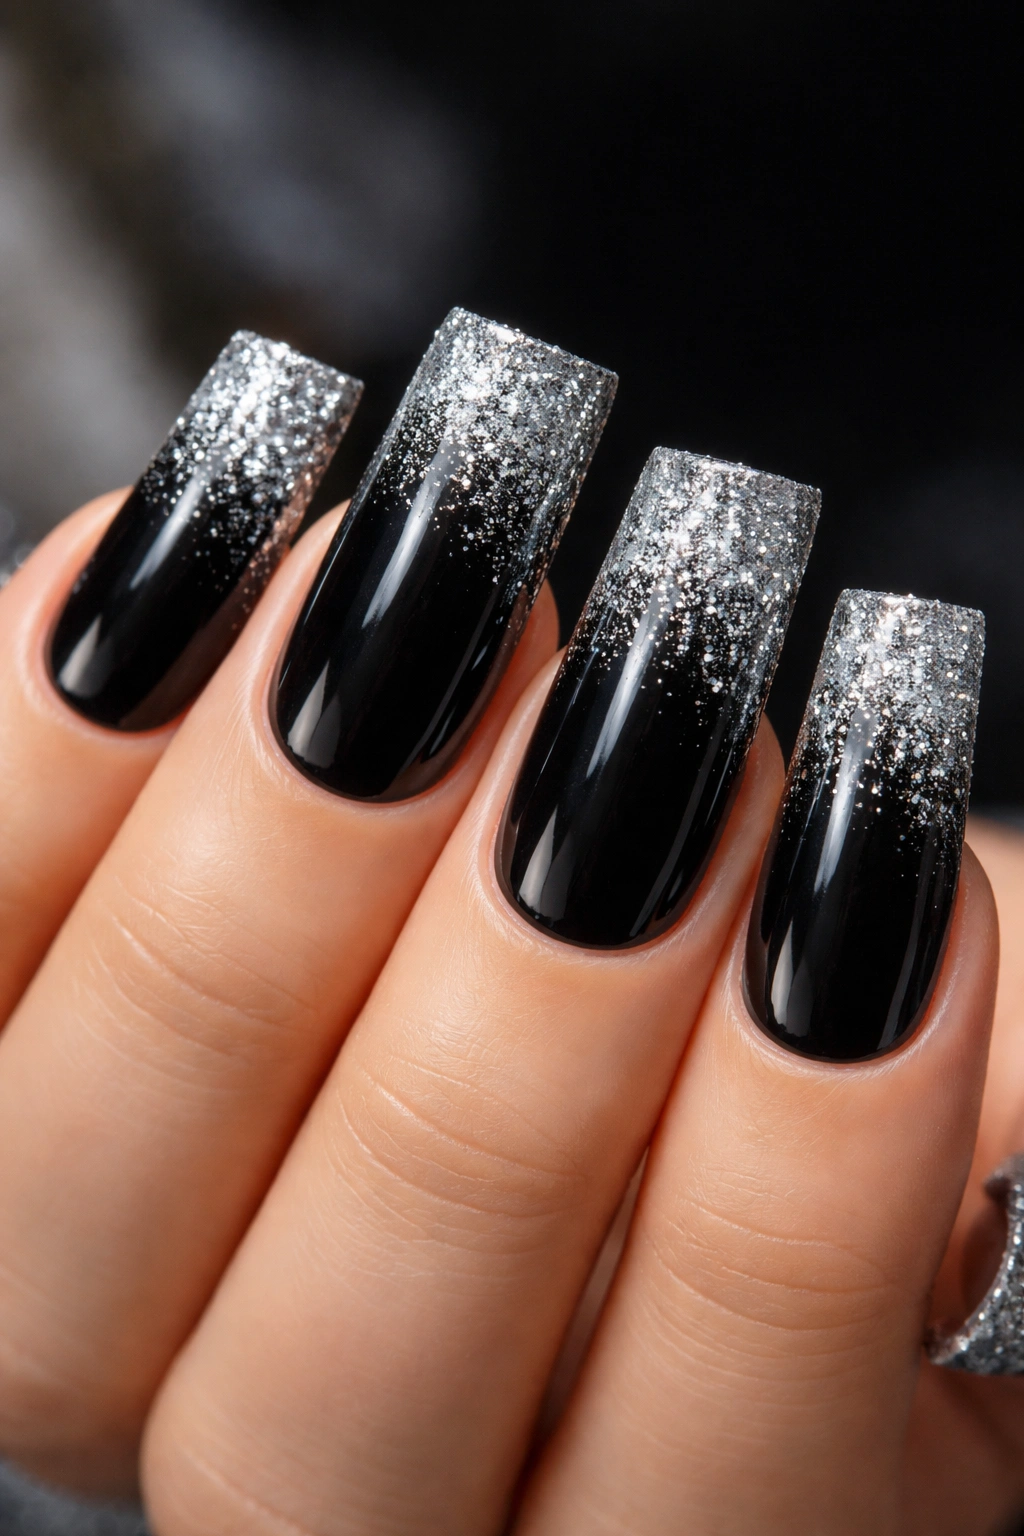
Glitter gradients combine sparkle with sophistication, and when you layer glitter gradually from sparse to dense across the surface of a duck nail, you create visual interest and movement. Starting with a black base and gradually building more silver glitter toward the tip creates a naturally eye-catching effect that catches light from multiple angles.
Application Technique for Glitter Gradients
Paint two coats of glossy black polish as your base and let it dry or cure completely. Using a makeup sponge or a dedicated gradient sponge, pick up some glitter polish on the sponge and apply it to just the tip area of your nail, using a dabbing motion (not swiping). Rinse the sponge lightly and dab it in the middle section with a slightly lighter touch to create a fade effect. The goal is maximum glitter concentration at the tip, minimal at the base, with a smooth transition in between. If using gel polish, cure after each layer application. If using regular polish, wait 1-2 minutes between layers so the glitter has time to settle.
Visual Impact and Wearability
- Glitter gradients feel festive and elevated without being over-the-top
- The gradient effect looks more sophisticated than a uniform glitter manicure
- Black base keeps the look grounded and prevents glitter from feeling too casual
- Works for both everyday wear and special occasions depending on the glitter size and density
- The shimmer catches light constantly, making your hands look intentionally styled
Tip: Use a topcoat specifically designed for glitter (usually thicker and stickier than standard topcoat) to prevent glitter from shifting or sliding around once you’ve applied it.
7. Black And Silver Checkerboard Pattern
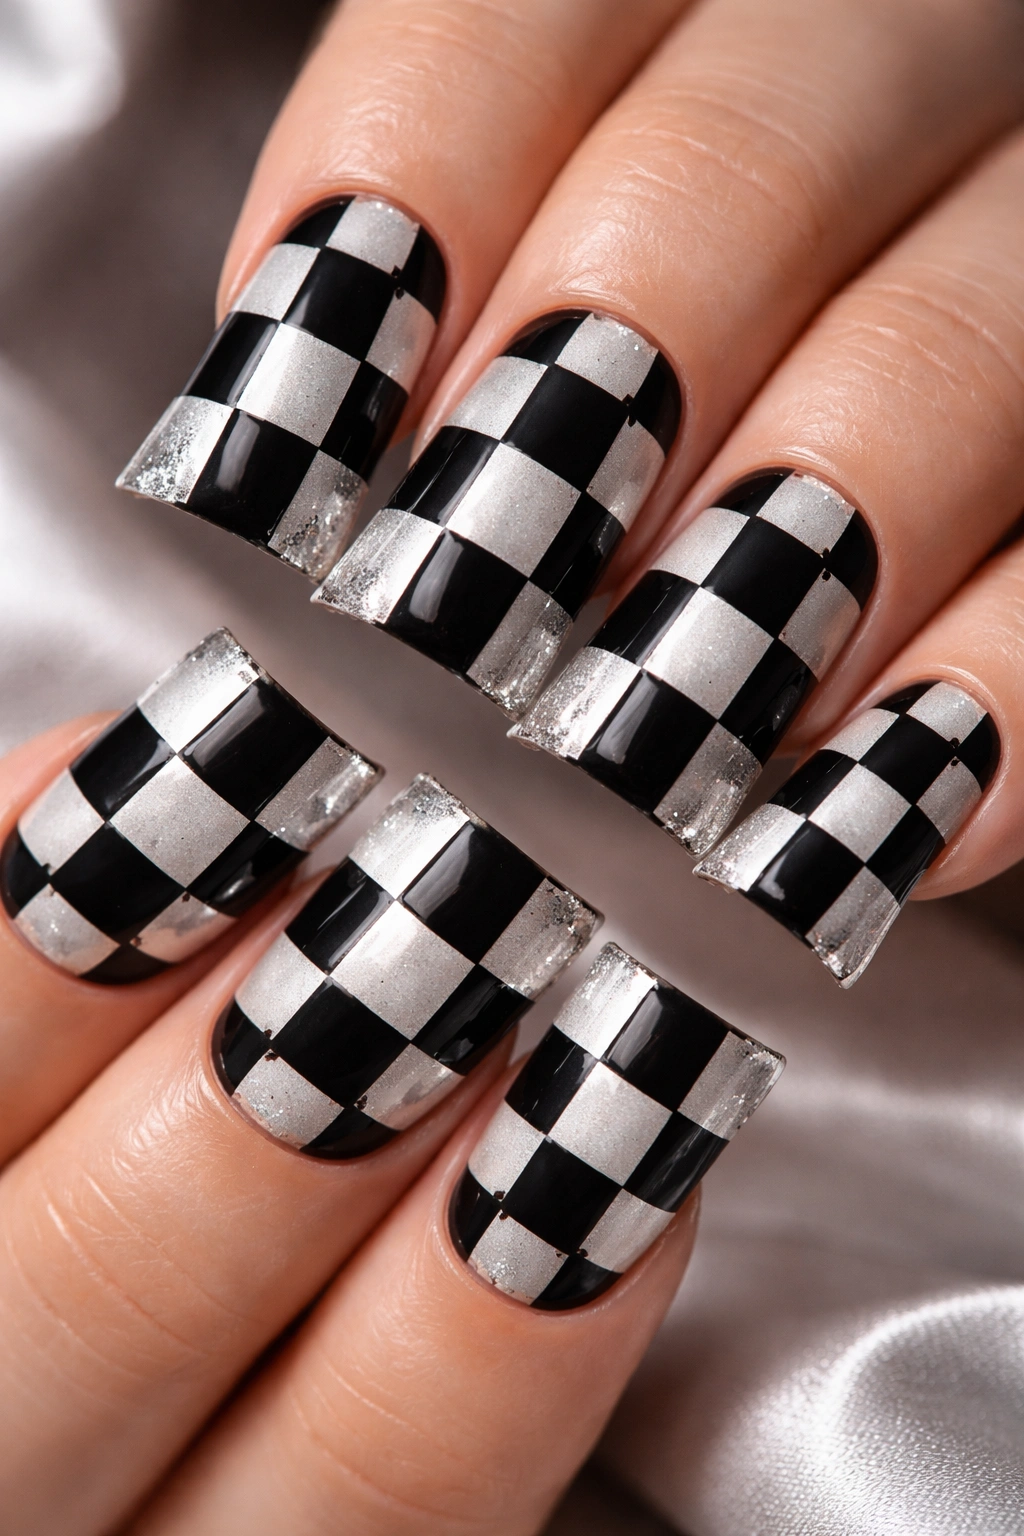
Checkerboard designs are inherently graphic and modern, and duck nails provide the perfect wide, flat surface to showcase this classic pattern without it looking cramped or cluttered. Black and silver checkerboards feel retro-modern — nostalgic of certain eras while still feeling contemporary and intentional.
Creating Perfect Checkerboard Tiles
Start with a light gray or white base coat, which serves as your neutral background. Using a nail art striping brush or a thin liner, paint evenly-spaced horizontal black lines across your nail, leaving space between each line equal to the line width (so if your line is 2mm wide, leave a 2mm gap between lines). Once the black is dry, paint evenly-spaced vertical black lines in the same spacing. This creates a grid. Now, select alternate squares in the grid and fill them with silver metallic polish, leaving the other squares empty or filled with your base color. For a more complex look, alternate between black and silver tiles completely. The key is keeping spacing consistent — use a ruler or a grid template if needed.
Pattern Precision and Effect
- Checkerboard requires precision but isn’t technically difficult once you have the right tools
- Duck nails accommodate larger tiles than shorter nails, making the pattern easier to execute
- Black and silver checkerboards feel both playful and sophisticated depending on context
- The pattern is bold enough to make a statement while still being versatile enough for multiple settings
- Minimal color but maximum visual interest through geometric repetition
Worth noting: If hand-painting a perfect checkerboard feels intimidating, many nail salons sell checkerboard stencils that remove the need for precision line-painting.
8. Black Base With Splattered Silver Details
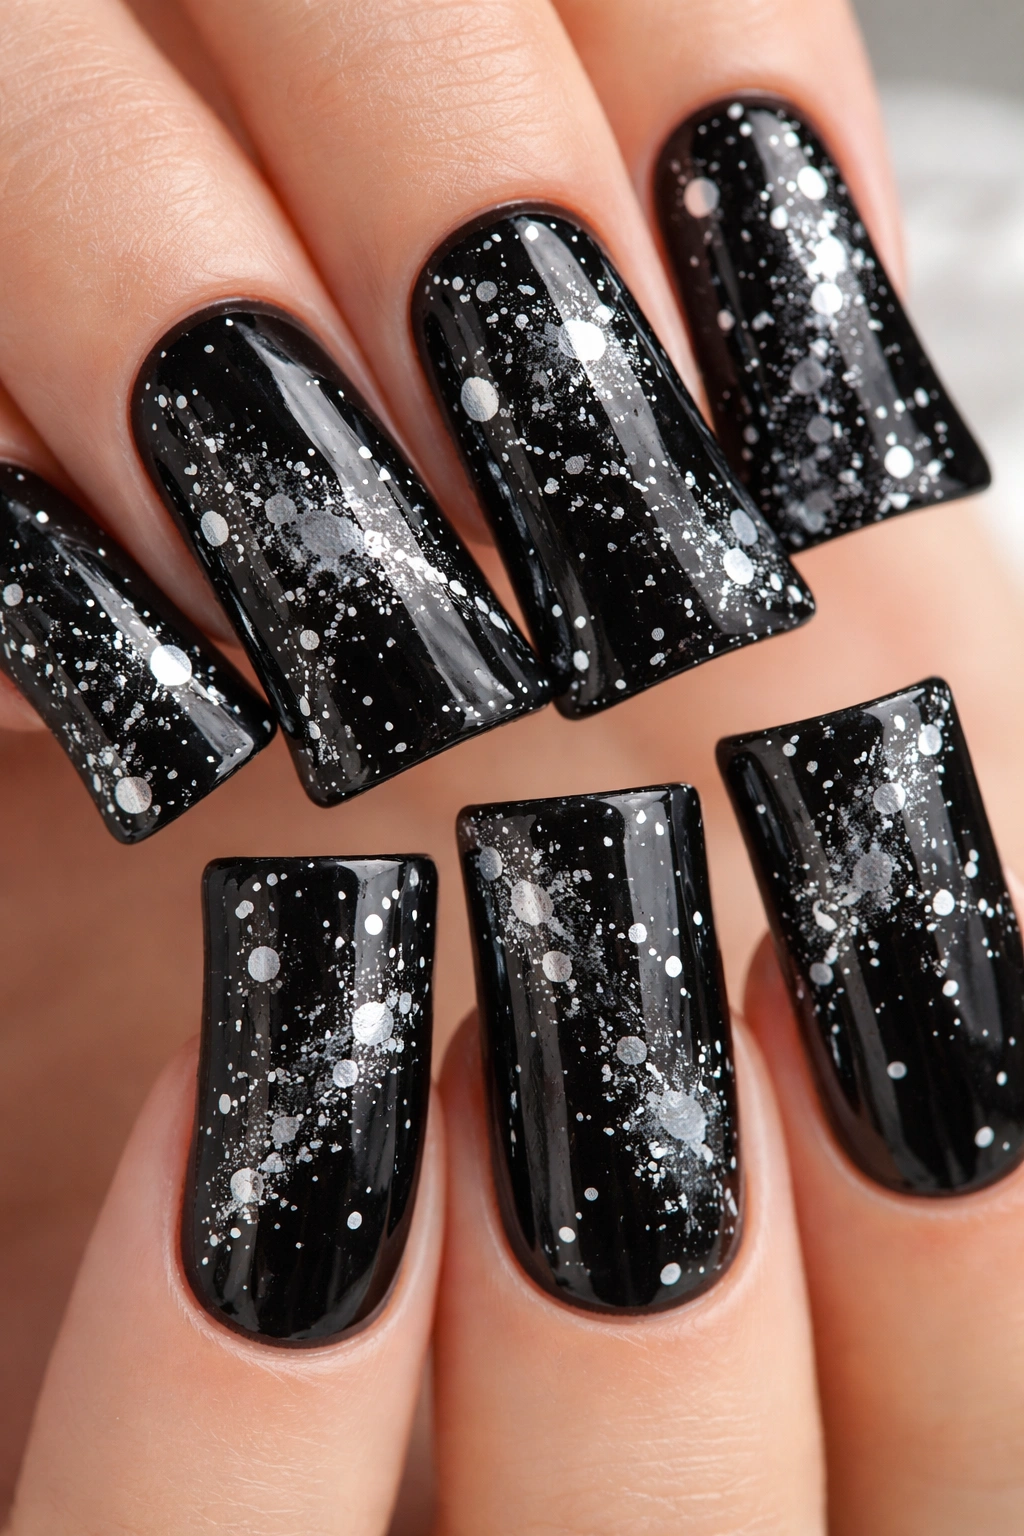
Splatter designs feel spontaneous, artistic, and deliberately imperfect — they leverage the illusion of controlled chaos to create a design that feels both professional and creative. Silver splatters on a black background create an almost galaxy-like or star-field effect that’s visually arresting without requiring advanced nail art techniques.
Splatter Technique Application
Paint two coats of glossy black polish on your nails and let them dry completely. Pour a small amount of silver metallic or glitter polish into a shallow dish. Dip an old toothbrush bristles-first into the polish, then use your fingernail or a thin stick to flick the bristles toward your nails, creating a splatter effect. The distance and angle control how large the splatters are — hold the toothbrush closer for smaller, finer splatters, or farther away for bolder splashes. Build the splatter gradually, adding more coverage where you want more density and leaving sparse areas for visual breathing room. Seal with topcoat.
Why Splatter Feels Fresh and Modern
- Splatter designs feel artistic and creative without being overly technical
- The imperfect nature of splattering actually enhances the design — perfection is the goal in other designs, but splatter celebrates controlled imperfection
- Silver splatters on black create high contrast and visual pop that catches attention immediately
- Works on duck nails because the large surface area accommodates multiple splatters without looking cluttered
- Surprisingly forgiving technique — minor imperfections are part of the aesthetic
Pro tip: Practice your splatter technique on a practice wheel or scrap piece first. This helps you calibrate the toothbrush distance and bristle flick for your desired splatter size and density.
9. Silver Foil Accents on Black Matte Finish
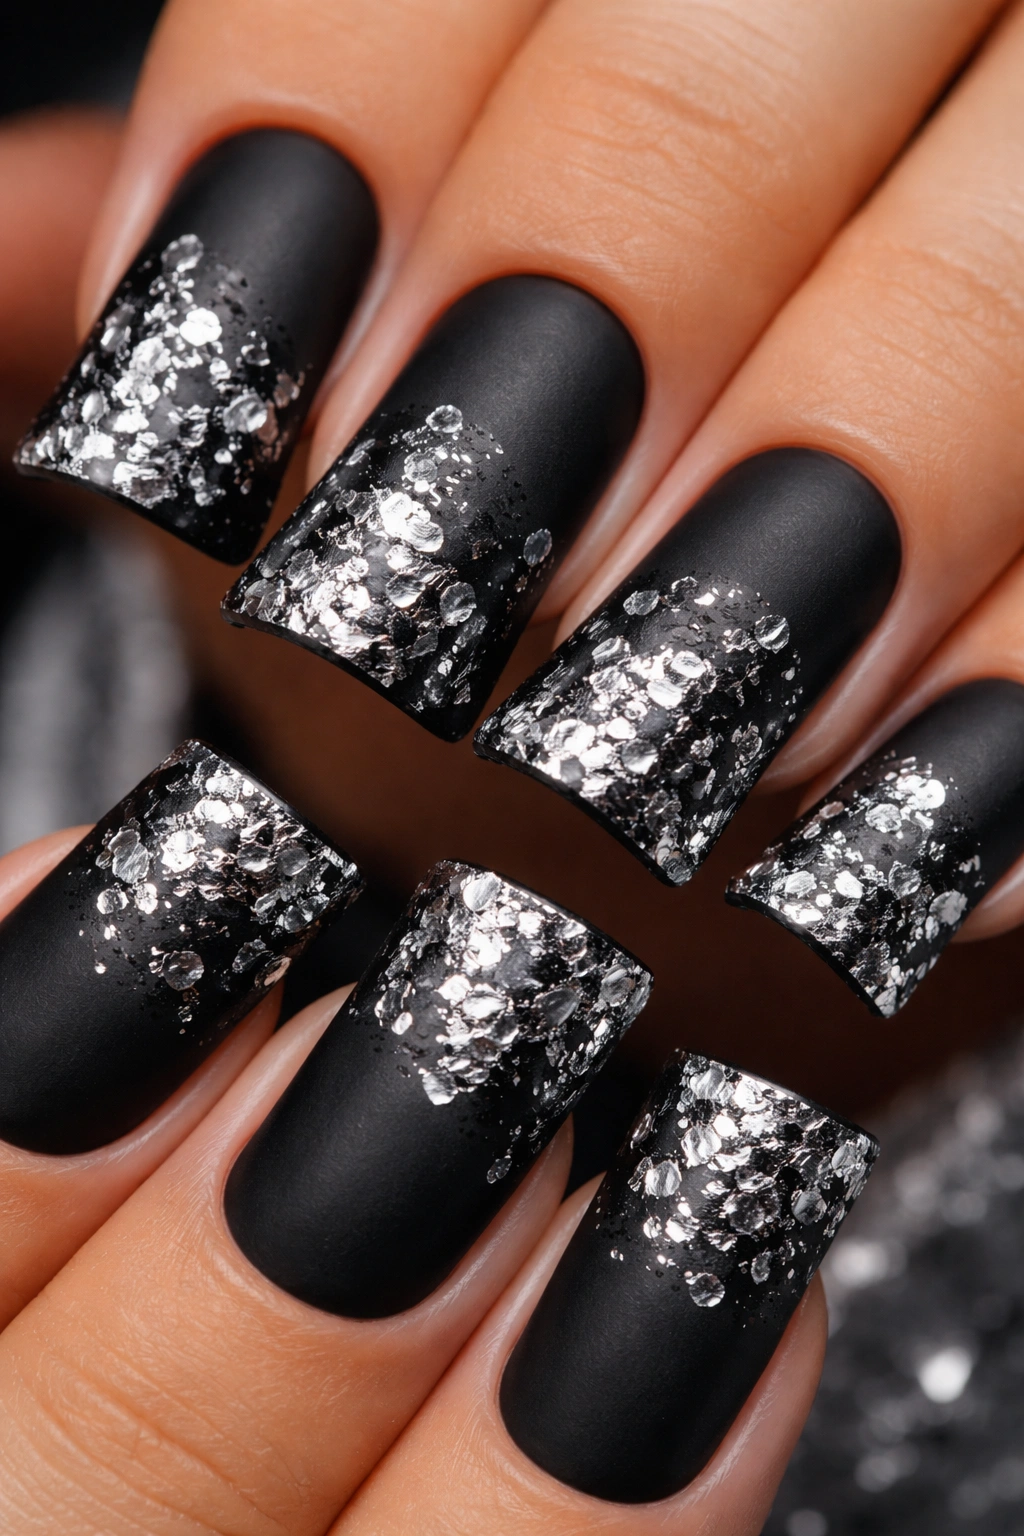
Foil accents are nail confetti pieces that adhere to wet polish, creating shiny, dimensional details that sit slightly raised from the nail surface. Applying silver foils to a black matte base creates stunning contrast — the matte black keeps the look sophisticated while the reflective foil adds glamour and catches light from every angle.
Foil Application Process
Paint two coats of black matte polish on your nails and let them dry completely. While the matte finish is dry, apply a thin layer of a sticky base coat or a light gel topcoat over areas where you want to place foil accents. While this layer is still tacky, use a foil applicator tool or tweezers to carefully press small pieces of silver foil onto the wet base coat. The foil will stick to the tacky surface. Once the foil is placed, seal everything with a shiny topcoat to protect the foil and create a smooth finish. The contrast between the matte black and the glossy foil is what makes this design striking.
Dimensional Quality and Luxury Feel
- Foil accents create actual three-dimensional texture that catches light and shadow
- The reflective quality of foil makes nails look expensive and carefully designed
- Black matte base prevents the overall look from feeling too shiny or overwhelming
- Foil can be applied in geometric patterns, along the edges, or scattered randomly for different aesthetics
- Creates a luxury appearance that feels intentionally curated rather than hastily decorated
Design secret: Foil accents work especially well along the side edges or tips of duck nails, where the three-dimensional quality is most visible and catches light most effectively.
10. Black Tips With Silver Half-Moon Base
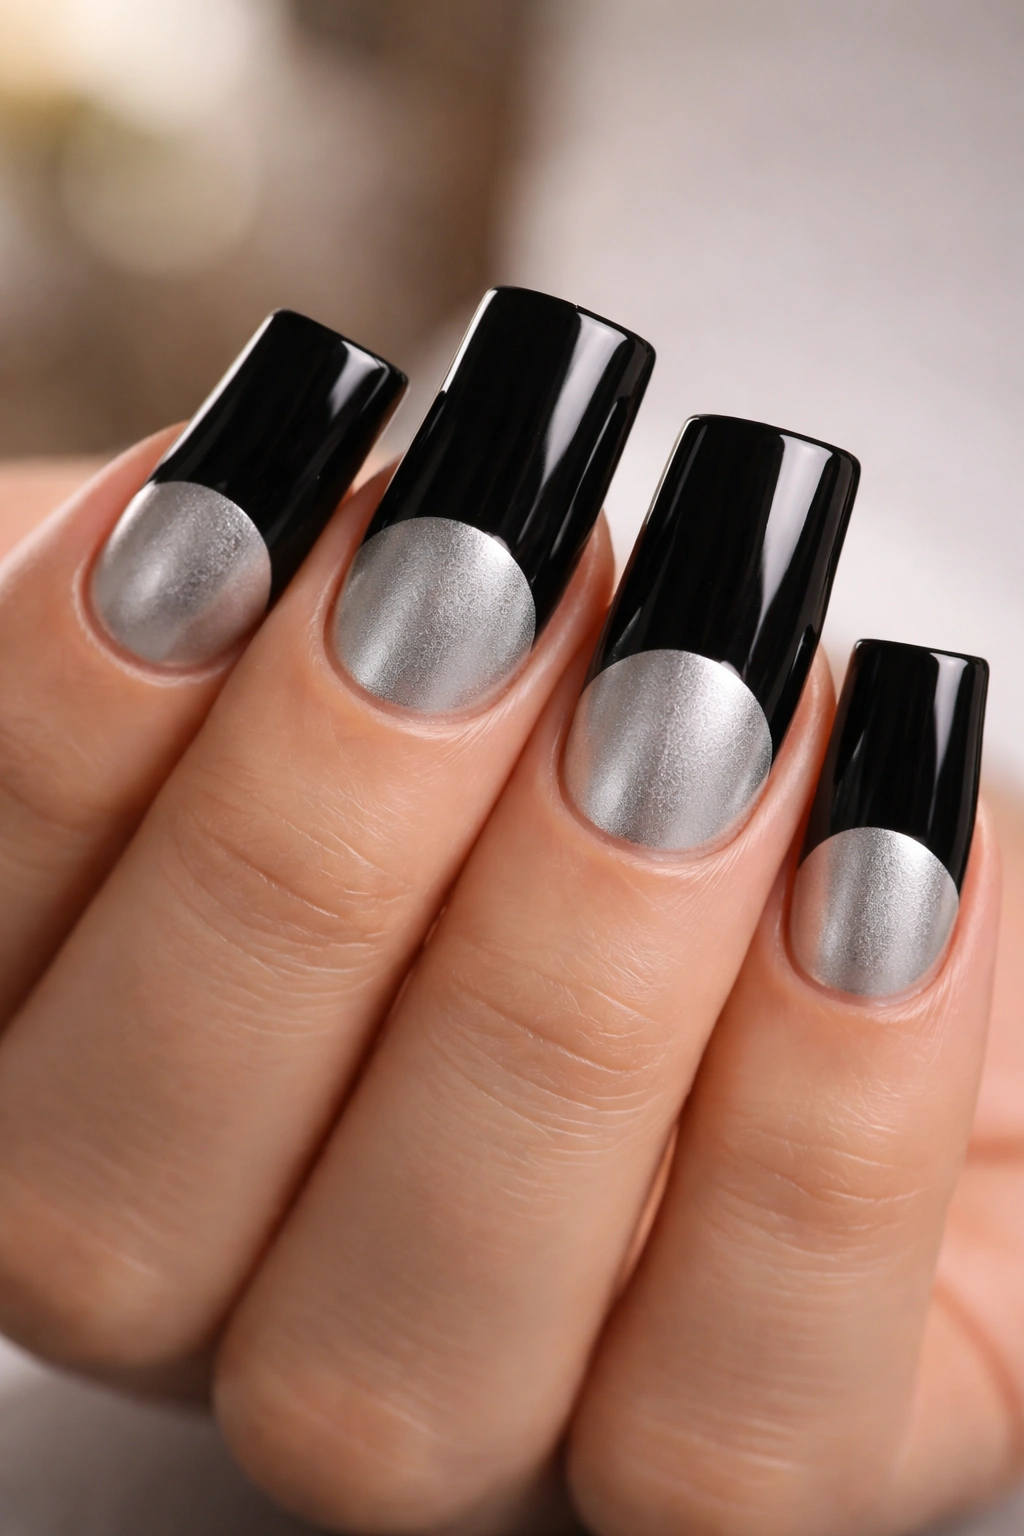
Half-moon manicures feature a curved line of color contrasting with the rest of the nail, typically near the cuticle area. This classic design gets a modern twist when you reverse it — a black half-moon outline near the cuticle with shimmering silver filling the rest of the nail. The curved line is easier to create on duck nails because their wider shape gives you more cuticle area to work with.
Half-Moon Design Execution
Start with a base coat and apply silver metallic polish to the entire nail — two coats for full coverage. While the silver is dry, use a half-moon stencil (sticky-backed adhesive stickers shaped in a half-moon curve) placed at the cuticle area, covering the bottom curved section. Paint black polish over the exposed area above the stencil line. Once the black is dry, gently peel away the stencil to reveal a clean half-moon divide between the black and silver. Finish with a topcoat to seal and protect both colors.
Balance and Elegance
- Half-moon designs instantly feel sophisticated and considered — the geometric curve suggests intentional design
- Black and silver in a half-moon creates a yin-yang like balance that feels harmonious
- Duck nails accommodate a larger half-moon than shorter nails, making the design feature more prominent
- Works for both minimalist and maximalist aesthetics depending on whether you use matte or glossy finishes
- Timeless design that transcends trends while still feeling current
Application note: If stencils aren’t available, you can hand-draw a half-moon line using a thin curved brush, though stencils create much cleaner results with less effort.
11. Dimensional Black Lace With Silver Shimmer
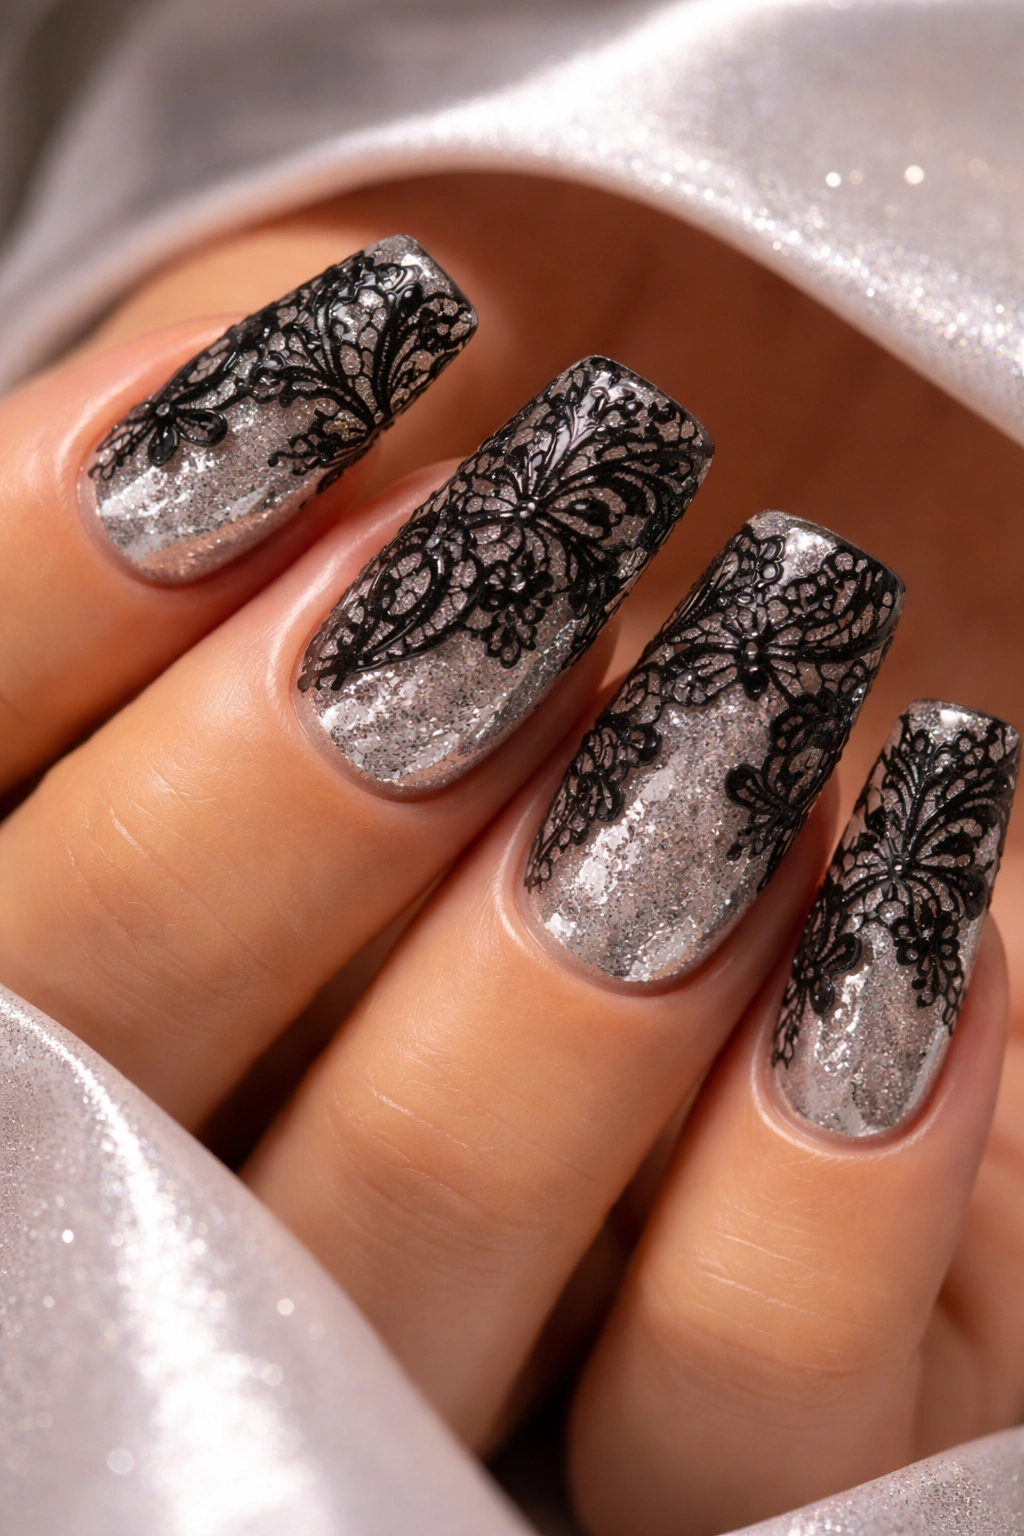
Lace designs bring delicate, intricate detail to duck nails, and when you pair black lace patterns with silver shimmer, you create an elegant look that feels simultaneously delicate and bold. This design works beautifully because duck nails provide enough space for detailed lace patterns without them becoming overwhelming or illegible.
Creating Lace Effect Nails
Paint two coats of silver shimmer or metallic polish as your base. Once dry, use a thin detail brush to paint delicate black lace patterns across your nail — think floral vine patterns, intricate borders, geometric lace weaving, or traditional lace-like designs. You don’t need to fill the entire nail with black — the most successful lace designs feature negative space, leaving plenty of silver visible between the black lines. If you’re not confident hand-painting, lace nail decals are widely available and create perfect results without requiring artistic skill. Apply the decal to your silver base, then seal everything with a topcoat. The shimmer peaking through the lace pattern creates dimension and visual interest.
Sophistication and Detail
- Lace designs feel elevated and vintage-inspired without looking dated or costume-like
- Black lace on silver creates stunning contrast that reads as both romantic and edgy
- Duck nails accommodate detailed lace work that would look cramped on shorter nails
- The interplay between the black lace lines and the silver shimmer creates constant visual movement
- Works for both everyday elegant looks and special occasion manicures depending on the specific lace pattern chosen
Worth knowing: If hand-painting lace feels too ambitious, nail decals and stickers specifically designed to look like lace are widely available at beauty supply stores and online retailers, and they create stunning results with zero drawing required.
Final Thoughts

Black and silver duck nails offer sophisticated elegance with endless design possibilities. The generous surface area of duck nails lets you showcase intricate patterns, bold graphics, and dimensional details that wouldn’t be possible on shorter nail shapes. Whether you’re drawn to geometric designs, metallics, or delicate details, this color combination provides the perfect foundation for creating a manicure that feels intentional, polished, and distinctly you.
The beauty of these eleven designs is that they range from beginner-friendly (like the simple ombre or half-moon) to more involved projects (like checkerboards or detailed lace) — so you can choose based on your current skill level and available tools. Start with whatever resonates most with your personal style, master that design, and then experiment with others. The more you practice, the faster you’ll develop the muscle memory and confidence to tackle increasingly complex nail art. Black and silver is a color combination that will never feel outdated, making any of these designs a solid investment in your nail art repertoire.
