

Baby blue stiletto nails are having a major moment, and for good reason. There’s something about the combination of that soft, calming shade with the dramatic elongated silhouette that strikes the perfect balance between sophisticated and playful. Whether you’re drawn to understated elegance or bold statement designs, baby blue works beautifully on a stiletto shape because it catches the light in unexpected ways and pairs well with almost any skin tone. The color isn’t as harsh as bright blue, which makes it wearable for everyday settings, yet it’s distinctive enough to turn heads and make a genuine style impact.
What makes baby blue so versatile for stiletto nails specifically is that the elongated shape already commands attention—so baby blue allows you to play with texture, embellishments, and intricate designs without the result feeling overwhelming. You can go minimalist and let the polish and shape do all the talking, or you can layer in glitter, geometric patterns, marbling, metallics, and gemstones to create something that feels genuinely custom and artistic. The soft tone also photographs beautifully, which means your nails look stunning both in natural light and in photos—a detail that matters more than you’d think when you’re deciding what design to commit to for the next few weeks.
Let’s explore ten distinct baby blue stiletto nail ideas that range from effortlessly chic to show-stopping glamorous. Each one is absolutely achievable at home with the right tools and products, or you can bring these designs to a nail technician as inspiration. The key to making any of these work is starting with a smooth base coat, using quality polishes with good opacity, and sealing everything with a glossy topcoat unless you’re specifically going for a matte finish.
1. Pure Pastel Baby Blue Perfection
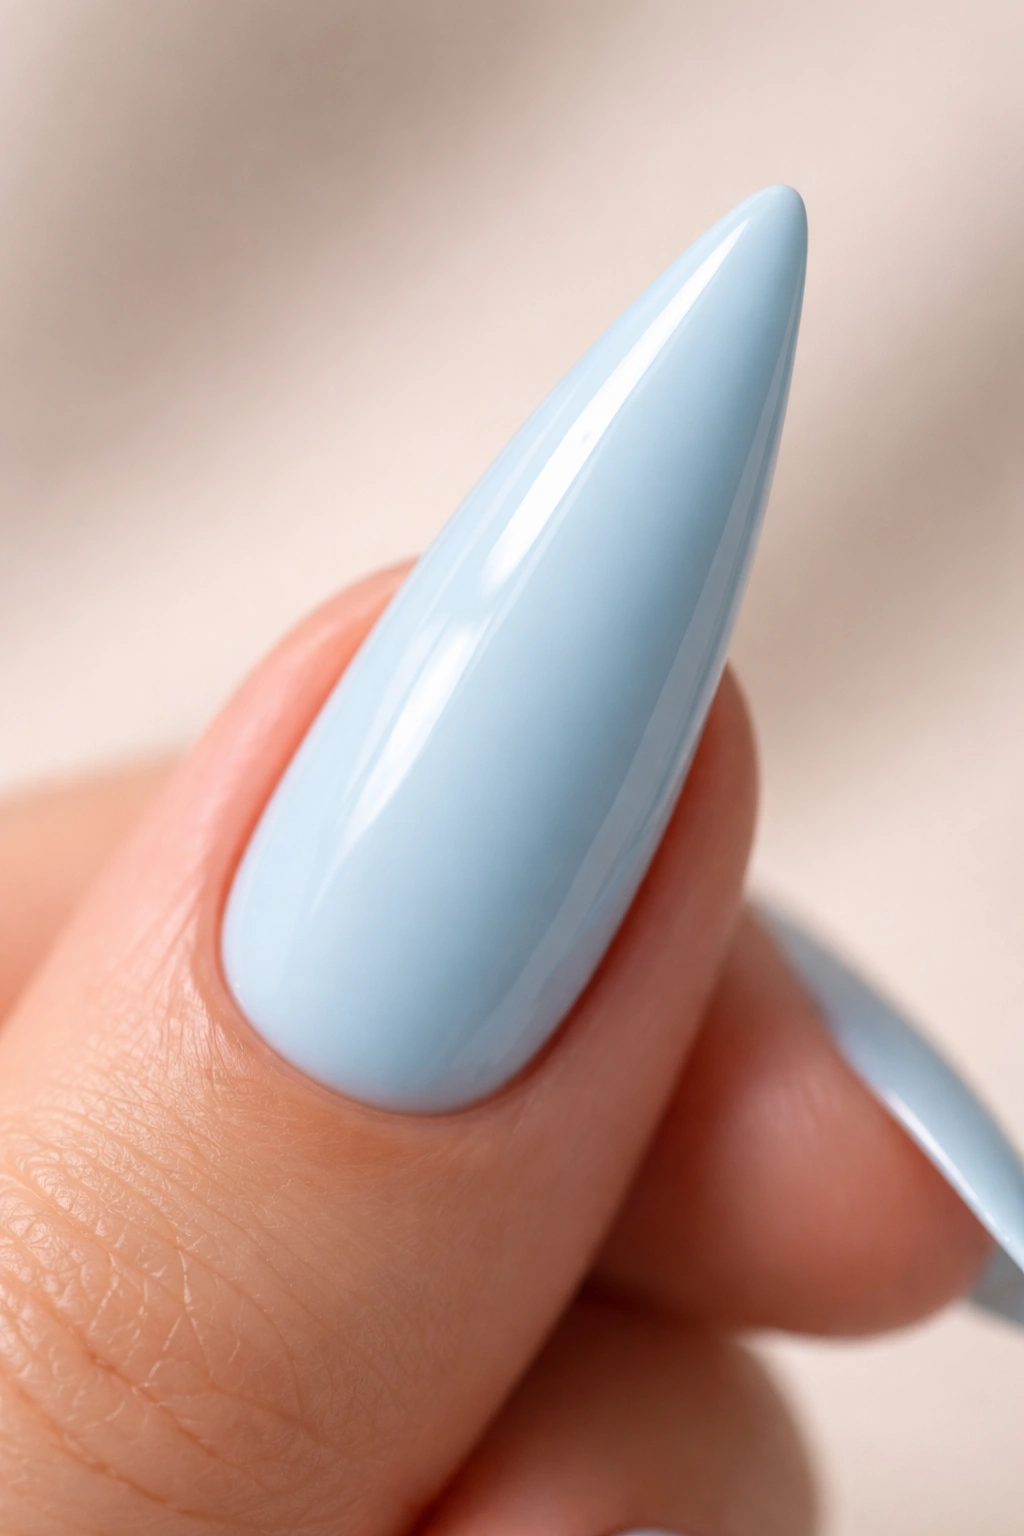
Sometimes the most elegant choice is the simplest one. A single, solid coat of creamy baby blue polish on perfectly filed stiletto nails needs nothing else to feel complete and polished. The shape itself provides all the drama you need, and the soft color keeps it wearable in professional settings while still looking intentional and manicured. This is the go-to design when you want something that feels timeless rather than trendy, a canvas that works with any outfit in your closet.
Why This Design Works
The beauty of a solid baby blue stiletto is that there’s nowhere to hide—the nail shape and the polish color have to be flawless. This forces you to invest in a genuinely good quality polish with excellent opacity and a smooth finish. When you nail the execution (pun intended), the result feels like you just left a professional salon. The shade sits right in that sweet spot between cool and warm, so it complements virtually every skin undertone without looking washed out or artificial.
Application Tips for Best Results
- Use a ridge-filling base coat to create a perfectly smooth canvas—any bumps or imperfections will show on a solid color
- Apply thin, even coats rather than one thick coat; two coats usually gives the best opacity without looking goopy
- Let each coat dry completely before applying the next one to avoid dragging or bubbling
- Invest in a good topcoat—a glossy seal will make the color pop and protect your polish from chipping
Pro tip: If you find your baby blue looking streaky after one coat, that’s normal—resist the urge to keep painting over the same spot. Wait for it to dry completely, then apply a second thin coat.
2. Baby Blue Ombre Gradient to White
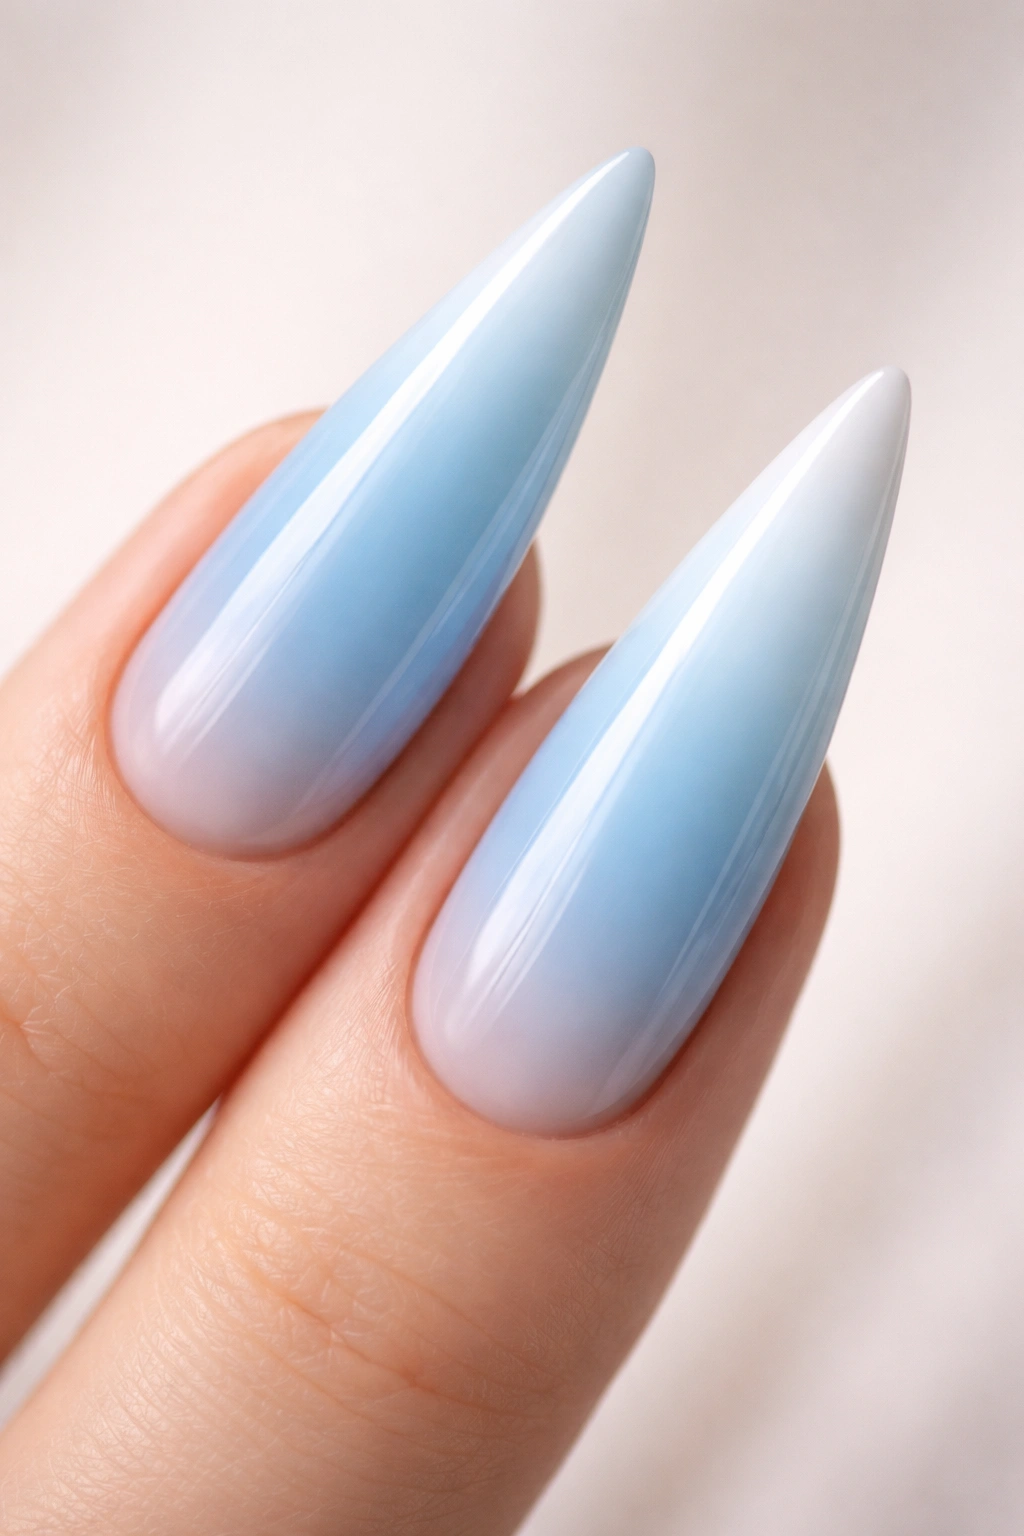
An ombre effect on stiletto nails creates a sophisticated, almost ethereal look that feels modern and artistic without being loud. The gradient fades from a deeper baby blue at the base to soft white at the tip, mimicking the way light hits the elongated shape and creating visual movement along the nail. This design works beautifully for special occasions, but it’s subtle enough that you can wear it to work or everyday events without it feeling over-the-top.
How to Achieve the Ombre Effect
Sponge ombre is the most forgiving technique for gradient nails, and it’s actually simpler than it looks. You’ll need your baby blue polish, a white polish, a small cosmetic sponge (not a sea sponge—a dense makeup sponge works best), and a plate or ceramic tile to blend the colors on. Paint vertical stripes of baby blue and white next to each other on your sponge, then press the sponge gently onto your nail in a rolling motion rather than stamping it down. You might need 2-3 applications to build the gradient to opacity, which is totally normal.
Design Variations to Consider
- Reverse the gradient: white at the base fading to baby blue at the tip
- Create a diagonal gradient instead of vertical for a completely different feel
- Add a thin line of gold or silver shimmer down the center to emphasize the shape
- Keep the ombre subtle with very close shades of blue, or make it dramatic by fading all the way to pure white
Insider note: The sponge technique leaves a slightly textured finish, so seal it with a smooth topcoat to create a glass-like finish and blend any speckles.
3. Baby Blue with Sparkling Glitter Accents
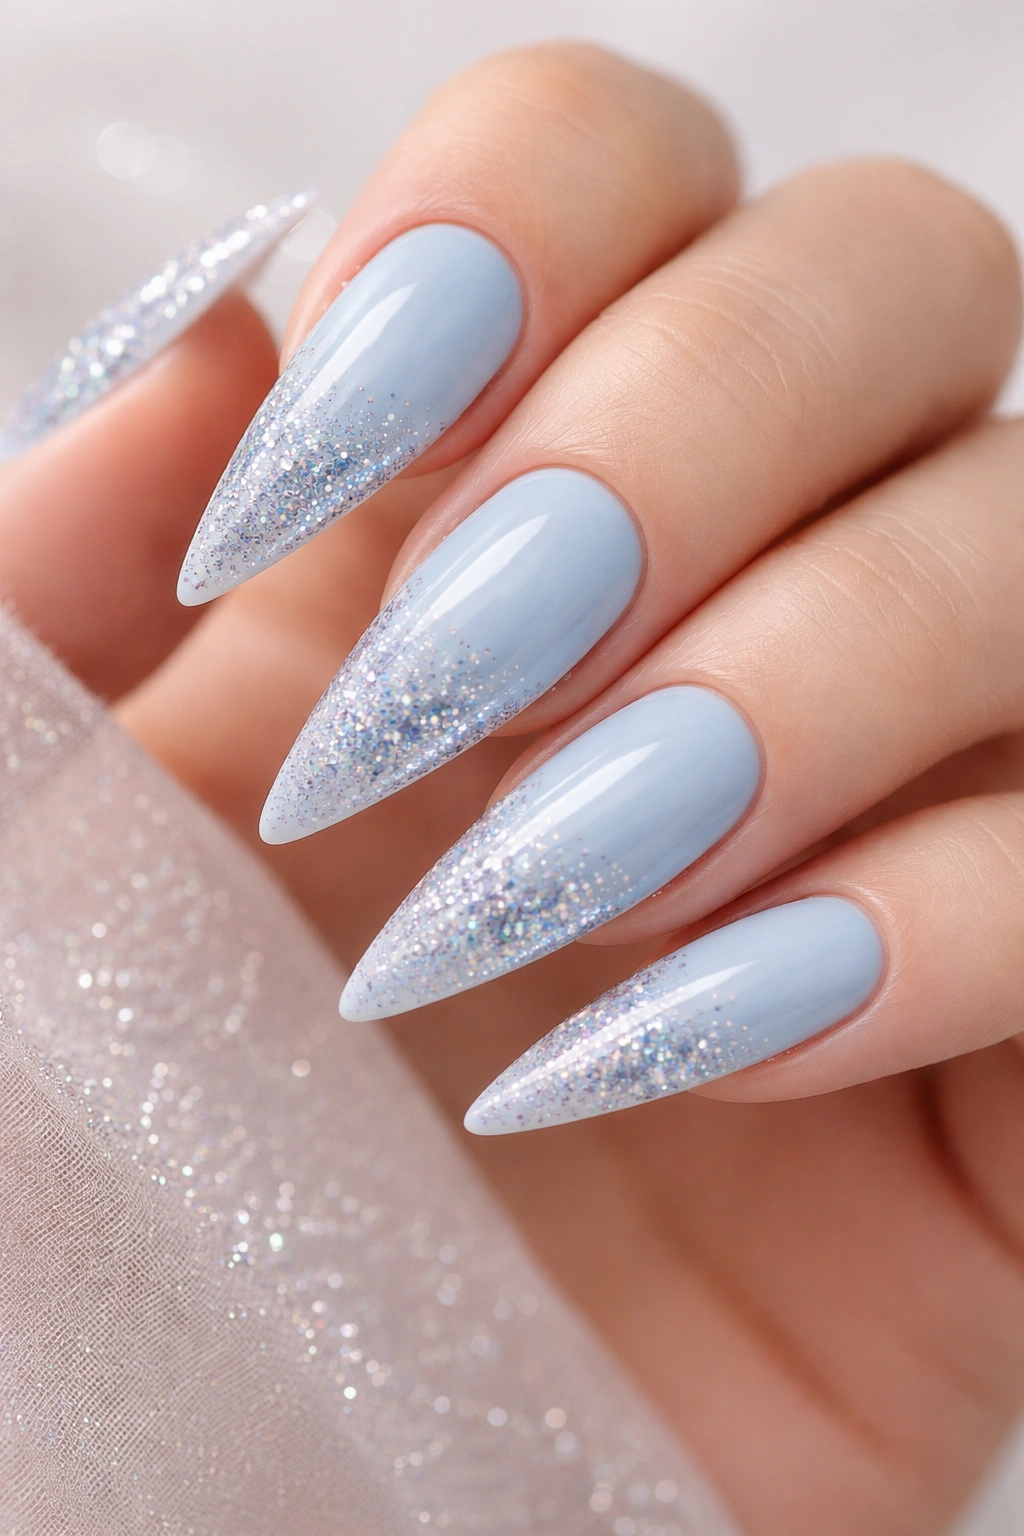
Add dimension and glamour by layering glitter over your baby blue base. You can go subtle with a delicate sprinkle of fine glitter on the tips, or amp it up with chunky holographic glitter scattered across the entire nail, or create a gradient that concentrates the glitter toward the tip. The elongated stiletto shape gives glitter somewhere dramatic to go, and the light reflection off the particles makes your nails catch the eye from across a room.
Glitter Application Strategies
Fine shimmer glitter embedded in a gel or thick topcoat creates an understated sparkle that reads as intentional rather than accidental. For this look, apply your baby blue base, seal with a clear topcoat, then apply a thick layer of clear gel and sprinkle ultra-fine glitter while the gel is still wet. Seal with another topcoat to lock everything in place. Chunky glitter or holographic flakes look more dramatic and playful—apply them to wet topcoat the same way, pressing them gently into the surface so they stick. Ombre glitter (where glitter concentration increases toward the tip) takes a bit more patience but creates a truly show-stopping effect.
Color Combinations That Pop
- Baby blue base with silver or white glitter for a cool, icy look
- Baby blue with holographic or rainbow glitter for maximum visual impact
- Baby blue with rose gold glitter for a softer, warmer vibe
- Baby blue with mirror or chrome glitter for a futuristic feel
Worth knowing: Glitter application is easier with a sticky gel or a topcoat with a longer working time, which gives you seconds to place glitter exactly where you want it before it sets.
4. Baby Blue Marble Design

Marbling creates an organic, artistic look that feels custom and luxurious. The technique involves swirling white, navy blue, and baby blue polish together on the nail to create a natural stone or watercolor effect. Because each nail comes out slightly different even when using the same technique, marbled stiletto nails feel genuinely one-of-a-kind. This design reads as more creative and artistic than a solid color while still being elegant and wearable.
Water Marble vs. Brush Marble Techniques
Water marbling is the classic method: drop different colored polishes into room-temperature water, swirl them together with a toothpick to create a pattern, then dip your nail into the water to pick up the design. The catch is that water marbling has a learning curve and takes practice to get clean results. Brush marbling is more forgiving and actually easier to control—simply apply your baby blue base, then use a thin brush to paint strokes and swirls of white and navy blue directly onto the nail, blending them slightly with the brush before the polish dries.
Design Combinations Worth Trying
- Soft baby blue base with white and pale gray marbling for a subtle, understated look
- Baby blue with navy blue and white for higher contrast and more visual drama
- Baby blue base with holographic flakes mixed into the marbling effect for extra dimension
- Asymmetrical marbling where one nail is heavily marbled and others are more understated
Pro tip: If water marbling feels intimidating, start with brush marbling instead—it’s genuinely easier to execute and the results are just as beautiful.
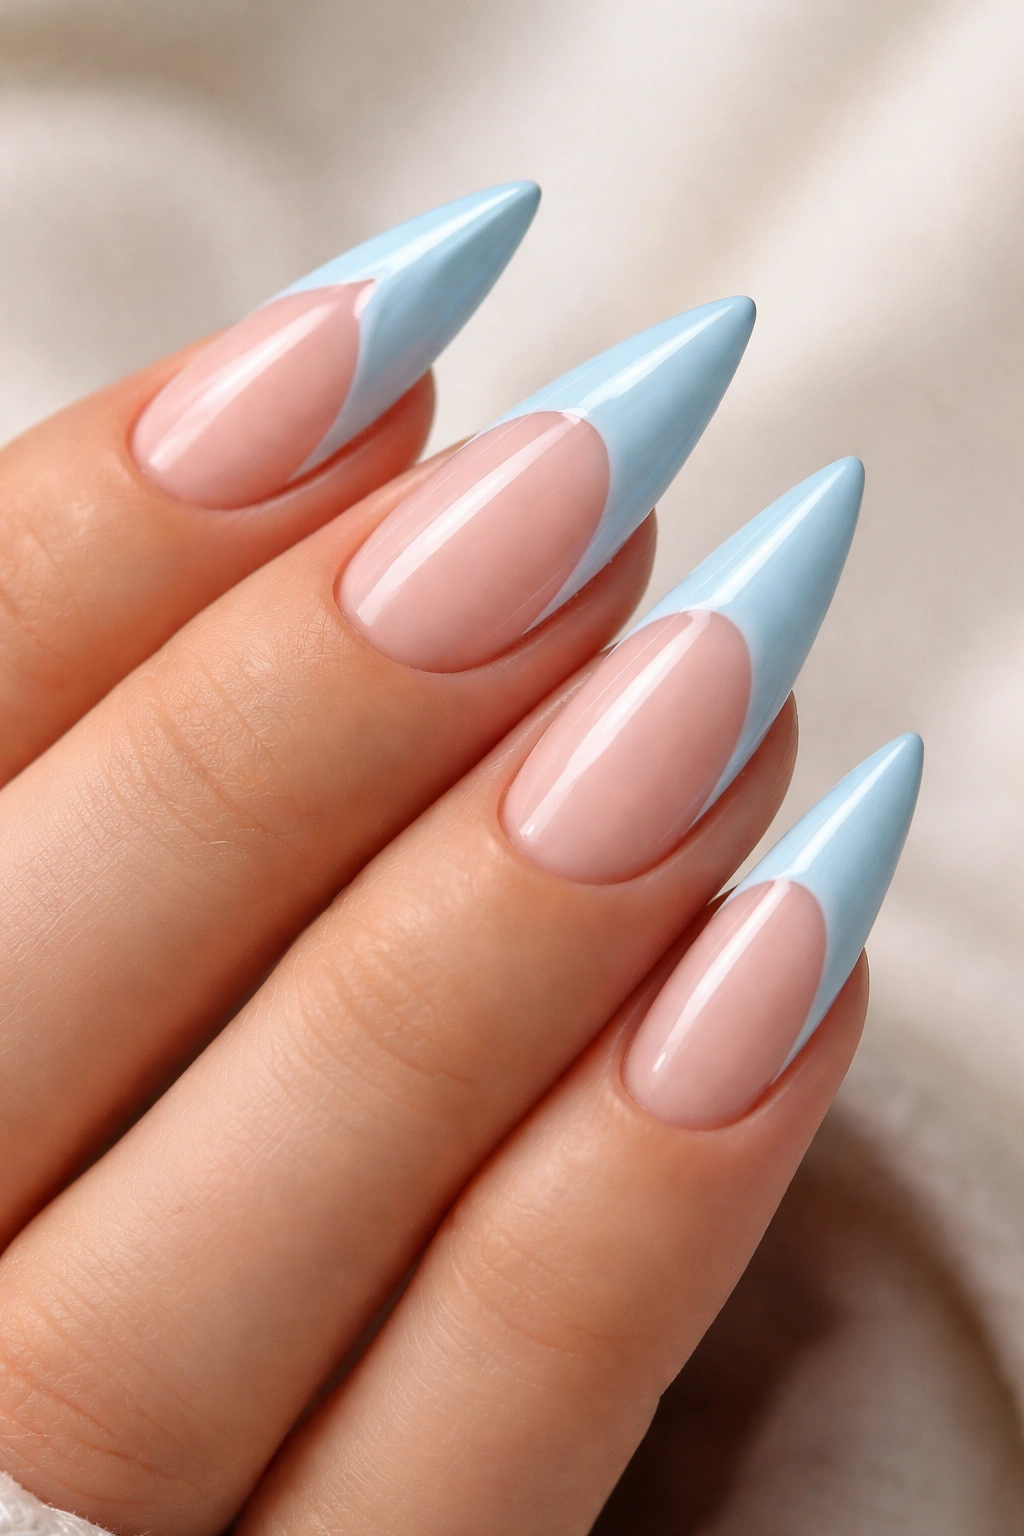
5. Baby Blue French Tips with Classic White Edges
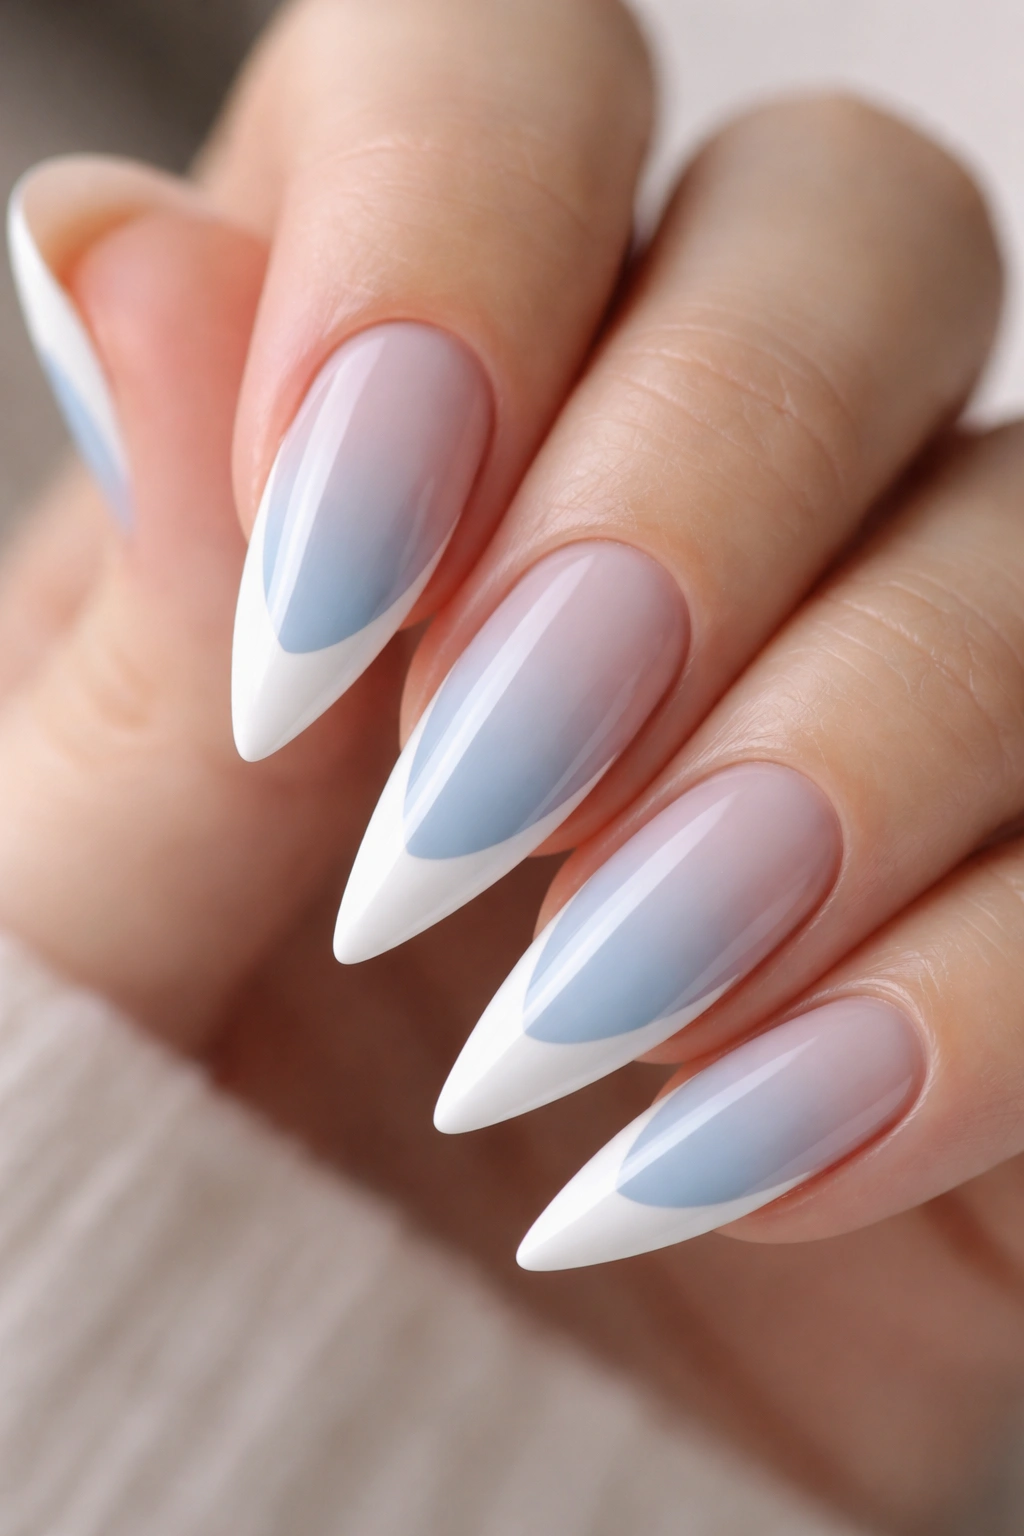
A modern take on the timeless French manicure, baby blue French tips use the soft shade as the base color with crisp white tips. This feels fresh and playful while maintaining an elegant, polished aesthetic. The white tips draw the eye directly to the length of the stiletto shape and create a clean, intentional finish. This design is appropriate for literally any setting—work, weddings, everyday life—because it reads as classic rather than trendy.
Creating Perfect French Tip Lines
The key to flawless French tips is a straight edge and a steady hand. You have several options: use a French tip guide (a thin curved sticker that adheres to your nail to guide where the white should start), paint freehand with a thin brush if you have steady hands, or use nail tape to create a perfectly straight line. Paint your baby blue base coat first and let it dry completely. Then apply your white polish to the tip area using thin strokes. If you mess up the line, let the white polish dry and clean up the edges with a small brush dipped in acetone or nail dehydrator.
Variation Ideas for the Classic Design
- Thicker white tips (covering more of the nail length) for a bolder look
- Thin, delicate white tips for a more subtle French manicure feel
- Curved white tip instead of straight—more modern and less traditional
- Add a thin gold or silver line where the baby blue and white meet for extra detail
Insider note: French tips are actually harder to keep pristine than most designs because the white shows every smudge and imperfection, so seal with a strong topcoat and avoid hangnails in that tip area.
6. Baby Blue with Gold Geometric Patterns
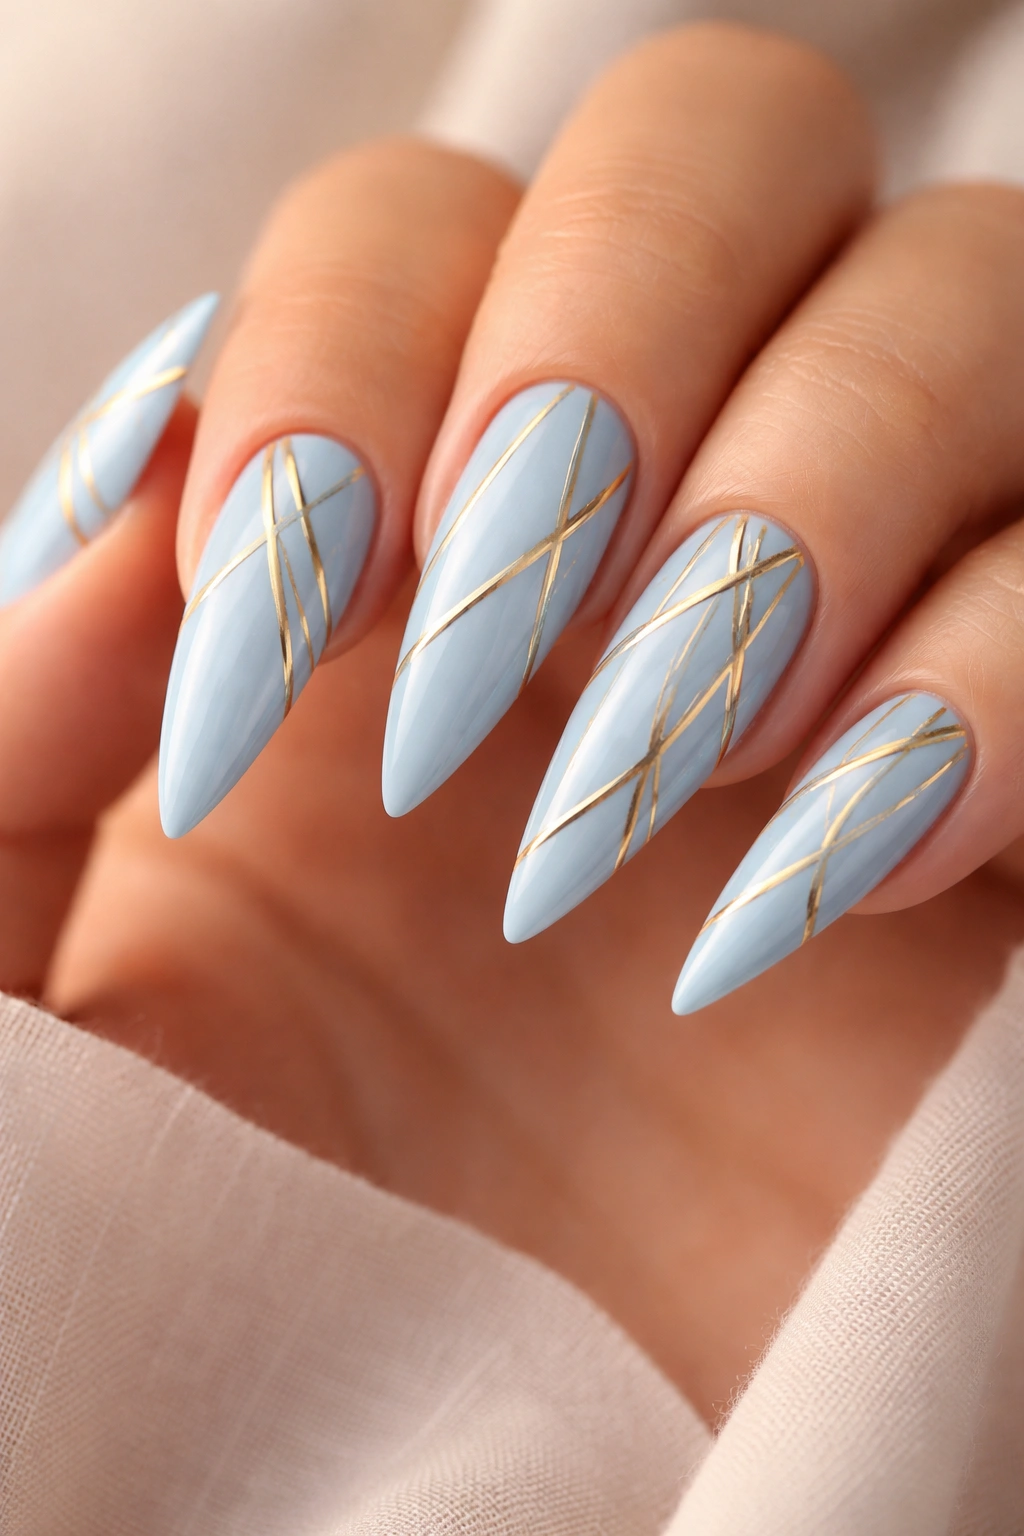
Geometric designs feel modern and editorial, especially when you use metallic gold accents against the soft baby blue base. Think angular lines creating triangles, stripes, or abstract shapes, or concentric shapes that play with the length of the stiletto. Gold metallics catch the light beautifully and create visual interest without feeling chaotic or overwhelming. This design works for anyone who loves modern art and wants their nails to reflect that aesthetic.
Geometric Pattern Ideas
Diagonal stripes in gold create movement and elongate the already-long silhouette of the nail. Triangular patterns covering the lower half of the nail leave the upper portion clean. Abstract wavy lines create something fluid and organic while still feeling geometric. Thin gold outlines creating geometric shapes scattered across the nail offer a more playful, less serious vibe. Half-and-half designs where geometric patterns cover only part of the nail and solid baby blue covers the rest create balance and visual interest.
Tools and Techniques for Precision
A thin nail art brush or a dotting tool allows you to paint gold lines freehand, but this takes practice. Nail striping tape creates perfectly straight lines—apply the tape to your dried base coat, paint over the area with gold, let the polish dry, and carefully peel the tape away. Geometric nail stickers offer the easiest option if you want flawless patterns without the technique challenge—simply apply them to your base coat and seal with topcoat.
Worth knowing: Gold metallics and baby blue create a cool-toned, sophisticated pairing that works especially well for cooler undertones, though it’s universally flattering.
7. Baby Blue Cat Eye or Chrome Nail Effect
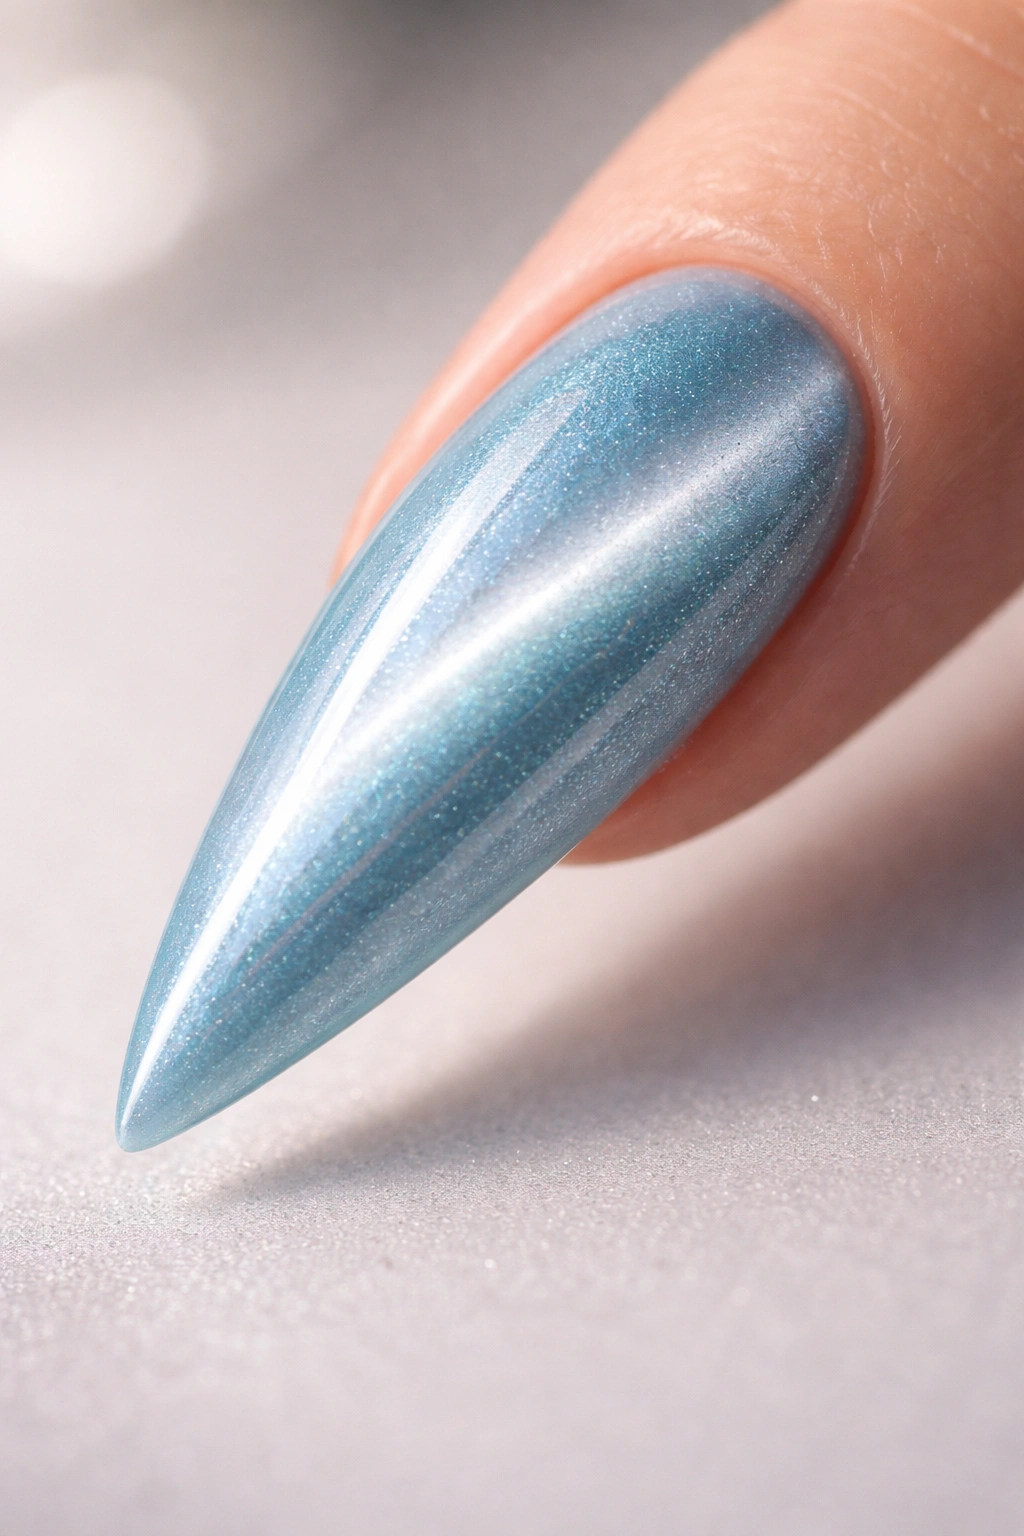
A cat eye or magnetic effect creates a illusion of depth and movement on your nails, with a reflective “stripe” that appears to shift and move as you move your hand. This ultra-modern look makes your stiletto nails look almost like polished metal. The effect requires a magnetic nail polish (which contains iron particles) and a magnet held near the nail as the polish dries. Baby blue magnetic polish creates a softer, more wearable version of this trendy effect compared to bolder chrome shades.
How to Create the Magnetic Effect
Apply your baby blue magnetic polish to your nail in normal strokes, then immediately hold a magnet about a quarter-inch away from your nail surface for 10-15 seconds while the polish is still wet. The iron particles in the polish will align toward the magnet, creating a striped or eye-like pattern. The size and position of the magnet determines whether you get a thin line or a wider stripe. Practice on a couple of nails to figure out the magnet position that gives you the effect you want.
Achieving Different Styles with the Magnetic Effect
- Hold the magnet straight up and down to create vertical stripes
- Angle the magnet to create a diagonal stripe that elongates the nail shape
- Move the magnet slightly to create a curved, eye-like effect (hence “cat eye”)
- Use multiple magnets for patterns with multiple stripes or more complex designs
Pro tip: Don’t use the magnet too close to the nail or leave it there too long—15 seconds is usually the sweet spot. Too much magnet exposure can over-align the particles and lose the definition of the stripe.
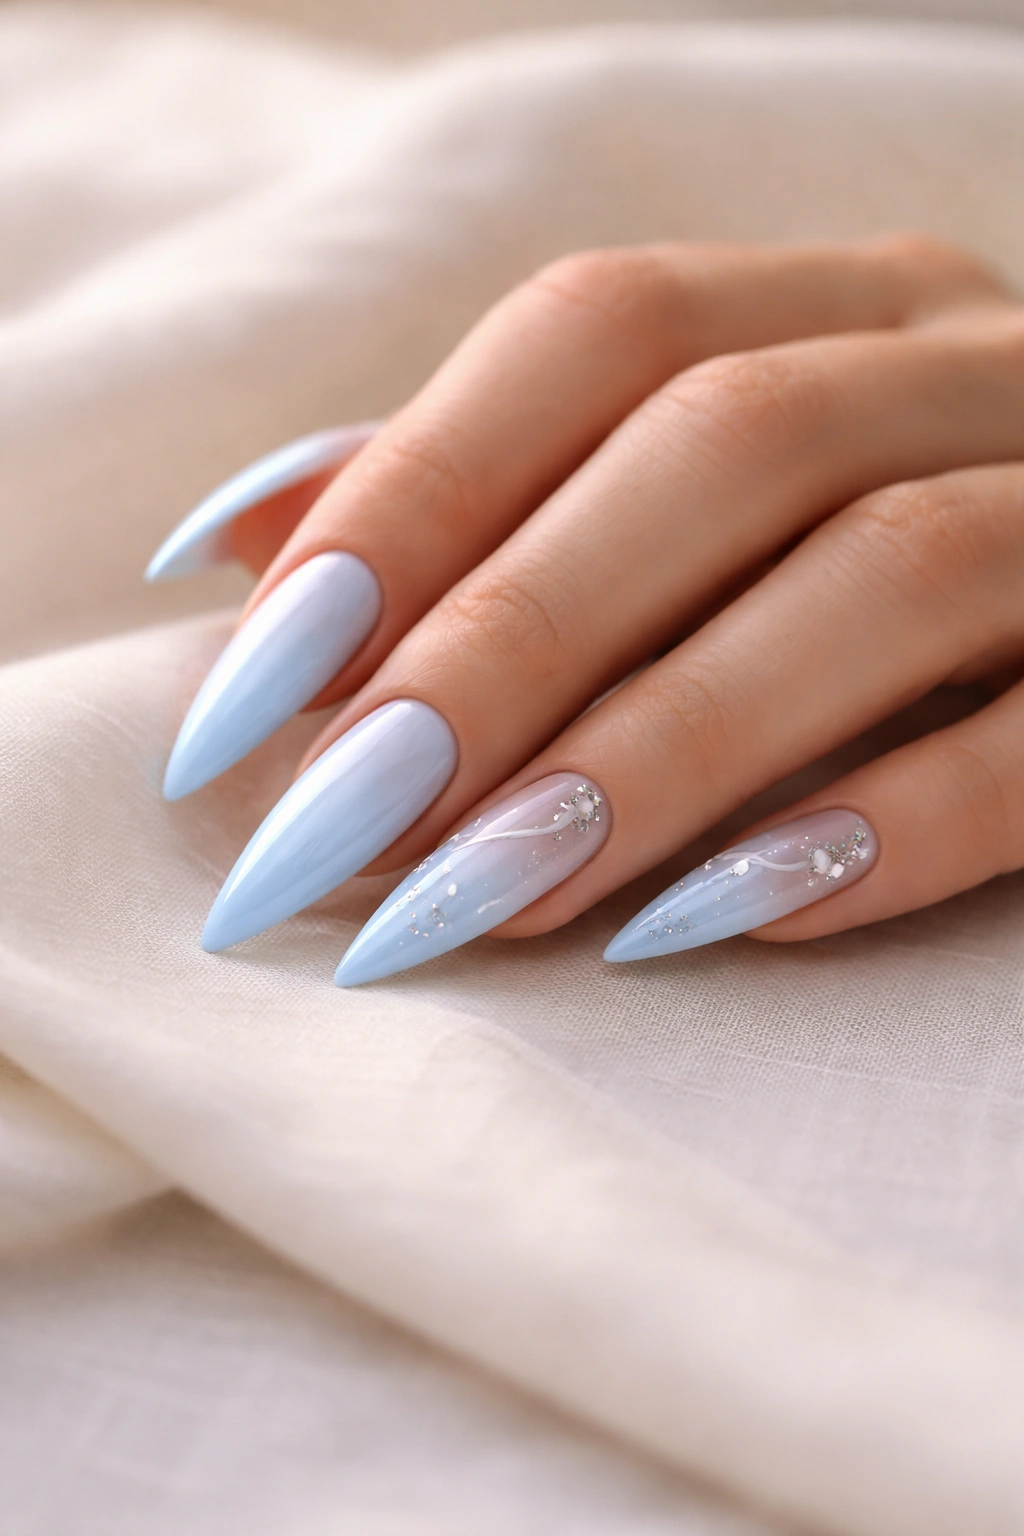
8. Baby Blue with Delicate Floral Designs
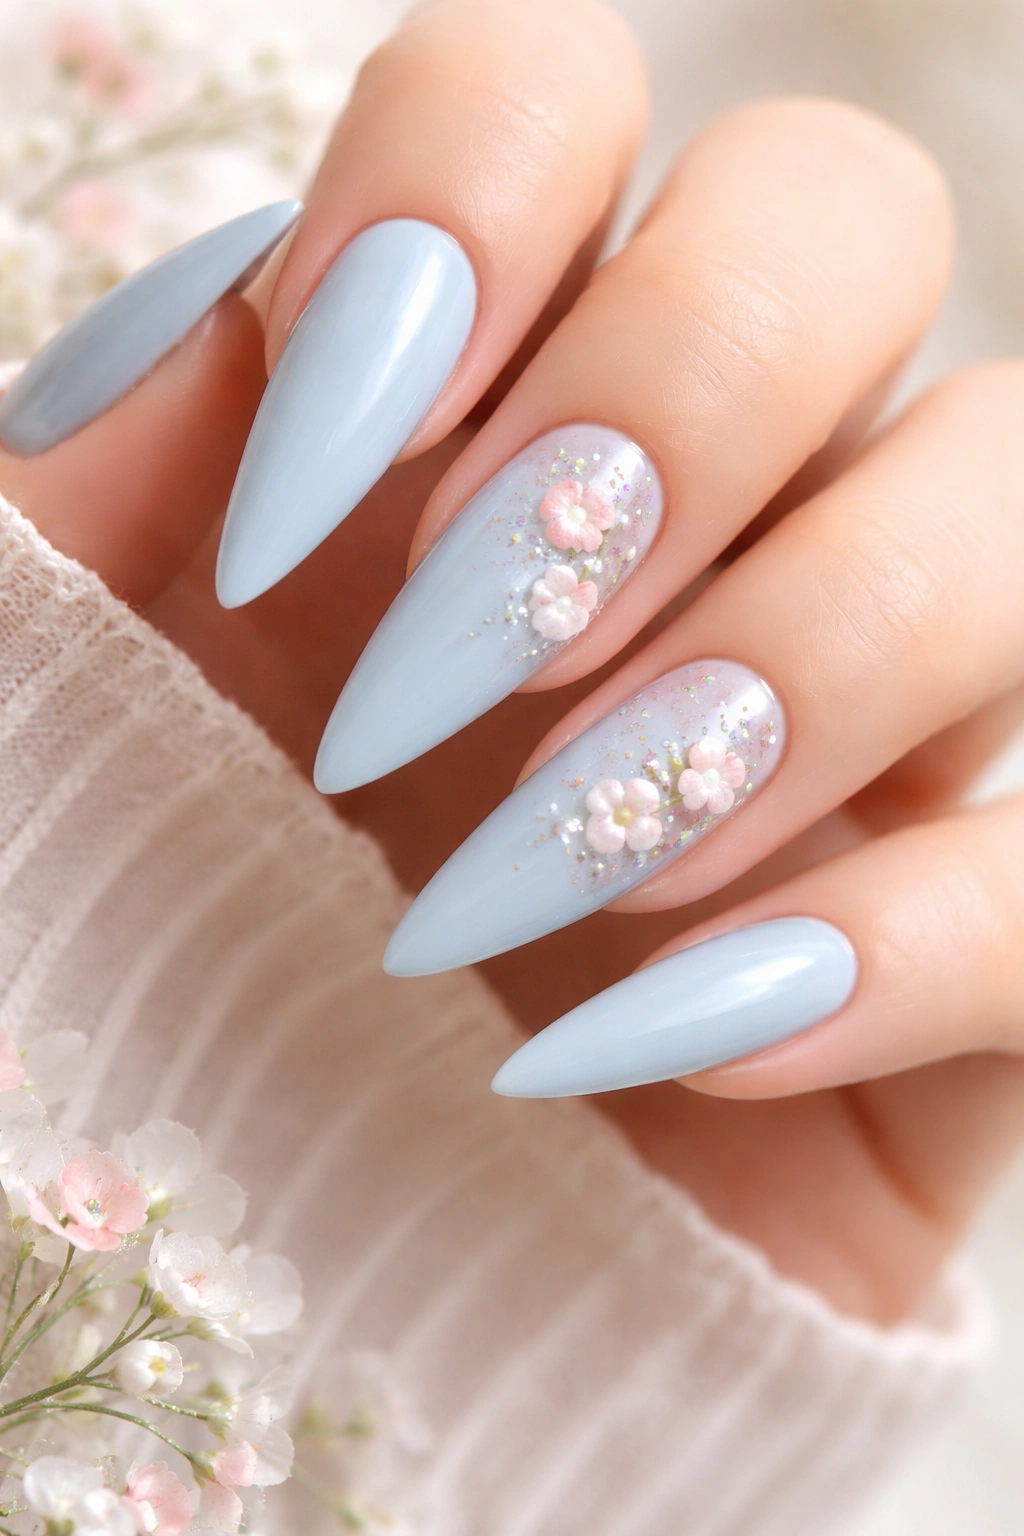
Floral nail art brings romance and femininity to the baby blue base, creating a design that feels both artistic and wearable. You can hand-paint tiny flowers, use floral nail stickers, or create a watercolor floral effect with soft, blended colors. Flowers in white, pink, gold, or green against the baby blue create different moods—pastels for romantic, metallics for glamorous, or earth tones for bohemian.
Floral Design Options for Different Aesthetics
Minimal florals scattered across a few nails (leaving others solid baby blue) create an understated, elegant look. A full floral garden covering all ten nails in varied designs feels artistic and show-stopping. Watercolor florals using wet-on-wet blending techniques create soft, impressionistic flowers. Line-drawn botanical designs using thin brushes create a modern botanical illustration feel. Single statement flowers on one nail paired with solid baby blue on the rest creates balance and visual hierarchy.
Execution Methods Based on Your Skill Level
If you’re a talented painter, hand-painting florals is absolutely possible—you’ll need very thin brushes and a steady hand. Nail stickers offer a gorgeous alternative with zero technique required; simply apply them to your base coat and seal with topcoat. Combining stickers with hand-painted details (like adding gold outlines around stick-on flowers) creates a semi-custom look. Digital nail art designs applied with a special printer and water slide nail decals offer professional results if you have access to the equipment.
Insider note: Florals work especially well on stiletto nails because the elongated shape gives you more canvas space to work with detailed designs.
9. Baby Blue with Nude or White Reverse French
A reverse French (also called an inverted French or reverse tip) flips the classic design on its head—the nail tip stays baby blue while the base features a contrasting color, typically nude, white, or beige. This creates an unexpected, modern twist on a traditional design. The effect makes the stiletto shape feel even more dramatic because your eye travels along the nail from the colored base to the pastel tip.
Creating the Reverse French Look
Apply your nude or white polish to the entire nail first and let it dry completely. Then use a curved French tip guide or painter’s tape to mark off the upper portion of the nail that should stay baby blue. Apply baby blue polish to that section and remove the guide while the polish is still slightly wet. The transition line should be smooth and clearly defined. Some people use a thin brush to clean up the line afterward with one color or the other for absolute precision.
Color Combinations That Create Different Moods
- Baby blue tip with nude base for a soft, neutral, universally wearable look
- Baby blue tip with white base for higher contrast and a more modern feel
- Baby blue tip with beige base for warm undertones and a sophisticated vibe
- Baby blue tip with pale pink base for a romantic, feminine combination
Worth knowing: Reverse French manicures are easier to keep pristine than traditional French tips because the base color (usually matte nude or white) doesn’t show marks as easily as pure white does.
10. Baby Blue with 3D Embellishments and Rhinestones
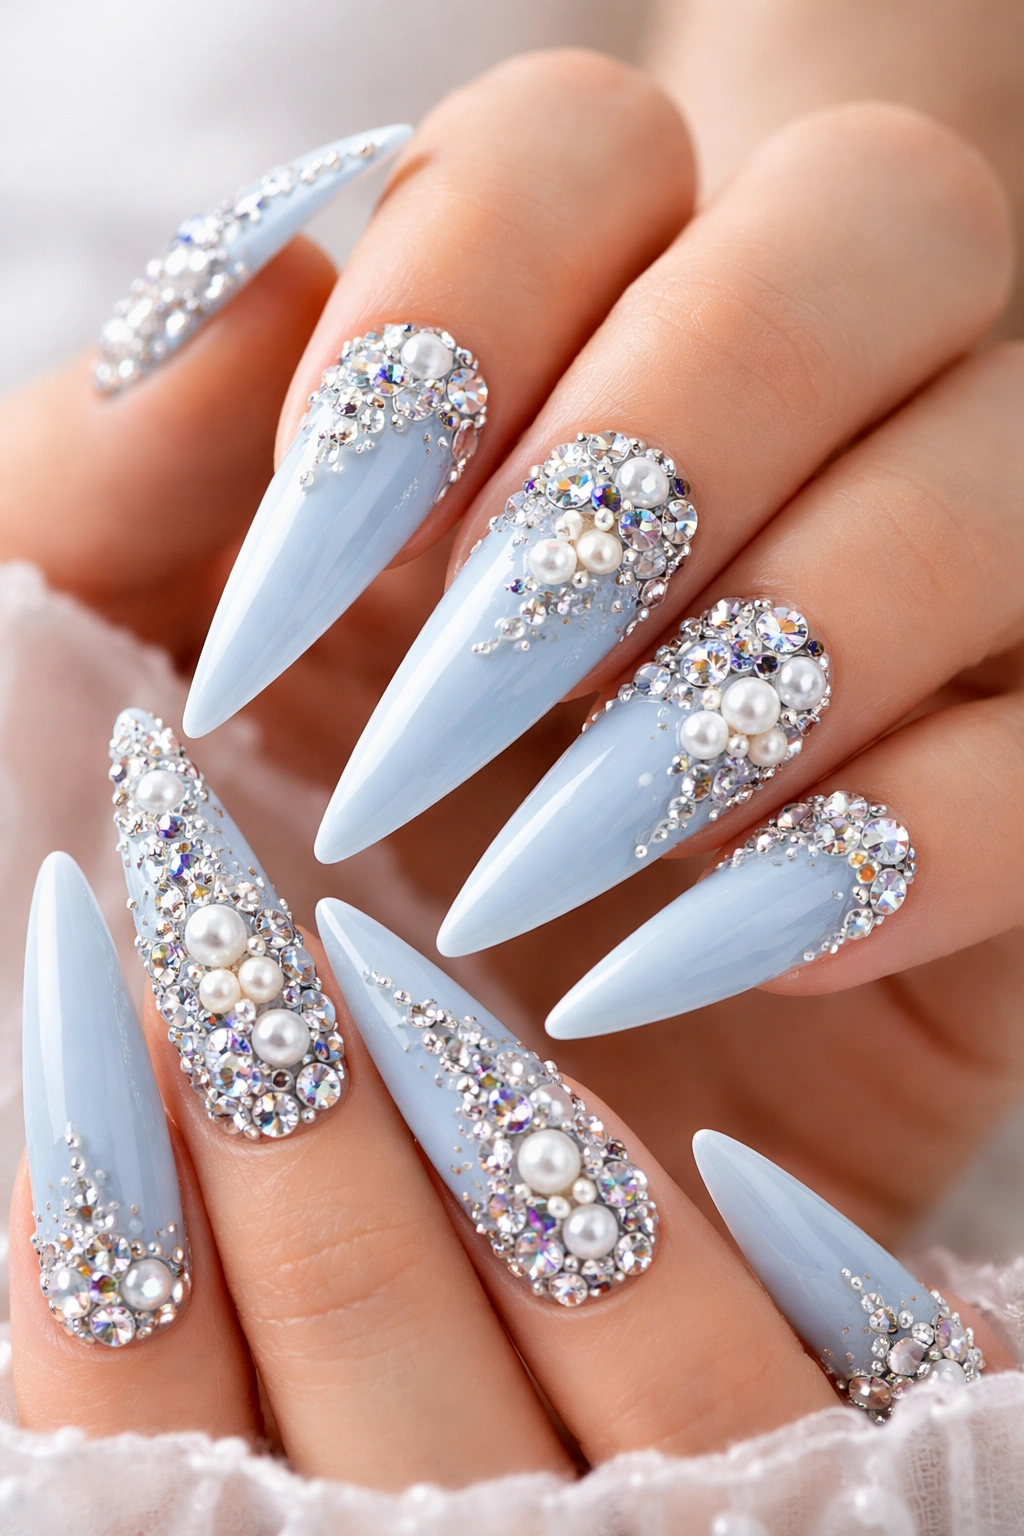
For maximum glamour and impact, layer baby blue with 3D nail art—think rhinestones, studs, pearls, and dimensional embellishments. This look is genuinely show-stopping and works beautifully for special events, nights out, or any time you want your nails to be the focal point of your look. The elongated stiletto shape provides the perfect canvas for placed embellishments without the design feeling cramped or busy.
Strategic Embellishment Placement
A single statement rhinestone or pearl on one or two nails creates elegant simplicity. A gradient of rhinestones increasing in size from the base of the nail to the tip emphasizes the length. Rhinestones outlining a geometric shape or creating patterns across multiple nails creates intentional, artistic designs. Corner embellishments (one or two stones in the upper corner of each nail) create subtle luxury. Clustered rhinestones concentrated on a few nails while others stay solid creates balance and visual hierarchy.
Working with Different Types of Embellishments
Rhinestones are traditional nail art jewels and come in various sizes, cuts, colors, and quality grades. Higher-quality rhinestones have more facets and reflect light more brilliantly. Pearls offer a softer, more delicate look. Studs and spikes create edgier, more avant-garde designs. Holographic or aurora borealis finishes catch rainbow light. Metallic studs in gold, silver, or rose gold add glam without the jewelry aesthetic.
Securing Embellishments So They Stay Put
Special nail glue or rhinestone adhesive bonds stones permanently to your nail. Apply a small amount of adhesive to the back of the stone (or to the nail surface), then press it in place for 10-15 seconds. Use tweezers if you’re working with tiny stones to position them precisely. Seal with topcoat, making sure the topcoat flows around the sides of the stones but doesn’t completely bury them. For long-lasting wear, make sure your base is completely dry before applying adhesive—any tackiness will compromise the bond.
Pro tip: Order your embellishments in advance so you have them before your manicure appointment—not all nail suppliers carry the exact stones you want in stock.
Final Thoughts
Baby blue stiletto nails offer endless possibilities depending on your personal style, the occasion, and how much time you want to invest in your manicure. Whether you choose the timeless elegance of a solid baby blue, the artistic flair of marble or florals, the modern edge of geometric patterns or chrome effects, or the glamorous statement of rhinestones and embellishments, you’re working with a shade that feels both sophisticated and playful. The key is choosing a design that genuinely reflects what makes you feel confident and beautiful, then executing it with care and quality products.
If you’re doing your nails at home, invest in good tools (quality brushes, guide stickers, proper nail files), allow plenty of drying time between coats, and don’t rush the process. If you’re going to a nail technician, bring reference photos of the specific design you want, and don’t hesitate to ask questions about how they’ll achieve the look. Baby blue is forgiving enough that even if a design doesn’t turn out exactly as you pictured, the soft color still looks polished and put-together. Start with a design that matches your skill level and current confidence, and work your way up to more complex ideas as you gain experience and see what you enjoy maintaining over multiple weeks.
