

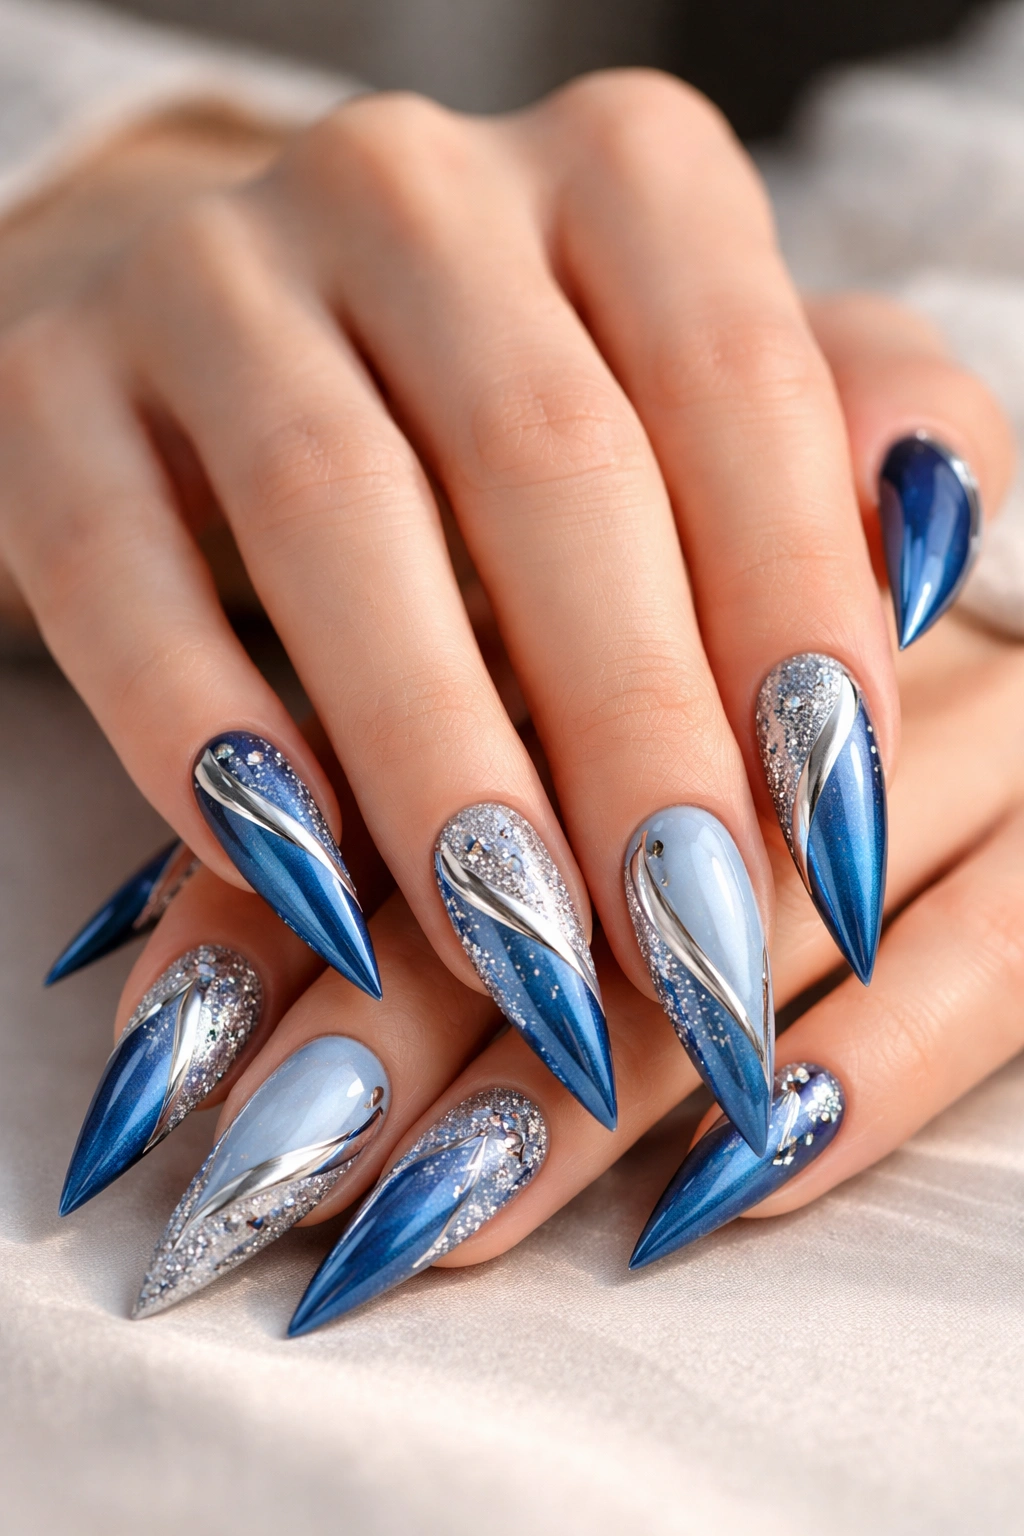
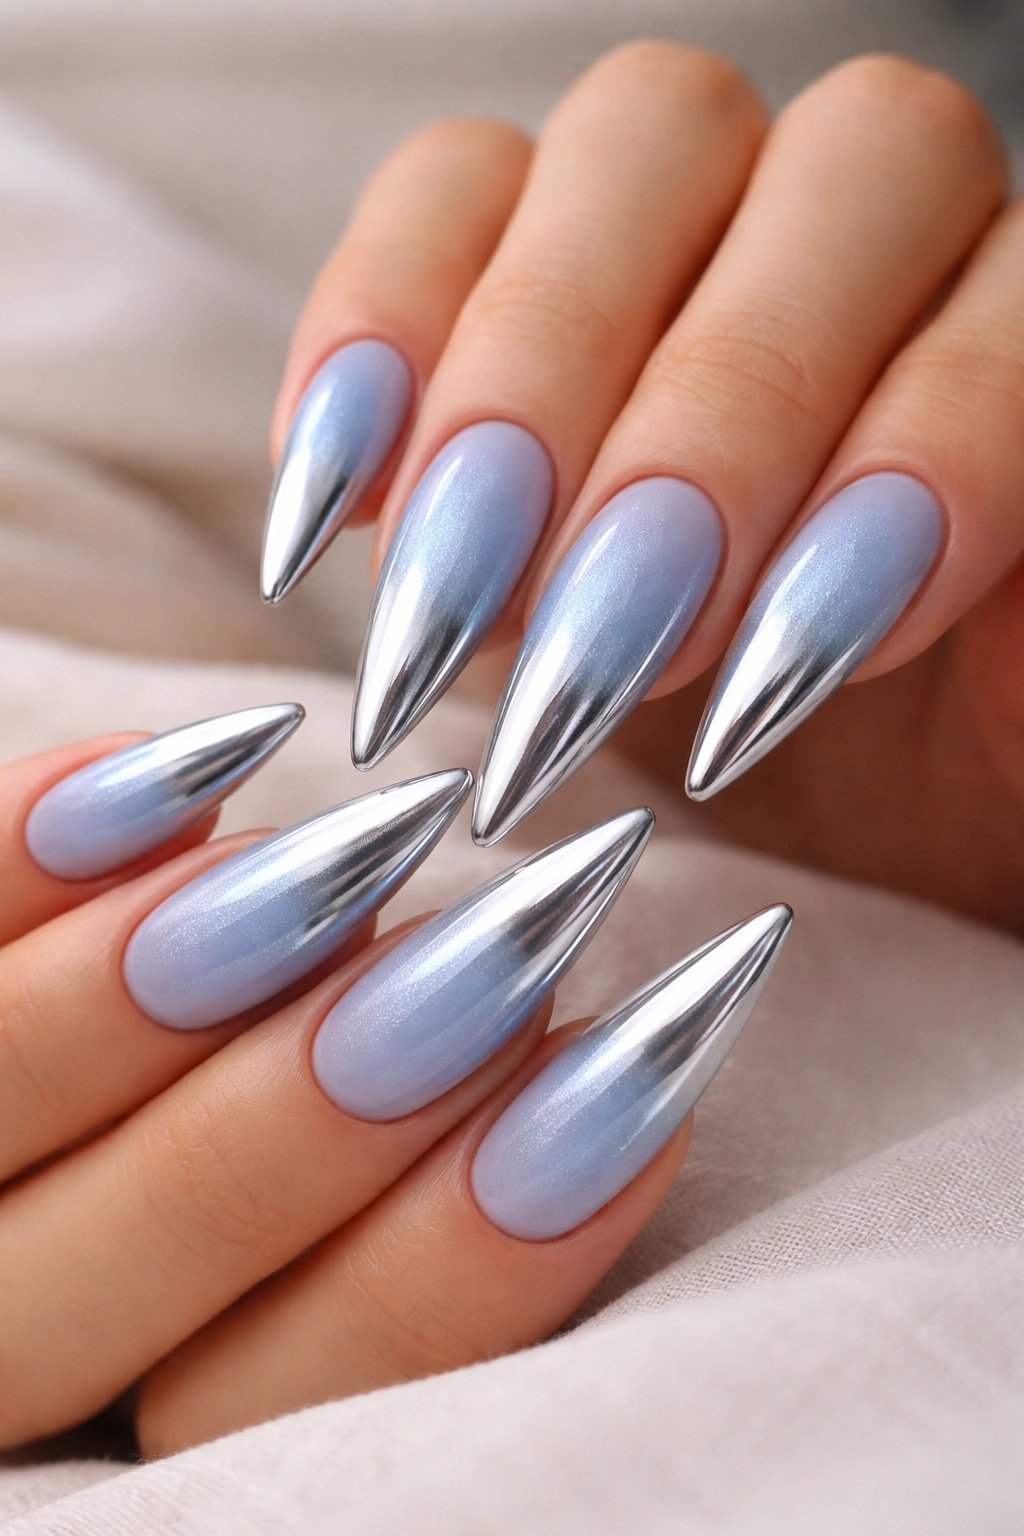
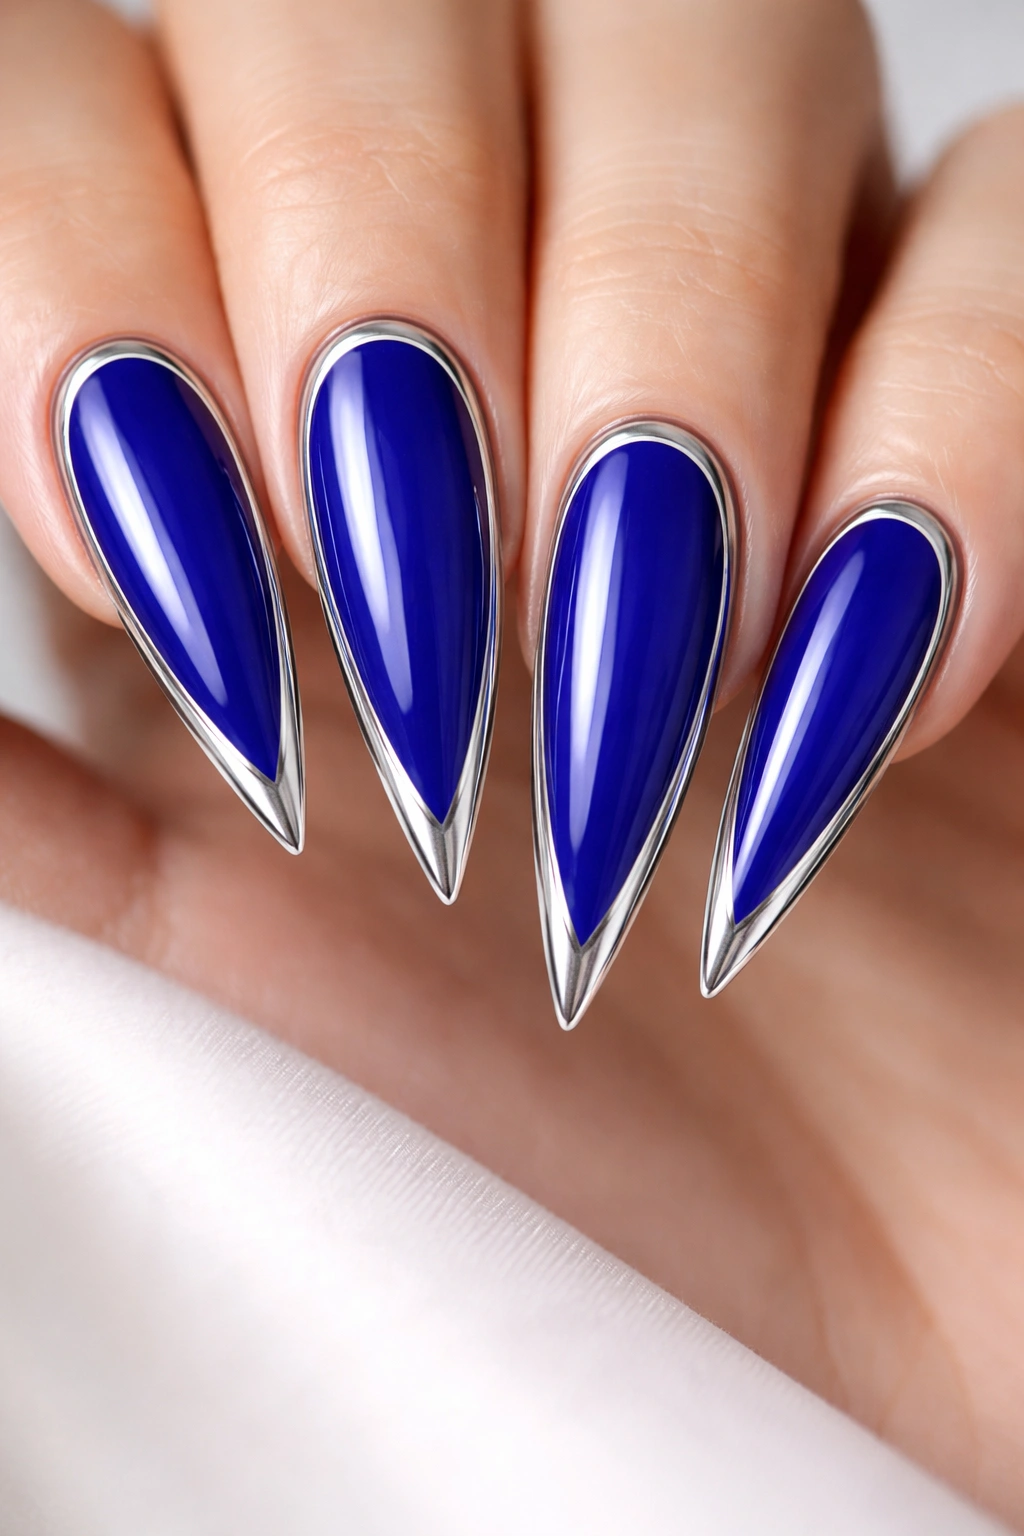
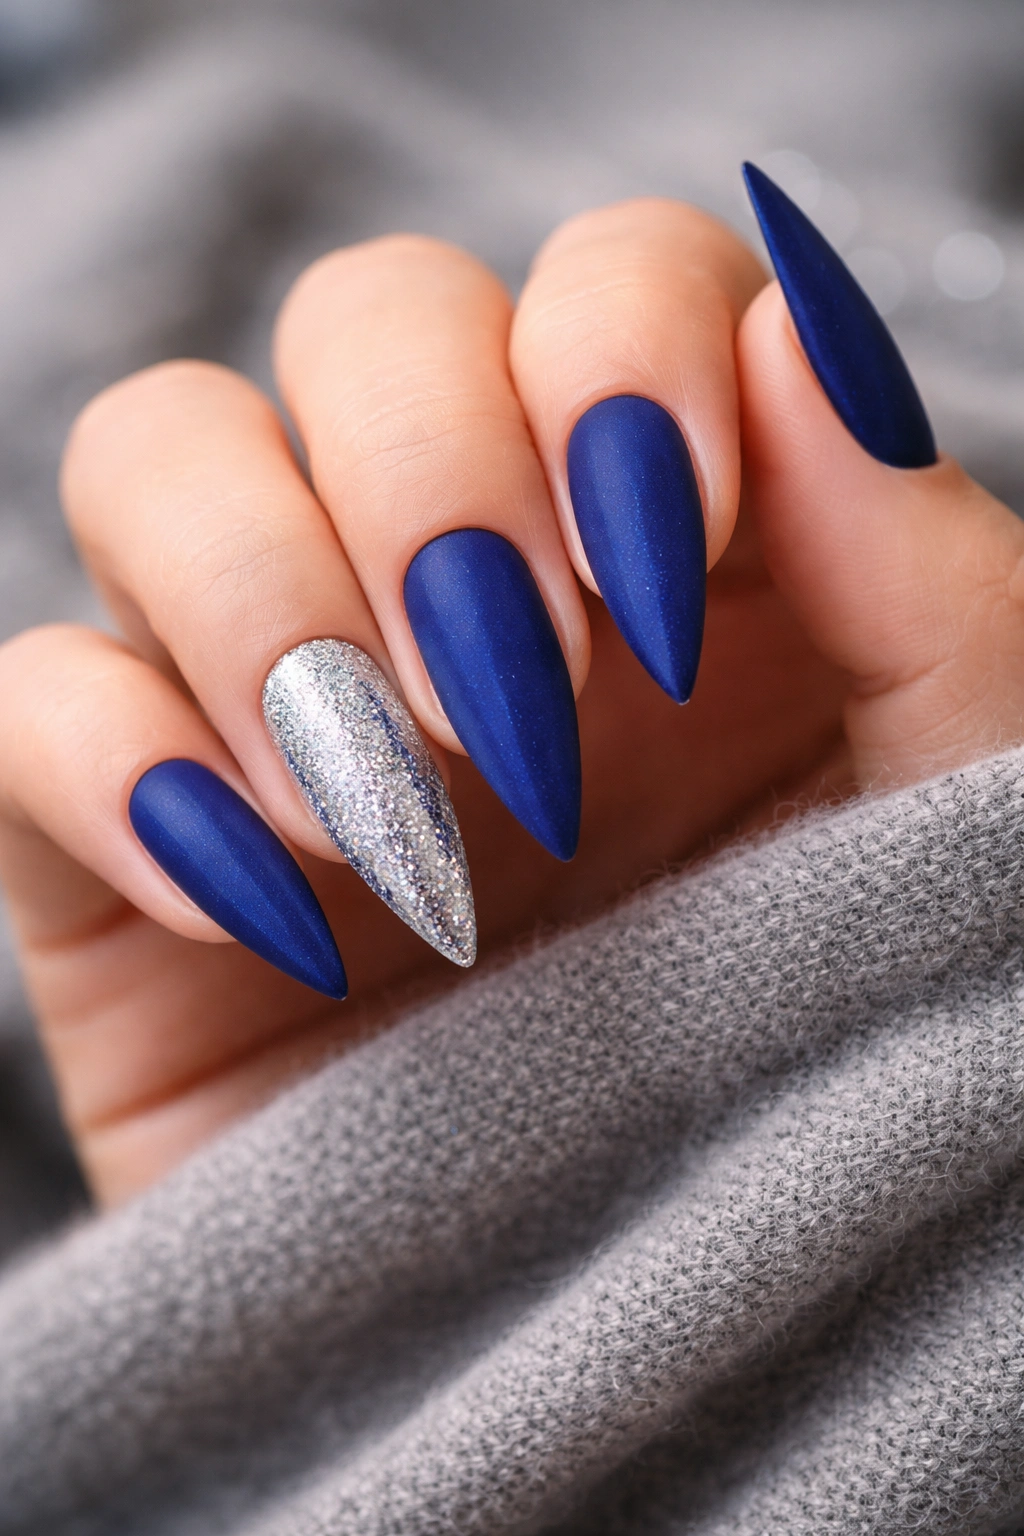
Blue and silver might be the most versatile color combo in nail design — it’s sophisticated enough for a boardroom meeting, eye-catching enough for a night out, and timeless enough that you won’t tire of it in three weeks. Whether you’re drawn to cool, icy tones or deeper ocean blues paired with mirror-like silver accents, this color pairing offers endless possibilities for stiletto nails. The contrast between blue and silver creates natural depth and movement, making your nails look more dimensional and intentional than a single solid color ever could.
Stiletto nails are the perfect canvas for blue and silver designs because their length and sharp edges amplify any nail art you apply. The elongated shape gives you more surface area to work with, so intricate details and gradient transitions really shine. Combined with the cool undertones of blue and silver, stiletto nails instantly read as polished, modern, and a little bit edgy — which is exactly the vibe that draws people to this style in the first place.
Why Blue and Silver Stilettos Suit Your Personal Style
Blue and silver stilettos work because they bridge formal and fun. Unlike neons or hot pinks that scream party, and unlike neutral nudes that fade into the background, blue and silver give you a nail look that adapts to the occasion. Wear them to a client dinner and they look professional and intentional. Wear them to brunch with friends and they feel trendy and confident.
The psychological weight of blue adds calm and trust, while silver introduces glamour and shimmer. Together, they create a nail aesthetic that feels both grounded and luxe — you look put-together without looking overdone. Stilettos amplify this effect because the sharp points and extended length naturally draw the eye, making even a simple two-color design feel high-impact.
The Versatility Factor
- Works with formal work outfits, casual weekend wear, and everything in between
- Reads as modern and intentional without feeling trendy or temporary
- Complements most skin tones because blue and silver are universally flattering
- Pairs beautifully with both warm and cool undertones in your personal color palette
- Photographs exceptionally well, making your nails look sharp in selfies and video calls
Pro tip: The depth of blue you choose matters more than you might think. Navy and deep blues create a moody, sophisticated look, while sky blue and powder blue feel lighter and more playful — pick the shade that matches your mood first, then build outward.
How to Achieve Perfect Blue and Silver Stiletto Nails at Home or in the Salon
Getting blue and silver stilettos to look salon-quality depends on your application technique and your product choices. Whether you’re painting them yourself or booking a technician, understanding the fundamentals helps you explain exactly what you want and catch any details that might not translate correctly.
Stiletto nails require a few extra steps compared to shorter shapes. Your base coat needs to be extra smooth because any bumps or ridges get magnified by the length and shape. The blue shade should be opaque enough that you don’t need three coats — thick paint looks clumpy and builds up unevenly on stilettos. Silver accents work best when applied cleanly and with intention; a sloppy silver line or smudged glitter pulls the whole design down.
Application Essentials for Stiletto Success
- Use a nail dehydrator or rubbing alcohol before your base coat to eliminate any moisture or oils that cause peeling
- Apply thin, even coats of color — two thin coats beat one thick coat every single time
- Invest in a quality top coat because stilettos face more wear and tear than shorter nails
- Seal designs completely so silver accents, glitter, or chrome powder don’t shift or lift prematurely
- Consider gel polish if you’re investing time and money in stiletto nails — the durability is worth it
Worth knowing: Stiletto nails are long enough that small imperfections become obvious. If you’re painting at home, a good lamp and a steady hand matter. If you’re going to a salon, bring reference photos of the exact design you want — verbal descriptions often lead to miscommunication.
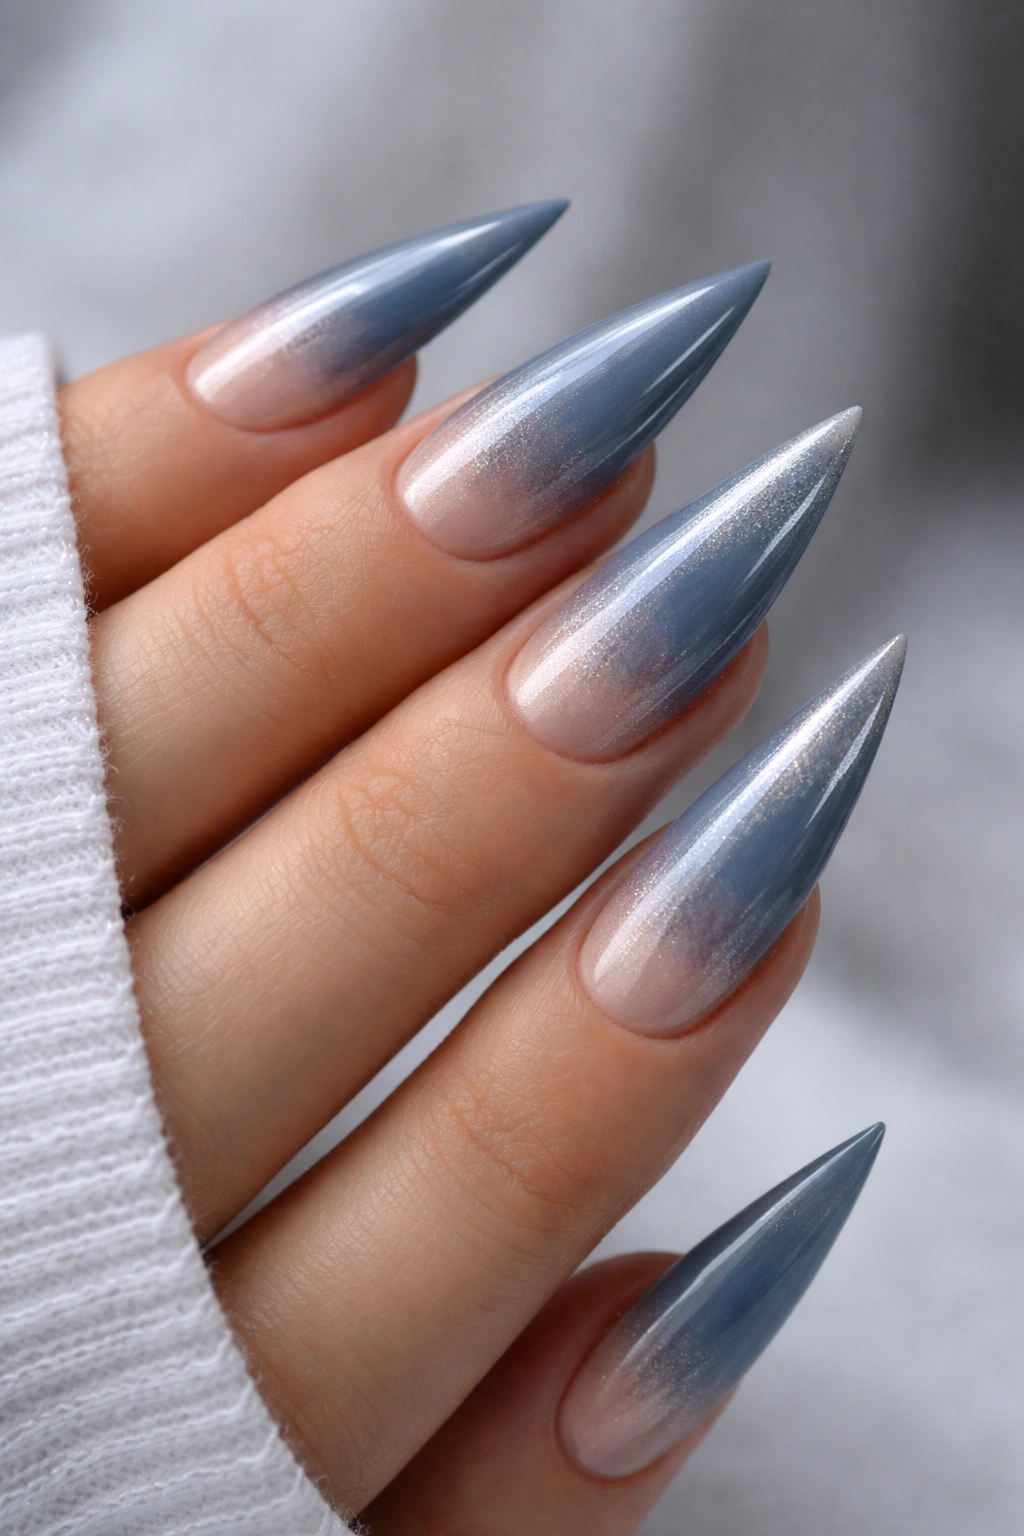
1. Icy White Tip with Silver Glitter Gradient
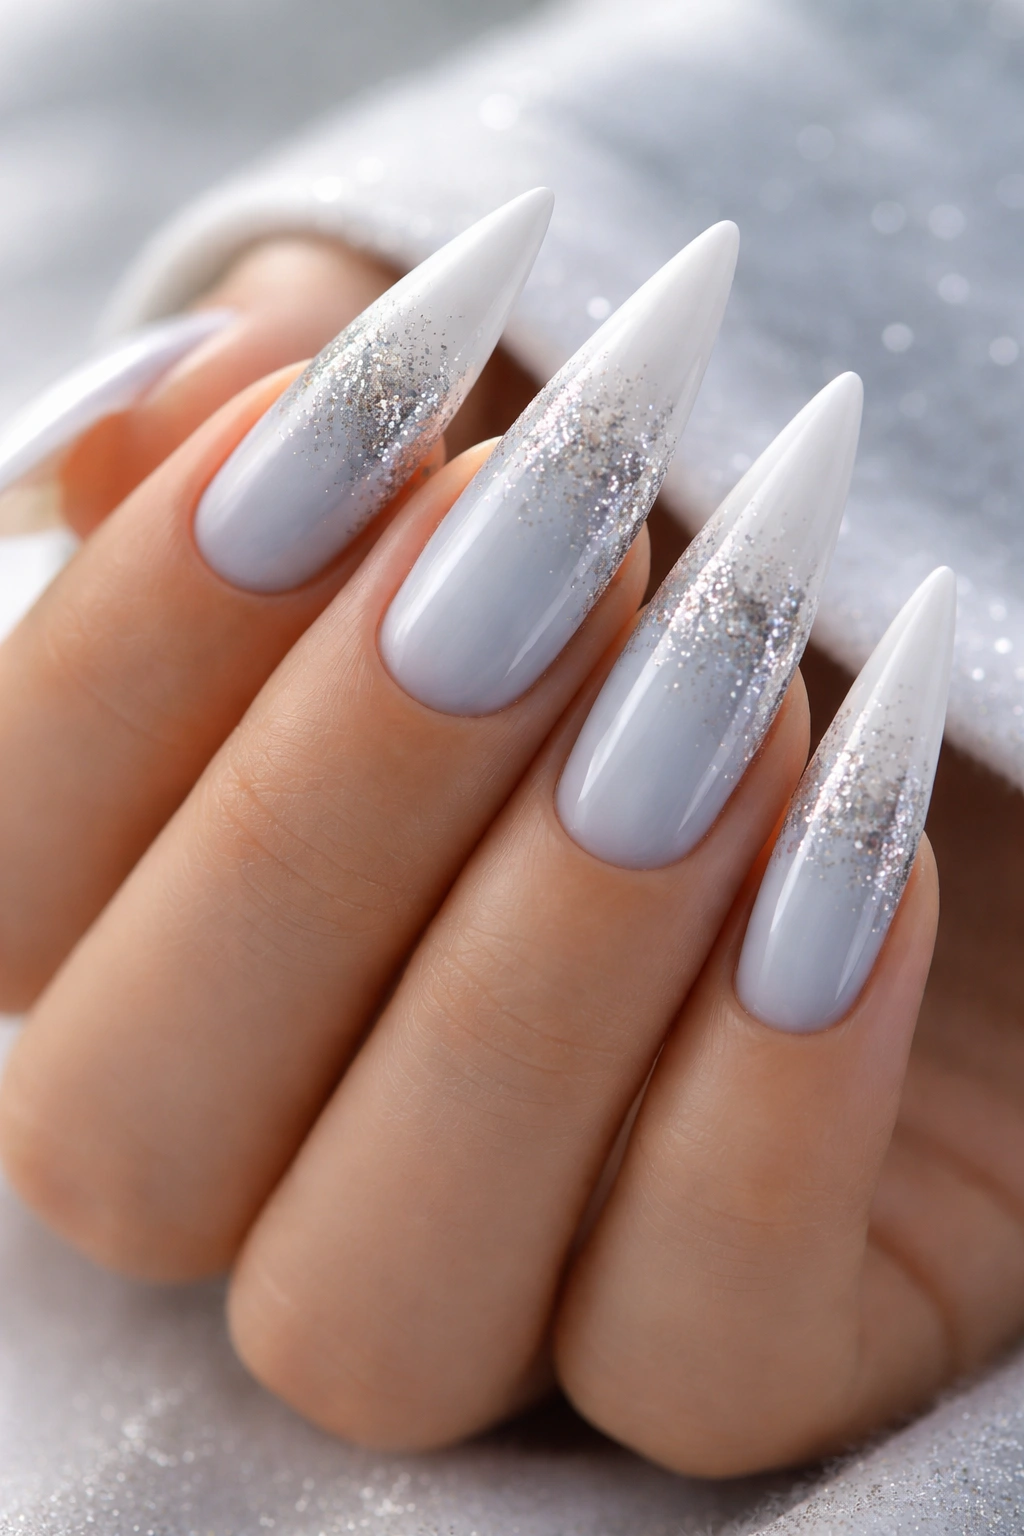
This design stacks multiple textures into a single, cohesive look. Start with a pale blue base that sits somewhere between ice and sky — think more ethereal than bold. The white tip gives traditional French manicure vibes, but instead of stopping there, layer a fine silver glitter that transitions from the white tip down the sides of the nail, creating a gradient effect that catches light and adds movement.
The magic happens in the transition zone where white meets silver glitter meets pale blue. Applied correctly, it looks like light is literally bouncing off your nails. Stilettos elongate this gradient, so what might look cramped on a shorter nail becomes genuinely stunning on a stiletto shape.
Why It’s Sophisticated and Wearable
- Works for professional settings because the base color is subtle and cool-toned
- The glitter feels special without being over the top or costume-like
- Reads as intentional and elevated, not like you grabbed whatever was at the bottom of your nail drawer
- Translates beautifully in different lighting — indoors it’s cool and calm, in sunlight it sparkles
How to Create the Glitter Gradient Effect
- Apply a thin base coat of pale blue across the entire nail
- Paint a white or off-white tip, keeping edges clean and precise — this defines the focal point
- Mix fine silver glitter with clear gel or polish and apply it to a makeup sponge
- Dab the sponge onto the white tip area, then gently blend it down toward the blue base using stippling motions (don’t swipe, dab)
- Seal everything with a glossy top coat to lock in the gradient and give it dimensional depth
Insider note: The finer your glitter, the more polished the result. Chunky glitter reads as costume-like, but superfine silver glitter adds shimmer without screaming “special occasion.”
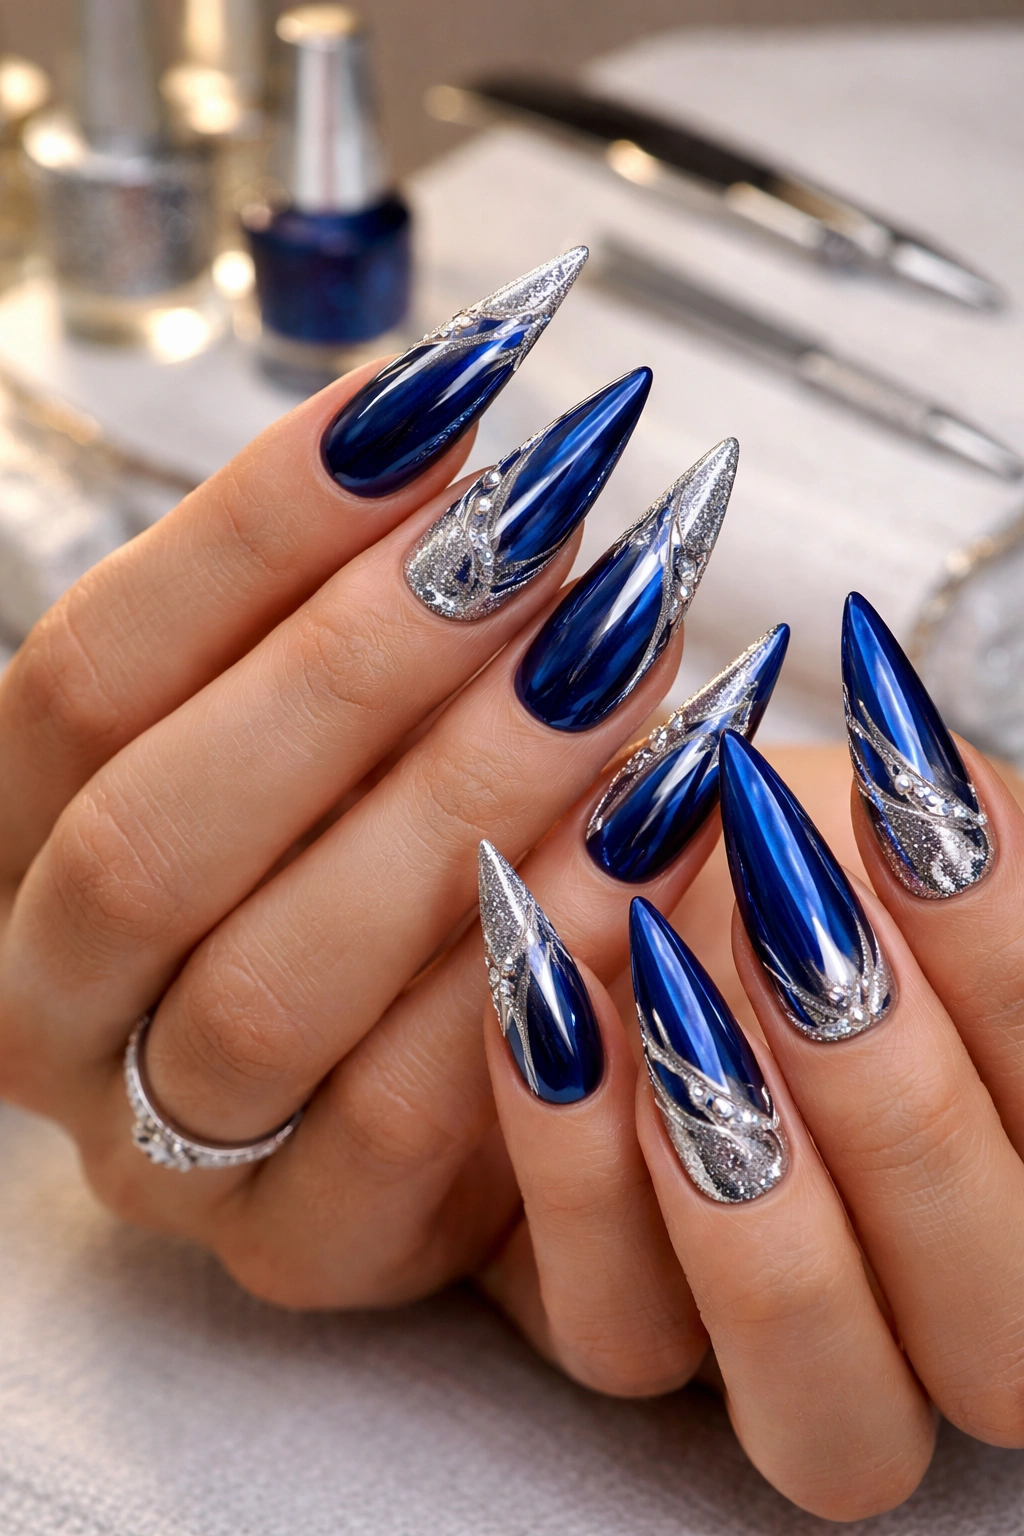
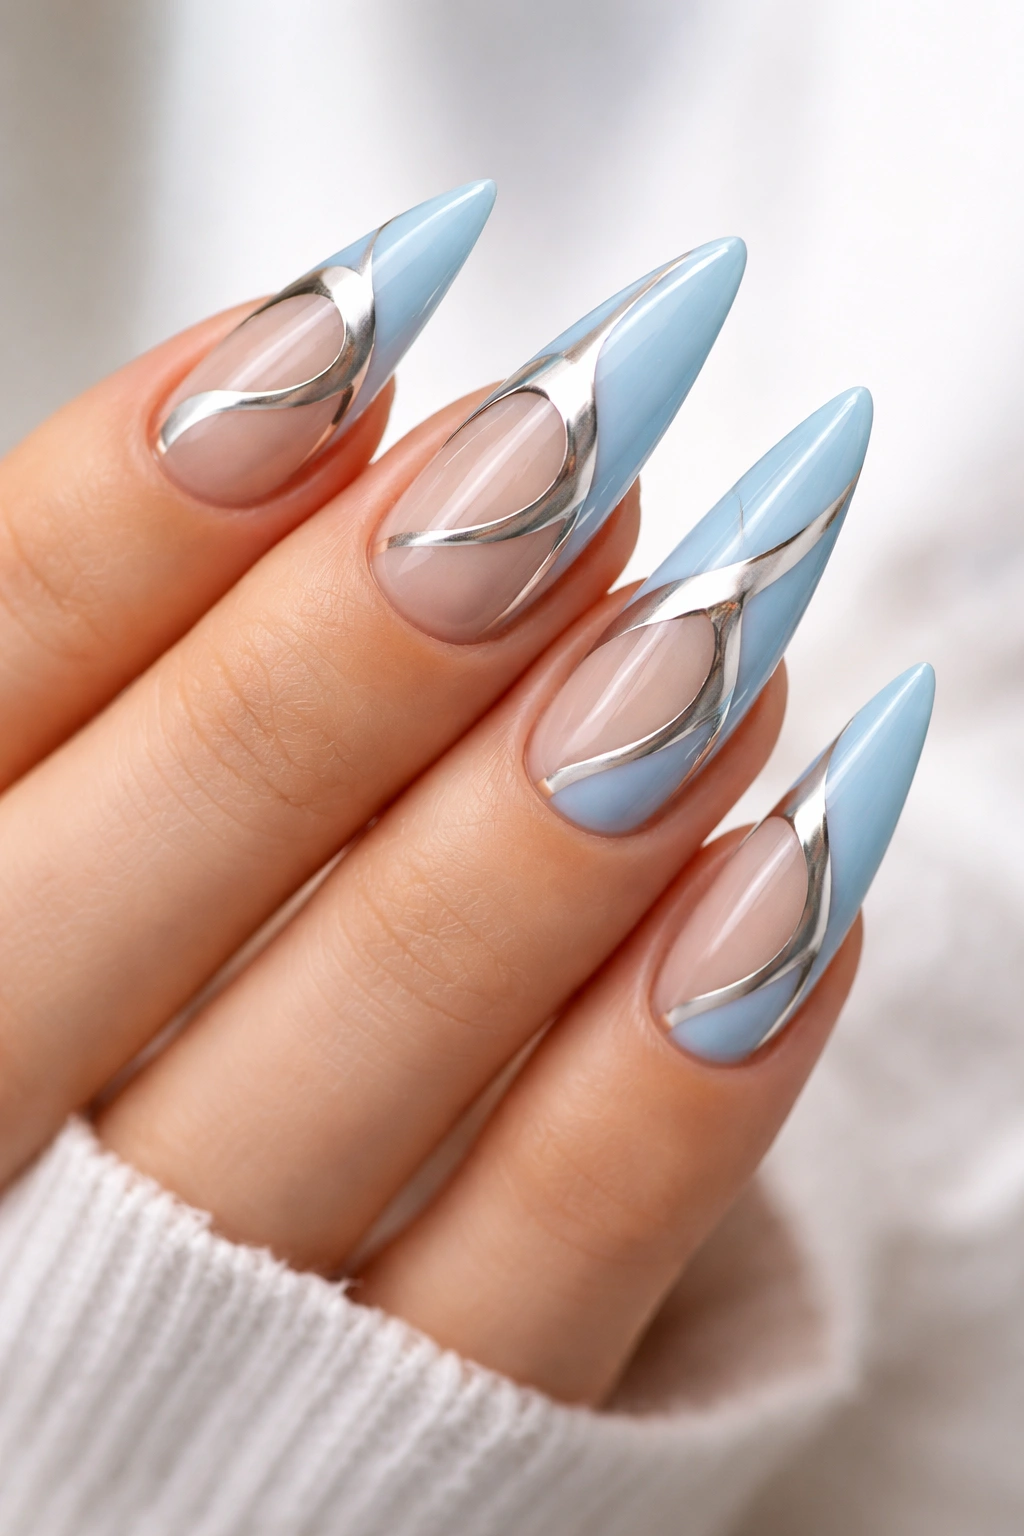
2. Deep Ocean Blue with Silver Foil Accents
Go for a rich, almost jewel-toned blue — the kind that appears nearly black in dim light but reveals its true depth in daylight. Pair it with geometric silver foil sections that create sharp, intentional lines across the nail. The foil catches light in a way that glossy polish never can, so even a small amount of silver creates visual impact.
Foil is less forgiving than glitter because it doesn’t blend — it declares itself. That’s actually what makes it powerful. On stilettos, a silver foil accent that runs down the center of the nail or frames the edges creates a design with real presence and definition.
What Makes This Look Feel Elevated
- Deep blue reads as sophisticated and intentional, never casual or casual
- Silver foil reflects light in a way that draws attention to your hands
- The combination of metallic and matte (or glossy blue) creates visual contrast
- Works as an accent rather than requiring full coverage, so application is more forgiving
Design Options Using Foil
- Single vertical silver foil line down the center of the nail
- Silver foil frame around the edges, leaving the center blue
- Alternating silver and blue sections for a striped or ombré effect
- Silver foil accent on just one or two nails per hand for a subtle pop
Quick note: Foil adheres best to a slightly tacky base, so don’t fully cure your blue polish before applying foil. If you’re working with regular polish, apply the foil while the top coat is still slightly wet.
3. Sky Blue Ombre into Silver Chrome
Ombre designs work exceptionally well on stilettos because the elongated shape gives you space to create a true color transition. Start with a bright sky blue at the base and gradually transition into a shimmery silver chrome finish toward the tips. The movement feels intentional and modern — it’s not a random color choice but a deliberate gradient.
Chrome powder creates a mirror-like finish that’s hard to achieve any other way. When you’re layering it from silver into the tips, it creates an almost liquid quality, like your nails are catching light in real time.
The Ombre Transition Technique
- Apply sky blue as your base color across the entire nail — make sure it’s opaque and even
- Create a simple ombre by applying lighter blue or white near the tips on a makeup sponge, then stippling it onto the nail to create a gradual transition
- Once the base ombre is set, apply chrome powder over the lighter tip area using a soft, dry brush in gentle circular motions
- The chrome adheres to the lighter area and creates a seamless shimmer effect that transitions from matte to mirror-like
Why Ombre Feels Modern and Intentional
- Color transitions feel deliberate rather than like you ran out of polish
- The chrome adds dimension that a flat color never achieves
- Works across multiple lighting conditions — looks different and equally beautiful indoors and in sunlight
- Gives your hands visual interest without being loud or screaming for attention
Styling tip: This design pairs beautifully with minimalist jewelry. Let your nails be the statement — keep rings, bracelets, and watches intentionally simple so they don’t compete.
4. Midnight Blue with Silver Glitter Tips
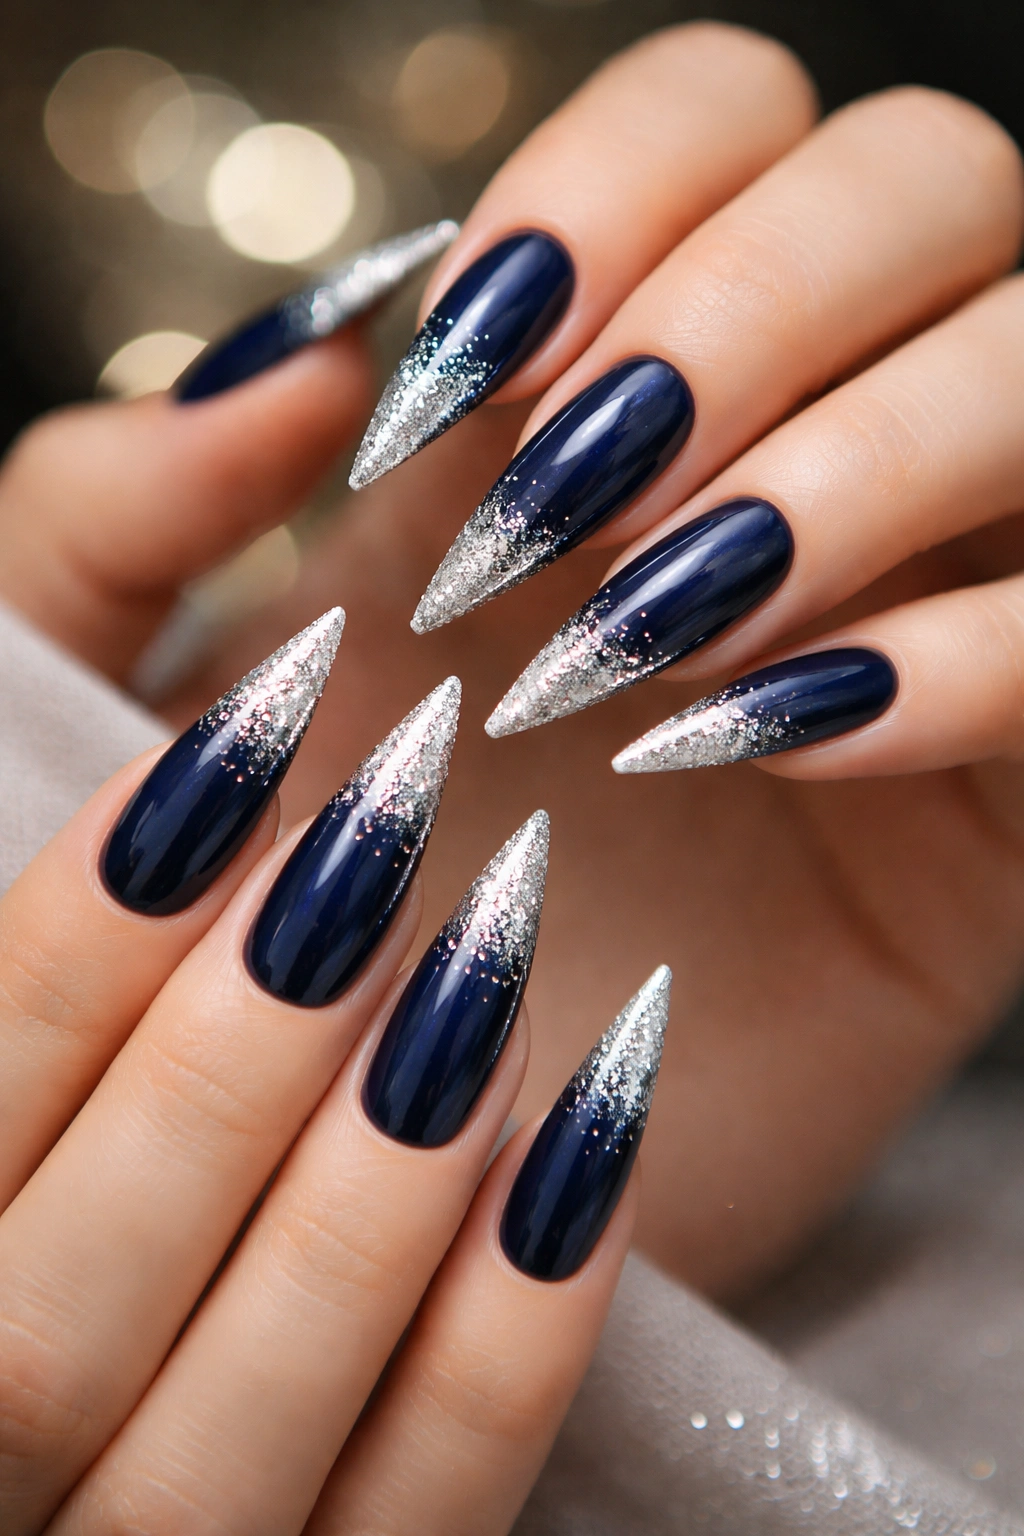
This is the opposite of the traditional French manicure — instead of a light tip, you’re going bold. Paint the entire nail a rich midnight blue, then add a shimmering silver glitter top coat that concentrates toward the tips. The effect is like starlight gathered at the edge of your nail.
The dark blue base means the silver glitter reads as jewelry rather than glitter. It feels elevated and intentional. Stilettos maximize this effect because the tip gets elongated, giving you more surface area for the silver to shine.
The Glitter Concentration Technique
- Apply midnight blue as a smooth, opaque base coat across the entire nail
- Apply a clear base coat to just the tip area (the last quarter to third of the nail)
- Apply silver glitter to a makeup sponge and press it onto the clear base on the tips, letting it fade as you move toward the center
- The glitter concentrates at the tips where you want the focal point, then gradually disappears as you move toward the base
Why This Design Feels Luxe
- The dark base makes the silver read as deliberate jewelry, not random sparkle
- Concentration of glitter at the tips draws the eye to your hands in a flattering way
- Stiletto shape elongates the glitter area, making the effect more dramatic
- Works for both subtle (if you use fine glitter) and bold (if you use chunky glitter) aesthetic preferences
Pro tip: Apply your glitter while your base coat is still slightly tacky. If it fully cures before you apply glitter, the glitter won’t adhere as reliably and might shed.
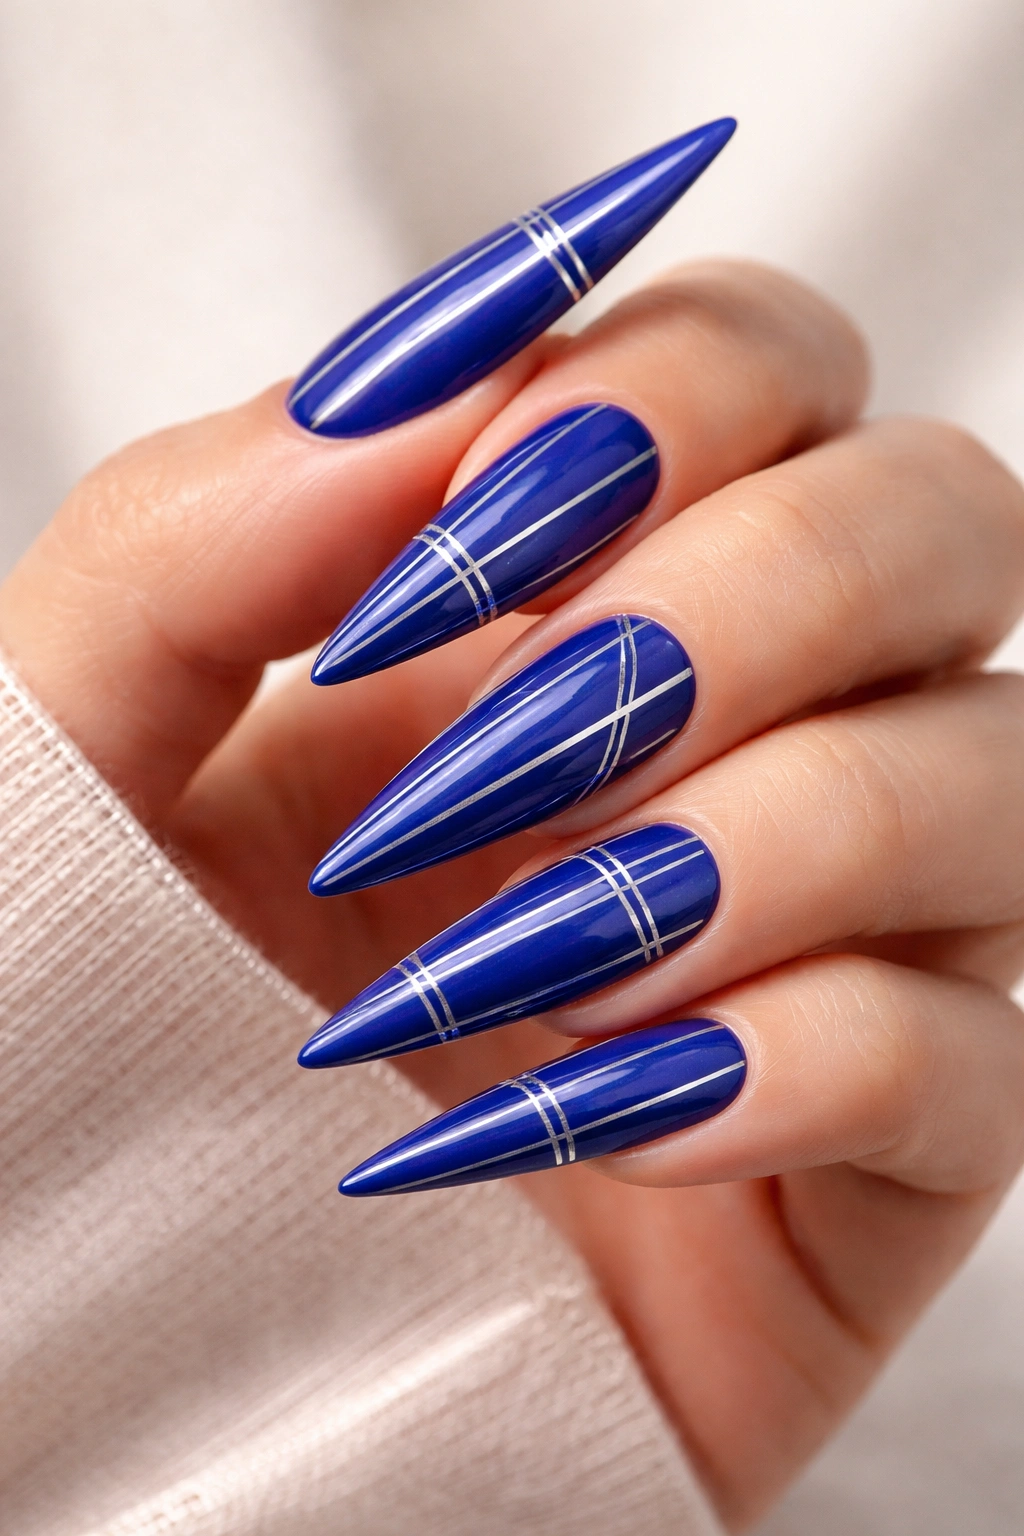
5. Cobalt Blue with Thin Silver Striping
Cobalt blue is bold without being overwhelming — it’s the color of a clear sky or deep water, and it reads as confident and put-together. Add thin, precise silver stripes that run horizontally or vertically across the nail, and you’ve created a design with geometric interest and movement.
Striping requires a steady hand or a thin striping brush. The thinner the silver line, the more intentional and polished the design feels. On stilettos, thin lines create visual rhythm without overwhelming the base color.
Creating Perfect Silver Stripes
- Apply cobalt blue as your base — make sure it’s completely opaque and smooth
- Using a thin striping brush or a nail art pen, apply silver lines across the nail
- For horizontal stripes, paint lines that are evenly spaced (try every half-inch or so on a stiletto)
- For vertical stripes, run lines from base to tip, keeping spacing even
- For diagonal stripes, create movement by angling lines at 45 degrees across the nail
Design Variations That Keep It Interesting
- Single silver stripe down the center of the nail for subtle elegance
- Multiple horizontal stripes for a modern, graphic feel
- Alternating the stripe direction on different nails for visual variety
- Paint stripes on just two or three nails per hand, leaving the others solid cobalt
Insider knowledge: The silver-to-blue contrast is crucial. If your blue and silver are too similar in value (brightness), the stripes won’t pop. Make sure your silver is noticeably lighter or more reflective than your blue base.
6. Periwinkle with Silver Marble Swirls

Periwinkle sits perfectly between blue and purple, giving you a color that feels romantic and intentional. Marble it with silver by dropping silver polish or ink into your wet periwinkle base and swirling it together. The effect is like looking at stone — organic, natural-looking, and infinitely complex.
Marble designs feel less “done” and more like art. On stilettos, the marble pattern stretches across the elongated surface, creating more room for the swirls to develop and become visually interesting.
The Water Marble or Swirl Technique
- Fill a small cup with room-temperature water
- Drop your periwinkle polish into the water (it’ll float on top — this is correct)
- Immediately drop silver polish drops onto the periwinkle — it’ll create rings that spread across the surface
- Drag a thin tool (toothpick, thin striping brush, or nail art pen) through the rings in curved motions to create swirls
- Dip your nail into the water to pick up the marble pattern, then immediately dip it into clean water to rinse and stop the process
- Remove excess water and seal with top coat
Why Marble Feels Elevated
- Organic swirls feel handcrafted and intentional, not mass-produced
- Each nail is slightly different, which adds personality and prevents a cookie-cutter appearance
- The combination of periwinkle and silver feels both romantic and modern
- Works at any nail length, but stilettos showcase the pattern across more surface area
Worth knowing: Water marble technique has a learning curve. Your first attempt might not be perfect, but each try teaches you how the polish spreads. Film-forming polishes work better than thick formulas — thin, high-flow polish spreads and swirls more reliably.
7. Navy with Silver Half-Moon Accent
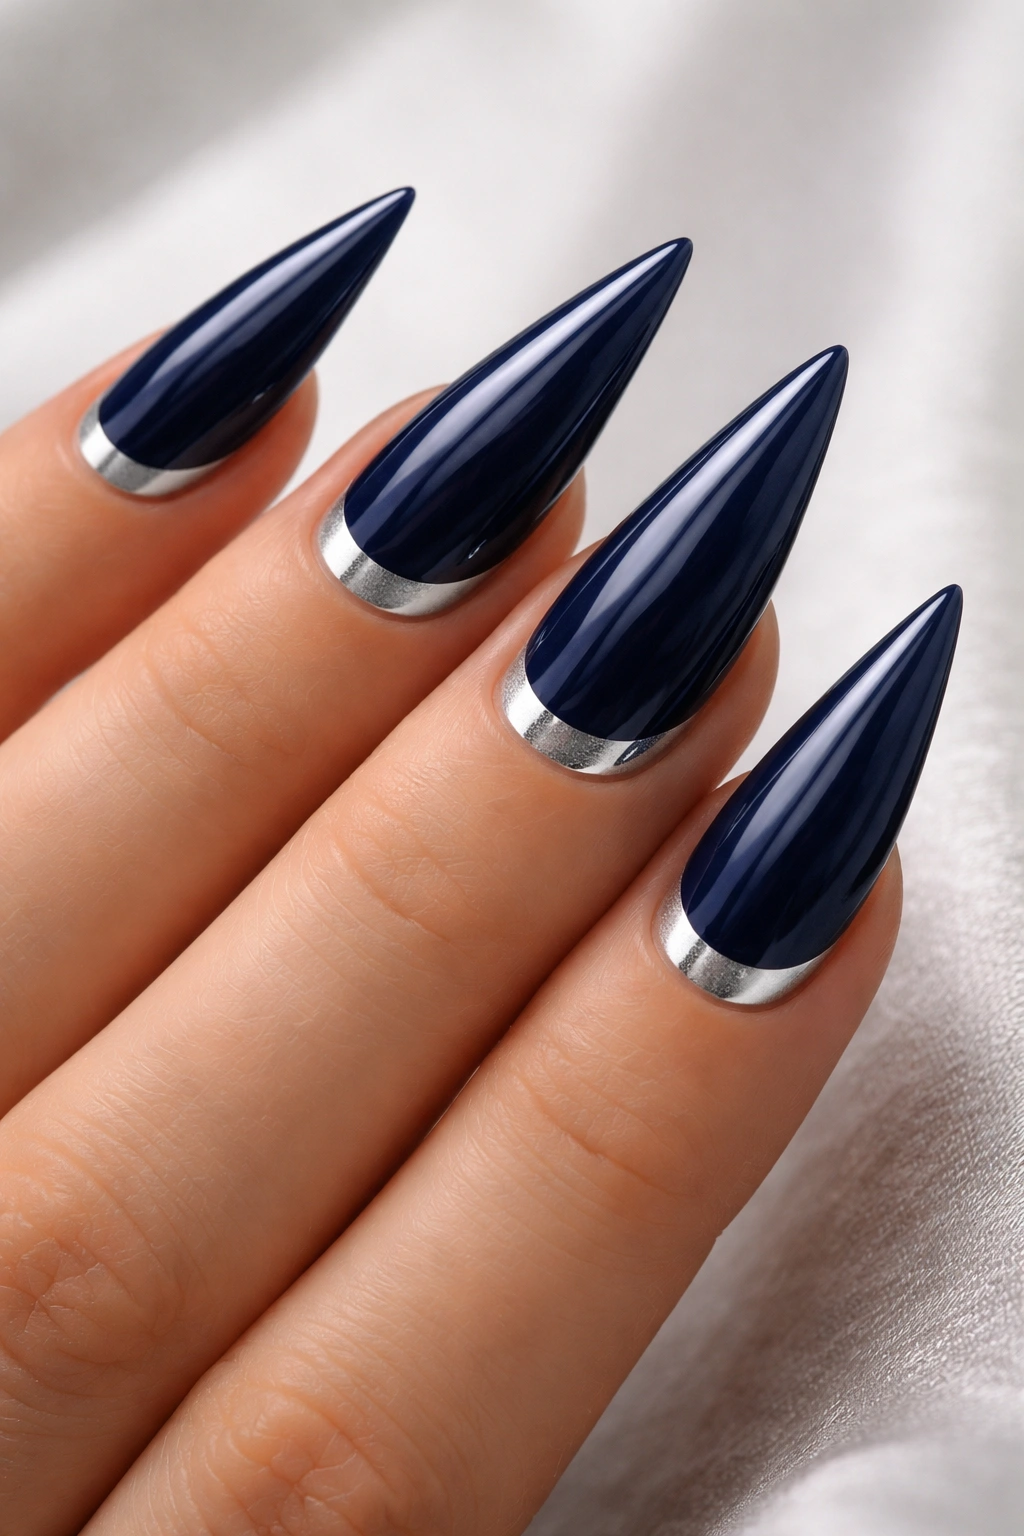
The half-moon design (also called moon manicure) places a contrasting color or finish at the base of the nail near the cuticle. Use navy blue for the main nail and silver for the half-moon arc at the base. It’s a classic shape that feels modern when executed cleanly, and it gives you built-in balance and proportion.
On stilettos, the half-moon shape at the base creates a visual anchor point. Instead of the eye following the entire length of the nail (which can make very long stilettos feel overwhelming), the half-moon draws attention down and creates a defined starting point.
How to Paint a Crisp Half-Moon
- Apply navy blue across the entire nail — make sure coverage is opaque and smooth
- Once the navy is completely dry, apply a thin base coat to just the base area where you want your half-moon
- Using a curved striping brush or a thin round brush, paint silver polish along the curved area at the base (where the nail meets the nail bed)
- Keep the silver arc thin and precise — a thick half-moon reads as sloppy, while a cleanly defined one reads as intentional
- Seal with a top coat
What Makes This Design Timeless
- The half-moon shape has been used in nail design for decades because it’s genuinely flattering
- Placing the accent at the base rather than the tip creates a grounded, balanced look
- Navy and silver feel sophisticated without trying too hard
- Stilettos make the half-moon shape appear elegant and elongated
Pro tip: If freehand painting is intimidating, use a half-moon stencil — they’re inexpensive and remove all the guesswork. Place it at the base of your nail, paint your silver color over the stencil, and peel it away for a perfectly crisp edge.
8. Soft Blue with Silver Geometric Shapes
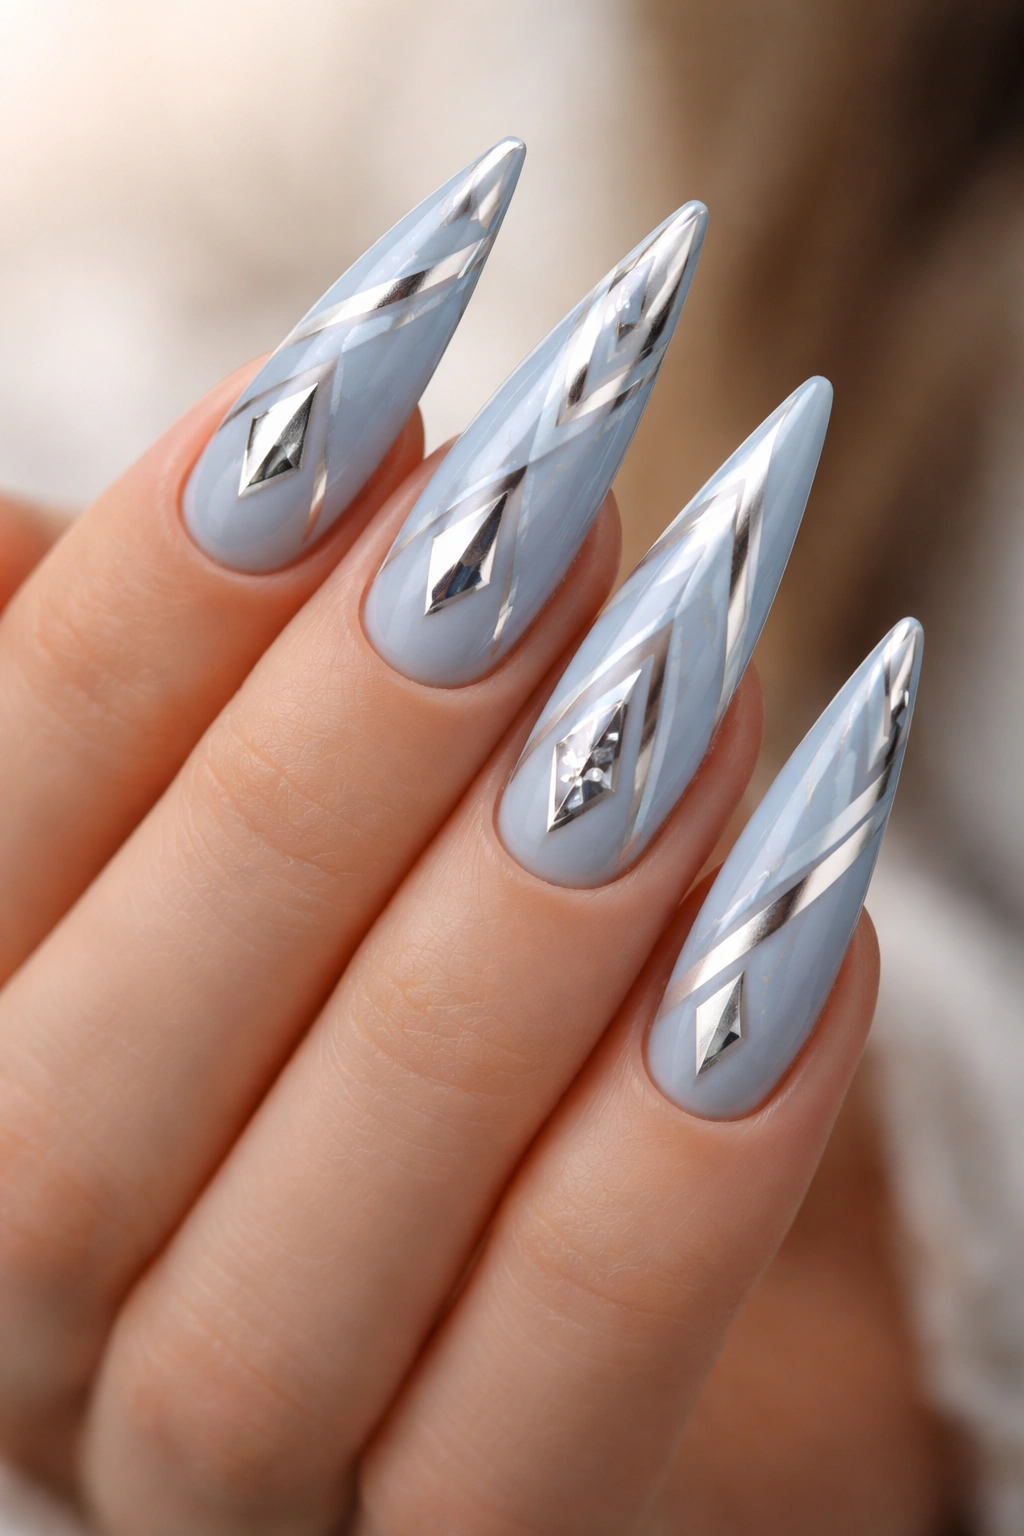
Soft, powder-like blue pairs beautifully with solid silver geometric shapes — triangles, diamonds, squares, or abstract forms. The soft blue creates a calm, soothing base, while silver geometric shapes add modern, intentional design elements. This design feels contemporary and artistic without being over the top.
Geometric shapes read as planned and deliberate. When you add them to a soft blue base on stiletto nails, you’re creating a design that looks like it came from a professional nail artist or high-end nail salon, even if you’re doing it at home.
Creating Sharp Geometric Shapes
- Apply soft blue as your base color — aim for something more pale than saturated
- Using a thin striping brush, nail art pen, or even a toothpick dipped in silver polish, draw your geometric shapes
- For clean triangles: use a ruler or make three straight lines that meet at points
- For diamonds: draw two triangles pointing toward each other, then mirror them below
- For abstract shapes: let intuition guide you — random shapes connected by silver lines feel modern and artistic
- Apply shapes to each nail differently so the design feels intentional rather than repetitive
Design Placement Options
- Geometric shapes concentrated at the tips
- Shapes scattered across the nail at different heights
- One large geometric element per nail
- Small geometric accents on just one or two nails per hand
Styling note: This design works especially well if you like minimalist aesthetic and modern jewelry. The geometric shapes echo architectural lines, making the overall look cohesive and intentional.
9. Baby Blue with Silver Shimmer Over the Entire Nail
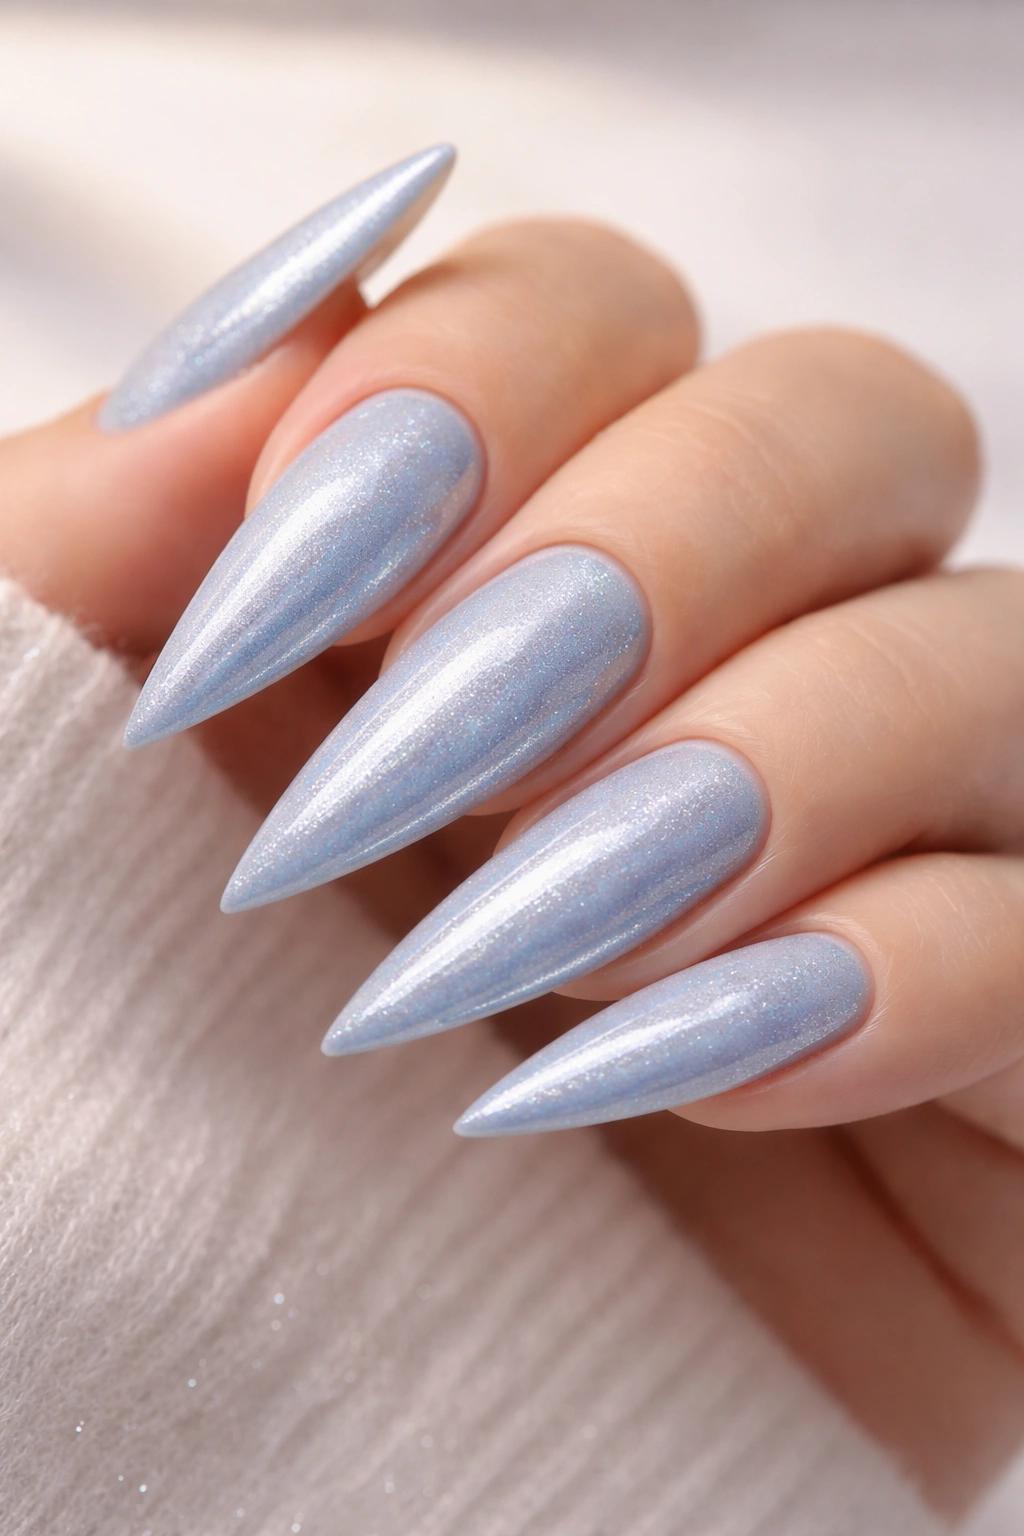
Sometimes simplicity wins. A soft baby blue base covered with a sheer silver shimmer creates a color that’s more nuanced and interesting than either shade alone. The shimmer adds depth without overwhelming the soft blue base, creating what feels like an aquamarine or pale turquoise tone.
This design works beautifully on stilettos because the extended length shows off the subtle color shift as light hits your nails from different angles. In bright light, the silver shimmer catches and creates sparkle; in lower light, the soft blue dominates.
Creating a Subtle Shimmer Finish
- Apply baby blue as your base color — make sure it’s opaque and smooth across all nails
- Apply a top coat with built-in shimmer particles across the entire nail (you can find these labeled as shimmer top coats or sheer shimmer polishes)
- Alternatively, layer a sheer silver polish or glitter over the baby blue to create dimension
- Seal with a glossy top coat to enhance the shimmer and create dimension
Why This Subtle Approach Works
- The shimmer adds interest without requiring detailed art or designs
- Works in professional settings because the shimmer is refined rather than bold
- Catches light naturally, making your nails look healthy and well-maintained
- Easier to maintain than designs with multiple components — one color plus shimmer, sealed together
Quick fact: Silver shimmer over blue reads differently than blue shimmer over silver. With blue as the base and silver on top, the blue dominates visually, and the silver adds depth. This creates a more grounded, professional aesthetic than reversing the order.
10. Royal Blue with Silver Nail Art Frame
Create a decorative “frame” around the edges of the nail using silver polish or nail art pen. The frame runs along the outer perimeter — around the sides and tip — leaving a royal blue center. It’s like you’ve mounted your nail as artwork. The frame doesn’t need to be thick; even a thin silver outline creates definition and visual interest.
This design uses the entire surface area of the stiletto to create a contained, intentional look. The frame draws the eye inward, creating focus and balance.
How to Paint a Clean Frame
- Apply royal blue as your base — make sure coverage is opaque and even
- Using a thin striping brush or nail art pen filled with silver polish, paint a line along the outer edge of the nail (just inside where the nail actually ends)
- Paint another parallel line closer to the center, creating a frame that’s about 2-3mm wide
- Connect the lines at the corners and along the tip to create a complete frame shape
- You can make the frame simple (just the outer border) or more decorative (add small corners or flourishes)
Variations on the Frame Concept
- Create a thick frame that takes up a quarter of the nail’s surface
- Paint frames only on accent nails (like your ring fingers), leaving the others solid royal blue
- Add decorative elements inside the frame (like small dots or short lines) for extra detail
- Use different widths of silver — thick lines on some nails, thin lines on others
Pro tip: If freehand lines are difficult, use nail striping tape to create clean, straight edges. Press the tape onto your nail where you want the frame, paint over it with silver, then peel the tape away for perfectly clean lines.
11. Teal with Silver Confetti Scattered Across
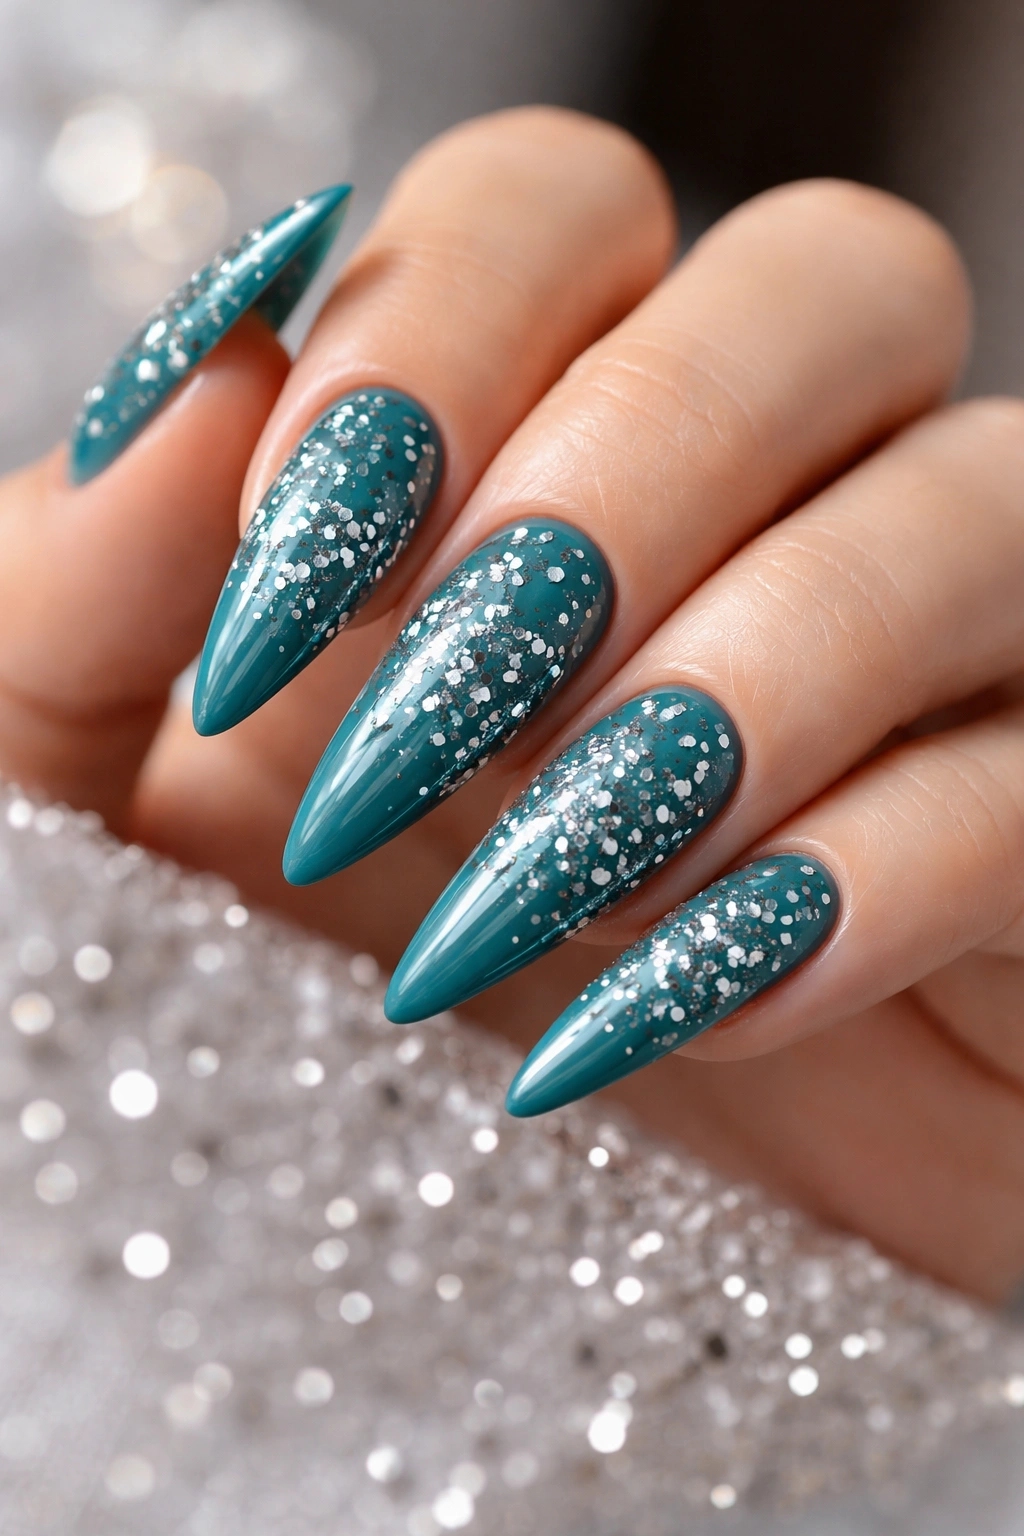
Teal — that stunning blue-green hybrid — pairs beautifully with scattered silver confetti. The confetti can be small silver flakes, dots, or tiny shapes scattered at random across the nail. The effect feels celebratory without being loud, and playful without being juvenile.
Scattered confetti works especially well on stilettos because you have enough surface area to place the pieces with intention. The randomness creates visual interest, but the nail shape ensures it doesn’t feel chaotic.
Creating the Scattered Confetti Effect
- Apply teal as your opaque base color
- Using a thin brush or nail art pen, paint small silver dots or shapes scattered across the nail
- For a more organic look, vary the size of the confetti pieces
- Concentrate some pieces toward the tips and fewer toward the base to create subtle movement
- Seal with a top coat to set everything in place
Types of Silver Confetti You Can Use
- Small solid dots in varying sizes
- Tiny dashes or short lines at different angles
- Silver stamping designs applied randomly across the nail
- Actual confetti pieces (tiny metallic shapes) applied with a tacky base coat underneath
- A combination of shapes for visual variety
Fun fact: The confetti doesn’t need to cover the entire nail. In fact, a sparser confetti pattern often reads as more intentional and sophisticated than a heavily covered one. You want the teal to remain the dominant color, with silver accents adding interest.
12. Steel Blue with Silver Reverse Ombré
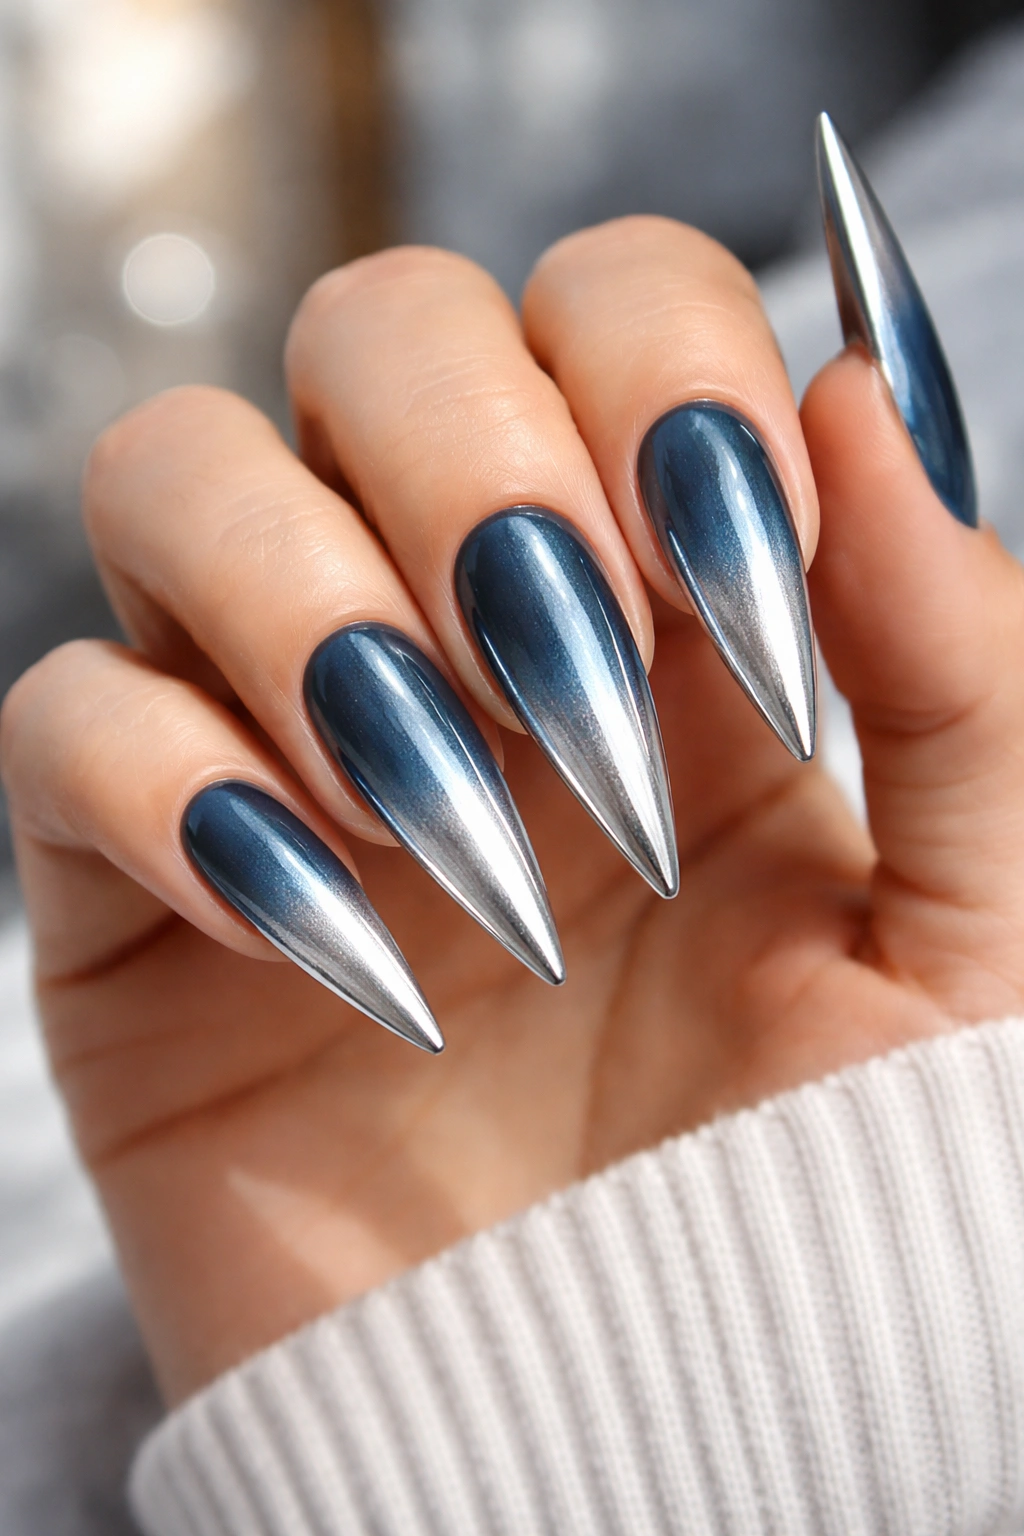
Reverse ombré flips the traditional gradient — instead of light-to-dark, you go dark-to-light. Start with steel blue at the base and gradually transition to silver toward the tips. On stilettos, this creates a visual flow that guides the eye from the base to the tip, making the nails feel even more elongated.
Steel blue is sophisticated and cool-toned, while silver tips keep the design from feeling heavy. Together, they create something both bold and elegant.
Creating a Reverse Ombré Gradient
- Apply steel blue at the base of the nail — you want full opacity here
- Apply the same steel blue to a makeup sponge
- Using a second makeup sponge or brush, apply white or pale silver to the upper portion
- Dab the two colors together at the transition point, blending them gradually
- Once the gradient base is set, apply silver chrome powder or silver top coat to just the tip area for extra shimmer
- Seal with a glossy top coat to enhance dimension
Why Reverse Ombré Feels Directional and Modern
- The gradient creates a visual path that flows from base to tip
- Stilettos elongate the gradient zone, making it more visually impactful
- Going dark-to-light is less common than light-to-dark, making it feel fresh
- Steel blue at the base grounds the design while silver tips keep it feeling light and airy
Insider tip: The transition zone is where the magic happens. Spend extra time blending the colors together in the middle so there’s no harsh line. A smooth, gradual transition reads as intentional and professional.
13. Dusty Blue with Silver Mirror Powder Tips

Dusty blue has a muted, sophisticated quality — it’s blue but with gray undertones, creating a color that feels refined rather than bold. Add silver mirror powder to the tips and you’ve created nails that literally shine. Mirror powder creates a liquid-metal finish that’s more refined than regular glitter or chrome.
On stilettos, mirror powder tips create a focal point at the most visible part of your nail. The effect is like dipping your nail tips in liquid silver.
Applying Mirror Powder to Stiletto Tips
- Apply dusty blue as your base — make sure it’s opaque and covers the entire nail
- Apply a thin layer of clear or tinted gel base to the tip area (the last quarter to third of the nail) — mirror powder needs something slightly sticky to adhere to
- Using a dry brush (this is important — the brush should be completely dry), apply mirror powder using gentle circular motions
- The powder adheres to the tacky base and creates the liquid-metal effect
- Apply a glossy top coat to seal everything — this locks in the powder and creates shine
What Makes Mirror Powder Different from Other Finishes
- Creates a literal mirror effect rather than shimmer or sparkle
- Reads as more sophisticated and refined than glitter
- Reflects light in a way that photographs beautifully
- Works in both professional and creative settings
Worth knowing: Mirror powder is fragile until sealed. Before you apply your top coat, any touch to the powder area will disturb the finish. Once it’s sealed, it’s durable and long-lasting.
14. Slate Blue with Silver Nude Ombre Blend
Slate blue — darker and more gray-toned than traditional blue — mixed with a soft silver-nude ombre creates depth and sophistication. The blend creates a color that’s almost iridescent, shifting between blue, silver, and nude depending on the angle and lighting.
This design works because it’s not a harsh contrast but a harmonious blend. On stilettos, the ombre transition has more space to develop, creating a seamless shift from one tone to the next.
Creating the Ombre Blend
- Apply slate blue as your base color at the nail bed area (the base half of the nail)
- Apply a nude or champagne color in the middle transition zone
- Apply silver or pale shimmer at the tip
- Using makeup sponges, dab and blend the colors together where they meet
- The goal is not three separate colors but a seamless gradient where colors transition into one another
- Seal with a glossy top coat
Why This Design Feels Elevated and Intentional
- The blend creates complexity that reads as high-end and artisan
- Slate blue is less common than bright or navy, making the design feel fresh
- The ombre technique suggests the design is carefully planned rather than random
- Stilettos showcase the gradient across enough surface area to make the color transition truly stunning
Styling note: This design pairs beautifully with neutral clothing and metallic jewelry. Let the ombre gradient be the focal point.
15. Light Blue with Silver Negative Space Design
Negative space designs use the natural nail (or a contrasting color underneath) to create the actual design. Paint your nail light blue, then leave strategic areas unpainted or fill those areas with silver instead, creating shapes or patterns. The unpainted areas become part of the visual design rather than being covered up.
Negative space designs feel modern and artistic. On stilettos, leaving areas unpainted can actually make the nails feel less overwhelming — instead of a solid long nail, you’ve broken up the length with intentional gaps.
Creating Negative Space Designs
- Apply light blue as your base, but instead of covering the entire nail, paint strategically — leave the tips unpainted, or create a stripe down the center that’s unpainted
- Fill the unpainted areas with silver polish or leave them as natural nail (for a nude effect)
- Alternatively, paint light blue across the entire nail, then use a thin brush to “erase” sections by painting over them with clear polish or your base coat color
- Create geometric negative space (triangles at the tips, lines down the sides) or organic negative space (abstract shapes)
Negative Space Ideas That Work on Stilettos
- Leave the bottom quarter of the nail unpainted (silver or nude) and paint light blue on top three-quarters
- Create thin vertical stripes of negative space with light blue between them
- Paint light blue with geometric cutouts — like diamond shapes — where you leave silver showing through
- Create a partial mani where just the tips are painted in light blue with silver underneath showing
Pro tip: Negative space designs look cleaner if your base (whether silver or nude) is polished and intentional. If you’re leaving natural nail showing, make sure your nails are freshly filed and shaped for a clean appearance.
16. Blue Velvet with Silver Glitter Accent Nails
Velvet polish creates a soft, matte finish that looks like actual velvet fabric. Use it for a rich blue base, then create accent nails using silver glitter or chrome powder. The combination of matte blue and shimmering silver creates texture and visual interest through contrast.
On stilettos, this design uses the elongated shape to showcase both finishes — the matte blue on most nails emphasizes the length and shape, while the glittery accent nails draw attention and add glamour.
Combining Velvet and Glitter Finishes
- Apply blue velvet polish to four of your five fingers (or however many accent nails you want)
- On your accent nails (typically ring fingers or thumbs), apply a silver glitter or chrome polish instead
- Make sure the velvet nails are completely matte and the glitter nails are completely shimmering — the contrast is what makes this work
- Seal the glitter nails with a glossy top coat to enhance shine, and seal the velvet nails with a matte top coat to enhance the velvet texture
- The different finishes prevent the look from feeling flat or one-dimensional
Why Texture Creates Visual Impact
- Combining matte and shiny creates depth that a single finish can’t achieve
- The eye is drawn to the shimmery accent nails, creating a natural focal point
- Velvet texture feels luxurious and high-end
- Stilettos show off both finishes across their elongated surface, creating maximum impact
Finishing touch: Velvet polish can be delicate, so handle these nails carefully for the first few days. Once fully cured, they’re durable, but the matte finish requires a bit more care than a glossy one.
Final Thoughts
Blue and silver stiletto nails represent the intersection of sophistication and personality — you’re making a statement that you care about your appearance and aren’t afraid to wear color, but you’re doing it with restraint and intentionality. Whether you go for icy, ethereal tones or rich, dramatic blues paired with bold silver accents, the key is choosing designs and finishes that reflect how you want to feel when you look down at your hands.
The designs above offer a starting point, but they’re also springboards for your own creativity. Notice which color combinations call to you, which textures appeal to your aesthetic, and which design placements feel balanced on your hand shape. Blue and silver are forgiving colors that work across seasons, skin tones, and personal styles, so you can experiment freely without worrying that a design won’t “work.”
Remember that the quality of the application matters as much as the design itself. Whether you’re painting at home or visiting a technician, take time to ensure clean base coats, opaque color application, and precise details. Stiletto nails show off both your artistic choices and your attention to detail — make sure both are worth showing off.
