

Pink and silver is one of the most versatile and glamorous color combinations for stiletto nails, whether you’re heading to a night out or just want your everyday look to feel a bit more elevated. There’s something inherently sophisticated about pairing soft, romantic pink tones with the shimmer of silver—the combination works across skin tones, matches countless outfits, and gives off both elegance and edge at the same time.
The beauty of this pairing is its flexibility. You can go soft and romantic with blush pink and delicate silver accents, or lean into drama with hot pink and bold metallic silver designs. You can combine them in ombré, geometric patterns, marble effects, glitter gradients, or minimalist abstract art. Whether you prefer nail art that’s understated or statement-making, there’s a pink and silver stiletto design that’ll fit your vibe.
What makes these ideas work so well for stiletto nails specifically is that the long, dramatic shape amplifies the visual impact of color and design. A simple detail on a short nail might go unnoticed, but on a stiletto, it becomes gallery-worthy. We’ve rounded up ten design ideas that showcase the full range of what’s possible when you combine these two colors, from classic elegance to trendy contemporary looks.
1. Ombré Pink to Silver Fade
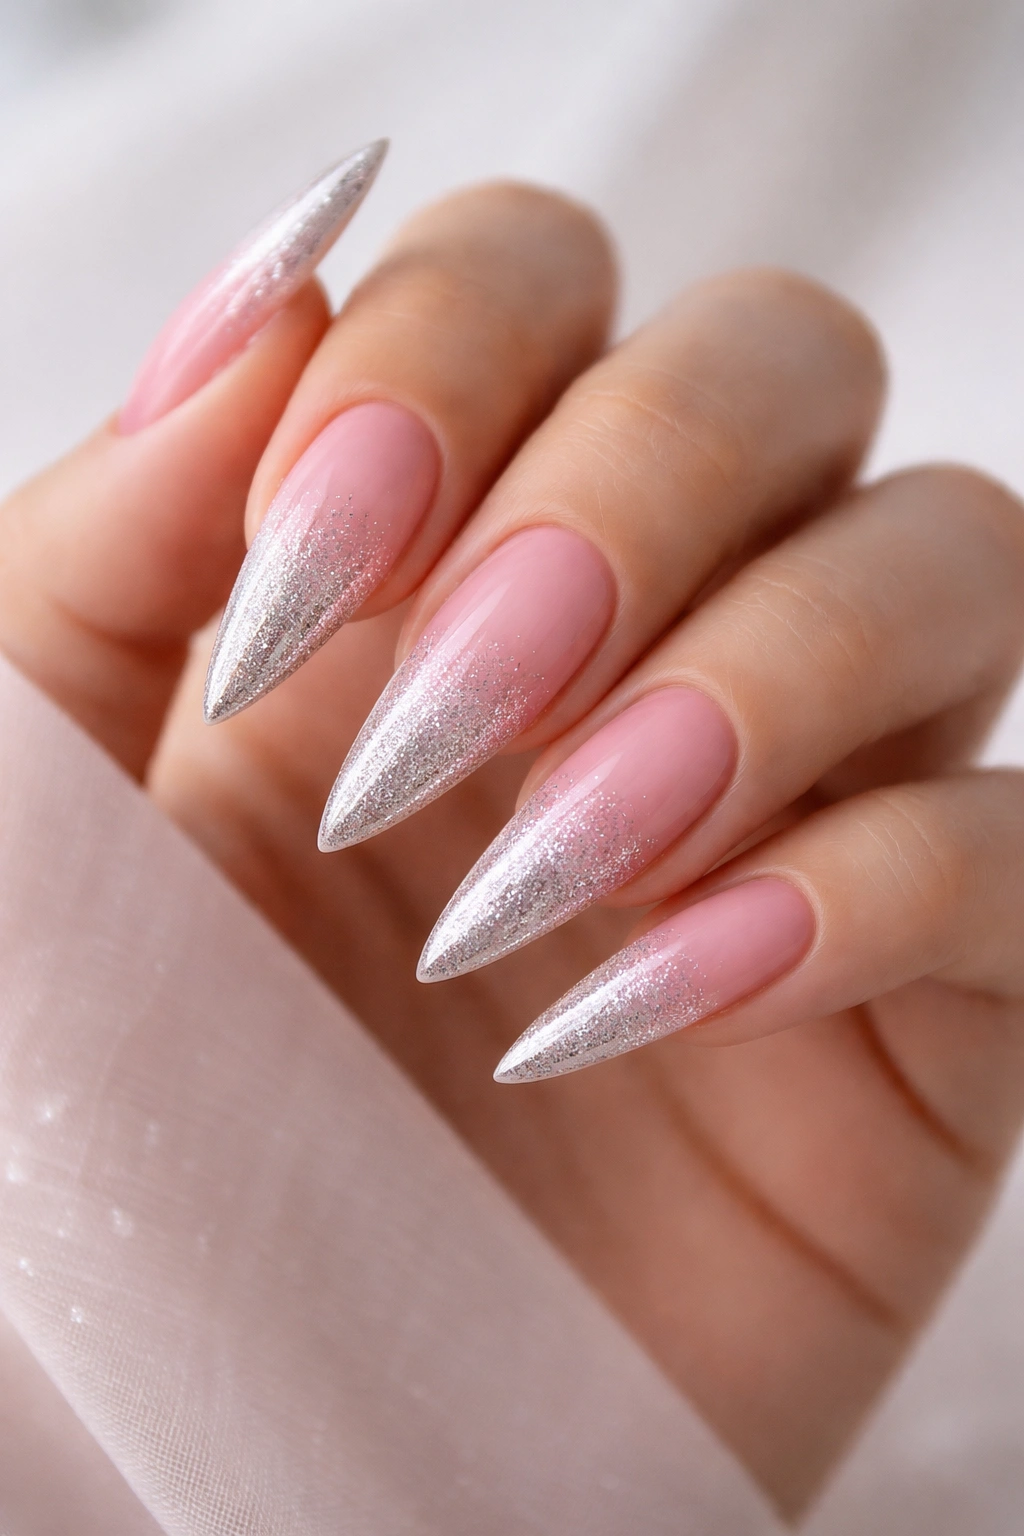
An ombré design that transitions smoothly from soft pink at the cuticle to shimmering silver at the tip creates an incredibly polished, high-fashion aesthetic that works for nearly any occasion. This gradient style flatters the elongated shape of stiletto nails and draws the eye naturally toward the pointed tip.
Why This Design Works So Well
The ombré gradient is one of the most universally flattering nail designs because it elongates the finger and creates a sense of movement and flow. When you’re working with pink and silver specifically, you get the romantic warmth of pink paired with the sophisticated coolness of silver—the two colors complement each other without competing. The fade technique creates depth and dimension that simple solid colors can’t achieve, even on longer nails.
How to Achieve This Look
- Use a soft, cool-toned pink (think ballet slipper or dusty rose) as your base color
- Apply 2-3 thin coats of your pink polish to ensure even coverage across all nails
- Grab a makeup sponge and lightly dampen it with water
- Apply silver polish to a palette or plate, then dab the sponge into it
- Sponge the silver onto the tip third of your nail, working from the edge inward, blending where the colors meet
- Repeat the sponging motion 2-3 times to build the gradient smoothly
- Seal everything with a glossy top coat to smooth out any texture from the sponging process
- For extra shine, use a silver shimmer or holographic polish on the tips rather than a flat metallic
Pro tip: Practice the ombré technique on a nail wheel or practice nail tips before committing to your actual nails—the sponging method takes a bit of technique to get smooth.
2. Silver Glitter Gradient on Pink Base
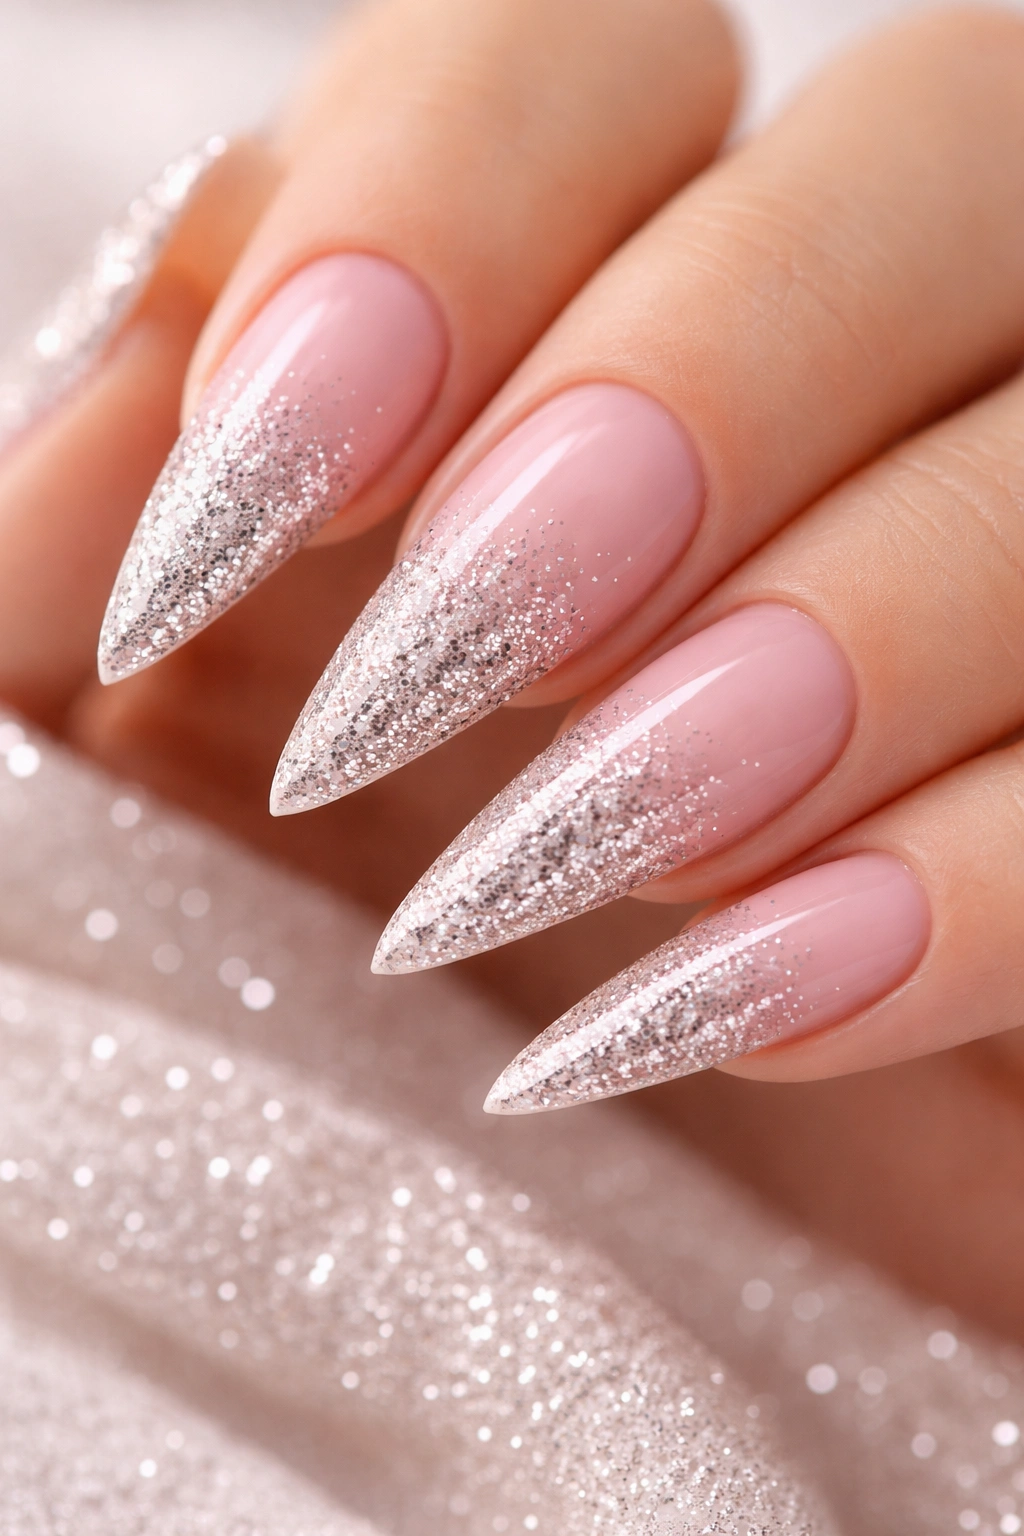
Swap the smooth ombré for a glitter gradient by keeping your base a solid pink and adding silver glitter that gets increasingly dense toward the tip. This design offers more texture and sparkle than an ombré fade, making it perfect if you love a bit of shimmer.
What Makes Glitter Gradients Stand Out
Glitter gradients are dynamic and eye-catching without being overwhelming if you execute them right. By keeping the glitter concentrated at the tips and lighter at the base, you avoid the chunky, overly decorated look that some full-coverage glitter nails can have. The stiletto shape gives the glitter room to shine—literally—without the nails looking too busy.
Application Steps for Glitter Gradient
- Paint all nails with 2 coats of a creamy pink base color (nude-pink, rose, or blush all work beautifully)
- Choose a silver glitter polish with mixed-size sparkles for visual interest
- Using a glitter brush or thin detail brush, apply the silver glitter polish starting about halfway down the nail
- Layer the glitter more densely as you move toward the tip, creating a natural gradient effect
- The tip third should be fully saturated with glitter for maximum sparkle
- Seal with a thick gel top coat or regular top coat to even out the texture and keep glitter particles in place
- Optional: use a fine silver dust or chrome powder on top of the glitter for an extra holographic effect
Worth knowing: Glitter polish requires more patience to apply cleanly than regular polish—use a steady hand and take your time building the gradient in thin layers rather than one heavy coat.
3. Silver Geometric Lines on Pink
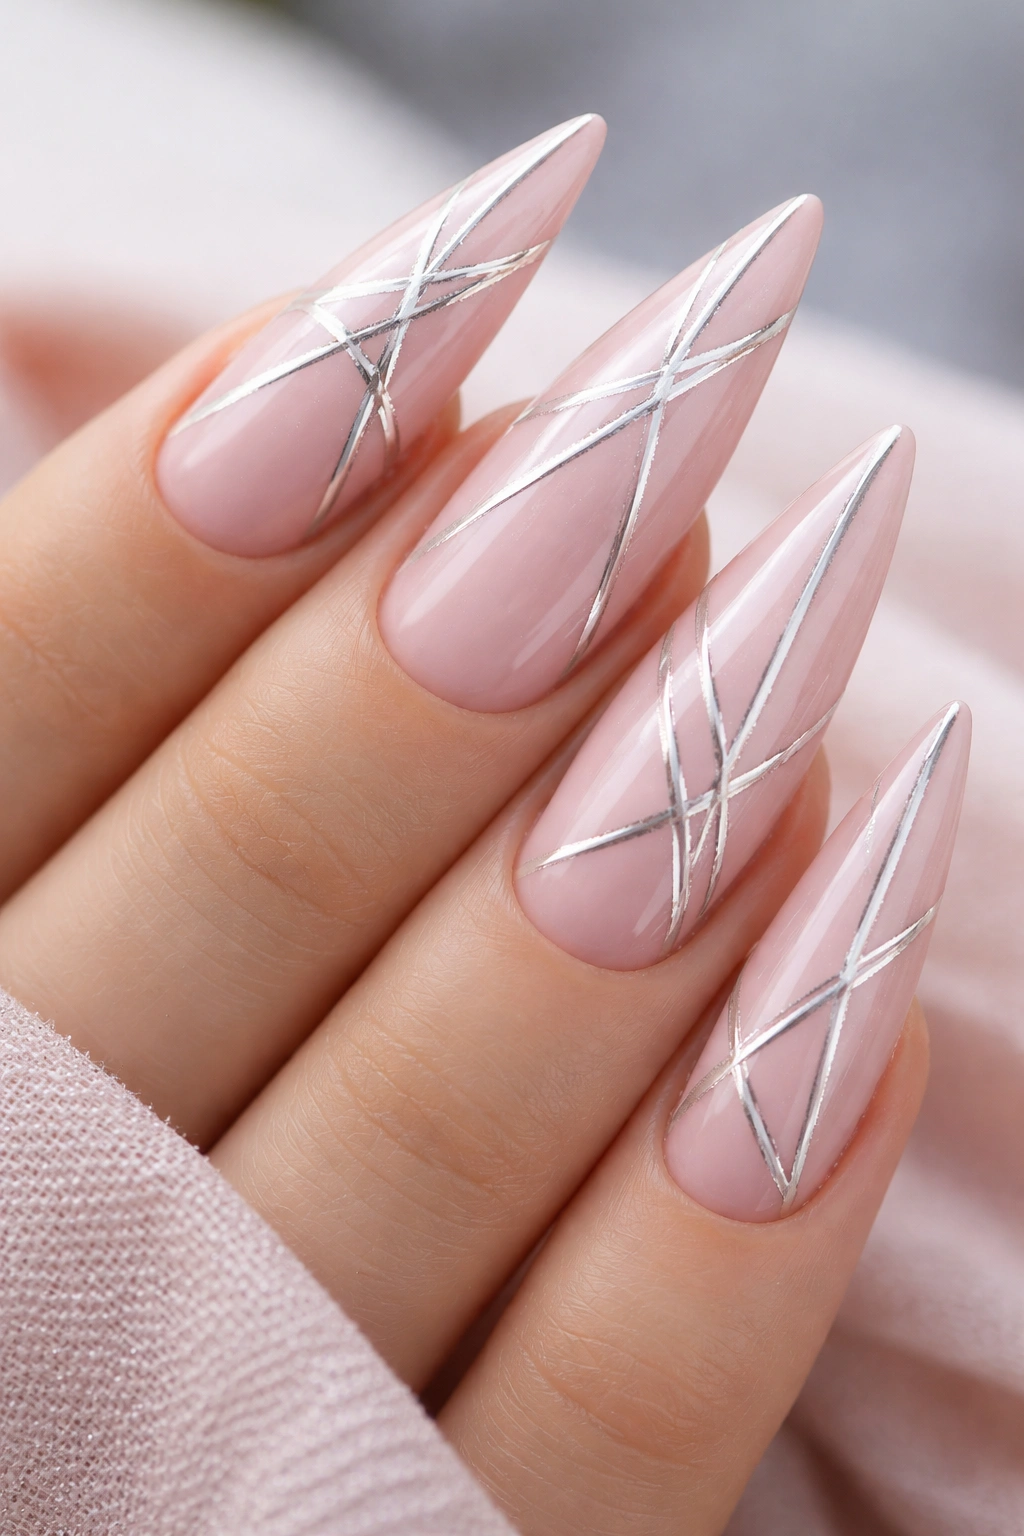
Crisp geometric patterns—thin silver lines, triangles, or abstract shapes—layered over a pink base create a modern, minimalist aesthetic that feels effortlessly chic. Geometric nail art is having a real moment, and pink and silver is an excellent color pairing for this style.
Why Geometric Designs Suit Stiletto Nails
The clean lines and sharp angles of geometric art echo the pointed, architectural shape of stiletto nails beautifully. Instead of the design clashing with the nail shape, they enhance each other. Geometric patterns also feel more contemporary and less “decorated” than some other nail art styles, which appeals to people who want something distinctive without being over-the-top.
Executing Geometric Stiletto Art
- Begin with a pink base coat on all nails—pale pink, dusty rose, or even a slightly deeper mauve-pink all pair gorgeously with silver
- Using a thin nail art brush or a fine-tipped striping pen, draw silver lines across the nail (diagonal stripes, vertical bars, or a combination)
- Create geometric shapes like triangles at the cuticle, or asymmetrical lines that follow the angle of the nail point
- You can go for perfectly precise lines using a striping brush, or embrace slightly imperfect hand-drawn lines for a more artisanal feel
- Keep most of the nail plain pink and use silver accents strategically—one accent line per nail, or lines on alternating fingers, for a sophisticated, uncluttered look
- Seal with a matte or glossy top coat depending on your preference (matte makes the design look more graphic; glossy adds polish and shine)
Insider note: Thin striping lines look sharpest and most professional when executed with a striping brush or nail art pen rather than a regular brush—they give you better control and cleaner edges.
4. Pink Marble with Silver Veining
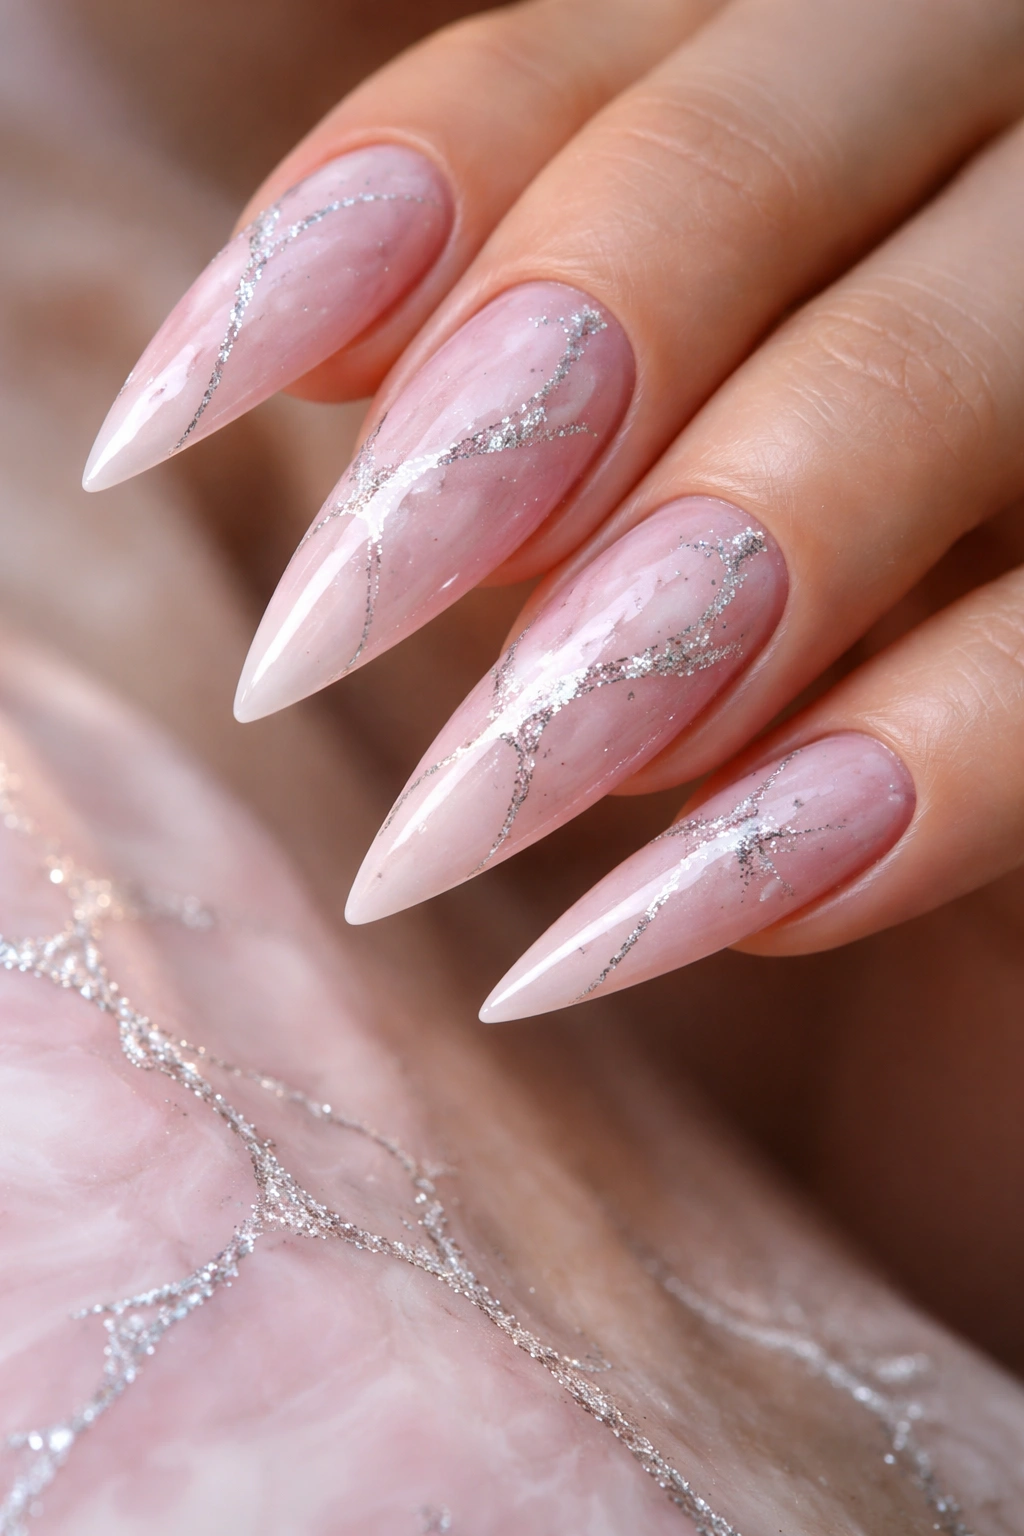
Marble effects are classic and sophisticated, and when you create a pink marble base with silver veining running through it, you get an elevated, almost stone-like aesthetic that reads as expensive and intentional. This design is easier to execute than it looks.
The Appeal of Marbled Nails
Marble has inherent elegance—it’s a natural material associated with luxury, high-end interiors, and fine art. When you translate marble effects onto nails, you automatically invoke that same sense of sophistication. The pink and silver combination makes the marble look delicate yet striking, rather than cold or sterile like some marble manicures can feel.
Creating Pink Marble with Silver Veins
- Paint all nails with a base of light pink or soft mauve-pink (2 coats for full coverage)
- While the base coat is still slightly tacky, use a thin nail art brush with silver polish to paint irregular, branching lines across the nail (think of veins running through stone)
- Don’t aim for perfect lines—marble veining is naturally irregular and organic, so embrace imperfection
- Add some silver dots or small pools scattered across the nail to create visual interest and depth
- You can also use a very fine striping brush to create hairline-thin silver lines that overlap and intersect
- Top coat everything to create a smooth, polished finish that makes the effect pop
- For a more pronounced effect, use a silver shimmer or holographic polish for the veining rather than flat silver
Pro tip: If you mess up a vein line or create an effect you don’t like, you can easily paint over it while it’s still wet and try again—one of the benefits of this freehand technique.
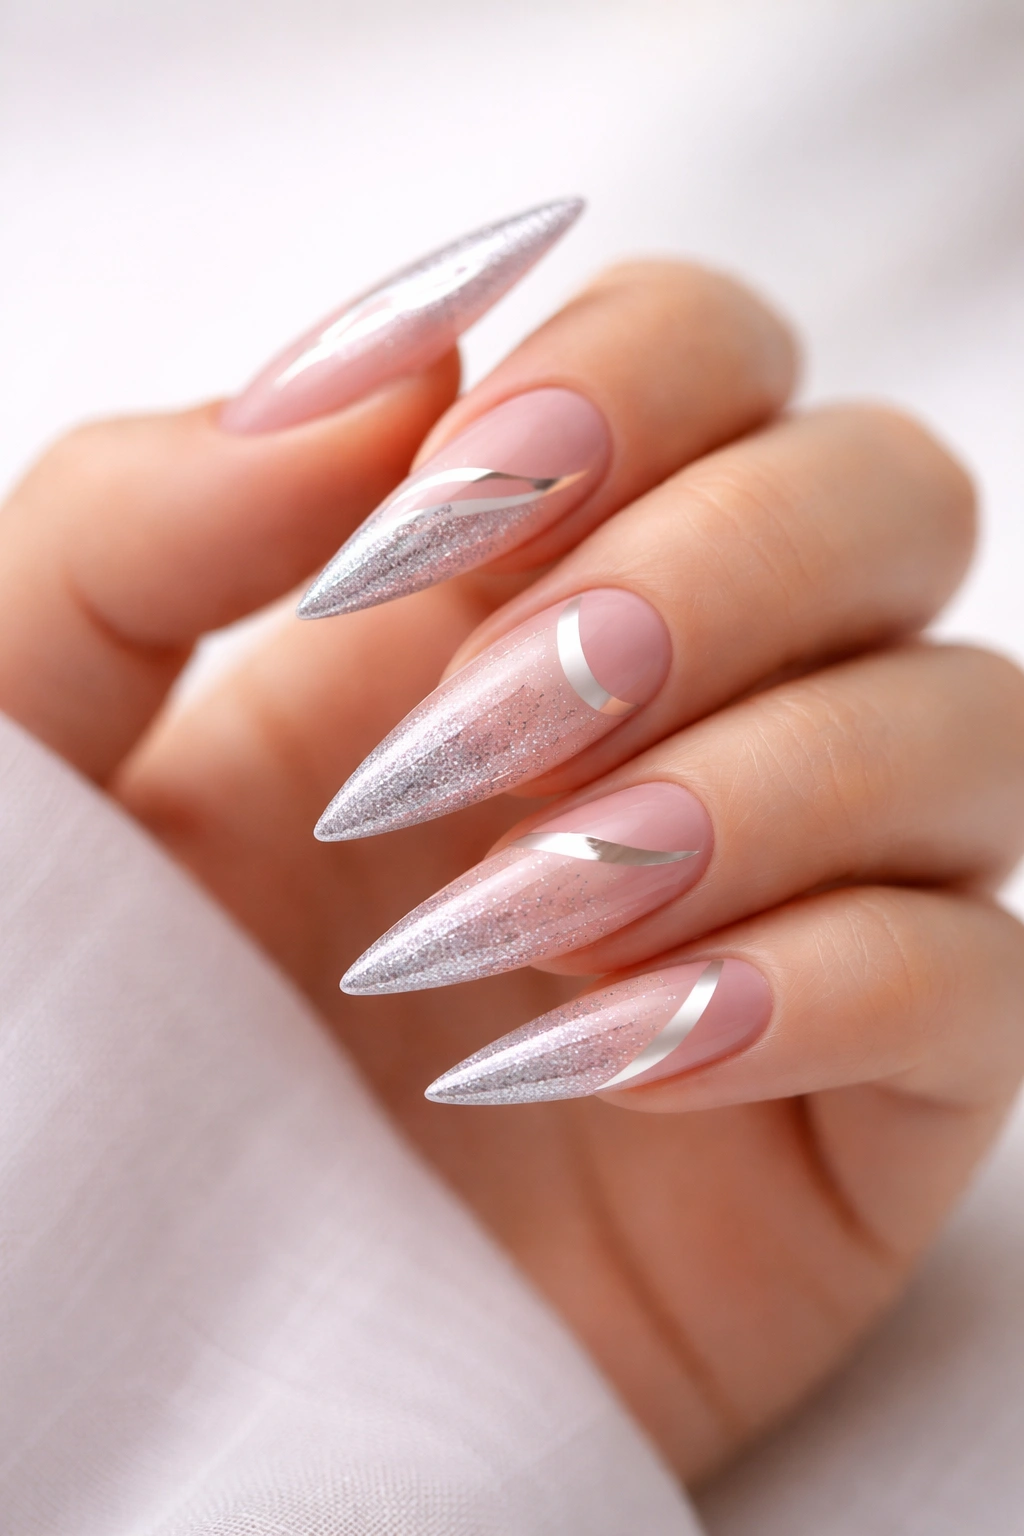
5. French Tips with Silver and Pink Reverse Design
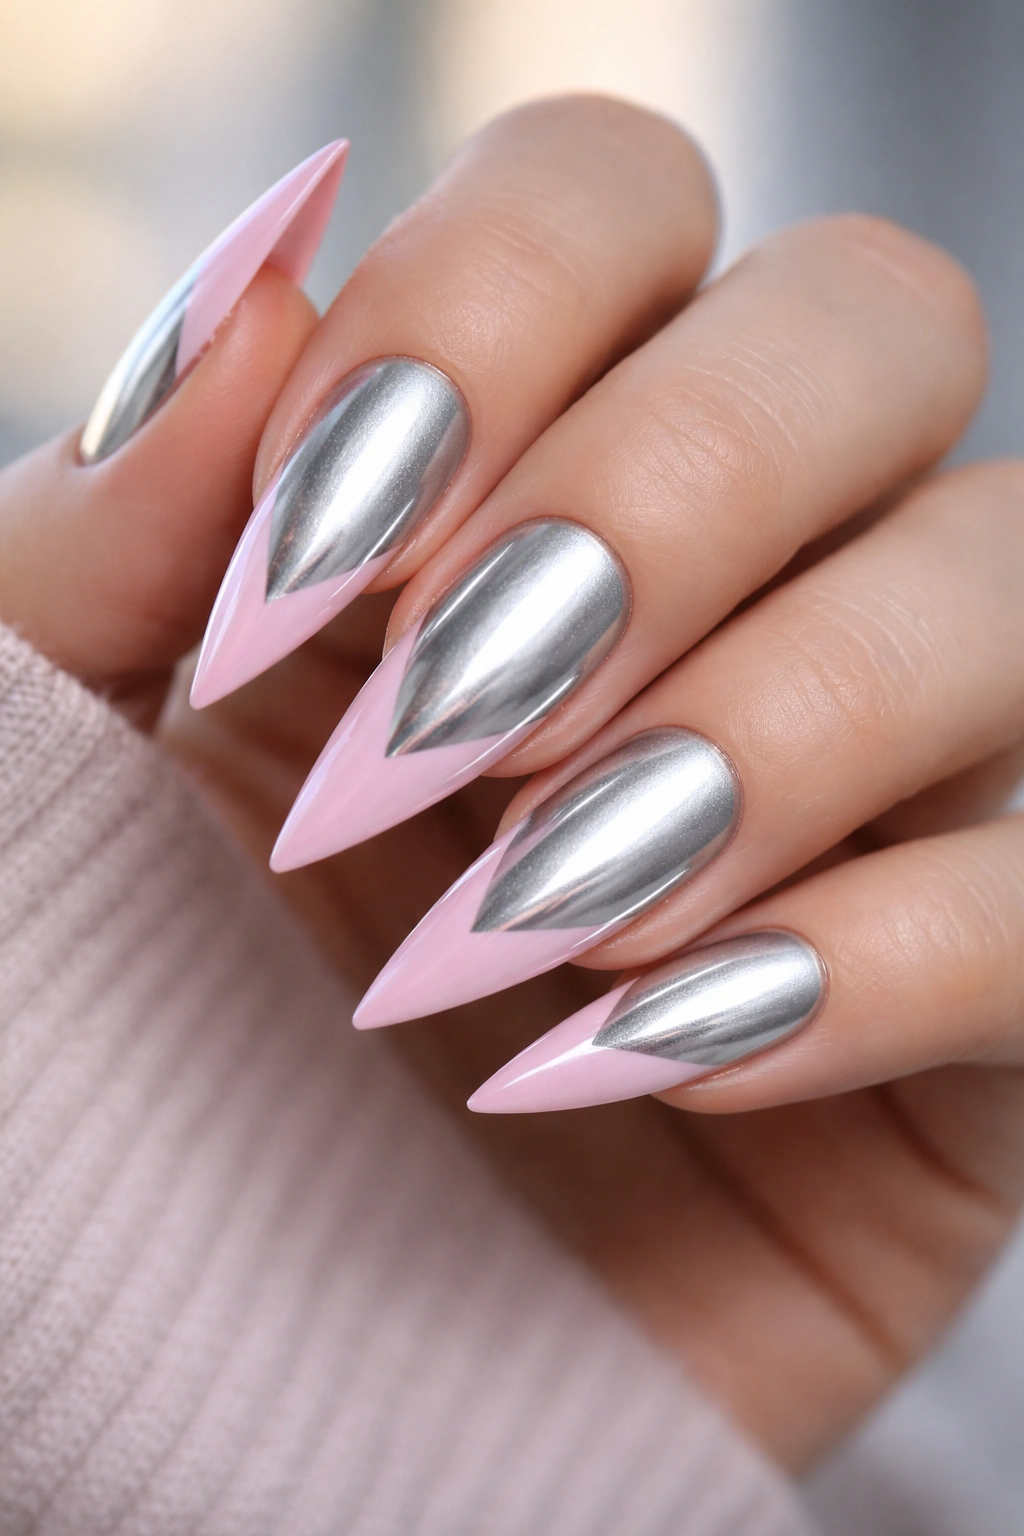
Put a fresh spin on the classic French manicure by reversing the traditional color placement: keep your nail base silver and create the tips in pink. This “reverse French” or “reverse ombre French” design feels modern and unexpected while still maintaining the elegance of the traditional French tip silhouette.
Why Reverse French Tips Feel Fresh
The traditional French tip is iconic, but it’s also predictable. By swapping the colors—making the base metallic silver and the tips pink—you get something that immediately reads as current and fashion-forward without abandoning the sophisticated structure that makes French tips so classic. On stilettos, the effect is particularly striking because the tip is so pronounced and dramatic.
How to Paint Reverse French Tips
- Paint all nails with 2 coats of a metallic silver polish (choose a silver shimmer, chrome, or holographic finish depending on how much shine you want)
- Using a thin nail art brush or French tip brush, carefully paint the tip of each nail in a soft pink (about 2-3mm of the very tip)
- Create a clean, slightly curved line at the base of the pink tip—this defines the French tip silhouette
- If you want a softer transition, you can lightly blend where the pink and silver meet using a damp brush
- For a bolder look, keep the line sharp and clean with no blending
- Seal with a glossy top coat to enhance the shine of both the silver and pink
- Optional: add a thin white highlight line at the very edge of the tip (on top of the pink) for a super clean, defined French manicure look
Worth knowing: The key to clean French tips is a steady hand and a good quality French tip brush—the brush width makes all the difference in creating an even line.
6. Pink Base with Silver Confetti Accent Nail

Keep nine nails simple with just a pink base, and designate one accent nail—typically the ring finger or thumb—as your statement maker by covering it with silver confetti, glitter, or sparkly details on the pink background. This design is easy to wear daily while still giving you that touch of glamour and sparkle.
The Power of the Accent Nail
An accent nail lets you have maximum impact with minimal effort. Instead of creating detailed art on all ten nails, you concentrate your energy and creativity on just one, which makes the design feel intentional and chic rather than overdone. The accent nail naturally draws attention and becomes the focal point of your manicure.
Creating a Sparkly Confetti Accent
- Paint all nails with a creamy, medium pink as your base color (2 coats for full coverage)
- On your designated accent nail, apply a layer of clear top coat or a tacky base coat while the pink is still wet or immediately after
- While that clear layer is tacky, sprinkle silver glitter, confetti, or sequins onto the nail surface
- Press them gently into the surface so they stick without sliding around
- You can also use a dotting tool to place individual pieces of silver confetti for a more controlled, artistic look
- Fill in any gaps with additional glitter or leave some negative space for a more modern aesthetic
- Seal everything with a generous layer of thick top coat to smooth out the texture and keep all pieces firmly in place
- For a more refined look, use fine silver dust or powder rather than chunky glitter—it’ll look more sophisticated and less costume-y
Pro tip: Apply your confetti while your base coat is still slightly wet or tacky—this helps the pieces adhere better than applying them over a completely dry base.
7. Pink with Silver Foil Nail Art
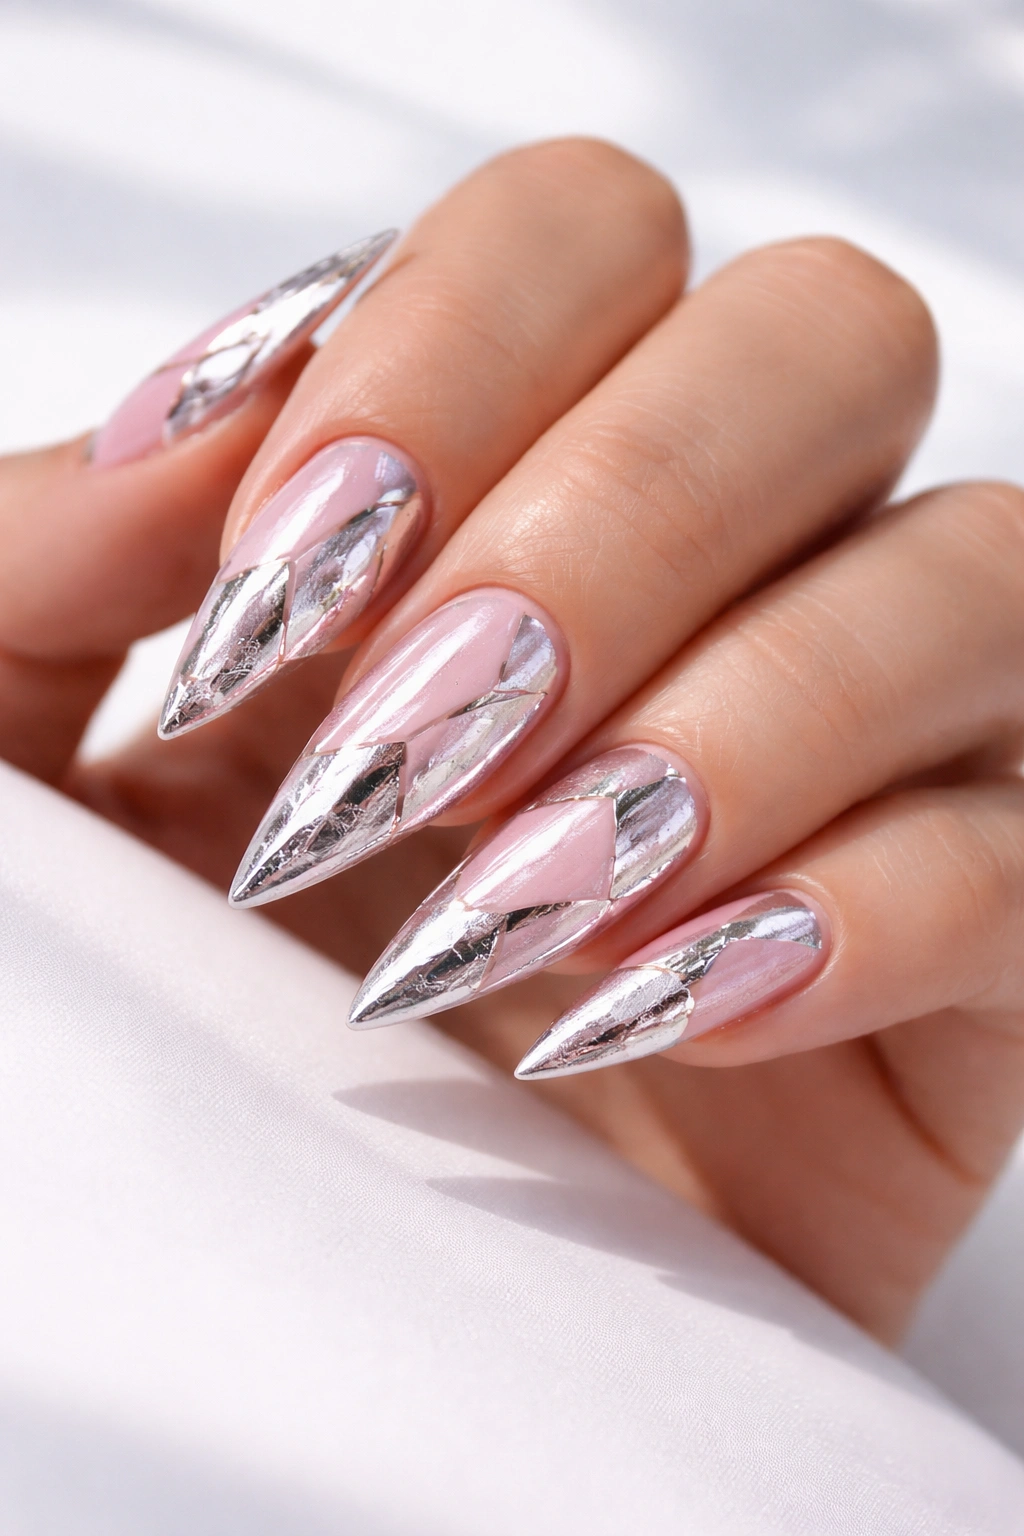
Metallic foil nail art creates a sleek, futuristic look that’s trendy and eye-catching. You apply thin sheets of silver foil to a pink base using a tacky gel or foil adhesive, creating geometric shapes, abstract designs, or complete coverage depending on your preference.
The Modern Appeal of Foil Designs
Foil nail art has a distinctly contemporary feel—it’s reflective, dimensional, and slightly edgy in a way that plain polish can’t match. The silver foil against pink creates a high-contrast, fashion-forward aesthetic that reads as intentional and current. It’s become increasingly popular over recent years as gel and foil application methods have become more accessible.
Applying Silver Foil to Pink Nails
- Start with a pink base coat on all nails (2 coats of a solid pink shade works best)
- Apply a thin layer of foil adhesive (a specialized gel that comes with foil sheets) or a very tacky base coat over the areas where you want foil to stick
- Cut your silver foil sheets into the shapes or sizes you want—geometric shapes, abstract free-form pieces, or strips work beautifully
- Press the foil pieces firmly onto the wet adhesive, using a wooden stick or tool to ensure good contact
- Peel away the backing paper carefully; the foil will stick to the adhesive while the backing releases
- You can layer multiple foil pieces or combine foil with other details like glitter or hand-painted design
- Seal everything under a thick top coat (gel top coat works best for foil manicures)
- Optional: use foil on just the tips, or create geometric patterns with foil rather than covering the whole nail
Worth knowing: Foil application works best with gel polish rather than regular polish because the foil adhesive needs a tacky surface that remains sticky—regular polish sets too quickly and dries completely.
8. Delicate Pink and Silver Floral Design
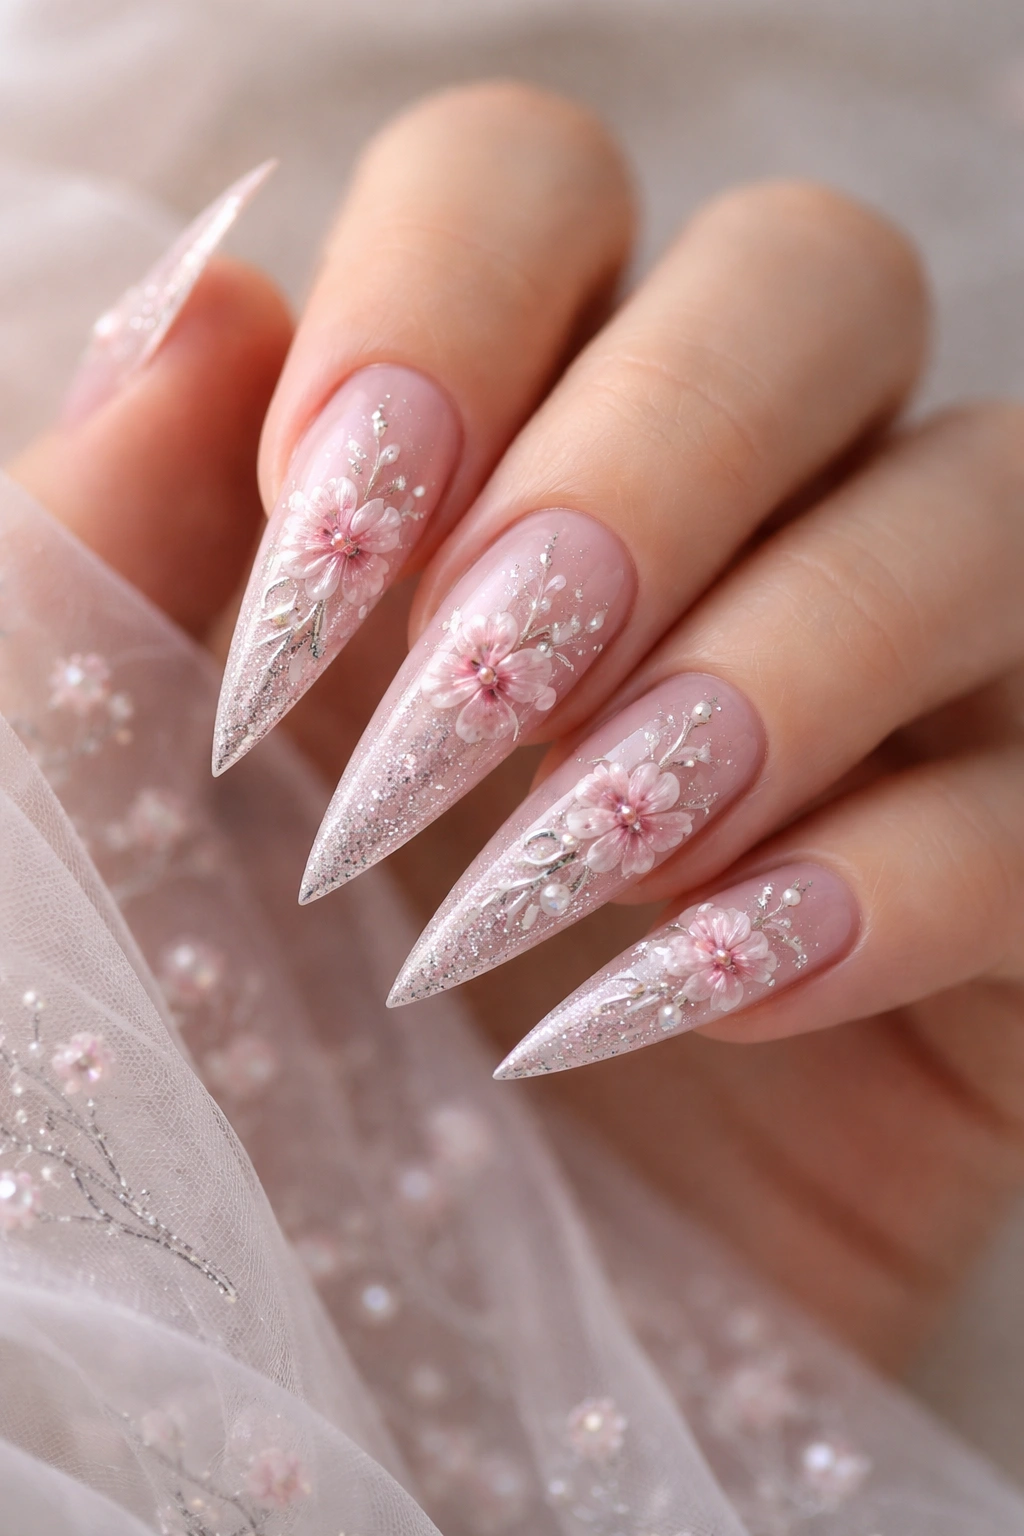
Hand-painted flowers in pink and silver create an elegant, romantic aesthetic that feels feminine without being juvenile. Small roses, daisies, or abstract floral shapes scattered across a contrasting base bring artistry and charm to your stiletto nails.
Why Florals Work on Stiletto Nails
The length and drama of stiletto nails actually provide ideal canvas space for delicate floral designs. Flowers on short nails can look cramped or cartoony, but on stilettos, there’s room to include detail and dimension. The pointed shape also creates a natural focal point at the tip, which is a great place for a flower or floral cluster.
Painting Pink and Silver Flowers
- Apply a light or neutral pink base coat on all nails (or use white, cream, or nude as your background for flowers to stand out more sharply)
- Using a fine nail art brush, outline a simple flower shape in silver polish (a 5-petal flower, rose outline, or abstract bloom)
- Fill in the flower petals with a darker or brighter pink shade
- Add silver details like stamens, leaf outlines, or tiny dots for texture and visual interest
- You can also reverse this—paint the flowers in silver and add pink details and shadows
- Place one flower per nail, or scatter 2-3 small flowers across different nails for a cohesive pattern
- Use a toothpick or dotting tool to add tiny silver dots around flowers, creating a garden-like scene
- Seal with a glossy top coat to protect the design and add shine
Pro tip: Paint florals on a sticky base coat (a tacky gel or regular polish base) rather than on a completely dry surface—this helps the design adhere better and prevents smudging.
9. Silver Chrome Tips with Pink Gradient Base
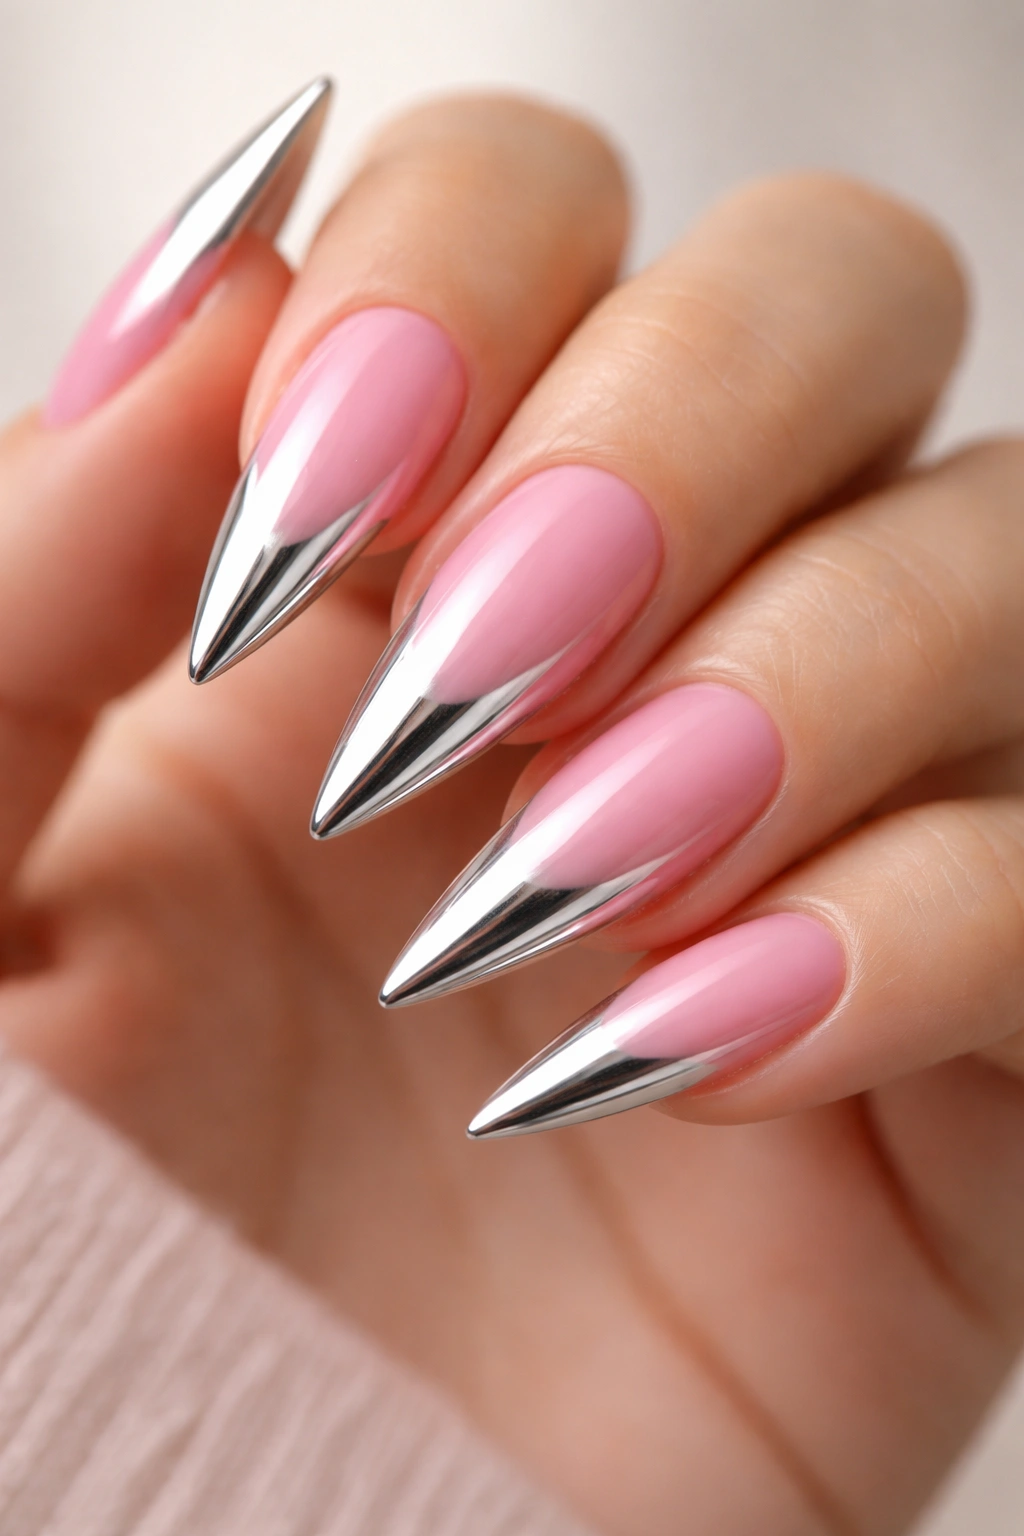
Create a high-shine, futuristic effect by using silver chrome powder (the kind that creates that mirror-like finish) on the tips of your nails while building a gradient from pale pink at the cuticle to medium pink at the middle. Chrome is incredibly trendy and eye-catching, and pink provides the warmth to offset chrome’s cool, metallic edge.
The Impact of Chrome on Stilettos
Chrome nails catch light beautifully and create an almost liquid-metal effect that’s absolutely striking. On stiletto nails, which are already high-impact, chrome takes the drama to another level. The combination of chrome and a pink gradient creates a futuristic yet romantic aesthetic that feels very current.
Achieving Chrome Tips with Pink Gradient
- Paint all nails with pale pink as your base color (2 coats for opacity)
- Using a makeup sponge, create a gradient by adding slightly more saturated pink toward the middle and tip of the nail
- Work with thin layers, building the gradient gradually so it looks smooth and blended
- Once your gradient is complete and dry, apply a sticky gel base coat or thick layer of gel to the tip area (about the top third of the nail)
- Chrome powder works best over gel, so ensure your surface is tacky before applying the powder
- Using a velvet or microfiber applicator (usually included with chrome powder sets), gently press silver chrome powder onto the tacky gel surface
- Wipe away excess powder with a dry brush or cloth—the chrome will stick to the gel and create that mirror-like finish
- Seal everything with a thick gel top coat to create a smooth, protected surface
- Use a gel lamp to cure your design
Insider note: Chrome powder can be expensive, but a little goes a long way—you only need a tiny amount to create a full mirror effect, so one package lasts quite a while.
10. Pink and Silver Ombre with Negative Space Details
Combine an ombré gradient from pink to silver with intentional negative space (areas where you leave the nail bare or show the natural nail) to create a sophisticated, modern design that feels balanced and not overly decorated. Negative space nail art is chic and gives your manicure a contemporary edge.
Why Negative Space Feels So Contemporary
Negative space—the deliberately blank areas you leave in your design—creates visual interest through what’s NOT there as much as through what is. This design principle feels very modern and minimalist. By combining negative space with the soft romance of pink and silver ombré, you get something that’s elegant but not fussy, sophisticated but not overdone.
Creating Ombré with Strategic Negative Space
- Paint all nails with pink base color (2-3 coats for full opacity)
- Using a makeup sponge, blend silver ombré onto the tips (same technique as Design #1, but you’ll interrupt it with negative space)
- Before sealing the ombré, plan where you want to leave bare nail showing—consider geometric shapes like half-moons at the tips, vertical stripes down the center, or abstract cutout shapes
- Use a thin brush or nail striping pen to carefully paint over those areas with a clear polish or the color of your natural nail (if you want the bare spots to really read as negative space)
- This creates a clean separation between your ombré design and the blank space
- Once everything is dry, seal with top coat
- For a more seamless approach, you can use nail guides or stencils to create perfectly clean negative space shapes while you build your ombré
Pro tip: Test your negative space design on a practice nail or nail wheel first—it’s harder to visualize than regular designs, so sketching it out beforehand saves time and frustration.
Final Thoughts

Pink and silver stiletto nails offer endless possibilities, whether you’re drawn to soft, romantic aesthetics or bold, modern designs. The key is choosing a design that matches your personal style and comfort level with nail art complexity. A simple ombré or glitter gradient is accessible even if you’ve never done nail art before, while geometric patterns or detailed florals reward those willing to practice and experiment.
The beauty of this color combination is that it genuinely works across seasons, occasions, and personal aesthetics. Pair pink and silver with your everyday look for instant polish, or save these designs for special events when you want to feel extra confident and glamorous. Stiletto nails inherently command attention, so the designs you choose to display on them should reflect what you love and what makes you feel like your best self.
Remember that nail art is forgiving—if you don’t achieve perfection on your first try, you can always paint over it and try again. Start with simpler designs, build your skills and confidence, and gradually experiment with more complex techniques. Your nails are a canvas for self-expression, and these ten pink and silver stiletto nail ideas are just the beginning of what’s possible.
