

Burgundy French tips on stiletto nails hit that perfect sweet spot—sophisticated enough for the office, bold enough to turn heads, and luxurious enough to feel like a splurge even when you’re doing them at home. There’s something about the combination of deep wine tones paired with the sharp, elongated silhouette of stilettos that just feels inherently expensive and put-together. The contrast between the classic French tip and the dramatic nail shape creates visual interest without feeling over-the-top, while burgundy adds depth and richness that feels more modern than traditional white-tipped designs.
What makes burgundy such a smart choice for this nail shape is its versatility. Unlike brighter reds, burgundy reads as a neutral that works year-round—it’s warm enough for autumn and winter, but sophisticated enough to carry through spring and summer without feeling seasonal. It pairs beautifully with virtually any skin tone, from fair to deep complexions, and it complements both warm and cool-toned wardrobes. Whether you’re dressing up for a night out or want your everyday manicure to feel elevated, burgundy French tip stilettos deliver that premium aesthetic.
The ideas below range from minimalist classics to intricate designs that push the boundaries of nail art. Some focus on playing with the traditional French tip shape itself, while others layer on additional elements like metallics, textures, and embellishments. The beauty of this particular combination is that even the simplest version looks impressive, but there’s plenty of room to experiment and make the style entirely your own. Whether you’re getting these done at a salon or you’re confident in your at-home nail application skills, you’ll find ideas here that match your vision.
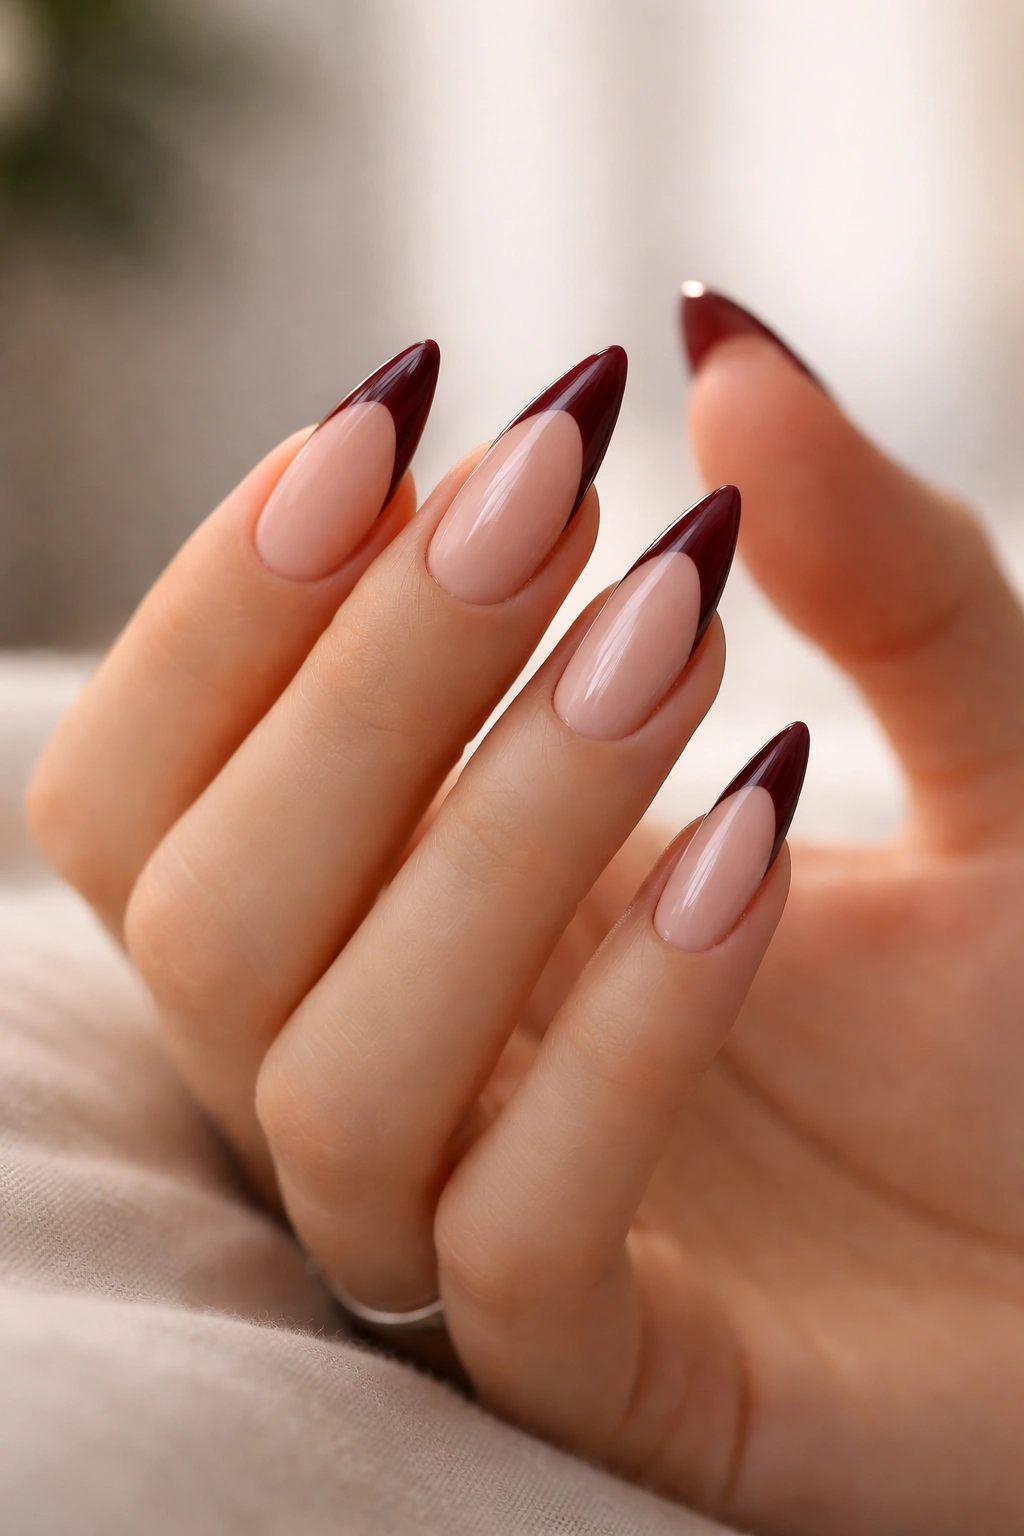
1. Classic Burgundy French Tips with Glossy Finish
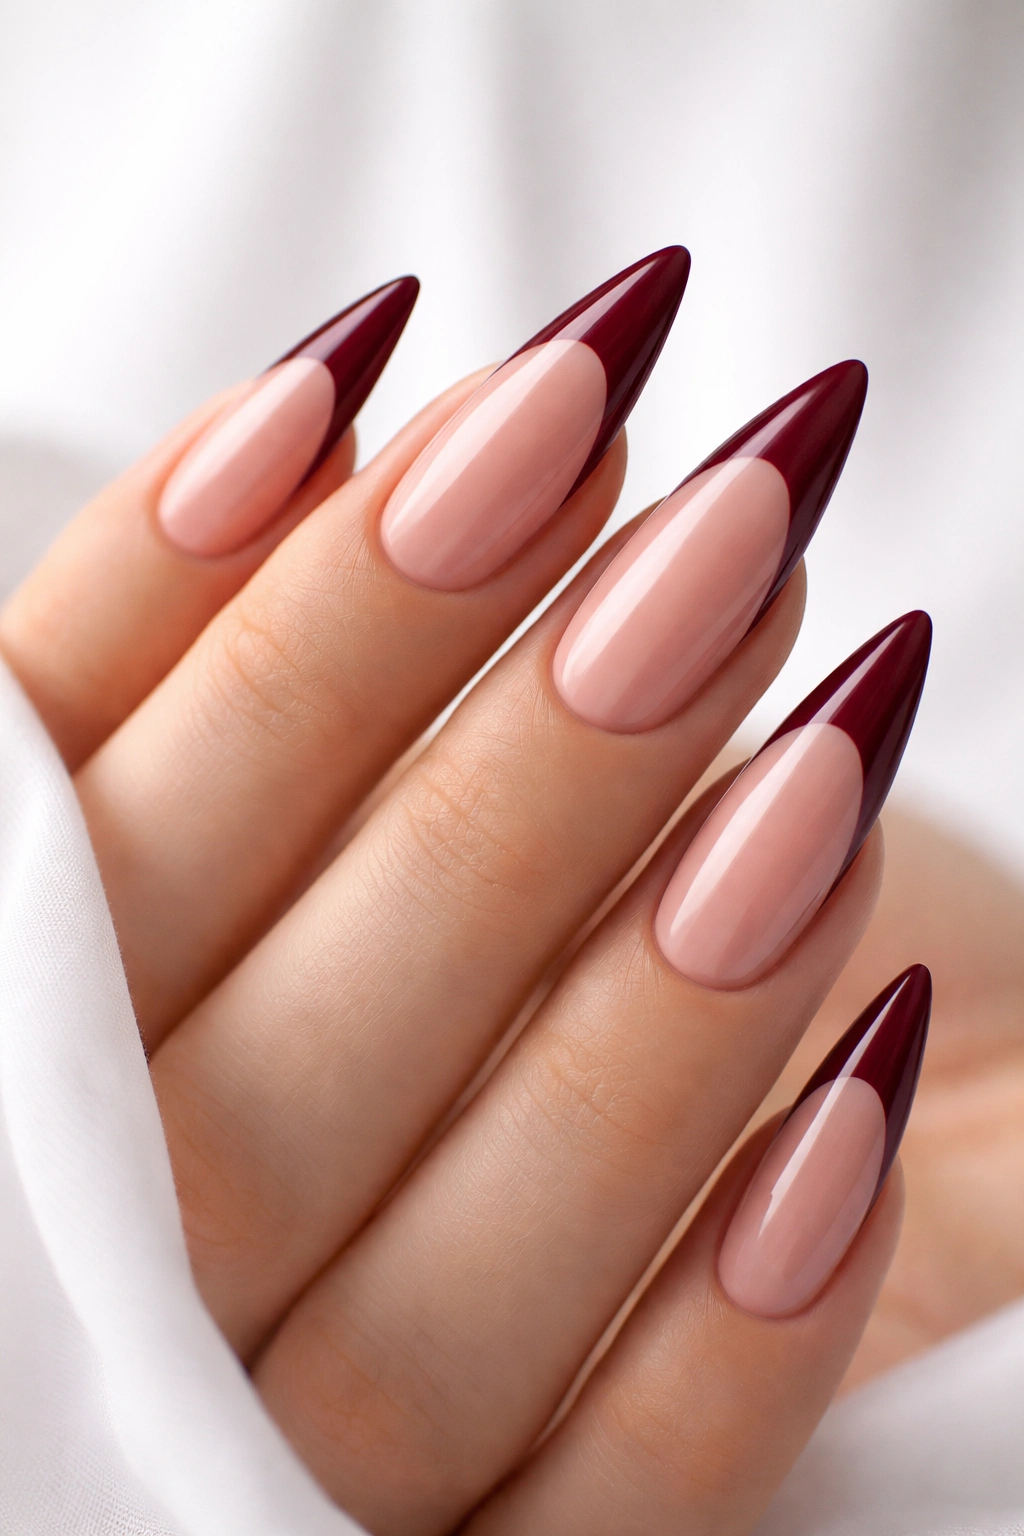
The timeless version gets a reason to be timeless for a reason—it works, it photographs beautifully, and it never looks dated. This is pure elegance: a nude or natural pink base that extends the full length of the stiletto, with a sharp burgundy line creating the French tip. The key here is keeping the tip line clean and even, about ¼ inch from the edge of the nail. A high-shine topcoat makes the contrast between the base and tip even more striking.
Why This Design Never Gets Old
The classic French tip borrowed its appeal from simplicity and precision. On stilettos, that minimal approach gets amplified—the sharp shape of the nail already makes a statement, so you don’t need complexity to make an impact. Burgundy intensifies this without the aggression of a true red, making it feel intentional rather than trend-following.
Application Tips for the Perfect Line
The straightest way to nail (literally) a clean French tip line is using a thin nail art brush or a striping brush. Apply the burgundy in one smooth stroke from one side of the nail to the other. If you’re not confident freehand, French tip guides or nail stencils remove all the guesswork. Two thin coats of burgundy cover better than one thick coat, which is less likely to streak or drip.
Pro tip: Let your base color dry completely before applying the French tip color—any tackiness will cause the burgundy to pull or smudge when the brush touches it.
2. Burgundy French Tips with Gold Foil Accents
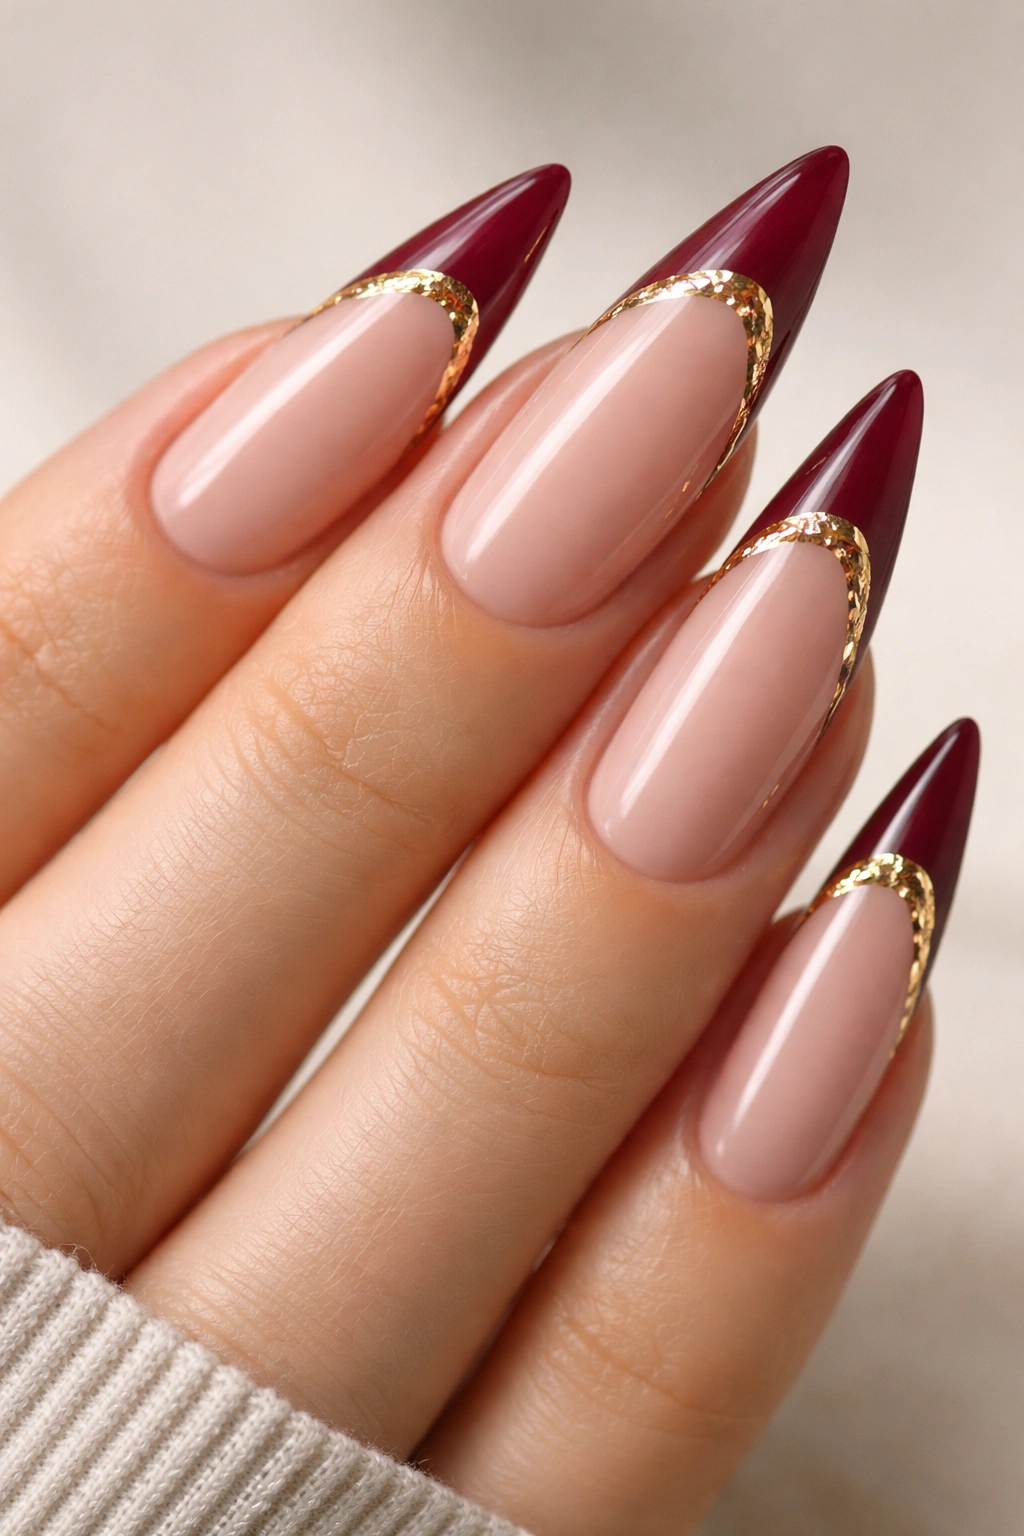
Here’s where classic meets glam. Keep your French tips clean and minimal, but add a thin stripe of gold foil running along the edge where the burgundy meets the natural nail base. This could be a delicate line right at that junction, or you could sandwich the gold between a burgundy outline, creating a fine metallic frame. The foil catches light and movement, adding dimension without overwhelming the design.
Choosing Your Gold Tone
Not all golds are created equal on nail art. Warm golds work beautifully with burgundy, especially rose golds or champagne-toned foils. Cool golds can work too if you opt for a more yellow-leaning shade rather than white gold, which might read as too sterile against the warm burgundy base. Experiment with what feels right against your skin tone.
How to Apply Foil Cleanly
Foil transfers work best over a sticky base layer—apply your French tips, then while the burgundy is still slightly wet or tacky, use a foil applicator tool (or even tweezers) to carefully place the foil where you want it. Press gently and lift straight up. For a more polished look, seal everything with a layer of clear topcoat once the foil is set and dry. You can also use foil that’s self-adhesive, which gives you more control over exact placement.
3. Ombre Burgundy French Tips Fading Into Pink
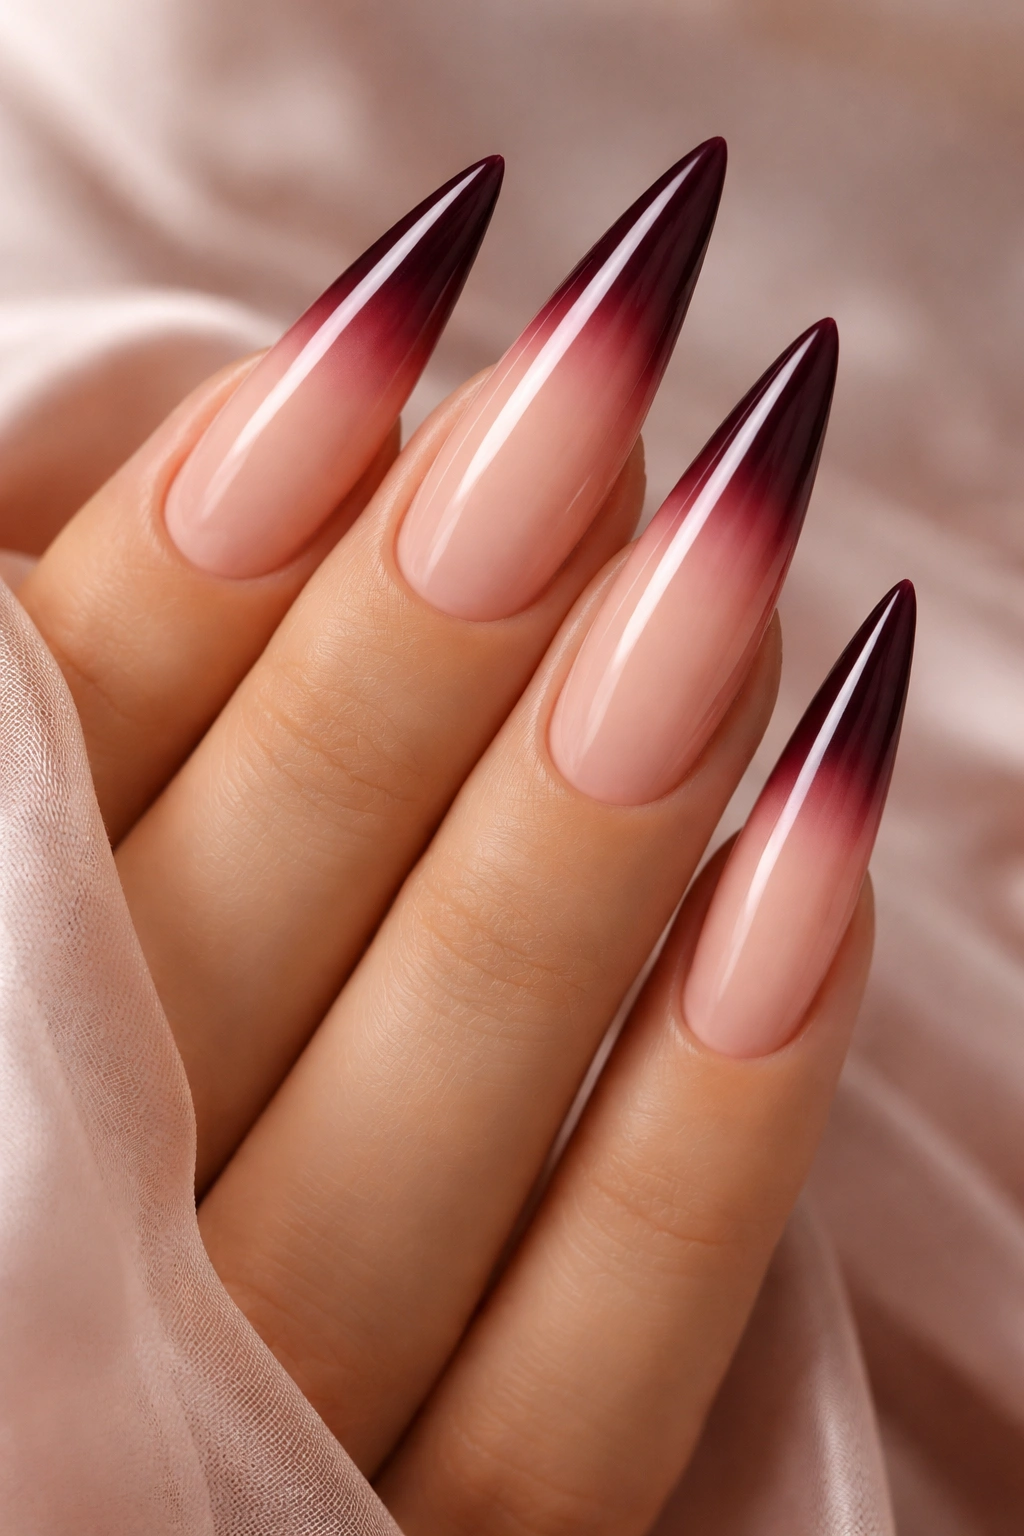
Blur the line between traditional and contemporary with an ombre French tip that transitions from deep burgundy at the edge to a soft rose or blush pink at the point where it meets the nude base. This gradient creates movement and prevents the look from feeling too stark or geometric. The effect is romantic and modern at once—particularly flattering if you have fair or medium skin tones.
Creating a Smooth Ombre Transition
There are two reliable methods here. The first is the sponge method: apply both colors to a makeup sponge in horizontal stripes (burgundy on top, pink below), then stipple the sponge onto the French tip area. This blends the colors as you apply. The second method is blending with a brush—apply burgundy first, then while it’s wet, apply pink below it and use a clean damp brush to blend where they meet. Each technique takes practice but both yield beautiful results.
Which Colors Blend Best
Burgundy to rose works seamlessly because they’re neighbors on the color wheel. If you want more drama, try burgundy fading to a peachy-pink, which creates unexpected contrast. The key is choosing colors that are only one or two shades apart—trying to blend burgundy with a bright hot pink will look muddy.
4. Burgundy French Tips with Matte Finish and Glossy Edges
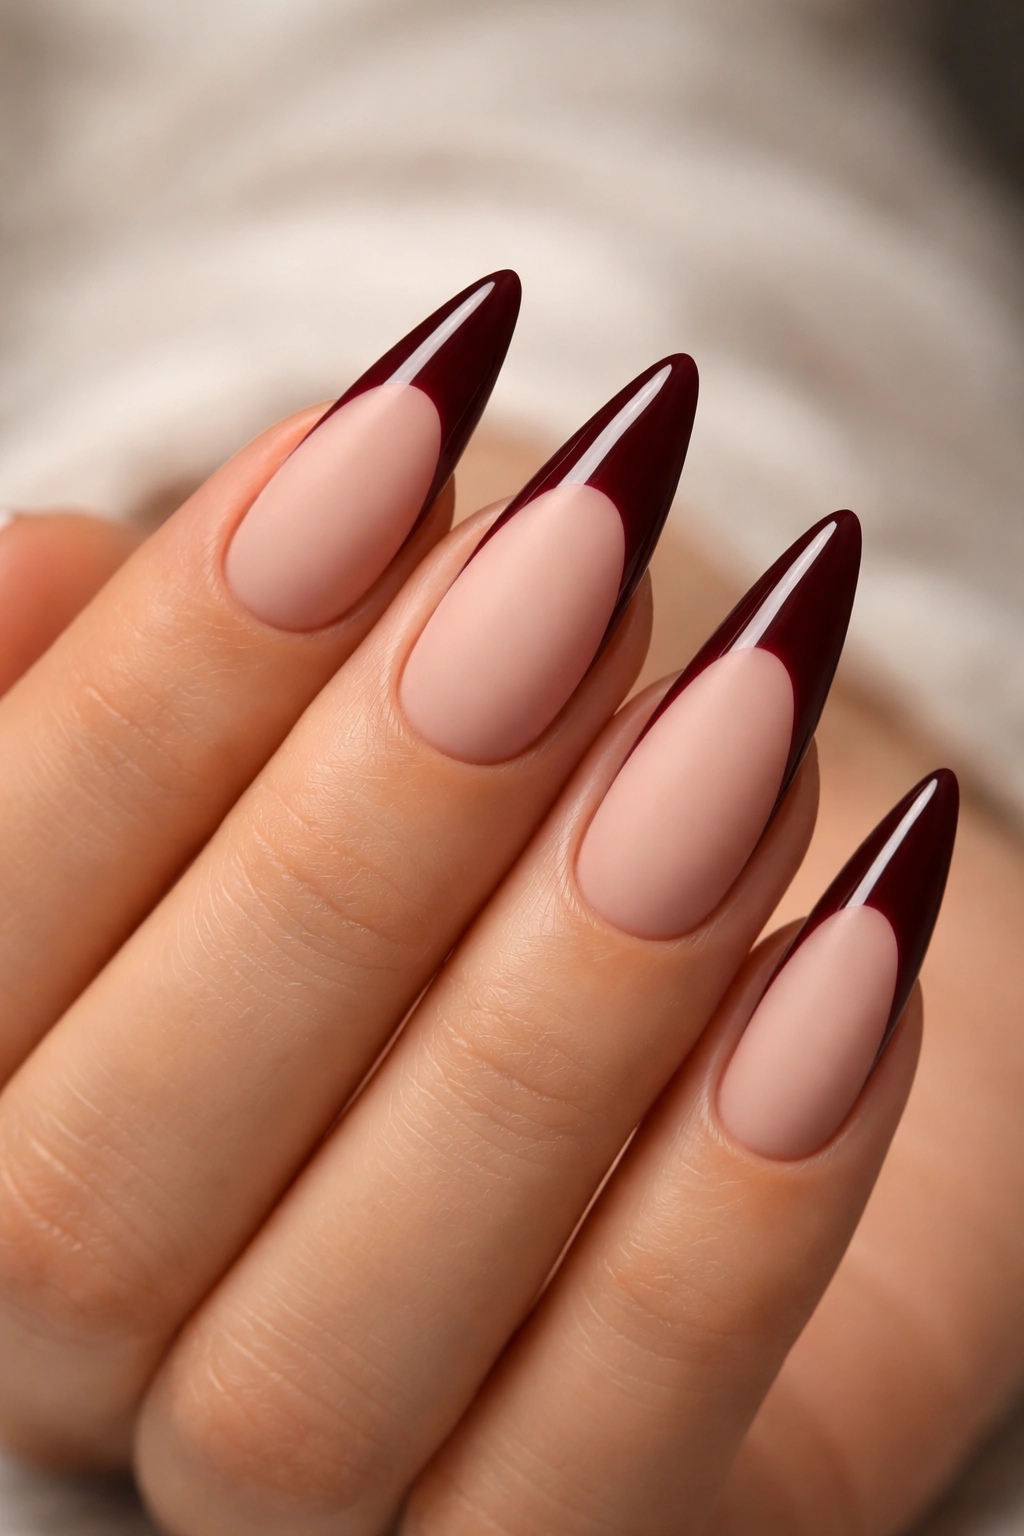
Play with texture for a design that feels unexpected and high-fashion. Paint your entire nail with a matte topcoat, creating a velvety, sophisticated look. Then paint just the burgundy French tip with a glossy topcoat, so it catches light while the rest of the nail remains matte. This contrast is subtle but deeply satisfying, especially under artificial lighting.
The Psychology of Matte vs. Glossy
Matte finishes feel modern, modern, and editorial—there’s an intentionality to choosing matte that reads as fashion-forward. Combining matte with a glossy accent highlights that accent and draws the eye to it. On stilettos, this creates a very deliberate focal point at the tip, which is exactly where you want attention.
Applying Matte Topcoat Without Streaking
Matte topcoats need extra care because any brushstrokes tend to show. Use smooth, even strokes in the same direction, and avoid over-brushing. Two thin coats work better than one thick coat. Make sure your base colors are completely dry before applying matte topcoat, as any remaining stickiness will cause the matte to pull or become uneven. The glossy French tip goes on after the matte layer is fully set.
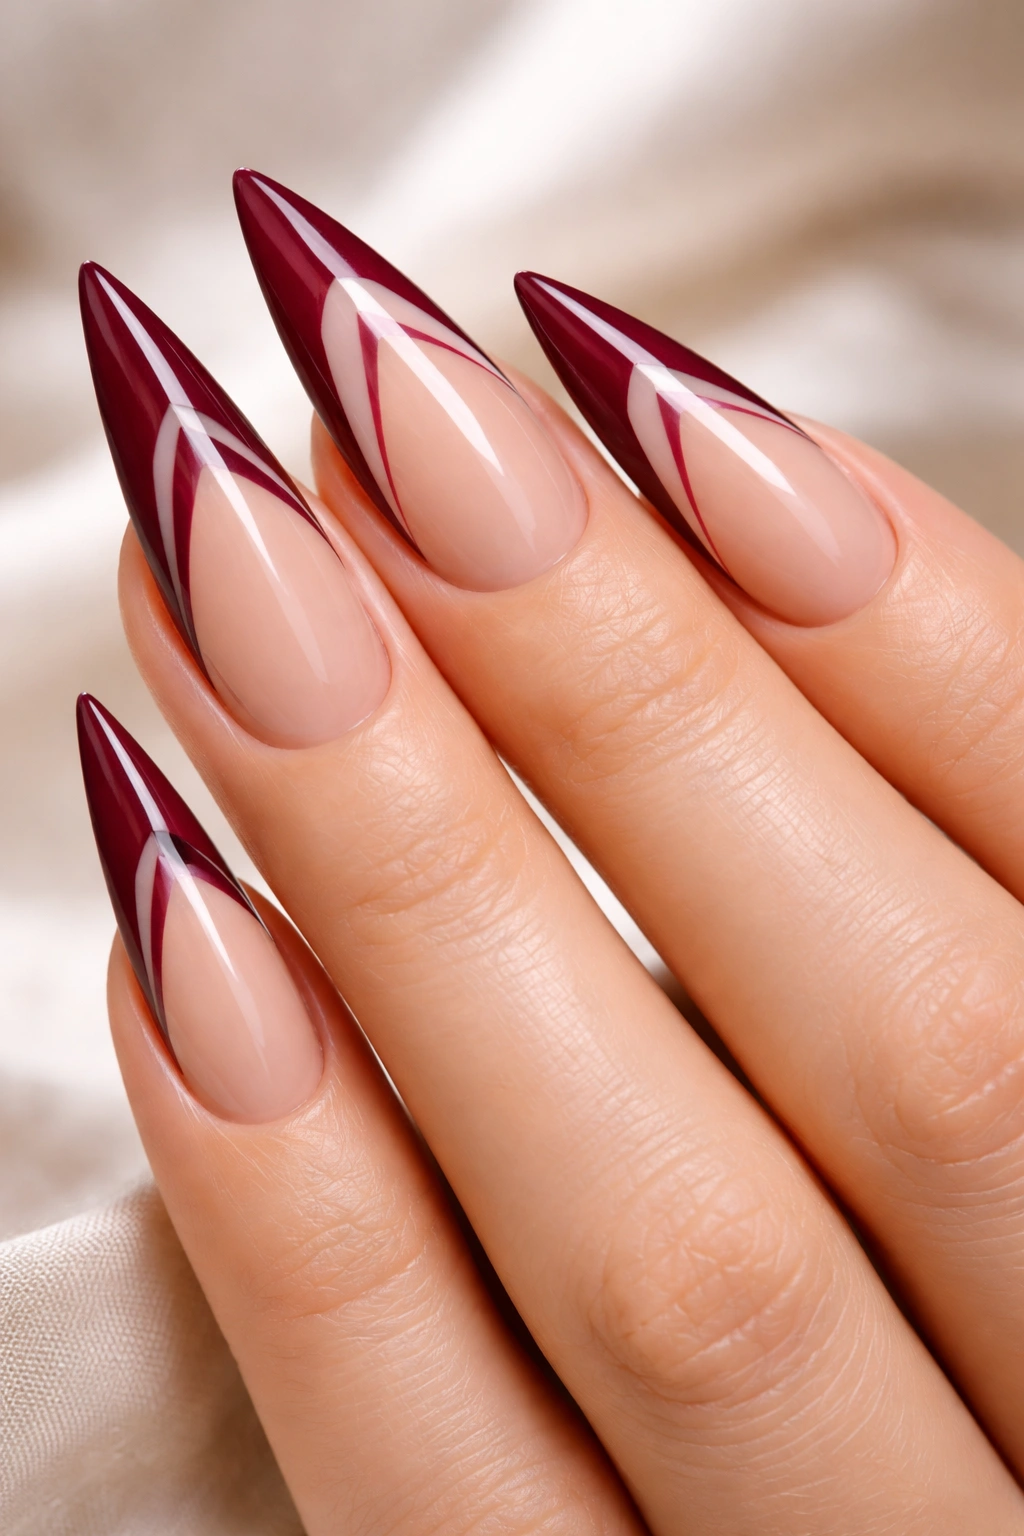
5. Burgundy French Tips with White Swirl Details
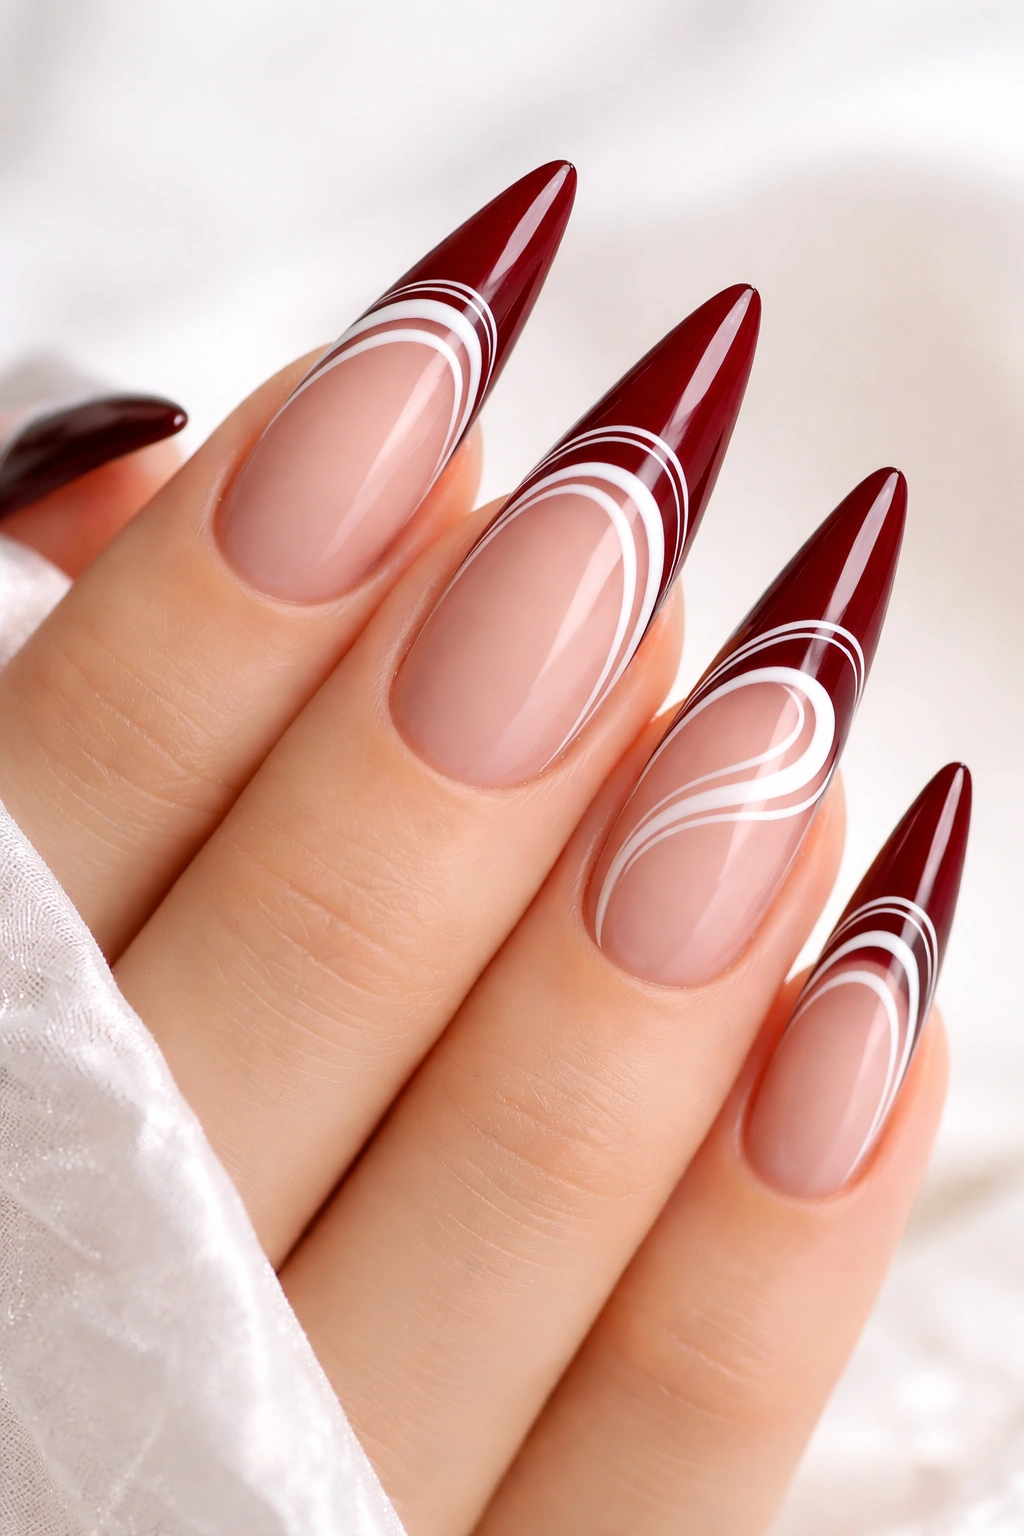
Add a whimsical edge to the classic French tip by painting delicate white swirls or flourishes across the burgundy. Think of it as marbling or hand-drawn abstract line work. These could spiral from the tip upward, branch out like vines, or form organic wavy lines. It’s detailed enough to feel special but not so intricate that it’s overwhelming.
Sketching Designs That Feel Natural
The best swirls are the ones that don’t look too calculated. Use a thin nail art brush (size 0 or 000) and let your hand move freely rather than trying to trace every line perfectly. If you’re nervous, lightly sketch with a pencil first (test the lead on paper to make sure it won’t be too dark). White shows up beautifully over burgundy, so you don’t need multiple coats—one careful application usually suffices.
When to Use White Liner vs. Acrylic Paint
Acrylic paint gives you more opacity and forgiveness if you need to do a second coat, though cleanup can be trickier. A white nail liner (essentially white nail polish in a thin tube) is easier to control and dries quickly, but it requires a steadier hand. Choose based on your comfort level and the intricacy of your design.
Worth knowing: Keep a damp cotton swab nearby while you’re painting details. If you make a mistake, you can gently wipe it away before it dries, especially with paint. Polish sets faster, so work quickly.
6. Burgundy French Tips with Minimal Gemstone Accents
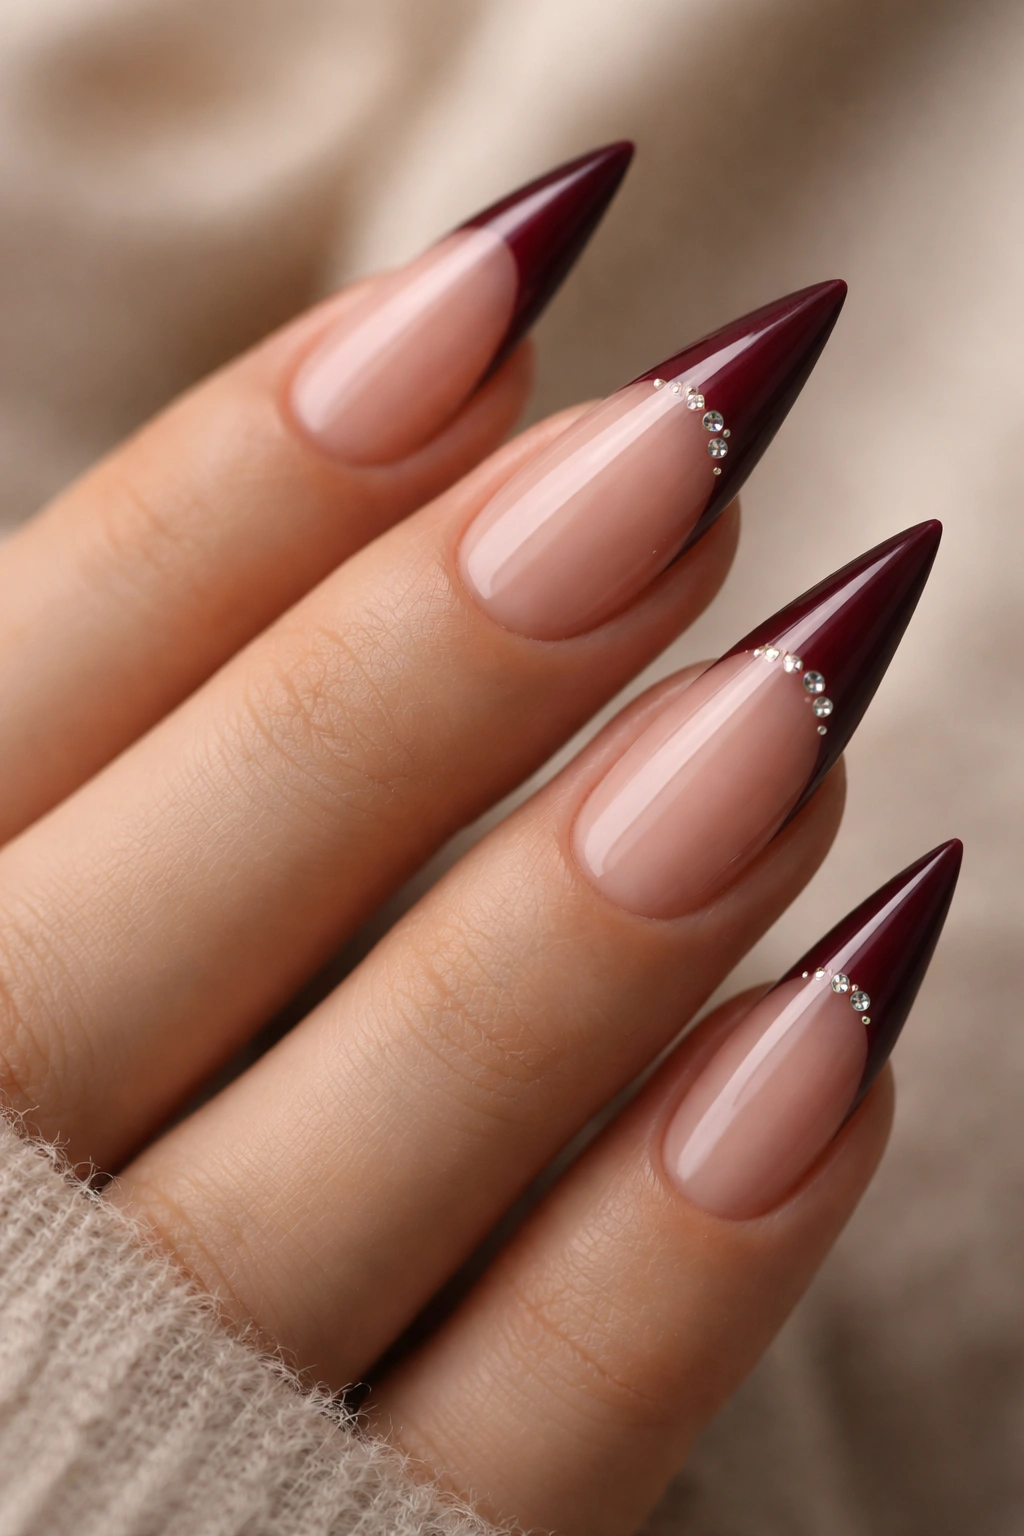
Elevate the look with just two or three small rhinestones or nail gems, strategically placed where the burgundy tip meets the base color. This is restraint done right—the gems add luxury and sparkle without creating visual chaos. You could place them in a triangle formation, position them asymmetrically across just one or two nails, or line them up along the side of the nail.
Choosing and Placing Gems
Smaller stones (sizes 1.5mm to 3mm) feel more sophisticated than large ones on stilettos. If you’re going for a premium look, Swarovski crystals beat budget rhinestones—the clarity and sparkle are noticeably different. Apply gems using nail glue or a sticky base layer, pressing each stone gently until it’s secure. Make sure the area is completely dry and clean before applying gems.
Protecting Your Gems Long-Term
Once you’ve placed your stones, seal everything with a layer of topcoat, making sure to coat all sides of each gem. This prevents them from catching on clothing or catching during daily activities. High-shine topcoat makes gems appear even more brilliant. Avoid submerging your nails in water for at least 24 hours after placing gems to ensure the glue has fully set.
7. Burgundy French Tips with Thin Gold Outline
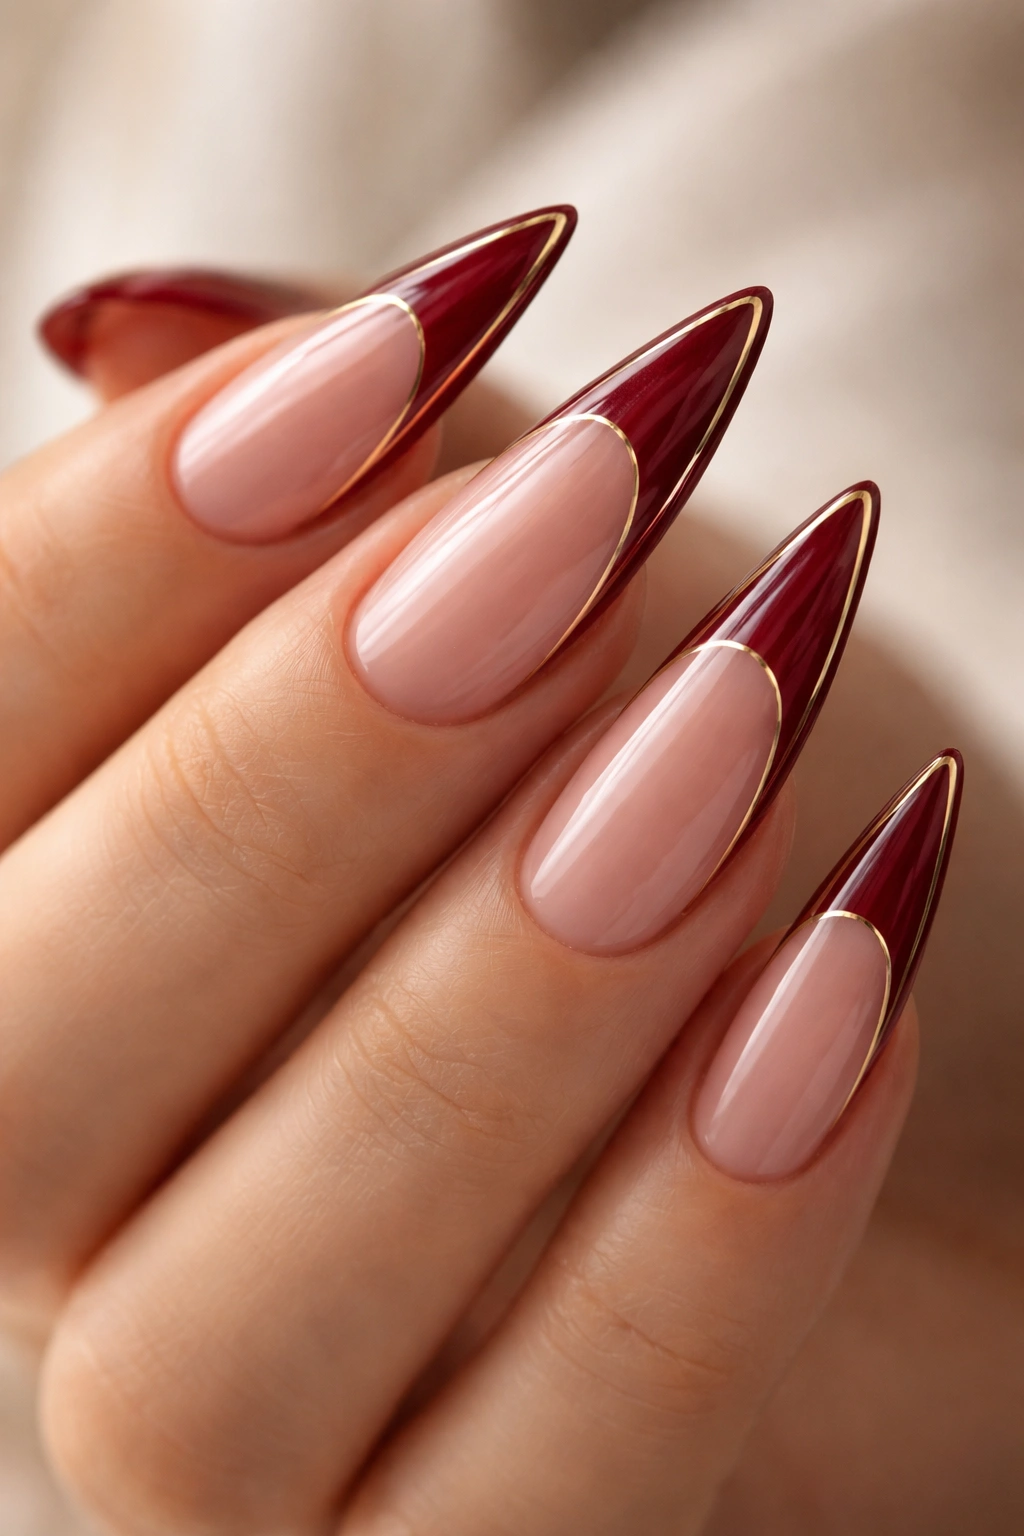
Instead of a traditional filled French tip, create an outline effect by painting just the edge of the burgundy tip with a thin gold line. This creates a refined frame around the burgungy and natural nail junction. It’s architectural, modern, and adds a metallic touch without overwhelming the design. The gold line should be delicate—think 1-2mm width at most.
Gold Liner Tricks for Precision
A gold nail liner or thin brush gives you the control needed for a clean, even line. If you don’t have a liner, a striping brush works too. The trick is using very little product and making one smooth motion rather than multiple attempts. It’s better to apply a second thin line than to try to correct an uneven first attempt. Let the first line dry before adding another layer if needed.
Pairing Gold with Burgundy Undertones
Warm golds (including rose golds) have natural affinity with burgundy because they share similar warm undertones. If your burgundy leans toward cool (more blue-toned), a slightly yellow-leaning gold still works, but test it first on a practice nail if possible. You’re looking for complementary rather than clashing—the gold should enhance the richness of the burgundy, not compete with it.
8. Burgundy French Tips with Nude Gradient Base

Skip the harsh line between base and tip by creating a subtle gradient from a pale nude at the cuticle to a slightly deeper peachy-nude in the middle, then transitioning into the burgundy French tip. This ombré effect across the entire nail creates a cohesive, almost 3D effect that reads as sophisticated and blended rather than segmented.
Achieving a Multi-Color Gradient
The sponge method works beautifully for full-nail gradients. Apply your three colors to a makeup sponge in horizontal stripes (nude at bottom, mid-tone in middle, burgundy at top), then stipple across the nail in gentle pressing motions. You want to stipple, not swipe—pressing creates better blending than brushing. Do this 2-3 times to get good coverage and smooth transitions.
Color Selection for Seamless Flow
The secret here is picking colors that are closely related. Start with a pale nude, pick a shade that’s just slightly warmer or deeper, then go to your burgundy. Each step should feel like a natural progression. If there’s too much contrast between any two colors, the gradient will look patchy rather than intentional.
9. Burgundy French Tips with Black Accents and Lines
Create drama by adding thin black lines or accents alongside or within your burgundy French tips. This could be a thin black outline around the burgundy tip, black lines running vertically up the sides of the tip, or a black geometric accent at the very edge. The contrast between burgundy and black is bold and fashion-forward, with just enough edge to feel contemporary.
Black Line Placement Ideas
A single thin black line running down each side of the burgundy tip creates a frame effect. Multiple thin lines parallel to each other suggest movement. A black outline around the entire burgundy tip creates a defined border. Geometric shapes like triangles or diamonds within the tip add structure. Choose based on the vibe you’re going for—minimalist lines feel sleek, while geometric shapes feel more artistic.
Application and Precision
Black shows up instantly and doesn’t require multiple coats, which makes it forgiving to work with. Use a thin brush or liner and work slowly. Black nail polish tends to be thicker than other colors, so thin it slightly with a drop of clear topcoat if it’s getting too viscous to control. A steady hand matters here—wobbly lines read as unintentional rather than artistic.
10. Burgundy French Tips with Rose Gold Glitter Transition
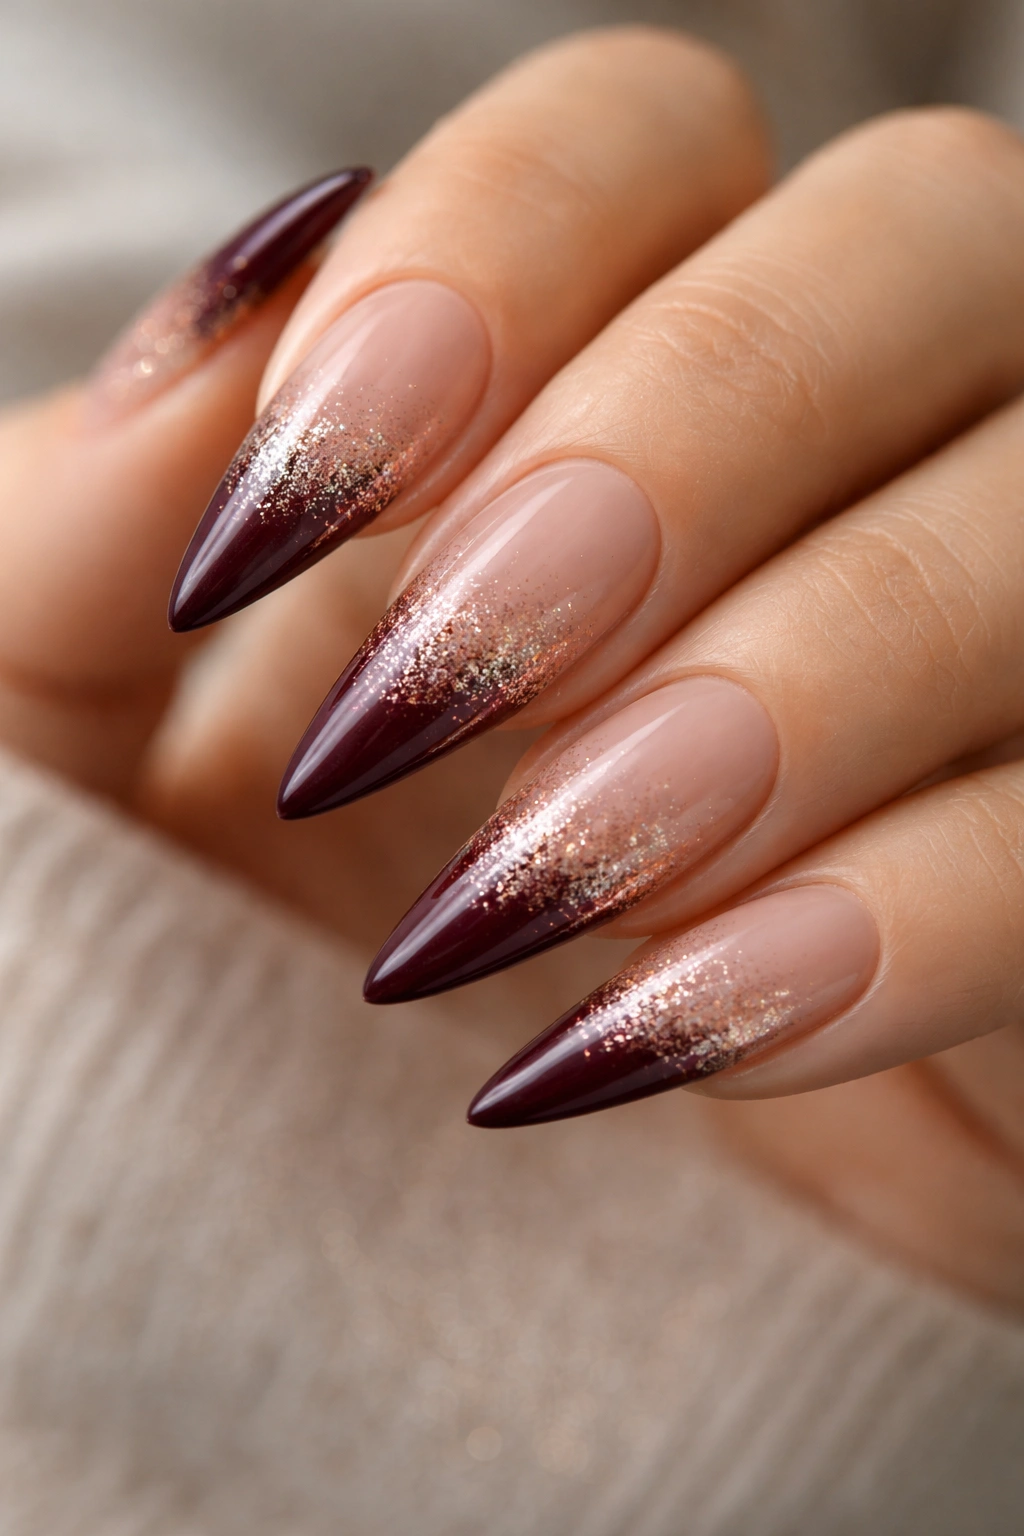
Create a gradient effect where your burgundy French tip slowly transitions into a dusting of rose gold or champagne glitter near the tip. Instead of a sharp line, the glitter gradually gets denser as you move toward the edge of the nail, creating a sparkly fade-out effect. It’s glamorous and catches light beautifully, especially under artificial lighting or on the dance floor.
Layering Glitter Over Solid Colors
Apply your burgundy base first and let it dry completely. Then use a glitter gradient technique: apply a clear or slightly tinted topcoat to the area where you want glitter to start, then sprinkle fine glitter onto that wet layer. Use a brush to gently stipple the glitter area to blend it into the solid burgundy below. Once dry, seal everything with a topcoat. The glitter particles will be held in place and won’t shed.
Glitter Size and Density
Fine glitter particles (rather than chunky or holographic varieties) create a more refined, gradient effect. Chunky glitter tends to sit in clumps and doesn’t blend smoothly. Rose gold and champagne glitters are warm-toned enough to complement burgundy beautifully. Start with a light application—you can always add more, but removing excess glitter mid-application is harder.
Pro tip: If glitter application intimidates you, pre-made glitter gradients nail polish (where the color transitions to glitter within the bottle) takes all the guesswork out of the process.
11. Burgundy French Tips with Burgundy Velvet or Suede Texture
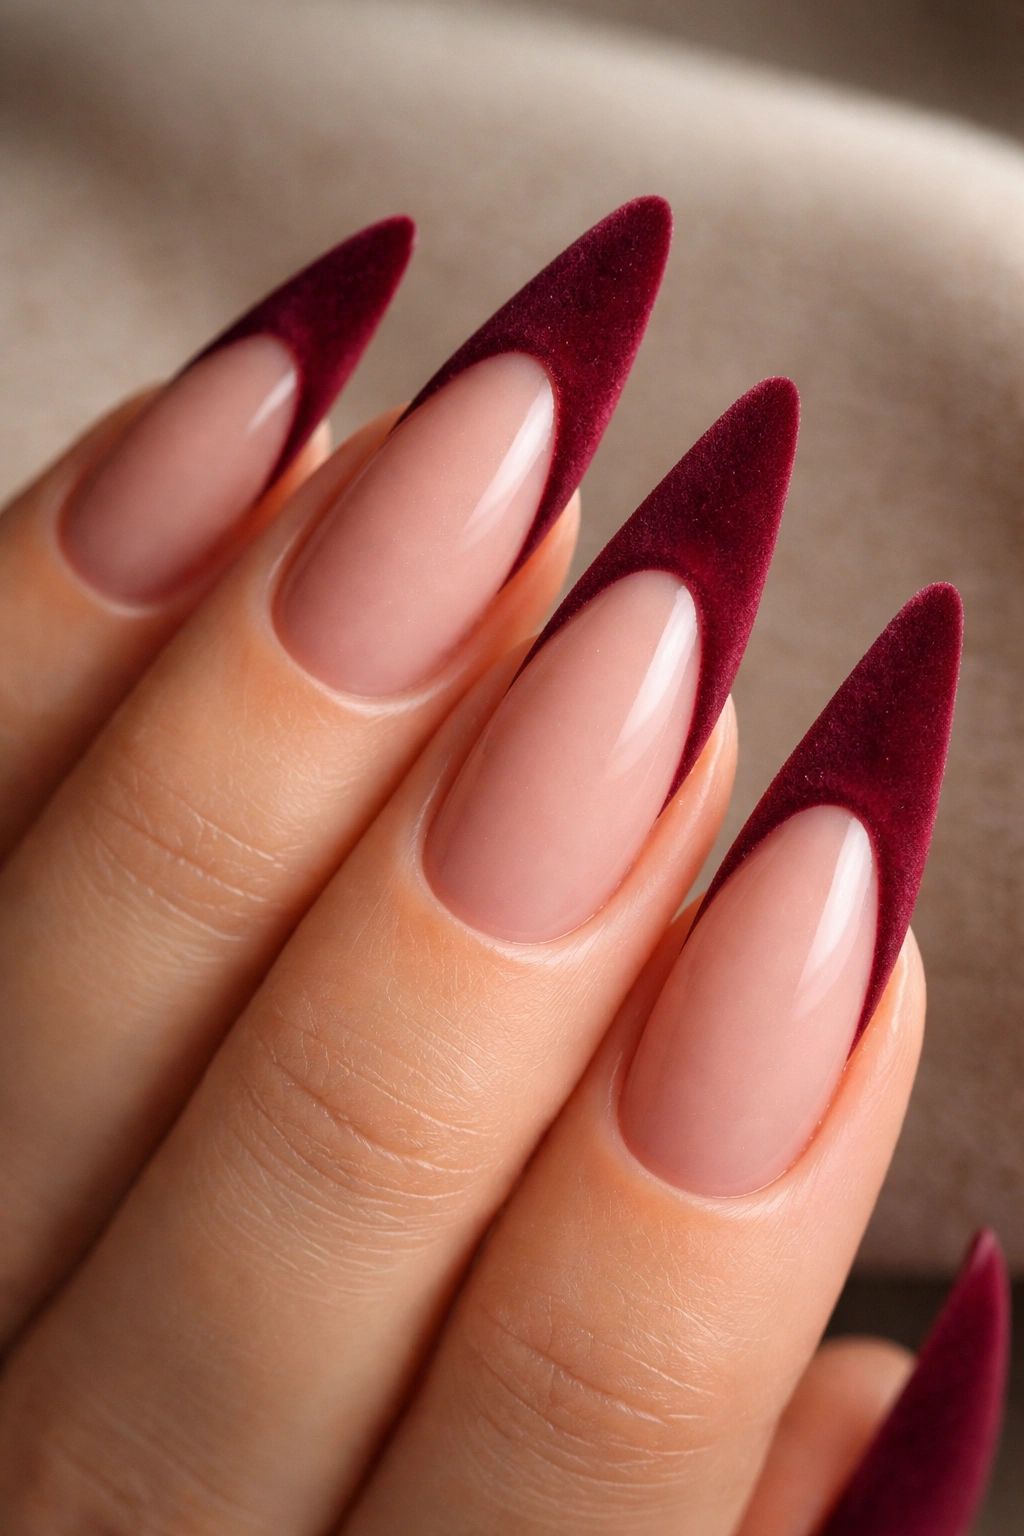
Move beyond traditional smooth finishes with a velvet or suede effect on your burgundy French tips. These matte textured finishes feel luxurious and look almost three-dimensional. Some products are specifically designed for velvet nails and come in a burgundy shade, or you can create the effect by mixing fine flock powder into clear topcoat and applying it over your burgundy tips.
Understanding Velvet Nail Products
Velvet nail powders and suede finishes come in bottles or as loose powders. The bottled versions are applied like topcoat and dry to a fuzzy texture. Loose powders require a sticky base layer (like a topcoat with a slight tack), then you dust the powder over the wet surface. The flock powder adheres to the sticky layer and creates a fabric-like texture. Both methods work—the bottled versions are easier, while loose powders give you more customization.
Caring for Textured Nails
The fuzzy texture catches on everything—clothing, hair, skin—so you need to be mindful during daily activities. The texture also wears away with friction, so textured nails don’t have the longevity of traditional polish. They’re beautiful for special occasions or for a few days as a statement look, but they’re not the most practical for everyday wear. Seal them carefully to extend wear time.
12. Burgundy French Tips with Negative Space Design
Embrace negative space by creating cutouts or shapes within your burgundy French tips that reveal the nail surface beneath. This could be a geometric cutout—triangles, circles, or stripes of exposed nail within the burgundy—or more organic shapes. The contrast between the solid burgundy and the bare nail creates a modern, almost architectural feel.
Planning Your Negative Space Pattern
Sketch your design on paper first to visualize it. Simple patterns (horizontal stripes of exposed nail alternating with burgundy stripes, or a triangle pointing toward the cuticle) work best on stiletto nails because the shape is already dramatic. Complex patterns can get lost on the nail. Use tape or stencils to create clean lines and prevent the burgundy from bleeding into the negative space areas.
Protecting Exposed Nail
The exposed nail areas are your natural nail, which is more prone to staining and damage than sealed nail. Apply a clear topcoat to the entire nail, including the negative space areas, to protect your natural nail and give the design a finished look. This also makes the bare nail areas look intentional rather than accidental.
13. Burgundy French Tips with Pearl or Metallic Dust Finish

Blend sophisticated sophistication by using pearl or metallic dust over your burgundy French tips. This creates a lustrous, almost iridescent quality that shifts subtly in different lighting. Pearl dust gives a soft shimmer, while metallic dust (gold, silver, or copper) creates a more pronounced shimmer. The effect feels expensive and editorial.
Applying Dust Finishes
Dust finishes work best over a sticky or tacky base layer. Some topcoats are formulated to have a slight tack for exactly this reason. Apply your burgundy, let it set (but not completely dry), then use a flat brush to dust the powder over the tacky surface, making sure every area is coated. Seal with a topcoat once the dust is evenly distributed. The key is an even application—patchy dust application looks accidental rather than intentional.
Blending Dust with Your Burgundy Undertone
Choose dust finishes that complement your burgundy’s undertone. If your burgundy is warm and wine-like, warm metallics (gold, copper, rose gold) work beautifully. If your burgundy leans cooler or more blue-toned, cooler metallics (silver, platinum) might be more flattering. Pearl finishes work universally and add a soft glow without metallic harshness.
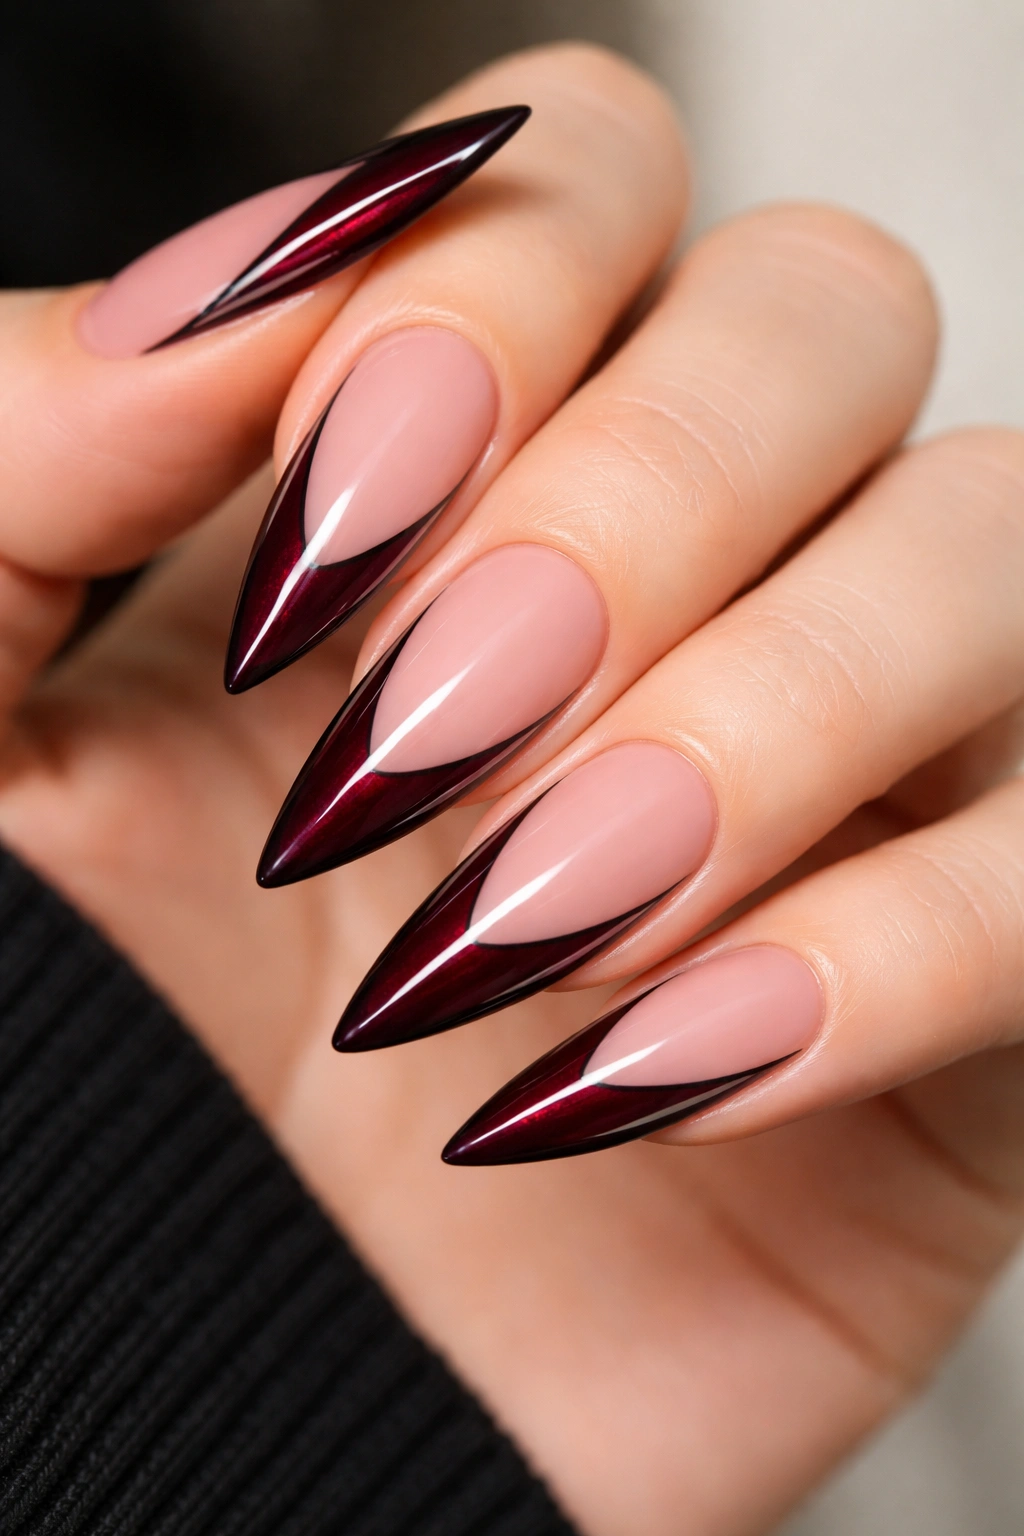
14. Burgundy French Tips with Chrome or Mirror Finish Edge

Take the French tip to the extreme with a true chrome or mirror finish edge. The very tip of the nail gleams with a reflective, almost liquid metal appearance. This is the most dramatic version on this list—pure luxury and high fashion. Chrome finishes are typically applied as a powder over a sticky base, creating an intense reflective surface.
What Makes Chrome Different from Other Metallics
Chrome and mirror finishes are highly reflective and multipurpose—they literally look like polished metal. They’re more dramatic than traditional gold or silver metallics and create an undeniably statement-making look. They work especially well on stilettos because the elongated shape gives the chrome enough surface to really shine and reflect light.
Application of Chrome Powder
Chrome powder application requires patience and precision. Apply a sticky base layer (usually a special chrome base or a tacky topcoat), then use the applicator that comes with the chrome powder to rub it onto your nail in circular motions. The more you rub, the more reflective the finish becomes. Multiple light applications create a more even result than one heavy application. Once you’ve achieved the desired intensity, seal with a topcoat formulated for chrome (regular topcoat can dull the effect).
Worth knowing: Chrome finishes are delicate and require careful maintenance. Avoid intense friction or rough handling, as the powder can wear away unevenly. They’re stunning for special events and photo opportunities, but not the most practical for extended wear.
Final Thoughts
The beauty of burgundy French tip stilettos lies in how easily they adapt to your aesthetic—whether you’re drawn to classic minimalism or editorial high fashion, there’s a version here that speaks to your style. The shape alone makes a statement, and burgundy adds sophistication without the aggression of true red. Start with whichever design speaks to you most, but don’t hesitate to experiment once you find your favorite base.
The most important thing is that your nails feel like an extension of your confidence, not a trend you’re chasing. Whether you’re getting these done at a salon or creating them at home, invest in quality polish and take your time with application. The details—clean lines, even colors, properly sealed designs—are what separate a manicure that looks polished from one that looks exceptional. Your hands are constantly visible, so make them count.
