

The grunge aesthetic has made a powerful comeback, and there’s something undeniably striking about pairing that deliberately imperfect, edgy vibe with the bold geometry of stiletto nails. Stilettos are already a statement — they’re sharp, confident, and unapologetically dramatic. When you layer grunge elements onto them, you create a look that’s moody, artistic, and far more interesting than basic solid colors. The beauty of grunge nails lies in their intentional imperfection: smudged details, distressed textures, matte finishes, and dark, earthy tones that make you look like you stepped straight out of a vintage magazine spread or an underground art scene.
What makes grunge stilettos particularly compelling is that the elongated canvas gives you so much room to play with layering, negative space, and texture. The sharp points naturally lend themselves to dramatic details and unexpected finishes. Unlike shorter nails where intricate work can feel cramped, stilettos let you create nails that read as genuinely artistic rather than just decorated. The longer length also means your grunge designs will catch light differently, making metallics, glitters, and foil elements read more dynamically.
The best part? You don’t need to be a nail artist to pull off these looks. Many of these designs actually benefit from a slightly rough-around-the-edges aesthetic — that’s literally the point. If your sponged gradient isn’t perfectly even or your metallic drip isn’t precisely placed, it’s not a mistake. It’s on-brand. Here are the grunge stiletto nail ideas that deliver maximum impact.
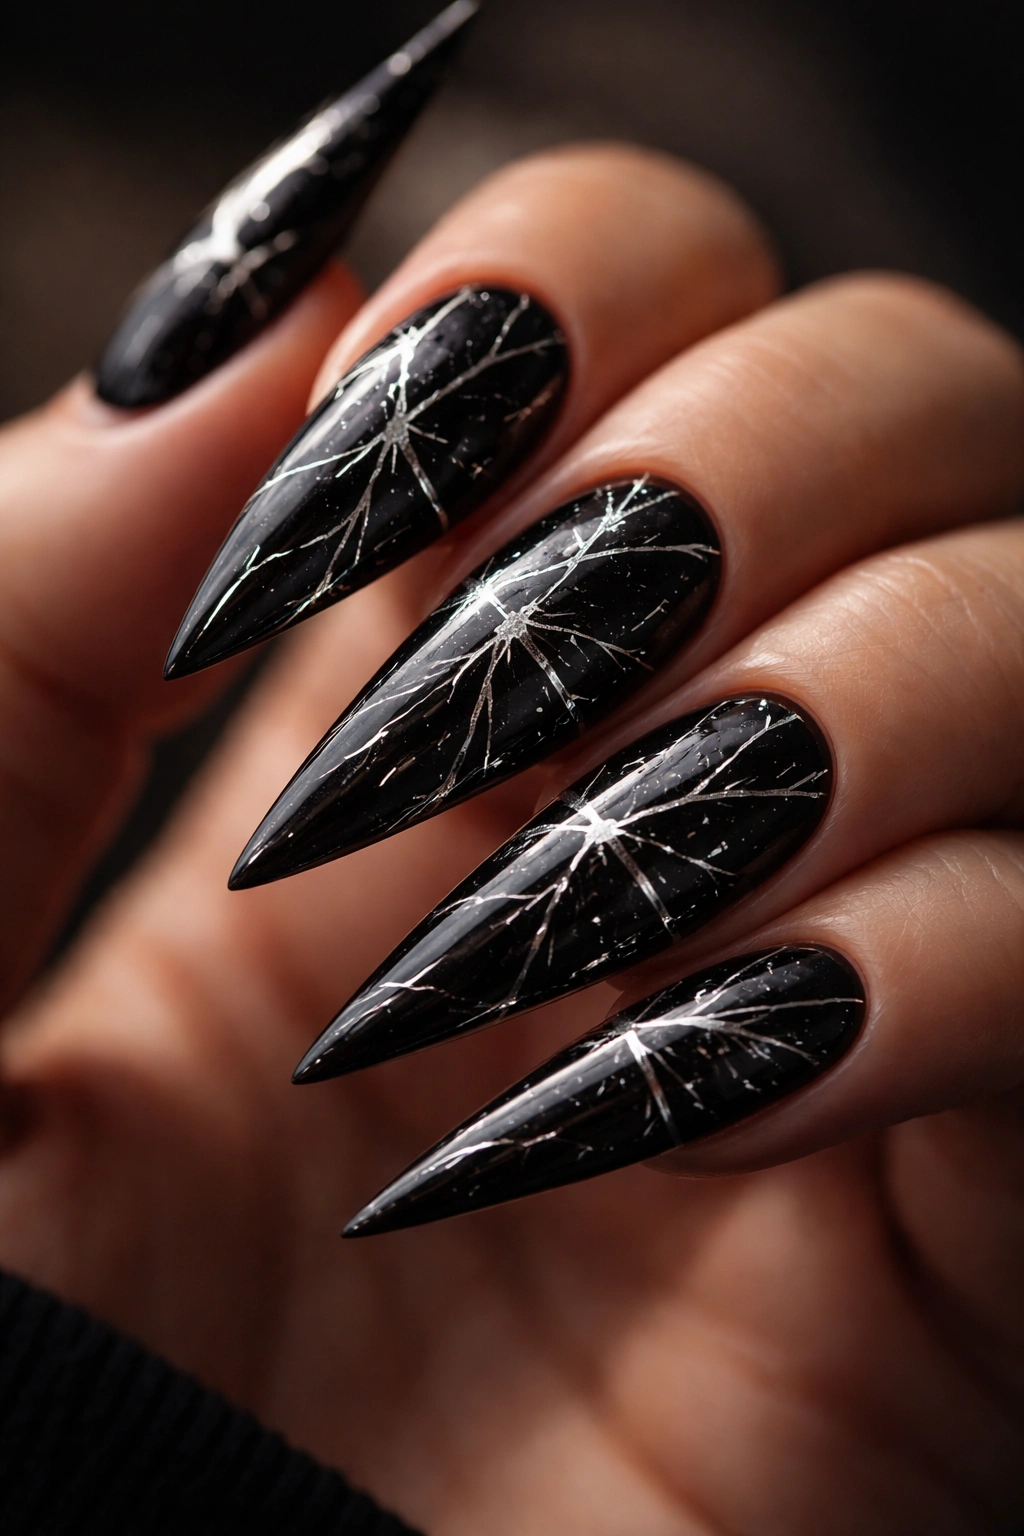
1. Black Shattered Glass Effect
This design mimics the look of broken, fractured glass scattered across a deep black base, and it’s an instant showstopper. Start with a glossy jet-black base and allow it to dry completely. Once dry, use a thin, sharp brush or a dotting tool to create thin silver or white lines in jagged, random patterns across the entire nail surface. The lines should look like cracks spreading outward, sometimes branching off into smaller fractures.
Why This Grunge Look Works
The shattered glass effect bridges the line between elegant and edgy — it’s structured enough to look intentional but broken enough to feel raw. The stark white lines against deep black create incredible contrast, and the design photographs beautifully, making your stilettos look editorial and fashion-forward. This is the kind of design that makes people stop and ask where you got them done.
How to Apply and Perfect It
- Base coat, then two coats of black gel or regular polish, fully cured
- Thin white gel in a fine brush or use white striping tape for perfectly straight lines
- Create 3-4 main cracks radiating from random points, then add 2-3 smaller branches off each
- Seal with a glossy top coat to make the glass effect genuinely reflective
- If you mess up a line, it actually looks more authentic — true shattered glass isn’t perfect
Pro tip: Film this while the white lines are still wet and the light hits them, and you’ll have one of those nail videos that just stops people mid-scroll.
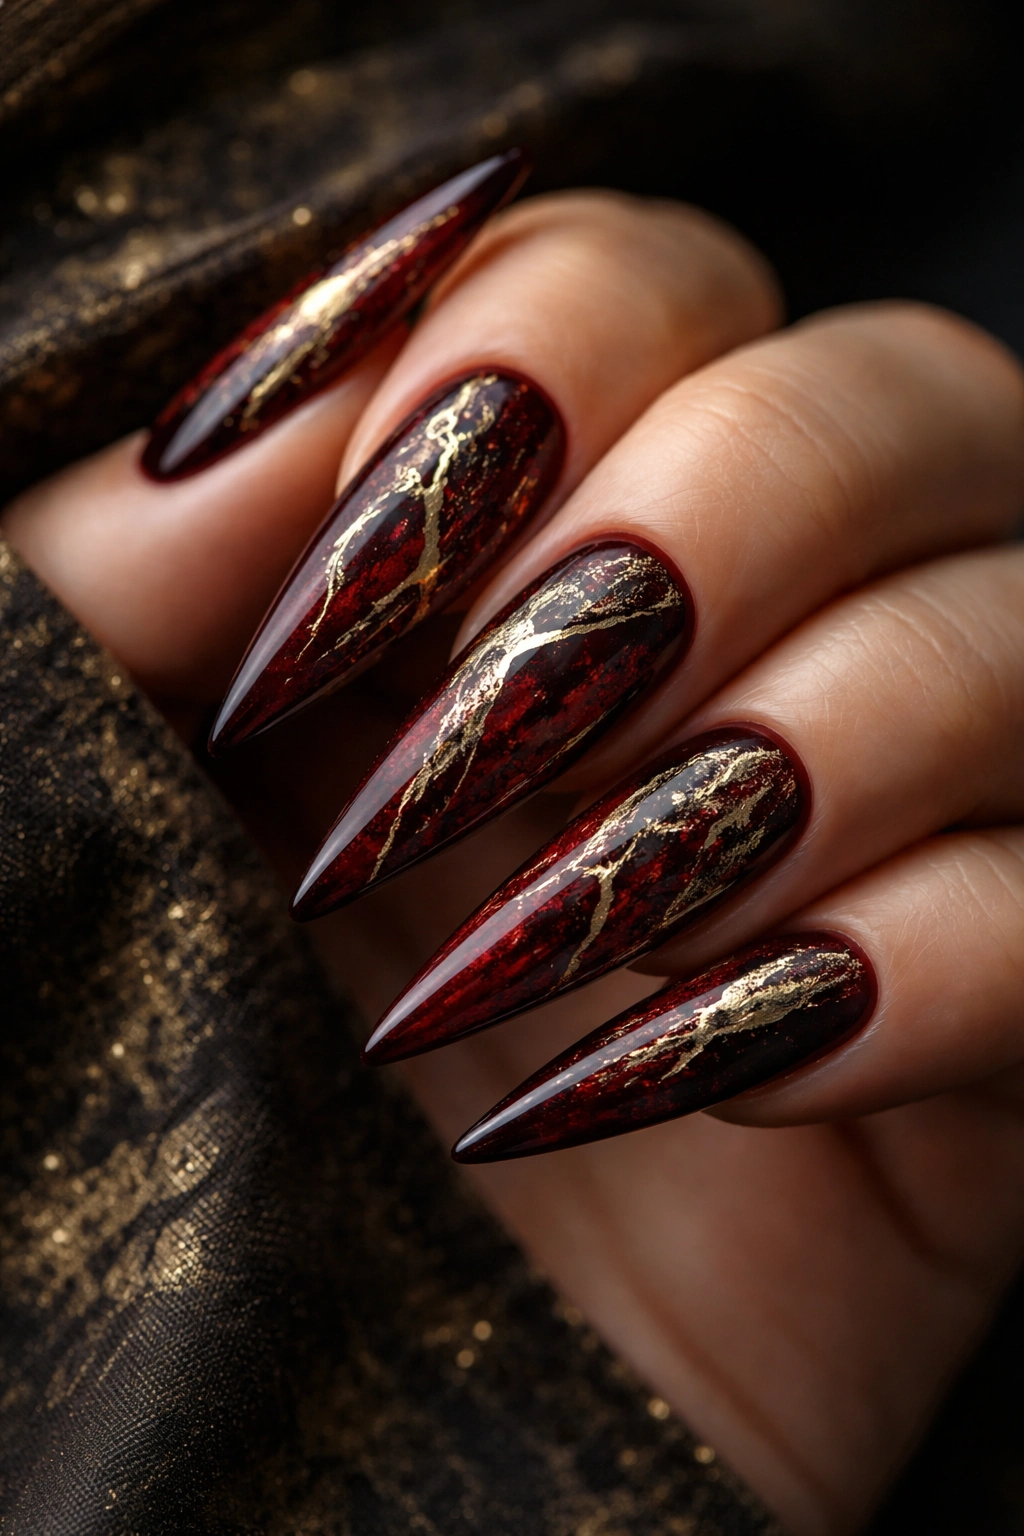
2. Matte Burgundy with Metallic Cracks
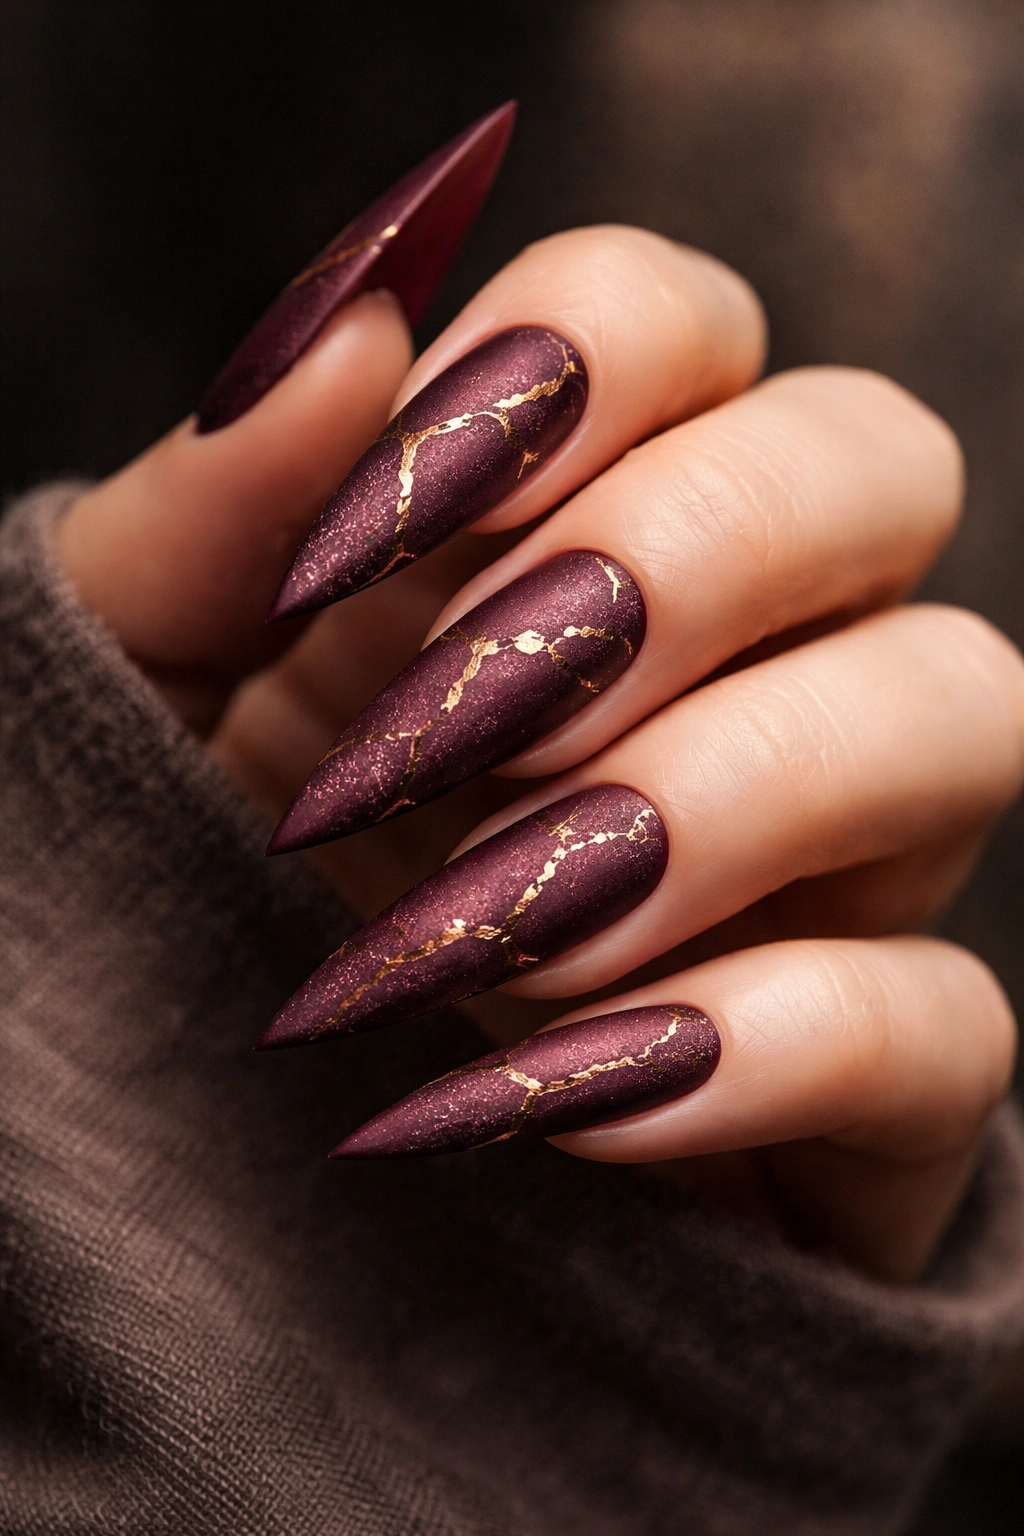
Pair a deep matte burgundy base with metallic gold or rose gold cracks running through it for a look that feels luxe and moody at once. The matte finish is essential here — it gives the design that aged, worn quality that makes it feel authentically grunge. Burgundy reads as both romantic and sinister, which is the essence of the grunge aesthetic.
What Makes This Design Stand Out
Matte finishes automatically feel more sophisticated and artistic than glossy ones, and they diffuse light in a way that makes the metallic accents pop without being overly shiny. The contrast between the soft matte and the reflective metallic creates dimension that reads beautifully from any angle. Burgundy is one of those colors that works with the grunge vibe because it’s moody without being plain black.
Building This Design Step by Step
- Apply a clear base coat, then two coats of burgundy polish
- Once fully dry, apply a matte top coat and let it cure
- Use a thin metallic brush or a metallic striping pen to draw delicate cracks across the surface
- The cracks don’t need to spread like spider webs — loose, organic lines work better here
- Gold creates a more vintage feel; rose gold leans slightly more modern
- Seal with a matte top coat to maintain the finish
Worth knowing: Matte top coats sometimes look chalky if you use too heavy a hand, so apply thin layers and build gradually.
3. Dark Forest Green with Gold Leaf Accents
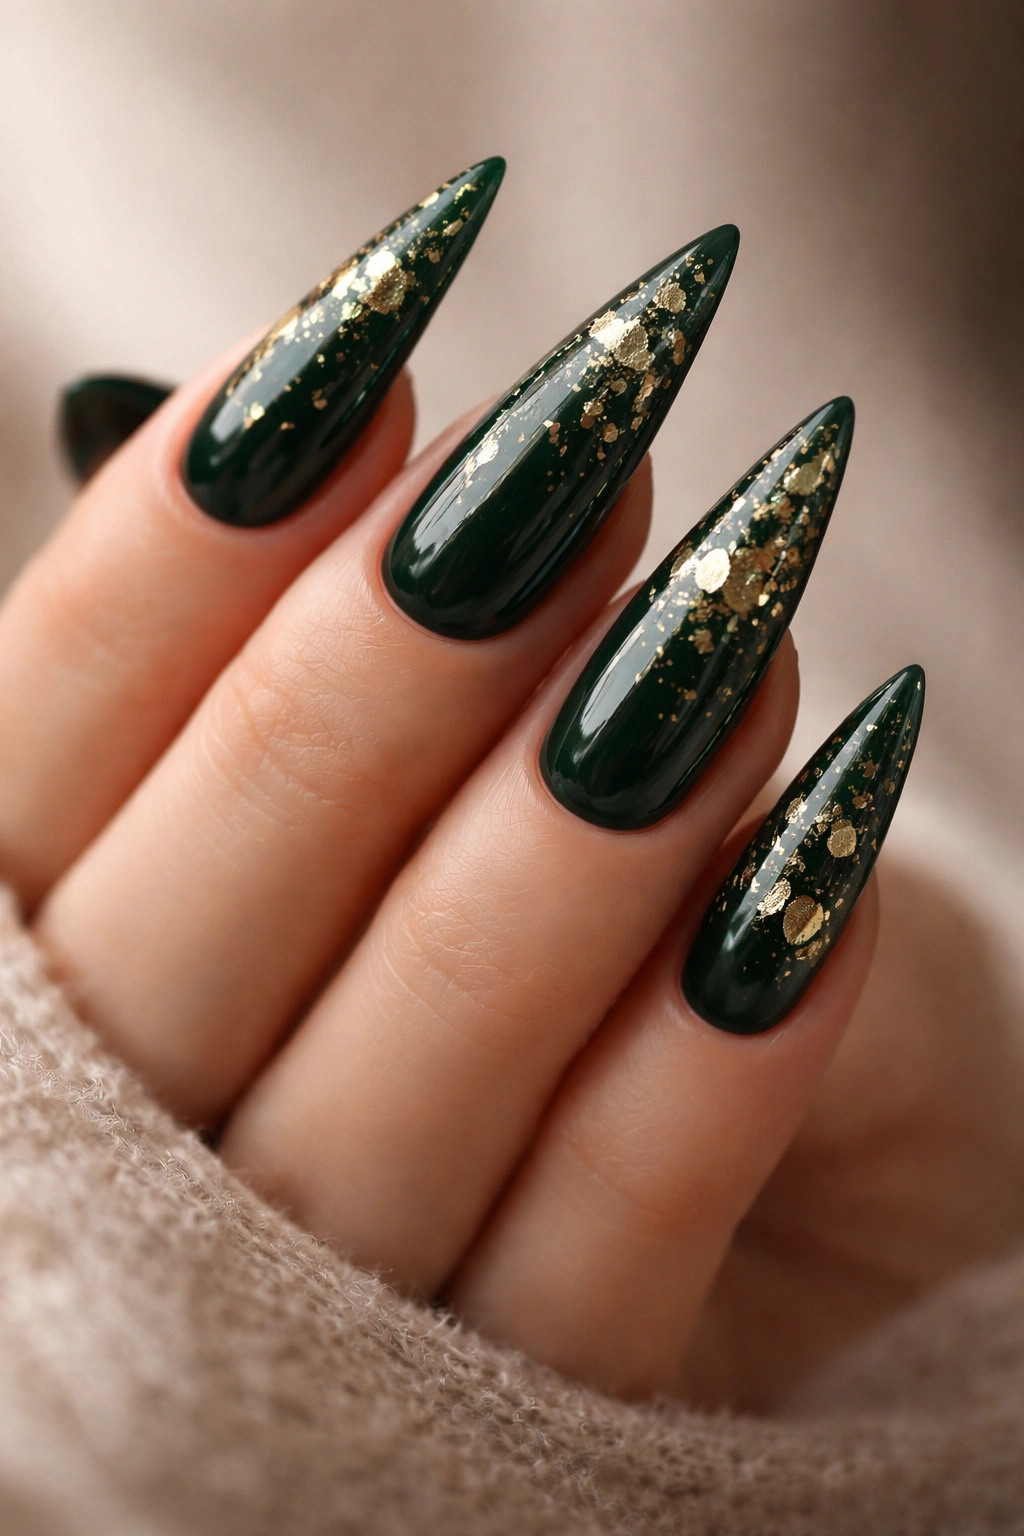
This design combines a deep, jewel-toned forest green base with scattered gold leaf flecks that look like nature reclaiming the surface. It’s earthy, mysterious, and channels that moody nature-inspired grunge energy. The gold leaf catches light beautifully and adds an unexpected luxury element that makes it feel less “dark” and more “sophisticated and moody.”
Why Green Works for Grunge
Unlike black, which can feel one-dimensional, dark green is complex — it has depth, history, and personality. It reads as mysterious without being heavy. When paired with gold, it feels almost like an aged, weathered surface that time and nature have embellished. This is the color combo you’d see on vintage jewelry or antique painted metal.
Applying Gold Leaf Beautifully
- Base coat, then two coats of dark forest green, fully cured
- Lightly brush a tiny amount of gold leaf adhesive or tacky top coat onto random areas of the nail
- Press small pieces of gold leaf onto the adhesive — don’t worry about perfect placement
- Smooth gently with a soft brush (the pieces should look naturally scattered, not arranged)
- Seal with a matte or satin top coat to soften the shine of the gold
- The leaf pieces should look like they’ve been there for ages, not freshly applied
Insider note: Real gold leaf is cheaper than you’d think and creates a far more authentic look than painted metallic details.
4. Charcoal Smoke with Silver Drips
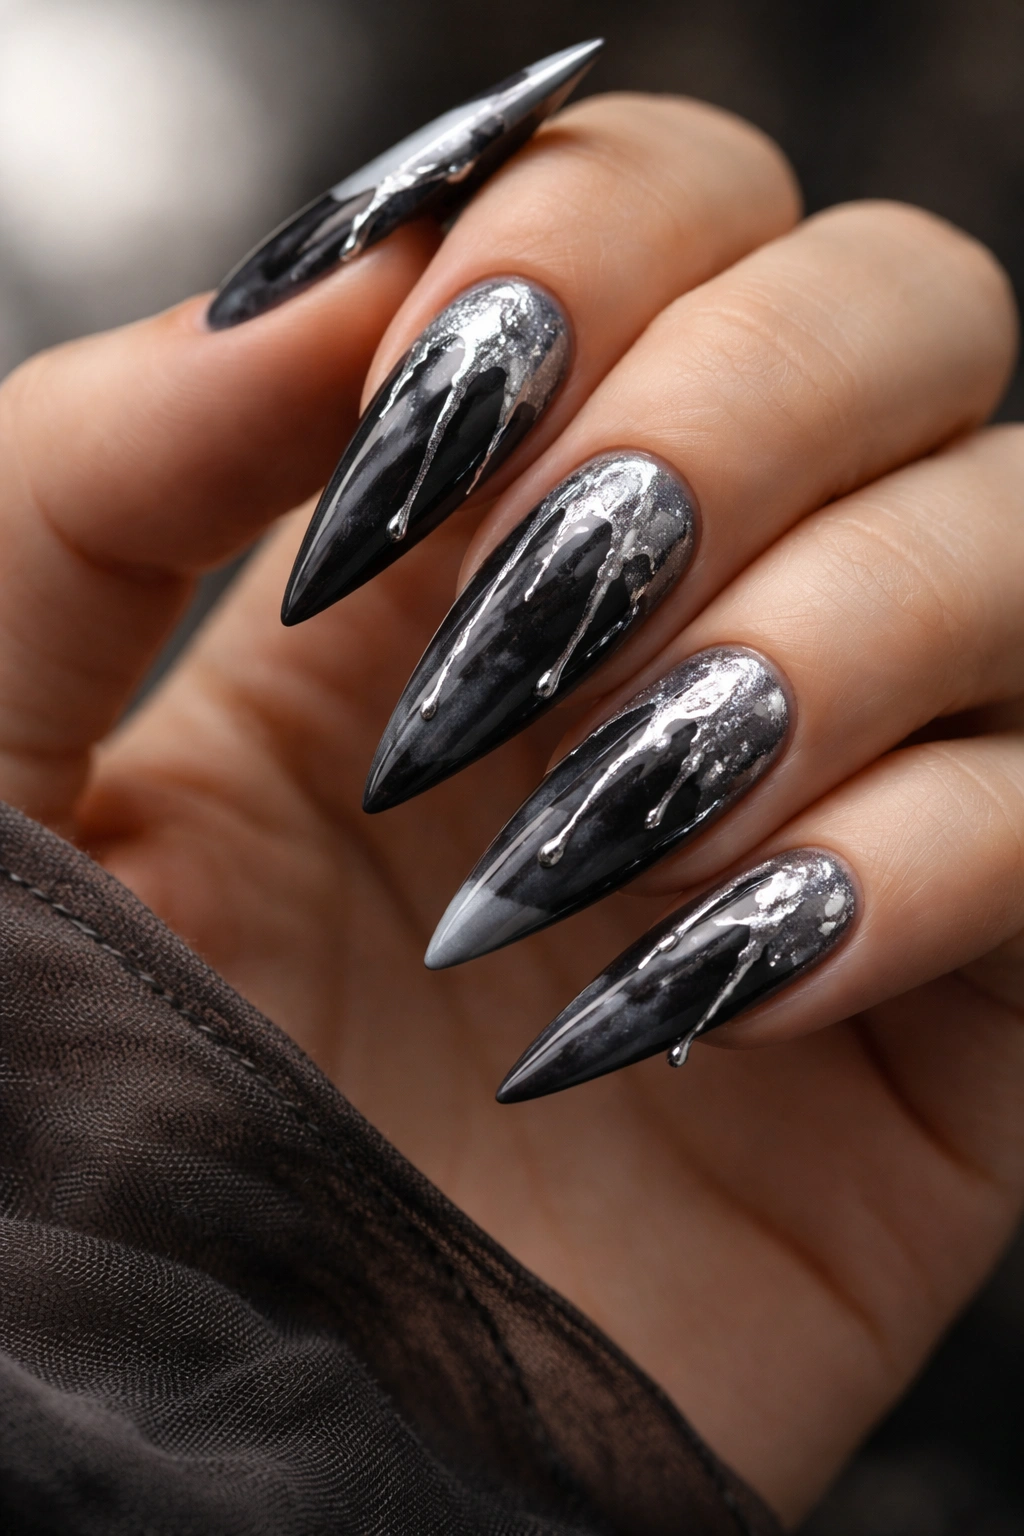
Create the illusion of silver paint dripping down a charcoal grey base, as if the design is actively moving or melting. This design feels dynamic and artistic. The charcoal base should be a softer grey than pure black — not quite as harsh, but definitely moody. The silver drips should start at the top or sides and trail downward in organic, gravity-led lines.
What This Design Communicates
The dripping element makes the design feel contemporary and intentional, like you’re wearing wearable art. It’s the kind of design that feels very “now” but still reads as grunge because of the muted color palette and the imperfect application. The silver adds just enough shine to prevent the overall look from feeling flat or boring.
Achieving the Dripping Effect
- Base coat, then two coats of charcoal grey polish
- While the grey is still very slightly tacky (test on a practice surface first), use a silver gel or thin metallic polish
- Create lines with a thin brush starting from the top edge and letting them trail downward
- Don’t make them perfectly straight — natural drips are irregular and pause periodically
- You can also use a thin striping brush loaded with silver gel and drag it gently down
- Seal with a glossy top coat — the shine on the silver drips against matte grey is striking
Pro tip: Practice the drip technique on a paper nail wheel before committing to your actual nails.
5. Deep Purple with Distressed Patches
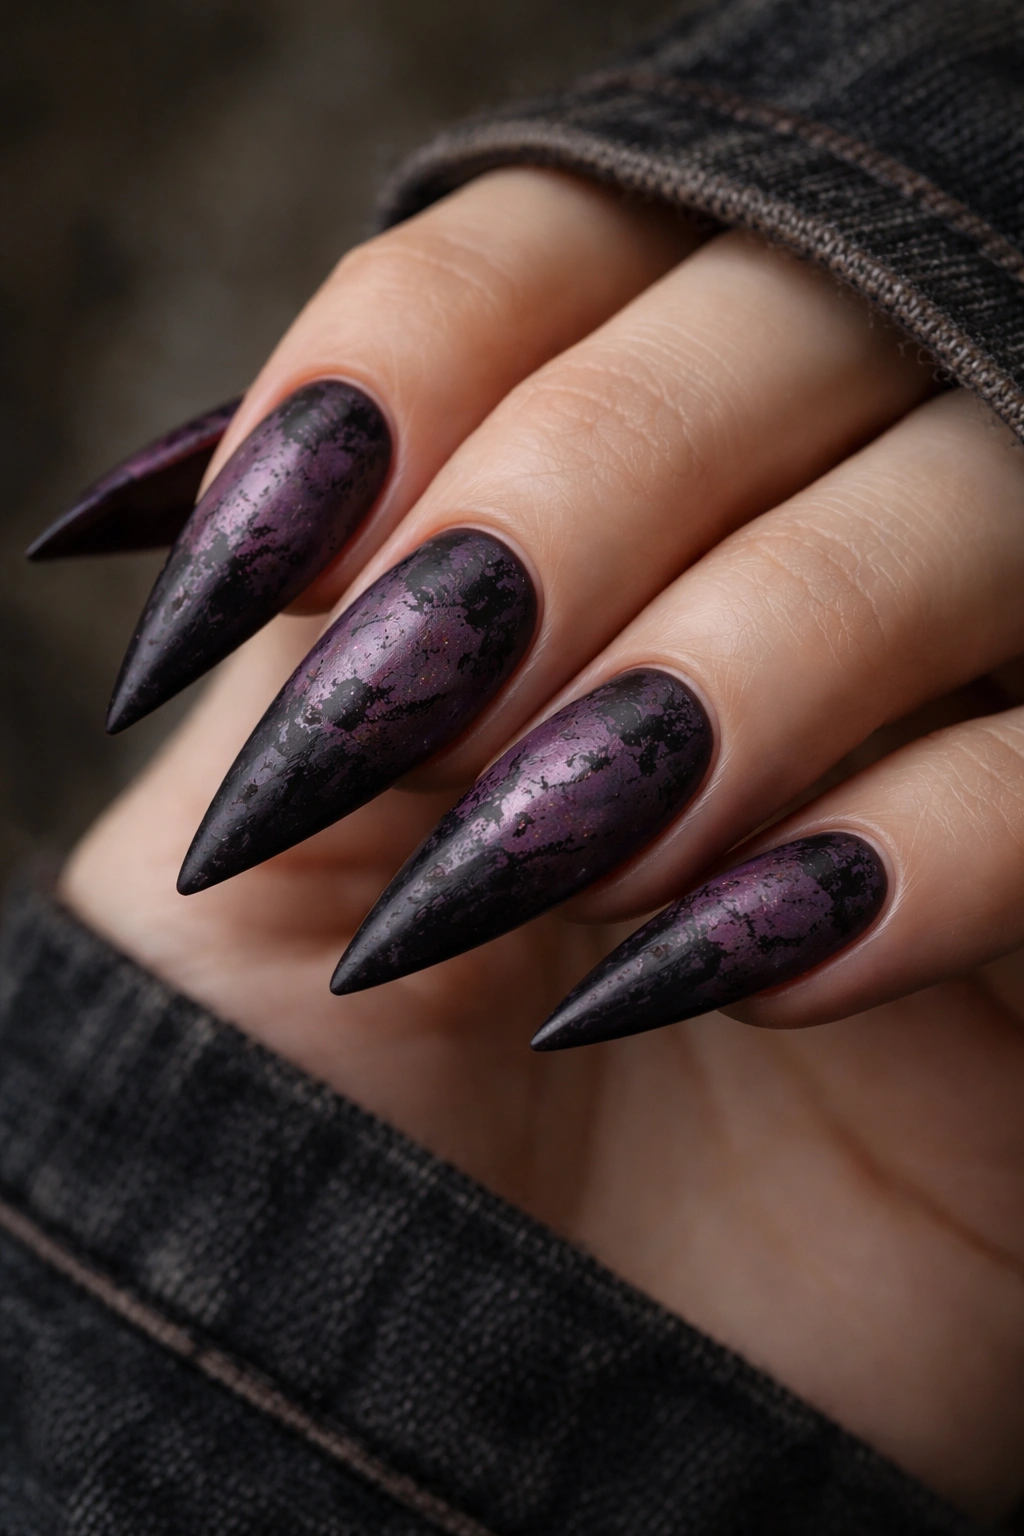
Layer a deep purple base with intentionally distressed patches of black, creating an aged, worn effect like the paint is chipping away to reveal something darker underneath. This design plays with negative space and creates visual interest through texture and layering rather than added decorative elements.
Why Distressing Creates Authentic Grunge Energy
Distressed finishes look like time and use have altered the surface, which is the entire philosophy of grunge. Rather than adding complexity, you’re removing it strategically, which somehow feels more artistic. Deep purple with black distressing reads as both elegant and rebellious — it’s the color combination of bruised velvet.
Creating Convincing Distressed Details
- Apply a clear base coat, then two coats of deep purple polish
- Once fully dry, load a damp sponge or a slightly damp makeup sponge corner with black polish
- Press the sponge gently onto random sections of the nail — you’re creating irregular patches, not a pattern
- The black should look like it’s obscuring the purple underneath, not painted on top
- Aim for 4-6 patches per nail, distributed unevenly
- Seal with matte top coat for a worn, aged finish
- If you seal with glossy, it looks shinier and slightly less grunge, but both work
Worth knowing: Sponging looks best with contrasting colors — black on purple creates far more drama than black on dark grey.
6. Black Base with Torn Foil Details
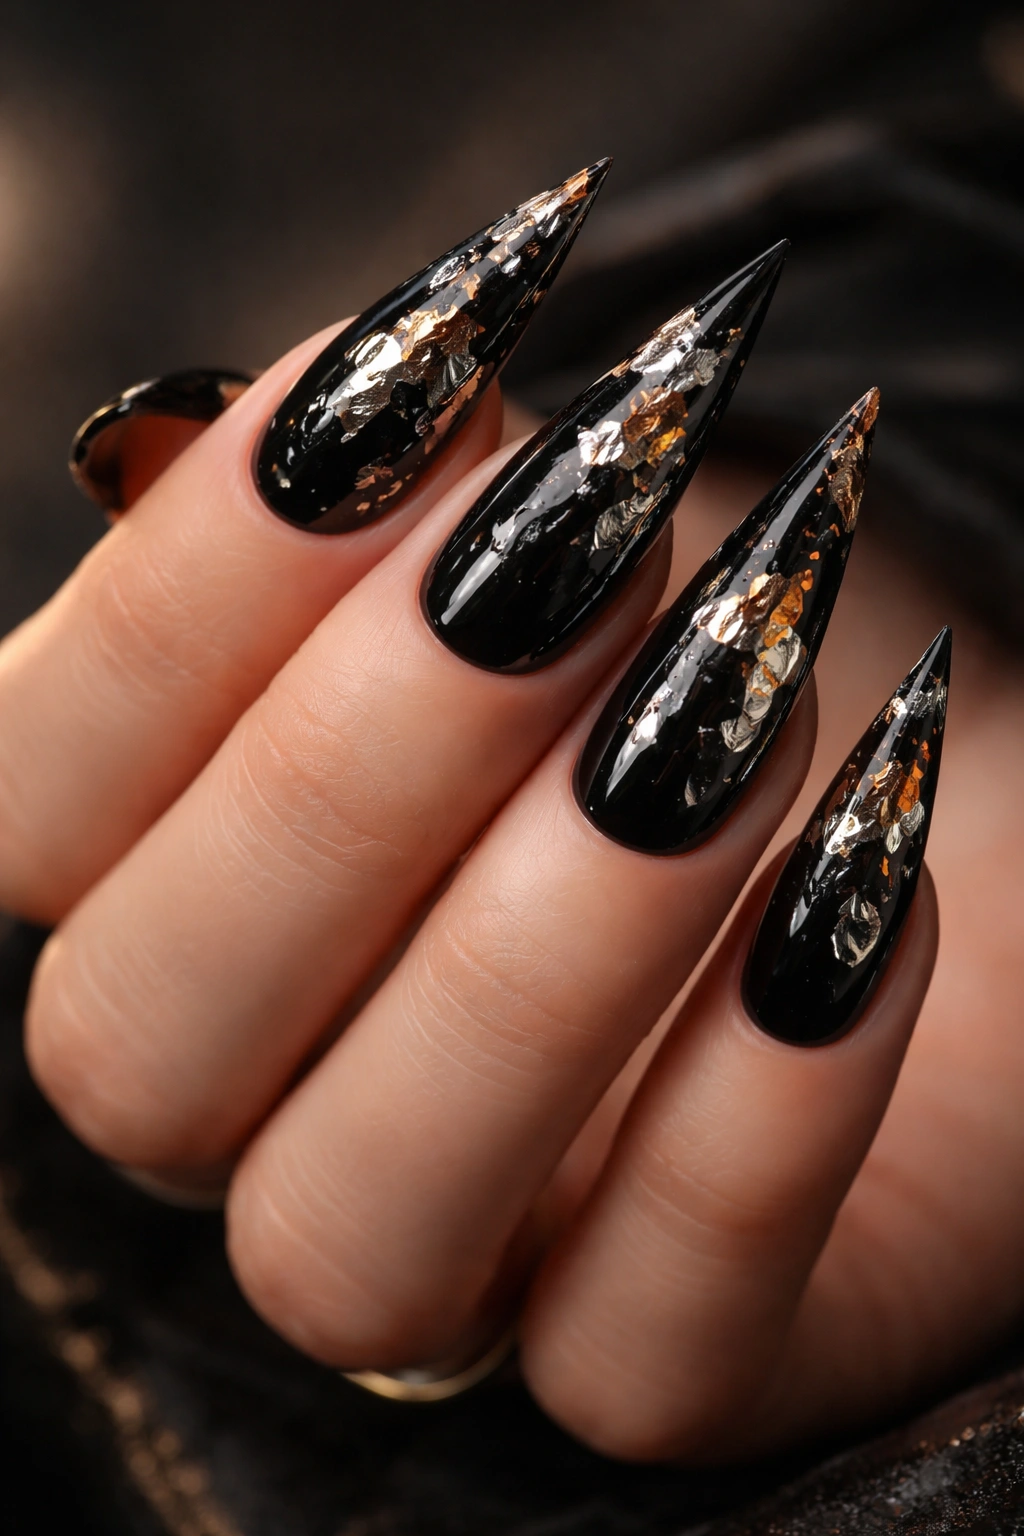
Apply a glossy black base and then strategically adhere torn pieces of metallic foil — gold, silver, or copper — to create the effect of metallic material embedded in or breaking through the surface. The foil pieces should look randomly placed and varied in size, like actual fragments you’ve collected and embedded.
What Makes Foil Stand Out
Foil has a unique, slightly three-dimensional quality that painted metallics simply can’t replicate. It catches light differently depending on the angle, making your nails more visually interesting in person than in photos. The torn, irregular edges feel more grunge-authentic than carefully cut shapes would.
Working with Foil Successfully
- Start with a glossy black base coat and polish, fully cured
- Use a tiny amount of clear nail glue or a very tacky top coat on small areas
- Tear foil into irregular pieces (don’t cut them — torn edges look more natural)
- Press pieces gently onto the sticky areas and smooth with a soft brush
- Layer pieces at slightly different angles so they catch light differently
- You can cover roughly 30-40% of the nail with foil; too much looks busy
- Seal carefully with a matte or satin top coat (glossy can make it look plastic)
Pro tip: You can also use nail foil transfer sheets if loose foil feels intimidating — they apply smoothly and create a similar effect.
7. Dark Navy with White Splatters
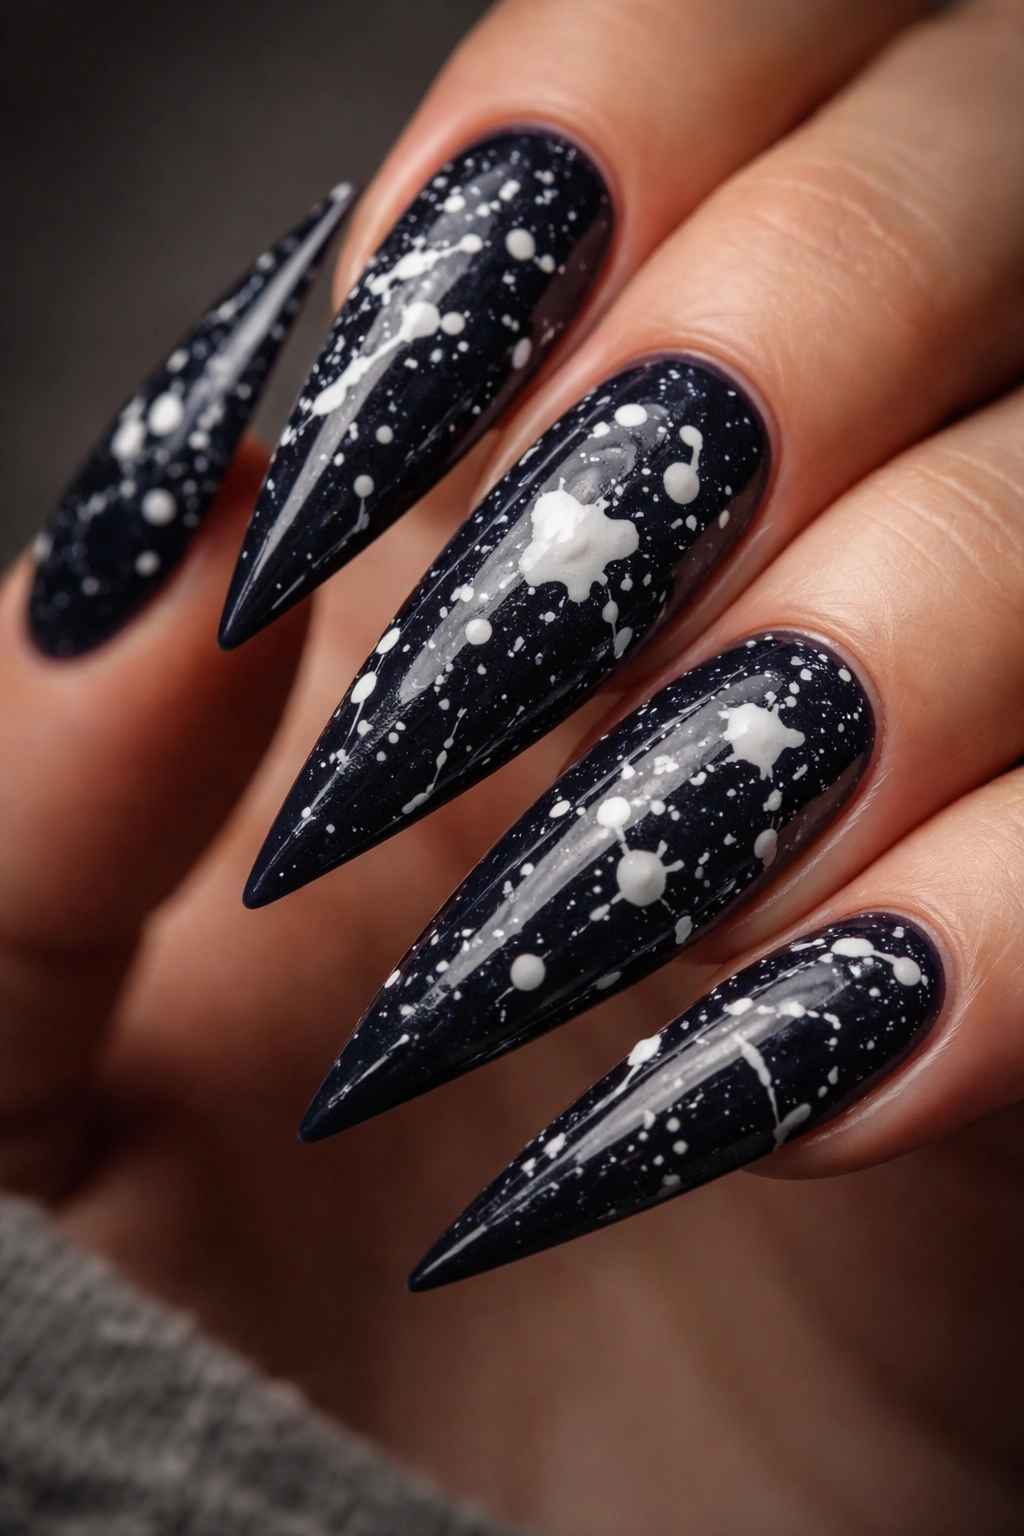
Create sharp white splatters across a dark navy base for a look that feels rebellious and artsy, like paint flecked across a canvas. Navy is darker than black but slightly warmer, making it feel less severe. The white splatters should be random, varied in size, and distributed unevenly across the nail.
Why Splatters Feel Contemporary Yet Grunge
Splattering is the nail equivalent of abstract art — it’s deliberately imperfect, and that imperfection is the entire point. White against dark navy creates clean contrast without feeling harsh. This design works on stilettos because the long shape gives you enough canvas to make the splatters feel intentional rather than accidental.
Creating Convincing Splatter Details
- Base coat, then two coats of dark navy polish
- Load a thin brush or dotting tool with white gel or regular polish
- Flick your wrist slightly or tap the brush against your nail to create irregular splatter marks
- Create splatters across all sections — top, middle, bottom — but unevenly
- Vary the splatter sizes: some tiny dots, some small bursts, some slightly larger marks
- Aim for roughly 15-25 splatter marks per nail
- Seal with glossy top coat (splatters look fresher and more energetic with shine)
Worth knowing: If a splatter doesn’t look right, you can remove it with a damp brush while the polish is still wet.
8. Gunmetal Grey with Holographic Shards
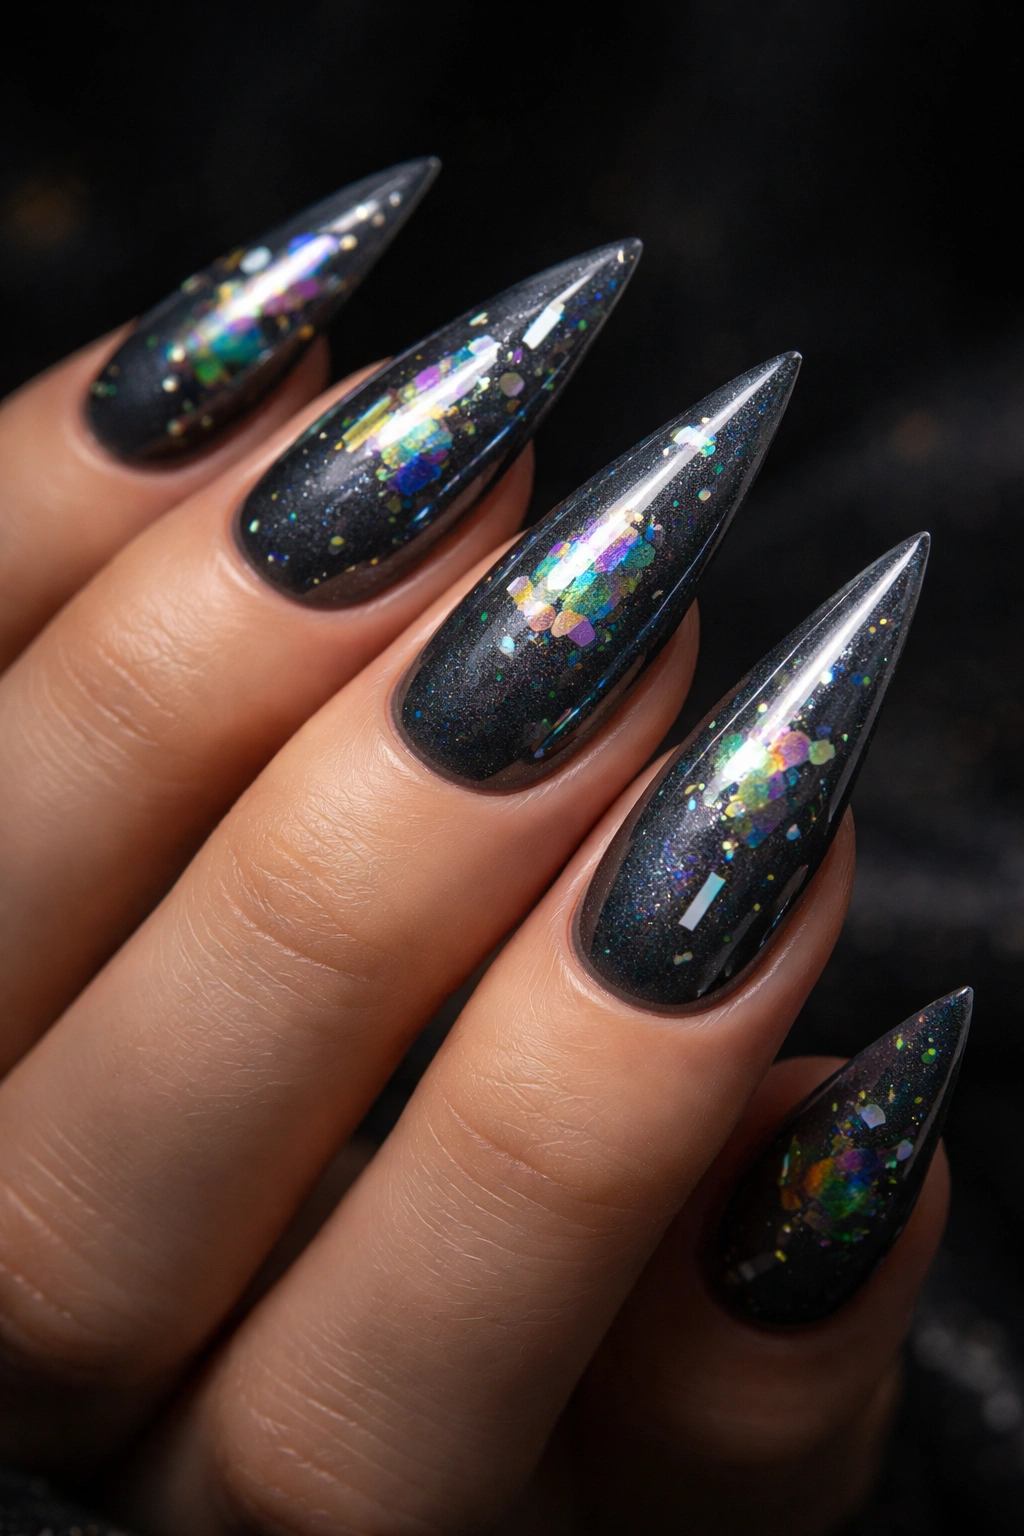
Layer a muted gunmetal grey base with holographic nail foil pieces or holographic glitter that catches rainbow light, creating the impression of shattered holographic material embedded in metal. This design is the grunge aesthetic meeting subtle futurism — it’s dark and moody but with an unexpected sparkle that reveals itself when light hits it.
What Makes This Look Distinctive
Holographic effects are mesmerizing in person because they shift color based on angle and light. On a muted gunmetal base, the effect is less “glittery and fun” and more “mysterious and otherworldly.” It’s the kind of design that looks completely different in natural light versus indoors versus in photos.
Building the Holographic Effect
- Base coat, then two coats of gunmetal grey polish
- You have two options: holographic foil pieces or holographic gel with foil
- If using foil pieces: apply tacky top coat to random areas and press torn holographic foil onto the sticky spots
- If using holographic gel: apply sheer holographic gel to specific sections and cure
- The holographic elements should look scattered and somewhat sparse — not covering the entire nail
- Seal with a glossy top coat so the holographic pieces reflect light maximally
- The effect is most dramatic on at least three of five fingers
Insider note: Holographic effects look more striking on longer nails because the pieces spread across more surface area.
9. Black Lace Over Nude
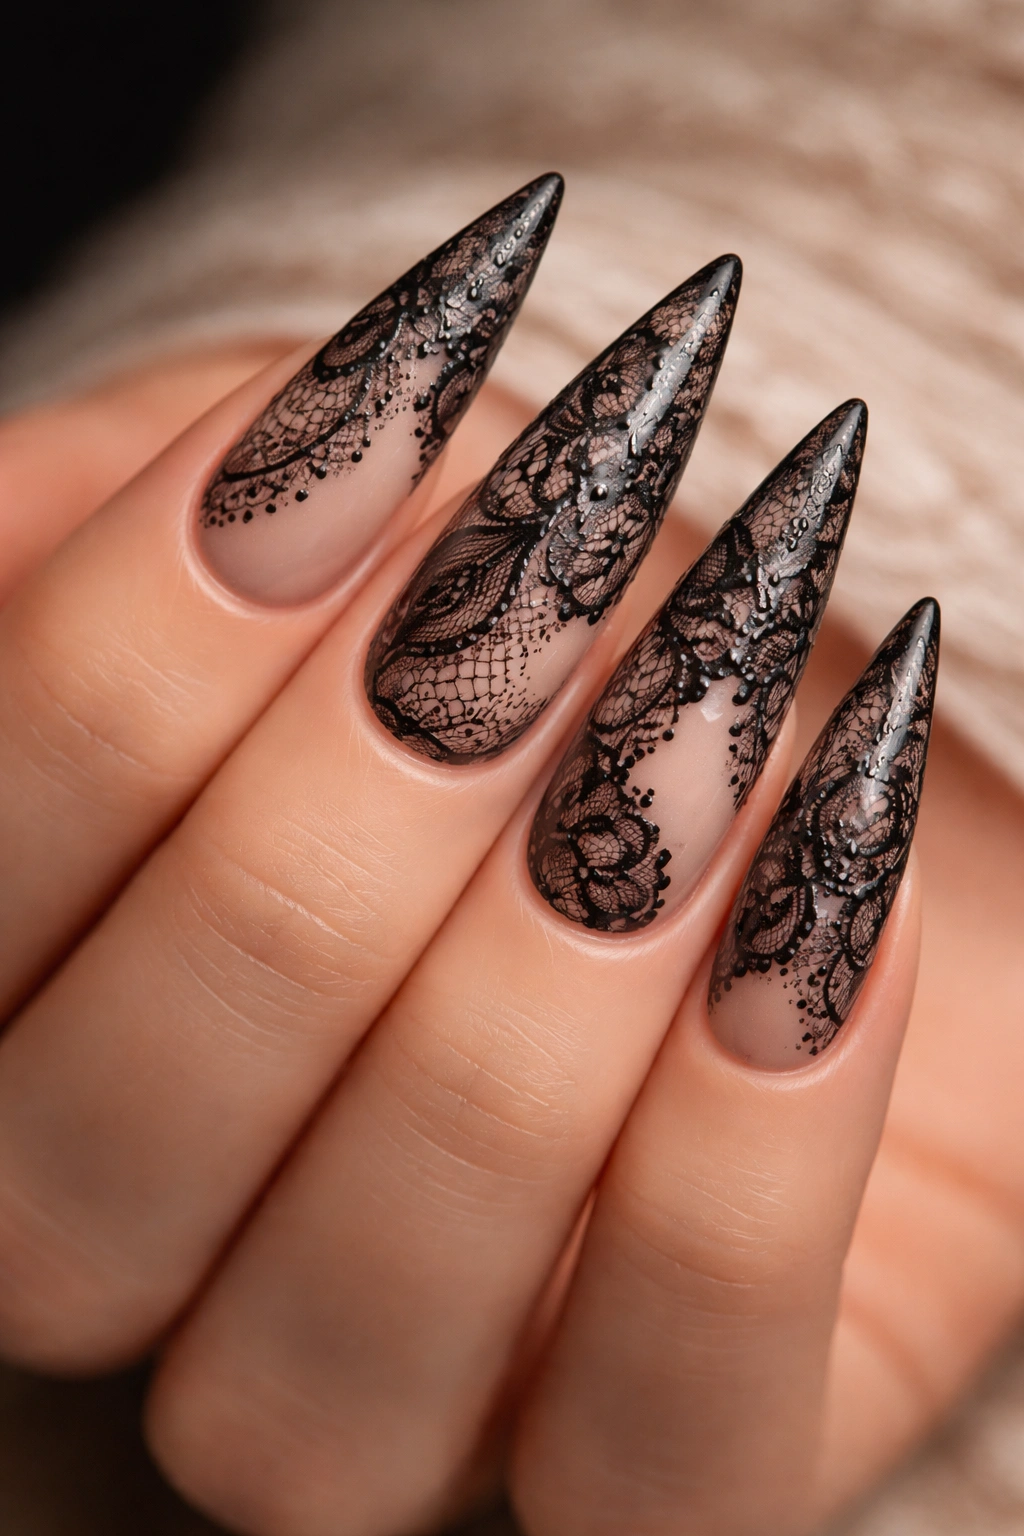
Create a delicate illusion by painting a sheer nude or skin-tone base and then adding intricate black lace-like patterns on top, making the nail look like lace is draped over the surface. This is the most elegant of the grunge options — less edgy than the others but still maintaining that moody, artistic aesthetic.
Why Lace Reads as Sophisticated Grunge
Lace traditionally signals femininity and romance, but black lace has always had an edge to it — think Victorian goth, vintage lingerie with attitude, dark elegance. The contrast between the sheer nude (which reveals your actual nail) and the detailed black creates a look that’s refined but still moody.
Executing Detailed Lace Patterns
- Base coat, then one or two coats of sheer nude or light skin-tone polish
- Use a thin brush and black gel to create lace-like patterns: delicate lines forming small loops and curves
- Think of the patterns as reminiscent of actual lace: repetitive but organic, not geometric
- You can create a lace cuff at the tip, or scattered lace elements across the nail
- The patterns should feel intricate but not overwrought — fine lines, not thick ones
- Seal with glossy top coat for a polished, finished look
- This design benefits from being symmetrical-ish across matching nails
Pro tip: Look at actual lace photos while designing — it helps you create convincing patterns rather than making up designs.
10. Deep Oxblood with Weathered Gold
Paint a deep oxblood red base (so dark it’s almost burgundy-brown) and layer weathered, distressed gold accents that look aged and worn. Oxblood is one of the moodiest colors available, and gold on oxblood reads as vintage wealth — luxury that’s been sitting in a forgotten corner for decades.
What Makes Oxblood the Ultimate Grunge Red
Oxblood isn’t a cheerful red or a clean red — it’s a red that’s been aged, deepened, and complicated. It’s the color of old blood, oxidized metals, and Victorian-era aesthetics. When paired with weathered gold, it feels like discovering jewelry in an antique shop.
Layering Weathered Gold Details
- Base coat, then two or three coats of deep oxblood red for full opacity
- Once fully dry, use a fine brush to paint irregular gold lines or shapes
- The gold doesn’t need to be precise — slightly wobbly lines feel more authentic
- Create thin lines that look like they’re emerging from cracks, or small rectangular shapes like weathered details
- You can also use gold foil for a shinier, more obviously metallic effect
- Distress the look by softening the gold edges slightly with a damp brush
- Seal with matte top coat for a vintage, worn feel
- Or seal with glossy if you want the gold to shimmer more prominently
Worth knowing: Oxblood requires three coats to fully hide the nail bed, so plan accordingly.
Final Thoughts
Grunge stiletto nails represent a deliberate choice to embrace moody, artistic aesthetics without sacrificing elegance. The best part about exploring these designs is that they thrive on imperfection — there’s no “wrong” way to create distressed textures, scattered elements, or layered finishes. Each of these 10 ideas works because they balance muted, dark color palettes with unexpected details, metallics, or textures that reward close inspection.
What makes stilettos the perfect canvas for grunge designs is their inherent drama. You’re not trying to tone down the look or make it subtle — you’re leaning all the way in. Whether you’re drawn to the sharp, geometric quality of the shattered glass design or the soft, romantic edge of black lace, there’s a grunge stiletto aesthetic that matches your vibe.
The longevity of these designs also makes them smart choices. Unlike highly trendy nail art that dates quickly, grunge nails exist in a timeless aesthetic — moody, artistic, and always slightly outside the mainstream. You can wear them to an edgy fashion event, a formal dinner where you want to add unexpected edge, or just as part of your everyday look when you want to feel a bit more powerful and intentional. That’s the real appeal of grunge stilettos: they announce that you’re not following someone else’s rules.
