

Stiletto nails paired with heart designs create one of the most romantic, eye-catching looks in nail art right now. There’s something about the sharp, dramatic points of stiletto nails combined with the softness of a heart shape that feels unexpectedly elegant—bold yet romantic, edgy yet feminine. Whether you’re looking to express your style before Valentine’s Day, add a touch of love to your everyday look, or simply try something that makes a statement, heart stiletto nails offer endless creative possibilities.
What makes heart stiletto nails so versatile is that they work across virtually every color palette, technique, and skill level. You can go subtle with a single delicate heart on a nude base, or dramatic with full-coverage heart designs in jewel tones and glitter. The pointed stiletto shape actually complements heart designs beautifully because the sharp lines create natural contrast with the curved, romantic shape of the hearts themselves.
The best part? You don’t need to be a professional nail artist to achieve most of these designs. Many of these heart stiletto ideas use simple techniques like stamping, dotting tools, gradient application, or even freehand drawing that beginners can master with a little practice. This guide walks you through 10 stunning heart stiletto nail ideas with exact techniques, color recommendations, and pro tips to help you recreate each one with confidence.
1. Heart Shape with Diamond Outline
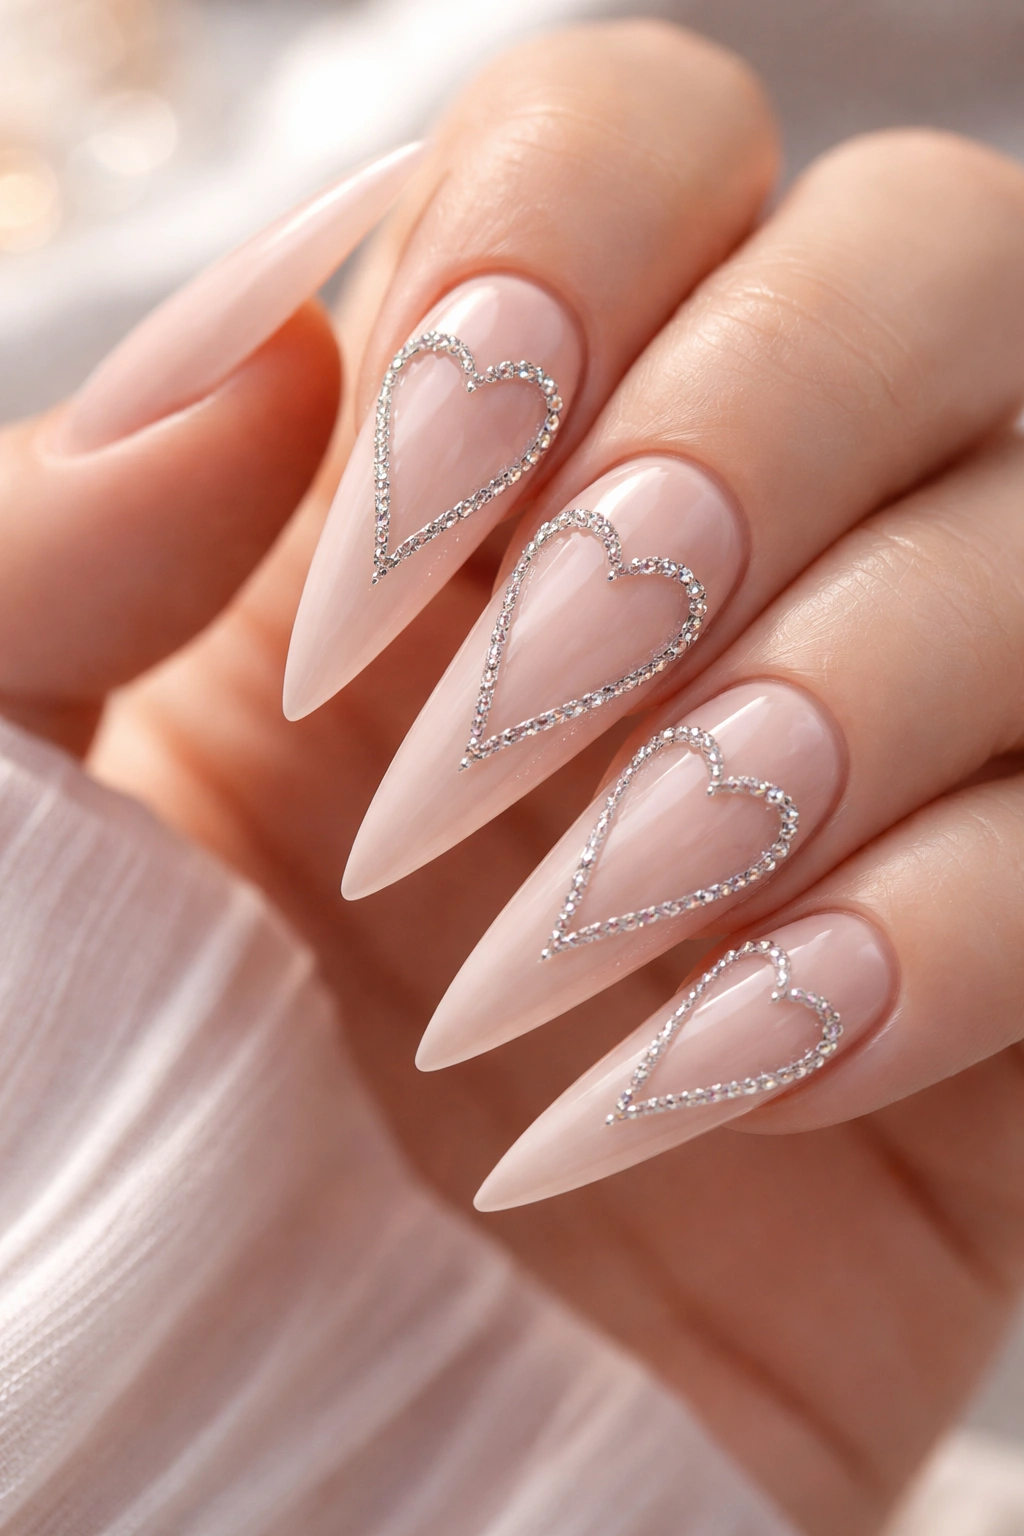
This design plays with luxury and romance by framing a solid heart in a delicate diamond or crystalline outline. The concept is simple but striking: paint a rich base color across all nails, then use a fine detail brush or toothpick to outline a heart shape with a contrasting metallic shade, often gold or silver. What makes this approach special is the precision—the outlined heart creates a jeweled effect that catches light and elevates the entire manicure instantly.
Why This Design Stands Out
The outlined heart creates visual depth and sophistication that makes this design feel expensive and intentional. The thin line work draws attention to the heart shape without overwhelming the nail, and it works beautifully on shorter or longer stiletto nails. The metallic outline also catches light at different angles, making your nails shimmer as you move your hands—perfect for adding subtle glamour to everyday wear or special occasions. The contrast between the base color and the outline is what really sells this design; choose colors with genuine visual separation rather than similar tones.
What You’ll Need
- Base coat (apply to protect the nail)
- Solid color polish for the nail base (deep jewel tones like emerald, sapphire, or burgundy work beautifully)
- Fine-tip detail brush or thin striping brush
- Gold, silver, or holographic metallic polish
- Top coat for shine and protection
- Dotting tool or toothpick for additional embellishments if desired
- Nail file for shaping your stiletto points
Pro tip: Use a white or cream base coat under your metallic outline polish if the base color is very dark—this makes the outline pop even more and prevents the metallic from looking dull.
2. Red and Gold Ombre Heart Stilettos
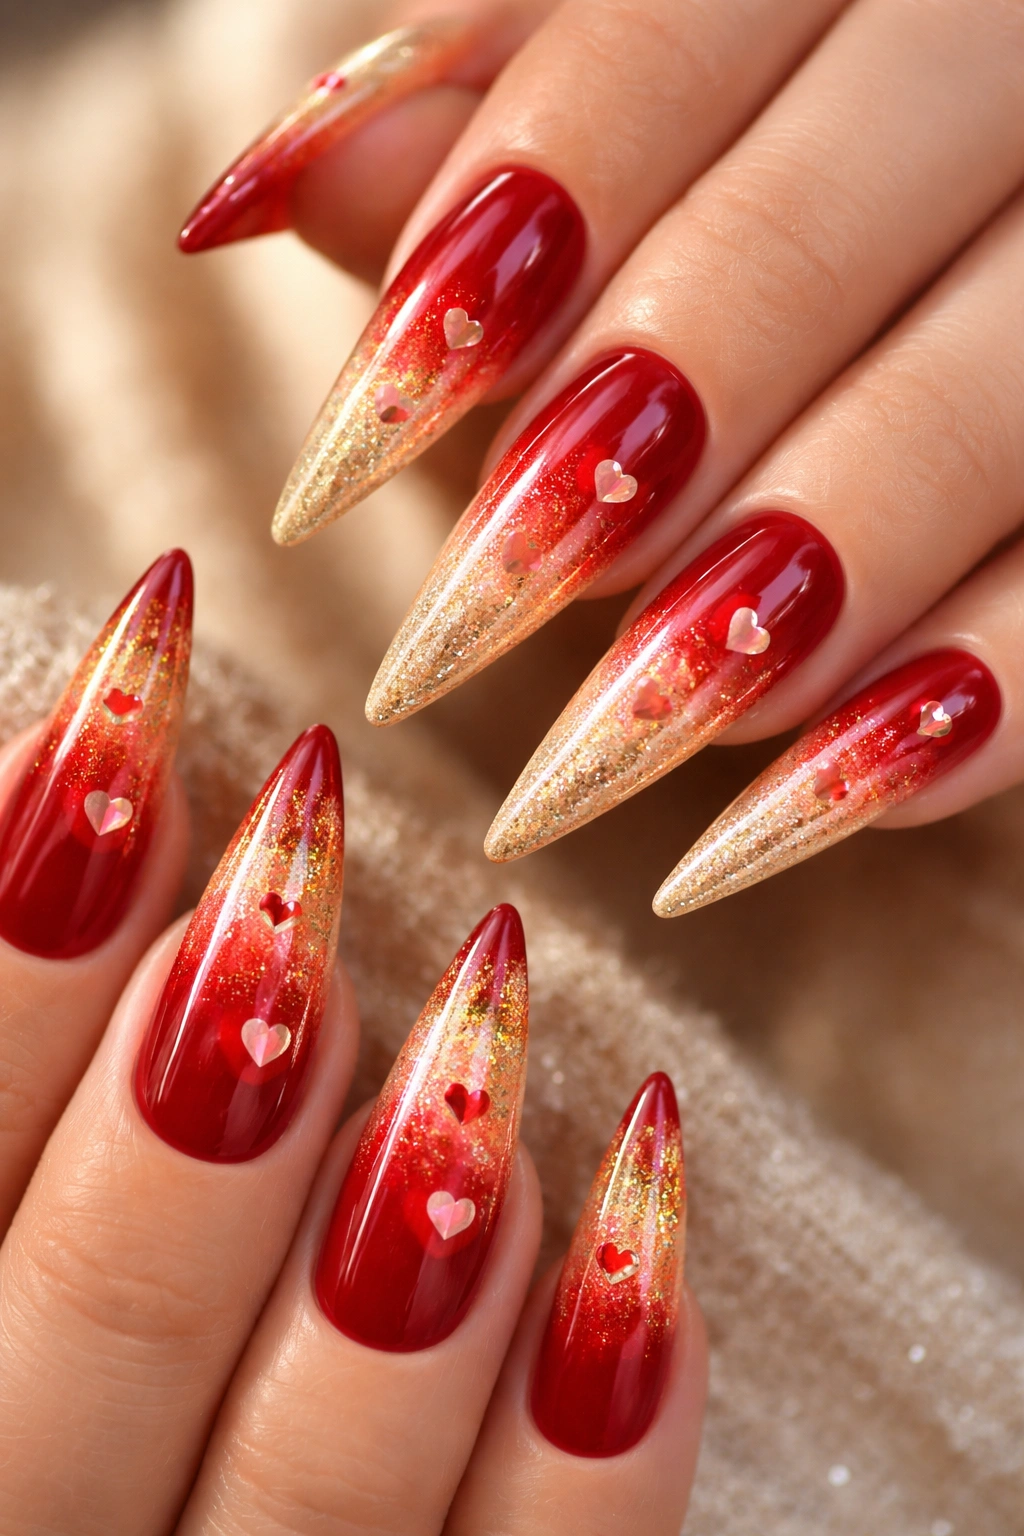
This design combines two timeless romance symbols—red and gold—in a smooth gradient that flows across your nails while centering on a heart shape. The ombre effect moves from deep red at the cuticle area to bright gold at the tip, creating a naturally flowing transition. Hearts are painted or stamped over the ombre base, making them float across the gradient like little tokens of affection.
How to Create This Stunning Gradient
The ombre technique here uses a makeup sponge to blend two polish colors seamlessly across the nail surface. Paint broad strokes of deep red and bright gold onto your makeup sponge, then dab repeatedly over the nail until the colors blend into a smooth gradient. You’ll need at least 2-3 applications of color through the sponge to achieve a polished, blended look. Once your gradient base dries completely, use a thin brush to paint small to medium red or white hearts across the nail. The hearts become the focal point that anchors the romantic gradient.
Building Your Color Palette
- Deep burgundy or classic red polish as your gradient base color
- Bright gold polish for contrast and warmth
- White or cream polish for the heart details
- High-quality makeup sponge (cosmetic sponges work better than regular ones)
- Nail file and buffer to smooth the gradient seams
- Sealed top coat (essential—this protects the intricate gradient)
Worth knowing: Red and gold create natural visual warmth, so this design is especially stunning on deeper skin tones where the colors appear even richer and more vibrant.
3. Black Heart on Nude Base
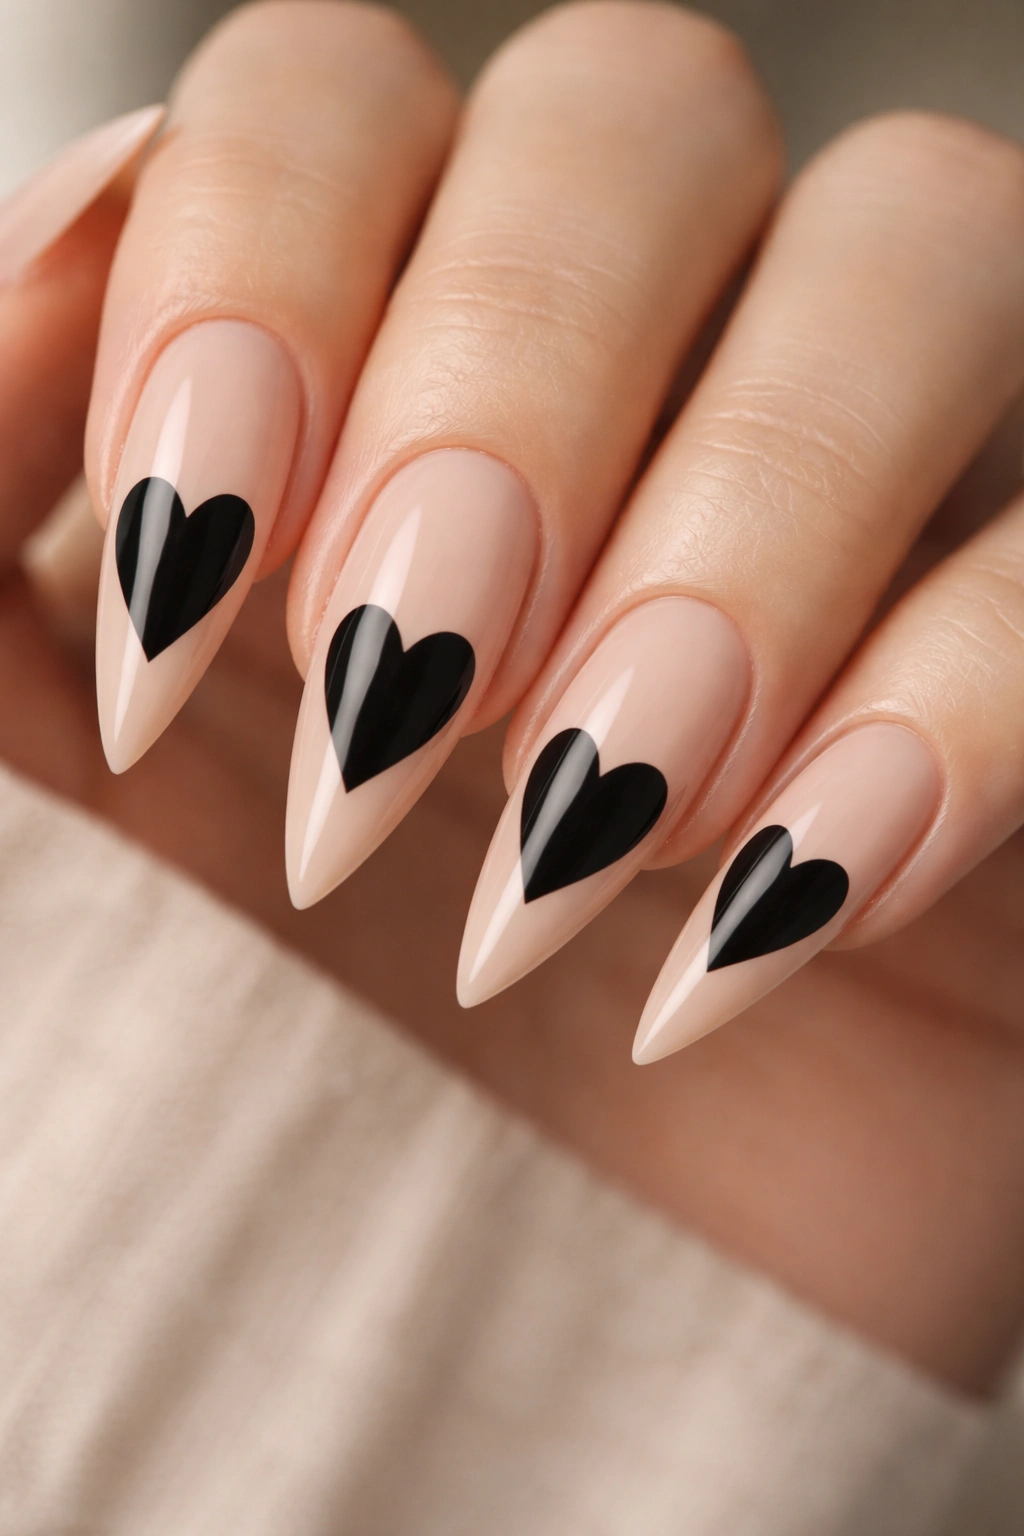
Minimalist elegance meets romance in this timeless combination. A soft, creamy nude base provides the perfect canvas for a bold black heart—typically one large centered heart or several smaller ones scattered across the nail. This design works on any skin tone and automatically reads as sophisticated rather than juvenile because of the contrast and simplicity.
Why Minimalism Creates Impact
The black-on-nude combination is a study in contrast and restraint. Because you’re using only two elements, the heart shape becomes the undeniable focal point—there’s nowhere else for the eye to look. The nude base elongates the nail visually, making stiletto nails appear even more dramatic, while the sharp black lines of the heart create a beautiful geometric counterpoint. This design also transitions seamlessly from everyday wear to evening looks simply by adding a glossy top coat or changing your accessories.
The Simple Color Formula
- Nude polish in a shade that matches your undertone (warm nude, cool nude, or deep nude)
- Matte or glossy black polish (test which finish you prefer)
- Ultra-fine detail brush for precise heart outlines
- Black gel polish option if you want longer-lasting color
- Clear top coat for shine
- Acetone for cleaning up any mistakes while the black polish is wet
Pro tip: Paint your black hearts while your nude base is still slightly tacky—black polish adheres better and creates crisper lines on a slightly wet surface than on fully dry polish.
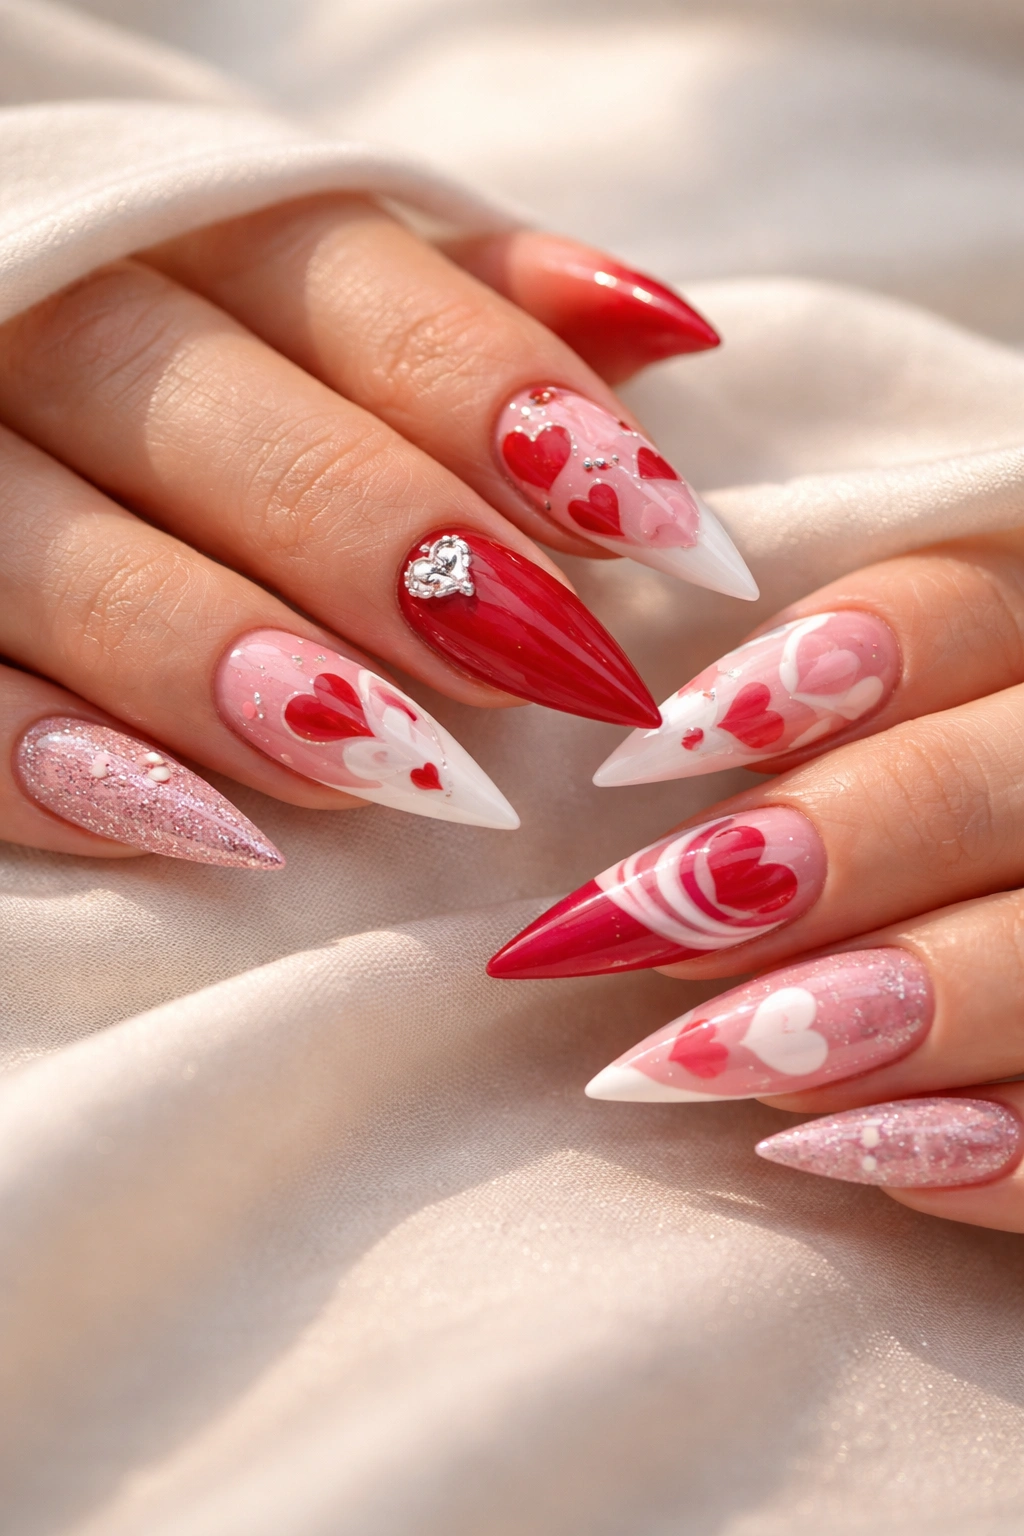
4. Gradient Pink Heart Nails
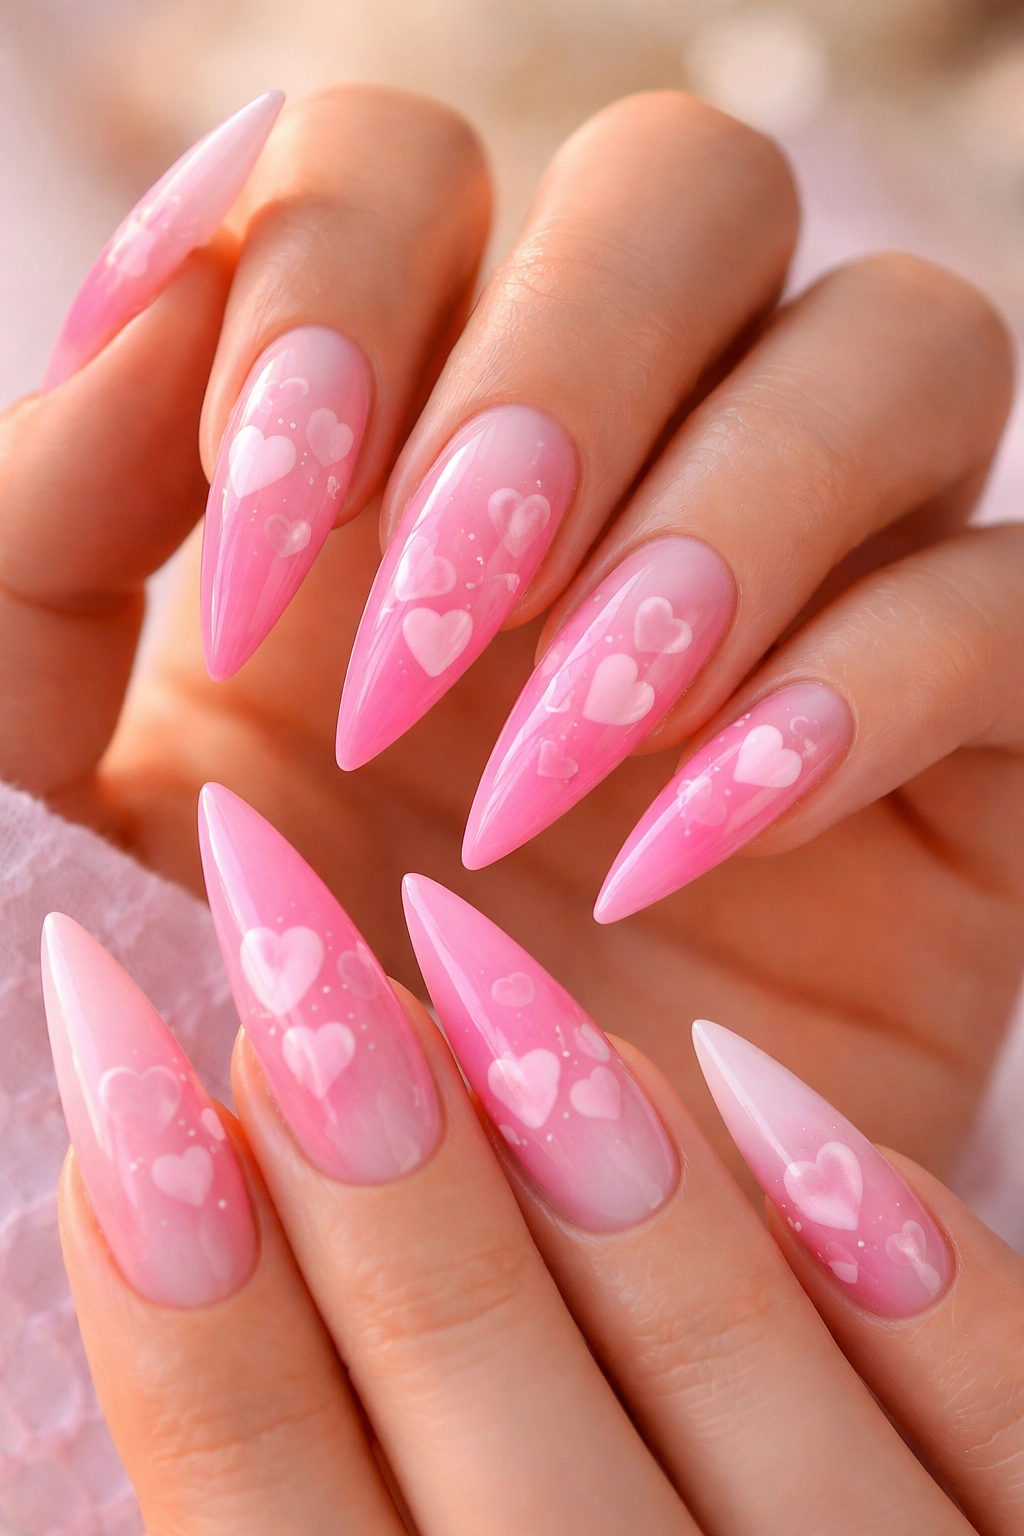
A soft ombre that moves through various shades of pink creates a dreamy, romantic effect that feels both modern and timeless. This design works with three to four coordinating pink shades—from pale blush to hot pink—blended seamlessly across the nail. Hearts are layered in contrasting pink shades, creating dimension within the gradient itself.
The Blending Technique for Perfect Transitions
Using your makeup sponge, create a gradual color transition from the lightest pink at the cuticle to the deepest pink at the tip. The key is working in small sections and allowing each layer to set slightly before adding the next shade. You’re building the gradient gradually rather than trying to blend two colors all at once. Once your gradient base is complete and fully dry, add white or rose gold hearts across the gradient for contrast. The hearts become visual anchors that add shape and interest to the flowing color.
Pink Shades That Create Cohesion
- Ultra-pale blush pink (almost white-pink) for the base
- Light mauve-pink for the first transition
- Medium dusty rose for the center transition
- Deep hot pink or magenta for the tips
- White, cream, or rose gold polish for the heart details
- Makeup sponge specifically for nail art (better texture than cosmetic sponges)
- Glossy top coat to seal and unify the gradient
The beauty of this design is that the pink gradient feels inherently romantic without needing additional embellishment, so the hearts can be simple and clean-lined.
5. White Heart with Rose Gold Tips
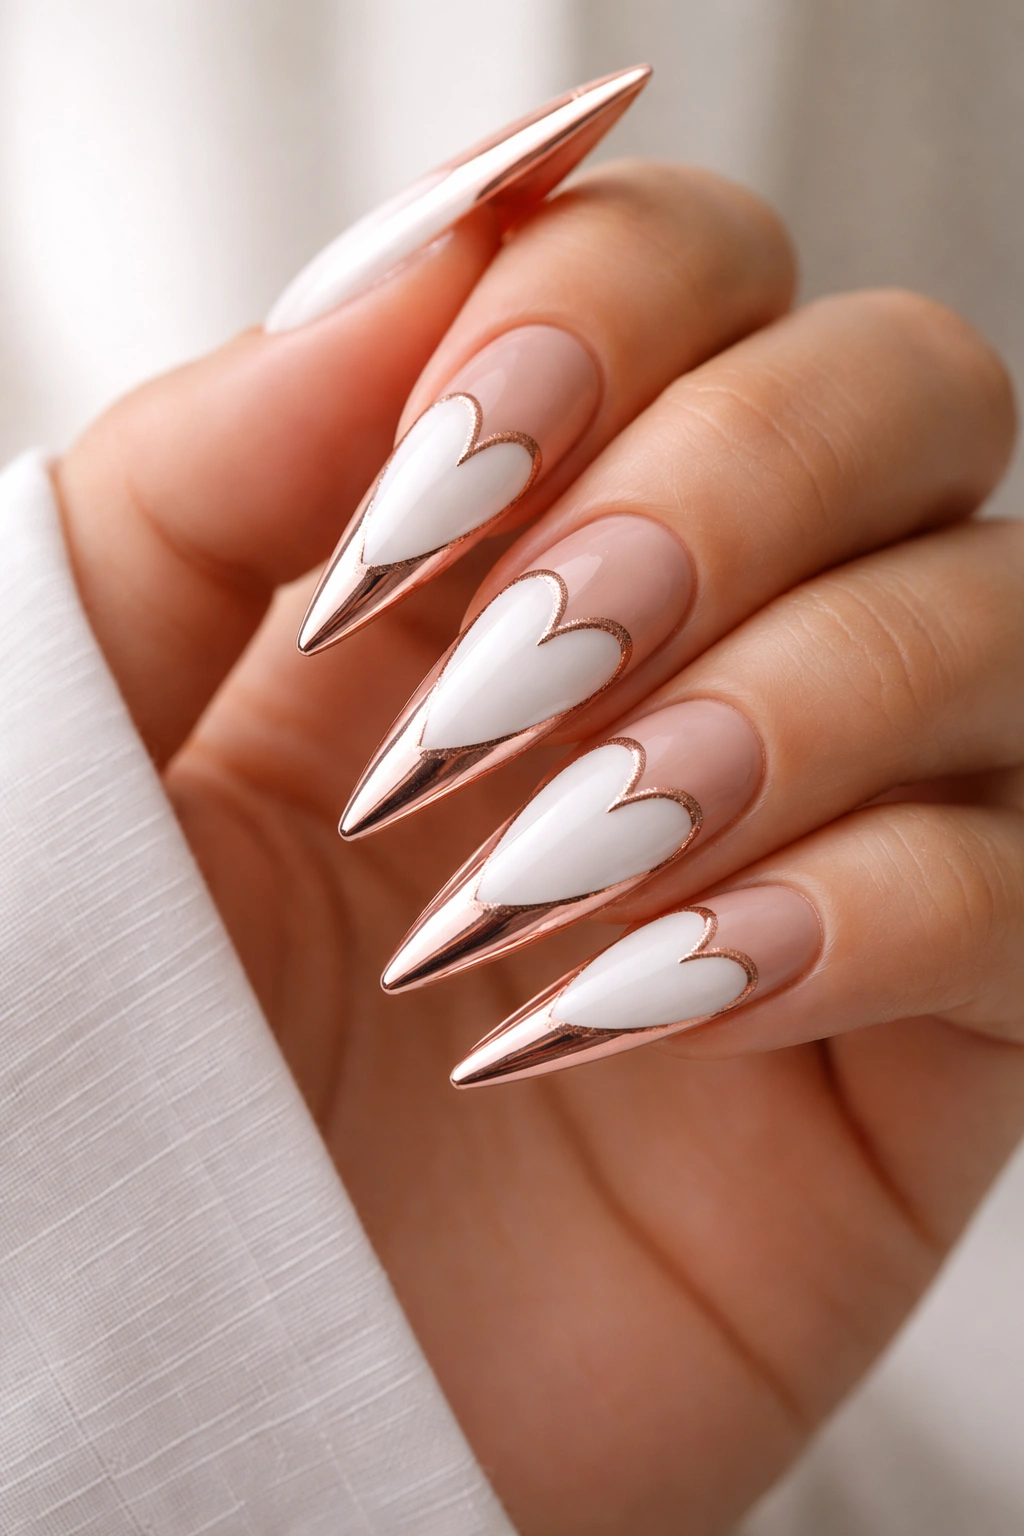
This design combines the elegance of a white base with the warmth of rose gold accents and uses negative space strategically. Paint the entire nail white, then apply rose gold polish only to the very tip of the stiletto, creating a gradient effect. Hearts are outlined in rose gold, bridging the two colors and creating visual unity across the design.
Creating Dimension with Metallic Accents
Rose gold is the perfect metallic warm tone for white bases because it bridges the gap between cool and warm tones, making it universally flattering. The rose gold tip creates natural eye flow from the heart design down to the pointed tip of the stiletto—your eye travels along the nail shape. The white background makes both the rose gold and the heart details pop without any competing colors. This design is especially striking because it uses only three elements—white, rose gold, and the heart shape—creating an almost architectural aesthetic.
The Material List for This Elegant Look
- Pure white or off-white base polish (test which reads better against your skin tone)
- Rose gold metallic or shimmer polish
- Fine detail brush for heart outlines
- Makeup sponge or gradient applicator for blending the white and rose gold at the tip
- Glossy top coat for that polished, expensive finish
- Optional: rose gold flake polish for additional sparkle in the heart areas
Insider note: Apply your rose gold to the tip with a slightly feathered edge using the makeup sponge—this creates a softer, more blended transition than a hard line, which looks more refined and professional.
6. Glitter-Filled Heart Stilettos
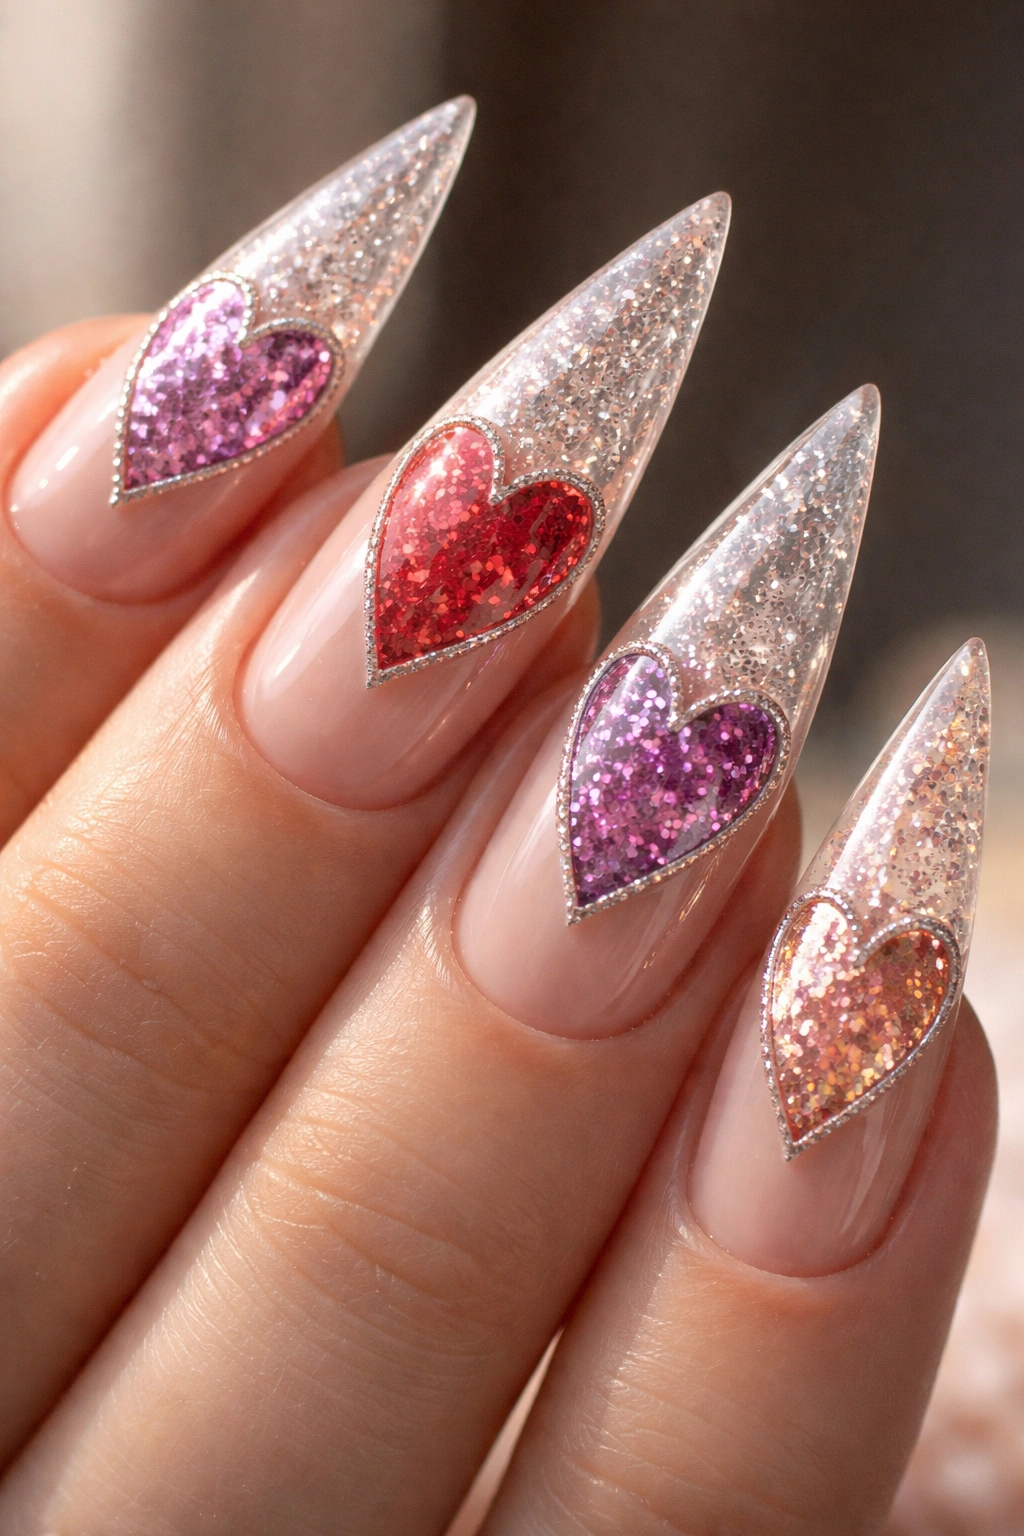
This playful design uses chunky or fine glitter contained within a heart outline, creating a fun, textured focal point. The base color remains clean and polished while the heart becomes a glitter-filled party that draws every bit of attention. You can use solid glitter fills, ombre glitter (dense at the center, fading toward the edges), or mix multiple glitter colors within a single heart.
Building the Glitter Effect Properly
The technique here involves creating a clean heart outline first using a thin brush or stamping, then carefully filling that outlined heart with glitter while the base polish underneath is still slightly wet. A toothpick or detail brush helps position individual glitter pieces if you’re using chunky glitter. Alternatively, you can apply a thick layer of clear gel polish within the heart shape and cure it under a UV lamp, then press loose glitter into the uncured gel. This method gives you more control and creates a sealed, dimensional effect. The glitter becomes embedded and won’t shed, and light reflects off each glitter particle differently as you move your hands.
Materials for Glitter Perfection
- Your choice of base color polish (jewel tones or classic red/pink work best)
- Holographic, chunky, or fine glitter in coordinating shades
- Clear topcoat or clear gel polish to seal the glitter
- Thin detail brush for outlining the heart
- Toothpick or glitter applicator for placing individual pieces
- Gel lamp if using gel method
- Optional: loose glitter in multiple colors for a confetti effect
Pro tip: If you’re using loose glitter in a traditional polish base, apply it while the base is still slightly wet, then seal immediately with a quick-dry top coat. Waiting too long allows the base to dry completely and the glitter won’t adhere as securely.
7. Valentine’s Day Red Ombre Heart
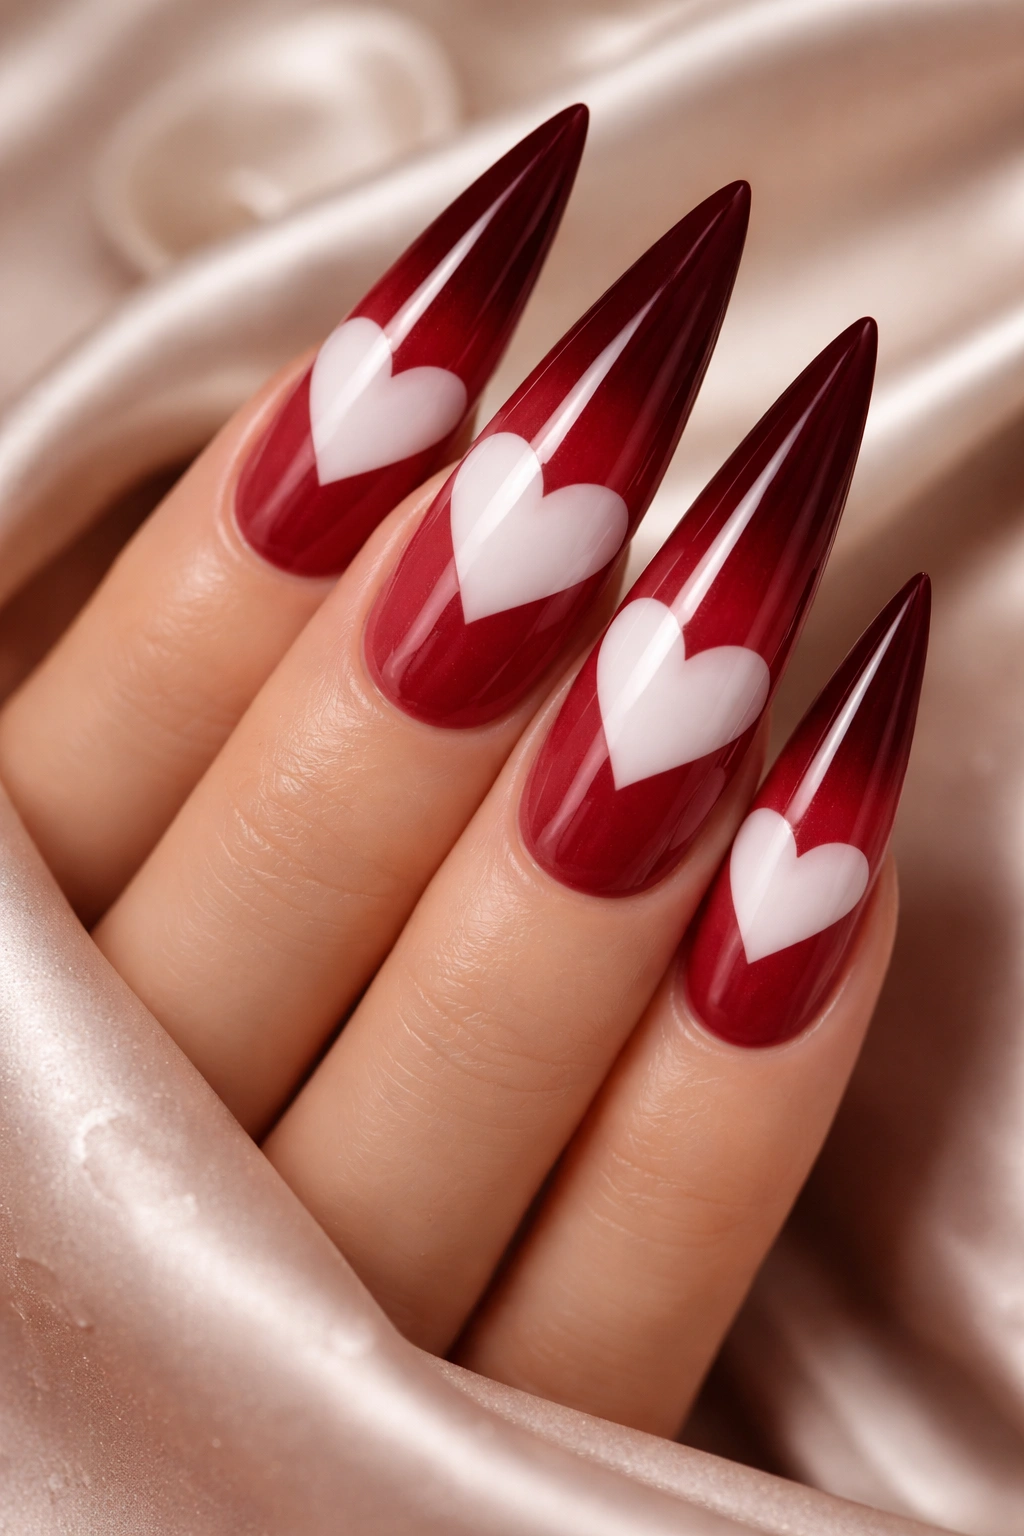
This is the quintessential romantic design that screams Valentine’s Day while remaining timeless enough to wear year-round. A gradient ombre flows from deep burgundy or maroon at the cuticle to bright red in the center to ruby or crimson at the tip, creating a rich, jewel-toned effect. Large, white or silver hearts are painted or stamped across the gradient, making them the focal point against the dynamic color backdrop.
Why Red Gradients Feel So Luxurious
Red ombres work because each shade of red still reads as cohesive while providing dramatic color variation across the nail. The deeper shades near the cuticle ground the design, while the brighter red in the middle and deeper ruby at the tip create movement and visual interest. White or silver hearts against this gradient have extraordinary contrast, making them appear almost three-dimensional. The combination feels expensive and intentional, even though it’s entirely achievable at home with basic blending techniques.
Your Complete Red Ombre Toolkit
- Deep burgundy or maroon polish for the base shade
- Bright true red for the center
- Ruby or crimson for the tip
- White or silver polish for the heart details
- Makeup sponge for blending the gradient
- Fine detail brush for painting clean heart shapes
- Glossy top coat to seal everything together
- Optional: red gel polish if you prefer a longer-lasting manicure
The red ombre works best when you commit to bold, true red shades rather than muted or brick-toned reds—the vibrancy is what makes this design feel special.
8. Holographic Heart Stiletto Nails
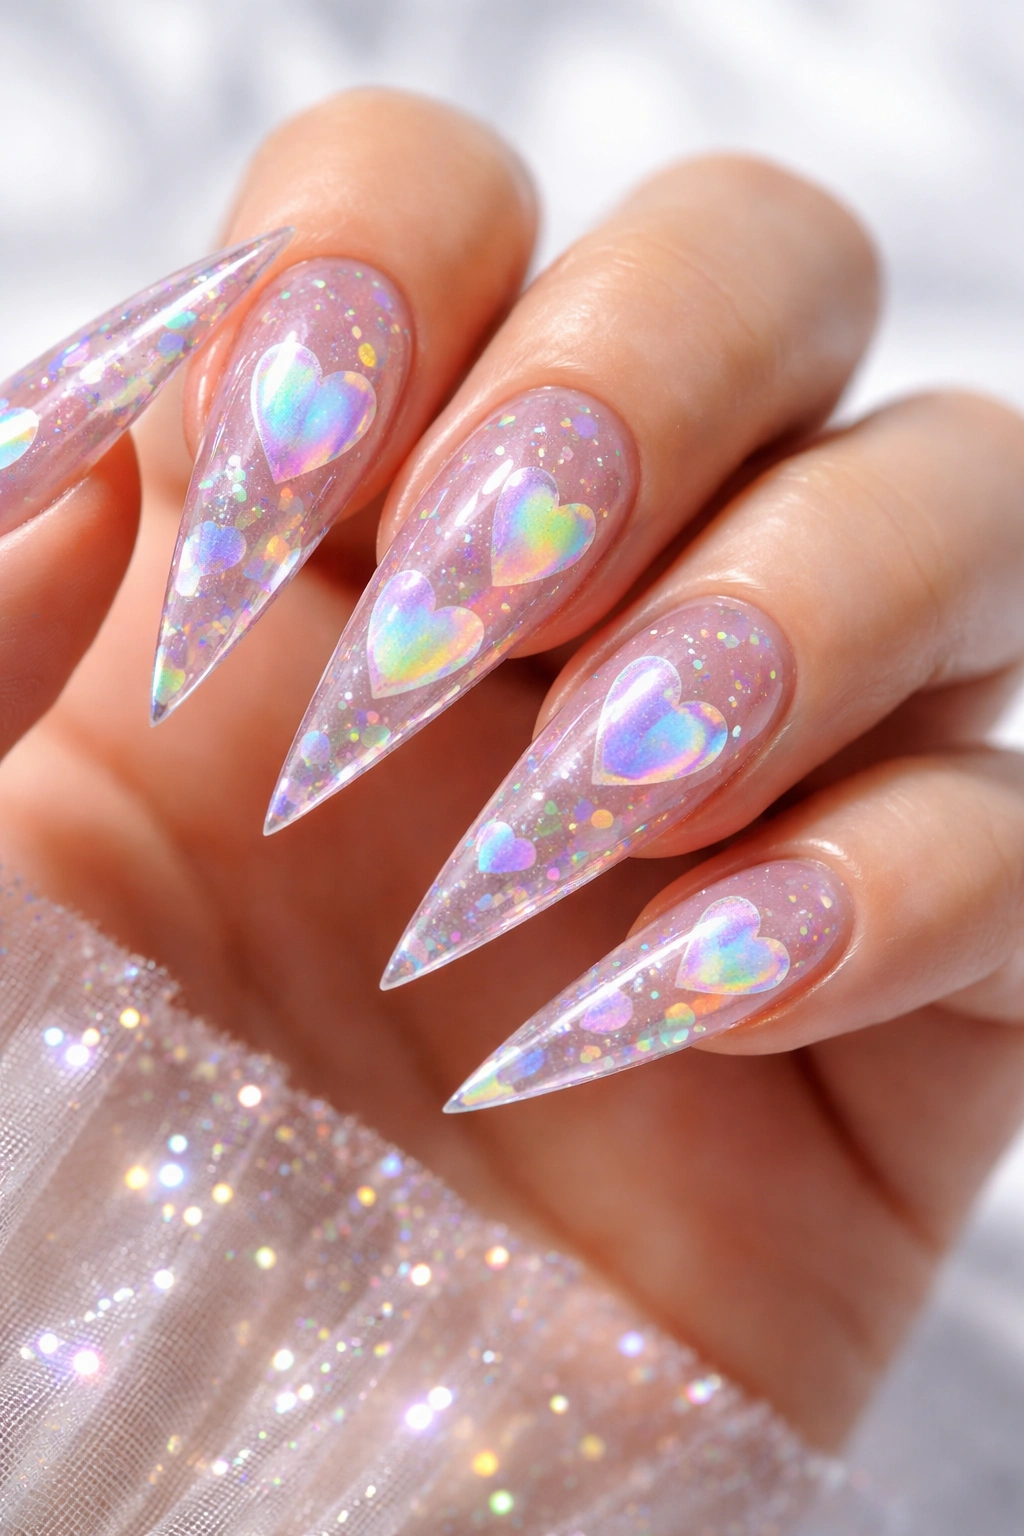
Holographic polish creates a magical, color-shifting effect that’s perfect for heart designs. A clear, neutral, or white base becomes the canvas, and holographic polish is applied to create heart shapes that shift through the entire spectrum as light hits them. The hearts appear to move and change color as you move your hands, creating an almost magical appearance.
Achieving the Holographic Effect
Holographic polishes contain tiny light-refracting particles that bend light in multiple directions, creating rainbow effects. The effect is most dramatic over a white or very light base, which provides maximum contrast for the light to bounce off. You can apply holographic polish using traditional brush strokes in a heart outline, or use holographic flake polish and seal it with clear topcoat for an even more dramatic dimensional effect. Some people use holographic glitter mixed with clear gel for a hybrid approach that maximizes sparkle and light refraction.
Holographic Heart Materials
- White or clear base polish
- High-quality holographic polish in at least one shade (or multiple shades for a rainbow effect)
- Thin detail brush for precise heart application
- Clear topcoat for sealing and protecting the holographic effect
- Optional: holographic flakes or glitter for additional dimension
- Gel polish and UV lamp if using the gel method for longer wear
Worth knowing: Holographic effects are most visible in natural light or bright indoor lighting—they may appear more subtle in dim lighting, so consider your environment when wearing this design.
9. Negative Space Heart Design
This modern, artistic approach uses the natural nail color as part of the design. Paint your base color across most of the nail, then deliberately leave a heart-shaped area unpainted, allowing your natural nail to show through. You can frame this negative space heart with metallic outlines, pastel colors, or additional nail art, making the bare nail the focal point.
Why Negative Space Creates Sophistication
Negative space designs feel contemporary and intentional because they require restraint and precision. The bare nail creates a striking contrast against the polished areas, and your natural nail color becomes a design element in itself. This approach also works beautifully on longer stiletto nails where you have more surface area to work with. The heart shape becomes even more graphic when it’s defined by what surrounds it rather than what fills it.
Building the Negative Space Effect
- Base color polish in a bold shade (jewel tones, pastels, or metallics)
- Thin detail brush for creating clean lines around the negative space
- Optional: outline the negative space heart with a contrasting metallic
- Top coat to seal the design
- Nail file and buffer for clean edges
- Optional: add small designs or colors within the negative space for more complexity
The challenge with negative space designs is creating perfectly clean, precise lines. A thin detail brush and steady hand are essential, or you can use a stencil if you prefer.
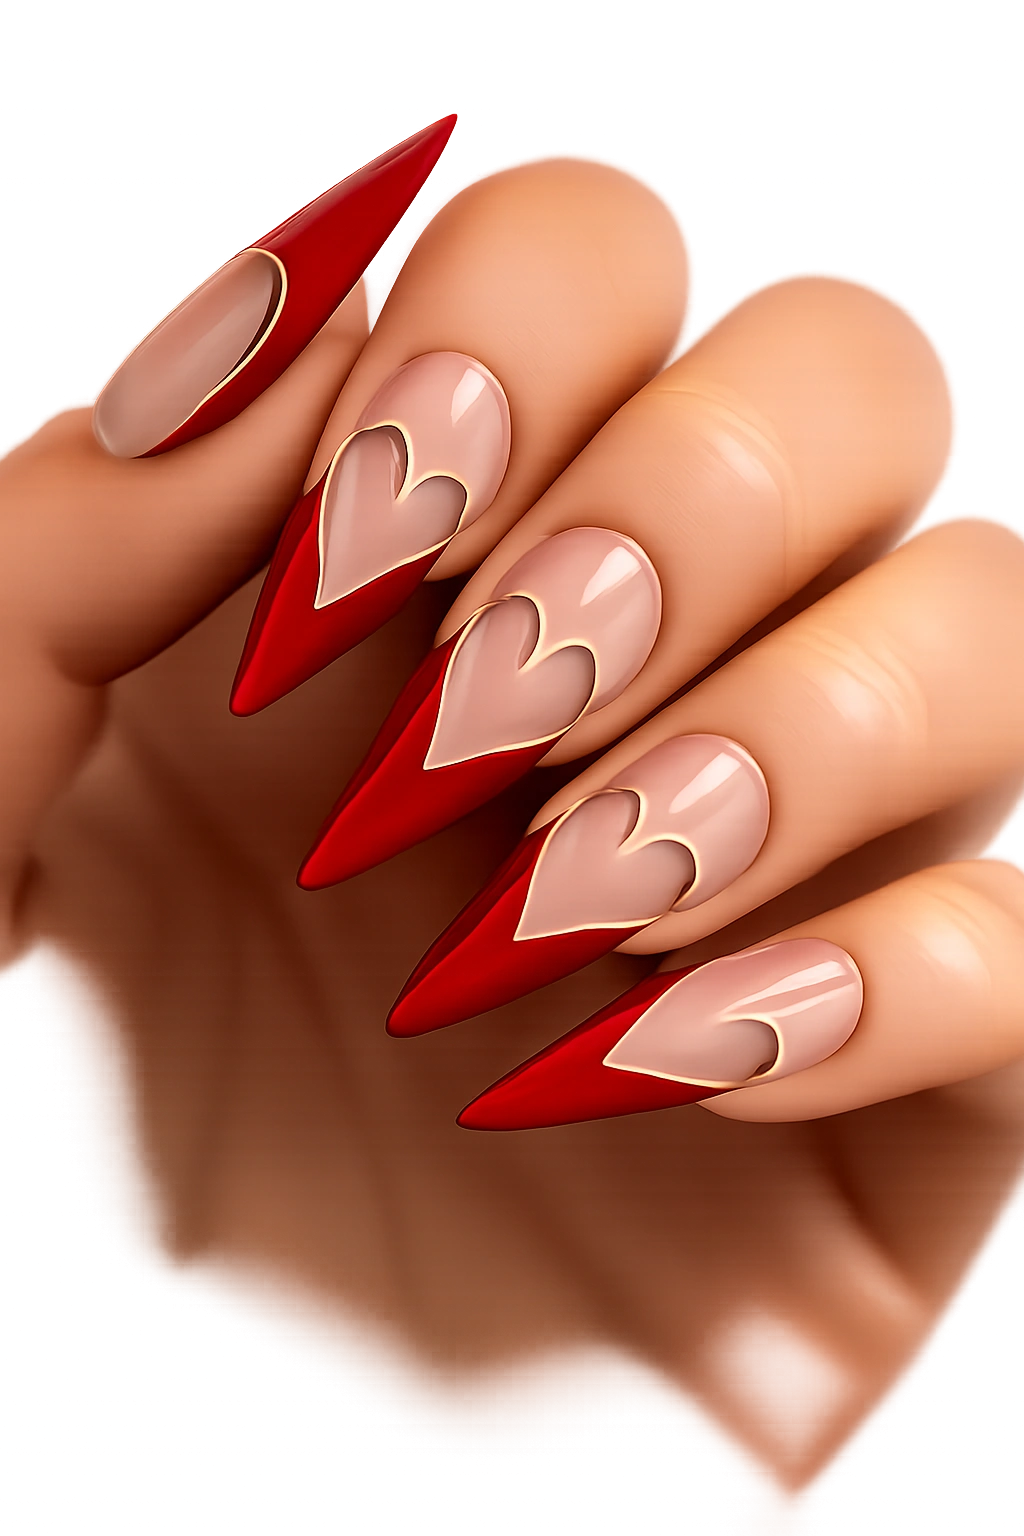
10. Heart French Tip Stilettos
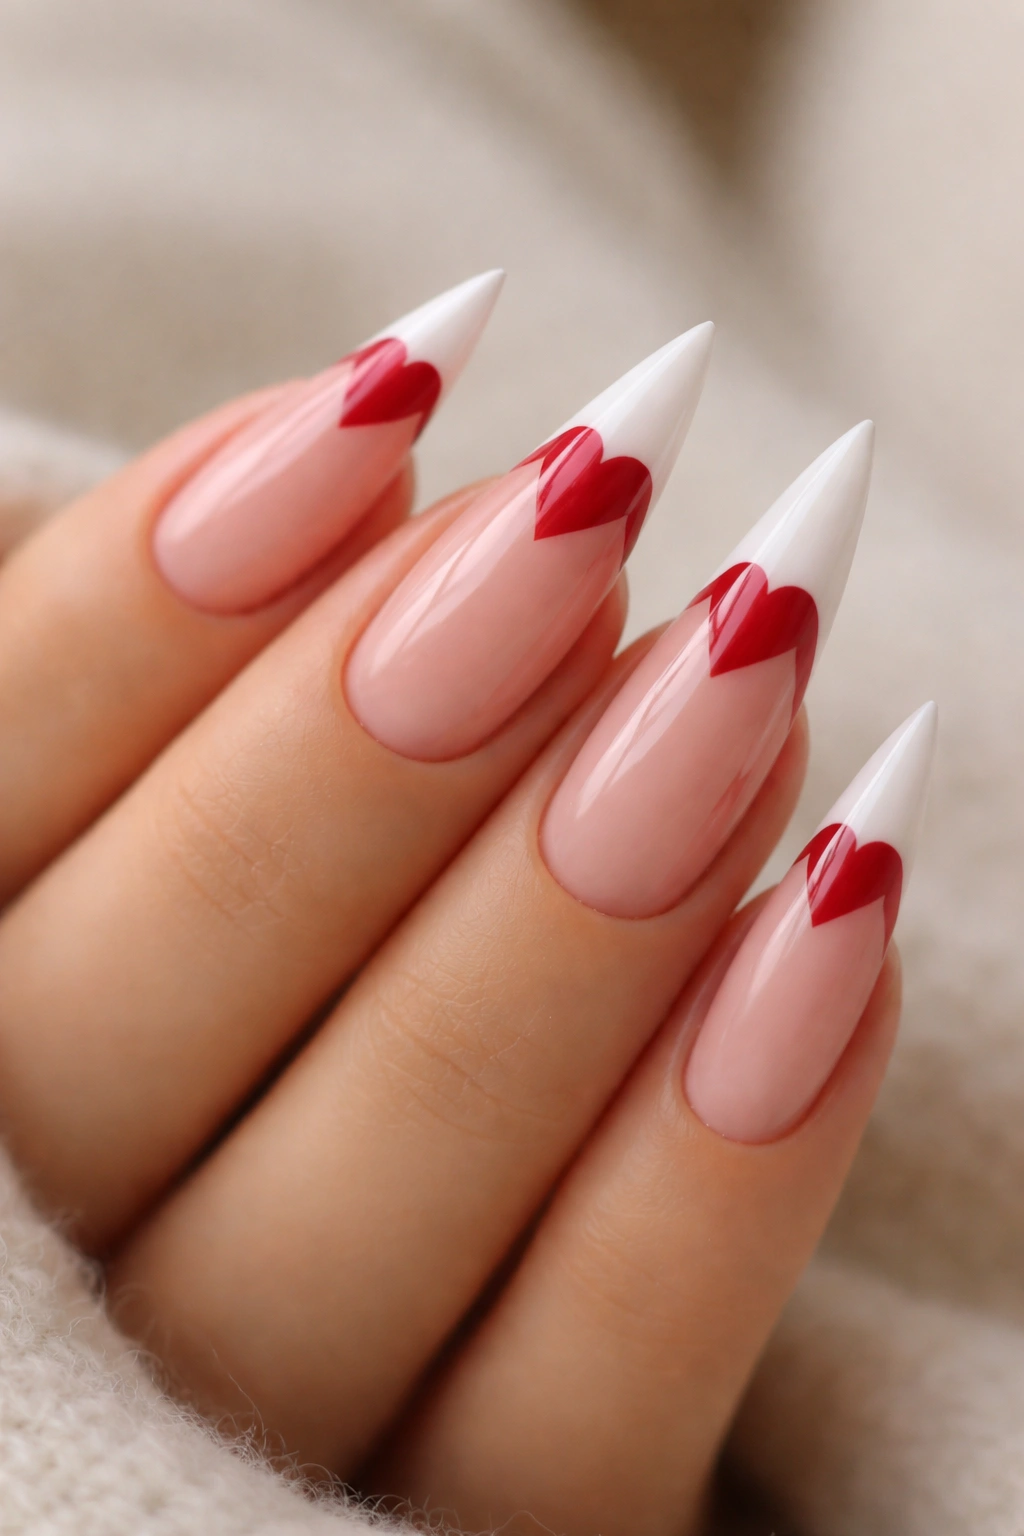
This twist on the classic French manicure replaces the traditional white tip with a heart design that curves gracefully along the pointed stiletto tip. The nail base remains nude, pale pink, or white, while a contrasting color (typically red, burgundy, or a metallic shade) creates a heart shape along the very tip. Some versions feature a small heart at the center of the tip, while others create a larger heart that encompasses the entire pointed end.
Modernizing the French Manicure
The French tip is timeless because of its elegant simplicity, and adding a heart makes it romantic while maintaining that sophisticated aesthetic. This design works particularly well on stiletto nails because the pointed tip creates a natural focal point for the heart shape. The heart tip draws attention to the length and shape of your nails while keeping the overall look refined. This design transitions beautifully from professional settings to evening events simply because of its fundamental elegance.
Materials for a Perfect French-Heart Design
- Neutral base color (pale pink, nude, or white)
- Heart-color polish (red, burgundy, rose gold, or metallic)
- Thin detail brush for painting the heart shape
- Optional: nail stencils to guide the heart shape
- Glossy top coat for shine and protection
- Nail file for maintaining your stiletto points
- Optional: accent the heart with small gems or glitter
Pro tip: If painting a heart at the tip feels intimidating, use a nail stencil to guide your brush work. Stencils create clean, symmetrical hearts every time, and you simply paint over the stencil with your polish color.
Final Thoughts
Heart stiletto nails represent the perfect marriage of bold nail fashion and romantic expression. Each of these 10 designs demonstrates how versatile this combination can be—from minimalist elegance with black on nude to playful glitter-filled hearts to sophisticated negative space concepts. The key to pulling off any of these designs is choosing colors and techniques that genuinely excite you rather than just following trends.
The technical skills required for most of these designs are absolutely achievable for beginners and experienced nail enthusiasts alike. Detail brush work improves with practice, gradient blending gets smoother each time you try it, and choosing the right tools makes everything easier. Start with whichever design speaks to you most, and don’t hesitate to customize the colors to match your skin tone, wardrobe, or personal style.
Remember that the pointed stiletto shape actually works in your favor for heart designs—the contrast between the dramatic sharp points and the soft, curved hearts creates visual interest and makes your nails feel intentional and fashionable. Whether you’re creating these designs for a special occasion or as an everyday expression of your style, heart stiletto nails deliver impact, romance, and undeniable visual appeal. Your hands deserve to feel as beautiful and confident as you are.
