

Prom night demands nails that make a statement before you even say a word. Black stiletto nails have transcended trend status to become a prom staple—sophisticated, timeless, and endlessly versatile enough to complement literally any dress color or style. The elongated almond or coffin shape paired with bold black polish creates an instant polish that reads as confident and put-together, while the sleek lines naturally elongate your fingers and photograph beautifully under prom lighting.
The challenge isn’t finding black stiletto designs—it’s finding the right black stiletto design that matches your dress, personality, and vision for the night. A simple high-gloss black nail can feel elegant and minimalist. Add metallic accents, and suddenly you’ve got glamour. Introduce crystals or pearls, and you’re in full red-carpet territory. The subtle variations in finish, embellishment, and complementary colors create entirely different moods, and each one serves a different prom aesthetic.
Beyond aesthetics, there’s real strategy to choosing prom nails. You want a design that’s striking enough to feel special but practical enough that you can actually dance, eat, and enjoy your date without worrying about your nails. Length matters—stilettos are naturally dramatic, so the balance between statement-making and wearability is important. You also want a design that won’t chip or dull under the rigors of a long night of celebration.
This guide walks through ten black stiletto nail designs that work beautifully for prom, from ultra-minimalist and chic to show-stopping and ornate. Each design comes with the practical details you need—how to achieve the look, what makes it work for prom, and exactly who should consider it. Whether you’re going for quiet elegance or full glamour, you’ll find a black stiletto design here that feels like you.
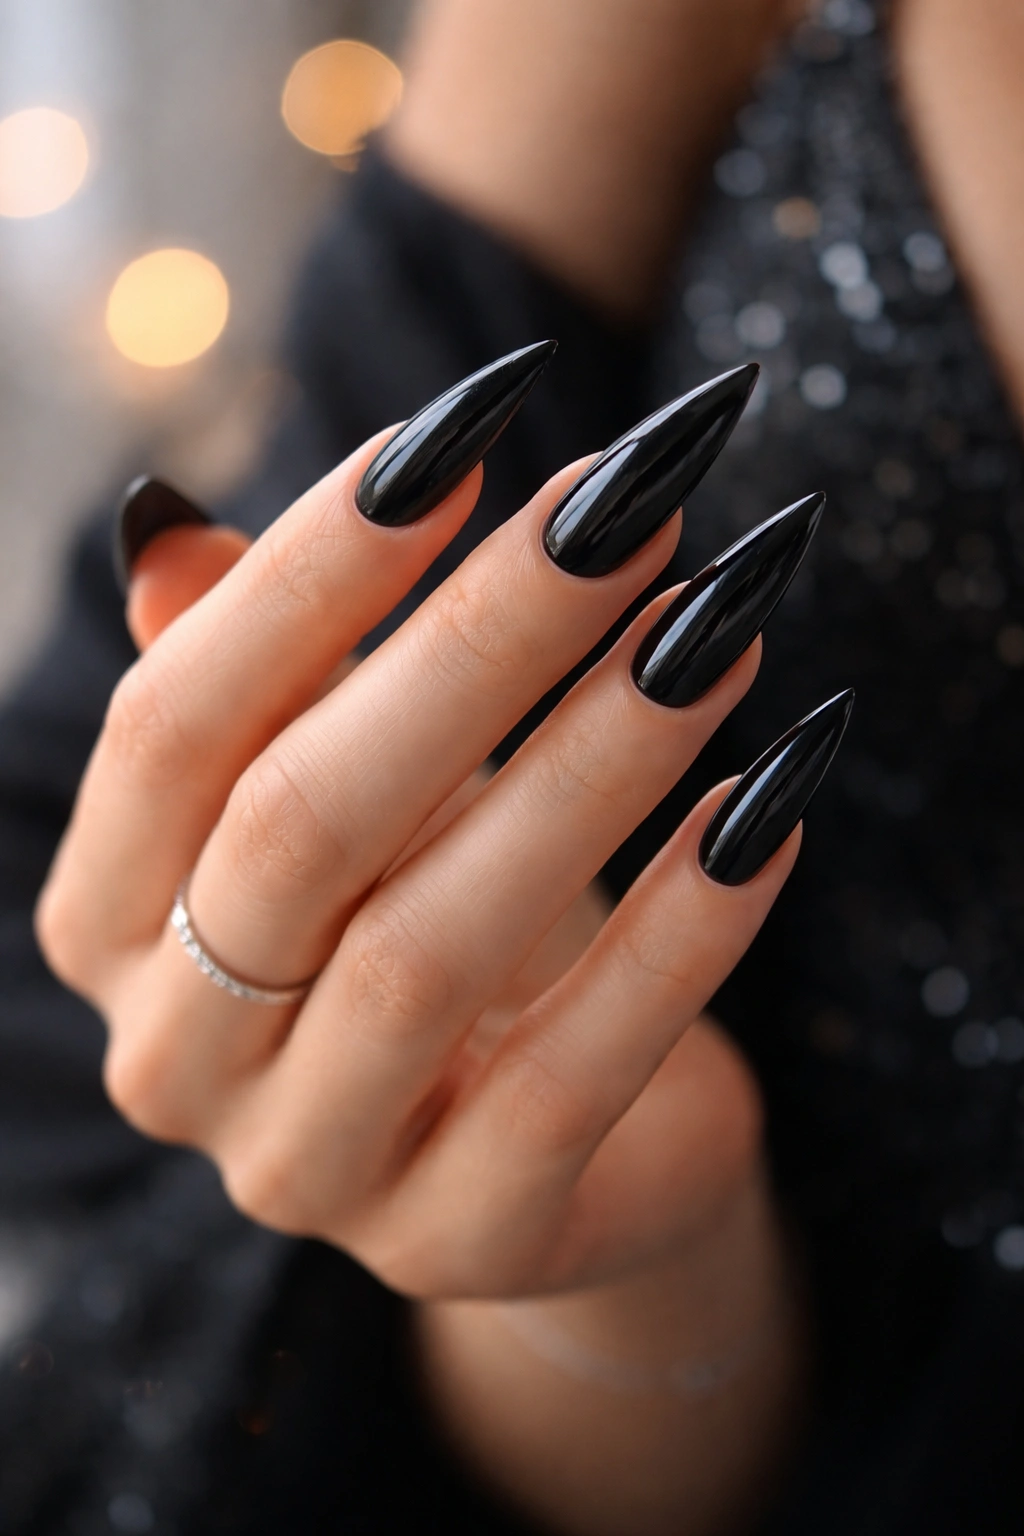
1. Classic High-Gloss Black Stilettos
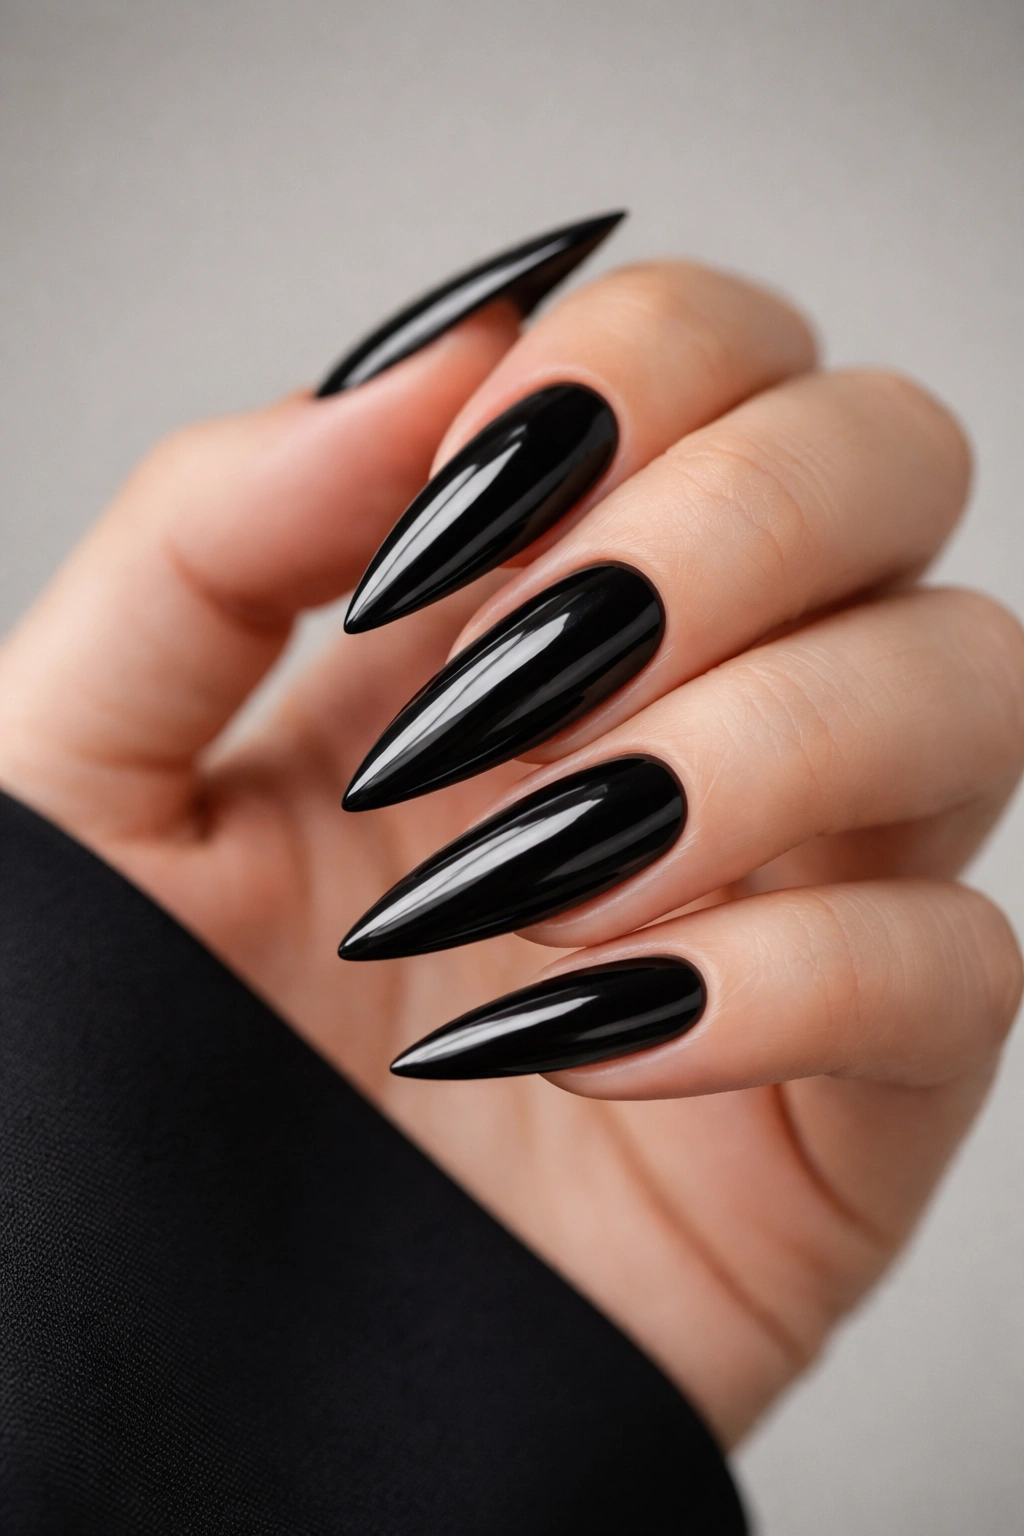
There’s a reason glossy black stilettos have remained a prom favorite for decades—they work. A single-color, high-shine black nail with a perfect mirror-like finish is the definition of timeless elegance. This look depends entirely on execution: the polish must be flawlessly applied with no streaks, the shine must be pristine, and the stiletto shape must be cleanly sculpted. Done right, it’s sophisticated and effortless. Done sloppily, it reads as unfinished.
Why This Stays the Gold Standard for Prom
The genius of classic glossy black is its total neutrality. It pairs with any dress color—white, blush, coral, red, emerald, navy, even black itself. It complements any skin tone. It works with any hair color, makeup style, or dress neckline. While other designs might feel risky or trendy, glossy black stilettos read as universally flattering and intentionally refined. This is the nail equivalent of a perfect red lip—a statement that’s been proven to work.
The Execution That Makes All the Difference
- Polish formula matters: Use a premium black polish with true opacity in 2-3 coats, not a thin watery formula that requires four. Look for a formula that self-levels—this means the polish spreads smoothly without leaving visible brush strokes.
- Seal with a thick, glossy top coat: A cheap top coat will dull even the best black polish. Use a high-quality gel top coat or a premium traditional top coat designed to magnify shine.
- Clean up your cuticles completely: On black nails, every dried bit of polish around the cuticle shows as a flaw. Take extra care during application and cleanup.
- Keep them pristine throughout the night: Pack a small bottle of quick-dry top coat to refresh any minor dulling that happens during dancing or eating.
Pro tip: Pair glossy black stilettos with a nude or peachy lip and bright white eyeliner on the waterline—the contrast makes both your nails and eyes pop, and it’s a classic prom-night formula that never fails.
2. Black Stilettos with Soft Nude Ombre Gradient
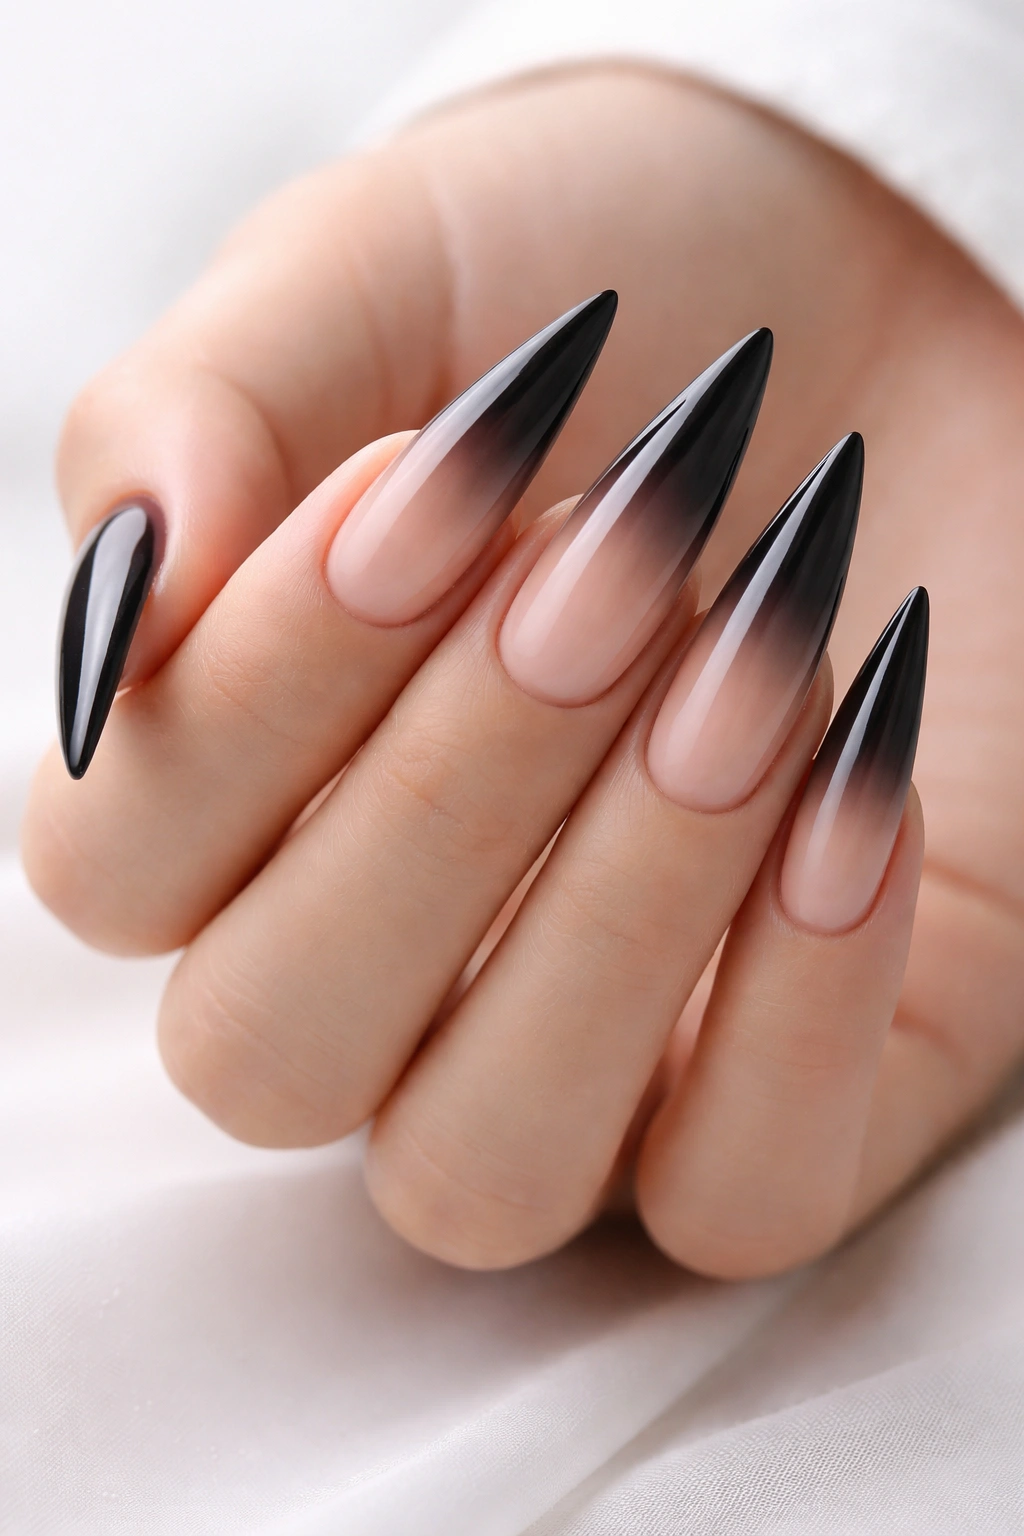
This design merges the boldness of black with the subtlety of a soft gradient, creating an understated elegance that feels modern and intentional. The nails transition from a nude or peachy tone at the base to deep black at the tips. The effect is less dramatic than a sharp color-block and more sophisticated than a solid color—it’s a design that works for someone who wants visual interest without full-on sparkle.
How the Gradient Creates Quiet Luxury
A gradient or ombre effect naturally draws the eye to the tips of your nails, which is why it works so beautifully on stilettos—the elongated shape is already dramatic, and a gradient amplifies that drama in an elegant, not-trying-too-hard way. The nude-to-black transition also creates the optical illusion that your fingers are slightly longer than they actually are because the nude base recedes visually while the black tips advance.
How to Achieve This Look
- Start with a nude or beige base: Apply 2-3 coats of a nude polish that matches your skin tone or is slightly warmer. This is your foundation.
- Blend the transition: Using a sponge, dab black polish onto the tip area of the sponge and gently bounce and drag it across the nail where you want the gradient to begin. The key is to blend, not to create a harsh line. You’ll likely need 2-3 passes to build opacity in the black while keeping the transition soft.
- Seal with gloss: A thick, glossy top coat is essential here—it will magnify the gradient effect and make it look airbrushed and professional.
Alternatively, many nail technicians now use gel polish and a wet brush technique to blend the gradient seamlessly—if you’re having this done professionally, ask about gel ombre application.
Worth knowing: This design can sometimes photograph with less contrast than it appears in person, especially under flash. Test it in your prom lighting if possible, or bring a photo of similar nails to your appointment to ensure the designer understands your vision.
3. Black Stilettos with Metallic Gold Accents
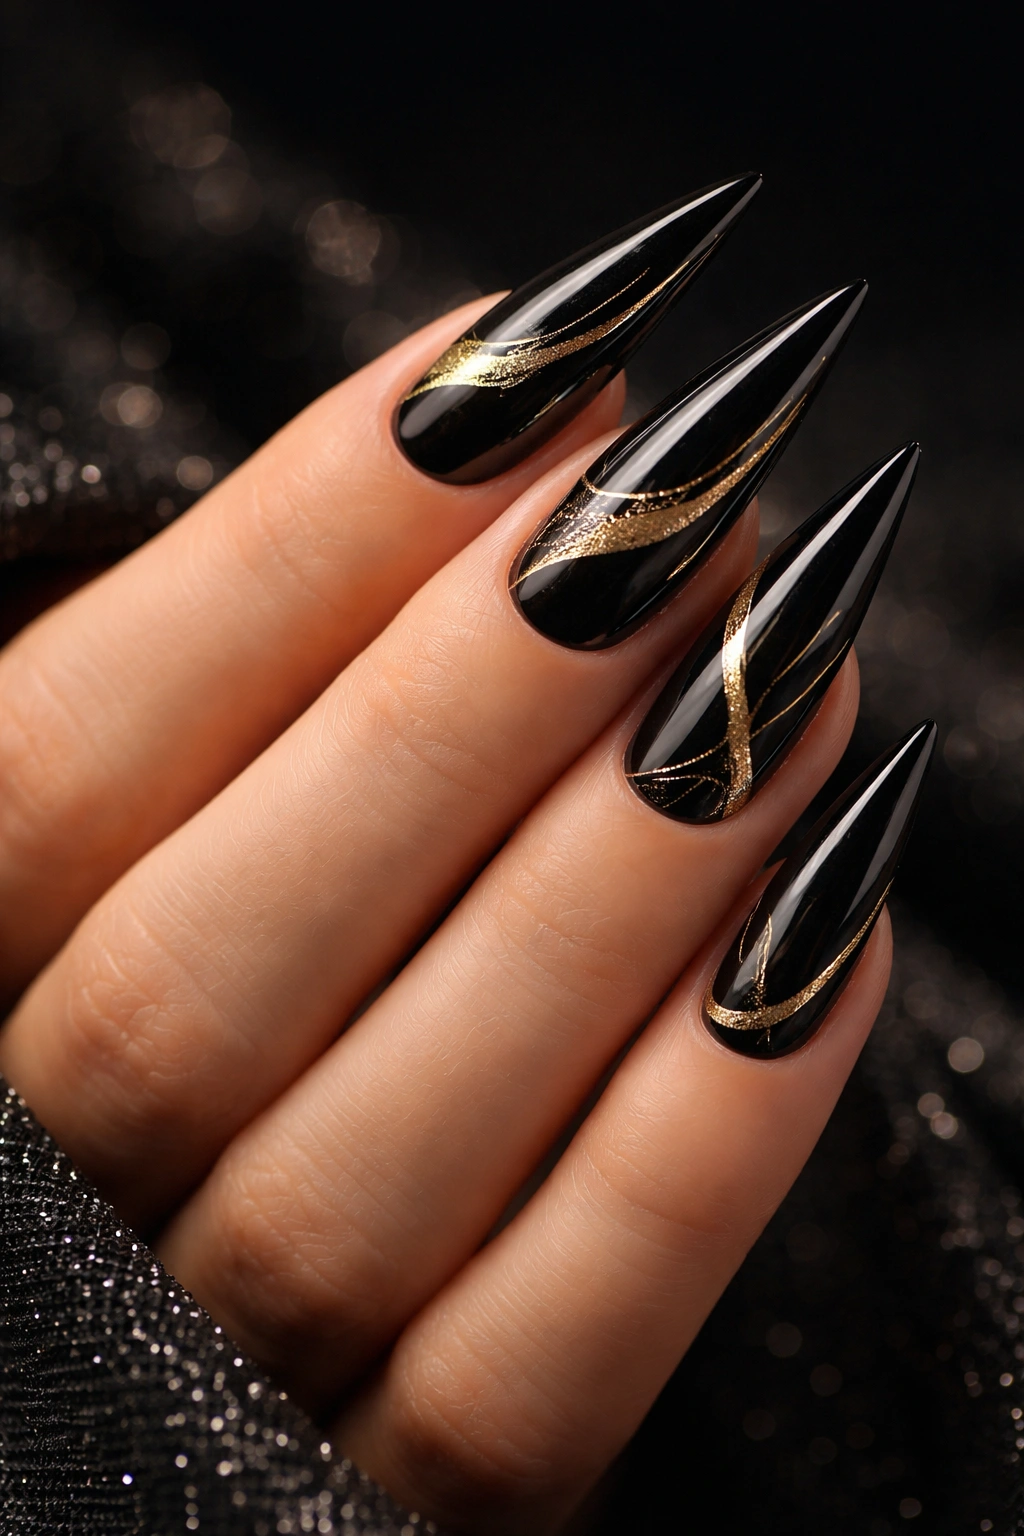
Gold and black is a timeless high-fashion pairing, and when applied to prom nails, it immediately elevates the look from elegant to glamorous. This design features black as the dominant color with gold metallic accents—whether that’s a thin gold stripe along the edge, gold foil scattered across the nail, a geometric gold design, or a delicate gold filigree pattern. The gold catches light beautifully and adds just enough visual texture to feel special without overwhelming the sophistication.
Why Black and Gold Signals Prom-Ready Glamour
Gold is inherently luxe—it’s the color of jewelry, evening wear, and red-carpet style. When you pair it with black, you’re referencing a classic formal palette that’s been elevated for decades. A black dress with gold jewelry is an automatic combination, so black nails with gold accents feel like they were designed as part of your overall look, not just an afterthought. The contrast between the deep matte or glossy black and the reflective shine of gold creates depth and visual interest.
Design Ideas Within This Category
- Gold foil details: Thin lines of gold foil pressed into the black polish, creating the effect of geometric patterns or abstract shapes. This tends to feel modern and artistic.
- Gold dust or chrome powder: A fine metallic coating that sits on top of the black, catching light as you move. This feels more ethereal and less structured.
- Gold stripe along the edge: A thin vertical or diagonal gold line running down each nail, creating sleek minimalist elegance.
- Gold reverse stamp or pattern: A delicate repeating pattern (small dots, tiny stars, filigree designs) stamped in gold over the black base.
Pro tip: If you’re wearing a gold dress or gold jewelry, skip the gold nail accents and go with a different metallic (silver or rose gold) to create interesting contrast. If your dress is a different color, gold on black becomes a complementary statement piece.
4. Matte Black Stilettos with Metallic or Chrome Tips
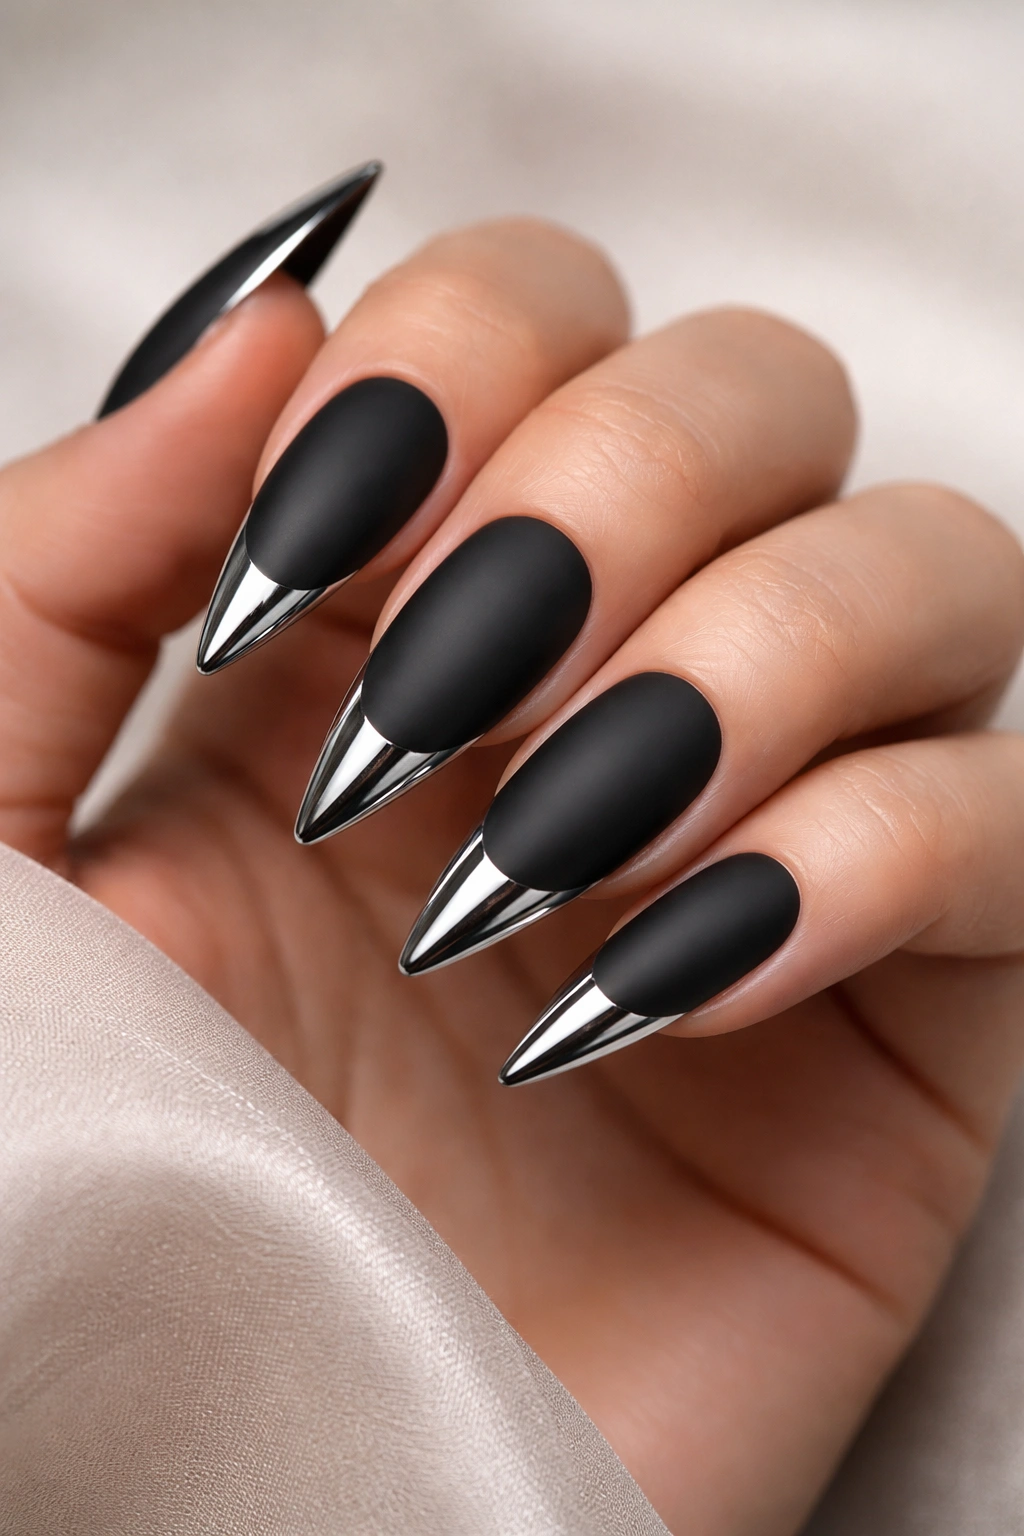
This design splits the difference between matte and metallic by keeping the base of the nail in a soft, non-reflective matte black while the tips feature a high-shine chrome, mirror, or holographic metallic finish. The contrast between the two finishes creates a modern, almost edgy elegance—it’s sophisticated but with an contemporary twist that feels fresh and fashion-forward.
The Power of Texture Contrast
Matte finishes are inherently understated and velvety, which can sometimes read as boring on their own. Add a reflective metallic tip, and suddenly you’ve got a design that’s visually complex and interesting. The matte creates a calm backdrop while the chrome or mirror tips become the focal point. This design works beautifully for someone who wants impact without feeling over-the-top.
How to Create This Effect
- Base coat of matte black polish: Apply 2-3 coats of a true matte black polish (not a satin finish, which has some subtle shine). A matte topcoat ensures the base stays completely non-reflective.
- Chrome or mirror powder on the tips: Once the matte base is set, apply a chrome or mirror powder to the tip area. Chrome powders require a tacky base (some use a sticky top coat, some use gel base), and the powder is pressed on gently and buffed to a mirror-like finish. This is definitely a “have a professional do this” technique unless you’ve practiced extensively.
- Seal everything: A gel top coat over both the matte area and the chrome area, properly cured, creates a smooth, unified finish that lasts all night.
Alternatively, you can achieve a simpler version by using a metallic foil or metallic press-on design on the tips, though the true chrome effect requires powder application.
Worth knowing: Chrome and mirror finishes can sometimes catch light in ways that read as overwhelming in photos. If you’re planning on a lot of photo ops (and you are, it’s prom), request a slightly more subtle chrome finish during your appointment, or consider a holographic powder instead, which is equally eye-catching but slightly softer.
5. Black Stilettos Adorned with Crystals and Diamonds
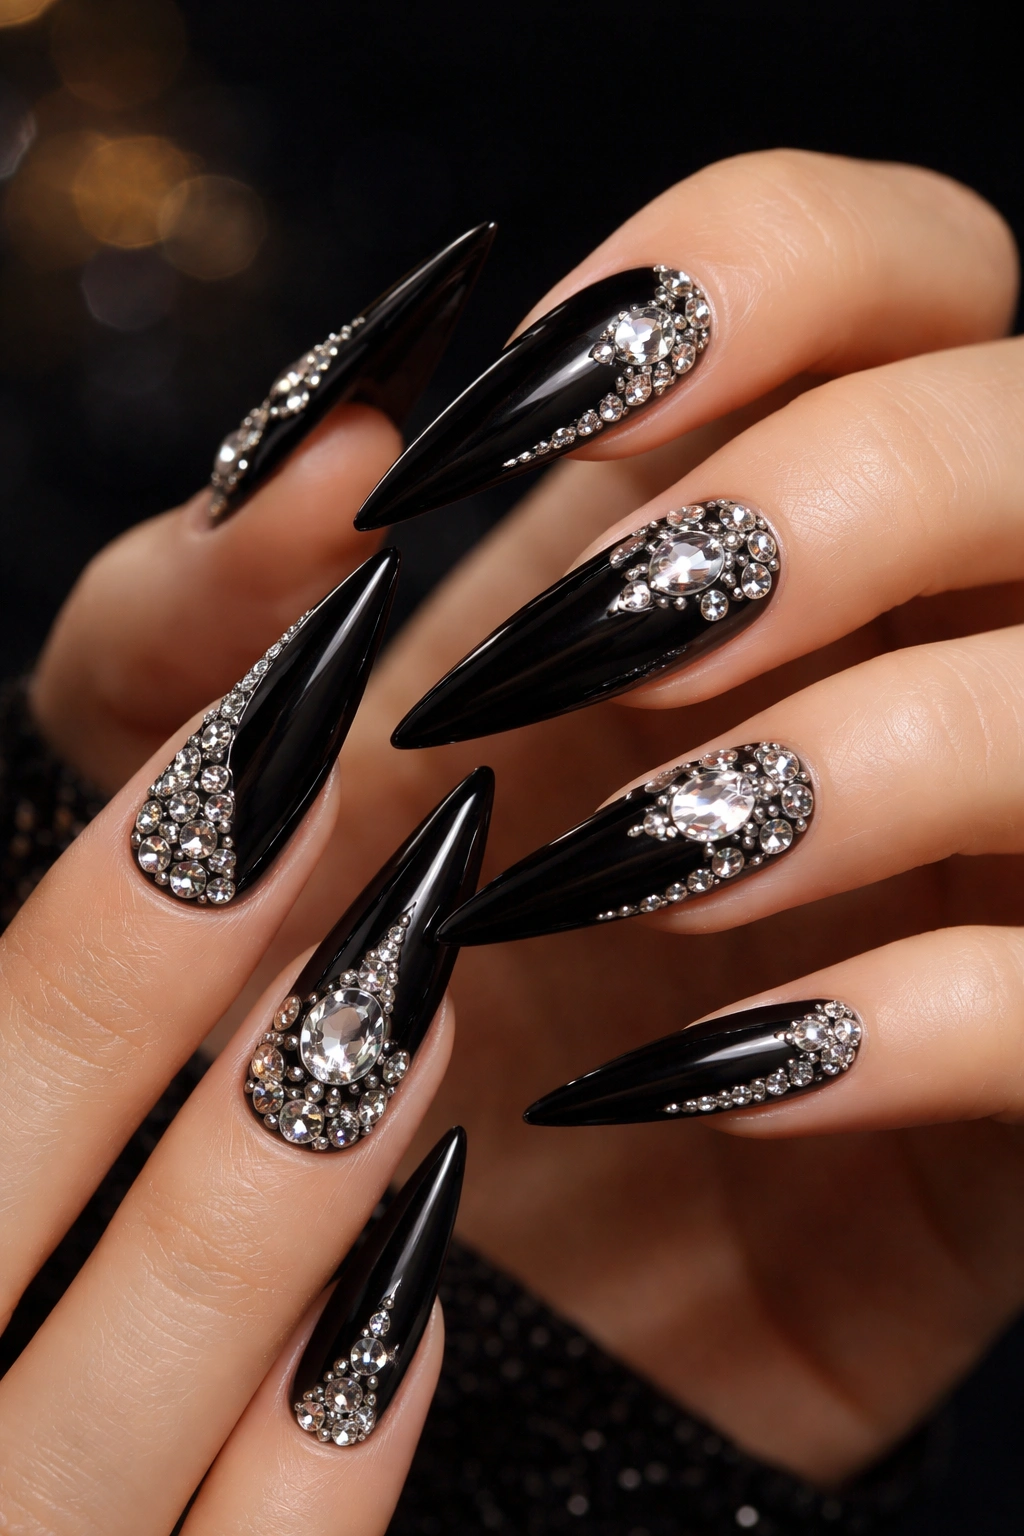
This is the nail design for someone who wants to feel like they’re walking a red carpet at prom. Individual crystals, Swarovski diamonds, or rhinestones are placed strategically across the black nail—sometimes forming a pattern, sometimes scattered asymmetrically, sometimes concentrated on the tips or the accent nail. The result is undeniably glamorous, catches light constantly, and photographs spectacularly.
When This Design Works Best
Crystal-adorned nails need the right context to feel sophisticated rather than costume-y. They work beautifully if your dress is relatively simple and solid-colored (letting your nails be the sparkly focal point), or if your dress is already heavily embellished (your nails complement the overall glam energy). They also work if you’re wearing a neutral, minimal dress and want one major statement piece. They’re less ideal if you’re wearing a heavily patterned or textured dress and heavily embellished jewelry—everything competes.
Practical Considerations for Prom Durability
- Quality adhesive matters: Crystals need to be applied with a special nail adhesive or a thick gel base that ensures they don’t pop off mid-dance. Cheap glue is the enemy here.
- Strategic placement: Crystals on the very edge of the nail or the underside of the nail are more likely to snag on fabric or break off. The safest placement is across the face of the nail, slightly set back from the edges.
- Seal them in: Once crystals are applied, a thick layer of top coat (or gel top coat) is painted over them, creating a smooth, sealed surface. This protects the stones and prevents them from shifting or catching.
- Bring backup crystals and strong adhesive: Pack a small container of extra Swarovski stones and nail glue in your clutch. If a stone pops off, you can reattach it in a bathroom—this is not an emergency, it’s just part of having luxury nails.
Pro tip: On a few nails (maybe just your ring finger or accent nail), go heavier with crystals. Keep 2-3 other nails with just a light dusting of stones. This creates visual balance and prevents your hands from looking weighed down by sparkle.
6. Black Stilettos with a Nude or Flesh-Tone Negative Space Design
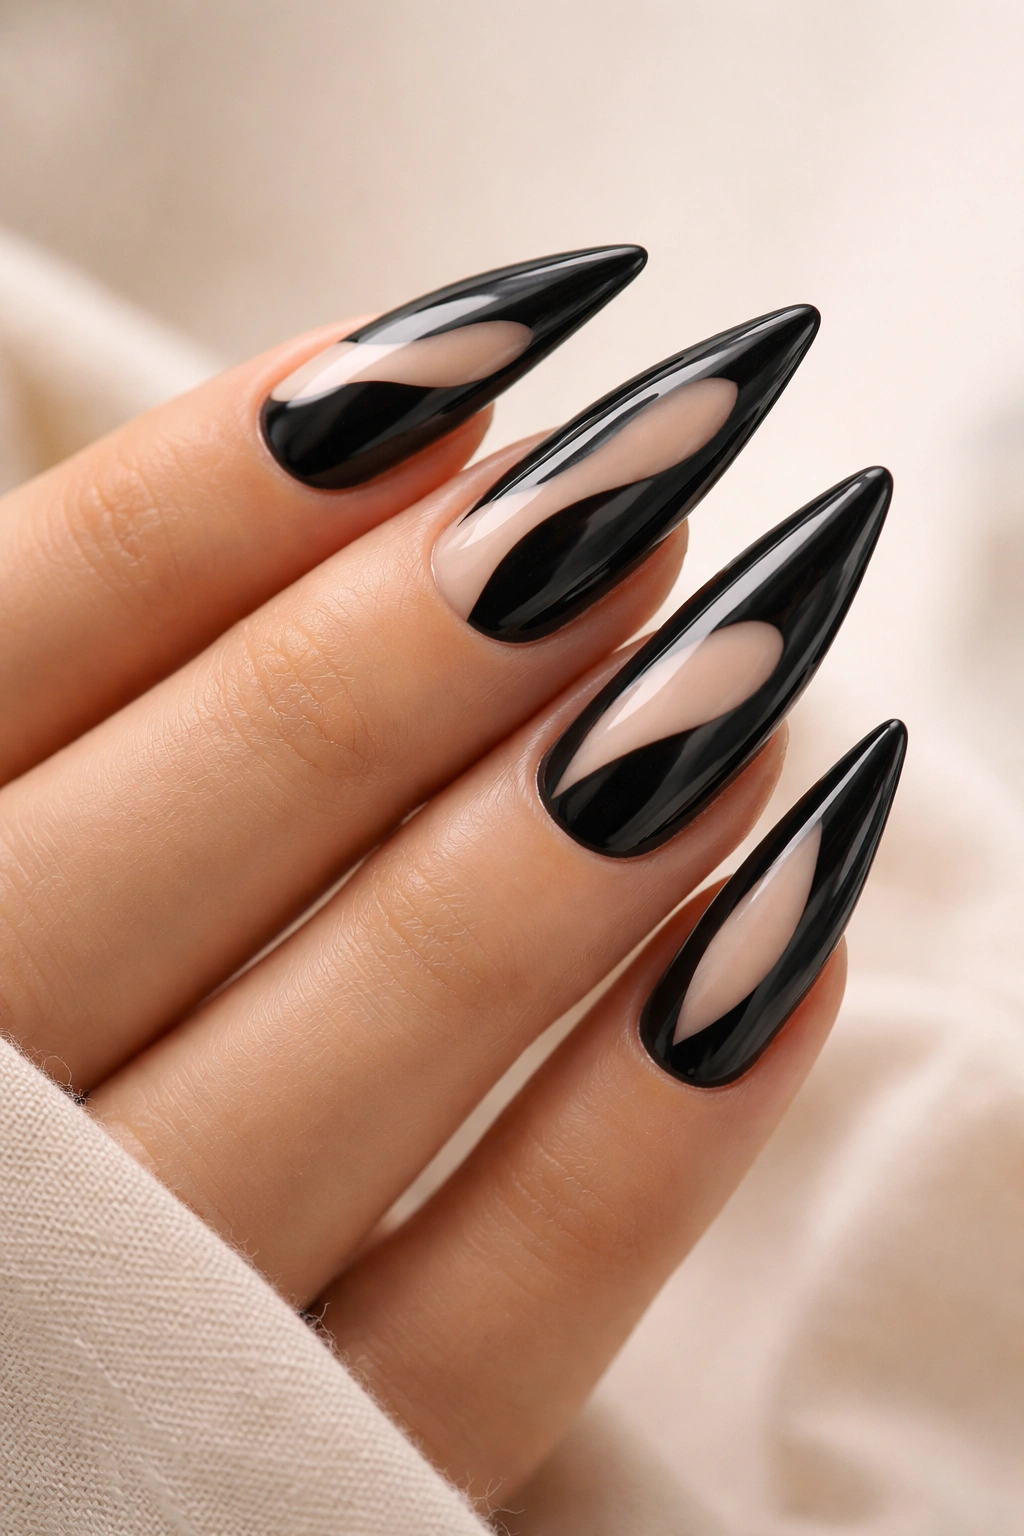
This design creates the illusion of a French manicure, but elevated and modern. The black forms a geometric or organic negative space (a strip along the edge, a crescent at the cuticle, a triangular cutout at the tip, or an asymmetrical swoosh), while the majority of the nail remains nude, natural, or matches your skin tone. The effect is sleek, minimalist, and feels contemporary—it’s the opposite of maximalist glamour, but equally sophisticated.
Why Negative Space Feels So Elegant for Prom
Negative space designs work because they feel intentional and design-forward. They’re not flashy, but they demonstrate clear aesthetic vision. The contrast between the natural nail tone and the black creates definition without relying on embellishment or shine. This design works beautifully for someone who prioritizes elegance and understatement over sparkle.
Design Variations to Consider
- Modern French: A thin black line across the very tip, instead of the traditional white. Looks fresh and editorial.
- Half-moon negative space: The classic reverse half-moon, with black covering the cuticle area and the rest of the nail left nude or natural. Modern and graphic.
- Geometric cutout: An angular triangle, rectangle, or abstract geometric shape in black, with the rest nude. Very architectural and fashion-forward.
- Asymmetrical accent: One nail features a dramatic black shape (maybe a diagonal stripe or a partial coverage), while the others remain solid nude or nude-with-black-tips. Creates visual interest without full commitment.
Worth knowing: Negative space designs are actually more forgiving than solid designs—they don’t require a perfectly opaque base since you’re not trying to create a flawless solid color. However, they do require a steady hand (or a professional) to create clean, precise lines. Budget for a professional appointment to ensure the edges are sharp.
7. Black Stilettos with Pearl, Pearl Dust, or Pearlescent Finish
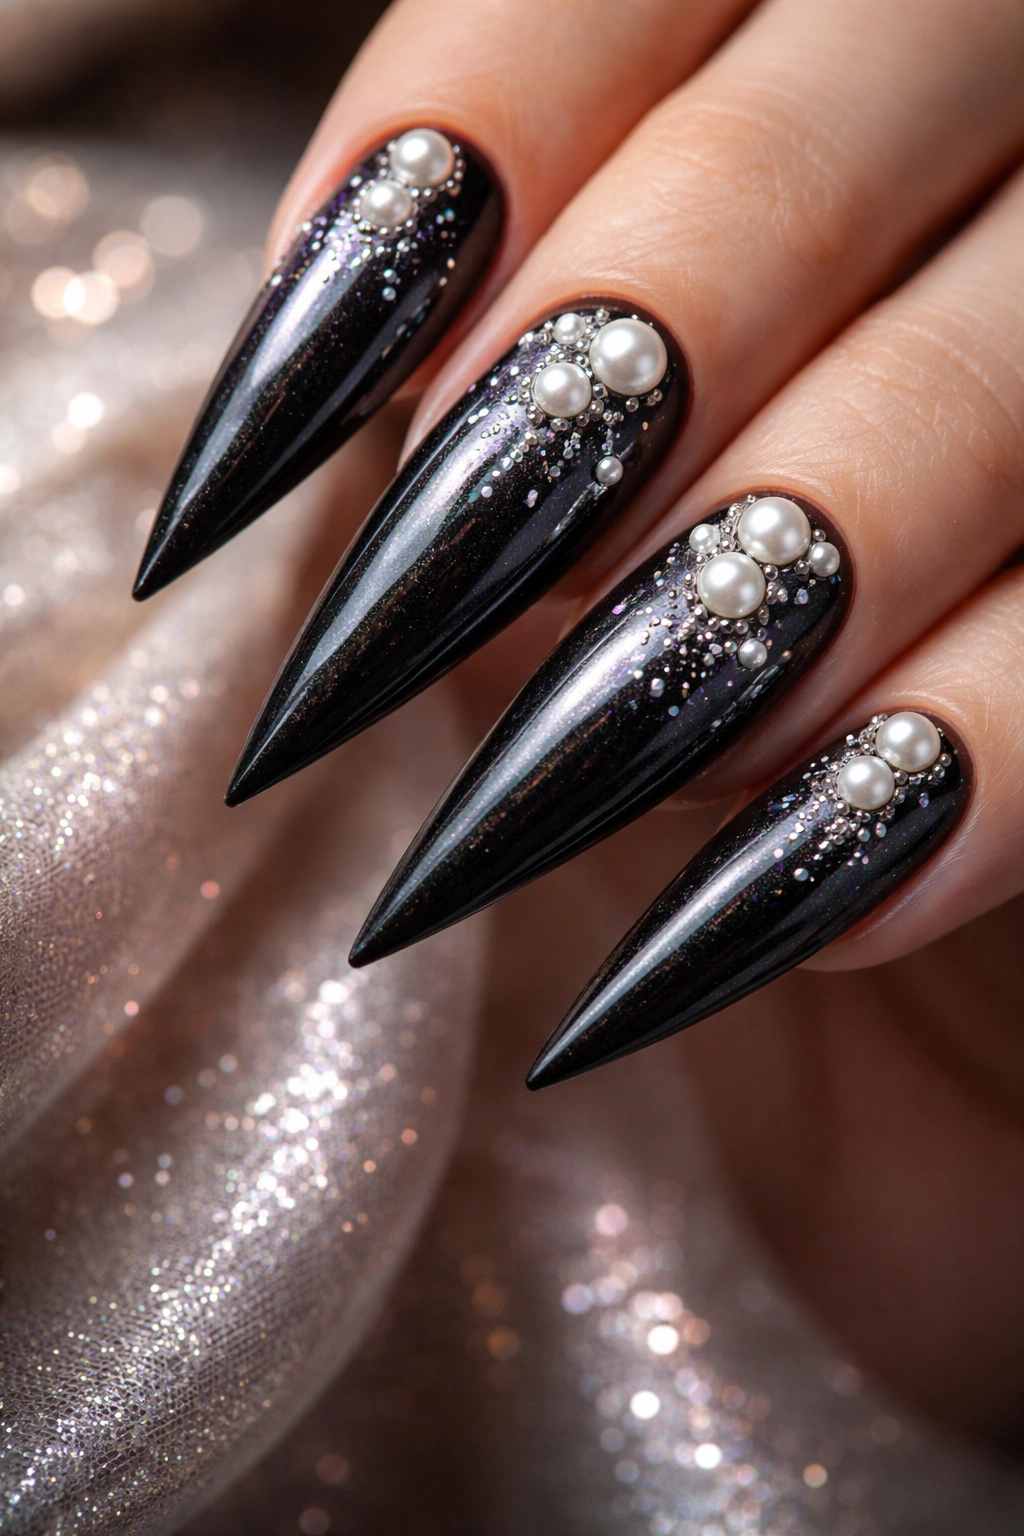
This design uses pearls or pearl elements to add dimension to black stiletto nails. It might be tiny pearl beads applied across the nail surface, a pearlescent powder mixed into or layered over the black polish, or a pearl chrome finish that creates an iridescent effect. The result is nails that shimmer with subtle, shifting color when they catch the light—elegant, expensive-looking, and undeniably beautiful.
The Sophistication of Pearl and Black
Pearl has inherent luxury and elegance—it’s the gemstone of pearls, forever associated with timeless formal wear and bridal elegance. When paired with black, pearl becomes even more sophisticated. The subtle iridescence of pearl prevents the black from feeling flat or heavy, while the black background prevents the pearl from feeling too delicate or feminine. Together, they create a balance that feels mature, refined, and effortlessly polished.
How Pearl Finishes Are Applied
- Pearl dust or powder: A finely milled pearlescent powder is mixed into a base polish or layered over it, creating a shimmering, multidimensional finish. The result is subtle shimmer that’s visible in certain lighting.
- Individual pearls or pearl beads: Tiny faux-pearl beads are adhered to the black base using a gel or adhesive, typically in a pattern (scattered, clustered, or forming a design). This creates actual three-dimensional texture.
- Pearl chrome or pearl mirror powder: Similar to regular chrome, but formulated to have an opalescent or iridescent finish rather than a pure mirror effect. Creates the illusion of depth and color-shifting.
Pro tip: Pearl finishes can sometimes feel a bit bridal or wedding-adjacent if you’re not careful. Balance the pearl against something slightly edgier—maybe pair pearl black nails with a bold lip color or a slightly more modern nail shape. Or let the elegance of the pearl-black combination stand on its own if you’re going for full formal sophistication.
8. Black Stilettos with Silver Glitter, Sparkle, or Confetti
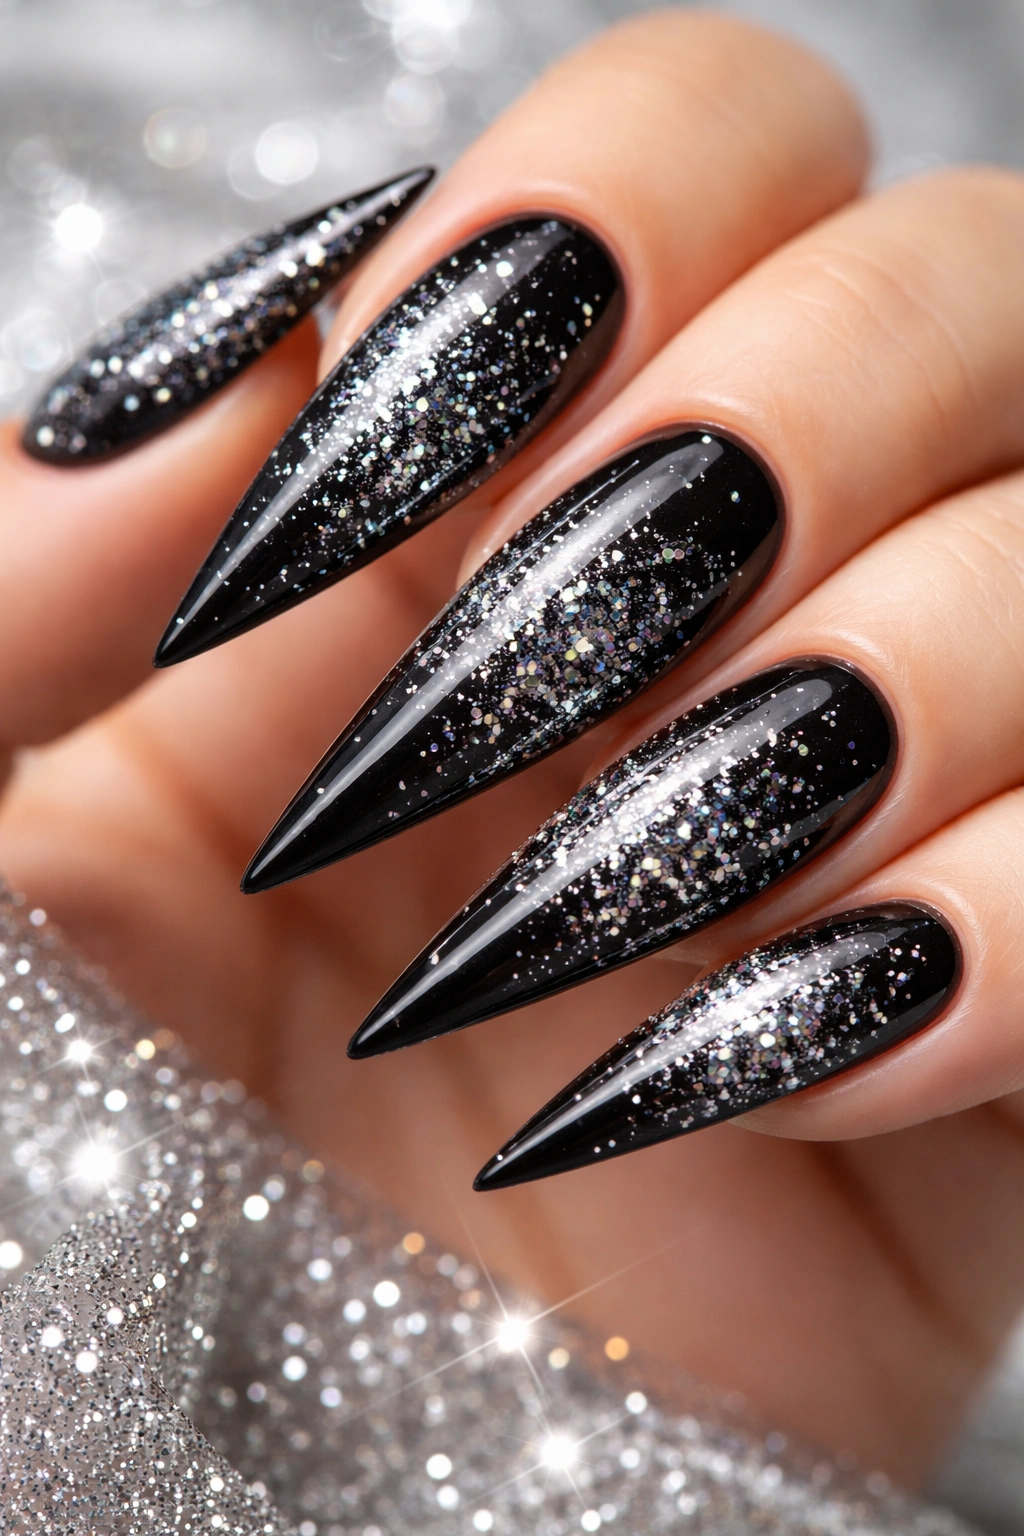
For someone who wants maximum sparkle and movement, black stilettos embedded with silver glitter, iridescent confetti, or holographic sparkle deliver pure glamour. The nails sparkle and catch light with every gesture, creating an effect that’s undeniably festive, celebratory, and prom-ready. This design can range from subtle (a light dusting of fine glitter) to over-the-top (chunky glitter covering the entire nail).
How Subtle Sparkle Differs from Costume Sparkle
The key to making glitter nails feel sophisticated rather than costume-y is the type and placement of glitter. Fine glitter dust creates subtle shimmer that feels expensive. Chunky glitter is fun and festive but reads as more playful than elegant. A glitter gradient (heavier glitter at the tips, fading to barely-there at the cuticle) feels more intentional than glitter covering the entire nail uniformly. And placement matters—glitter on the tips only, or concentrated in specific areas, feels more design-forward than uniform coverage.
Glitter Application for Maximum Longevity
- Use gel-based glitter application: Traditional glitter pressed into tacky top coat can shed and flake. Gel-based glitter formulas or glitter suspended in gel polish adhere far better and last through a full night of prom activities.
- Layer glitter strategically: If you’re using glitter powder, a sticky base coat (or gel base) is applied first, then the glitter is pressed on, and finally a thick top coat seals everything in place. Professional application is highly recommended here.
- Choose quality glitter: Cheap glitter can look dull and plastic. Invest in glitter specifically formulated for nails—it’s designed to catch light beautifully and maintain its shine.
Worth knowing: Glitter nails can be tricky to remove. If you’re having them applied, ask about removal or plan to soak them off carefully at home using acetone and foil wrapping. This is not a huge deal but worth planning for.
9. Black Stilettos with Geometric Designs or Line Art
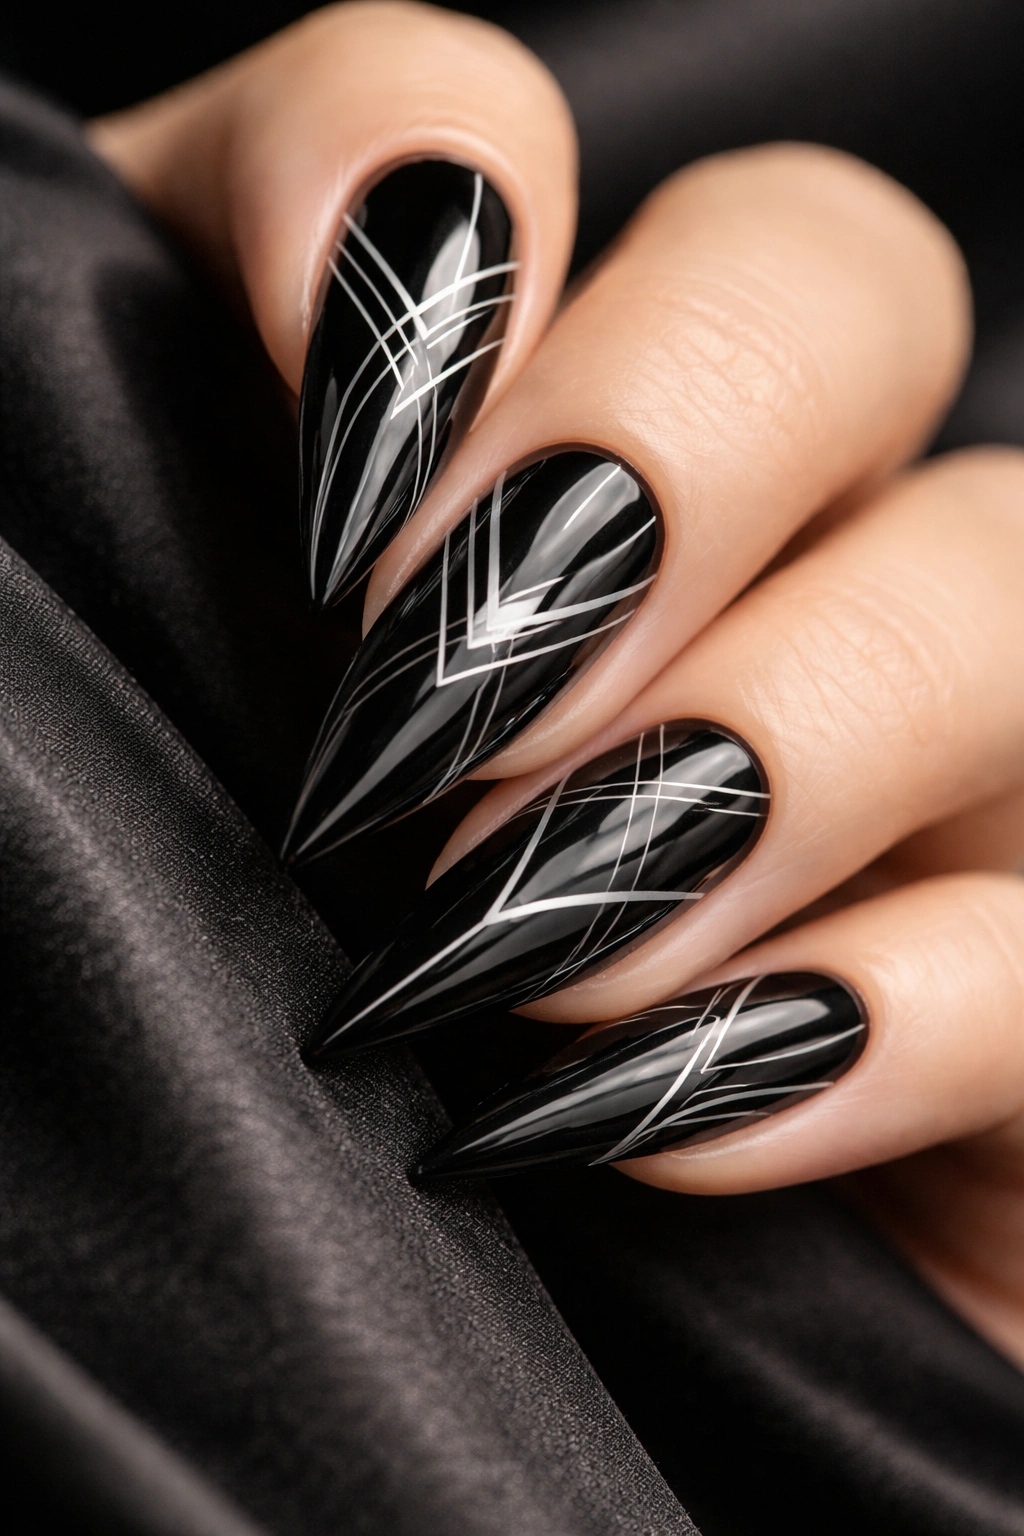
For the prom-goer who loves graphic design and modern aesthetics, geometric black stilettos feature clean lines, angular shapes, or intricate line-art designs applied on top of a black base or as part of a two-color combination. This might be white geometric patterns on black, black patterns on a nude base, or metallic (gold or silver) line art overlaid on black. The result is artistic, fashion-forward, and distinctly modern.
Why Geometry Feels Fashion-Forward
Geometric designs reference high-fashion nail art and editorial aesthetics. They require precision and demonstrate clear design intent. A simple solid color can feel generic, but a geometric design immediately signals that you’ve thought carefully about your nails. This design appeals to someone with artistic sensibility, someone who loves modern art and design, or someone who wants their nails to feel like an intentional extension of their overall aesthetic vision.
Geometric Design Ideas
- Negative space geometry: Clean black lines forming shapes (triangles, squares, hexagons) with the negative space being nude or natural nail. Very architectural and modern.
- White-on-black line art: Delicate white lines creating abstract patterns, minimalist designs, or tiny detailed artwork on a black background. Feels like wearable art.
- Color-blocking: Two or three distinct colors creating bold geometric sections. For instance, black, nude, and a metallic stripe creating angular blocks across the nail.
- Metallic geometric accents: Gold or silver lines creating geometric patterns (thin stripes, triangles, hexagons) over the black base. More glamorous than minimalist.
Pro tip: Geometric designs look best on longer, more clearly shaped nails—the clean lines show up better on a larger canvas. Stiletto or coffin shapes are ideal for displaying geometric design work. If you’re a beginner attempting DIY geometry, invest in a set of thin nail-art brushes and a top coat to seal in your design.
10. Black Stilettos with Subtle Burgundy or Wine Ombre
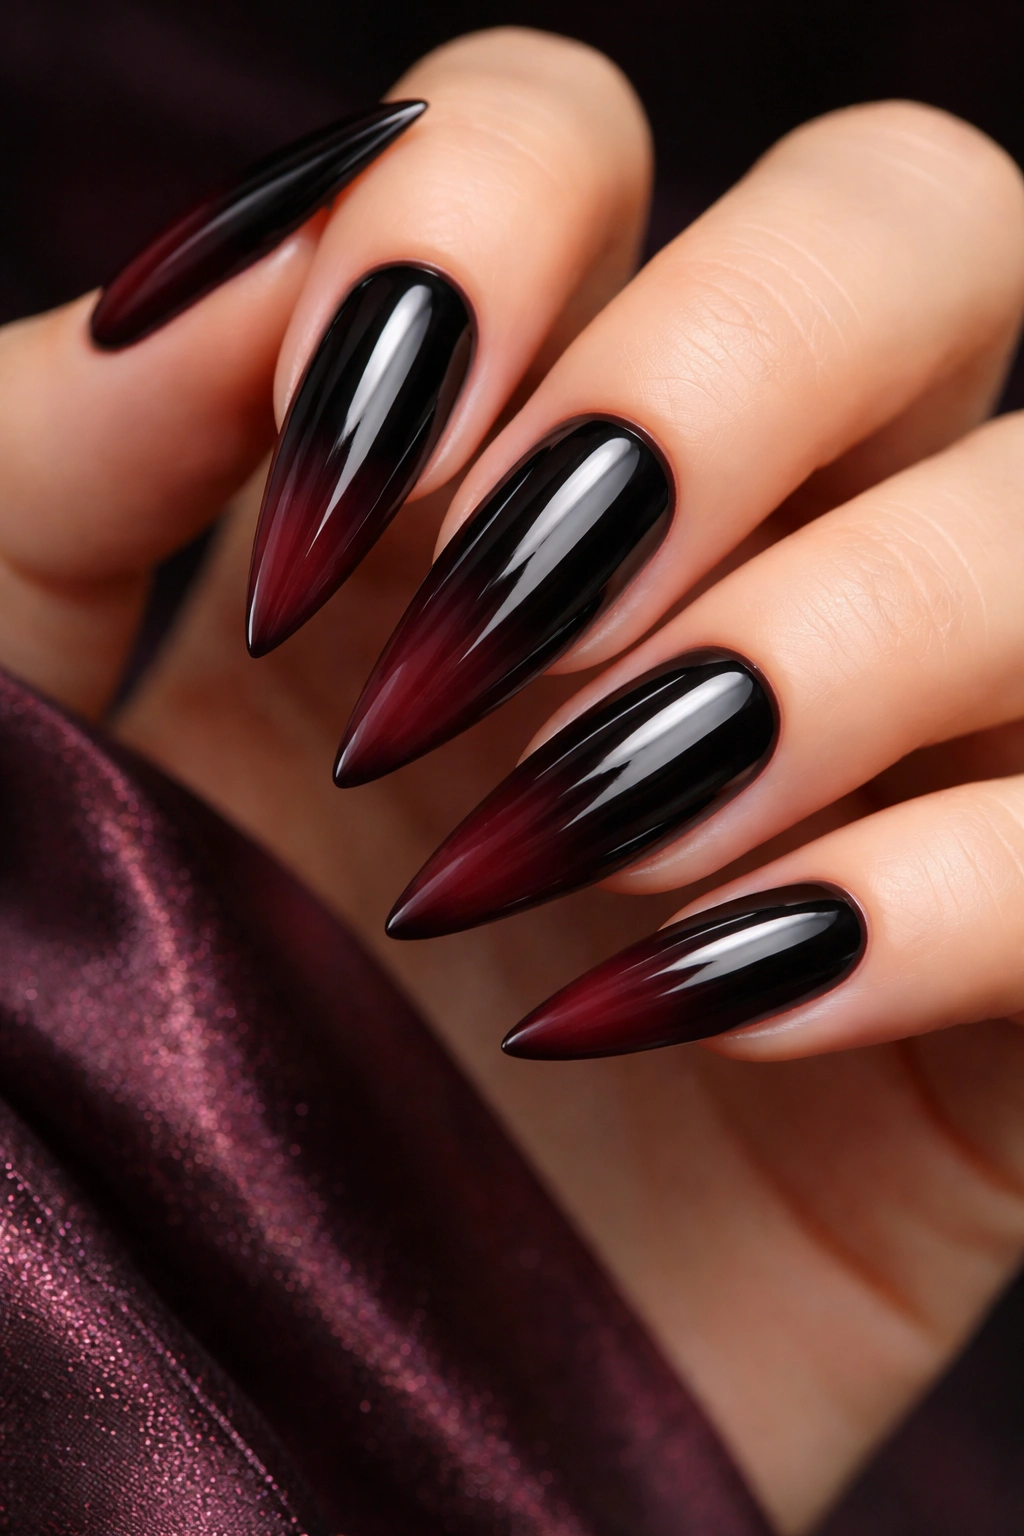
This design transitions from classic black into deeper, richer burgundy, wine, or deep plum tones. The effect is sophisticated and slightly moody—it reads as black at first glance, but the undertones add depth and richness. This design works beautifully for someone who wants an elevated version of black, something that feels special without being drastically different. The deeper burgundy or wine tones also photograph beautifully and create a romantic, formal mood.
Why Burgundy Deepens the Black
Burgundy and wine tones are inherently luxe and formal—they’re associated with fine wine, velvet, and evening elegance. When they transition into or undershadow black, they create a multidimensional effect that’s far more interesting than a solid black. The warmer undertones of burgundy prevent the black from feeling cold or harsh. The overall effect is sophisticated, slightly mysterious, and decidedly formal.
How to Achieve the Burgundy-to-Black Gradient
- Start with a burgundy or wine base: Apply 2-3 coats of a deep burgundy, wine, or plum polish. This creates the foundation and ensures full opacity.
- Blend the transition: Using a sponge or blending brush, dab black polish onto the tip area and gently blend it into the burgundy base. You’ll need multiple passes to create a smooth gradient. The key is patience and multiple light layers rather than trying to get full opacity in one pass.
- Optional: Add black tips: If you want a more distinct gradient (less fully blended), you can apply straight black to the final 1/4 inch of the nail tips and leave the transition softer in the middle area.
- Seal with a thick glossy top coat: This magnifies the gradient and creates a polished, professional finish.
Gel polish application tends to create the smoothest, most professional-looking gradients, so this is a design worth investing in professional application for.
Worth knowing: This design can sometimes read as more burgundy than black in certain lighting, depending on the opacity of the burgundy and the softness of the gradient. If you want your nails to read as decidedly black, ask your technician to keep the burgundy more in the mid-nail area and push the black further toward the tips. Bring a reference photo to your appointment so you and your technician are envisioning the same effect.
Final Thoughts
Your prom nails are part of your overall look, which means they should feel authentic to who you are and align with the mood you’re creating for the night. Whether you choose minimal classic elegance, maximum glamorous sparkle, or something thoughtfully in between, your black stiletto nails will be noticed. They photograph beautifully, they feel elevated and intentional, and they say something confident about whoever’s wearing them.
The ten designs here cover every aesthetic—from ultraminimalist glossy black to full-on crystal-adorned glamour, from understated negative space to geometric modern art. Pick the design that makes you feel the most like yourself, schedule your appointment early enough that you’re not rushed, and bring reference photos or this article to your appointment so your technician understands exactly what you’re envisioning. Your nails deserve that level of intentionality.
Most importantly, remember that prom night is about celebrating you—your accomplishments, your friendships, and your own sense of style and confidence. Black stiletto nails are the perfect vehicle for that celebration, regardless of which design you choose. They’re timeless, they photograph beautifully, and they make you feel polished and put-together from the moment you step out of the car.
