

Stiletto nails have become synonymous with bold, statement-making style—and when you combine that sharp silhouette with airbrush artistry, you’ve unlocked an entirely new dimension of nail design. The precision and gradient capabilities of airbrushing transform stiletto nails into miniature canvases where color melts into color, designs bloom with dimensional depth, and even the most intricate details become possible without looking overworked or heavy.
Airbrushing offers something that hand-painting and traditional nail art can struggle with: seamless color transitions, gossamer-thin coverage that builds beautifully, and an almost ethereal quality that makes designs look like they’re floating on the nail surface rather than sitting on top of it. On the elongated real estate of a stiletto nail, these advantages shine even more brightly. Your nails become a gallery of wearable art.
The beauty of airbrush stilettos is that they work across every aesthetic and occasion. Whether you’re drawn to dramatic ombré blends, celestial scenes, geometric abstractions, or hyper-realistic florals, the airbrush gives you the control and blending ability to execute them with polish. This guide walks you through ten distinct airbrush stiletto designs—each one photographable, technically sound, and absolutely achievable with the right technique and practice.
1. Gradient Ombré From Deep Burgundy to Nude
This is the design that never goes out of style because the execution is deceptively simple yet timelessly elegant. The airbrush creates a seamless color transition from a rich burgundy at the cuticle that gradually lightens to a soft, creamy nude at the free edge. The beauty lies in how the airbrush eliminates any visible line or demarcation—it’s a gradient that flows naturally across the length of the nail.
Why This Works on Stilettos
The elongated shape of a stiletto nail provides the perfect vertical canvas for a gradient to really shine. The eye naturally travels down the length of the nail, and a well-executed ombré draws the gaze along that entire journey. Burgundy and nude are colors with real depth and sophistication—burgundy reads as confident and slightly sultry, while nude keeps it wearable and professional enough for work or a dinner out.
How to Execute This Design
- Start with a base coat and a white or nude base polish to build your gradient on top of
- Load your airbrush with burgundy and spray from the cuticle area, keeping your hand steady and your spray pattern consistent
- Gradually decrease the concentration of burgundy by moving your airbrush farther from the nail or reducing air pressure as you move toward the tip
- Switch to the nude shade and spray across the entire nail to soften the transition and create that seamless blend
- The key is multiple light passes rather than one heavy application—build the gradient slowly and it will look polished instead of streaky
- Seal with a glossy top coat to enhance the luminosity of the gradient
Pro tip: If the transition looks too harsh after your first pass, don’t panic. A clean airbrush loaded with a medium tone between the two colors, sprayed gently over the line where burgundy meets nude, will blur them together perfectly.
2. Celestial Night Sky With Constellation Details
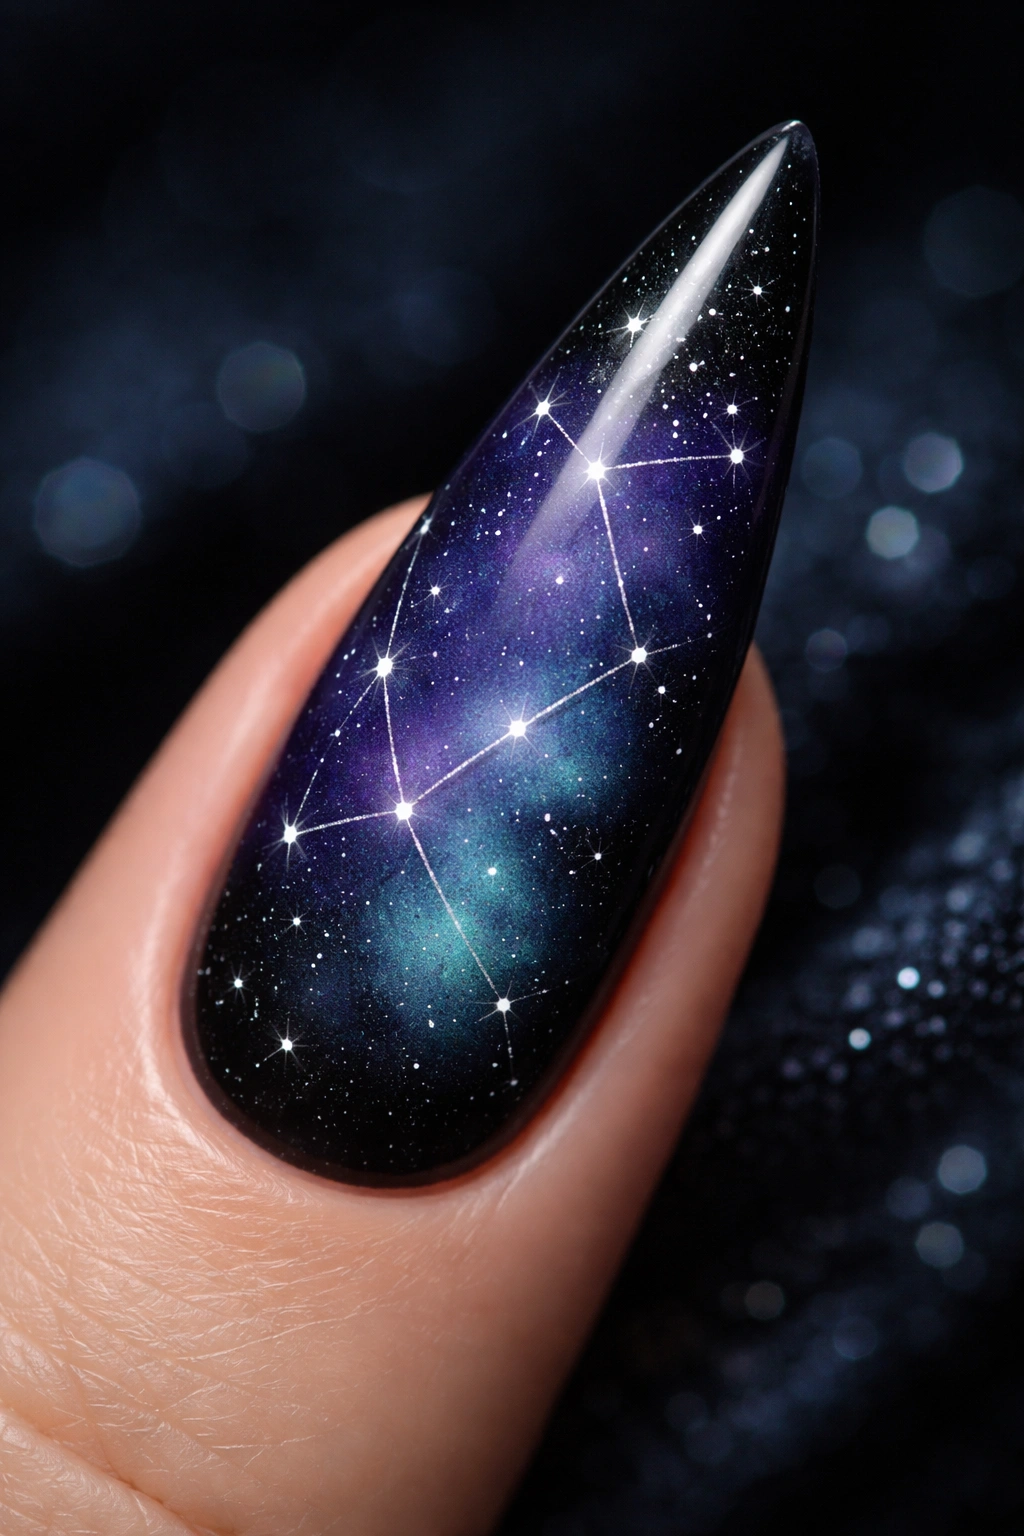
Transform your stiletto nails into a window onto a starlit sky. A deep navy or black base serves as the backdrop for a dreamy airbrush ombré that transitions through shades of purple, teal, and back to black. Once the base gradient is set, hand-painted or stenciled constellation lines and tiny stars create a narrative across the nails.
The Visual Impact
Celestial designs feel mysterious and personal—you’re essentially wearing a piece of the cosmos on your fingertips. The airbrush creates the atmospheric quality of a real night sky with its soft color transitions, while the constellation details add sophistication and a touch of the unexpected. This design photographs beautifully in both daylight and under nail lamps.
Layering the Design
- Create your ombre base first: black at the base, fading through deep purple and teals toward the tip
- Let this cure completely under the lamp—you need a solid foundation before adding details
- Using a thin brush or a dotting tool, add small white or silver dots to represent stars (place them irregularly, not in a grid)
- Connect some stars with fine lines to suggest constellation patterns—Big Dipper, Orion, or even more abstract personal constellations work beautifully
- A metallic accent line or a delicate crescent moon on one accent nail elevates the whole design
- Finish with a glossy or matte top coat depending on the mood you want—glossy feels more ethereal, matte feels more moody
Worth knowing: Celestial designs work best on at least two nails as a matching set, then you can carry accent elements (a constellation, a moon shape) to the other nails for cohesion without repetition.
3. Watercolor Floral With Soft Pink and Peach Tones
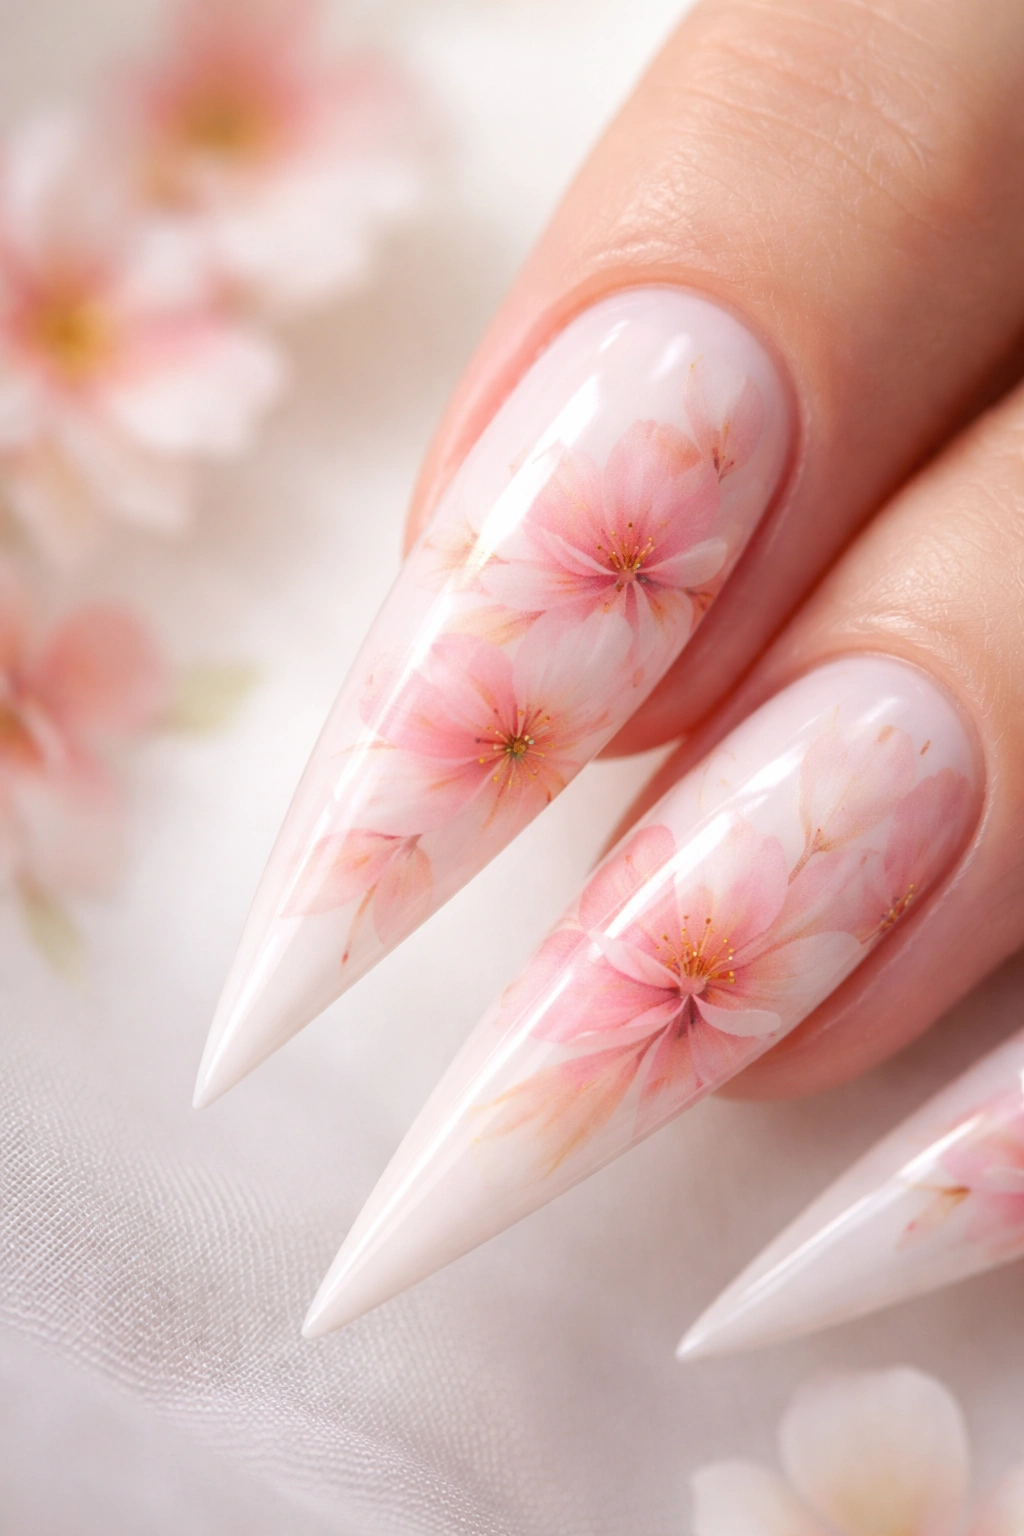
Airbrushing excels at capturing the delicate, watercolor aesthetic—colors bleeding into each other, soft edges that fade away, layers of translucent pigment that build dimension. A watercolor floral on stiletto nails starts with a white or pale ivory base, then light pinks, peachy tones, and hints of coral are airbrushed in organic, flowing shapes that suggest flower petals and stems.
Why Watercolor Works
The airbrush’s ability to create soft, feathered edges is exactly what makes watercolor feel authentic. You’re not painting tight flower shapes—you’re suggesting them, letting the colors and the viewer’s imagination do some of the work. This design reads as sophisticated and artistic without being precious or overly detailed.
Building Your Watercolor Base
- Prime with a white or off-white base coat to give your colors brightness and prevent them from appearing muddied
- Using light pink or coral, begin spraying organic, irregular shapes toward the tips and sides of the nails
- Don’t aim for symmetry—nature isn’t symmetrical, and watercolor certainly isn’t
- Switch to a peachy tone and overlap your spray in places, allowing the colors to merge naturally
- Add touches of a deeper rose or mauve in select areas to create subtle depth and shadow
- A few hand-painted green stems and leaf shapes, added after the airbrush work dries, ground the design and anchor it visually
Insider note: The most convincing watercolor designs have areas where color is concentrated and rich, and areas where it nearly fades to nothing. This variation is what makes it feel like watercolor rather than flat airbrushed color.
4. Chrome or Mirror Finish With Geometric Overlay
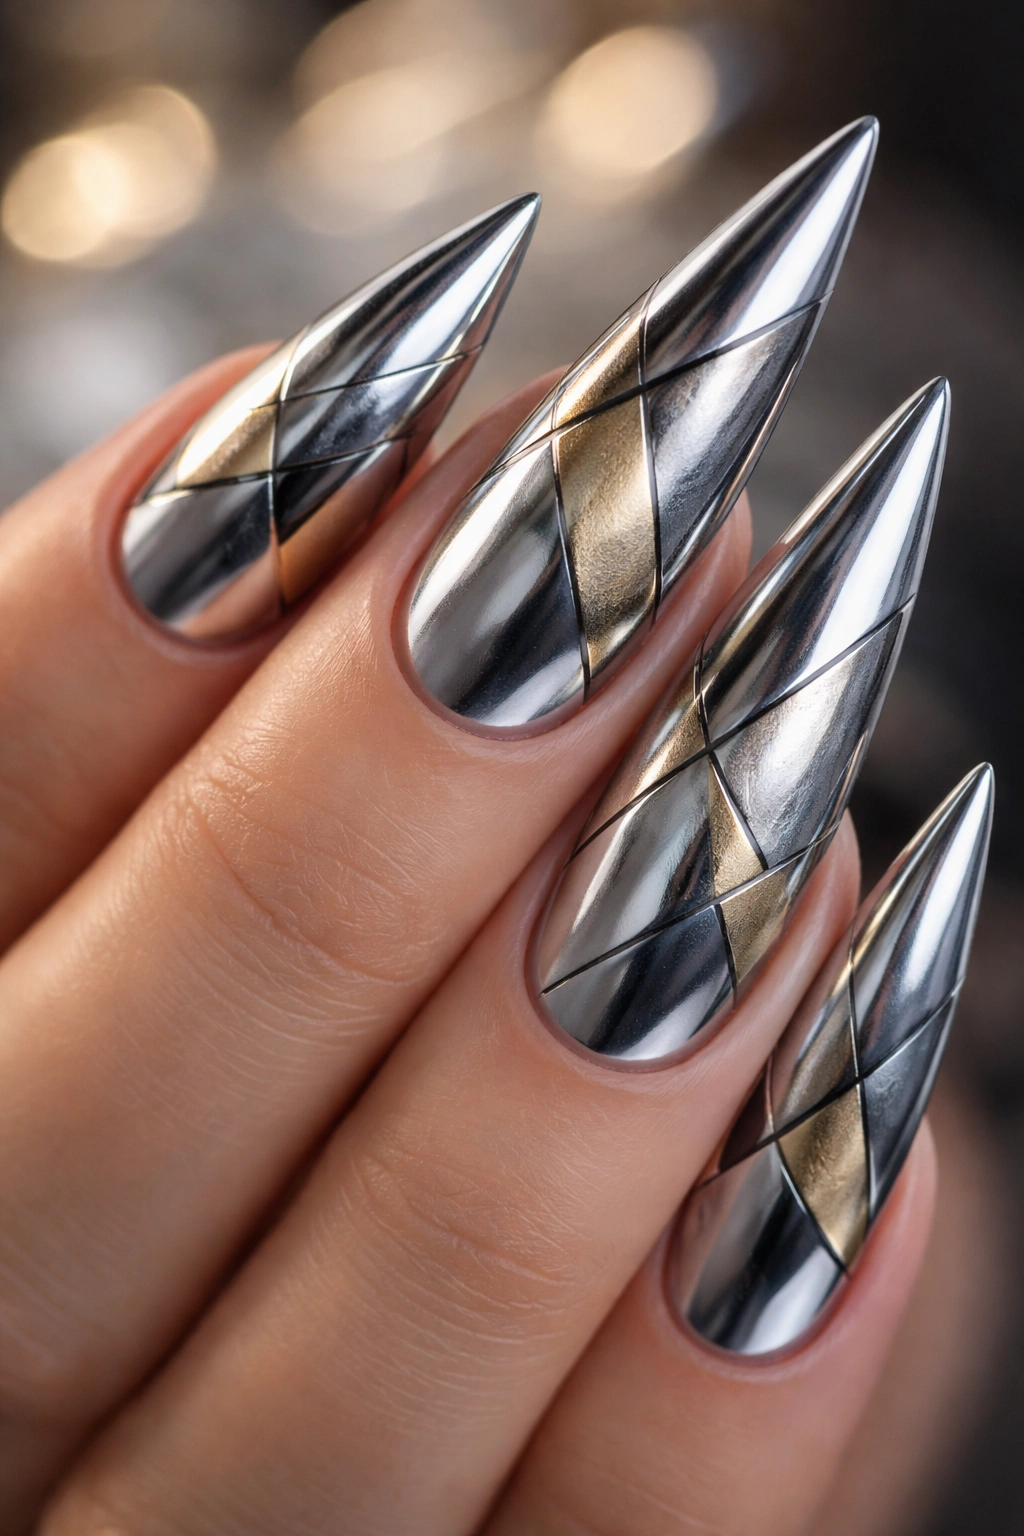
Chrome and mirror finishes have become hugely popular, and stiletto nails are the ideal shape to show them off. An airbrush can’t create chrome directly, but you can build a reflective base using metallic or holographic polishes, then layer geometric shapes—triangles, lines, angular patterns—in complementary metallics or dark shadows using stencils and careful airbrush work.
The Technical Challenge and Payoff
Chrome finishes are notoriously reflective and require excellent lighting and positioning to photograph well, but in person they’re absolutely stunning. The geometric overlay prevents the mirror finish from feeling one-note and adds an architectural, modern edge. This design reads as high-fashion and definitely requires you to be confident in your nail game.
Creating Dimension on a Reflective Base
- Apply a chrome or holographic base coat and cure
- Using geometric stencils or vinyl cutouts, place them on your cured base—the stencil masks everything except the geometric shapes
- Using your airbrush with a gunmetal gray, dark silver, or black, spray gently over the exposed areas to create shadow and definition
- The contrast between the highly reflective chrome and the matte or semi-matte geometric overlay creates the illusion of depth
- Remove the stencil carefully and inspect your lines—they should be clean and precise
- Seal with a glossy top coat to enhance the reflectivity of the chrome
Pro tip: Light source matters. Point a lamp or your phone’s flashlight at different angles to make the chrome pop and catch the light. The geometric shadows become much more dramatic and impressive with proper lighting.
5. Sunset Ombré in Coral, Gold, and Deep Orange
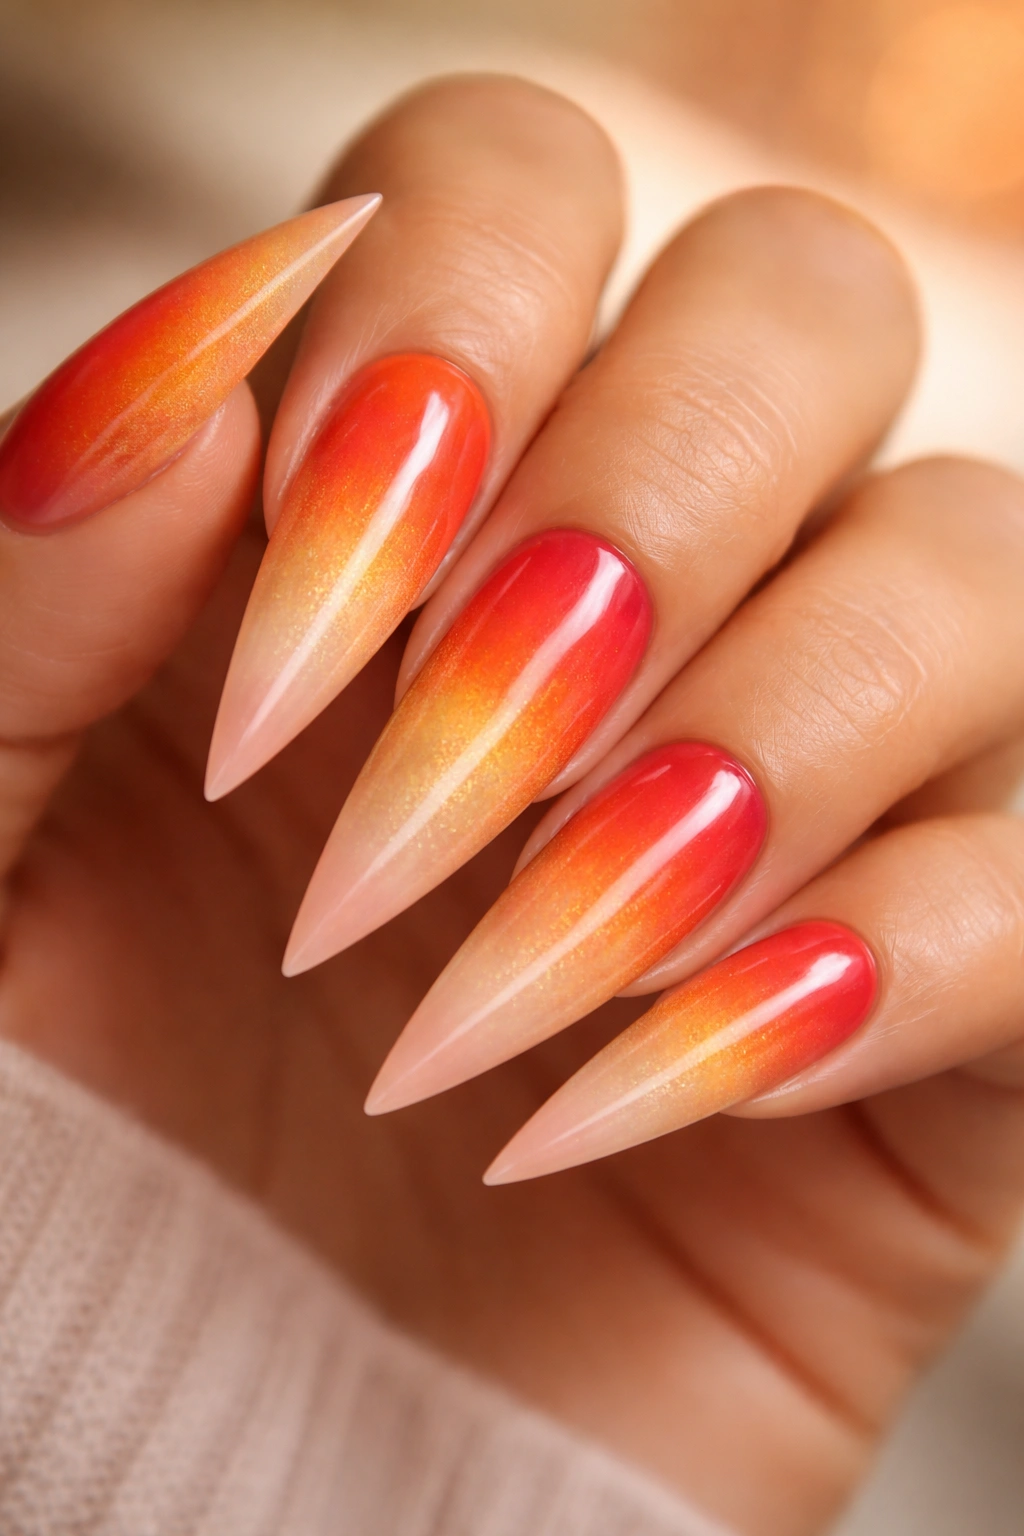
Capture the warmth and drama of a sunset with an airbrush gradient that moves from deep orange or burnt sienna at the cuticle, through golden yellow and coral mid-nail, and finishes with a pale peachy or cream tone at the tip. The warmth of this palette is universally flattering and works year-round.
Why Sunsets Feel Right on Stilettos
Sunsets are inherently dramatic—there’s a reason photographers obsess over them. Transferring that drama to a stiletto nail creates instant visual interest and sophistication. The warm tones complement most skin tones, and the design is recognizable enough to get compliments but subtle enough to wear anywhere.
Blending the Warm Tones
- Apply a pale cream or nude base coat to provide a smooth foundation
- Starting at the cuticle, spray a thin layer of deep orange, concentrating the color right at the base
- Gradually lighten your spray by moving away from the cuticle or reducing air pressure as you move toward mid-nail
- Introduce golden yellow or peachy tones in the middle section, allowing them to blend with the orange below and the lighter tones above
- Finish the tip with a pale peach or off-white by reducing the pigment concentration even further
- The goal is a smooth progression with no visible stops or starts—each color should meld into the next
Worth knowing: The warmth of sunset colors makes this design especially beautiful during cooler months, but it works beautifully any time. The gradient direction (dark at cuticle, light at tip) naturally elongates the nail visually, which is an added bonus for stiletto shapes.
6. Galaxy Design With Nebula Effects and Stars

Push beyond a simple night sky into full galaxy territory. A galaxy design incorporates swirling nebula effects in purples, blues, pinks, and teals, small white or metallic stars scattered throughout, and sometimes a subtle glow effect around the edges. The airbrush is perfect for creating the soft, swirling quality of a nebula.
Creating Nebula Swirls
- Start with a black or very dark navy base coat
- Using your airbrush with soft, sweeping motions, introduce purple, blue, and pink in organic, swirling patterns—don’t aim for realism, just dreaminess
- Overlay some teal and deep fuchsia in places where colors already exist, building up depth and complexity
- A light pass of white or pale lavender airbrushed over certain areas creates the impression of stardust or cosmic energy
- Once fully cured, add white stars by dotting or using a stencil, and connect a few with fine lines for constellation elements
- Consider a holographic or metallic glitter overlay in the center of the galaxy—it catches light and adds dimension
Insider note: Galaxies work best as a set across multiple nails, with each nail showing a different section of the same cosmic landscape. This allows you to create a larger narrative and showcase the complexity of the design across five coordinated nails.
7. Metallic Gradient From Rose Gold to Bronze
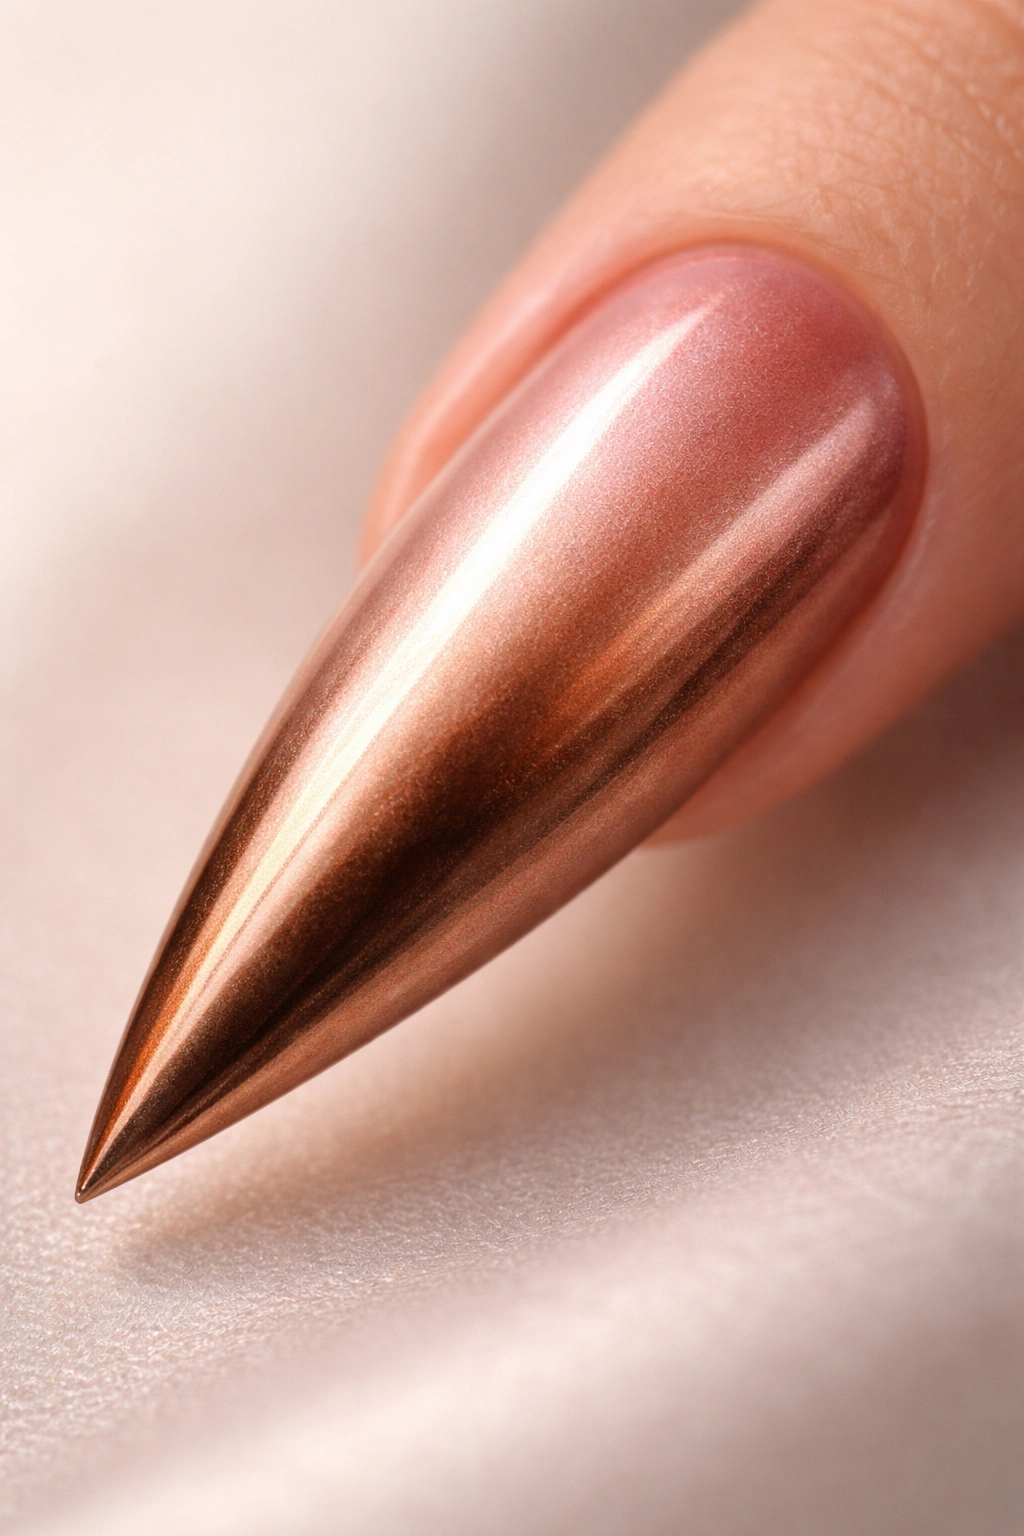
Rose gold and bronze are warm, luxurious metallics that create an elegant, slightly vintage-modern vibe. An airbrush allows you to blend these metallics seamlessly, creating a gradient that catches light differently depending on the angle and lighting conditions.
Why Metallic Gradients Elevate Stilettos
Metallic finishes are inherently high-shine and eye-catching, but a gradient prevents them from feeling flat or one-dimensional. The transition from rose gold (cooler and softer) to bronze (warmer and deeper) creates visual interest and texture. This is a design that photographs beautifully under any lighting.
Achieving a Flawless Metallic Blend
- Metallic polishes can sometimes be thick and difficult to airbrush, so consider thinning them slightly with airbrush-appropriate thinners (never use regular nail polish thinner)
- Apply a smooth base coat and cure
- Spray your rose gold from the cuticle area, building it up with multiple light passes to achieve full opacity
- Gradually transition toward bronze by first introducing a burnt copper mid-tone between the two metallics
- Continue spraying bronze toward the tips, ensuring the transition is smooth and the metallic finish is even
- Use a soft, diffused spray pattern to avoid striations or visible spray lines
- Seal with a glossy top coat—this enhances the reflectivity and makes the gradient even more luminous
Pro tip: Metallic polishes look their best with careful lighting and photography. A lamp positioned to the side of your hand will showcase the depth and shine of the metallic gradient beautifully.
8. Marble Effect in Black, White, and Gray Tones
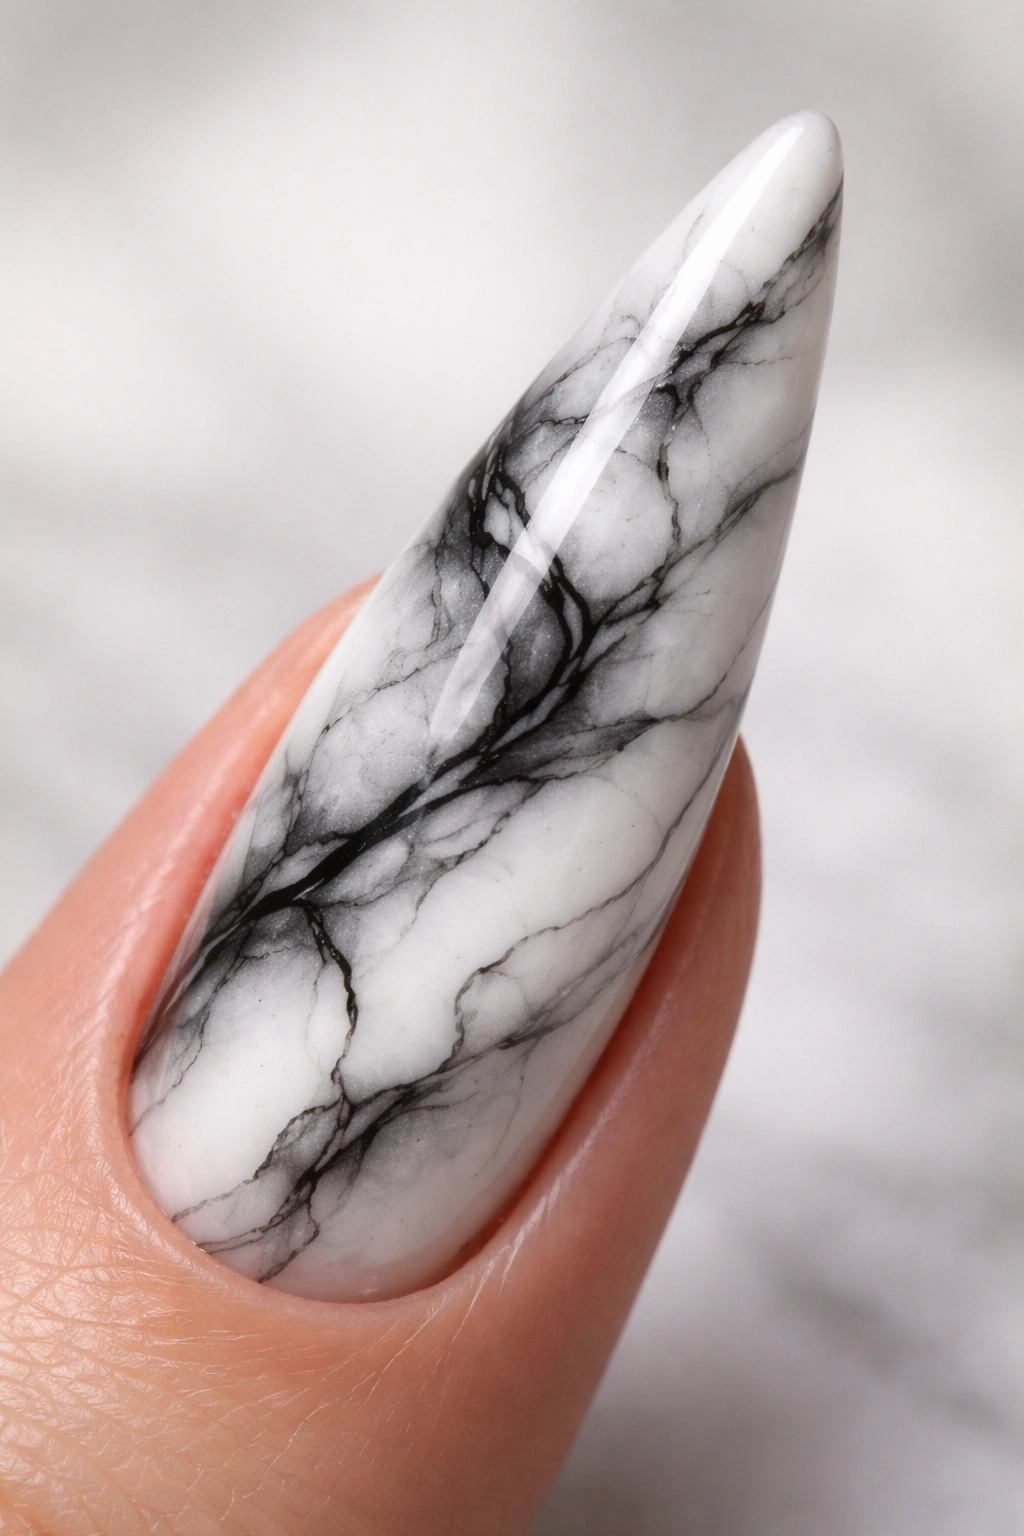
Marble is a timeless, sophisticated pattern, and the airbrush is an excellent tool for creating the organic, veined appearance of natural stone. Using black, white, and shades of gray, you can create a design that mimics the look of marble with soft color transitions and hand-painted vein details.
Capturing Natural Stone Realism
- Apply a white or off-white base coat—this is your marble foundation
- Using your airbrush with light gray, spray irregular patches across the nail, creating cloudy areas that suggest the natural variation of marble
- Layer darker gray and black in strategic areas, building depth and shadow
- Allow colors to merge and blend naturally—don’t aim for precision, aim for organic randomness
- Once the base is cured, use a very thin brush and dark gray or black polish to hand-paint delicate veins across the surface—follow the paths of your color transitions but make the lines fine and slightly irregular
- A glossy top coat completes the luxe marble look
Worth knowing: Marble designs look best when they’re large enough to be clearly visible—stiletto nails provide this scale beautifully. The elongated shape allows you to show off the complexity of the marble pattern across a larger surface area than you’d have on a shorter nail shape.
9. Glitter Gradient With Fine Metallic Dust

Combine the elegance of a gradient with the sparkle of glitter for a design that feels both refined and celebratory. Start with a subtle color gradient (such as nude to pink or champagne to gold), then layer fine metallic glitter, holographic dust, or star-shaped glitters to create texture and dimension without overwhelming the base design.
Layering Glitter Responsibly
- Create your smooth color gradient base first and cure it completely
- Use your airbrush to apply a thin layer of clear or nude-tinted glitter suspension (pre-made glitter products designed for airbrushing work best)
- Alternatively, hand-apply fine glitter to specific areas—the cuticle region, the tip, or along one edge—rather than covering the entire nail
- This creates a graduated glitter effect where sparkle is concentrated in some areas and minimal in others
- A holographic dust (applied dry with a small brush or misted with top coat) creates a subtle rainbow effect without being chunky
- Seal with a top coat to prevent glitter migration and create a smooth, glass-like finish
Pro tip: When airbrushing glitter products, use a lower air pressure and take more time—glitter can clog airbrush nozzles if sprayed too aggressively. Strain the product through a fine mesh before use to minimize debris.
10. Ombre With Negative Space and Line Art Details
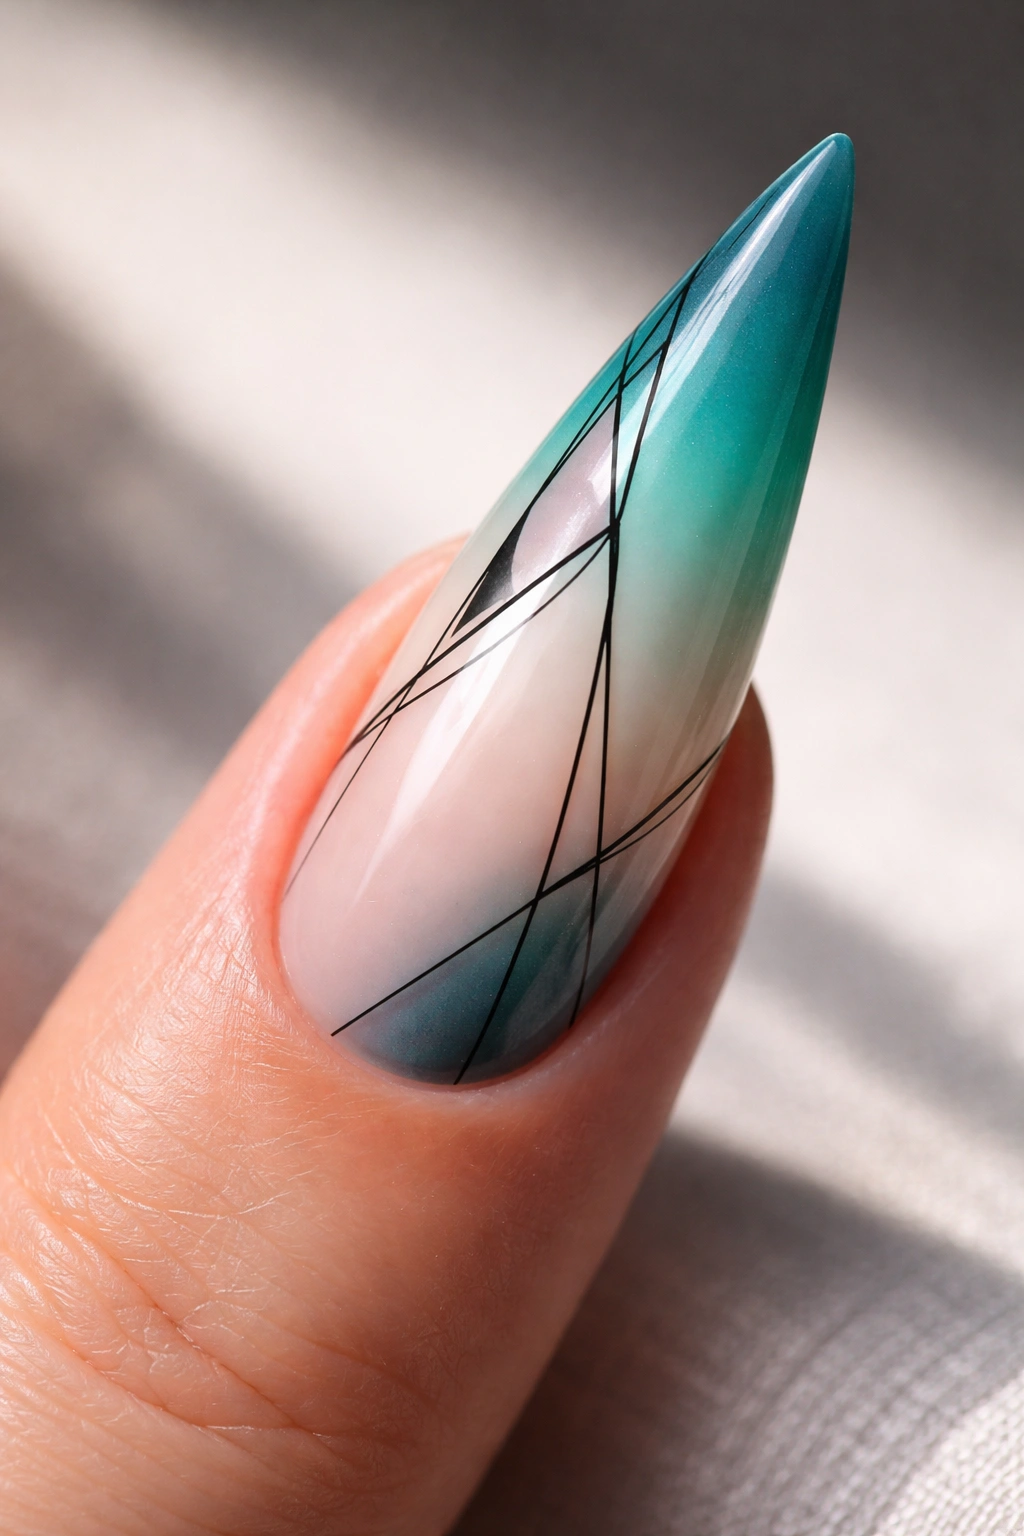
This design combines the soft, blended qualities of an ombré with the precision and modernity of geometric line art. Create an ombré gradient (such as teal to white or blush to champagne), then incorporate thin, precise lines or minimalist geometric shapes that cut through the gradient, creating intentional negative space and visual interest.
Combining Techniques for Maximum Impact
- Build your ombré base—let’s say a soft teal to white gradient
- Once fully cured, use thin vinyl stencils or tape to create geometric patterns: thin lines running the length of the nail, geometric triangles in one corner, or a delicate grid pattern
- Using black or a contrasting dark color, spray over the exposed areas carefully to create precise lines and shapes
- The negative space (where no color is sprayed) reveals the polish beneath, creating a layered, sophisticated look
- Remove tape or stencils carefully, and assess your lines—they should be clean and intentional
- The combination of soft ombré and hard geometric lines creates visual tension and prevents the design from feeling too sweet or feminine
Insider note: This design works beautifully as an accent nail look where only one or two nails feature the full ombré-plus-line-art treatment, while the other nails showcase just the ombré. This creates a cohesive, coordinated set that doesn’t feel overdone.
Final Thoughts

Airbrush stiletto nails occupy a special place in nail art—they’re dramatic enough to make a real statement, yet the precision and blending capabilities of airbrushing allow you to execute sophisticated designs that feel polished and intentional rather than overdone. The elongated surface area of a stiletto nail becomes an advantage, not a limitation. It gives you room to layer colors, create gradients that flow naturally, and showcase intricate details without the design feeling cramped or chaotic.
The designs covered here are starting points. Each one can be customized endlessly—adjust colors to match your wardrobe or mood, add personalization through hand-painted details, or combine elements from multiple designs to create something entirely your own. With an airbrush, an understanding of technique, and the willingness to practice, stiletto nails become your personal gallery of wearable art.
