

If you’re looking for a nail design that genuinely turns heads, zebra print duck nails hit that perfect intersection of bold, playful, and sophisticated all at once. The duck shape—that extended, slightly curved tip—already commands attention, but when you layer in the high-contrast graphic punch of zebra stripes, you’ve got something that works for fashion-forward everyday wear, special occasions, or just days when you want your nails to be the conversation starter.
The beauty of this combination is how endlessly adaptable it is. You can go classic with crisp black and white stripes, or venture into unexpected color territories that make the design feel entirely fresh. The duck nail shape elongates your fingertips and creates visual drama, while the zebra print adds movement and graphic interest that keeps the style from ever feeling boring or one-dimensional.
What makes zebra print duck nails so compelling is how they balance wildness with wearability. The stripe pattern is graphic and eye-catching, but it’s also sophisticated enough to work in professional settings or elegant occasions. The duck shape adds that extra touch of personality without crossing into costume territory. Here are twelve genuinely distinct ways to interpret this style, each with its own visual signature and wear potential.
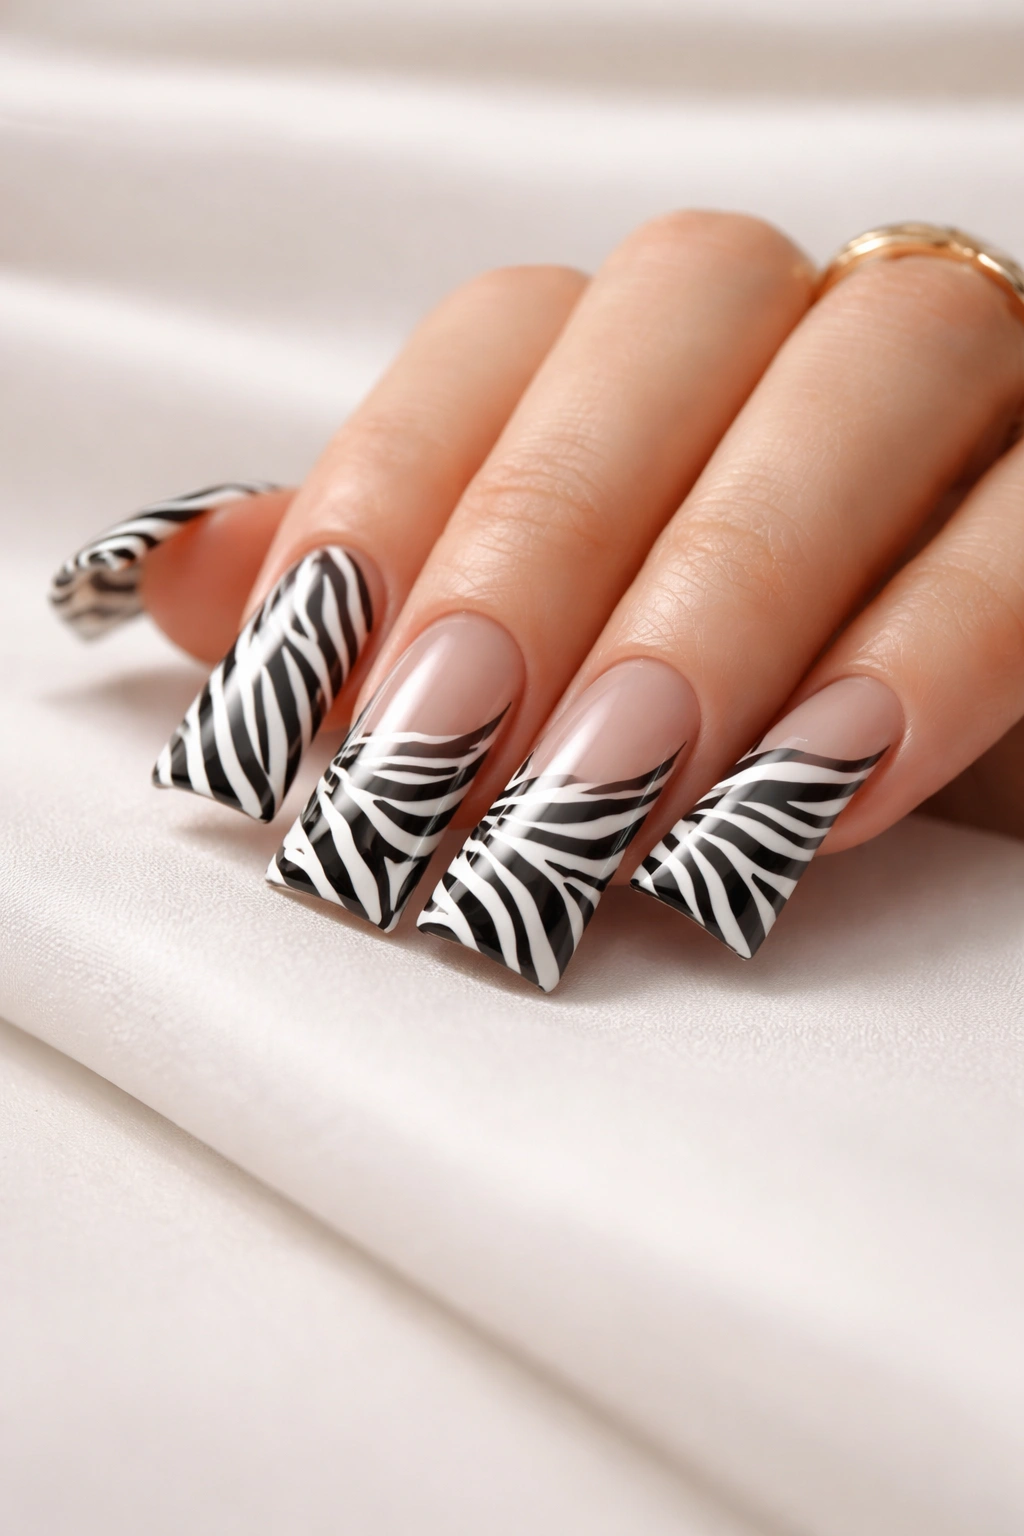
1. Classic Black and White Zebra Stripes
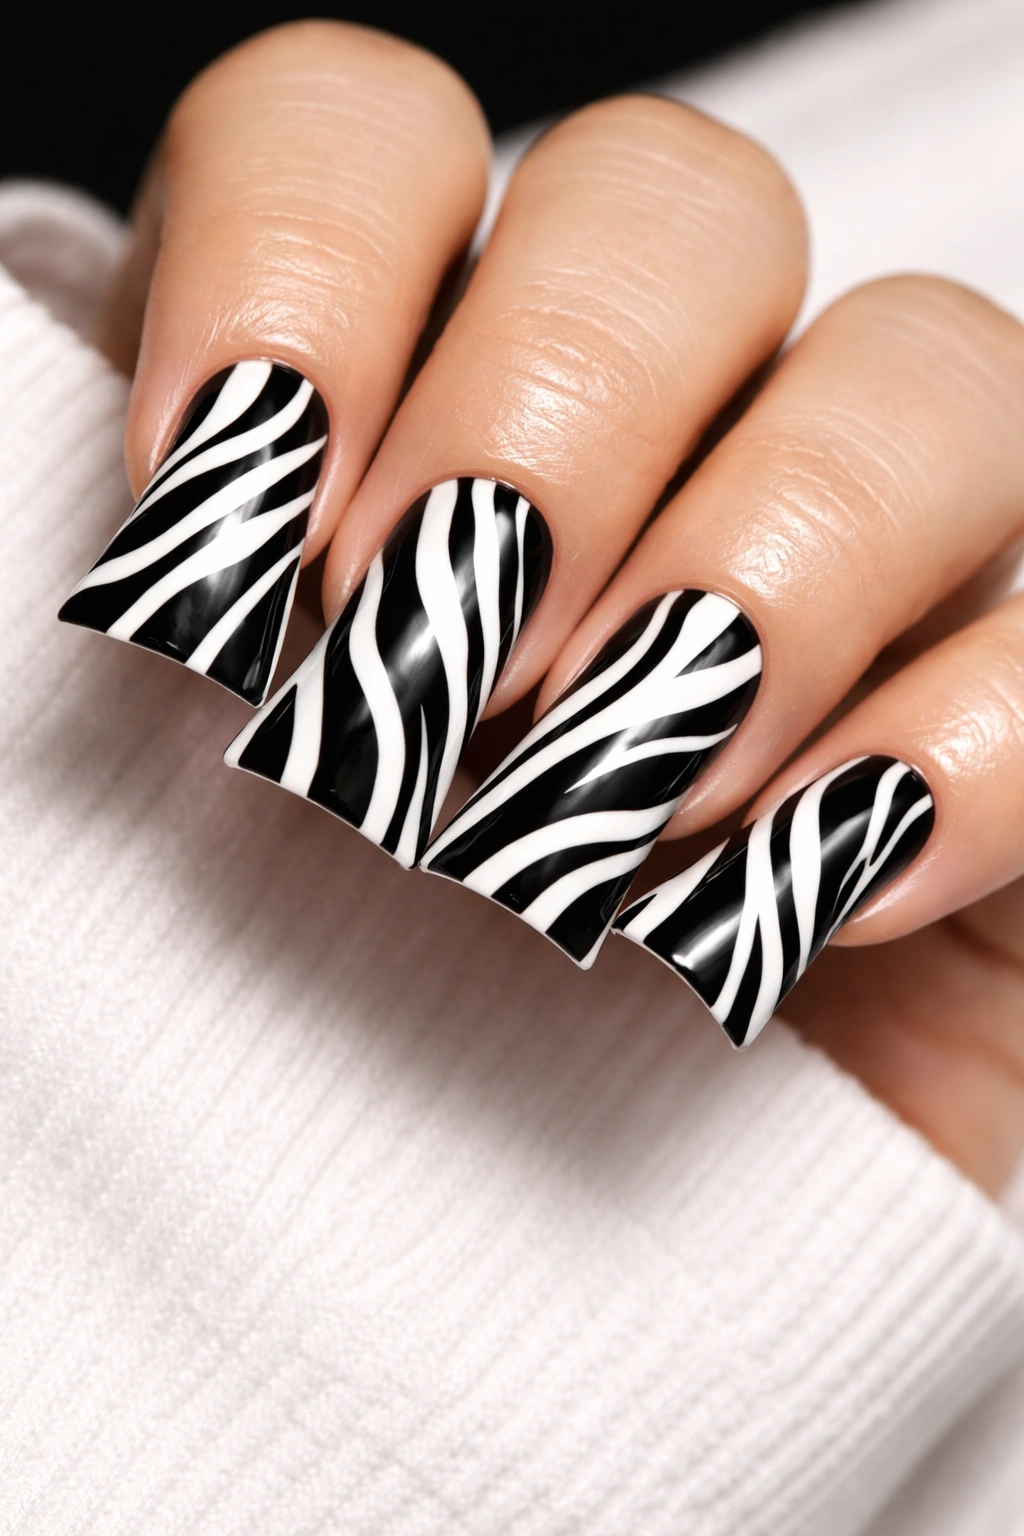
The timeless version—pure black and white in razor-sharp, evenly spaced stripes—is where most people start, and honestly, it’s the version that never gets old. The contrast is maximum, the graphic impact is undeniable, and there’s something inherently chic about the restraint of a true two-color palette.
Why This Remains the Gold Standard
The classic black-and-white combo works because it’s genuinely high-contrast without requiring any color-mixing decisions. Each stripe reads with absolute clarity, and the pattern stays visible from across a room. The simplicity actually demands precision—there’s nowhere to hide with just two colors—which means a well-executed black-and-white zebra stripe speaks volumes about the quality of the manicure itself. The ducks nails create the perfect canvas for these bold geometric stripes because the width and length of the nail lets you fit enough stripes to create genuine pattern density without overcrowding.
What to Know Before You Try It
- A steady hand or access to a skilled nail artist becomes non-negotiable with this design; uneven stripes immediately stand out against pure white
- Matte topcoat finishes intensify the graphic punch, while glossy finishes make the stripes feel more modern and streamlined
- The stripe width matters more than you’d think—wider stripes read as bolder and more graphic, while thinner stripes create a busier, more intricate feeling
- White polish as a base tends to be trickier to apply evenly than off-white or cream; don’t be afraid to adjust slightly toward warmer undertones if you’re painting at home
- Pro tip: If you’re DIY painting, lay down your white base, let it fully cure and harden, then do a light buff with a soft file to give the surface just enough tooth for your black stripes to adhere cleanly without dragging or pulling the white underneath.
2. Reverse Zebra with Gold Accents
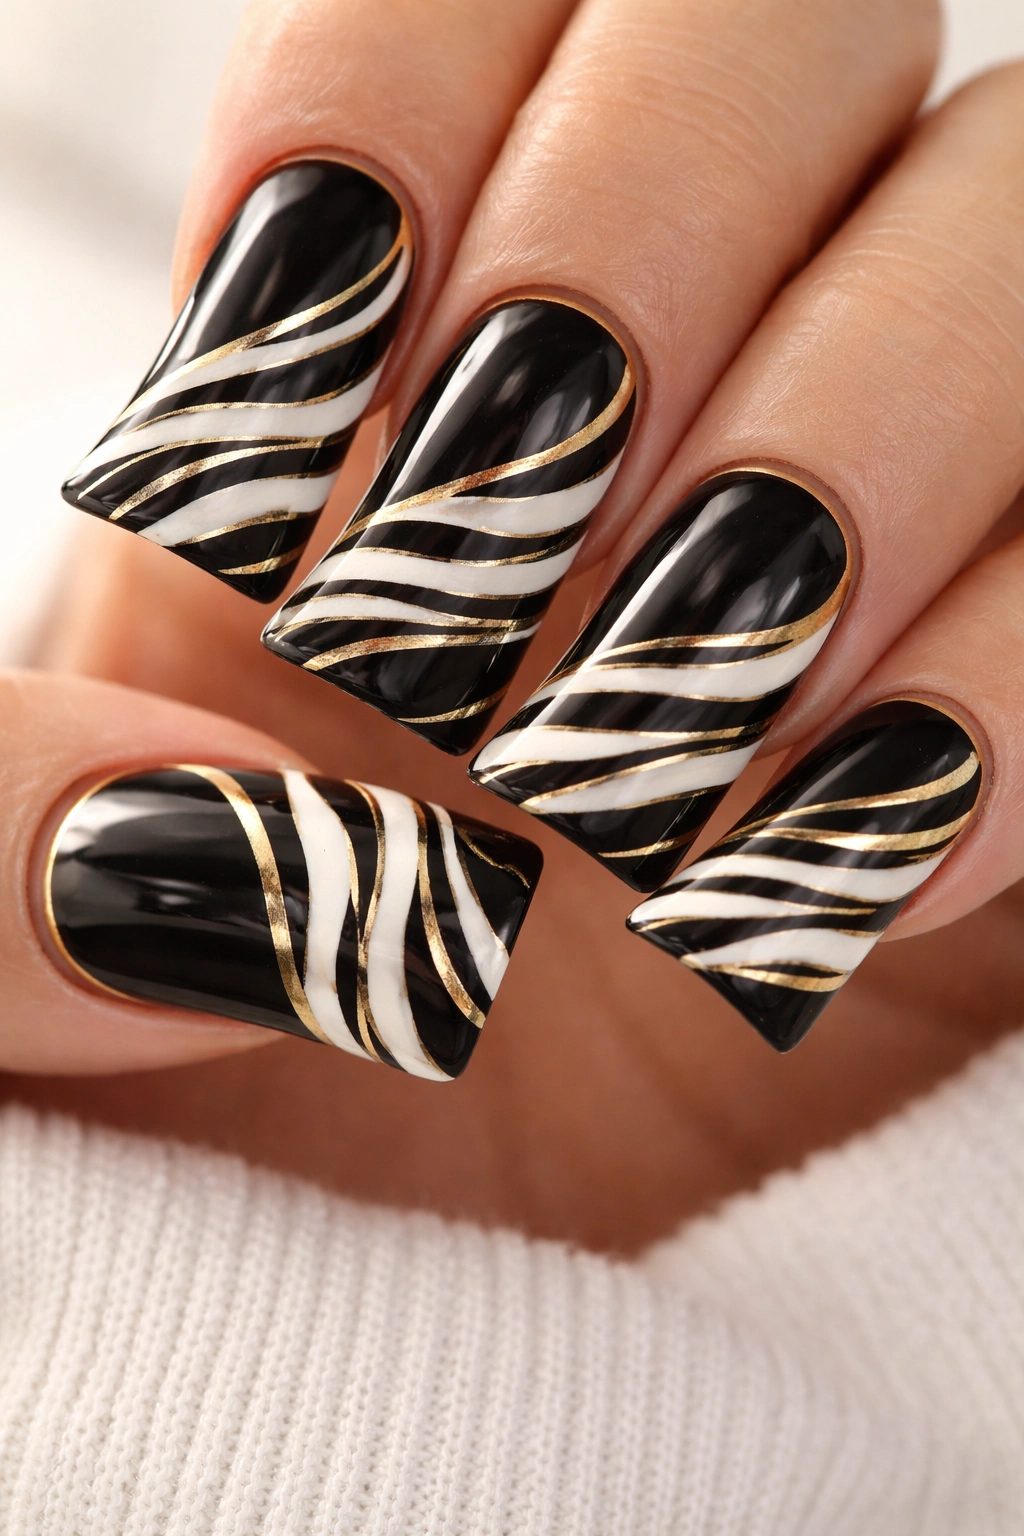
Flip the traditional ratio by making your base color black or very dark charcoal, then adding white stripes with thin metallic gold lines running parallel to or intersecting the white bands. This version feels immediately more elevated and works beautifully for evening wear or any occasion that calls for a touch of glamour.
Why Gold Lifts Everything
Adding gold to the equation transforms the whole vibe from playful-graphic to genuinely luxurious. Gold catches light in a way that simple white doesn’t; it adds dimension and sparkle without being glittery or overdone. The thin gold stripes create visual interruption within the pattern that makes it feel more intentional and designed rather than randomly applied. On duck nails, this metallic element draws attention to the nail shape itself—the gold lines follow the contours and curves, creating a flattering effect that actually enhances hand appearance.
How to Execute It Well
- Use a thin liner brush or a very fine striping tool for the gold lines; thicker gold stripes can overwhelm the pattern and make it feel costume-like rather than refined
- Gel polish with embedded metallic pigments (rather than metallic topcoats layered on top) tends to look more cohesive and prevents the metallic elements from sliding around
- A matte black base with glossy white stripes and matte gold accents creates interesting texture variation that makes the design feel more sophisticated
- The gold works best when it’s genuinely metallic rather than warm yellow—true gold or champagne tones integrate with the color scheme far better than mustard or brass
- Worth knowing: If you’re doing this at home, let each color fully cure completely before adding the next layer, or you’ll risk the colors blending together instead of creating clean, distinct lines.
3. Pink and White Zebra with Ombre Gradient
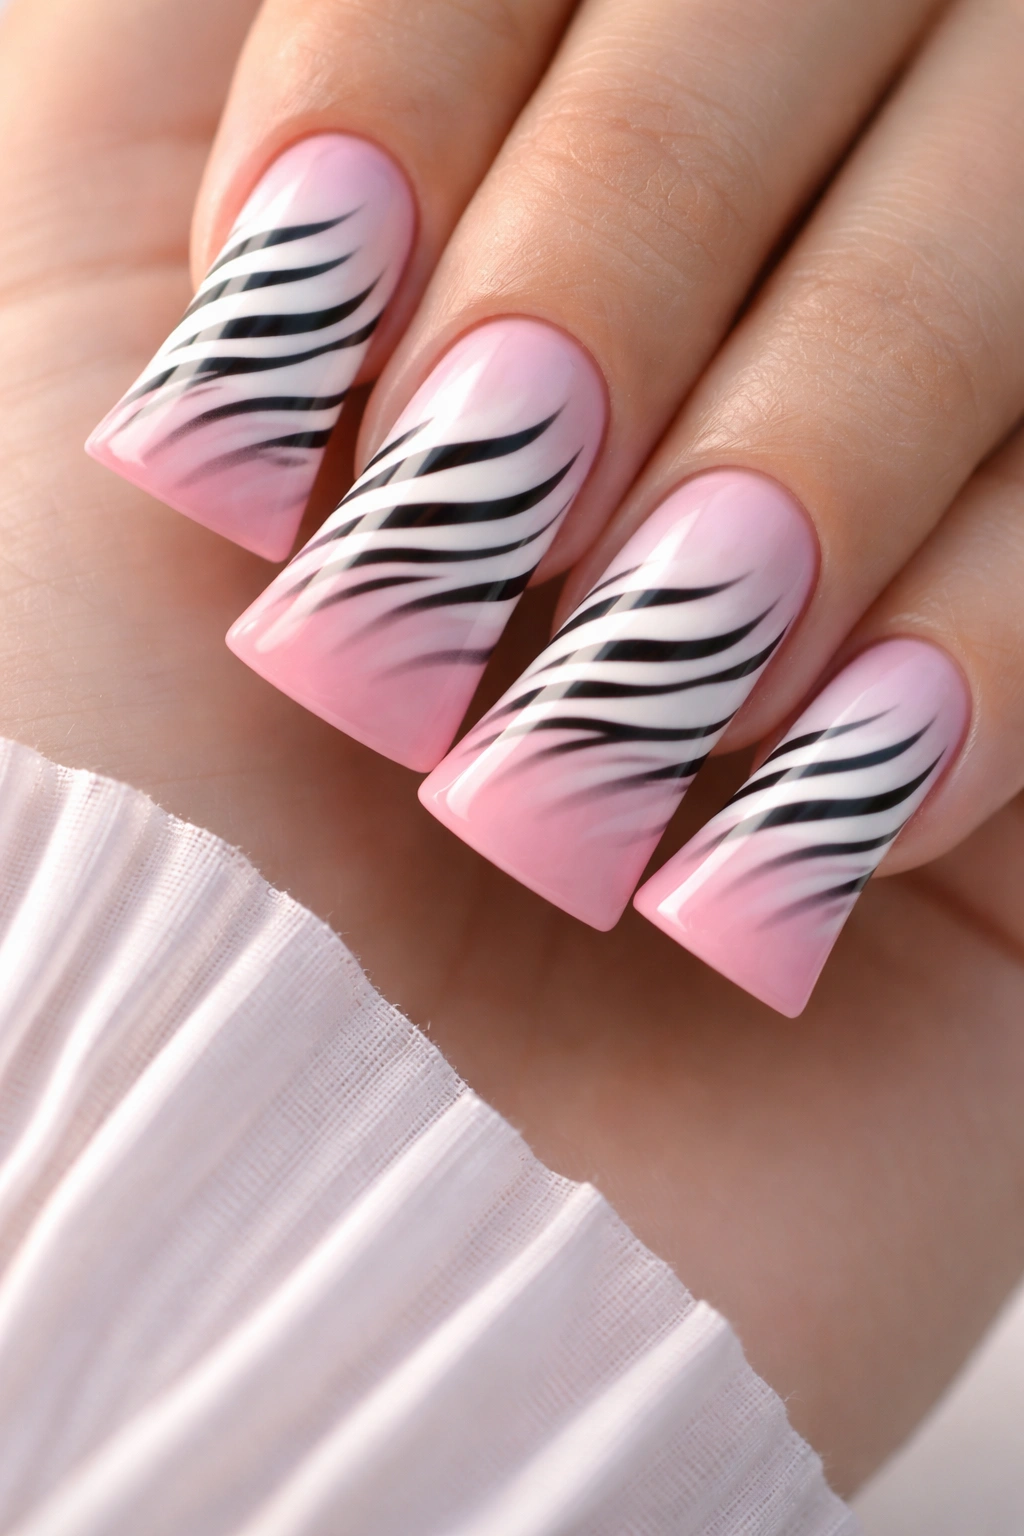
Create traditional black-white zebra stripes, but make them gradient—starting as thin, crisp stripes at the base of the nail and gradually widening and bleeding into soft pink hues as they extend toward the tip. This version keeps the graphic punch of zebra print while adding a romantic, ombré softness that feels fresh and modern.
Why Gradient Stripes Feel Contemporary
Gradient ombré effects have become incredibly popular in nail design because they inherently soften any pattern they’re applied to. When you take something as bold and graphic as zebra stripes and blend them into a color gradient, you create visual movement that’s captivating—the eye travels across the nail in a way that static patterns don’t achieve. On duck nails, this effect is particularly striking because the extended length gives the gradient space to develop and transition smoothly without feeling rushed or cramped. The softness of the pink counterbalances the boldness of the zebra pattern perfectly.
Technical Execution
- Start with a white base polish and apply your black stripes at the cuticle area with standard width and spacing
- Transition into your gradient using a dry brush or sponge method, applying pink polish directly to a makeup sponge and stippling it onto the nail to create the blend
- The stripes should gradually become less defined as they approach the tip, finally dissolving into solid pink at the very edge
- Use a top-coat designed for ombré work to help blend and smooth the transition between colors
- The nail length of duck nails is essential here—shorter nails don’t provide enough space for the gradient to develop naturally
- Pro tip: If your gradient looks too abrupt, add a layer of very diluted pink polish (mix pink with clear gel in a 1:2 ratio) over the transition zone to soften the line between solid stripes and pure pink.
4. Gold and Black Zebra with Matte Finish

Combine rich black with warm gold or champagne-toned stripes, then seal the entire design with a matte topcoat for a finish that feels understated, sophisticated, and distinctly upscale. This version reads as intentionally elegant rather than bold or playful—perfect if you love the pattern but want it to feel more subtle in a professional or formal context.
What Matte Topcoat Actually Changes
Matte finishes completely transform how a pattern reads visually. Glossy nails feel contemporary and punchy; matte finishes feel intentional, artistic, and refined. When you apply matte topcoat over gold-and-black stripes, the gold loses its reflective shine and takes on a warmer, more velvety quality. The black becomes more of a true noir instead of a reflective surface. Together, they create a design that feels sophisticated and understated while still being graphically interesting—this is the zebra print equivalent of wearing an elegant piece of jewelry that doesn’t shout but speaks volumes to anyone who’s paying attention.
Application Details
- A truly opaque matte finish requires a good quality matte topcoat—cheap versions can look chalky or patchy instead of velvet-smooth
- Apply matte topcoat evenly and completely to seal in your design; any glossy spots that remain will break the overall effect
- Matte finishes can show fingerprints slightly more than glossy ones, so consider applying a thin glossy topcoat over the matte for durability and finger-smudge resistance
- The stripe width should remain consistent for a sophisticated feeling—varied stripe widths can make the matte finish look unfinished or intentionally distressed
- Duck nail shape actually benefits from matte finish because it emphasizes the clean lines and curved contours without the reflectivity that can sometimes make longer nails feel overly statement-making
- Worth knowing: Matte topcoat is trickier to remove than glossy—budget extra time for removal and use acetone rather than gentler polish removers to avoid excessive soaking.
5. Purple and White Zebra Stripes
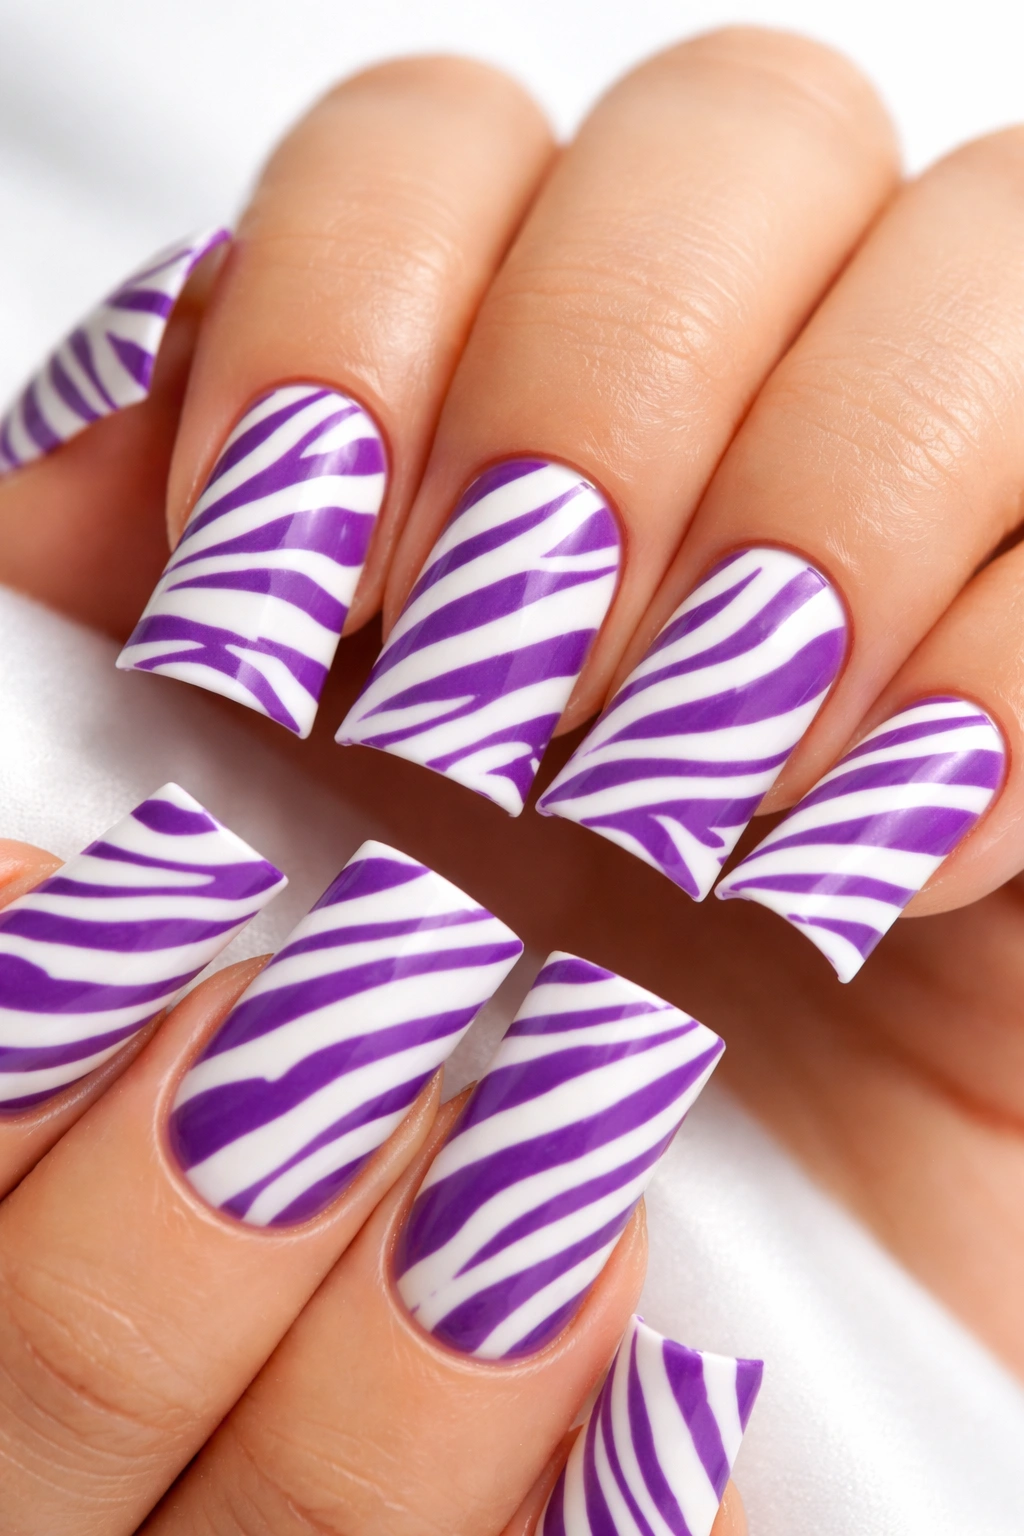
Move away from the classic black entirely and paint your stripes in a deep eggplant, royal purple, or rich plum shade against a crisp white base. This color combination feels bold and unexpected while maintaining that graphic punch that makes zebra print so visually interesting.
Why Purple Changes the Entire Energy
Purple carries an inherent sophistication that black doesn’t quite have—it feels fashion-forward, slightly bold, and decidedly intentional. When you apply purple stripes against white, you’re making a clear design choice rather than reaching for the expected. Purple also works beautifully across different skin tones and seasonal color palettes in ways that pure black sometimes can’t. It adds visual warmth without reading as warm-toned, which makes it surprisingly versatile. On duck nails, purple stripes create a pattern that’s still eye-catching but feels more curated and less purely graphic-bold.
Selection and Application
- Choose your purple shade carefully—a blue-toned purple feels cool and modern, while a red-toned purple feels warmer and more romantic
- Royal purple stripes read as bolder than soft lavender stripes; if you want subtle, go lighter; if you want drama, go deeper
- The white base is crucial here—off-white or cream will mute the purple and make the whole design feel less punchy
- A glossy topcoat makes the purple stripes pop with depth and richness, while matte topcoat makes them feel velvety and more subdued
- Purple can photograph with color-cast issues depending on lighting; in natural light it reads true, but under artificial light it might shift toward blue or pink
- Pro tip: If you’re concerned about purple staining your nails or if you have naturally yellowing nails, use a quality base coat barrier and consider using purple gel polish rather than traditional lacquer for cleaner results.
6. Coral Orange and Cream Zebra with Geometric Twist
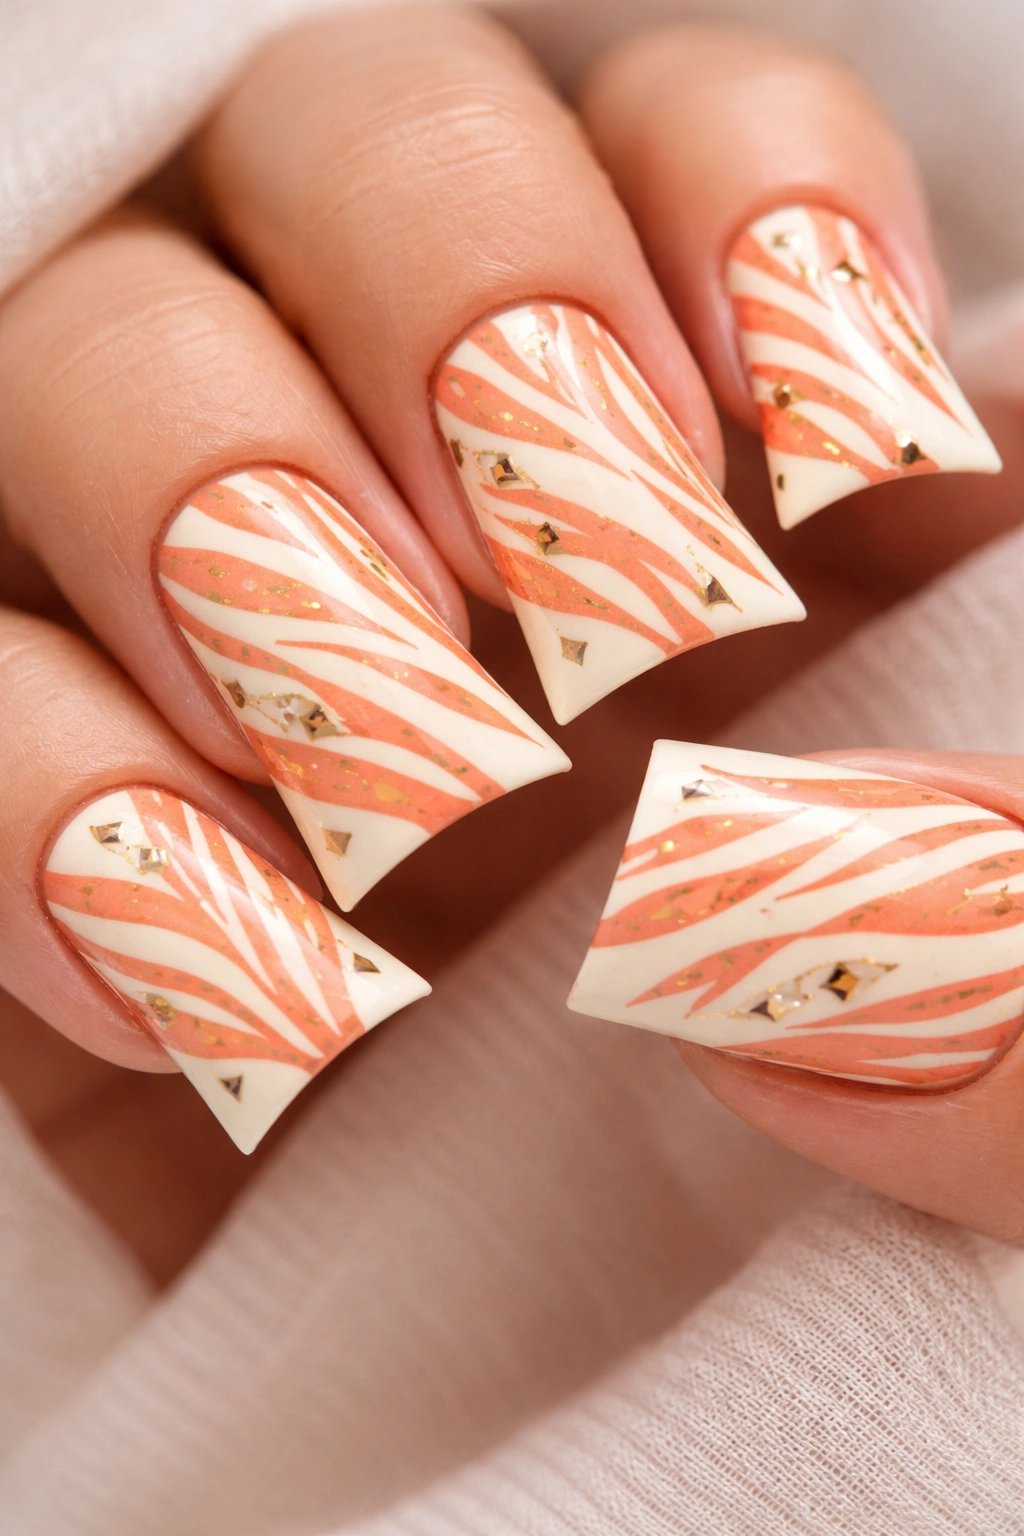
Create your zebra stripes using a vibrant coral-orange against a soft cream base, then add tiny geometric shapes (diamonds, triangles, or small circles) at strategic points along the stripes. This version maintains the zebra print identity while adding an extra layer of pattern play that feels contemporary and artfully layered.
How Layered Patterns Create Visual Interest
When you combine two patterns—the organic flow of zebra stripes with the structured precision of geometric shapes—you create a design that feels more thoughtfully composed and less purely decorative. The geometric elements should appear intentional, not random; they might sit at regular intervals along each stripe or cluster in the corners of the nail. This layering elevates the design from simple pattern to curated artistic statement. Coral and cream is a particularly warm, inviting color combination that works across seasons and skin tones, and the additional geometric layer makes the design feel current and design-forward.
Execution Approach
- Plan your geometric placement before painting—sketch lightly with a pencil or mark with a dotting tool so you’re not adding shapes haphazardly
- Keep the geometric shapes small relative to the overall nail (aim for elements that are 2-3mm, not dominating the design)
- Use the same coral polish for your geometric shapes as you’re using for stripes so they feel cohesive with the overall pattern
- Matte geometric shapes against glossy stripes create interesting texture variation, or keep everything glossy for a unified, seamless finish
- The cream base should be warm and slightly peachy to harmonize with the coral rather than being a true cool cream
- Worth knowing: Adding multiple pattern layers requires a steady hand or professional expertise—this isn’t an ideal design for DIY if you’re not comfortable with finer details, but it’s absolutely achievable with practice.
7. Navy and Nude Zebra Stripes
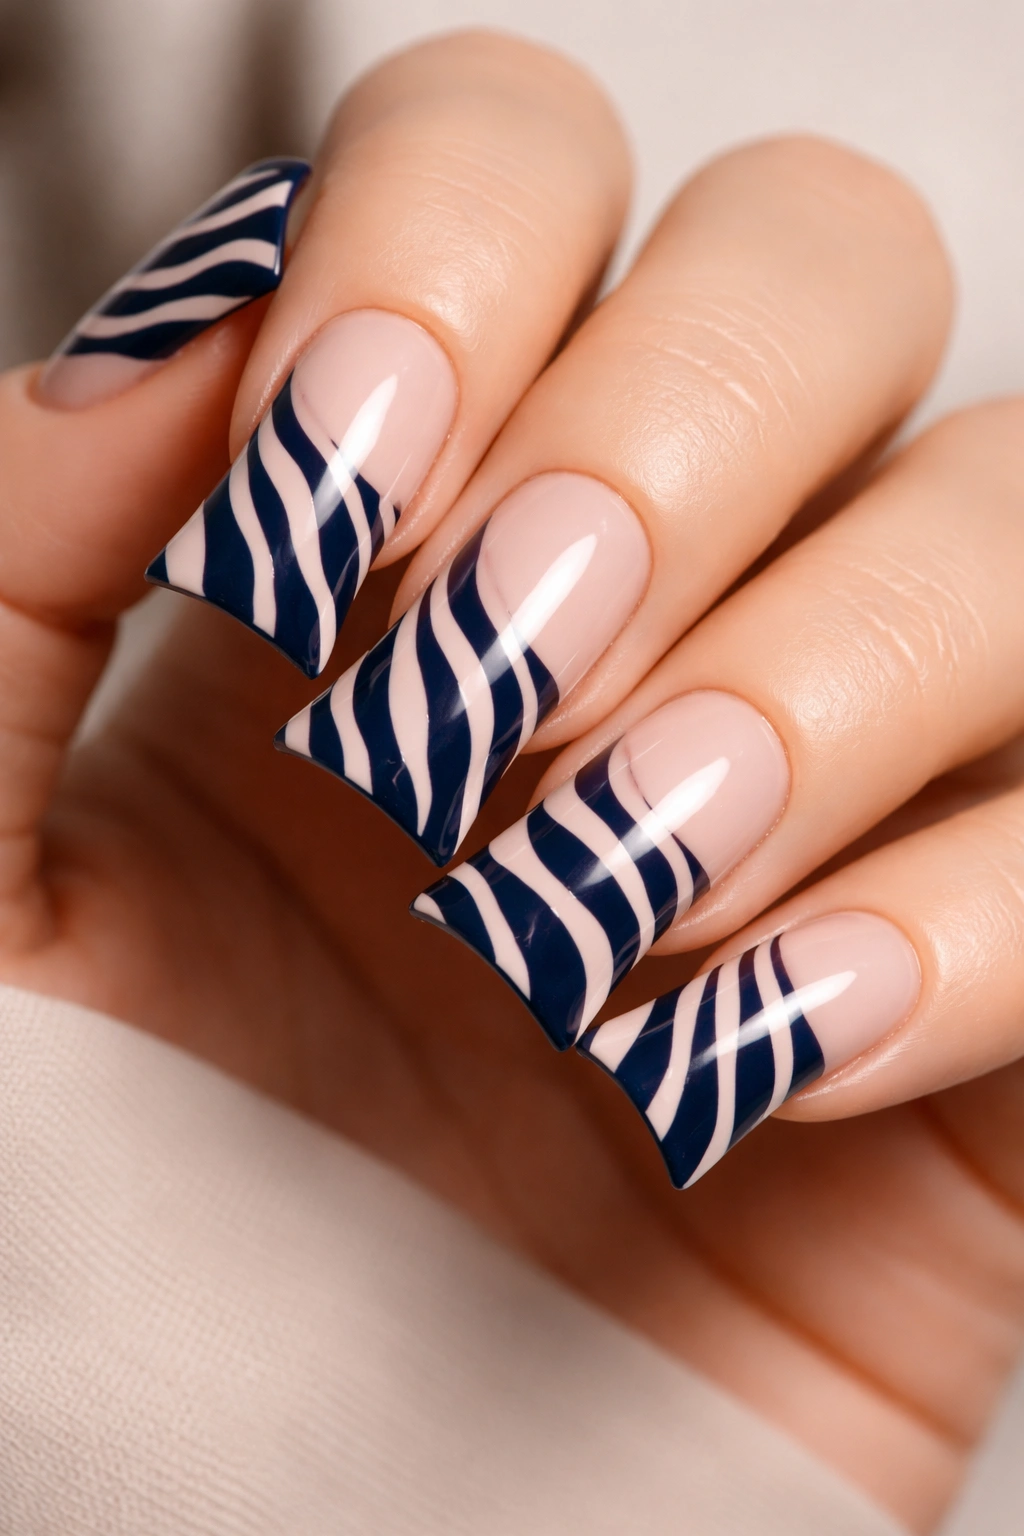
Paint rich navy stripes against a soft, skin-toned nude base for a version that feels naturally sophisticated and works beautifully in professional environments while still being visually interesting and distinctly fashionable. This color pairing is classic without feeling boring because the zebra stripes add that graphic punch.
Why Navy-and-Nude Works Universally
Navy is sophisticated and grounding, while nude is universally flattering and creates the illusion of elongated fingers. Together, they create a combination that’s professional-elegant rather than statement-bold. The contrast is present—navy against nude is clearly visible—but it’s more subtle than black and white, making this version ideal if you love the zebra print design but need something that works in conservative professional settings. Navy also develops an almost jewel-tone quality on the nail that upgrades the overall feeling beyond simple black stripes.
Color and Application Considerations
- Your nude base should match or be slightly darker than your actual skin tone for maximum flattering elongation effect
- If you have deeper skin, a warm, cocoa-toned nude works better than a pale pink-nude
- Navy should be a true navy (not blue, not black) with slight depth and richness
- The stripe width can be slightly wider than with black-and-white without losing sophistication
- A glossy finish keeps this combination feeling current and polished; matte can read as more retro or intentionally vintage
- Gel polish versions of both navy and nude tend to photograph more accurately with true color than traditional lacquers
- Pro tip: Navy can occasionally have a slightly blue cast under certain lighting—if this bothers you, opt for a navy with a tiny bit of purple undertone (navy-plum) which photographs and looks more consistently true across lighting conditions.
8. Holographic Zebra Stripes Against Solid Black
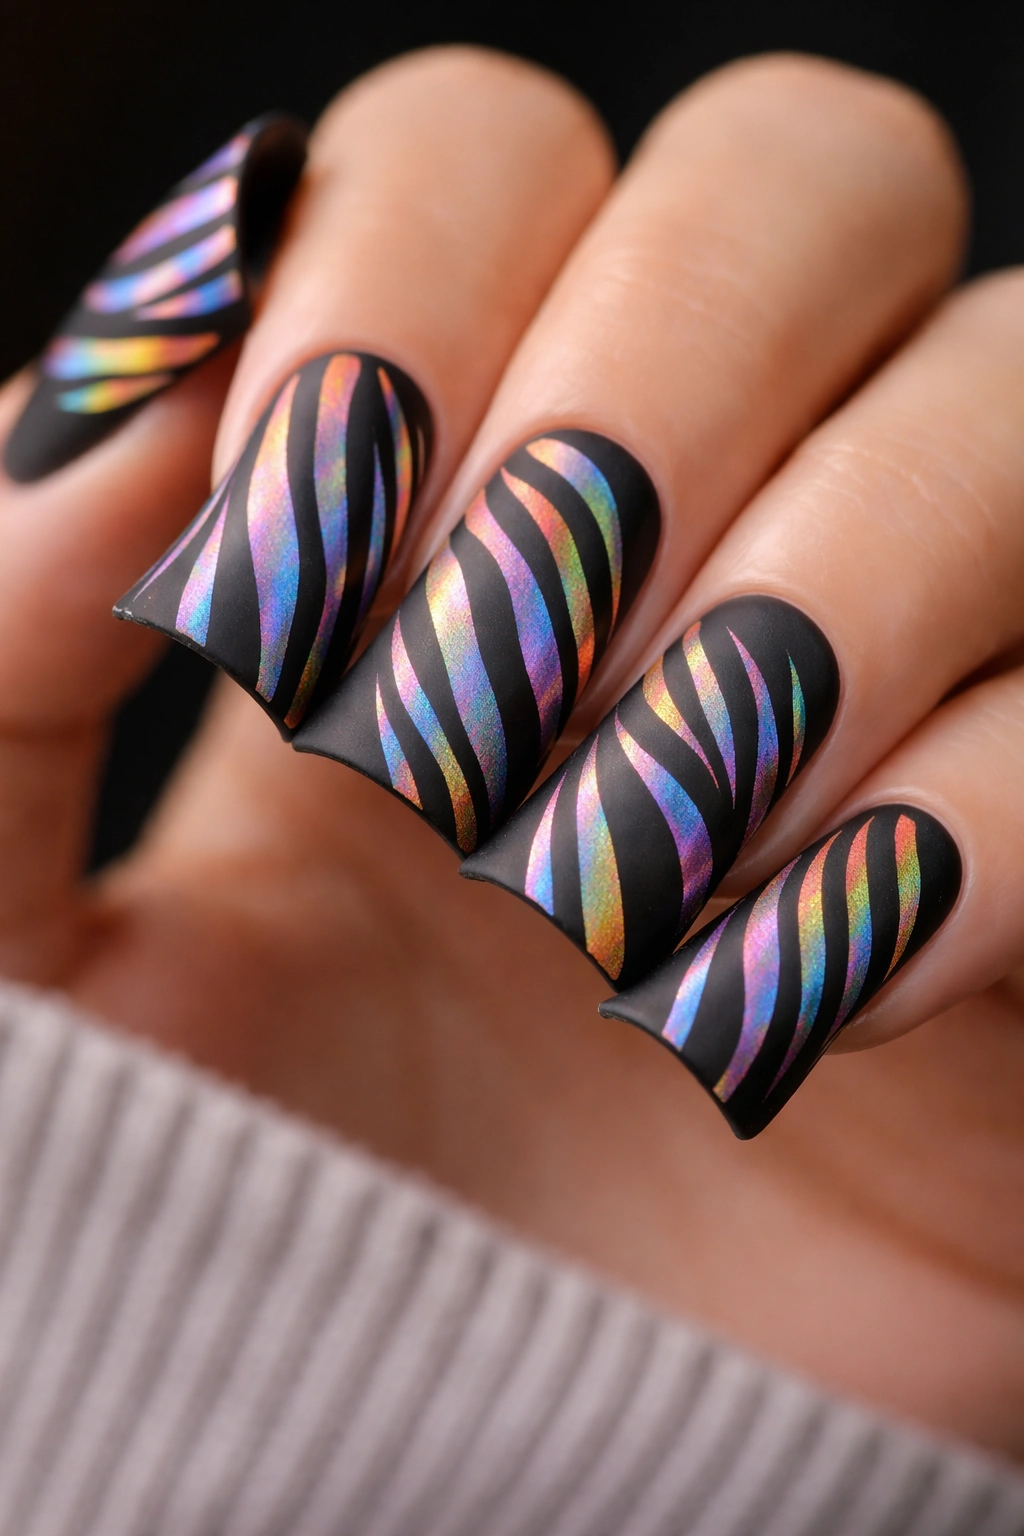
Create your zebra stripes using holographic or color-shifting polish that transforms across the rainbow as the nail moves and catches light, set against a matte black background. This version is dramatic, modern, and genuinely eye-catching in a way that static colors simply cannot achieve.
Why Holographic Creates Movement
Holographic finishes contain tiny, reflective particles that create rainbow light-play across the entire stripe as the nail moves. Against a matte black base, this effect is particularly striking—the static black emphasizes how dynamic the holographic stripes are. This design works beautifully for anyone who loves nails that photograph interestingly and feel different in person versus in photos. The duck nail shape gives the holographic effect more surface area to play across, and the curved tip catches light in particularly flattering ways that makes the effect feel three-dimensional and intentional rather than gimmicky.
Technical Specifics
- Holographic polishes vary dramatically in quality—cheaper versions are barely visible, while premium versions create genuine rainbow light-play
- Apply holographic polish in thin layers and build opacity gradually; thick layers of holographic can look muddy instead of shimmery
- A black base must be absolutely opaque—any patchy areas will make the holographic stripes look inconsistent
- Matte topcoat over holographic kills the effect; use glossy topcoat to maintain the light-reflecting quality
- Holographic polishes are often somewhat translucent, so you may need 2-3 thin layers to achieve full opacity and strong color effect
- The stripe application requires precision—slightly wobbly lines become less noticeable with glossy finishes but stand out clearly with reflective, light-catching holographic stripes
- Worth knowing: Holographic polishes can be prone to staining, so use a quality base coat and allow full curing time before applying topcoat to prevent color transfer.
9. Soft Pink and Rose Gold Zebra Stripes
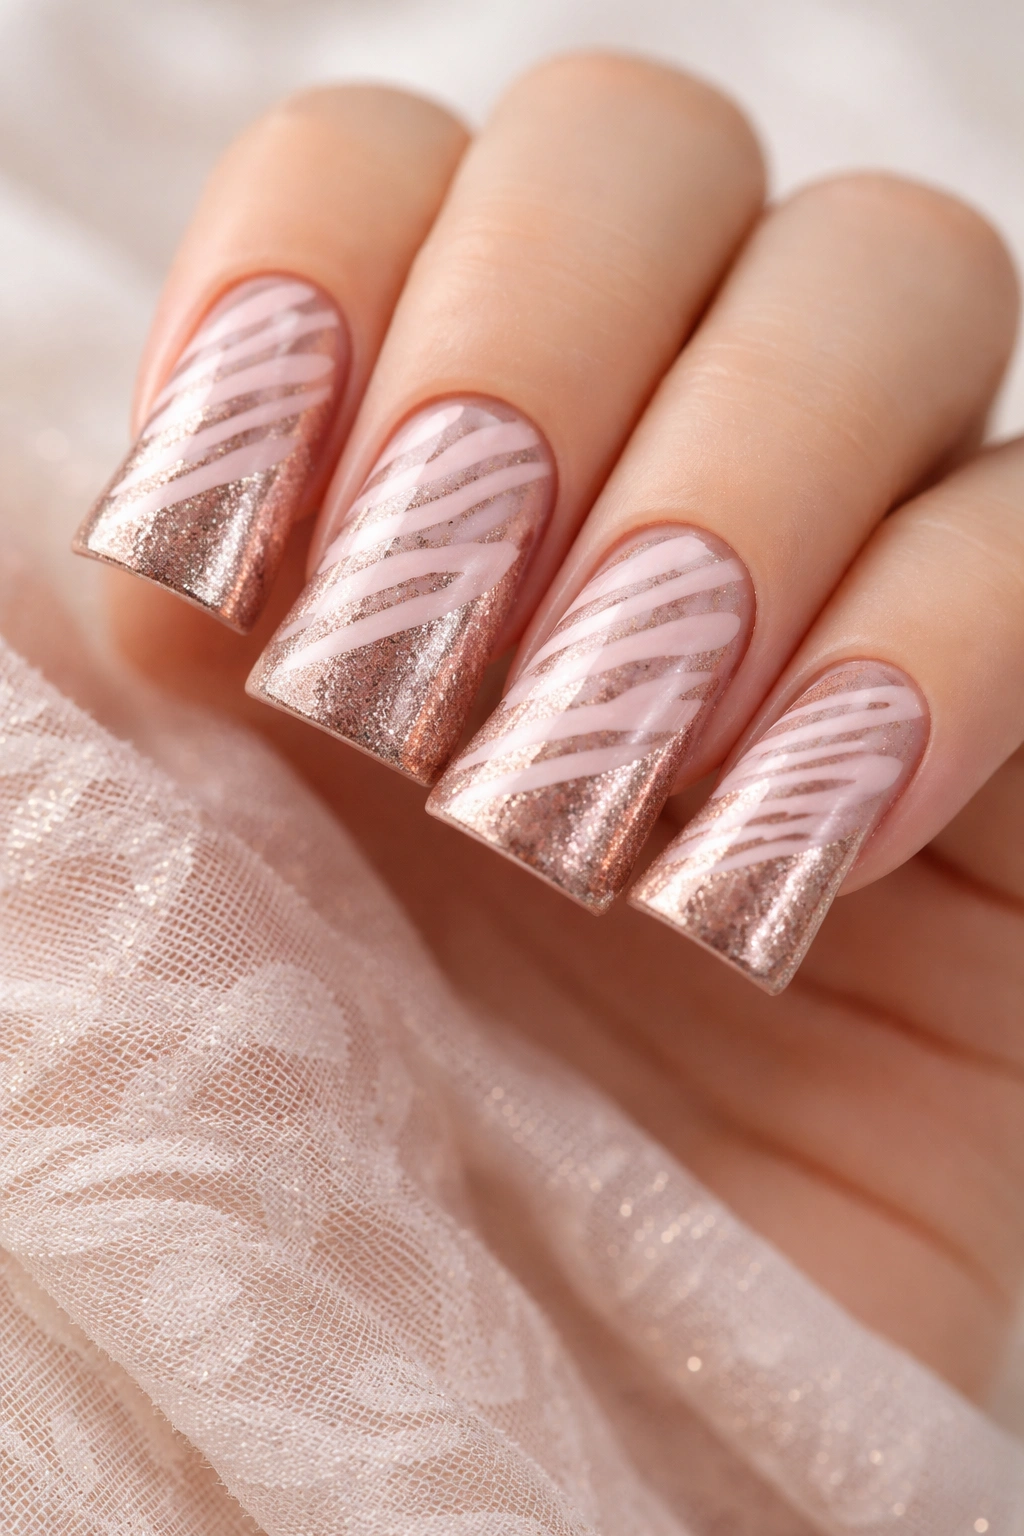
Combine delicate pale pink stripes with a warmer rose gold base, creating a design that feels romantic, feminine, and sophisticated without veering into costume or overly cutesy territory. This color palette is particularly flattering and works beautifully across seasons.
Why Rose Gold Elevates Soft Pink
Soft pink alone can read as baby-like or very young; rose gold alone can sometimes feel trendy-temporary. Together, they create something that transcends those limitations. The rose gold provides warmth and a subtle metallic quality that adds dimension, while the pink stripes keep things soft and romantic. The combination feels intentionally curated rather than simply decorative. Rose gold has exceptional skin-tone compatibility—it flatters warm, cool, and neutral undertones equally well, making this a genuinely universal design choice. On duck nails, this softer color palette actually emphasizes the elegant length and curve of the shape without the boldness that darker zebra stripe versions create.
Selection and Layering
- Rose gold works better as a metallic base than as actual gold-pink; if you want true rose-gold coloring, consider a nude-pink with rose-gold shimmer rather than a pink base with rose-gold stripes
- Your pink stripes should be noticeably lighter than the base so the zebra pattern reads clearly; otherwise the design can look like a solid, shimmery color from a distance
- A glossy topcoat is essential here—the metallic quality of rose gold is what makes this combination special, and matte finishes kill that effect
- The stripe width can afford to be slightly thinner with this softer palette since the color contrast isn’t as high as with darker versions
- Pale pink polish can be tricky to apply evenly—it sometimes reads as patchy or streaky, so invest in a high-quality pink base coat
- Pro tip: If your pale pink is showing streakiness, apply it in very thin layers and cross-hatch your application direction on each layer—this prevents visible brush strokes and creates more even opacity.
10. Teal and White Zebra with Accent Nail
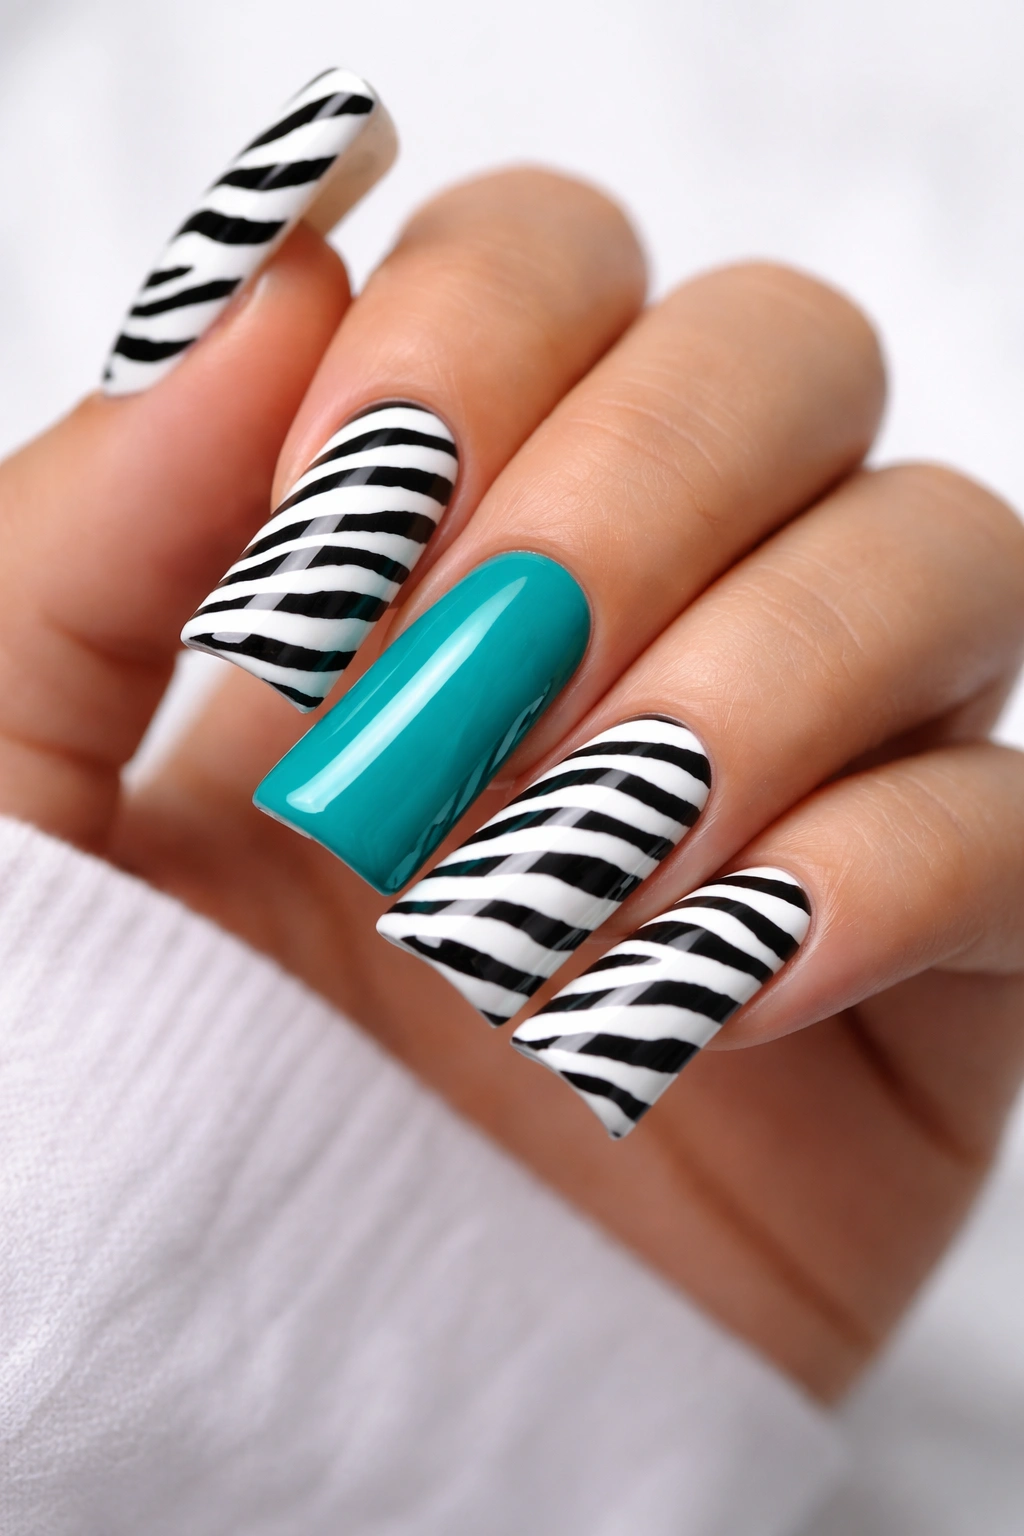
Create traditional black-and-white zebra stripes on most nails, but dedicate one accent nail (usually the ring finger) to a solid teal or deep turquoise color. This approach gives you the bold zebra pattern while creating visual balance through strategic color placement.
Why Accent Nails Work With Bold Patterns
Wearing a full set of zebra-striped nails can feel slightly intense after a while—your hands become very pattern-forward and bold. Adding one solid accent nail in a complementary color creates visual rest and sophistication. Teal is particularly smart as an accent color because it’s unexpected but harmonious; it contains blue and green tones that create visual balance without clashing. This approach is also practical—it lets you enjoy the bold pattern while maintaining an overall look that feels more refined and intentional. The accent nail draws attention and becomes a focal point, which can actually be flattering for hand shape depending on which finger you choose.
Strategic Implementation
- Your teal accent nail should be equally long and shaped the same as your zebra-striped nails for visual cohesion
- Teal works best when it’s true teal (blue-green balance) rather than overly blue or overly green
- The teal accent nail can be solid, or you can add a subtle element like a thin gold line or a metallic topcoat to tie it visually to your other nails
- Glossy topcoat on both zebra and accent nail creates unity; if you use matte on the stripes, consider matte on the accent as well
- Ring finger is the traditional accent nail placement, but index or middle finger works beautifully if you prefer
- Worth knowing: Teal can occasionally have a blue-cast that photographs differently in different lighting—warm-toned teal (leaning slightly green) tends to photograph more accurately than cool-toned teal.
11. Ombre Zebra Gradient From Black to White
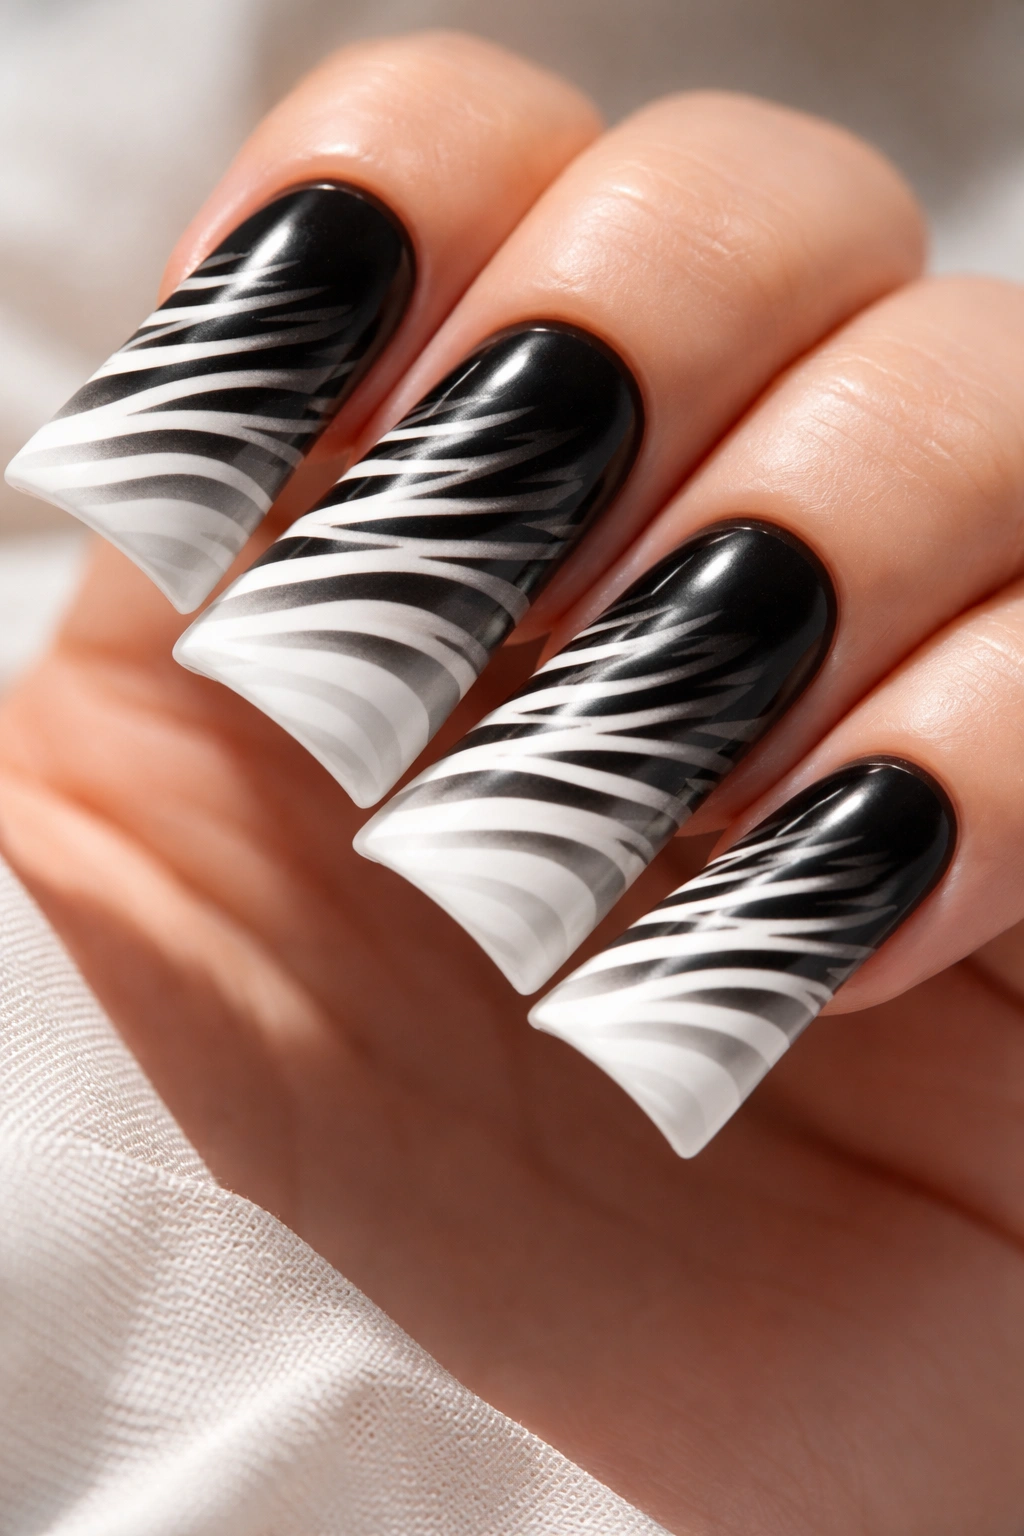
Create an ombre effect across the nail that transitions from deep black at the cuticle to pure white at the tip, then apply zebra stripes that follow this gradient—making them darker (or more opaque) in the black areas and lighter (or more translucent) in the white areas. This version is visually sophisticated and requires technical skill but creates truly stunning results.
Why Gradient Stripes Feel Artistic
Standard zebra stripes are geometric and graphic; gradient zebra stripes are artistic and dimensional. When your stripes change opacity and tone as they move across the nail, following an ombre gradient, the design gains depth and movement that static stripe patterns don’t have. The technique requires understanding how to layer translucent polish over gradients to create the effect—it’s not simple, but it’s absolutely achievable with patience. On duck nails, where the length creates natural visual flow, this effect becomes a genuine showstopper. The gradient reads as intentional and high-effort, which inherently upgrades the perceived value and sophistication of the manicure.
Technical Requirements
- Your base ombre must be fully established and set before you begin adding stripes
- Stripes work best when they’re created using slightly translucent polishes that allow the ombre gradient to show through
- A thin striping tool or liner brush becomes essential; you can’t achieve precision with regular application tools
- Building multiple thin layers of stripe polish is better than applying one thick layer that can obscure the gradient beneath
- This design benefits from gel polish techniques where you’re curing between each layer
- Gel topcoat designed for color work keeps the delicate stripes from shifting or smudging
- Pro tip: Practice this technique on nail tips first before attempting it on your actual nails—the precision required means your first attempt might not be perfect, and practice tips are far less frustrating to restart than living nails.
12. Neon Zebra Stripes Against Pastel Base

Create vivid, electric neon stripes (neon pink, neon yellow, or neon green) against a soft pastel base in a complementary shade (pale pink, pale yellow, or pale mint). This combination is bold, contemporary, and genuinely striking—it works beautifully for anyone who loves color and wants a design that’s undeniably statement-making.
Why Neon Against Pastels Creates Contrast
Neon polish has intensity that regular brights don’t—it’s specifically formulated to glow and catch light in ways that create visual vibration. Placing neon against pastel creates maximum contrast because you’re pairing the most intense, saturated color with the softest, most muted version of a similar hue. The effect is visually arresting without reading as chaotic. This combination works particularly well in person and in photos because neon photographs with genuine accuracy (unlike some colors that shift under different lighting). The pastel base prevents the design from feeling exclusively nightlife-focused and adds a sweetness that balances neon’s inherent intensity.
Color Selection and Application
- Match your neon and pastel—if you’re using neon pink, pair it with pale pink; if you’re using neon yellow, pair it with pale yellow
- Neon polish is notoriously translucent and requires multiple thin layers to achieve opacity; budget time for this build-up
- A white base coat under your pastel helps it appear more opaque and truly pastel-colored rather than slightly tinted
- Your neon stripes can be thinner than stripes in other color combinations because the intensity of neon makes them read clearly even at narrow widths
- Glossy topcoat is essential—matte finishes mute neon’s glow and make it read as regular bright polish instead of true neon
- Neon polishes can stain, so use a quality barrier base coat and avoid extended wear without removal
- Worth knowing: Neon works best in environments with good lighting—in dim lighting, neon loses its glow and simply reads as bright color, which is still beautiful but not the full neon effect.
Final Thoughts
Zebra print duck nails work because they combine two strong design elements—the geometric boldness of stripes and the elongating elegance of the duck shape—in a way that feels cohesive rather than conflicting. Whether you choose classic black and white, unexpected color combinations, or technically ambitious gradient versions, you’re making a design choice that’s undeniably attention-grabbing while still being wearable across contexts.
The real magic happens when you choose your specific version based on what you actually want to project. A professional looking for sophisticated nails might choose navy-and-nude stripes with a matte finish, while someone wanting pure playful boldness might go neon-against-pastel. The beauty of having twelve distinct approaches is that there’s genuinely a version for every personality, occasion, and preference.
Whatever zebra print duck nail design you choose, the key to making it look intentional rather than costume-like is precision—clean stripes, evenly applied polish, and a topcoat that’s smooth and consistently applied. This isn’t a design where imperfection reads as charming; it’s one where detail work directly impacts how polished and curated the final result feels. Invest in application precision, and your zebra print duck nails will absolutely deliver the impact and admiration you’re going for.
